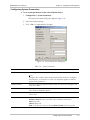
1
RADview-SC/TDMoIP
Network Management System
Service Center for TDMoIP Applications
IPmux-8/16
© 1994–2005 RAD Data Communications
Publication 11/05
Contents
Chapter 1. Introduction
1.1 The IPmux-8/16 Device .................................................................................... 1-1
1.2 Managing IPmux-8/16 with RADview SC/TDMoIP............................................. 1-1
Overview of RADview FCAPS Model .......................................................................1-2
Overview of IPmux-8/16 Management Functions .....................................................1-2
Chapter 2. Installation and Setup
2.1 Configuring IPmux-8/16 for Management.......................................................... 2-1
Configuring the IP Parameters ..................................................................................2-1
Configuring the Manager List....................................................................................2-2
2.2 Connecting IPmux-8/16 to the Management Station ......................................... 2-3
Chapter 3. Configuration Management
3.1 Using the RADview User Interface .................................................................... 3-1
Using the Element Manager .....................................................................................3-1
Selecting the Device or a Port ..................................................................................3-3
System Level Menu Options.....................................................................................3-4
Port Level Menu Options .........................................................................................3-5
3.2 Configuring General Parameters ........................................................................ 3-6
Configuring System Parameters ................................................................................3-7
Configuring System Information ...............................................................................3-8
Maintaining the Manager List ...................................................................................3-9
Configuring the Host Interface IP List .....................................................................3-12
Configuring the VLAN Table of the Ethernet Switch ................................................3-15
3.3 Configuring IPmux-8/16 Ports at the Physical Layer ......................................... 3-17
Configuring Ethernet Parameters ............................................................................3-17
Configuring E1/T1 Parameters ................................................................................3-20
Configuring Internal T1 Parameters ........................................................................3-24
Configuring E3/T3 Parameters ................................................................................3-25
Configuring CT3 Parameters...................................................................................3-26
Configuring CT3 Clocks .........................................................................................3-27
3.4 Assigning Timeslots to Bundles ........................................................................ 3-29
3.5 Managing Bundle Connections........................................................................ 3-30
Creating Bundle Connections.................................................................................3-31
Removing Bundle Connections ..............................................................................3-31
3.6 Additional Tasks .............................................................................................. 3-33
Displaying Ethernet Interface Information...............................................................3-33
Displaying the System Inventory.............................................................................3-34
Resetting IPmux-8/16 to the Default Configuration .................................................3-35
Polling the Agent....................................................................................................3-35
Clearing the MAC Tables .......................................................................................3-35
Resetting IPmux-8/16.............................................................................................3-35
Chapter 4. Configuring Typical Applications
4.1 Overview .......................................................................................................... 4-1
IPmux-8/16 User’s Manual
i
Table of Contents
Application ..............................................................................................................4-1
Guidelines for Configuring IPmux Units....................................................................4-2
4.2 Configuring IPmux-11 Units .............................................................................. 4-4
Configuring the IP Parameters ..................................................................................4-4
Configuring the Manager List....................................................................................4-4
4.3 Configuring IPmux-16 ....................................................................................... 4-4
Configuring the IP Parameters ..................................................................................4-4
Configuring the Manager List....................................................................................4-4
4.4 Connecting IPmux to the Management Station.................................................. 4-5
4.5 Configuration Sequence .................................................................................... 4-5
4.6 Creating Circuits................................................................................................ 4-6
Creating Mesh Service Circuit ..................................................................................4-6
Chapter 5. Security Management
5.1 Enabling or Disabling Telnet Access................................................................... 5-1
Chapter 6. Performance Management
6.1
6.2
6.3
6.4
6.5
6.6
Setting the Polling Interval ................................................................................. 6-1
Viewing Bundle Statistics................................................................................... 6-1
Viewing Bundle Current Statistics ...................................................................... 6-3
Viewing Bundle Intervals Statistics ..................................................................... 6-4
Viewing Ethernet Port Statistics.......................................................................... 6-6
Viewing E1/T1, E3/T3 Port Statistics................................................................... 6-8
Viewing E1/T1, E3/T3 Port Current Statistics .............................................................6-8
Viewing E1/T1, E3/T3 Port Intervals Statistics ..........................................................6-12
6.7 Viewing CT3 Port Statistics .............................................................................. 6-14
Viewing CT3 Port Intervals Statistics .......................................................................6-16
Chapter 7. Fault Management
7.1 Monitoring Object Status .................................................................................. 7-2
Masking Traps..........................................................................................................7-2
Viewing Active Alarms .............................................................................................7-3
Viewing the History Log ...........................................................................................7-4
Clearing the History Log...........................................................................................7-5
Viewing Self Test Results ..........................................................................................7-5
7.2 Performing Loopback Tests ............................................................................... 7-6
Performing an E1/T1 Port Loopback Test ..................................................................7-6
Performing an E3/T3 Port Loopback Test ..................................................................7-6
Performing a CT3 Port Loopback Test ......................................................................7-8
ii
IPmux-8/16 User’s Manual
Chapter 1
Introduction
1.1 The IPmux-8/16 Device
IPmux-8 and IPmux-16 (referred to as IPmux-8/16) are modular TDMoIP
gateways. IPmux-8/16 modules enable TDM circuits to be extended over Packet
Switched Networks (PSN) . The devices convert the data stream coming from the
TDM ports into configurable-sized Ethernet frames that are transported over the
Ethernet port and vice versa. IPmux-8/16 offers end-to-end synchronization for
TDM applications and large buffers to compensate for the delay variation inserted
by the network. The devices can be used to extend TDM-based services over
IP/Ethernet backbones for both Metropolitan Area Network and corporate
applications. IPmux-8/16 can be managed locally via an ASCII terminal or
remotely via Telnet or RADview (RAD’s SNMP-based network management
application).
1.2 Managing IPmux-8/16 with RADview SC/TDMoIP
IPmux-8/16 includes an SNMP agent that enables full SNMP management via
SNMP-based network management, for example, by means of RADview network
management stations. In addition, the IPmux-8/16 includes additional
management capabilities via both out-of-band and inband communication:
•
Supervision terminal (ASCII terminal or a PC running a terminal emulation
program), connected either directly or through a modem or any other type of
full-duplex data link. This terminal can perform all the IPmux-8/16 supervision
and configuration functions, and in particular the preliminary system
configuration.
•
Telnet, by means of any host capable of IP communication (out-of-band using
SLIP or PPP, or inband over IP) with IPmux-8/16. The functions available
under the Telnet protocol are similar to those available from a supervisory
terminal.
This manual discusses configuration via RADview, RAD’s SNMP-based network
management application for PC or Unix. To configure via ASCII terminal, or
Telnet, see the IPmux-8/16 Installation and Operation Manual.
Managing IPmux-8/16 with RADview SC/TDMoIP
1-1
IPmux-8/16 User’s Manual
Chapter 1 Introduction
Overview of RADview FCAPS Model
RADview provides a complete solution for monitoring and controlling IPmux. The
RADview solutions conform to ITU-T Telecommunication Management Network
(TMN) recommendations for SNMP management systems, known as the FCAPS
model:
• Fault management – detects and correlates fault in network devices, isolates
faults and initiates recovery actions.
•
Configuration management – tracks configuration changes, configures, installs
and distributes software and configuration files across the network.
•
Accounting management – collects accounting data and generates network
usage reports.
•
Performance management – continuously monitors network performance
(QoS, CoS) and resource allocation.
•
Security management – controls and restricts access to network resources.
Overview of IPmux-8/16 Management Functions
Table 1-1 lists the operations that you can perform via RADview, and their
locations in this manual.
Table 1-1. Management Functions
Operation
Location in User’s Manual
Configuration
Chapter 3
• Configuring System Parameters
• Configuring System Information
• Maintaining the Manager List
• Configuring the Host Interface IP List
• Configuring the VLAN Table of the Ethernet Switch
• Configuring Ethernet Parameters
• Configuring E1/T1 Parameters
• Configuring Internal T1 Parameters
• Configuring E3/T3 Parameters
• Configuring CT3 Parameters
• Configuring CT3 Clocks
• Assigning Timeslots to Bundles
• Removing Bundle Connections
• Displaying Ethernet Interface Information
• Displaying the System Inventory
• Resetting IPmux-8/16 to the Default Configuration
• Polling the Agent
• Clearing the MAC Tables
• Resetting IPmux-8/16
1-2
Managing IPmux-8/16 with RADview SC/TDMoIP
IPmux-8/16 User’s Manual
Chapter 1 Introduction
Table 1-1. Management Functions (Cont.)
Operation
Location in User’s Manual
Security
Chapter 5
• Enabling or Disabling Telnet Access
Peformance
Chapter 6
• Setting the Polling Interval
• Viewing Bundle Statistics
• Viewing Bundle Current Statistics
• Viewing Bundle Intervals Statistics
• Viewing Ethernet Port Statistics
• Viewing E1/T1, E3/T3 Port Current Statistics
• Viewing E1/T1, E3/T3 Port Intervals Statistics
• Viewing CT3 Port Current Statistics
• Viewing CT3 Port Intervals Statistics
Fault
Chapter 7
• Masking Traps
• Viewing Active Alarms
• Viewing the History Log
• Clearing the History Log
• Viewing Self Test Results
• Performing an E1/T1 Port Loopback Test
• Performing an E3/T3 Port Loopback Test
• Performing a CT3 Port Loopback Test
Managing IPmux-8/16 with RADview SC/TDMoIP
1-3
Chapter 1 Introduction
1-4
Managing IPmux-8/16 with RADview SC/TDMoIP
IPmux-8/16 User’s Manual
Chapter 2
Installation and Setup
This chapter describes how to set up IPmux-8/16 for management and connect it
to the management station, and includes the following sections:
•
Configuring IPmux-8/16 for Management
•
Connecting IPmux-8/16 to the Management Station
2.1 Configuring IPmux-8/16 for Management
To remotely administer IPmux via a Network Management Station (NMS), it is
necessary to first configure some basic IPmux parameters via an ASCII terminal
session to the IPmux Control Port. The following steps are required:
1. Configuring the host IP parameters (IP address, IP mask, default gateway)
2. Defining the Network Management Station in the Manager List.
Configuring the IP Parameters
The IPmux host IP parameters may be assigned automatically via DHCP or the
may be configured manually.
To manually configure the host IP parameters:
1. Display the Host IP menu (Configuration > System > Host IP)
2. Disable the DHCP mechanism
3. Save the changes
4. Enter the new host IP parameters for IPmux:
Host IP address
IP mask
Default gateway
5. Save the changes.
Configuring IPmux-8/16 for Management
2-1
IPmux-8/16 User’s Manual
Chapter 2 Installation and Setup
Configuration>System>Host IP
1. IP address
... (192.168.10.1)
2. IP mask
... (255.255.255.0)
3. Default gateway
... (0.0.0.0)
4. DHCP
(Disable)
5. DHCP Status
>
>
Please select item <1 to 5>
ESC-prev.menu; !-main menu; &-exit
1 Mngr/s
Figure 2-1. Configuring the Host IP Parameters for IPmux-8/16
Configuring the Manager List
To configure the Manager List:
1. Display the Manager List menu (Configuration > System > Management >
Manager list)
2. Enter the IP parameters of the Network Management Station:
Manager IP address
3. Save the changes.
Configuration>System>Management>Manager list
1.
Manager IP address
... (192.168.10.100)
2.
Link up/down trap
(Disable)
3.
Alarm trap
(Disable)
4.
VLAN tagging
(Disable)
>
Please select item <1 to 5>
ESC-prev.menu; !-main menu; &-exit
Figure 2-2. Configuring the Manager List
2-2
Configuring IPmux-8/16 for Management
1 Mngr/s
IPmux-8/16 User’s Manual
Chapter 2 Installation and Setup
2.2 Connecting IPmux-8/16 to the Management Station
IPmux-8/16 can be managed by a Network Management Station (NMS) that is
located on the LAN (hub or switch) connected to the one of the unit’s Ethernet
ports.
To connect IPmux-8/16 to the network management station:
1. Connect a network management station to the LAN (hub or switch).
2. Connect one of IPmux’s Ethernet ports to the LAN.
Connecting IPmux-8/16 to the Management Station
2-3
Chapter 2 Installation and Setup
2-4
Connecting IPmux-8/16 to the Management Station
IPmux-8/16 User’s Manual
Chapter 3
Configuration Management
This chapter describes how to configure IPmux-8/16 on all levels: system and port,
and contains the following sections:
•
Using the RADview User Interface
•
Configuring General Parameters
•
Configuring IPmux-8/16 Ports at the Physical Layer
•
Assigning Timeslots to Bundles
•
Managing Bundle Connections
•
Additional Tasks.
3.1 Using the RADview User Interface
The RADview IPmux-8/16 Element Manager window provides a dynamically
updated representation of IPmux-8/16, allowing you to monitor and manage
IPmux-8/16. The window displays:
•
The device hardware configuration, showing the existing slots and ports
•
The status of the each port is indicated by the background color of its row, in
the following way:
Table 3-1. Element Manager Port Status Colors
Row Color
Status
Gray
Normal
Purple
Fail
Blue
Test
Using the Element Manager
The Element Manager window (see Figure 3-1 for IPmux-8, Figure 3-2 for
IPmux-16, Figure 3-3 for IPmux-16 with channelized T3) contains three columns:
•
The Object column (Interface Name) represents the system or slot object
•
The Interface Type column, represents the type of the interface port installed
in this slot
•
The Connector Type column, represents the type of physical connector on this
port
Using the RADview User Interface
3-1
Chapter 3 Configuration Management
IPmux-8/16 User’s Manual
By selecting a row, you can manipulate the selected system or port. When
selected, a light blue frame is displayed around the selected window, and the
selected row is colored with dark gray. Only one entry can be selected at a time.
Figure 3-1. Element Manager – IPmux-8
Figure 3-2. Element Manager – IPmux-16
3-2
Using the RADview User Interface
IPmux-8/16 User’s Manual
Chapter 3 Configuration Management
Figure 3-3. Element Manager - IPmux-16 Channelized T3
Selecting the Device or a Port
IPmux-8/16 is managed by selecting one of its two levels of objects and then
selecting the desired function from the menus.
These are two IPmux-8/16 user interface object levels:
•
System (whole device) – This level contains all the parameters and functions
common to the whole device.
•
Port – This level contains all the parameters and functions of the selected port.
To select the entire device (system):
•
In the Element Manager window, click the System row.
To select a port:
•
In the Element Manager window, click the row of the desired port.
Using the RADview User Interface
3-3
IPmux-8/16 User’s Manual
Chapter 3 Configuration Management
System Level Menu Options
The element manager allows you to configure the device parameters.
To configure an IPmux via the element manager:
•
Select the node in the Service Center map and from the Configuration menu,
select Element Manager...
The Element Manager dialog box (Figure 3-1, Figure 3-2, Figure 3-3)
appears allowing you to configure any of the elements listed.
Table 3-2. System Management Options
Tasks - Configuration
Dialog Box and Parameter Location
Path
Setting system information
System Information dialog box
See Configuring System Information
Configuration
System Info…
Setting system parameters
System Parameters dialog box
See Configuring System Parameters
Configuration
System Parameters…
Viewing system inventory
System Inventory dialog box
See Viewing System Inventory
Configuration
System Inventory…
Setting Bundle values
Bundle Connection Table
See Managing Bundle Connections
Configuration
Bundles…
Bundle ConnectionTable…
Configuring the VLAN Table of
the Ethernet Switch
VLAN Table dialog box
See Configuring the VLAN Table of the
Ethernet Switch
Configuration
VLAN Table
Bridge 1 (or 2)
Restoring default configuration
See Resetting IPmux-8/16 to the Default
Configuration
Configuration
System Commands
Default Configuration
Resetting IPmux configuration
See Resetting IPmux-8/16
Configuration
System Commands
Reset
Clearing MAC Tables
See Clearing the MAC Tables
Configuration
System Commands
Clear MAC Table
Bridge 1 (or 2)
Polling the agent
See Polling the Agent
Configuration
System Commands
Poll Agent
Tasks – Fault
Dialog Box and Parameter Location
Path
Viewing active alarms
Active alarm list
See Viewing Active Alarms
Fault
Alarms…
Viewing the history log
System log buffer
See Viewing the History Log
Fault
History Log
List…
Clearing the History Log
See Clearing the History Log
Fault
History Log
Clear…
3-4
Using the RADview User Interface
IPmux-8/16 User’s Manual
Chapter 3 Configuration Management
Tasks - Statistics
Dialog Box and Parameter Location
Path
Setting polling interval
Polling Interval dialog box
See Setting Polling Interval
Statistics
Polling Interval…
Viewing Bundle statistics
Bundle ConnectionTable
See Viewing Bundle Statistics
Statistics
Bundle Statistics…
Options
Dialog Box and Parameter Location
Path
Lists Host Interfaces IP
Host Interfaces IP List dialog box
See Host Interface IP List
Options
Host Interfaces IP List…
Establishing link between
IPmux and manager
Manager List dialog box
See Maintaining the Manager List
Options
Manager List…
Masking traps
Masking Traps dialog box
See Masking Traps
Options
Masking Traps…
Setting Telnet Access
Access dialog box
See Enabling or Disabling Telnet Access
Options
Access…
Port Level Menu Options
RADview for IPmux allows you to monitor and configure the following port level
management options.
Table 3-3. Port Level Management Options
Tasks - Configuration
Dialog Box and Parameter Location
Path
Displaying information
Interface Information
See Viewing Ethernet Interface Information
Configuration
Interface Info…
Setting parameters
Parameters dialog box
See Configuring Ethernet Parameters
Configuration
Parameters…
Setting E1/T1 parameters
Parameters dialog box
See Configuring E1/T1 Parameters
Configuration
Parameters…
Configuring bundles
Bundle dialog box
See Managing Bundles (E1/T1 only)
Configuration
Bundles…
Parameters dialog box
See Configuring E3/T3 Parameters
Configuration
Parameters…
Setting CT3 parameters
See Configuring CT3 Parameters
Configuration
Parameters…
Tasks - Diagnostics
Dialog Box and Parameter Location
Path
Interface Loopback dialog box
See Performing an E1/T1 Port Loopback Test
Diagnostics
Loopback…
Ethernet Interface
E1/T1 Interface
E3/T3 Interface
Setting E3/T3 parameters
CT3 Interface
E1/T1 Interface
Performing loopback test
Using the RADview User Interface
3-5
IPmux-8/16 User’s Manual
Chapter 3 Configuration Management
Table 3-3. Port Level Management Options (Cont.)
Tasks - Configuration
Dialog Box and Parameter Location
Path
Interface Loopback dialog box
See Performing an E3/T3 Port Loopback Test
Diagnostics
Loopback…
Performing loopback test
Interface Loopback dialog box
See Performing a CT3 Port Loopback Test
Diagnostics
Loopback…
Tasks – Statistics
Dialog Box and Parameter Location
Path
Viewing current data statistics
Current Data
See Viewing E1/T1, E3/T3 Port Current
Statistics
Statistics
Current…
Viewing intervals data statistics
table
Intervals Data
See Viewing E1/T1, E3/T3 Port Intervals
Statisitics
Statistics
Intervals …
Interface Statistics dialog box
See Viewing Ethernet Port Statistics
Statistics
Interface Statistics…
Viewing current data statistics
Current Data
See Viewing CT3 Port Current Statistics
Statistics
Current…
Viewing intervals statistics
Current Intervals
See Viewing CT3 Port Intervals Statistics
Statistics
Intervals…
E3/T3 Interface
Performing loopback test
CT3 Interface
E1/T1/E3/T3 Interface
Ethernet Interface
Viewing interface statistics
CT3 Interface
3.2 Configuring General Parameters
At system level you can:
3-6
•
Configure system information
•
Configure system parameters
•
View system inventory parameters
•
Configure bundles
•
Configure system commands
•
Poll agent
•
Configure host interface IP list
•
Configure managers
•
Mask traps
•
Telnet access.
Configuring General Parameters
IPmux-8/16 User’s Manual
Chapter 3 Configuration Management
Configuring System Parameters
To set system parameters for the selected IPmux device:
1. Configuration > System Parameters...
The System Parameters dialog box appears (Figure 3-4).
2. Enter the required settings.
3. Click <Set> to implement the changes.
Figure 3-4. System Parameters Dialog Box
Table 3-4. System Parameters
Parameter
Possible Values / Remarks
ToS Value
IP ToS (Type of Service) assigned to this channel
0–255
Configures IP ToS field in the IP frames transmitted by the device. Configures
the entire byte - not only the 3 ToS bits. ToS assignment applies to all TDM
packets leaving IPmux-16.
Default Gateway
Gateway to which management frames will be sent (when the managers is not
in the host subnet)
LAN Redundancy
These parameters exist for versions > 3.0. Parameters are disabled when two
E3/T3 cards are installed in Ipmux.
Active Interface
LAN1=1025
LAN2=1057
Enforcement State
Enables user to enforce a Link in spite of the redundancy mechanism
No Enforcement: Returns usual rules of the redundancy mechanism
LAN1: Main Link
LAN2: Backup Link
Note: Set Enforcement State by clicking [Enforced LAN] and selecting value.
Configuring General Parameters
3-7
IPmux-8/16 User’s Manual
Chapter 3 Configuration Management
Table 3-4. System Parameters (Cont.)
Parameter
Possible Values / Remarks
Redundancy
Disabled (Off): forces the device to start using Main (Link 1) imediately, no
matter what is its state and stay there
Enabled: system will use the following values (based on Recovery)
When Recorvery=Yes: Auto: device switches back to main link when valid
When Recorvery=No: Manual: device doesn't switch back to main link
Default Interface
Forces the device to use specific link
LAN1 (Main): device starts to use of Main (Link 1) immediately, no matter what
is its state and stays there. No Redundancy.
LAN2 (Backup): device starts to use of Backup (Link 2) immediately, no matter
what is its state and stays there. No Redundancy.
Recovery
Yes, No
Wait to Restore (sec)
Time device has to wait in the redundant state until it goes back to the default
link
30, 60
ETH1 Card Aging Time
(sec)
ETH1 Card Aging Time in seconds
Unchecked
Checked: 16..4080
Note: parameter enabled only if there is a card in Slot 1
ETH2 Card Aging Time
(sec)
ETH2 Card Aging Time in seconds
Unchecked
Checked: 16..4080
Note: parameter enabled only if there is a card in Slot 2
Configuring System Information
To set system information for the selected IPmux device:
1. Configuration > System Info...
The System Information dialog box appears (Figure 3-5).
2. Enter the required settings. You can change the Name, Contact, Location,
Date and Time fields.
3. Click <Set> to implement the changes.
3-8
Configuring General Parameters
IPmux-8/16 User’s Manual
Chapter 3 Configuration Management
Figure 3-5. System Information Dialog Box
Maintaining the Manager List
The Manager List command enables you to establish the actual link between the
selected IPmux device and the manager.
Note
You can define a maximum of ten managers for each host.
To display the manager list:
•
Options > Manager List...
The Manager List appears.
Configuring General Parameters
3-9
IPmux-8/16 User’s Manual
Chapter 3 Configuration Management
Figure 3-6. Manager List
Table 3-5. Manager List Parameters
Parameter
Possible Values/Remarks
Manager IP Address
IP address of the Network Management System
Host Name
LAN1, LAN2, OOB (out of band)
Next Hop IP Address
IP address of next Hop
Mask Traps
Indicates whether or not traps are masked by the system
Yes, No
Access Ports
Defines from which port or ports this manager can configure the device:
Port1..Port4
All
All Users
VLAN Tagging
Yes, No
VLAN ID
1 ..4094
VLAN Priority
0.. 7
To add an entry in the manager list:
1. In the Manager List, click <Add...>
The Add Manager dialog box appears (Figure 3-7).
2. Enter the required settings.
3. Click <Set> to implement the changes.
Note
3-10
This option is not available if ten managers currently exist.
Configuring General Parameters
IPmux-8/16 User’s Manual
Chapter 3 Configuration Management
Figure 3-7. Add Manager Dialog Box
Table 3-6. Add Manager Parameters
Parameter
Possible Values / Remarks
Host Name
LAN1, LAN2, OOB (out of band)
Manager IP Address
IP address of the selected entry
Next Hop IP
Address
For Agent version ≥ 2.0
Access Ports
Defines from which port or ports this manager can configure the device:
Port1..Port4
All
All Users
VLAN
Tagging
Yes, No
ID
1 ..4094
Priority
0.. 7
Mask Traps
None
When selected (unchecked), all traps are disabled
Alarm Status
When selected (unchecked), the trap is enabled
System
When selected (unchecked), the trap is enabled
Note
The agent will not add a Manager that already exists in one Host. The following
message will appear: “Cannot add this Manager. This Manager may already exist for
another Host.”
Configuring General Parameters
3-11
IPmux-8/16 User’s Manual
Chapter 3 Configuration Management
To change an entry in the manager list:
1. Select an entry in the Manager List and click <Change…>
The Change Manager dialog box appears (Figure 3-8).
2. Enter the required settings.
3. Click <Set> to implement the changes.
Figure 3-8. Change Manager Dialog Box
To remove an entry from the Manager List:
1. Select a row from the Manager List and click <Remove>.
A message appears warning about possible disconnection of the Agent.
2. Click <OK> to confirm remove.
Figure 3-9. Removing Manager
Configuring the Host Interface IP List
Note
The Host Interface IP List entry exists only for Agent version ≥ 2.0.
To display the host interface IP list:
•
Options > Host Interface IP List...
The Host Interface IP List appears.
3-12
Configuring General Parameters
IPmux-8/16 User’s Manual
Chapter 3 Configuration Management
Figure 3-10. Host Interface IP List
Table 3-7. Host Interface IP Parameters
Parameter
Possible Values / Remarks
Host Name
LAN1, LAN2, OOB (out of band)
Host Interface IP
IP address of the Host Interface
Host IP Mask
IP address of the Host MAsk
Default Next Hop
IP address of next Hop
Default VLAN Tagging
Yes, No
VLAN ID
1 to 4094
VLAN Priority
0 to 7
To add an entry in the Host Interface IP List:
1. In the Host Interface IP List, click <Add...>
The Add Host Interface IP dialog box appears.
2. Enter the required settings.
3. Click <Set> to implement the changes.
Configuring General Parameters
3-13
IPmux-8/16 User’s Manual
Chapter 3 Configuration Management
Figure 3-11. Add Host Interface IP
Note
You cannot add an entry in the Host Interface IP List if all 3 Hosts (ETH1, ETH2, and
Control (OOB)) exist in the Host Interface IP List, or if one ETH slot exists in the
device, and this ETH and the Control (OOB) Hosts exist in the Host Interface IP List.
To remove an entry from the Host Interface IP List:
1. Select a row from the Host Interface IP List and click <Remove…>
A message appears:
“Removing IP Host.
All data related to this IP Host will be removed.”
2. Click <OK> to confirm remove.
Note
3-14
This is disabled if a row has a manager.
Configuring General Parameters
IPmux-8/16 User’s Manual
Chapter 3 Configuration Management
Configuring the VLAN Table of the Ethernet Switch
The VLAN Table > Bridge 1/2 command enables you to establish virtual LANs
(VLANs) to segment your network into multiple smaller networks. You can use
VLANs to reduce traffic on each network segment and to increase security.
To view the VLAN table:
1. Configuration > VLAN Table > Bridge 1... (or Bridge 2….)
The Bridge 1 (or 2) VLAN Table dialog box appears.
Figure 3-12. Bridge 1 VLAN Table Dialog Box
Table 3-8. Bridge 1 VLAN Table Parameters
Parameter
Possible Values / Remarks
VLAN ID
1..4094
Port 1
Member
Not Member
Port 2
Member
Not Member
Port 3
Member
Not Member
Port 4
Member
Not Member
Note
Bridge 1 exists only if there is a card in Slot 1.
Bridge 2 exists only if there is a card in Slot 2.
Configuring General Parameters
3-15
IPmux-8/16 User’s Manual
Chapter 3 Configuration Management
You have the following options:
•
Add a VLAN
•
Change a VLAN
•
Remove a VLAN
To add a VLAN to the VLAN Table:
1. Click Add.
The Add VLAN dialog box appears.
2. Configure the desired parameters.
3. Click Apply.
The VLAN, if valid, is added to the VLAN Table.
4. Click Close.
The Add VLAN dialog box is closed and the new entries are added to the
end of the list in the VLAN Table Dialog Box.
Note
• You can sort the list according to the desired column by clicking on the column
heading.
• Add is disabled when there are 64 entries in the table.
Figure 3-13. VLAN Table – Add VLAN Dialog Box
To change a VLAN in the VLAN Table:
1. Select the row you wish to change.
2. Click Change.
The Change VLAN dialog box appears.
3. Configure the desired parameters.
4. Click Set.
The VLAN Table is updated.
Note
If no port is selected to be member of this VLAN then the VLAN is removed.
5. Click Close.
The Change VLAN dialog box is closed.
3-16
Configuring General Parameters
IPmux-8/16 User’s Manual
Chapter 3 Configuration Management
Figure 3-14. VLAN Table – Change VLAN Dialog Box
To remove a VLAN from the VLAN Table:
1. Select the row of the VLAN to be removed.
2. Click Remove.
The VLAN is removed from the VLAN Table.
3.3 Configuring IPmux-8/16 Ports at the Physical Layer
At port level, you can configure parameters for:
•
Ethernet ports
•
E1/T1 ports
•
E3/T3 ports.
Configuring Ethernet Parameters
To set configuration parameters for the Ethernet interface:
1. Click the Ethernet port.
2. Configuration > Parameters...
The Interface Parameters dialog box appears.
Configuring IPmux-8/16 Ports at the Physical Layer
3-17
Chapter 3 Configuration Management
IPmux-8/16 User’s Manual
Figure 3-15. Ethernet Interface Parameters Dialog Box
Table 3-9. Ethernet Interface Parameters
Parameter
Possible Values / Remarks
Slot
1, 2
Note: This does not appear for OOB.
Port
ETH1, ETH2, Control (OOB)
Note: OOB means out-of-band
Auto Negotiation
Enable (checked), Disable (unchecked)
Note: Disabled for Control (OOB) port
Max Capability
Advertised
Defines the maximum capabilities of the interface
Only applicable when Auto Negotiation is enabled (checked)
10BASE-T half duplex mode, 10BASE-T full duplex mode,
100BASE-TX half duplex mode, 100BASE-TX full duplex mode
Note: Working in half duplex mode is not optimal and might cause communication
problems. Disabled for Control (OOB) port
Default Type
Only applicable when Auto Negotiation is disabled
10BASE-T half duplex mode, 10BASE-T full duplex mode,
10BASE-TX half duplex mode, 10BASE-TX full duplex mode
Rate Limit (kbps)
The maximum rate permitted to transfer via this port, in Kbps:
Disable, 256, 512, 1000, 2000, 4000, 8000, 16000, 20000, 32000, 40000,
64000, 80000
Note:
• 32000, 64000 exist for User port only
• If Rate Limit field has been changed to or from Disable then a message-box will
open: “Changing Rate Limit may disconnect the Agent for 30 seconds”.
Click OK to set the new parameters.
3-18
Configuring IPmux-8/16 Ports at the Physical Layer
IPmux-8/16 User’s Manual
Chapter 3 Configuration Management
Table 3-9. Ethernet Interface Parameters (Cont.)
Parameter
Possible Values / Remarks
Unconditional Tagging
Controls port stacking operation and whether to add or remove a tag from the
frames on this port:
Unmodified – Tags are not modified
Tag - Add tag to untagged frames
Double Tag - Add tag to all frames
Untag - Remove a tag from the frame on this port
Note: Double Tag is not available for Network port
Stacking VID
The PVID, the VLAN ID assigned to untagged frames or Priority-Tagged frames
received on this port:
1..4094
Default Priority Tag
The default ingress User Priority for this port:
0..7
For User Port:
• If Rate Limit = 32000: 2-7
• If Rate Limit = 64000: 4-7
Note
If Auto Negotiation is disabled (unchecked) and Max Capability Advertised is
different than the capabilities of the LAN (i.e. Max Capability=100Base-T full duplex
while the LAN works in 10Base-T half duplex), the NMS will disconnect.
Configuring IPmux-8/16 Ports at the Physical Layer
3-19
IPmux-8/16 User’s Manual
Chapter 3 Configuration Management
Configuring E1/T1 Parameters
To display or configure E1/T1 parameters:
1. Click an E1/T1 port.
2. Configuration > Parameters...
The E1/T1 Parameters dialog box appears.
Figure 3-16. E1 Parameters Dialog Box
3-20
Configuring IPmux-8/16 Ports at the Physical Layer
IPmux-8/16 User’s Manual
Chapter 3 Configuration Management
Figure 3-17. T1 Parameters Dialog Box
Table 3-10. E1/T1 Parameters
Parameter
Possible Values / Remarks
Slot
3, 4
Port
CH1 to CH8
Type
E1, T1
Admin. Status
Enabled, Disabled
Transmit Clock Source
Source of the transmit clock
Internal: Local clock source is used
External: Received from the other interface network and used for data
transmission on this interface
Loopback: Transmit clock recovered from received data
Adaptive: Adaptive clock regeneration
Rx Sensitivity
Determines the maximum attenuation of the receive signal that can be
compensated for by the interface receive path
Long Haul, Short Haul
(only applicable for E1 ports)
Configuring IPmux-8/16 Ports at the Physical Layer
3-21
IPmux-8/16 User’s Manual
Chapter 3 Configuration Management
Table 3-10. E1/T1 Parameters (Cont.)
Parameter
Possible Values / Remarks
Line Type
Line type affects the number of bits per second that the link can reasonably
carry. It also affects the interpretation of the port performance statistics.
For E1 ports:
Framed (G.704), Framed-CRC, Framed-MF, Framed-CRC-MF
Unframed (G.703): Use when the data being transmitted is unframed
For T1 ports:
ESF: Extended SuperFrame
D4: AT&T D4 format
Unframed: Use when the data being transmitted is unframed
Line Code
Type of Zero Code Suppression used on the link
(only applicable for T1
ports)
B7ZS, B8ZS, AMI
Idle Code
Byte pattern of the data transmitted in the E1/T1 Framer idle timeslots
(not applicable when the
Line Type is unframed)
0 to FF
Signaling Mode
Type of signaling used on the link
(only applicable for T1
ports)
None, Robbed Bit
Line Mode
T1 device operation mode
(only applicable to T1
ports)
DSU, CSU
Line Length (ft)
0-133, 134-266, 267-339, 400-533, 534-655
(only applicable for T1 ports with the Line Mode DSU)
Tx Gain (dB)
Transmit line gain
(only applicable for T1
ports with the Line Mode
CSU)
0, -7.5, -15, -22.5
Restore Time (sec)
1, 10
(only applicable to T1
ports. Not applicable
when the Line Type is
unframed)
Used to change the sync. Algorithms to reduce the time required for the port to
return to normal operation after a RED (LOF – loss of frame synchronization)
alarm.
3-22
Configuring IPmux-8/16 Ports at the Physical Layer
IPmux-8/16 User’s Manual
Chapter 3 Configuration Management
Table 3-10. E1/T1 Parameters (Cont.)
Parameter
Possible Values / Remarks
Conditioning CAS (ABCD)
(for E1)
Trunk conditioning signaling value after alarm detection
Conditioning CAS (AB)
(for T1)
0x1 to 0xF: E1
0x0 to 0xF: T1 ESF
0x0 to 0x3:T1 D4
Alarms that can cause trunk conditioning: LOS, LOF, AIS at the far end E1/T1
port or receive buffer underrun/overrun at the local ATM level
For E1 ports, this parameter is applicable only when the Line Type is E1-MF or
E1-CRC-MF.
For T1 ports, this parameter is not applicable when the Signaling Mode is None.
First 2.5 Sec. Signaling
Conditioning
Trunk conditioning signaling; the value to be sent as a signaling during the first
2.5 seconds after alarm detection
(only applicable for T1
ports, except when the
Signaling Mode is None or
when Line Type is
unframed)
0x0 to 0xF, FF: T1 ESF
0x0 to 0x3, FF: T1D4
Conditioning Data Pattern
Trunk conditioning data pattern to be sent upon a DS0 fail
Alarms that can cause trunk conditioning: LOS, LOF, AIS at the far end E1/T1
port or receive buffer underrun/overrun at the local ATM level.
0x0 to 0xFF
Alarms that can cause trunk conditioning: LOS, LOF, AIS at the far end E1/T1
port or receive buffer underrun/overrun at the local ATM level.
Not applicable when the Line Type is Unframed.
In unframed mode, Condtioning will be a result of LOS (Loss of Signal) at the far
end E1/T1 port or receive buffer underrun/overrun at the local ATM level and
will cause AIS tramsission towards the PBX.
AIS Transmit
Enables/disables AIS transmit when Ethernet cable (for TDMoIP) is out
(disconnected)
Enabled, Disabled
Configuring IPmux-8/16 Ports at the Physical Layer
3-23
IPmux-8/16 User’s Manual
Chapter 3 Configuration Management
Configuring Internal T1 Parameters
To display or configure Internal T1 port parameters:
1. Click an Internal T1 port.
2. Configuration > Parameters...
The T1 Parameters dialog box appears.
Figure 3-18. Internal T1 Parameters Dialog Box
Table 3-11. Internal T1 Parameters
Parameter
Possible Values / Remarks
Slot
3, 4
Port
CH1..CH28
Type
T1
Suppress Port
Indication
Defines whether Agent will mask port's alarms and statistics or not
Unchecked (don’t mask), Checked (masked)
Line Type
Line type affects the number of bits per second that the link can reasonably carry. It also
affects the interpretation of the port performance statistics.
ESF: Extended SuperFrame
D4: AT&T D4 format
Unframed: Use when the data being transmitted is unframed
Restore Time
(sec)
1, 10
Used to change the sync. Algorithms to reduce the time required for the port to return to
normal operation after a RED (LOF - loss of frame synchronization) alarm.
Note: Not applicable when the Line Type is Unframed
Transmit AIS
3-24
Enables/disables AIS transmit when Ethernet cable (for TDMoIP) is out (disconnected)
Enabled, Disabled
Configuring IPmux-8/16 Ports at the Physical Layer
IPmux-8/16 User’s Manual
Chapter 3 Configuration Management
Configuring E3/T3 Parameters
To display or configure E3/T3 parameters:
1. Click an E3/T3 port.
2. Configuration > Parameters...
The E3/T3 Parameters dialog box appears.
Figure 3-19. E3/T3 Parameters Dialog Box
Table 3-12. E3/T3 Interface Parameters
Parameter
Possible Values / Remarks
Slot
3, 4
Port
CH1
Type
E3, T3
Mask Port Indication
Check-box: Checked = Mask, Unchecked = Unmasked
Transmit Clock Source
Source of the transmit clock
Internal: Local clock source is used
External: Recovered from the other interface network and used for data
transmission on this interface (will not be supported in next phase)
Loopback: Transmit clock recovered from received data
Adaptive: Adaptive clock regeneration
Configuring IPmux-8/16 Ports at the Physical Layer
3-25
IPmux-8/16 User’s Manual
Chapter 3 Configuration Management
Configuring CT3 Parameters
To display or configure CT3 parameters:
1. Click a CT3 port.
2. Configuration > Parameters...
The CT3 Parameters dialog box appears.
Figure 3-20. CT3 Parameters Dialog Box
Table 3-13. CT3 Interface Parameters
Parameter
Possible Values / Remarks
Slot
3, 4
Port
Channelized T3
Type
CT3
Suppress Port Indication
Defines whether Agent will mask port's alarms and statistics or not
Unchecked (don’t mask), Checked (masked)
Line Type
Indicates the variety of DS3 C-bit or E3 application implementing this
interface. The type of interface affects the interpretation of the usage and
error statistics.
The rate of DS3 is 44.736 Mbps and E3 is 34.368 Mbps. The
dsx3ClearChannel value means that the C-bits are not used except for
sending/receiving AIS.
C-Bit: ANSI T1.107-1988 [9]
M13: ANSI T1.107a-1990 [9a]
Transmit AIS
3-26
Enables/disables AIS transmit when Ethernet cable (for TDMoIP) is out
(disconnected)
Enabled, Disabled
Configuring IPmux-8/16 Ports at the Physical Layer
IPmux-8/16 User’s Manual
Chapter 3 Configuration Management
Configuring CT3 Clocks
To display or configure CT3 clock parameters:
1. Click a CT3 port.
2. Configuration > Clocks...
The Clocks Parameters dialog box appears.
Figure 3-21. Clocks Dialog Box
Configuring IPmux-8/16 Ports at the Physical Layer
3-27
IPmux-8/16 User’s Manual
Chapter 3 Configuration Management
Table 3-14. Clocks Parameters
Parameter
Possible Values / Remarks
Slot
3, 4
Port
Channelized T3
Type
CT3
T3 Tx. Clock Source
The source of Transmit Clock.
LBT: the recovered receive clock is used as the transmit clock
Internal: a local clock source is used or that an external clock is attached to
the box containing the interface
Internal 1..28 Tx. Clock
Source
The source of Transmit Clock.
LBT: the recovered receive clock is used as the transmit clock
Internal: a local clock source is used or that an external clock is attached to
the box containing the interface
External CLK: transmit clock is derived from the recovered receive clock of
another DS3 interface
Adaptive: adaptive clock regeneration
Adaptive CH: adaptive clock regeneration
To set the external source for internal T1 ports:
1. Click <TX Clk Source>.
Select desired value for CLK Source.
2. Click <Set>.
3-28
Configuring IPmux-8/16 Ports at the Physical Layer
IPmux-8/16 User’s Manual
Chapter 3 Configuration Management
3.4 Assigning Timeslots to Bundles
Note
Bundle is not relevant for unframed Line Type.
To view bundles for an E1/T1 port:
1. Click an E1/T1 port.
2. Configuration > Bundles...
The Bundle screen appears.
Figure 3-22. Bundles – Port Level
Bundles are groups of timeslots. The Bundle Table displays the details of each
bundle in the upper section of the table, and a representation of each timeslot
with the bundle assigned to it in the lower section of the table. Each bundle can be
assigned to multiple timeslots, but each timeslot can only have one bundle
assigned to it.
Note
Bundles that are colored yellow are only configurable when they are not part of a
circuit.
If the device is limited to work with only one bundle, the others will be colored
dark blue.
Assigning Timeslots to Bundles
3-29
Chapter 3 Configuration Management
IPmux-8/16 User’s Manual
Table 3-15. Bundle Parameters – Port Level
Parameter
Possible Values / Remarks
Slot
Slot
Port
Port
Type
E1, T1
Bundle No.
For E1: 1 to 496
For T1: 1 to 384
Bundle Name
Name of the selected bundle
Empty Bundle
When checked, indicates the bundle has not been assigned to any TSs (time slots)
Bundle Status
Connected, Disabled, Remote Fail, Local Fail, Unavailable, Validation Fail,—
Time Slots
The timeslots and the bundles assigned to them. Timeslots with bundles assigned to them
are marked with a dark blue box, while unassigned timeslots are marked with a gray box.
A T1 port has 24 timeslots that can be assigned to a bundle; an E1 port has 31 (without
MF) or 30 (with MF).
Note
You cannot edit a bundle that has already been used to define a connection in the
Bundle Connection Table (Figure 3-23). To edit such a bundle, first delete the
bundle from the Bundle Connection Table (Figure 3-23), and then return to the
Bundle Table to select new parameters.
To select an available timeslot:
1. Select a bundle from the Bundle Configuration Table and click Edit…
2. Click the square beneath the timeslot number.
Selected timeslots appear yellow.
3. Click <Apply>.
To select all available timeslots for the selected bundle:
•
Click <Select All>.
To remove all selected time slots from the selected bundle:
•
Click <Clear All>.
3.5 Managing Bundle Connections
Notes
• When there is any combination of two interfaces in slots 3 and 4, the agent
sends a bundle name starting with Bundle 1 instead of Bundle 249 (for E1) or
Bundle 193 (for T1).
• The Bundle Connection Table is used by all the different IPmux products. Not all
parameters are relevant to IPmux.
3-30
Managing Bundle Connections
IPmux-8/16 User’s Manual
Chapter 3 Configuration Management
Creating Bundle Connections
For information on creating and managing bundle connections using the Service
Center map, refer to chapter 7 of the RADview SC/TDMoIP System Manual.
Removing Bundle Connections
For information on removing bundle connections using the Service Center map,
refer to chapter 7 of the RADview SC/TDMoIP System Manual. In cases where a
circuit is broken, you may use the bundle connection table to manually remove a
bundle connection.
To view the bundle connection table:
•
Configuration > Bundles > Bundle Connection Table…
The Bundle Connection Table appears.
Figure 3-23. Bundle Connection Table
Table 3-16. Bundle Connection Table Parameters
Parameter
Possible Values/Remarks
Slot No. / Channel No.
Slot or channel to be configured
For slots: 1 to 4
For channels: 1 to 8
Bundle No.
For E1: 1 to 496
For T1: 1 to 384
In slot 3 for Card Type = E1/T1, T3/E3: Bundle number = 1
In slot 4 for Card Type = T1: Bundle number = 193
In slot 4 for Card Type = T3/E3: Bundle number = 249
Bundle Name
Bundle name for selected channel.
Admin. Status
Connected, Disconnected (frames will not be sent from this channel)
Oper. Status
Connected, Disabled, Remote Fail, Local Fail
Dest. Name
Logical name or IP address of the destination IPmux-16
Next Hop
Indicates IP address to which the Ehternet frame will be sent when the Dest. Name
IP is not in the device subnet
Managing Bundle Connections
3-31
Chapter 3 Configuration Management
IPmux-8/16 User’s Manual
Table 3-16. Bundle Connection Table Parameters (Cont.)
Parameter
Possible Values/Remarks
Dest. Bundle
Bundle number in the destination IPmux device
For E1: 1 to 496
For T1: 1 to 384
Jitter Buffer (tens of
µsec
Depth of the jitter buffer (elastic buffer per link whose size is configurable in units
of 10 micro seconds (µs).
T1:
0..3.. 2400 (0 - 24 ms)
E1:
0..3..3200 (0 - 32 ms)
T3/E3: 0..3..2400 (0 - 24 ms)
Default (for both E1 and T1) 300
TOS
0 to 255
TDM Bytes in Frame
E1/T1:
48..1440 (steps of 48)
Note: List of values differs for different interfaces
E3/T3:
240..1440 (steps of 48)
VLAN Tagging
Select this checkbox to enable VLAN tagging
Note: Trying to activate the VLAN Tagging function in an unsuitable environment
causes NMS disconnection
VLAN ID
1 to 4094
Appears only when VLAN Tagging is enabled
VLAN Priority
0 to 7
Appears only when VLAN Tagging is enabled
OAM Connectivity
Disabled, Enabled
Bundle Throughput
(kbps)
Amount of data transferred per second, per bundle
LAN1 Usage (%)
Current system performance on LAN1
LAN2 Usage (%)
Current system performance on LAN2
Note: This field exists only when the LAN2 card exists.
LAN1 Total
Throughput (Kbps)
Amount of data transferred per second, on LAN1
LAN2 Total
Throughput (Kbps)
Amount of data transferred per second, on LAN2.
Note: This field exists only when the LAN2 card exists.
Note
The Bundle Usage and LAN Usage Parameters fields exist only for
Agent version ≥ 2.0.
To remove an entry from the Bundle Connection Table:
1. Select a row in the Bundle Connection Table and click <Remove>.
2. Click <Remove>
A warning message appears.
3-32
Managing Bundle Connections
IPmux-8/16 User’s Manual
Chapter 3 Configuration Management
Figure 3-24. Remove Bundle Connection
3. Click <Yes> to confirm remove.
3.6 Additional Tasks
Displaying Ethernet Interface Information
To display information about an Ethernet interface
1. Click an Ethernet port.
2. Configuration > Interface Info...
The Interface Information dialog box appears.
Figure 3-25. LAN Interface Information
Note
The field Slot does not appear for OOB (out-of-band).
Additional Tasks
3-33
IPmux-8/16 User’s Manual
Chapter 3 Configuration Management
Table 3-17. Ethernet Interface Parameters
Parameter
Possible Values / Remarks
Slot
1, 2
Note: This does not appear for OOB.
Port
User1, User2, User3, Network, Control (OOB)
OOB means out-of-band
Type
Ethernet
Mode
Transmission mode: Full duplex, Half duplex
Rate (Mbps)
Transmision rate: 10, 100
Status
Status of the link: Connected, Not Connected
Displaying the System Inventory
To display the System Inventory for the selected IPmux-16:
•
Configuration > System Inventory...
The System Inventory dialog box appears.
Figure 3-26. System Inventory Dialog Box
Table 3-18. System Inventory Parameters
Parameter
Possible Values / Remarks
System ID
System identification number
Slot 1/Slot 2/
Slot 3/Slot 4
Card ID and hardware version
PS1/PS2
AC, DC, None
Status: Failed, OK, –
Fan 1/Fan 2
Status: Failed, OK
3-34
Additional Tasks
IPmux-8/16 User’s Manual
Chapter 3 Configuration Management
Resetting IPmux-8/16 to the Default Configuration
To set the selected IPmux to the Default Configuration:
1. Configuration > System Commands > Default Configuration.
The following message appears:
RESETTING AGENT CONFIGURATION. Current configuration will be lost.
2. Click <OK> to confirm reset of the default configuration.
The default configuration replaces the current configuration.
Polling the Agent
To poll the agent:
•
Configuration > System Commands > Poll Agent.
The agent is polled.
Clearing the MAC Tables
To clear the bridge 1 (or 2) dynamic (MAC) LAN table:
1. Configuration > System Commands > Clear MAC Table > Bridge 1 (or 2).
The following message appears:
Erasing Slot1 MAC Table / Information will be lost.
2. Click <OK> to confirm.
The MAC Table is cleared.
Resetting IPmux-8/16
To reset the selected IPmux-8/16:
1. Configuration > System Commands > Reset.
The following message appears:
RESETTING AGENT. Operation may change system configuration.
2. Click <OK> to confirm.
The IPmux is reset.
Note
The reset operation implements any changes made to the IPmux configuration.
Additional Tasks
3-35
Chapter 3 Configuration Management
3-36
Additional Tasks
IPmux-8/16 User’s Manual
Chapter 4
Configuring Typical
Applications
This chapter provides detailed instructions for setting up a typical application using
two IPmux-11 units opposite an IPmux-16 unit, and contains the following
sections:
•
Overview
•
Configuring IPmux-11 Units
•
Configuring IPmux-16
•
Connecting IPmux to the Management Station
•
Configuration Sequence
•
Creating Circuits
4.1 Overview
Application
The section provides detailed instructions for configuring two IPmux-11 units
opposite an IPmux-16 unit, in a point-to-multipoint application including
configuration via a supervisory terminal. See the following figure:
Figure 4-1. Two IPmux-11 Units Operating opposite IPmux-16
Overview
4-1
IPmux-8/16 User’s Manual
Chapter 4 Configuring Typical Applications
Guidelines for Configuring IPmux Units
Certain guidelines are relevant to this application. In general, there are four basic
configuration steps (described below) that need to be followed when deploying
any IPmux unit.
1. IP Configuration – Setting the device host IP address and the manager IP
address.
Note
For IPmux-16 it is necessary to define three IP addresses:
• For out-of-band management traffic (optional)
• For TDMoIP traffic via Ethernet port 1
• For TDMoIP traffic via Ethernet port 2.
The IP network can consist of either switches or routers. The minimum
requirement is 10 Mbps full duplex.
An IPmux should be configured with a default gateway/next hop address if
a routed network is used.
The manager IP address is used to manage the agent by the network
management station.
2. Physical layer configuration – Setting the TDM parameters (line type, clocking,
etc.) according to the application requirements and topology.
TDM traffic will be sent between the central IPmux-16 and the two remote
IPmux-11 units at Station A and Station B over the IP network.
The TDM traffic can be either generated by a BER tester connected to the
IPmux units or by a PBX. A remote local loop can be used on the remote
IPmux units in order to avoid the need for an additional BER tester.
3. Creating bundles – Allocating timeslots to bundle/s
4. Connecting bundles – Directing the bundles, defined above, to remote IPmux
units.
Table 4-1. Bundle Configuration
4-2
Overview
Channel
Bundle Number
1
1–31
2
32–62
3
63–93
4
94–124
5
125–155
6
156–186
7
187–217
8
218–248
IPmux-8/16 User’s Manual
Chapter 4 Configuring Typical Applications
Configuration Summary Table
Table 4-2. Configuration Summary
Device
E1 Parameters
IP Parameters
Bundle Creation
Bundle
Connection
IPmux-11 (A)
• Transmit clock source:
adaptive
Host IP address:
10.10.10.126
Bundle No. 1
Timeslots in
bundle: 1–10
IPmux-16
Ethernet port 1
Host IP address:
40.40.40.111
Bundle No. 1
Timeslots in
bundle: 1–10
IPmux-16
Ethernet port 2
• Out-of-band
host IP
address:
40.40.40.102
Bundle No. 1,
Timeslots in
bundle: 1–10
IPmux-11 (A)
Bundle No. 2,
Timeslots in
bundle: 11–20
IPmux-11 (B)
• Line type: Framed G.704
CRC-4 disabled
• CAS: disabled
IPmux-11 (B)
• Transmit clock source:
adaptive
• Line type: Framed G.704
CRC-4 disabled
• CAS: disabled
IPmux-16
• Transmit clock source:
loopback
• Line type: CRC-4
disabled (framed)
• CAS: disabled
• Ethernet port
1 host IP:
13.13.13.13
• Ethernet port
2 host IP:
14.14.14.14
The initial configuration of the IPmux-11 and the IPmux-16 needs to be done via
an ASCII terminal connected to the IPmux terminal control port. However, after
performing the initial configuration (host IP address, default gateway and a
manager list), you can manage the units using any of the following options:
•
Manage IPmux-11 or IPmux-16 from any IP host using the Telnet protocol.
After establishing a Telnet session with the IPmux unit, the Telnet protocol
offers the same functionality as the supervisory terminal, enabling remote
access over IP networks.
•
Manage IPmux-11 or IPmux-16 by means of SNMP-based network
management stations, e.g., the RADview TDMoIP Service Center network
management station offered by RAD.
Overview
4-3
Chapter 4 Configuring Typical Applications
IPmux-8/16 User’s Manual
4.2 Configuring IPmux-11 Units
This section explains how to configure IPmux-11 units. The configuration
procedure is similar for both units.
Configuring the IP Parameters
To configure the host IP parameters:
1. Display the Host IP menu (Configuration > System > Host IP), and configure
the IP address and mask of the host.
10.10.10.126 for IPmux-11 (A) host
40.40.40.111 for IPmux-11 (B) host.
2. Save the changes.
Configuring the Manager List
To configure the manager list:
1. Display the Manager List menu (Configuration > System > Management >
Manager list), and enter IP parameters for the network manager station.
2. Save the changes.
4.3 Configuring IPmux-16
Configuring the IP Parameters
To configure the host IP parameters:
1. Display the Host IP menu (Configuration > General Configuration >
Management Configuration > Host Configuration), and assign the following
IP addresses to the hosts:
40.40.40.102 for out-of-band management host
13.13.13.13 for Ethernet 1 host
14.14.14.14 for Ethernet 2 host.
2. Save the changes.
Configuring the Manager List
To configure the manager list:
1. Display the Manager List menu (Configuration > General Configuration >
Management Configuration > Manager List), and enter IP parameters for the
network manager station.
2. Save the changes.
4-4
Configuring IPmux-16
IPmux-8/16 User’s Manual
Chapter 4 Configuring Typical Applications
4.4 Connecting IPmux to the Management Station
IPmux can be managed by a Network Management Station (NMS) that is located
on the LAN (hub or switch) connected to the one of the unit’s Ethernet ports.
To connect IPmux to the Network Management Station:
1. Connect a Network Management Station to the LAN (hub or switch).
2. Connect one of the IPmux’s Ethernet ports to the LAN.
4.5 Configuration Sequence
Several basic configuration steps need to be followed when deploying any IPmux
unit:
1. Preliminary IP Configuration – Setting the IPmux host IP address and the
manager IP address.
2. Physical layer configuration – Setting the TDM parameters (line type, clocking,
etc.) according to the application requirements and topology. This can be
accomplished via the supervisor terminal or via the Service Center. This
chapter demonstrates physical layer configuration using the Service Center.
3. Creating circuits / Configuring bundles – Assigning timeslots to bundles and
connecting bundles. This can be accomplished via the supervisor terminal or
graphically via the Service Center. This chapter demonstrates the graphical
creation of circuits using the Service Center.
IPmux can be managed by a network management station that is located on
the LAN connected to the one of the unit’s Ethernet ports. In order to establish a
proper connection, it is necessary to configure IPmux with a basic configuration.
To perform preliminary IPmux configuration:
1. Connect an ASCII terminal to the IPmux RS-232 control port.
2. Log in as Superuser (su).
3. Assign an IP address to IPmux.
4. Assign a subnet mask and a default gateway.
5. You can also enable or disable the IPmux DHCP client.
6. Set read, trap, and read/write communities to public.
7. Set a manager IP address and location.
8. Reset IPmux.
Note
Make sure that you save your settings at each configuration screen.
Configuration Sequence
4-5
Chapter 4 Configuring Typical Applications
IPmux-8/16 User’s Manual
4.6 Creating Circuits
In the Service Center application, circuits can be created for Mesh and Normal
Services. This section demonstrates creating circuits as a Mesh Service. For more
information, see the RV-SC/TDMoIP System Manual.
Creating Mesh Service Circuit
Figure 4-2. Mesh Services Map
4-6
Creating Circuits
IPmux-8/16 User’s Manual
Chapter 4 Configuring Typical Applications
Defining E1 Parameters
To configure E1 parameters for the source IPmux-16:
1. Double click on the desired IPmux-16 source (40.40.40.102) in the Mesh
Services Map (Figure 4-2).
The Element Manager appears.
Figure 4-3. IPmux-16 Element Manager
2. Select CH1.
3. From the Configuration menu, select Parameters...
The Interface Parameters dialog box appears (Figure 4-4).
4. Select the following parameters:
Transmit Clock Source = Loopback
Line Type =Framed (G.704).
5. Click <Set>.
Creating Circuits
4-7
IPmux-8/16 User’s Manual
Chapter 4 Configuring Typical Applications
Figure 4-4. IPmux-16 E1 Interface Parameters
To configure E1 parameters for the destination IPmux-11:
1. Double click on the desired IPmux-11 destination (10.10.10.126) in the Mesh
Services Map (Figure 4-2).
The Element Manager appears.
Figure 4-5. IPmux-11 Element Manager
2. Select CH1.
4-8
Creating Circuits
IPmux-8/16 User’s Manual
Chapter 4 Configuring Typical Applications
3. From the Configuration menu, select Parameters...
The Interface Parameters dialog box appears (Figure 4-6).
4. Select the following parameters:
Transmit Clock Source = Adaptive
5. Click <Set>.
Figure 4-6. IPmux-11 E1 Interface Parameters
Creating Circuit
To create a circuit between IPmux-16 (40.40.40.102) and IPmux-11
(10.10.10.126):
1. On the Services Map, select the source for the circuit. In this example it is the
IPmux-16 (40.40.40.102).
2. While holding down the CTRL key, right click the mouse and drag a line
between the source IPmux-16 (40.40.40.102) and destination IPmux-11
(10.10.10.126).
The Manual Circuit Configuration dialog box appears.
Creating Circuits
4-9
Chapter 4 Configuring Typical Applications
IPmux-8/16 User’s Manual
Figure 4-7. Manual Circuit Dialog Box – General Parameters Tab
3. Click on the General Tab (Figure 4-7) and configure the following parameters:
Connection Type = E1
Connection Bandwidth = 10xTS
4. Click on the Primary Circuit Tab (Figure 4-7) and configure the following
parameters:
Line Type = Framed (G.704)
TDM Bytes in Frame = 48
OAM Connectivity = Enabled
4-10
Creating Circuits
IPmux-8/16 User’s Manual
Chapter 4 Configuring Typical Applications
Figure 4-8. Manual Circuit Dialog Box – Primary Circuit Tab
5. If the devices are on a network segment that uses VLANs, click on the EP
Param Tab (Figure 4-9) and configure the following parameters:
VLAN Tagging = Enabled (Checked)
VLAN ID = 111
VLAN Priority = 2
Note
Use the vertical scroll bar on the right side of the dialog box to scroll the window
and display fields that are off the page.
Creating Circuits
4-11
Chapter 4 Configuring Typical Applications
4-12
Creating Circuits
IPmux-8/16 User’s Manual
IPmux-8/16 User’s Manual
Chapter 4 Configuring Typical Applications
Figure 4-9. Manual Circuit Dialog Box – EP Param Tab
Creating Circuits
4-13
IPmux-8/16 User’s Manual
Chapter 4 Configuring Typical Applications
Save Circuit Parameter Settings
To save parameter settings:
1. In the Manual Circuit Dialog Box, click <Set>.
A message appears asking you if you want to create another circuit.
Figure 4-10. Create Another Circuit Dialog
2. Click <No>.
The circuit is created and appears on the Mesh Services Map.
3. Repeat the preceding steps to configure the second IPmux-11 unit and create
a second circuit between IPmux-16 and the second IPmux-11 unit, using the
appropriate IP address and VLAN parameters.
The second circuit is created and appears on the Mesh Services Map.
Figure 4-11. Mesh Services Map, Showing Circuits Between IPmux-16 and Two IPmux-11 Units
4-14
Creating Circuits
IPmux-8/16 User’s Manual
Chapter 4 Configuring Typical Applications
Displaying Circuit Parameters
Using the Services Map, you can display the circuit parameters of a link to verify
that the parameters are correct.
To display circuit parameters:
1. Click on a link in the Services Map (Figure 4-11).
2. Right click and select Circuit List…
The Circuit List appears.
Figure 4-12. Circuit List
3. Click <Parameters…>
The Manual Circuit Parameters dialog box appears.
4. Verify that the parameters are correct.
The typical application is now configured.
Creating Circuits
4-15
Chapter 4 Configuring Typical Applications
4-16
Creating Circuits
IPmux-8/16 User’s Manual
Chapter 5
Security Management
This chapter discusses how to manage IPmux-8/16 security, and includes the
following section:
•
Enabling or Disabling Telnet Access
5.1 Enabling or Disabling Telnet Access
The Access command allows you to enable Telnet access.
To enable Telnet access:
1. Options > Access…
The Access dialog box appears (Figure 5-1).
2. Configure Telnet Access and click <Set>.
Figure 5-1. Access Dialog Box
Table 5-1. Telnet Access Parameters
Parameter
Possible Values/Remarks
Telnet Access
Enable/Disable accessing the device via Telnet
Disable - no one will be allowed to access the device via Telnet
Enable - all users are allowed Telnet Access
Managers Only - Only manager stations listed in the manager's list are allowed
Enabling or Disabling Telnet Access
5-1
Chapter 5 Security Management
5-2
Enabling or Disabling Telnet Access
IPmux-8/16 User’s Manual
Chapter 6
Performance Management
This chapter discusses how to monitor IPmux-8/16 performance, and includes the
following sections:
•
Setting the Polling Interval
•
Viewing Bundle Statistics
•
Viewing Bundle Current Statistics
•
Viewing Bundle Intervals Statistics
•
Viewing Ethernet Port Statistics
•
Viewing E1/T1, E3/T3 Port Statistics
•
Viewing CT3 Port Statistics.
6.1 Setting the Polling Interval
To configure the polling interval:
1. Statistics > Polling Interval…
The Polling Interval dialog box appears (Figure 6-1).
Figure 6-1. Polling Interval
2. Select Polling Interval and check Polling Enable.
3. Click <Set>.
6.2 Viewing Bundle Statistics
To view bundle statistics:
•
Statistics > Bundle Connection Statistics...
The Bundle Connection Statistics Table appears.
Viewing Bundle Statistics
6-1
Chapter 6 Performance Management
IPmux-8/16 User’s Manual
Figure 6-2. Bundle Connection Table – Statistics
Table 6-1. Bundle Connection Parameters – Statistics
Parameter
Remarks
Slot No.
Slot nunber
1 to 4
Channel No.
Channel to be configured
1 to 8
Bundle No.
For E1: 1 to 496
For T1: 1 to 384
Bundle Name
Bundle name for selected channel.
Admin Status
Connected, Disconnected
Oper. Status
Connected, Disabled, Remote Fail, Local Fail
Dest. Name
Logical name or IP address of the destination IPmux
Far-End TDM Status
Status of the Far-End TDM Line (failure state information):
No Alarm – No Alarm / No Defect
Fail - Alarm Indication Signal (AIS)
RDI - Remote Defect Indication
Sequence Errors
Number of times frames were dropped because frames were received from the
network with SN fields not equal to the last SN + 1 (or 2).
Buffer Underflow
Number of times frames were dropped because the receive buffer was in an underrun
state. The buffer enters underflow state when:
• Sequence errors occur
• Flow underrun takes place due to PDV expiration.
• An overflow condition occurs.
Buffer Overflow
6-2
Number of times that frames were droopped because the receive buffer exceeded the
maximum allowed depth.
Viewing Bundle Statistics
IPmux-8/16 User’s Manual
Chapter 6 Performance Management
6.3 Viewing Bundle Current Statistics
To view the Bundle Current Table:
•
From the Bundle Connection Statistics table (Figure 6-2), click <Bundle
Current Statistics…>.
The Bundle Current statistics dialog box appears.
Figure 6-3. Bundle Current Statistics
Viewing Bundle Current Statistics
6-3
Chapter 6 Performance Management
IPmux-8/16 User’s Manual
Table 6-2. Bundle Current Statistics Parameters
Parameter
Remarks
Bundle No.
For E1: 1 to 496
For T1: 1 to 384
Bundle Name
Bundle name for selected channel
Time Elapsed (sec)
Amount of time that has passed since the beginning of the current 15-minute
interval
0..899
Sequence Errors
Number of times frames were dropped because frames were received from the
network with SN fields not equal to the last SN + 1 (or 2).
Buffer Underflow
Number of times frames were dropped because the receive buffer was in an
underrun state. The buffer enters underflow state when:
• Sequence errors occur
• Flow underrun takes place due to PDV expiration
• An overflow condition occurs
Buffer Overflow
Number of timesthat frames were droopped because the receive buffer exceeded
the maximum allowed depth
Max. Delay Variation
(10µsec)
Maximum size of the buffer (in 10's of usec) in the selected interval
6.4 Viewing Bundle Intervals Statistics
If more than one measurement interval has passed since the IPmux startup or
reset, you can view a selected 15-minute interval or cumulative totals of the data
from the previous 24 hours in a graph or a table.
Statistics from previous intervals for a specific E1/T1 or E3/T3 port can be viewed
in list or graph form.
To view a list of statistics from previous intervals:
•
From the Bundle Connection Statistics Table (Figure 6-2), click <Bundle
Intervals Statistics…>.
The Bundle Intervals Statistics dialog box appears.
6-4
Viewing Bundle Intervals Statistics
IPmux-8/16 User’s Manual
Chapter 6 Performance Management
Figure 6-4. Bundle Intervals Statistics
The Bundle Intervals Data parameters are the same as the Bundle Current Data
Parameters (Table 6-2) with the addition of information regarding Interval No. and
its duration.
Viewing Bundle Intervals Statistics
6-5
IPmux-8/16 User’s Manual
Chapter 6 Performance Management
6.5 Viewing Ethernet Port Statistics
To view interface statistics for the Ethernet interface:
1. Click the Ethernet interface.
2. From the Statistics menu, select Interface Statistics ...
The Interface Statistics dialog box appears (Figure 6-5).
Figure 6-5. Interface Statistics – Ethernet
Table 6-3. Interface Statistics Parameters – Ethernet
Parameter
Remarks
Port
ETH1, ETH2
Type
ETH
Received from Ethernet
Frames
Number of correct frames received
Octets
Number of octets received
Alignment Error Frames
Number of frames received with alignment errors
FCS Error Frames
Number of frames received with CRC errors
Transmitted to Ethernet
Frames
Total number of frames successfully transmitted
Octets
Total number of octets successfully transmitted
6-6
Viewing Ethernet Port Statistics
IPmux-8/16 User’s Manual
Chapter 6 Performance Management
Table 6-3. Interface Statistics Parameters – Ethernet (Cont.)
Parameter
Remarks
Single Collision Frames
Counter of successfully transmitted frames for which transmission is inhibited by
exactly one collision. Valid only in half duplex mode.
Multiple Collision
Frames
Counter of successfully transmitted frames for which transmission is inhibited by
more than one collision. Valid only in half duplex mode.
Differed Transmission
Frames
Counter of frames for which the first transmission attempt is delayed because the
medium is busy. Valid only in half duplex mode.
Late Collision Frames
Number of times that a collision is detected on a particular interface later then
512 bit-times into the transmission of a packet. Valid only in half duplex mode.
Carrier Sense Error
Frames
Number of times that the carrier sense condition was lost or never asserted when
attempting to transmit a frame.
Viewing Ethernet Port Statistics
6-7
IPmux-8/16 User’s Manual
Chapter 6 Performance Management
6.6 Viewing E1/T1, E3/T3 Port Statistics
You can view a selected 15-minute interval or cumulative totals of the data from
the previous 24 hours. Current statistics for a specific E1/T1 port can be viewed in
list or graph form.
Viewing E1/T1, E3/T3 Port Current Statistics
To view the Current Statistics:
•
Statistics > Current…
The Port Current Statistics dialog box appears (Figure 6-6).
Note
If Mask Port Indication is On a message box opens with the following message:
CH not active. No data.
Figure 6-6. Current Data – E1
6-8
Viewing E1/T1, E3/T3 Port Statistics
IPmux-8/16 User’s Manual
Chapter 6 Performance Management
Table 6-4. Current Data Parameters – E1/T1
Parameter
Remarks
Slot
3, 4
Port
Port number of the interface
CH1..CH8
Type
E1, T1
Current Data
Each parameter displays the number of seconds of that particular type of error
encountered by the E1/T1 interface during the current 15-minute interval
Time Elapsed
(sec)
Amount of time that has passed since the beginning of the current 15-minute interval
LOS
0..899
Loss of Signal failure
Sync. LED turns off during LOS
For T1:
Upon observing 192 contiguous pulse positions with no pulse of either positive or
negative polarity. (Signal is more than 30dB below nominal amplitude).
For E1:
Upon observing 255 contiguous pulse positions with no pulse of either positive or
negative polarity.
LOF
(RED alarm)
Loss of Frame, Local alarm
Sync. LED turns off during LOF
Declared when an OOF defect persists for 2.5 seconds and no AIS detect is present
OOF defect is the occurrence of a framing bits error
RAI
Remote Alarm indication (also called - YELLOW ALARM)
An RAI pattern is received from the far end (user) when the far end framer enters a RED
condition (Loss Of Frame). In this condition, the sync. LED turns off
AIS
Alarm Indication Signal - received from user
Sync. LED blinks during AIS
For T1:
Detected when an unframed "all 1" signal is received for 3 msec
For E1:
Detected when a string of 512 bits contains fewer than three zero bits
LOMF
Loss of Framing sequence in Time Slot 16
Valid in E1 MF mode only
FEBE
Number of FEBE (Far End Back Failure) seconds
BES
Bursty Errored Seconds
(Errored second type B)
A count of seconds with 2 up to 319 CRC error events, without AIS or SEF (framing bits
errors) detection
ES
Errored Seconds
A second containing one or mode of the following events:
•
CRC error event, SEF (OOF) event, or AIS
•
OOF defect is the occurrence of framing bits error
If SES is also effective at the same time, ES will run for 10 seconds and stop
Viewing E1/T1, E3/T3 Port Statistics
6-9
IPmux-8/16 User’s Manual
Chapter 6 Performance Management
Table 6-4. Current Data Parameters – E1/T1 (Cont.)
Parameter
Remarks
SES
Severely Errored Seconds
320 or more CRC error events, one or more SEF (OOF), or AIS. OOF defect is the
occurrence of framing bits error
UAS
Unavailable Seconds
Number of seconds that the interface is unavailable. The system is unavailable after 10
continuous SES.
DM
Degraded Minutes
A Degraded Minute is determined by collecting all of the Available Seconds, removing
any Severely Errored Seconds and grouping the result in 60-second groups (1 minute).
A Degrated Minute is such a group that the cumulative errors during the seconds within
the group exceed 1x10⁻⁶
LCV
Line Code Violation
For T1:
The sum of BPV and EXZ defects that occurred in a second.
BPV is the occurrence of a zero string greater than 15 (for AMI) or 7 (for B8ZS).
EXZ is the occurrence of a pulse of the same polarity as the previous pulse.
For E1:
Count the number of code violations (two consecutive bipolar violations of the same
polarity)
Note: The LCV alarm, appears as Unknown in the Active Alarms List.
AR%
Availability Ratio
(900-UAS)/900
Notes
• BESs and DMs are valid when Line Type is CRC or ESF.
• FEBE counter is supported if the Port is E1 and Line Type is CRC-MF.
• LOMF counter is supported if the Port is E1 and Line Type is CRC-MF or MF.
Table 6-5. Current Data Parameters – E3/T3
Parameter
Possible Values / Remarks
Slot
3, 4
Port
CH1
Type
E3, T3
Current Data
Each parameter displays the number of seconds of that particular type of error
encountered by the E1/T1 interface during the current 15-minute interval
Time Elapsed (sec)
Amount of time that has passed since the beginning of the current 15-minute
interval
0..899
6-10
Viewing E1/T1, E3/T3 Port Statistics
IPmux-8/16 User’s Manual
Chapter 6 Performance Management
Table 6-5. Current Data Parameters – E3/T3 (Cont.)
Parameter
Possible Values / Remarks
LOS
Loss of Signal failure
Sync. LED turns off during LOS
For T3:
Upon observing 192 contiguous pulse positions with no pulse of either positive or
negative polarity. (Signal is more than 30dB below nominal amplitude).
For E3:
Upon observing 255 contiguous pulse positions with no pulse of either positive or
negative polarity.
AIS
Alarm Indication Signal - received from user
Sync. LED blinks during AIS
For T3:
Detected when an unframed "all 1" signal is received for 3 msec.
For E3:
Detected when a string of 512 bits contains fewer than three zero bits.
ES
Errored Seconds
A second containing one or mode of the following events:
• CRC error event, SEF (OOF) event, or AIS
• OOF defect is the occurrence of framing bits error
If SES is also effective at the same time, ES will run for 10 seconds and stop
SES
Severely Errored Seconds
320 or more CRC error events, one or more SEF (OOF), or AIS. OOF defect is the
occurrence of framing bits error
UAS
Unavailable Seconds
Number of seconds that the interface is unavailable. The system is unavailable after
10 continuous SES.
Viewing E1/T1, E3/T3 Port Statistics
6-11
IPmux-8/16 User’s Manual
Chapter 6 Performance Management
Viewing E1/T1, E3/T3 Port Intervals Statistics
If more than one measurement interval has passed since the IPmux startup or
reset, you can view a selected 15-minute interval or cumulative totals of the data
from the previous 24 hours in a graph or a table.
Statistics from previous intervals for a specific E1/T1 or E3/T3 port can be viewed
in list or graph form.
To view a list of statistics from previous intervals:
1. Click an E1/T1 or E3/T3 port:
2. Statistics > Intervals…
The Intervals Data dialog box appears.
Figure 6-7. Intervals Data – E1/T1
6-12
Viewing E1/T1, E3/T3 Port Statistics
IPmux-8/16 User’s Manual
Chapter 6 Performance Management
The Intervals Data - E1/T1 parameters are the same as the Current Data
Parameters (Table 6-4) with the addition of information regarding Interval No., its
duration and the following parameters:
Table 6-6. Intervals Data Parameters – E1/T1
Parameter
Possible Values / Remarks
AR
Availability Ratio
ESR
Errored Seconds Ratio
SESR
Severely Errored Seconds Ratio
Viewing E1/T1, E3/T3 Port Statistics
6-13
IPmux-8/16 User’s Manual
Chapter 6 Performance Management
6.7 Viewing CT3 Port Statistics
You can view a selected 15-minute interval or cumulative totals of the data from
the previous 24 hours. Viewing CT3 Port Current Statistics
To view the Current Statistics:
1. Select a CT3 port.
2. Statistics > Current…
The channelized T3 Current Statistics dialog box appears.
Figure 6-8. Channelized T3 Current Statistics
Note
6-14
If Mask Port Indication is On a message box opens with the following message:
CH not active. No data.
Viewing CT3 Port Statistics
IPmux-8/16 User’s Manual
Chapter 6 Performance Management
Table 6-7. Channelized T3 Current Statistics Parameters
Parameter
Remarks
Slot
3, 4
Port
Channelized T3
Time Elapsed
(sec)
Amount of time that has passed since the beginning of the current 15-minute interval
LOS
0..899
Loss of Signal failure
Sync. LED turns off during LOS
For T1:
Upon observing 192 contiguous pulse positions with no pulse of either positive or
negative polarity. (Signal is more than 30dB below nominal amplitude).
For E1:
Upon observing 255 contiguous pulse positions with no pulse of either positive or
negative polarity.
LOF
(RED alarm)
Loss of Frame, Local alarm
Sync. LED turns off during LOF
Declared when an OOF defect persists for 2.5 seconds and no AIS detect is present
OOF defect is the occurrence of a framing bits error
AIS
Alarm Indication Signal - received from user
Sync. LED blinks during AIS
For T1:
Detected when an unframed "all 1" signal is received for 3 msec
For E1:
Detected when a string of 512 bits contains fewer than three zero bits
RDI
Remote Defect Indication
LES
Number of Line Errored Seconds
0..899
PES
Counter associated with the number of P-bit Errored Seconds
0..899
PSES
Counter associated with the number of P-bit Severely Errored Seconds
0..899
CES
Number of C-bit Errored Seconds
0..899
CSES
Number of C-bit Severely Errored Seconds
0..899
SEFS
Counter associated with the number of Severely Errored Framing Seconds
0..899
UAS
Unavailable Seconds
Number of seconds that the interface is unavailable. The system is unavailable after 10
continuous SES.
0..899
Viewing CT3 Port Statistics
6-15
Chapter 6 Performance Management
IPmux-8/16 User’s Manual
Viewing CT3 Port Intervals Statistics
If more than one measurement interval has passed since the IPmux startup or
reset, you can view a selected 15-minute interval or cumulative totals of the data
from the previous 24 hours in a graph or a table.
To view a list of statistics from previous intervals:
1. Click a CT3 port:
2. Statistics > Intervals…
The channelized T3 Intervals Statistics dialog box appears.
Figure 6-9. Channelized T3 Intervals Statistics
The channelized T3 Intervals Statistics parameters are the same as the Current
Data Parameters (Table 6-7) with the addition of information regarding Interval
number and its duration.
6-16
Viewing CT3 Port Statistics
Chapter 7
Fault Management
This chapter describes how to manage IPmux-8/16 alarms and how to run a
loopback test, and contains the following sections:
•
Monitoring Object Status
Masking Traps
Viewing Active Alarms
Viewing the History Log
Clearing the History Log
Viewing Self Test Results
•
Performing Loopback Tests
Performing an E1/T1 Port Loopback Test
Performing an E3/T3 Port Loopback Test
Performing a CT3 Port Loopback Test
Monitoring Object Status
7-1
IPmux-8/16 User’s Manual
Chapter 7 Fault Management
7.1 Monitoring Object Status
Masking Traps
The Masking Traps command enables you to select which traps should be
masked.
To manually select traps for masking:
1. Options > Masking Traps…
The Masking Traps dialog box appears (Figure 7-1).
2. Select which traps to mask and click <Set>.
Figure 7-1. Masking Traps Dialog Box
Table 7-1. Masking Traps Parameters
Parameter
Possible Values/Remarks
Authentication
Failure
Selecting this checkbox disables the Authentication Failure trap.
Checked (disabled), Unchecked (enabled)
LOS, LOF, AIS, RDI, FEBE
Bundle Connection
Bundle
Connectivity
7-2
Checked (disabled), Unchecked (enabled)
Monitoring Object Status
IPmux-8/16 User’s Manual
Chapter 7 Fault Management
Viewing Active Alarms
The Alarms command enables you to view agent alarms from the time that the
selected IPmux was turned on or from the last time the active alarm list was
cleared.
To view the Active Alarm List:
•
Fault > Alarms...
The Active Alarm list appears.
Figure 7-2. Active Alarm List
Table 7-2. Active Alarm Parameters
Parameter
Possible Values / Remarks
Slot
1 to 4
Port
Port number
1 to 8
Alarm
No Alarm Present, Far End LOF, Far End Sending AIS, Near End LOF, Near End Loss
of Signal, Near End Sending TS16 LOMF, Remote Alarm Indication
[Print…]
Prints list
[Save to File…]
Saves list
Monitoring Object Status
7-3
IPmux-8/16 User’s Manual
Chapter 7 Fault Management
Viewing the History Log
The History Log command enables you to display a history of alarms (up to
512 entries) that were sent from the selected IPmux to the network management
station.
To view the History Log:
•
Fault > History Log > List…
The System Log Buffer table appears.
Figure 7-3. System Log Buffer
Table 7-3. System Log Buffer Parameters
Parameter
Possible Values / Remarks
No.
The number of the trap in the Log Buffer
Description
Brief description of the trap – up to 80 characters
[Next]
Displays next 20 entries in table
[Print…]
Prints list
[Start From]
Opens Start From dialog box. Select starting Interval Number and click <Set>
[Save to File…]
Saves list
7-4
Monitoring Object Status
IPmux-8/16 User’s Manual
Chapter 7 Fault Management
Clearing the History Log
To clear the History Log:
1. Fault > History Log > Clear.
A confirmation box appears.
2. Click <OK> to confirm.
Figure 7-4. Clearing Log Buffer
Viewing Self Test Results
To view Self Test results obtained when the selected IPmux-8/16 was
powered up:
•
Diagnostics > Self Test Results...
The Self Test Results dialog box appears displaying descriptions of detected
faults.
Figure 7-5. Self Test Results
Monitoring Object Status
7-5
IPmux-8/16 User’s Manual
Chapter 7 Fault Management
7.2 Performing Loopback Tests
Performing an E1/T1 Port Loopback Test
To initiate a loopback test for an E1/T1 interface:
1. Click an E1/T1 interface.
2. Diagnostics > Loopback...
The Interface Loopback dialog box appears (Figure 7-6).
3. Set the desired loopback test and click <Set>.
The loopback test is performed.
Figure 7-6. Interface Loopback Dialog Box – E1/T1
Table 7-4. E1/T1 Interface Loopback Parameters
Parameter
Possible Values / Remarks
Slot
3, 4
Port
CH1 to CH8
Type
E1/T1
Current Loopback
Current loopback status
Internal, External, Disable
Loopback
Type of loopback test
Internal, External, Disable
Performing an E3/T3 Port Loopback Test
To initiate a loopback test for an E3/T3 interface:
1. Click an E3/T3 interface.
2. Diagnostics > Loopback...
The Interface Loopback dialog box appears (Figure 7-7).
3. Set the desired loopback test and click <Set>.
The loopback test is performed.
7-6
Performing Loopback Tests
IPmux-8/16 User’s Manual
Chapter 7 Fault Management
Figure 7-7. Interface Loopback Dialog Box – E3/T3
Table 7-5. E3/T3 Interface Loopback Parameters
Parameter
Possible Values / Remarks
Slot
3, 4
Port
CH1
Type
E3/T3
Current Loopback
Current loopback status
Internal, External, Disable
Loopback
Type of loopback test
Internal, External, Disable
Performing Loopback Tests
7-7
IPmux-8/16 User’s Manual
Chapter 7 Fault Management
Performing a CT3 Port Loopback Test
To initiate a loopback test for a CT3 interface:
1. Click a CT3 interface.
2. Diagnostics > Loopback...
The Interface Loopback dialog box appears (Figure 7-8).
3. Set the desired loopback test and click <Set>.
The loopback test is performed.
Figure 7-8. Interface Loopback Dialog Box – CT3
Table 7-6. CT3 Interface Loopback Parameters
Parameter
Possible Values / Remarks
Slot
3, 4
Port
Channelized T3
Type
CT3
Current Loopback
Current loopback status
Internal, External, Disable
Loopback
Type of loopback test
Internal, External, Disable
7-8
Performing Loopback Tests