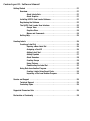
1
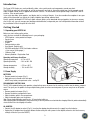
WRAP FLAG 1 FLAG 2 FIXED TBLOCK VERT
CAPS
BFONT STYLE BOX
ULINE
BCODE
PRINT
CLEAR
VERT
BCODE
BOX/UL
CARD ID
LANG
SAVE
ALIGN
ERASE
SAVE
GRAPHIC
219
Industrial
Labelprinter
Instructions for Use
www.dymo.com
2
WRAP FLAG 1 FLAG 2 FIXED TBLOCK VERT
CAPS
BFONT STYLE BOX
ULINE
BCODE
PRINT
CLEAR
VERT
BCODE
BOX/UL
CARD ID
LANG
SAVE
219
ALIGN
SAVE
GRAPHIC
ERASE
Contents part I : Printer Manual
Introduction
..................................................... 3
Getting Started . . . . . . . . . . . . . . . . . . . . . . . . . . . . . . . . . . . . . . . . . . . . . . . . . . . . . 3
1. Unpacking your ILP219 kit . . . . . . . . . . . . . . . . . . . . . . . . . . . . . . . . . . . . 3
2. Power Supply . . . . . . . . . . . . . . . . . . . . . . . . . . . . . . . . . . . . . . . . . . . . . . 3
3. Installing/Changing the cassette . . . . . . . . . . . . . . . . . . . . . . . . . . . . . . . 4
4. Printing your first label . . . . . . . . . . . . . . . . . . . . . . . . . . . . . . . . . . . . . . . 4
Getting to know your printer . . . . . . . . . . . . . . . . . . . . . . . . . . . . . . . . . . . . . . . . . . . . 5
Display . . . . . . . . . . . . . . . . . . . . . . . . . . . . . . . . . . . . . . . . . . . . . . . . . . . . . 5
Backlighting . . . . . . . . . . . . . . . . . . . . . . . . . . . . . . . . . . . . . . . . . . . . . . . . . . 5
Typing text and symbols . . . . . . . . . . . . . . . . . . . . . . . . . . . . . . . . . . . . . . . . 5
CAPITALS . . . . . . . . . . . . . . . . . . . . . . . . . . . . . . . . . . . . . . . . . . . . . 5
SPACE . . . . . . . . . . . . . . . . . . . . . . . . . . . . . . . . . . . . . . . . . . . . . . . 5
USING THE SHIFT KEY . . . . . . . . . . . . . . . . . . . . . . . . . . . . . . . . . . 5
BACKSPACE . . . . . . . . . . . . . . . . . . . . . . . . . . . . . . . . . . . . . . . . . . . 5
ERASE . . . . . . . . . . . . . . . . . . . . . . . . . . . . . . . . . . . . . . . . . . . . . . . 5
ESCAPE . . . . . . . . . . . . . . . . . . . . . . . . . . . . . . . . . . . . . . . . . . . . . . 5
NAVIGATION KEY . . . . . . . . . . . . . . . . . . . . . . . . . . . . . . . . . . . . . . . 6
INTERNATIONAL CHARACTERS AND SYMBOLS . . . . . . . . . . . . . . . 6
Formatting your label . . . . . . . . . . . . . . . . . . . . . . . . . . . . . . . . . . . . . . . . . . . . . . . . . 7
TEXT SIZE . . . . . . . . . . . . . . . . . . . . . . . . . . . . . . . . . . . . . . . . . . . . . . . . . . . 7
TEXT STYLE . . . . . . . . . . . . . . . . . . . . . . . . . . . . . . . . . . . . . . . . . . . . . . . . . . 7
VERTICAL TEXT . . . . . . . . . . . . . . . . . . . . . . . . . . . . . . . . . . . . . . . . . . . . . . . 7
UNDERLINING AND BOXED TEXT . . . . . . . . . . . . . . . . . . . . . . . . . . . . . . . . . 7
MULTIPLE LINES . . . . . . . . . . . . . . . . . . . . . . . . . . . . . . . . . . . . . . . . . . . . . . 8
JUSTIFYING TEXT IN MULTI-LINE LABELS . . . . . . . . . . . . . . . . . . . . . . . . . . 8
ALIGNING TEXT ON A LABEL . . . . . . . . . . . . . . . . . . . . . . . . . . . . . . . . . . . . . 8
PRODUCING A BAR CODE . . . . . . . . . . . . . . . . . . . . . . . . . . . . . . . . . . . . . . . 9
PAGE BREAK . . . . . . . . . . . . . . . . . . . . . . . . . . . . . . . . . . . . . . . . . . . . . . . . .10
Printing modes . . . . . . . . . . . . . . . . . . . . . . . . . . . . . . . . . . . . . . . . . . . . . . . . . . . . .11
WRAP-AROUND LABELS . . . . . . . . . . . . . . . . . . . . . . . . . . . . . . . . . . . . . . . .11
FLAG LABELS . . . . . . . . . . . . . . . . . . . . . . . . . . . . . . . . . . . . . . . . . . . . . . . . .12
COMPONENT/OUTLET LABELS . . . . . . . . . . . . . . . . . . . . . . . . . . . . . . . . . . .13
TERMINAL BLOCK / PATCHPANEL LABELS . . . . . . . . . . . . . . . . . . . . . . . . . .13
MODULE MARKING LABELS . . . . . . . . . . . . . . . . . . . . . . . . . . . . . . . . . . . . .14
Saving labels and preferences . . . . . . . . . . . . . . . . . . . . . . . . . . . . . . . . . . . . . . . . . .16
Using files on the memory card . . . . . . . . . . . . . . . . . . . . . . . . . . . . . . . . . . . . . . . . .17
GRAPHICS
. . . . . . . . . . . . . . . . . . . . . . . . . . . . . . . . . . . . . . . . . . . . . . . . . . . . .17
Printing
. . . . . . . . . . . . . . . . . . . . . . . . . . . . . . . . . . . . . . . . . . . . . . . . . . . . .18
ADJUSTING PRINT HEAD TEMPERATURE . . . . . . . . . . . . . . . . . . . . . . . . . . . . . . . . . .19
Troubleshooting . . . . . . . . . . . . . . . . . . . . . . . . . . . . . . . . . . . . . . . . . . . . . . . . . . . . .19
Warranty Registration . . . . . . . . . . . . . . . . . . . . . . . . . . . . . . . . . . . . . . . . . . . . . . . . .19
Contents part II : Software Manual
Getting Started . . . . . . . . . . . . . . . . . . . . . . . . . . . . . . . . . . . . . . . . . . . . . . . . . . . . .21
Overview . . . . . . . . . . . . . . . . . . . . . . . . . . . . . . . . . . . . . . . . . . . . . . . . . . . .21
About Labels Sets . . . . . . . . . . . . . . . . . . . . . . . . . . . . . . . . . . . . . .21
About Graphics . . . . . . . . . . . . . . . . . . . . . . . . . . . . . . . . . . . . . . . .21
Installing ILP219 Card Loader Software . . . . . . . . . . . . . . . . . . . . . . . . . . . .21
Registering the Software . . . . . . . . . . . . . . . . . . . . . . . . . . . . . . . . . . . . . . .22
The Ilp219 Card Loader User Interface . . . . . . . . . . . . . . . . . . . . . . . . . . . .22
Groups View . . . . . . . . . . . . . . . . . . . . . . . . . . . . . . . . . . . . . . . . . .24
Graphics View . . . . . . . . . . . . . . . . . . . . . . . . . . . . . . . . . . . . . . . . .24
Menus and Commands . . . . . . . . . . . . . . . . . . . . . . . . . . . . . . . . . .24
Getting Help . . . . . . . . . . . . . . . . . . . . . . . . . . . . . . . . . . . . . . . . . . . . . . . . . .25
Creating Labels . . . . . . . . . . . . . . . . . . . . . . . . . . . . . . . . . . . . . . . . . . . . . . . . . . . . .26
Creating a Label Set . . . . . . . . . . . . . . . . . . . . . . . . . . . . . . . . . . . . . . . . . . .26
Opening a New Label Set . . . . . . . . . . . . . . . . . . . . . . . . . . . . . . . .26
Assigning a Card ID . . . . . . . . . . . . . . . . . . . . . . . . . . . . . . . . . . . .26
Adding Label Text . . . . . . . . . . . . . . . . . . . . . . . . . . . . . . . . . . . . . .27
Adding Symbols . . . . . . . . . . . . . . . . . . . . . . . . . . . . . . . . . . . . . . .27
About Barcodes . . . . . . . . . . . . . . . . . . . . . . . . . . . . . . . . . . . . . . . .28
Creating Groups . . . . . . . . . . . . . . . . . . . . . . . . . . . . . . . . . . . . . . .29
Using Pictures . . . . . . . . . . . . . . . . . . . . . . . . . . . . . . . . . . . . . . . . .30
Downloading the Label Set . . . . . . . . . . . . . . . . . . . . . . . . . . . . . . .32
Using Data from Another Program . . . . . . . . . . . . . . . . . . . . . . . . . . . . . . . .32
Creating Labels Using Smart Paste . . . . . . . . . . . . . . . . . . . . . . . .34
Importing a File from Another Program . . . . . . . . . . . . . . . . . . . . .34
Service and Support . . . . . . . . . . . . . . . . . . . . . . . . . . . . . . . . . . . . . . . . . . . . . . . . . .35
Technical Support . . . . . . . . . . . . . . . . . . . . . . . . . . . . . . . . . . . . . . . . . . . . .35
Contacting Dymo . . . . . . . . . . . . . . . . . . . . . . . . . . . . . . . . . . . . . . . . . . . . . .35
Supported Characters Sets . . . . . . . . . . . . . . . . . . . . . . . . . . . . . . . . . . . . . . . . . . . . .36
Declaration of Conformity . . . . . . . . . . . . . . . . . . . . . . . . . . . . . . . . . . . . . . . . . . . . . .38
Introduction
The Dymo ILP219 helps you mark and identify cables, wires, patch panels and components around your plant.
The ILP219 can print your information to suit the environment you work in: thermally printed tape can be wrapped around
cables, flagged around wires or applied onto different surfaces. The information can be spaced along a label to fit a row of
switches ,fuses or patch panels.
It can create bar codes, print graphics, and display text in a variety of formats. It can also combine these options in one, providing all the information you require in a highly readable, long-lasting adhesive label.
Dymo’s specially developed ILP 219 Card Loader software allows you to download data and graphics to store on a memory
card. In this way, you can manage your labelling and identification, and provide your staff with portable information to label
key installations while in the plant or in the field.
Getting Started
1. Unpacking your ILP219 kit
Before you start setting up the printer,
verify you have received the following items in your packaging:
- ILP219 printer + extra protective bumper
- Carrying case
- AC Adaptor
- 2 tapes
- Communications cable
- User Manual (English only)
- CD-ROM containing ILP219 Card Loader software
+ User manual (8 languages )
- 1 Memory Card
- Warranty booklet + Registration Card
Operating and Storage Conditions.
Operating temperature : 4°C to +40°C
Operating humidity
: 10% to 90% RH
Storage temperature
Storage humidity
: 0°C to + 40°C
: 10% to 90% RH
2. Power Supply
BATTERIES
• Remove protective bumper (Fig. 1).
• Apply pressure to thumb catch then open
and lift away battery compartment cover - see fig B1
Fig. 1
RECHARGEABLE BATTERY PACK
The ILP 219’s optional battery pack provides a long-lasting source of power for the machine, and fits into the battery compartment. This gives you the option of using multiple battery packs to ensure constant power if you are away from an AC power
source.
• Remove protective bumper (Fig. 1).
• Remove the battery compartment cover.
• Slide the battery pack in the compartment
• Slide the bumper again over the printer.
Note: Please charge the battery pack for min. 14 hours before initial use.
After connecting the AC adapter press the power-on key to turn the printer on and activate the charging. When the printer automatically
shuts off after 2min. the charging will continu.
AC ADAPTOR
• Connect the AC adaptor to socket (Fig. 2). Inserting the adaptor plug disconnects the supply from the batteries.
• Unplug the AC adaptor from the printer before disconnecting the mains power to the adaptor, otherwise last label memory
settings will be lost (see also ON/OFF).
3
Fig. 2
Note: Please use the AC Adaptor to re-charge your battery pack and press the power-on key to activate the charging.
3. Installing/Changing the cassette
• Press catch in and open access door (fig B1).
• Hold cassette as shown, then lift cassette B2 straight up and out.
• Ensure tape and ribbon B3 are taut across mouth of cassette and tape passes between guideposts before installing as
shown. If necessary, turn spool B4 clockwise to tighten ribbon.
• Check that cassette switch B5 is set for the cassette type -see fig. A notch in the cassette will fit over the switch when it is
set correctly.
• Insert cassette with tape and ribbon positioned as shown between print head C2 and pinch roller C1.
• Push firmly C3 until cassette clicks into place. Ensure tape and ribbon are positioned correctly.
• Close door B1 until it clicks shut.
IMPORTANT: Please slide the protective bumper back over the printer.
4. Printing your first label
• Press the red power-on key
. The display will light up and an empty screen will be shown.
• Set your language (default setting is " OFF") :
• Press the +
keys. You’re now in the language selection list.
• Use the arrows H and P to scroll through the list.
• Press to make your selection.
Note: This is very important as this setting will have an implication on all language related features to the machine such as
special characters, currency, unit of measure ( See also page 5)
• Type your name using the ABC keypad
• Press the
key twice ( = current settings -see page 17)
• Your name label is now printed.
• Cut label - slide the cut lever downwards.
4
PART I : Printer Manual
Getting to know your printer
Display
WRAP FLAG 1 FLAG 2 FIXED TBLOCK VERT
CAPS
BFONT STYLE
BOX
ULINE
BCODE
These annunciators are explained in more detail throughout the manual.
Backlighting
When the printer is used in a darker environment and the display is difficult to read than the backlighting can be used.
Toggling this key will set the backlighting on or off.
Typing text and symbols
CAPITALS
The standard setting for the ILP219 is to type upper case letters. The CAPS indicator on the display will be highlighted to confirm this.
Press
to shift again to lower case.
SPACE
Type
SYMBOL
to insert a space in your text.
USING THE SHIFT KEY
The shift key has a dual action. Press and hold down while pressing another key, or press
key to remain in the locked position.
Use before pressing an alphabet key to produce an upper case (CAPS) letter.
Use before pressing a dual-purpose key to access the legend or function above the key .
If you press while CAPS is set, you will produce a lower-case letter.
and release for the SHIFT
BACKSPACE
Press
to delete the character to the left of the cursor.
clear
CLEAR
+
Press
+
unchanged.
to clear all the current text, and cancel any fixed length setting, but leave the text size and other settings
erase
ERASE
+
Press +
to erase all the current text and all defined settings.
ESCAPE
Press the
key takes you out of any setting/function and returns you to the start screen.
5
NAVIGATION KEY
• Press Q or R to move the cursor along the text, one character at a time.
• Press + Q or R to move the cursor to the beginning or end of the line of text.
• When used in conjunction with certain function keys, use Q or R to select options.
• To insert characters into the text, use Q or R to position the cursor under the character to the right of the insertion
point, then type in the characters required.
• Press H or P to move the cursor to the start of the previous or next line of a multi-line label.
• Press + H or P to move the cursor to the beginning or end of the label.
ADDING INTERNATIONAL CHARACTERS AND SYMBOLS
International characters
The ILP 219 can add a wide range of accented and other international characters. It uses RACE technology ( Rapid Accented
Character Entry ), comparable to a mobile phone keyboard, to provide a number of different characters from the same key. If
you tap the same key repeatedly within a short time, you can scroll through a sequence of characters based on that letter. For
example, pressing the E key repeatedly in the French-language version will scroll through e - é - è - ê - ë. If you wait for more
than one second, the character will be selected, and the cursor will move on to the next position.
Note: Please make sure that you have selected the appropriate language or the universal “UNI” language for access to all
international characters.
Example:
Type a twice, and the letter à appears. If you tap the key again within one second, á will appear. Pause for a second, and
the letter á will be selected, and the cursor will move on to the next position.
Currency symbols
The
key also uses RACE to scroll through a number of currency symbols: e - £ - $ - ¢ - ¥.
The starting order of currency symbols in the list depends on your language settings.
Punctuation
You can insert punctuation in your label by using the PUNCT key, which uses RACE to scroll through a number of punctuation
marks:
Other symbols
The ILP219 can print a wide range of symbols.
A first selection of the most common symbols and some international characters can be inserted using the keys, or a key
with H.
SYMBOL
A further range of 20 symbols can be accessed by pressing H and
. Refer to the symbol chart to see the symbols
available. You can access the symbol you want in two ways:
• Type the symbol reference code.
• Use the cursor Q or R to navigate along the row of symbols you require.
• Press ENTER
to insert the symbol into your label
Press
to cancel.
6
Formatting your label
TEXT SIZE
The ILP219 can print text in four different heights (small, medium, large and big font) and in three different widths (condensed, normal and expanded). The combination of height and width is shown in the text size panel in the display.
B
To select the size of text you require, press
.
Use H or P on the navigator key to select the height of text you require, and Q or R to select the width of text. Confirm
your selection in each case by pressing ENTER .
Please keep in mind that the height of your text is also depending on the size of the tape you have installed ( see following
table).
Height
Condensed
Normal
Extended
small
medium
large
BOX/UL
TEXT STYLE
Besides the size of text, you can also choose one of four styles for your text:
italic
shadow
outline
RORRIM
• Press STYLE, and the display will prompt you to select one of these four options
• Select the style you require using the Q and R arrows, and press ENTER . The style indicator will be highlighted.
Note : that you cannot combine these styles with each other.
VERTICAL TEXT +
Single-line labels can be printed with the text running vertically. Pres
You cannot underline vertical text.
+
to select this option.
BOX/UL
UNDERLINING AND BOXED TEXT
+
You can choose three options: underlined text, boxed text (square) or boxed text (rounded).
Press +
, and use the Q or R keys to select the style you want.
Note that you cannot underline text in a box.
BOX/UL
TEXT
1. underlined
=
2. square box
=
TEXT
3. square box with rounded corners
=
TEXT
7
MULTIPLE LINES
Press ENTER to start the next line of text on a multi-line label.
This is a two ↵ line label on the display will be printed as:
ROOM
DATA
and the display will indicate two lines: (show line display)
You can print up to four lines on one label, depending on the width of the tape you are using:
ALIGN
JUSTIFYING TEXT IN MULTI-LINE LABELS
For multi-line labels, you can choose three options for your text alignment: left-justified, centre-justified, or right-justified.
Press
repeatedly to toggle between these three options, which are shown on the left of the display.
Press ENTER to make your selection.
ALIGN
left justified:
centred:
STAIRCASE
emergency lighting
BX-243
STAIRCASE
emergency lighting
BX-243
right justified:
STAIRCASE
emergency lighting
BX-243
ALIGN
ALIGNING TEXT ON A LABEL
+
For fixed-length labels, you can also choose how you position your text in relation to the edge of the label: left, centred, or
aligned right.
Left-aligned will place the blank space within the label after the text (on the right).
Right-aligned will place the blank space within the label before the text (on the left)
Centre-aligned will split the blank space within the label equally on both sides of the text.
ALIGN
Press H +
to toggle between the different alignment combinations (left, centred, right).
Press to make your selection
Note that you can combine these alignments with different justifications of your multi-line labels (see following table for nine
possible combinations).
left-justified
left-aligned:
STAIRCASE
emergency lighting
BX-243
8
left-justified
centre-aligned:
STAIRCASE
emergency lighting
BX-243
left-justified
right-aligned:
STAIRCASE
emergency lighting
BX-243
centre-justified
left-aligned:
STAIRCASE
emergency lighting
BX-243
centre-justified
centre-aligned:
STAIRCASE
emergency lighting
BX-243
centre-justified
right-aligned:
STAIRCASE
emergency lighting
BX-243
right-justified
left-aligned:
STAIRCASE
emergency lighting
BX-243
right-justified
centre-aligned:
STAIRCASE
emergency lighting
BX-243
right-justified
right-aligned:
STAIRCASE
emergency lighting
BX-243
BCODE
PRODUCING A BAR CODE
+
The ILP 219 can generate bar codes in the six standard barcode formats: EAN-13, EAN-8, UPC-A, UPC-E, CODE-39 and CODE-128.
Barcodes can be printed on 19mm wide labels only and can be either full height or mixed with text on one or two lines.
To create a bar code:
• Press H +
to display the barcode type previously selected.
• Use H or P to step through the barcode types available: EAN-13, EAN-8, UPC-A, UPC-E, CODE-39 and CODE-128.
• Press to select the barcode type displayed. The barcode indicator will light in the display and the symbols ( and (
will appear at each end of the space allocated for barcode characters.
MODE
BCODE
MODE
Note : Backspace
or Escape
will cancel the barcode function and return to the current label.
• Enter the characters which will become the barcode, e.g.: 1234567.
• Press to return to the label.
Note that the barcode indicator will appear in the display whenever the cursor is positioned under barcode characters.
• To edit a barcode, press H +
; the barcode characters only will be displayed and the barcode indicator will light in the display.
• Press or H +
again to return to the label.
BCODE
MODE
BCODE
MODE
On a single line label, a bar code can be mixed with text which is small, medium or large size:
ABC
123456
ABC
123456
ABC
123456
9
A two-line label always has small size text when it is mixed with a barcode.
Text entered before pressing followed by H +
, will result in text above the barcode:
BCODE
MODE
ABC
123456
Entering the text after pressing
at the end of a barcode will produce text below the barcode:
123456
ABC
Text can be underlined, e.g.:
LabelPOINT
123456
ABC
DEF
A box can be added around the complete label:
LabelPOINT
ABC
123456
DEF
Note : This option is not possible when using Big Font text size!
PG BRK
PAGE BREAK
+
You can create ‘multiple formats’ in the same label. You do this by dividing your label into ‘pages’ or blocks of text, each with
its own text size and style settings. Each of these blocks is separated by a page break. The number of lines which can be created in each page will depend on the label width. You can store up to two page breaks in a label.
Press
+ to insert a page break.
When scrolling through the text, each page break is identified by the symbol ·||·. When you scroll through a label with Q or R,
the display will show which ‘page’ of a label you are in. In the example below, you are in the third of three sections:
[ ] [ ] [=]
Note : Page breaks cannot be used in combination with graphics.
10
BCODE
Printing modes
MODE
WRAP-AROUND LABELS
With WRAP-AROUND labels you can wrap your label completely around your wire or cable. The data is automatically printed
onto the label as many times as possible. This way the data is clearly legible from any angle once applied. The number of
times your text is repeated will depend on the length of the label which is set by the diameter of the cable you have entered or
the size of the tape ( horizontal wrapping).
1. Horizontal wrap
WRAP
Horizontal wrapping will produce a label that you wrap around a cable or wire, where the text will run across the label.
• Press the
key.
• The first mode to appear in the display is horizontal wrap.
BCODE
MODE
• Press
to select
• The indicator WRAP will be highlighted.
- The length of the label depends on the length of the text
- The amount of lines you can print will depend on the width of the tape you are using (for more detail see SIZE
function page 7)
- When asking multiple copies the printer will print after each label 2 small points to indicate the place to cutt off.
- The printing will stop when using data from the memory which causes an error against the available features.
Please verify your settings and re-start the printing.
2. Vertical wrapping
WRAP VERT
With vertical wrap, you wrap your label around the cable or wire. The text will run along the label.
• Press the
key.
• Use the arrow H on the navigator key to scroll through to the second mode:
BCODE
MODE
• Press ENTER and the machine will prompt you to enter the diameter.
• The display will show Ø= xx, where xx is defaulted to 2.5mm or 0.1 inch.
• Use arrows H or P on the navigator key to increase or decrease the settings (in steps of 0.1mm or 1mm / 0.1” or 1” ) until
you have reached the diameter of your cable.
- or Move the cursor to the left with arrow Q to set the left-hand digit. Enter the cable diameter via the keypad.
• Press ENTER to select. The indicators WRAP and VERT will be highlighted.
- When asking multiple copies the printer will print after each label 2 small points to indicate the place to cutt off.
- The printing will stop when using data from the memory which causes an error against the available features. Please verify
your settings and re-start the printing
- Big font can’t be used with this option.
- Max. 3 caracters can be printed on a 12mm tape (smallest font). When entering >3 characters your legend will be cut off.
- Max. 5 caracters can be printed on a 19mm tape (smallest font). When entering >5 characters your legend will be cut off.
11
FLAG LABELS
With flag labels, the unprinted part of the tape is wrapped around your wire or cable, and the tape is folded back on itself to
form a flag. The flag is therefore as long as the text. The information is automatically printed on both sides of this ‘flag’ part of
the tape, so that it is clearly legible from almost any angle.
The ILP219 can print two types of flag labels: in both cases, it will prompt you to enter the diameter of the wire or cable. The
printer will automatically calculate the circumference of your cable and will print a made-to-measure flag.
1. FLAG 1
In FLAG 1 mode, the unprinted part of the label (on the left) is to be wrapped around the wire or cable. On the remaining part,
your information is automatically printed twice, so that you can fold it back on itself to form the flag.
BCODE
• Press the
key.
• Then use H or P on the navigator key to scroll through to the FLAG 1 mode :
MODE
• Press to select.
• The machine will now prompt you to input the diameter of the wire or cable. The display will show Ø= xx, where xx is
defaulted to 6.4mm or 0.25 inch.
• Use H on the navigator key to increase the settings (in steps of 0.1 or 1mm / 0.1” or 1”) until you have reached the diameter
of your cable.
- or Move the cursor to the left with arrow Q to set the left-hand digits. Enter the cable diameter via the keypad.
• Press ENTER to select. The indicator FLAG 1 will be highlighted.
FLAG 1 mode can print flags for wires or cables with a maximum diameter of 1000mm or 40 inch.
- When asking multiple copies the printer will print after each label 2 small points to indicate the place to cutt off.
- The printing will stop when using data from the memory which causes an error against the available features. Please verify
your settings and re-start the printing.
2. FLAG 2
In FLAG 2 mode, your information is printed at both ends of a label. The unprinted space in the middle is the same size as the
circumference of the wire or cable. This part is wrapped around the wire or cable, and the two printed ends are stuck back to
back to form a flag.
BCODE
• Press the
key.
• Use arrows H or P on the navigator key to scroll through to the FLAG 2 mode:
MODE
• Press ENTER to select.
• The machine will now prompt you to input the diameter of the wire or cable. The display will show Ø= xx, where xx is
defaulted at 2.5mm or 0.1 inch.
• Use H or on the navigator key to increase the settings (in steps of 0.1mm or 1mm / 0.1” or 1”) until you have reached the
diameter of your cable.
12
- or Move the cursor to the left with arrow Q to set the left-hand digits. Enter the cable diameter via the keypad.
• Press ENTER
to select. The indicator FLAG 2 will be highlighted on the display.
FLAG 2 mode can print flags for cables or wires with a maximum diameter of 1000mm or 40 inch.
- When asking multiple copies the printer will print after each label 2 small points to indicate the place to cutt off.
- When a label from the list on the memory card causes an error against the available features the printer will stop.
Please verify your settings and re-start the printing.
COMPONENT/OUTLET LABELS (were label size is specified)
Fixed Lenght
FIXED
BCODE
• Press the
key.
• Use the arrow H on the navigation key to scroll through to the FIXED LENGTH mode:
• Press ENTER to select.
MODE
• The machine will now prompt you to input the length you wish to set. The display will show L= xx, where xx is defaulted to
20mm or 0.79 inch.
• Use H arrow on the navigator key to increase the settings (in steps of 0.1mm or 10mm) until you have reached the length
you require.
- or Move the cursor to the left with arrow H to set the left-hand digits. Enter the length via the keypad.
• Press ENTER to select. The indicator FIXED will be highlighted.
Maximum fixed length is 999,9mm or 40 inch. Minimum fixed length is 20mm or 0.79 inch.
- When asking multiple copies the printer will print after each label 2 small points to indicate the place to cutt off.
- When a label in the list from the memory card causes an error against the available features the printer will stop.
Please verify your settings and re-start the printing.
TERMINAL BLOCK / PATCHPANEL LABELS
Terminal Block Mode TBLOCK
Terminal block mode allows you to print one label with multiple information, spaced at exactly the right intervals, so that you
can label a row of terminal, switches, fuses or patch connectors on a patchpanel.
1. Horizontal terminal block mode (= patchpanel mode)
BCODE
• Press the
key.
• Use arrows H or P on the navigator key to scroll through to the TERMINAL BLOCK mode:
MODE
13
• Press ENTER to select.
C ) you wish to set as the fixed distance between the blocks or ports.
• The machine will now prompt you to input the step (C
The display will show C = xx, where xx defaults to 12mm or 0.5inch.
• Use the cursor keys H or P to increase or decrease the settings (min. increments of 0.1 mm or 0.1 inch) until you have
reached the distance you require.
- or Move the cursor to the left with arrow Q to set the left-hand digits. Enter the step via the keypad.
Maximum step is 500mm or 20 inch. Minimum step is 5mm or 0.2 inch.
• Press ENTER to select. The indicator TBLOCK will be highlighted.
If one label in the list from the memory card causes an error against the available features a blank label will be printed.
2. Vertical terminal block mode
BCODE
CO
• Press the
MODE
key. Then use the cursor keys H or P to scroll through to the VERTICAL TERMINAL BLOCK mode:
• Press ENTER to select.
C ). The display will
• The machine will now prompt you to input the step you wish to set as the distance between the blocks (C
show C = xx, where xx is defaulted to 6mm or 0.025 inch for the steps between your terminal blocks.
• Use the cursor key to increase or decrease the settings (min. increments of 0.1mm or 0.1 inch) until you have reached the
length you require.
- or Move the cursor to the left with arrow Q to set the left-hand digits. Enter the step via the keypad.
Maximum step is 50mm or 2 inch. Minimum step is 2mm or 0.2 inch.
• Press ENTER to select. The indicators TBLOCK and VERT will be highlighted.
- When using files from the memory card that contain too many characters than allowed onto the label,only the amount of
characters possible will be printed.
MODULE MARKING LABELS
Module Marking Mode FIXED-TBLOCK
Module marking mode allows you to create and print labels for electrical modules.
Every supplier of these modules has a standard length, where every module length is the length of the smallest module times
a factor X.
The meaning of this mode is to one label that will fit exactly with the total amount of modules placed in one row of a rack.
ROOM 1
HEATING
ROOM 1
LIGHT
14
• Press the
BCODE
MODE
key. Then use the cursor keys H or P to scroll through to the MODULE PRINTING mode:
• Press ENTER to select. The annunciator FIXED + TBLOCK will be highlighted.
• You will be asked to enter the length of the smallest module. The Default value is set at 17,5mm or 0.75 inch.
• Use the keyboard to enter the numbers. Move the cursor to the left with arrow Q to set the left-hand digits. Press ENTER
to select.
• You will now be asked to enter (via the keypad) the total number of modules on 1 row. Default value is set at 1.
- min. amount of modules is 1
- max. amount of modules is 99
• Press ENTER to select.
• The printer will now ask you to define one by one the size of each of the different modules . The size is always the length of
the smallest module times a factor X. After each module press ENTER to confirm.
- min. is 1 & max. is 9 that can be used for factor X.
• Now the layout of your module rack has been setup you can start to fill in the data. This can be done by entering data
manually or using data stored onto the memory card (for downloading data onto the memory card see manual Part II page ??).
- Max. 2 lines can be printed.
- We strongly recommend that you first set your font size in function of the number of lines and characters required per
module.
A. Manual Entry
1. Please enter the text for your first module.
2. Press the print button. Press ENTER or the Print button again to start printing the current label for the first module
3. Press +
to erase the previous text from the display.
4. Type in the text for the next module. Select [current] from the printing menu. Press enter or the print button again to
start printing the label for the second module.
5. Please repeat steps 3 to 4 until all labels of the module rack are printed.
- After each label a vertical line will be printed.
- The text is automatically centered on each label.
- If you don’t whish to print all of the labels you have defined at the beginning you
can end the selection by pressing +
. The printer will feed his trailer.
- An incorrect printed size can occur due to the mechanical limitations (tolerances) of the printer when giving in data
manually. Some slight adjustment will than have to be made to the size of the smallest module .
B. Using data stored onto the memory card
See section “ Using files from the memory card “ starting Page 19.
When using data from your memory card you have 2 options:
1. Group Printing
If you wish to print all the labels in a group stored on your memory card (Go to page 18 for more details.)
NOTE:
• If there are more labels inside the selected group than pre-defined modules only the first labels are printed (# modules).
• If there are less labels inside the selected group than modules only the labels inside the group will be printed and the rest of
the label will be left blank.
• If one label inside the selection creates an error against the available features the printer will produce a blank label.
2. Selection printing
If you wish to print a selection of labels from your memory card: (Go to page 19 for more details.)
15
NOTE:
• If you have selected more labels than you have defined modules, only the first labels will be printed.
• If you have selected less labels than you have defined modules , only the selected labels will be printed. The rest of the label
will be left blank.
• If one label inside the selection creates an error against the available features the printer will produce a blank label.
Saving labels and preferences
SAVE
Saving a label
+
You can save up to 8 labels in the memory of the printer.
SAVE
1. To save your current label, press SHIFT
+
to display the memory locations. If there are no labels saved, the cursor
will appear under the first box, which will be highlighted. The display will show :
GGGGGGGG
The boxes are full if they contain a label and the cursor will be under the last changed label, e.g.:
BBBBBGGG
Contents lab
In this example, there are 5 saved labels, the cursor is under the one which was last changed and the contents of that label is
displayed on the second line.
2. Use Q or R on the navigation key to move the cursor under an empty location
3. Press ENTER to save your label and return to the label, or
to exit and return to the label.
SAVE
Recalling a saved label
SAVE
1. Press
to display the memory locations of saved labels - as shown in Saving a label above.
2. Use Q or R to move the cursor under each full location, until the label you require is displayed.
3. Press ENTER to select the label required, or
to exit and return to the current label.
clear
Deleting a saved label H +
1. To delete a saved label, use Q or R to move the cursor under the location
2. Press H +
.
Saving Preferences
You can save four different settings using the preference keys
. These keys will store the format, label type
and
settings and printing mode you have selected, but will not store the actual content of the label.
Underneath these keys 4 different modes are already pre-defined. These printing modes & settings can be overwritten to comply your personal labeling needs.
1. Press H +
to store your preferred settings and printing mode in P1.
2. Press
if you want to apply those settings to the label you are working on.
Info stored is Size, Printing mode,Style ...
The 4 pre-defined printing modes are :
vertical wrap.
Flag 1
Fixed Length
Horizontal Terminal Block (=patchpanel mode)
For more detailed information on these printing modes please go the chapter “ Printing Modes “.
- Module Marking Mode cannot be stored !
16
Downloading labels, files and graphics onto a memory card
(see also PART II DYMO ILP219 Card loader software).
Using files on the memory card
Inserting a memory card
Insert the memory card as shown in the illustration below. You can check the name of the card by pressing H +
. The
card ID will appear on the top line of the display. A card contains 64 kb and can store up to 32 file names (= groups) and 32
different graphics. Each file can contain an unlimited number of labels.
GRAPHIC
Selecting a file
1. Press
, and the first file name contained on the card will appear in the display. Use H or P on the navigator key to scroll
through the different file names on the card. The file names appear on the 1st line of the display.
2. Press ENTER to select the file you require.
GRAPHIC
Selecting a label
1. Once you have selected a file, the first 16 characters of the first label in the file will appear on the second line of the display.
You can use the H or P keys to scroll through the contents of the file. The first line of each label will be shown.
2. Press ENTER to select the required label.
For more information on working with ILP 219 Card Loader software, consult Part Two of this manual, Dymo ILP219 Card
Loader Software.
GRAPHIC
GRAPHICS
+
The ILP 219 can store up to 32 bitmap graphics on a memory card (see section Saving a label). These can easily be combined
with text within labels.
1. Press +
.
2. Use H or P arrows on the navigator key to choose whether to place your graphic on the left or on the right of your text:
GRAPHIC
j
lG + A
will place the graphic on the left of your text.
j
lA + G will place your graphic on the right of your text.
3. Press ENTER to confirm the selection you have made. The display will show the first graphic stored onto the memory
card. The name of the graphic is given on the second line of the display.
4. Use H or P arrows on the navigator key to scroll to the graphic you require.
5. Press ENTER to select it. On the left of the display you will see the corresponding icons appear:
[G] [=] or [=] [G]
Note: This operation can be repeated as many times as wanted.
6. To delete the graphic from the label, select EMPTY from the list
Note: The two possibilities described above can be combined if you want to have a logo before and after your text.
17
Printing
Pressing the PRINT button will bring you into the Print Mode menu.
The display will show a range of five options, which you can select with H or P on the navigator key.
Different printing options
1. CURRENT
Press ENTER and the ILP219 prints one copy of the current label.
Pressing print again will do the same
2. COPIES
You can print multiple copies of the same label.
Use the H or P to scroll to this option in the printing menu.
Press ENTER to select this option . You will be prompted to enter the number of copies.
# = 01
Use arrows H or P to select the number of units. If you need to print more than nine copies, move the cursor to the left with
the navigator key to set the left-hand digit. Press ENTER and the machine will begin to print the number of copies of the
label.You can also type directly the number via the keypad.
ROOM 1 : ROOM 1
3.INCREMENTAL
This allows you to print labels in incremental series.
1. Start by typing the initial number you want the serialization to start with.
If need you can also set the starting number by using H or P to set the right-hand digit of the starting number (on the left
area of the display), then Q to set the left-hand digit.
2. Select the incremental option from the PRINT menu using the H or P.
3. Press ENTER , and the cursor moves to the ending value (on the right of the display area. Set the starting number by
using H or P, and then press ENTER .
4. The labels will be numbered automatically in increments of 1.
The ILP 219 will automatically print combinations of text + number (Line1, Line2, Line3) or number + text (5Z, 6Z, 7Z, etc.) .
It starts looking on the right side of the text and increments the first number it finds .
4. GROUP
If you wish to print all the labels in a group stored on your memory card:
1. Go to the Group option in the print menu. Press ENTER to select.
2. Use H or P to scroll through the different groups of labels on the memory card (=FILES)
3. Once the group name you require appears on the screen, press ENTER again, and the entire group will be printed.
5. SELECTION
If you wish to print a selection of labels from your memory card:
• Scroll through the print menu using H or P to the “ selection “ option. Press enter to select.
• Use H or P to scroll through the different groups in the memory card.
• Press enter again to select a group, and you will be asked to select which labels from the group you wish to print.
You can set the starting and ending label.
For example: if you want to print labels 1, 2 and 3, then select 1 as the starting label, press enter
ending label.
18
, and select 3 as the
T°
ADJUSTING PRINT HEAD TEMPERATURE
+
Certain types of materials may require a different print head temperature. The print head temperature setting can be adjusted
to darken or lighten your printed legend.
T°
, and you will be prompted to enter an increase or reduction in the print head
To change the temperature, press +
temperature. This can be raised till + 5, or reduced by up to 20 in increments of 1 ( were + results in a darker print).
Cleaning
Clean the cutter blade regularly. Press and hold down cutter lever E to expose cutter blade D1, then use a cotton swap and
alcohol to clean both sides of the blade. Release cutter lever E
Check and clean print head face d2 regularly using a cotton swap and alcohol ONLY.
When using the permanent polyester we strongly advise to clean the cutter blade on highly a regular base to
avoid jamming of the knives caused by the strong adhesive.
Troubleshooting
No display
• check machine is on
• replace discharged batteries
• check AC adaptor.
• Check if battery pack is charged
No printing or poor text
• replace discharged batteries
• check tape cassette installed correctly
• clean the print head
• replace the tape cassette.
Tape jammed
• lift out tape cassette carefully
• remove/release jammed tape
• DO NOT cut the ink ribbon - turn spool to tighten
• cut off excess label tape
• refit/replace the tape cassette.
Poor cutter performance
• clean the cutter blade regularly
No response to print key
• !!!!!!!!!!!!!!! in the display indicates a printer jam.
Press any key to return to normal display. Open the cassette compartment and free the jam.
No success?
• Call the DYMO customer service hotline telephone number in your country - see the warranty booklet.
Warranty Registration
Please complete the warranty registration card and return it to the relevant customer service address, within seven days `
• see the warranty booklet for details
19
PART II : Software Manual
Card Loader Software
Getting Started
This manual describes how to use the DYMO ILP219 Card Loader software to create and download files that contain libraries
of labels and graphics for use with the DYMO ILP219 industrial label printer.
Overview
The DYMO ILP219 Card Loader software provides an easy method for creating sets of labels and graphics which can then be
downloaded to the DYMO ILP219 industrial label printer. Once downloaded to the printer, the labels are stored on a memory
card. A memory card is a programmed Smart Card that is used by the DYMO ILP219 printer. You can have multiple memory
cards containing different label sets from which you can select the labels and graphics you wish to print.
You can create label sets directly in the ILP219 Card Loader software, import text from another program that was saved in a
delimited format, or you can use the Smart Paste command. Smart Paste allows you to create labels by copying multiple
entries from a word processor, spreadsheet, or other type of program.
About Label Sets
A label set is one or more groups of labels and, optionally, a set of selected graphics. A label set usually contains related labels
and graphics for a specific labeling application. The labels can be grouped within the label set by category, usage, or other
means, for easy identification and retrieval.
For example, one label set may contain all of the labels and graphics that might be required by an installer for a telephone
cabling installation. A project manager who has determined the cable layout for a particular installation can create a label set
containing all the labels and graphics for the required cables, group them by department or room, and then download the label
set to an ILP printer. The installer then takes the printer containing the label set to the installation site and prints the labels as
the cables are installed, adding appropriate graphics as necessary.
About Graphics
The ILP219 Card Loader software allows you to import up to 32 individual graphics. You can then choose which graphics you
wish to become part of a label set.
The following graphics formats can be imported into the software: BMP, JPG, PCX, PNG, TIF, WMF, and EMF. Regardless of the
format imported, all graphics are converted to monochrome bitmap images that are 48 pixels high. The width is scaled so that
the same aspect ratio is maintained as in the original image.
Each graphic image has a unique name of up to twelve characters. By default, the name of the image will be the first twelve
characters of the source file name. However, you can edit the name once imported.
21
Registering the Software
The first time you start the ILP219 Card Loader application, you will be asked to register the software. We highly recommend
that you register your ILP219 Card Loader software so that you can receive customer support, information on product
updates, and special announcements from DYMO.
If you choose not to register the software at this time, you will be prompted the next three times you start the program. You
can register the software at any time as described below.
To register the software
1
Select Register from the Help menu.
The Welcome dialog box appears.
1
Click Register.
The Registration Wizard appears.
1
Complete all of the required fields on the registration form and click Next. Required fields are labeled in bol type.
2
Answer the questions presented on the next two screens and click Next.
The Registration dialog box appears.
1
Choose to register over the Internet or print the registration form for mail or fax registration.
If you choose to register over the Internet, wait a few seconds while your information is transmitted to DYMO.To
register by mail or fax, click Print to print the completed registration form, and mail or fax the form to the location
printed on the form.
The ILP219 Card Loader User Interface
The ILP219 Card Loader software consists of three views: the Group view, the Label view, and the Graphics view. This section
describes each of these views in detail.
To start ILP219 Card Loader software
R Select Start > Programs > DYMO ILP219 Card Loader > DYMO ILP219 Card Loader.
The ILP219 Card Loader software opens in the Labels view.
Labels View
The Labels view shows the text of each label in the label set. This view allows you to enter and edit the text of your labels.
Menus
Toolbar
Label Contents
View Tabs
Status Area
Each row in this view represents one label. You can choose to display the label text as labels or as lines. The As Labels view,
shown in the figure above, displays the lines for each label as they will print. Lines that have barcodes applied are displayed in
underlined, bold type. The barcodes will not display.
22
The As Lines view shows each line of the label in a separate column. This allows you to select a column of data and perform a
global action, such as deleting a line of text or applying a barcode.
Groups View
The Groups view displays the contents of your label set in a tree view displaying your labels organized by groups. You can
have up to 32 groups within a label set. The number of labels that you can create in each label set is limited only by the
amount of memory available on the memory card.
From the Groups view, you can organize your labels, moving and copying labels from one group to another or deleting labels
or groups of labels from the set.
The icon shown for each label indicates if the label includes a barcode
or only text
.
When you select a group in the Groups view and then change to Labels view, only the labels in the currently selected group
are displayed. When you add a label in Labels view, the new label is added to the currently selected group. To see all the labels
in the set, select Card ID before selecting the Labels tab.
Graphics View
The Graphics view shows all of the graphics that have been added to this label set. From this view you can add, copy, or delete
graphics. You can also flip an image vertically or horizontally.
23
Menus and Commands This section summarizes the commands available to you. For more detailed information
about a particular command, refer to the Help.
File Menu
The following commands are available from the File menu.
Toolbar Icon
Menu Command
Description
New Label Set
Closes the current label set, prompting you to save the
set if necessary, and opens a new, unnamed label set.
Open
Displays the Open File dialog box to select a label set
to open. If the current label set has been modified and
not saved, prompts you to save the changes.
Remembers the last directory accessed by the Open or
Save As command.
Save
Saves the current label set to disk. If the current set
has not been saved, uses the Save As command.
Save As
Displays the Save File dialog box allowing you to name
the label set prior to saving.
Create Group
Adds a new group to the label set with the name New Group.
Rename Group
Selects the current group name allowing you to edit
the existing name or enter a new name.
Import
Allows you to import label text from a delimited or text
file into a new or existing group in the current label set.
Print Report
Prints the label data to the selected printer.
Printer Setup
Displays the Printer Setup dialog box and allows
access to the Driver Properties.
Download
Downloads the current label set to the ILP219 label printer.
Exit
Exits the program. If the current label set has not been
saved, prompts you to save the changes.
24
Edit Menu
The following commands are available from the Edit menu
Toolbar Icon
View Menu
Undoes the last action.
Cut
Cuts the selection to the clipboard.
Copy
Copies the selection to the clipboard.
Paste
If the clipboard contains text, pastes the clipboard
contents onto the current label. If the clipboard contains a graphic, pastes the image into the graphics list.
Delete
Deletes the currently selected label, group, or image. If
a group is deleted, all of the labels within the group are
also deleted.
Select All
Selects all the labels.
Card ID
Displays the Card ID dialog box allowing you to assign
a card ID to the current label set.
Smart Paste
Performs a multi-label paste. See p. 34
Description
Displays the Groups view.
Displays the Labels view
Displays the Graphics view
Opens a preview window which shows how the label will print.
Description
Allows you to insert a picture from a file. See “Using Pictures” on page 13.
The following commands are available from the Help menu.
Menu Command
Contents
Register
About
Getting Help
Undo
The following commands are available from the Insert menu.
Menu Command
Picture
Help Menu
Description
The following commands are available from the View menu.
Menu Command
Groups
Labels
Graphics
Label Preview
Insert Menu
Menu Command
Description
Displays the Help Table of Contents.
Displays the Electronic Registration page.
Displays the current version of the software.
The ILP219 Card Loader software includes extensive Help.
To access the Help
2 Select Contents or Help Index from the Help menu.
3 Select the topic you want to read about.
The Help can also be accessed by pressing F1 in most windows and dialog boxes to display context-sensitive help.
25
Creating Labels
The ILP219 Card Loader software allows you to create and group labels that you can download to the memory card in an
ILP219 label printer. You can then print the labels contained on the memory card any number of times and in any combination.
You can also choose add one or two of the images included in the label set to your labels.
This chapter gives you an overview of creating labels with ILP219 Card Loader software. For more information on any of these
features, refer to the Help.
Creating a Label Set
To create a label set, you follow these steps:
1. Open a new label set.
2. Assign a Card ID.
3. Add the text and barcodes for your labels.
4. Group the labels.
5. Add pictures to the set.
6. Download the label set to ILP219 printer.
Opening a New Label Set
You can create and save an unlimited number of label sets. Each of these label sets stores a related group or groups of labels
that can be downloaded and used over and over again.
To create a new label set
R From within the ILP219 Card Loader software, select New Label Set from the File menu.
A new blank label set opens in the Labels view.
Assigning a Card ID
The Card ID is a name that identifies the label set contained on a memory card. For example, the Card ID may be a job number
for an electrical installation or some other meaningful reference.
The Card ID can be up to 15 alphanumeric characters including spaces. You should assign a Card ID to a label set before you
download the label set to the memory card in an ILP219 printer. If you have not assigned a Card ID when you select
Download, the Card ID dialog box appears. Once the label set is downloaded, pressing the Card ID button on the printer will
display the Card ID from the memory card. This allows you to verify the contents of the memory card.
To assign the Card ID
1. Select Card ID from the Edit menu.
The Card ID dialog box appears.
2. Enter an identifier for this label set in the Enter/Edit ID field.
The identifier can be up to 15 alphanumeric characters including spaces.
3. Click OK.
The Card ID you entered now appears next to Card ID: in the Groups view.
Card ID in Groups view
26
Adding Label Text
You add text to labels in the label set using the Labels view. Labels can contain up to four lines of text. If you are going to add
a barcode then the labels are limited to two lines. See Appendix A for a list of supported characters.
To create a label
1. Start the ILP219 Card Loader program.
The main window appears in the Labels view.
2. Type up to four lines of text in one of the label rows for each label you wish to create.
You can also add labels to your set by one of the following methods:
• Copying text from another open application using the Copy and Paste commands.
• Importing a .csv or .txt file using the Import command. See “Importing a File from Another Program” on page 17.
• Using the Smart Paste command. See “Creating Labels Using Smart Paste” on page 17.
3. Click
or select Save from the File menu.
The Save File dialog box appears.
4. Type a name for the label set and click Save.
The label set is saved to your hard disk with a .dyl extension automatically added to the file name.
5. Select Label Preview from the View menu.
A preview window appears showing the label as it will print.
Adding Symbols
The ILP219 Card Loader software includes a number of predefined symbols. You can choose to add these symbols to the labels.
To add a symbol
1. Place the cursor at the point in the label text where you want the symbol to appear.
2. Select a symbol from the Insert Symbol pull-down list.
The Symbol appears at the cursor position in the label text.
27
About Barcodes
You can choose to add a barcode to your label. This feature can be very useful, for example, if you are labeling items that will
be scanned with a barcode reader. When you add a barcode to your label, the label is limited to two lines instead of four.
In As Labels mode, clicking Apply Barcode when you have more than one label selected applies a barcode to the first line of
each selected label. For example, if you have a group of labels that contain the part number as the first line and the description
as the second line, the part number on the first line becomes a barcode when you click Apply Barcode.
In As Lines mode, the lines of the labels are displayed as columns. You select a column of lines to apply a barcode to the
entire group.
The barcode symbologies supported are Code39, Code128, EAN 13, EAN 8, UPC A, and UPC E.
Adding a Barcode
You can apply barcodes in one of the following ways:
• To an entire group of labels.
• To a range of one or more labels.
• To individual lines.
To apply barcodes to a group of labels
1. From the Groups tab, select the Group to which you wish to add barcodes.
2. Select the Labels tab.
3. Select As Lines under View Mode.
4. Do one of the following:
• In As Lines mode, click the Line 1 or Line 2 label at the top of the column to which you want to apply a barcode.
• In As Labels mode, select a group of label numbers to which you want to apply a barcode.
5. Click Apply Barcode.
The Insert Barcode dialog box appears.
6. Select the type of barcode from the Barcode type drop-down list.
7. Click OK.
The font is changed to bold and underline to indicate that it will print as a barcode on the label.
In As Lines mode, the line selected on each label becomes a barcode. In As Labels mode, the first line of the selected labels
becomes a barcode. In either case, if the label contains more than two lines, advising you that applying a barcode will cause
any text in lines three or four to be lost.
To insert a barcode to a range of labels
1. Select the Labels tab.
2. Select As Lines under View Mode.
3. Select one or more lines of text to which you wish to apply barcodes.
4. Select Apply Barcode.
The Insert Barcode dialog box appears.
5. Select the type of barcode from the Barcode type drop-down list.
6. Click OK.
The font is changed to bold and underline to indicate that it will print as a barcode on the label.
28
To insert a barcode to an individual line of text
1. Select the Labels tab.
2. Select As Lines or As Labels under View Mode.
3. Select a line of text to which you wish to apply a barcode.
4. Select Apply Barcode.
The Insert Barcode dialog box appears.
5. Select the type of barcode from the Barcode type drop-down list.
6. Click OK.
The font is changed to bold and underline to indicate that it will print as a barcode on the label.
Viewing the Barcode Type
When you apply a barcode to text on a label, the text is displayed in bold and underlined. You can display the label properties
to determine which barcode type has been applied.
To determine the barcode type
1. Right-click over the text that contains the barcode and select Label Properties.
The Label Properties dialog box appears showing the type of barcode applied to the text.
1. Click OK to close the dialog box.
Removing a Barcode
To remove the barcode, highlight the text and use the Backspace or Delete key, or select
.
Creating Groups
Groups are used to organize your labels within the label set. Your label set includes a group named *UNASSIGNED* where all
new labels appear by default. You cannot change the name of or delete this group.You can create up to 31 additional groups in
each label set. You can then move labels from the *UNASSIGNED* group or any other group as you wish. You can also copy
and paste labels from one group to another.
The Groups view allows you to create and rename groups, copy and move labels among groups, or delete labels and groups.
When you select a group in the Groups view and then change to Labels view, only the labels in the currently selected group
are displayed. When you add a label in Labels view, the new label is added to the currently selected group. The status line in
the Labels view always shows the currently selected group.
Adding New Groups
You add new groups from the Groups view. When a new group is added, it is given the name New Group. If a group already
exists with this name, then a number is added to the name New Group for each successive group added.
For example, New Group, New Group 2, New Group 3, and so on.
To add a new group
1. Select the Groups tab.
2. Select Create Group from the File menu.
A new group is added to the Groups view with the default name New Group. You can now rename the group to something
meaningful to your label set, for example Network Room.
29
Renaming Groups
Group names are limited to 12 alphanumeric characters and can contain spaces.
To rename a group
1. Select the Groups tab.
2. Select the group you wish to rename.
3. Select Rename Group from the File menu.
You can also right-click on the group name and select Rename Group.
4. Enter the new name for the group.
Moving Labels within Groups
If you do not have a specific group selected when you add a new label, the label is added to the *UNASSIGNED* group. Once
the label is created you can then move it to an appropriate group.
To move label within groups
1. Select the Groups tab.
2. Expand the group that contains the label you wish to move by clicking on the + in front of the group name.
3. Select the label you wish to move and drag it to the desired group.
You can select more than one label at a time by holding down the Shift key to select a range of labels or the Ctrl key to
select multiple individual labels.
Deleting Groups
When you delete a group from the label set, all associated labels within the group are also deleted.
To delete a group
1. Select the Groups tab.
2. Move any labels you wish to keep to another group.
3. Select the group you wish to delete.
4. Select Delete from the Edit menu.
A confirmation dialog box appears.
5. Click OK to delete the group.
Using Pictures
Each label set can contain a library of images that can be added to a label when the label is printed. You can insert up to 32
images in each label set. You can duplicate images within the label set and then flip the copies vertically or horizontally to
make different versions of the same image available. When you print a label from the ILP219 printer, you have the option of
adding up to two images (one at the beginning of the label and one at the end).
Inserting a Picture
You can add a picture to your label set from a file. The format can be BMP, JPG, PCX, PNG, TIF, WMF, or EMF. The picture is
changed to a monochrome bitmap image and is scaled automatically to 48 pixels high and a width that maintains the aspect ratio.
To insert a picture
1. Select the Graphics tab.
2. Select Picture from the Insert menu.
The Open dialog box appears.
3. Select the graphic file you wish to insert.
The image appears in the preview area of the dialog box.
30
If you wish to rotate the image, you must do so at this point prior to actually inserting the image in the label set. This is
because images are resized for optimal height as they are imported. Rotating an image after it is imported would impact the
image quality.
4. Click one of the following:
•
to rotate the image 90 degrees to the left.
•
to rotate the image 90 degrees to the right.
5. Click Open.
The image you selected appears in the Graphics view with the same name as the source file. You can now choose to copy
the image or flip the image along its horizontal or vertical axis.
Copying an Image
Once an image is inserted, you can make duplicate copies of the image with different names. This is useful if you wish to have
the same image available but presented with different orientations.
To copy an image
1. Select the Graphics tab.
2. Select the image you wish to copy.
3. Click Duplicate.
A new version of the image appears. The new image has the same name as the original but with a number added.
For example, a copy of an image with the name logo is named logo1.
Flipping an Image
You may wish to have several versions of the same image but in different orientations for use on different types of labels. You
can flip an image on its vertical or horizontal axis from within the graphics view.
To flip an image
1. Select the Graphics tab.
2. Select the image you wish to change.
3. Duplicate the image if you wish to keep a copy of the image in its original orientation.
4. Click one of the following:
• Flip Horizontally to flip the image on its horizontal axis (from right to left).
• Flip Vertically to flip the image on its vertical axis (from top to bottom).
Renaming an Image
When a picture is inserted, it is named using the first twelve characters of the source file name. You can rename the picture
from the Graphics view.
To rename an image
1. Select the Graphics tab.
2. Select the image you wish to rename.
3. Click on the name to enter edit mode.
4. Type a new name for the image.
Deleting an Image
You can delete an image from the Graphics view.
To delete an image
1. Select the Graphics tab.
2. Select the image you wish to delete.
3. Select Delete from the Edit menu.
The image is removed from the Graphics view.
31
Downloading the Label Set
When your label set is complete, you can download it to a memory card in an ILP219 printer attached to your computer. The
label set can be downloaded as many times as you wish to different memory cards allowing several people to use the same
label information on their individual label printers.
To download the label set
1. Save the label set using the Save command on the File menu.
2. Click or
select Download from the File menu.
If you have not assigned a Card ID to this label set, the Card ID dialog appears. If your printer is not connected properly,
an error message will appear.
A confirmation dialog appears advising you that labels and graphics currently stored in your printer will be replaced with
the new label set.
3. Click OK to continue the download.
The labels and graphics in your label set are now available to print on the ILP219 printer.
Using Data from Another Program
ILP219 Card Loader includes two commands that allow you to create labels from other programs: Smart Paste and Import.
The Smart Paste command allows you to create multiple labels from a list created in a word processing, spreadsheet, or other
similar program. Import allows you to print labels from a text or delimited file exported from a database program.
See Appendix A for information about the character set supported by the ILP219 label printer.
Spreadsheet Text
When copying and pasting rows of text from a spreadsheet program using Smart Paste, each row is treated as a separate label
and each cell in the row is treated as a separate line on the label, similar to how the label is displayed when in As Lines mode
of the Labels view.
For example, the rows in the following spreadsheet:
will create two three-line labels: one for DYMO and one for Esselte.
Text File
Many programs can create a text file, such as a text editing program, a database application, and so on. When you export text
from a database, you usually create a delimited file with each entry separated by comma or tab characters and a carriage
return/line feed at the end of each entry.
Both the Smart Paste and the Import commands recognize the delimiter characters and will insert a line break on the label.
When a comma is used as a delimiter, make sure any commas that you want to print on the label are enclosed in quotation
marks. The carriage return/line feed will start a new label.
NOTE: The separator character may be different for countries other than the US. When using Smart Paste or importing from a
text file, the list separator character is based on the Windows list separator (or regional setting) being used.
32
For example, the following lines of text (if List Separator in Regional Settings is set to comma):
DYMO Corp., 44 Commerce Road, “Stamford, CT 06902”
Esselte, 48 South Service Road,”Melville, NY 11471”
will create two three-line labels: one for DYMO and one for Esselte.
In another example, the following three lines of text will create three two-line labels (if List Separator in Regional Settings is
set to comma):
Pencils, 3 for $1.00
Pens, $0.50 each
Erasers, $1.00
Multi-Line Text from a Word Processor
When copying text from a word processor, you will typically have multi-line text. In this case, the text for each label is separated by either a single blank line or a carriage return/line feed.
If a blank line is contained in the text, Smart Paste reads the text as multiple labels separated by a single blank line. If no blank
line is found, the text is read as multiple, one-line labels.
For example, the following two addresses are separated by a single blank line and Smart Paste will create two three-line labels.
However, the following three lines of text contain no blank lines. So, Smart Paste will create three one-line labels.
33
Creating Labels Using Smart Paste
This section explains how text copied from different sources is turned into labels using the Smart Paste command.
To create labels using Smart Paste
1. Copy the text you wish to print as labels to the clipboard.
2. Select Smart Paste from the Edit menu.
A dialog box appears telling you how many labels were imported.
3. Click OK.
Importing a File from Another Program
You can import a .csv or .txt file containing label text directly into the ILP219 Card Loader software. This is useful when you
have exported text from a spreadsheet or database program where you cannot copy the desired text using Smart Paste.
To import a file
1. Select Import from the File menu.
The Import dialog box appears.
2. Select the file you wish to import.
You can select any file with a .csv or .txt extension.
3. Click Open.
The Select Import Group dialog box appears showing the list of available groups in this label set.
Notice that a new group has been added using the first 12 characters of the imported file’s name. This is the default
group where the imported text will be added.
4. Select a group for the imported labels and click OK.
A confirmation dialog box appears confirming the successful import.
5. Click OK.
34
Service and Support
Technical Support
If you experience problems with the set up or use of the ILP219 Card Loader software, carefully read this manual and consult
the Help to make sure you have not missed something that is covered in the documentation.
If you cannot resolve your problem by consulting the documentation, you can obtain additional information at any time from
the Support section on the DYMO Web site or by contacting DYMO Technical Support. See “Contacting DYMO” for a list of
DYMO telephone numbers.
Contacting DYMO
The following table provides a list of telephone numbers to reach DYMO Sales and Support departments. You can also reach
DYMO at www.dymo.com.
Country
Telephone Support
Fax Support
Australia
Belgë/Belgique
Canada
Czech Republik
Danmark
Deutschland
España/Portugal
France
Hong Kong
Hungaria
Italia
Mexico
Nederland
New Zealand
Norge
Österreich
Polska
Schweiz/Suisse
Slovakia
Suomi
Sverige
Turkey
United Kingdom
United States
1 800 633 868
02/ 713 38 08
(800) 263-6105
02/ 6191 2720
35 25 65 08
069/ 66 56 85 29
91/662 31 49
01/69 32 49 32
+852 2527 1928
1-424 6600
02/ 45 28 13 08
+01 5368 2066
020/581 93 86
0800 803 966
22 97 17 10
01/ 599 14 20 12
00800/311 12 50
01/342 04 66
+420-2-6191-2720
09 229 07 04
08/ 632 00 57
212/ 286 26 30 PBX
(+44) 020/ 7341 55 29
(203) 588-2500
1 800 817 558
+31 20 581 93 80
02/ 6191 2730
+31 20 581 93 80
+31 20 581 93 80
+31 20 581 93 80
+31 20 581 93 80
1-424 6601
+31 20 581 93 80
020/ 581 93 80
0800 737 212
+31 20 581 93 80
02/627-400-160
+31 20 581 93 80
+31 20 581 93 80
+420-2-6191-2730
+31 20 581 93 80
+31 20 581 93 80
212/286 26 28
+31 20 581 93 80
35
Appendix A
Supported Character Set
The DYMO ILP219 label printer supports a specific set of characters. Therefore, you need to be sure that you use only those
characters when creating labels in the ILP219 Card Loader software.
If you enter text containing a character that is not supported by the ILP219 printer into labels either directly, by importing, or
by pasting, the unsupported character is displayed in green and the icon for the label in the Groups view includes an exclamation point. This allows you to easily find the unsupported characters so they can be changed.
When you download labels that contain unsupported characters, a warning dialog box appears. You have the choice of continuing with the download, in which case the unsupported characters will be replaced with an underscore character, or you can
cancel the download and change any unsupported characters to characters that are supported.
The following tables show the character sets supported by the DYMO ILP219 label printer for several language groups.
Table 1. Western European - Dutch, English, French, Italian, Spanish, Portugese, Norwegian, Danish, Swedish, and Finnish.
Table 2. Polish - Polish, Czech, and Hungarian.
36
Table 3. Turkish - Turkish.
Table 4. Baltic - Estonian, Latvian, and Lithuanian.
37
Declaration of Conformity
DYMO Corporation
44 Commerce Road
Stamford, CT 06902-4561
Phone: (203) 355-9000
Fax: (203) 355-9090
Equipment Information
Description: Thermal Transfer Printer
Model: ILP219
This equipment has been tested and found to comply with the limits for a Class B digital device, pursuant to Part 15 of the FCC
(Federal Communications Committee) rules. These limits are designed to provide reasonable protection against harmful interference in a residential installation. This equipment generates, uses, and can radiate radio frequency energy, and, if not
installed and used in accordance with the instructions, may cause harmful interference to radio communications.
However, there is no guarantee that interference will not occur in a particular installation. If this equipment does cause harmful
interference to radio or television reception, which can be determined by turning the equipment off and on, the user is encouraged to try correcting the interference by one or more of the following measures:
•
•
•
•
•
Reorient the receiving antenna.
Increase the separation between the equipment and the receiver.
Connect the equipment to an outlet on a circuit different from that to which the receiver is connected.
Use shielded cables to connect this device to computers.
Consult the dealer or an experienced radio/TV technician for help.
You may find helpful the following booklet, prepared by the FCC: Interference Handbook. This booklet is available from the
U.S. Government Printing Office, Superintendent of Documents, Washington, DC 20402-9325.
WARNING
Changes or modifications to this unit not expressly approved by the party responsible for compliance could void the user’s
authority to operate the equipment and void the manufacturer’s warranty.
Certification
This device has been tested and complies with the requirements of:
UL 1950
EN60950: Low Voltage Directive Product Safety
FCC Part 15 Class B
EN55022: Radiated and Conducted Emissions B
EN50082-1: Generic Immunity ESD, RF, and Transient Susceptibility
Copyright
Copyright © 2002 DYMO Corporation. All rights reserved. 07/02
Trademarks
DYMO is a registered trademark of Esselte Corporation. All other trademarks are the property of their respective holders.
38