1
Use & Care Guide
Manual de Usa¥ Cuidado
English / Espa_aI
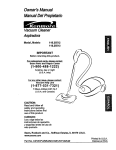
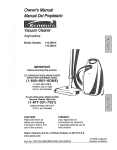
Models/Madelas:
116.21514
Kenmoreo
Canister Vacuum CJeaner
Aspiradora
PiN
CO1ZDUDOOUO0-
KCOIZDUDZOUO
Sears Brands Management
Corporation
Hoffman
U.S,A
Estates, iL 60179
_,kenmoJ'_.COl_
*_w,
sea E_.com
Before Using Your New
Vacuum Cleaner ....................
Packing List .....................
Vacuum Cleaner Help Line ...........
Kenmore Vacuum Cleaner Warranty
Important Safety Instructions ..........
Parts and Features ................
Assembly Instructions ..............
Operating Instructions ..............
How to Start ..................
Vacuuming Tips ...............
Suggested Pile Height Settings ......
Attachments ..................
Attachment Use Table ............
Attachment Storage ..............
Performance Features .............
Canister Care .....................
2
2
3
... 3
4
5-7
8-9
t0
10-11
12-13
t3
14-16
16
17
18
19
Removing Clogs .................
19
Cleaning Exterior and Attachments .. 19
Bag Changing ..................
20
Motor Safety Filter Changing .......
21
Exhaust Filter Changing ...........
22
PowerMate ® Care ..................
23
Belt Changing and Agitator
Cleaning ....................
23-24
Bulb Changing ..................
25
Agitator Servicing ...............
25
Troubleshooting ................
26-27
Master Protection Agreements ........
28
Requesting Assistance
Or Service ................
Back Cover
Please read this guide. It will help you assemble and operate your new Kenmore vacuum
cleaner in the safest and most effective way.
For more information
about vacuum cleaner care and operation, call your nearest Sears
store. You will need the complete model and serial numbers when requesting information.
Your vacuum cleaner's model and seriaJ numbers are located on the Model and Serial
Number Plate.
Use the space below to record the model number and serial number of your new Kenmore
vacuum cleaner.
Model No.
Serial No.
Date of Purchase
Keep this book and your sales check (receipt) in a safe place for future reference.
1
PACKING LIST
Your KENMORE VACUUM CLEANER is packaged
components assembled separately in the carton:
1
1
1
1
1
1
Canister Vacuum Cleaner
PowerMate®
Hose & Handle Assembly
Floor Brush*
Crevice Tool**
Combination Brush
1
1
1
1
1
1
with the following
parts and
Pet Tool *
Pet PowerMate@
Upper Wand
Lower Wand
Use & Care Guide
Repair Parts List
Each of the above assemblies are shown in detail inside the Repair Parts List.
*These items are found under the Too! Cover.
**These items are found on the hose & handle assembly.
1-877-531-7321
8:OOam-5:OOpm EST, M_F
(U.S.A. and Canada)
One Year Limited Warranty
When assembled, operated and maintained according to all instructions supplied with
the product, if this vacuum cleaner fails due to o defect in material or workmanship
within one year from the date of purchase, return it to any Sears store, Sears Parts &
Repair Center or other Kenmore outlet for free repair.
if this vacuum cleaner is used for other than private family purposes, this warranty
applies for only 90 days from the date of purchase.
This warranty covers only defects in material and workmanship. Sears will NOT pay for:
1. Expendable items that can wear out from normal use, including but not limited to
filters, belts, light bulbs, and bags.
2. A service technician to instruct the user in correct product assembly, operation or
maintenance.
3. A service technician to clean or maintain this product.
4. Damage to or failure of this product if it is not assembled, operated or maintained
according to all instructions supplied with the product.
.5. Damage to or failure of this product resulting from accident, abuse, misuse or use for
other than its intended purpose.
6. Damage to or failure of this product caused by the use of detergents, cleaners,
chemicaIs or utensils other than those recommended in all instructions supplied with
the product.
7. Damage to or failure of parts or systems resulting from unauthorized modifications
made to this product.
Disclaimer of implied warranties; limitation of remedies
Customer's sole and exclusive remedy under this limited warranty shall be product
repair as provided herein. Implied warranties, including warranties of merchantability
or
fitness for a particular purpose, are limited to one year or the shortest period allowed
by law. Sears shall not be tiable for incidental or consequential damages. Some states
and provinces do not altow the exclusion or limitation of incidental or consequential
damages, or [imitations on the duration of implied warranties of merchantability
or
fitness, so these exclusions or limitations may not apply to you.
This warranty applies only while this vacuum cleaner is used in the United States and
Canada.
This warranty gives you specific legal rights, and you may also have other rights which
vary from state to state.
Sears Brands Management
Corporation,
Hoffman Estates, IL 60179
U.S.A
Read
all instructions in this guide before
assembling or using your vacuum cleaner'
AWARNING:
Your safety is important to us. To reduce the risk of fire, electrical shock, injury to
persons or damage when using your vacuum cleaner, follow basic safety
precautions including the following:
Use your vacuum cleaner only as described
in this guide. Use only with Sears
recommended
attachments.
Use extra care when cleaning on stairs.
Do not put on chairs, tables, etc. Keep on
floor.
Disconnect electrical supply before
servicing or cleaning out the brush area.
Failure to do so could result in the electrical
shock or brush suddenly starting.
Do not use vacuum cleaner to pick up
flammable or combustible liquids (gasoline,
cleaning fluid, perfumes, etc.), or use in
areas where they may be present. The
fumes from these substances can create a
fire hazard or explosion.
Do not leave vacuum cleaner when plugged
in. Unpfug from outlet when not in use and
before performing servicing.
Do not pick up anything that is burning or
smoking_such as cigarettes, matches, or hot
ashes.
To reduce the risk of electrical shock - Do
not use outdoors or on wet surfaces.
Do not use vacuum cleaner without dust
bag and/or filters in place.
Do not allow to be used as a toy. Close
attention is necessary when used by or near
children.
Do not use with a damaged cord or plug.
If vacuum cleaner is not working as it
should, has been dropped, damaged, left
outdoors, or dropped in water, return it to a
Sears Service Center.
Always change the dust bag after
vacuuming carpet cleaners or freshener,
powders, and fine dust. These products
clog the lifters, reduce airflow and can
cause damage to the vacuum cleaner.
Failure to chage the bag could cause
permanent damage to the vacuum cleaner.
Do not pull or carry by cord, use cord as a
handle, close a door on cord, or pull cord
around sharp edges or corners. Do not run
vacuum cleaner over cord. Keep cord
away from heated surfaces.
Do not use the vacuum cleaner to pick up
sharp hard objects, small toys, pins,paper
clips, etc. They may damage the vacuum
cleaner.
Do not unplug by pulling on cord. To
unplug, grasp the plug, not the cord.
Do not operature the vacuum cleaner
without the exhaust filter or filter door in
place.
Do not handle plug or vacuum cleaner with
wet hands.
The hose contains electrical wires. Do not
use when damaged, cut, or punctured.
Replace if cut or worn. Do not pick up
sharp objects.
Do not put any objects into openings.
De not use with any opening blocked; keep
free of dust, lint, hair, and anything that
may reduce air flow.
Always turn off and unplug before
connecting or disconnecting either hose,
wand, Pet PowerMate ®, or nozzle,
Keep hair, loose clothing, fingers, and all
parts of body away from openings and
moving parts.
Hold plug when rewinding onto cord reel.
Do not allow plug to whip when rewinding.
You are responsible for making sure that
your vacuum cleaner is not used by anyone
unable to operate it properly.
Turn off all controls before unplugging.
SAVE THESEINSTRUCTIONS
Proper assembly and safe use of your vacuum cleaner are your responsibilities. Your vacuum
cleaner is intended for Householduse. Read this Use & Care Guide carefully for important
use and safety information. Thisguide contains safety statements under warning and
caution symools.
•
HII
III
4
I
I
It is important to know your vacuum cleaner's parts and features to ensure its proper and
safe use. Review these before using your vacuum cleaner,
Handle &
Hose Assembly
Canister
Replacment Parts
CB-3
Belt
Headlight
Bulb
Motor
Filter
Safety
Filter
Part No.
in Canada
20-5218
20-40118
20-5248
20-40601
C
20-5O558
20-50403
EF-1
20-86889
20-40324
CF-1
2o-8688_
..... ,
20-40321
Dust Bag
Exhaust
Part No.
in USA
Style No.
Object
PowerMate & Wands
Upper
Wand
--
Lawer
Wand
Overload
Protector/Belt
Reset Button -_
Headlight
and Lens
!-Wand
/
Furniture
Handle
Release _
Pedal
//
./"
P_|e Height
|nd]cafor
,_
Belt
- PowerMaJe
Model/Serial
Number (On Bottom)
[Not Shown)
Qulck
Release Pedal
HANDLE & HOSE ASSEMBLY
3-W_€ On/Off Switch
E|ectronic
Suction
Tool
Combination
Brush
Hose Swivel
CANISTER
® ¢_'-_.i
Pet PowerMale
If _
Storage Cover ® I_'_
_
(Pet PowerMate
I _i
_r
inside) -_
_.
_"'_
T_
°', .leer
I
{_
Brush
"--_"-7 F
Tool Storage Cover
I_31
Canister Hood'_i_'_
Carry Handle j__--_'_'_
_
_.
\._
II _--
_
Pet FowerMate °
/-Cord Rewind
/Button
j
/
/
_ _x,,oos,
,i.er_o..e,
_
J"
(Exhaust Filler inside)
Moto, 5aFety Filter
__
XTJ_"
/
-,_-
-
Dust
,
g
/
"",,,..._.i--.-_
/n_n l
,i
Please pay special attention 1o these hazard alert boxes, and follow any
instructions given. WARNING statements alert you to such dangers as fire,
electric shock, burns and personal injury. CAUTION statements alert you to such
dangers as personal injury and/or property damage.
AWARNING
Electrical Shock Hazard
DO NOT plug into electrical supply until
assembly is complete. Failure to do so
could result in electrical shock or injury.
IIIII
I
Before assembling vacuum cleaner, check
the PACKING LIST (page 2}. Use this list
to verify that you have received and
identified all the components of your new
Kenmore vacuum cleaner.
Insert wand onto
PowerMate until the
POWERMATE
wand locks into place.
HOOD AND TOOL STORAGE
COVER
It is normal for the canister hood and tool
storage cover to come off when opened
further than needed. Line up the hinge slots,
insert the hinges into the slots, and close
the hood and tool storage cover to
reinstall.
CAUTION
Never open canister hood with the tool
storage cover open. This will help to
prevent damage from occurring to the
canister hood and/or tool storage cover.
fill UI Jl/I II III
I II
I
HOSE
Line up the hose latch tab and notch in
canister hood and insert hose into canister
until it snaps into place.
CANISTER
Hose
Latch
1. Open the canister hood.
2. Check to see that the dust bag is
properly installed. See BAG CHANGING
(page 20) for instructions.
3. Check to see that the motor safety filter
is properly installed. See MOTOR SAFETY
FILTER CHANGING (page 21) for
instructions.
To remove: Do not open hood before
removing hose. With hood closed, depress
hose latch tab. Pull upward on hose.
VIANDS
HANDLE
1, tnsert upper
wand into lower
wand until lock
button snaps in
place.
Insert wand into handle until lock button
To remove:
Press wand lock
button and pull
wands apart.
snaps in place, Be sure hose is not tw|sted.
j
m
IU
__
I
I
J
_'_'I
Upper
To remove: Press handle quick release
button and pull up on handle.
Wand
Lack
Button
The combination brush can be stored on
the hose handle by placing on hose handle
before attaching wand.
-._Cord
Holder
I
_
Lower
Wand
5
O
Area
-Raised
2. insert the plug of
the PowerMate ® cord
into the plug holder
as shown. DO NOT
force.
Raised area of the
plug must be towards
hand,
3. Secure the cord
into the cord holder
on the back of the
wand.
To store: Disconnect hose from wand and
canister to prevent stress on hose during
storage. Store hose in a loosely coiled
position so the hose covering is not
stressed.
CAUTION
Moving parts! To reduce the risk of personal injury, DO
NOT touch the agitator when vacuum cieaner is on.
Contacting the agitator while it is rotating can cut,
bruise or cause other injuries. Always turn off and
unplug from electrical outlet before servicing.
Use caution when operating near children.
IIIIUIIIIIH
II
IIIIIIIIIUIUI
[
HOW TO START
I
,_
I
I
II
2. Plug the polarized power cord into a 120
Volt outlet ]ocated near the fioon
WARNING
Personal
Hazard
Injury
and Product
Damage
To rewind: Turnoff
and unplug the
vacuum cleaner.
Hold the plug while
rewinding to
prevent damage or
injury from the
moving cord. Push
cord rewind button.
DO NOT plug in if switch is in ON
position. Personal injury or property
damage could result.
The cord moves rapidly when
rewinding. Keep children away
and provide a clear path when
rewinding the cord to prevent
personal injury.
3. Lower wand from upright position by
pressTngon the handIe release pedal.
DO NOT use outlets above counters.
Damage from cord to items in
surrounding area could occur.
_
Release
_./_..
Pile
/
Pedal-_
r" PileHeight
When any abnormafity/failure occurs,
stop using the product immediately and
disconnect the power plug.
_
Cord
_="_
Rewind
_-"4__
1. Pull cord out of
canister to desired
HeZght
-__"
_
4. Select a pile height setting by pressing
the HEIGHT ADJUST pedal on the rear of
the PowerMate. The pile height setting
shows on the indicator. See SUGGESTED
PILEHEIGHT SETTINGS (page 13).
will not rewind
until the cord
rewind button is
pushed.
ength. The cord
Attention: Refer to your carpet
manufacturers cleaning recommendations.
Some more deiicate carpets may require
that they be vacuumed with the PowerMate
agitator turned off to prevent carpet
damage.
NOTE: To reduce the risk of electric shock,
this vacuum cleaner has a polarized plug;
one blade is wider than the other. This plug
will fit in a polarized outlet only one way. If
the plug does not fit fully in the outlet,
reverse the plug. if it still does not fit,
contact a qualified electrician to install the
proper outlet. Do not change the plug in
any way.
lO
5. Select a position on the handle threeway On/Off switch.
CARPET - turns on
both the canister and
the PowerMate motors.
Headlight and agitator
will come on.
cx_trt
ELECTRONICSUCTION CONTROL
The electronic suction control affows you to
change the power of the vacuum cleaner
suction motor.
HIGH increases
Incre(==e suction for
FLOOR - turnson the
canister motor only.
[]
,_
Suction
Decrease
Suction
OFF - Turnsvacuum
cleaner off.
NOTE - When this switch is in the FLOOR
position the nozzle headffght DOES NOT
function since no electricity flows to the
PowerMate.
.A.CAUT,O.
DO NOT leave the PowerMate running in
one spot for any length of tlme. Damage
to carpet may occur.
I
I I
I I
IIIIIIIIHI
III
IIIII
carpets.
upholsteries and
LOW POWER
decreases suction
for draperies and
lightweight rugs.
i
VACUUMING TIPS
SUGGESTEDSWEEPINGPATTERN
STAIRS
For best cleaning action, the PowerMate
should be pushed straight away from you
and pulled straight back. At the end of
each pull stroke, the direction of the
PowerMate should be changed to point into
the next section to be cleaned. This pattern
should be continued across the carpet or
floor with slow, gilding motions.
Personal Injury Hazard
J WARN NG
Use care if canister is placed on stairs. It
may fall, causing personal injury or
property damage.
_i_ CAUTIO N
NOTE: Fast,
random strokes
do not provide
complete
cleaning.
Product Damage Hazard
Do not pull on the hose to move the
canister from one stair to the next. When
finished cleaning in one area use the
handle grip an the canister to move the
vacuum cleaner to a new location for
further cleaning.
_IL CAUTION
r
ii Uiiiii U ii ii iii
II
Product Damage Hazard
STAIR GRIP
Use care if the PowerMate and wand is
left in the upright position as it may tip
over easily. Property damage can occur if
tipped.
The stair grip located on the caster will aid
in preventing the canister from slipping
when used on stairs. During normal
operation while the canister is in the
horizontal position, the caster wheel rotates
freely 360%
,_k WARNING
Personal
Hazard
Injury
and Product
in order to prevent
the canister from
slipping on stairs,
the STAIR GRIP
feature
automatically locks
the caster wheel in
position when the
canister is placed on
residential stairs.
Damage
DO NOT run over power cord with
PowerMate. Personal injury or product
damage could result.
DO NOT pull plug from wall by
the power cord. If there is damage to
the cord or plug, personal injury or
property damage could result.
NOTE: Be sure the canister is resting
securely on the stairs and the caster is in a
locked position before using.
12
J
EDGE CLEANER
HOSESWIVEL
Active brush edge
cleaners are on both
sides of the
PowerMate. Guide
either side of the
PowerMate along the
wall or next to
furniture to help
remove dirt trapped
at carpet edges.
The 360 ° hose swivel
allows the hoseto turn
I
without moving the
canister. Thisis helpful
for cleanlng in small
areas. Check hosefor
twisting before pulling
canister.
SUGGESTEDPILE HEIGHT SETTINGS
For best deep down c|eaningF use the XLO
setting. Howevert you may need to raise the
height to make some jobs easier_ such as
scatter rugs and some deep pile carpets,
and to prevent the vacuum cleaner from
shutting off. Suggested settings ar e•
HI - Shags deep pile, or scatter rugs.
MED - Medium to deep pile.
LO - Low to medium pile.
XLO - Most carpets and bare floors.
13
ATTACHMENTS
illl i,i
CAUTIO N
DO NOT attach or remove handle or
wands while vacuum cleaner is ON. This
could cause sparking and damage the
electrical contacts or electronic controls.
ATTACHMENTSON HANDLE
PowerMate is
attached, turn
vacuum cleaner
off before
NOTE: if the
removing
handle
from wand.
fltl._!_..,_.__Wa nd
Release
1. Press wand
. release button
and pull up on
handle.
Pet PowerMate
_,_
2. Slide attachments firmly on handle as
needed. See ATTACHMENT USETABLE
(page 16).
NOTE:
To remove combination brush, press the
brush release button and slide off.
Brush
Release
Brush
NOTE:
To remove floor brush and/or Pet
PowerMate0 press the wand release button
and slide off.
Wand
Handle
Crevice
Tool
14
ATTACHMENTS ON WAND
1. To
remove
wand from
PowerMate_
lock wand
_nstraightup position.
4
2. Press wand quick release pedal with foot
and pull the wand straight up and out of
PowerMate.
NOTE:
To remove combination brush, press the
tool release button and slide off.
Brush
Release
3. Put attachments on wand as needed. See
ATTACHMENT USE TABLE(page 16).
NOTE:
To remove floor brush and/or Pet
PowerMatet press the tool release button
and slide off,
15
COMBINATION
CREVICE TOOL
BRUSH
Attach the crevice tool to the handle
The combination brush uses two tools, the
dusting brush and the pet tool. Each is for
use on various surfaces, See ATTACHMENT
USE TABLE (page 16).
storage locations as shown.
To remove dusting
brush or pet tool,
release by
pressing tab and
lifting off the
holder.
To a_tach, insert
tab on holder
into slot on
dusting brush or
pet toot and
press untit tab
snaps into place.
Tab-_
I
ATTACHMENT USE TABLE
CLEANING
1
AREA
Between
ATTACHMENT
Comb;nallon
Brush
Bare
_u,n_fu,._ c_h_o.s
I
I/
I/
PetTool±
I/
I/
Crevice Tool
9/
Floor 5rush
(_
O,op.1
sloi,_
Carpeted
FJoo,, FJoo.i_g_ Wo,_
I/
_
It'
V'
,b
PowerMate
Pet PowerMate
I/3
4
l/
I/
U'
it
]. Always clean attachments before using on fabrics.
2. Use the pet tool to remove pet hair from deticate surfaces, such as upholstery and
drapes. DO NOT use on a pet.
3. 3-way On/Off switch shourd be in FLOOR position.
4, ,Some Models: Pet PowerMate attachment instructions are included with the products,
16
ATTACHMENT STORAGE
Pet PowerMate
FloorBrush& Pet Tool
This canister is equipped with an on-board
storage area for a Pet PowerMate
attachment.
Thiscanister is equipped with an on-board
storage area for attachments.
To Store:
To Store:
1. Open the tool storage cover.
1. Open the Pet PowerMate storage cover.
2. Insert the tool and press down until it
clicks into place.
2. Insert the Pet PowerMate and press down
until it ciicks into place.
3. Close the lid securely.
3. Close the lid securely.
Pet PowerMafe
Pet
Cover
FJoor
To Remove:
To Remove:
1. Open
1. Open the storage cover.
the storage
2. Remove
area.
cover.
Pet PowerMate
from
2. Remove attachment
area.
the storage
from the storage
3. Use as needed. See ATTACHMENTS
(page 14-15) and ATTACHMENT USE TABLE
(page 16).
3. Use as needed. See ATTACHMENTS
(page 14-15) and ATTACHMENT USETABLE
(page I6).
17
I
PERFORMANCEFEATURES
i
iii,,
iiiiii
ii i
CHECK BAG INDICATOR
_IbWARNING
When the vacuum cleaner ts running with
normal airflow, the CHECK BAG light is
off. The light comes on whenever the bag
is tuff, airflow becomes blocked, or if
there is o clog. If that occurs, first check
the disposable
dust bag. Then
CHECKBAG
check the motor
Ind_ator-,_//
safety filter and /_'_-,,
other possible
clog locations
shown in
REMOVING
CLOGS (page
19).
Personal Injury Hazard
Always turn off and unplug the vacuum
cleaner before cleaning the agitator area
as agitator may suddenly restart. Failure
to do so can result in personal injury.
BELTRESET
The PowerMate has
built-in protection
against motor and
beit damage should
the agitator jam. If
the agitator slows
down or stops, the
BELTRESETshuts off
the PowerMate. The
canister motor will
continue to run.
BELT RESET
To correct problem: See the TROUBLESHOOTING table (page 26).
, NOTE: The indicator light may come on
when using certain attachments, due to
reduced airfiow through a_achment. When
using in LOW POWER the indicator light
may not function.
To correct problem: Turn off and unplug
vacuum cleaner, remove obstruction, then
press BELT RESET button.
If the problem persists, have the vacuum
cleaner serviced by a Sears or other
qualified service agent.
THERMAL PROTECTOR
This vacuum cleaner has a thermal
protector which automatically trips to
protect the vacuum cleaner from
overheating. If a clog prevents the normal
flow of air to the motor, the thermal
protector turns the motor off
automatically. This allows the motor to
cool in order to prevent possible damage
1'othe vacuum cleaner.
To correct problem: Turn off and unplug
vacuum cleaner to allow the vacuum
cleaner to cool and the thermal protector
to reset. Check for and remove clogs, if
necessary. See REMOVING CLOGS (page
19). Also check and replace any clogged
filters. Wait approximately thirty (30)
minutes and plug the vacuum cleaner in
and turn back on to check if the thermal
protector has reset.
18
I
REMOVING CLOGS
i
The vacuum cleaner creates suction that
picks up dirt. Rapidly moving air carries
the dirt to the dust bag through the airflow
passages. The dust bag lets the air pass
through, while it traps the dirt.
For best cleaning results, keep the
airflow passage open. Check the
starred ('Jr) areas occasionally for
clogs. Turn off and unplug
vacuum cleaner from outlet
before checking.
Motor
Safety
Fiffer
TO CHECK FOR CLOGS:
If the vacuum cleaner still has poor suction,
do the following:
• Check dust bag and change if full. See
BAG CHANGING (page 20).
Check motor safety filter and exhaust
filter and replace if dirty. See MOTOR
SAFETY FILTERCHANGING (page 21) and
EXHAUST FILTERCHANGING (page 22).
I. Connect the hose to the canister and turn
vacuum cleaner on. Check the end of the
hose for suction. If there is good suction
on the hose handle, there is no clog in the
hose. If the suction is bad, remove any
dirt or debris in the hose and handle.
Check PowerMate for any dirt or debris
in the belt path area or in the agitator
area. Carefully remove any string or
debris located on the agitator or end
caps. See TO CLEAN AGITATOR (page
24).
2. Connect hose handle to wand. Check the
end of the wand for suction, if there is
good suction at the end of the wand,
there is no clog in the wand. If the
suction is bad, remove any dirt or debris
in the wand.
3. Check PowerMate swivel. Remove any
dirt or debris.
I
f
CLEANING EXTERIOR AND ATTACHMENTS
ill illi,i ,111
1. Turnoff and unplug vacuum cleaner. DO
NOT drip water on vacuum cleaner.
,_
2. To clean exterior, or to reduce static
electricity and dust build-up, wipe outer
surface of vacuum cleaner and attachments. Use a clean, soft cloth that has
been dipped in a solution of mild Iiquid
detergent and water, then wrung dry. Wipe
dry after cleaning.
CAUTION
Do not use attachments if they are wet.
Attachments used in dirty areas, such as
under a refrigerator, should net be used
on other surfaces until they are washed.
They could leave marks,
I
19
I
I
III
I[1111111111
BAG CHANGING
[
For best cleaning results, the dust bag should be changed often. The CHECK BAG indicator
will come on when the bag needs to be changed or the airflow is blocked.
NOTE: Use replacement
(page 6).
dust bag STYLE C, see part number detail in REPLACEMENT PARTS
REMOVING DUST BAG
1.Turnoff and unplugvacuumcleaner.
REPLACING DUST BAG
2. Remove hose from canister. {See
ASSEMBLY INSTRUCTIONS, page 8).
Note: DO NOT bend or crease the middle
of the cardboard when instalilng the bag
into the bag mount slots.
3. Pull hood release out and up.
I. Verify that vacuum cleaner is unplugged.
2. Rotate red bag
____!\\
mount down and
install bag into slots _
per illustration,
pushing down until
the cardboard tab
locks into position
and the holes align,
3. Tuck the bag securely into the bag
cavity so that none of the bag is able to be
pinched by the hood,
4. Lift canister hood.
4. Close and latch canister hood.
5. Insert hose into canister until it snaps in
place. ASSEMBLY INSTRUCTIONS, page 8).
illll i
CAUTION
NEVER EMPTY OUT AND REUSEA DUST
BAG. Very fine materials, such as carpet
freshener, face powder, fine dust, plaster,
soot, new carpet lint, etc. can clog the
bag and cause it to burst before it is full
and may cause damage to vacuum
S. Pull bag out of the
red bag mount and
dispose of dust bag,
NOTE: Check the
motor safety filter
and replace, if
necessary. (See
MOTOR SAFETY
FILTERCHANGING,
page 21).
cleaner motor. Change bag more often
when vacuuming these materials.
ii
NOTE: The red bag mount will flip forward
after removing bag. ThiswiJl prevent the
hood from closing until a new bag is
installed.
2O
i
MOTOR SAFETY FILTERCHANGING
The motor safety filter must be replaced when dirty. It should be replaced regularly
depending on use conditions. The filter CANNOT be washed as it will lose its dust trapping
ability.
NOTE: Use replacement motor safety filter STYLECF_I, see part number detail in
REPLACEMENT PARTS(page 6).
_k
3. Replace the filter,
white side facing
toward dust bag,
by sliding it back
into place under the
ribs tn the bag
cavity. Tuck filter in
so that it fits
completely under
the rubber retainer.
WARNING
Electrical Shock Hazard
Turn off and unplug vacuum cleaner from
electrical outlet. Do not operate the
vacuum cleaner without the motor safety
Filter. Be sure the filter is dry and properly
installed to prevent motor failure and/or
electrical shock.
IIIII
4. Replace the bag as outlined in the BAG
CHANGING section (page 20].
1. Remove the bag
as outlined in the
BAG CHANGING
section (page 20}.
2. Lift the rubber
retainer and pull out
motor safety filter
as shown.
21
I
EXHAUST FILTERCHANGING
The exhaust filter cartridge must be replaced regularly. Replace the filter when the entire
surface area is covered evenly. The filter CANNOT be washed as it will lose its dust trapping ability.
NOTE: Use replacement exhaust filter STYLE EF-|, see part number detail in REPLACEMENT
PARTS(page 6)_
3. Replace the
exhaust filter
cartridge.
Place
the new filter into
the canister with
the foam seal
_hb WARNING
Fire and/or Electrical Shock Hazard
Do not operate with a clogged exhaust
filter or without the exhaust filter installed.
Do not operate without filter cover
installed,
facing towards
the canister.
1. Purl out and down on
the exhaust filter cover
to remove from the
canister and lay aside.
4. Replace the
exhaust filter cover
by peacing the two
tabs on the filter
cover into the slots
2. Pull the exhaust
Filter
Filter
on the canister and
rotate into place
until it snaps closed.
filter up and out
from the rear of
the canister.
Tabs
22
Always follow all safety precautions when performing maintenance to the PowerMate.
_kWARNING
Electrical Shock Or Personal Injury Hazard
Always turn off and unplug vacuum
cleaner before performing maintenance
to the vacuum cleaner. Failure to do so
could result in electrical shock or personal
injury from vacuum cleaner suddenly
starting.
I
BELTCHANGING AND AGITATOR CLEANING
TO REMOVE BELT
1, Turn off and unplu9 vacuum cleaner.
5. To remove cover,
grasp the sides and
pull out.
2. Turn PowerMate upside down.
3. Unscrew the two (2) PowerMate cover
screws,
6. Lift agitator
assembly out
and remove
worn beIt.
End Cap
7. Check and clean end cap areas. See
AGITATOR ASSEMBLY (page 24) for picture
of €ompIete agitator assembly.
4. Turn
PowerMate top
side up. Press
handle release
pedal and lower
the swivel. Lift
rear Iatches up.
23
TO CLEAN AGITATOR:
TO REPLACEBELT
NOTE: In order to keep cleaning efficiency
high and to prevent damage to your vacuum cleaner, the agitator must be cleaned
every time the belt is changed.
NOTE= Use replacement beJt STYLECB-3,
see part number detail in REPLACEMENT
PARTS(page 6),
The agitator must also be cleaned according to the following schedule:
Vacuum Cleaner Use
Clean Acjilator
HEAVY (used daily)
every week
MODERATE (used 2-3 times!week)
every month
LIGHT (used 1 time!week)
every 2 months
1. Install new
,
motor drive,
then over belt
belt over
path.
_r
tator assembly back into
PowerMate,
\
_"-'_
Agitator
Belt
Path
EndCap
IMPORTANT
3. Verify that end
cap is pressed
firmiy into position.
Disconnect vacuum cleaner from electrical
outlet, Check and remove hair, string and
lint buiid-up frequently in the PowerMate
agitator and end cap areas.
Remove any dirt or debris in the belt path
area or in the brush roller area.
3. Line up front of cover and base, Rest
cover on front edge of base as shown.
any string or
debris located
on the agitator
or end caps.
AGITATOR ASSEMBLY
End Cap
Brush Unit
End Cap -
Side
Rear
Latch
Latches
4, Rotate cover
back. Press cover
firmly until Side
and rear latches
snap into place.
Make sure there is no gap between the
cover and base.
5. TurnPowerMateupsidedownand
replace two (2) cover screws.
24
I
LIGHT BULB CHANGING
,,11
la,cAuT,oN
_kWARNING
Electrical Shock Or Personal Injury
Hazard
i
IDa not plug in or turn on until the vacuum
Icleaner is completely reassembled.
!Turn off and unplug vacuum cleaner
before performing maintenance to the
vacuum cleaner. Failure to do so could
JDo not use a bulb rated over 9W
J(13V). During extended use, heat from
Jthe bulb could overheat surrounding
result in electrical shock or personal
injury from the vacuum cleaner
suddenly starling.
Plastic parts.
NOTE: Use replacement bulb number 2052,48, see part number detail in REPLACEMENT PARTS(page 6).
_
I. Remove PowerMate cover as shown in
BELT CHANGING AND AGITATOR
CLEANING (page 23-24) section.
_ _. t
eusnm
rO rlgn_
/-_ -_,,,,_
I
I
_
3. To replace the
light bulb, corefully insert fully
_
4. Reinstall
PowerMate cover
as shown in BELT CHANGING AND
AGITATOR CLEANING (page 23-24)
section.
2. Remove the light
bulb by pulling
straight out.
AGITATOR SERVICING
TO CHECK THE BRUSHES
,_
WARNING
Electrlcal Shock Or Personal Injury
Hazard
When brushes are worn to the level of the
base support bars, replace the agitator
assembly,
Always turn off and unplug vacuum
cleaner before performing maintenance
to the vacuum cleaner. Failure to do so
could result in electrical shock or personal
injury from vacuum cleaner suddenly
TO REPLACEAGITATOR
ASSEMBLY
s!art!ng.
New
,
Brushes
1. Remove PowerMate cover, belt and
agitator assembly. See "To Remove Belt" in
BELT CHANGING AND AGITATOR
CLEANING (page 23-24).
.........
Worn Brushes
2, Replace agitator assembly. See your
separate repair parts list for part number.
3. Reinstall belt and PowerMate cover. See
"To replace belt" in BELT CHANGING AND
AGITATOR CLEANING (page 23-24}.
Base
Supped
Bet
25
{
Review this table to find do-it-yourse{f solutions for minor performance problems. Any other
service needed should be performed by a Sears or other qualified service agent.
iii1,111,1,1111111111111,1111
iiiiiiii,ii i i
i i iiii iiii i ii
i i ii i
iii
AkWARNING
Always turn off and unplug vacuum cleaner before performing maintenance to the
vacuum cleaner. Failure to do so could result in electrical shock or personal injury.
Vacuum
cleaner won't
1. Unpluggedat wall outlet.
1. Plug In firmly, push ON/OFF
start.
swilch
to on.
2. Tripped circuit breaker!blown
2. Reset circuit breaker or replace fuse.
fuse at household service panel
3.
Loose hose electrical
3. Reconnect
hose ends. (page 8)
connections.
Poor job of dirt
1. Fell or clogged dust bag.
1. Change bag. (page 20}
pick-up.
2. Clogged airflow passages.
3. Dirty filters.
4. Wrong pite height setting.
2. Clear airflow passages. {page |9}
3. Change filters. (page 2_-22}
4. Adjust setting. {page 13)
5. Wrong power level selected.
6. Hole in hose.
Z Worn PowerMate
agitator.
5. Adjust control, {page
Z Change agitator.
8. Worn or broken belt,
(page 23-26)
8 & 9. See BELT CHANGING
9. Dirty agitator or end caps.
Tripped overload
PewerMato.
11)
6. Replace hose.
AND
AGITATOR CLEANING
protector in
(page 23-24).
10. Remove any items that may be
caeght or jammed,
then reset. If
vacuum cleaner starts and stops
again, clean agitator
and end cops,
teen reset. {page 1B, 25)
Vacuum
cleaner starts
1. Hose or hood e_ectrical
hut shuts off.
I. Check connections_ reconnect hose
connections.
ends. (page 8}
2. Tripped overload protectoi" in
2. Remove any items that may be
PowerMote.
caught or jammed, then reset. If
vacuum cleaner starts and stops
again, clean agitator
and end caps,
then reset. (page _8}
3. Tripped thermal protector
in canister.
3. ,See PERFORMANCE
PowerMale willnot
1, PowerMate connections
I,
run when affached.
unplugged.
2, Worn or broken belt.
3. Dirty agitator
4.
"Thermal
Plug In firmly.
2 & =3. See BELT CHANGING
AGITATOR CLEANING
or end caps.
Tripped overload protector
PowerMote.
in
FEATURES -
Protector" (page 18).
AND
(page 23-24).
4. Remove any items that may be
coughl or iammed_ then reset. If
vacuum cleaner starts and stops
again, cleon agitator
and end caps_
then reset. {page t8, 25}
5, Switch not in CARPET position.
5. Move switch to CARPET position.
(page it)
26
CHECK
BAG
Indicator L
Foilor dogged dustbag.
2. Dirty riflers,
3. Blocked airftow passage,
adlvates.
4.
,i
Ce_ain
attachment
tools,
I. Change bag. (page 20)
2. Change filters.(page 21)
3. Clear blodcagefrom airflow
passage.(page 19)
4. This isnormal. Lightshould go off
when tool Is removed.
.......
Vacuum cleaner picks up
1. Wrong pile height setting.
1. Adjust setting, (page 13)
moveable
2.
2. Select lower Power Level. (page 1t|
rugs -or-
PowerMate
too hard.
pushes
Cord won't
rewind,
Vacuum cleaner leaves
Suction toe strong,
1. Dfrty power cord,
I.
2, Cord jammed.
2. PulI out cord and rewind, (page t0)
Clean the power cord.
1, Wrong vacuuming pattern.
1. ;See VACUUMING
marks on carpet.
Vacuum Cleaner Help Line:
1-877-531-7321
8:00am-5:00pm
(U.S.A. and
27
EST, M-F
Canada)
TIPS (page 12].
Master Protection Agreements
Congratulations
on making a smart purchase. Your new Kenmore® product is designed and
manufactured for years of dependable operation. But like all products, it may require
preventive maintenance
or repair from time to time. That's when having a Master Protection
Agreement can save you money and aggravation.
The Master Protection Agreement
the Agreement*
includes:
also helps extend the life of your new product. Here's what
Parts and labor needed to help keep products operating properly under normal use, not
just defects. Our coverage goes well beyond the product warranty.
No deductibles, no
functional failure excluded from coverage -- real protection.
1_
Expert service by a force of more than 10,000 authorized Sears service technicians,
which means someone you can trust will be working on your product.
[]
Unlimited
want us.
service calls and nationwide
"No-lemon"
guarantee - replacement
failures occur within twelve months.
service, as often as you want us, whenever
of your covered product if four or more product
[_
Product replacement
D+
Annual Preventive
[]
Fast help by phone - we call it Rapid Resolution - phone support from a Sears
representative on all products. Think of us as a "talking owner's manual."
if your covered product can't be fixed.
Maintenance
Check at your request-
Power surge protection against electrical
[]
you
damage
no extra charge.
due to power fluctuations.
$250 Food Loss Protection annually for any food spoilage that is the result of
mechanical
failure of any covered refrigerator
or freezer.
[]
Rental reimbursement
[]
10% discount off the regular
installed parts.
if repair of your covered product takes longer than promised.
price of any non-covered
repair service and related
Once you purchase the Agreement, a simple phone call is all that it takes for you to schedule
service. You can call anytime day or night, or schedule a service appointment
online.
The Master Protection Agreement is a risk free purchase. If you cancel for any reason during
the product warranty period, we will provide a full refund. Or, a prorated refund anytime after
the product warranty period expires. Purchase your Master Protection Agreement today!
Some limitations and exclusionsapply. For prices and additional information in the U.S.A.call
1.800.827.6655.
+• Coverage in Canada varies on some items. For full details call Sears Canada at 1-800-3616665.
Sears Installation
Service
For Sears professional instal3ation of home appliances, garage door openers, water
and other major home items, in the U.S.A. or Canada call 1-800-4-MY-HOME_.
28
heaters,
Antes de usar su aspiradora nueva .., 1
Lista de embalaje
...............
1
Linea de ayuda de aspiradoras ......
2
Garanffa de la asplradora
de Kenmore ......................
2
Instrucciones imporlantes
de segurldad .....................
3
Piezas y caracterlsticas ............
4-6
tnstrucciones de ensamble .........
7-8
instruccJones de operafi6n
..........
9
Para comenzar ...............
9-10
Sucjerencias para aspirar ......
1!-12
Sugerenoias sobre el ajuste de
nivel de pelo de la alfornbra
.....
12
Accesorios ..................
13-15
Cuadro de uso de los accesorios .. 15
Almacenaje de] accesorios ........
16
Caracter[sticas de
rendimiento
...................
17
Cuidado del recept6cu]o ...........
18
Quitar de los residuos de basura
en los conductos ...............
18
Limpieza del exterior y de los
accesrrios ...........
..........
18
Cambio de la bolsa ............
19
Cambio del filtro de seguridacl
del motor ....................
20
Cambio del filtro de escape ......
21
Cuidado de la PowerMate e .........
22
Cambio de la carrea y limpieza
del agitador ................
22-23
Cambio de la bombilla ..........
24
Cuidado del agitador ...........
24
Reconocimiento de problemas ... 25-26
Acuerdos maestros de protecci6n ... 27
Informact6n de asistencia
o servicio ...........
Posterior Cubierta
Por favor lea esta gufa que le ayudara a ensamblar y operar su aspiradora nueva de Kenmore
en una manera m6s segura y efectiva,
Para mas informaci6n acerca dei cuidado y operaci6n de esta aspiradora, Ilame a su tlenda
Sears mas cercana, Cuando pregunte por inforrnaci6nusted necesitar6 el n0rnerocompleto de
ser!e y modelo de la aspiradora que est6 Iocalizado en [a placa de los n0meros de modelo y
serie.
Use el espacio de abajo para registrar et n0mero de modelo y serie para su nueva aspiradora
Kenmore,
N0mero de Modelo
NOmero de $erle
Fecha de Compra
Mantenga este libro y su recibo en un lugar seguro para referencias futuras.
LISTA
DE EMBALAJE
Su ASPiRADORA
separado:
I
1
1
1
1
KENMORE se empaca con las siguientes piezas y componentes pot
Receptdculo
PowerMate®
Manguera
Cepillo para pisos_
Herramienta para
hendiduras*
1
1
1
1
1
Cepilto para combinaci6n*
Pet PowerMate_)
Tubo telescopico
Manual de uso y cuidado
Lista de partes
Cada uno de estos ensambles es mostrado detalladamente en la lista de piezas para
reparaci6n.
_Estos arffculos se encuentran bajo la ¢ubierta de almacenamiento para accesorios.
1-877-531-7321
8_OOam-5:OOpm EST,M-F
(U.S.A. and Canada)
Garantia limltada de un afio
SIesta aspiradora falla per un defecto en sus mater|ales o fabricaci6n en el per{ode de
un afio desde la fecha de compra, cuando se instala, maneja y mantiene siguiende
todas las instrucciones incluidas con el producto, devu61vala a cualquier fienda Sears,
Sears Parts & Repair Center (Centre de Reparaciones y Piezas Sears) o a otro
distribuidor
Kenmore para que reparen el aparato de forma gratuita.
Fsta garanffa es v6|ida solamente durante 90 dfas desde la fecha de compra,
si ta aspiradora se uttiza para otros fines que no sean el use familiar privado.
Esta garanffa
cubre exclusivamente
los defectos
de mater|ales
y fabricaci6n.
Sears NO
pagar6:
1. Los elementos
desechables
que puedan desgastarse
con un usa normal, incluyendo
sin car6cter
excluyente,
filtros, correas,
16mparas y bolsas.
2. Un t6cnico
del servicio t6cnico para que ensefie al usuario a instalar, manejar
o
mantener
correctamente
el producto.
3, Un t6cnico del servicio t_cnico para llmpiar o mantener
este producto,
4. Dafios o aveHa de este producto
si no se ha instalado,
mane]ado
o mantenido
siguiendo todas
las instrucciones
incluidas con ef producto.
5. Dafios o aveHa a este producto
originados
per accldente,
abuse, use incorrecto
o
use del producto
para otros fines distintos de los indicados.
6. Dafios o aver_a de este producto
causados
per el use de detergentes,
limpiadore%
productos
qu{micos o utensilios diferentes
a los recomendados
en todas las
instrucciones
que se incluyen
con el producte.
7. Dafios o aver{as de las piezas o sistemas causados
per modificaciones
no
autorizadas
que se hayan hecho a este producto.
L{mitaci6n de responsabilldad de las garanffas impff¢itasl limitaci6n de remedi0s
El 6nice y exclusive remedio del cliente bajo esta garanffa limitada ser6 la reparaci6n
del producto segOn Io indicado en este documento. Las garanffas impl{citas, incluyendo
las garantias de comerciabilidad o idoneidad para un prop6sito especffico, se limitan a
un afio o et perfodo m6s corto permitido per la ley. Sears no set6 responsable per
dafios incidentales ni consecuenciales. Algunos estados o provincias no permiten la
exclusi6n o Iimitaci6n de dafios incidentales e censecuenciales, ni Iimitaciones en la
duraci6n de las garanffas impffcitas de comerciabilidad o idoneidado per Io que estas
exclusiones o limitaciones podrian no aplicar en su case.
Esta garanffa
Canad6.
aplica solamente cuando esta aspiradora
se utiliza en Estados Unidos o
Esta garant|a le otorga derechos legales especfficos, y usted podrla tener otros
derechos que vat[an en funci6n de cada estado.
Sears Brands Management
Corporation,
Heffman
Estates, IL 60179
iii
Lea las instrucciones
iii
en este manual
ii
antes de armor
i1,1,
o usar su aspiradora'
ADVERTENCIA:
Su segur_dad es muy importante pare nosotros. Para reduc|r el rlesgo de incendlo, cheque
el_ctrico, lesi6n corporal o da_os al utilizer su asplradora, actOe de acuerdo con precauclones
b6sicas de seguridad, entre elias:
Use su asplradora _nicamente en ta farina
descr|ta en este manual. Use On|camente con
accesorios recomendados
per Sears.
Apague redes loscontrolesantes de
desenchut:ar.
Tenga culdado especial al utilizar [a aspiradora
en escalones. No la coloque sabre sillas_ mesas,
etc. Mant_ngala en e_ piso.
Desconecte el corct6n et_ctrico antes de
componer o l[mpiar el _rea del cepil]o. De Io
contrarloj el cepiilo podHa arrancar de forma
imprevista o podria produclrse un cheque
el_ctrico.
No abandone la aspiradora cuando est_
conectada. Descon_ctela cuando no la est_
usando y antes de dar]e servicia.
No use ta aspiradora pare asplrar ffquidos
inflamables o combustibles (gasoline, ffquidos
pare limpieza, perfumes, etc.) n| la use en
lugares donde _stos podr_an estar presentes. Los
vapores de estas sustanc[as pueden crear un
peligro de incend|o o explosl6n.
Pc=rereducT[ el riesgo de cheque el_ctrlco_ no
use su aspiradora al aire fibre ni solore
superficies mojac!as.
No levante nlnguna case que se est_ quemando
o emfflendo humo, come cigarrillos_ cer[Hos o
cenizas ca[ientes.
No permita que sea ufi]izoda come juguete. Se
requiere tener mayor cufdado cuando sea
utiJ|zada en la pro×ira|dad de nines o per n|_os.
No use la asp|radora sin tener instalada ra boise
para polvo y/a los filtros.
Cambie siempre fa balsa para po[vo despu_s de
aspirar llmpiadores de a]fombras o
clesodorantes, taleos y pelves fines. Estos
productos atascan la bolsa, reducen el fluje de
alre y pueden causar que _sta se tampa. Si no
cambia la balsa podrfa ocasionar da_o
permanente ala aspiradora.
No use la asph'adora si el cord6n o e[ enchufe
estcln da_ados. Si la asp|fedora no est6
funcionando adecuadamente o si se ha de|ado
caer, est6 dafiada, se ha de lade expuesta ala
intemper|e a se ha dejado caer en agua t
_levu_]vala a un Centre de servicio de Sears.
No jale n[ tmnsporte Ja aspiradora per el
cord6n; no use el cord6n come mango; no cierre
puertas sabre el cord6n; no |ale el cord6n sabre
rebordes agudos ni esquinas. No pose la
aspiradora sabre el cord6n. Mantenga el cord6n
ale|ado de superficies calientes.
No use la aspiradora pare levantar oh|eros
agudos, juguetes pequefios, alfileres,
sujetapapeles, etc. Podrfan dafiar la asp|roe|era
o Ia balsa para polvo.
No opere sin e] filtro de escape n! la cub_erta
del fibre de escape insta)ados.
No descenecte la aspiradora tirando del cord6n
_=l_¢tr|co. Pare desconectarla, ja_e e[ enchufe, no
el cord6n.
No toque la aspiradora
manes me|arias.
La manguer= contiene cables el_etr|cos. No ]a gg
use euando est_ €lafiada, eortada0 a perforada_
Reemplc_ee si est6 cortada o desgastada. No
levante objetas afffados.
nt e[ enchufe con Ias
iwi
Slempre apagu_ y desconecte la asp|radora
antes de conectar o desconectar Ja manguera_
Pet HandiMate_ o la boqui[lo.
_o coloque objetos en las abe_turas.
=No ufilice la asplradora s| alguna abertura estct
ibloqueada; mant_ngala Jibre de polvo, pelusa,
cabellos y cualquiera cosa que podrfa disminu|r
el flujo de aire.
Sujete el enchufe con [a mane al enrollar el
cord6n eJ6ctrico. Para desconectarla_ |ale el
enchufe_ no e[ eorc_6n.
JMantenga el cabello, rope suelta, declos y todas
!las partes del cuerpo alejados de las aberturas
y piezas meccinicas.
Usted es responsable de asegurar que su
aspiradora no sea utilizacla per ninguna persona
que no puec[a mane|aria eorrectamente.
GUARDE ESTASINSTRUCCIONES
El armada y use seguro de su asplradora son su responsabff|dad. Esta asptradora ha s_do d|sefiada
exclusivamente pare usa dom_stlco. La aspiradora deber6 almaeenarse en un lugar seco yen el
interior. Lea este Manual de Use y Cuidado detenidamente, pues confiene informaci6n lmportante
sabre segurldad y use. Esta gu_a eonttene informaeJ6n sabre segur!dad debajo de s!mbolos de
advertencia cuidado.
iii
i
,11111
iii
"
3
,,,,,,,,,,,,,,,,,,,,,,,,,,,
Esimportante
conocer Jas piezas y caracterfsticas de su aspiradora
cuado y seguro. Exam{nelas antes de usar su aspiradora.
Tubo
Inf_rior_
para asegurar
su uso ade-
Partes de Reemplazo
Objeto
Estilo No.
Correa
CB-3
Pieza N °
en EUA
Pieza N o
en Canad6
20-5218
Bombilla
20_40118
20-5248
Balsapara polvo
............
C,
.....
20-50558
20-50403
i
Filtrod e escape
EF-1
20-86889
20-40324
Filtrode segurldad
del motor
CF-t
2o'-"8688a
20-40321
PowerMate ¥ Tubes
--
Superior _
Tube
Inferior
j
Be 6n de _'
BELTRESET
(Protector contra
Pedal de liberaci6n
Luz
r6p|da del tube
Pratector
de
Pedal de
liberaci6n
Pedal de selecci6n
de nivel de pale
de la alfombra
Limpiador de or|llas
(no moslrada)
de serie
y modela de PowerMate
(Parte inferior)
MANGUERA
& ACCESORIOS
Interruptor
apagado
de encendldo/
de tres posicJones
(OFF/FLOOR/CARPET)
Control
de
$ucci6n
elecfr"
"
para
hend_duras
Cepillo para
comblnoci6n
glratorlo de
la manguera
RECEPT.i_CU
LO
Cubierta de
almecenornlen|o
retracci6n
Cepillo para
pelo de
anlmales
de escape
de escape
fiffro
(Filtro
adenfro)
Cord6n
el6c|rico
Filtro de protecci6n
del motor (detr6s de
la bo|sa de polvo}
TcJ
Pestillo
de lata
Manija de
transportac_6n
Bo|sa de
i iiiiiii
iiiiii
Par favor ponga especial aten¢i6n a 6stos recuadros con alerta de rlesgo.
J
ADVERTENCEA: Esta informa¢i6n le alertar6 dee peligro de fuego, cheque el_ctrlco,
!
leslonesqUemaduraSy
dafios
y lesioneS.a
la propiedad.CUIDADO:
Esta informaci6n le alertara de peEigroscoma
illlllllll ii
,
ADVERTE NCIA
PeEigrode choque eE_drlco
INo conectela
asplradora basra que termine
Jde armada. De Io €ontrar|e padrla causar un
Antes de armar la aspiradora, reivise la
LESTA DE EMBALAJE(p_g 1). Use esta lista
para verificar e identificar que ha recibido
todos los componentes de su nueva aspiradora Kenmore.
r
LA TAPA Y LA CUBIERTA
Es normal que la tapa del recept6cuto se
desprenda al ser abterta m6s de Io necesar[o.
Para colocar nuevamente la tapa, alinee las
ranuras de I0 bisagra, ins_rtelasy cierre la
tapa.
_k
CUtDADO
Nunca debe abrir la capucha del contenedor
estando la tapa abierta. Adse evitar6 dories
a la capucha deecontenedor y/o a la tapa.
MANGUERA
Introduzca la vara en ia
PowerMate
basra que el
POWERMATE
pedal de liberaci6n
quede fijo en podci6n.
Alinee la pestafia de suJeci6nde Ja manguera
y la ranura de la cubierta deJrecept6culo e
introduzca la mancjuera en e] recept6culo
hasta que quede fija en posici6n.
Pestafia
de sujecT6n
de la
RECEPTACULO
1. Abra la tapa del recept6culo.
2. Examine que ]a balsa para polvo este
instalada correctamente. Consulte las instrucclones de insta]aci6n en: CAMBIO DE LA
BALSA (p_g 19).
3. Examine que el filtro de seguridad de]
motor que este insta]ado correctamente.
Consulte las instrucciones de instalaci6n en:
CAMBIO DEL FELTRODE SEGURIDAD DEL
MOTOR (p_g 20).
I
i •
Para retirar:
No abra la cub_erta antes de desprender
la manguera. Con la cubterta cerrada, tire
hacia arriba la lencjLietade seguridad y
jale de la manguera.
TUBOS
MANGO
1. Inserte el tubo
superior en el tubo
inferior hasta que
e] bot6n de cierre
se encaje a presi6n
en e] su lugar.
Para quitar:
Presione el bot6n
de cierre del tubo
superior y separe
los tubos.
Introduzca el tubo en el mango hasta que el
bot6n quede en posfci6n.Aseg6rese de que la
manguera no est_ lorcida.
Para retirar: Optima el bot6n de Iiberaci6n
r6pida del mango para liberar el mango y
tire de[ mango hacia arriba.
j
t_
-,--Sujotoaor
de] corcl6n
m
El Cepillo de combinacion puede set
almacenado en el mango de la manguera,
co]ocandolo en el mango antes de
conectar el tubo telescopico
_-'-Tubo
infeHor
-Area
elevada
Para Guardar: Para prevenir [a presl6n de la
manguera mientras se guarda, desunala
manguera del tubo de la aspiradora. Guarde
la manguera en una posici6nenrollada y floja
de tal manera que [a tapa de la manguera no
seestire.
2../nserte el enchufe
eI cord6n del
PowerMate® en e]
sostenedor del
enchufe como se
muestra.
No Io fuerce.
Levantadae
introdusoaeI enchufe.
3. Asegure el cord6n
en e] sostenedor para
el cord6n en ]a parte
posterior del tubo,
liberac|6n
de| tubo
Cep]llo
para
€omblnaci6n
CUIDADO
iPartes en movimiento! Para reducir el riesgo de dafios
corporales, no toque el agitador cuanclo la aspiradora
est6 encendida. El tocar el agitador mlentras que est6
glrando puede cortar, contuslonar
o causar otras
lesiones.
5iempre
apague
¥ desconecte
del
tomacorrlente
antes de clar mantenlmienlo.
Tenga
cuidado al asp|rat cerca de nifios.
PARA COMENZAR
,_
ADVERTENCIA
Peligro de lesi6n personal y dafio al
)roducto
$1EMPREapague ante de desconectar.
El cord6n el_ctrlco se mueve
r6pidamente durante el enro|lamiento.
Mantenga atejados a los niEosy
asegure espacio llbre suficiente para
evitar les;onespersonales a! enrollar
el €ord6n.
NO use los enchuFes|ocalizados sobre
los muebles. Losobjetos cercanos
podrian resultar daEados.
Cuando alguna anormalldadidesperfecto ocurra, pare de usar el producto
inmedlatamen|e ¥ descon_ctelo del
toma corriente.
2. Conecte el cord6n el_ctrico po|arizado en
un enchufe de 120 voltJosque se encuentre
cerca del piso.
Para enroltar: Apagu_ y
desconect_ la aspiradora.
Sujete el enchufe mientras
enrolla el cord6n para
tmpedfr dafio o lesi6n corporal pot el movlmlento
del cord6n, Oprima el
bot6n de[ cord6n el_ctrico
con la mano o con el pie.
t
3. Baje el tubo desde la posici6n vertical
pisando el peda| de liberaci6n del mango
(HANDLE RELEASE).
Pedal
de
liberaci6n
del mango"-__
_.
t_
/
Podoldo
1. Tire del cord6n
para sacarlo del
recept6culo hasta
tener ta longitud
deseada. El cord6n
no se enroI[ar6 basra
que oprima el bot6n
para enrollarlo.
NOTA: Para reducir
el riesgo de choque et_ctrico_esta aspiradora
cuenta con una clavija polarizada, uno de los
contactos es m6s ancho que el otro. La clavija
s61o puede introducirsede una manera en el
enchufe. Si la clavija no cabe bien en el
enchufe, invi_rtala. Si aOn no cabe, Ilame a un
electricista para que instale un enchufe
correcto. No a]tere la clavija de n|nguna
manera.
HEIGHT
C_,_._.\_
de ia alfombra)-/
Indicadorde
nivel,-lepe,o
I,.otfo..,b,o
(_
_,_,..,.,.
"_..,_
g
4. Seleccione una affura del pe|o de la
alfombra usando el pedal pequefio
ubicado en ia parte posteriorde la
PowerMate. El nivel del pe[o ta alfombra se
muestra en et |ndieador. Consulte
SUGERENCIAS SOBREEL AJUSTE DE NIVEL
DEL PELO DE LAALFOMBR.A (p_g 12).
Atenci6n: Refi_rasea [as recomendaciones
del fabricante para Iimpiar su alfombrao
Algunas alfombras rodsdelicadas pueden
requerir el usa de la asp|radora con el
agitador PowerMate desconectado para
prevenir que Ia a[fombra sea dafiada.
5. Seleccione una posici6n del interruptor de
tres-posicionesen el mane o.
CONTROL ELECTRONICO DE
ASPIRACION
CARPET (ALFOMBRA)enciende los motores
del recept6culo y de [a
PowerMate. La
bombTIla delantera y
el agitador se
encenderan,
El control electronico de aspiraci6n le
permite cambiar la potencia de succi6n
de la aspiradora,
®
En HIGH se incre_Jkasplraci6n
para muebIes y
-aIfombras.
Aumen]_ar menta la succi6n
_pl_Dism|nulr
En LOW POWER la
aspiraci6n succi6rt disminuye_
para limpiar cortihas y tapetes delgados.
FLOOR (PISO) - s61o
enciende el motor del
recept6curo.
OFF (APAGADO) - Apague Ia aspiradora.
NOTA - Cuando este control est_ en la
posicT6nFLOOR (PISO)0 la luz de PowerMate_
no funciona porque la eJectricidad no fluye al
PowerMate.
ii
I cu,DAoo
| NO deje ta PowerMate funcionando en un
| lugar durante ning_n espacio de fiempo: se
J puede dafiar la alfombra.
lO
I
SUGERENCIASPARAASPIRAR
Esti[o de limpieza sugerido,
Para obtener la mejor acct6n de Jimpiezase
recomienda empujar ]a PowerMate en direcci6n directamente opuesta a ustedy jalarla en
Ifnea recta. AI final de cada pasada de
regreso,cambie [a dkecci6n de la PowerMate
hacia la siguientesecci6n a Jimpiar.Contin0e
asi_a trav_=sde toda la alfombra o piso de una
manera ]enta y deslizante.
NOTA: Las
pasadas rdpidas y
a[ azar no Iogran
una limpieza
completa.
ii
_CUIDADO
Peligro de lesi6n personal y dafio al
3roducto
renga cuidado si el PowerMate y la
manguera se dejan en posici6nvertical pues
_ueden caerse fc_cilmente.Si se voltean
3uecle haber dafio de propledacL
,_
ADVERTENCIA
Peligro de tesi6n personal y da_o al
)roduclo
No atropeUeel cord6n el_,ctricoconla
PowerMate. Hay un peligro de iesi6n
corporal o dafios de propiedad.
No fire del cord6n elicit]co para
desenchufarlo de la pared. Si hay dafios
en el €ord6n el6ctrlco o el enchufe, hay un
pellgro de lesi6n corporal o dafios de
propiedad.
ill
ESCALERAS
_kADVERTENCIA
Peligro de lesi6n personal
Tenga culdado si coloca el recept6culo sobre
escalones. Si se cae, podHa causar lesi6n
ersonal o da5o a la propiedad.
,_k CUIDADO
Peligro de lesi6n personal y dafio al
produclo
No jale de ia manguera para mover la
aspiradora de un escal6n al siguiente.
Cuando term|he de limpiar un 6tea use la
manija en la aspiradora para moverla a
otro lugar para continuar la limpieza.
SOSTI_NPARA LA ESCALERA
El sost_n para la escalera esta situado en el
cuerpo y ayudar6 a evttar que la
aspiradora se deslice cuando se est6
utilizado en las escaleras. Durante la
operaci6n normal de la aspiradora mientras
que est6 en la posici6n horizontal, las
ruedas del cuerpo gtren Iibremente 360 °.
La caracteristica del
STAIR GRIP [Sost_n
para la Escalera)
permite que ]as
ruedas del cuerpo se
traben automaticarnente en posici6n
cuando la aspiradora esta
colocada en escaleras
residenciales.
NOTA:AsegOrese
que la asp_radoraest_
descansando
conseguridad sobre las
escalerasy el basepara piso est6 en la
posici6nbloqueada antesde usarla.
J
LIMPIADOR DEORILLAS
Losactivos cepiJ[os
timpiadores de orillas
estan en cada lado
de la PowerMate.
Pase [a PowerMate
junto a [as paredes o
junto a Jos muebles
para ayudar a eliminat la tierra
acumulada en [as oriHasde [a affombra.
I
El disposifivogiratorio
de la manguera 360 °
II
sin necesidad de mover el receptHculo,
i
I
Estoes mW Ofil para
limpiar en €_reaspepermite Aseg6resede
que _sta gire
quefias.
que la manguera no
est_ torcida antes de ]ajar el recept_culo.
SUGERENCtAS
SABREELAJUSTEDENtVELDEPELODELAALFOMBRA
Use el ajuste XLO (bajo) para obtener la
mejor limpieza a rondo. Par otra parte, quizc%
se requiera elevar e[ nivel para faci]itar a[guhas tareas, coma par ejemplo cuando se trata
de tapetes y algunas alfombras de pe[o
[argo, y para impedir que la aspiradora se
apague. Se sugieren los siguientesajustes:
HI - Pelo muy iargo y sue[to,tapetes, alfombras muy acojinadas.
MED - Pelo mediano a [argo.
LO- Pelo corto a mediano.
XLO - La mayor_a de tas alfombras y pisos
descub[ertos.
12
i
ACCESORIOS
i
| NO instale ni retire el mango nl los tubos I
I cuando la asplradora est6 encendida. Esto I
Ipodria causar chispas y dafiar los contac- I
Jtosel_ctrlcos
o control electronico.
J
ACCESORIOSDELMANGO
NOTA: S! tiene instalada [a
PowerMate, apague ]a aspiradora antes de
qu[tar el mango de los tubos.
1. Oprima el
bot6n
de r6pida
liberaci6n
del mango para
liberar el mango
y tire del mango
hacia arriba.
-_
j_/
Pet PowerMate
Boton_ de
_
liberac[6n
del lubo
_
NOTA'
Para removerel cepi]lode combinaci6n,
presioneel bot6n liberadory sep6relo.
2. Deslice e[ accesor|o deseado con firmeza
sobre el mango. Consulte:CUADRO DE USO
DE LOSACCESORIO$ (p6g 15).
Bot6n de
liberaci6n
de|
NOTA:
Para remover el cepillo de piso yio el
cepi[Io para pelo de mascotas, preslone
el bot6n ffberador del tubo y sep6relo.
Bot6n de
|iberaci6n
13
ACCESORIOSDELTuBe
L Para retirar
los tubes de
ta PowerMate,
col6quelos en
la pos[ci6n
vertical de
bloqueo.
para pesos
PetPowerMate J
Pedalde _
1
2. Piseel pedal de
liberaci6nk_ II
r6plda _j ,_
J
liberaci6n r6pida
ciel tube y tire del
/
I
para desprenderlo
de la PowerMate.
tubo hacia arriba
Bot6n de liberaci6n
ACCESORIOS
(p_g_5).
Cepillo
Tubo
NOTA:
Para remover e! cepitlo de combinaci6n,
presione el bot6n liberador y sep_relo.
3. Coloque el accesorio deseado sabre el
tube. Consultela CUADRO DE use DE LOS
__--
_lL_'_
para
NOTA:
Para remover el cepil!o de p_soy/o el
cepillo para pelo de mascotas,presionee!
bot6n ]Tberadordel accesorioy sep6relo.
comb_naci6n
14
CEPILLO PARA COMBINACi(3N
HERRAMIENTAPARA HENDIDURA5
El cepillo de combinaci6n tiene dos
accesorios, el cepil[o para polvo y el cepiffo
para pelo de animales, estos se utilizan en
diferentes superficies, ver TABLA DE
ACCESORIOS (p_g 15).
Conecte |a herram[enta para hendiduras al
mango como se muestra.
Para remover et
cepillo para polvo o
el cepi[Io para pelo
de animales,
presJone la leng[3eta
y desprenda
e!
cepillo
Para conectarJo_
Lang0eta_,\
_
inserte la [engLieta
superior en la
para polvo o el
cepiJlo para pelo
ranura
del cepillo
de animales,
presione hasta que
este quede fijo.
Ranura-._
_'___
_1_
CUADRO DEUSO DE LOSACCESORIOS
Area
Mu_bIo,
t J
ACCESORIO
£n_rot
=ojlne=
Cortln=_
!
de Limpieza
E=cdones
_iso$
P[t0_.
descublerto=
alf0mEm_o_!
Alfombras
Palettes
Cepillopara sacudir
Cepillo
para anirnales
2
_
Herr=mienta
parahendicluras
Cepil]o pare piSos
V'
I/
t!
It
m
_
_
Powo M=,o
Pet PowerMate
4
I/
v3
v
v
If
v
v
1. Siempre fimpie los accesoriosantes de usar sobre telas.
2. Use e[ cepTIIo para pelo de animales para remover los cabellos de superficies c[elicadast
como Io son tapicerias y cortinas. NO se utilice en anima[es
3. El interruptor de 3 pos[cionesdebe estar en la posTci6nFLOOR(PISO).
4. La Handi-Mate Jr.® y la Pet PowerMate incluyen suspropias instruccionespara use de
accesorios.
15
[]
S
J
ALMACENAJE DEL
PET POWERMATE Y ACCESORIOS
PET POWERMATE
CEPILLOPARA PISOSY CEPILLO
PARAANIMALES
Est_ aspiradora
esta equipada
con
almac_n a bordo para el accesorio
PowerMate.
Pet
Est_ aspiradora esta equipada con
almac_n a bordo para accesor|os.
Para almacenar:
I. Abra la cubierta
PowerMate.
de almacena_e
Para almacenar:
I. Abra ]a cubierta
accesorios.
del Pet
2, Inserte el Pet PowerMatet presi6nelo en
su lugar hacia abajo,
de almacenaje
de]
2. Cotoque el cepillo para pisos y e[ cepillo
para animales0 presi6nelo en su lugar hacia
abajo,
3. Cierre la cubierta con seguridad.
3. Cierre la cubierta con seguridad.
Pet PowerMale
/
Cubierta
Para quitar:
1. Abra la cubierta de atmacenaje.
Para quitar:
I. Abra la cubierta de almacenaje.
2. Levante el Pet PowerMate de su lugar.
2. Levante
3. Utilfcelo como sea necesario. V_ase
ACCESORIOS (p_g 13-14) y CUADRO DE
USO DE LOS ACCESORIOS (p_g 15).
los accesorios
de su ]ugaro
3. Utiffcelo como sea necesario. V_ase
ACCESORIOS (p_cj 13-M) y CUADRO DE
USO DE LOS ACCESORIOS (p_g 15).
16
[
CARACTERiSTICAS
DE RENDIMIENTO
iii
INDICADOR DE CHECKBAG
_ADVERTENCIA
Pe|igro de lesiones personaJes
Apagu6 y clesconectesiempre ta aspiradora
antes de limpiar las 6teas de la agffador
pues,_stespodfien arrancar de manera
imprevista. El no hacerlo, podfia resuItar en
lesionespersonales.
PROTECTOR
CONTRASOBRECARGAS
La PowerMate cuenta con proteccf6n
incorporada contra
dafio del motor y la
Bot6nde
correa en caso de
atascamiento del
agitador. Si el
agitador funciona
m6s despacio o se
atasca, el bot6n de
BELTRESETse activa.
El motor del
receptc_culocontinuar6 funcionando.
Cuando la asplraclora est6 funcionando conel
flujo normal de aire, el indicador de CHECK
BAG estd apagado. Se enciende la tuz
cuando la bolsa esta IJena, el flujo de airs
est_ obstruido, o si hay una obstruccion. Si
esto sucede, revise la bolsa para polvo, el
filtro de la seguridad del motor y otros tugares
posiblespor
residuosde
Indicatorde
basura. V_ase
CHECKBAG--,.
QUITAR DE LOS
RESIDUOS DE
BASURA EN LOS
CONDUCTOS
(pagina 18).
Para €orregir el problema: V_ase el diagrama
RECONOCIMIENTO DE PROBLEMAS(pagina
25).
Nora= Esposible que la luz encienda al usar
los accesorios porque el flujo de aire es
reducido pot los accesorios. Cuando se
utiliza el baja potencia la luz de| indicador
puede que no funcione.
Para corregir el problema: Apagu_ y
desconect_ ta aspiradora, ffmpie la
obstrucci6n,y despu_spresione el bot6n de
BELTRESET(protector clesobrecarga).
Si el probiema persiste, busque un t_cnico
calificacto que haga el servicio de la
asplradora.
PROTECTOR
TERMAL
Esta aspiradora tiene un protector termal
que se ajusta automdticamente para
proteger a Ja aspiradora clel sobrecalentamiento. Si una obstrucci6n imp|de el
flujo normal de aire al motor, el protector
termal apaga el motor outom6ticamente
para permifir clue ei motor se enfrre a fin
de evitor posibles dafios a la aspiradora.
Para corregir el problema: Apagu_ y
desconect_ Ia aspiradora para permifir que
la aspiradora se enfrfe y que el protector
termal se reajuste. Busque y saque los
obslrucciones, sl es necesarlo. Examine
tambi_n y reempiaceiiimpie cualquler filtro
obstruido. V_ase QUITAR DE LOS
RESIDUOS DE BASURA EN LOS
CONDUCTOS (p_g 18). Espere
aproximaclamenle treinta (30) minutes y
enchufe la aspiradora y volt_ela para
checar si el protector termal se ha
reajustado.
17
I
QUITAR DELOSRESIDUOSDE BASURAEN LOSCONDUCTOS
La aspiradora crea succi6n o aspiraci6n que levanta
la tierra. La tierra es impulsada a trav6s de las vias /'/" _.
de flujo aire hasta la bolsa por una r6pida
///,f_'_,
corriente de aire. La bolsa para polvo permite el /'_,/"
flujo de aires pero atrapa la tierra.
__.///
Para Iograr los mejores resultados de
/_
limpieza0 mantenga abiertas las vias de ,_o_
aire. Examine peri6dicamente las 6reas /o_/
indicadas con asteriscos(_) para
/_j/
asegurarse de que no est6n
_'/_'_
bioqueadas. Apagu6 y desconectef'//
de] recept_cu[o antes de _==,._*j_"
rev!sario.
Fiitro
de
seguridad
Filtro
de
_j_
PARA CHECAR OBSTRUCCIONES:
Si la aspiradora aun fiene una baja succion,
haga Io siguiente.
Checar la bolsa de polvo y cambiar al
estar ffena. Ver CAMBIO DE BOLSA (pbg
I. Conecte la maguera a la aspiradora y
enciendaia. Cheque el final de la
manguera para la succion.Si hay buena
succion en el mango de la manguera, no
hay obstrucclon en la manguera. Si la
succlon es mala, remueva cualquier
suciedad u objeto en la maguera y
mango.
20).
Checar fiitro de seguridad dee motor y el
filtro de escape y cambielo si esta sucio.
Ver CAMBIO DE FILTRO DE SEGURIDAD
(pbg 21) y CAMBIO DE FILTRO DE
ESCAPE (pbg 22).
Checar Power Mate sobre cualquier
suciedad u obstruccion en el area de la
banda o el area del agitador.
Cuidadosamente remueva cualquier
obstruccion u objeto Iocatizados en el
agitador o sus tapas. Ver LIMPIEZA DEL
AGITADOR (pbg 24).
2. Conecte la manguera al tubo telescopico.
Cheque el final del tubo telescopico para
ia succion, Si hay buena succion a] final,
significa que no hay obstruction en el
tubo telescopico. Si la succion es mala,
remover cualquier suciedad u objeto en el
tubo telescopico.
3. Revisar el conducto de succlon del Power
Mate. Remover cualquier suciedad u
objeto.
LIMPIEZADEL EXTERIORY DE LOSACCESORIOS
1. Apagu6 y desconecte el cord6n el6ctrico de
la clavija de la pared. NO rocle agua sobre la
aspiradora.
CUIDADO
No use los accesoriossi est6n mojados. Los
accesoriosque se utUicenen 6teas sucias,
debajo del refrlgerador, no deben usarseen
otras superficiessin antes ser lavados.
Podrlan dejar marcas.
2. Para limpiar el exterior o reducir la
electricidad est6tica y acumulaci6n de
polvo, limpte la superficie exterior de [a
aspiradora y los accesorios. Use un trapo
suave y limpio, m6jelo en una soluci6n de
agua y detergente ffquido_ y expr[malo
seco. S6quela despu6s de limpiar.
18
I
CAMBIO DE LA BOLSA
La bolsa debe cambiarse seguido para Iograr los mejores resultadosde limpieza. El Indloador
CHECK BAG (indicador electr6nico de la bolsa) prendera ouando esta necesite set cambiada o
cuando el fluido de aire este bloqueado.
NOTA: Use el reemplazo de EaBOLSA DE POLVO Estilo C, ver en detaUe el n0mero de parte
en CAMBIO DE PARTES(P6g 6).
REMOVIENDO LA BOLSA DE
POLVO
REEMPLAZANDO LA BOLSA DE
PO LVO
1. Apagu_ y desconect_[a aspiradora.
NOTA: NO doble nl pliegue el centro del
cart6n al instalar la bolsa en las ranuras del
montaje de la bolsa.
2. Quite [a manguera de Eaaspiradora. (Ver
ENSAMBLE, p_g 7).
1. Verifique que la aspiradora este
desconectada.
3. Tire del pestillo de la tapa hacia fuera y
hacia arriba.
2. Gire hacTaabajo
el soporte para la
bolsa roja y para
insertar_a bolsa en
las ranuras empuje
hacia abajo hasta
que Jas[eng_Jetasde
cart6n encierren
seguramenteen [as posic[onesapropiadas
como seve en el diagrama.
4. Levante la tapa de] recept6culo.
3. Empuje la bolsa osegur6ndola dentro de la
cav)dad para evitar que sea trabada por ]a
tapa de Jaaspiradora.
4. Baje la cubierta del recept6culo y cierre el
pestillo.
5. fntroduzca la manguera en el reoept6culo
hasta que quede flja en posici6n (Ver
ENSAMBLE_p_g 7)°
CUI DADO
5. Soque lo bo[sa del montaje rojo.
NUNCA VACII_ Y REUTILICE UNA
BOLSA PARA POLVO. Los materiales
mw finos, tales como desodorantes
para alfombras, talco facial, polvo
fino, yeso, holl|n, pelusa de
a|fombras nuevas, etc., pueden
atascar |a bolsa y causar que se
rompa antes de que est6 |lena y
puede clafiar el motor de la
aspiradora. Camble ta bolsa m6s
seguido cuando aspire este tipo de
materiales.
NOTA: Revisey
cambie el filtro de
segurldad del motor,
cuando sea necesario.
{Ver CAMBIO DEL
FtLTRO DE
SEGURIDAD DEL
_--,
MOTOR, p_lg 20).
NOTA: El montaje rojo de Io bolsa se inclinar6
hacia adelante clespu_sde que retire la bolsa.
Estoimpedira que la tapa se cierre antes de
lnstalar una bolsa nueva.
• 19
CAMBIO DELFILTRODESEGURIDADDELMOTOR
Estefl]tro se tiene cluecambiar cuando est6 sucio. Debe cambTarse peri6dicamente seg0n las
condicionesde uso, El filtro no se puede lavar pues perderia su capacldad para atrapar polvo.
NOTA: Use el reemplazo de] filtro de seguddad det motor ESTILO CF-1, ver en detalle el
n6mero de parte en CAMBfO DE PARTE$(P6g 6),
_k
3. Reempiace el
filtro, instale la
superficie blanca de
el [ado de la bolsa
de polvo deslizando
este en las costiltas
de la cavidad, Meta
el filtro para que
quepa pot completo
debajo del
dispositivode
retenci6n de goma.
ADVERTENCIA
Peligro de cboque el6ctrico
Apagu6 y desconect6 la aspiraciora, No
opere la asplradora sin el filtro de seguridad
del motor. Aseg6urese de que el filtro esl6
se¢o e instalado adecuadamente para
impedir que el motor falle y/o que se proetuzca un choque el6ctrico,
1. Para quitar Ia
bolsa, siga las
instruccionesen
CAMBIO DE LA
BOLSA (p_cj 19).
4. V6ase CAMBIO DE LA BOLSA (p6g 19)
para cambiar la boisa,
2. Levante el dispositivo de retenci6n de
goma y saque el fittro de seguddad
como se ve en e]
diagrama.
2O
CAMBIO DELFILTRODE ESCAPE
Este cartucho del filtro de escape debe ser reemp[azado regularmente. Cambie el flltro cuando
e| 6rea superficial est_ cubierta par completo. El filtro no se puede ]avar pues perdeHa su
capacidad para atrapar po|vo.
NOTA: Use e[ reemplazo del fihro de escape ESTILO EF-t, ver en detalie el nOmero de parte
en CAMBIO DE PARTES(P6g 6).
3. Reernplace el
cartucho del filtro
Peligra de fuega o choque el6ctrico
i No opere con un filtro de escape bloqueado
o sin el filtro de escape instalados. No
opere sin ]a cublerta del filtro de escape
instalada,
i/
,,,,,,,,,,L
i
1, Jale y baje la
cubierta de] filtro de
escape para quitarla
de la aspiradora y
coI6quela a un lada.
de
escape
del escape. Coloque
el filtro nuevo en/a
aspiradora con el
lado de esponja en
direcci6n a |a
aspiradora.
2. Jale el filtro de
escape hacia
arriba y hacia
fuera de la parte
posterior de la
aspiradora.
4. Monte la
cublerta del filtro
de escape
colocando las dos
tencjLietas en la
cubierta del filtro
en fas ranuras de
la aspiradora y
gire en su lugar
basra que cierre
completamente.
Siempre deber6n seguirsetodas las precaucionesde seguridad antes de efectuar el
mantenimiento a la PowerMate.
_kADVERTENCIA
Peligro de choque el_ctrlco o lesi6n
corporal
Apagu_ y desconect_ la aspiradora
antes de efectuar el mantenimiento
a su
aspiradora. De io contrario podrfa
produclrse un choque el6ctrlco o causar
lesi6n corporal si la aspiradora arranca
de manera imprevlsta.
CAMBIO DELA CORREAY LIMPIEZADELAGITADOR
PARARETIRARLA CORREA
1. Apagu_
5. Para quitar la
cubierta, agarre los
lados y tire afuera.
y desconect6 la aspiradora.
2. Co[oquela PowerMate con la parte
inferior hacia arriba.
3. Quite los dos (2)
tornillos en la cubierta de
la PowerMate.
6. Levante la
unidad del
agitador y
quite la correa
gastada.
4. Coloque la
PowerMate en la
posici6n vertical
Apriete el pedal
del mango de
liberaci6n y baje
la articulaci6n
giratoria.
Levante
tos pestillos
traseros
extremo
Pesfi|los
Pesfillos
laterales
tzaseros
Z Examine y limpie las 6teas de tapa del
extremo.
En la ENSAMBLE DEL
AGITADOR (pbg 23) se proporciona una
ilustraci6n de todo el ensamble del
agitador.
22
LIMPIEZADELAGITADOR
PARARETIRARLA CORREA
NOTA: Para rnantener una alta eficiencia
de ffmpieza y evitar dafios a la aspiradora, hay que limpiar el agitador coda vez
que se cambia ia correa.
NOTA: Use el reemplazo de la correa
ESTILO CB-3, ver en detalle el n0mero de
parte en CAMBIO DE PARTES(P6cj 6).
1. Instale una
correa nueva
Tambi_n hay que limpiar el agitador
segOn el sicjuiente calendarto:
El use de la
aspiradora
Limpie el
agitador
Frecuente
cada
(usada
-
_
impulsordel
sobre la ruta de
la correa,
2. Coloque otra
vez la unidad
del agitador en
la PowerMate.
cada mes
IMPORTANTE
poslcion.
la aspiradora. Exael agitador y las
mismo en la
todo cabello, hTIoy
4. Alinee la porte
frontal de [a cubierta con la base.
Coloque la cubierta sobre el horde
delantero de la base come se muestra.
Retire todo indicia de basura o suciedad
de la ruta de [a correa y del rodi]lo del
agitador.
Con cuidado
saque los tapas
y quite e[ hilo o
los testes
ubicados en el
agitador.
Cublerta
ENSAMBLE DEL AGITADOR
Ruta de
- Tapa
Extreme
3. Verificar que la
tapa del agitador
este presionada
firmemente en su
Ligere coda 2 meses
(usada 1 vez per semana)
Apagu6 y desconect6
mine ffecuentemente
6teas de soporte clel
PowerMate y etimine
pelusa acumulada.
r
semana
dTariamente)
Moderado (usada 2 o 3 veces
per semana)
r
del
la €orrea
extreme
Pestillos
lalerales
Unidad
de]
PestTffos
traseros
5. Gire la
cubierta hacJa
atr6s. Apriete
con poca
hasta que los
pestiHos
y traseras
encierren
seguramente.
extremo
cepii|o
Cerci6rese que no hay espacio entre [a
cubierta y la base.
6. Coloque la PowerMate con la porte
inferior hacia arriba e inserte los dos (2)
tornitlos en la cubierta.
23
....................................
.........'...........• ....................................................
_-
.........
'
................ _....................
" _ i ........ : ....... : ...........
CAMBIO DE LA BOMBILLA
I
2. Quite la
bombifJa vieja del
portal_mparas
jalando derecho
hacia fuera.
ADVERTENCIA
Peligro de choque el_ctrico o lesi6n cor.
:poral
Apagu_ y desconecte la unldad antes de
llmpiarla o darle servlcio. De Io
€ontrarlo podHa producirse un choque
el_ctrico o causar lesi6n corporal si la
aspiradora arranca de manera
imprevista.
4_
la bomb|lla
cuidadosarnente
ins_rtela del
portaicimparas
3. Para
reemplazar
en
la ranura.
CUIDADO
No conecte o encende la aspiradora antes
de armada €ompletamente.
III
ii
i
I
CUIDADO
NOTA: Use el reemptazo de la bombitla
numero 20-3248, ver en detalle eJ n0mero
de parte en CAMBIO DE PARTES(P6g 6).
cerca.
I. Quite Jacubierta de Ja PowerMate como
se describe en fa secci6n CAMBIO DE LA
CORREAY LIMPIEZA DELAGITADOR (p_g
22-23).
CUIDADO
4. Reinstale la cubTerta de la PowerMate
corno se describe en la secc_6n CAMBIO
DE LA CORREA Y LIMPIEZA DEL
AGITADOR (p_g 22-23).
DEL AGITADOR
4_IkADVERTENCIA
PARAREVISARLOSCEPILLOS
Peligro de cheque el_ctrico o lesi6n
corporal
Cuando los cepillos est_n gastados al nivel de
las barras de soporte en Ja baset cambie el
agitador completo.
Desconecte la corriente antes de
efectuar el mantenimlento a su
aspiradora.
De Io contrario podrla
producirse un cheque el_ctrico o causar
lesi6n corporal si la aspiradora arranca
de manera imprevlsta.
Cepff_os Nuevos
I
No use una bombilta de m6s de 9W (13V).J
Cuando se use la asplradora por un largo I
per|odo de tiempo, el calor de la bombilla !
puede calentar las partes de plastico
!
PARACAMBIARELAGITADOR
1. Retire Ia cubierta, correa y ensamble del
agitador de la PowerMate Consulte"Para
retirar Ia correa" bajo CAMBIO DE LA
CORREAY LIMPIEZA DELAGITADOR (P6g
22-23}.
Cep_llos Desgastado
2. Reemplace el agltador. Ver pot separado
su llsta de partes de reparaclon para el
numero de parte
3. Jnstalela correa, y la cub_ertade la
PowerMate. Consulte"Para cambiar [a
correa" bajo CAMBIO DE LACORREAY
UMPIEZA DEL AGITADOR (p_=g22-23).
BQrYa de
soporte
de la base
24.
i
Revise
este
recuadro
para encontrar solucionesa problemas qua puede corregir usted mismo.
Cuaiquier otto serviciodebeser realizado per SEARSu otto agente de servic|o ¢alificado.
La aspffadorano erranra.
1. Est6desconectada,
i, Conectebien, presieneeI bct6n
ON/OFF.
Cottacircuffos
botado o fusible
ctuemado en eI tabIero
de la residencia.
Conextones d_ctricas
manguero
No aspffa
satisfacfor]amente,
de serVIcto
3. Vuelva o conectarlos extremesde
[a manguera. {p_g 7)
de la
sueltos.
I. Balsa para polvo Ilena• atascacia.
2, V_as de fiujo de aire atascadas.
3. Flitros sucios,
4. Ajus_e incorrecta
2. Restabiezeae] cortadrcuitoso
camble el fusible.
de nival de
polo de [a alfombra.
Incorrecta selecci6n de hive] de poder
5,
6, Manguera rota.
7, Ag[lador de la PowerMate
1. Cambie Ia balsa, Ip_9 19)
2. Limplelos v_asde flu|o de afro.
(page 18)
3. Cambte IQsflltros, (p69 20-21)
4. Ajusteef ntvel,(Pa9 12)
5. Ajusteel control.(p_.g10)
6. Cambie la monguera,
7. Camble [a acjftador.(p_g 22-2-5)
desgastadas.
8. Correa desgastada o rata,
9. Acjitador o tapas de Josextremes
sucJos,
10, P_oFector contra sobrecarcjas
PowerMafe
La aspiradoraarranca,
perase apaga,
de _a
botada,
1. Conexionesel_ctrlcasde [a manguera
o de la tapa.
2, Proteclor contra sobrecargas
PowerMme botado,
de la
3. Protector termal bctado
en el receptctcuIo,
La PowerMQteno funciona
cuandoest_ instalacla.
1, Conexienesde la PowerMate
desconectadas.
2. Correa desgastadao rata.
3. Agitador o tapasde extremesde
_ste sucios,
4. Protectorcontra sobrecarcjas
de [a
PowerMatebatado.
5, El switchno esto en ]a posleZ6n
CARPET(alfambra).
25
i 8 & 9, ConsulteCAMBIO DE LACORREAY
LIMPIEZADELAGITADOP_
(pctg22-23)
10, Retire¢ualquieroh]eta atorado a
atmcado, Iuego restablezca. Sila
asplradoraarranca parese vuetvea
apagar, limple eI agitador y Iestopos
de1extremesde _ste, [uega
restablezca. {p_g 17,24)
1. Examinelas cenexionesel_ctricczs_
vuelvaa conectar los extremos
de [a manguera. (p_g
2, Retirecuala,uferobj_to atomdo o
atascada,[uegorestabIezca. Slla
aspiradoraarranca pete sevuelvea
apacjor_llmpieel acjitador¥ lostapas
deIexl/emosde _ste, Iuego
restablezca. [p_cj17)
3, ConsuIteCARACTEEJSTICAS
DE
EENDIMtENTO- "Protector Terrnal."
(p_9 17)
1, Conectebien,
........................
2&3, Consu]teCAMBIO DE LA CORREAY
LIMPIEZADELAGITAOOR.
(p_g22-23)
4, RetirecuaIquterobjeto atorodo o
Qtascado_luegorestablezca. S__o
aspiradoraarranea pero sevueivea
apagar, ]lmplee| acjltador y lostopos
del extremesde _ste, ]ue9o
restab[ezca. (p_g 18, 25)
5, Mover el switcha la posici6n
CARPET(alfombra). (p_g ]1)
El indicador
de CHECK
BAG (indicator
electr6nice
de la bo_a)
enciende.
1. Bolsa para polvo [lena o atascada
2. F[Itrossucios.
3. V{as de f|u._ode aJre crtascodas.
1. Cambie ta bolsa. (p_g 19)
2. CambTe los filtros. (PFJ9 20)
3, Desbloquee
Icesv{os de flujo de
4.
4,
Ciertos
accesorios.
aire. {p_g 19}
Esto es normal.
set normal
El indicador
cuando
est6 quitada.
La asplrodora
[evanta
tapetes o es d_ffci]
empu_or la PowerMate.
1. Ajuste incorrecto de nivel de
pe!o de la affornbra.
2, Aspiraci6n
demasiado
potente.
I,
Ajuste el hive[, (p_q 19)
2. Seleccionor
n_vel de poder
baje. (p_g10)
El cord6n
no se enrolla.
La aspiradora
marcas
deja
1. Cord6n
2. Cord6n
eJ6ctrico suc[o.
atascaclo,
1. Estilo de limp_eza
incorrecta.
en la affombra.
1. iimp]e
el cord6n el_¢tr]€o,
2. T_re del corcl6n y despu_s
enr6[le]o. (p,_g 9)
1. Consulte
ASPIRAR.
Linea de ayuda de aspiradoras:
1-877-531-7321
8:00am-5:00pm
EST,M-F
(U.S.A. and Canada)
26
5UGERENC|A$
(p_g 9)
debe
_a herramienta
PARA
Acuerdos Maestros de Protecci6n
Enh0rabuena
fabricado
pueden
per hater
pare
prec|sar
Maestro
Maestro
cont]nuoci6n
preventive
de Protecci6n
de Protecci6n
indicames
inteligente.
Su nuevo
a_,os de funcienamiento
un mantenimlento
tenor un Acuerdo
El Acuerdo
una cempra
ofrecerle
o alguna
puede
tombi_n
Kenmore@
Pore al |gual
reparaci6n
ahorrarle
le ayuda
In que el Acuerdo*
producte
€onfiabIe.
est6 diseEado
que redes
y
los productos
de vez en cuando.
Per este motlvo,
d]nere e inconvenientes.
a prolongar
la vlda _til de su nuevo
proc[ucto, A
incluye:
[_
Partes y mann de obra necesarios pare ayudar a que esfos pmductos fruncionencorrectamente
bale eondlc|onales normales de use, no slmplemente def'ectos. Nuestra cobertura va touche m6s
a|l_ de la garantia del producto. Ning0n deducible, ninguna averla funcional queda excluida de
la €obertura- protecci6n real.
[_
Servicio experta ofrecido per una lista de m6s de 10.000 t&cnlcosautorizades del servicio t6cnicn
de 5ears. Io que significa que algulen en quTen usted puede €onfiar estar6 trabajando en su
produdo.
[_
NGmero illmitado de Ilamadas al servicie t_cnico y servicio en toda la naci6n, tan continue coma
usted nos Io solicite, sin _mportar donde est,.
[_
Garantla sofia de sustltuci6n del producte. La sustituci6n de su producto cubierta sl se producen
cuatro o m6s aver_as en dace moses.
[_
Sustltuci6n de! producto per otto nueve si su producto cublerto no puede repararse.
1_
Revlsi6n y mantenimlento
[_
Ayuda r_plda per tel6fone - Nosotros Io Ilamames ResoIuc|6n r_plda. Soporte telef6nico de un
representante de Sears en lodes los productos. Piense en nos0tros come un "manual del usuar|o
parlante".
[_
Protecci6n centre sub!dos de tensi6n que provoquen defies el_ctrices causados per los
fiuctuaclones de la €orriente.
anuaI proven|ire slempre que 1odesee y sin cargo algano.
$250 de pretecci6n contra la p6rd_da de alimentos anualmente en case de que se estropee a|g_n
alimento €ome resultado de una averse mec6nlca de cualquier cangelador o refrigerador
cub!otto.
[_
Reembolso del alquiler si la reparaci6n de su producto cubie_'to tomczm6s t_empo del pramefida.
10% de descuento en el precio regular de cualquier serviclo €[ereparaci6n no cublerto y de los
piezas instaladas relacionadas.
Una vez que compre
un scrvlcio.
linen,
El Acuerdo
durante
el Acuerdo,
Puede Ilamar
maestro
el periodo
prorrateado
s6lo bastarci una
a cue!quiet
de protecci6n
de garanffa
despu6s
hera
es una €ompra
del proclucto,
de| peHodo
simple
Ilamada
telof6nica
de[ di'a o de !¢J noche, e concertar
fibre de rlesgos,
|e devoIveremos
de vencimiento
una
que pueda
iCompre
programar
clta de servicio
S| pot cualquier
rode e! dinero.
de la gorantia,
pare
raz6n
on
concela
O, un reembolso
su Acuerdo
maestro
hey!
Aplican algunas |imitaciones ¥ exclusiones. Para precios y m6s informaci6n en EE.UU., Ilame al 1-800827-6655.
'_ La cobertura
Caned6
Servlcio
en Caned6
varla
en alclunos
artlculos.
Pare
obtener
fades !as detaIIes_
|lame
a Sears
1-800-361-6665.
de instalaci6n
Pare la instaIaci6n
garajes,
calentadores
1-800-4-MY-HOME®.
de
profeslonai
de ague
Sears
per parte
de Sears de electr0dom_sficos_
V arras arffculos
principales
27
pare
el begat,
abr]dores
en EE.UU.
de puertas
o Caned6
cle
ilame
al
Your Home
For troubleshooting,
product manuals and expert advice:
managemylife
www.managemylife.com
For repair - in your home - of all major brand appliances,
lawn and garden equipment, or heating and cooling systems,
no matter who made it, no matter who sold it!
For the replacement parts, accessories and
owner's manuals that you need to do-it-yourself.
For Sears professional installation of home appliances
and items like garage door openers and water heaters.
1-800-4-MY-HOME®
(1-800-469-4663)
www,sears, com
Call anytime, day or night
(U.S,A. and Canada)
www.sears.ca
Our Home
For repair of carry-in items like vacuums, lawn equipment,
and electronics, call anytime for the location of the nearest
Sears Parts & Repair Service Center
1-800-488-1222
(U.S.A.)
www.sears.com
1-800-469-4663
(Canada)
www.sears.ca
To purchase a protection agreement on a product serviced by Sears:
1-800-827-6655
(u.s._.)
Para pedir servicio de reparaci6n
a domicilio, y para ordenar piezas:
1-888-SU-HOGAR®
11800-361-6665
(Canada)
Au Canada pour service en frane.,ais:
1.800.LE.FOYER _c
(1-800633-6937)
www.sears.ca
® Registered
Trademark
/
TM
Trademark
of KCD IP, LLC in the United States,
or Sears Brands, LLC in other countries
® Marca Registrada / TM Ma_ea de F&brica de KCD IP, LLC en Estados Unidos, o Sears Brands, LLC in otms parses.
Marque de commerce /
Marque d6pos6e de Sears Brands, LLC