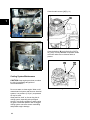
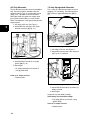
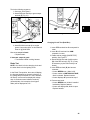
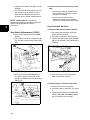
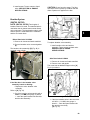
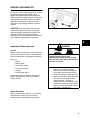
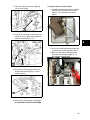
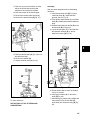
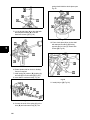
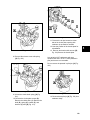
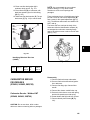
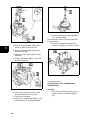
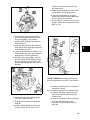
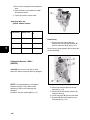
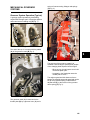
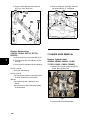
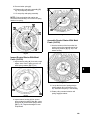
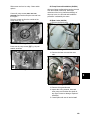
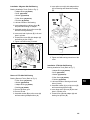
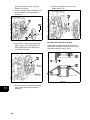
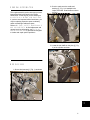
1
272147 Vanguard Single Cylinder
4/27/07
1:03 PM
Page 1
272147 - Vanguard Single Cylinder OHV Air-Cooled Engines
272144 - Vanguard Twin Cylinder OHV Air-Cooled Engines
275429 - Vanguard Twin Cylinder OHV Liquid-Cooled Engines
MS-0750 - Vanguard 3-Cylinder OHV Liquid-Cooled Gasoline Engines
MS-1055 - Vanguard 3-Cylinder OHV Liquid-Cooled Diesel Engines
BRIGGS&STRATTON
CORPORATION
Part No. 272147-1/07
POST OFFICE BOX 702
MILWAUKEE, WI 53201 USA
BRIGGSandSTRATTON.COM
©2007 Briggs & Stratton Corporation
VANGUARD™ SINGLE CYLINDER OHV AIR-COOLED ENGINES
Quality Starts With A
Master Service Technician
Briggs & Stratton
Other Briggs & Stratton
Commercial Power Repair Manuals:
1/07
™
Vanguard Single Cylinder
OHV Air-Cooled Engines
SECTION 1- Safety, Maintenance & Adjustments
SECTION 2 -Troubleshooting
SECTION 3 - Engine Disassembly
SECTION 4 - Exhaust Systems
SECTION 5 - Fuel Systems & Carburetion
SECTION 6 - Governor Systems
SECTION 7- Cylinder Heads & Valves
SECTION 8 - Starters
SECTION 9 - Lubrication Systems
SECTION 10 - Cylinders, Covers & Sumps
SECTION 11 - Crankshafts, Camshafts, Balancing Systems &
Gear Reductions
SECTION 12 - Pistons, Rings & Connecting Rods
SECTION 13 - Final Engine Assembly
SECTION 14 - Engine Specifications & Reference Tables
1
2
3
4
5
6
7
8
9
10
11
12
13
14
FORWARD
This guide has been written and published by Briggs & Stratton Corporation to aid our dealers' mechanics
and company service personnel when servicing the products described herein.
It is assumed that these personnel are familiar with the servicing procedures for these products, or like or
similar products, manufactured by Briggs & Stratton Corporation. It is also assumed that they have been
trained in the recommended servicing proce dures for these products, which includes the use of mecha nics
hand tools and any special tools that might be required.
Proper service and repair is important to the safe, econo mical and reliable operation of all engines and
engine driven systems. The troubleshooting, testing, service and repair procedures described in this guide
are effective methods of performing such operations.
We could not possibly know of and advise the service trade of all conceivable procedures or methods by
which a service might be performed, nor of every possible hazards and/or results of each procedure or
method. We have not undertaken any such wide evaluation. Therefore, anyone who uses a procedure or
method not described by the manufacturer must first satisfy himself that neither his safety, nor the safety of
the product, will be endangered by the service or operating procedure selected.
All information, illustrations, and specifications contained in this guide are based on the latest production
information available at the time of publication. However, Briggs & Stratton Corporation reserves the right
to change, alter, or otherwise improve the product at any time without prior notice.
Some compone nts or assemblies of the product described in this guide may not be considered repairable.
Disassembly, repair and reassembly of such components may not be included in this guide.
Copyright © 2008 Briggs & Stratton Corporation
All rights reserved.
No part of this material may be reproduce d or transmitted, in any form or by any means, electronic or
mechanical, including photocopying, recording or by any information storage and retrieval system, without
prior permission in writing from Briggs & Stratto n Corporation.
SECTION 1 - SAFETY, MAINTENANCE AND ADJUSTMENTS
ENGINE SAFETY ................................................................................. 5
In The I nterest Of Safety
..................................................... 5
The Safety Alert Symbol ....................................................................... 5
Additional Precautions.......................................................................... 8
1
BRIGGS & STRATTON NUMERICAL IDENTIFICATION SYSTEM..... 9
ENGINE MAINTENANCE................................................................... 10
Fuel and Oil Recommendations.......................................................... 10
Changing Oil....................................................................................... 11
MAINTENANCE SCHEDULE ............................................................. 12
Air Cleaner Service. ............................................................................ 13
In-Line Fuel Filter Service ................................................................... 15
ENGINE ADJUSTMENTS .................................................................. 15
Armature Air Gap Adjustments ........................................................... 15
Carburetor Idle-Mixture Adjustments .................................................. 15
Control Adjustments ........................................................................... 16
Cooling System Maintenance ............................................................. 18
Flywheel Brake Adjustments (104700) ............................................... 19
Governor Adjustments ........................................................................ 19
Electro-Magnetic Idle Down Adjustments ........................................... 25
Spark Plug Maintenance..................................................................... 26
Valve Clearance Adjustments............................................................. 26
Combustion Chamber Deposits ......................................................... 27
3
1
4
ENGINE SAFETY
In The Interest Of Safety
This repair manual contains safety information
that is designed to:
• Make you aware of hazards associated
with engines.
• Inform you of the risk of injury associated
with those hazards.
• Tell you how to avoid or reduce the risk
of injury.
WARNING
• attempting to service this
Before
equipment, read and understand this
manual and the operating instructions of
the equipment it powers.
Failure to FOLLOW instructions could result in
DEATH, SERIOUS INJURY (including
paralysis) or property damage.
The Safety Alert Symbol
The safety alert symbol ( ) is used to identify
safety information about hazards that can result
in personal injury.
A signal word (DANGER , WARNING, or CAUTION)
is used with the alert symbol to indicate the
likelihood and the potential severity of injury. In
addition, a hazard symbol may be used to
represent the type of hazard.
DANGER indicates a hazard which, if
not avoided, will result in death or
serious injury.
WARNING indicates a hazard which, if
not avoided, could result in death or
serious injury.
CAUTION indicates a hazard which, if
not avoided, might result in minor or
moderate injury.
CAUTION: When this signal word is used
without the alert symbol, it indicates a situation
that could result in damage to the engine.
WARNING
Briggs & Stratton does not approve or
authorize the use of these engines on 3wheel All Terrain Vehicles (ATV’s),
motorbikes, fun/recreational ve hicles for
use in competitive events. Use of these
engines is such applications could result in
property damage, serious injury (including
paralysis), or even death.
• Prior to work, read and understand the
section(s) of this manual that pertain to
the job. Follow all safety warnings.
• Wear suitable eye protection.
• When servicing engines or equipment,
prevent accidental starting by removing
the spark plug wire from the spark
plug(s).
• Disconnect negative battery terminal if
the application is equipped with an
electric starting system.
• Peri odically clean engine. Keep governor
parts free of dirt, grass and other debris
which can affect engine speed and
cooling.
• Always use fresh gasoline. Stale fuel can
cause gum deposits in the carburetor
and cause leakage, flow restrictions or
other failures.
• Check fuel lines and fittings frequently for
cracks or leaks and replace if necessary.
5
1
HAZARD SYMBOLS AND
MEANINGS
Explosion
Fire
Shock
1
Goggles
Kick
Back
Toxic
Fumes
Chemical
Burns
Hot
Surface
Read
Explosive
Pressure
Entanglement
Disconnect
Spark Plug
WARNING
The engine exhaust from this product
contains chemicals known to the State of
California to cause cancer, birth defects
and other reproductive harm.
6
WARNING
Gasoline and its vapors are extremely
flammable and explosive.
Fire or explosion can cause severe burns or
death.
When adding fuel:
• Turn engine OFF and let engine cool at
least 2 minutes before filling or refilling.
• Fill fuel tank outdoors or in a wellventilated area.
• Do not overfill fuel tank. Fill tank to
approximately 1-1/2 inches below top
of neck to allow for fuel expansion.
• Keep gasoline away from sparks, open
flames, pilot lights, heat and other
ignition sources.
• Check fuel lines, tank, cap and fittings
frequently for cracks or leaks and
replace if necessary.
When starting engine:
• Make sure spark plug, muffler, fuel cap
and air cleaner are in place.
• Do not crank engine with spark plug
removed.
• If fuel sp ills, wait until it evaporates
before starting engine.
• If engine floods, set choke to
OPEN/RUN position. Place throttle in
FAST and crank until engine starts.
When operating equipment:
• Do not tip engine or equipment at an
angle which would cause fuel to spill.
• Do not choke carburetor to stop
engine.
When transporting equipment:
• Transport with fuel tank empty or with
fuel shut-off valve set to OFF.
When storing gasoline or equipment with
fuel in tank:
• Store away from furnaces, sto ves,
water heaters or other appliances that
have a pilot light or other ignition
source because they can ignite
gasoline vapors.
DANGER
Running engines produce heat.
Temperature of muffler and surrounding
areas can exceed 150°F (65°C). Severe
burns can occur on contact.
•
•
•
Allow muffler, engine cylinder fins and
radiator to cool before touching.
Remove accumulated combustibles
from muffler area and cylinder area.
Install and maintain in working order a
spark arrestor before using equipment
on forest-covered, brush-covered
unimproved land. The state of
California requires this (Section 4442
of the Public Resources Code). Other
states may have similar laws. Federal
laws apply on federal land.
DANGER
Engines give off carbon mono xide, an
odorless, colorless, poison gas.
Breathing carbon monoxide can cause
nausea, fainting or death .
• Start and run engine outdoors.
• Do not start or run engine in an
enclosed area, even if doors and
windows are open.
1
DANGER
Starting engine creates sparking. Sparking
can ignite nearby flammable gases.
Explosion and fire could resu lt.
• If there is a natural or LP gas leakage
in the area, do not start engine.
• Do not use pressurized starting fluids
because vapors are flammable.
WARNING
DANGER
Unintentional sparking can result in fire or
electric shock.
Unintentional start-up can result in
entanglement, traumatic amputation or
severe lacerations.
Before performing adjustments or repairs:
• Disconnect spark plug wire and keep it
away from spark plug.
• Disconnect negative (-) battery
termin al.
When testing for spa rk:
• Use approved spark plug tester.
• Do not check for spark with spark plug
removed.
Rotating parts can contact or entangle
hands, feet, hair, clothing or accessories.
Traumatic amputation or severe lacerations
can result.
• Operate equipment with guards in
place.
• Keep hands and feet away from
rotating parts.
• Tie up long hair and remove jewelry.
• Do not wear loose-fitting clothing,
dangling drawstrings or items that
could become entangled in the
equipm ent.
7
WARNING
1
Charging batteries produces hydrogen gas.
Do not store or charge and battery near an
open flame or devices that utilize a pilot
light or can create a spark.
WARNING
Kerosene and its vapors are extremely
flammable and should be handle d with t he
same precautions as gasoline.
DANGER
Broken bones, fractures, bruises or sprains
could result.
• Remove all external equipment/engi ne
loads before starting e ngine.
• Direct-coupled equipment componen ts
such as, but not limited to blades,
impellers, pulleys and sprockets must
be securely attached.
WARNING
All fuel compo nents should be in good
condition and properly maintained.
• Repairs should only be made with
factory approved parts.
• Repair work should be done by a
qualified technician.
• Flexible supply lines should be
checked regularly to make sure they
are in good condition.
8
BRIGGS & STRATTON NUMERICAL
IDENTIFICATION SYSTEM
1
9
ENGINE MAINTENANCE
Fuel and Oil Recommendations
1
Fuel
Fuel must meet these requirements:
• Use clean, fresh unleaded gasoline.
• A minimum of 87 octane / 87 AKI (91
RON). For high altitude use, see “High
Altitude” bel ow.
• Gasoline with up to 10% ethanol
(gasohol) or up to 15% MTBE (Methyl
Tertiary Butyl Eith er) is accepta ble.
CAUTION: Do not use unapproved gasoline
minutes to circulate the stabilizer throughout the
system. The engine and fuel can then be stored
for up to 24 months.
If gasoline has not been treated with a fuel
stabilize r prior to storage, it must be draine d fr om
the engine into an approved container. Run the
engine until it stops from lack of fuel. The use of
a fuel stabilizer in the storage container is
recommended to maintain freshness.
CAUTION: Some fuel, called “oxygenated” or
“reformulated” gasoline, is gasoline blended with
alcohol or ether. Excessive amounts of these
blends can damage the fuel system or cause
performance problems. If any undesirable
operating symptoms occur, use gasoline with a
lower percentage of alcohol or ether.
such as E85. Do not mix in gasoline or modify
the engine to run on alternate fuels. This will
damage the engine components and void the
engine warranty.
To protect the fuel system from gum formation,
mix a fuel stabilizer into the gasoline see
“Storage” below. All fuel is not the same.
If starting or performance problems occur:
• Change fuel providers or change brands.
High Altitude
At altitudes over 5000 feet (1524 meters), a
minimum of 85 octane / 85 AKI (89 RON)
gasoline is acceptable. To remain emissions
compliant, high altitude adjustment is require d.
Operation without this adjustment will cau se
decreased performance, increased fuel
consumption and increased emissions.
At altitudes below 2500 feet (762 meters), high
altitude adju stment is not recommended.
Storage
Fuel can become stale when stored over 30
days. Stale fuel causes acid and gum deposits to
form in the fuel system and/or on essential
carburetor parts. To keep fuel fresh, use Briggs
& Stratton FRESH START™ (#5041) fuel
stabilizer, available as a liquid additive or a drip
concentrate cartridge.
There is no need to drain gasoline from the
engine before storage if fuel stabilizer is added
according to instructions. Run the engine for two
10
Oil
Oil has four purposes:
• It cools
• It cleans
• It seals
• It lubricates
During normal operation, small particl es of metal
from the cylinder walls, pistons, beari ngs as well
as normal combustion deposits will gradually
contaminate the oil. Dust particles from the air
also contaminate the oil. This forms an abrasive
mixture that can cause wear to the internal parts
of the engine if the oil is not changed regularly.
Fresh oil also assists in cooling. Old oil gradually
becomes thick and loses its cooling ability as
well as its lubricating qualities.
Use a high quality detergent oil classified “For
Service SF, SG, SH, SJ” or higher. Use synthetic
oil such as Briggs & Stratton (#100074) or
equivalent. If synthetic oil is not available, Brig gs
& Stratton non-synthetic 30 weight oil (#100005 or
#100028) is an acceptable substitute. Do not use
special additives with recommended oils.
Do not mix oil with gasoline.
1. Park equipment so engine is level.
2. Remove oil drain plug ([A] Fig. 2).
• Drain oil while engine is still warm.
3. Install drain plug. Torque to value listed .
SEE SECTION 14- ENGINE SPECIFICATIONS.
4. Remove oil filter ([C] Fig. 3), if equipped.
• Clean surface of filter mounting adaptor
([D] Fig. 3).
• Apply light coat of clean engine oil to new
filter gasket.
Fig. 1
CAUTION: The use of non-synthetic multiviscosity oils (5W-30, 10W-30, etc.) in
temperatures above 40°F (4°C ) will result in
higher than normal oil consumption. When usin g
a multi- viscosity oil, check oil level more
frequently. SAE 30 oil, if used below 40°F (4°C),
will result in hard starting and possible engine
bore damage due to inadequate lubrication.
NOTE : The use of synthetic oils does not alter
the oil change intervals.
Changing Oil
Change oil and filter (if equipped) after the first 58 hours. Thereafter, change oil every 100 hours
of operation.
Change oil more ofte n if engine is operated in
dirty or dusty conditions or if engine is operated
under heavy loads and/or in high ambient air
temperatures.
Fig. 3
5. Screw filter on by hand until gasket
contacts oil filter mounting adapter. Then
tighten an additional 1/2 to 3/4 turn .
6. Clean area around oil fill cap and tube ([B]
Fig. 2).
7. Fill with the correct amount of new oil.
SEE SECTION 14- ENGINE SPECIFICATIONS.
Start engine and run at idle for a minute or so.
8. Shut engine off and wait for oil to settle
back into the cylinder.
9. Check dipstick. If necessary, add more oil
slowly to brin g oil level to FULL mark ([A]
Fig. 4) on dipstick.
Fig. 4
CAUTION: Do not overfill. Overfilling can cause
seals to fail or overheating due to oil foaming.
Fig. 2
10. Replace oil fill cap and dipstick.
11. Start and run engine. Check for oil leaks.
11
1
MAINTENANCE SCHEDULE
1
W ARNING
Unintentiona l spa rking can result in fire or
electric shock.
Unin tentiona l sta rt-up can re sult in
entanglem ent, traum atic amp utation or
severe lacerations.
Before perform ing adjustme nts or repairs:
•
Disconnect spark plug(s).
•
Disconnect neg ative (-) battery cable.
•
Use only the correct tools .
12
Air Cleaner Service
CAUTION: Never operate an engine with the air
cleaner assembly or air cleaner cartri dge
removed.
A correctly serviced air cleaner protects internal
engine parts fr om airborne dir t and du st particles.
If air cleaner instructions are not followed,
particles that should be collected in the air
cleaner will pass into the engine. These particl es
are abrasive and will cause the piston rings and
cylinder bore to wear more quickly. As the rings
and bore wear, the particles enter the cylinder
and contaminate the oil. This forms an abrasive
mixture that will erode and damage internal
engine components.
Prevent dirt and dust from entering the engine
through improper sealing.
• Replace worn or damaged air cleaner
gaskets and seals.
• Replace air cleaner mounting brackets if
bent or damaged.
Remove Air Cleaner Assembly
1. Follow steps 1 through 3 listed previously.
2. Remove screws and nuts holding air
cleaner base (F) to carburetor and/or
control bracket.
3. Pull air cleaner base away from
carburetor.
4. Disconnect breather tube (G) from air
cleaner base or rocker cover.
Fig. 5
Cleaning and Replacing Air Filters
Refer to Figures 5-10 that show the air cleaner
for your engine.
1. Loosen screws or kn obs (A) holding air
cleaner cover in place and remove cover
(B).
2. Carefully clean debris from the base and
cover, then remove air filter element
retaining nut (C) (if equipped).
3. Lift off filter element (D) with the precleaner (E) (if so equipped).
4. Wash pre-cleaner in warm soapy water.
5. Rinse and dry thoroughly.
6. Saturate pre-cleaner in fresh clean engine
oil and squeeze out excess. (Do not oil
pre-cleaners labeled DO NOT OIL.)
Replace pre-cleaner if no longer
serviceable.
7. Gently tap filter element on a solid surface
to dislodge debris. Replace filter element
if very dirty or damaged.
8. Reinstall pre-cleaner, element, retaining
nut(s), cover and screws.
Fig. 6
CAUTION: Do not use pressurized air or
solvents to clean filter elements. Pressurized air
can damage elements and solvents might
dissolve filter mesh.
13
1
1
Fig. 9
Fig. 7
Fig. 8
Fig. 10
14
Install Air Cleaner Assembly
1. Connect breather tube to back side of air
cleaner base.
2. Position base (with new gasket) on
carburetor.
NOTE: Use new screws with sealant band or
place non-hardening sealant on mounting
screws.
3. Start screws into carburetor and tighten
securely.
4. Install air cleaner element and/or precleaner.
In-Line Fuel Filter Service
Replace in-line fuel filter every year or 100 hours
of operation, whichever occurs first. Replace the
filter if dirt or water are present. Refer to the
correct illustrated parts list (IPL) that applies to
your engine for the correct filter.
ENGINE ADJUSTMENTS
Armature Air Gap Adjustments
1. Rotate flywheel until magnets are away
from armature.
2. Loosen both armature mounting scr ews
(A) and pull armature away from flywheel.
3. Snug one screw.
4. Insert the proper thickness gauge ([B] Fig.
11) between armature and flywheel.
SEE SECTION 14- ENGINE SPECIFICATIONS.
5. Turn flywheel. Loosen screws and allow
the magnets to pull armature against
thickness gauge ([B] Fig. 11).
6. Tighten screws to listed values. See on
page 255.
Carburetor Idle-Mixture Adjustments
Initial Mixture Adjustmen t
Refer to the figure that shows your engine.
1. Turn the idle mixture screw ([A] Fig. 1 2) in
until you feel it just make contact with the
seat.
2. Back the idle mixture screw out 1-1/4
turns.
3. Start the engine and let run at half throttle
for 5 minutes to bring it up to operating
temperature.
Adjusting Idle Mixture RPM
Refer to the figure that shows your engine.
NOTE: Parts removed for clarity.
1. Move throttle to SLOW .
2. While holding the speed control lever (B)
against the idle speed screw, adjust the
idle speed screw (C) to obtain 1750 RPM,
except as noted for the following models:
• Model 104700: 1500 RPM
• Models 161400, 260700, 261700: 1200
RPM
Fig. 11
• Models 085400, 086400, 115400,
117400, 118400, 185400: 1300 RPM
3. Turn idle mixture screw (A) clockwise
(CW) until the engine just begins to slow.
4. Turn idle mixture screw counterclockwise
(CCW) until the engine just begins to
slow.
15
1
5. Turn idle mixture screw back to midpoint
and release the speed control lever.
6. Install limiter cap (if equipped) using
knockout pin (#19135).
1
Fig. 14
Fig. 12
NOTE: (138400) Does not have an idle
adjustment screw.
Fig. 15
7. Move speed control from SLOW to FAST.
If the engine does not accelerate smoothly:
• Adjust idle mixture screw 1/8 turn CCW.
8. Check idle RPM and readjust to
specifications, if required.
Fig. 13
Control Adjustments
Throttle Control
(050000, 085400, 086400, 115400, 117400,
118400, 138400, 185400, 235400, 245400,
28Q700)
The throttle controls on these units are
interconnected with the governor linkage system.
SEE SECTION 6- GOVERNOR SYSTEMS.
16
Throttle Control
(161400, 104700, 260700, 261700)
Refer to Figures 16 and 17 that show your
engine.
1. Loosen casing clamp screw (A).
2. Move throttle to FA ST .
3. Move casing in direction of arrow (B) until
casing stops.
4. Tighten casing clamp screw.
Fig. 16
Choke-A-Matic®
(104700, 161400, 260700, 261700,
28Q700)
Choke control cables are often provided by the
original equipment manufacturer. Please refer to
the information provided by the OEM when this
general description is not sufficient to adjust the
choke control.
1. Loosen choke con trol casing clamp screw
on engine control panel or governor
control bracket.
2. Move choke control lever or kno b to
CHOKE.
3. Move choke control casing in the direction
that completely closes the choke valve.
4. Tighten the casing clamp screw.
Choke-A-Matic® Adjustments (161400)
Refer to the figure that shows your engine.
1. Move throttle control to FAST. The end of
the choke link should contact the end of
the choke lever slot. To adjust, expand or
contract loop (A) in the choke link.
2. Move equipment control lever to CHOKE .
The choke plate must be closed. Readjust
as required.
Fig. 17
Choke Control
(050000, 085400, 086400, 115400, 117400,
118400, 138400, 185400, 235400, 245400)
The choke on these models has a separate
manual control.
Ensure that the choke valve is completely open
or closed when the con trol is moved through its
range of motion.
Fig. 18
17
1
Clean the static screen ([A] Fig. 21)
.
1
Fig. 19
Fig. 21
Clean the ducting (B) and cylinder fins ([C] Fig.
22), yearly or every 100 hours of operatio n. Clean
more often when dust or airborne debris is
present.
Fig. 20
Cooling System Maintenance
CAUTION: Keep engine parts clean to reduce
the risk of overheating and ignition of
accumulated debris.
Do not use water to clean engine. Water could
contaminate fuel system and short out electrical
systems. Low pressure (5-10 psi.) compressed
air may be used.
Grass particles, chaff, or dirt can clog the air
cooling system, especially after prolonged
service in very dusty conditions or when cutting
dry grass. Continued operation with a clogged
cooling system can cause severe overheating
and possible engine damage.
18
Fig. 22
Flywheel Brake Adjustments
(104700)
The flywhe el brake system is part of a safety
control mechanism required by some equipment
applications. When the operator releases an
equip ment control (bail) with the engine running
at the FAST selection, the flywheel brake must
stop the engine within 3 seconds.
WARNING
Unintentional sparking can result in fire or
electric shock.
Unintentional start-up can result in
entanglement, traumatic amputation or
severe lacerations.
Before performing adjustments or repairs:
• Disconnec t spark plug(s).
• Disconnect negative (-) battery cable.
• Use only the correct tools.
Using torque wrench #19393 and a socket to fit
the flywheel nut, turn the flywheel clockwise
(CW) with the brake engaged. Turning at a
steady rate, the torque reading should be the
listed value. SEE SECTION 14- ENGINE
SPECIFICA TIONS.
If the reading is low:
• Check the thickness of the brake pad.
• Replace brake lever and pad if the brake
pad thickness is less than 0.090 in.
(2.29mm).
If the pad is within specification:
• Adjust the control cable casing anchor to
position the pad closer to the flywheel
when the safety control is in RUN.
If correct adjustment cannot be made:
• Replace the brake assembly.
Governor Adjustments
CAUTION: Complete the governor static
adjustment before starting or running engine.
Incorrect adjustment could result in engine overspeeding causing engine damage.
DANGER
Engines give off carbon monoxide, an
odorless, colorless, poison gas.
Breathing carbon mon oxide can cause
nausea, fainting or death.
• Start and run engine outdoors.
• Do not start or run engine in an
enclosed area, even if doors and
windows are open.
1
NOTE: (161432-0080-01,161430-0199-01,
185430-0099-01, 185430-0140-01, 1854300299-01) These engine models are equipped
with governors supplied by equipment
manufacturers. Consult with the OEM for service
procedures on these model/types.
A complete governor system adjustment
includes the fo llowing:
1. A static governor adjustment.
2. Engine warm-up.
3. Idle and/or governed idle adjustment.
4. Top no-load RPM adjustment.
Install all linkages and springs before performing
static governor adjustments. Refer to the
illustr ation that match es the governor system on
your en gine.
NOTE: (050000, 085400, 086400, 115400,
117400, 118400, 138400, 185400, 235400,
245400) These models have left hand threads
on the governor lever nut.
Static Governor Adjustment
(050000, 085400, 086400, 115400, 117400,
118400, 138400, 185400, 235400, 245400)
1. Loo sen lock nut (A) hol ding governor lever
(B) to governor crank ([C] Fig. 23).
2. Rotate throttle plate linkage from IDLE to
WOT (Wide Open Throttle). Note direction
of rota tion of the governor lever (B)
attached to the throttle linkage ([D]
Fig.23).
3. Place and hold the throttle plate linkage in
FAST position.
19
Static Governor Adjustment
(161400, 104700, 260700, 261700, 28Q700)
1. Loosen nut holding governor lever ([A]
Fig. 25) to governor crank.
2. Rotate throttle linkage from idle to wide
open throttle. Note the direction of rotation
of the governor arm attached to the
throttle linkage.
3. Place and hold the throttle in high speed
position.
4. While holding the throttle plate, rotate the
governor shaft ([B] Fig. 25) until it stops in
the direction noted in step 2.
5. While holding the governor shaft, torque
the governor lever nut to listed value.
SEE SECTION 14- ENGINE SPECIFICATIONS.
1
Fig. 23
4. Rotate the governor shaft in direction
noted in previous step, until it stops.
5. While holding governor crank, torque the
governor lever nut (left hand
thread)(Fig.2.)
Fig. 25
Fig. 24
20
Fig. 26
3. With the carburetor idle speed screw (A),
adjust RPM to 1200 RPM.
4. With governed idle screw ([B] Fig. 30),
adjust RPM to 1400 RPM.
1
Fig. 27
Fig. 28
Fig. 30
Governed Idle Speed Adjustments
(085400, 086400, 115400, 117400, 138400,
185400, 235400, 245400)
Recommended tools:
#19200
NOTE: (050000, 118400, 28Q700) Do not
have a Governed Idle Speed adjustment.
#19389
Fig. 29
1. Start and run engine at 1/2 throttle for 5
minutes to bring engine to operating
temperature.
2. Move throttle to SLOW .
21
Governed Idle RPM Adjustments
(161400, 260700, 261700)
1
5. Remove rod ([C] Fig. 33 th rough Fig. 35).
#19480 or #19229
Fig. 31
Install all linkages and springs and be sure that
all carburetor adjustments have been made
before performing any of the run ning governor
adjustments. To find the corr ect top no load RPM
by model-type number, log into
thepowerportal.com//repower.
Fig. 33
NOTE: (104700) Does not have a governed
idle adjustment.
Early production versions of 260700 and 261700
had governor levers with three spring anchoring
slots. Position spring in middle slot.
Fig. 34
Fig. 32
Refer to figure that shows your model.
1. Start and run engine at 1/2 throttle for 5
minutes to bring engine to operating
temperature.
2. Move throttle to SLOW .
3. Align holes in the governor control lever
gear (A) and governor control plate ([B]
Fig. 33 through Fig. 35) Insert 0.125 in.
(3.2 mm) diameter rod (C).
4. Using tang bender tool (D), bend
governed idle speed tang to obtai n 1400
RPM .
22
Governed Idle RPM, Fixed Speed Adjustable
(161400 - No Generators)
1. Start and run engine at 1/2 throttle for 5
minutes to bring engine to operating
temperature.
2. Turn speed regulator nut (A)
counterclockwise (CCW) to align idle
speed holes (B) in governor control lever
gear with governor control plate.
3. Insert 0.125 in. (3.2 mm) diameter rod ([ C]
Fig. 35).
• Some units may have remote throttles
furnished by the OEM.
1. Move throttle to FA ST .
2. Align holes in the governor control lever
gear (A) and governor control plate ([B]
Fig. 37 or Fig. 38).
3. Insert 0.125 in. (3.2 mm) diameter rod ([ C]
Fig. 37 or Fig. 38).
NOTE: (104700) Alignment holes on early
production models were 0.062 in. (3.2 mm).
4. Using tang bender tool (D), bend spring
tab (or turn adjustment screw) to ob tain
proper top no load RPM.
Fig. 35
4. Using tang bender tool ([D] Fig. 35), bend
governed idle spring tab to obtain 1400
RPM .
5. Remove rod.
59
Top No Load RPM Adjustments
(050000, 085400, 086400, 115400, 117400,
118400, 138400, 185400, 235400, 245400)
1. Start and run engine at 1/2 throttle for 5
minutes to bring engine to operating
temperature.
2. Move throttle to FA ST .
3. Adjust top no load limiting screw ([A] Fig.
36) to obtain proper no load RPM.
Fig. 37
Fig. 36
Top No Load RPM Adjustments
(104700, 161400, 260700, 261700, 28Q700)
• Refer to the figure that shows your
model.
Fig. 38
5. Remove rod.
23
1
Top No Load RPM, Fixed Speed
Adjustable
(161400 - No Generators)
Top No Load RPM, Fixed Speed Adjustable
(161400 - Generators)
1. Turn the speed regulator nut ([A] Fig. 41)
until the desired top no load speed is
achieved.
1
Fig. 39
1. Turn speed regulator nut (A) clockwise
(CW) to align top no load holes in
governor control lever gear and governor
control plate.
2. Insert 0.125 in. (3.2 mm) diameter rod ([ B]
Fig. 40).
63
Fig. 40
3. Using tang bender tool ([C] Fig. 40), bend
governor spring tang to obtain proper top
no load RPM.
4. Remove rod.
24
Fig. 41
Pre-Load RPM, Fixed Speed Adjustable
(161400 - Generators)
1. Push in and up on speed regulator nu t to
disengage from notch in control panel.
2. Start and run engine at 1/2 throttle for 5
minutes to bring to operating temperature.
Fig. 42
3. Push the governor control all the way to
the end of its travel and hold it there.
4. While holding the governor control, (Fixe d
Speed Regulator rod removed for
clarity)use the tang bender ([A] Fig. 42) to
obtain proper pre-load speed.
5. use the tang bender ([A] Fig. 42) to obtain
proper pre-load speed.
6. As soon as pre-load RPM is set, move
throttle to IDLE.
7. Stop engine.
8. Engage speed regulator nut back into
notch in the control panel.
1
Top No Load RPM:
• 3150 RPM (50 cycles)
• 3750 RPM (60 cycles)
Pre Load RPM:
• 4000 RPM (50 cycles)
• 4300 RPM (60 cycles)
Fig. 43
Electro-Magnetic Idle Down
Adjustments
NOTE: Governed idle speed and top no-load
speed must be properly set before adjusting the
electro-magnetic idle down.
Electro-Magnetic Idle Down (161400)
1. Loosen both adjusting nuts ([A] a nd [B]
Fig. 43). Then, unscrew nut (A) until flush
with end of bolt.
2. Start and run engine at 1/2 throttle for 5
minutes to bring engine up to operating
temperature.
3. With the engine running, apply 12VDC to
connector (C). Extended governor lever
([D] Fig. 43) will be pulled against head of
idle bolt.
4. Adjust nut (A) to obtain 2300 RPM .
Remove 12VDC from connector.
5. Hold nut (A) and idle down control in
position. Tighten nut ([B] Fig. 43.)
6. Reapply 12VDC to connector to check
electro-magnetic action and engine RPM.
Readjust as necessary.
Electro-Magnetic Idle Down
(115400, 117400, 118400, 185400,
235400, 245400, 246400)
1. Loosen both adjusting nuts ([A] a nd [B]
Fig. 44). Then, unscrew nut (A) until flush
with end of bolt.
2. Start and run engine at 1/2 throttle for 5
minutes to bring engine up to operating
temperature.
25
3. With the engine running, apply 12VDC to
white connector with the blue
wires([C]Fig. 44). Extended governor will
be pulled against head of idle down bolt.
([C]Fig. 44).
Use a wire gauge ([A] Fig. 45) to set the spark
plug gap.
Set spark plug gap at listed value.
1
Fig. 45
Torque spark plugs to listed value.
SEE SECTION 14- ENGINE SPECIFICATIONS.
Valve Clearance Adjustments
Fig. 44
4. Adjust nut ([A] Fig. 44) to obtain 2100-2500
RPM .
Use the lowest RPM in this range that the
electro-magnet will hold reliably. Remove 12 VDC
from connector.
5. Hold nut and idle down control in this
position and tighten nut ([B] Fig. 44) to
listed value.
SEE SECTION 14- ENGINE SPECIFICATIONS.
6. Re-apply 12VDC to connector to check
electro-magnetic action and engine RPM.
Re-adjust, if necessary.
Spark Plug Maintenance
Replace Spark Plug
Replace spark plug every year. Replace spark
plugs if electrodes are burned away, or the
porcelain is cracked.
NOTE : Local laws may require the use of a
resistor spark plug to suppress ignition signals. If
an engine was originally equipped with a resi stor
spark plug, replace it with the same type of spark
plug.
Do not blast-clean spark plugs. Spark plugs
should be cleaned by scraping or hand wire
brushing and washing in a commercial solvent.
26
Adjust Valve Clearance
Valve clearances should always be adjusted on
a cold engine.
1. Remove the valve cover.
2. Rotate the crankshaft in the normal
direction until you get to TDC (Top Dead
Center) of the compression stroke.
3. Insert a narrow indicator (screwdriver or
small rod) into the spark plug hole against
the pisto n to indicate piston movement.
4. While watching the indicator, rotate
crankshaft clockwise (CW) past TDC until
piston is 0.25 in. (6mm) down from TDC.
This is to prevent the compression
release (if eq uipped) from affecting
adjustments.
5. Loosen the jamb nut on the rocker arm.
For correct clearance dimensions see page 255.
6. Insert the proper feeler gauge. While
moving it back and forth, carefully tighten
the adjustment screw until a slight amount
of resistance is felt on the feeler gauge.
7. Tighten the jamb nut without moving the
adjustment screw Fig. 46, 47, 49, 49.
1
Fig. 46
8. Rotate the crankshaft through a few
revolutions and recheck the clearance.
Fig. 49
Combustion Chamber Deposits
Remove combustion chamber deposits every
500 hours or whenever cylinder head is
removed.
WARNING
Wear eye protection when using
compressed air to clean parts.
Fig. 47
With the piston at Top Dead Center (TDC),
remove combustion chamber deposits from top
of piston with a plastic scraper or a scotch pad.
CAUTION: Use care to prevent debris from
entering push rod or oil return cavities in cylinder.
Do not damage cylinder, top of piston, cylinder
head and cylinder head gasket surfaces.
It is not necessary to remove the discoloration
marks on the piston, valves and/or cylinder head.
These marks are normal and will not affect
engine operation.
Remove the loose deposits from around the top
ring land area using compressed air and a soft
bristle brush.
Fig. 48
27
1
28
SECTION 2 - TROUBLESHOOTING
GENERAL INFORMATION ............................................................................ 31
SYSTEMATIC ENGINE CHECKS. ................................................................. 31
IGNITION SYSTEM...... .................................................................................. 32
Spark Test ................................................................................................................32
Spark Miss Test........................................................................................................ 32
2
CARBURETION ............................................................................................. 32
COMPRESSION ............................................................................................ 33
Compression Test .................................................................................................... 33
ELECTRICAL TEST EQUIPMENT ................................................................. 35
Digital Multimeters & Settings ..................................................................................35
AC Volts. .................................................................................................................. 35
DC Volts ...................................................................................................................35
DC Amps over 10 Amps........................................................................................... 35
Ohms or Continuity .................................................................................................. 35
Diode Test ................................................................................................................36
AC Amps ..................................................................................................................36
DC Amps under 10 Amps ........................................................................................ 36
DC Shunt.................................................................................................................. 36
Tachometers ............................................................................................................36
ALTERNATOR OUTPUT TESTS ................................................................... 36
DC Alternator............................................................................................................ 36
AC Alternator............................................................................................................38
1.2 Amp Unregulated Alternator...............................................................................3 8
4 Amp Regulated Alternator..................................................................................... 39
9 Amp Regulated Alternator..................................................................................... 39
10 Amp Regulated Alternator. ..................................................................................40
10 & 16 Amp Regulated Alternator ..........................................................................41
Dual Circuit Alternator .............................................................................................. 43
Tri–Circuit Alternator ................................................................................................ 44
29
ELECTRICAL COMPONENT TESTS ............................................................ 45
Diode Test ................................................................................................................45
Anti-Afterfire Solenoid Test ......................................................................................46
Batteries ...................................................................................................................4 7
Installing A Battery ................................................................................................... 47
Charge Indicator Test...............................................................................................47
Stop Switch Test. ..................................................................................................... 48
Rocker Switch Test (085400, 115400, 117400, 138400, 161400, 185400,
235400, 245400) ......................................................................................................4 9
2
KEY & INTERLOCK SWITCHES ................................................................... 50
Troubleshooting Five-Terminal Key Switch .............................................................50
Troubleshooting Six-Terminal Key Switch ............................................................... 51
LOW OIL PRESSURE SWITCH..................................................................... 51
Oil Pressure Switch Test..........................................................................................52
Oil Pressure Test...................................................................................................... 52
OIL GARD® LOW-OIL PROTECTION SYSTEMS......................................... 53
Troubleshooting Oil Gard® 2-Wire Systems............................................................53
Troubleshooting Oil Gard® 4-Wire System..............................................................54
Troubleshooting Oil Gard® (161400) .......................................................................5 5
STARTER MOTORS ...................................................................................... 56
Check Starter Motor Drive (All Models) ...................................................................56
Check Starter Motor Wiring (138400, 185400, 235400, 245400) ............................56
Test Key Switch & Solenoid (138400, 185400, 235400, 245400) ........................... 57
Check Starter Motor (138400, 185400, 235400, 245400) ....................................... 57
Check Starter Motor (104700, 161400, 260700, 261700) ....................................... 58
30
GENERAL INFORMATION
Most complaints concerning engine operation
can be classified as one or more of the following:
1. Will not start
2. Hard starting
3. Lack of power
4. Runs rough
5. Vibration
6. Overheating
7. High oil consumption
An important consideration to remember is that
what appears to be a problem with the engine
may actually be the fault of the equipment. Since
many types of equipment are powered by Briggs
& Stratton engines, it is impossible to list all the
conditions that may exist. Following, is a list of
some common engine problems and their
relationship to equipment applications.
No Start - Hard Start
1. Loose belt or blade
• Can cause a kickback effect.
2. Cranking under load
• Parasitic loads may prevent starting.
3. Mis-adjusted controls
• Improper linkage and cable adjustments
may prevent starting.
4. Interlock system failure
• Non-functioning safety switches,
pressure sensing modules, float
switches or interconnecting wires can
prevent engine cranking or ignition
spark.
Engine will not stop
1. Equipment stop switch not functioning.
2. Engine ground wire damaged or
disconnected.
Vibration
1. Bent cutter blades
2. Loose spindles and couplings
3. Bent/broken deck or weldments
4. Bent crankshaft
5. Loose equipment mounting bolts
6. Damaged or worn belts and pulleys
7. Out of balance impeller
2
Power Loss
1. Bind or drag in equipment
2. Grass build-up under deck
3. No lubrication in equipment gear box
4. Excessive belt tension
SYSTEMATIC ENGINE CHECKS
A systematic check of the engine can be
performed in minutes, and is an accurate method
of determining the source of the problem. The
basic procedure is the same for all engines.
Variations, by model, will be shown under the
subject heading. If the engine will not start, and
the cause is not apparent, perform a systematic
check in the following order:
1. Ignition System
2. Carburetion
3. Compressi on
WAR NING
Flywheel kickback can occur if the flywheel
key is sheared. Bodily injury may occur.
Briggs & Stratton OHV engines use
MAGNETRON ® ignition and flywheel magnets.
NOTE: Some engines are wired with ignition
components supplied by the original equipment
manufacturer (OEM). Contact the OEM for
service information and adjustment procedu res.
31
IGNITION SYSTEM
Operate starter and be sure the RPM is 350 or
more. Observe tester gap in window of tester.
Spark Test
If spark jumps tester gap:
• Ignition is good.
If spark does not jump tester gap:
WARNING
2
Prevent accidental starting. Re move the
spark plug wire from the spark plug.
Ground the wire a fter removal. Failure t o do
so can cause pers onal inju ry.
Test Magnetron armature on the engine. Before
replacing the armature, be sure that the problem
is not in the wiring or switches.
NOTE: Engines with Magnetron ignition will
show spark at the tester even if the flywheel key
is sheared.
Connect the spark plug wire (A) to the long
terminal of Ignition Tester #19368 ([B] Fig. 1).
Ground the tester to the engine with the alligator
clip.
• Check the ignition coil.
Spark Miss Test
1. To determine if an engine miss is ignition
related, use Ignition Tester # 19368, in
series with spark plug lead and spark
plug.
2. Start and run engine.
If spa rk consistently jumps the tester gap but
the miss continues:
• The problem is downstream from the
tester.
1. Check the spark plug.
2. Check compression.
3. Check fuel system and/or carburetion.
If spark in tester gap is erratic:
• Check ignition coil and asso ciated wiring.
CARBURETION
Before checking the carburetion, be sure the fuel
tank has an ample supply of fresh, clean
gasoline. Be sure that the shutoff valve (if
equipped) is open and fuel flows freely through
the fuel line. Make sure the choke closes
completely. If engine will not start, remove and
inspect the spark plug as follows:
Wet plug symptoms:
Fig. 1
WARNING
Do not check f or spark with spark plug
removed.
32
• Overchoking
• Excessively rich fuel mixture
• Water in fuel
• Float needle valve stuck open
• Plugged air cl eaner
Dry plug symptoms:
• Leaking carburetor mounting gaskets
• Gummy or dir ty carburetor, fuel line or
tank
• Float needle valve stuck shut
• Inoperative fuel pump
• Inoperative anti–afterfire solenoid
To determine if fuel is getting to the combustion
chamber through the carburetor, remove the
spark plug and pour a small quantity of gasoline
through the spark plug hole. Replace the spark
plug.
If the engine fires a few times and then stops:
• Focus your attention on dry plug
symptoms.
If the engine does not fire:
Compression Test
1. Run engine for 5 minutes allowing engine
to reach operating temperature.
NOTE : If engine is cold or cannot be started, air
flow may be higher (gauge readi ngs lower)
because compression components are not at
normal operating temperatures.
2. Remove spark plugs from engine.
Disconnect air cleaner tube and cylinder
breather tube at carburetor intake elbow.
3. Rotate crankshaft in direction of operation
until piston for cylinder being tested is at
top dead center of the compression
stroke.
WARNING
• Replace the spark plug.
COMPRESSION
Check the sealing capability of compression
components by using cylinder leakdown tester
Tool# 19545. The leakdown test will identify which
components may be at fault.
A regulated amount of compressed air is used to
pressurize the combustion chamber with the
piston at Top Dead Center (TDC) on the
compression stroke. By listening for air leaks, it
is possible to isolate a specific component or
components causing a problem. An engine in
good condition will display a reading in the green
area on the outlet gauge with a minimum of
audible leakage. A reading in the yellow or red
area along with high audible leakage noise,
indicates a problem with the compression
components.
A small amount of air leakage is normal in all
engines, including new engines, providing that
the outlet gauge remains in the green area.
However, if a single component is displaying
more audible leakage, look to that component for
a potential problem.
For example:
Frequently, a slight air leak at the head gasket
may not register on the gauge. Obviously the
head gasket would require replacement, as any
leak at the head gasket would have an adverse
affect on engine performance.
Injury may occur if the crankshaft is
allowed to rot ate or the engine is not
securely fastened to a stand or the
application. The air pressure can create a
substantial rotational force if the cranks haft
is not locked with the piston at top dead
center.
4. Assemble the clamping tool (comes in kit
#19545) to the crankshaft. Tighten screws
(A) secu rely to prevent the crankshaft
from turning.
5. Insert drive end of a 3/8” breaker bar into
slot of clamp. Hold the breaker bar to
prevent the crankshaft from turning or
install a bolt through the slot of the tool
([B] Fig. 2) into an open hole in the bolt
circle of the cylinder cover.
Fig. 2
33
2
NOTE : The crankshaft must be held with the
NOTE : Any air lea ks at the connections or
piston at top dead center to seal the combustion
chamber and eliminate any chance of rotation. If
the engine is installed in an application, the
equipment can often lock the crankshaft from
moving.
fittings of the tester will affect the accuracy of the
test.
6. Pull out the regulator adjustment knob (A)
and turn knob counterclockwise as far as
it will go. Make sure air outlet valve ([B]
Fig. 3) is closed.
2
10. Listen for air leaking from the cylinder
head gasket, carburetor, exhaust system
and the cylinder breather tube.
NOTE : If a high flow of air is leaking from the
exhaust and carburetor, make sure the piston is
at TDC on the compression stroke.
• Air flowing between the cylinder and
cylinder head indicates that the cylinder
head gasket is leaking.
• Air flowing from the carburetor indicates
air is leaking past the intake valve and
seat.
• Air flowing from the exhaust system
indicates air is leaking past the exhaust
valve and seat.
• Air flowing from the cylinder breather
tube or high oil fill dipstick tube indicates
air is leaking past the piston rings.
Fig. 3
COMPRESSION TEST RESULTS
7. Connect the tester to a compressed air
source (minimum air pressure of 70 psi).
8. Install the outlet hose into the spark plug
hole of the cyli nder being tested. Be sure
O-ring is seated to prevent air leak at
spark plug hole. Connect other end to
tester.
9. Turn regulator adjustment knob clockwise
until the tester’s needle is on the set point.
Push knob in to lock. Slowly open air
outlet valve and note position of needle on
gauge, Fig. 4.
Fig. 4
34
Reading is Green but a
small amount of air is
leaking from head
gasket.
Replace head g asket,
and re-test.
Reading is Green with
minimum air leakage.
Look for problems not
compression related.
Reading is Yellow/Red
or Red, and all the air is
leaking from one
component.
Look for a possible
problem with that
component.
Reading is Red, and air
is leaking from several
components.
Check th at pisto n is at
TDC on the
compression stroke. If
reading does not
change, look for
problems beginning
with the component
that appeared to leak
the mo st air. Re-test
after r epair.
11. When te st is complete, close air valve.
Then, pull out knob and turn
counterclockwise as far as it will go to
release pressure in combustion cha mber.
12. Disconnect outlet hose from tester before
removing from spark plug hole.
Possible Causes for Poor Compression:
• Loose cylinder head bolts
• Blown head gasket
• Burned valves, valve seats and/or loose
valve seats
• Insufficient tappet clearance
• Warped cylinder head
• Warped valve stems
• Worn bore and/or rings
• Broken connecting rods
DC Volts
10
0
OFF
Insert the BLACK test lead
into the COM receptacle of
the multimeter. Insert the
RED test lead into the VΩ
receptacle.Set the rotary
switch to V===.
30
20
∼
V
V
30 0m V
Ω
A~
A
VΩ
10A
FUSED
COM
2
Fig. 6
DC Amps over 10 Amps
0
10
20
30
∼
OFF
V
V
300 mV
Ω
ELECTRICAL TEST EQUIPMENT
A~
A
VΩ
10A
FUSED
COM
Digital Multimeters & Settings
A digital multim eter is required to perform
electrical tests. Briggs & Stratton offers
multimeter (#19581 ) from your dealer source of
supply. The multimeter you use must withstand
DC input of 10 - 20 amps for up to 30 seconds and
should be equipped with two fuses to prevent
damage to the meter if the input limits are
exceeded. Refer to the operators manual that
applies to your meter for the procedure to check
the fuses and general operation.
The digital multimeter is used for numerous tests
which include the following:
Use with DC Shunt. Insert
the BLACK test lead into the
COM receptacle of the
multimeter. Insert the RED
test lead into the VΩ
receptacle. Set the rotary
switch to 300mV.
Fig. 7
Ohms or Continuity
0
10
OFF
V
20
30
∼
V
30 0m V
Ω
A~
A
10A
Insert the BLACK test lead
into the COM receptacle of
the multimeter. Insert the
RED test lead into the VΩ
receptacle. Set the rotary
switch to Ω.
VΩ
FUS ED
COM
AC Volts
0
10
20
30
V∼
OFF
V
300mV
Ω
A~
A
10A
VΩ
Insert the BLACK test lead
into the COM receptacle
of the multim eter. Insert the
RED test lead into the VΩ
receptacle. Set the rotary
switch to V~.
Fig. 8
FUSED
COM
Fig. 5
35
DC Shunt
Diode Test
0
10
OFF
V
20
Insert the BLACK test lead
into the COM receptacle of
the multim eter. Insert the
RED test lead into the VΩ
receptacle. Set the rotary
switch to +))))). This setting
also signals continuity with
a continuous tone.
30
∼
V
30 0m V
Ω
A~
A
VΩ
10A
FUS ED
2
COM
When checking DC output on systems over 10
Amps, use a digital multimeter with the DC Shunt
([# 19468] Fig.12) to avoid blowing a fuse in the
multimeter.
Fig. 9
AC Amps
0
10
OFF
V
20
30
∼
V
30 0m V
Ω
A~
A
10A
Insert the BLACK test lead
into the COM receptacle of
the multimeter. Insert the
RED test lead into the 10A
receptacle. Set the rotary
switch to A~.
Fig. 12
Tachometers
Tachometers are available from your Briggs &
Stratton source of supply. Order Tachometer
# 19200 (A) or Digital Tachometer & Hourmeter
# 19389 ([B] Fig. 13).
VΩ
F USED
COM
Fig. 10
DC Amps under 10 Amps
0
10
OFF
V
20
30
∼
V
30 0m V
Ω
A ~
A
10A
Insert the BLACK test lead
into the C OM receptacle of
the multimeter. Insert the
RED test lead into the 10A
receptacle. Set the rotary
switch to A===.
Fig. 13
ALTERNATOR OUTPUT TESTS
VΩ
FUS ED
COM
DC Only Alternator
Fig. 11
36
The DC alternator provides current for cha rging a
12 volt battery. Current from the alternator is
unregulated and is rated at 3 amps. The output
rises from 2 amps at 2400 RPM to 3 amps at
3600 RPM.
Use an accurate tachometer and a tang bender
to temporarily adjust the engine speed to the
RPM specified in the test instructions before
testing alternator output.
Perform alternator tests in the following
sequence:
1. Test alternator output.
2. Test diode(s).
Test in the following sequence:
1. Set meter to DC Output test. See Figure
11.
2. Attach RED test lead clip to DC output
terminal connector ([A] Fig. 14).
2
Fig. 15
If meter beeps once:
• Diode is OK.
If meter makes a continuous tone :
Fig. 14
• Diode is shorted.
• Replace the diode.
If meter displays OL:
3. Attach BLACK test lead clip to positive (+)
battery terminal ([B] Fig. 14).
4. Start engine.
Output should be 2 to 4 amps DC @ 3600 RPM.
Output will vary with battery voltage. If battery
voltage is at its maximum, output will be
approximately 2 amps.
If no or low output is found:
• Test diode.
• Proceed to step 3.
3. Reverse test leads.
If meter beeps once:
• Diode is installed backwards.
If meter still displays OL:
• Diode is open.
• Replace the diode.
Diode Test
In the Diode Test, the multim eter will display
forward voltage drop across the diode(s) . If
voltage drop is less than 0. 7 volts, meter will beep
once and display the voltage drop. A continuous
tone indicates continuity (shorted diode) An
incomplete circuit (open diode) will be displayed
as OL.
1. Set meter to Diode Test. See Figure 9.
2. Attach RED test lead ([A] Fig. 15) clip to
point (B) and BLACK test lead (C) clip to
point ([D] Fig. 15). It may be necessary to
pierce wire with a pin as shown.
NOTE : Replacement diode harnesses are
available. Use Rosin Core solder to install new
harness. Use shrink tubing or tape on all
connections. Do not use crimp connectors.
37
2
AC Only Alternator
1.2 Amp Unregulated Alternator
The AC alternator provides current for headlights
only. Current for lights is available when the
engine is running. Use 12 volt lights with a total
rating of 60 - 100 watts to test the alternator.
With lights rated at 70 watts, the voltage rises
from 8 volts at 2400 RPM to 12 volts at 3600
RPM. The brightness of the light(s) changes with
engine speed.
1. Set meter to AC test. See Figure 5.
2. Attach RED test lead clip to AC output
terminal connector ([A] Fig. 16).
The 1.2 amp DC alternator provides current for
charging a 12 volt battery. The alternator has a
RED connector (A) and BLACK wire ([B] Fig.
17).
Fig. 17
1. Set meter to DC test. See Figure 11.
2. Attach RED test lea d clip to DC output pin
([C] Fig. 18) in connector.
Fig. 16
3. Attach BLACK test lead clip to engine
ground ([B] Fig. 16).
4. Start engine.
• AC output should be no less than 14
volts @ 3600 RPM.
0
10
O FF
V
20
30
∼
V
30 0mV
Ω
A~
A
10A
VΩ
FU SED
If low or no output is found:
CO M
• Replace stator.
Fig. 18
3. Attach BLACK test lead clip to positive (+)
battery terminal.
4. Start engine.
Output will vary with battery voltage.
If the battery is at maximum voltage:
• The output will be no less than 1 amp
@3600 RPM.
If low or no output is found:
• Replace stator.
38
4 Amp Regulated Alternator
The electrical system must be connected to a
charged 12 volt battery to test alternator output.
1. Disconnect battery ground cable from
battery negative (-) terminal.
2. Set meter. See Figure 11.
3. Place DC Shunt # 19468 on negative
battery post. Install negative ([A] Fig. 19)
cable on DC shunt battery terminal.
4. Connect multimeter test leads to DC shunt
terminals, red to RED (B) and BLACK to
BLACK ([C] Fig. 19).
5. Adjust governor to 3600 RPM.
Output should be approximately 4 amps at 3600
RPM.
If output is acceptable:
• Remove test equipment.
• Return governor to original set RPM.
2
Fig. 19
• With one test lead still connected to one
of the wires, check for continuity to
ground with the other test lead. There
should not be continuity.
If output is less than 4 amps:
If there is continuity:
• Disconnect battery ground cable from
battery negative (-) terminal (A).
• Disconnect RED wire ([D] Fig. 19) from
regulator/rectifier.
• Set meter. See Figure 8.
• Connect test lead to wire disconnected
from regulator/rectifier.
• Connect second test lead to terminal B of
key switch.
• Turn key switch to RUN.
There should be continuity.
• Replace stator.
Confirm results after repair and return governor
to orig inal set RPM.
If there is no continuity:
• Replace the fuse between the key switch
and connector.
Retest to confirm repair.
If there is continuity:
• Reconnect RED wire to regulator/
rectifier.
• Disconnect wires at (E) and ([F] Fig. 19).
• Connect multimeter test leads to two
wires not connected to regulator/rectifier.
There should be continuity.
NOTE: Early stators had connectors between
upper and lower halves. Both halves are
included for service.
9 Amp Regulated Alternator
The 9 amp regulated alternator system provides
AC through a single lead to the regulator–
rectifier. The regulator–rectifier converts AC to
DC, and regulates current to the battery.
Charging rate will vary with engine RPM, state of
battery charge and temperature.
NOTE: Regulator–rectifier will not function
unless it is grounded to engine. Make sure
regulator–rectifier is securely mounted to engine
against
bare metal.
.
Test in the following sequence:
9 Amp AC Outp ut Test
Temporarily disconnect stator wire harness from
regulator-rectifier.
1. Set meter. See Figure 5.
2. Attach RED test lead clip to green output
terminal ([A] Fig. 20).
39
2
Fig. 20
Fig. 21
3. Attach BLACK test lead clip to engine
ground.
AC output should be no less than 40VAC @3600
RPM.
3. Attach BLACK test lead clip to positive (+)
battery terminal.
4. Start Engine.
Output should be 3 – 9 Amps @ 3600 RPM.
If no or low output is found:
• Replace stator.
9 Amp DC Outp ut Test
When testing regulator–rectifier for amperage
output, a 12 volt battery with a minimum charge
of 5 volts is required. There will be no charging
output if battery voltage is below 5 volts.
CAUTION: Connect test leads before starting
engine. Be sure connections are secure. If a test
lead vibrates loose while engine is running,
regulator-rectifier may be damaged.
1. Set meter. See Figure 11.
2. Attach RED test lead clip to DC output
terminal ([A] Fig. 21) on regulator–
rectifier.
40
10 AMP Regulated Alternator
Model 185400
To test alternator output, engine’s electrical
system must be connected to a fully charged 12
volt battery.
1. Adjust governor to 3600 RPM for test.
2. Disconnect battery ground cable from
battery negative (-) terminal.
3. Set meter. See Figure 11.
4. Place DC Shunt # 19468 on negative
battery post.
5. Install battery ground cable to DC shunt
battery terminal. See Fig. 22
6. Connect multimeter test leads to DC shunt
terminals, RED to RED and BLACK to
BLACK.
7. Start engine.
Output should be approximately 3 amps @ 3600
RPM.
If there is continuity:
• Reconnect the RED wire with BLACK
stripes to regulator/rectifier.
11. Connect multimeter test leads to the two
wires not connected to regulator/rectifier.
There should be continuity .
If there is no continuity:
• Replace stator.
If there is continuity:
Fig. 22
2
• Check for continuity between GREEN
wire and engine ground.
There should not be continuity.
If there is continuity to ground:
• Replace stator.
• Readjust governor to original set RPM.
If output is good:
• Remove test equipment and readjust
governor to original set RPM
If out put is low or none:
• Disconnect RED wire with BLACK stripe s
from regulator/rectifier.
NOTE : Early stators had connectors between
upper and lower halves, but are serviced as a
pair.
8. Set meter. See Figure 8.
9. Connect multimeter test leads to wire
disconnected from regulator/rectifier and
second test lead to terminal B of key
switch.
10. Turn key switch to RUN.
There should be continuity.
10 & 16 Amp Regulated Alternator
The 10 &16 amp regulated alternator system
provides AC current through two YELLOW
output leads (A) to the regulator-rectifier(B). The
regulator-rectifier converts the AC current to DC
and regulates current to the battery. The
charging rate varies with engine RPM and
temperature.
The stator and regulator-rectifier are the same
for the 10 and 16 amp systems. The system
output is determined by the flywheel magne t
size.
If there is no continuity:
• Replace fuse between key switch and
connector.
• Retest as above to confirm repair.
41
Fig. 23
2
When checking alternator components, make
tests in the following sequence:
Test Alternator Output
1. Temporarily disconnect stator wire
harness from regulator-rectifier.
2. Set meter to AC Volts position. See Figure
5.
3. Insert RED and Black test lead probes into
output terminals in yellow connector, as
shown in Figure 24.
4. With engine running at 3600 RPM output
should be no less than:
• 20 Volts- 10 Amp System
• 30 Volts- 16 Amp System
5. If NO or LOW output is found check for
bare wires or other defects. If wiring
defects are not visible, replace the stator.
Fig. 24
Regulator-Rectifie r Test
In order to avoid blowing the fuse in the meter,
DC shunt tool #19359 is required when testing
the 10 & 16 Amp systems. The DC shunt must
be installed on the negative (-) terminal of the
battery.
Fig. 25
All connections must be clean and tight for
correct amperage readings.
Make sure the stator wire harness is connected
to the regulator-rectifier.
Make tests in the following sequence:
1. Install shunt on negative battery terminal.
2. Set Meter. See Figure 7.
3. Connect RED test lead to Red post
terminal on shunt ([A] Fig. 25).
4. Connect BLACK test lead to BLACK post
terminal on shunt ([B] Fig. 25).
5. Start engine and stabilize at 3600 RPM.
Output should be:
• 3-10 Amps for a 10 Amp System
• 3-16 Amps for a 16 Amp System
If no or low output is found:
• Be sure that the regulator–rectifier is
grounded and all connections are clean
and secure.
If there is still no or low output:
• Replace the regulator–rectifier.
42
Dual Circuit Alternator
The dual circuit alternator provides DC for
battery charging and AC for the headlights. The
battery is not used for the lights, so lights are
available if battery is disconn ected or removed.
The current from the DC side of the alternator is
unregulated and rated at 3 amps. The output
rises from 2 amps at 2400 RPM to 3 amps at
3600 RPM.
This alternator uses a polarized plug with two
pins. The RED lead (A) charges the battery, the
WHITE lead ([B] Fig. 26) is for lights.
The bump on the connector indicates the
DC output terminal.
2
Fig. 27
3. Attach BLACK test lead clip to positive (+)
battery terminal.
4. Start engine.
With a fully charged batte ry, output will be
approximately 2 amps DC at 3600 RPM.
Fig. 26
If no or low output is found:
• Test the diode.
Dual Circuit Alternator DC Output Test
Test in the following sequence:
1. Set meter. See Figure 11.
2. Attach RED test lea d clip to DC output pin
([E] Fig. 27) in the connector ([F] Fig. 27).
Dual Circuit Diode Test
1. Rotate selector to +))))) (DIODE TEST)
position. See Fi gure 9.
2. Attach RED test lead clip (A) to point (B)
and BLACK test lead clip (C) to DC output
pin (D). Fig. 28. (It may be necessary to
pierce wire with a pin as shown( E)).
If meter beeps once:
• Diode is OK.
If meter makes a continuous tone :
• Diode is shorted.
• Replace the diode.
If meter displays OL:
• Proceed to step 3.
3. Reverse test leads.
If meter beeps once:
• Diode is installed backwards.
43
If meter still displays OL:
• Diode is open.
• Replace the diode.
4. If diode tests OK, check sta tor for bare
wires or other obvious defects. If
grounded leads are not visible, replace
the stator.
2
Output should be no less than 14 volts AC @
3600 RPM.
If no or low output is found:
• Replace stator.
Tri–Circuit Alternator
The tri–circuit alternator provides AC through a
single output lead and connector ([B] Fig. 29) to
a wiring harness containing two diodes (C). One
diode rectifies the AC to 5 amps negative (-) DC
for lights (D). The second diode rectifies the AC
to 5 amps positive (+) DC for battery charging
and external loads ([E] Fig. 30).
Fig. 28
NOTE: Service replacement diode harnesses
are available. Use resin core solder when
installing new harness. Use shrink tubing or tape
all connections. DO NOT USE CRIMP
CONNECTORS.
Fig. 30
NOTE : Some equipment manufacturers supply
Dual Circuit Alternator AC Output Test
1. Set meter. See Figure 5.
2. Attach RED test lead clip to AC output
terminal ([G] Fig. 29).
the diodes as an integral part of the equipment
wiring harness.
A 1 ohm 20 watt resistor (supplied by OEM) ([A]
Fig. 76) is placed in series with the (+) DC
charging lead, limiting the charging current to
approximately 3 amps when the clutch is not
engaged. When the clutch is engaged the
resistor is bypassed allowing full output to the
battery and clutch. Since the alternator powers
the lights, the lights are available even if the
battery is disconnected or removed. Current for
the lights is available as long as the engine is
running. The output depends upon engine RPM,
so the intensity of the lights changes with engine
speed.
Fig. 29
3. Attach BLACK test lead clip to engine
ground.
4. Start engine.
44
Test in the following sequence:
1. Set meter. See Figure 5.
2. Attach RED test lead clip to green output
terminal ([F] Fig. 31).
2
Fig. 32
Fig. 31
3. Attach BLACK test lead clip to engine
ground. Output should be no less than 28
Volts AC @ 3600 RPM.
If no or low output is found:
• Replace stator.
If alternator output is good:
• Test diodes located in wiring harness.
Diode Test
NOTE: One diode is for the charging circuit and
the other diode is for the lighting circuit.
In the Diode Test position, the meter will display
the forward voltage drop across the diode(s). If
the voltage drop is less than 0.7 volts, the meter
will “Bee p” once as well as display the voltage
drop. A continuous tone indicates continuity
(shorted diode). An incomplete circuit (open
diode) will be displayed as “OL.”
Charging Circuit Test (Red Wire)
1. Insert RED test lead into VΩ receptacle in
meter.
2. Insert BLACK test lead into COM
receptacle in meter.
3. Rotate selector to+))))) (DIODE TEST)
position. See Fi gure 9.
4. Attach BLACK test lead clip (A) to point
(B) of the RED wire (C), Fig. 32. (It may
be necessary to pierce wire with pin as
shown.)
5. Insert RED test lead (D) into harness
connector.
• If meter BEEPS once, diode is OK.
• If meter makes a CONT INUOUS TONE,
diode is shorted. Replace harness.
• If meter displays OL proceed to step 6.
6. Reverse test leads.
• If meter BEEPS once, diode is installed
backwards. Replace harness.
• If meter still displays OL, diode is open.
Replace harness.
45
2
Fig. 33
Lighting Circuit Test (White Wire)
1. Insert RED test lead into VΩ receptacle in
meter.
2. Insert BLACK test lead into COM
receptacle.
3. Rotate selector to+))))) (DIODE TEST)
position. See Fi gure 9.
4. Attach RED test lead clip (A) to point (B)
of the WHITE wire (C), FIG.33. (It may be
necessary to pierce wire with a pin as
shown.)
5. Insert BLACK test lead probe (D) into
harness connector.
• If meter BEEPS once, diode is OK.
• If meter makes a CONT INOUS TONE,
diode is shorted. Replace harness.
• If meter displays OL proceed to step 6.
6. Reverse test leads.
• If meter BEEPS once, diode is installed
backwards. Replace harness.
• If meter still displays OL diode is open.
Replace harness.
NOTE: Service replacement diode harnesses
are available.
46
Anti-Afterfire Solenoid Test
The anti-afterfire solenoid is controlled by the
equipment key switch. With the switch OFF , the
solenoid plunger closes, stopping fuel flow
through the fixed main jet. With the switch in the
ON and START posi tions, the solenoid plunger
opens, allowing normal fuel flow. The solenoid is
operating properly if it clicks when the switch is
turned ON or OFF . If solenoid does not click, the
problem could be the equipment wiring, engine
wiring or the solenoid.
Afterfire can also be caused by using the afterfire
terminal of the key switch to turn the alternator
OFF when the engine is turned OFF . The
alternator continues to produce voltage and
current as long as the engine continues to turn
over, even with the key OFF . The voltage and
current continue to energize the anti-afterfire
solenoid allowing fuel to pass through the
engine, into the hot muffler, causing the afterfire.
If the equipment is wired this way, replace the 5
terminal switch with a 6 terminal switch.
Use the correct wiring diagram for the type of
alternator used.
Early solenoids were grounded through the
solenoid case.
To determine the problem, perform the following
tests in order:
NOTE : The sole noid requires 9 volts minimum
DC to function.
1. Remove solenoid from carburetor.
2. Place a jumper wire on either terminal of a
9 volt transistor battery and on one of the
pins ([B] Fig. 34) in the solenoid
connector.
3. Place another jumper wire on the
remaining pin ([B] Fig. 34) in the solenoid
connector and on the other terminal of the
battery.
Fig. 34
Plunger ([A] Fig. 34) should retract freely. When
battery connections is removed, plunger should
return.
Replace solenoid if plunger sticks or doesn’t
move.
Batteries
Handling Instructions
Batteries contain corrosive fluid s and toxic
materials. Handle with care.
• Keep batteries away from children.
• Do not puncture, mutilate, disassemble
or incinerate.
• Do not (short) make direct contact
between (+) positive and (-) negative
battery terminals.
WARNING
Batteries contain acid which is p oisonous
and causes severe bu rn s.
Batteries give off explosive gases.
•
•
•
Do not smoke.
Avoid contact w ith skin, eyes and
clothing.
Do not charge o r service battery near
an open flame.
Inst alling A Battery
1. Connect all equipment being operated.
2. Place battery in holder with a flat base.
3. Tighten hold-down evenly until snug.
4. Connect positive cable (+) first.
5. Connect negative cable (-) last.
2
Fig. 35
Testing Battery
1. Physical check - clean if necessary and
check for:
• Corrosion
• Dirt
• Terminals, clamps (secure, in good
condi tion)
2. Bring battery to full ch arge.
• Use a charger that automatically reduces
charge rate.
• Fill battery cells with distilled water after
charging (for batteries previously in
service).
NOTE : If battery gets hot to the touch, or is
spitting acid (gassing), unplug charger
periodically.
3. Set meter to DC Volts. See Figure 6.
4. Attach RED meter test clip to positive (+)
battery terminal.
5. Attach BLACK meter test lead to negative
(–) battery terminal.
6. With key switch OFF, press starter button.
If ignition and starter use the same switch,
ground the ignition using Ignition Tester
# 19368.
7. Turn switch to START.
47
Meter should display 9 volts or more when
cranking engine.
If less than 9 volts:
• Replace battery.
8. With battery charged, check specific
gravity readings of each cell (B) with a
hydrometer
([A] Fig. 36).
9. Record the results.
2
If control lever does not contact stop switch
tang:
• Check control cable for adjustment or
binding. Bend tang as required or
replace worn parts as needed.
2. Inspect stop switch mounting to be sure
switch is firmly anchored in control
bracket. Replace switch if it cannot be
anchored securely.
3. Set meter to test for continuity. See Figure
8.
4. Move speed control to FAST .
5. Disconnect stop switch w ire ([A] Fig. 37)
at ignition armature ([C] Fig. 37).
6. Connect test probe to wire terminal ([B]
Fig. 37)
Fig. 36
Readings should be above 1.250 (compensating
for temperature).
Replace the battery if specific gravity readings
vary 0.50 or if all cells read less than 1.225.
Stop Switch Test
1. Move speed control to FAST , then to
STOP. The control lever tab (A) m ust
contact the stop switch tang ([B] Fig. 37).
Fig. 38
7. Connect one test lead to switch tang ([D]
Fig. 37) and the other lead to ignition stop
wire.
NOTE: Ensure that control lever tab ([F] Fig. 38)
does not contact switch tang at ([E] Fig. 38).
Fig. 37
48
2
Fig. 40
Fig. 39
8. Move stop switch wire(s) ([A] Fig. 39).
Continuity should remain constant. If
intermittent or no continuity exists, repair
or replace wire(s) or connections.
9. Move test lead from stop switch wire ([A]
Fig. 39) to engine ground.
With speed control set to FAST ,
• There should be no continuity.
10. Move speed control to STOP.
• The meter should show continuity.
3. Move safety control to RUN. The brake
pad lever tab must not con tact the switch
tang.
4. Adjust control as necessary or per OEM
instructio ns.
Rocker Switch Test
(085400, 115400, 117400, 138400,
161400, 185400, 235400, 245400)
Two types of rocker switches are used to stop
these engines. One has two spade terminals.
The other has three terminals and is used only
with Oil Gard® . Test both switches the same
way.
1. Set meter to ohms. See Figure 8.
Flywheel Brake Test (104700)
This model uses a mechanical flywheel brake in
addition to a stop switch that grounds the coil.
1. Remove flywheel cover
2. Move safety control on equipment to RUN ,
then to STOP. The tab on the brake pad
lever ([B] Fig. 40) must contact the switch
tang ([C] Fig. 40).
On two terminal switches connect meter leads to
both terminals ([A] Fig. 44), on three terminal
switches connect leads to terminals 2 and 3.
Fig. 41
49
2. Operate rocker switch and observe meter
readings.
3. The meter should show maximum or very
low resistance as the switch is moved
back and forth. Replace the switch if it
remains open or closed in both positions.
NOTE: (185430-0099-01 ) is wired with
components supplied by the OEM. Contact the
OEM for wiring diagrams and service
information.
2
Stop Switch Adjustments (161400)
1. Move remote speed control to the FA ST
position.
2. The governor control lever should not ([A]
Fig. 42) make contact with the stop switch
tang.
Fig. 42
3. Move the remote to the STOP po sition.
The engine governor control lever tab
should be contacting the stop switch tang
([B] Fig. 43).
If control lever does not contact stop switch
tang:
• Check control cable for adjustment or
binding. Adjust as required or replace
worn parts as needed.
• Be sure the stop switch is firmly
anchored in control bracket. Replace
switch if it cannot be anchored securely.
Key & Interlock Switches
Troubleshoot ing Interlock Switch (104700)
1. Disconnect interlock switch wires from
spade termin als of switch.
2. Set meter to read Ohms. See Figure 8.
3. Connect test leads to two spade terminals
([A] Fig. 44) of swi tch. There should be no
continuity.
Fig. 44
4. Push switch lever in until switch clicks.
Meter should read continuity.
Troubleshoot ing Five-Termina l Key Switch
1. Disconne ct wires from key switch.
2. Set meter to test for continuity. See Figure
8.
3. Check continuity between terminals with
switch in OFF, RUN and START positions
per Key Switch Continuity Chart.
Fig. 43
50
There should be continuity between the terminals
as listed in the table. Replace switch if the re is no
continuity or continuity exists where it should not.
OFF
M
M+
Yes
Yes
B
L
shown in Fig. 45.There must be continuity
between terminals #1, #3, # 6 and the key
switch case when key switch is OFF.
ST
Stop
1
Yes
2
Yes
Yes
Run
Yes
Start
4. Check each terminal for continuity to
ground. The only terminal that should
have continuity to ground is the M
termin al.
2
If there is continuity at any other terminal:
• Replace switch.
If switch is good:
• Check wires for loose or broken
connectors and continuity.
• Repair or replace as required.
Troubleshoot ing Six-Termina l Key Switch
1. Remove carburetor cover with key switch.
Disconnect wiring harness from key
switch.
2. Set multimeter to Diode Test.
Fig. 46
4. Disconnect interlock switch wires from
spade terminals on switch and at starter
motor connector.
5. Set multimeter to Ohms. See Figure 8.
6. Connect one meter test lead to the end of
one wire connector. Connect the other
test lead to connector terminal for the
same wire.
7. Meter should read low or no resistance.
8. Move wire inside connector.
• Meter should not change value.
• Replace or repair wiring if there is
intermittent or no continuity.
• Repeat for each wire in harness.
Low Oil Pressure Switch
Fig. 45
3. There must be continuity between
terminals with key switch in position
shown.See number sequence of terminals
The oil pressure switch is located on the sump,
oil filter adapter ([A] Fig. 47), or on the bypass
cover, Fig. 48.
51
2. Connect one tester lead to the switch
terminal and the other tester lead to the
metal body of the switch, Fig. 49.
2
Fig. 47
Fig. 49
Fig. 48
NOTE: (104700) The pressure switch may
activate at engine speeds below 2000 RPM,
which is normal.
There should be continuity when no pressure is
applied to the switch.
3. Connect the probe end of the switch to a
low pressu re source ([A] Fig. 49).
The switch should open at approximately:
• 104700 - 4 to 6 psi (0.28 - 0.41 bar)
• 260700, 261700 - 7 to 10 psi (0.48 - 0.69
bar)
• 28Q700 - 7 to 10 psi (0.48 - 0.69 bar)
4. Replace the switch if test results are not to
specification. Torque to listed value.
5. Start engine and check for oil leaks.
Oil Pressure Test
If the switch does not deactivate at speeds
above 2000 RPM:
• Stop the engine and check for proper oil
level.
• Perform an oil pressure and/or oil
pressure switch test.
If the oil pressure switch is within specification
and the warning light remains on, verify engine
oil pressure with an oil pressure gauge ([A] Fig.
50).
Oil Pressure Switch Test
Set meter. See Figure 8.
1. Remove the switch.
Fig. 50
52
1. Oil level must be between the ADD and
FULL mark on dipstick.
2. Remove pressure switch or 1/8 in. NPTF
plug in oil filter adapter.
3. Install oil pressure gauge ([A] Fig. 50).
4. Start engine. Run for approximately 5
minutes.
5. Check oil pressure at 3000 RPM. Oil
Pressure should be 10~50 psi (0.7~3.5
Bar).
If Oil Pressure is Low, check for:
• Engine RPM Too Low
• Wrong Viscosity or Diluted Oil
• Low Oil Level
• Broken Pressure Relief Spring
• Missing Pressure Relief Plunger
• Worn Bearings
• Damaged or Worn Oil Pump
If Oil Pressure is H igh, check for:
• Wrong Viscosity Oil
• Plugged Oil Galleries
• Stuck Pressure Relief Plunger
OIL GARD® LOW-OIL
PROTECTION SYSTEMS
The system may have a module with four wires
(BLUE, BLACK, WHITE and RED) or two w ires
(BLACK, BLACK) .
Preliminary Low Oil Checks:
• Ensure the engine oil level is to the FULL
mark.
• Ensure the fuel delivery system is
functioning properly.
• Ensure that the engine i s not being
operated at an excessive angle.
• Ensure that the wiring is not obviously
pinched or otherwise damaged.
Troubleshooting Oil Ga rd® 2-Wire Sy stems
Symptom: Engine starts, dies and will not
keep runn ing
Disconnect the BLUE or BLACK wire at ([A] Fig.
51) and start engine.
If the engine starts and dies:
• Replace the module ([E] Fig. 51 ) and
retest.
If the engine starts and co ntinues to run:
• Reconnect the wire at
.
If the engine d ies:
• Check continuity in the wire between ([A
and B] Fig. 51).
VANGUARD™ series engines are equipped with
Oil Gard® low oil protection systems designed to
prevent engine damage from running with
insufficient oil. This oil float system is mounted
inside the engine cylinder. Oil Gard® will shut
down a running engine and prevent it from
restarting if the oil level becomes too low.
When the oil drops below the minimum level, a
float pin contacts the sensor mounting bracket in
the cylinder. This completes a circuit from the
ignition coil, through the module, to the float
sensor and then to ground. This grounds the
ignition coil and prevents the spark plug from
firing. When a restart is attempted, a light in the
ON/OFF switch flashes to indicate LOW OIL.
The Oil Gard® protection system consists of:
• An oil float sensor located inside the
cylinder.
• An electronic module.
• An ON/OFF rocker switch.
• Connecting wires.
If there is no continuity:
• Replace the wire.
If the wire has continuity:
• Replace the float sensor in the cylinder
.
Symptom: Engine will no t start
• Disconnect wires at ([C and D] Fig. 51)
and attempt an engine start.
If the engine does not start:
• Check the ignition armature (G) for
grounds.
If the engine starts and runs:
• Reconnect the wire at (C).
If the engine does not stop:
• Reconnect the wire at (D).
If the engine d ies:
53
2
• Check the ignition switch ([H] Fig. 51).
If the wire is go od:
• Replace the float sensor in the cylinder
([F] Fig. 52).
Symptom: Engine will no t start
• Disconnect wire at ([C and D] Fig. 52)
and start engine.
If the engine does not start:
• Check the ignition armature (G) for
grounds.
2
If the engine starts and runs:
• Reconnect the wire at (C).
If the engine does not stop:
• Reconnect the wire at (D).
If the engine d ies:
• Check the ON/OFF rocker switch ([H] Fig.
52).
Fig. 51
Troubleshooting Oil Gard® 4-Wire System
NOTE: (185430, Type 0099-1) These
engines are wired with components supplied by
both Briggs & Stratton and the OEM. Contact the
OEM for wiring diagrams and service
information.
Symptom: Engine starts, dies, and will not
stay running
• Disconnect BLUE or BLACK wire at ([A]
Fig. 52) and start engine.
If the engine starts and dies:
• Replace the module (E) and retest.
If the engine starts and runs:
• Reconnect the wire at (A).
If the engine d ies:
• Check continuity in the wire between (A)
and (B).
If there is no continuity:
• Replace the wire.
54
Fig. 52
Troubleshooting Oil Gard® (161400)
2
Fig. 53
Problem
Letter
Cause
Remedy
No Spark - Light Flashes
A
B
C
Low Oil In Cylinder
Excessive Angle Of Operation
Worn Oil Gard® Switch
Refill With Oil
Reduce Angle of Operation
Replace Switch
No Spark - Light Does Not
Flash - Correct Amount of
Oil In Cylinder
D
E
F
Wiring Harness Grounded
Stop Wire Grounded
Worn Magnetron® Armature
Repair Or Replace Wiring Harness
Repair Or Replace Wire
Replace Armature
Spark Present - Light Does
Not Flash
G
H
Worn Light Or Harness
Oil Gard® Switch Wire Not Making
Ground To Cylinder
Worn Oil Gard® Switch
Replace Light
Adjust Wire
C
Replace Switch
Intermittent Spark
D or E
C
H
Ground Stop Wire Or Harness
Worn Oil Gard® Switch
Oil Gard® Switch Wire Not Making
Ground To Cylinder
Repair Or Replace Wiring Harness
Replace Switch
Adjust Switch Wire
No Spark - Light Does Not
Flash
I or J
Wiring Harness Connections
Reversed
Reverse Connections
55
STARTER MOTORS
Check Starter Motor Drive
(All Models)
1. When the starter motor is activated, the
pinion gear should rise, engage the
flywheel ring gear and crank the engine. If
the drive does not react properly, inspect
the helix and pinion gears for operation or
correct rotation, Fig. 54.
2
Check Starter Motor Wiring
(138400, 185400, 235400, 245400)
Required Equipment:
Multimeter set to DC Volts.
1. Charge the battery if the voltage is low.
2. Set meter. See Figure 6.
3. Disconnect wire from starter terminal ([A]
Fig. 56).
4. Connect BLACK test lead to engine
ground or negative battery (-) post (B).
5. Connect RED test lead to the wire
disconnected from the starter terminal.
6. Turn key switch to START. Multimeter
should show approximate battery voltage.
If there is no voltage:
7b88
Fig. 54
2. Use lithium grease at base of helix to
correct sticking. Proper starter operation
depends on pinion moving freely on helix,
Fig. 55.
Fig. 56
If voltage is present:
• Remove and bench test the starter.
Fig. 55
56
Test Key Switch & Solenoid
(138400, 185400, 235400, 245400)
If continuity is present:
Required Equipment:
Set meter. See Figure 8.
1. Turn the key switch ON.
2. Check for contin uity at the input side (A) o f
the solenoid and ground ([B] Fig. 57).
If not:
• Proceed to step 4.
• Replace key switch.
4. Reconnect the connector from the starter
switch.
5. Test for continuity at the output terminal
(A) of the solenoid with the key in the
START position and ground ([B] Fig. 59).
2
Fig. 57
Fig. 59
If continuity is present:
• Proceed to step 3.
If continuity is present:
If not:
• Replace starter.
• Replace key switch.
3. Check for continu ity at the yellow terminal
(A) of the connector coming from the
switch with the key in the START position
and ground ([B] Fig. 58).
If not:
• Replace solenoid.
Check Starter Motor
(138400, 185400, 235400, 245400)
Required Equipment:
• Digital Multimeter # 19464 (E).
• Tachometer #19200
• DC Shunt #19468 ([D] Fig. 57)
• A fully charged 12 volt battery Fig. 60.
1. Set multimeter to 300mv. See Figure 7.
Fig. 58
57
2. Connect starter motor (A), starter switch
(B), DC shu nt (C) on negative battery
terminal (D) and meter ([E] Fig. 60).
Remove starter motor from engine.
1. Set multimeter to 300mv. See Figure 7.
2. Connect starter switch (D) to starter motor
(E), battery (C), BLACK lead (G), RED
lead (H), shunt (B) and multimeter ([A]
Fig. 61).
2
Fig. 60
3. Activate starter motor.
• Tachometer should read 6800 RPM
minimum.
• Meter should not read more than 25
amps.
If starter motor is not within specification:
• Replace starter motor.
Fig. 61
3. Note length of starter motor housing.
Starter M otor Housing Specifications:
Check Starter Motor
(104700, 161400, 260700, 261700)
Required Equipment:
• Digital Multimeter (A), #19464
• DC Shunt (B), #19468
• Tachometer #19200, or equivalent
• A fully charged 12 volt battery ([C] Fi g.
61).
Housing Length
in. (mm)
Minimum RPM
Maximum Amps
3.375 (85.7)
7000
24
3.656 (93)
5000
20
5.563 (116)
6500
35
4. Activate starter motor.
5. Note multimeter and tachometer readings.
A starter motor in good condition will be within
specifications above.
If starter motor is not within specification:
• Replace starter motor.
58
SECTION 3 - ENGINE DISASSEMBLY
GENE RAL DISASSEMBLY STEPS ............................................................... 61
Blower Housing Removal ( 050000, 085400, 0 86400, 1 15400, 1 17400, 118400,
185400 ) ................................................................................................................... 61
Blower Housing Removal (138400, 235400, 245400) ............................................. 61
Blower Housing Removal (104700) ......................................................................... 61
Blower Housing Removal (161400) ......................................................................... 62
Blower Housing Removal (260700, 261700) ...........................................................62
Blower Housing Removal (28Q700) ........................................................................ 62
3
CONTROL BRACKETS.................................................................................. 63
Control Bracket Removal (050000, 0 85400, 0 86400, 1 15400, 117400, 118400,
138400 , 185400, 235400, 245400)......................................................................... 63
Control Bracke t Removal (104700) ..........................................................................63
Control Bracke t Removal (161400) ..........................................................................64
Control Bracket Removal (260700, 261700)............................................................ 64
Control Bracke t Removal (28Q700)......................................................................... 65
ENGINE BAFFLES......................................................................................... 65
Engine Baffle Removal (05000, 085400, 086400, 115400, 117400, 118400,
13 8400, 185400, 235400, 245400) .......................................................................... 65
En gine Baffle Rem oval (161400) .............................................................................66
En gine Baffle Removal (260700, 261700) ............................................................... 66
En gine Baffle Removal (28Q700) ............................................................................66
59
BREATHER SYSTEMS ................................................................................. 67
Breather System
(050000, 085400, 086400, 115400, 117400, 118400, 138400, 185400,
235400, 245400) ....................................................................................................6 7
Remove/Replace Breather System
(10470 0) .................................................................................................................. 67
Breather System
(16140 0) .................................................................................................................. 68
Breather System
(26070 0, 261700) ....................................................................................................6 9
Breather System
(28Q700) ................................................................................................................. 70
3
ELECTRIC STARTER MOTORS .................................................................. 71
Electric Starter Removal
(13840 0, 235400, 245400) ...................................................................................... 71
Electric Starter Removal
(10470 0, 260700, 261700, 28Q700) ....................................................................... 71
MAGNETRON® IGNITION SYSTEMS ......................................................... 72
Spark Plug Wires
(All Models) ............................................................................................................. 72
Ignition System Removal
(050000, 085400, 086400, 115400, 117400, 118400, 235400, 245400,
161400, 104700, 260700, 261700, 28Q700) ..........................................................7 2
FLYWHEELS ................................................................................................. 72
Flywheel Removal
(050000, 085400, 086400, 115400, 117400, 118400, 138400, 185400,
235400, 245400, 28Q700) ......................................................................................7 2
Flywheel Removal
(10470 0) .................................................................................................................. 73
Flywheel Removal
(26070 0, 261700) ....................................................................................................7 3
OIL FILTER ADAPTERS ................................................................................ 74
Remove/Replace Oil Filter Adapters .......................................................................74
60
GENERAL DISASSEMBLY STEPS
The sequence of actions required to
disassemble the outer components of an engine
vary from model to model. As a general rule, it is
most efficient to remove only those items that
prevent access to a system or part. This section
discusses removing all external systems and
components but does not open cylinder housing s
or heads.
Always remove spark plugs before
performing any maintenance on the engine.
For information regarding the removal of fuel
tanks and associated components for your
model, SEE SECTION 5- FUEL SYSTEMS AND
CARBURETION.
For information regarding the removal of exhau st
systems, SEE SECTION 4- EXHAUST
SYSTEMS.
Blower Housing Removal
(050000, 085400, 086400, 115400,
117400, 118400, 185400)
NOTE : (050000, 118400) Disconnect the
return spring on the governor lever and the wire
to the “Low Oil Sensing Module.”
Blower Housing Removal
(138400, 235400, 245400)
NOTE : Disconnect the wires ([A] Fig. 2) for the
voltage regulator and key switch (if installed).
3
Fig. 2
Blower Housing Removal (104700)
1. Remove the five screws that secure
blower housing to engine ([A] Fig. 3).
Remove the mounting bolts ([A] Fig. 1) shown
and set housing aside.
Fig. 3
Fig. 1
61
Blower Housing Removal
(161400)
1. Remove the five screws ([A] Fig. 4) that
secure the blower housing to the engine
block.
Blower Housing Removal
(28Q700)
1. Remove the oil cap and dipstick
assembly.
2. Remove the four screws (A) that secure
the rotating screen.
3. Remove the two mounting bolts ([B] Fig.
6) that secure the fuel pump mounting
bracket.
3
Fig. 4
Blower Housing Removal
(260700, 261700)
1. Remove the oil dipstick cap.
2. Remove screws ([A] Fig. 5) from the
blower housing.
Fig. 6
4. Remove the two screws (A) that secure
the top of the outer housing to the inner
housing.
5. Remove the remaining screws ([B] Fig. 7)
around the perimeter of the outer blower
housing.
Fig. 5
Fig. 7
6. Remove the two screws that secure the
front housing bracket (A).
62
7. Remove the two screws that hold the rear
housing mounting bracket ([B] Fig. 8).
3
Fig. 9
Fig. 8
NOTE : Leave the cotter pin ([C] Fig. 9) in the
8. Remove inner blower housing and set
aside.
governor shaft to prevent it from falling into the
cylinder.
Control Bracket Removal
(104700)
CONTROL BRACKETS
Control Bracket Removal
(050000, 085400, 086400, 115400,
117400, 118400, 138400, 185400,
235400, 245400)
Control brackets on these models are
incorporated into the blower housing.
To remove the governor lever for the models
listed above, refer to Fig. 9 and follow the steps
outlined below:
1. Hold the governor lever and remove the
upper nut (A) securing the governor lever.
Part of the control bracket must be removed
during the removal of the carburetor. SEE
SECTION 5- CHOKE BRACKET.
The rest of the control bracket assembly cannot
be disasse mbled until the flywheel is removed.
SEE SECTION 3- FLYWHEEL REMOVAL.
With the flywheel removed:
1. Remove the alternator (if equipped)
assembly ([A] Fig. 10).
2. Remove the back plate ([B] Fig. 10).
CAUTION: Do not bend the governor shaft cotter
pin while removing the top or botto m governor
lever nut.
2. Remove the lower nut (B) and set aside.
CAUTION: 085400, 086400, 115400, 117400,
138400, 185400,23540 0, 245400 have left-hand
threads on the governor shaft.
Fig. 10
63
3. Remove the screws holding the control
bracket ([A] Fig. 11).
Control Bracket Removal
(260700, 261700)
NOTE : For better access to the control bracket,
remove the oil filter adapter first. SEE SECTION
3- OIL FILTER ADAPTER.
1. Remove the links and springs from the
governor lever ([A] Fig. 13).
3
Fig. 11
4. Remove the clamp that secures the
governor lever to the shaft.
Control Bracket Removal
(161400)
1. Remove governor lever.(A).
2. Disconnect springs and links (B) from
governor lever.
3. Remove head bolts (C) that secure the
control bracket to the cylinder head. When
baffle is removed, re-install the bolts hand
tight.
4. Remove the oil fill tube screw.([D] Fig. 12)
5. Remove control bracket screws.([E] Fig.
12).
Fig. 13
2. Loosen governor lever screw and nut ([B]
Fig. 13).
3. Remove control bracket screws ([A] Fig.
14).
Fig. 14
Fig. 12
Disconnect ground wires and remove the
connector from the bracket.
6. Remove the wire from the Oil Gard ®
terminal and the stop switch.
64
Control Bracket Removal
(28Q700)
ENGINE BAFFLES
NOTE : Part of the control bracket assembly
Engine Baffle Removal
(05000, 085400, 086400, 115400,
117400, 118400, 138400, 185400,
235400, 245400)
must be removed in order to remove the
carburetor. SEE SECTION 5- REMOVING
CARBURETOR.
To remove remaining control bracket
components:
1. Remove the three screws ([A] Fig. 15) that
secure the bracket to the cylinder.
The engine baffles for the models listed above
consist of stamped sheet metal parts (A) that
wrap around the cylinder. The larger engines
have separate lower baffles (B) and some have
an additional plastic baffle ([C] Fig. 17) to seal
the blower housing.
Remove the screws that secure the baffles to the
engine.
Fig. 15
2. Disconne ct the governor return sprin g (A)
and the throttle link ([B] Fig. 16) from the
governor lever.
Fig. 16
3. Set control bracket aside.
4. Loosen nut that secures governor lever to
governor shaft.
5. Remove governor lever and set aside.
Fig. 17
65
3
Engine Baffle Removal
(161400)
The main cylinder baffle is removed with the
engine control bracket. SEE SECTION 3CONTROL BRACKET REMOVAL..
Remove the bo lts holding the baffle shown below
([A] Fig. 18).
NOTE : The l ower baffle still has one mounting
bolt that will be removed when the flywheel is
removed. SEE SECTION 3- FLYWHEEL
REMOVAL.
3. Remove the bolts that secure the baffle to
the cylinder ([A] Fig. 20).
3
Fig. 20
Fig. 18
Engine Baffle Removal
(260700, 261700)
Engine Baffle Removal
(28Q700)
1. Remove the two bolts ([A] Fig. 21).
1. Remove the mounting bolts shown in
([A] Fig. 19).
2. Remove the bolts that secure the oil fill
tube.
Fig. 21
Fig. 19
NOTE : The blower housing support/baffle plate
([B] Fig.21) must be removed after the flywheel
is removed. SEE SECTION 3- BLOWER
HOUSING REMOVAL.
66
BREATHER SYSTEMS
Briggs & Stratton engines use a breather valve to
maintain and control a pulsating vacuum in the
cylinder or sump. The vacuum helps to control oil
leakage past piston rings, valve guides, oil seals,
governor lever shaft and gaskets.
The breather valve is a fiber disc or reed that
closes on the piston's up stroke and opens on
the piston's down stroke.
Breather System
(050000, 085400, 086400, 115400,
117400, 118400, 138400, 185400,
235400, 245400)
Remove Valve Cover
1. Remove screws (A) fr om valve cover, Fig.
22.
2. Remove valve cover and gasket(s).
3
Fig. 23
To check breather assembly:
1. Cover relief hole with thumb.
2. Blow into the breather port hole - air
should not pass.
3. Inhale through the breather hose port - air
should pass freely.
Replace valve cover if any binding or sticking is
discovered.
Remove/Replace Breather System
(104700)
1. Remove air cleaner cover, flywheel brake
cover (if equipped), blower housin g, rope
starter, and flywheel. SEE SECTION 1AIR CLEANER SERVICE.
Fig. 22
The breather components are built into the valve
cover for the models listed. They consist of (A) a
port for the breather hose, (B) a reed and valve
assembly inside the cover and ([C] Fig. 23) a
relief hole to balance cylinder pressures in case
the breather asse mbly sticks or binds.
Fig. 24
67
2. Remove breather cover ([A] Fig. 24) from
top of cylinder.
NOTE: Fiber disc valve cannot be checked with
gauge.
3. Replace the valve if it is warped, worn or
damaged.
4. Install disc valve on seat ([B] Fig. 25).
Breather System
(161400)
1. Remove four screws that hold valve cover
(A) and gasket (B).
2. Remove valve cover. Breather assembly
(C) and gaske t ([D] Fig. 27) will come off
with valve cover.
3
Fig. 27
Fig. 25
5. Install gasket, cover, and screws. Torque
screws to listed value. SEE SECTION 14ENGINE SPECIFICATIONS.
3. Separate valve cover from breather
assembly.
4. Replace the breather if the fiber disc valve
is stu ck or binding. 0.045 in. (1.14 MM.) wire
gauge ([A] Fig. 28) should not enter the
space between the fiber disc valve and
body. Do not force the gauge.
NOTE: Breathers are vented into the air cleaner
base or intake manifol d to prevent dirt from
entering the cyl inder. Be sure vent tube is no t
damaged and that it seals properly.
Inspect breather tube ([A] Fig. 26) for cracks,
holes, and hardening.
Fig. 28
To install breather assembly:
Fig. 26
68
1. Install gasket (D), breather assembly (C),
gasket (B), and valve cover ([ A] Fig. 27)
to cylinder head.
2. Push breather tube on to nipple of air
cleaner base.
3. Install screws. Torque screws to listed
value. SEE SECTION 14- ENGINE
SPECIFICATIONS.
CAUTION: Do not force the gauge. The fiber
disc valve is held in place by a retainer that will
distort if pressure is applied to the disc.
Breather System
(260700, 261700)
NOTE: (260700, 261700) Two lengths of
breather tubes were used. The standard tube is
used when the air cleaner base mounts directly
on the carburetor. The long breather tube is used
when a spacer is used between the carburetor
and the air cleaner base.
Before Date Code 91120900
1. Remove air cleaner and intake manifold.
2. Remove breather valve cover and gasket
(A).
The breather valve assembly ([B] Fig. 29) is
mounted in the cylinder.
3
Fig. 30
To replace breather valve assembly:
1. Install new disc valve and retainer
assembly. Torque screws to listed value.
SEE SECTION 14- ENGINE
SPECIFICATIONS.
After Date Code 91120800
1. Remove air cleaner and intake manifold.
2. Remove cover and gasket.
This cover has an additional flapper valve ([A]
Fig. 31) built into it.
Fig. 29
If the fiber disc in the breather valve
assembly is stuck or binding:
• Replace the entire breather valve
assembly.
Refer to ([A] Fig. 30).
1. Check the breather valve assembly with a
0.045 in. (1.14 MM.) wire gauge. It should
not enter the space between the fiber disc
and the valve assembly.
Fig. 31
1. Check the breather valve in the cover with
a 0.045 in. (1.14 MM.) wire gauge. It
should not enter the space between the
disc and the cove r body
([A] Fig. 32).
69
2. Remove two screws holding breather.
Remove breather and gasket and discard
gasket.
3. A 0.045 in. (1.14 MM.) wire gauge (A)
should not enter the space between the
fiber disc valve (B) and the body (C). The
breather holes ([D] Fig. 34) must be open.
4. Check as shown in. Fig. 34.
Fig. 32
2. Install new disc valve and retainer
assembly. Torque screws to listed value.
SEE SECTION 14- ENGINE
SPECIFICATIONS.
3
3. Install cover ([A] Fig. 33) with new gaske t.
Torque screws to listed value.
Fig. 34
Replace the breather if the fiber disc valve is
stuck or binding.
CAUTION: The fiber disc valve is held in place
by an internal bracket that will distort if pressure
is applied to the valve. Do not apply force when
checking valve.
Fig. 33
5. Place new breather gasket and breather
on cylinder. Gaskets do not require
sealant.
6. Install two screws. Torque screws to listed
value. SEE SECTION 14-ENGINE
SPECIFICATIONS.
Install breather tube to breather.
Breather System
(28Q700)
NOTE: There is a 0.120 in. (3.0 MM.) diameter
plastic plug installed in the elbow on the 28Q700
engine where the breather mounts. If it gets
plugged the oil will get sucked out of the engine.
Clean the plug any time there is service
performed in that area.
1. Remove breather tube from breather.
70
ELECTRIC STARTER MOTORS
Electric Starter Removal
(138400, 235400, 245400)
Electric Starter Removal
(104700, 260700, 261700, 28Q700)
1. Remove the two bolts that secure starter
to cylinder ([A] Fig. 37 , 38,39).
1. Remove negative battery cable.
2. Disconnect the wire from the key switch.
3. Remove the nuts ([A] Fig. 35) that support
the starter motor.
4. Remove starter.
3
Fig. 37
Fig. 35
1. Disconnect the wire from the voltage
regulator.
2. Remove the nuts ([A] Fig. 36) that support
the starter motor.
Fig. 38
Fig. 36
Fig. 39
71
Ignition System Removal
(050000, 085400, 086400, 115400,
117400, 118400, 235400, 245400,
161400, 104700, 260700, 261700,
28Q700)
41) or other strap wrench or socket-type
flywheel holder, determined above.
3. Turn the flywheel nut CCW with a 1/2 in.
breaker bar (B) and socket to remove.
1. Disconnect stop switch w ire (A) at
armature (B).
2. Remove armature screws ([C] Fig. 40).
3. Lift off armature.
3
Fig. 41
Fig. 40
FLYWHEELS
4. Thread the flywheel nut (A) on to the
crankshaft until to p of nut is flush with end
of crankshaft threads, Fig. 42.
5. Install Flywheel Puller #19203 (B). Turn
puller screws into flywheel puller holes
until puller contacts flywheel nut.
6. Tighten puller nuts (C) equally until
flywheel loosens, (Fig. 42) and/or (Fig.44).
Flywheel Removal
(050000, 085400, 086400, 115400,
117400, 118400, 138400, 185400,
235400, 245400, 28Q700)
WARNING
Eye injury could occur if flywheel is struck
with a hard object.
• Do not strike flywheel with hard object
or steel tool.
• Wear safety goggles or other eye
protection.
1. If necessary, remove the fan from the
flywheel.
2. Prevent the flywheel from turning with
Flywheel Strap Wrench, #19433, ([A] Fig.
72
Fig. 42
Flywheel Removal
(104700)
1. Disconnect the tension spring on the
flywheel brake from its anchor ([A]
Fig.45).
3
Fig. 43
Fig. 45
2. Remove the flywheel nut with a strap
wrench and a 1in. socket.
3. Using tool #19203, remove flywheel and
drive key.
Flywheel Removal
(260700, 261700)
1. Remove the nut and washer and starter
cup ([A] Fig. 46).
Fig. 44
Fig. 46
2. Remove the second nut and washer ([B]
Fig. 46).
3. Remove the backing plate that secures
the fan to the flywheel.
73
4. Install tool #19203 as shown ( [A] Fig. 47)
and tighten the nuts evenly until the
flywheel comes free of the crankshaft.
3
Fig. 49
Fig. 47
When the flywheel is removed, the stator and the
remaining bolt ([A] Fig. 48) for the support baffle
can be removed.
2. Use a new gasket and reposition adapter.
3. Torque screws to listed value , as shown in
Fig. 50.
Fig. 50
Fig. 48
OIL FILTER ADAPTERS
Remove/Replace Oil Filter Adapters
1. Remove oil filters and oil filter adapters as
shown below.
Fig. 51
74
SECTION 4 - EXHAUST SYSTEMS
GENERAL INFORMATION ............................................................................ 77
Inspecting Exhaust Systems....................................................................................77
REMOVE/INSTALL EXHAUST SYSTEM (050000, 085400, 115400,
117400, 118400, 138400, 185400, 235400, 245400) .................................... 78
REMOVE/INSTALL EXHAUST SYSTEM (104700) ....................................... 79
REMOVE/INSTALL EXHAUST SYSTEM (161400) ....................................... 80
REMOVE/INSTALL EXHAUST SYSTEM (260700, 261700) ......................... 82
4
REMOVE/INSTALL EXHAUST SYSTEM (28Q700) ...................................... 84
75
4
76
GENERAL INFORMATION
To meet the various requirements of the original
equipment manufacturers (OEMs), some
engines are shipped without exhaust systems.
Exhaust systems for these engines are serviced
and supplied by the OEM. Contact the original
equipment manufacturer for speci fic service
information on non-Briggs & Stratton exhaust
systems.
CAUTION: When replacing exhaust system
Fig. 1
components, replacement parts must be the
same as originally specified by the OEM. This
may include some mounting brackets and
hardware. Follow the procedures recommended
by the OEM for disassembly and assembly.
4
DANGER
Inspecting Exhaust Systems
General
Exhaust system components must be inspected
whenever the exhaust system is disassembled.
Never reinstall broken or damaged components.
Check for:
• Cracks
• Broken welds
• Split muffler seams
• Loose internal parts
• Gaskets
• General wear and fit
Inspect the exhaust manifold for damage and
signs of leakage at the cylinder and muffler
mating surfaces.
Running engines produce heat.
Temperature of muffler and surrounding
areas can reach 150°F (65°C). Severe burns
can occur on contact.
•
•
•
Allow muffler, engine cylinder finds and
radiator to cool before touching.
Remove accumulated combustibles
from muffler area and cylinder area.
Install and maintain in working order a
spark arrestor before using equipment
on forest-covered, brush-covered
unimproved land. The state of
California requires this (Section 4442
of the Public Resources Code). Other
states may have similar laws. Federal
laws apply on federal land.
Spark Arrestors
Remove spark arrester ([A] Fig. 1) for cleaning
and inspection monthly or every 50 hours.
Replace screen if deteriorated or perforated.
77
REMOVE/INSTALL EXHAUST
SYSTEM (050000, 085400, 115400,
117400, 1 18400, 138400, 1 85400,
235400, 245400)
A typical muffler installation for the models listed
above is shown in (Fig. 2).
Fig. 4
2. Remove two muffler nuts ([A] Fig. 5).
4
Fig. 2
To remove the muffler assembly:
1. Remove muffler brace screws ([A] Fig. 3
or Fig. 4), if equipped.
Fig. 5
3. Remove the muffler and exhaust gaskets.
4. Inspect the exhaust system. SEE
SECTION 4- EXHAUST SYSTEMS.
To install the muffler assembly:
Fig. 3
NOTE : U se (#93963) valve lubricant on all
exhaust system threads to prevent galling of the
threads and ease future disassembly.
1. Place new exhaust gasket on cylinder
head studs.
2. Mount muffler.
3. Install muffler brace (if equipped) and
hand tighten hardware.
78
4. Check for proper alignment and any
interference issues.
5. Torque muffler nuts to listed values.
6. If equipped, torque muffler brace screw to
listed values.
4. Remove backplate and gasket. SEE
SECTION 3-ENGINE DISASSEMBLY.
5. Take off the two screws (A) that hold the
exhaust elbow shield ([B] Fig. 8) and
remove shield.
REMOVE/INSTALL EXHAUST
SYSTEM (104700)
4
Fig. 8
6. Remove the screws ([A] Fig. 9) hol ding
the exhaust elbow and set elbow aside.
Fig. 6
To remove 104700 muffler assembly:
1. Remove the screws that secure the
muffler guard (if equipped).
2. Bend down locking tabs (A) on screw lock.
3. Remove muffler screws and muffler brace
nut ([B] Fig. 7).
Fig. 9
7. Inspect the exhaust system and its
components. SEE SECTION 4EXHAUST SYSTEMS.
Fig. 7
NOTE : For access to the exhaust elbow,
remove the blower housing, if necessary.
79
To install the 104700 muffler system:
NOTE : U se (#93963) valve lubricant on all
REMOVE/INSTALL EXHAUST
SYSTEM (161400)
exhaust system threads to prevent galling of the
threads and ease future disassembly.
1. Position new gasket, exhaust elbow and
screws ([A] Fig. 10).
2. Torque screws to listed values.
3. Place the exhaust elbow shield in position
and secure with the two mounting screws
([A] Fig. 10). Torque screws to listed
values.
4
Fig. 11
To remove muffler from model 161400:
1. Remove carburetor heat shield ([A] Fig.
12).
Fig. 10
4. Slide muffler mounting screws through
lock plate and push screws through
muffler.
5. Place new gasket on mating surface of
muffler and insert screws through back
plate.
6. Position second new gasket on the back
plate and fit assembly into place on
exhaust elbow.
7. Torque muffler mounting screws to listed
values. SEE SECTION 14- ENGINE
SPECIFICATIONS.
8. Bend the screw lock tabs against the flat
of the muffler mounting screw heads.
9. Install muffler shield (if equipped). Torque
screws to listed values.
80
Fig. 12
2. Remove muffler guard (B) and manifold
guard
([C] Fig. 12).
3. Take the muffler guard bracket ([A] Fig.
13) off of the muffler.
To install muffler to model 161400:
1. Assemble the lower portion of the exhaust
manifold (with its gasket) and two bolts
([A] Fig. 16) to the muffler and fingertighten.
Fig. 13
4. Remove the mounting screws that secure
muffler (A) to its support bracket (B) and
exhaust manifo ld ([C] Fig. 14).
4
Fig. 16
2. Secure the muffler/manifold assembly and
its gasket to the head and finger-tighten.
3. Make sure the support bracket is under
the blower housing flan ge ([B] Fig. 17)
and start the mounting bolts.
Fig. 14
5. Remove the mounting bolts that secure
the exhaust manifold ([A] Fig. 15) and
exhaust gaskets.
Fig. 17
Fig. 15
6. Inspect the exhaust system components.
See SECTION 4- EXHAUST SYSTEMS.
81
When all components are properly aligned;
4. Torque manifold bolts ([A] Fig. 18) to listed
values. SEE SECTION 14- ENGINE
SPECIFICATIONS.
5. Torque bracket bolts ([B] Fig. 18) to listed
values.SEE SECTION 14- ENGINE
SPECIFICATIONS.
6. Install manifold guard bracket and torque
to listed values.
7. Install the muffler heat shield bracket [A]
with four screws. Torque to listed values.
REMOVE/INSTALL EXHAUST
SYSTEM
(260700, 261700)
4
Fig. 20
Fig. 18
8. Secure muffler guard ([A] Fig. 19) to its
bracket with four screws and torque to
listed values.
To remove muffler from model 261700:
1. Remove the engine blower housing. SEE
SECTION 3- ENGINE DISASSEMBLY.
2. Remove the two lower bolts (A) that hold
muffler to bracket ([B] Fig. 21).
Fig. 19
9. Install carburetor heat shield ([B] Fig. 19)
with two mounting screws (C) and torque
to listed values
Fig. 21
3. Loosen muffler clamp nut ([C] Fig. 21) and
spread clamp slightly with screwdriver.
4. Take note of the different sizes and
remove the two bolts and three screws
82
that secure the exhaust elbow cover (Fig.
22).
Fig. 22
5. With the clamp loose, work the muffler
free of manifold.
6. Slide exhaust elbow cover free of exhaust
manifold.
NOTE : If further engine disassembly is required:
Remove bracket screws ([A] Fig. 23 ) under
cylinder head and remove bracke t.
4
Fig. 24
10. Inspect the exhaust system components.
SEE SECTION 4- EXHAUST SYSTEMS.
To install muffler assembly:
NOTE : Use (#93963) valve lubricant on all
exhaust system threads to prevent galling of the
threads and ease future disassembly.
1. Set new exhaust gasket on mating surface
of cylinder head ([A] Fig. 25).
Fig. 23
7. Remove exhaust elbow mounting bolts
([A] Fig. 24).
8. Set exhaust manifold (B), manifold guard
([C] Fig. 24) aside.
9. Discard old gaskets.
Fig. 25
2. With second gasket set inside heat shield,
place shield on top of cylinder head
exhaust gasket
([B] Fig. 25).
83
3. Place exhaust manifold elbow on gasket
in heat shield and install mounting bolts.
([A] Fig. 26)
11. Torque muffler clamp screw and nut to
listed values.SEE SECTION 14- ENGINE
SPECIFICATIONS.
12. Torque lower bracke t bolts to listed
values. SEE SECTION 14- ENGINE
SPECIFICATIONS.
13. Install mounting screws in exhaust elbow
cover.
14. Torque all fasteners to listed values.
REMOVE/INSTALL EXHAUST
SYSTEM
(28Q700)
Fig. 26
4
4. Torque bolts to listed values.
NOTE : If lower mounting bracket was removed:
Install bracket (See Fig. 23).
5. Torque bracket mounting bolts to listed
value. SEE SECTION 14- ENGINE
SPECIFICATIONS.
6. Slide elbow cover on to elbow heat shield
but do not install fasteners.
7. Assemble the muffler clamp and slip over
slotted flange of muffler.
8. Push the muffler and clamp assembly (A)
on the exhaust manifold ([B] Fig. 27).
Fig. 28
To remove muffler from model 28Q700:
1. Remove muffler brace screw ([A] Fig. 29).
Fig. 27
9. Install support bolts through lower support
bracket and finger-tighten.
10. Make sure the muffler assembly is
completely seated on exhaust manifold.
84
Fig. 29
2. Band back locking tabs ([B] Fig. 29).
3. Remove bolts and muffler.
4. Discard old muffler gasket.
5. Remove muffler adapter screws ([A] Fig.
30).
6. Bend tabs ([A] Fig. 32) to secure the bolts.
A T-40 TORQUX ™ bit is required. Briggs &
Stratton (#19442) “TORQUX STAR BITS.”
Fig. 32
4
Fig. 30
6. Inspect the exhaust system components.
SEE SECTION 4- EXHAUST SYSTEMS.
To install muffler on Model 28Q700:
NOTE : U se (#93963) valve lubricant on all
exhaust system threads to prevent galling of the
threads and ease future disassembly.
1. Install muffler adapter with new gasket.
Fig. 31
2. Torque mounting bolts to listed
values.SEE SECTION 14- ENGINE
SPECIFICATIONS.
3. Install muffler with new gasket (Fig. 32).
4. Install muffler bracket screw.
5. Torgue muffler mounting bolts to listed
values.
85
4
86
SECTION 5 - FUEL SYSTEMS AND CARBURETION
FUEL SYSTEM CLEANING AND INSPECTION............................................ ………..89
FUEL TANKS, FITTINGS AND LINES ........................................................... ………..90
Fuel System (050000, 118400)................................................................................………...90
Fuel System (085400, 115400, 117400, 138400, 185400, 235400, 245400) ......... ………...90
Fuel System (104700) ..............................................................................................………...93
Fuel System (161400) ..............................................................................................………...94
Fuel System (260700, 261700)................................................................................………...96
Fuel System (28Q700).............................................................................................………...97
CARBURETOR SERVICE PROCEDURES (0500 00, 085400, 086400,
5
115400, 117400, 118400, 104700, 161400, 185400, 260700, 261700)……………..99
Carburetor Service - Mikuni (050000, 085400, 086400, 115400,
117400, 118400, 185400) ........................................................................... ………..99
Carburetor Service - Mikuni (104700) ......................................................... ………105
Carburetor Service - Mikuni (161400) ......................................................... ………110
Carburetor Service - Mikuni (260700, 261700) ........................................... ………117
CARBURETOR SERVICE PROCEDURES (138400).................................... ………121
Carburetor Service - Nikki (138400)......................................................................... ……….121
CARBURETOR SERVICE PROCEDURES (2354 00, 245400, 28Q700) ....... ………125
Carburetor Service - Walbro LMT (23540 0, 245400, 28Q700)................................……….125
Carburetor Service - Nikki (28Q700)........................................................................……….128
87
5
88
WARNING
Gasoline and its vapors are extremely
flammable and explosive.
Fire or explosion can cause severe burns or
death.
When adding fuel:
• Turn engine OFF and let engine cool at
least 2 minutes before removing.
• Fill fuel tank outdoors or in a well ventilated area.
• Do not overfill fuel tank. Fill tank to
approxi mately 1-1/2 inches below top
of neck to allow for fuel expansion.
• Keep gasoline away from sparks, open
flames, pilot lights, heat and other
ignition sources.
• Check fuel lines, tank, cap and fittings
frequently for cracks or leaks and
replace if necessary.
When starting engine:
• Make sure spark plug, muffler, fuel cap
and air cleaner are in place.
• Do not crank engine with spark plug
removed.
• If fuel spills, wait until it evaporates
before starting engine.
• If engine floods, set choke to
OPEN/RUN position. Place throttle in
FAST and crank until engine starts.
When operating equipment:
• Do not tip engine or equipment at an
angle which would cause fuel to spill.
• Do not choke carburetor to stop
engine.
When transporting equipment:
• Transport with fuel tank empty or with
fuel shut-off valve set to OFF.
When storing gasoline or equipment with
fuel in tank:
• Store away from furnaces, stoves,
water heaters or other appliances that
have a pilot light or other ignition
source because they can ignite
gasoline vapors.
FUEL SYSTEM CLEANING AND
INSPECTION
CAUTION: Do not use carburetor cleaner on
non-metallic parts. Use carburetor cleaner only
after removing plastic and rubber parts.
CAUTION: Do not use a screw in the fuel hose
to stop fuel leakage. The screw threads will
loosen rubber particles which will get into the fuel
system. Turn the fuel shut off valve OFF before
servicing the carburetor.
Clean gummy or dirty fuel tanks with Briggs &
Stratton Carburetor Cleaner (#100041 or #100042)
or equivalent.
1. Replace air cleaner gaskets and mounting
gaskets whenever carburetor is removed.
2. Inspect fuel tank for:
• Corrosion
• Leaks
• Broken mounting brackets
3. Check fuel cap and filler neck for:
• Proper seals
• Vents
• Functional quantity gauge (if equipped)
4. Check fuel filter for blockage of any kind.
5. Check fuel shut-off valve for:
• Proper operation
• Security of all mounting hardware
6. Check condition and torque of all
mounting studs and hardware.
Clean or replace parts as required, and
reassemble with new hoses, clamps and
gaskets.
89
5
FUEL TANKS, FITTINGS AND
LIN ES
Fuel System (050000, 118400)
Removal
1. Disconnect breather hose ([A] Fig. 1) at
rocker cover and remove air cleaner
assembly.
2. Release clamp and disconnect tank hose
at fuel shut-off valve ([B] Fig. 1).
3. Place hose in appropriate container and
allow fuel to completely drai n from tank.
5
Fig. 1
1. Open carburetor bowl drain screw and
drain remaining fuel into appropriate
container.
2. Close bowl drain screw.
3. If equipped, remove the remote throttle
control bracket (A).
6. Remove tank mounting bolts.Keep hoses
with tank.
7. Open hose clamp and remove hose from
tank outlet fitting and set aside.
8. Remove shut-off valve and bracket if
necessary.
Installation
For torque values: SEE SECTION 14- ENGINE
SPECIFICATIONS.
1. Install valve bracket on side of blower
housing and torque screws to values
listed.
2. Install shut-off valve and hose on valve
bracket. Clamp hose to carburetor fitting.
3. Install new hose and clamp on tank outlet
fitting. Connect other end of hose and
clamp to shut-off valve fitting.
Route tank hose through retainer on crankcase
cover, then position tank on engine.
4. Start all screws, then torque each to
values listed.
5. Position trim plate and install phillips
screws to values listed.
6. Install throttle control knob.
7. If equipped, install the remote throttle
control bracket and rewind assembly, and
torque screws to values listed.
8. Connect breather hose to valve cover,
then install air cleaner assembly.
9. Add small amount of fuel to tank, open
shut-off valve and check for leaks.
10. Start engine and check for leaks again.
Fuel System
(085400, 115400, 117400, 138400,
185400, 235400, 245400)
Fig. 2
4. Remove throttle control knob.
5. Remove phillips screws ([B] Fig. 2) a nd
trim plate.
90
Removal
1. Open hose clamp and disconnect tank
hose at fuel shut-off valve.
2. Place hose in appropriate container and
allow fuel to completely drai n from tank.
3. Open carburetor bowl drain screw and
drain remaining fuel into appropriate
container.
4. Close bowl drain screw.
5. If equipped with metal key switch cover
(Fig. 3), remove screws from cover and
allow cover to hang from wiring.
12. Release clamp and disconnect hose
from tank outlet fitting. Set aside.
13. Release clamp and disconnect hose at
carburetor fitting.
14. Remove screw ([A] Fig. 5) and remove
shut-off valve with spacer (B).
Fig. 5
15. Drain any remaining fuel into appropriate
container.
16. Disasse mble shut-off valve, if necessary.
Fig. 3
6. Remove throttle control knob.
7. If equipped with separate contr ol cover,
remove screw from top of cover and
remove cover.
8. Remove screws ([A] Fig. 4) at left and
right ends of trim plate.
9. Lift off trim plate, leaving rocker switch
wires connected (Fig. 4), if equipped.
Removing Governor Linkage Bracket
(085400, 115400, 117400, 138400,
185400, 235400, 245400)
Removing the governor linkage bracket is
essentially the same for all the models listed
above.
To gain access to the carburetor, complete the
following steps:
1. Remove return spring ([A] Fig. 6) and set
aside.
2. Remove mounting bolt ([B] Fig. 6) and set
governor control bracket aside.
Fig. 4
10. Remove screws and/or nuts from front
and rear of tank.
11. Lift off tank and hose.
91
5
Fig. 6
Fig. 8
3. Slide carburetor from its mounting studs
and disconnect governor link ([A] Fig. 7)
and anti-backlash spring ([B] Fig. 7) when
carburetor is free.
4. Remove governor link and anti-backlash
spring from governor lever ([C] Fig. 7) and
set aside.
5
Fig. 7
5. Remove the carb spacer from the
carburetor mounting studs. SEE
SECTION 13- FINAL ENGINE
ASSEMB LY.
Inspect Fuel System. SEE SECTION 5- FUEL
SYSTEM CLEANING AND INSPECTION.
Installation
For torque values: SEE SECTION 14- ENGINE
SPECIFICATIONS.
1. Place gasket, carb spacer and gasket on
mounting studs.
2. Connect governor/choke linkages on
carburetor and position carburetor on
mounting studs.
3. Mount governor control bracket/s (as
required) and connect links and springs.
4. Position shut-off valve and hose into index
hole on blower housing.
5. Install spacer and screw, and torque to
values listed.
6. Connect hose with clamp to carburetor
fitting.
7. Install new hose and clamp on tank outlet
fitting.
8. Connect other end of hose and clamp to
shut-off valve fitting.
9. Route tank hose through retainer on
crankcase cover, then position tank on
engine.
10. Start all screws and nu ts.
NOTE : (115400) Do not pinch governor link
spring behind head of screw. The ground wire
terminal must be installed under screw on right
side of tank.
92
11. Torque screws and nuts to values listed.
12. Position trim plate and install short screw
on left side and long screw on right side.
13. Install separate control cover (if
equipped) and torque screws to values
listed.
14. Install throttle control kno b.
15. Position metal key switch cover (if
equipped) and start all screws.
16. Torque mounting screws to values listed.
17. Add small amount of fuel to tank.
18. Open shut-off valve and check for leaks.
19. Install air cleaner assembly. SEE
SECTION 1- AIR CLEANER SERVICE.
and use information appropriate for your
engine model.
20. Start engine and check for leaks again.
Fig. 10
Inspect Fuel System. SEE SECTION 5- FUEL
SYSTEM CLEANING AND INSPECTION.
8. Remove air filter and housing.
9. Remove muffler.
10. Remove Blower Housing.
11. Disconnect stop switch wire (A) and
return spring ([B] Fig. 11) from governor
lever.
Fuel System (104700)
5
Removal
1. Close shut-off valve, if equipped.
2. Release clamp and disconnect fuel hose
from carburetor fitting.
3. Place hose in appropriate container, open
shut-off valve, and allow fuel to
completely drain from tank.
4. Release clamp and disconnect hose from
tank fitting.
5. Disassemble shut-off valve and filter, if
equipped, from hoses and set aside.
6. Remove the two Phillips screws that
secure the brake assembly cover ([A] Fig.
9).
Fig. 11
Fig. 9
7. Remove the three tank mounting screws
([A] Fig. 10) and remove tank.
12. Remove governor link ([A] Fig. 12) from
carburetor by pulling up on link.
13. Remove governor bracket mounting
screws that are shown in ([B] Fig. 12).
93
8. Install tank using long screw next to brake
assembly and short screws underneath.
9. Torque screws to values listed.
10. Position brake assembly cover and
install phillips screws to values listed.
11. Install hose assembly to tank fitting and
carburetor fitting with new clamps.
12. Add small amount of fuel to tank, open
shut-off valve, and check for leaks.
13. Start engine and check for leaks again.
Fuel System (161400)
Fig. 12
14. Move the carburetor from its mounting
studs and disconnect the choke link when
it is free.
Installation
5
For torque values: SEE SECTION 14- ENGINE
SPECIFICATIONS.
1. Install choke link on carburetor choke
shaft.
2. Place the large gasket (A), space r (B) and
carburetor gasket (C) as shown in
(Fig.13).
Removal
1. Release clamp and disconnect tank hose
at shut-off valve ([A] Fig. 14).
2. Place hose in appropriate container and
allow fuel to completely drai n from tank.
3. Open carburetor bowl drain screw ([B] Fig.
14), if equipped, and drain remaining fuel
into appropriate container. Close bowl
drain screw.
4. Remove choke and throttle control knobs.
5. Remove screws ([C] Fig. 14) that secure
trim plate.
Fig. 14
Fig. 13
3. Slip choke link through control bracket and
install bracket (Refer back to Fig. 12).
4. Reinstall stop switch wire and governor
lever return spring (Refer to Fig. 11).
5. Install Blower Housing. SEE SECTION 3ENGINE DISASSEMBLY.
6. Install muffler. SEE SECTION 4EXHAUST SYSTEMS.
7. Install air filter and housing.
94
6. Remove air filter and housing.
7. Remove tank support screws above valve
cover.
8. Lift off tank and carefully slip hose and
filter (if equippe d) under the governor link.
9. Slip spark plug wire through hole in tank
support. Set tank aside.
10. Remove bo lts ([A] Fig. 15) that secure
shut-off valve.
Inspect Fuel System. SEE SECTION 5- FUEL
SYSTEMS AND CARBURETION.
Installation
For torque values: SEE SECTION 14- ENGINE
SPECIFICATIONS.
1. Install the carburetor assembly as shown
in (Fig. 17).
Fig. 15
11. Remove bo lts ([B] Fig. 15) that hold the
choke bracket, air intake duct and
carburetor.
12. While removing carburetor, disconnect
governor link and anti-backlash spring.
13. Release clamp and disconnect hose with
shut off valve from carburetor fitting.
14. Drain any remaining fuel into appropriate
container.
5
NOTE : Some variations of model 161400
incorporated a fuel pump mounted near the
blower housing and the air cleaner cover. This
allowed for a remote fuel tank installation by
some OEMs. The pump is operated by vacuum
pulses from the engine.
1. Disconnect vacuum line (A) and fuel line
(B) to the fuel pump ([C] Fig. 16)
2. Remove two screws that secu re mounting
bracket to cr ankcase.
3. Remove pump from bracket (if
necessary).
Fig. 16
Fig. 17
Refer to (Fig. 17)
• (A) Carburetor gaskets in these
locations.
• (B) Choke link connected to choke shaft.
• (C) Governor Lever and anti-backlash
spring connected to throttle.
2. Torque carburetor mounting bolts to
values listed.
3. Connect fuel hose and clamp from fuel
shut-off valve to carburetor. Torque
mounting bolts to values listed.
4. Route spark plug wire through hole in tank
support bracket and route tank hose and
filter under governor link, then position
tank on e ngine.
5. Start screws through tank support. Do not
tighten at this time.
6. Connect new hose and clamps between
fuel filter and shut-off valve.
7. Connect breather hose to base. Install
screws and torque to listed value.
8. Install air filter, pre-cleaner, and air
cleaner cover. Tighten wing knobs
securely.
95
9. Fit left end of trim plate into slot in air
cleaner base.
10. Start screws in holes along trim plate.
11. Torque screws to values listed.
12. Torque tank support screws above valve
cover to values listed.
13. Install choke and th rottle control knobs.
14. Add small amount of fuel to tank.
15. Open shut-off valve.
16. Check for leaks.
17. Start engine and check for leaks again.
6. Loosen screw at hose clamp, if equipped,
on control bracket.
7. Remove pump screws and remove pump
and hose assembly from engine.
8. Disassemble hoses from pump, shut-off
valve, and filter, if equipped.
9. Remove screws and pump bracket, if
necessary.
10. Remove air filter and housing.
11. Remove the two nuts that secure the air
induction manifold and the carburetor.
12. Disconnect the choke link ([A] Fig. 19)
and while sliding the carburetor from its
mounting studs, disconnect the governor
link and anti-backlash spring ([B] Fig. 19).
Fuel System
(260700, 261700)
Removal
5
For this engine series, remote fuel tanks were
typically installed by the OEM. The following
procedure does not include removal of the tank
from the equipment.
1. Release clamp and disconnect tank hose
([A] Fig. 18) at pump inlet fitting.
2. Place hose in appropriate container and
allow fuel to completely drai n from tank.
3. Open carburetor bowl drain screw, if
equipped, an d drain remaining fuel into
appropriate container.
4. Close bowl drain screw.
5. Release clamps and disconnect impulse
hose at crankcase fitting ([B] Fig. 18) and
fuel supply hose at carburetor fitting ([C]
Fig. 18).
Fig. 19
Inspect Fuel System.
SEE SECTION 5- FUEL SYSTEMS AND
CARBURETION.
Installation
FOR TORQUE VALUES: SEE SECTION 14ENGINE SPECIFICATIONS.
1. Place gasket, heat shield, gasket, heat
riser and another g asket as shown in
(Fig.21).
Fig. 18
96
2. Disconnect the clamps at the carburetor
fitting
([A] Fig. 21) and the crankcase ([B] Fig.
21).
3. Remove the bolts ([C] Fig. 21) that secure
the pump to its mounting bracket.
Fig. 20
2. While sliding carburetor on its mounting
studs, install the governor link and antibacklash spring (Refer back to Fig. 20).
3. Install choke link.
4. Mount new gasket and air intake manifold
and secure with two nuts.
5. Torque mounting nuts to values listed.
6. Install air filter housing and air filter.
7. Re-install pump bracket, if removed.
Torque screws to values listed.
8. Install pump and hose assembly on pump
bracket and torque screws to values
listed.
9. Connect hoses and clamps to carburetor
fitting and crankcase fitting. Route hose
under hose retainer.
10. Torque screw to values listed.
11. Connect new fuel ho se and clamps
between tank outlet and pump inlet
fittings.
12. Add small amount of fuel to tank, open
shut-off valve, if equipped, and check for
leaks.
13. Start engine and check for leaks again.
Fuel System (28Q700)
Fig. 21
4. Remove air filter cove r and air filter.
5. Remove the two nuts ([A] Fig. 22) that
secure the air filter housing to the
carburetor mounting studs.
6. Remove the supporting bolt ([B] Fig. 22) in
the air filter housing.
Fig. 22
7. Slide the air cleaner housing free of the
carburetor mounting studs and disconnect
the crankcase breather tube from the
housing.
8. Remove the two studs ([A] Fig. 23) that
hold the carburetor to the air intake
manifold.
Removal
For this engine series, remote fuel tanks were
typically installed by the OEM. The following
procedure does not include removal of the tank
from the equipment.
1. Release clamp and disconnect tank hose
at pump inlet fitting (Previously removed).
97
5
Fig. 25
Fig. 23
5
9. Whi le removing the carburetor, disconnect
the governor link with anti-backlash spring
(B) and the choke link ([C] Fig. 23).
10. Remove the two bolts that secure the air
intake manifold to the crankcase
([A]Fig.24).
Fig. 24
Installation
1. Make sure the seal is properly seated in
the groove of the air intake manifold ([A]
Fig. 25).
98
2. Install air intake manifold and torque bolts
to values listed.
3. Slip mounting bolts through carburetor
and connect governor lever with its antibacklash spring and the choke link.
4. Slip carburetor gasket on the bolts install
carburetor. Torque bolts to values listed.
5. Place gasket on studs and mount air
cleaner housing on carburetor studs.
Torque nuts to values listed.
6. Install air cleaner housing supporting bolt
(See [B] Fig. 22). Torque to values listed.
SEE SECTION 14- ENGINE
SPECIFICATIONS.
7. Install air filter and cover.
8. Install fuel pump to its mounting bracket
(Refer back to Fig. 21). Torque bolts to
values listed.
9. Install hoses and clamps to carburetor fuel
inlet, cylinder housing and fuel tank
supply hose.
10. Install shut-off valve with new hose and
clamps on carburetor fitting. Install screws
and torque to values li sted.
CARBURETOR SERVICE
PROCEDURES
(050000, 085400, 086400, 115400,
117400, 1 18400, 104700, 1 61400,
185400, 260700, 261700)
Some engines were built using both Nikki and
Walbro carburetors. These carburetors have a
fixed high spe ed main jet with adjustment screws
for idle mixture and idle speed only. Be certain to
use both the manufacturer and the carburetor
number when ordering service parts. Service
parts are available for both carburetors.
Engines used in snow removal equipment use
Nikki carburetors with an adjustment screw for
idle speed only. This carburetor also has a
primer bulb port.
Disasse mbly
1. Remove float bowl mounting screw (A),
washer (B) and float bowl ([C] Fig. 27).
Fig. 27
2. Remove float bowl gasket ([D] Fig. 28)
5
Carburetor Service - Mikuni
(050000, 085400, 086400, 115400,
117400, 118400, 185400)
CAUTION: Do not use wires, drills or other
devices to clean out metering holes or passa ges.
Do not use carburetor cleaner on non-metallic
parts.
Fig. 28
NOTE : Use compressed air at a moderate
pressure setting (5-7 PSI) . Blow in both directions
to clean out all openings and passages.
CAUTION: Main jet ([ A] Fig. 29) must be
removed before emulsion tube (B) is removed or
damage to threads of the emulsion tube will
result.
3. Remove main jet (A).
4. Remove carburetor emulsion tube ([ B]
Fig. 29) with screwdriver #19061.
Fig. 26
99
Fig. 31
Fig. 29
5
9. Remove screws (A) holding choke pl ate
([B] Fig. 32) and remove.
The float hinge pin ([A] Fig. 30) is a wedge fit.
5. Tap the small end of the pin (B) with a
center punch until it is loo se.
6. Remove pin (A) and remove the float ([C]
Fig. 30) and inlet needle assembly.
Fig. 30
7. Remove pilot jet (A) with Screwdriver #
19062.
8. Pry off the idle mixture valve limiter (B), if
used. Remove the idle mixture screw and
spring ([C] Fig. 31).
100
Fig. 32
10. Lift out choke shaft (A) with upper (B)
and lower ([C] Fig. 33) choke shaft
bushings.
Fig. 35
To clean carburetor:
Fig. 33
SEE SECTION 5- FUEL SYSTEMS AND
CARBURETION.
NOTE: Engines with type numbers not ending in
A1 or E1 have removable idle and main air jets.
Remove jets ([A] Fig. 34 ) with carburetor jet
screwdriver (#19280).
5
Assembly
Use new seals and gaskets when assembling
carburetor.
1. Install plastic washer (B) on throttle shaft
(A).
2. Install the throttle shaft in the carburetor
body with flat ([C] Fig. 36) facing out.
Fig. 34
11. Remove screw and lock washer (A) from
throttle plate (B) and remove throttle
plate.
12. Lift out throttle shaft and plastic washer
([C] Fig. 35).
Fig. 36
3. Place the throttle plate (A) on the throttle
shaft (B) with the stamped numbers ([C]
Fig. 37) to the right. Install screw with
washer.
101
7. Install choke shaft ([A] Fig. 39) into
carburetor.
NOTE : Make sure the choke shaft retainer stop
(B) is between the carburetor body stop (C) and
the detent spring ([D] Fig. 39) in order to install
the choke plate next.
Fig. 37
5
4. Rotate throttle shaft to check for binding.
Correct if required.
5. Place upper choke shaft bushing ([A] Fig.
39) on choke shaft (B) with the detents
(C) facing away from the long choke lever
arm (D) and the stop ([E] Fig. 38) facing
the bottom of the shaft.
6. Place bottom bushing ([F] Fig. 38) on
bottom of choke shaft.
Fig. 39
NOTE: Holes in choke plate are offset from
center. Be sure to install choke plate with holes
properly aligned with holes in cho ke shaft.
8. Place choke plate (A) on choke shaft ([B]
Fig. 40) and secure with two screws.
Fig. 40
NOTE: Engines with type numbers not ending in
A1 or E1 have removable idle and main air jets.
Install jets ([A] Fig. 41) with carburetor jet
screwdriver (#19280).
Fig. 38
102
Fig. 41
CAUTION: Emulsion tube ([A] fig. 42) must be
installed before main jet (B) or damage to th e
threads of the emulsion tube will result.
Fig. 43
15. Install spring (A) to groove in fuel needle
valve ([B] Fig. 44).
5
9. Install emulsion tube (A) with screwdriver
#19061. Install main jet ([B] Fig. 42).
Fig. 44
16. Slide fuel need le valve assembly (A) on
tab (B) of float ([C] Fig. 45).
Fig. 42
FOR MAIN JET AND PILOT JET
IDENTIFICATION, SEE IDENTIFYING MAIN
AND PILOT JETS ON PAGE 107.
10. Install pilot jet ([A] Fig. 43).
11. Install idle mixture screw ([B] Fig. 43)
and spring.
12. Turn mixture screw in until it just makes
contact with the seat.
13. Back mixture screw off 1-1/2 turns.
14. Install limiter ([C] Fig. 43) if used.
Fig. 45
17. Place float assembly ([A] Fig. 46) in
carburetor.
18. Insert the small end of the float hinge pin
(B) by hand until pin is through the float
103
hinge (C) and both hinge pin posts ([D]
Fig. 46).
21. Install float bowl gasket ([A] Fig. 48) to
carburetor body groove.
22. Make sure the gasket does not twist or
kink.
Fig. 48
Fig. 46
5
19. Install the hinge pin.
20. Turn the carburetor body upside down.
NOTE : The float (A) should be parallel to the
23. Position bowl drain ([A] Fig. 49 ) as
shown.
24. Install float bowl (B), washer (C), and
mounting screw (D), to carburetor.
25. Tighten screw ([D] Fig. 49) securely.
float bowl mounting surface ([B] Fig. 47).
Fig. 49
Fig. 47
If not parallel:
• Replace the fuel inlet valve, float and
hinge pin.
If still not parallel:
• Replace carburetor.
104
Identifying Main And Pilot Jets
(085400, 115400, 117400, 185400)
Type Numbers Not Ending In A1Or E1
Model
Seri es
085400
115400**
115400*
117400
185400**
185400*
** Large
A ir C leaner
Standard
Main Jet
71.3
75
75
81.3
93.8
91.3
High
Altitude
Main Jet
67. 5
72.5
72.5
78. 8
90
90
Standard
Pilot
Jet
42.5
45
42.5
42.5
40
37.5
*Small
Air Cleaner
Hig h
Altitude
Pilot Jet
40
42.5
37.5
41.3
35
35
Type Numbers Ending in A1 or E1
Model
Seri es
085400
115400
117400
185400**
185400*
** Large
A ir C leaner
Standard
Main Jet
67.5
75
81.3
91.3
91.3
High
Altitude
Main Jet
82. 5
72.5
78. 8
90
90
Standard
Pilot
Jet
42.5
42.5
42.5
40
37.5
Hig h
Altitude
Pilot Jet
40
40
41.3
35
35
Fig. 50
Disasse mbly
1. Remove float bowl mounting screw (C),
washer (B) and float bowl ([A] Fig. 51).
*Small
Air Cleaner
Carburetor Service - Mikuni
(104700)
Fig. 51
CAUTION: Do not use wires, drills or other
devices to clean out metering holes or passages.
2. Remove float bowl gasket ([A] Fig. 52).
NOTE : Use compressed air at a moderate
pressure setting (5-7 PSI). Blow in both
directions to clean out all openings and
passages.
Fig. 52
105
5
3. Push float hinge pin (A) out of th e hinge
posts (B). Remove float (C) and needle
assembly ([D] Fig. 53).
4. The float hinge pin ([A] Fig. 53) is a slip fit.
After Date Code 90042833
Remove the fixed main jet. Remove the main
emulsion tube with Carburetor Jet Screwdriver,
#19062.
6. Pry off the idle mixture valve limiter (if
used). Remove the idle mixture scr ew and
spring from carburetor body ([A] Fig. 55).
7. Remove pilot jet ([B] Fig. 55) with Jet
Screwdriver #19062.
5
Fig. 53
5. Remove the main jet (A) and the emulsion
tube ([B] Fig. 54).
Fig. 55
8. Remove choke plate screws (A). Remove
choke plate (B),
9. Unhook choke shaft spring ([C] Fig. 56).
10. Remove choke shaft (D) and upper
retainer (E), spring (C), washer (F), seal
(G), and lower retainer ([H] Fig. 56).
Fig. 54
For correct main jet and pilot jet identification,
See Identifying Main Jets on page 107.
Before Date Code 90042933
The emulsion tube can not be removed with the
main jet in the carburetor. Unscrew the main jet
first, then the emulsion tube.
106
Fig. 56
11. Remove air jets (if removable) on either
side of the choke plate opening with
Carburetor Jet Screwdriver # 19280.
12. Note the p osition of the throttle plate.
13. Remove the throttle plate screws (A).
14. Remove the throttle plate ([B] Fig. 57).
Assembly
Use new seals and gaskets when assembling
carburetor.
1. Install throttle shaft seal ([B] Fig. 59) to
carburetor body (A). Install seal with
grooved side out, Fig. 59.
2. Place throttle shaft retainer (C) on throttle
shaft (D). Install throttle shaft to carburetor
body.
3. Rotate throttle shaft until the flat (E) on the
throttle shaft (D) is facing out.
4. Lay the throttle plate (F) on the shaft with
the stamped numbers (G) to the left.
Install two screws ([H] Fig. 59).
5
Fig. 57
15. Slide the throttle shaft ([A] Fig. 58) out of
the carburetor body.
16. Remove the washer (B).
17. Inspect the shaft seal ([C] Fig. 58).
Fig. 59
Fig. 58
To clean carburetor:
SEE SECTION 5- FUEL SYSTEMS AND
CARBURETION.
5. Rotate throttle shaft to check for binding.
Correct if required.
6. Install upper retainer (A) to the choke
shaft ([B] Fig. 60).
7. Install spring (C), washer (D), seal (E) and
lower retainer (F) to choke shaft (B).
Insert shaft into carburetor body ([G] Fig.
60).
107
Fig. 60
8. Connect one spring end ([A] Fig. 61) to
the carburetor body (B), the other end (C)
to the choke lever ([D] Fig. 61) to hold
choke plate open.
Fig. 62
9. Place choke plate ([A] Fig. 63) on choke
shaft with stamped number (B) tow ard the
fuel inlet nipple (C) side of the carburetor.
10. Secure with two screws ([D] Fig. 63).
5
Fig. 61
NOTE: Engines with type numbers not ending in
A1 or E1 have removable idle and main air jets.
Remove or install jets ([A] Fig. 62) with
carburetor jet screwdriver (#19280).
108
Fig. 63
11. Choke should close when shaft is rotated
CCW. Tighten screws securely.
12. Install idle and main air jets, if equipped,
on either side of carburetor air inlet.
13. Install pilot jet ([B] Fig. 64). Tighten
securely.
14. Install idle mixture screw and spring ([A]
Fig. 64). Do not tighten the idle mixture
screw.
Fig. 64
15. Slide fuel need le valve assembly (A) on
to tab (B) of float ([C] Fig. 65).
Fig. 66
17. Insert the float hinge pin (A) through the
float hinge and both hinge pin posts ([B]
Fig. 67). Center the hinge pin in the hinge
pin posts.
Fig. 65
16. Place float assembly ([A] Fig. 66) in
carburetor.
Fig. 67
18. Turn the carburetor body upside down.
The floa t (A) should be parallel to the float
bowl mounting surface ([B] Fig. 68).
109
5
Fig. 70
Identifying Main Jets (104700)
Fig. 68
If not parallel:
• Replace the fuel inlet valve, float and
hinge pin.
5
19. Install the emulsion tube (A) and then the
main jet ([B] Fig. 69).
Model Series Standard Jet High Altitude Jet
Before
100
92.5
90091033
After
107.5
102.5
90090933
Carburetor Service - Mikuni
(161400)
CAUTION: Do not use wires, drills or other
devices to clean out metering holes and
passages.
NOTE : Use compressed air at a moderate
Fig. 69
20. Position bowl drain (A) as shown, Fig.69.
21. Install float bowl (B), washer (C), and
mounting screw (D), to carburetor.
22. Tighten screw ([D] Fig. 70) securely.
110
pressure setting (5-7 PSI). Blow in both
directions to clean out all openings and
passages.
Fig. 73
Fig. 71
Disasse mbly
1. Remove the float bowl mounting screw
(C), washer (B) and float bowl ([A] Fig.
72).
4. Remove the pin, float and inlet needle
assembly.
5. Remove fixed main (B) jet from end of
fuel pick up tube first, Fig. 74, then
remove the emulsion tube ([A] Fig. 74).
5
Fig. 72
2. Remove float bowl gasket (A).
3. The float hinge pin is a wedge fit. One end
of float hinge pin has two flats ([B] Fig.
73). Tap the opposite end of the pin until
loose.
Fig. 74
If emulsion tube does not come out with jet:
• Reach into carburetor throat with flat
blade screwdriver and gently tap top
of stuck emulsion tube until it comes
out (Fig. 75).
111
Fig. 75
6. Remove pilot jet ([A] Fig. 76) with
screwdriver # 19062.
Fig. 77
9. Unhook the choke shaft spring.
10. Remove choke plate screws ([A] Fig.78).
11. Remove choke plate (B), shaft (C),
spring (D), washers (if used),se al (E),
bushings (F) Fig. 78).
5
Fig. 76
7. Pry off the idle mixture valve limiter ([A]
Fig. 77).
8. Remove the idle mixture screw ([B]
Fig.77).
Fig. 78
NOTE: Engines with type numbers not ending in
A1 or E1 have removable idle and main air jets.
112
15. Remove and inspect the bushing ([F] Fig.
80). Replace if worn or damaged.
Remove or install jets ([A] Fig. 79) with
carburetor jet screwdriver (#19280).
5
Fig. 80
To clean carburetor:
Fig. 79
Note the position of the throttle plate.
12. Remove throttle plate screws ([A] Fig.
81) and remove plate (B).
13. Slide the throttle sha ft (C) out of the
carburetor body.
14. Remove the throttle shaft seal (D) and
washer (E).
SEE SECTION 5- FUEL SYSTEMS AND
CARBURETION.
Inspect the idle mixture screw. Replace the
screw if the point is bent or there is a groove in
the tip of the needle.
Assembly
Use new seals and gaskets when assembling
carburetor.
1. Install throttle shaft bushing (A) to
carburetor body with grooved side out,
Fig. 81.
2. Place washer (B) and throttle shaft seal
(C) on the throttle shaft ([D] Fig. 81).
3. Install the throttle shaft to the carburetor
body.
4. Rotate throttle shaft until the flat on the
shaft is facing out.
113
spring should hold the choke plate open
Fig. 84.
Fig. 81
5. Lay the throttle plate (A) on the shaft with
the stamped numbers (B) to the left.
Install two screws ([C] Fig. 82).
Fig. 84
10. Place choke plate (A) on choke shaft
with stamped nu mber(s) (B) facing
opposite the fuel inlet (C). Attach with
screws ([D] Fig. 85).
5
Fig. 82
6. Rotate throttle shaft to check for binding.
Correct if required.
7. Install spring (A), washer (B), bushing (C)
and seal (D) to choke shaft ([E] Fig. 83).
8. Insert shaft to carburetor body, Fig. 83.
Fig. 85
11. Install pilot jet ([A] Fig. 86).
Fig. 83
9. Connect the ends of the spring (A) to the
lever (B) and carburetor body (C). The
114
Fig. 88
15. Slide fuel need le valve assembly (A) on
to tab (B) of float ([C] Fig. 89).
Fig. 86
12. Place emulsion tube (B) in fuel pick
up first, then install fixed main jet ([A]
Fig. 87) .
5
13. Install the emulsion tube (B) with jet
screwdriver #19062, (C) and install the
fixed main jet ([A] Fig. 87).
Fig. 89
16. Place float assembly (A) in carburetor,
Fig. 90.
17. Insert the small end of the float hinge pin
(B) by hand until pin is through the float
hinge (C) and both hinge pin posts (D),
Fig. 90.
Fig. 87
NOTE: For main jet and pilot jet identification
and selection, See Identifying Main Jets on page
14. Install spring (A) to groove in fuel needle
valve ([B] Fig. 88).
115
Fig. 92
Fig. 90
18. Turn the carburetor body upside down.
The floa t (A) should be parallel to the float
bowl mounting surface ([B] Fig. 91).
22. Install idle mixture screw ( D) and spring
Fig. 93. Turn screw in until it just seats. Do
not tighten.
23. Back screw off 1-1/2 turns.
24. Install limiter ([E] Fig. 93), if used.
5
Fig. 91
If not parallel:
• Replace the fuel inlet valve, float and
hinge pin.
19. Position bowl drain as shown, Fig. 92.
20. Install float bowl (A), washer (B), and
mounting screw ([C] Fig. 92), to
carburetor.
21. Tighten screw (C) securely.
116
Fig. 93
Identifying Main Jets (161400)
Model Series Standard Jet High Altitude Jet
Before
100
92.5
90091033
After
107.5
102.5
90090933
Fig. 94
These carburetors are equipped with two styles
of choke shafts:
• Plastic shaft with snap-in choke plate
• Metal shaft with screw-mounted choke
plate.
Carburetor Service - Mikuni
(260700, 261700)
CAUTION: Do not use wires, drills or other
devices to clean out metering holes or passages.
To remove plastic choke shaft and plate:
1. Rotate choke shaft to wide open position.
2. Pull choke plate out of choke shaft and
lever.
3. Remove choke shaft and lever, return
spring (when used) and foam washer.
NOTE : Use compressed air at a moderate
pressure setting (5-7 PSI). Blow in both
directions to clean out all openings and
passages.
To remove metal choke shaft and plate:
1. Rotate choke shaft and lever closed.
Replacement carburetors may have a spring
detent that will hold the choke closed.
2. Hold choke closed. Remove two screws
holding choke plate.
3. Remove plate.
4. Release tension on choke shaft.
5. Remove choke shaft and lever, return
spring and seal assembly.
117
5
Disasse mble
1. Remove fuel bowl mounting screw (C) and
washer (B). Remove the fuel bowl ([A]
Fig. 95).
Fig. 95
2. Remove float bowl gasket ([A] Fig. 96).
5
Fig. 97
5. Remove the main jet (A) from the fuel
pick-up tube.
6. Remove the emulsion tube ([B] Fig. 98)
with a carburetor jet screwdriver.
Fig. 96
3. Remove float hinge pin (A), float ([B] Fig.
97), and inlet needle.
Float hinge pin is a drive fit and one end of the
pin has two flats.
4. Tap the end opposite the flats with a
center punch ([C] Fig. 97) until it is loose.
118
Fig. 98
7. Remove the pilot jet (A) with Screwdri ver #
19062, Fig. 99.
Fig. 101
Fig. 99
8. Remove idle mixture screw with spring
([A] Fig. 100).
11. Remove the air jets located on either
side of the choke plate opening with
carburetor jet screwdriver # 19280.
12. Note the position of the throttle plate for
reinstallation.
13. Remove the throttle shaft screws ([B]
Fig. 101)Remove the throttle plate.
Low emissio n LMT carburetors with type
numbers that end in A1 or E1 have pressed in
pilot jets that are not removable.
Do not remove the pressed in pilot jets ([A] Fig.
102).
Fig. 100
Fig. 102
9. Unhook the choke shaft spring ([A] Fig.
101).
10. Remove the choke plate screws (B).
Remove the choke plate (C). Remove the
shaft (D), spring (A), washer (E), and
retainers (F) and ([G] Fig. 101).
14. Remove brass pilot jet ([A] Fig. 103) from
carburetor body.
119
5
shaft. Secure with two screws ([ G] Fig.
105).
Fig. 103
15. Using carburetor nozzle screwdriver #
19280, remove main carburetor emulsion
tube ([A] Fig. 104).
Fig. 105
1. Install throttle shaft seal (A) to carburetor
body. Install seal with grooved side out.
2. Place plastic throttle shaft seal (B) o n
throttle shaft ([C] Fig. 106).
3. Install throttle shaft to carburetor body.
5
Fig. 104
TO CLEAN CARBURETOR: SEE SECTION 5FUEL SYSTEMS AND CARBURETION.
Assembly
1. Assemble retainer ([A] Fig. 105) on choke
shaft (B).
2. Place choke shaft spring (C) on shaft and
hook small hook in notch on choke lever
3. Assemble washer (D), and retainers (E) to
choke shaft.
4. Insert choke shaft assembly into
carburetor body. Engage large end of
return spring (C) on boss.
5. If the carburetor has a spring detent, guide
the detent spring into the slot on the
choke shaft lever.
6. Place choke plate (F) on shaft, single
notch on edge towards fuel inlet. Two half
moon dimples position the plate on the
120
Fig. 106
4. Rotate throttle shaft until the flat side of
the shaft is facing out.
5. Lay the throttle plate (A) on the shaft with
the stamped numbers ([B] Fig. 107) to the
left. Install two screws with lock washers.
CARBURETOR SERVICE
PROCEDURES
(138400)
Carburetor Service - Nikki
(138400)
CAUTION: Do not use wires, drills or other
devices to clean out metering holes or passages.
NOTE : Use compressed air at a moderate
Fig. 107
6. Rotate throttle shaft to check for binding.
Correct if required.
pressure setting (5-7 PSI). Blow in both
directions to clean out all openings and
passages.
5
Identifying Main And Pilot Jets
(260700, 261700)
Type Numbers Not Ending in A1 or E1
Model
Seri es
Standard
Main Je t
260700
261700
110
110
Hig h
Altitude
Main Jet
105
105
Standard
Pilot
Jet
-
High
Altitude
Pilot Je t
-
Fig. 108
Disasse mble
1. Remove bowl mounting screw (A) and
float bowl (C). Discard float bowl gasket
121
(D) and float bowl screw washer ([B] Fig.
109).
Fig. 109
2. Remove float hinge pin (A), ca rburetor
float (B) and float needle valve ([C] Fig.
110).
Fig. 111
6. Remove screw ([A] Fig. 112).
7. Remove, throttle plate (B), throttle shaft
(C) and seal ([D] Fig. 112).
5
Fig. 110
3. Remove main jet first ([A] Fig. 111) with a
carburetor jet scr ewdriver.
4. Remove carburetor emulsion tube ([ B]
Fig. 111).
5. Remove rubber plug ([C] Fig. 111).
122
Fig. 112
8. Remove screw (A), choke plate (B), choke
shaft (C) and choke shaft seal ([D]
Fig.113).
Fig. 113
9. Remove idle speed screw ([A] Fig. 114).
Fig. 115
5
TO CLEAN CARBURETOR: SEE SECTION 5FUEL SYSTEMS AND CARBURETION.
Assemble
1. Install pilot jet ([A] Fig. 116).
Fig. 114
10. Remove pilot jet ([A] Fig. 115).
Fig. 116
2. Place new seal ([A] Fig. 117) lip down on
the choke shaft (B). Insert shaft into
carburetor while engaging detent spring
123
(C) on choke lever detents ([D] Fig. 117).
Rotate shaft closed.
3. Place choke plate (E) on choke shaft (B),
secure with screw ([F] Fig. 117).
Fig. 119
NOTE: For correct main jet and pilot jet
identification and selection.
Fig. 117
5
10. Insert the inlet needle (A) into the slot on
the float ([B] Fig. 120).
4. Place new throttle shaft seal ([A] Fig. 118)
on the throttle shaft (B). Insert in
carburetor with throttle lever ([C] Fig. 118)
set as shown.
5. Install idle speed screw ([D] Fig. 118) with
spring. Turn screw until it touches throttle
lever stop.
6. Place throttle plate (E) on throttle shaft
with holes over shaft and secure with
screw ([F] Fig. 118).
Fig. 120
11. Install float a nd needle assembly to
carburetor. Install and center float hinge
pin ([A] Fig. 121).
Fig. 118
7. Insert tapered end of rubber plug (A) in
passage.
8. Install emulsion tube (B).
9. Install main jet ([C] Fig. 119).
Fig. 121
124
12. Place new float bowl gasket (A) in
carburetor body groove, Fig. 119.
13. Place float bowl (B) on carburetor with
drain boss parallel (C) to fu el inlet fitting
([D] Fig. 122).
14. Install new float bowl washer (E). Torque
bowl screw ([F] Fig. 122) to values listed.
NOTE : Use compressed air at a moderate
pressure setting (5-7 PSI). Blow in both
directions to clean out all openings and
passages.
These carburetors have a fixed high speed main
jet with a screw for idle mixture adjustment (B)
and a screw for idle speed adjustment ([A] Fig.
123). The different carburetors are identified as
LMT1 and up.
The letters LMT are cast into the body of the
carburetor while the identification numbers (C)
are stamped into carburetor mounting flange
next to idle mixture screw or above the fuel inlet
([D] Fig. 123).
5
Fig. 122
Identifying Main And Pilot Jets
(138400)
Fig. 123
Model
Seri es
Standard
Main Je t
138400
79
Hig h
Altitude
Main Jet
76
Standard
Pilot
Jet
44
High
Altitude
Pilot Je t
43
CARBURETOR SERVICE
PROCEDURES
(235400, 245400, 28Q700)
Carburetor Service - Walbro LMT
(235400, 245400, 28Q700)
Disasse mbly
1. Remove float bowl screw and washer.
2. Remove float bowl and float bowl gasket
from carburetor.
3. Remove float hinge pin, float and inlet
needle.
4. Remove idle mixture needle limiter cap.
5. Remove the idle mixture screw with spring
and the idle speed screw with spring.
6. Rotate throttle shaft (A) and lever closed.
7. Remove throttle plate screws ([B] Fig.
124).
CAUTION: Do not use wires, drills or other
devices to clean out metering holes or passages.
125
Fig. 126
15. Remove float hinge pin (A), float ([B] Fig.
127), and inlet needle.
Fig. 124
5
8. Remove the throttle plate, throttle sha ft
with lever. Remove the foam seal.
9. Remove the throttle shaft bushing from
the carburetor body.
10. Rotate the choke shaft ([C] Fig. 125) to
wide open.
11. Pull the choke plate ([D] Fig. 125) out of
the choke shaft slot.
Float hinge pin is a drive fit and one end of the
pin has two flats.
16. Tap the end opposite the flats with a
center pun ch ([C] Fig. 127) until it is loose.
Fig. 127
To clean carburetor:
SEE SECTION 5- FUEL SYSTEMS AND
CARBURETION.
Fig. 125
12. Remove the choke shaft, lever, return
spring (if used) and the foam seal.
13. Remove the float bowl.
14. Remove the emulsion tube ([E] Fig. 126)
with Carburetor Jet Screwdriver #19280.
126
Assembly
1. Press the new fuel inlet seat (C) in until it
is flush with the fuel inlet boss ([D] Fig.
128).
throttle lever should be to the left of the
idle speed screw.
9. Rotate the throttle shaft CW until the idle
stop is against the idle speed screw.
10. Place the throttle plate (L) on to the
throttle shaft with the numbers (M) facing
into the carburetor, on the right.
11. Place a drop of Loctite® on to the screw
threads. Tighten the throttle plate screws
([N] Fig. 130).
Fig. 128
2. Insert the spring inside the large foam
seal. Slide the seal and spring on to the
choke shaft ([G] Fig. 129), with the
straight end of the spring up toward the
choke shaft lever.
3. Insert the choke shaft into the carburetor
body until the hook of the spring hooks on
to the spring anchor (E).
4. Lift the choke shaft lever up slightly. Turn
CCW until the stop on the lever clears the
spring anchor. Push the shaft down.
5. Insert the choke plate ([H] Fig. 129) into
the choke shaft, with the dimples toward
the fuel i nlet side of the carburetor. The
dimples hold and align the choke plate to
the shaft.
5
Fig. 130
NOTE: (235400) Throttle plate movement is
limited on and will not go to WOT. This is normal.
12. Install the emul sion tube with Carburetor
Screwdriver # 19280.
Fig. 129
6. Install the throttle shaft bushing ([J] Fig.
130) to the carburetor body.
7. Slide the foam seal (I) on to the throttle
shaft (K).
8. Slide the throttle shaft and seal into the
carburetor body. The i dle stop on the
Be sure the tube seats into the carburetor body.
13. Blow out any chips or debris that may
have been loosened after installing the
emulsion tube.
14. Insert the needle to the slot on the float.
1. Place the float and needle on the
carburetor. Install and center the float
hinge pin.
127
2. Place a new bowl gasket on the carburetor
body.
3. Place the bowl on the carburetor. Install
the float bowl screw.
4. Torque the screw to values listed.
Identifying Main Jets
(235400, 245400, 28Q700)
5
Model Series
Standard Jet
High Altitude
Jet
235400
497570
497571
245400
498172
498172
28Q700
231858
231850
Fig. 131
Disasse mbly
1. Remove fuel bowl screws (G) and
separate fu el bowl (H) and solenoid (E)
from the carburetor body ([I] Fig. 132).
Do not lose the spring betwee n the fuel bowl and
the float assembly.
Carburetor Service - Nikki
(28Q700)
CAUTION: Do not use wires, drills or other
devices to clean out metering holes or passages.
NOTE : Use compressed air at a moderate
pressure setting (5-7 PSI). Blow in both
directions to clean out all openings and
passages.
Location of the part number ([A] Fig. 131).
128
Fig. 132
2. Remove the solenoid (E) from the fuel
bowl ([H] Fig. 132).
3. Remove the float assembly (J) from the
carburetor base (I).
4. Pull the hinge pin (K) from the float base.
5. Separate the float and needle from the
float base ([L] Fig. 133).
9. Remove two screws (A) and throttle plate
(B) and pull the throttle shaft ([C] Fig. 136)
from the carburetor body.
Fig. 133
6. Remove the float base gasket ([M] Fig.
134) from the carburetor body.
Fig. 136
10. Remove the idle mixture screw with
spring (D) and the idle speed screw with
spring ([E] Fig. 137).
5
Fig. 134
7. Press down on the main jet ([N] Fig. 135)
to remove it from the float base tube.
8. Replace the float base if it shows signs of
wear or damage.
Place the main jet into the float base tube. Press
the jet in until it clicks into position. Do not force.
Fig. 137
11. Turn the choke plate as shown in
Fig.138.
12. Pull the choke plate (F) from the choke
shaft ([G] Fig. 138).
13. Remove the choke shaft with lever,
return spring and foam washer.
Fig. 135
129
Assembly
1. If separated, place the throttle return
spring ([A] Fig. 140) inside the large foam
seal (B).
2. Slide the seal and spring on to the choke
shaft (C) with the top of the spring (D)
contacting the choke shaft lever ([E]
Fig.140).
3. Turn the choke shaft ccw while gently
pushing it into the carburetor body until
the bottom end of the spring ( A) rests on
the back of the spring perch ([F] Fig. 140).
Fig. 138
CAUTION: This carburetor has pressed-in jets
that are not serviceable. Do not attempt to
remove the jets.
5
To clean carburetor:
SEE SECTION 5- FUEL SYSTEM AND
CARBURETION.
14. Insert jumper wires to the connecto rs ([A]
Fig. 139) on the end of the solenoid.
15. Connect other end of jumper wires to a
new 9 volt transistor battery.
The plunger needle ([B] Fig. 139) should retract
into the solenoid body.
If not:
Fig. 140
4. Lift the choke shaft up slightly and
continue turning ccw until the stop (E) on
the lever clears the spring perch ([F]
Fig.141).
5. Push the shaft inward.
6. When released, the choke shaft lever
should rest on the spring perch as shown
(Fig. 141.)
• Replace the solenoid.
Fig. 139
Fig. 141
7. Insert the choke plate (G) into the ch oke
shaft (H) with the dimples ([I] Fig. 142)
toward the air inlet side of the carburetor.
130
The dimples position the choke plate on the
shaft.
Fig. 144
Fig. 142
8. Install small foam washer (J) to throttle
shaft (K).
9. Install throttle shaft to the carburetor body.
12. Install idle mixture screw ( O) with spring
and the idle speed screw ([P] Fig. 145)
with spring .
13. Turn each screw until the head of the
screw touches the spring.
10. Turn throttle shaft until flat ([L] Fig. 143)
is facing out.
5
Fig. 145
Fig. 143
NOTE: The holes in the throttle plate are offset. If
the throttle plate is installed incorrectly it will not
close.
14. Put the inlet need le ([Q] Fig. 146) into the
slot on the float (R).
15. Place the needle and float assembly into
the float base (S).
16. Insert the needle into the seat, and the
float hinge to the hinge support.
17. Install the float hinge pin ([T] Fig. 146).
11. Lay the throttle plate (M) on the flat of the
throttle shaft. Install two screws ([N]
Fig.144).
131
20. Insert the spring ([Y] Fig. 150) to the
bottom of the float assembly.
Fig. 146
18. Place gasket (U) on carburetor body ([V]
Fig. 147).
5
Fig. 149
21. Place the fuel bowl (A) on the carburetor
base ([B] Fig. 150).
22. Fasten with scr ews ([C] Fig. 150).
23. Install solenoid (D) and washer ([E]
Fig.150).
24. Torque solenoid to values listed
(Fig.150).
Fig. 147
NOTE : The l ocating tang (W) on the float
assembly must be placed in the recess ([X] Fig.
148) of the carburetor base as shown.
19. Place the float assembly (S) on the
carburetor base ([V] Fig. 148).
Fig. 148
132
Fig. 150
SECTION 6 - GOVERNOR SYSTEMS
MECHANICAL GOVERNOR SYSTEMS........................................................ 135
Governor System Operation (Typical) ..................................................................... 135
Governed Speed (RPM) Limits ................................................................................ 136
GOVERNOR COMPONENTS (050000, 118400) .......................................... 136
Governor Component Removal ............................................................................... 136
Governor Component Inspection ............................................................................. 137
Governor Component Installation ............................................................................ 138
GOVERNOR COMPONENTS (085400, 086400, 115400, 117400, 138400,
185400, 235400, 245400) ............................................................................. 139
Governor Component Removal ............................................................................... 139
Governor Component Inspection ............................................................................. 140
Governor Gear Shaft - Remove and Replace.......................................................... 140
Governor Component Installation ............................................................................ 140
GOVERNOR COMPONENTS (104700, 161400, 260700, 261700, 28Q700) 141
Governor Component Removal ............................................................................... 141
Governor Component Inspection ............................................................................. 142
Governor Crank Bushing Replacement ...................................................................142
Governor Component Installation ............................................................................ 143
6
133
6
134
MECHANICAL GOVERNOR
SYSTEMS
series of interconnecting linkages and springs
([D] Fig. 3).
Governor System Operation (Typical)
A governor system operates by transmitting
engine RPM through a pair of flyweights (A) th at
retract and extend a sliding cup ([B] Fig. 1).
Fig. 1
The end of the cup is in contact with the paddle
(A) of the governor crank ([B] Fig. 2).
6
Fig. 3
The purpose of the governor system is to
maintain a desired engine speed (RPM) in spite
of the changing loads imposed on the engine.
• When at rest, the sprin gs are set to hold
the throttle plate open.
• In operation, the flyweights cause the
throttle plate to close.
The engine speed at which these two forces
balance is called the governed speed and can be
set by using different spring combina tions or
adjustments (E) to the te nsion of the governor
return spring ([F] Fig. 3).
Fig. 2
The governor crank (A) is connected to the
throttle plate (B) by a governor lever (C) and a
135
Governed Speed (RPM) Limits
In order to comply with specific top governed
speed limits, Briggs & Stratton supplies
equipment manufacturers (OEM)s with engines
that have adjustable top speed limits. These
limits are set to OEM specifications.
The top no-load speed limit will allow no more
than the desired top governed speed limit when
the engine is operated on a rig id test stand at our
factory. However, the design of the equipment
being powered can affect engine speeds.
Check top governed speed with a tachometer
when the engine is running on a completely
assembled unit. The equipment should be
operated at no load when making this check.
2. While holding governor shaft (B), loosen
nut (A) as shown in Fig. 4.
If a governor spring must be replaced:
• Consult the appropriate Illustrated Parts
List.
After a new governor spring i s installed, check
engine top governed speed with an accurate
tachometer and adjust as required.
6
Fig. 4
3. Disconnect governor return spring (E),
throttle plate links and spring (D).
4. Remove governor lever ([B] Fig. 5).
GOVERNOR COMPONENTS
(050000, 118400)
Governor Component Removal
NOTE : The blower housing, flywheel and other
components of the engine must be removed to
replace the governor gear assembly. See
SECTION 3- ENGINE DISASSEMBLY.
Remove gear reduction housing, if equipped,
before removing the cylinder housi ng Cover. See
SECTION 11- CRANKSHAFTS, CAMSHAFTS,
BALANCING SYSTEMS AND GEAR
REDUCTIONS.
1. Slip a box-end wrench (A) on the top nut
(Fig. 4).
Fig. 5
5. Remove lower governor lever nut ([F]
Fig.6).
Do not remove the spring clip ([G] Fig. 6) at this
time.
136
11. Tap the shaft through the cylinder
housing with a small punch or equivalent
(Fig. 8).
Fig. 6
6. Remove cylinder cover. See SECTION
10- CYLINDERS, COVERS AND
SUMPS.
7. Rotate the engine crankshaft so the
counter weight ([J] Fig. 7) is in position
shown.
8. Remove the spring clip from the governor
crank.
9. Push governor crank ([A] Fig. 7) down into
the cylinder housing and remove.
Fig. 8
The entire assembly will come free of the
housing.
6
Governor Component Inspection
1. Inspect the governor gear for wear and
chipped or damaged teeth.
2. Inspect the governor flyweight assembly
for freedom of movement.
3. Ensure that the cup is retained throughout
the flyw eight travel.
If discrepancies are found:
• Replace the go vernor gear as a complete
assembly.
If the shaft hole is damaged or worn:
Fig. 7
• Replace the cylinder or cylinder cover
assembly.
10. Remove E-clip from governor shaft and
retain.
137
Governor Component Installation
1. Make sure the flyweights, spool and gear
move freely.
2. Set thrust washer (if used) on th e shaft of
the governor gear ([A] Fig. 9).
5. Install E-clip ([A] Fig. 11) on governor
crank and push crank up through cylinder
housing and install thrust washer. Make
sure the paddle of the governor shaft rests
on the face of the governor cup.
Fig. 11
Fig. 9
6
3. Press the governor shaft through its
mounting hole in the cylinder until it
bottoms on the face of the washer (Fig.
10) or until it extends just past the outer
surface of the cylinder housing.
6. Install the spring clip ([A] Fig. 12) as
shown.
Fig. 12
Fig. 10
4. Make sure teeth engage the crankshaft
drive gear.
138
7. Install cylinder cover.
8. Install lower nut upside-down on governor
crank until it bottoms on the threads of the
shaft.
9. Place governor lever on governor crank.
10. Place upper nut on end of governor
crank.
11. Tighten nut on lever until governor crank
turns with slight movement of the
governor lever.
12. Connect governor link and spring.
13. Ensure that you can feel the governor
crank paddle make contact with the
governor cup on governor gear.
14. While holding the paddle against the
governor cup, tighten the upper locknut.
15. Reinstall any other components you
removed,
16. Perform static adjustment. See
SECTION 1- SAFETY, MANTENANCE
AND ADJUSTMENTS.
4. Rotate crankshaft ([I] Fig. 14) as
necessary for adequate clearance to
remove governor crank (F).
GOVERNOR COMPONENTS
(085400, 086400, 115400, 117400,
138400, 1 85400, 235400, 2 45400)
Governor Component Removal
1. Drain oil from engine.
2. Remove necessary engine components to
gain access to cylinder cover. See
SECTION 3- ENGINE DISASSEMBLY.
3. Remove cylinder cover. See SECTION
10- CYLINDERS, COVERS AND
SUMPS.
The governor gear (H) and governor crank (F)
are illustrated in Fig. 13.
Fig. 14
5. Remove nut ([A] Fig. 15) (left hand
threads) and lift off governor lever (B).
6. Remove nut (C) (left hand threads), spring
clip (D) and thrust washer (E) from
governor crank (F).
7. Remove felt seal (G) if equipped.
8. Push governor crank ([F] Fig. 15) down
through cylinder housing.
Fig. 13
Fig. 15
NOTE : Rotate crankshaft and camshaft as
needed for clearance. If necessary, remove
camshaft.
9. Remove governor gear ([I] Fig. 16) from
cylinder cover using two screw drivers.
139
6
10. Remove thrust washer.
Fig. 16
Governor Component Inspection
See SECTION 6- GOVERNOR SYSTEMS.
Governor Gear Shaft - Remove and
Replace
1. Press governor gear shaft (K) out of
cylinder cover from outside, Fig. 17.
6
Fig. 18
Governor Component Installation
1. Place thrust washer on governor gear
shaft.
2. Place governor gear weights (if removed)
in governor cup and place assembly on
governor gear shaft.
3. Push assembly down until gear snaps into
groove on governor gear shaft.
4. Position the crankshaft and other
components as required for clearance to
install the governor crank.
5. Install E-ring (if equipped) in groove on
governor crank (F). (Refer to Fig. 11).
6. Push governor crank up through cylinder
housing.
7. Place felt seal (G) (if equipped) and thrust
washer (E) on crank. Insert spring clip (D)
in governor crank (F),Fig. 19.
8. Install camshaft (if removed).
NOTE : Orienta tion and location of spring clip (D)
is shown in Fig.12.
Fig. 17
2. Press either end of the new governor gear
shaft (K) into the inside of cylinder cover
from the inside until shaft is 1.220 - 1.222
in. (30.99 - 31.04 mm) high (L) from boss,
Fig. 18.
140
9. Install lower nut (C) on governor crank (F)
with serrations UP until nut bottoms on
threads of the crank. Tighten nut (left
hand threads), Fig. 19.
10. Place governor lever (B), on governor
crank (F).
11. Install top nut ([A] Fig. 19) with serratio ns
down on l ever.
12. Hold paddle of governor crank against
cup of governor gear while tightening top
nut (left hand threads).
Fig. 21
NOTE : 60 Hz generators use the outer hole ([P]
Fig. 21), while 50 Hz generators use the inner
hole (Q) on the governor lever (B). Generator
governor spring part numbers are listed in the
Illustrated Parts List.
14. Reinstall any other components you
removed,
15. Perform static adjustment. See
SECTION 1- page 18.
6
Fig. 19
NOTE : The following two illustrations (Fig. 20 &
Fig. 21) show the general procedure for
assembling governor linkages. Details vary with
the type of equipment being powered.
13. Hook governor spring (M), link (O) and
link spring (N) into lever ([B] Fig.20 or
Fig.21).
GOVERNOR COMPONENTS
(104700, 161400, 260700, 261700,
28Q700)
Governor Component Removal
NOTE : (161430 type 0199-01) This is
equipped with a governor supplied by the OEM.
Contact OEM for governor and engine speed
information.
Fig. 20
1. Drain oil from engine before beginning
disassembly.
2. Remove rust, nicks, burrs, etc. from
crankshaft P.T.O.
3. Remove necessary engine components to
gain access to cylinder cover.Remove
cylinder cover. Remove bolts holding
cylinder cover or sump. Tap on side of
cover to loosen and remove cover or
sump if necessary.
4. Loosen governor lever nut (A) and remove
governor lever (B), Fig. 22.
141
5. Inspect bushing for burrs or foreign
materi al.
f35p15
Fig. 22
5. Remove spring clip ([A] Fig. 23).
6. Push governor crank down through
cylinder and out of bearing.
7. Pry out governor crank seal. Do not
damage seal bore. Discard seal.
Fig. 24
If discrepancies are found:
• Replace the go vernor gear as a complete
assembly.
If the shaft bushing is damaged or worn:
• Replace bushing.
6
f34p14
Governor Crank Bushing
Replacement
Fig. 23
Governor Component Inspection
Refer to (Fig. 24).
1. Pry governor gear from shaft, if necessary
2. Inspect the governor gear (A) for wear and
chipped or damaged teeth.
3. Inspect the governor flyweight pivots (B)
for freedom of movement.
4. Ensure that cup (C) is retained throughout
the flyw eight travel.
142
1. Remove bushing with a .375 in. (9.5 mm)
rod ([A] Fig. 25) by driving downward into
the cylinder housing.
2. From the outside, use tool (#19204) and
press new bushing into cylinder until it is
flush with the outside surface.
3. Finish ream the bushing using tool
(#19333).
4. Thoroughly clean away all chips and
cutting debris.
Fig. 27
Fig. 25
Governor Component Installation
1. Press in new seal.
2. Slide governor crank ([A] Fig. 26) up
through the bushing and position as
shown in the appropriate illustration.
6
CAUTION: Ensure that governor crank is in the
position illustrated. (Fig. 26) (Fig. 27) and (Fig.
28) If it is not, proper governor adjustments
cannot be made and will result in over-speeding
and engine damage.
Fig. 28
3. Install washer and spring clip. Install
spring clip ([A] Fig. 29) as show n.
f40p16
Fig. 26
Fig. 29
143
4. Install governor gear. Ensure that
counterweights ([A] Fig. 30) move freely
without binding.
Fig. 30
5. Install cylinder cover or sump. See
SECTION 10- CYLINDERS, COVERS
AND SUMPS.
NOTE: (161432 Type 0080-01) When
6
assembling governor lever assembly (A), ensure
that tab on strike plate ([B] Fig. 31) is between
upper and lower half of lever clamping area.
Fig. 31
6. Re install any components you removed
to gain access to the cylinder cover.
7. Perform a static adjustment. See
SECTION 1- SAFETY, MAINTENANCE
AND ADJUSTMENTS.
144
SECTION 7 - CYLINDER HEADS AND VALVES
ROCKER ARM ASSEMBLIES ....................................................................... 147
Remove Rocker Arm Assembly (050000, 118400).................................................. 147
Remove Rocker Arms (085400, 086400, 115400, 117400, 138400, 185400) ........147
Remove Rocker Arm Assembly (235400, 245400).................................................. 147
Remove Rocker Arms (104700, 161400, 260700, 261700, 28Q700) .....................148
CYLINDER HEAD REMOVAL........................................................................ 148
Remove Cylinder Head (050000, 085400, 086400, 115400, 117400, 118400,
138400, 185400) ......................................................................................................148
Remove Cylinder Head (104700, 161400, 260700, 261700) ..................................149
Remove Cylinder Head (28Q700)............................................................................ 149
VALVES ......................................................................................................... 150
Remove Valves ( 050000, 086400, 11 8400, 104700) ..............................................1 50
Remove Valves (085400, 086400, 115400, 117400, 138400 , 185400, 161400,
260700, 261700, 28Q700) ......................................................................................150
INSPECT CYLINDER HEAD CO MPONENTS ............................................... 151
Inspect Push Rods (All Models) ............................................................................... 151
Inspect Head For Distortion (All Models) .................................................................151
Inspect Valve Guide Inner Diameter (All Models) .................................................... 151
7
Inspect Va lve Stem / Valve Guide Tolerance (All Models) ......................................152
Inspect Va lve Seat (All Models) ............................................................................... 152
Reface Valves and Seats (All Models)..................................................................... 152
145
CYLINDER HEAD ASSEMBLY ..................................................................... 153
Install Push Rod Guides and Studs (085400, 104700, 115400, 117400, 118400,
28Q700) .................................................................................................................1 53
Installing Valve Springs & Retainers (050000, 235400, 245400) ........................... 154
Install Valve Springs And Retainers
(104700, 28Q700) ................................................................................................... 155
Install Valve Springs And Retainers
(085400, 115400, 117400, 138400, 185400) ..........................................................155
Install Valve Springs And Retainers
(161400, 260700, 261700) ...................................................................................... 155
INSTALLING CYLINDER HEADS ................................................................. 155
INSTALL ROCKER A RMS ............................................................................ 157
Install Push Rods & Rocker Arms (104700, 161400, 260700, 261700, 28Q700) .. 157
Install Push Rods & Rocker Arms (235400, 245400) .............................................158
ADJUST V ALVE CLEARANCE ..................................................................... 158
Valve Clearance (Typical) ....................................................................................... 158
Valve Clearance (104700, 161400, 260700, 260700, 261700, 28Q700) ...............158
7
146
Remove Rocker Arms
(085400, 086400, 115400, 117400,
138400, 185400)
ROCKER ARM ASSEMBLIES
Remove Rocker Arm Assembly
(050000, 118400)
1. Remove the jamb nut (A) from the rocker
arm stud.
2. Remove the rocker arm pivot (B) from the
studs and remove the rocker arms ([C]
Fig. 2).
1. Remove the four bolts ([A] Fig. 1) that
mount the rocker arm assembly to the
cylinder head.
050000
Fig. 2
3. Remove valve stem caps (if equipped )
and push rods (D).
4. Remove rocker stud (E) and push rod
guide ([F] Fig. 2).
7
Remove Rocker Arm Assembly
118400 (235400, 245400)
Fig. 1
1. Remove two hex screws (A) holding
rocker arm shaft to cylinder head, Fig. 3.
2. Lift out the rocker arm assembly.
3. Remove valve stem caps (if equipped ).
4. Remove the push rods.
Fig. 3
2. Remove valve stem caps (if equipped ).
3. Remove push rods and label them for
reassembly in their origin al locations.
4. Remove either snap ring ([B] Fig. 4).
5. Remove rocker arms (C) and spring (D)
from rocker shaft (E).
147
6. Remove valve adjusting screw and nut
([F] Fig. 4) from rocker arm.
4. Remove rocker arm studs (D) and push
rod guides ([E] Fig. 5), if equipped.
Fig. 5
Fig. 4
Remove Rocker Arms
(104700, 161400, 260700, 261700,
28Q700)
7
1. Loosen rocker arm set screws ([A] Fig.5).
2. Remove rocker arm nuts ( B), and rocker
arms (C).
3. Remove push rods and note the following:
104700, 161400:
• Push rods are identical.
260700, 261700:
• The intake push rod has center section that
is made of aluminum and is hollow.
28Q700:
• The intake push rod is aluminium and
hollow.
• Exhaust push rod has a red band of paint
for identification.
CYLINDER HEAD REMOVAL
Remove Cylinder Head
(050000, 085400, 086400, 115400,
117400, 118400, 138400, 185400)
1. Remove four cylinder head bolts ([A] Fig.
6) and lift off cylinder head.
Fig. 6
2. Remove and discard head gasket.
148
Remove Cylinder Head
(104700, 161400, 260700, 261700)
3. Make note of an y discrepancies and
discard old head gaske t.
1. Remove head bolts ([A, B, C & D] Fig.7)
and cylinder head.
NOTE : Engines manufactured before 940501xx
were equipped with sealing washers under
cylinder head bolts (A) and ([C] Fig. 7).
2. Remove and discard head gasket.
Fig. 8
7
Fig. 7
Remove Cylinder Head (28Q700)
1. Remove head bolts ([A] Fig.8) and
cylinder head.
2. Remove and discard head gasket.
149
VALVES
Remove Valves
(050000, 086400, 118400, 104700)
1. Place cylinder head on a solid and flat
work surface.
2. Bundle a rag under the face of the valve
being removed.
3. With a small socket mounted on a drive
handle, push the valve retainer down from
the direction of the open slot as shown in
([A] Fig. 9).
4. Follow the sequence shown ([B & C]
Fig.9).
Remove Valves
(085400, 086400, 115400, 117400,
138400, 185400, 161400, 260700,
261700, 28Q700)
1. Place cylinder head on a solid and flat
work surface.
2. Bundle a rag under the face of the valve
being removed.
3. Install rocker arm nuts ([A] Fig. 10) and
studs in cylinder head. Do not tighten.
4. Slip end of Valve Spring Compressor
#19347 (B), under nut and over valve
spring.
5. Press down on tool handle to compress
valve spring and remove split retainer.
6. Gradually release pressure on tool to
remove retainer ([C] Fig. 10), spring, and
seal(s).
7. Discard the seals.
7
Fig. 10
Fig. 9
5. Allow valve to slide out of guide
6. Repeat this process for the remaining
valve.
7. Remove oil splash gu ard (if equipped) and
set aside.
150
INSPECT CYLINDER HEAD
COMPONENTS
3. If an area is questionable, use a feeler
gauge to measure the amount of
distortion as shown in Fig. 13.
Inspect Push Rods (All Models)
Check pushrods for straightness as shown in
Fig. 11.
Fig. 11
Replace if bent.
Inspect Head For Distortion (All
Models)
1. Clean the mating surface of the cylinder
head.
2. Using a straight edge that extends across
both sides of the cylinder head mating
surfaces:
• Check that the straight edge comes in
contact with the entire mating surface
area of the head.
• Move the straight edge to various different
positions on the mating surface.
• If equal contact is made in all positions, the
mating surface is good (Fig. 12).
Fig. 13
For reject dimensio ns, see SECTION 14ENGINE SPECIFICATIONS.
If the allowable distortion limit is exceeded:
• Replace the cylinder head and/or cyl inder
block.
Inspect Valve Guide Inner Diameter
(All Models)
For 28Q700:
1. Measure intake and exhaust valve guides
with Valve Guide Plug Gauge #19381.
• Replace cylinder head if the flat end of the
gauge can enter guide 1/4 in. (6.35 mm)
or more.
If plug gauge is not available:
• Measure valve guides and compare with
listed reject dimensions. See SECTION
14- ENGINE SPECIFICATIONS.
Fig. 12
151
7
Inspect Valve Stem / Valve Guide
Tolerance (All Models)
1. Measure the valve stem at the locations
illustrated in ([A & B] Fig. 14).
Fig. 14
Reface Valves and Seats (All Models)
Valve faces can be resurfaced using a
commercially available valve grinding tool.
Briggs & Stratton does not recommend this
practice as a high quality repair procedure.
• Replace damaged or worn valves.
For specifications relating to the engine you are
working on, see SECTION 14- ENGINE
SPECIFICATIONS.
1. Cut valve seats with Neway Valve Seat
Cutter Kit #19237 or #19343, ([ A] Fig. 15)
to specifications listed for your engine’s
exhaust and intake seats.
• Place the proper guide pin in the valve
guide.
• Use the appropriate cutter and grind the
valve seat using the handle and slight
pressure.
For listed reject dimensions: See SECTION 14ENGINE SPECIFICATIONS.
7
Inspect Valve Seat (All Models)
NOTE : Because of the additional heat endured
by the exhaust valve, inspect the area around
the exh aust seat very carefully. Cracks or an
improper fit of the seat may not be readily
apparent. Additionally, a seat that is tight when
the engine is cold may become loose with the
heat of operation. One indication is metallic
stains around the exhaust seat.
Fig. 15
Valve and seat are lapped in using Valve
Lapping Tool, #19258 and Valve Lapping
Compound #94150 to assure a g ood seal
between the valve face and the seat.
2. Thoroughly clean lapping compound from
valve seat and valve face.
If seat is wider than specification:
• Use a narrowing cutter.
If valve face is bu rned:
• Replace the valve.
3. Replace valve if taper depth margin ([A]
Fig. 16) is less than 1/64” (.4mm).
152
4. Replace valve seat if dimension ([B] Fig.
16) is less than 1/64” (.4mm).
Fig. 16
Replace broken, distorted, or worn valve springs.
Fig. 18
CYLINDER HEAD ASSEMBLY
Install Push Rod Guides and Studs
(085400, 104700, 115400, 117400,
118400, 28Q700)
If push rod guide was removed:
1. Place push rod guide (A) in cylinder head
with word “TOP” (except 104700) toward
Mag. side of cylinder head, Fig.17 or
2. Coat rocker arm stud threads with Loctite
#242 sealant.
3. Install rocker arm studs.
• Torque studs ([B] Fig. 17and Fig. 18) to
value listed in SECTION 14- ENGINE
SPECIFICATIONS.
NOTE: All engines use valve stem seals on the
intake valve.
Valves will stick and damage the valve stem
seals if the stems and guides are not free of
foreign material and burrs.
4. Lightly coat valve stems with Valve Guide
Lubrica nt #93963. Install valves to valve
guides.
Fig. 17
153
7
Two piece valve stem seals were used on early
production intake valves (28Q700), Fig. 19.
Be sure Valve Guide Lubricant #93963 is not on
valve face, valve seat, or exposed end of valve
stem.
• Gasket seal or washer is used on intake
valve only, (085400, 115400, 117400,
118400, 185400, 235400, 245400,
28Q700).
Installing Valve Springs & Retainers
(050000, 235400, 245400)
1. Install the oil splash guide in the rocker
box (if equipped) as shown in Fig. 21.
Fig. 19
Current production engines use a one piece
valve stem seal, Fig. 20.
Fig. 21
7
NOTE : The exhaust valve is marked with a
raised "EX" on its face.
Fig. 20
5. Oil the inside diameter of the valve stem
seal with engine oil.
• Install on the valve stem.
6. Slide seal down against head plate or
cylinder head.
2. Insert the valves into their guides and set
the head on a folded shop cloth to support
and prevent the valves from falling out of
the cylinder head.
3. With the valve face resting on the shop
cloth, position the return spring over the
valve.
4. Push the valve retainer over the valve
stem as shown in Fig. 22.
NOTE: Current production valve stem seals on
28Q700 are a press fit on the valve guide boss.
To install, place intake valve in valve guide. Slide
new seal down over valve stem against valve
guide boss. Using a (10 mm) six point deep
socket press or tap seal down until it bottoms.
Fig. 22
154
Make sure the keeper is completely seated in the
groove of the valve stem.
• Repeat this process for the remaining
valve.
3. Place retainer on spring. Use Valve Spring
Compressor, #19347 ([A] Fig. 24) to press
on retainer and compress spring.
Install Valve Springs And Retainers
(104700, 28Q700)
1. Place a shop rag or wood blocks on work
surface to support valves. Place cylinder
head on rag or blocks and install valve
spring over valve stem.
2. Place retainer (A) on spring. Depress
retainer with thumbs to compress spring,
Fig. 23.
Fig. 24
4. Compress spring until valve stem extends
through valve retainer and groove is
above retainer.
5. Place both halves of valve keeper in valve
stem groove. Slowly release tension on
valve spring and valve spring kee per.
Install Valve Springs And Retainers
(161400, 260700, 261700)
Fig. 23
3. Compress spring until valve stem extends
through large end of retainer slot.
Continue to press until small end of slot
can slide into valve stem groove on valve
stem. Be sure retainer is fully engaged in
valve stem groove.
1. Place cylinder head on workbench with
support to hold valves in place. Install
valve springs and valve spring retainers
over valve stems.
2. Install rocker arm nuts on studs.
Compress spring with Valve Spring
Compressor #19347. Install split keepers
in groove on valve stem.
3. Remove rocker arm nuts.
INSTALLING CYLINDER HEADS
Install Valve Springs And Retainers
(085400, 115400, 117400, 138400,
185400)
1. Place cylinder head on work surface. With
a block of wood or a shop cloth to support
the valves. Install valve spring o ver valve
stem.
2. Thread rocker arm nut on rocker stud, with
hex nut down.
NOTE : Do not use sealer on gaskets.
Torque screws in sequence shown by model
number, as shown in:
• Fig. 25 (050000, 085400, 115400, 117400,
118400, 185400, and 235400, 245400)
• Fig. 26 (050000, 086400)
• Fig. 27 ( 104700)
• Fig. 28(161400)
• Fig. 29(260700, 261700)
• Fig. 30 (28Q700)
155
7
• Fig. 31 ( 138400)
Torque cylinder he ads in three steps:
For example:
For final torque of 220 lb-in. (25 Nm) :
• First step 75 lb-in. (9 Nm)
• Second step 150 lb-in. (17 Nm)
• Final step 220 lb-in. (25 Nm)
1
4
2
3
CAUTION: Do not tighten any screw to the final
torque before all screws have been tightened to
the second step. Uneven tightening may warp
the cylinder head.
Fig. 27
4
1
3
1
3
5
7
4
2
2
Fig. 28
Fig. 25
1
1
4
3
3
2
Fig. 26
156
4
2
Fig. 29
INSTALL ROCKER ARMS
2
5
4
Install Push Rods & Rocker Arms
(104700, 161400, 260700, 261700,
28Q700)
8
6
3
1
7
1. Install push rods (A) through push rod
guide. Make sure push rods are seated in
valve tappets ([B] Fig. 32).
Fig. 30
1
3
4
2
Fig. 31
Fig. 32
2. Remove all lubri cant from end of valve
stems.
3. Place valve caps ([C] Fig. 33), (when
used) on end of valve stems.
4. Place rocker arms on studs. Install rocker
arm nuts (D) and screw while holding
rocker arm against valve cap ( [C] Fig. 33).
• Tighten rocker arm until rocker ball is finger
tight.
5. Rotate crankshaft at least two revolutions
to be sure push rods operate rocker arms.
For final torque values:
See SECTION 14- ENGINE SPECIFICATIONS.
NOTE: (260700, 261700) Plain w ashers are
used on cylinder head screws outside the valve
cover. Sealing washers are used on cylinder
head screws inside the valve cover.
NOTE: (161400) The top two cylinder head
bolts without washers are inserted through
cylinder baffle, then cylinder head.
Fig. 33
157
7
Install Push Rods & Rocker Arms
(235400, 245400)
6. Tighten the jamb nut without moving the
adjustment screw.
1. Install push rods. Be sure each push rod is
seated in its tappet.
2. Place rocker arm shaft assembly on
cylinder head making sure that push rod
sockets engage valve adjusting screws.
3. Install two screws ([A] Fig. 34) in rocker
arm shaft and cylinder head.
• Torque screws as listed. See SECTION 14ENGINE SPECIFICATIONS.
Fig. 35
7. Rotate the crankshaft through a few
revolutions and recheck the clearance.
8. Repeat this process until both valves
consistently fall within specifications.
Valve Clearance (104700, 161400,
260700, 260700, 261700, 28Q700)
7
Fig. 34
ADJUST VALVE CLEARANCE
Valve Clearance (Typical)
Valve clearances sho uld always be checked on a
cold engine. The clearance allows for valve
expansion as a result of heat generated during
engine operation.
To adjust valve clearances, proceed as follows:
1. Ensure that the piston is at TDC
2. Ensure that the bolts mounting the rocker
assembly are properly torqued.
3. Loosen the jamb nut ([A] Fig. 35) on the
rocker arm.
4. Insert the proper blade of feele r gauge ([B]
Fig. 35).
5. While moving it back and forth, carefully
tighten the adjustment screw until a slight
amount of resistance i s felt on the feeler
gauge.
158
1. Turn crankshaft until piston is at TDC on
compression stroke.
2. Insert a narrow screwdriver or small rod
into spark plug hole against piston. The
screwdriver is used to gauge piston
movement.
3. While watching screwdriver or rod, turn
crankshaft clockwise (flywheel end) past
TDC until piston is 1/4 in. (6 mm) down.
NOTE: Correct positioning of crankshaft is
required to eliminate compression rel ease from
holding valves open.
4. Using a feeler gaug e ([A] Fig. 36), check
valve clearance.
See SECTION 14- ENGINE SPECIFICATIONS.
5. Adjust as required.
Fig. 36
6. When valves are adjusted, hold rocker nut
and tighten rocker ball screw or nut to
torque listed.
7. Recheck clearance and adjust, if required.
7
159
7
160
SECTION 8 - STARTERS
REWIND STARTERS………………………... ................................................. 163
Remove Rewind Starter Housings (Typical) ............................................................163
Install Rope And Handle Assembly. .........................................................................1 66
Disassemble Rewind Starter (161400, 235400, 245400) ........................................166
Inspect Rewind Starter (161400, 235400, 245400) .................................................167
Assemble Rewind Starter (161400, 235400, 245400) .............................................167
Disassemble Rewind Starter With Metal Pawls (104700) .......................................168
Inspect Rewind Starter With Metal Pawls (104700)................................................. 169
Assemble Rewind Starter With Metal Pawls (104700) ............................................169
Disassemble Rewind Starter (28Q700) ................................................................... 170
Assemble Rewind Starter (28Q700) ........................................................................171
ELECTRIC STARTERS ................................................................................. 171
Ring Gear Replacement...........................................................................................172
Test Starter Drive and Clutch................................................................................... 172
Starter Drive (104700, 161400, 260700, 261700) ................................................... 173
Starter Drive (115400, 117400, 138400, 185400) ................................................... 173
Starter Drive (235400, 245400)................................................................................ 174
Starter Drive (28Q700)............................................................................................. 175
8
161
8
162
REWIND STARTERS
Install Rope And Handle Assembly
Handles With Inserts
Remove Rewind Starter Housings
(Typical)
1. Remove four screws (A) holding rewind
starter housing ([B] Fig. 1) and remove.
2. If riveted, drill through rivets. Clean all
debris.
NOTE : Some units do not use an insert in the
handle.
1. To determine proper length of starter rope,
see SECTION 14- ENGINE
SPECIFICATIONS. Cut as necessary.
2. Insert rope (A) through starter handle (B)
and starter handle insert (C).
3. Tie knot on end of rope, leaving
approximately 1/2 in. (13 mm) ([D] Fig. 3)
of rope left. Pull knot into handle insert
and pull insert into starter handle.
CAUTION: Knot must be an overhand knot (E)
so it will not pull through pulley, hole in handle
and/or insert.
Fig. 1
For starters that are spot welded to blower
housing:
3. Drill out spot welds (A) using a 3/16 i n. (4.8
mm) drill bit ([ B] Fig. 2). Drill only deep
enough to loosen spot welds.
8
Fig. 3
Fig. 2
4. Reinstall using original screws or use nuts
and bolts ([C] Fig. 2) as listed in the
Illustrated Parts List (IPL).
163
Disassemble Rewind Starter
(115400, 117400, 118400, 138400,
185400, 260700, 261700)
WARNING
9. Wiggle pulley until spring comes free of its
anchor.
10. Carefully lift out pulley and spri ng
assembly, (Fig. 5).
NOTE : Do not remove spring from pulley. Pulley
and spring are serviced as an assembly.
Eye injury could occur if flywheel is struck
with a hard object.
• Do not strike flywheel with hard object
or steel tool.
• Wear safety goggles or other eye
protection.
1. Pull starter rope out as far as it will go.
2. Lock pulley with screwdriver in fins.
3. Extract knot at pulley and cut off knot.
4. Remove rope and handle from rewind
starter.
5. Unlock pulley and slowly release spring
tension.
6. Insp ect rope for fraying or broken strands.
Replace if worn.
If re-using old rope:
• Burn pulley end of rope with a match to
prevent swelling and unraveling.
7. Remove shoulder screw (A) and retainer
(B).
8. Lift out pawls (C) and springs ([D] Fig. 4).
Fig. 5
Inspect Pulley Assembly
1. Inspect pulley for wear, cracks, rough
edges (A) or burrs in pulley groove (B)
and wear on center hole ([C] Fig. 6).
Replace pulley if damaged or worn.
2. Inspect spring for broken ends, kinks and
burrs. Replace if damaged or worn.
8
Fig. 6
Fig. 4
164
3. Inspect starter housing for wear or sharp
edges at rope eyelet (D), center pivot post
(E), and inner spring anchor tab ([F] Fig.
6). Replace assembly if worn or damaged.
4. Position springs (A) over posts (B) in
pulley. Install pawls ([C] Fig. 9).
Assemble Rewind Starter
(115400, 117400, 118400, 138400,
185400, 260700, 261700)
1. Lay starter housing flat on work bench.
2. Position pulley and coil spring assembly
(A) over center pivot post ([B] Fig. 7) in
starter housing.
Fig. 9
Fig. 7
3. Rotate pulley counterclockwise until slight
resistance is felt, indicating that spri ng is
engaged in spring tab, (Fig. 8).
5. Install retainer (A) making sure that slots
(B) in retainer engage tabs ([C] Fig. 10)
on pulley.
6. Hold retainer down, compressing pawl
springs and install retainer screw. Torque
screw (D) to listed value. See SECTION
14- ENGINE SPECIFICATIONS.
7. While holding retainer, rotate pulley to
extend and retract pawls. If the pawls do
not extend and retract, remove retainer
and reinstall.
8
Fig. 8
Fig. 10
8. Wind up pulley and lock in place.
9. Insert rope and tie overhand knot. See
SECTION 8- Fig. 3.
10. Allow spring to slowly retract rope into
assembly.
165
Disassemble Rewind Starter (161400,
235400, 245400)
1. Pull starter rope out as far as it will go.
2. Lock pulley to prevent it from retracting in
starter housing.
3. Extract rope at pulley and cut off knot.
4. Remove rope and handle from rewind
starter.
5. Unlock pulley and slowly release spring
tension.
6. Inspect rope for fraying and broken
strands. Replace if worn.
10. Lift out pulley. The starter spring cup (D)
will normally remain in starter housing ([E]
Fig. 12).
If reusing old rope:
• Burn pulley end of rope to prevent
swelling and unraveling.
7. Remove retainer screw (A), small washer
(B), retainer (C), brake spring (D), and
large washer ([E] Fig. 11).
Fig. 12
11. Remove spring an d cup (A) from starter
housing ([B] Fig. 13) or pulley.
8
Fig. 11
8. Lift out pawls (A) and pawl springs (B).
9. Rotate pulley (C) until it feels free.
WARNING
Fig. 13
NOTE : Do not remove spring from cup. Cup and
spring are serviced as an assembly.
Prevent Eye Injury. Wear eye protection
when working on rewind starter pulleys and
springs.
166
Inspect Rewind Starter (161400,
235400, 245400)
1. Inspect starter pulley for cracks, rough
edges, wear or bu rrs in pulley groove (A),
wear on spring cup lugs (B) and center
hole ([C] Fig. 14). Replace pulley if
damaged or worn.
Fig. 14
Assemble Rewind Starter (161400,
235400, 245400)
1. Place spring and cup in pulley, with outer
end of spring (A) between two wide
spaced lugs (B) in pulley and spring cup
projections ([C] Fig. 16) next to the two
wide spaced lugs.
Fig. 16
2. Inspect starter housing eyelet (A), center
pivot post (B) and inner spring retainer
([C] Fig. 15). Replace housing assembly if
worn or damaged.
8
Fig. 15
Fig. 17
2. Note location of inner spring tab (A) a nd
location of inner spring anchor ([B] Fig.
17) on center post of starter housing.
3. Lower starter housing on to pulley and
spring assembly, then invert assembly.
167
8. Insert rope through housing and hole in
pulley.
9. Secure rope to pulley with overhand knot.
10. Remove pu lley lock and allow spring to
slowly retract rope into rewind starter
assembly.
11. Install handle. See SECTION 8- Fig. 3.
Fig. 18
4. Install paw ls (A) and pawl springs ([B] Fig.
19) in pully.
5. Install retainer spring (A), retainer (B),
washer (C) and retainer screw ([D] Fig.
19).
Disassemble Rewind Starter With
Metal Pawls (104700)
WARNING
6. Rotate pully ([A] Fig. 20) clockwise un til
inner spring is tight.
8
Fig. 19
Prevent Eye Injury. Wear eye protection
when working on rewind starter pulleys and
springs.
1. Pull starter rope out as far as it will go.
2. Lock pulley to prevent it from retracting in
starter housing.
3. Extract rope at pulley and cut off knot.
4. Remove rope and handle from rewind
starter.
5. Unlock pulley and slowly release spring
tension.
6. Inspect rope for frayed and broken
strands. Replace if worn.
If reusing old rope:
• Burn pulley end of rope to prevent
swelling and unraveling.
7. Remove retainer screw (A) and retainer
([B] Fig. 21).
Fig. 20
7. Lock pulley with screwdriver in fins to
prevent it from unwinding in housing.
168
Fig. 21
8. Lift out starter pawls (A) and pawl spri ngs
([B]).
9. Remove brake spring (C).
10. Rotate pulley and spring assembly ([D]
Fig. 22) until pulley feels free.
11. Lift out pulley and spring assembly.
NOTE : Pulley and spring with retainer are
serviced as an assembly. Do not remove spring
retainer fr om pulley.
Fig. 24
Assemble Rewind Starter With Metal
Pawls (104700)
1. Note the location of the free end of the
spring in the pulley assembly and of the
inner spring retainer ([A] Fig. 25) in the
starter housing.
Fig. 22
Inspect Rewind Starter With Metal
Pawls (104700)
1. Insp ect starter pulley (A) for cracks, rough
edges, wear, burrs in pulley groove, or a
loose spring retainer ([B] Fig. 23).
8
Fig. 25
2. Line up the free end of spring with the
spring retainer (A) in the housing (Fi g.
25). Assemble the pulley in the housing.
3. Rotate pulley countercl ockwise until
spring engages retainer.
Fig. 23
2. Inspect starter housing (A) for wear or
burrs at starter housing eyelet (B), center
pivot post (C), and at inner spring retainer
([D] Fig. 24). Replace damaged or worn
components.
169
4. Install pawls (A), pawl springs (B), and
brake spring ([C] Fig. 26).
9. Insert rope through housing and hole in
pulley.
10. Secure rope to pulley with overhand
knot. See SECTION 8- FIG. 3.
11. Remove pu lley lock and allow spring to
slowly retract rope into rewind starter
assembly.
Disassemble Rewind Starter (28Q700)
NOTE : If problems are encountered with the
Fig. 26
5. Place retainer (A) on brake spring and
partially tighten retainer screw ([B] Fig.
27. Pierced holes on retainer must be
between pawls and stop on pulley.
clutch, replace the entire clutch unit. Remove
starter clutch from crankshaft pilot with tool
(#19244).
1. Cut knot at starter pulley and remove
rope.
2. Grasp outer end of rewind spring ([A] Fig.
28) with pliers. Pull out of housing as far
as possible.
3. Turn spring 1/4 turn. Remove from pulley
or bend up one of the tangs with Tang
Bender #19480. Lift out starter pulley to
disconnect spring.
8
Fig. 27
6. Torque retainer screw ([B] Fig. 433) to
listed value. See SECTION 14- ENGINE
SPECIFICATIONS.
7. Rotate pulley countercl ockwise until
spring is tight.
8. Lock pulley with screwdriver.
170
Fig. 28
4. Clean rewind housing, pulley and rewind
spring in solvent. Wipe clean with cloth.
Assemble Rewind Starter (28Q700)
8. Install rope.
1. Straighten spring to allow easier
installation and restore tension.
2. Oil spring.
3. Insert either end of spring into blower
housing slot and hook into pulley (A).
4. Place a dab of grease (B) on steel pul ley.
5. Set pulley into housing. Bend tang down.
Adjust tang gap to 0.063 i n. (1.6 mm) ([C]
Fig. 29). Depress pulley fully into rewind
housing when measuring tang gap.
Fig. 31
9. Insert rope through housing and hole in
pulley.
10. Secure rope to pulley with overhand
knot. See SECTION 8- Fig. 3.
11. Remove pu lley lock and allow spring to
slowly retract rope into rewind starter
assembly.
ELECTRIC STARTERS
Fig. 29
6. Place a 0.75 in. (19 mm) ([A] Fig. 30)
square piece of stock into center of pulley
hub.
With pulley oriented as in Fig. 29, wind the stock
and pulley counterclockwise until spring is
wound tightly and end of spring seats in tapered
hole ([B] Fig. 30).
Typical starter locations (A) are shown for
horizontal crankshaft engines (Fig. 32) and
vertical crankshaft engines (Fig. 33).
8
Fig. 32
Fig. 30
7. Back off pulley until pulley hole is aligned
([A] Fig. 31) with eyelet in blower housing.
171
Fig. 34
Fig. 33
NOTE: Some engines are equipped with an
OEM supplied electric starter. Contact the OEM
for service information and adjustment
procedures.
Ring Gear Replacement
Briggs & Stratton engines use an aluminum,
plastic or steel ring gear that is attached to the
flywheel. Replace the ring gear if it shows wear
or damage. Some ste el ring gears are pressed or
heat shrunk to the flywheel. These ring gears are
not replaceable.
Test Starter Drive and Clutch
When the starter is activa ted, the pinion gear
should engage the ring gear and crank the
engine. Clutch should not slip during engine
cranking.
To check starter drive:
Inspect helix (A) and pinion gear ([B] Fig. 35) for
freedom of operation.
If damage or binding is noted:
• Replace the drive assembly.
WARNING
8
Eye injury could occur if flywheel is struck
with a hard object.
• Do not strike flywheel with hard object
or steel tool.
• Wear safety goggles or other eye
protection.
Fig. 35
CAUTION: Do not oil pinion gear on clutch
helix.
Use approved flywheel removal tools.
1. Using a center punch, mark center of
rivets holding rin g gear ([A] Fig. 34) to
flywheel (B).
2. Drill out rivets with a #13 (4.7 mm) drill bit.
Clean holes after drilling.
3. Attach new gear to flywheel using four
screws (C) and lock nuts ([D] Fig. 34)
provided with gear.
172
To check drive clutch with starter still
installed on equipment:
• Discon nect spark plug.
• Block mower blade (if equipped).
• Engage starter motor.
Replace the clutch assembly if it slips.
Starter Drive
(104700, 161400, 260700, 261700)
Disassemble Starter Drive
(Roll Pin Retainer)
1. Place starter drive retainer on support
block and drive out rol l pin ([A] Fig. 36) to
remove starter drive.
CAUTION: Do not oil pinion gear on clutch
helix.
3. Wash the parts in solvent.
Assemble Starter Drive
NOTE : Use new roll pin when assembling
starter drive .
Fig. 36
2. Remove cover (B), upper spring retainer
(C), spring (D), clutch retainer (E), washer
(F), pini on gear (G) and clutch ([H] Fig.
37).
Refer to Fig. 37.
1. Place starter clutch (H) on armature shaft
and rotate clutch until it drops into place.
2. Install pinion gear (G) with beveled edges
of pinion gear teeth away from motor.
3. Place washer (F) and clutch retainer (E)
on armature shaft.
4. Place spring (D), spring retainer (C), and
cover (B) on to clutch retainer.
5. Press new roll pin (A) through retainer slot
and armature shaft hole until pin is
centered in shaft.
Starter Drive
(115400, 117400, 138400, 185400)
Disassemble Starter Motor Drive
(Retainer Ring Retainer)
1. Grasp end of rubber dust cover and pull to
remove.
2. Push down on upper spring retainer (A) to
expose retainer ring (B) on shaft.
3. Use a small screwdriver, and pry off
retaining ring.
4. Remove upper spring retainer, spring (C),
and pinion gear and clutch ([D] Fig. 38).
Fig. 37
Inspect Starter Drive
1. Inspect the pinion gear (G) for damaged
teeth.
2. Correct an y sticking between pinion gear
and clutch ([H] Fig. 37).
173
8
Starter Drive
(235400, 245400)
Disassemble Starter Drive
(Snap Ring Retainer)
1. Remove dust cover (A).
2. Push down on upper spring retainer (B) to
expose snap ring ([C] Fig. 39) on shaft.
Fig. 38
Inspect Starter Drive
1. Inspect the pinion gear and clutch ([D] Fig.
38) for damaged teeth.
Some pinion gears use a rubber bottom as part
of the clutch.
If clutch rubber inside pinion gear is worn or
damaged, pinion gear will slip when starter
is engaged.
• Check for wear or damage.
2. Wash the parts in solvent.
8
Assemble Starter Motor Drive
NOTE : Use new retaining ring when assembling
Fig. 39
3. Place two halves of tool #19467 (D), with
hex ends down on armature shaft around
snap ring (C) and grooves in two halves
on retainer ring, Fig. 40.
4. Slide sleeve (E) of tool #19467 down over
two halves.
5. Install puller screw ([F] Fig. 40) from tool
#19467 in center of two halves, and turn
screw in until retainer ring is removed.
starter drive .
Refer to Fig. 38
1. Lubricate starter shaft helix (E) with a light
coat of lithium grease.
2. Assemble clutch and pinion gear (D) on to
shaft.
3. Install spring (C) and spring retainer (A),
with open end up.
4. Seat the retainer ring in the groove in the
shaft.
Fig. 40
174
6. Remove upper spring retainer (B), return
spring (G), lower retainer (H), pinion gear
(I), and starter clutch ([J] Fig. 39).
Starter Drive (28Q700)
Inspect Starter Drive
1. Inspect the pinion gear (I) for damaged
teeth.
Some pinion gears use a rubber bottom as part
of the clutch.
If clutch rubber inside pinion gear is worn or
damaged, pinion gear will slip when starter
is engaged.
• Check for wear or damage.
Correct any sticking betwee n pinion gear and
starter shaft helix ([K] Fig. 39).
CAUTION: Do not oil pinion gear on clutch
helix.
2. Wash the parts in solvent. Assemble
Starter Motor Drive
Fig. 41
Disassemble Starter Drive
(C-Ring Retainer)
1. Remove and discard the C-ring ([A] Fig.
448).
2. Remove retainer (B), washer (C), return
spring (D), pinion gear (E), and starter
clutch ([F] Fig. 42).
3. Inspect the pinion gear for damaged teeth.
4. Correct any sticking between the pinion
gear and the helix.
CAUTION: Do not oil pinion gear on clutch
NOTE : Always use new retaining ring when
helix.
assembling starter drive.
Refer to Fig. 39
1. Grease inside of pinion gear with
Lubriplate (or equivalent).
2. Install the pinion gear (I) with the
chamfered teeth up.
3. Place starter clutch (J) on starter shaft.
Turn clutch until it drops into place.
4. Assemble lower spring retainer (H) with
open end up.
5. Install return spring (G), and install upper
spring retainer (B) with open end up.
6. Place new retainer ring (C) i nside two
halves of tool #19467 (D), and slide tool
sleeve down over two halves, Fig. 41.
7. Place tool #19467 ove r armature and strike
tool with hammer (L) to drive ring into
groove.
8. Pull up on upper spri ng retainer (B) until
retaining ring snaps into groove in upper
spring retainer, Fig. 39.
9. Install rubber dust cover (A). Push dust
cover down until it snaps into groove in
lower spri ng retainer (H).
5. Wash the parts in solvent.
6. Check the IPL for parts availability.
8
Fig. 42
175
Inspect Starter Drive
1. Inspect the pinion gear ([E] Fig. 42) for
damaged teeth.
Some pinion gears use a rubber bottom as part
of the clutch.
If clutch rubber inside pinion gear is worn or
damaged, pinion gear will slip when starter
is engaged.
• Check for wear or damage.
2. Correct an y sticking between pinion gear
and starter clutch (F) helix, Fig. 42.
CAUTION: Do not oil pinion gear on clutch
helix.
3. Wash the parts in solvent.
4. The pinion gear (E), clutch (F), and C-ring
([A] Fig. 42) are available as separate
service parts from your Briggs & Stratton
source of supply.
8
Assemble Starter Motor Drive
Refer to Fig. 448
1. Place starter clutch ([F] Fig. 42) on starter
shaft. Turn clutch until it drops into place.
2. Grease inside of pinion gear with
Lubriplate (or equivalent).
3. Install the pinion gear with the chamfered
teeth up.
4. Install return spring (D) making sure
spring is in recess of pinion gear.
5. Place washer (C) on starter clutch splines,
and install retainer (B).
If retainer has a n otch as shown:
• Rotate notch away from open end of Cring.
6. Place new C-ring ([A] Fig. 42) over
chamfered end of shaft. Press C-rin g on
until it snaps into groove in shaft.
176
SECTION 9 - LUBRICATION SYSTEMS
SYSTEM TYPES……………………………. ................................................... 179
Oil Dipper (050000, 085400, 086400, 115400, 117400, 138400, 185400,
235400, 245400) ......................................................................................................179
Oil Dipper (161400) .................................................................................................. 179
Oil Slinger (28Q700) ................................................................................................179
Pressure Lubrication (104700, 260700, 261700).....................................................1 80
Pressure Filtration ....................................................................................................180
OIL PUMP SERVICE ..................................................................................... 180
Oil Pump & Screen Removal/Installation (104700, 260700, 261700) ..................... 180
Oil Pump & Screen Removal/Installation (28Q700) .................................................182
OIL GARD® SYSTEM (050000, 085400, 086400, 115400, 117400,
138400, 185400, 235400, 245400) ................................................................ 184
Oil Gard® System .................................................................................................... 184
Oil Gard® (161400)........................................................................................ 185
Oil Gard® System (161400) .....................................................................................185
9
177
9
178
SYSTEM TYPES
For information regarding external breather
systems:
See SECTION 3- ENGINE DISASSEMBLY.
Briggs & Stratton OHV engines use four
lubrication systems.
1. Oil Dipper
2. Oil Slinger
3. Pressure Filtration
4. Pressure Lubrication
Oil Dipper (050000, 085400, 086400,
115400, 117400, 138400, 185400,
235400, 245400)
f23p11
Fig. 2
Oil Slinger (28Q700)
The oil slinger (A) i s driven by the camshaft ([B]
Fig. 3).
The dipper ([A] Fig. 1) is an integral part of the
connecting rod cap.
Replace connecting rod if dipper is damaged or
broken.
Fig. 3
Replace oil slinger if worn or damaged.
9
Fig. 1
Oil Dipper (161400)
The dipper ([A] Fig. 2) is a separate part, held on
the connecting rod cap with the connecting rod
screws.
If dipper shows cracks or missing pieces:
• Replace connecting rod or dipper.
179
Pressure Lubrication (104700,
260700, 261700)
Pressure Filtration
Fig. 6
OIL PUMP SERVICE
Fig. 4
Oil Pump & Screen Removal/
Installation (104700, 260700, 261700)
The oil pump can be accessed from the outside
of the sump.
Oil Pump Removal/Installation (104700)
1. Remove the three screws that hold the oil
pump cover to the sump.
The O-ring that seals the cover is held in a
channel machined into the sump ([A] Fig. 7).
9
Fig. 5
Fig. 7
180
2. Lift the pump rotor and its drive shaft from
the sump ([A] Fig. 8).
2. Remove snap ring ([A] Fig. 10) retaining
inner rotor to shaft.
f32p15
Fig. 8
3. Remove the outer oil pump rotor ([A]
Fig.9).
Fig. 9
4. Remove the O-ring and discard.
5. Inspect the O-ring channel, inner and
outer pump rotor an d the drive shaft for
any signs of wear or damage. Replace if
worn or damaged.
6. Coat all parts with new oil and rei nstall.
7. Install cover and torque bolts to listed
value. See SECTION 14- ENGINE
SPECIFICATIONS.Oil Pump Removal/
Installation (260700, 261700)
1. Remove three screws that hold the pump
cover and O-ring.
Fig. 10
3. Carefully remove inner and outer rotors.
Remove the drive shaft.
4. Inspect the O-ring channel, inner and
outer pump rotor an d the drive shaft for
any signs of wear or damage. Replace if
any discrepancies are found.
5. Oil and install outer (A) and inner rotor ([B]
Fig. 11) in pump cavity. Do not use force
to install and turn the rotors to engage the
pump in the cam or governor gear.
6. Install snap ring retainer on inner pump
rotor shaft.
7. Place O-ring (C) in groove (D), in cover
([E] Fig. 11).
9
Fig. 11
8. Install oil pump cover and torque bolts to
listed value.
181
Oil Screen Removal/Installation (104700)
The oil pump screen is located inside the sump.
Remove sump from cylinder to clean or replace
the screen.
1. Remove two screen retaining screws ([A]
Fig. 12). Clean or replace as needed.
Fig. 14).Press screen into position as
shown.
Fig. 14
Oil Pump & Screen Removal/
Installation (28Q700)
Fig. 12
2. Install screen and torque screws to
listed value. See SECTION 14- ENGINE
SPECIFICATIONS.
Screen Removal/Installation (28Q700)
Three types of oil pump screens were used on
these engines. Oil pump screens ([A] Before date
code 94110700) were mounted inside the sump
and held with one screw ([B] Fig. 15).
Oil Screen Removal/Installation (260700,
261700)
The oil pump screen is located inside the sump.
Remove sump from cylinder to clean or replace
the screen.
1. Drive out screen, Fig. 13Do not reuse.
9
Fig. 15
Remove, clean and/or replace as required.
Torque screw to listed value.
The intermediate screen ([C] After date code
94110600) could be removed from the outside of
the sump with the oil pump, Fig. 16.
Fig. 13
2. Install oil pump screen with hole (A) facing
away from governor shaft bearing ([B]
Fig. 16
182
Slide screen out from its cavity. Clean and/or
replace.
Current oil pump screen (After date code
98063000) requires the sump be removed from
the engine.
Drive the screen out from the outside of the
sump cover (Fig. 17).
Oil Pump Removal/Installation (28Q700)
All three oil pump configurations can be removed
from the outside of the sump. With slight
variations of the O-ring channel and design of
the pump cover, the removal and installation
procedure is essentially the same.
All Date Codes (28Q700)
1. Remove the pump cover.
Fig. 17
Press new oil pump screen ([D] Fig. 18) until
seated, as shown.
Fig. 19
2. Remove the inner rotor and the outer
rotor.
Fig. 18
9
Fig. 20
3. Remove O-ring and discard.
4. Inspect the O-ring channel, inner and
outer pump rotor an d the drive shaft for
any signs of wear or damage. Replace if
necessary.
5. Coat all parts with new oil and rei nstall.
183
After Date Code 98063000 (28Q700)
1. Install new O-ring ([A] Fig. 21) in channel
in sump.
Before 94110700 (28Q700)
1. Install O-ring ([A] Fig. 23) to groove in
sum p.
2. Place pump cover on oil pump cavity, and
install three screws.
3. Torque to listed value.
Fig. 21
2. Install cover and torque bolts to listed
value. See SECTION 14- ENGINE
SPECIFICATIONS.
After 94110600 (28Q700)
1. Install O-ring ([A] Fig. 22) to groove in
sum p.
2. Place pump cover on oil pump cavity. Line
up two notches (B) in pump cover with
two ribs (C) in pump cavity.
Fig. 23
OIL GARD® SYSTEM (050000,
085400, 0 86400, 115400, 1 17400,
138400, 1 85400, 235400, 2 45400)
For Troubleshooting information:
See SECTION 2- TROUBLESHOOTING, pg.54.
9
Oil Gard® System
OIL GARD® will stop a running engine if the oil
level drops below a safe level. The engine may
restart after oil has drained back into sump but
will only run momentarily.
Fig. 22
3. Install three screws and torque to listed
value.
184
Low oil will cause contact between the cylinder
housing and a shaft attached to a float. The
sensor assembly is show n with the shaft ([A] Fig.
24) grounding against the cylinder housing.
OIL GARD® (161400)
For Troubleshooting information:
See SECTION 2- TROUBLESHOOTING, pg.55.
Oil Gard® System (161400)
Fig. 24
When the switch is submerged in oil, the shaft is
lifted and no longer makes contact with the
cylinder.
An O-ring provides a seal between the cylinder
housing and the terminal ([Fig. 25] A & B).
When engine runs low on oil, the engine will stop
and the Oil Gard® light will flash. The engine will
not restart until the correct amount of oil is
added.
This system uses a float to operate a magnetic
switch. When the oil level is correct, the float
rises (A) and opens the switch. When the oil
level is low, it drops ([ B] Fig. 27) and closes the
switch. This causes two things to occur:
1. The ignition primary circuit will cause the
warning light to flash.
2. The engine will stop.
Fig. 25
The signal from the low oil sensor is sent to a
two-wire ([A] Fig. 26) or four wire module which
is connected to a stop switch.
9
f59p26
Fig. 26
Fig. 27
185
Disassemble Oil Gard® System (161400)
1. Disconne ct wire (A) from float assembly
terminal and remove mounting screws
([B] Fig. 28).
f61p28
Fig. 28
2. Remove float assembly ([A] Fig. 29) from
cylinder.
9
f62p28
Fig. 29
To service warning light,
1. Disconnect wire connector and remove
light from control panel.
2. Remove air cleaner to gain access to light
(if so equipped).
186
Inspect Oil Gard® System (16140 0)
1. Inspect float assembly for cracks in
housing and float.
2. Check Oil Gard® switch operation by
connecting a continuity tester to the wire
terminal and ground clip.
3. In the normal upright position, the tester
should read continuity.
4. Turn the float assembly upside down.
5. The tester should read no continuity.
Assemble Oil Gard® System (161400)
Refer to Fig. 29
1. Install serviceable light assembly in
control panel.
2. Install new gasket ([A] Fig. 29 ) with
sealant bead toward cylinder and float
assembly.
3. Apply sealant to screw threads.
4. Install mounting screws.
5. Torque to listed value. See SECTION 14ENGINE SPECIFICATION.
6. Install wire terminal.
SECTION 10 - CYLINDERS, COVERS AND SUMPS
REMOVING COVERS AND SUMPS ............................................................. 189
Removal: (All Models) ..............................................................................................1 89
Crankshaft Seals (All Models)..................................................................................189
BEARINGS ..................................................................................................... 189
Camshaft Bearings (All Models)...............................................................................189
Ball Bearing Service (050000) ................................................................................. 190
Ball Bearing Service (085400, 086400) ...................................................................1 90
Ball Bearing Service (115400, 117400, 118400) .....................................................192
Ball Bearing Service Counter-Balance (185400) .....................................................195
Ball Bearing Service (235400, 245400) ...................................................................1 96
DU & Ball Bearing Service (161400)........................................................................197
Aluminum Bearing Service (104700) .......................................................................198
Aluminum Bearing Service (260700, 261700) .........................................................1 99
DU™ & Ball Bearing Service (28Q700) ................................................................... 199
INSTALLING COVERS AND SUMPS ............................................................ 200
Seal Protectors (All Models).....................................................................................200
Installation: Cylinders and Covers And Sumps (All Models)....................................200
Crankshaft End Play ................................................................................................202
CYLINDER BORES........................................................................................ 203
Measuring Cylinder Bore (All Mode ls) .....................................................................2 03
Resizing Cylinder Bores...........................................................................................2 04
Finishing And Cleaning Cylinder ..............................................................................205
10
187
10
188
REMOVING COVERS AND SUMPS
Removal: (All Models)
Before removing a cover or sump from engine,
remove rust, paint, or burrs from the PTO end of
the crankshaft.
1. Drain the oil from the engine.
2. Remove the cover or sump bolts (Fig. 1).
Crankshaft Seals (All Models)
Oil seals are a press fit in cylinder and sump
covers.
Oil Seal Removal (All Models)
Pry the old se al out of its mounting (Fi g. 2), using
a screwdriver.
If cover or sump sticks:
• Tap lightly with soft mallet on alternate
sides of cover.
Fig. 2
Install new oil seals whenever engine is
disassembled or when replacing bearings. Use a
seal protector to prevent damage to the oil seal
when installing cover or sump.
BEARINGS
Fig. 1
NOTE: Do not remove dowel pins.
To remove internal cylinder components, see
SECTION 11- CRANKSHAFTS, CAMSHAFTS,
BALANCING SYSTEMS AND GEAR
REDUCTIONS.
To remove cylinder head, see SECTION 7CYLINDER HEADS AND VALVES.
To remove piston assemblies, see SECTION 12PISTONS, RINGS AND CONNECTING RODS.
Some engine models use a combination of
bearings in the cylinder and cover. Check your
Illustrated Parts List (IPL) to determine
serviceability.
Camshaft Bearings (All Models)
1. Measure cam bearing in the cylinder and
cover or sump.
If plug gauge is not available for your model:
• Compare measurements with reject
dimensio ns. See SECTION 14- ENGINE
SPECIFICATIONS.
189
10
Use the following plug gauges to check cam
bearings:
• 161400 - Gauge #19383
• 104700 - Gauge #19164 (Magneto-Side)
• 260700, 261700 - Gauge #19383
• 28Q700 - Ga uge #19164
Insert the gauge ([A] Fig. 3) into the beari ng at
several locations.
If the plug gauge can be inserted 1/4 in. (6.35
mm) or more:
• Replace cylinder, cover or sump.
Ball Bearing Service (085400, 086400)
Removal: Magneto-Side Ball Bearing
Bearing Removal Tools: (Refer to Fig. 4)
• Puller Screw ([A] #19318)
• Washer ([B] #225136)
• Adapter/Driver ([C] #19397)
• Bushing ([D] #19454)
1. Remove oil seal.
2. Assemble washer (B) to puller screw and
insert through adapter/driver (C).
3. Place bushing (D) against ball bearing.
4. Insert puller screw (A) with driver adapter
into ball bearing and thread into bushing
(D).
5. Tighten puller screw until ball bearing
comes free of cylinder.
Fig. 3
Ball Bearing Service (050000)
Removal: Magneto And PTO Side Ball
Bearing
1. Set the cylinder or cover on an appropriate
fixture in an arbor press.
2. Use a press die that fits through the seal
opening and carefully apply pressure fr om
the inside until the b earing comes free of
the housing.
NOTE : The seal for the crankshaft PTO and the
10
flywheel end are the same. However, the inner
diameter of the bearing s are not. If bearing
replacement is necessary, replace both bearings
as a set and be sure to order the bearings by
individual part number.
Installation: Magneto And PTO- Side Ball
Bearing
Press a new bearing into a housing or cover fr om
the outside in. Be sure that the bearing goes into
the channel straight and th at the beari ng is
completely seated into its machined opening.
190
Fig. 4
Installation: Magneto-Side Ball Bearing
Bearing Installation Tools: (Refer to Fig. 5).
• Adapter/Driver ([A] #19397)
• Driver ([B] #19320)
• Washer ([C] #225136)
• Puller Screw ([D] #19318)
• Pilot Nut ([E] #19395)
1. Lubricate outside of ball bearing.
2. Insert adapter/driver (A) into driver (B)
and place ball bearing on adapter.
3. Assemble washer (C) to puller screw (D)
and insert through bushing.
4. Insert small end of pilot nut (E) in oil seal
boss in cylinder.
5. Thread puller screw (D) with adapter (A)
and bearing in pilot nut (E).
6. Tighten until ball bearing is seated.
4. Insert puller screw (A) with adapter/driver
(C) into bearing and thread into bushing
(D).
Fig. 6
5. Tighten until ball beari ng comes free of the
cover.
Fig. 5
Removal: PTO-Side Ball Bearing
Bearing Removal Tools: (Refer to Fig. 6)
• Puller Screw ([A] #19318)
• Washer ([B] #225136)
• Adapter/Driver ([C] #19397)
• Bushing ([D] #19454)
1. Remove governor gear.
2. Remove oil seal.
3. Assemble washer (B) to puller screw (A)
and insert through adapter/driver (C).
Installation: PTO-Side Ball Bearing
Bearing Installation Tools (Refer to Fig. 7)
• Adapter/Driver ([A] #19397)
• Driver ([B] #19320)
• Washer ([C] #225136)
• Puller Screw ([D] #19318)
• Pilot Nut ([E] #19395)
1. Lubricate outside of bearing and install
shims (if used).
2. Assemble washer (C) to puller screw (D)
and insert through pilot nut (E).
3. Insert large end of pilot nut (E) into seal
boss in cylinder cover.
4. Thread screw (D) with adapter (A) and
bearing into pilot nut (E).
191
10
5. Tighten screw until bearing is seated.
Fig. 7
Installation: Magneto-Side Ball Bearing
Bearing Installation Tools: (Refer to Fig. 9)
• Support ([A] #19394)
• Washer ([B] #225136)
• Puller Screw ([C) #19318)
• Pilot ([D] #19396)
1. Lubricate outside of ball bearing.
2. Place ball bearing on support (A).
3. Assemble washer (B) to puller screw (C)
and insert through pilot (D).
4. Insert puller screw (C) with small end of
pilot (D) into cylinder and thread into
support (A).
Ball Bearing Service
(115400, 117400, 118400)
Removal: Magneto-Side Ball Bearing
Bearing Removal Tools: (Refer to: Fig. 8)
• Washer ([A] #225136)
• Puller Screw ([B] #19318)
• Driver ([C] #19320)
• Support ([D] #19394)
1. Remove oil seal.
2. Assemble washer (A) to puller screw (B)
and insert through large end of driver (C).
3. Place open side of support (D) against ball
bearin g.
4. Insert screw (B) with driver (C) through
ball bearing and thread into support (D).
5. Tighten until ball bearing comes free of
cylinder.
10
Fig. 8
192
Fig. 9
5. Tighten screw until ball bearing is seated.
6. Install new oil seal . Use large end of driver
(#19320) and press seal until flush with
cylinder cover.
Removal: PTO-Side Ball Bearing (Crankshaft
& Camshaft)
Ball Bearing Removal Tools: (Refer to Fig. 10)
• Washer ([A] #225136)
• Puller Screw ([B] #19318)
• Driver ([C] #19320)
• Support ([D] #19454)
1. Remove Governor Gear.
2. Remove oil seal.
3. Assemble washer (A) to puller screw (B)
and insert through large end of driver (C).
4. Place open side of driver (C) against ball
bearin g.
5. Insert puller screw (B) w ith driver (C)
through ball bearing and thread into
support (D).
Fig. 10
6. Tighten until ball bearing is seated.
Removal: PTO-Side Ball Bearing (With 6:1
Gear Reduction)
Bearing Removal Tools: (Refer to Fig. 12).
• Puller Nut ([A] #19139)
• Puller Stud ([B] #19398)
• Support ([C] #19454)
• Washer ([D] #225136)
• Nut ([E] #94814)
1. Remove governor gear.
2. Assemble puller nut (A) to puller stud (B)
and insert through ball bearing.
3. Place support (C) over ball bearing.
4. Assemble washer (D) and nut (E) to puller
stud (B) and thread nut down to the end of
the threads on sup port (C).
• Hold 3/8” hex end of stud with wrench
while tightening nut (E). Tighten until ball
bearing comes free of cover.
6. Tighten until bearing comes free of cover.
Installation: PTO-Side Ball Bearing
Ball Bearing Installation Tools: (Refer to Fig. 11)
• Washer ([A] #225136)
• Puller Screw ([B] #19318)
• Driver ([C] #19320)
• Pilot Nut ([D] #19395)
1. Lubricate outside of ball bearing.
2. Inse rt puller screw (B) through washer (A)
and through small end of driver (C).
3. Place ball bearing on driver (C).
4. Insert large end of pilot nut (D) into oil seal
boss of cylinder cover.
5. Thread puller screw (B), washer (A),
driver (C) and ball bearing into pilot nut
(D).
Fig. 12
Installation: PTO-Side Ball Bearing (With 6:1
Gear Reduction) (Fig. 13)
1. Lubricate outside of ball bearing.
Fig. 11
193
10
2. Using arbor press and tool ([A] #19320).
Fig. 13
Installation: Magneto-Side Ball Bearing
Bearing Installation Tools: (Refer to Fig. 15)
• Washer ([A] #225136)
• Puller Screw ([B] #19318)
• Pilot ([C] #19396)
• Support ([D] #19394)
1. Lubricate outside of bearing.
2. Place ball bearing on support (D).
3. Assemble washer (A) to puller screw (B).
4. Insert small end of pilot (C) into seal boss
in cyl inder.
5. Insert puller screw (B) through pilot (C)
and thread into support (D).
6. Tighten until ball bearing is seated.
3. Press bearing until it bottoms.Ball Bearing
Service (138400, 185400).
Removal: Magneto-Side Ball Bearing
Bearing Removal Tools (Refer to: Fig. 14)
• Washer ([A] #225136)
• Puller Screw ([B] #19318)
• Driver ([C] #19320)
• Support ([D] #19394)
1. Remove oil seal.
2. Assemble washer (A) to puller screw (B)
and insert through large end of driver (C).
3. Place open side of support (D) against
bearin g.
4. Insert puller screw (B) with driver through
ball bearing and thread into support (D).
Fig. 15
7. Install new oil seal. Use large end of tool
(#19320) and press seal until flush with
cylinder.
Removal: PTO-Side Ball Bearing
Bearing Removal Tools: (Refer to: Fig. 16)
• Washer ([A] #225136 (2))
• Puller Screw ([B] #19318)
• Driver ([C] #19320)
• Support ([D] #19394)
1. Remove governor gear.
2. Remove oil seal.
3. Assemble washer (A) to puller screw (B)
and insert through large end of driver (C).
10
Fig. 14
5. Tighten screw until bearing comes free of
cylinder.
194
Ball Bearing Service Counter-Balance
(185400)
Fig. 16
Installation: PTO-Side Ball Bearing
Bearing Installation Tools: (Refer to Fig. 17).
• Washer ([A] #225136)
• Support ([B] #19394)
• Puller Screw ([C] #19318)
• Pilot ([D] #19396)
1. Lubricate outside of bearing.
2. Install shim(s) - if used.
3. Assemble washer (A) to puller screw (C).
4. Insert large end of pilot (D) into seal boss
of cover.
5. Insert puller screw (C) through pilot (C)
and thread into support (B).
Removal: Counter-Balance Ball Bearing
Bearing Removal Tools: (Refer to Fig. 18)
• Puller Nut ([A] #19406)
• Puller Stand-Off ([B] #19408)
• Nut-Hex ([C] #92278)
• Screw-Hex ([D] #94373)
1. Remove nut-hex (C) and screw-he x (D)
from flywheel puller (#19069).
2. Place a flat washer with a 1/4” hole on
screw assembly and insert through puller
stand-off (B).
3. Thread screw-hex (D) into puller nut ( A).
4. Insert assembly through ball bearing until
puller nut (A) engages bearing race.
5. Turn nut (C) down to puller stand-off (B).
6. Hold screw from turning and turn nut until
bearing comes free of cylinder or cover.
10
Fig. 18
Fig. 17
6. Tighten screw until bearing is seated.
7. Install new oil seal. Use large end of tool
(#19320) and press seal until flush with
cover.
8. Install thrust washer and governor gear.
Push governor gear and cup on to shaft
as far as it will go.
195
Installation: Counter-Balance Ball Bearing
Bearing Installation Tool: (Refer to Fig. 19)
• Driver ([A] #19320)
1. Oil outside of ball bearing.
2. Using an arbor press and driver (A), press
ball bearing until it is seated.
Fig. 19
2. Assemble washer (A) to puller screw (B)
and insert through large end of driver (C).
3. Place open side of support (D) against ball
bearin g.
4. Insert puller screw (B) w ith driver (C)
through ball bearing and thread into
support (D).
5. Tighten until bearing comes free of
cylinder.
Installation: Magneto-Side Ball Bearing
Bearing Installation Tools: (Refer to Fig. 21)
• Washer ([A] #225136)
• Puller Screw ([B] #19318)
• Pilot ([C] #19396)
• Support ([D] #19440)
1. Lubricate outside of bearing.
2. Place ball bearing on support (D).
3. Assemble washer (A) to puller screw (B).
4. Insert small end of pilot (C) into seal boss
in cyl inder.
5. Insert screw (B) through pilot (C) and
thread into support (D).
6. Tighten until ball bearing until seated.
Ball Bearing Service (235400, 245400)
Removal: Magneto-Side Ball Bearing
Bearing Removal Tools (Refer to Fig. 20).
• Washer ([A] #225136)
• Puller Screw ([B] #19318)
• Driver ([C] #19320)
• Support ([D] #19394)
1. Remove oil seal.
10
Fig. 21
Fig. 20
196
Removal: PTO-Side Bearing
Bearing removal tools: (Refer to: Fig. 22)
• Washer ([A] #225136)
• Puller Screw ([B] #19318)
• Driver ([C] #19320)
• Support ([D] #19440)
1. Remove governor gear.
2. Remove oil seal.
3. Assemble washer (A) to puller screw (B)
and insert through large end of driver.
4. Assemble second washer (A) over puller
screw (B) up against driver (C).
Fig. 23
Fig. 22
5. Place open side of support (D) against ball
bearing with notch (E) of support (D) over
two ribs in cylinder cover.
6. Insert puller screw (B) w ith driver (C) and
washer (A) through ball bearing and
thread into support (D).
7. Tighten until ball bearing comes free of
cylinder cover.
2. Install shim(s) -if used.
3. Assemble washer (A) to puller screw (C).
4. Insert large end of pilot (D) into seal boss
of cylinder cover.
5. Insert puller screw (C) through pilot (D)
and thread into support (B).
6. Tighten until bearing is seated.
7. Install new oil seal . Use large end of driver
(#19320) and press oil seal flush with
cylinder cover.
8. Install thrust washer and governor gear.
Push governor gear and cup on to shaft
as far as it will go.
DU & Ball Bearing Service
(161400)
Removal: Magneto-Side DU Bearing
1. Remove oil seal.
2. Using cylinder sup port tool (#19351) and
bearing drive r tool (#19350) ([A] Fig. 24),
press bearing out of cylinder.
Installation: PTO-Side Ball Bearing
Bearing Installation Tools: (Refer to Fig. 23)
• Washer ([A] #225136)
• Support ([B] #19440)
• Puller Screw ([C] #19318)
• Pilot ([D] #19396)
1. Lubricate outside of bearing.
Fig. 24
197
10
Installation: Magneto-Side DU Bearing
1. Place cylinder on cylinder support tool
(#19351).
2. Position new bushing against counterbored bearing with the oil hole aligned
with hole (B) in the side of the bore ([A]
Fig. 25).
3. Press the new bearing (A) into place.
Removal: PTO Ball Bearing
1. Remove oil seal .
2. Support the cylinder cover on arbor press
and press out bearing using bushing (A)
driver (#19226). Press be aring to the inside
of the cover Fig. 27.
Fig. 27
Fig. 25
4. Stake the bearing in place by driving a
long pu nch (B) against the edge of the oil
hole ([A] Fig. 26).
Installation: PTO Ball Bearing
1. Lubricate outside surface of bearing and
set on inside of cover.
2. Using an arbor press and a suitable block,
press against the outer race of bearing.
3. Press bearing into place until it is flush
with the surface of the cover ([A] Fig. 28).
10
Fig. 26
5. Repeat the staking operation from the
opposite end of bearing.
6. Remove any burrs formed by the staking
operatio n.
7. Install the oil seal.
198
Fig. 28
4. Install PTO bearing oil seal.
Aluminum Bearing Service (104700)
Measure magneto-side be aring and PTO beari ng
with plug gauge (#19178) or compare
measurements with reject size dimension.
If measurement exceeds specified
dimension:
• Place split of bearing seam ([A] Fig. 30)
as shown.
• Replace cylinder and/or sump.
Aluminum Bearing Service (260700,
261700)
Measure magneto-side be aring and PTO beari ng
with plug gauge (#19378) or compare
measurements with reject size dimension. See
SECTION 14- ENGINE SPECIFICATIONS.
If measurement exceeds specified
dimension:
• Replace cylinder and/or sump.
DU™ & Ball Bearing Service (28Q700)
Removal: Magneto -Side DU™ Bearing
1. Remove oil seal.
2. Using cylinder sup port tool (#19351) and
bearing drive r tool (#19350) ([A] Fig. 29),
press bearing out of cylinder.
Fig. 30
2. Use cylinder support (#19227) (A) and
bushing driver (#19226) (B) to press the
new bearing ([C] Fig. 31) to 7/64” (2.78
mm) (D) from seal surface on magneto
side.
Fig. 31
Fig. 29
3. Stake bearing in cylinder where shown
([A] Fig. 32).
10
Installation: Magneto-Side DU™ Bearing
1. Place DU™ bearing on cylinder with oil
hole in line with oil hole in cylinder
bearin g.
If cylinder bearing cavity does not have oil
hole:
Fig. 32
199
PTO-Side Ball Bearing
If the measurement obtained from the sump
cover bearing exceeds limitations:
• Replace sump.
Installation: Cylinders and Covers
And Sumps (All Models)
Make sure the mating surfaces of the cylinder
and cover or sump are clean.
1. Place the gasket ([A] Fig. 33) on the
mating surface of the cylinder.
INSTALLING COVERS AND
SUMPS
Seal Protectors (All Models)
Use a seal protector to prevent damage to oil
seals when installing covers or sumps.
10
Tool#
Color
Size
19334/1
White
.787
(19.99mm)
19334/2
Red
.875
(22.23mm)
19334 /3
Blue
.984
(24.99mm)
19334/4
Orange
1.00
(25.40mm)
19334 /5
Brown
1.062
(26.97mm)
19334/6
Green
1.181
(30.00mm)
19334/7
Yellow
1.378
(35.00mm)
19356/8
Purple
1.317
(33.45mm)
19356 /9
Black
1.503
(38.18mm)
200
Fig. 33
2. Place the cover or sump on top of the
gasket and install the cover mounting
bolts finger tight.
NOTE: It may be necessary to rotate crankshaft
and camshaft to ge t oil pump (when equipped) to
engage drive slot in camshaft. For counterbalanced engines, it may be necessary to rotate
the counterweight shaft to mesh with timing gear
when installing cover.
• Do not force cover.
• Make sure mechanical governor gear
and oil pump (if used) is engaged with
camshaft.
• For adjustment procedure for crankshaft
end play, see Page 207.
3. Follow the torque sequence shown for the
engine you are working on:
Fig. 37
Fig. 34
Fig. 38
Fig. 35
10
Fig. 39
Fig. 36
201
CRANKSHAFT END PLAY
When cylinder cover or sump is installed with a
standard gasket, end play should be as listed in
SECTION 14- ENGINE SPECIFICATIONS.
Always measure end play with a standard gasket
in place.
If end play is less than listed:
• Use additional gasket(s) between the oil
sump and cylinder to get proper end play.
If end play is more than listed:
Fig. 40
• Use Part #220624 shim on magneto end
of crankshaft ([A] Fig. 43 non-pump
applications) or on PTO end of
crankshaft ([B] Fig. 44 pump
applications).
Fig. 43
Fig. 41
Fig. 44
10
Fig. 42
202
CYLINDER BORES
Resizing Cylinder Bores
Inspect the cylinder whenever the engine has
been disassembled. Look for cracks, stripped
bolt holes, broken fins or any evidence of
cylinder wall damage or wear.
A cylinder bore may be resized to 0.020 in. (0.51
mm) over the standard size shown in the engine
specifications. See SECTION 14- ENGINE
SPECIFICATIONS. If done accurately, the
corresponding 0.020 in. (0.51mm) oversize rings
and pistons will fit correctly and maintain proper
clearances.
Measuring Cylinder Bore (All Models)
Use Telescoping Gauge with a Micrometer, or
Dial Bore Gauge #19487 to measure the cylinder
bore diameter.
Measure the cylinder bore twice at right angles at
each of the positions shown in Fig. 45.
• First two measurements, at position (A)
at the top of the cylinder bore.
• Second two measurements, at position
(B) in the middle of the cylinder bore.
• Third two measurements, at position ([C]
Fig. 45) at the bottom of the piston ring
travel in the cylinder bore.
Cylinders can be resized with a good quality
hone set.
For aluminum bore engines:
• Briggs & Stratton Hone Set (#19205)
For sleeve bore engines:
• Briggs & Stratton Hone Set (#19211)
Consult the Briggs & Stratton Service Tools
Catalog (MS-8746) for specific hone set contents.
If a boring bar is used to resize a cylinder
bore:
• A finish hone must be used to produce
the proper cross-hatch texture.
CAUTION: Honing grit is impossible to remove
from a ball bearing. Remove ball bearing from cylinder before honing or rapid w ear of the bearing
will result.
Fig. 45
This produces six different measurement values.
Calculate the average value of all these
measurements and compare with the
specifications listed for the engine you are
working on.
See SECTION 14- ENGINE SPECIFICATIONS.
If the cylinder bore is more than .003 in.
(.08mm) oversize or .0015 in. (.04mm) outof-round:
• The cylinder must be resized.
If the cylinder bore is within specification and
shows no signs of other damage:
1. Fasten cylinder to a honing fixture or a
heavy iron bracket. Use a level to align
drill press spindle with cylinder bore.
Some cylinders require shims.
2. Check cylinder bores at top and bottom for
burrs. Remove burrs to prevent damage
to hone.
NOTE: (085400, 115400, 117400, 138400,
161400, 185400, 235400, 245400) These
models have cylinders bores that are 30°
degrees from the horizontal plane. The honing
fixture must hold the base of the cylinder at 60°
degrees from horizontal for the cylinder bore to
be vertical.
3. When available, fasten cylinder (A) to a
honing fixture (B), with clamp (C) and
shims ([D] Fig. 46).
• Recondition with finishing stones to
restore the cross-hatch.
203
10
Fig. 46
If using hand drill to hone:
• Clamp the cylinder and honing fixture in
a vise at a convenient working height.
If using drill press:
• Oil the surface of the drill press table
liberally. Set (do not anchor) the honing
fixture/plate (A) and cyl inder on dril l
press table.([B] Fig. 47).
Fig. 47
4. Select hone set as mentioned earlier.
5. Place hone in middle of cylinder bore.
6. Tighten adjusting knob with finger or small
screwdriver until stones fit snugly against
cylinder wall. Do not force.
7. Drill press or portable electric drill should
operate at 300 to 700 RPM.
8. Connect drive shank to hone. Be sure that
cylinder and hone are centered and
aligned with drive shank and drill spindle.
9. Lubricate and flush honing stones and
cylinder bore frequently with honing oil or
ATF.
The cylinder will show the most wear in the ring
travel area (C). Because the cylinder does not
wear oversize or out-of-round below the ring
10
204
travel area, (D) use this area to guide hone to
straighten cylinder bore, Fig. 47.
10. Start the drill and, as the hone spins,
move it up and down limiting the travel to
the bottom of the cylinder ([E] Fig. 47).
11. As the bottom of the cylinder increases in
diameter, gradually increase the length of
the strokes until hone travels full le ngth of
bore and extends past the cylinder bore
ends ([F] Fig. 47). Do n ot extend hone
more than 3/4 in. to 1 in. (19.1 mm to 25.4
mm) at either end of cylinder bore ([G]
Fig. 47).
12. As cutting tension decreases, stop hone
and tighten the adjusting knob.
13. Check cylinder bore frequently with an
accurate micromete r.
14. Hone to approximately 0.0005 in. (0.013
mm) larger than specification to allow for
shrinkage when cylinder cools. On cast
iron sleeve cylinders, change from rough
stones to finishing stones when within
0.0015 in. (0.04 mm) of desired size. On
aluminum bore engines, switch to
finishing stones earlier.
Honing grit is abrasive and will cause rapid wear
to internal components of the engine unless it is
completely removed. The entire cylinder must be
thoroughly cleaned after honing.
1. Wash the cylinder carefully in kerosene or
commercial parts cleaning solvent.
2. Thoroughly wash cylinder using a stiff
brush with soap and hot water.
3. Rinse thoroughly with hot running water.
4. Repeat cleanin g and rinsing. until all
traces of honing grit are gone.
After cleaning the cylinder, wipe the cylinder bore
with a clean white rag or napkin . Honing grit will
appear as gray residue on the rag.
If any honing grit is evident:
• Re-wash and rinse the cylinder and
recheck.
When there is no trace of honing grit on the rag,
the cylinder has been properly cleaned. Oil the
cylinder bore to prevent rusting.
Finishing And Cleaning Cylinder
A reconditioned cylinder should have a 30° to
45° crosshatch finish (Fig. 48).
10
Fig. 48
Correct stones, l ubrication and drill speed along
with rapid movement of hone within the cylinder
during the last few strokes, will produce this
finish.
To produce the proper cross hatch finish:
• Use a drill speed of approximately 200
RPM.
• 40 - 60 strokes per minute.
205
10
206
SECTION 11 - CRANKSHAFTS, CAMSHAFTS, BALANCING SYSTEMS,
GEAR REDUCTIONS
CRANKSHAFT & CA MSHAFT REMOVAL (050000, 085400, 086400,
117400, 138400, 185400, 235400, 245400, 161400, 104700, 260700,
261700) ......................................................................................................... 213
Inspecting Camshaft (All Models) ............................................................................213
Inspecting Crankshaft. .............................................................................................2 14
BALANCING SYSTEMS ..........................................................................................215
Rotating Counterweight System (161400, 185400, 235400, 245400)..................... 215
Oscillating Counterweight System (260700, 261700).............................................. 216
Synchro-Balance® System (28Q700)......................................................................217
GEAR REDUCTIONS ..............................................................................................219
Mounting Positions (115400, 118400) .....................................................................219
11
207
11
208
CRANKSHAFT & CAMSHAFT
REMOVAL
(050000, 085400, 086400, 117400,
138400, 1 85400, 235400, 2 45400,
161400, 1 04700, 260700, 2 61700)
8. Remove the piston. See SECTION 12PISTONS, RINGS AND CONNECTING
RODS.
9. Remove crankshaft(Fig. 2).
1. Drain oil from cylinder/sump.
2. Remove blower housi ng, flywheel and any
other accessories that obstr uct cover/
sump removal. See SECTION 3- ENGINE
DISASSEMBLY.
CAUTION: Remove rust, paint a nd any burrs
from the PTO end of crankshaft. This will reduce
the possibility of damaging the oil seal and
bearin g.
3. Remove cylinder cover or sump. See
SECTION 10- CYLINDERS, COVERS
AND SUMPS.
With the cover removed, the following
components are visible: (Refer to Fig. 1)
• (A) Camshaft
• (B) Crankshaft
• (C) Timing Gear and Key
Fig. 2
Inspecting Camshaft (All Models)
1. Check teeth for wear or damage.
2. Measure camshaft lobes (A) and journals
([B] Fig. 3) as shown.
Fig. 3
11
Fig. 1
4. Align timing marks and lift out the
camshaft ([A] Fig. 1).
5. Remove the tappets.
6. Remove the timing gear and retain
woodruff key.
7. Remove connecting rod bolts and rod cap.
209
If any discrepancies are found:
Inspecting Compression Release
(050000, 085400, 115400, 117400, 118400,
138400, 185400, 235400, 245400)
When inspe cting the compression release
mechanism, ensure that all parts move freely.
• Replace complete camshaft assembly.
Inspecting Valve Tappets (All Models)
Inspect valve tappets for wear on the tappet
surface. Replace if worn or damaged.
Inspecting Crankshaft
Refer to Fig. 6 to check wear points on
crankshaft.
1. Measure the diameters of the PTO journal
(A), crank pin (B) and mag journal (C).
2. Check keyways (D) for wear and
spreading.
3. Check timing gear ([E] Fig. 6) for chipped
or cracked teeth and for wear in the
keyway. Replace crankshaft and gear if
worn or damaged.
Fig. 4
1. Rotate the weight (A) against the spring
and move the decompression pin ([B] Fig.
4) back and forth. Pin should slide easily
through camshaft.
2. The weight should return with spring
pressure.
If weight binds, pivot pin is worn, or spring is
broken:
• Replace complete camshaft assembly.
Inspecting Compression Release
(104700, 161400, 260700, 261700, 28Q700)
Check compression release mechanism ([A] Fig.
5) for wear, nicks, and freedom of movement.
Fig. 6
4. Polish crankshaft journals for smooth
lubricating surface. Use crocus cloth until
polish lines are uniform over entire
journal.
Directio n of polish lines must be as show n in ([A]
Fig. 7).
11
Fig. 7
Fig. 5
210
5. Wash journal with a solvent such as
kerosene to remove residue.
For reject size dimensi ons, see SECTION 14ENGINE SPECIFICATIONS.
BALANCING SYSTEMS
Rotating Counterweight System
(161400, 185400, 235400, 245400)
This system uses a geared counterweight (A)
that rotates opposite the crankshaft
counterweight (B), Fig. 8.
Fig. 9
Installation
Refer to Fig. 10.
1. Turn crankshaft to align timing marks (G)
on cam gear and crankshaft timing gear.
2. Install counterweight (D) into cylinder.
3. Align timing mark on counterweight gear
with second mark on crankshaft timing
gear (H).
4. Install cylinder cover.
Fig. 8
Removal/Inspection
1. Remove cylinder cover. See SECTION
10- CYLINDERS, COVERS AND
SUMPS.
2. Turn crankshaft until all timing marks are
aligned.
3. Remove counterweight.
4. Measure and inspect the counterweight
shaft journals (E) and gear teeth ([F] Fig.
9). Replace shaft if worn beyond
tolerances.
5. Measure both counterweight bearings.
6. Replace the cylinder cover or cylinder if
corresponding bearing is beyond
tolerances.
11
Fig. 10
211
Oscillating Counterweight System
(260700, 261700)
6. Remove connector link ([I] Fig. 13).
Removal/Disassembly
1. Remove cylinder cover. See SECTION
10- CYLINDERS, COVERS AND
SUMPS.
2. Turn crankshaft to align timing mark on
gear (A) with timing mark on camshaft
(B).
3. Remove camshaft ([C] Fig. 11).
Fig. 13
Fig. 11
4. Remove crankshaft timing gear (D) and
counterweight assembly ([E] Fig. 12).
Inspect Counterweight Assembly (260700,
261700)
Inspect the following counterweight components
for damage or wear. Replace parts as
necessary. Refer to Fig. 13.
• Pivot Shaft Bearing (J)
• Pivot Shaft (K)
• Link Pin Bore (G)
• Link Pin (H)
• Connector Link Pin Bearing (L)
• Connector Link Eccentric Bearing (M)
• Connector Link (I)
For reject dimensio ns, see SECTION 14ENGINE SPECIFICATIONS.
Assembly/Installation Counterweight
Assembly
1. Attach connector link to counterweight
with link pin.
2. Install snap ring into groove of
counterweight link pin bore.
11
Fig. 12
5. Remove snap ring (F) from link pin bore
(G), and push out link pin ([H] Fig. 13).
212
3. Install counterweight assembly into
cylinder and slide link (N) on to crankshaft
eccentric ([O] Fig. 14).
Fig. 14
4. Install timing gear on crankshaft.
Refer to Fig. 15.
5. Turn cranksh aft to position timing mark on
gear (A) toward camshaft location.
6. Install camshaft (C) and align timing
marks (B) and (A).
7. Position cylinder cover gasket (P) on
cylinder dowel pins.
8. Slide counterweight pivot shaft (Q) i nto
counterweight pivot shaft bore (R) and
install cylinder cover.
Synchro-Balance® System (28Q700)
This system uses a link and counterweight that
oscillates opposite the piston Fig. 16.
Fig. 16
Removal/Inspection Synchro-Balance®
1. Remove sump cover and cylinder head.
See SECTION 10- CYLINDERS,
COVERS AND SUMPS.
2. Remove connecting rod cap.
3. Remove connecting rod and piston from
engine. See SECTION 12- PISTONS,
RINGS AND CONNECTING RODS.
4. Remove camshaft and crankshaft with
counterweight assembly.
5. Remove timing gear and woodruff key ([A]
Fig. 17). If gear is tight, pry off with two
screwdrivers being careful not to damage
gear.
11
Fig. 15
Fig. 17
6. Remove screw (B) from counterweight.
7. Remove PTO side weight (C), dowel pin
(D), and link (E) from crankshaft,.
8. Remove crankshaft from magneto side
counterweight ([F] Fig. 18).
213
5. Install screw ([B] Fig. 19). Torque to listed
value.
Fig. 18
9. Measure counterweight bearings and
crankshaft eccentrics and compare to
reject dimensions. See SECTION 14ENGINE SPECIFICATIONS.
If counterweight bearings are discolored,
scored or worn beyond tolerances:
• Counterweights must be replaced as a
set.
If the eccentrics are discolored, scored or
worn beyond tolerances:
• Replace the crankshaft
Assembly/Installation Synchro-Balance®
Refer to Fig. 19.
1. Slide magneto side counterweight (F) on
to crankshaft.
2. Place crankshaft and counterweight in a
vise (G). Use soft vise jaws or shop rags
to protect magneto journal.
3. Slip link (E) over do wel pin (D) with
rounded edge of free end (H) u p.
4. Slide PTO side counterweight (C) on to
dowel pin and crankshaft eccentric (I).
11
214
Fig. 19
NOTE: Rotate crankshaft to check for binding. If
necessary loosen and re-torque screw. Check
again for freedom of rotation.
6. Install woodruff key and slide timing gear
on to crankshaft with chamfer toward
eccentric.
NOTE: If necessary, heat gear under a warm
light to expand it before installing.
7. Lay cylinder on its side, cylinder head to
the left.
8. Place crankshaft and counterweight
assembly into cylinder. Using seal
protector, start magneto journal into
magneto bearing.
9. Align link (E) with cylinder link pin ([ J] Fi g.
20). Push assembl y into place.
The housing can be installed in four positions (A,
B, C, D) relative to the crankshaft ([E] Fig. 21).
Fig. 20
Fig. 21
10. Install connecting rod and piston with
lubrication hole in rod toward magneto
side. This will expose rod assembly
marks.
11. Assemble the connecting rod cap, screw
locks and screws.
12. Torque screws and bend up locks.
13. Install ta ppets and camshaft.
14. Align timing marks on camshaft and
timing gear. Install sump cover.
GEAR REDUCTIONS
Remove Gear Reduction Housing (115400,
118400)
1. Remove the drain plug (A). Drain the oil
from the gear housing into an appropriate
container.
2. Clean PTO shaft with crocus cloth and
wipe with a solvent such as kerosene to
remove residue. It is important that PTO
shaft journal be thoroughly cleaned.
3. Remove four cover screws (B) and cover
([C] Fig. 22). Inspe ct cover for bearing
wear and damage. Replace if necessary.
The gear reduction attachment reduces PTO
shaft RPM by 6:1. That is, the crankshaft turns 6
times to 1 turn of the PTO shaft.
Mounting Positions (115400, 118400)
11
Fig. 22
4. Remove large gear, and inspect journal
surface s (D), seal areas, keyway (E), and
215
gear teeth for wear, pitting or scoring.
Replace if necessary
5. Inspect crankshaft gear teeth ([F] Fig. 23)
for wear, pitting or scoring. Replace if
necessary.
Fig. 23
6. Remove four screws attaching housing
([G] Fig. 24) to cylinder. Bend ears on
locking plates away from heads of two
screws inside housing.
Fig. 24
11
7. Remove housing and inspect for bearing
wear, cracks and warping. Replace if
necessary.
216
8. Replace crankshaft oil seal and cork
gasket ([H] Fig. 25).
Fig. 25
Assemble Gear Reduction Housing
Install seals with sealing lip (A) toward engine
side of gear case (B) or cover ([C] Fig. 26) . Press
until seal is flush with case or cover.
Fig. 26
Install Gear Reduction Housing
(115400, 118400)
1. Install new cork gasket on housing, and
place housing against cylinder cover in
original position, Fig. 27.
5. Insert seal protector (E) in seal of cover.
Install cover ([F] Fig. 29) to gear case.
Fig. 29
6. Install cover screws and torque to listed
value.
7. Check end play of PTO shaft. End play
limits: 0.002 - 0.030 in. (0.05 - 0.76 mm).
Fig. 27
2. Install mounting screws (A) and locking
plates ([B] Fig. 27. Torque to listed value.
See SECTION 14- ENGINE
SPECIFICATIONS.
3. Bend one ear of locking plates against flat
on screw heads inside gear housing,
(Inset, Fig. 28).
Filling Reduction Gear Case (115400, 118400)
1. To fill gear case, remove oil level plug ([A]
Fig. 30) and oil fill/vent plug (B).
2. Fill gear case with SAE 30W.
3. Fill gear case just to the point of
overflowing at the lower hole (C).
11
Fig. 30
Fig. 28
4. Install large reduction gear (C) and cover
gasket ([D] Fig. 29).
4. Install oil level plug in lower hole and
torque to listed value.
5. Install oil fill/vent plug in top hole of the
case and torque to listed value. See
SECTION 14- ENGINE
SPECIFICATIONS.
217
11
218
SECTION 12 - PISTONS, RINGS AND CONNECTING RODS
REMOVE PISTON AND CONNECTING ROD............................................... 221
Piston Removal ........................................................................................................2 21
Piston Ring Removal................................................................................................221
Piston Pin Removal..................................................................................................222
INSPECT PISTON ......................................................................................... 222
Measure Piston Pin Bore .........................................................................................222
Measure Ring Groove Clearance............................................................................. 222
Measure Piston Ring End Gap................................................................................. 223
INSPECT CONNECTING ROD..... ................................................................. 223
Inspect Connecting Rod Bearings............................................................................ 223
ASSEMBLE PISTON AND CONNECTING ROD ........................................... 223
Piston Pin Installation ...............................................................................................223
Ring Installations...................................................................................................... 224
PISTON INSTALLATION (TYPICAL) ............................................................. 225
Install Connecting Rod Caps....................................................................................226
12
219
12
220
4. Remove the piston. (Fig. 2). Be careful no t
to damage the surface of the cylinder bo re
with the connecting rod.
REMOVE PISTON AND
CONNECTING ROD
Piston Removal
For related engine information: See SECTION 3ENGINE DISASSEMBLY.
1. Clean carbon deposits or any ridge
buildup from top of cylinder bore to
prevent ring breakage.
2. Remove connecting rod cap screws ([A]
Fig. 1) and connecting rod cap.
Check the illustrated parts list (IPL) for your
model to determine the proper locking hardw are.
Fig. 2
Piston Ring Removal
1. Remove the first two piston rings using
Piston Ring Expander ( #19340) , Fig. 3.
Fig. 3
Fig. 1
3. With the conne cting rod cap removed,
rotate the crankshaft to push the piston to
Top Dead Center (TDC).
Some oil control rings consist of two thin steel
rails and a spring expander. The oil control rings
cannot be removed with tool #19340.
2. Grab one end of the steel rail. Wind the
rail from the oil ring groove into the next
ring groove.
3. Repeat into the top ring groove and off the
piston.
12
221
Piston Pin Removal
INSPECT PISTON
1. Remove snap ring ([A] Fig. 4) from both
sides of piston( if equipped).
Inspect piston for scuffing or galling of the piston
skirt. Discoloration of the piston is not cause for
rejection
Measure Piston Pin Bore
Always look for "out-of-round" conditions.
1. Measure piston pin bore with telescoping
gauge and compare reading with reject
dimension.
Fig. 4
2. Slide piston pin ou t of piston. Set pin and
connecting rod aside.
Piston Pin Removal (28Q700)
1. Rotate piston pin retainer (A) until one end
is exposed in notch ([B] Fig. 5) of the
piston pin bore.
Fig. 6
See SECTION 14- ENGINE SPECIFICATIONS.
Replace piston if out-of-round or worn beyond
reject dimension.
Measure Ring Groove Clearance
1. Clean carbon from top ring groove.
2. Place a new ring ([A] Fig. 7) in groove.
3. Measure the space between the ring and
the ring land and compare with reject
dimension.
Fig. 5
12
2. Grasp end of piston pin retainer with
needle nose pliers. Pull in and up to
remove retainer.
3. Push piston pin out from other side. Set
pin and connecting rod aside.
Fig. 7
4. Repeat for center ring and oil ring.
222
Replace piston if rej ect dimensions are
exceeded. See SECTION 14- ENGINE
SPECIFICATIONS.
Measure Piston Ring End Gap
1. Insert the top ring into the cylinder about
an inch below the surface of the head ([A]
Fig. 8).
2. Measu re gap with feeler gauge ([B] Fig. 8)
as shown.
Fig. 9
ASSEMBLE PISTON AND
CONNECTING ROD
Piston Pin Installation
Fig. 8
1. Orient the connecting rod and piston as
shown in (Fig. 10).
2. Align the letters “MAG” ([A] if used) on the
connecting rod with the notch or arrow
([B] Fig. 10) on the piston.
3. Repeat this process for the 2nd ring.
INSPECT CONNECTING ROD
Inspect Connecting Rod Bearings
Replace the connecting rod if either bearing is
scored, scuffed or otherwise damaged.
1. Measure the crank pin be aring (A) and the
piston pin bearing ([B] Fig. 9).
2. Use a telescoping gauge at approximate
120° intervals and record the readings to
get an average dimension, as shown i n
Fig. 9.
3. Replace rod if either measurement
exceeds tolerances.
See SECTION 14- ENGINE SPECIFICATIONS.
Fig. 10
3. If piston uses two pin locks, install one
lock into the groove at this time.
4. Oil the piston pin and slip through piston
bore and connecting rod pin bearing.
5. Install remaining pin lock to secure
assembly.
NOTE: (085400, 115400, 117400, 118400,
185400, 235400, 245400) These pistons do
223
12
not have offset piston pin bores and can be
assembled to the connecting rod in either
direction.
marks on the first and second ring. Install them
facing up.
6. Oil the piston pin.
7. Insert pin from the side opposite the
shoulder stop or the first installed lock.
8. Install the second lock in the piston groove
to retain the pin. Ensure both locks are
firmly set in the grooves.
Ring Installations
New piston rings are recommended any time the
original rings are removed from the piston. When
installing new service rings, refer to the detailed
instructions included with the set.
If using the ori ginal rin gs, refer to the figure
below that shows the sequence of reinstallation.
Refer to your model.
1. Install the oil control ring(s) (A) and
expander (B).
2. Install the center ring (C).
3. Install the top ring ([D] Fig. 568).
4. Note the shape of each ring and be care ful
to install them in the proper position.
Fig. 12
Ring Installation (115400, 117400, 138400,
185400, 235400, 245400)
NOTE: The top ring ([D] Fig. 13) is barrel faced
and plated.
1. Install the expander oil and control rings
(A) an d expander (B).
2. Install the center ring (C) with the “Id”
mark facing up.
3. Install the top ring ([D] Fig. 13).
Ring Installation (050000, 118400)
Fig. 13
Fig. 11
12
Ring Installation (085400)
Note the shape of each ring and be careful to
install them in their proper position.
NOTE: The top ring is plated. The center ring is
phosphate coated (black). This model has id
224
Ring Installation (104700)
Note the shape of each ring and be careful to
install them in their proper position.
1. Install the oil control rings (A) and
expander (B).
2. Install the center ring (C) with groove
down, as shown.
3. Install the top ring ([D] Fig. 14).
2. Install the center ring (C).
3. Install the top ring ([D] Fig. 16).
Fig. 14
Fig. 16
Ring Installation (161400)
Note the shape of each ring and be careful to
install them in their proper position.
1. Install the oil control rings (A) and
expander (B).
2. Install the center ring (C) with the “T”
facing up.
3. Install the top ring ([D] Fig. 15) with the “T”
facing up.
PISTON INSTALLATION (TYPICAL)
To prevent excessive oil consumption and/or
compression "blow-by," stagger the piston ring
gaps as illustrated in Fig. 17.
Fig. 17
CAUTION: Do not install piston and ring
assembly without ring compressor.
Fig. 15
Ring Installation (28Q700)
Note the shape of each ring and be careful to
install them in their proper position.
1. Oil the piston rings and piston skirt.
2. Compress rings with Ring Compresso r
#19070 (A) , or Ring Compressor #19230,
([B] Fig. 18).
NOTE: Install gap of oil ring expander (B) 1 80
degrees from gap in oil control ri ng ([A] Fig. 16).
1. Install the oil contr ol ring (A) and expand er
(B).
225
12
8. Set piston and compressor assembly
([A] Fig. 21) on cylinder. Be careful not to
scratch the surface of the bore with the
connecting rod.
9. Push the piston down through the ring
compressor and into the cylinder (B) until
piston is in cylinder bore ([C] Fig. 21).
CAUTION: Do not use exce ssive force when
Fig. 18
installing the piston. You could damage the side
rails of the oil control ring or impact the
crankshaft with the bottom of the connecting rod.
3. Place piston and ring compressor upside
down on bench with projections ([C] Fig.
19) on compressor facing rod.
4. Tighten ring compressor until rings are
fully compressed.
5. Loosen ring compressor slightly so the
compressor can be rotated on the piston
skirt while holding connecting rod.
6. Remove connecting rod cap (E) from
connecting rod ([D] Fig. 19), if installed.
Fig. 21
Install Connecting Rod Caps
1. Position connecting rod cap ([A] Fig. 22)
as shown.
Fig. 19
7. Oil cylinder bore and crank pin.
Position piston with notch or casting mark (G)
toward the flywheel side of the engine (Fig. 20).
Fig. 22
12
NOTE : Install rod cap with match marks ([A] Fig.
23) aligned. Connecting rod cap should snap on
when asse mbled correctly.
Fig. 20
226
Fig. 23
NOTE: (28Q700) The notch in the connecting
rod cap (A) must engage the tab on the
connecting rod ([B] Fig. 24).
Fig. 24
2. Install the rod bolts, dipper an d washers (if
equipped) and torque as listed. See
SECTION 14- ENGINE
SPECIFICATIONS.
CAUTION: (28Q700)
Torque screw closest to the piston first.
Torque screw farthest from the piston second.
3. Rotate crankshaft two revolutions to
ensure crank pin and rod are not binding.
4. Move connecting rod from side to side to
ensure clearance from crank pin
sidewalls.
12
227
12
228
SECTION 13 - FINAL ENGINE ASSEMBLY
GENERAL INFORMATION ............................................................................ 231
MODEL 050000.............................................................................................. 231
Models 085400, 086400, 115400, 117400, 118400, 13840 0, 185400,
235400, 245400 ............................................................................................. 234
MODEL 104700.............................................................................................. 236
MODEL 161400.............................................................................................. 238
MODELS 260700, 261700 ............................................................................. 240
MODEL 28Q700............................................................................................. 242
13
229
13
230
GENERAL INFORMATION
This engine assembly section assumes you have
inspected all the items listed in the "Reject
Dimensions" for the engine you are working on.
See SECTION 14- ENGINE SPECIFICATIONS.
If you have not inspected all the listed items, you
may be replacing expensive parts needlessly
and/or reinstalling troublesome parts.
Refer to SECTION 1- SAFETY, MAINTENANCE
AND ADJUSTMENTS, for final adjustment and
general servicing information see SECTION 2TROUBLESHOOTING for procedures designed
to isolate and repair specific problems.
2. Check to make sure the small steel
bushing ([A] Fig. 2) is installed in the
intake side baffle. Install baffle as shown
in Fig. 2.
Fig. 2
3. Locate the rear baffle on the pins ([A] Fig.
3) of the cylinder as shown.
MODEL 050000
1. Secure wire harness ([A] Fig. 1) as shown.
Fig. 3
Fig. 1
13
231
4. Install flywheel, woodruff key and position
flywheel on crankshaft (Fig. 4).
Fig. 6
Fig. 4
5. Position the starter cup (A) on top of the
blower fan (B) by aligning the two drive
flanges with the casting depressions.
Install starter hub (if equipped), washer
(C) and flywheel nut ([D] Fig.5).
7. Torque the flywheel nut to value listed in
SECTION 14- ENGINE
SPECIFICATIONS.
8. Position the Oil Gard® module ([A] Fig. 7)
as shown.
Fig. 7
Fig. 5
6. Place Flywheel Strap Wrench #19433 ([A]
Fig. 6) around outer rim of flywheel.
13
232
9. Install the cylinder shield (Fig. 8).
11. Install grounding lead ([A] Fig. 10) as
shown.
Fig. 8
10. Set the blower housing in position and
check that no wires are pinched. Position
spark plug lead in the contour created for
it ([A] Fig. 9).
Fig. 10
12. Assemble shield ([A] Fig. 11) as shown.
Fig. 11
Fig. 9
13. Mount the remaining blower housing
bolts and torque to value listed. See
SECTION 14- ENGINE
SPECIFICATIONS.
13
233
14. Refer to Fig. 12 and install components
as shown.
MODELS 085400, 086400, 115400,
117400, 1 18400, 138400, 1 85400,
235400, 245400
NOTE : The 185400 was used as a general
representation of the following models; 085400,
086400, 115400, 117400, 118400, 138400,
235400, 245400. Those engines that have gear
reduction systems are covered in section 11.
With minor variations, the 185400 is a good
outline for the procedures required to assemble
the above mentioned engines.
1. Make sure the wiring harness is routed
and secured as shown in ([A] Fig. 14).
Fig. 12
15. Loosely Install the spark plug and route
the ignition lead as shown in Fig. 13.
Fig. 14
2. Mount ignition coil ([B] Fig. 14) and
connect ground wire.
3. Mount flyw heel ([A] Fig. 15), making sure
the new woodruff key is in place.
4. Install starter cup ([B] Fig. 15) and torque
flywheel nut to listed value. See
SECTION 14- ENGINE
SPECIFICATIONS.
Fig. 13
Fig. 15
13
234
5. Install the upper (A) and lower ([B] Fig.
16) cylinder shields.
11. Connect fuel hose ([C] Fig. 18) to
carburetor.
Fig. 16
6. Install the blower housing. Make sure the
engine turns over with the starter rope.
7. Install the governor lever and connect the
return spring (A), carburetor throttle link
(B) and the choke link (C) to the control
bracket ([D] Fig. 17).
Fig. 18
12. Install air cleaner base ([A] Fig. 19).
Fig. 19
13. Install air filter and cover.
Fig. 17
8. Install muffler.
9. Install fuel tank.
10. Install fuel shut-off valve (A) and support
for air filter assembly (B).
NOTE : Make sure ground wire is mounted as
shown in (Fig. 20).
13
Fig. 20
235
14. Mount the Oil Gard® module ([A] Fig. 21)
as shown and connect wires to the stop
switch.
Fig. 21
15. Install the breather tube (A) and route the
spark plug wire ([B] Fig. 22) as shown.
3. Place large carburetor gasket-adapter ([A]
Fig. 24).
Fig. 24
4. With the governor lever in position, loosely
install both control brackets ([A & B]
Fig.25).
Fig. 22
16. Mount trim cover over the throttle and
choke controls.
MODEL 104700
Fig. 25
5. Connect governor return spring ([A]
Fig.26).
1. Install electric starter (if equipped ).
2. Position governor lever in position as
shown in ([A] Fig. 23).
Fig. 26
6. Position the back plate ([A] Fig. 27) and
loosely start the mounting screws.
7. Mount the alternator (B) and the ignition
coil (C).
13
Fig. 23
236
8. Route the alternator wire (D) and the
ignition coil wire (E) as shown in Fig. 27.
carburetor assembly ([C] Fig. 28) on
mounting studs.
Fig. 28
Fig. 27
9. With the wires routes as shown, torque the
back plate and control bracket mounting
bolts to listed values. See SECTION 14ENGINE SPECIFICATIONS.
10. Mount the flywheel, woodruff key, fan
and rewind starter hub. Torque flywheel
nut to listed value. See SECTION 3ENGINE DISASSEMBLY.
11. Install the exhaust manifold and its heat
shield. See SECTION 4- EXHAUST
SYSTEMS.
12. Install the oil-fill tube and to rque to listed
values.
13. Slip the insulator and gasket on the
carburetor mounting bolts.
14. Connect governor link (A) and Choke-AMatic l ink ([B] if installed). Slide
15. Install blower housing and valve cover.
16. Install muffler assembly. See SECTION
4- EXHAUST SYSTEMS.
17. Install air filter assembly.
18. Install fuel ta nk and connect fuel hose to
carburetor. See SECTION 5- FUEL
SYSTEMS A ND CARBURETION.
19. Connect spring to flywheel brake and
install cover.
20. Install oil filter adapter and oil filter.
13
237
MODEL 161400
4. Position the fan to allow for the magnet to
fit in the fan cut-out ([A] Fig. 31).
1. Install the cylinder baffle using the upper
head bolts (A) and one lower mounting
screw ([B] Fig. 29). Make sure to torque
head bolts to listed values. See SECTION
14- ENGINE SPECIFICATIONS.
Fig. 31
5. Install the ignition coil and adjust the air
gap.
6. Route the ignition harness as shown (A)
and connect wire to ignition coil. Torque
control bracket screws ([B] Fig. 32) to
values listed in section 14.
Fig. 29
2. Install the flywheel back plate shown in
([A] Fig. 30).
Fig. 30
3. Install the flywheel, woodruff key, fan, fan
retainer, starter cup and screen assembly
and the flywheel nut.
13
238
Fig. 32
7. Connect the main governor spring (A), the
return spring (B) and the governor link
with its spring (C).
8. Connect the other end of the governor link
and spring to throttle lever ([D] Fig. 33)
and temporarily install carburetor.
11. Torque carburetor mounting bolts ([D]
Fig. 35) to values listed. See SECTION
14- ENGINE SPECIFICATIONS.
Fig. 33
9. Route the spark plug wire (A) and the
governor links as shown and install the
blower housing. Make sure there are no
obstructions to the governor links at (B)
and ([C] Fig. 34).
Fig. 35
12. Connect fuel line from the shut-off valve
to the carburetor and install valve ([A] Fig.
36) as shown.
Fig. 36
Fig. 34
10. Install the intake manifold ( A) and the
bracket for the fuel shut-off valve (B).
Engage the choke control (C) as shown.
13. Install the oil-fill tube.
14. Connect ground wire to Oil Gard®
sensor.
15. Install muffler assembly. See SECTION
4- EXHAUST SYSTEMS.
16. Install fuel tank. See SECTION 5- FUEL
SYSTEMS A ND CARBURETION.
13
239
17. Connect breather hose and install air
filter housing (A) and trim ([B] Fig. 37).
2. Install the control bracket (Fig. 39).
Fig. 39
Fig. 37
18. Install air filter and cover.
3. Connect the main governor spring ([A]
Fig. 40).
MODELS 260700, 261700
1. Mount the governor lever (A) o n th e
governor shaft as shown in Fig. 38.
Fig. 40
4. Connect the idle control spring ([A]
Fig.41).
Fig. 38
Fig. 41
5. Install the alternator.
13
240
6. Install the ignition coil harness to the
ground term inal (A) and route the
harness ([B] Fig. 42) as shown.
11. Install the fan retainer, flywheel nut and
starter cup. Torque to listed values.
Fig. 44
Fig. 42
7. Loosely position the back plate and route
the alternator wires as shown in ([A]
Fig.43).
12. Install the ignition coil and set the air gap.
13. Install the exhaust system. See
SECTION 4- EXHAUST SYSTEMS.
Route the spark plug wire as shown in
([A] Fig. 45).
Fig. 43
Fig. 45
8. Tighten all back plate mounting screws to
the torque listed. See SECTION 14ENGINE SPECIFICATIONS.
9. Install electric starter.
10. Install the flywheel with its woodruff key.
When positioni ng the fan assembly on the
flywheel, make sure the cutout for the
magnet is properly positioned.
13
241
14. Install the governor links as sho wn in Fig.
46.
21. Install blower housing.
Fig. 48
Fig. 46
15. Install the air cleaner manifold and attach
breather hose. Torque nuts to listed
values. See SECTION 14- ENGINE
SPECIFICATIONS.
16. Install fuel pump bracket (A) and fuel
pump (B).
17. Connect fuel l ines ([C] Fig. 47) to
carburetor and cylinder.
MODEL 28Q700
1. Install flywheel guard ([A] Fig. 49).
2. Install alternator with the power output
wires positioned as shown ([B] Fig. 49).
3. Install starter motor (C) with the bracket
for the voltage regulator ([D] Fig. 49).
Torque all mounting hardware to listed
values.
Fig. 47
18. Install oil fill tube.
19. Install air cleaner assembly. See
SECTION 1- SAFETY, MAINTENANCE
AND ADJUSTMENTS.
20. Install oil filter adapter.
13
242
Fig. 49
4. Install flywheel with fan, fan retainer and
flywheel nut. Torque nut ([A] Fig. 50) as
shown to values listed in section 14.
Fig. 50
5. Install ignition coil and set air gap.
6. With coil installed and ground wire
connected, route wire through small
clamp ([A] Fig. 51) to grounding terminal
on equipment.
7. Install governor link with spring (A) and
connect choke arm ([B] Fig. 52) as
shown.
Fig. 52
8. Install air cleaner base to carburetor and
torque mounting nuts ([A] Fig. 53) to
listed values. See SECTION 14- ENGINE
SPECIFICATIONS.
Fig. 53
Fig. 51
13
243
9. Install inner blower housing with brackets
([A] Fig. 54) as shown.
Fig. 54
10. Install the oil-fill tube.
11. Install the outer blower housing on
brackets (Refer to Fig. 54).
12. Install grill to top of flywheel fan.
13. Install bracket for the fuel pump (A).
Install pump (B) and connect fuel lines
([C] Fig. 55).
Fig. 55
13
244
SECTION 14 - ENGINE SPECIFICATIONS & REFERENCE TABLES
MODEL 050000 ........................................................................................... 247
Engine S pecifications .................................................................................. 247
Fastener Torque S pecifications................................................................... 247
Reject Dimensions....................................................................................... 248
MODELS 085400 & 086400 ........................................................................ 250
Engine S pecifications .................................................................................. 250
Fastener Torque S pecifications................................................................... 250
Reject Dimensions....................................................................................... 251
MODELS 115400 & 117400 ........................................................................ 253
Engine S pecifications .................................................................................. 253
Fastener Torque S pecifications................................................................... 253
Reject Dimensions....................................................................................... 254
MODEL 118400 ........................................................................................... 256
Engine S pecifications .................................................................................. 256
Fastener Torque S pecifications................................................................... 256
Reject Dimensions....................................................................................... 257
MODEL 138400 ........................................................................................... 259
Engine S pecifications .................................................................................. 259
Fastener Torque S pecifications................................................................... 259
Reject Dimensions....................................................................................... 260
MODEL 18544. ............................................................................................ 262
Engine S pecifications .................................................................................. 262
Fastener Torque S pecifications................................................................... 262
Reject Dimensions....................................................................................... 263
14
245
MODELS 235400 & 245400 ........................................................................ 265
Engine Specifications .................................................................................. 265
Fastener Torque S pecifications................................................................... 265
Reject Dimensions....................................................................................... 266
MODEL 161400........................................................................................... 268
Engine Specifications .................................................................................. 268
Fastener Torque S pecifications................................................................... 268
Reject Dimensions....................................................................................... 269
MODEL 104700........................................................................................... 271
Engine Specifications .................................................................................. 271
Fastener Torque S pecifications................................................................... 271
Reject Dimensions....................................................................................... 272
MODELS 260700 & 261700 ........................................................................ 274
Engine Specifications .................................................................................. 274
Fastener Torque S pecifications................................................................... 274
Reject Dimensions....................................................................................... 275
MODEL 28Q700 .......................................................................................... 277
Engine Specifications .................................................................................. 277
Fastener Torque S pecifications................................................................... 277
Reject Dimensions....................................................................................... 278
14
246
MODEL 050000
Engine Specifications (050000)
Armature Air Gap
Bolt Circle (1)
Bore
Crankshaft End Play
Displacement
Fuel Tank Capacity
Oil Capacity - No Filter
Spark Plug Gap
Stroke
Valve Clearance - Intake
Valve Clearance - Exhaust
.012 -.020 in. (.30 -.50
3.625 in. (92.08 mm)
2.047 in. (52.0 mm)
.002 -.006 in. (.05 -.15
4.88 cu. in. (80 cc)
1.7 qt. (1.6 liter)
13 oz. (.4 liter)
.024 -.028 in. (.60 -.70
1.496 in. (38.0 mm)
.004 -.008 in. (.10 -.20
.004 -.008 in. (.10 -.20
mm)
Fastener Torque Specifications (050000)
Tool Size
Torque
Air Cleaner Bas e / Backplate
Air Cleaner Cover
Armature
Blower Housing
Carburetor Bowl Sc rew
Connecting Rod
Control Bracket
Control Panel Trim
Cylinder Cover
Cylinder Head
Cylinder Shield
Engine Mounting Plate
Exhaust Manifold / Adapter
Flywheel Guard
Flywheel Nut
Fuel Shut-Off Valve
Fuel Shut-Off Valve Bracket
Fuel Tank
Governor Lever Nut
Muffler
Muffler Guard
Oil Drain Plug
Oil Guard Module
10 mm
Slotted
7 mm
10 mm
10 mm
10 mm
10 mm
Phillips
10 mm
12 mm
10 mm
10 mm
12 mm
10 mm
17 mm
10 mm
10 mm
10 mm
10 mm
10 mm
10 mm
10 mm
10 mm
45 lb-in. (5 Nm)
30 lb-in. (3 Nm)
30 lb-in. (3 Nm)
100 lb-in. (11 Nm)
55 lb-in. (6 Nm)
90 lb-in. (10 Nm)
45 lb-in. (5 Nm)
30 lb-in. (3 Nm)
90 lb-in. (10 Nm)
250 lb-in. (28 Nm)
90 lb-in. (10 Nm)
90 lb-in. (10 Nm)
180 lb-in. (20 Nm)
45 lb-in. (5 Nm)
35 lb-in. (47 Nm)
90 lb-in. (10 Nm)
90 lb-in. (10 Nm)
90 lb-in. (10 Nm)
65 lb-in. (7 Nm)
45 lb-in. (5 Nm)
90 lb-in. (10 Nm)
125 lb-in. (14 Nm)
90 lb-in. (10 Nm)
mm)
mm)
mm)
mm)
14
247
Fastener Torque Specifications (050000)
Tool Size
Torque
Oil Guard Float Switch
Rewind Retainer Screw
Rewind Starter
Rocker Arm Assembly
Rocker Ball Set Screw or Nut
Spark Plug
Valve Cover
10 mm
Phillips
10 mm
10 mm
10 mm
5/8 in.
10 mm
45 lb-in. (5 Nm)
70 lb-in. (8 Nm)
45 lb-in. (5 Nm)
45 lb-in. (5 Nm)
45 lb-in. (5 Nm)
180 lb-in. (20 Nm)
35 lb-in. (4 Nm)
Reject Dimensions (050000)
Standard Size
Reject Size
Cylinder (050000)
Magneto Bearing
Camshaft Bearing
Bore Diameter
Bore Out-Of-Round
Ball
.5122 in. (13.01 m m)
2.047 in. (52.00 m m)
N/A
N/A
.5130 in. (13.03 m m)
2.050 in. (52.07 m m)
.0015 in. (.04 m m)
Cylinder Head (050000)
Standard Size
Reject Size
Intake Valv e Seat Angle
45°
N/A
Intake Valv e Seat Width
Intake Valve Stem Diameter
Intake Valv e Guide
3/64-4/64 in. (1.19-1.59 mm)
.2154 in. (5.47 m m)
.2165 in. (5.50 m m)
N/A
.2134 in. (5.42 m m)
.2200 in. (5.59 m m)
Exhaust Valv e Seat Angle
45°
N/A
Exhaust Valv e Seat Width
Exhaust Valve Stem Diameter
Exhaust Valv e Guide
3/64-4/64 in. (1.19-1.59 mm)
.2154 in. (5.47 m m)
.2165 in. (5.50 m m)
N/A
.2134 in. (5.42 m m)
.2200 in. (5.59 m m)
Cylinder Cover (050000)
PTO Bearing
Camshaft Bearing
N/A
.5122 in. (13.01 m m)
N/A
.5130 in. (13.03 m m)
Crankshaft (050000)
Crank Pin Journal
Mag-Side J ournal
PTO-Side J ournal
.9055 in. (23.00 m m)
.6693 in. (17.00 m m)
.6693 in. (17.00 m m)
.9039 in. (22.96 m m)
.6677 in. (16.96 m m)
.6677 in. (16.96 m m)
Camshaft (050000)
Mag-Side J ournal
PTO-Side J ournal
Intake lobes
Exhaust lobes
.5118 in. (13.00 m m)
.5118 in. (13.00 m m)
1.0039 in. (25.50 m m)
1.0039 in. (25.50 m m)
.5110 in.
.5110 in.
.9764 in.
.9764 in.
14
248
(12.98 m m)
(12.98 m m)
(24.80 m m)
(24.80 m m)
Reject Dimensions (050000)
Standard Size
Reject Size
Connecting Rod (050000)
Crank Pin Bearing
Piston Pin Bearing
.9059 in. (23.01 mm)
.5516 in. (14.01 mm)
.9071 in. (23.04 mm)
.5528 in. (14.04 mm)
Piston (050000)
Piston Pin Diameter
Piston Pine Bore
Ring End Gap (Top)
Ring End Gap (Middle)
Ring End Gap (Oil Control)
Ring Land Clearance (Top)
Ring Land Clearance (Middle)
Ring Land Clearance (Oil Control)
.5512 in. (14.00 mm)
.5516 in. (14.01 mm)
.006-.014 in. (.15-.35
.006-.014 in. (.15-.35
.008-.028 in. (.20-.70
.001-.003 in. (.03-.07
.001-.003 in. (.03-.07
.001-.033 in. (.03-.07
.5496 in. (13.96 mm)
.5528 in. (14.04 mm)
.030 in. (.76 mm)
.030 in. (.76 mm)
.040 in. (1.02 mm)
.008 in. (.20 mm)
.008 in. (.20 mm)
.008 in. (.20 mm)
Starter Rope (050000)
Rope Size
Rope Length
#4 (3.18 mm)
67 in. (1. 7 m)
mm)
mm)
mm)
mm)
mm)
mm)
N/A
N/A
14
249
MODELS 085400 AND 086400
Engine Specifications (085400 & 086400)
Armature Air Gap
Bolt Circle (1)
Bore
Crankshaft End Play
Displacement
Fuel Tank Capacity
Oil Capacity - No Filter
Spark Plug Gap
Stroke
Valve Clearance - Intake
Valve Clearance - Exhaust
.012 -.020 in. (.30 -.50 mm)
3.625 in. (92.08 mm)
2.441 in. (62.0 mm)
.001 -.008 in. (.03 -.20 mm)
7.69 cu. in. (126 cc)
3.2 qt. (3.0 liter)
20 oz. (.6 liter)
.030 in. (.76 mm)
1.653 in. (42.0 mm)
.002 -.004 in. (.05 -.10 mm)
.002 -.004 in. (.05 -.10 mm)
Fastener Torque Specifications (085400 & 086400)
Tool Size
Torque
Air Cleaner Base / Backplate
Air Cleaner Cover
Air Cleaner Support Bracket
Armature
Blower Housing
Carburetor Bowl Screw
Connecting Rod
Control Bracket
Control Panel Trim
Cylinder Cover
Cylinder Head
Cylinder Shield
Flywheel N ut
Fuel Shut-Off Valve
Fuel Tank
Governor Lever Nut
Muffler
Muffler Guard
Oil Drain Plug
Oil Fill Cap
Oil Guard Module
Oil Guard Float Switch
Rewind Starter
Rocker Arm Piv ot
Rocker Arm St ud
Rocker Ball Set Screw or Nut
Spark Plug
Valve Cover
10 mm
Wing Nut
10 mm
10 mm
10 mm
12 mm
10 mm
10 mm
10 mm
12 mm
12 mm
10 mm
21 mm
10 mm
10 mm
10 mm
12 mm
Phillips
12 mm
Wing Nut
8 mm
Phillips
10 mm
14 mm
12 mm
10 mm
5/8 in.
10 mm
45 lb-in. (5 Nm)
N/A
45 lb-in. (5 Nm)
30 lb-in. (3 Nm)
45 lb-in. (5 Nm)
85 lb-in. (10 Nm)
90 lb-in. (10 Nm)
45 lb-in. (5 Nm)
45 lb-in. (5 Nm)
175 lb-in. (20 Nm)
220 lb-in. (25 Nm)
45 lb-in. (5 Nm)
44 lb-ft. (60 Nm)
70 lb-in. (8 Nm)
90 lb-in. (10 Nm)
60 lb-in. (7 Nm)
175 lb-in. (20 Nm)
90 lb-in. (10 Nm)
175 lb-in. (20 Nm)
45 lb-in. (5 Nm)
35 lb-in. (4 Nm)
45 lb-in. (5 Nm)
45 lb-in. (5 Nm)
N/A
175 lb-in. (20 Nm)
35 lb-in. (4 Nm)
180 lb-in. (20 Nm)
35 lb-in. (4 Nm)
14
250
Reject Dimensions (085400 & 086400)
Standard Size
Reject Size
Cylinder (085400 & 086400)
Magneto Bearing
Camshaft Bearing
Bore Diameter
Bore Out-Of-Round
Ball
.5909 in. (15.01 m m)
2.441 in. (62.00 m m)
N/A
N/A
.5917 in. (15.03 m m)
2.442 in. (62.03 m m)
.0015 in. (.04 m m)
Cylinder Head (085400 & 086400)
Standard Size
Reject Size
Intake Valv e Seat Angle
45°
N/A
Intake Valv e Seat Width
Intake Valve Stem Diameter
Intake Valv e Guide
3/64-4/64 in. (1.19-1.59 mm)
.2346 in. (5.96 m m)
.2368 in. (6.02 m m)
N/A
.2338 in. (5.94 m m)
.2378 in. (6.04 m m)
Exhaust Valv e Seat Angle
45°
N/A
Exhaust Valv e Seat Width
Exhaust Valve Stem Diameter
Exhaust Valv e Guide
3/64-4/64 in. (1.19-1.59 mm)
.2346 in. (5.96 m m)
.2368 in. (6.02 m m)
N/A
.2338 in. (5.94 m m)
.2378 in. (6.04 m m)
Cylinder Cover (085400 & 086400)
PTO Bearing
Camshaft Bearing
Ball
.5909 in. (15.01 m m)
N/A
.5917 in. (15.03 m m)
Crankshaft (085400 & 086400)
Crank Pin Journal
Mag-Side J ournal
PTO-Side J ournal
1.0236 in. (26.00 m m)
.7874 in. (20.00 m m)
.7874 in. (20.00 m m)
1.0228 in. (25.98 m m)
.7866 in. (19.98 m m)
.7866 in. (19.98 m m)
Camshaft (085400 & 086400)
Mag-Side J ournal
PTO-Side J ournal
Intake lobes
Exhaust lobes
.5905 in. (15.00 m m)
.5905 in. (15.00 m m)
1.0709 in. (27.20 m m)
1.0709 in. (27.20 m m)
.5898 in. (14.98 m m)
.5898 in. (14.98 m m)
1.0433 in. (26.50 m m)
1.0433 in. (26.50 m m)
Connecting Rod (085400 & 086400)
Crank Pin Bearing
Piston Pin Bearing
1.0424 in. (26.02 m m)
.5516 in. (14.01 m m)
1.0252 in. (26.04 m m)
.5524 in. (14.03 m m)
14
251
Reject Dimensions (085400 & 086400)
Standard Size
Reject Size
Piston (085400 & 086400)
Piston Pin Diameter
Piston Pine Bore
Ring End Gap (Top)
Ring End Gap (Middle)
Ring End Gap (Oil Control)
Ring Land Clearance (Top)
Ring Land Clearance (Middle)
Ring Land Clearance (Oil Control)
.5512 in. (14.00 m m)
.5516 in. (14.01 m m)
.006-.014 in. (.15-.35 mm)
.006-.014 in. (.15-.35 mm)
.008-.028 in. (.35-.70 mm)
.001-.003 in. (.03-.07 mm)
.001-.003 in. (.03-.07 mm)
.001-.003 in. (.03-.07 mm)
.5504 in. (13.98 m m)
.5524 in. (14.03 m m)
.040 in. (1.0 mm)
.040 in. (1.0 mm)
.060 in. (1.50 mm)
.008 in. (.20 mm)
.008 in. (.20 mm)
.008 in. (.20 mm)
Starter Rope (085400 & 086400)
Rope Siz e
Rope Lengt h
#4 (3.18 mm)
67 in. (1.7 m)
N/A
N/A
14
252
MODELS 115400 AND 117400
Engine Specifications (115400 & 11740 0)
Armature Air Gap
Bolt Circle (1)
Bore
Crankshaft End Play
Displacement
Fuel Tank Capacity
Oil Capacity - No Filter
Spark Plug Gap
Stroke
Valve Clearance - Intake
Valve Clearance - Exhaust
.012 -.020 in. (.30 -.50
3.625 in. (92.08 mm)
2.677 in. (68.0 mm)
.001 -.008 in. (.03 -.20
11.05 cu. in. (181 cc)
4.2 qt. (4.0 liter)
24 oz. (.7 liter)
.030 in. (.76 mm)
1.968 in. (50.0 mm)
.002 -.004 in. (.05 -.10
.002 -.004 in. (.05 -.10
mm)
Fastener Torque Specifications (115400 & 117400)
Tool Size
Torque
Air Cleaner Bas e / Backplate
Air Cleaner Cover
Air Cleaner Support Bracket
Armature
Blower Housing
Carburetor Bowl Sc rew
Choke Lever St ud Screw
Connecting Rod
Control Bracket
Control Panel Trim
Cylinder Cover
Cylinder Head
Cylinder Shield
Flywheel Nut
Fuel Shut-Off Valve
Fuel Shut-Off Valve Bracket
Fuel Tank
Governor Lever Nut
Idle Down Control
Muffler
Muffler Bracket
Muffler Guard
Oil Drain Plug
Oil Fill C ap
Oil Guard Module
Oil Guard Float Switch
10 mm
Wing Nut
10 mm
10 mm
10 mm
12 mm
10 mm
10 mm
10 mm
10 mm
12 mm
12 mm
10 mm
21 mm
10 mm
10 mm
10 mm
10 mm
12 mm
12 mm
12 mm
Phillips
12 mm
Wing Nut
Phillips
10 mm
45 lb-in. (5 Nm)
N/A
45 lb-in. (5 Nm)
30 lb-in. (3 Nm)
45 lb-in. (5 Nm)
85 lb-in. (10 Nm)
45 lb-in. (5 Nm)
90 lb-in. (10 Nm)
45 lb-in. (5 Nm)
45 lb-in. (5 Nm)
175 lb-in. (20 Nm)
220 lb-in. (25 Nm)
45 lb-in. (5 Nm)
44 lb-ft. (60 Nm)
70 lb-in. (8 Nm)
45 lb-in. (5 Nm)
90 lb-in. (10 Nm)
60 lb-in. (7 Nm)
140 lb-in. (16 Nm)
175 lb-in. (20 Nm)
175 lb-in. (20 Nm)
90 lb-in. (10 Nm)
175 lb-in. (20 Nm)
45 lb-in. (5 Nm)
35 lb-in. (4 Nm)
45 lb-in. (5 Nm)
mm)
mm)
mm)
14
253
Fastener Torque Specifications (115400 & 117400)
Tool Size
Torque
Rewind Retainer Screw
Rewind Starter
Rocker Arm Piv ot
Rocker Arm St ud
Rocker Ball Set Screw or Nut
Spark Plug
Starter Contactor
Starter Motor Bracket
Starter Motor Thorough Bolts
Stator
Valve Cover
Voltage Regulator
Phillips
10 mm
14 mm
12 mm
10 mm
5/8 in.
8 mm
12 mm
10 mm
10 mm
10 mm
10 mm
70 lb-in. (8 Nm)
45 lb-in. (5 Nm)
N/A
175 lb-in. (20 Nm)
35 lb-in. (4 Nm)
180 lb-in. (20 Nm)
35 lb-in. (4 Nm)
140 lb-in. (16 Nm)
50 lb-in. (6 Nm)
45 lb-in. (5 Nm)
35 lb-in. (4 Nm)
45 lb-in. (5 Nm)
Reject Dimensions (115400 & 117400)
Standard Size
Reject Size
Cylinder (115400 & 117400)
Magneto Bearing
Camshaft Bearing
Bore Diameter
Bore Out-Of-Round
Ball
.5909 in. (15.01 mm)
2.6772 in. (68.00 mm)
N/A
N/A
.5917 in. (15.03 mm)
2.6783 in. (68.03 mm)
.0015 in. (.04 mm)
Cylinder Head (115400 & 117400)
Standard Size
Reject Size
Intake Valve Seat Angle
45°
N/A
Intake Valve Seat Width
Intake Valve Stem Diameter
Intake Valve Guide
3/64-4/64 in. (1.19-1.59 mm)
.2346 in. (5.96 mm)
.2368 in. (6.02 mm)
N/A
.2338 in. (5.94 mm)
.2378 in. (6.04 mm)
Exhaust Valve Seat Angle
45°
N/A
Exhaust Valve Seat Width
Exhaust Valve Stem Diameter
Exhaust Valve Guide
3/64-4/64 in. (1.19-1.59 mm)
.2346 in. (5.96 mm)
.2368 in. (6.02 mm)
N/A
.2338 in. (5.94 mm)
.2378 in. (6.04 mm)
Cylinder Cover (115400 & 117400)
PTO Bearing
Camshaft Bearing
Ball
.5909 in. (15.01 mm)
N/A
.5917 in. (15.03 mm)
Crankshaft (115400 & 117400)
Crank Pin Journal
Mag-Side Journal
PTO-Side Journal
1.1811 in. (30.0 mm)
1.1811 in. (30.0 mm)
.9842 in. (25.0 mm)
1.1803 in. (29.98 mm)
1.1803 in. (29.98 mm)
.9835 in. (24.98 mm)
14
254
Reject Dimensions (115400 & 117400)
Standard Size
Reject Size
Camshaft (115400 & 117400)
Mag-Side J ournal
PTO-Side J ournal
Intake lobes
Exhaust lobes
.5905 in. (15.00 m m)
.5905 in. (15.00 m m)
1.1102 in. (28.20 m m)
1.1102 in. (28.20 m m)
.5898 in. (14.98 m m)
.5898 in. (14.98 m m)
1.0827 in. (27.50 m m)
1.0827 in. (27.50 m m)
Connecting Rod (115400 & 117400)
Crank Pin Bearing
Piston Pin Bearing
1.1817 in. (30.02 m m)
.6303 in. (16.01 m m)
1.1827 in. (30.04 m m)
.6311 in. (16.03 m m)
Piston (115400 & 117400)
Piston Pin Diameter
Piston Pine Bore
Ring End Gap (Top)
Ring End Gap (Middle)
Ring End Gap (Oil Control)
Ring Land Clearance (Top)
Ring Land Clearance (Middle)
Ring Land Clearance (Oil Control)
.6299 in. (16.00 m m)
.6303 in. (16.01 m m)
.006-.004 in. (.15-.35 mm)
.006-.004 in. (.15-.35 mm)
.014-.028 in. (.35-.70 mm)
.001-.003 in. (.03-.07 mm)
.001-.003 in. (.03-.07 mm)
.001-.003 in. (.03-.07 mm)
.6291 in. (15.98 m m)
.6311 in. (16.03 m m)
.040 in. (1.0 mm)
.040 in. (1.0 mm)
.060 in. (1.50 mm)
.008 in. (.20 mm)
.008 in. (.20 mm)
.008 in. (.20 mm)
Starter Rope (115400 & 117400)
Rope Siz e
Rope Lengt h
#4 (3.18 mm)
89 in. (2.3 m)
N/A
N/A
14
255
MODEL 118400
Engine Specifications (118400)
Armature Air Gap
Bolt Circle (1)
Bolt Circle (2)
Bore
Crankshaft End Play
Displacement
Fuel Tank Capacity
Oil Capacity - No Filter
Spark Plug Gap
Stroke
Valve Clearance - Intake
Valve Clearance - Exhaust
.012 -.020 in. (.30 -.50
3.625 in. (92.08 mm)
4.5 in. (114.3 mm)
2.677 in. (68.0 mm)
.002 -.006 in. (.05 -.15
11.05 cu. in. (181 cc)
3.8 qt. (3.6 liter)
24 oz. (.7 liter)
.024 -.028 in. (.61 -.71
1.968 in. (50.0 mm)
.004 -.008 in. (.10 -.20
.004 -.008 in. (.10 -.20
Fastener Torque Specifications (118400)
Tool Size
Torque
Air Cleaner Bas e / Backplate
Air Cleaner Cover
Armature
Blower Housing
Connecting Rod
Control Bracket
Control Panel Trim
Cylinder Cover
Cylinder Head
Cylinder Shield
Exhaust Manifold Adapter
Flywheel Guard
Flywheel Nut
Fuel Shut-Off Valve
Fuel Shut-Off Valve Bracket
Fuel Tank
Governor Lever Nut
Muffler
Muffler Guard
Oil Drain Plug
Oil Guard Module
Oil Guard Float Switch
Rewind Starter
Rocker Arm Assembly
Rocker Ball Set Screw or Nut
Spark Plug
Valve Cover
10 mm
Wing Nut
10 mm
10 mm
10 mm
10 mm
10 mm
12 mm
12 mm
10 mm
12 mm
10 mm
21 mm
10 mm
10 mm
10 mm
10 mm
12 mm
Phillips
12 mm
Phillips
10 mm
10 mm
10 mm
10 mm
5/8 in.
10 mm
45 lb-in. (5 Nm)
N/A
30 lb-in. (3 Nm)
45 lb-in. (5 Nm)
90 lb-in. (10 Nm)
45 lb-in. (5 Nm)
45 lb-in. (5 Nm)
175 lb-in. (20 Nm)
220 lb-in. (25 Nm)
45 lb-in. (5 Nm)
180 lb-in. (20 Nm)
45 lb-in. (5 Nm)
44 lb-ft. (60 Nm)
70 lb-in. (8 Nm)
45 lb-in. (5 Nm)
90 lb-in. (10 Nm)
60 lb-in. (7 Nm)
175 lb-in. (20 Nm)
90 lb-in. (10 Nm)
175 lb-in. (20 Nm)
35 lb-in. (4 Nm)
45 lb-in. (5 Nm)
45 lb-in. (5 Nm)
45 lb-in. (5 Nm)
35 lb-in. (4 Nm)
180 lb-in. (20 Nm)
35 lb-in. (4 Nm)
14
256
mm)
mm)
mm)
mm)
mm)
Reject Dimensions (118400)
Standard Size
Reject Size
Cylinder (118400)
Magneto Bearing
Camshaft Bearing
Bore Diameter
Bore Out-Of-Round
Ball
.5909 in. (15.01 m m)
2.677 in. (68.00 m m)
N/A
N/A
.5917 in. (15.03 m m)
2.678 in. (68.07 m m)
.0015 in. (.04 m m)
Cylinder Head (118400)
Standard Size
Reject Size
Intake Valv e Seat Angle
45°
N/A
Intake Valv e Seat Width
Intake Valve Stem Diameter
Intake Valv e Guide
3/64-4/64 in. (1.19-1.59 mm)
.215 in. (5.46 m m)
.2165 in. (5.50 m m)
N/A
.213 in. (5.41 m m)
.22 in. (5.59 m m)
Exhaust Valv e Seat Angle
45°
N/A
Exhaust Valv e Seat Width
Exhaust Valve Stem Diameter
Exhaust Valv e Guide
3/64-4/64 in. (1.19-1.59 mm)
.215 in. (5.46 m m)
.2165 in. (5.50 m m)
N/A
.213 in. (5.41 m m)
.22 in. (5.59 m m)
Cylinder Cover (118400)
PTO Bearing
Camshaft Bearing
Ball
.5909 in. (15.01 m m)
N/A
.5917 in. (15.03 m m)
Crankshaft (118400)
Crank Pin Journal
Mag-Side J ournal
PTO-Side J ournal
1.1811 in. (30.0 m m)
.9842 in. (25.0 m m)
.9842 in. (25.0 m m)
1.1795 in. (29.96 m m)
.9827 in. (24.96 m m)
.9827 in. (24.96 m m)
Camshaft (118400)
Mag-Side J ournal
PTO-Side J ournal
Intake lobes
Exhaust lobes
.5905 in.
.5905 in.
1.117 in.
1.117 in.
.5898 in.
.5898 in.
1.113 in.
1.113 in.
(15.00 m m)
(15.00 m m)
(28.37 m m)
(28.37 m m)
(14.98 m m)
(14.98 m m)
(28.27 m m)
(28.27 m m)
14
257
Reject Dimensions (118400)
Standard Size
Reject Size
Connecting Rod (118400)
Crank Pin Bearing
Piston Pin Bearing
1.1815 in. (30.01 mm)
.6303 in. (16.01 mm)
1.1827 in. (30.04 mm)
.6315 in. (16.04 mm)
Piston (118400)
Piston Pin Diameter
Piston Pine Bore
Ring End Gap (Top)
Ring End Gap (Middle)
Ring End Gap (Oil Control)
Ring Land Clearance (Top)
Ring Land Clearance (Middle)
Ring Land Clearance (Oil Control)
.6299 in. (16.00 mm)
.6303 in. (16.01 mm)
.006-.014 in. (.15-.35
.006-.014 in. (.15-.35
.008-.028 in. (.20-.70
.001-.003 in. (.03-.07
.001-.003 in. (.03-.07
.001-.003 in. (.03-.07
.6283 in. (15.96 mm)
.6315 in. (16.04 mm)
.030 in. (.76 mm)
.030 in. (.76 mm)
.040 in. (1.02 mm)
.008 in. (.20 mm)
.008 in. (.20 mm)
.008 in. (.20 mm)
Starter Rope (118400)
Rope Size
Rope Length
#4-1/2 (3.57 mm)
79 in. (2. 0 m)
14
258
mm)
mm)
mm)
mm)
mm)
mm)
N/A
N/A
MODEL 138400
Engine Specifications (138400)
Armature Air Gap
Bolt Circle (1)
Bolt Circle (2)
Bolt Circle (3)
Bore
Crankshaft End Play
Displacement
Fuel Tank Capacity
Oil Capacity - No Filter
Spark Plug Gap
Stroke
Valve Clearance - Intake
Valve Clearance - Exhaust
.012 -.020 in. (.30 -.50
3.937 in. (100 mm)
5.0 in. (127 mm)
6.5 in. (165.1 mm)
2.835 in. (72.0 mm)
.002 -.025 in. (.05 -.64
13.12 cu. in. (215 cc)
4.8 qt. (4.5 liter)
32 oz. (.9 liter)
.030 in. (.76 mm)
2.087 in. (53.0 mm)
.005 -.008 in. (.13 -.20
.005 -.008 in. (.13 -.20
mm)
Fastener Torque Specifications (138400)
Tool Size
Torque
Air Cleaner Bas e / Backplate
Air Cleaner Cover
Armature
Blower Housing
Carburetor Bowl Sc rew
Connecting Rod
Control Bracket
Control Panel Trim
Cylinder Cover
Cylinder Head
Cylinder Shield
Flywheel Nut
Fuel Shut-Off Valve
Fuel Tank
Governor Lever Nut
Idle Down Control
Muffler
Muffler Guard
Oil Drain Plug
Oil Fill C ap
Oil Guard Module
Oil Guard Float Switch
Rewind Retainer Screw
Rewind Starter
10 mm
8 mm
10 mm
10 mm
12 mm
10 mm
10 mm
10 mm
12 mm
12 mm
10 mm
21 mm
10 mm
10 mm
10 mm
12 mm
12 mm
10 mm
12 mm
Wing Knob
10 mm
Phillips
Phillips
10 mm
45 lb-in. (5 Nm)
N/A
30 lb-in. (3 Nm)
45 lb-in. (5 Nm)
85 lb-in. (10 Nm)
90 lb-in. (10 Nm)
45 lb-in. (5 Nm)
45 lb-in. (5 Nm)
175 lb-in. (20 Nm)
220 lb-in. (25 Nm)
45 lb-in. (5 Nm)
44 lb-ft. (60 Nm)
70 lb-in. (8 Nm)
90 lb-in. (10 Nm)
60 lb-in. (7 Nm)
140 lb-in. (16 Nm)
175 lb-in. (20 Nm)
90 lb-in. (10 Nm)
175 lb-in. (20 Nm)
40 lb-in. (5 Nm)
45 lb-in. (5 Nm)
45 lb-in. (5 Nm)
70 lb-in. (8 Nm)
45 lb-in. (5 Nm)
mm)
mm)
mm)
14
259
Fastener Torque Specifications (138400)
Tool Size
Torque
Rocker Arm Pivot
Rocker Arm Stud
Rocker Ball Set Screw or Nut
Spark Plug
Starter Contactor
Starter Key Switch Panel
Starter Motor Bracket
Starter Motor Thorough Bolts
Stator
Valve Cover
Voltage Regulator / Rectifier
14 mm
12 mm
10 mm
5/8 in.
10 mm
10 mm
12 mm
7 mm
10 mm
10 mm
10 mm
N/A
175 lb-in. (20 Nm)
35 lb-in. (4 Nm)
180 lb-in. (20 Nm)
45 lb-in. (5 Nm)
45 lb-in. (5 Nm)
140 lb-in. (16 Nm)
50 lb-in. (6 Nm)
45 lb-in. (5 Nm)
35 lb-in. (4 Nm)
45 lb-in. (5 Nm)
Reject Dimensions (138400)
Standard Size
Reject Size
Cylinder (138400)
Magneto Bearing
Camshaft Bearing
Bore Diameter
Bore Out-Of-Round
Ball
.5909 in. (15.01 m m)
2.8346 in. (72.0 m m)
N/A
N/A
.5917 in. (15.03 m m)
2.8358 in. (72.03 m m)
.0015 in. (.04 m m)
Cylinder Head (138400)
Standard Size
Reject Size
Intake Valv e Seat Angle
45°
N/A
Intake Valv e Seat Width
Intake Valve Stem Diameter
Intake Valv e Guide
3/64-4/64 in. (1.19-1.59 mm)
.2346 in. (5.96 m m)
.2368 in. (6.02 m m)
N/A
.2338 in. (5.94 m m)
.2378 in. (6.04 m m)
Exhaust Valv e Seat Angle
45°
N/A
Exhaust Valv e Seat Width
Exhaust Valve Stem Diameter
Exhaust Valv e Guide
3/64-4/64 in. (1.19-1.59 mm)
.2346 in. (5.96 m m)
.2368 in. (5.50 m m)
N/A
.2338 in. (5.94 m m)
.2378 in. (6.04 m m)
Cylinder Cover (138400)
PTO Bearing
Camshaft Bearing
Ball
.5909 in. (15.01 m m)
N/A
.5917 in. (15.03 m m)
Crankshaft (138400)
Crank Pin Journal
Mag-Side J ournal
PTO-Side J ournal
1.1811 in. (30.0 m m)
1.1811 in. (30.0 m m)
.9842 in. (25.0 m m)
1.1803 in. (29.98 m m)
1.1803 in. (29.98 m m)
.9835 in. (24.98 m m)
14
260
Reject Dimensions (138400)
Standard Size
Reject Size
Camshaft (138400)
Mag-Side Journal
PTO-Side Journal
Intake lobes
Exhaust lobes
.5905 in. (15.00 mm)
.5905 in. (15.00 mm)
1.1476 in. (29.15 mm)
1.1476 in. (29.15 mm)
.5898 in. (14.98 mm)
.5898 in. (14.98 mm)
1.1083 in. (28.15 mm)
1.1083 in. (28.15 mm)
Connecting Rod (138400)
Crank Pin Bearing
Piston Pin Bearing
1.1817 in. (30.02 mm)
.6303 in. (16.01 mm)
1.1827 in. (30.04 mm)
.6311 in. (16.03 mm)
Piston (138400)
Piston Pin Diameter
Piston Pine Bore
Ring End Gap (Top)
Ring End Gap (Middle)
Ring End Gap (Oil Control)
Ring Land Clearance (Top)
Ring Land Clearance (Middle)
Ring Land Clearance (Oil Control)
.6299 in. (16.00 mm)
.6303 in. (16.01 mm)
.006-.014 in. (.15-.35
.006-.014 in. (.15-.35
.014-.028 in. (.35-.70
.001-.003 in. (.03-.07
.001-.003 in. (.03-.07
.001-.003 in. (.03-.07
.6291 in. (15.98 mm)
.6311 in. (16.03 mm)
.040 in. (1.0 mm)
.040 in. (1.0 mm)
.060 in. (1.5 mm)
.008 in. (.20 mm)
.008 in. (.20 mm)
.008 in. (.20 mm)
Starter Rope (138400)
Rope Size
Rope Length
#5 (3.97 mm)
67 in. (1. 7 m)
mm)
mm)
mm)
mm)
mm)
mm)
N/A
N/A
14
261
MODEL 185400
Engine Specifications (185400)
Armature Air Gap
Bolt Circle (1)
Bolt Circle (2)
Bore
Crankshaft End Play
Displacement
Fuel Tank Capacity
Oil Capacity - No Filter
Spark Plug Gap
Stroke
Valve Clearance - Intake
Valve Clearance - Exhaust
.012 -.020 in. (.30 -.50
3.937 in. (100 mm)
6.5 in. (165.1 mm)
3.150 in. (80.0 mm)
.001 -.008 in. (.02 -.20
18.06 cu. in. (296 cc)
6.3 qt. (.6 liter)
32 oz. (.9 liter)
.030 in. (.76 mm)
2.323 in. (59.0 mm)
.002 -.004 in. (.05 -.10
.002 -.004 in. (.05 -.10
Fastener Torque Specifications (185400)
Tool Size
Torque
Air Cleaner Bas e / Backplate
Air Cleaner Cover
Air Cleaner Support Bracket
Armature
Blower Housing
Carburetor Bowl Sc rew
Connecting Rod
Control Bracket
Control Panel Trim
Cylinder Cover
Cylinder Head
Cylinder Shield
Flywheel Nut
Fuel Shut-Off Valve
Fuel Tank
Fuel Tank Bracket
Governor Lever Nut
Idle Down Control
Muffler
Muffler Guard
Oil Drain Plug
Oil Fill C ap
Oil Guard Module
Oil Guard Float Switch
10 mm
Wing Knob
45 lb-in. (5 Nm)
N/A
10 mm
10 mm
12 mm
10 mm
10 mm
10 mm
12 mm
14 mm
10 mm
21 mm
10 mm
10 mm
30 lb-in. (3 Nm)
45 lb-in. (5 Nm)
85 lb-in. (10 Nm)
175 lb-in. (20 Nm)
45 lb-in. (5 Nm)
45 lb-in. (5 Nm)
175 lb-in. (20 Nm)
310 lb-in. (35 Nm)
45 lb-in. (5 Nm)
63 lb-ft. (85 Nm)
70 lb-in. (8 Nm)
90 lb-in. (10 Nm)
10 mm
12 mm
12 mm
Phillips
12 mm
Wing Knob
10 mm
Phillips
60 lb-in. (7 Nm)
140 lb-in. (16 Nm)
175 lb-in. (20 Nm)
90 lb-in. (10 Nm)
175 lb-in. (20 Nm)
40 lb-in. (5 Nm)
45 lb-in. (5 Nm)
45 lb-in. (5 Nm)
14
262
mm)
mm)
mm)
mm)
Fastener Torque Specifications (185400)
Tool Size
Torque
Rewind Retainer Screw
Rewind Starter
Rocker Arm Pivot
Rocker Arm Shaft
Rocker Ball Set Screw or Nut
Spark Plug
Starter Contactor
Starter Key Switch Panel
Starter Motor Bracket
Starter Motor Thorough Bolts
Stator
Valve Cover
Voltage Regulator / Rectifier
Phillips
10 mm
14 mm
12 mm
10 mm
5/8 in.
10 mm
10 mm
12 mm
7 mm
10 mm
10 mm
10 mm
70 lb-in. (8 Nm)
55 lb-in. (6 Nm)
N/A
175 lb-in. (20 Nm)
35 lb-in. (4 Nm)
180 lb-in. (20 Nm)
45 lb-in. (5 Nm)
45 lb-in. (5 Nm)
140 lb-in. (16 Nm)
50 lb-in. (6 Nm)
45 lb-in. (5 Nm)
35 lb-in. (4 Nm)
45 lb-in. (5 Nm)
Reject Dimensions (185400)
Standard Size
Reject Size
Cylinder (185400)
Magneto Bearing
Camshaft Bearing
Bore Diameter
Bore Out-Of-Round
Ball
.5909 in. (15.01 mm)
3.1496 in. (80.0 mm)
N/A
NA
.5917 in. (15.03 mm)
3.1508 in. (80.03 mm)
.0015 in. (.04 mm)
Cylinder Head (185400)
Standard Size
Reject Size
Intake Valve Seat Angle
45°
N/A
Intake Valve Seat Width
Intake Valve Stem Diameter
Intake Valve Guide
3/64-4/64 in. (1.19-1.59 mm)
.2346 in. (5.96 mm)
.2368 in. (6.02 mm)
N/A
.2338 in. (5.94 mm)
.2378 in. (6.04 mm)
Exhaust Valve Seat Angle
45°
N/A
Exhaust Valve Seat Width
Exhaust Valve Stem Diameter
Exhaust Valve Guide
3/64-4/64 in. (1.19-1.59 mm)
.2346 in. (5.96 mm)
.2368 in. (5.50 mm)
N/A
.2338 in. (5.94 mm)
.2378 in. (6.04 mm)
Cylinder Cover (185400)
PTO Bearing
Camshaft Bearing
Ball
.5909 in (15.01 mm)
N/A
.5917 in. (15.03 mm)
Crankshaft (185400)
Crank Pin Journal
Mag-Side Journal
PTO-Side Journal
1.3386 in. (34.0 mm)
1.1811 in. (30.0 mm)
1.1811 in. (30.0 mm)
1.3370 in. (33.96 mm)
1.1803 in. (29.98 mm)
1.1803 in. (29.98 mm)
14
263
Reject Dimensions (185400)
Standard Size
Reject Size
Camshaft (185400)
Mag-Side Journal
PTO-Side Journal
Intake lobes
Exhaust lobes
.5905 in. (15.00 mm)
.5905 in. (15.00 mm)
1.2657 in. (32.15 mm)
1.2657 in. (32.15 mm)
.5898 in. (14.98 mm)
.5898 in. (14.98 mm)
1.2402 in. (31.50 mm)
1.2402 in. (31.50 mm)
Connecting Rod (185400)
Crank Pin Bearing
Piston Pin Bearing
1.3392 in. (34.02 mm)
.7091 in. (18.01 mm)
1.3402 in. (34.04 mm)
.7098 in. (18.03 mm)
Piston (185400)
Piston Pin Diameter
Piston Pine Bore
Ring End Gap (Top)
Ring End Gap (Middle)
Ring End Gap (Oil Control)
Ring Land Clearance (Top)
Ring Land Clearance (Middle)
Ring Land Clearance (Oil Control)
.7086 in. (18.00 mm)
.7091 in. (18.01 mm)
.006-.014 in. (.15-.35
.006-.014 in. (.15-.35
.014-.028 in. (.35-.70
.001-.003 in. (.03-.07
.001-.003 in. (.03-.07
.001-.003 in. (.03-.07
.7078 in. (17.98 mm)
.7098 in. (18.03 mm)
.040 in. (1.0 mm)
.040 in. (1.0 mm)
.060 in. (1.5 mm)
.008 in. (.20 mm)
.008 in. (.20 mm)
.008 in. (.20 mm)
Starter Rope (185400)
Rope Size
Rope Length
#5 (3.97 mm)
79 in. (2. 0 m)
14
264
mm)
mm)
mm)
mm)
mm)
mm)
N/A
N/A
MODELS 235400 AND 245400
Engine Specifications (235400 & 245400)
Armature Air Gap
Bolt Circle (1)
Bolt Circle (2)
Bolt Circle (3)
Bore
Crankshaft End Play
Displacement
Fuel Tank Capacity
Oil Capacity - No Filter
Spark Plug Gap
Stroke
Valve Clearance - Intake
Valve Clearance - Exhaust
.012 -.020 (.30 -.50 mm)
5.0 in. (127 mm)
6.5 in. (165.1 mm)
7.75 in. (197 mm)
3.504 in. (89.0 mm)
.001 -.008 in. (.02 -.20 mm)
23.86 cu. in. (391 cc)
7.4 qt. (.7 liter)
32 oz. (.9 liter)
.030 in. (.76 mm)
2.48 in. (63.0 mm)
.004 -.006 in. (.10 -.15 mm)
.004 -.006 in. (.10 -.15 mm)
Fastener Torque Specifications (235400 & 245400)
Tool Size
Torque
Air Cleaner Bas e / Backplate
Air Cleaner Cover
Air Cleaner Support Bracket
Armature
Blower Housing
Connecting Rod
Control Bracket
Control Panel Trim
Cylinder Cover
Cylinder Head
Cylinder Shield
Fly Wheel Fan Retainer
Flywheel Nut
Fuel Shut-Off Valve
Fuel Tank
Governor Lever Nut
Idle Down Control
Muffler
Muffler Guard
Oil Drain Plug
Oil Fill C ap
Oil Fill T ube
Oil Guard Module
Oil Guard Float Switch
Rewind Retainer Screw
10 mm
Wing Knob
10 mm
10 mm
10 mm
10 mm
10 mm
10 mm
12 mm
14 mm
10 mm
12 mm
21 mm
10 mm
10 mm
10 mm
12 mm
12 mm
10 mm
12 mm
Wing Knob
10 mm
10 mm
Phillips
Phillips
45 lb-in. (5 Nm)
N/A
45 lb-in. (5 Nm)
30 lb-in. (3 Nm)
45 lb-in. (5 Nm)
175 lb-in. (20 Nm)
45 lb-in. (5 Nm)
45 lb-in. (5 Nm)
175 lb-in. (20 Nm)
420 lb-in. (47 Nm)
45 lb-in. (5 Nm)
90 lb-in. (10 Nm)
63 lb-ft. (85 Nm)
70 lb-in. (8 Nm)
90 lb-in. (10 Nm)
60 lb-in. (7 Nm)
140 lb-in. (16 Nm)
175 lb-in. (20 Nm)
90 lb-in. (10 Nm)
175 lb-in. (20 Nm)
40 lb-in. (5 Nm)
20 lb-in. (2 Nm)
45 lb-in. (5 Nm)
45 lb-in. (5 Nm)
70 lb-in. (8 Nm)
14
265
Fastener Torque Specifications (235400 & 245400)
Tool Size
Torque
Rocker Arm Shaft
Rocker Ball Set Screw or Nut
Spark Plug
Starter Contactor
Starter Key Switch
Starter Motor Bracket
Starter Motor Thorough Bolts
Stator
Valve Cover
Voltage Regulator / Rectifier
10 mm
12 mm
5/8 in.
8 mm
10 mm
12 mm
10 mm
10 mm
10mm
10 mm
85 lb-in. (10 Nm)
35 lb-in. (4 Nm)
180 lb-in. (20 Nm)
35 lb-in. (4 Nm)
45 lb-in. (5 Nm)
140 lb-in. (16 Nm)
50 lb-in. (6 Nm)
45 lb-in. (5 Nm)
35 lb-in. (4 Nm)
45 lb-in. (5N m)
Reject Dimensions (235400 & 245400)
Standard Size
Reject Size
Cylinder (235400 & 245400)
Magneto Bearing
Camshaft Bearing
Counterweight Bearing
Bore Diameter
Bore Out-Of-Round
Ball
Ball
Ball
3.5039 in. (89.0 mm)
N/A
N/A
N/A
N/A
3.5051 in. (89.03 mm)
.0015 in. (.04 mm)
Cylinder Head (235400 & 245400)
Intake Valve Seat Angle
Intake Valve Seat Width
Intake Valve Stem Diameter
Intake Valve Guide
Exhaust Valve Seat Angle
Exhaust Valve Seat Width
Exhaust Valve Stem Diameter
Exhaust Valve Guide
45°
3/64-4/64 in. (1.19-1.59 mm)
.2346 in. (5.96 mm)
.2368 in. (6.02 mm)
45°
3/64-4/64 in. (1.19-1.59 mm)
.2346 in. (5.96 mm)
.2368 in. (5.50 mm)
N/A
N/A
.2338
.2378
N/A
N/A
.2338
.2378
Cylinder Cover (235400 & 245400)
PTO Bearing
Camshaft Bearing
Counterweight Bearing
Ball
Ball
Ball
N/A
N/A
N/A
Crankshaft (235400 & 245400)
Crank Pin Journal
Mag-Side Journal
PTO-Side Journal
1.5354 in. (39.0 mm)
1.3779 in. (35.0 mm)
1.3779 in. (35.0 mm)
1.5339 in. (38.96 mm)
1.3764 in. (34.96 mm)
1.3764 in. (34.96 mm)
14
266
in. (5.94 mm)
in. (6.04 mm)
in. (5.94 mm)
in. (6.04 mm)
Reject Dimensions (235400 & 245400)
Stand ard Size
Reject Size
Camshaft (235400 & 245400)
Mag-Side Journal
PTO-Side Journal
Intake lobes
Exhaust lobes
.5905 in. (15.00 mm)
.5905 in. (15.00 mm)
1.2894 in. (32.75 mm)
1.2894 in. (32.75 mm)
.5898 in. (14.98
.5898 in. (14.98
1.2598 in. (32.0
1.2598 in. (32.0
Counterweight Shaft (235400 & 24500)
Mag Side Journal
PTO Side Journal
.6772 in. (17.2 mm)
.6772 in. (17.2 mm)
.6756 in. (17.16 mm)
.6756 in. (17.16 mm)
Connecting Rod (235400 & 245400)
Crank Pin Bearing
Piston Pin Bearing
1.5362 in. (39.02 mm)
.7878 in. (20.01 mm)
1.5370 in. (39.04 mm)
.7886 in. (20.03 mm)
Piston (235400 & 245400)
Piston Pin Diameter
Piston Pine Bore
Ring End Gap (Top)
Ring End Gap (Middle)
Ring End Gap (Oil Control)
Ring Land Clearance (Top)
Ring Land Clearance (Middle)
Ring Land Clearance (Oil Control)
.7874 in. (20.00 mm)
.7878 in. (20.01 mm)
.006-.014 in. (.15-.35
.006-.014 in. (.15-.35
.014-.028 in. (.35-.70
.001-.003 in. (.03-.07
.001-.003 in. (.03-.07
.001-.003 in. (.03-.07
.7866 in. (19.98 mm)
.7886 in. (20.03 mm)
.040 in. (1.0 mm)
.040 in. (1.0 mm)
.060 in. (1.5 mm)
.008 in. (.20 mm)
.008 in. (.20 mm)
.008 in. (.20 mm)
Starter Rope (235400 & 245400)
Rope Size
Rope Length
#5 (3.97 mm)
79 in. (2. 0 m)
mm)
mm)
mm)
mm)
mm)
mm)
mm)
mm)
mm)
mm)
N/A
N/A
14
267
MODEL 161400
Engine Specifications (161400)
Armature Air Gap
Bolt Circle (1)
Bolt Circle (2)
Bore
Crankshaft End Play
Displacement
Fuel Tank Capacity
Gear Reduction End Play
Oil Capacity - No Filter
Spark Plug Gap
Stroke
Valve Clearance - Intake
Valve Clearance - Exhaust
.008 -.012 in. (. 20 -.30 mm)
5.0 in. (127 mm)
6.5 in. (165.1 mm)
3.0 in. (76.2 mm)
.002 -.025 in. (. 05 -.64 mm)
16.48 cu. in. (270 cc)
5.0 qt. (4.7 liter)
.002-.030 in. (.05-.76)
40 oz. (1.2 liter)
.030 in. (.76 mm)
2.33 in. (59.18 mm)
.003 -.005 in. (. 08 -.13 mm)
.003 -.005 in. (. 08 -.13 mm)
Fastener Torque Specifications (161400)
Tool Size
Torque
Air Cleaner Base / Backplate
Air Cleaner Cover
Armature
Blower Housing
Connecting Rod
Control Bracket
Control Panel Trim
Cylinder Cover
Cylinder Head
Cylinder Shield
Exhaust Manifold / Adaptor
Exhaust Manifold Heat Shield
Flywheel Guard
Flywheel N ut
Fuel Pump
Fuel Pump Bracket
Fuel Shut-Off Valve
Fuel Shut-Off Valve Bracket
Fuel Tank
Fuel Tank Bracket
Gear Reduction Housing
Gear Reduction Cover
Governor Lever Nut
Idle Down Control
8 mm
Wing Knob
7/32 in.
8 mm
5/16 in. 12 Point
10 mm
8 mm
10 mm
10 mm
8 mm
10 mm
7 mm
7 mm
15/16 in.
8 mm
8 mm
8 mm
8 mm
8 mm
8 mm
1/2 in.
1/2 in.
10 mm
12 mm
55 lb-in. (6 Nm)
N/A
30 ln-in. (3 Nm)
45 lb-in. (5 Nm)
185 lb-in. (21 Nm)
55 lb-in. (6 Nm)
45 lb-in. (5 Nm)
140 lb-in. (16 Nm)
165 lb-in. (19 Nm)
45 lb-in. (5 Nm)
140 lb-in. (16 Nm)
35 lb-in. (4 Nm)
35 lb-in. (4 Nm)
65 lb-ft. (88 Nm)
45 lb-in. (5 Nm)
45 lb-in. (5 Nm)
45 lb-in. (5 Nm)
45 lb-in. (5 Nm)
45 lb-in. (5 Nm)
45 lb-in. (5 Nm)
140 lb-in. (16 Nm)
185 lb-in. (21 Nm)
45 lb-in. (5 Nm)
140 lb-in. (16 Nm)
14
268
Fastener Torque Specifications (161400)
Tool Size
Torque
Intake Manifold
Muffler
Muffler Brac ket
Muffler Guard
Oil Drain Plug
Oil Fill Cap
Oil Fill Tube
Oil Guard Float Switch
Rewind Retainer Screw
Rewind Starter
Rocker Arm Stud
Rocker Arm Pivot
Rocker Ball Set Screw or Nut
Spark Plug
Starter Drive Cover
Starter Motor Bracket
Starter Motor Thorough Bolts
Stator
Valve Cover
Voltage Regulator / Rectifier
8 mm
8 mm
8 mm
1/4 in. & 8 mm
3/8 in. Square
Wing Knob
7 mm
7 mm
Phillips
8 mm
13 mm
13 mm
14 mm Hex
5/8 in.
8 mm
8 mm
8 mm
1/4 in.
8 mm
10 mm
55 lb-in. (6 Nm)
45 lb-in. (5 Nm)
45 lb-in. ((5 Nm)
30 lb-in. (30 Nm)
125 lb-in. (14 Nm)
40 lb-in. (5 Nm)
20 lb-in. (2 Nm)
35 lb-in. (4 Nm)
70 lb-in. (8 Nm)
55 lb-in. (6 Nm)
140 lb-in. (16 Nm)
N/A
55 lb-in. (6 Nm)
180 lb-in. (20 Nm)
45 lb-in. (5 Nm)
140 lb-in. (16 Nm)
34 lb-in. (4 Nm)
30 lb-in. (3 Nm)
55 lb-in. (6 Nm)
45 lb-in. (5 Nm)
Reject Dimensions (161400)
Standard Size
Reject Size
Cylinder (161400)
Magneto Bearing
Camshaft Bearing
Counterweight Bearing
Bore Diameter
Bore Out-Of-Round)
1.5005 in. (38.11 m m)
.6255 in. (15.89 m m)
.6255 in. (15.89 m m)
3.0 in. (76.2 m m)
N/A
1.5015 in. (38.14 m m)
.6275 in. (15.94 m m)
.6275 in. (15.94 m m)
3.003 in. (76.28 m m)
.0015 in. (.04 m m)
Cylinder Head (161400)
Intake Vale Seat Angle
Intake Valv e Seat Width
Intake Valve Stem Diameter
Intake Valv e Guide
Exhaust Valv e Seat Angle
Exhaust Valv e Seat Width
Exhaust Valve Stem Diameter
Exhaust Valv e Guide
45°
3/64-4/64 in. (1.19-1.59 mm)
.2354 in. (5.98 m m)
.2380 in. 6.05 m m)
45°
3/64-4/64 in. (1.59-1.98 mm)
.2354 in. (5.98 m m)
.2380 in. (6.05 m m)
N/A
N/A
.2346 in. (5.96 m m)
.24 in. (6.10 m m)
N/A
N/A
.2346 in. (5.96 m m)
.24 in. (6.10 m m)
14
269
Reject Dimensions (161400)
Standard Size
Reject Size
Cylinder Cover (161400)
PTO Bearing
Camshaft Bearing
Counterweight Bearing
Ball
.6255 in. (15.89 m m)
.6255 in. (15.98 m m)
N/A
.6275 in. (15.94 m m)
.6275 in. (15.94 m m)
Crankshaft (161400)
Crank Pin Journal
Mag-Side J ournal
PTO-Side J ournal
1.43 in. (36.32 m m)
1.5 in. (38.10 m m)
Ball
1.429 in. (36.3 m m)
1.4973 in. (38.03 m m)
N/A
Camshaft (161400)
Mag-Side J ournal
PTO-Side J ournal
Intake Lobes
Exhaust Lobes
Compression Release Lobe
.6250 in. (15.88 m m)
.6250 in. (15.88 m m)
N/A
N/A
N/A
.6230 in. (15.82 m m)
.6230 in. (15.82 m m)
1.2183 in. (30.94 m m)
1.2183 in. (30.94 m m)
.022-.028 in. (.56-.71 mm)
Counterweight Shaft (161400)
Mag-Side J ournal
PTO-Side J ournal
.6250 in. (15.88 m m)
.6250 in. (15.88 m m)
.6230 in. (15.82 m m)
.6230 in. (15.82 m m)
Connecting R od (161400)
Crank Pin Bearing
Piston Pin Bearing
1.4303 in. (36.33 m m)
.8009 in. (20.34 m m)
1.4331 in. (36.40 m m)
.8013 in. (20.35 m m)
Piston (161400)
Piston Pin Diameter
Piston Pin Bore
Ring End Gap (Top)
Ring End Gap (Middle)
Ring End Gap (Oil Control)
Ring Land Clearance (Top)
Ring Land Clearance (Middle)
Ring Land Clearance (Oil Control)
.8005 in. (20.33 m m)
.8009 in. (20.34 m m)
.006-.014 in. (.15-.35 mm)
.006-.014 in. (.15-.35 mm)
.014-.028 in. (.35-.70 mm)
.001-.003 in. (.03-.07 mm)
.001-.003 in. (.03-.07 mm)
.001-.003 in. (.03-.07 mm)
.80 in. (20.32 m m)
.8013 in. (20.35 m m)
.030 in. (.76 mm)
.030 in. (.76 mm)
.065 in. (1.65 mm)
.004 in. (.10 mm)
.004 in. (.10 mm)
.008 in. (.20 mm)
Starter Rope (161400)
Rope Siz e
Rope Lengt h
#5 1/2 in. (4.37 mm)
62 in. (1.6 mm)
N/A
N/A
14
270
MODEL 104700
Engine Specifications (104700)
Armature Air Gap
Bolt Circle (1)
Bore
Crankshaft End Play
Displacement
Fuel Tank Capacity
Oil Capacity - With Filter
Oil Capacity - No Filter
Spark Plug Gap
Stroke
Valve Clearance - Intake
Valve Clearance - Exhaust
.008-.012 in. (.20-.30 mm)
8.0 in. (203.2 mm)
2.561 in. (65.06 mm)
.002-.020 in. (.05-.51 mm)
10 cu. in. (164 cc)
1.5 qt. (1.4 liter)
28 oz. (.8 liter)
24.7 oz. (.7 liter)
.030 in. (.76 mm)
1.94 in. (49.28 mm)
.003-.005 in. (.08-.13 mm)
.003-.005 in. (.08-.13 mm)
Fastener Torque Specifications (104700)
Tool Size
Torque
Air Cleaner Cover
Armature
Blower Housing
Breather Cover
Connecting Rod
Control Bracket
Throttle Control Bracket
Sump Cover
Cylinder Head
Exhaust Manifold / Adaptor
Exhaust Manifold Heat Shield
Flywheel Brake Assembly
Flywheel Brake Cover
Flywheel Guard / Backplate
Flywheel Nut
Fuel Tank
Governor Lever Nut
Intake Manifold
Muffler
Muffler Bracket
Muffler Guard
Oil Drain Plug
Oil Fill T ube
Oil Filter Adapter
Oil Pressure Switch
Wing Knob
7/32 in.
8 mm
8 mm
8 mm
8 mm
7 mm
10 mm
13 mm
10 mm
7 mm
7 mm
Phillips
8 mm
24 mm
8 mm
8 mm
10 mm
11 mm
13 mm
1/4 in.
7/16 in. Square
8 mm
10 mm
1 1/16 in.
N/A
30 lb-in. (3 Nm)
55 lb-in. (6 Nm)
55 lb-in. (6 Nm)
90 lb-in. (10 Nm)
45 lb-in. (5 Nm)
35 lb-in. (4 Nm)
140 lb-in. (16 Nm)
165 lb-in. (19 Nm)
140 lb-in. (16 Nm)
35 lb-in. (4 Nm)
35 lb-in. (4 Nm)
35 lb-in. (4 Nm)
30 ln-in. (3 Nm)
65 lb-ft. (88 Nm)
45 lb-in. (5 Nm)
45 lb-in. (5 Nm)
45 lb-in. (5 Nm)
60 lb-in. (7 Nm)
75 lb-in. (8 Nm)
35 lb-in. (4 Nm)
125 lb-in. (14 Nm)
20 lb-in. (2 Nm)
140 lb-in. (16 Nm)
75 lb-in. (8 Nm)
14
271
Fastener Torque Specifications (104700)
Tool Size
Torque
Oil Pump Cover
Oil Pump Screen
Rewind Retainer Screw
Rewind Starter
Rocker Arm Stud
Rocker Arm Pivot
Rocker Ball Set Screw or Nut
Spark Plug
Starter Drive Cover
Starter Motor Bracket
Starter Motor Thorough Bolts
Stator
Valve Cover
8 mm
7 mm
Phillips
8 mm
10 mm
10 mm
T-15
5/8 in.
7/32 in.
10 mm
8 mm
1/4 in.
8 mm
55 ln-in. (6 Nm)
35 lb-in. (4 Nm)
70 lb-in. (8 Nm)
55 lb-in. (6 Nm)
85 lb-in. (10 Nm)
N/A
50 lb-in. (6 Nm)
180 lb-in. (20 Nm)
35 lb-in. (4 Nm)
140 lb-in. (16 Nm)
35 lb-in. (4 Nm)
30 lb-in. (3 Nm)
45 lb-in. (5 Nm)
Reject Dimensions (104700)
Standard Size
Reject Size
Cylinder (104700)
Magneto Bearing
Camshaft Bearing
Bore Diameter
Bore Out-Of-Round
1.182 in. (30.02 m m)
.5010 in. (12.73 m m)
2.561 in. (65.06 m m)
N/A
1.184 in.
.5031 in.
2.464 in.
.0015 in.
Cylinder Head (104700)
Standard Size
Reject Size
Intake Valv e Seat Angle
45°
N/A
Intake Valv e Seat Width
Intake Valve Stem Diameter
Intake Valv e Guide
3/64-4/64 in. (.79-1.19 mm)
.2354 in. (5.98 m m)
.2380 in. (6.05 m m)
N/A
.2346 in. (5.96 m m)
.24 in. (6.10 m m)
Exhaust Valv e Seat Angle
45°
N/A
Exhaust Valv e Seat Width
Exhaust Valve Stem Diameter
Exhaust Valv e Guide
3/64-4/64 in. (1.19-1.59 mm)
.2354 in. (5.98 m m)
.2380 in. (6.05 m m)
N/A
.2346 in. (5.96 m m)
.24 in. (6.10 m m)
Sump Cover (104700)
PTO Bearing
Camshaft Bearing
1.182 in. (30.02 m m)
.6899 in. (17.52 m m)
1.184 in. (30.07 m m)
.6930 in. (17.6 m m)
Crankshaft (104700)
Crank Pin Journal
Mag-Side J ournal
PTO-Side J ournal
1.23 in. (31.24 m m)
1.181 in. (30.0 m m)
1.181 in. (30.0 m m)
1.228 in. (31.19 m m)
1.179 in. (29.95 m m)
1.179 in. (29.95 m m)
14
272
(30.07 m m)
(12.78 m m)
(65.12 m m)
(.04 m m)
Reject Dimensions (104700)
Standard Size
Reject Size
Camshaft (104700)
Mag-Side J ournal
PTO-Side J ournal
Intake lobes
Exhaust lobes
Compression Release Lobe
.5 in. (12.7 m m)
.6890 in. (17.5 m m)
N/A
N/A
.020-.025 in. (.51-.64 mm)
.498 in. (12.65 m m)
.6871 in. (17.45 m m)
1.136 in. (28.85 m m)
1.136 in. (28.85 m m)
.022-.028 in. (.56-.71 mm)
Connecting R od (104700)
Crank Pin Bearing
Piston Pin Bearing
1.231 in. (31.26 m m)
.5519 in. (14.02 m m)
1.233 in. (31.32 m m)
.5522 in. (14.02 m m)
Piston (104700)
Piston Pin Diameter
Piston Pine Bore
Ring End Gap (Top)
Ring End Gap (Middle)
Ring End Gap (Oil Control)
Ring Land Clearance (Top)
Ring Land Clearance (Middle)
Ring Land Clearance (Oil Control)
.5515 in. (14.01 m m)
.5519 in. (14.02 m m)
.006-.014 in. (.15-.35 mm)
.006-.014 in. (.15-.35 mm)
.014-.028 in. (.35-.70 mm)
.001-.003 in. (.03-.07 mm)
.001-.003 in. (.03-.07 mm)
.001-.003 in. (.03-.07 mm)
.5511 in. (14.0 m m)
.5522 in. (14.02 m m)
.030 in. (.76 mm)
.030 in. (.76 mm)
.065 in. (1.65 mm)
.004 in. (.10 mm)
.004 in. (.10 mm)
.008 in. (.20 mm)
Starter Rope (104700)
Rope Siz e
Rope Lengt h
#4 1/2 (3.18 mm)
92 in. (2.3 m)
N/A
N/A
14
273
MODELS 260700 & 261700
Engine Specifications (260700 & 26170 0)
Armature Air Gap
Bolt Circle (1)
Bore
Crankshaft End Play
Displacement
Fuel Tank Capacity
Oil Capacity - With Filter
Oil Capacity - No Filter
Spark Plug Gap
Stroke
Valve Clearance - Intake
Valve Clearance - Exhaust
.008 -.012 in. (.20 -.30
10.0 in. (254 mm)
3.437 in. (87.29 mm)
.002 -.020 in. (.05 -.51
26.55 cu. in. (435 cc)
N/A
72 oz. (2.1liter)
64 oz. (1.9 liter)
.030 in. (.76 mm)
2.860 in. (72.64 mm)
.003 -.005 in. (.08 -.13
.003 -.005 in. (.08 -.13
Fastener Torque Specifications (260700 & 261700)
Tool Size
Torque
Air Cleaner Cover
Armature
Blower Housing
Breather Cover
Breather Retainer
Connecting Rod
Control Bracket
Sump Cover
Cylinder Head
Cylinder Shield
Exhaust Manifold / Adaptor
Exhaust Manifold Heat Shield
Flywheel Fan Retainer
Flywheel Guard / Backplate
Flywheel Nut
Fuel Hose Retainer
Fuel Pump
Fuel Pump Bracket
Governor Lever Nut
Intake Manifold
Muffler
Muffler Bracket
Muffler Clamp
Wing Knob
7/32 in.
8 mm
8 mm
7/32 in.
5/16 in. 12 Point
8 mm
13 mm
13 mm
8 mm
10 mm
8 mm & 1/4 in.
13 mm
8 mm
30 mm
7 mm
8 mm
7 mm
8 mm
13 mm
8 mm
10 mm
13 mm
N/A
30 lb-in. (3 Nm)
45 lb-in. (5 Nm)
80 lb-in. (9 Nm)
25 lb-in. (23 Nm)
200 lb-in. (23 Nm)
45 lb-in. (5 Nm)
250 lb-in. (28 Nm)
225 lb-in. (25 Nm)
45 lb-in. (5 Nm)
140 lb-in. (16 Nm)
25 lb-in. (3 Nm)
140 lb-in. (16 Nm)
30 ln-in. (3 Nm)
125 lb-ft. (169 Nm)
35 lb-in. (4 Nm)
45 lb-in. (5 Nm)
35 lb-in. (4 Nm)
45 lb-in. (5 Nm)
125 lb-in. (14 Nm)
45 lb-in. (5 Nm)
55 lb-in. (6 Nm)
90 lb-in. (10 Nm)
14
274
mm)
mm)
mm)
mm)
Fastener Torque Specifications (260700 & 261700)
Tool Size
Torque
Oil Drain Plug
Oil Fill Tube
Oil Filter Adapter
Oil Pressure Switch
Oil Pump Cover
Rewind Retainer Screw
Rewind Adaptor
Rewind Starter
Rope Starter Cup
Rotating Screen
Rocker Arm Stud
Rocker Arm Pivot
Rocker Ball Set Screw or Nut
Spark Plug
Starter Motor Bracket
Starter Motor Thorough Bolt s
Stator
Valve Cover
Voltage Regulator / Rectifier
7/16 in. Square
8 mm
10 mm
1 1/16 in.
Phillips
Phillips
T-30
8 mm
8 mm
Phillips
13 mm
13 mm
14 mm Hex
5/8 in.
10 mm
8 mm
1/4 in.
8 mm
10 mm
125 lb-in. (14 Nm)
20 lb-in. (2 Nm)
140 lb-in. (16 Nm)
75 lb-in. (8 Nm)
55 lb-in. (6 Nm)
70 lb-in. (8 Nm)
55 lb-in. (6 Nm)
55 lb-in. (6 Nm)
140 lb-in. (16 Nm)
35 lb-in. (4 Nm)
140 lb-in. (16 Nm)
N/A
55 lb-in. (6 Nm)
180 lb-in. (20 Nm)
140 lb-in. (16 Nm)
35 lb-in. (4 Nm)
30 lb-in. (3 Nm)
55 lb-in. (6 Nm)
45 lb-in. (5 Nm)
Reject Dimensions (260700 & 261700)
Standard Size
Reject Size
Cylinder (260700 & 261700)
Magneto Bearing
Camshaft Bearing
Bore Diameter
Bore Out-Of-Round
1.625 in. (41.28 mm)
.6255 in. (15.89 mm)
3.436 in. (87.29 mm)
N/A
1.628
.6280
3.439
.0015
Cylinder Head (260700 & 261700)
Standard Size
Reject Size
Intake Valve Seat Angle
45°
N/A
Intake Valve Seat Width
Intake Valve Stem Diameter
Intake Valve Guide
3/64-4/64 in. (1.19-1.59 mm)
.2354 in. (5.98 mm)
.2380 in. (6.05 mm)
N/A
.2346 in. (5.96 mm)
.24 in. (6.10 mm)
Exhaust Valve Seat Angle
45°
N/A
Exhaust Valve Seat Width
Exhaust Valve Stem Diameter
Exhaust Valve Guide
3/64-4/64 in. (1.59-1.98 mm)
.2354 in. (5.98 mm)
.2380 in. (6.05 mm)
N/A
.2346 in. (5.96 mm)
.24 in. (6.10 mm)
in.
in.
in.
in.
(41.35 mm)
(15.95 mm)
(87.3 mm)
(.04 mm)
14
275
Reject Dimens ions (260700 & 2617 00)
Standard Size
Reject Size
Sump Cover (260700 & 261700)
PTO Bearing
Camshaft Bearing
Counterweight Pivot Shaft
1.625 in. (41.28 mm)
.6255 in. (15.89 mm)
.5 in. (12.7 mm)
1.628 in. (41.35 mm)
.6280 in. (15.95 mm)
.498 in. (12.65 mm)
Crankshaft (260700 & 261700)
Crank Pin Journal
Mag-Side Journal
PTO-Side Journal
Eccentrics
1.624 in. (41.26 mm)
1.624 in. (41.26 mm)
1.624 in. (41.26 mm)
2.6811 in. (68.10 mm)
1.622
1.622
1.622
2.679
Camshaft (260700 & 261700)
Mag-Side Journal
PTO-Side Journal
Intake lobes
Exhaust lobes
Compression Release Lobe (Before 911209xx)
Compression Release Lobe (After 911208xx)
.6250 in. (15.88 mm)
.6250 in. (15.88 mm)
N/A
N/A
N/A
N/A
.6229 in. (15.82 mm)
.6229 in. (15.82 mm)
1.375 in. (34.93 mm)
1.375 in. (34.93 mm)
.025-.030 in. (.64-.76 mm)
.065-.070 in. (1.65-1.78 mm)
Counterweight Assembly (260700 & 261700)
Pivot Shaft Bore
Counterweight Pin Bore
Link Pin
Connector Pin Bore
Connector Eccentric Bore
.5015
.6281
.6205
.6221
2.862
.5031
.6230
.6189
.6230
2.684
Connecting Rod (260700 & 261700)
Crank Pin Bearing
Piston Pin Bearing
1.625 in. (41.30 mm)
.8009 in. (20.34 mm)
1.627 in. (41.33 mm)
.8013 in. (20.35 mm)
Piston (260700 & 261700)
Piston Pin Diameter
Piston Pine Bore
Ring End Gap (Top)
Ring End Gap (Middle)
Ring End Gap (Oil Control)
Ring Land Clearance (Top)
Ring Land Clearance (Middle)
Ring Land Clearance (Oil Control)
.8005 in. (20.33 mm)
.8009 in. (20.34 mm)
.006-.014 in. (.15-.35
.006-.014 in. (.15-.35
.006-.014 in. (.15-.35
.001-.003 in. (.03-.07
.001-.003 in. (.03-.07
.001-.003 in. (.03-.07
.80 in. (20.32 mm)
.8013 in. (20.35 mm)
.030 in. (.76 mm)
.030 in. (.76 mm)
.030 in. (.75 mm)
.004 in. (.10 mm)
.004 in. (.10 mm)
.008 in. (.20 mm)
Starter Rope (260700 & 261700)
Rope Size
Rope Length
#6 (4.76 mm)
62 in. (1. 6 m)
14
276
in. (12.74
in. (15.80
in. (15.76
in. (15.80
in. (68.12
mm)
mm)
mm)
mm)
mm)
mm)
mm)
mm)
mm)
mm)
mm)
N/A
N/A
in. (41.22
in. (41.22
in. (41.22
in. (68.05
in. (12.78
in. (15.82
in. (15.72
in. (15.82
in. (68.17
mm)
mm)
mm)
mm)
mm)
mm)
mm)
mm)
mm)
MODEL 28Q700
Engine Specifications (28Q700)
Armature Air Gap
Bolt Circle (1)
Bore
Crankshaft End Play
Displacement
Fuel Tank Capacity
Oil Capacity - With Filter
Oil Capacity - No Filter
Spark Plug Gap
Stroke
Valve Clearance - Intake
Valve Clearance - Exhaust
.010 -. 014 in. (. 25 -.36 m m)
10.0 in. (254 mm)
3.437 in. (87.29 m m)
.002 -. 023 in. (. 05 -.58 m m)
28.37 cu. in. (465 cc)
N/A
52 oz. (1.5 liter)
48 oz. (1.4 liter)
.030 in. (.76 m m)
3.062 in. (77.78 m m)
.003 -. 005 in. (. 08 -.13 m m)
.005 -. 007 in. (. 13 -.18 m m)
Fastener Torque Specifications (28Q700)
Tool Size
Torque
Air Cleaner Base / Backplate
Air Cleaner Cover
After-Fire Solenoid
Armature
Blower Housing Brackets
Blower Housing
Breather Cover - Air Cleaner Base
Breather Cover - Cylinder
Carburetor To Manifold Bolts
Connecting Rod (After 980630xx)
- Small Bolt (Before 980701xx)
- Large Bolt (Bef ore 980701xx)
Control Bracket
Counterw eight Screw
Sump (By Hole Siz e)
Cylinder Head
Cylinder Shield
Exhaust Manifold / Adaptor
Flywheel Fan Retainer
Flywheel Guard
Flywheel Bolt
Fuel Pump
Fuel Pum p Bracket
Governor Lev er Nut
Intake Manifold
Muffler
5/16 in.
Wing Knob
1/2 in.
5/16 in.
3/8 in.
3/8 in. & T-20
5/16 in.
5/16 in.
5/16 in.
5/16 in.
3/8 in.
1/2 in.
5/16 in.
7/16 in.
1/2 in.
1/2 in.
5/16 in.
1/2 in. or T-40
1/2 in.
5/16 in.
15/16 in.
3/8 in.
1/4 in.
3/8 in.
3/8 in.
1/2 in.
55 lb-in. (6 Nm)
N/A
45 lb-in. (5 Nm)
30 lb-in. (3 Nm)
85 lb-in. (10 Nm)
85 lb-in. (10 Nm)
35 lb-in. (4 Nm)
55 lb-in. (6 Nm)
65 lb-in. (7 Nm)
185 lb-in. (21 Nm)
160 lb-in. (18 Nm)
260 lb-in. (29 Nm)
45 lb-in. (5 Nm)
115 lb-in. (13 Nm)
140 / 200 lb-in. (16-23 Nm)
220 lb-in. (25 Nm)
35 lb-in. (4 Nm)
165 lb-in. (19 Nm)
140 lb-in. (16 Nm)
35 lb-in. (4 Nm)
100 lb-ft. (136 Nm)
45 lb-in. (5 Nm)
35 lb-in. (4 Nm)
45 lb-in. (5 Nm)
100 lb-in. (11 Nm)
165 lb-in. (19 Nm)
14
277
Fastener Torque Specifications (28Q700)
Tool Size
Torque
Oil Drain Plug
Oil Fill T ube
Oil Filter Adapter
Oil Pressure Switch
Oil Pump Cover
Oil Pump Screen
Rocker Arm Pivot
Rocker Arm Stud
Rocker Ball Set Screw or Nut
Rotating Screen
Spark Plug
Starter Drive Cover
Starter Motor Bracket
Starter Motor Thorough Bolts
Stator
Valve Cover
Voltage Regulator / Rectifier
7/16 in. Square
1/4 in.
1/2 in. or T-40
1 1/16 in.
5/16 in.
1/4 in.
10 mm
10 mm
T-15
5/16 in.
5/8 in.
1/4 in.
1/2 in.
5/16 in.
Phillips
3/8 in.
3/8 in.
125 lb-in. (14 Nm)
20 lb-in. (2 Nm)
125 lb-in. (14N m)
75 lb-in. (8 Nm)
80 lb-in. (9 Nm)
35 lb-in. (4 Nm)
N/A
140 lb-in. (16 Nm)
60 lb-in. (7 Nm)
35 lb-in. (4 Nm)
180 lb-in. (20 Nm)
35 lb-in. (4 Nm)
140 lb-in. (16 Nm)
35 lb-in. (4 Nm)
35 lb-in. (4 Nm)
60 lb-in. (7 Nm)
45 lb-in. (5 Nm)
Reject Dimensions (28Q700)
Standard Size
Reject Size
Cylinder (28Q700)
Magneto Bearing
Camshaft Bearing
Link Pin
Bore Diameter
Bore Out-Of-Round
1.365 in. (34.96 mm)
.5015 in. (12.74 mm)
.4900 in. (12.45 mm)
3.4365 in. (87.29 mm)
N/A
1.3830 in. (35.13 mm)
.5040 in. (12.80 mm)
.4885 in. (12.41 mm)
3.4395 in. (87.36 mm)
.0015 in. (.04 mm)
Cylinder Head (28Q700)
Standard Size
Reject Size
Intake Valve Seat Angle
45°
N/A
Intake Valve Seat Width
Intake Valve Stem Diameter
Intake Valve Guide
3/64-4/64 in. (1.19-1.987 mm) N/A
.2354 in. (5.98 mm)
.2346 in. (5.96 mm)
.2380 in. (6.05 mm)
.24 in. (6.10 mm)
Exhaust Valve Seat Angle
45°
N/A
Exhaust Valve Seat Width
Exhaust Valve Stem Diameter
Exhaust Valve Guide
3/64-4/64 in. (1.59-1.98 mm)
.2354 in. (5.98 mm)
.2380 in. (6.05 mm)
N/A
.2346 in. (5.96 mm)
.24 in. (6.10 mm)
Sump Cover (28Q700)
PTO Bearing
Camshaft Bearing
1.3765 in. (34.96 mm)
.5015 in. (12.74 mm)
1.3830 in. (35.13 mm)
.5040 in. (12.80 mm)
14
278
Reject Dimensions (28Q700)
Standard Size
Reject Size
Crankshaft (28Q700)
Crank Pin Journal (Before 98070xx)
Crank Pin Journal (After 98070xx)
Mag-Side Journal
PTO-Side Journal
1.2489
1.4986
1.3780
1.3780
1.2478
1.4975
1.3761
1.3761
Camshaft (28Q700)
Mag-Side Journal
PTO-Side Journal
Intake lobes
Exhaust lobes
.5000 in. (12.70 mm)
.5000 in. (12.70 mm)
N/A
N/A
.4981 in. (12.65 mm)
.4981 in. (12.65 mm)
1.2213 in. (21.02 mm)
1.2213 in. (21.02 mm)
Synchro-Balance® Assembly (28Q700)
Eccentric Bearings
Link Bearings (Both Ends)
Link Pin
2.2060 in. (56.03 mm)
.4915 in. (12.48 mm)
.4900 in. (12.45 mm)
2.2121 in. (16.19 mm)
.4930 in. (12.52 mm)
.4885 in. (12.41 mm)
Connecting R od (28Q700)
Crank Pin Bearing (Before 980701xx)
Crank Pin Bearing (After 980701xx)
Piston Pin Bearing
1.2502 in. (31.76 mm)
1.5003 in. (38.11 mm)
.8009 in. (20.34 mm)
1.2521 in. (31.80 mm)
1.5020 in. (38.15 mm)
.8013 in. (20.35 mm)
Piston (28Q700)
Piston Pin Diameter
Piston Pine Bore
Ring End Gap (Top)
Ring End Gap (Middle)
Ring End Gap (Oil Control)
Ring Land Clearance (Top)
Ring Land Clearance (Middle)
Ring Land Clearance (Oil Control)
.8005 in. (20.33 mm)
.8009 in. (20.34 mm)
.006-.014 in. (.15-.35 mm)
.006-.014 in. (.15-.35 mm)
.014-.028 in. (.35-.70 mm)
.001-.003 in. (.03-.07 mm)
.001-.003 in. (.03-.07 mm)
.001-.003 in. (.03-.07 mm)
.80 in. (20.32 mm)
.8013 in. (20.35 mm)
.030 in. (.76 mm)
.030 in. (.76 mm)
.065 in. (1.65 mm)
.006 in. (.15 mm)
.006 in. (.15 mm)
.006 in. (.15 mm)
Starter Rope (28Q700)
Rope Size
Rope Length
#5 1/2 (4. 37 mm)
63 in. (1. 6 m)
N/A
N/A
in.
in.
in.
in.
(31.72 mm)
(38.06 mm)
(34.99 mm)
(34.99 mm)
in.
in.
in.
in.
(31.69 mm)
(38.04 mm)
(34.95 mm)
(34.95 mm)
14
279
14
280