1
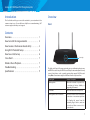
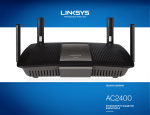
Linksys AC1200 Max Wi-Fi Range Extender

How to install the range extender
12VDC
1.5A
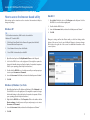
Before setup, unplug or disconnect any range extenders on the network.
1. Connect the antennas and power cable as pictured. Antennas should be
upright for best results. Note: Your antennas might look different from those
pictured here.
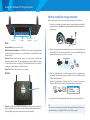
Audio Jack
Ethernet
Back
Wi-Fi Protected
Setup™ button
Power
12VDC
1.5A
Power Switch European versions only.
Wi-Fi Protected Setup Button Use Wi-Fi Protected Setup to automatically and
securely add wireless devices to your network. Refer to Using Wi-Fi Protected
Setup on page 7.
2. Plug in the range extender midway between your router and the area
without Wi-Fi. Be sure you have at least 50% of your router’s Wi-Fi signal at
that point on the device you will use for setup.
Range Extender
Ethernet (blue) Connect wired devices to your wireless network with
Ethernet (network) cables. The green light turns on when an Ethernet device
is connected and active on this port. The light blinks when the extender is
sending or receiving data over the Ethernet port.
Audio Port Connect the extender to your speaker.
Bottom
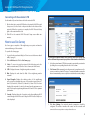
3. Wait for a solid light on the cover of the range extender. It could take up to
two minutes. On a computer, phone or tablet, connect to the Wi-Fi network
“Linksys Extender Setup.”
•
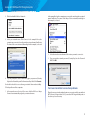
Windows 7 and Windows 8 will ask you, “Do you want to set up your
network?” Click the link, “Connect to network without setting it up.”
Reset button
4. If setup doesn’t start automatically, open a browser to http://192.168.1.1.
Reset Press and hold this button for about five seconds to reset the extender to
its factory defaults. You can also restore the defaults from the Administration >
Factory Defaults screen in the extender’s browser- based utility.
TIP
You can also connect the range extender by using Wi-Fi Protected Setup. For
more information, see “Using Wi-Fi Protected Setup” on page 7.
2