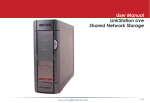
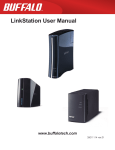
Download Buffalo LinkStation Live User manual
Transcript
User Manual
LS-XHL and LS-CHL
LinkStation Pro and Live Models
www.buffalotech.com
35010807 ver.01 v2.2
Introduction
Congratulations on your new LinkStation! This user manual is intended to assist you in
configuring it.
Because we’re constantly updating our products, the images and text in this manual may vary
slightly from the images and text displayed by your LinkStation. These changes are minor
and should not affect the ease of setup adversely. As time passes, future user interfaces,
updated software, and later versions of this manual may be freely available for download at
our web site www.buffalotech.com.
For best results, attach the LinkStation to an uninterruptable power supply (UPS). Back
up all your stored files regularly. See the ‘Backup Jobs’ page for instructions using the
LinkStation’s built-in backup utility. If you run into difficulties or need additional help, feel
free to contact our technical support. Contact information for Buffalo Technology and our
technical support is available on page 62.
Table of Contents
Introduction
Diagrams and Layout
Power Switch
Installing Software
Using your LinkStation
Using your LinkStation with a PC
Using your LinkStation with a Mac
Finding LinkStation’s IP address
Settings and Configuration
Web Admin Tool
Users/Groups
Adding Users
Adding Groups
Network
Settings
Workgroup/Domain
System Settings
Disks
USB Hard Drives
Formatting Hard Drives
Mapping Additional Shares
Maintenance
Notification
Backup Jobs
Initialization
UPS
Extensions
Sleep Timer
Print Server
Time Machine
DLNA Media Server
iTunes Server
BitTorrent Client
Direct Copy
Remote Access WebAccess
FTP
4
5
6
7
8
12
13
15
16
Troubleshooting
17
18
20
Troubleshooting Multiple Shares
Disk Errors
Status LED Flash Codes
Fan Replacement
Appendix
21
22
23
25
26
Specifications
Factory Defaults
Contact Information (USA)
GPL Source Code Information
27
28
30
31
32
37
42
44
45
47
48
53
55
57
57
59
60
61
62
63
Front PanelLayout
Layout
Status LED
Replaceable
Fan
USB
Power Mode
Switch
AUTO
ON
OFF
Ethernet
(to Router)
Function
Button
Power Plug
Power Switch
The “Power Mode” switch on the back of the unit
has three positions: “Auto”, “On”, and “Off”. The
“Auto” position automatically powers the unit on
or off with your PC. If your PC is turned on the
LinkStation will power up; if the PC is turned off
the LinkStation will power down.
You must have installed the NAS Navigator2
software on your PC for this feature to work.
Otherwise, if you move the switch to “auto”, your
unit will power down by itself and you will have to
manually turn it back on.
Power
Mode
AUTO
ON
OFF
Also note that the unit needs to be powered on to
use Web Access, BitTorrent, or Sleep Timer. If you
use any of these features regularly, it is best to
leave the Power Mode switch set to “On”.
Move the switch to the “Off” position to turn the
LinkStation off. It will take about 35 seconds to
shut down. Do not unplug or interrupt power to
the unit until shutdown is complete and the Status
LED is no longer lit.
Installing Software
Insert the Link Navigator CD into your computer’s CD/DVD drive. On
a PC, the setup wizard will launch automatically. Select your preferred
language to continue.
Alternately, you can launch the program manually. Open your
LinkNavigator CD and click on “Lang.exe”.
If you are installing the software on a Mac, open the CD and click on the
LinkNavigator icon to begin installation.
Step through the wizard to install your software.
Using your LinkStation with a PC
After installation, you’ll have a new shortcut to Buffalo NAS Navigator on your
desktop. Click it to open the NAS Navigator2 client utility.
Double-click on your NAS
device’s icon to open it. Or,
right-click on it for more
options.
From NAS Navigator2, you
can easily browse the shares
on your LinkStation, open its
Web Admin Tool, map a drive
letter to a share, or make a
desktop shortcut to the main
share on the LinkStation.
Using your LinkStation with a Mac
After installing the LinkNavigator software, your Mac will have
“NASNavigator” in the dock.
Clicking on NASNavigator opens NAS Navigator2, the LinkStation’s
client utility. Click on the “gear” symbol to drop down available
commands.
Open Web opens the Web Admin Tool. Configure opens the menu
on the next page. Color Label lets you color-code your NAS devices
in NAS Navigator2. Show View Options lets you choose the size and
order of icons in the NAS Navigator2 display.
your LinkStation
withmenu
a Mac
In NAS Navigator2,Using
choose Configure
from the drop-down
to get
to the Web page. Click Open Web Page to go the Web Config Tool, or
click IP Address to change the LinkStation’s IP Address settings.
The IP Address page lets you change the LinkStation’s IP address
settings.
Show View Options lets you choose the order of icons in the NAS
Navigator2 display. You may also adjust the size of the icons from
here.
You can manually add LinkStation shares
(folders) to your desktop by adding them to the
Mac’s server list. Begin by clicking Go, and
then choose Connect to Server.
In the Server Address field, enter your
LinkStation’s IP address in the form smb://
ipaddress (where “ipaddress” is your
LinkStation’s IP address), and click Connect.
If you don’t know your LinkStation’s IP
address, see page 12.
10
Select Guest and click on Connect. Note: If you have configured
share permissions on your LinkStation, select Registered User
and enter your login credentials.
Select the volume that you want to mount, such as share or
share-mac, from the list of folders on the LinkStation.
The share will open.
11
Finding your LinkStation’s IP Address
If you don’t know your LinkStation’s IP address,
there are several ways to get it.
One simple method is to use the NAS Navigator
client utility (included on your CD) to find your
LinkStation. Just click on the icon for your
LinkStation and you’ll be able to read its IP address.
You can always get the LinkStation’s IP address
from your router’s configuration utility. Many
Buffalo routers list this information on the Client
Monitor page, as shown to the right. Consult
your router’s documentation for instructions on
identifying the LinkStation’s IP address.
12
Web Admin
Tool
Advanced
Settings
To open the Web Admin Tool, right-click on your
LinkStation in NAS Navigator2 and choose Open
Web Admin.
Alternately, you could type the LinkStation’s IP
address in the URL bar of a browser running on a
computer connected to the same network as the
LinkStation. This also works with non-Windows
PCs.
This login prompt will appear. Enter admin for the user name. Until you change it, the password
for the admin account will be password. Press the Login button when finished.
User name: admin
Password: password
13
Welcome to the Web Admin Tool! On the left side, you can see your LinkStation’s system
information. Tabs and Submenus along the upper edge allow easy access to all of the settings
pages for your LinkStation.
Category Tabs
Submenus
Help and
Instructions
Individual
Settings
14
Adding Users
To add users, select the Users/Groups tab.
Local Users is the default submenu. Click on
Create User.
Enter your user information and click Save.
15
Adding Groups
To add a group, select the Local Groups
submenu under the Users/Groups tab. Click
on Create Group.
Enter information for your group and click on
Save.
16
Network Settings
Network Settings contains settings that
affect your Ethernet connection. In most
networks, LinkStation will get its IP Address
automatically from a DHCP server. You
may disable DHCP here and configure the IP
address settings manually if desired. If no
DHCP server is available and an IP Address is
not set manually, then the IP address will be
assigned to a random address on the 169.254.
xxx.xxx subnet with subnet mask 255.255.0.0.
Ethernet Frame Size and Services are also set
from this page. Only use JumboFrame settings
when operating in a Gigabit environment where
all other clients support the same JumboFrame
setting.
17
Advanced Settings
Workgroup/Domain Settings
To add the LinkStation to your workgroup or
domain, click Modify Settings.
Depending on your network type, you may
choose to authenticate in Workgroup or NT
Domain mode.
18
Screens are different depending on whether
you authenticate in Workgroup or NT Domain
mode. Whichever mode you choose, enter the
information needed to log in to the network and
click Save when finished.
19
System Settings
In System Settings, you can modify the
NetBIOS name of your LinkStation, date and
time settings, and language settings.
20
USB Hard Drives
Add a USB hard drive to the LinkStation
simply by plugging it in to USB port on the
LinkStation. It will then appear in the master
folder as a new share on the LinkStation. Not
all USB hard drives are supported. Some USB
hard drives may need to be reformatted with
the LinkStation’s format utility before working
properly.
Before disconnecting a USB device from the
LinkStation, it should be dismounted. Hold
the function button down until it glows blue,
and then turns off. It’s now safe to unplug
your USB device. You may also dismount your
USB device from within System/Storage/Disks
in the Web Admin Tool.
Note: Unplugging USB devices without
dismounting them first may corrupt your data!
21
Formatting Hard Drives
Formatting of hard drives is done in the
System/Storage area of the Web Admin Tool.
To format hard drives, select the hard drive(s)
that you want to format and click on Format
Disk.
22
Mapping Additional Shares
You can map additional drive letters to shares on your
LinkStation. From NAS Navigator2, right-click on
your LinkStation and select Browse Shares.
Your LinkStation will open. “Share” is a data folder in
your LinkStation by default. “Info” contains your user
manuals. If you have created other folders, then they
will be visible here too. You can map drive letters to
any of these folders.
23
From the Tools pull-down menu, select Map Network Drive. Choose a drive letter from the
Drive: pull down menu. To specify the folder to map, either find it with Browse or enter
\\LinkStation_Name\share_name in the Folder: field, where LinkStation_Name is your
LinkStation’s hostname and share_name is the name of a folder on your LinkStation. Check the
Reconnect at logon checkbox to have Windows connect to this mapped drive everytime it starts.
When finished, press the Finish button. Your share is now mapped to a drive letter.
24
Maintenance
The Maintenance submenu holds settings for
Email notification.
You can also restart the LinkStation from here.
25
Email Notification
If you have access to an SMTP mail server,
your LinkStation can send you reports and
alerts. To configure this, navigate to System/
Maintenance, open Email Notification, and click
on Modify Settings.
Enable notification and enter your SMTP server
address and port. If your SMTP server requires
authentication, choose the authentication
type from the drop-down menu and enter any
necessary login information. Change the title
and types of emails you’ll receive if desired.
Click Save when done.
26
Backup Jobs
To create a new backup job, click Create New
Job in System/Backup/Backup Jobs Setup.
Select the desired job schedule and properties
and click Apply when done.
27
Initialization
You can restore settings to their factory
defaults by clicking Restore LinkStation. You
can choose to either keep the current admin
password after initialization, or revert the
password to its default setting of “password”.
You can also restore factory settings with the
following procedure:
1. Move the power switch to the ‘Off’ position.
The LinkStation will shut down after about 45
seconds.
2. While holding down the function button,
move the power switch to the ‘On’ position.
The function button will begin to flash blue.
3. While the function button is still flashing,
press it again. Initialization may take several
minutes.
28
Initialization will affect different settings on the LinkStation depending on which method you use.
Initializing the LinkStation from within the Web Admin Tool restores the following settings to
their factory defaults: LinkStation name, description, NTP settings, Workgroup settings, shared
services, shared folder access, user list, group list, email notification, UPS settings, and backup
jobs. The Admin password may optionally be reset as well.
Initializing the LinkStation with the function button and power switch restores the following
settings to their factory defaults: DHCP, frame size, and Admin password.
29
UPS
An Uninteruptable Power Supply may be
attached to the LinkStation’s USB port. Once
attached, you may configure it from System/
Power Management/UPS Settings.
30
Sleep Timer
The LinkStation can be configured to go
into power-saving (“sleep”) mode at regular
intervals. In Power Management/SleepTimer,
click Modify Settings to configure a sleep
interval.
The LinkStation’s power switch must be set to
on for sleep mode to work. To manually wake a
LinkStation from sleep mode before its wakeup time, move the power switch to off, wait 30
seconds, then move the switch back to the on
position.
31
Print Server
• To share a USB printer with the LinkStation,
navigate to Extensions/PrintServer in the
Web Admin Tool and Enable print server
functionality. Connect the printer to a USB
port on the LinkStation and power it on.
• In NAS Navigator2, right-click on the
LinkStation and choose Browse Shares.
32
• Right-click on the lp icon and select Connect.
• You will receive a warning that the server
does not have the proper drivers. Click OK to
continue.
33
• The Add Printer Wizard will launch. Select the proper
driver for your printer. If the specific printer is not
in the list, then insert the CD that came with your
printer into your PC’s CD-ROM drive and click Have
Disk. Refer to your printer documentation for further
information on installing your printer if necessary.
Click OK to finish.
• If lp is the only printer installed on the PC, then it will
automatically be set as the default printer. If it’s not
the only printer, you may make it the default printer
by clicking Printers and Faxes in Control Panel, rightclicking on the lp icon and selecting the Set as Default
Printer option from the drop-down menu.
34
• To print a test page or configure additional printer
settings, right click on the lp printer icon and select
Properties. This will open the printer’s driver properties
page.
• Click Print Test Page to print a sample page. You can
also browse through the available settings for the printer.
Please refer to the printer’s documentation for more
information on changing the printer’s settings.
NOTES: The printer installation process can be done on any
machine on your network. Multiple machines may print
to the printer at the same time. Repeat this process on all
computers that require access to the printer.
Not all USB printers are supported. Multifunction printers
are specifically not supported.
35
If a corrupt print job is sent to a
printer, printing may suddenly fail.
If your print jobs seem to be locked
up, clearing the print queue may
resolve the issue.
To delete the print queue, click
Delete Print Queue. This will clear
all current print jobs. Users will
have to re-send any incomplete
print jobs to the printer.
If there are still problems sending
jobs to the printer, shut down the LinkStation and the printer. Turn the printer on, and then
turn the LinkStation back on again. Verify that the USB cable is securely fastened to both the
printer and the LinkStation. Finally, you may consult the printer manufacturer’s documentation
for more troubleshooting information.
36
Time Machine
To use the LinkStation as a location for backups
from a Mac running Time Machine, begin by
creating a folder for the backups.
In Shared Folder Setup, click on Create Folder.
Name the folder. Make sure that Apple is checked
for Shared Folder Attributes. Disable Recycle Bin
support. Click Save.
37
Navigate to Extensions/Time Machine and click Modify
Settings.
Enable Time Machine. For the Target Folder, choose the
folder you created for the backups. Click Save.
Enter the Mac’s “Computer Name” (from its Sharing page) as
the Target Host Name. For the Target MAC address, enter
the Mac’s Ethernet ID from Advanced Settings in its Network
Preferences page. See the next page for instructions on
finding the right values for these fields. Click Create when
done.
38
The name for the Target Host Name field can be found just
under the Computer Name on the Sharing page in System
Preferences. It is circled in red in the screenshot to the left.
Do not include the part after the first period. By default,
the Target Host name will be the same as the Computer
Name above it unless you have changed it. To work with
Time Machine, this name should contain only the following
characters: 0123456789abcdefghijklmnopqrstu vwxyz_ABCDEFGHIJKLMNOPQRSTUVWXYZ. Spaces and other
characters should not be used if Time Machine is to function
properly.
For the Target MAC address, enter the Mac’s Ethernet MAC
Address from System Profiler, located in Applications/Utilities.
Make sure that you are looking at the Ethernet MAC Address
and not the AirPort MAC Address, as they will be different.
39
It will take several minutes for the image file to be
created. The file TargetHostName_TargetMACAddress.
sparsebundle is being created in the backup folder.
To be safe, wait ten minutes before continuing.
After ten minutes have passed, open the Finder.
Click on All below Shared. Find your LinkStation’s
“TimeMachine” in the window and double-click on it.
Close the Finder.
40
Open Time Machine. Click on Choose Backup Disk.
Choose your LinkStation from the list and click Use
for Backup. In 120 seconds, Time Machine will begin
running a backup.
41
DLNA Media Server
A share on the LinkStation can be streamed
to DLNA compatible media players on your
network. To configure DLNA media streaming,
click on Modify Settings.
Highlight Enabled and choose the media folder
on your LinkStation to share. Click Save when
done.
42
Clicking Authorized DLNA Media Clients opens
this screen, where you can see all of the
available media players on your network. Click
Close when done.
43
iTunes Server
Your LinkStation includes iTunes server
capability. The iTunes server will be
available as long as a share is enabled in the
LinkStation’s DLNA media server settings.
Computers running iTunes on the network
with your LinkStation will detect the server,
which will appear on the left side of iTunes
under “Shared”. Click on it to see the music
stored on the LinkStation.
44
BitTorrent Client
LinkStation’s built-in BitTorrent client will
download files for you. To enable it, select
Enabled. Chose a target folder for downloaded
files to go to and click Save.
Then, click Open Download Manager.
45
To add a torrent, select either Add Torrent
From File or Add Torrent From URL, and then
Browse. Navigate to the torrent file and open
it. Click Add.
The file(s) will automatically download in the
background.
Note: For best results, move the power mode
switch on the back of the LinkStation to the
“On” position while the BitTorrent client is
running. Otherwise, the LinkStation may
shut down in the middle of a download.
46
Direct Copy
You can copy digital media files directly to the LinkStation from a
USB storage device, such as a digital camera, USB flash drive, or
external hard disk.
1. Connect your USB device to the USB port on the back of the
LinkStation. The function button on the front of the unit
will glow blue for 60 seconds.
2. While the function button is still glowing blue, press it once.
By default, a new folder yyyymmdd is created in the share folder,
where yyyy is the year, mm is the month, and dd is the day. All files
from the source USB device are copied to that folder. The function
button will flash during file transfer and turn off when it’s done.
Before disconnecting the USB device from the LinkStation, it should
be dismounted. Hold the function button down until it glows blue,
and then turns off. It’s now safe to unplug your USB device.
Note: Unplugging USB devices without dismounting them first may
corrupt your data!
47
Remote Access - WebAccess
With Buffalo’s WebAccess, you can access your
LinkStation from anywhere in the world with
an Internet connection. It’s easy to access your
files, or share them with other people, wherever
they may be.
To use Webaccess, Enable ‘Web Access
Service’.
You may also enable SSL Encryption if desired.
Using ‘BuffaloNAS.com’ is recommended.
Otherwise, you’ll have to manage your own
DNS settings.
‘Auto-Configure Firewall’ is recommended if your router supports UPnP (most do since 2001).
If you choose not to enable this, then you must manually configure your router and firewall to
forward internal port 9000 to the LinkStation.
Choose a name for your BuffaloNAS account and a password (“key”). This name is the name that
will be used to access your LinkStation and to share with your friends. The password for this
protects other people from using it, so picking a strong password is recommended. If you get a
message that your chosen account name is already in use, then choose a different account name.
Click Help in the top right of the window for detailed information on each setting.
48
To enable WebAccess for a share, click on the sharename
from Extensions/WebAccess.
Choose your desired level of Web Access from the ‘Web
Access Settings’ drop-down menu:
‘Disable’ will prevent remote access to this share through
WebAccess. This is the default setting.
‘Allow Anonymous’ will allow anyone to access the share.
Choose this if you want your LinkStation share and all
files on it to be freely available to everyone in the world.
‘Allow All Groups/Users’ will allow only people who
have an account on the LinkStation to access this share
remotely.
‘Use Inherited Folder Permissions’ gives each user the
same rights to folders remotely that they have locally.
Click the Save button to save your changes.
49
Using WebAccess
To access your LinkStation remotely, open a browser window
on any computer connected to the Internet and go to www.
buffalonas.com.
In the dialog box, type the BuffaloNAS name that you set on
page 48.
Alternately, you can go directly to your share by typing
BuffaloNAS.com/your_BuffaloNAS_name in the URL window.
The folders from your LinkStation’s share will appear. Files
from anonymous shares will appear to the right. To see files
from shares that are not set to anonymous, or to upload files,
you will need to log in. The ‘login’ link is on the top left corner
of the page.
50
To access individual folders on the right,
click on their open links.
Clicking on individual files will give you other
options, depending on the filetype.
51
Uploading Files with WebAccess
To upload files to the TeraStation, click Upload
in the bottom left corner of the window. Note:
This option will only appear if you are logged in
and at least one user (besides admin) has been
given access to the share.
A new window will open. Click on Browse and
navigate to the file that you want to upload.
Then, click Upload.
Your file will be copied to the TeraStation.
52
Remote Access - FTP
The LinkStation includes FTP server capability, allowing you
to access files on it from anywhere. If FTP is enabled for a
folder, then you can read, edit, and save to any files in that
folder from anywhere. To use FTP,
1: Set up your account. In Users/Groups, make a user
account for yourself. For convenience, give this account the
same username and password that you use to log in to your
computer. Then, you won’t have to retype it in each time
you access the LinkStation locally.
2: In Network Settings/Network Services, enable the FTP
service.
3: Enable remote access. In Shared Folders Setup, click
on the folder that you want to be able to access remotely. It
will be named “share” unless you have added new folders
to your LinkStation. Enable FTP in Shared Folder Support.
Enable Access Restrictions. Give yourself Read or Read
and Write permissions. Click ‘Apply’. Then, check ‘FTP’ in
Shared Folder Support. Click ‘Save’.
53
4: Forward your port. In your router’s setup utility, forward port 21 to the LAN-side IP address
of the LinkStation.
To access your LinkStation remotely, type ftp://username:password@ipaddress/share into a web
browser where
username - is your username
password - is your password
ipaddress - is the WAN side IP address of your router, and
share - is the name of the folder on your LinkStation that you’re accessing.
54
Troubleshooting Multiple Shares
When accessing multiple shares from a Windows
PC, you may see this error message.
This is caused by having multiple shares to the
same resource using different login credentials.
The error occurs when connecting to at least one
secure, restricted share. Due to a constraint in Microsoft Windows, only one set of login credentials
can access or map drive letters for a network resource such as the LinkStation. As such, only
one username and password can be used while mapping drives to a PC. If unsecure, unrestricted
shares are mapped and then an attempt to map a secure, restricted share is made from the same
PC, then this error will occur. To prevent this, you must create all mapped shares using the same
login and password information. Please follow the steps on the next page to remedy this problem.
55
Mapping Multiple Shares
When mapping any share, select the Connect using a different
user name option. A login and password prompt will appear.
Use the username and password required by any secure,
restricted shares for all shares. All mapped shares on a
single PC must use the same username and password!
If only unrestricted shares are being mapped, then it’s not necessary to set a username and
password for shares. Multiple mapped drives to unrestricted shares can exist without a username
or password as long as no restricted, secure shares are mapped. If an unrestricted share and a
restricted share are being mapped or accessed, use the restricted username and password for the
unrestricted share login by using the Connect using a different user name option. This will allow a
Windows PC to access both shares without any problems.
56
Troubleshooting
Disk Errors
If LinkStation encounters a disk error, it will be reported in the LinkStation status on the top of
any of the Web-Based configuration screens. Run a Disk Scan in the event of this error. If that
doesn’t work, try a reformat. Reformatting the drive will delete all of the data on it, so try to back
up any data you can before beginning. Finally, if none of the above help, then please contact
Technical Support for further assistance.
LED Error Codes:
During normal operation, the Status LED is lit blue. It flashes during boot and shutdown. It will
flash red in case of errors, alternating between flashing for 1 second (tens digit) and 1/2 second
(ones digit). Combine the number of longer flashes with the number of shorter flashes to produce
a two digit error code:
E00
E01
E02
E03
E04
E06
E07
E10
E11
E15
E16
E17
-
(no flashes) MPU failure.
DRAM data line problem.
DRAM address line problem.
RTC chip error.
failed to extract kernel.
corrupted firmware.
a hard disk was not found.
UPS error.
fan error.
hard drive I/O error.
no hard disks detected.
internal controller error.
E20
E21
E22
E23
57
-
circuit board error.
internal controller error.
mount error.
hard disk is malfunctioning.
LED Information Codes:
The status LED will flash amber to give information codes. Like the error codes, these alternate
between flashing for 1 second (tens digit) and 1/2 second (ones digit). Combine the number of
longer flashes with the number of shorter flashes to produce a two digit information code:
I19
I23
I25
I26
I27
I28
-
erasing disk.
initializing system.
updating firmware.
initializing web configuration.
checking USB disk.
formatting USB disk.
58
Fan Replacement
Replacement fans for the LinkStation are available from Buffalo Technology. The
part name is “OP-FAN/LS”. This is the only fan you should use in your LinkStation!
Before replacing the fan, power down the LinkStation.
Remove the screw from the top of the LinkStation. The fan will now slide straight out
to the side. For detail, refer to the Quick Setup Guide of OP-FAN/LS.
Unplug the connector by pulling it
straight up.
59
Specifications
Data Transfer Rates:
10/100/1000 Mbps
Hard Drive:
3.5” SATA
Main Connector Type:
RJ-45 (Ethernet)
USB Interface:
USB 2.0/1.1
Protocol Support:
TCP/IP
SMB/CIFS, HTTP, FTP, AppleTalk (File Sharing)
HTTP (Management)
NTP (Time Synchronization)
Power Supply:
100-240V 50/60Hz
Client OS Support:
Windows® Vista™/XP/2000, Windows XP MCE 2005/2004,
Windows Server 2003/2008, Mac OS® 10.3.9 or later
Power Consumption:
Avg. 17W, Max. 24W (with no USB devices connected)
Dimensions:
6.9” x 1.8” x 6.1” (175 x 45 x 156 mm)
Weight:
~2.5 pounds (1.1 kg)
Operating Environment:
41°- 95° F, 5°- 35° C; 20-80% non-condensing
Mac and Mac OS are trademarks of Apple Inc., registered in the U.S. and other countries. Windows is a registered trademark of Microsoft Corporation in the United States and other countries.
60
FactoryAmerica)
Defaults
GPL Information (North
Administrator Name: admin (cannot be changed)
Password: password
Default Shared Folder: share
Recycle Bin: enabled for share
DHCP Client: Automatic. If no DHCP Server is available, then the IP address is assigned randomly to the
169.254.xxx.xxx subnet with subnet mask 255.255.0.0.
Three default groups are always available on the LinkStation: hdusers, admin, and guest. These groups may
not be deleted or edited.
Microsoft Network Group: WORKGROUP
Ethernet frame size: 1518 bytes
AFP: enabled
FTP Server: disabled
NTP: enabled
Print Server: enabled
WebAccess: disabled
Time Machine: disabled
DLNA Media Server: disabled
BitTorrent: disabled
61
Contact Information
Europe
North America
Buffalo Technology UK Ltd.
2 Bracknell Beeches, Old Bracknell Lane
Bracknell, Berkshire, RG12 7BW
United Kingdom
Buffalo Technology USA Inc.
11100 Metric Blvd, Suite 750
Austin, TX 78758
GENERAL INQUIRIES GENERAL INQUIRIES Monday through Friday
8:30am-5:30pm CST
Direct: 512-794-8533
Toll-free: 800-456-9799
Fax: 512-794-8520
Email: [email protected]
Email: [email protected]
TECHNICAL SUPPORT Buffalo Technology provides technical
support in English, German, French,
Italian, and Spanish. For opening hours
and relevant telephone numbers, please
go to
TECHNICAL SUPPORT North American Technical Support by
phone is available 24 hours a day, 7
days a week. (USA and Canada).
Toll-free: (866) 752-6210
Email: [email protected]
www.buffalo-technology.com/contact
62
GPL Information
GPL Information (North
America)
Source code for Buffalo products that use GPL code is available at http://opensource.buffalo.jp.
63


