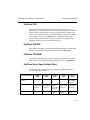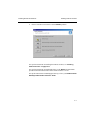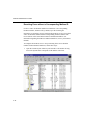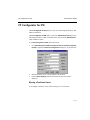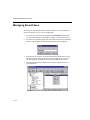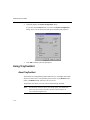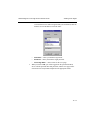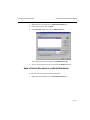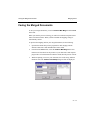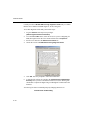
1
FaxPress
The Integrated Network Fax Server
Administrator & Users’ Guide
IMPORTANT NOTICE
©2003, Castelle. All Rights Reserved. Part No. 61-1226-001 rev B. This material is protected by
international copyright laws. Reproduction in any form is prohibited without permission.
FaxPress, the FaxPress logo, Faxmain, FaxTray, Castelle and the Castelle logo are registered
trademarks of Castelle. Novell, Netware,and NDS are registered trademarks of Novell, Inc.
Microsoft, Windows, Windows 95, Windows 98, Windows 2000, Windows NT, Microsoft Word,
Microsoft Outlook, are registered trademarks of Microsoft, Inc. All product names are registered
trademarks or trademarks of their respective owners.
Castelle makes no representations or warranties with respect to the contents or use of this manual,
and specifically disclaims any express or implied warranties on merchantability or fitness for any
particular purpose. Castelle reserves the right to change, without notice, product offerings or
specifications and the information in this document. No publication may be reproduced in any form
without written permission from Castelle. Use, duplication, or disclosure is subject to the restrictions
as set forth in the Rights in Technical Data and Computer Software clause at DFARS 252.227-7013
subparagraph (c)(1)(ii), or the Commercial Computer Software-Restricted Rights at CFR 52.227-19,
subparagraphs (c)(1) and (2), as applicable. If user is a unit or agency of the United States
Government, or if a license hereunder is acquired pursuant to a contract with any such unit or
agency, user agrees that the Software and Documentation are provided with Restricted Rights.
Castelle Corporate Headquarters
855 Jarvis Drive
Morgan Hill, CA 95037
www.castelle.com
Castelle North America
Toll Free: +1(800) 289-7555
Fax: +1(408) 852-8100
Email: [email protected]
Castelle International Sales
Phone: +1 (408) 852-8000
Technical Support
Technical support is available by mail, fax, e-mail, or phone from 6am to 5PM Pacific Standard
Time.
Phone: +1(408) 852-8080
Fax: +1(408) 852-8180
E-mail: [email protected]
ii
iii
iv
Contents
FaxPress Administrator’s Guide
Introducing the FaxPress _______________________ 1-1
About the FaxPress Network Fax Servers ____________________________________ 1-2
FaxPress Server Models and Specifications ___________________________________ 1-4
FaxPress SBE ________________________________________________________ 1-4
FaxPress 2500 ________________________________________________________ 1-4
FaxPress 5000 ________________________________________________________ 1-4
FaxPress 7000 ________________________________________________________ 1-5
FaxPress 7500 DID ____________________________________________________ 1-5
FaxPress 7500 E&M ___________________________________________________ 1-5
FaxPress Server Specifications Chart ______________________________________ 1-5
Package Contents ________________________________________________________ 1-8
About the Castelle FaxPress 7.0 CD-ROM ___________________________________ 1-9
Documentation _________________________________________________________ 1-10
Printed Documentation ________________________________________________ 1-10
Electronic Documentation ______________________________________________ 1-10
Castelle Resources_______________________________________________________ 1-11
Technical Support ____________________________________________________ 1-11
Web Site____________________________________________________________ 1-12
Installing the Server____________________________ 2-1
Overview _______________________________________________________________ 2-2
Installing FaxPress Server Hardware________________________________________ 2-3
Attaching the FaxPress Server to your Network ______________________________ 2-3
LED Indicators________________________________________________________ 2-4
Installing the FaxPress Server Software______________________________________ 2-5
FaxPress 7.0 Product Activation Key ______________________________________ 2-5
Operating System Requirements __________________________________________ 2-6
Installing on Windows 98/ME/2000/XP and NT _____________________________ 2-7
Installing on NetWare NDS (IPX/SPX) Server______________________________ 2-20
Installing on NetWare 5 or 6 (Pure IP) NDS Server __________________________ 2-31
Installing on NetWare Bindery Server ____________________________________ 2-43
Installing on the Castelle Storage Server___________________________________ 2-54
v
Installing the Client____________________________ 3-1
Overview _______________________________________________________________ 3-2
Installing the Administrator Client __________________________________________ 3-3
Creating a Remote Installation ____________________________________________ 3-10
Installing the FaxPress Users’ Client _______________________________________ 3-13
Installing the FaxPress Client on Microsoft Windows Terminal Server ___________ 3-20
About Windows Terminal Server, Citrix MetaFrame, and the FaxPress Client _____ 3-20
Running the FaxPress Client Setup for Microsoft Windows Terminal Server ______ 3-24
Installing Software from the Network _____________________________________ 3-48
Uninstalling the FaxPress Client ___________________________________________ 3-49
Installing Add On Products _____________________ 4-1
Add-On Products Overview ________________________________________________
Email Integration ______________________________________________________
Third Party Integration__________________________________________________
Fax Archive __________________________________________________________
Installing the Add On Products _____________________________________________
4-2
4-2
4-2
4-3
4-4
Configuring FaxPress _________________________ 5-1
Overview _______________________________________________________________ 5-2
Logging into FaxPress_____________________________________________________ 5-3
Starting the FaxPress Client ______________________________________________ 5-3
Locate Your FaxPress Server_____________________________________________ 5-5
Login to a FaxPress Server ______________________________________________ 5-8
Configuring Server Settings _______________________________________________ 5-11
Configuring Line Settings_________________________________________________ 5-13
Configuring Storage Reclamation _________________________________________ 5-16
Configuring Internet Faxing ______________________________________________ 5-19
Creating an Internet Routing Table _______________________________________ 5-21
Configuring Dialing Properties ____________________________________________ 5-25
Configuring Advanced Functions __________________________________________ 5-30
Advanced Functions___________________________________________________ 5-30
Supported Functions __________________________________________________ 5-32
Configuring User Authentication (SSO) _____________________________________ 5-34
Accessing Novell Users with Single Sign On (SSO)__________________________ 5-34
FaxPress Authentication Methods ________________________________________ 5-34
Automatic creation of Mailboxes_________________________________________ 5-36
vi
Selecting User Authorization____________________________________________
Enable Single Sign On_________________________________________________
Viewing Server Information ______________________________________________
Load Sharing ___________________________________________________________
Load Sharing Requirements ____________________________________________
Automatic Routing: PBX and FaxPress Integration ___________________________
5-38
5-40
5-45
5-47
5-47
5-49
Administrator Utilities _________________________ 6-1
Overview _______________________________________________________________ 6-2
Administrator Utilities ____________________________________________________ 6-3
Accessing the Administration Tools _______________________________________ 6-4
FP Configurator for TCPIP________________________________________________ 6-5
FP Configurator for IPX _________________________________________________ 6-11
Importing Microsoft Exchange Users _______________________________________ 6-19
Documents _____________________________________________________________ 6-21
Inbound Faxes: Using the FaxPress DropFax Utility __________________________ 6-22
Using the FaxPress User Duplication Utility _________________________________ 6-24
Importing Network Users ________________________________________________ 6-28
Line Scheduler__________________________________________________________ 6-37
Stopping the Line Scheduler ____________________________________________ 6-39
Managing Users _______________________________ 7-1
Overview _______________________________________________________________ 7-2
Creating Faxmain Users ________________________________________________ 7-2
Authenticating Users ___________________________________________________ 7-2
Configuring the User ___________________________________________________ 7-3
Creating User Accounts ___________________________________________________ 7-4
Using Microsoft Active Directory Services____________________________________ 7-5
Installing ADSI _______________________________________________________ 7-5
Importing NT Users____________________________________________________ 7-6
Using Single Sign On (SSO) _______________________________________________ 7-15
Assign Users to Groups ________________________________________________ 7-16
Create a User Properties Template _______________________________________ 7-16
Login ______________________________________________________________ 7-16
Remove Network Association option _____________________________________ 7-18
Configuring User Properties ______________________________________________ 7-19
Overview ___________________________________________________________ 7-19
Configuring Basic User Properties _______________________________________ 7-19
vii
Configuring Delivery Options for Outgoing Faxes ___________________________
Configuring Fax Receipt Parameters ______________________________________
Configuring a User Printer ______________________________________________
Archive Settings ______________________________________________________
Network Details ______________________________________________________
7-22
7-24
7-25
7-30
7-32
Administering FaxPress________________________ 8-1
Overview _______________________________________________________________ 8-2
Administration Folders____________________________________________________ 8-3
Managing Transaction Logs________________________________________________ 8-6
Defining Bill Back Codes _________________________________________________ 8-10
Product Activation Key __________________________________________________ 8-12
Configuring Fax Approval ________________________________________________ 8-14
Define Approval Requirements __________________________________________ 8-14
Select Approvers _____________________________________________________ 8-16
Approve Faxes _______________________________________________________ 8-17
Configuring Fax Lines ___________________________________________________ 8-19
Creating Corporate Phone Books __________________________________________ 8-21
Create FaxPress Phone Books ___________________________________________ 8-22
ODBC Database Phone Book ___________________________________________ 8-25
Creating Corporate Cover Pages___________________________________________ 8-35
Developing Custom Software ___________________ 9-1
Overview _______________________________________________________________ 9-2
FaxPress Drop Directory __________________________________________________ 9-3
The Drop Directory Configuration File - jobqueue.cfg _________________________ 9-3
Drop Directory Users ___________________________________________________ 9-6
FaxPress Software Developers’ Kit (SDK) ___________________________________ 9-12
Archiving Faxes _____________________________ 10-1
Overview ______________________________________________________________ 10-3
Preparing for Installation_________________________________________________ 10-6
Environment Requirements _____________________________________________ 10-6
Databases ___________________________________________________________ 10-7
Creating a User Account for the FaxPress Archive ___________________________ 10-8
Installing FaxPress Archive ______________________________________________ 10-11
Configuring the FaxPress Archive_________________________________________ 10-17
viii
Select Mode ________________________________________________________
Select Database _____________________________________________________
Continue Configuring FaxPress Archive__________________________________
Starting Archive Services ________________________________________________
Updating FaxPress Archive ______________________________________________
Changing the Archive Database ________________________________________
Updating the Configuration ____________________________________________
Managing Archived Faxes _______________________________________________
Locating your Archived Faxes__________________________________________
Archived Faxes _____________________________________________________
Filtering Archived Faxes ______________________________________________
Managing Saved Faxes __________________________________________________
Using FaxPress Archive _________________________________________________
Creating Archived Transaction Log Filters ________________________________
Troubleshooting the Archive Service ______________________________________
Information Storage ____________________________________________________
10-17
10-18
10-20
10-29
10-30
10-30
10-30
10-31
10-31
10-32
10-35
10-40
10-42
10-42
10-47
10-49
FaxPress User’s Guide
FaxPress Basics _____________________________ 11-1
Faxmain _______________________________________________________________ 11-2
FaxPress Neighborhood __________________________________________________ 11-3
FaxPress Server ______________________________________________________ 11-3
Mailbox ____________________________________________________________ 11-3
Corporate Phone Books ________________________________________________ 11-7
Personal Folders ________________________________________________________ 11-8
Local Phone Books ___________________________________________________ 11-8
Saved Faxes _________________________________________________________ 11-9
Favorite Documents___________________________________________________ 11-9
Favorite Messages ___________________________________________________ 11-10
Cover Page Templates ________________________________________________ 11-10
FaxPress User Privilege Levels ___________________________________________ 11-10
Sending Faxes _______________________________ 12-1
Sending Faxes from Applications __________________________________________ 12-2
Accumulate Fax: Sending Multiple Documents in One Fax Job _______________ 12-3
Using FaxPress Icon in Word ___________________________________________ 12-5
ix
Sending Faxes from Faxmain______________________________________________ 12-8
Addressing the Fax___________________________________________________ 12-10
Attaching Files ______________________________________________________ 12-12
Specifying Delivery Options ___________________________________________ 12-15
Sending the Fax _____________________________________________________ 12-16
Choosing Recipients from Your Phone Books _____________________________ 12-16
Adding New Recipient _______________________________________________ 12-19
Sending Faxes Using the Broadcast Switch _________________________________ 12-21
Sending Faxes with FaxTray _____________________________________________ 12-22
Sending Faxes from Explorer_____________________________________________ 12-23
Managing Sent Faxes ___________________________________________________ 12-24
Viewing Faxes ______________________________________________________ 12-24
Saving Faxes _______________________________________________________ 12-25
Printing Faxes ______________________________________________________ 12-26
Resending Faxes ____________________________________________________ 12-26
Deleting Faxes ______________________________________________________ 12-27
Holding Outgoing Faxes ______________________________________________ 12-28
Releasing a Hold on Outgoing Faxes_____________________________________ 12-29
Changing Fax Transmission Order ______________________________________ 12-29
Forwarding Faxes via Email ___________________________________________ 12-30
Approving Fax Transmission___________________________________________ 12-32
Viewing Fax Properties _______________________________________________ 12-34
Refreshing the Queue_________________________________________________ 12-35
Receiving Faxes _____________________________ 13-1
Overview ______________________________________________________________ 13-2
Viewing Faxes __________________________________________________________ 13-6
Saving a Fax ____________________________________________________________ 13-8
Printing Faxes __________________________________________________________ 13-9
Deleting a Fax __________________________________________________________ 13-9
Forwarding Faxes _______________________________________________________ 13-9
Forwarding Faxes Automatically________________________________________ 13-10
Forwarding Faxes Manually ___________________________________________ 13-13
Sending a Fax__________________________________________________________ 13-15
Routing a Fax__________________________________________________________ 13-16
Forwarding a Fax via Email______________________________________________ 13-17
Viewing Fax Properties__________________________________________________ 13-18
Refreshing the Queue ___________________________________________________ 13-18
x
Setting Personal Preferences ___________________ 14-1
Overview ______________________________________________________________ 14-2
Setting Personal File Storage Location ______________________________________ 14-3
Setting General Options __________________________________________________ 14-5
Selecting Viewer Application ______________________________________________ 14-7
Setting Default Phone Books ______________________________________________ 14-8
Setting Startup Options _________________________________________________ 14-10
Setting Tracing Criteria _________________________________________________ 14-11
Printing Faxes _______________________________ 15-1
Overview ______________________________________________________________ 15-2
Printing a Fax __________________________________________________________ 15-3
Printing a List __________________________________________________________ 15-6
Managing Stored Faxes________________________ 16-1
Managing Archived Faxes ________________________________________________ 16-2
Locating your Archived Faxes___________________________________________ 16-2
Archived Faxes ______________________________________________________ 16-3
Filtering Archived Faxes _______________________________________________ 16-5
Managing Saved Faxes __________________________________________________ 16-10
Notices and Alerts ____________________________ 17-1
Using Notices ___________________________________________________________ 17-2
Overview ___________________________________________________________ 17-2
View a Notice _______________________________________________________ 17-3
Delete a Notice ______________________________________________________ 17-5
Print a Notice ________________________________________________________ 17-5
Using TrayFaxAlert _____________________________________________________ 17-6
About TrayFaxAlert___________________________________________________ 17-6
Setting Up TrayFaxAlert _______________________________________________ 17-7
Modify a Monitored Mailbox Account ____________________________________ 17-9
Using TrayFaxAlert __________________________________________________ 17-10
Creating Cover Pages _________________________ 18-1
Overview ______________________________________________________________ 18-2
Creating a Master Cover Page ____________________________________________ 18-3
xi
Overview ___________________________________________________________ 18-3
Create a Cover Page Master_____________________________________________ 18-3
Importing Graphics ___________________________________________________ 18-6
Add Substitution Variables _____________________________________________ 18-7
Save Cover Page Master ______________________________________________ 18-11
Use European Characters ______________________________________________ 18-11
Downloading the Cover Page to the FaxPress Server _________________________ 18-12
Publishing Cover Pages _________________________________________________ 18-14
Creating Phone Books ________________________ 19-1
Overview ______________________________________________________________ 19-2
What are Phone Books _________________________________________________ 19-2
Formatting Phone Numbers _____________________________________________ 19-5
Creating Local Phone Books ______________________________________________ 19-6
Create Local FaxPress Phone Books ______________________________________ 19-6
ODBC Database Phone Book __________________________________________ 19-11
Creating Personal Phone Book ___________________________________________ 19-20
Create a Group ______________________________________________________ 19-21
Import a Phone Book File _____________________________________________ 19-22
Editing a FaxPress Phonebook____________________________________________ 19-24
Favorite Documents and Messages _____________ 20-1
Using Favorite Documents ________________________________________________ 20-2
Add a Favorite Document ______________________________________________ 20-2
Import a Document in Fax Format________________________________________ 20-5
Attach a Favorite Document ____________________________________________ 20-6
Send a Favorite Document as an Email Attachment __________________________ 20-7
View a Favorite Document _____________________________________________ 20-8
Delete a Favorite Document ____________________________________________ 20-9
Using Favorite Messages__________________________________________________ 20-9
Add Favorite Message ________________________________________________ 20-10
Include a Favorite Message on a Cover Sheet ______________________________ 20-11
Rename a Favorite Message ___________________________________________ 20-11
Delete a Favorite Message _____________________________________________ 20-11
View a Favorite Message ______________________________________________ 20-12
xii
Merging Faxes _______________________________ 21-1
Overview ______________________________________________________________ 21-2
Preparing for Installation ________________________________________________ 21-3
ODBC Drivers _______________________________________________________ 21-3
Installing FaxMerge _____________________________________________________ 21-4
Uninstall Mail Merge__________________________________________________ 21-5
Creating a Main Document _______________________________________________ 21-5
Attaching a Data Source__________________________________________________ 21-8
Attach a Data Source to the Template _____________________________________ 21-8
Inserting Merge Fields __________________________________________________ 21-11
Faxing the Merged Documents ___________________________________________ 21-13
Connecting to GoldMine _______________________ 22-1
FaxPress and GoldMine Integration________________________________________ 22-2
Preparing for Installation ________________________________________________ 22-3
ODBC Drivers _______________________________________________________ 22-3
Before Installing _____________________________________________________ 22-3
Installing the Goldmine to MS-Word Link __________________________________ 22-3
Uninstalling _________________________________________________________ 22-4
Installing the Goldmine to FaxPress Link ___________________________________ 22-4
Uninstalling _________________________________________________________ 22-5
Faxing with the GoldMine/FaxPress Connection _____________________________ 22-5
Faxing with the FaxPress Link __________________________________________ 22-5
Faxing Merged Forms _________________________________________________ 22-7
Merging from MS Word _______________________________________________ 22-9
Creating Templates______________________________________________________ 22-9
Updating GoldMine Templates ___________________________________________ 22-12
Updating Templates from within MS Word _______________________________ 22-12
Updating Templates from within GoldMine _______________________________ 22-12
Configuring FaxPress Login _____________________________________________ 22-13
Automated Faxing______________________________________________________ 22-14
Appendices
A Appendix ________________________________ A-1
32 Bit ODBC Data Sources _____________________________________________ A-1
B Appendix _________________________________ B-1
Troubleshooting _____________________________________________________ B-1
C Appendix _________________________________ D-1
Server Directory Tree ________________________________________________ D-1
D Appendix _________________________________ E-1
Agency Compliance __________________________________________________ E-1
E
Appendix _________________________________ F-1
The FaxPress 7500-DID and E&M_______________________________________ F-1
Index _________________________________________
xiv
Part 1
FaxPress
Administrator’s
Guide
FaxPress Administrator’s Guide
Introducing the FaxPress
1
What’s In This Chapter
About the FaxPress Network Fax Servers .................................................... 1-2
FaxPress Server Models and Specifications.................................................. 1-4
FaxPress SBE............................................................................................. 1-4
FaxPress 2500 ............................................................................................ 1-4
FaxPress 5000 ............................................................................................ 1-4
FaxPress 7000 ............................................................................................ 1-5
FaxPress 7500 DID .................................................................................... 1-5
FaxPress 7500 E&M .................................................................................. 1-5
Package Contents ............................................................................................ 1-8
About the Castelle FaxPress 7.0 CD-ROM ................................................... 1-9
Documentation............................................................................................... 1-10
Printed Documentation ............................................................................ 1-10
Electronic Documentation........................................................................ 1-10
Castelle Resources ......................................................................................... 1-11
Technical Support .................................................................................... 1-11
Web Site................................................................................................... 1-12
FaxPress User’s Guide
About the FaxPress Network Fax Servers
Castelle's FaxPress network fax servers offer a variety of easy-to-use, economical
approaches to network faxing in one reliable server appliance. A complete
hardware and software solution, FaxPress requires only 40 MB of disk space for
file storage on an existing server or workstation.
Specifically designed to help reduce communication costs and facilitate efficient,
error-free information exchange with your customers, suppliers and staff, the
FaxPress takes care of your fax jobs faster, more accurately and less expensively
than any standalone fax machine, allowing both local and offsite users to send,
receive, and manage faxes directly from their workstations.
The time, labor, and money saving features FaxPress offers include:
•
faxing straight from desktop applications
•
fax management and transmission tracking (i.e. fax history, sender, time
sent, destination address, bill-back codes, etc)
•
notification features, allowing users to monitor document delivery status
•
outstanding fax quality and document legibility
•
attachment and formatting options
•
flexible inbound fax routing to groups' or individuals' fax or email boxes
•
document delivery to both fax and email recipients simultaneously
•
immediate or scheduled broadcast/batch faxing; scheduling faxes for offpeak hours dramatically reduces document delivery costs
•
increased confidentiality and security; incoming faxes can be routed
directly to the recipient's desktop
•
fax archiving, eliminating the need to keep copies of faxed documents
•
least-cost fax routing to minimize telephone charges
•
load sharing, for efficient high volume fax transmission.
Designed to be a dedicated network fax server, the FaxPress server uses a
multitasking microprocessor to manage the internal and external resources it uses
for faxing operations. The microprocessor manages the FaxPress' outgoing fax
1—2
About the FaxPress Network Fax Servers
Introducing the FaxPress
and print queues stored on the network file server, monitors and manages the
modems, rasterizes outgoing faxes, and sends incoming faxes to the database.
FaxPress comes with a fully functional Windows-based administration utility –
FaxMain. FaxMain can be used both to manage FaxPress users and administer
FaxPress units, as well as send and receive faxes. The most frequent
administrative functions FaxMain performs include, but are not limited to:
•
Adding and deleting users
•
Setting user properties
•
Configuring FaxPress server properties
•
Managing outgoing and incoming job queues
•
Managing phone books & cover pages
•
Sending & Receiving Faxes
FaxPress comes with a complete set of Windows-based client software utilities
and drivers to allow users to easily send and receive faxes from their workstations.
Depending on users’ preferences, there are five different ways to send and receive
faxes using FaxPress:
•
Sending and receiving faxes using the FaxMain software utility
•
Sending faxes from within any third party Windows application
•
Sending and receiving faxes via your email system, e.g., Outlook, Lotus
Notes, GroupWise.
•
Sending and receiving faxes using your customized application software
based on FaxPress APIs
•
Sending and receiving faxes using FaxPress Drop Directories
•
Sending and receiving faxes from both personal and corporate phone
books
Congratulations on the purchase of your FaxPress network fax server, and thanks
for choosing Castelle.
1—3
FaxPress User’s Guide
FaxPress Server Models and Specifications
The FaxPress product line ranges from a single line FaxPress SBE for the small
office to the 8-line FaxPress 7500 for high volume fax traffic. All FaxPress server
models are designed for NT and NetWare network environments. The units can be
configured to support TCP/IP protocol for NT environments and IPX/SPX
protocol for NetWare environments. A multi-protocol key is available that allows
the unit to support login from both protocols for client workstations. Call your
Castelle representative for more information regarding the multi-protocol feature.
This section provides additional information about each FaxPress server model. A
features chart is provided at the end of the chapter.
FaxPress SBE
The FaxPress SBE server is designed for small to medium size networks with
medium fax traffic. The unit has a single Motorola Cold Fire CPU5102, 8MB of
RAM, 0.5 MB flash ROM, and two 14,400 kbps fax modems.
FaxPress 2500
The FaxPress 2500 is designed for small to medium size networks with medium
fax traffic. The unit has a single Motorola Cold Fire CPU5102 microprocessor,
8MB of RAM, 0.5 MB flash ROM, and one or two 14,400 kbps fax modem.
FaxPress 5000
There are two types of FaxPress 5000 servers: a 4 line and an 8 line. The FaxPress
5000 is designed for medium-to-heavy fax traffic. The FaxPress 5000 features a
Motorola ColdFire CPU 5102 for network interface and file format conversion
and one Motorola ColdFire CPU 5102 for every four fax modems. The network
interface is Ethernet 10/100 BASE-T. The memory consists of 32 MB
DRAM and 0.5 MB FLASH ROM for the firmware. Each fax board consists of
four fax modems and is equipped with additional 1MB of memory to handle large
fax loads.
1—4
FaxPress Server Models and Specifications
Introducing the FaxPress
FaxPress 7000
The FaxPress 7000 is designed for medium-to-heavy fax traffic. It is a rackmountable device. The FaxPress 7000 features a Motorola ColdFire CPU 5102 for
network interface and file format conversion and one Motorola ColdFire CPU
5102 for every four fax modems. The network interface is Ethernet 10/100 BaseT. The memory consists of 32 MBDRAM and 0.5 MB Flash ROM for the
firmware. Each fax board consists of four fax modems and is equipped with
additional 1 MB of memory to handle large fax loads.
FaxPress 7500 DID
The FaxPress 7500 DID is the FaxPress 7000 plus an additional 4-line DID trunk
interface. For in depth information regarding the 7500 see Appendix E.
FaxPress 7500 E&M
The FaxPress 7500 E&M is the FaxPress 7000 plus an additional 4-line E&M
trunk interface. For in depth information regarding the 7500 see Appendix E.
FaxPress Server Specifications Chart
The following chart provides important information regarding the FaxPress
servers and their specifications.
FUNCTION/FEATURE
FAXPRESS
SBE
FAXPRESS
2500
FAXPRESS
5000
FAXPRESS
7000
FAXPRESS
7500
Number of Fax
Modems
1 lines
2 lines
4 or 8 lines
8 lines
8 lines plus 4
DID or E&M
interfaces
Processor
1 Motorola
5201 ColdFire
processor
1 Motorola
5201 ColdFire
processor
2 or 3
Motorola
5201 ColdFire
processors
3 Motorola
5201 ColdFire
processors
3 Motorola
5201 ColdFire
processors
Processor Speed
33 MHz
33 MHz
33 MHz and
16 MHz
33 MHz and
16 MHz
33 MHz and
16 MHz
1—5
FaxPress User’s Guide
FAXPRESS
SBE
FUNCTION/FEATURE
Recommended
Number of Users
5 - 50
FAXPRESS
5000
FAXPRESS
2500
5 - 100
5 - 500
FAXPRESS
7000
5 - 500
FAXPRESS
7500
5 - 500
Memory Configuration
8MB
8MB
32 MB
32MB
32 MB
Network Topology
Ethernet
Ethernet
Ethernet
Ethernet
Ethernet
Network Speed
10/100BaseT
auto-selection
10/100BaseT
auto-selection
10/100BaseT
auto-selection
10/100BaseT
auto-selection
10/100BaseT
auto-selection
Email Integration
Not Included
Standard
Standard
Standard
Standard
Automatic Routing
Support
Yes
Yes
Yes
Yes
Yes
NetWare 3/4/5/6
Yes
Yes
Yes
Yes
Yes
Microsoft Windows
NT/2000/XP/ME
Yes
Yes
Yes
Yes
Yes
Linux (Samba
enabled)
Yes
Yes
Yes
Yes
Yes
NT Terminal Server
Support
Yes
Yes
Yes
Yes
Yes
Ethernet
Protocol
Supported
IEEE
802.2/802.3
802.2 SNAP
Ethernet II
type 8137
IEEE
802.2/802.3
802.2 SNAP
Ethernet II
type 8137
IEEE
802.2/802.3
802.2 SNAP
Ethernet II
type 8137
IEEE
802.2/802.3
802.2 SNAP
Ethernet II
type 8137
IEEE
802.2/802.3
802.2 SNAP
Ethernet II
type 8137
Fax Lines
1
2
4 or 8
8
8
Dialing Method
Tone or pulse
Tone or pulse
Tone or pulse
Tone or pulse
Tone or pulse
Modem Chip
Rockwell
R144EFXL
Rockwell
R144EFXL
Rockwell
R144EFXL
Rockwell
R144EFXL
Rockwell
R144EFXL
Modem
Transfer rate
14,400 bps
14,400 bps
14,400 bps
14,400 bps
14,400 bps
Dedicated Modem
Memory
N/A
N/A
1 MB per 4
modem lines
1 MB per 4
modem lines
1 MB per 4
modem lines
Fax
Compatibility
ITU-T Group
III, T.4, T.30
ITU-T Group
III, T.4, T.30
ITU-T Group
III, T.4, T.30
ITU-T Group
III, T.4, T.30
ITU-T Group
III, T.4, T.30
Parallel ports
1
1
1
1
1
Power Supply
External
9 VDC
External
9 VDC
Internal
90 ~ 250VAC
autoswitching
Internal
90 ~ 250VAC
autoswitching
Internal
90 ~ 250VAC
autoswitching
Frequency
50 or 60 Hz
50 or 60 Hz
50 or 60 Hz
50 or 60 Hz
50 or 60 Hz
1—6
FaxPress Server Models and Specifications
FUNCTION/FEATURE
FAXPRESS
SBE
FAXPRESS
2500
Introducing the FaxPress
FAXPRESS
5000
FAXPRESS
7000
FAXPRESS
7500
Maximum power
9 Watts
9 Watts
40 Watts
40 Watts
40 Watts
Height
1.5”
2.2”
3.12”
3.5”
3.5”
Width
8.95”
8.95”
12”
16.7”
16.7”
Depth
6.1”
6.4”
12”
13.9”
13.9”
Weight
1.15 lbs
1.26 lbs
10 lbs
6.80 lbs
10.28 lbs
1—7
FaxPress User’s Guide
Package Contents
The FaxPress shipment contains:
•
An SBE, 2500, 5000, 7000 or 7500 FaxPress fax server
•
A Castelle FaxPress 7.0 CD-ROM
•
A power cable
•
A printed FaxPress Administrator and Users’ Guide and a FaxPress Email
Gateways Administrator and Users’ Guide.
Note:
1—8
The FaxPress SBE comes with the FaxPress Administrator and
Users’ Guide only. The SBE does not support email integration.
About the Castelle FaxPress 7.0 CD-ROM
Introducing the FaxPress
About the Castelle FaxPress 7.0 CD-ROM
The Castelle FaxPress 7.0 CD-ROM provides:
•
FaxPress 7.0 server software (see Chapter 2, "Installing the Server")
•
FaxPress 7.0 administrator client software (see Chapter 3, "Installing
the Client")
•
FaxPress 7.0 users’client software (see Chapter 3, "Installing the
Client")
•
Administration Tools (see Chapter 6, "Administrator Utilities")
•
Documentation (see "Documents" on page 6-21)
•
Add-on products (see Chapter 4, "Installing Add On Products".)
1—9
FaxPress User’s Guide
Documentation
Printed Documentation
New unit purchases of a 2500, 5000, 7000 or 7500 FaxPress fax server come with
two printed manuals:
•
A FaxPress Administrator and Users' Guide
•
A FaxPress Email Gateways Administrator and Users' Guide
The above FaxPress units support a variety of email integration options available
with the FaxPress 7.0 software, including the Outlook Direct, Exchange
Connector, Lotus Notes, and SMTP Gateways.
New unit purchases of a FaxPress Small Business Edition (SBE) appliance come
with one printed manual:
•
A FaxPress Administrator and Users' Guide.
FaxPress SBE units will not support the FaxPress 7.0 software's email integration
options, so the printed Email Gateways Administrator and Users' Guide is not
shipped with the FaxPress SBE. The FaxPress SBE will, however, continue to
work with the 6.3 versions of the FaxPress Email Gateways even after upgrading
to the FaxPress 7.0 software.
Electronic Documentation
Castelle also provides access to electronic versions of the printed FaxPress
documentation, as well as additional FaxPress-related documentation:
1—10
•
in the Documents folder on the Castelle FaxPress 7.0 CD
•
in the Administration Tools folder (see "Documents" on page 6-21)
•
on the Web. If your workstation has an Internet connection and the FaxPress client installed, you can access this documentation right from your
desktop by going to Start>Programs>FaxPress>Documents on Web,
or to http://www.castelle.com/support/documentation.
Castelle Resources
Introducing the FaxPress
Castelle Resources
Castelle Corporate Headquarters
855 Jarvis Drive
Morgan Hill, CA 95037
www.castelle.com
Castelle North America
Toll Free: +1(800) 289-7555
Fax: +1(408) 852-8100
Email: [email protected]
Castelle International Sales
Phone: +1 (408) 852-8000
Technical Support
To qualify for technical support, your Castelle product must be registered with
Castelle. Visit Castelle's Customer Services web page at:
http://www.castelle.com/support
for more information about product registration.
Technical support is available by mail, fax, e-mail, or phone from 6am to 5PM
Pacific Standard Time.
Phone: +1(408) 852-8080
Fax: +1(408) 852-8180
E-mail: [email protected]
For efficient resolution, please be ready to provide the following information to
the Castelle technical support representative who answers your call:
•
Company name, phone number, pager/cell phone number, email address &
fax number
•
The type and model number of your unit
•
The unit's 8-digit serial number, printed on a label on the bottom of the unit.
•
The version number of the FaxPress software you are using.
•
The version number of the unit's firmware.
1—11
FaxPress User’s Guide
•
The version number of the network software you are using (e.g., NetWare
3.12).
•
The network topology (e.g., Ethernet).
•
The name and version numbers of the email system and clients you are using.
•
A description of the problem or its symptoms.
Web Site
The Castelle web site, http://www.castelle.com, provides a point of departure for
a variety of information.
Information regarding the following topics is available at
http://www.castelle.com/products/faxpress
1—12
•
FaxPress Server Hardware and Software
•
Sending, Receiving and Managing Faxes
•
Castelle Internet Faxing (CIF)
•
Email Integration
•
Network Integration
•
Automatic Routing and PBX Integration
•
FaxPress White Papers
•
FaxPress Brochure
Installing the Server
2
What’s In This Chapter
Overview .......................................................................................................... 2-2
Installing FaxPress Server Hardware ........................................................... 2-3
Attaching the FaxPress Server to your Network........................................ 2-3
LED Indicators ........................................................................................... 2-4
Installing the FaxPress Server Software ....................................................... 2-5
FaxPress 7.0 Product Activation Key ........................................................ 2-5
Installing on Windows 98/ME/2000/XP and NT....................................... 2-7
Installing on NetWare NDS (IPX/SPX) Server ....................................... 2-20
Installing on NetWare 5 or 6 (Pure IP) NDS Server................................ 2-31
Installing on NetWare Bindery Server..................................................... 2-43
Installing on the Castelle Storage Server ................................................. 2-54
FaxPress Administrator’s Guide
Overview
This chapter describes:
2—2
•
How to connect the FaxPress hardware to the network.
•
How to install the FaxPress server software from the CD-ROM.
•
How to enable the FaxPress 7.0 Product Activation Key.
Installing FaxPress Server Hardware
Installing the Server
Installing FaxPress Server Hardware
Each FaxPress server contains all of the hardware required to concentrate network
faxing into a single location:
•
10/100BASE-T network interface connections
•
14.4k bps fax modem with configurable fax line connections
•
Intelligent microprocessor
•
Serial and parallel printer ports
Attaching the FaxPress Server to your Network
To attach the FaxPress server to your network, follow these steps:
1.
Connect the network cable to the FaxPress server. FaxPress Ethernet servers
use an RJ-45 connector for 100BASE-T topology.
Note:
If you are installing the FaxPress server in an NT environment, you
must assign the FaxPress a unique IP address. To configure the
FaxPress with an IP address, place the unit on the same network
segment as the configuring workstation. The installation program
allows you to assign the FaxPress server an IP address. If you want
the FaxPress on a different segment, install the software first, then
use the FaxPress Administrative Tools to configure the FaxPress
with an IP address for the segment you want to move the unit to.
Refer to "Administrator Utilities" on page 6-3, for instructions on
changing the FaxPress’ IP address.
2.
Connect the fax lines to the FaxPress server.
3.
If you are connecting a printer to the FaxPress server, connect the printer
cable to the appropriate printer port.
4.
Plug the power cable into the FaxPress server.
5.
Plug the power cable into a power source. On 5000 and 7000 units, set the
power switch to ON.
2—3
FaxPress Administrator’s Guide
When the unit is powered on, the red and green LEDs flash through a power-on
sequence for about 15 seconds. The red LED remains illuminated after the
sequence completes. This indicates that the FaxPress server is functional but is not
communicating with the network. Install the FaxPress server software to establish
network communication.
LED Indicators
All FaxPress models have the same set of LED indicators, positioned either on the
front (SBE) or on the back (2500, 5000, 7000/7500) of the unit.
The LEDs indicate FaxPress status and network activity, and are a useful
troubleshooting tool. For more information regarding using the LEDs for
troubleshooting, see "Interpreting LEDs" in Appendix B.
FAXPRESS STATUS/ACTIVITY
LED
Alert
Normally OFF. RED indicates the unit
1. is not currently connected.
2.
3.
2—4
is not properly installed.
has, if GREEN Ready light is also present, a job in the print
queue.
Ready
Normally GREEN; indicates the unit is communicating with the
network.
100 BaseT
AMBER if LAN connector is using 100 BaseTX; otherwise OFF.
10 BaseT
AMBER if LAN connector is using 10 BaseT; otherwise OFF.
LAN
Normally flashes GREEN intermittently; indicates network
activity.
Data/Line
GREEN while sending a fax; registers fax modem’s activity.
Installing the FaxPress Server Software
Installing the Server
Installing the FaxPress Server Software
FaxPress 7.0 Product Activation Key
The FaxPress server's FaxPress 7.0 software must be activated with a Product
Activation Key, determined by your FaxPress unit's serial number, to enable the
FaxPress 7.0 software and any associated FaxPress email gateways to function.
The FaxPress 7.0 email gateways - the Outlook Direct, Exchange Connector,
Lotus Notes, and SMTP Gateways - are available with the FaxPress 2500, 5000,
7000 and 7500. The FaxPress 7.0 email gateway versions are not an option with
the FaxPress Small Business Edition (SBE) unit.
Castelle provides three ways to access the Activation Key Request page and
obtain your FaxPress unit's key code. The first is available during the FaxPress
server software installation, the second is available after the FaxPress
Administrator or User client software installation has installed the Windowsbased FaxMain utility, the third is available at any time by going directly to the
Activation Key Request page on the Castelle web site, at:
http://www.castelle.com/cgi-bin/fp7keycode.pl
For customers with no Internet access or who have questions regarding the
Product Activation procedure, please contact Castelle's Order Administration
Department at 1-408-852-8056, or email [email protected].
The Product Activation Key access options are as follows:
1.
In the activation code screen at the end of the Castelle FaxPress 7.0 server
software installation, the Obtain Key From Web button allows you to go to
the Activation Key Request page on Castelle's web site to obtain your unit's
key code. Once you have the 16-digit Product Activation Key code, enter it
exactly as given in the Product Activation Key field. Include all hyphens,
exclude spaces, and click Continue.
2.
If you choose the Skip button option during the FaxPress server software
installation, the FaxPress 7.0 software must be activated using the FaxMain
utility installed during the client software installation. The FaxMain utility
will give you the option of enabling either a temporary, 30-day evaluation,
or acquiring your unit's Product Activation Key code and fully activating
the FaxPress 7.0 software and associated email gateways.
2—5
FaxPress Administrator’s Guide
To use the FaxMain utility to access Castelle's Activation Key request page and
obtain your Product Activation Key, follow these steps:
1.
Go to FaxMain's Product Activation Key directory, (Start>Programs>
FaxPress>FaxMain), then double-click on FaxPress 7.0 from the Product
Name entries on the right.
2.
Next, in the Product Activation Key screen, click the Obtain Key From Web
button to go to Castelle's Activation Key Request page for your FaxPress
unit's Activation Key code. Next, select either the Activate Product or
Enable 30 days evaluation radio button, then enter the 16-digit Activation
Key code exactly as given in the Activation Key field. Include all hyphens,
exclude spaces, and click Enable.
Operating System Requirements
Run the Castelle FaxPress server software installation from:
•
a Windows 98/ME workstation
•
an NT/2000/2000/XP/XP Professional workstation or server
Setup will detect the operating system used; the operating system used will
determine your installation options.
Install the FaxPress server software onto workstations or file servers running:
•
Windows 95/98/ME, NT/2000/2000 Professional or XP/XP Professional.
•
Novell Netware NDS, Netware 5 or 6 (Pure IP), or Netware Bindery.
•
Linux (Samba enabled) – Linux installation documentation is available on
Castelle’s web site at:
http://www.castelle.com/support/documentation/
The server software can also be installed onto the Castelle Storage Server, a
network attached storage appliance that provides all the necessary disk space for
incoming and outgoing fax messages, databases, and system files, effectively
eliminating the need for a file server.
2—6
Installing the FaxPress Server Software
Installing the Server
SERVER OPERATING SYSTEM
1=
WINDOWS VERSION
1N
OVELL
95
x
98/ME
x
4NT/2000/XP
x
2NT/2000
398/ME
CASTELLE
STORAGE
SERVER
x
x
x
x
x
supports Novell Bindery Mode, NDS and Netware 5.x Pure IP installations.
2
= NT 4.0 Workstation and Windows 2000 Professional can be used as the file server.
3
= File sharing must be enabled. Recommended only for one or two line FaxPress units.
4
= NT applies to both server and workstation versions.
Installing on Windows 98/ME/2000/XP and NT
The installation software is able to locate a new FaxPress on the network only
when the workstation and the FaxPress server are connected to the same network
segment. If you want to place the FaxPress on a different segment, run the install
program first to set up the FaxPress, then follow the instructions in "Moving a
FaxPress Server" on page 6-5, to move the unit to another segment.
If you have a 10BT FaxPress unit and you are in an auto-sensing environment, use
a workstation on the same hub or switch as FaxPress. Try a passive hub (one that
doesn't reproduce the signal) or lock the port to 10BT ½ duplex.
If you are installing on a Windows XP workstation, please note whether the
workstation is a member of a domain or workgroup. (System Properties>
Network Identification>Properties) If the workstation is a member of a
workgroup, please see the configuration requirements following the installation.
("Configuring Windows XP for the FaxPress" on page 2-19) If the workstation
is a member of a domain, no additional steps are required.
2—7
FaxPress Administrator’s Guide
Before installing, please confirm:
1.
You have administrator privileges on the Windows workstation used to run
the FaxPress server software setup, as well as the Windows workstation or
server being used to host the FaxPress – i.e. the target file server – if the two
are different.
2.
TCP/IP is installed and configured on the workstation.
3.
All Windows programs are closed.
4.
All anti-virus software is disabled.
Note:
If you are installing the FaxPress server on a remote NT network
file server, you need to add the IP address and remote server name
to the hosts file on the local NT file server or workstation. The full
path is: ~\system32\drivers\etc\Hosts\<hosts file>
Installing the Software
To install the FaxPress server software on a 98, ME, 2000/XP or NT workstation:
1.
2—8
Log onto the shared hard drive on the target file server with system
administrator privileges. If installing to a drive on a different system, then
map a drive to the location on the remote system where you would like the
FaxPress server software to be located. Make sure you are connected to the
remote system with administrator privileges.
Installing the FaxPress Server Software
Installing the Server
2.
Place the Castelle CD-ROM in the drive. The autorun program will be
launched from your CD ROM drive. The Castelle FaxPress Setup screen
will be displayed.
3.
Click Install FaxPress to begin in the installation process. The FaxPress
Project Setup will prepare the InstallShield® Wizard to guide you through
the rest of the installation process. When it is complete the Welcome Screen
will be displayed on your screen. Click Next>
2—9
FaxPress Administrator’s Guide
4.
In the Select Installation, click the Administrator Installation button to
install the FaxPress server software.
Note:
2—10
If the FaxPress client has previously been installed on the
workstation you will be prompted with an additional screenshot to
either “Install FaxPress Server, or its Add on Products. . ." or "To
uninstall the existing FaxPress client". Choose the first option, "To
install the FaxPress Server. . ."
Installing the FaxPress Server Software
Installing the Server
5.
To install the FaxPress server, click on the Install FaxPress Server button
in the Select Component installation screen.
6.
The next installation screen requires you to choose the kind of network
system you want to install the FaxPress server on. Setup will detect whether
the workstation you’re on is running Windows 98/Windows ME, or
Windows 2000/Windows NT:
If you’re using Windows 98/ME this setup screen will appear. Select
the Windows 98/Windows ME button.
2—11
FaxPress Administrator’s Guide
If you’re using Windows 2000, XP or NT, this setup screen will appear.
Select the Windows NT/2000/XP (TCP/IP) button.
7.
2—12
This XP warning screen will appear, instructing you to read the
“Configuring XP for the FaxPress” tech note. This information is also
provided in "Configuring Windows XP for the FaxPress" on page 2-19.
Installing the FaxPress Server Software
Installing the Server
8.
The Castelle FaxPress Server Installation on Windows NT/2000/XP
screen requires you to click Next>.
9.
All shareable drives on your workstation will be displayed in the Select
Installation Drive screen. Highlight the drive you want to use as your
FaxPress file server and click Next>.
2—13
FaxPress Administrator’s Guide
Note:
If the shared drive you are using is NTFS, the FaxPress server and
the FaxPress client workstations must have full access permission.
10. Enter the FaxPress server serial number in the next installation dialog box,
then click Next>. The serial number is on the bottom of the FaxPress unit.
11. To customize your installation directory location, specify the directory name
in the next screen. Only the root direct path can be changed. The tail path
must be ~\Castelle\[Serial_Number], where
[Serial_Number] is the number entered in step 10 above. Click Next>.
2—14
Installing the FaxPress Server Software
Installing the Server
12. The FaxPress server name dialog box requires a name for the FaxPress
server. This name identifies the FaxPress in the Login dialog box. The
factory default name is the FaxPress serial number. The new name may be
up to 46 characters including the dash, period and underscore. Do not use
the spacebar. Click Continue to display the IP address installation screen.
13. Enter a valid, unique IP address for the FaxPress server.
The IP address must be valid in the segment to which the FaxPress is
currently connected. If you want to move the FaxPress to another location
following installation, you must reconfigure the IP address after the
installation completes and before you move the unit. The new IP address must
be valid in the segment to which you are moving the FaxPress. See
"Administrative Utilities" in Appendix F, for instructions on how to change
the FaxPress IP Address.
Click Next> to display the Gateway IP Address dialog box.
2—15
FaxPress Administrator’s Guide
14. If the FaxPress communicates only with other devices connected to the
current network segment, leave the edit box blank. If the FaxPress needs to
communicate across network segments, enter the Gateway IP Address of
the segment to which the FaxPress is connected.
Click Next>.
15. The Summary information will be displayed.
Verify the parameters you selected. If a parameter is incorrect, select Back.
The Back button restarts the process with the selection of the drive partition.
If everything is correct, select Continue. The program will copy the files to
the network file server, configure the FaxPress and reset the FaxPress.
2—16
Installing the FaxPress Server Software
Installing the Server
16. The FaxPress installation program will now copy all the server software to
your file server.
17. A Product Activation Key, determined by your FaxPress unit's serial
number, is required to use the FaxPress 7.0 software. Click the Obtain key
from web button to retrieve the 13-digit key, enter the key, including all
hyphens and excluding spaces, then click Continue.
Select Skip to enter the key at a later time. Selecting Skip will enable the
FaxPress 7.0 software for a 30-day period.
If you select Skip, the Product Activation Key code may be also obtained
from the Activation Key Request page on the Castelle web site, at
http://www.castelle.com/cgi-bin/fp7keycode.pl, then entered in Faxmain's
Product Activation Key directory (Start>Programs>FaxPress>Faxmain.)
Double-click on FaxPress 7.0 from the Product Name entries on the right to
bring up the Product Activation Key field. The FaxPress Administrator client
must be installed to access Faxmain’s Product Activation Key folder.
2—17
FaxPress Administrator’s Guide
18. This Warning messsage will only appear if setup attempts to login to the
FaxPress server, and finds that the FaxPress unit is unavailable. Verify that
the FaxPress unit is operational, and reboot it if necessary. This message
does not indicate any error in the FaxPress server software installation.
Note:
In some cases, if setup takes an especially long time to
communicate with the FaxPress, the above Warning message may
be displayed erroneously. If you suspect this is the case, check the
FaxPress server LED status, then try logging into the FaxPress
from a client before rebooting.
19. This Warning message will appear if you select to skip the Product
Activation Key process.
2—18
Installing the FaxPress Server Software
Installing the Server
20. When the completion message is displayed, click OK to finish the FaxPress
Server software installation.
The server bootup process will first set the new TCP/IP address, then sequence
your FaxPress server. At the completion, the Alert light should be turned off and
your FaxPress server will return to normal status. This may take a few minutes.
This completes the server setup for Windows NT/2000. If you’re using a
Windows XP workstation logged onto the network as a workgroup rather than
domain member, the workstation must be configured for use with the
FaxPress. See "Configuring Windows XP for the FaxPress" on page 2-19 for
details. You must install the FaxPress client software on a workstation to configure
your FaxPress and to set up user mailboxes. For instruction on the client setup,
refer to "Installing the Client" on page 3-1. Server configuration is described in
"Configuring FaxPress" on page 5-1. For Add-On Products information, see
Chapter 4, Installing Add On Products.
Configuring Windows XP for the FaxPress
After finishing the FaxPress server installation on a Windows XP machine logged
on to the network as a workgroup member rather than as a domain member,
(System Properties> Network Identification>Properties) you’ll need to
configure Windows XP before the FaxPress will boot properly.
Follow these steps to configure Windows XP for the FaxPress:
1.
Right-click on the Castelle directory (C:\Program Files\Castelle), then
select Properties.
2—19
FaxPress Administrator’s Guide
2.
With the Sharing tab selected, check Allow network users to change my
files in the Network sharing and security section. Click Apply, then OK.
3.
Reboot the FaxPress.
Installing on NetWare NDS (IPX/SPX) Server
The FaxPress server software may be installed on a Novell network from either a
Windows 98/ME, NT, XP or 2000 workstation. The installation software uses the
IPX protocol to locate the FaxPress server on the network. The software installs
the database and files on the target file server and configures the FaxPress server.
No other network configuration is required. The FaxPress administrator can
further configure the server using the FaxPress client software.
The requirements for installing on NDS are as follows:
2—20
•
The target file server or workstation must be a 32 bit Windows platform
running Windows 98/ME, NT/2000/2000 Professional or XP/XP
Professional.
•
Novell client 32 needs to be installed on the PC you are installing from.
Installing the FaxPress Server Software
Installing the Server
•
You need to be logged in to NDS with administrator privileges to the context
where you are installing to. (Castelle installs its directory under the Volume.
Make sure you have NDS administrator privileges to this location.)
•
Using NDS Manager, please verify that the Master File Server you are trying
to install on has a read\write replica to the root.
Note:
If, when installing from an NT workstation to a Novell network,
installation does not find FaxPress, switch to a workstation on the
same segment.
Before installing the FaxPress server software on a Novell NDS network server,
please confirm the following:
1.
You have administrator privileges on the workstation used to install the
FaxPress server software.
2.
You must have Novell NDS supervisor privileges in both the Novell context
where you will be running the FaxPress installation, and also in the context
where the Novell file server used to host the FaxPress is located.
3.
You must have an available user license on your Novell NDS context.
4.
Make sure that there is an available drive letter for mapping the volume
chosen during the install. The FaxPress server setup will create a temporary
drive mapping to the volume chosen during the installation.
5.
Exit all Windows programs.
Installing the Software
To install the FaxPress server software on a Novell NDS (IPX/SPX) network
server, follow these steps:
2—21
FaxPress Administrator’s Guide
1.
Log onto the NDS tree and file server with supervisor privileges, then place
the Castelle CD-ROM in the drive. The autorun program will launch the
Castelle FaxPress Setup screen. Click Install FaxPress.
2.
The FaxPress 7.0 Project Setup launch the InstallShield® Wizard. The
Welcome Screen will be displayed on your screen.
Click Next> to continue.
2—22
Installing the FaxPress Server Software
Installing the Server
3.
In the Select Type of Installation screen, select the Administrator
Installation button.
4.
In the Select Component screen, select Install FaxPress Server.
2—23
FaxPress Administrator’s Guide
2—24
5.
Select Novell Netware.
6.
In the Select Network screen, select the Netware NDS (IPX/SPX) button.
Installing the FaxPress Server Software
7.
Installing the Server
The FaxPress Novell NDS Installation Welcome screen is displayed.
Click Next>.
8.
Enter the FaxPress server serial number. The serial number is located on the
bottom of the FaxPress unit. Setup requires the serial number to locate the
FaxPress server on the network.
2—25
FaxPress Administrator’s Guide
9.
Select the context that allows you to access the volume in which you want
to install the FaxPress software, then click Next>.
10. Select a volume in which to install the software. Click Next>.
Note:
2—26
Listings prefixed with + are context names. Selecting a context
name and clicking on Next> or double-clicking on the name causes
the program to display the volumes that are available in the context
and other contexts that can be accessed through the context. The
volume you select can be in any accessible context.
Installing the FaxPress Server Software
Installing the Server
11. Enter a path for the server files.
The files will be installed at the location you specify. You can alter the default
path, but you must retain \castelle at the end of the statement. You cannot
change the (mapped) drive letter.
Select Continue.
12. Enter a name for the FaxPress server.
This name identifies the FaxPress in the Login dialog box. The factory default
name is the FaxPress serial number. You can create a new name using up to
47 characters including the dash, period and underscore. Do not use the
spacebar. Select Continue.
2—27
FaxPress Administrator’s Guide
13. The summary table lists the parameters you have chosen for the FaxPress
server. Review the entries. If any parameter is incorrect, select Back to
return to the first parameter dialog box, and re-enter the parameters. If the
entries are correct, select Next>.
14. Setup will now begin copying files.
2—28
Installing the FaxPress Server Software
Installing the Server
15. A Product Activation Key, determined by your FaxPress unit's serial
number, is required to use the FaxPress 7.0 software. Click the Obtain key
from web button to retrieve the 13-digit key, enter the key, and click
Continue. Select Skip to enter the key at a later time. Selecting Skip will
enable the FaxPress 7.0 software for a 30-day period only.
If you select Skip, the Product Activation Key code may be also obtained
from the Activation Key Request page on the Castelle web site, at
http://www.castelle.com/cgi-bin/fp7keycode.pl, then entered in Faxmain's
Product Activation Key directory (Start>Programs>FaxPress>Faxmain.)
Double-click on FaxPress 7.0 from the Product Name entries on the right to
bring up the Product Activation Key field. The FaxPress Administrator client
must be installed to access Faxmain’s Product Activation Key folder.
16. This Warning messsage will only appear if setup attempts to login to the
FaxPress server, and finds that the FaxPress unit is unavailable. Verify that
the FaxPress unit is operational, and reboot it if necessary. This message
does not indicate any error in the FaxPress server software installation.
2—29
FaxPress Administrator’s Guide
Note:
In some cases, if setup takes an especially long time to
communicate with the FaxPress, the above Warning message may
be displayed erroneously. If you suspect this is the case, check the
FaxPress server LED status, then try logging into the FaxPress
from a client before rebooting.
17. This Warning message will appear if you select to skip the Product
Activation Key process.
18. When the completion message is displayed, click OK to finish the FaxPress
Server software installation.
19. Setup will now load the FaxPress server software and configure and reset
the FaxPress server. Click OK.
2—30
Installing the FaxPress Server Software
Installing the Server
20. The last thing the installation program does is create an NDS default printer
queue. Add this to the appropriate driver to create a default printer for your
FaxPress users.
This completes the server setup. You must install the FaxPress client software on
a workstation to configure your FaxPress and to set up user mailboxes. For
instructions on the client setup, refer to "Installing the Client" on page 3-1.
Installing on NetWare 5 or 6 (Pure IP) NDS Server
Use a workstation on the NDS network to install the FaxPress server software. The
installation software uses the TCP/IP protocol to locate the FaxPress server on the
network. The software installs the database and files on the target file server and
configures the FaxPress server. No other network configuration is required. The
FaxPress administrator can further configure the server using the FaxPress client
software.
In this mode FaxPress server will use pure TCP/IP protocol to communicate with
the Master File Server. We recommend that you use this mode of the installation
only in the following conditions:
•
You are installing on a NetWare 5 or 6. (Older versions of NetWare supported
"Emulated IP" which used IP packets over IPX/SPX. Not true IP, this mode
is NOT supported.
•
You are using only "pure IP". In mixed environments where both TCP/IP and
IPX/SPX are used, we recommend that you use the regular IPX/SPX
installation.
Note:
NDPS is not supported. FaxPress will only print to traditional
Novell print queues. If you are using NDPS you need to use a
gateway (provided by Novell) to link between the traditional print
queues and NDPS devices.
2—31
FaxPress Administrator’s Guide
If you run into any problems, please refer to the Troubleshooting Netware
Installations Tech note on our web site at:
http://www.castelle.com/support/faxpress/default.htm
Prior to installing the FaxPress server software on a Novell Netware 5 or 6 NDS
server, please confirm the following:
1.
You have administrator privileges on the workstation used to install the
FaxPress server software.
2.
You must have Novell NDS supervisor privileges on the Novell context that
you want to use as the FaxPress file server.
3.
You must have an available user license on your Novell NDS context.
4.
You can install the FaxPress server software on a Novell network from
either a Windows 95, 98/ME, NT or 2000 workstation.
5.
Make sure that there is an available drive letter for mapping the Novell
context.
6.
Exit all Windows programs and disable all anti-virus software.
Installing the Software
To install the FaxPress server software on a Novell Netware 5 or 6 NDS server,
follow these steps:
1.
2—32
Log onto the NDS tree and file server with supervisor privileges.
Installing the FaxPress Server Software
Installing the Server
2.
Place the Castelle CD-ROM in the drive. The autorun program will be
launched from your CD ROM drive. The Castelle FaxPress Setup screen
will be displayed.
3.
Click Install FaxPress to begin in the installation process. The FaxPress
Project Setup will prepare the InstallShield® Wizard to guide you through
the rest of the installation process. This may take a few moments. When it is
complete the Welcome Screen will be displayed on your screen.
Click Next> to continue.
2—33
FaxPress Administrator’s Guide
4.
The next screen displayed is entitled Select Type of Installation. In this
screen you must select the type of installation you want to perform.
To install the server, you must click on the Administrator Installation button.
5.
2—34
To install the FaxPress server, click on the Install FaxPress Server button
in the Select Component installation screen.
Installing the FaxPress Server Software
Installing the Server
6.
Select Novell Netware.
7.
In the Select Network installation screen, select NetWare 5/6 NDS (Pure
IP).
2—35
FaxPress Administrator’s Guide
8.
At the FaxPress Netware Installation Welcome screen, click Next>.
9.
Enter the FaxPress server serial number.
The serial number can be found on the bottom of the FaxPress unit. The
installation program requires the serial number to locate the FaxPress server
on the network. Be sure to use the correct serial number.
Click Continue.
2—36
Installing the FaxPress Server Software
Installing the Server
10. The FaxPress Setup dialog box for selecting the context appears.
Select the context that allows you to access the volume in which you want to
install the FaxPress software. Click Done when you are finished.
11. Select a volume in which to install the software.
Click Continue.
Note:
Listings prefixed with + are context names. Selecting a context
name and clicking on Continue or double-clicking on the name
causes the program to display the volumes that are available in the
context and other contexts that can be accessed through the context.
The volume you select can be in any accessible context.
2—37
FaxPress Administrator’s Guide
12. If setup detects that the file server supports both IPX/SPX and Pure IP, the
following window will appear.
13. Enter a path for the server files.
The files will be installed at the location you specify. You can alter the default
path, but you must retain \castelle at the end of the statement. The (mapped)
drive letter must not be changed.
14. Enter a name for the FaxPress server. You can create a new name using up
to 46 characters including the dash, period and underscore. The default
name is the FaxPress serial number.
2—38
Installing the FaxPress Server Software
Installing the Server
15. In IP mode, the FaxPress unit requires a static IP address. Enter a static IP
address, then click Next>.
16. If the FaxPress communicates only with other devices connected to the
current network segment, leave the edit box blank. If the FaxPress needs to
communicate across network segments, enter the Gateway IP Address of
the segment to which the FaxPress is connected.
Click Next>..
2—39
FaxPress Administrator’s Guide
17. The summary table lists the parameters you have chosen for the FaxPress
server. Review the entries.
18. If any parameter is incorrect, select Back to return to the first parameter
dialog box, and re-enter the parameters.
If the entries are correct, select Next>.
19. A Product Activation Key, determined by your FaxPress unit's serial
number, is required to use the FaxPress 7.0 software. Click the Obtain key
from web button to retrieve the 13-digit key, enter the key, an click
2—40
Installing the FaxPress Server Software
Installing the Server
Continue. Select Skip to enter the key at a later time. Selecting Skip will
enble the FaxPress 7.0 software for a 30-day period only.
If you select Skip, the Product Activation Key code may be also obtained
from the Activation Key Request page on the Castelle web site, at
http://www.castelle.com/cgi-bin/fp7keycode.pl, then entered in Faxmain's
Product Activation Key directory (Start>Programs>FaxPress>Faxmain.)
Double-click on FaxPress 7.0 from the Product Name entries on the right to
bring up the Product Activation Key field. The FaxPress Administrator client
must be installed to access Faxmain’s Product Activation Key folder.
20. This Warning messsage will only appear if setup attempts to login to the
FaxPress server, and finds that the FaxPress unit is unavailable. Verify that
the FaxPress unit is operational, and reboot it if necessary. This message
does not indicate any error in the FaxPress server software installation.
2—41
FaxPress Administrator’s Guide
Note:
In some cases, if setup takes an especially long time to
communicate with the FaxPress, the above Warning message may
be displayed erroneously. If you suspect this is the case, check the
FaxPress server LED status, then try logging into the FaxPress
from a client before rebooting.
21. This Warning message will appear if you select to skip the Product
Activation Key process.
22. When the completion message is displayed, click OK to finish the FaxPress
Server software installation.
The server bootup process will first set the new TCP/IP address, then
sequence your FaxPress server. At the completion, the Alert light should be
turned off and your FaxPress server will return to normal status. This may
take a few minutes.
2—42
Installing the FaxPress Server Software
Installing the Server
23. The program will load the FaxPress server software and configure and reset
the FaxPress server.
24. Setup creates an NDS default printer queue as the last step of the
installation. Click OK. Add this to the appropriate driver to create a default
printer for your FaxPress users. This completes the server setup. The
FaxPress client software must be installed on a workstation to configure the
FaxPress for use with your NetWare NDS server.
This completes the server setup. You must install the FaxPress client software on
a workstation to configure your FaxPress and to set up user mailboxes. For
instruction on the client setup, refer to "Installing the Client" on page 2-1. Server
configuration is described in Chapter 3. For Add-On Products information, see .
Installing on NetWare Bindery Server
FaxPress supports the Novell IPX network protocol. This lets you use any network
workstation, preferably 95/98 for Novell installs, running IPX to configure the
FaxPress server and to install the server software. The server software installs the
FaxPress database and system files on a target network file server and configures
the FaxPress with the information it needs to communicate with the target file
server. No other network configuration is required.
The requirements for installing on a Novell Bindery Server are as follows:
2—43
FaxPress Administrator’s Guide
•
The client PC must be a 32 bit Windows platform: 95/98/NT 4.0/NT2000*
•
Novell client 32 needs to be installed on the PC you are installing from.
•
You need to be logged in to this File Server with administrator privileges.
(Please make sure you have administrator privileges on this file server - not
only administrator privileges on the PC you are installing from.)
Note:
If you are installing to Novell from an NT workstation and you are
having problem with the installation try a 95/98 workstation.
Prior to installing the FaxPress server software on a Novell Bindery network
server, please confirm the following:
1.
You have administrator privileges on the NT machine that you are using to
install the FaxPress server software.
2.
You must have Novell Bindery supervisor privileges on the Novell server
that you want to use as the FaxPress file server.
3.
You must have an available user license on your Novell Bindery server.
4.
You can install the FaxPress server software on a Novell network from
either a Windows 95, 98/ME, NT or 2000 workstation.
5.
Make sure that there is an available drive letter for mapping the Novell
Bindery server.
6.
Exit all Windows programs.
Installing the Software
To install the FaxPress server software on a Novell Bindery network server:
2—44
1.
Log onto the your Windows workstation with Administrator privileges.
2.
Log onto your Novell Bindery network server with supervisor privileges
3.
Place the Castelle CD-ROM in the drive. The autorun program will be
launched from your CD ROM drive. The Castelle FaxPress Setup screen
will be displayed.
Installing the FaxPress Server Software
Installing the Server
4.
Click Install FaxPress to begin the installation. The FaxPress 7.0 Project
Setup will prepare the InstallShield® Wizard to guide you through the rest
of the installation process.
5.
The Welcome Screen will be displayed on your screen.
Click Next> to continue.
2—45
FaxPress Administrator’s Guide
6.
The next screen displayed is entitled Select Type of Installation. In this
screen you must select the type of installation you want to perform.
To install the server, you must click on the Administrator Installation button.
7.
2—46
To install the FaxPress server, click on the Install FaxPress Server button
in the Select Component installation screen.
Installing the FaxPress Server Software
Installing the Server
8.
Select the Novell Netware button.
9.
The Select Network screen requires you to select the Netware Bindery
(IPX/SPX) button.
2—47
FaxPress Administrator’s Guide
10. The FaxPress Novell Installation Welcome screen is displayed.
Click Continue.
11. Enter the FaxPress server serial number.
The serial number can be found on the bottom of the FaxPress unit. The
installation program requires the serial number to locate the FaxPress server
on the network. Be sure to use the correct serial number.
Click Continue.
2—48
Installing the FaxPress Server Software
Installing the Server
12. Select the Novell file server for the FaxPress from the file server list.
Select the server where you want to install the FaxPress software. Click
Next> when you are finished.
13. The available volumes on the selected server will be displayed in the next
screen.
2—49
FaxPress Administrator’s Guide
14. Enter a path for the server files.
The files will be installed at the location you specify. You can alter the default
path, but you must retain \castelle\<serial number> at the end of the
statement. You cannot change the (mapped) drive letter.
Select Continue.
15. Enter a name for the FaxPress server.
This name identifies the FaxPress in the Login dialog box. The factory default
name is the FaxPress serial number. You can create a new name using up to
47 characters including the dash, period and underscore. Do not use the
spacebar. Select Continue.
Note: If you are reinstalling or upgrading your FaxPress in the same location
on the same file server, a warning message will appear advising you that the
installation program will delete all existing faxes, notices and transaction logs.
You can click on No to cancel the installation at this point without losing the
2—50
Installing the FaxPress Server Software
Installing the Server
existing data. Refer to
http://www.castelle.com/products/faxpress/software.htm for more
information regarding upgrades.
16. The summary table lists the parameters you have chosen for the FaxPress
server.
If any parameter is incorrect, select Back to return to the first parameter
dialog box, and re-enter the parameters.
If the entries are correct, select Next>.
2—51
FaxPress Administrator’s Guide
17. A Product Activation Key, determined by your FaxPress unit's serial
number, is required to use the FaxPress 7.0 software. Click the Obtain key
from web button to retrieve the 13-digit key, enter the key, an click
Continue. Select Skip to enter the key at a later time. Selecting Skip will
enable the FaxPress 7.0 software for a 30-day period only.
If you select Skip, the Product Activation Key code may be also obtained
from the Activation Key Request page on the Castelle web site, at
http://www.castelle.com/cgi-bin/fp7keycode.pl, then entered in Faxmain's
Product Activation Key directory (Start>Programs>FaxPress>Faxmain.)
Double-click on FaxPress 7.0 from the Product Name entries on the right to
bring up the Product Activation Key field. The FaxPress Administrator client
must be installed to access Faxmain’s Product Activation Key folder.
18. This Warning messsage will only appear if setup attempts to login to the
FaxPress server, and finds that the FaxPress unit is unavailable. Verify that
the FaxPress unit is operational, an reboot it if necessary. This message does
not indicate any error in the FaxPress server software installation.
2—52
Installing the FaxPress Server Software
Note:
Installing the Server
In some cases, if setup takes an especially long time to
communicate with the FaxPress, the above Warning message may
be displayed erroneously. If you suspect this is the case, check the
FaxPress server LED status, then try logging into the FaxPress
from a client before rebooting.
19. This Warning message will appear if you select to skip the Product
Activation Key process.
20. When the completion message is displayed, click OK to finish the FaxPress
Server software installation.
The server bootup process will first set the new TCP/IP address, then
sequence your FaxPress server. At the completion, the Alert light should be
turned off and your FaxPress server will return to normal status. This may
take a few minutes.
2—53
FaxPress Administrator’s Guide
21. The program will load the FaxPress server software and configure and reset
the FaxPress server. Click OK.
22. The last thing the installation program does is create a NDS default printer
queue. Add this to the appropriate driver to create a default printer for your
FaxPress users.
This completes the server setup. You must install the FaxPress client software on
a workstation to configure your FaxPress and to set up user mailboxes. For
instructions on the client setup, refer to "Installing the Client" on page 3-1.
Installing on the Castelle Storage Server
An economical and reliable alternative to a file server, Castelle’s Storage Server
provides the disk space required for the FaxPress. If you are installing your
FaxPress on the Storage Server, confirm that:
•
the Storage Server is installed and active on the network, and configured with
a static IP address.
•
for convenience, the workstation you run the setup from is also the one you’d
like to install the Administrative Client on.
To install to the Castelle Storage Server, follow these steps:
1.
2—54
Log onto a Windows 98/ME or 2000/NT workstation with Administrator
privileges.
Installing the FaxPress Server Software
Note:
Installing the Server
You must log on with system administrator privileges to install the
FaxPress server software.
2.
Place the Castelle CD-ROM in the drive. The autorun program will be
launched from your CD ROM drive. The Castelle FaxPress Setup screen
will be displayed. If Autorun is disabled on your machine, and setup does
not launch automatically, run CD-Drive-Letter:\AutoRun.exe
3.
Click Install FaxPress to begin in the installation process. The FaxPress
Project Setup will prepare the InstallShield® Wizard to guide you through
2—55
FaxPress Administrator’s Guide
the rest of the installation process. When it is complete the Welcome Screen
will be displayed on your screen. Click Next>
4.
2—56
In the Select Installation screen click the Administrator Installation
button to install the FaxPress server software.
Installing the FaxPress Server Software
Installing the Server
5.
To install the FaxPress server, click on the Install FaxPress Server button
in the Select Component installation screen.
6.
Select Castelle Storage Server.
2—57
FaxPress Administrator’s Guide
2—58
7.
The Storage Server Welcome screen requires you to click Next>.
8.
Setup now searches the network for an available Storage Server.
9.
Select the Storage Server to use for installing the FaxPress. Click Next>.
Installing the FaxPress Server Software
Installing the Server
10. Enter the FaxPress server serial number in the next installation dialog box,
then click Next>. The serial number is on the bottom of the FaxPress unit.
11. To customize your installation directory location, specify the directory name
in the next screen.Only the root direct path can be changed. The tail path
must be ~\Castelle\[Serial_Number], where
[Serial_Number] is the number entered in step 10 above. Click Next>.
2—59
FaxPress Administrator’s Guide
12. The FaxPress server name dialog box requires a name for the FaxPress
server. This name identifies the FaxPress in the Login dialog box. The
factory default name is the FaxPress serial number. The new name may be
up to 46 characters including the dash, period and underscore. Do not use
the spacebar. Click Continue to display the IP address installation screen.
2—60
Installing the FaxPress Server Software
Installing the Server
13. Enter a valid, unique IP address for the FaxPress server.
The IP address must be valid in the segment to which the FaxPress is
currently connected. If you want to move the FaxPress to another location
following installation, you must reconfigure the IP address after the
installation completes and before you move the unit. The new IP address must
be valid in the segment to which you are moving the FaxPress. See
"Administrative Utilities" in Appendix F, for instructions on how to change
the FaxPress IP Address.
Click Next> to display the Gateway IP Address dialog box.
14. If the FaxPress communicates only with other devices connected to the
current network segment, leave the edit box blank. If the FaxPress needs to
communicate across network segments, enter the Gateway IP Address of
the segment to which the FaxPress is connected.
Click Next>.
2—61
FaxPress Administrator’s Guide
15. The Summary information will be displayed.
Verify the parameters you selected. If a parameter is incorrect, select Back.
The Back button restarts the process with the selection of the drive partition.
If everything is correct, select Continue. The program will copy the files to
the network file server, configure the FaxPress and reset the FaxPress.
16. The FaxPress installation program will now copy all the server software to
your file server.
17. A Product Activation Key, determined by your FaxPress unit's serial
number, is required to use the FaxPress 7.0 software. Click the Obtain key
from web button to retrieve the 13-digit key, enter the key, an click
2—62
Installing the FaxPress Server Software
Installing the Server
Continue. Select Skip to enter the key at a later time. Selecting Skip will
enble the FaxPress 7.0 software for a 30-day period only.
If you select Skip, the Product Activation Key code may be also obtained
from the Activation Key Request page on the Castelle web site, at
http://www.castelle.com/cgi-bin/fp7keycode.pl, then entered in Faxmain's
Product Activation Key directory (Start>Programs>FaxPress>Faxmain.)
Double-click on FaxPress 7.0 from the Product Name entries on the right to
bring up the Product Activation Key field. The FaxPress Administrator client
must be installed to access Faxmain’s Product Activation Key folder.
18. This Warning messsage will only appear if setup attempts to login to the
FaxPress server, and finds that the FaxPress unit is unavailable. Verify that
the FaxPress unit is operational, an reboot it if necessary. This message does
not indicate any error in the FaxPress server software installation.
2—63
FaxPress Administrator’s Guide
Note:
In some cases, if the FaxPress takes longer than usual to (come
up)respond??, the(if setup takes longer than usual to log in to the
FaxPress, thhe above Warning message may be being displayed
erroneously. If you suspect this is the case, check the FaxPress
server LED status, then try logging into the FaxPress from a client
before rebooting
19. This Warning message will appear if you select to skip the Product
Activation Key process.
20. When the completion message is displayed, click OK to finish the FaxPress
Server software installation.
The server bootup process will first set the new TCP/IP address, then sequence
your FaxPress server. At the completion, the Alert light should be turned off and
your FaxPress server will return to normal status. This may take a few minutes.
2—64
Installing the FaxPress Server Software
Installing the Server
21. When the completion message is displayed, click OK to finish the FaxPress
Server software installation.
The server bootup process will first set the new TCP/IP address, then
sequence your FaxPress server. At the completion, the Alert light should be
turned off and your FaxPress server will return to normal status. This may
take a few minutes.
22. This completes the server setup. You must install the FaxPress client
software on a workstation to configure your FaxPress and to set up user
mailboxes. For instruction on the client setup, refer to "Installing the
Client" on page 2-1. Server configuration is described in Chapter 3. For
Add-On Products information, see .
2—65
FaxPress Administrator’s Guide
2—66
Installing the Client
3
What’s In This Chapter
Overview .......................................................................................................... 3-2
Installing the Administrator Client ............................................................... 3-3
Creating a Remote Installation .................................................................... 3-10
Installing the FaxPress Users’ Client .......................................................... 3-13
Installing the FaxPress Client on Microsoft Windows Terminal Server . 3-20
Uninstalling the FaxPress Client.................................................................. 3-49
FaxPress Administrator’s Guide
Overview
This chapter describes:
3—2
•
How to install the FaxPress Administrator Client. This includes the
Administrative Tools for configuring the FaxPress server and importing NT
Users.
•
How to install a remote client installation program. This can be placed
anywhere on your network for individual users to install the FaxPress client
on their work stations.
•
How to install the FaxPress Client software from either the network or CDROM on the client workstation.
•
How to install the FaxPress Client software on Microsoft Windows Terminal
Server.
Installing the Administrator Client
Installing the Client
Installing the Administrator Client
This section describes how to install the FaxPress Administrator client, which
includes Faxmain, the FaxPress client administration utility, as well as the
FaxPress Administration Tools. (See "Administrator Utilities" on page 6-3)
To install the FaxPress Client for Administrators, you must log on with NT
system administrator privileges. Also, the Administrator client must be installed
on a workstation running the same network protocol as the the workstation
running the FaxPress Server software.
To install the FaxPress administrator software, follow these steps:
1.
Log onto your desktop with Administrator privileges.
2.
Place the Castelle CD-ROM in the drive. The autorun program will be
launched from your CD ROM drive. The Castelle FaxPress Setup screen
will be displayed.
3.
Click Install FaxPress to begin in the installation process. The FaxPress
Project Setup will prepare the InstallShield® Wizard to guide you through
the rest of the installation process.
3—3
FaxPress Administrator’s Guide
4.
The Welcome Screen requires you to click Next>.
5.
The Select Installation Type requires you to select the Administrator
Installation button. This selection also provides access to the remote client
installation program.
3—4
Installing the Administrator Client
Installing the Client
6.
To install the FaxPress Administrator Client, click Install FaxPress Client
for Administrators in the Select Component installation screen.
7.
The Default protocol for a FaxPress screen requires you to select the
network protocol for the client to use to communicate with the FaxPress.
Note:
If the FaxPress client is installed on a Windows 2000 or XP system,
but will use IPX/SPX to communicate with the FaxPress server, the
NetWare client version 4.83 SP1 or newer must be installed.
3—5
FaxPress Administrator’s Guide
8.
If you choose IPX/SPX, setup will confirm Microsoft Client for NetWare is
installed on your workstation, and this screen will appear.
9.
Click Next to display the Installation Directory window.
You can change the default installation directory by clicking Browse typing
or selecting a new path. When you are satisfied, click Next> and the Personal
Folders screen is displayed.
3—6
Installing the Administrator Client
Installing the Client
10. You can use the Personal Folders screen to identify where to store your
personal files and documents.
•
Specify the personal folders directory on your local drive or on a network
drive if you want to share those folders with other users.
•
You can change the location of your personal folders at any time through
the Personal Preferences Options in Faxmain. For more information,
refer to"Setting Personal File Storage Location" on page 14-3.
11. This Question screen allows you to choose whether or not to copy FaxPress
Documents folder - a 23 MB collection of all FaxPress documentation along with the Administrator client files. (See "Documents" on page 6-21
for more information regarding the Documents folder contents.)
3—7
FaxPress Administrator’s Guide
12. If you choose to copy the Documents folder, this Documents Directory
screen will appear, requiring you to specify a folder.
13. The Select Program Folder screen displays the default program folder for
the client files. Click Next>.
3—8
Installing the Administrator Client
Installing the Client
14. If you are re-installing the FaxPress software, an Installation Information
window will display alerting you to the existence of a previous installation
of FaxPress.
Click on Yes to keep your previous settings or No to overwrite them and
continue with the installation.
15. To start using FaxPress client, you should first restart your computer.
Choose the Restart option from the Setup Complete window, or if you do
not intend to invoke the FaxPress software immediately, you can choose the
restart later option.
3—9
FaxPress Administrator’s Guide
Creating a Remote Installation
The FaxPress remote installation program allows you to preconfigure the client
installation program and install it on a network drive for end user installation.
Things to consider before you start:
•
Decide whether you are going to make the remote installation available on a
network drive for end user installation, or whether you are going to “push”
the program on to the end users workstations with a program like SMS or Zen
Works. If you are going to place it on a network drive or shared drive, have
the drive parameters available before initiating the installation process.
•
The remote installation creation process is two basic steps:
1.
First the client installation program is copied to the drive that you designate, then
2.
The installation configuration procedure is performed to configure the
remote installation for silent running. This is the same installation configuration process that is performed for a stand-alone client installation. Among other parameters, you will be asked to provide the client
installation destination directory and the client installation network
type. Be sure that the drive letter you designate is available for every
end user and that they are all on the same network type.
•
At the end of the installation configuration process the program will tell you
that the workstation must be restarted for all the changes to take effect and ask
you whether you want to restart now or later. Be sure to choose Restart Now.
•
Finally, at the end of the whole process the preconfigured remote client
installation will be available in the drive you designate. The program name is
rsetup.exe.
To create a remote installation of the FaxPress client:
1.
3—10
Perform step 1 through step 5 in the section "Installing the Administrator
Client".
Creating a Remote Installation
Installing the Client
2.
To create a remote FaxPress client installation, click on the Create remote
installation for user button in the Select Component installation screen.
3.
The next screen, Destination Path, requests the location for your remote
client installation.
3—11
FaxPress Administrator’s Guide
3—12
4.
So that all of your FaxPress users can access the remote client installation,
choose either a network path or a shared directory. Make sure that all your
end users have the network or shared drive mapped to the same drive letter.
5.
From here on follow step 4 on page 3-15 through step 10 on page 3-19, in
section "Installing the FaxPress Users’ Client". At the end be sure to select
Restart Now to reboot the client workstation.
Installing the FaxPress Users’ Client
Installing the Client
Installing the FaxPress Users’ Client
Prior to installing the FaxPress client software for users on a Windows PC or
workstation, please confirm the following:
1.
Make sure the workstation is configured to use the same network protocol
as the FaxPress server you will use. See your FaxPress administrator for
details.
2.
Exit all Windows programs.
To install the FaxPress client:
1.
Place the FaxPress 7.0 CD-ROM into the workstation’s CD-ROM drive.
The installation programs will be automatically launched and the Castelle
FaxPress Setup screen will be displayed.
3—13
FaxPress Administrator’s Guide
3—14
2.
The Welcome screen requires you to click Next>.
3.
Select User Installation.
Installing the FaxPress Users’ Client
4.
Installing the Client
The Default protocol for a FaxPress screen requires you to select the
network protocol for the client to use to communicate with the FaxPress.
Note:
If the FaxPress client is installed on a Windows 2000 or XP system,
but will use IPX/SPX to communicate with the FaxPress server, the
NetWare client version 4.83 SP1 or newer must be installed.
3—15
FaxPress Administrator’s Guide
3—16
5.
If you choose IPX/SPX, setup will confirm Microsoft Client for NetWare is
installed on your workstation, and this screen will appear.
6.
The Destination Directory window requires you to approve the default
installation directory, or Browse to a new one.
Installing the FaxPress Users’ Client
7.
Installing the Client
You can use the Personal Folders screen to identify where to store your
personal files and documents.
•
Specify the personal folders directory on your local drive or on a network
drive if you want to share those folders with other users.
•
You can change the location of your personal folders at any time through
the Personal Preferences Options in Faxmain. For more information,
refer to "Setting Personal File Storage Location" on page 14-3.
3—17
FaxPress Administrator’s Guide
8.
Click on Next to display the Select Program Folder window.
The setup program will add items to the folder in the Program Folders field.
You can type a new folder name or select one from the Existing Folders list.
Click on Next to continue. The setup program will now copy the files.
9.
If you are re-installing the FaxPress software, an Installation Information
window will display alerting you to the existence of a previous installation
of FaxPress.
Click on Yes to keep your previous settings or No to overwrite them and
continue with the installation.
3—18
Installing the FaxPress Users’ Client
Installing the Client
10. To start using FaxPress 7.0 Client, you should first restart your computer.
Choose the Restart option from the Setup Complete window, or if you do
not intend to invoke the FaxPress software immediately, you can choose the
“Restart later” option. If you are creating a remote client, be sure to select
“Restart now”.
3—19
FaxPress Administrator’s Guide
Installing the FaxPress Client on Microsoft Windows
Terminal Server
Running the FaxPress 7.0 client software on a Microsoft Windows Terminal
Server provides the same easy-to-use, integrated messaging features associated
with running the FaxPress client on autonomous workstations.
About Windows Terminal Server, Citrix MetaFrame, and the
FaxPress Client
About Microsoft Windows Terminal Server
The Microsoft Windows Terminal Server Edition is an extension of the Windows
NT Server 4.0 and 2000 product line. In a Microsoft Windows Terminal
Server/Citrix MetaFrame environment, all applications are loaded on and
processed on the dedicated terminal server. Terminal Server users experience the
Windows NT workstation desktop operating system and Windows-based
applications centrally installed and running on the server from low cost thin-client
terminals. This centralized administration results in rapid deployment of
applications.
The FaxPress client application, for example, must be installed only once on the
Terminal Server, and then have access rights assigned, for the FaxPress client
application to then become available to all end-users on the network.
Windows Terminal Server provides users access to 16 or 32-bit Windows-based
applications from the following types of desktops:
3—20
•
a new class of low cost terminals called Windows-based Terminals, marketed by third-party hardware vendors.
•
existing 32-bit Windows desktop operating systems, e.g. Windows
95/98, Windows NT workstation, older 16-bit Windows-based desktops
running the Windows 3.11 operating system, X-based Terminals, Apple
Macintosh, MS-DOS, Network Computers, and UNIX-based desktops
(via a third-party add-on product).
Installing the FaxPress Client on Microsoft Windows Terminal Server
Installing the Client
About Citrix MetaFrame
The Citrix MetaFrame add-on package is installed after your NT or 2000 server
has the terminal server option enabled. The Citrix MetaFrame application
provides Microsoft's Windows Terminal Server with additional server and client
functionality by allowing any client, no matter what operating system, to connect
to a Windows Terminal Server and run a Windows application through their
browser. MetaFrame also provides a secure encryption option, load balancing, and
enables publishing and application management from a single server in a server
farm. Additionally, Citrix MetaFrame provides Citrix MetaFrame Administrator
tools for the Terminal Server, which the Terminal Server alone does not have.
Citrix Published Applications
Citrix Published Applications can be an HTML application (Citrix NFuse) or a
Windows 32-bit application that allows Microsoft Internet Explorer or Netscape
Navigator users web-based access to applications such as Microsoft Word/ Excel,
FaxPress client, VBScript and JavaScript Programming.
Castelle has tested the FaxPress client version 7.0 with Citrix Windows 32-Bit
Published Applications configured for Microsoft Word/ Excel/ PowerPoint/
Access.
Note:
FaxPress does not support Citrix WinFrame 1.7/1.8 for the 3.51 NT
Server platform.
Citrix Standard and Non-Standard Published Apps
Castelle is compatible with Citrix Standard Published Applications. Standard
Published Applications include any Windows-based 32-bit Microsoft applications
such as Microsoft Office and printing applications.
Castelle cannot guarantee support for non-standard, non-Windows-based
applications. These include custom applications for DOS, Unix, AS/400 running
accounting, financial and payroll systems that must print to a DOS printer.
You can request a 30-day evaluation of any FaxPress unit together with an easyto-use software developer kit (SDK) to try incorporating fax capabilities into nonstandard, custom applications.
3—21
FaxPress Administrator’s Guide
FaxPress Supported Terminal Server and Citrix MetaFrame/
WinFrame Versions
FaxPress Software Version 7.0
3—22
Microsoft NT
Terminal Server Ver: 4.0 /
2000
YES
Desktop Support.
Citrix
Meta - Frame Ver: 1.0 / 1.8
/XP
YES
Desktop Support.
Citrix
Windows 32 Bit
Published Applications
YES
32 Bit Published Applications.
(Ms based)
Citrix
DOS Clients Published
Applications
YES & NO
Please see below for
limitations.
Citrix
Web Server Published
Applications
(N-fuse)
YES
Citrix
Win – Frame Ver: 1.7 / 1.8
NO
No Support For The 3.51 NT
Server Platforms.
Installing the FaxPress Client on Microsoft Windows Terminal Server
Installing the Client
Terminal Server, Citrix, and FaxPress on your Network
The following gives you an idea of the way the Terminal Server, Terminal
Server/Citrix MetaFrame clients, and FaxPress work together on a network.
p
3—23
FaxPress Administrator’s Guide
Running the FaxPress Client Setup for Microsoft Windows
Terminal Server
Installing the FaxPress client on a Terminal Server uses the same Castelle
FaxPress Setup CD-ROM used to install the FaxPress server and client software.
Running the FaxPress client software in a Windows Terminal Server environment
requires you to install just one copy of the FaxPress client for Windows Terminal
Server on the Terminal Server itself. The FaxPress client features then become
accessible to all users on the network.
Note:
The FaxPress client for Windows Terminal Server is designed for
Windows Terminal Server and Citrix only, and will not work on
other network installs.
Requirements
The FaxPress client for Windows Terminal Server supports these Terminal Server
editions:
•
Windows NT Server 4.x, Terminal Server Edition
•
Windows 2000 Server, Terminal Services
Before installing the FaxPress client for Terminal Server, please confirm:
3—24
•
you are, at minimum, using FaxPress version 6.3, Service Pack 2, rev B
or, preferably, FaxPress 7.0.
•
the FaxPress server software is installed on a standalone workstation or
file server, not the Terminal/Citrix Server. Refer to your FaxPress
Administrator and User’s Guide for detailed FaxPress server software
installation instructions.
•
the FaxPress server is operational, i.e.- can send and receive faxes.
Note:
Make sure you have not installed the FaxPress server software on
the Terminal Server machine.
Installing the FaxPress Client on Microsoft Windows Terminal Server
Note:
Installing the Client
If you are running FaxPress version 5.x or older, uninstall it, then
upgrade to FaxPress 7.0. See Removing FaxPress from the
Terminal Server on page 47“ for help removing FaxPress.
Preparing the Terminal Server
Before installing the FaxPress client for Windows Terminal Server, make sure you
have:
•
set root drive mapping and run logon and compatibility scripts for each
Terminal Server user. Refer to the Microsoft Knowledge Base:
http://support.microsoft.com/support/kb/ and the Microsoft Terminal
Server page: http://www.microsoft.com/ntserver/terminalserver/ for
additional information regarding drive mapping, logon and compatibility
scripts.
•
created and configured user profiles for any applications intended for
integration with FaxPress – Microsoft Outlook, for example.
Next, be sure to:
•
disable all anti-virus programs running on the Terminal Server.
•
close the Microsoft Outlook client and remove Microsoft Outlook from
the StartUp folder. (Start>Programs> StartUp)
•
close all programs and reboot. This guarantees that Microsoft email is not
running in the background.
Running the Setup - Important Information!
Running the FaxPress Client for Windows Terminal Server setup is different from
running the other FaxPress client installations, in that the Terminal Server must
be in install mode for the required compatibility scripts to run during setup.
For the Terminal Server to be in install mode and for the required compatibility
scripts to run during setup, you will have to exit out of the FaxPress setup, and
install the FaxPress client from the Windows Add/Remove Programs Control
Panel.
3—25
FaxPress Administrator’s Guide
Installing the FaxPress client from Add/Remove Programs in the Control Panel
automatically puts the Terminal Server in install mode. In fact, if you are running
the installation on a Windows 2000 server, the following message will appear
when the FaxPress setup is launched.
Follow these steps to install the FaxPress client for Terminal Server:
1.
Place the FaxPress Setup CD into your computer’s CD-ROM drive. The
Castelle FaxPress Setup screen will launch automatically.
2.
Select Exit. DO NOT select Install FaxPress from the Castelle FaxPress
Setup screen. Select Exit.
Note:
3—26
The Terminal Server must be in install mode for the required
compatibility scripts to run during setup. You must install the
FaxPress client from Add/Remove Programs in the Control Panel
to automatically put the Terminal Server in install mode.
Installing the FaxPress Client on Microsoft Windows Terminal Server
3.
Installing the Client
After exiting out of the Castelle Fax Press setup, open your Add/Remove
Programs Control Panel. (Start>Settings>Control Panel>Add/Remove
Programs.) The Add/Remove Programs interface and procedure will vary
depending on what Windows OS you’re running. If necessary, refer to your
Microsoft Windows manual for details.
4.
From the Control Panel window, double-click on Add/Remove Programs.
5.
From the Add/Remove Programs Properties window, click Install.
3—27
FaxPress Administrator’s Guide
3—28
6.
Click Next>.
7.
In the Run Installation Program window, install.exe will appear in the
Command line for installation program field. Click Next>.
Installing the FaxPress Client on Microsoft Windows Terminal Server
Installing the Client
8.
In the Change User Option window, select All users begin with common
application settings, then click Next>.
9.
In the Welcome to FaxPress Installation screen, click Next>.
3—29
FaxPress Administrator’s Guide
10. From the Select Components screen, select Install FaxPress Client for
Microsoft Terminal Server, then click Next>.
11. In the Default Protocol window, select the TCP/IP, IPX/SPX, or NetWare 5
radio button, then click Next>.
3—30
Installing the FaxPress Client on Microsoft Windows Terminal Server
Installing the Client
12. In the Destination path screen, confirm the Destination Folder is Drive
letter:\Program Files\Castelle\FaxPress where Drive letter is the NT
Terminal Server root directory. Make sure the Castelle files are copied to
the WinNT root drive only. Do not copy the Castelle files to any other
mapped directory. Click Next>.
13. The Shared Directory screen requires you to click Browse to specify a
shared directory for the FaxPress host.ip file. This folder must be accessible
to all Terminal Server users and should be located on the Terminal Server
machine.
3—31
FaxPress Administrator’s Guide
14. In the Choose Folder window, select FaxPress.
15. Click Next>.
3—32
Installing the FaxPress Client on Microsoft Windows Terminal Server
Installing the Client
16. The Personal Folders screen requires you to specify a location for your
Personal Folders directory. Click Next> to select the default location, or
Browse to select a different one.
17. In the Select Program Folder window, click Next>.
3—33
FaxPress Administrator’s Guide
18. The FaxPress Outlook Direct for Terminal Server clients provides you the
option of installing the FaxPress Outlook Direct email gateway. Outlook
Direct, a FaxPress 7.0 feature, offers seamless fax/email integration,
offering users the ability to send and receive faxes right from the Outlook
mail client interface. Check the Install FaxPress Outlook Direct box and
click Next> to install Outlook Direct. Otherwise, click Next>.
FaxPress Outlook Direct, formerly called Exchange Direct, is a client-side service
software option that provides a simplified, cost-effective way for Microsoft
Outlook users to send and receive faxes. The Castelle FaxPress Transport, a
service added to your email profile, connects Outlook to the FaxPress server.
Client rather than server-based, Outlook Direct has the ability to operate
independently of an Exchange server, making it ideal for smaller networks.
Outlook Direct is not the ideal choice, however, for a remote, dial-up or Virtual
Private Network connection.
Note:
3—34
Refer to the FaxPress Email Gateways Administrator and Users’
Guide for information on Outlook Direct fax addressing
requirements.
Installing the FaxPress Client on Microsoft Windows Terminal Server
Installing the Client
19. In the Setup Complete window, select No, I will restart my computer
later, then click Finish to exit the FaxPress Setup Wizard and return to
Microsoft’s Installation Program to complete the setup.
The FaxPress client installation will be incomplete if you reboot before
finishing Microsoft’s installation program.
20. When the After Installation screen appears, indicating you’ve returned to
the Microsoft Add/Remove Programs wizard, click Next>.
3—35
FaxPress Administrator’s Guide
21. When the Finish Admin Install window appears, click Finish, then reboot
the Terminal Server. After rebooting, log in to the FaxPress client to send
and receive test faxes.
Setting up the FaxPress Client and DCX Print Driver for
Published Applications
For attached files to be converted to faxable format, and transmitted through the
FaxPress, you must configure the DCX Print Driver for Published Applications on
Citrix and Terminal Server. Setting up the DCX Print Driver for Published
Applications on Citrix and Terminal Server requires you to:
•
Download the FaxPress 7.0 from Castelle's website at http://www.castelle.com. This version provides the DCX Driver for Terminal Services.
•
Edit the existing Published Application or create a new Published Application.Once you've created a published application to support the
FaxPress DCX print driver, you'll need to modify the application string
to support 'Fax DCX print driver'.
Note:
3—36
Known issues exist with ASP and SAP Custom Databases and
Applications printing to the Fax DCX Printer.
Installing the FaxPress Client on Microsoft Windows Terminal Server
Installing the Client
To set up an Adobe published app, for example, follow these steps:
1.
For each seamless published app, from the Citrix console, right-click on the
application and select Properties.
2.
On the Application Location tab, in the Command Line box, insert the text:
"C:\Program Files\Castelle\FaxPress\Daemon.exe" -P
before the application name. Citrix will add the quotes for you. For instance, to
publish Adobe Acrobat Reader, you'd start with the application command line:
"C:\Program Files\Adobe\Acrobat 5.0\Reader\AcroRd32.exe"
then change it to read:
"C:\Program Files\Castelle\FaxPress\Daemon.exe" -P"C:\Program
Files\Adobe\Acrobat 5.0\Reader\AcroRd32.exe"
Make sure the path names are entered with no spaces.
To set up a Microsoft Word 97 published app:
1.
For each seamless published app, from the Citrix console, right-click on the
app and select Properties
2.
In the Application Location tab, in the Command Line box, insert the text:
"C:\Program Files\Castelle\FaxPress\Daemon.exe" -P
before the application name. For instance, to publish Adobe Acrobat Reader, you
will start with the application command line:
"C:\Program Files\Microsoft Office\Office\WinWord.exe"
Note:
Citrix will have put quotes around the path name for you.
Next, modify this to read:
"C:\Program Files\Castelle\FaxPress\Daemon.exe" -P"C:\Program
Files\Microsoft Office\Office\WinWord.exe"
Make sure the path names are entered with no spaces.
3—37
FaxPress Administrator’s Guide
The daemon is provided with concurrency issue handling; it internally ensures that
only one copy of it is active. Application open and close order is irrelevant; if the
app with the currently active daemon is closed, one of the other daemons is
awakened and becomes active. Inactive daemons, according to the MS discussion
of the API calls, take up no CPU time.
Adding Outlook Direct Transport to User Profiles
The FaxPress Outlook Direct service software enables Terminal Server clients to
use the FaxPress server to send and receive faxes via Exchange or Outlook.
For fax/email integration, the FaxPress Outlook Direct Transport must be added
to the list of available services for each user’s Mail profile, then configured with
both the FaxPress login and password information, and the user’s Outlook
mailbox name.
Note:
1.
3—38
The transport cannot be configured while the mail client is running.
Always close the Outlook or Exchange client when modifying
transport information.
Launch a Terminal Server client. Open the Mail or Mail and Fax control
panel. (Start>Settings>Control Panel> Mail.)
Installing the FaxPress Client on Microsoft Windows Terminal Server
2.
In the mail Properties window, click Show Profiles.
3.
Select the User Profile to edit, then click Properties.
Installing the Client
3—39
FaxPress Administrator’s Guide
3—40
4.
In the user’s Properties window, with the Services tab selected, click Add.
5.
In the Add Services to Profile window, select FaxPress Exchange Direct,
and click OK.
Installing the FaxPress Client on Microsoft Windows Terminal Server
6.
Installing the Client
The Login tab of the FaxPress Transport Properties dialog box provides
the information required for the transport to log in to the user’s FaxPress
account. Select the FaxPress Server name or IP address from the
pulldown menu. Enter the user’s FaxPress User Name and Password,
then click the Verify Login button.
Note:
Login is automatic and occurs when you open the mail client. If the
transport can’t log onto the server, you will be notified only after
you try to send a fax. Use the Verify Login button to confirm login.
3—41
FaxPress Administrator’s Guide
7.
This Login successful message will appear if the transport is able to connect
to the Faxpress server. Click OK.
8.
Select the General tab, then enter the user’s Exchange or Outlook User
Name. Select FAX from the Email Type pulldown menu. Click OK, then
exit.
3—42
Installing the FaxPress Client on Microsoft Windows Terminal Server
9.
Installing the Client
From the user’s mail Properties dialog box, and select the Delivery tab.
Select FaxPress Exchange Direct from the list of information services,
then click the Up arrow to place it first in the list.
10. Select the Addressing tab, then click Add. . .
3—43
FaxPress Administrator’s Guide
11. From the Add Address List window, select Contacts and click Add. Click
Close to save and exit.
12. Contacts should now appear as an address list option. Click Apply, then
OK to exit.
3—44
Installing the FaxPress Client on Microsoft Windows Terminal Server
Installing the Client
13. Close all programs and reboot the Terminal Server. After rebooting, have all
the users log in and send test faxes to confirm the setup’s success. Also,
make sure any shared resources, such as network drives or printers, are set
up for each user before using FaxPress.
Installing on a Novell Network
In a Novell Netware environment with an active Microsoft Windows Terminal
Server, FaxPress uses TCP/IP for FaxPress server to client communication.
To confirm that the FaxPress is able to communicate using TCP/IP:
•
the FaxPress server must be assigned an IP address.
•
the FaxPress client must be set to use TCP/IP as the default network protocol, a selection made during the client setup.
•
the FaxPress must be able to successfully send and receive test faxes.
3—45
FaxPress Administrator’s Guide
To assign the FaxPress Server an IP address, follow these steps:
3—46
1.
On a Windows 95/98, Me, NT or 2000 workstation with the FaxPress Client
for Administrators installed, launch the FaxPress Configurator for
IPX/SPX. (Start>Programs>FaxPress>Administration Tools>
FP Configurator for IPX/SPX)
2.
In the FaxPress Configuration (IPX protocol) window, enter your
FaxPress Server’s serial number, click Show Settings, then IP settings.
Installing the FaxPress Client on Microsoft Windows Terminal Server
3.
Installing the Client
Enter an IP address in the FaxPress IP Address field, and a subnet mask
address in the IP Mask field. Click the Set, then the Exit button. Reboot the
FaxPress server.
Note:
Leave the Gateway and Master File Server IP Addresses blank.
Removing FaxPress from the Terminal Server
Follow these steps to remove FaxPress from the Terminal Server:
1.
Go to Start Menu/Programs/Command Prompt CD to
C:/FaxPress/PrintDriver and type in this command: DcxSetup -d to
uninstall the DCX Print Driver.
2.
From the Control Panel click on Add/Remove Programs. Select the
FaxPress program and remove it from the program list.
3.
Go to Start Menu/Find/Files Or Folders and type in FaxPress.INI and
Delete all the FaxPress.INI files
4.
Delete all Castelle entries from registry:
HKEY_CURRENT_USER/SOFTWARE and
HKEY_LOCAL_MACHINE/SOFTWARE
5.
Reboot the NT Terminal Server system.
3—47
FaxPress Administrator’s Guide
Installing Software from the Network
To use the client workstation installation program stored on the network during the
FaxPress server software installation:
1.
Log onto the network and open Windows 3.x, 95, 98/Me, NT, 2000 or XP.
2.
Open the File Manager or Windows Explorer.
3.
Open the drive containing the client workstation files.
4.
Locate and open the Castelle directory.
5.
Locate and open one of the following subdirectories:
For Novell network environments:
•
Win16—For Windows 3.x
•
Win32—For Windows 95/98, NT and 2000
For Windows environments:
6.
•
FPCLIENT.16—For Windows 3.x
•
FPCLIENT.32—For Windows 95/98, NT and 2000
Locate and double-click on rsetup.exe to start the installation program.
Note:
3—48
If you install the client software from the network, you can only
choose either the Typical or Compact installation. You will not be
able to install the administration utilities that are available when
installing the Administrator installation option.
Uninstalling the FaxPress Client
Installing the Client
Uninstalling the FaxPress Client
The Castelle FaxPress Setup includes a FaxPress Client uninstall feature. This
feature will only appear as an option when the FaxPress Setup detects an existing
installation of the FaxPress Client. If you’re running a fresh install of the FaxPress
client, the uninstall screens will not appear.
To uninstall the FaxPress Client, follow these steps:
1.
Place the Castelle FaxPress CD-ROM in your CD-ROM drive. If autorun is
enabled the Castelle FaxPress Setup screen will appear. If not, browse to
the root of the CD drive and double click on autorun.exe. Click Install
FaxPress.
3—49
FaxPress Administrator’s Guide
2.
To uninstall the FaxPress Client, select the To uninstall the FaxPress
Client button.
3.
3—50
There are two FaxPress Client uninstallation options, a partial and a
complete. The partial uninstallation removes the client files, but retains all
Personal Folders contents, user settings, and FaxPress registry settings. The
complete uninstallation will completely remove all files. Select an option to
uninstall the FaxPress client according to your purpose.
Installing Add On Products
4
What’s In This Chapter
Add-On Products Overview ........................................................................... 4-2
Email Integration........................................................................................ 4-2
Third Party Integration............................................................................... 4-2
Fax Archive................................................................................................ 4-3
Installing the Add On Products ..................................................................... 4-4
FaxPress Administrator’s Guide
Add-On Products Overview
Add-on products on the Castelle FaxPress 7.0 CD include email integration and
third party integration software, as well as a fax database/archiving service.
The add-on products provided on the Castelle FaxPress 7.0 CD are:
•
FaxPress Archive
•
FaxPress Exchange Connector & Native Attachment Gateway
•
FaxPress SMTP Gateway
•
FaxPress Outlook Direct
•
FaxPress Lotus Notes Gateway
•
FabSoft’s Reform for Windows 95/98/NT/2000
Email Integration
Castelle’s FaxPress Email Gateways integrate fax and email, allowing faxes to be
sent and received right from the mail client. See your FaxPress Email Gateways
Administrator and Users’ Guide for specific information regarding FaxPress
Outlook Direct, the FaxPress Exchange Connector & Native Attachment
Gateway, the FaxPress Lotus Notes Gateway, and the FaxPress SMTP Gateway.
The FaxPress Email Gateways are not included with the single line, entry level
FaxPress SBE model.
Third Party Integration
A comprehensive collection of third party integration documentation, including:
•
FabSoft’s Reform
•
Microtek, HP and Avision scanners
•
Ricoh’s eCabinet
is provided in the Documents folder on the Castelle FaxPress 7.0 CD, and in the
Administration Tools’ Documents folder. See "Documents" on page 6-21 for
information regarding the Administration Tools’ Documents folder.
4—2
Add-On Products Overview
Installing Add On Products
Fax Archive
Fax Archive is a feature rich fax database/archiving service available to both
administrators and users. Installing the faxPress Archive service is highly
recommended. For detailed instructions on preparing for, installing, and
configuring FaxPress Archive, refer to "Archiving Faxes" on page 10-1.
4—3
FaxPress Administrator’s Guide
Installing the Add On Products
To locate the add-on products included on FaxPress 7.0 CD, follow these steps:
4—4
1.
Log on with administrator privileges to the designated workstation.
2.
Place the Castelle FaxPress CD-ROM in the CD-ROM drive. The Castelle
FaxPress Setup screen will launch automatically.
3.
From the Castelle FaxPress Setup screen, select Install FaxPress.
Installing the Add On Products
Installing Add On Products
4.
From the Welcome to the FaxPress Installation screen, click Next>.
5.
From the Select Components screen, select the Administrator Installation
button, which includes the FaxPress Add On products.
4—5
FaxPress Administrator’s Guide
4—6
6.
In the next Select Components screen, select Add On Products.
7.
Click Next>.
Installing the Add On Products
8.
Installing Add On Products
Choose from the list of Castelle’s current Add On products.
For specific instructions on installing the FaxPress Archive, see "Installing
FaxPress Archive" on page 10-11.
For specific instructions on installing Reform, see the Reform documentation
provided in the Documents folder on the Castelle FaxPress 7.0 CD.
For specific instructions on installing the Gateways, refer to your FaxPress Email
Gateways Administrator and Users’ Guide.
4—7
FaxPress Administrator’s Guide
4—8
Configuring FaxPress
5
What’s In This Chapter
Overview .......................................................................................................... 5-2
Logging into FaxPress..................................................................................... 5-3
Starting the FaxPress Client....................................................................... 5-3
Locate Your FaxPress Server..................................................................... 5-5
Login to a FaxPress Server ........................................................................ 5-8
Configuring the Supervisor Account ......................................................... 5-9
Configuring Server Settings ......................................................................... 5-11
Configuring Line Settings............................................................................. 5-13
Configuring Storage Reclamation ............................................................... 5-16
Configuring Internet Faxing ........................................................................ 5-19
Configuring Dialing Properties.................................................................... 5-25
Configuring Advanced Functions ................................................................ 5-30
Configuring User Authentication (SSO) ..................................................... 5-34
Viewing Server Information......................................................................... 5-45
Load Sharing ................................................................................................. 5-47
Automatic Routing: PBX and FaxPress Integration ................................. 5-49
FaxPress Administrator’s Guide
Overview
The FaxPress server is ready for basic operation without additional configuration
(in non-complex environments). After the server is installed on the network, you
can send and receive faxes on all your FaxPress lines. By default, the FaxPress
will direct all incoming faxes to the Unaddressed mailbox.
Three generic types of user accounts are already created for you:
•
The Unaddressed Mailbox
•
The Guest Mailbox
•
The Supervisor Mailbox
All of these generic user accounts or mailboxes are initially configured with no
password as the default. Immediately assign a password to the Unaddressed and
the Supervisor Mailboxes the first time you login to your FaxPress.
To specify the FaxPress server settings, login to a FaxPress server by rightclicking on the server, and selecting Properties from the context menu. Or, select
the server and click on the Properties icon on the Toolbar. The FaxPress
Properties dialog box is displayed. For detailed instructions on logging into a
FaxPress server, refer to the next section, "Logging into FaxPress" on page 5-3.
The FaxPress Properties contains the following tabs, each representing the
configurable features of the FaxPress server:
Server Settings (Refer to page 5-11)
Line Settings (Refer to page 5-13)
Storage Reclamation (Refer to page 5-16)
Castelle Internet Faxing (Refer to page 5-19)
Dialing Properties (Refer to page 5-25)
Advanced Functions (Refer to page 5-30)
User Authentication Novell Network users only. (Refer to page 5-34)
Server Information (Refer to page 5-45)
Load Sharing (Refer to page 5-47)
5—2
Logging into FaxPress
Configuring FaxPress
Logging into FaxPress
You login to FaxPress through the client desktop by selecting the Faxmain icon in
your FaxPress programs files. Faxmain displays your data in convenient folder
layout. The main folder is called FaxPress Neighborhood. When you open (or
expand) the FaxPress Neighborhood, all the available FaxPress servers on the
network will be displayed to you. If you are using a Novell network, all of the
FaxPress servers are displayed. If you are on a NT network, all the FaxPress
servers on the same TCP/IP segment will be displayed. If you wish to have access
to a FaxPress server that is on a different NT network segment, you will have to
manually locate the server by specifying the IP address and giving the server a
name. For more information on how to locate a remote server refer to "Locate
Your FaxPress Server" on page 5-5.
To start configuring you FaxPress server, your must:
•
Start the FaxPress client
•
Locate your FaxPress server (Required only for FaxPress servers installed on
different segments of a Windows NT network.)
•
Login as the FaxPress Supervisor.
Starting the FaxPress Client
1.
To start the FaxPress client software, open FaxMain by selecting the
following:
Start->Programs->FaxPress-> Faxmain
5—3
FaxPress Administrator’s Guide
2.
If this is the first time you have opened FaxMain, you may be prompted to
activate your FaxPress 7.0 software if you did not do so during the inital
software installation..
Enter your FaxPress Activation key code and click Enable, or select Obtain
Key from Web to get your activation key.
3.
Double click on the FaxPress Neighborhood folder to view all the
FaxPress servers that are configured for your client.
–
5—4
If you have five or less servers installed on a Novell network, they will
all be displayed in the FaxPress Neighborhood. Skip the next section
and proceed to "Login to a FaxPress Server" on page 5-8.
Logging into FaxPress
Configuring FaxPress
–
If you are using a Windows NT network, all servers on the same network segment can be automatically located If the servers are on a different segment, they must be manually located. The next section
"Locate Your FaxPress Server" provides the details for locating your.
Locate Your FaxPress Server
If you are using a Windows NT network, your FaxPress server could be installed
on a different TCP/IP segment.
To determine whether this is the case:
1.
Right-click on FaxPress Neighborhood to display the FaxPress
Accounts... button.
5—5
FaxPress Administrator’s Guide
2.
Click on the FaxPress Accounts... button to displayed the FaxPress
Accounts dialog box.
All the FaxPress servers installed on a Novell network and on a Windows NT
network that are on the same segment are automatically located and displayed.
If you want to add a FaxPress server installed on another segment of your
Windows NT network, perform the following steps.
1.
5—6
Right-click on FaxPress Neighborhood to display the FaxPress
Accounts... button.
Logging into FaxPress
2.
Configuring FaxPress
Click on the FaxPress Accounts... button to displayed the FaxPress
Accounts dialog box.
Note:
The TCP/IP Advanced button will be deactivated if the server
selected is installed on a Novell network.
3.
Click on the TCP/IP Advanced button in the FaxPress Accounts dialog
box. The Host Editor dialog box is displayed.
4.
In the Host Name edit box, enter a name to associate with the remote
FaxPress server you want to register.
5.
In the IP Address edit box, enter the IP address assigned to the FaxPress
server you want to register. Ask your network administrator for the correct
IP address.
6.
Click on the Add button to add the server to your list of available FaxPress
servers in the FaxPress Accounts dialog box. The new server will be
displayed in the server list in the left panel with an asterisk before its name,
designating this server as a user defined server.
7.
Click OK to return to FaxMain and double click on your FaxPress
Neighborhood folder. Your remote server should now be displayed.
5—7
FaxPress Administrator’s Guide
Login to a FaxPress Server
To log into a FaxPress server, do one of the following:
1.
Double click the appropriate server icon in your FaxPress Neighborhood
or, right click on the appropriate server and select Login... or Login As....
2.
In the FaxPress Login dialog box, enter “supervisor” in the User Name text
box, and leave the password blank.
Note:
3.
Although the “supervisor” account is initially set with a blank
default password, we recommend that you set the password or
establish your personal mailbox with supervisor privileges.
Select Login to complete the process.
You can now start using your FaxPress server.
5—8
Logging into FaxPress
Configuring FaxPress
Configuring the Supervisor Account
1.
Configure your supervisor account by right clicking on your Supervisor
mailbox and selecting Properties to display the User Properties Dialog
box.
2.
From the User Properties dialog box you can:
•
Insert your full name
•
Assign phone numbers
•
Set Password
•
Configure Incoming and Outgoing Fax Parameters
•
Configure Printers
•
View Network Details (for Novell network users)
•
Define Archive Database Settings
Note:
For detailed instructions on configuring your account refer to
"Configuring User Properties" in Chapter 4.
5—9
FaxPress Administrator’s Guide
3.
Set the password for the Supervisor user account by clicking on the Set
Password button. The Change Password dialog box is displayed.
Note:
5—10
Be sure to repeat this process for the Unaddressed User mailbox
account.
Configuring Server Settings
Configuring FaxPress
Configuring Server Settings
To configure the Server Settings:
1.
Click on the Server Settings tab to display the Server Settings dialog box.
This dialog box is the default that is displayed when you open the FaxPress
Properties dialog box.
2.
In the Server edit box you can rename the FaxPress server to some more
meaningful name.
3.
In the Default symbol set code edit box, select the code you want the
FaxPress to use for symbols on the cover page.
The possible options for the symbol set are:
•
PC-8 — This is the default setting for US personal computers.
•
PC-850 — This is the default setting for European personal computers.
To determine the right code to use, type chcp at the DOS prompt.
5—11
FaxPress Administrator’s Guide
–
If the result is “Code page 437”, set the symbol code to PC-8. This is
the setting to be expected on US Windows PCs. Please note that not
*all* European characters can be created on a US Windows PC,
although many of the characters (for example: umlaud and e-acute) can
be represented.
–
If the result is “Code page 850", set the symbol code to PC-850. This
should be the most common case for European PCs.
–
If the result is some other code page, it is not specifically supported by
FaxPress. Try the PC-850 setting, but this may not work for all characters.
Note:
5—12
The fixed information on cover pages can always be supported with
any characters and fonts. This applies to logos, words like “To:”
etc. The above issues are relevant only to the dynamically
substituted information on the cover page, i.e. the destination
name, company, comments text etc.
Make sure that the corporate and personal cover pages you use
were created on a personal computer with the same code pages.
4.
In the Default font edit box, select the font you want the FaxPress to use for
non-symbol characters on the cover page.
5.
If you want a default return voice number to appear on cover pages where
the user’s personal default return voice number is not used, enter the
number in the Voice Phone Number edit box.
6.
In the Date Format section, select the date format you want the FaxPress to
use for all date listings.
7.
In the Time Format section, select the time format you want the FaxPress to
use for all time listings.
8.
Click on OK to implement the configuration or click on another tab to set
other parameters.
Configuring Line Settings
Configuring FaxPress
Configuring Line Settings
FaxPress servers may have 1, 2, 4, or 8 fax lines. Each FaxPress server fax line is
independent and operates concurrently with the other fax lines. You must
configure each fax line, whether or not you connect the line to an outside phone
line. The configuration settings:
•
Provide information the FaxPress needs to communicate with other fax
machines
•
Identify the type of phone line you connect to the FaxPress server
•
Let you determine the direction of communication the line will use
•
Let you determine the type of inbound routing the line will use
To configure a FaxPress line:
1.
Right-click on the FaxPress server name and select the Properties... option
to display the FaxPress Properties dialog box.
2.
Select the Line Settings tab to display the Line Settings dialog box.
5—13
FaxPress Administrator’s Guide
Note:
The Fax line properties can also be configured through the Fax
Lines folder under the Administration branch. For more
information, refer to "Configuring Fax Lines" in Chapter 5.
3.
In the Fax Line edit box, select the fax line that you want to configure.
4.
If you want to provide the line with an identifier, enter a name or number in
the Remote Terminal ID field. The FaxPress will use this information to
identify itself during the negotiation phase of the fax transmission. You can
enter up to 20 characters for this feature and you may use the same name or
number for all available lines.
5.
If you want your company name or other identifier to appear in the header
at the top of each successful fax transmission, enter the name in the Imprint
Terminal ID edit box. You can enter up to 20 characters.
6.
In the Local Fax Phone Number edit box, enter the fax number of the line
connected to this FaxPress line port.
7.
In the PBX Pre-dial edit box, enter the prefix your PBX system requires for
accessing an outside phone line. This is not required if the FaxPress is not
connected to a PBX system.
Many companies have a PBX which requires users to dial a digit, usually a
“9” to get an outside line. FaxPress automatically inserts a 3 second pause
after the PBX pre dial. This means that you do not have to insert a comma
after the PBX digits.
If the PBX requires an access code on a per user basis, see "Configuring
Basic User Properties" on page 7-19.
8.
5—14
In the Dialing Type section, select the radio button that describes the dial
type supported by the phone line you connected to the FaxPress. Lines
configured for Pulse dialing support phones with rotary dials. Lines
configured for Tone dialing support push button and newer dialing systems.
Refer to your phone company representative if you need assistance
determining the type of dial system your phone lines support.
Configuring Line Settings
9.
Configuring FaxPress
In the Line Direction section, select the direction of communication you
want the line to handle. Select:
Bi-Directional if you want the line to handle incoming and outgoing
faxes.
Input Only if you want the line to handle incoming faxes only.
Output Only if you want the line to handle outgoing faxes only.
Not Connected if you do not want the line to handle incoming or outgoing faxes. If you do not connect a line to an available phone jack,
you must configure the line as Not Connected. If there is no phone
line connected to the fax port, and Not Connected is not selected,
FaxPress will mistakenly send fax jobs through the fax port without the phone line and end up with a job failed status.
Note:
The line direction parameter must be set for each line on the
FaxPress server. If a line is not currently being used, set this
parameter to Not Connected.
10. You must set a routing type parameter in the Routing Type section. This
parameter sets the method the FaxPress will use to distribute faxes received
on the current line to user mailboxes. You can select DID, DTMF or
Assigned Line User. DID and DTMF are automatic routing systems that
may require special equipment, configuration or instructions, or sender
intervention, and which place the incoming fax directly into the intended
recipient's user mailbox. If the automatic routing system is not used for the
current fax line, use Assigned Line To User, the default value, which
automatically places unaddressed incoming faxes into a specific FaxPress
mailbox. This mailbox can be the UNADDRESSED mailbox or any other
mailbox. The assigned user can route faxes from this mailbox to any other
mailbox. If UNADDRESSED is not used, only the mailbox user will be able
to route faxes. Other users will not see the fax in UNADDRESSED.
Refer to step 7 on page 7-21 for details on configuring user accounts for
DID/DTMF and T-30 Subaddressing.
11. Click on OK to implement the configuration or click on another tab to set
additional server parameters.
5—15
FaxPress Administrator’s Guide
Configuring Storage Reclamation
The FaxPress stores incoming and outgoing faxes, notices and transaction logs on
the network file server. These files can become very large and can affect the
amount of disk space the FaxPress has available to store new incoming and
outgoing faxes. If the FaxPress encounters insufficient disk space it will suspend
operations. Storing a large number of fax jobs can also result in a longer
initialization time for the FaxPress.
To ensure that there is sufficient disk space on the network server, periodically
purge the stored FaxPress faxes. The Storage Reclamation feature lets you delete
received faxes, notices and transaction logs once they reach a certain age. You can
reclaim space immediately, or configure the FaxPress to purge the files daily. You
can configure storage reclamation four ways:
1.
You can manually set time and files to be purge,
2.
You can set FaxPress to automatically cleanup all the files on the server at a
specified time,
3.
You can enable storage reclamation by the archive program (faxes will be
archived in a database and purged as specified), or
4.
You can choose to have no storage reclamation
Note:
The Auto Storage Reclamation feature and the FaxPress Archive
program are mutually exclusive. Because Storage reclamation may
delete the faxes before the archival program has a chance to
archive the faxes, if the FaxPress server is configured for archival,
Auto Storage Reclamation is turned off.
These options can be selected from the Storage Reclamation tab. For more
information on FaxPress Archive refer to "Configuring the FaxPress Archive"
on page 10-17.
To purge the FaxPress server data files:
1.
5—16
Right-click on the FaxPress Server name to display the context menu.
Select the Properties... option to display the FaxPress Properties dialog
box.
Configuring Storage Reclamation
2.
Select the Storage Reclamation tab to display the dialog box.
Note:
3.
Configuring FaxPress
The FaxPress server suspends all other operations while the
database files are being purged. Consequently, you should run
Storage Reclamation when the FaxPress is least heavily used.
To set your system for Manual Storage Reclamation:
a.
If you want the FaxPress to purge Fax and Notice files, select Delete
Fax/Notice older than and enter the number of days that you want the
FaxPress to retain faxes and notices before deleting them.
b.
If you want the FaxPress to purge transaction log files, select Delete
Transaction Logs older than, and enter the number of months that you
want the FaxPress to retain a transaction log before deleting it.
c.
If you are using Single Sign On with a Novell network for user
registration, you can activate Remove obsolete mailboxes. This will
remove the users that no longer exist in the serial number or global
5—17
FaxPress Administrator’s Guide
groups on NDS. For more information on Single Sign On, refer to
"Using Single Sign On (SSO)" on page 7-15.
d.
If you want to run the purge program immediately, click on Clean up
Now to display the Manual Storage Reclamation dialog box.
From the displayed list, choose the mailbox(es) to clean up.
4.
5—18
To enable Automatic Storage Reclamation, so that FaxPress will
automatically purge faxes, notices, or transaction logs, select Enable
Automatic Clean up and set the 12-hour Start cleanup at (hh:mm) clock.
5.
To enable FaxPress Archive, click Use FaxPress Archive service.
6.
You can configure the FaxPress Archive server from the Storage
Reclamation dialog box by clicking the Configure button. The archive
program will take over storage reclamation of notices, logs, and faxes after
the faxes have been archived. For detailed steps on configuring your archive
service, refer to "Archiving Faxes" on page 10-1
7.
Click on OK to save the configuration or click on another tab to set other
parameters.
Configuring Internet Faxing
Configuring FaxPress
Configuring Internet Faxing
The FaxPress has a software module called “Castelle Internet Faxing” to provide
support for internet faxing using a direct internet connection. “Internet faxing” is
sending a fax over the internet to a remote FaxPress server, which then uses phone
lines at its own location to send your fax at a lower cost.
If your company has multiple sites and has a FaxPress server installed at these
sites, you can use CIF to send faxes from users located at one site to users at
another site straight through CIF without using a public telephone line system.
To use internet faxing, both the sending and receiving FaxPress servers must have
TCP/IP configured and enabled. Client workstations do not need to have TCP/IP
enabled. If you use an intranet, both the sender and receiver Local Area Networks
must have a permanent connection to the Internet.
The CIF function transfers fax job files in PCX format across the Internet. Both
the sending and the receiving sides must be using FaxPress for CIF to work. CIF
can be enabled or disabled from FaxMain.
If CIF for incoming job is enabled: When FaxPress receives a CIF job, if the job’s
fax number matches its own fax number (according to line settings) then the fax
job will be stored in the “assign line to user” incoming fax queue. By default,
assign line to user is our “Unaddressed” user. Otherwise, fax job will be put in
Outgoing fax queue and fax it out based on the provided fax number in the
incoming fax job. If the fax number in the incoming fax job contains T-30 SubAddressing (e.g. 408-852-8103#1234##), incoming fax will be routed to the
specific user’s mailbox based on the matching mail box ID (e.g. 1234).
So that a fax server knows when to use internet faxing and when to just use its own
phone lines, you must create configuration tables that associate remote fax
numbers with remote FaxPress servers. On the transmission side, FaxPress uses
the routing table to identify the correct destination IP address of the receiving
FaxPress. It uses the “fax number” provided by the fax job initiator to locate the
matching IP address in the routing table. The routing table is sorted based on fax
number.
5—19
FaxPress Administrator’s Guide
You can configure a local FaxPress server to use a remote unit to:
•
Fax all faxes addressed to another country
•
Fax all faxes addressed to another area code within a country
•
Fax all faxes addressed to a specific fax number prefix within a country and
an area code
•
Fax all faxes addressed to a specific fax number
You can also configure you CIF to resend the fax over a local phone line if
acknowledgment is not received from the remote FaxPress server within a
specified time period.
To configure your server to process incoming and outgoing faxes through the
internet, follow these steps:
5—20
1.
Click on the Castelle Internet Fax (CIF) tab.
2.
In the Outgoing Faxes area, click the box to Send faxes through the
Internet Fax. You can also elect to:
Configuring Internet Faxing
3.
Configuring FaxPress
•
Use internet fax also for local calls (without a long distance prefix).
•
Send fax through local phone lines. . .if you want FaxPress to send
failed internet faxes over the phone lines, check this option, then enter the
amount of time to wait for acknowledgment. Failed outgoing internet
faxes are those faxes that FaxPress has not received a delivery acknowledgment from within the time you specify.
To receive internet faxes in the Incoming Faxes area, click the Allow this
FaxPress to receive internet faxes. You can now click the appropriate
radio buttons specify delivery locations:
–
Deliver directly to local users (this is the most common usage), or
–
Use as Gateway to other Internet Fax systems. If this is enabled,
faxes will not be delivered to local users or over the phone lines.
When CIF for outgoing fax is enabled, a CIF routing table is created. When using
FaxMain to set up CIF, there are several parameters that can be configured.
Creating an Internet Routing Table
To use internet faxing, you must establish an association between the fax
telephone number and the remote FaxPress server’s IP address by creating an
Internet routing table. On the transmission side, FaxPress will use the routing table
to identify the correct destination IP address of the receiving FaxPress. It uses the
fax number provided by the fax job initiator to locate the matching IP address in
the routing table. The routing table is sorted based on fax number. FaxPress
should never get the wrong IP address.
When your FaxPress server sends a fax, it will use the lookup table to determine
whether to use a phone line or the internet. When it receives an internet fax, a
FaxPress server will process the fax normally, but if the FaxPress server sees an
external number, the FaxPress server will automatically use its phone lines to
forward the fax to its final destination.
The routing table allows the FaxPress server to know when to use internet faxing
and when to just use its own phone lines, by associating remote fax numbers with
remote FaxPress servers.
The routing table allows a local FaxPress server to use a remote unit to:
•
Fax all faxes addressed to another country
5—21
FaxPress Administrator’s Guide
•
Fax all faxes addressed to another area code within a country
•
Fax all faxes addressed to a specific fax number prefix within a country and
an area code
•
Fax all faxes addressed to a specific fax number
You can also configure your CIF to resend the fax over a local phone line if
acknowledgment is not received from the remote FaxPress server within a
specified time period.
To add a new Internet routing table, follow these steps.
1.
Login to Faxmain as Supervisor and expand the Administration branch.
2.
Right-click on Castelle Internet Faxing and then, from the context menu,
select Add.
The Castelle Internet Fax dialog box will be displayed.
.
3.
Specify the remote server’s TCP/IP address
FaxPress IP Address — In the FaxPress IP Address field, enter the IP
(Internet Protocol) address assigned to the remote FaxPress server. The
address should be entered as a quadruple triplet, such as 192.168.2.220.
5—22
Configuring Internet Faxing
4.
Configuring FaxPress
Specify phone number selection criteria.
When the local server sees a fax number, it will parse it per the criteria you
set in the next three boxes to determine whether it should be sent to the
specified remote server. You can specify phone number criteria in terms of
country code, area code, and fax number or fax number prefix.
At a minimum, only one of the three criteria boxes needs to be filled in. If two
or more boxes are filled in, the specifications will be applied using logical
AND.
For example, if only the country code is filled in, then all faxes with that
country code will be sent to the specified server. If all three boxes are filled
in, then faxes will be sent to the specified server if the number has the same
country code AND the same area code AND the same fax number or fax
number prefix.
Depending upon how you fill in these boxes, you can specify sending to a
remote server:
•
All faxes with a specified country code.
•
All faxes with a specified country code AND area code.
•
All faxes with a specified country code AND area code AND local
prefix.
•
All faxes with a specified country code AND area code AND local
number.
–
Country Code — A country code. If you want to specify that your
FaxPress server covers only a single country, enter a country code and
leave the area code and fax number boxes empty.
–
Area Code — An area code. If you want to specify that your FaxPress
server covers a specific area code, enter an area code and leave the fax
number box empty. If you enter an area code, you must have specified a
country code (for the United States the number is “1”).
–
Fax Number (or prefix) — A local fax number or prefix. If you want
your FaxPress server to only dial to one fax number, enter the number
here. You will have had to specify the country code and area code also.
Click on OK. Repeat the process to add as many associations as you
want.
5—23
FaxPress Administrator’s Guide
Receiving
If CIF for incoming job is enabled:
When FaxPress receives a CIF job, if the job’s fax number matches its own fax
number (according to line settings) then the fax job will be stored in the “assign
line to user” incoming fax queue. By default, assign line to user is our
“Unaddressed” user. Otherwise, the fax job will be put in the Outgoing fax queue
and sent based on the provided fax number in the incoming fax job. If the fax
number in the incoming fax job contains T-30 Sub-Addressing (e.g. 408-8528103#1234##), incoming fax will be routed to the specific user’s mail box based
on the matching mail box ID (e.g. 1234). No other fax routing functions are
performed.
If CIF for incoming job is not enabled, then incoming CIF jobs will be thrown
away.
5—24
Configuring Dialing Properties
Configuring FaxPress
Configuring Dialing Properties
With a fax machine, dialing a number simply consists of dialing all the required
digits for the number. FaxPress can be setup to automatically add necessary
prefixes or strip out unnecessary prefixes. For FaxPress to do this, you must
configure the properties for generating the numbers in the Dialing Properties
dialog box.
If any of the following scenarios represent your system, you may want to activate
Dialing Rules:
•
Multiple sources of phone numbers, each with possible a different format of
stored numbers.
•
The desire to avoid repeated dialing of preamble digits, thus keeping the
dialing sequence short.
•
The increasing complexity of the phone numbering system. For e.g. area code
overlays require in some cases, the dialing of the complete long distance +
area code sequence.
•
The use of FaxPress in many different counties, with some countries not
having a concept of area codes, some countries having different dialing
restrictions etc.
For FaxPress to automatically generate complex phone number, you must
configure the following as a minimum:
•
The local country code
•
The local area code (if any)
•
The long distance preamble
•
The international preamble
•
The number of digits in the local phone number
•
Whether to insert the PBX password automatically at the beginning or end of
the fax telephone number.
5—25
FaxPress Administrator’s Guide
To configure Dialing Properties:
1.
2.
Select the Dialing Properties tab to configure your FaxPress server dialing
requirements.
Select the area code and country code for the area you are in the Where I
am box.
•
Country code is— The ITU assigned country code for each country. For
the US this is 1, for UK this is 44 etc. The country code for the FaxPress
is set in the Dialing Properties dialog.
•
Area code is— The next lower level detail in a phone number. In the US
this is a 3 digit number like 408. Some countries like Singapore do not
have an area code. In this case, all non-international numbers are local.
The area code for the FaxPress is set in the Dialing Properties dialog.
•
For long distance dial— The digit(s) that must be dialed for each long
distance call preceding the actual number. In the US, this is 1. This is
5—26
Configuring Dialing Properties
Configuring FaxPress
required for any number dialed whose area code does not match the area
code of the FaxPress.
•
For International dial— The digit(s) that must be dialed for each inter-
national call preceding the number. In the US, this is 011. This is required
for any number dialed to another country.
3.
Enter the maximum number of digits in a local phone number in the The
maximum number of digits for a local call is box.
In the US, this is the 7 digit number like 496 0474. A local number is one that
does not contain any long distance or international preambles or area codes.
4.
If you are using a PBX system and passwords are required for access to an
outside line, in the When dialing through PBX, check Dial Access Code
and in the scroll down box on the right select whether to insert the password
Before or After the number is dialed. To set the password, see "Configuring
Basic User Properties" on page 7-19. To set the same PBX pre-dial for all
lines, select Same PBX Pre Dial for all lines, then specify pre-dial digits
for International, Long Distance or Local.
Note:
5.
If you are upgrading from a previous version of FaxPress, this
removes the necessity to enter a “$” in the number.
You can activate the dialing rules you have just defined for all phone
numbers defined in you FaxPress native phonebooks in the Dialing
Properties, by clicking Apply dialing rules to fax numbers.
5—27
FaxPress Administrator’s Guide
6.
You can set the rules for dialing Area codes in the US or Canada by clicking
the Area Code Rules button at the bottom of the screen. The Area Code
Rules Dialog Box will be displayed.
a.
When making local calls, in some areas of the US and Canada, the
phone company requires that you dial the area code or even the long
distance preamble plus area code. To specify the requirements for your
area, select one of the following:
•
Always dial long distance preamble and area code.
•
Always dial long distance area code
•
Don’t dial the area code
In some cases, this requirement applies only when you are dialing specific exchanges. To specify when this is necessary, click the New but-
5—28
Configuring Dialing Properties
Configuring FaxPress
ton in the Dial long distance preambles with the following prefixes:
area.
7.
b.
Likewise, when making long distance phone calls, you may not need to
use area codes and long distance preambles for certain area codes.
Click New to specify the areas codes that do not require the addition of
area code numbers in the box for When calling to other area codes.
c.
When you are finished with your selections, click OK to return to the
Dialing Properties dialog box.
Click OK when you have finished configuring your dialing properties or
select another tab on continue configuring your server properties.
5—29
FaxPress Administrator’s Guide
Configuring Advanced Functions
Select the Advanced Functions tab in the FaxPress Server Properties screen to
configure advanced server functions and support features.
Advanced Functions
To configure Advanced Functions:
5—30
1.
To add a date and time stamp on the top of each incoming fax click the top
box. This line contains the date and time when the fax was received. This is
the local date and time as opposed to the date and time stamp in the header
line of the received fax.
2.
If you wish to keep outgoing faxes that were sent out successfully in your
Outgoing Fax Queue, click the box for Keep outgoing faxes that were
Configuring Advanced Functions
Configuring FaxPress
sent out successfully. The sent faxes will show up in the outgoing faxes
list with status SENT.
Note:
3.
All faxes that are not sent successfully will be retained
automatically.
If you activate the archive service for outgoing faxes, this will
automatically be turned on.
To Use the same fax line to send successive jobs to the same fax
number, click this box. If these features is checked, the successive faxes
will not be sent until the completion of the proceeding fax.
4.
To Include sender’s and recipient’s names in the imprint field of an
outgoing fax click this box. If you are including a cover sheet with your
faxes, this function may not be necessary. This setting eliminates the need
for a cover page in broadcast fax situations.
Note:
To be compliant with the Telephone Consumer Protection Act of
1991 you must include data and time and identification of sender
either in the top margin of each fax page or on the cover page. If
you are not including a cover page, you must select this option.
5.
If you wish to limit the amount of data sent during a resend operation for
failed faxes, click When resending failed faxes, to send only the part
that was not already sent. allows the FaxPress to send only the pages that
were not sent the first time. This will not function correctly with intelligent
fax machines (such as the FaxPress) that do not store (or print) the failed
fax.
6.
To automatically print a copy of the transmitted fax and it confirmation,
click After sending fax, print entire fax and confirmation page.
5—31
FaxPress Administrator’s Guide
7.
If you are using DID for routing faxes, click I am using DID for inbound
fax routing. When you enable this feature, an additional text box will be
displayed at the bottom of the dialog box.
Specify number of digits in your DID trunk line by clicking the appropriate
radio button for 3 or 4. The default value is 4.
Supported Functions
Click the Enable support for: box to configure the following support functions:
•
HP Network Scanner— Use this to configure the FaxPress server to accept
jobs from HP network scanners. See Castelle’s HP scanner and FaxPress
integration technical notes at http://www.castelle.com/support for
instructions on how to implement this feature.
•
InfoPress Fax-On-Demand— This system offers windows-based
management features, high-volume fax delivery, integration with leadingedge technologies like the Web and Adobe Acrobat. Extensive customization
features making the system unmatched in the industry. For more information,
see http://www.castelle.com/products/infopress/faxondemand.htm
5—32
Configuring Advanced Functions
•
Configuring FaxPress
Load Sharing— This is used to configure your FaxPress server to act as a
slave for either NT or Netware environments. When you enable this feature,
and additional text box will be displayed at the bottom of the dialog box.
Enter the serial number for the FaxPress server that will be the master for this
server.
Note:
The maximum number of slaves that a Master can have is two (2).
5—33
FaxPress Administrator’s Guide
Configuring User Authentication (SSO)
Accessing Novell Users with Single Sign On (SSO)
FaxPress Single Sign On (SSO) mechanism allows the network administrator to
use NDS (or Novell bindery servers) to authenticate and administer FaxPress
users. It provides the ability to control access to FaxPress by using Novell
administration tools such as: NWADMIN.
By tightly integrating with Novell Directory Services, FaxPress automatically
user groups on NDS and allows you to specify which network users have access
to FaxPress and what his privilege level is. To logon to FaxPress a user needs to
be logged on to NDS (or a bindery file server) and be specified as a member in one
of the FaxPress groups. When the user first logs on to FaxPress a mailbox is
automatically created for this user using the network name which he uses to logon
to the network. The administrator has full control over how this mailbox is created
and which properties will be assign to the mailbox such as which NDS print queue
will be assigned to the user.
To add new users to FaxPress, all the administrator needs to do is add him to one
of the FaxPress groups. When the user is removed from the group he will not be
granted access to FaxPress. SSO also provides an automated way to clean up nonused mailboxes for users who are removed from the groups.
FaxPress Authentication Methods
FaxPress allows the administrator to select the method by which users will be
authenticated and granted access to FaxPress. The following authentication
methods are available:
•
FaxPress Native Authentication — User needs to log on to FaxPress by
specifying a user name and a password. This method is always available, even
for SSO enabled FaxPress servers.
•
NDS Authentication — User needs to be logged on to a specified context on
NDS in order to be able to logon to FaxPress. No additional password is
required for FaxPress.
5—34
Configuring User Authentication (SSO)
•
Configuring FaxPress
Bindery File Server Authentication — User needs to be logged on to a
specified Novell File Server in order to be able to logon to FaxPress. No
additional password is required for FaxPress.
SSO Groups
In general, when users logs onto a Novell network, they receive privileges based
on membership in a group. In particular, if you use FaxPress Single Sign On,
FaxPress privileges are granted based on membership in a FaxPress specific
groups. There are two basic kinds of FaxPress groups: “serial number groups” and
“global groups”.
Serial number groups are used to convey privileges to your users for a specific
FaxPress server. Global groups are used to convey privileges to all your FaxPress
servers. For example, to define a user that can access every FaxPress server in
your network with User privileges, add them as a member to the global group
FAXPRESS_user. If in addition you want to give this user Supervisor privileges
on FaxPress server serial number 08001111, add this user as a member to the serial
number group named “08001111_Supervisor”.
If the user is a member in both a serial number group and a global group, the serial
number privilege level takes precedence.
Serial Number Groups
When you installed the Novell NDS Network FaxPress server, the installation
program created FaxPress Novell user groups called Serial Number Groups in
your server installation context.
For example, suppose that a particular FaxPress has a serial number of 08101111.
Then, to allow serial number privileges, use your Novell network Administrative
Tools (such as NWAdmin or NetAdmin) to assign users to groups with the
following names:
•
08101111_User— User*
•
08101111_Router— Router*
•
08101111_Operator— Operator*
•
08101111_Supervisor— Supervisor*
*Refer
to user privilege definitions in "Configuring the User" on page 7-3.
5—35
FaxPress Administrator’s Guide
In an NDS environment, these groups will be created in the same context in which
the FaxPress is installed.
In a Novell Bindery environment these groups will be created on the FaxPress
master file server (the server that the FaxPress server software is installed on.)
Global Groups
Membership in FaxPress Single Sign On can also be defined in terms of groups of
FaxPress servers by pointing a global membership group in a shared space. When
users are added to the global group, their privileges are defined for every FaxPress
server that shares the global group.
To allow global privileges:
•
Enable global groups for each server that you want to access members on a
global basis and locate the global groups in the same context. FaxPress will
create the groups for you.
•
Add users using Novell administrative tools to any of the following group
names:
•
FAXPRESS_User— User*
•
FAXPRESS_Router— Router*
•
FAXPRESS_Operator— Operator*
•
FAXPRESS_Supervisor— Supervisor*
*Refer
to user privilege definitions in "Configuring the User" in Chapter 4.
In an NDS environment, global groups can be created anywhere in the NDS tree
and the privileges granted will match membership in the group. For example, if
there are FaxPresses installed in regional contexts and the global groups exist in a
corporate context, an administrator will only have to update the global groups to
control the privileges of all FaxPresses.
Automatic creation of Mailboxes
Once you have enabled SSO on the FaxPress server, and added the users to the
above groups, the users can login to FaxPress. The user needs to first login to
either NDS or the file server that the administrator specified. When the user tries
5—36
Configuring User Authentication (SSO)
Configuring FaxPress
to login for the first time, he will be prompted with a message prompting him to
either select to create a new mailbox or connect to an existing mailbox.
If you are upgrading from a previous version of FaxPress please connect to you
existing mailbox.
You will be prompted to enter the password for the last time. Once SSO mailbox
is created you will not be prompted to enter you previous password again.
5—37
FaxPress Administrator’s Guide
If a new mailbox is created, the user’s network logon name will be used as the
mailbox name. The user’s “Fully qualified Network Name” (FNN) will be
associated with this mailbox. A FNN is a unique identifier for a user that includes
the server name or NDS context that contains the user. If for any reason this
association needs to be removed so the user can logon to a different mailbox, the
administrator can remove the association through the user properties user
interface (Refer to "Network Details" on page 7-32.)
Selecting User Authorization
To configure Single Sign On, do the following.
5—38
1.
Login to Faxmain with supervisor privileges.
2.
Right click on the [Server Name] folder and select Properties from the
context menu.
Configuring User Authentication (SSO)
3.
Configuring FaxPress
Use the right arrow at the top of the properties dialog box to leaf through
the server properties tabs. Click on the User Authentication tab to display
the User Authentication Dialog Box.
Note:
The User Authentication dialog box will only be enabled if you
have the Novell IntraNetware client installed on your workstation.
5—39
FaxPress Administrator’s Guide
4.
Select the method of user authentication that you would like to utilize in
How should FaxPress authenticate users.
The default is With FaxPress native authentication only, which means that
users must use a login ID and password in order to use FaxPress. This is the
default setting and has no additional parameters.
Enable Single Sign On
The FaxPress Single Sign On feature requires the existence of FaxPress groups.
These are created by the FaxPress server installation program in the server
installation context. There are two different kinds of FaxPress groups: serial
number groups and global groups. For more information regarding Single Sign On
and the concepts of groups refer to "SSO Groups" on page 5-35.
1.
If you are on an Novell NDS network and want to enable Single Sign On,
select With Novell NDS authentication using the network login ID.
a.
5—40
If you wish to relocate the serial number groups, click on Browse to
specify a different NDS context to be used for user authentication.
Configuring User Authentication (SSO)
Configuring FaxPress
FaxPress will create the serial number groups in the new location. The
Authorization Context dialog box will be displayed.
Highlight a choice and click OK to assign the NDS context. The mandatory FaxPress user groups must exist in the selected context.
b.
You can also specify whether to use global groups in the User
Authentication dialog box. This context is where the global groups
will be located. The default location is the FaxPress server context.
If you would like to use the global FaxPress user groups, select Also, use
global FaxPress groups. You can accept the default location or click on
Browse to specify the NDS context.
Note:
c.
The FaxPress global groups will be created in the selected context.
Click on OK to return to the User Authentication dialog box.
5—41
FaxPress Administrator’s Guide
2.
If you want to use a Novell Bindery File Server for authentication, from the
User Authentication dialog box, click on With Novell Bindery File Server.
and select the server you want to use from the drop down list.
3.
Specify new mailbox template parameters in the When automatically
creating a new mailbox section. Selecting a mailbox type in the scroll
down list for Mailbox template based on.
The scroll down list will include every user defined in the Users folder of the
Administration branch as a possible choice for your template. In this case, we
create a NDS specific user called NDS_Template. You can create your own
template or use any other defined user account.
4.
FaxPress can be configured to allow Single Sign On users direct access.
These means that the users do not have to be logged on to the Novell
network in order to access FaxPress.
•
If you want to make FaxPress directly assessable, set a password for FaxPress users, or for pre-existing FaxPress users you can elect to leave the
current password unchanged.
•
If you assign a random password, your FaxPress users will only be able
to access FaxPress through their Novell network login.
You can assign passwords for two cases of users:
5—42
Configuring User Authentication (SSO)
Configuring FaxPress
•
Novell users new to FaxPress
a.
For new FaxPress users, select Set password to and enter the
password in the edit box, to enable your users to access FaxPress
directly (when they are not logged into a Novell network).
b.
For new FaxPress users, select Generate random password to disable
direct user access to FaxPress (users will have to be logged into a
Novell network to access FaxPress).
•
Novell users with existing FaxPress user mailboxes.
a.
For existing FaxPress users, select Leave Password Unchanged or
Set password to and enter the password in the edit box, to enable your
users to access FaxPress directly (when they are not logged into a
Novell network).
b.
For existing FaxPress users, select Generate random password to
disable direct user access to FaxPress (users will have to be logged into
a Novell network to access FaxPress). Their current FaxPress password
will be changed to a random one once the mailbox is converted.
5—43
FaxPress Administrator’s Guide
5.
Click on OK to return to the User Authentication dialog box. When you
have completed configuring your user authentication parameters, click OK
to set the new configuration. The following message will be displayed:
Single Sign On is now enable, but to implement this feature you must add
your Novell network users to the FaxPress serial and/pr global groups.
5—44
Viewing Server Information
Configuring FaxPress
Viewing Server Information
1.
To view your server installation configuration parameters, click on the
Server Information tab.
5—45
FaxPress Administrator’s Guide
2.
5—46
Click on the Advanced button to review the server hardware configuration
settings.
Load Sharing
Configuring FaxPress
Load Sharing
Load sharing between FaxPress servers provides a way for a FaxPress to share its
outbound fax loads. In networks that have two or more FaxPress servers, a pair of
FaxPress servers can be configured to loadshare by configuring one as a slave to
the other.
You can configure a FaxPress server as a slave to only one master. Several slaves
may serve the same master, and a master may serve as a slave to another master.
The FaxPress installation software allows you to configure a FaxPress server as a
slave to another FaxPress server. Only the slave is configured – no special
procedure is needed for the master.
Load sharing can be used in either NT or NetWare environments. You may enable
the load sharing option in the installation software when you install the slave
server. Updating a FaxPress server installation to enable load sharing will not
affect the FaxPress’ current database.
The master and slave must be connected to the same full duplex network segment,
use the same network file server, and be installed with the same version of
software on the same volume. For NetWare 4.x and later, both FaxPress servers
must be installed in NDS mode.
When the slave server determines that it has available fax rasterization or modem
resources, it offers to share the load of the master by either rasterizing a job or
making a fax call. The master server reports the status of the job, and it load-shares
in the same manner it reports the status of local jobs.
Load Sharing Requirements
Note the following general load sharing requirements:
•
FaxPress servers must be running the same version of FaxPress server
software.
•
FaxPress servers must be configured to support the same network operating
system. When installed on NetWare 4.x or later file server, both FaxPress
servers must be installed under NDS.
•
The master file server should have at least a Pentium II processor.
5—47
FaxPress Administrator’s Guide
•
Both FaxPress servers must be installed on the same network sharable hard
drive in the same context and/or with the same shareable name. The master
FaxPress user account must permit multiple simultaneous logins—as many as
there are slaves plus the total number of slave fax lines.
•
Both FaxPress servers must be connected to the same full duplex network
segment (they must not be separated by routers or bridges).
•
Both FaxPress servers must use the same Ethernet frametype. (Token Ring
units must use either source routing or non-source routing.)
•
The installation workstation must have an x86 or Pentium processor.
NDS Requirement
•
When installing on an NDS fileserver, install FaxPress under NDS, not in
Bindery mode.
NT Requirements
•
Both FaxPress servers must be on the same segment as the NT file server.
•
Both FaxPress servers must be installed in the same directory with the same
sharable name.
•
Both FaxPress servers must be running FaxPress server software version 4.02
or later.
Performance Considerations
When a master FaxPress is configured to handle only incoming calls, the load
sharing slave FaxPresses can support eight simultaneously active outbound calls
with a mid-range Pentium-based file server. Although more lines can be added
with additional slave units, the combined capacity of the network, file server and
master FaxPress often limit the number of simultaneously active outbound calls to
less than the total number of slave lines. Increasing the number of slaves can
substantially add to the network segment traffic and master file server load.
5—48
Automatic Routing: PBX and FaxPress Integration
Configuring FaxPress
Automatic Routing: PBX and FaxPress Integration
Integration with a PBX or DID trunk lines is considered by Castelle to be the most
reliable form of fax routing, although Castelle also supports other forms of
automatic fax routing including T.30 Sub-Addressing, manual DTMF from a Fax
machine with a handset and Third-Party OCR routing.
FaxPress can be easily integrated with many popular PBX’s to provide automatic
delivery of incoming faxes to the recipient's email mailbox or desktop. Using your
corporate PBX eliminates the need to order additional outside lines and additional
hardware for the FaxPress.
The Castelle FaxPress SBE, 2500, 3500, 5000, 7000/7500 are designed to work
with standard loop start telephone lines. These models do require, however, the
use of an Exacom or CTPX converter or a compatible PBX to interface to wink or
loop start trunks, or to the PBX’s analog ports. See "The FaxPress 7500-DID and
E&M" on page -1 for more information.
For this reason, FaxPress is an ideal product for use behind a compatible PBX that
provides a loop start type interface. The FaxPress is easily connected to PBX's that
support loop start integration for Voice Mail, with configurable DTMF
transmission.
Preparing your PBX System for Automatic Fax Routing
Most PBXs can be configured to support multiple voice mail systems. The
FaxPress, to the PBX, will be seen as a second voice mail system.
PBX systems differ in many ways but they do share the common principles of
operation covered here. For more specific technical documentation on specific
PBX systems, please view our library of technical documents on this subject on
our support site:
http://www.castelle.com/support/documentation/
The primary concern when integrating FaxPress with your PBX is to make sure
that the PBX can be configured to transmit only the dtmf digits of the Mailbox ID,
and no other digits such as A or D tone, or a string of digits preceding the number.
FaxPress can, however, strip unnecessary digits in the following cases.
5—49
FaxPress Administrator’s Guide
For 4 digit mailbox IDs, FaxPress can:
•
from a 16 character set, strip 10 characters in front of the 4 digit mailbox
ID, and 2 characters after the mailbox ID.
•
from a 10 character set, remove 5 characters in front of the 4 digit mailbox ID, and 1 character after the mailbox ID
•
from a 6 character set, remove 2 characters in front of the 4 digit mailox
ID.
•
from a 5 character set, remove a # sign before or after the 4 digit mailbox
ID.
•
from a Philips iS3070 PBX string "xxxxxxxxxxxxx1234x" perform the
required parsing function.
For 3 digit mailbox IDs, FaxPress can:
•
from a 15 character set, strip 10 characters in front of the 3 digit mailbox
ID, and 2 characters after the mailbox ID.
•
from a 9 character set, remove 5 characters in front of the 3 digit mailbox
ID, and 1 character after the mailbox ID
•
from a 5 character set, remove 2 characters in front of the 3 digit mailox
ID.
•
from a 4 character set, remove a # sign before or after the 3 digit mailbox
ID.
•
from a Philips iS3070 PBX string "xxxxxxxxxxxxx123x" perform the
required parsing function.
In order for your PBX to pass the DTMF tones to the FaxPress you may be
required to make some program changes to your PBX. The PBX should consider
the FaxPress to be similar to a Third Party analog voice mail system. The vast
majority of PBXs are able to make custom program settings to integrate with a
variety of voicemail systems.
The analog fax modems used by the FaxPress requires your PBX to have sufficient
standard analog ports installed in your PBX. One analog port is required for each
FaxPress modem; please consult your FaxPress documentation to determine the
number of modems in your FaxPress unit.
5—50
Automatic Routing: PBX and FaxPress Integration
Configuring FaxPress
Once the FaxPress modems are connected to the PBX analog ports you will need
to set your PBX to forward the DID or DNIS information to those analog ports as
DTMF signals.
This is very similar to the way your voicemail system is set to work, with the last
3 or 4 digits of the phone number representing an extension number. This same
principle enables the FaxPress to receive an incoming fax call to the correct
FaxPress mailbox. A FaxPress user mailbox can represent a FaxPress client user,
printer, email address or customer application. The sender of the fax simply enters
a regular fax number and the FaxPress automatically delivers the fax to the correct
mailbox (network user, printer, email address or customer application).
Most people will allocate a block of DID or DNIS numbers currently not in use
and assign these to a hunt group. The hunt group is then tied to the assigned analog
ports on the PBX. The incoming numbers should be set to automatically call
forward to the hunt group and set to send the last 3 or 4 digits as DTMF signals
when the line is picked up. The FaxPress allows a default 15 second timeout
interval for the tones to be received, it will then verify that a mailbox matches
those received tones and begin to handshake with the sending fax machine. To
customize the timeout interval, see .
Configuring the FaxPress for PBX Integration
The FaxPress Server Properties and the FaxPress User Properties must both be
correctly configured for FaxPress/ PBX integration. FaxPress/PBX integration
requires the FaxPress to use the same settings used to enable Direct Inward
Dialing (DID).
To set the FaxPress Server Properties for automatic routing via your PBX, follow
these steps:
1.
Open Faxmain (Start>Programs>FaxPress>Faxmain), login as
Supervisor to a FaxPress server, right-click on the server, and select
Properties from the context menu.
5—51
FaxPress Administrator’s Guide
2.
Click on the Line Settings tab to display the Line Settings dialog box.
In the PBX Pre-dial edit box, enter the prefix your PBX system
requires for accessing an outside phone line.
Many companies have a PBX which requires users to dial a digit, usually a “9” to get an outside line. FaxPress automatically inserts a 3 second pause after the PBX pre dial. This means that you do not have to
insert a comma after the PBX digits.
If the PBX requires an access code on a per user basis, see "Configuring User Properties" on page 7-19.
For Routing Type, make sure the PBX/DID radio button is selected.
5—52
Automatic Routing: PBX and FaxPress Integration
3.
Configuring FaxPress
Select the Dialing Properties tab.
If your PBX system requires passwords for access to an outside line,
check Dial Access Code in the When dialing through PBX. From the
pull down menu on the right select whether to insert the password
Before or After the number is dialed.
5—53
FaxPress Administrator’s Guide
4.
Select the Advanced Functions tab.
Select I am using DID for inbound fax routing. When you enable this
feature, an additional text box will be displayed at the bottom of the
dialog box.
Specify number of DTMF digits your PBX passes by clicking the
appropriate radio button for 3 or 4. The default value is 4. You must
know precisely how many digits are being sent to the FaxPress from
the PBX. FaxPress provides the To enable DID receiving diagnostic
mode to determine the number of digits being sent.
Check To enable DID receiving diagnostic mode to record, in a
dtmf.log file, the mail box IDs of all fax recipients, the time of the
incoming faxes, and the number of DTMF digits passed by the PBX.
5—54
Automatic Routing: PBX and FaxPress Integration
Configuring FaxPress
To configure the User Properties for automatic fax routing via PBX, follow these
steps:
1.
Open Faxmain and log into a server with Supervisor privileges.
2.
Expand the Administration branch.
3.
Click on Users. The list of current user mailboxes is displayed in the right
panel.
4.
Right click on a user mailbox and select Properties.
In the User Properties dialog box, with the User Account tab selected,
enter an identifier number in the Mailbox ID text box. The identifier
number may contain 3 or 4 digits.
If necessary, enter a PBX access code in the PBX Access Code field.
Note:
See "Configuring User Properties" on page 7-19 for more
information regarding user configuration.
5—55
FaxPress Administrator’s Guide
Receiving Faxes without a Corresponding Mailbox ID
If a fax is sent to an identifier number for which there is no corresponding
FaxPress mailbox, FaxPress will, by default, reject the incoming fax.
In FaxPress 6.3 and above you may configure the FaxPress server to accept faxes
sent to an identifier number without a corresponding FaxPress mailbox. The
received faxes will be stored in the FaxPress Unaddressed mailbox. (For
information regarding the FaxPress Unadressed mailbox, refer to your FaxPress
manual.)
To configure the FaxPress server to accept incoming faxes sent to identifier
numbers without FaxPress mailboxes, follow these steps:
1.
5—56
Open the Castelle System folder on your hard drive. The number of fxcfg
files in the System folder corresponds to the number of fax lines.
Automatic Routing: PBX and FaxPress Integration
2.
Configuring FaxPress
Double-click on an fxcfg file to bring up the fxcfg text file.
Type:
did_failure=1
as shown below to allow incoming faxes sent to DID numbers without
corresponding FaxPress mailboxes to be received and stored in the FaxPress
Unaddressed mailbox.
Conversely, type:
did_failure=0
to reject incoming faxes sent to DID numbers without corresponding
FaxPress mailboxes.
Configuring the DID Timeout Interval
To specify the number of seconds the FaxPress should allow for incoming digit
reception. The timeout range is 1 to 15 seconds. The default value is 15 seconds.
5—57
FaxPress Administrator’s Guide
To customize the timeout interval, type:
did_timeout=9
as shown below.
DTMF Automatic Fax Routing
In DTMF automatic routing, the fax sender uses your mailbox’s four-digit
Mailbox ID to address the fax. To send a fax to a specific mailbox, the sender dials
the FaxPress’ phone number, and then addresses the fax using the recipient
mailbox’s four-digit Mailbox ID.
If your FaxPress uses DTMF routing, any fax machine with a touch-tone keypad
can use DTMF dialing procedures to address faxes directly to FaxPress user
mailboxes. Faxes automatically routed to your mailbox appear in your personal
Incoming fax list, and do not appear in the Unadddressed fax list. DTMF dialing
can be used to address a fax to one mailbox per call.
Fax senders must know your FaxPress mailbox ID in order to use DTMF dialing.
Faxes not specifically addressed with DTMF dialing are automatically routed to
5—58
Automatic Routing: PBX and FaxPress Integration
Configuring FaxPress
the Unaddressed mailbox, where they must be viewed and manuallly routed by a
user with Router privileges. Be sure to provide your FaxPress mailbox ID to
people who send you faxes.
Sending faxes via DTMF directly to a FaxPress mailbox requires the sender to use
the following addressing procedure:
1.
Using a fax station with a touch tone phone or keypad, dial the FaxPress’
fax number. The FaxPress will answer the call wih a fax data squeal.
2.
Wait for the end of the fax data squeal, then press * on the keypad. The
FaxPress will then respond with three tones to confirm DTMF mode. If the
FaxPress does not respond with three tones, try pressing the * again.
3.
After the three tones, dial the destination mailbox ID on the touch-tone
keypad, and then press # #. The FaxPress will respond with three tones to
verify input, followed by ready tones.
4.
Start the send operation.
If the FaxPress does not have a mailbox with the specified ID, it replies with one
long tone to signify a sequence error. If this happens, clear the error by pressing
# #, then return to step 2.
In short, the DTMF dialing syntax is as follows:
fax number (fax squeal) * (3 tones) mailbox ID ## (3 tones)
For troubleshooting help regarding your DTMF automatic routing, please refer to
the Automatic Fax Routing Troubleshooting link at:
http://www.castelle.com/support/documentation/
5—59
FaxPress Administrator’s Guide
5—60
Administrator Utilities
6
Overview .......................................................................................................... 6-2
Administrator Utilities .................................................................................... 6-3
FP Configurator for TCPIP ........................................................................... 6-5
FP Configurator for IPX .............................................................................. 6-11
Importing Microsoft Exchange Users ......................................................... 6-19
Documents...................................................................................................... 6-21
Inbound Faxes: Using the FaxPress DropFax Utility ................................ 6-22
Using the FaxPress User Duplication Utility .............................................. 6-24
Importing Network Users ............................................................................. 6-28
Line Scheduler ............................................................................................... 6-37
FaxPress Administrator’s Guide
Overview
This chapter describes the windows-based FaxPress Administration Tools group
of utilities available for the administrator to view and configure the settings on the
FaxPress. These administration utilities are installed when you install the
FaxPress Administrator client. Utilities are provided for both Windows NT and
Novell networks.
6—2
Administrator Utilities
Administrator Utilities
Administrator Utilities
1.
The FaxPress Administrator Client utilities, in the Administration Tools
folder, are installed during the Administrator Client Installation. By
default the Administration Tools folder is located in the C:\Program
Files\Castelle\FaxPress\ Administration Tools directory, and may be
accessed by going to Start>Programs>FaxPress>Administration Tools.
The Administration Tools utilities include:
•
FP Configurator for TCPIP - in a TCP/IP environment, this utility lets
you configure and troubleshoot the FaxPress’ IP information and saved
hardware settings. (See "FP Configurator for TCPIP" on page 6-5)
•
FP Configurator for IPX - in a Novell environment, this utility lets you
configure and troubleshoot the FaxPress’ IPX address information and
saved hardware settings.(See "FP Configurator for IPX" on page 6-11)
•
Import Microsoft Exchange Users - this utility creates mailbox
accounts in the FaxPress database for registered Exchange users. (See
"Importing Microsoft Exchange Users" on page 6-19)
•
Documents - this folder provides access to a variety of FaxPress documentation. (See "Documents" on page 6-21)
•
DropFax - this utility creates an easily accessible directory for inbound
faxes, allowing third-party applications to retrieve the faxes stored there.
("Inbound Faxes: Using the FaxPress DropFax Utility" on page 6-22)
•
Duplicate Users - this utility can be used to replicate users from a source
FaxPress server or servers to a target FaxPress server or servers. (See
"Using the FaxPress User Duplication Utility" on page 6-24)
•
Import Network Users - this utility creates mailbox accounts in the FaxPress database for users registered on an NT network (See "Importing
Network Users" on page 6-28. Also see "Importing NT Users" on
page 7-6)
•
Line Scheduler - this utility allows the FaxPress administrator to automatically change the fax line configuration during a specified time
period, enabling automatic, scheduled control of both inbound and outbound faxing activity. (See "Line Scheduler" on page 6-37)
6—3
FaxPress Administrator’s Guide
Accessing the Administration Tools
To access the Administration Tools, follow these steps:
1.
Go to Start>Programs>FaxPress>Administration Tools.
2.
Select the utility you’d like to implement from the Administration Tools
menu.
Note:
6—4
If the FaxPress Administrator client is installed in an IPX/SPX
environment, the Administrative Tools will also include the FP
Configurator for IPX/SPX in addition to the FP Configurator for
TCP/IP.
FP Configurator for TCPIP
Administrator Utilities
FP Configurator for TCPIP
The FP Configurator for TCPIP utility Windows based utility that allows you to
configure and troubleshooting a FaxPress server installed on a TCP/IP network.
The FP Configurator for TCPIP utility is part of the Administration Tools group
of administration utilities, which is installed with the Administrator client
installation option.
To run FP Configurator for TCPIP, follow these steps:
1.
Go to Start>Programs>FaxPress>Administration Tools>FP Configurator
for TCPIP to display the FaxPress Configuration dialog box.
2.
Enter the FaxPress server’s serial number in the text box.
3.
If the FaxPress server’s IP address is in a different segment, enter the
current FaxPress IP address in the TCP/IP Address edit box.
4.
Click on SHOW and the relevant data for this sever will be displayed.
Moving a FaxPress Server
To reconfigure a FaxPress server before moving it to a new location:
6—5
FaxPress Administrator’s Guide
1.
If want to move your server installed on a Windows NT network, you will
first need to change the IP address. Enter the TCP/IP address for the new
location in the FaxPress IP Address text box.
2.
Click the Set IP Address button to reboot the server and set it with the new
address.
3.
If you are moving the server installation to a different master file server,
enter the name of the new file server in the Master File Server text box.
4.
If the file server has a different TCP/IP address you will also have to change
it.
a.
Click the IP Settings button to launch the FaxPress IP Address
Configuration dialog box.
5.
You may have to change the Gateway settings also if the new location is on
a different segment.
6.
If necessary, replace the current subnet mask with the subnet mask the
FaxPress will use in its new location.
7.
Click on the SET button to store the information in the FaxPress to return to
the main dialog box.
8.
Select Reboot to implement your changes.
Troubleshooting
To capture the FaxPress server network traffic details:
1.
6—6
Click on the Capture Settings button to display the FaxPress Capture
Settings dialog box.
FP Configurator for TCPIP
2.
Administrator Utilities
To set the flag for capturing network traffic data during the boot up period,
click Set boot capture. And select Perform.
When you set this flag, FaxPress will capture the network traffic from the start
of the boot up procedure until the capture buffer is full. Capture buffer size is
set automatically as follows:
3.
•
1 MB if the total memory size is 4 MB.
•
2 MB if the total memory size is 8 MB.
•
4 MB if the total memory size is 12 MB
•
6 MB if the total memory size is 16 MB
•
10 MB if the total memory size is 32 MB
To include the capture of broadcast packets, click Include broadcast
packets.
4.
To capture network traffic during run time, click on the Set RT Capture
box, and select Perform. FaxPress will capture the data until the buffer is
full.
a.
You can designate the size of the buffer by changing the number in the
Buffer box. Each digit represents a MB of buffer space.
b.
To include the capture of broadcast packets, click Include broadcast
packets.
5.
To dump the captured data to a file, click Dump to File.
6—7
FaxPress Administrator’s Guide
a.
Designate the file name and location by clicking the Browse button.
The file format is compatible with Microsoft network monitor and has
the *.cap extension.
b.
After dumping the captured data to a file, click Release capture
buffer, to delete the data and reclaim the space.
c.
Click OK to save settings.
6.
After you have made the appropriate changes, click Perform. This will
return you to the main menu.
7.
Select Reboot to implement your changes.
Setting the Network Packet Type
FaxPress Ethernet and Token Ring servers are configured to automatically
determine the network packet type required to communicate on the network.
FaxPress supports the IEEE standard. The automatic feature broadcasts a frame
type over the network and waits for a response. If the network does not respond to
the frame type, the FaxPress broadcasts the next frame type. This cycle continues
until the FaxPress broadcasts the frame type your network uses.
6—8
FP Configurator for TCPIP
1.
Administrator Utilities
You can set the frame type the FaxPress uses by clicking Advanced
Settings button. The following dialog box is displayed:
•
•
Possible Ethernet frame types are:
•
802.2
•
802.3
•
802.2 SNAP
•
Ethernet II
•
Automatic
Possible Token Ring Frame types are:
•
802.2 source routing
•
802.2 SNAP source routing
•
802.2 non-source routing
•
802.2 SNAP non-source routing
•
Automatic
2.
After you have made the appropriate changes, click Set. This will return
you to the main menu.
3.
Select Reboot to implement your changes.
Changing the FaxPress Server Password
1.
To change the password associate with your FaxPress server, click on
Password.
6—9
FaxPress Administrator’s Guide
2.
Enter the new Password in the Password text box, and retype it in the
Confirm Password text box.
Note:
6—10
If you change the password in this utility, you must also change the
serial # users' password in the domain or Novell context.
3.
After you have made the appropriate changes, click Set. This will return
you to the main menu.
4.
Select Reboot to implement your changes.
FP Configurator for IPX
Administrator Utilities
FP Configurator for IPX
The FP Configurator for IPX utility lets you view and change the FaxPress’ IPX
address information.
The FP Configurator for IPX utility is part of the Administration Tools group of
administration utilities, which is installed when you perform the Administrator
client installation option.
To run FP Configurator for IPX, follow these steps:
1.
Go to Start>Programs>FaxPress>Administration Tools>FP Configurator
for IPX to display the FaxPress Configuration dialog box, as shown below.
2.
Enter the FaxPress server’s serial number in the text box.
3.
Click on Show Settings and the relevant data for this sever will be
displayed.
Moving a FaxPress Server
To reconfigure a FaxPress server before moving it to a new location:
6—11
FaxPress Administrator’s Guide
1.
If you want to move your server installed on a Novell IP network, you will
first need to change the IP address. Click the IP Settings button to launch
the FaxPress IP
2.
Enter the TCP/IP address for the new location in the FaxPress IP Address
text box.
3.
If you are moving the server installation to a different file server, enter the
name of the new file server in the Master File Server text box.
4.
You may have to change the Gateway settings also if the new location is on
a different segment.
5.
If necessary, replace the current subnet mask with the subnet mask the
FaxPress will use in its new location.
6.
Click on the SET button to store the information in the FaxPress to return to
the main dialog box.
7.
Select Reboot to implement your changes.
Troubleshooting Support
To capture the FaxPress server network traffic details:
1.
6—12
Click on the Capture Settings button to display the FaxPress Capture
Settings dialog box.
FP Configurator for IPX
2.
Administrator Utilities
To set the flag for capturing network traffic data during the boot up period,
click Set boot capture. And select Perform.
When you set this flag, FaxPress will capture the network traffic from the start
of the boot up procedure until the capture buffer is full. Capture buffer size is
set automatically as follows:
3.
•
1 MB if the total memory size is 4 MB.
•
2 MB if the total memory size is 8 MB.
•
4 MB if the total memory size is 12 MB
•
6 MB if the total memory size is 16 MB
•
10 MB if the total memory size is 32 MB
To include the capture of broadcast packets, click Include broadcast
packets.
4.
To capture network traffic during run time, click on the Set RT Capture
box, and select Perform. FaxPress will capture the data until the buffer is
full.
a.
You can designate the size of the buffer by changing the number in the
Buffer box. Each digit represents a MB of buffer space.
b.
To include the capture of broadcast packets, click Include broadcast
packets.
5.
To dump the captured data to a file, click Dump to File.
6—13
FaxPress Administrator’s Guide
a.
Designate the file name and location by clicking the Browse button.
The file format is compatible with Microsoft network monitor and has
the *.cap extension.
b.
After dumping the captured data to a file, click Release capture
buffer, to delete the data and reclaim the space.
c.
Click OK to save settings.
6.
After you have made the appropriate changes, click Perform. This will
return you to the main menu.
7.
Select Reboot to implement your changes.
Setting the Network Packet Type
FaxPress Ethernet and Token Ring servers are configured to automatically
determine the network packet type required to communicate on the network.
FaxPress supports the IEEE standard. The automatic feature broadcasts a frame
type over the network and waits for a response. If the network does not respond to
the frame type, the FaxPress broadcasts the next frame type. This cycle continues
until the FaxPress broadcasts the frame type your network uses.
6—14
FP Configurator for IPX
1.
Administrator Utilities
You can set the frame type the FaxPress uses by clicking Advanced
Settings button. The following dialog box is displayed:
•
•
Possible Ethernet frame types are:
•
802.2
•
802.3
•
802.2 SNAP
•
Ethernet II
•
Automatic
Possible Token Ring Frame types are:
•
802.2 source routing
•
802.2 SNAP source routing
•
802.2 non-source routing
•
802.2 SNAP non-source routing
•
Automatic
2.
After you have made the appropriate changes, click Set. This will return
you to the main menu.
3.
Select Reboot to implement your changes.
Changing the FaxPress Server Password
1.
To change the password associate with your FaxPress server, click on
Password.
6—15
FaxPress Administrator’s Guide
2.
Enter the new Password in the Password text box, and retype it in the
Confirm Password text box.
3.
After you have made the appropriate changes, click Set. This will return
you to the main menu.
4.
Select Reboot to implement your changes.
Converting FaxPress 3.x Phone Books to FaxPress 4.x
Phone Books
This utility lets you convert FaxPress 3.x phone books to FaxPress 4.x phone book
format, and 5.x to 6.x/7.x format.
The phone book you want to convert must be in working order before you can
convert it. Fix any phone book problems before running them in this utility. You
can use Pbfix to correct most problems. Pbfix.exe can be found in
\Castelle\Admin on the FaxPress CD-ROM.
The PB3to4 utility is found in the PhoneBook Conversion folder, which is part
of the Administration Tools group of administration utilities, that is installed
when you perform the Client Installation and choose the Administrator
installation option.
To convert a 3.x phone book:
6—16
FP Configurator for IPX
Administrator Utilities
1.
Go to the PhoneBook Conversion folder and click on PB3to4.exe to
display the pb3to4 dialog box, as shown below.
2.
Click on OK to display the name conversion dialog box, as shown below:
.
Choose the appropriate response (Yes or No). The Open dialog box appears,
as shown below.
3.
In the Open dialog box, locate the phone book you want to convert. The
path to the phone book is:
Castelle\serial_number\phonebks\id_number\
Where:
6—17
FaxPress Administrator’s Guide
4.
•
serial_number is the serial number of the FaxPress server where the
phone book is located.
•
id_number is a number assigned by the FaxPress that maps to a mailbox
user. You can use the IDLIST utility to identify the user.
Select settings.pdb and then click on OK.
The utility converts the selected phone book to a 4.x format. The size of the
file affects the length of time it takes the conversion to complete.
If there are additional phone books in the directory, a message appears asking
you if you want to convert another user phone book. You can also choose to
convert all of the user phone books by clicking on the box in front of Convert
all user phone books. Make your selection.
5.
6—18
Select No to exit the utility.
Importing Microsoft Exchange Users
Administrator Utilities
Importing Microsoft Exchange Users
The Import Microsoft Exchange Users utility can be used to automatically create
new FaxPress mailbox accounts based on user account information in the
Microsoft Exchange address book.
To create new FaxPress mailbox accounts from existing, registered Exchange user
accounts, follow these steps:
1.
Go to Start>Programs>FaxPress>Administration Tools>Import
Microsoft Exchange Users.
2.
In the Register FaxPress Users window, log in to the designated FaxPress
server by entering the FaxPress Server name, and a Supervisor-privileged
User Name and Password. Set the Privilege Level, Settings, and Mailbox
ID as you would in creating a new FaxPress user account. (See "Creating
User Accounts" on page 7-4 and "Configuring Mailbox IDs" on page -14
for more information.)
3.
Click Register.
6—19
FaxPress Administrator’s Guide
4.
6—20
From the Microsoft Exchange Global Address List, select a user or group
to import, then click OK..
Documents
Administrator Utilities
Documents
The Administration Tools’ Documents folder provides access to FaxPress
documentation folders. Access the FaxPress’ Documents folder by going to
Start>Programs>FaxPress> Administration Tools>Documents.
Note:
Copying the Administration Tools’ Documents folder from the
FaxPress Setup CD is optional. If this folder is not available, the
administrator may have chosen not to copy it from the CD.
The Documents folder contains FaxPress Release Notes, the FaxPress Email
Gateways Administrator and Users’ Guide, the FaxPress Administrator and
Users’ Guide, third party integration documents, the Softward Developer’s Kit
Guide, the Installing the FaxPress Client on Microsoft Terminal Server’s
Guide, and the Office Direct Storage Server Guide.
Note:
See Chapter 9, "Developing Custom Software" for more
information regarding the Castelle Software Development Kit
(SDK) and the associated Castelle Programming Interface (CPI)
software.
6—21
FaxPress Administrator’s Guide
Inbound Faxes: Using the FaxPress DropFax Utility
The FaxPress DropFax utility creates an easily accessible directory for inbound
faxes, allowing third-party applications to retrieve the faxes stored there. The
inbound faxes automatically stored in the drop directory appear in .TIF file format.
After the DropFax utility is activated from the Aministration Tools folder, a
DropFax icon will appear on your toolbar.
To activate the DropFax utility and create a Drop Directory for inbound faxes on
a specific FaxPress server, follow these steps:
6—22
1.
Go to Start>Programs>FaxPress>Administration Tools>DropFax.
2.
The DropFax icon will now appear on your toolbar. Right-click on the
DropFax icon and select Config.
Inbound Faxes: Using the FaxPress DropFax Utility
Administrator Utilities
3.
In the Configuration window, with the Server tab selected, select a
FaxPress server to create the Drop Directory on, then click Add. If required,
enter the FaxPress Supervisor name and password in the Verify window,
then click OK.
4.
Select the Directories tab. Confirm the FaxPress Server, Inbound Line
and Directory fields are correct, then check the Drop fax to directory box
and click OK. Fax jobs received through this line will be stored in TIF
format in the specified drop directory.
6—23
FaxPress Administrator’s Guide
Using the FaxPress User Duplication Utility
The FaxPress user duplication utility, DupUser.exe, can be used to replicate users
from a source FaxPress server or servers to a target FaxPress server or servers. The
duplication utility can be configured to overwrite or not overwrite existing user
settings in the target FaxPress server.
Follow these steps to copy the users from one FaxPress server to another:
6—24
1.
Launch the Duplicate User utility. (Start>Programs> FaxPress>
Administration Tools >Duplicate User.)
2.
In the Server Name list, select the FaxPress server with the users list you’d
like to replicate, then click the Source button.
Using the FaxPress User Duplication Utility
Administrator Utilities
3.
In the Server Name list, select the FaxPress server you’d like to copy the
FaxPress source server’s list to, then click Destination.
4.
Use the Option button if you’d like to overwrite the destination user
settings with the source user settings, or to replicate default in addition to
normal users.
6—25
FaxPress Administrator’s Guide
6—26
5.
Click the Replicate button.
6.
In the DupUser window screen, click Yes.
Using the FaxPress User Duplication Utility
7.
Administrator Utilities
Click OK.
6—27
FaxPress Administrator’s Guide
Importing Network Users
1.
Go to Start>Programs>FaxPress>Administration Tools>Import Network
Users.
The User Registration Wizard will walk you through the set up process.
2.
Enter the FaxPress Server Name, User name and Password.
You can use the FaxPress Server Name drop down list to enter your server
name.
When done, click Next>.
3.
6—28
The User Domain Information window will be displayed. This window
allows you to choose whether you want to add users from a domain or from
Importing Network Users
Administrator Utilities
a group within a domain and to select the specific user group or domain to
add to FaxPress.
a.
Select either a Domain or Group.
b.
Either enter the path for you user group or domain, or click on Browse
to use your Active Directory Service Interfaces (ADSI) to find groups.
6—29
FaxPress Administrator’s Guide
Note:
6—30
The path for your domain or group must conform to ADSI
standards; for example: WinNT://MyGroup/MyDomain
c.
When the ADSI Browser opens, click on WinNT.This initiates a
network-wide search for the NT domains and, if you selected group, the
groups within each domain. The search can take up to 15 minutes or
more depending on the size of your network.
d.
If you previously chose Domain, double-click on the domain in which
the users you want to synchronize with the FaxPress are located.
e.
If you previously chose Group, click once on the (+) selection box of
the domain directory containing the group that contains the users you
want to synchronize with the FaxPress. Double-click on the group you
want to use.
Importing Network Users
4.
Administrator Utilities
Specify privileges for new users in the User Setting for New Users dialog
box.
You can use the drop down list to choose an existing mailbox as the basis for
the new mailboxes.
6—31
FaxPress Administrator’s Guide
5.
If the FaxPress is configured for DID or DTMF automatic routing, you may
assign mailbox ID numbers to all users you want to have direct fax
numbers. DID and DTMF mailbox ID numbers must be 3 or 4 digits.
The program automatically generates an identifier number for each new user.
Mailbox identifiers may have up to four digits.
When done, click on Next.
6—32
Importing Network Users
6.
Administrator Utilities
From the group you have chosen, specify some or all users.
Click on the >> button to move selected users to the Add list. FaxPress
mailboxes will be created for all users in the Add list. To remove a user from
the Select Users to Add list, highlight the user you want to remove and click
on the << button.
When done, click Next.
6—33
FaxPress Administrator’s Guide
7.
If there are FaxPress users without NT privileges, you will have a chance to
correct the situation.
This screen presents users that you have added using individual FaxPress user
creation procedures who cannot (at least at this point) actually login to NT.
When done, click on Next.
6—34
Importing Network Users
8.
Administrator Utilities
Review your choices in the Option Verification Window.
If everything is right, click on Finish or click <Back to reset any of your
parameters.
6—35
FaxPress Administrator’s Guide
9.
After the program completes creating the new mailboxes, a prompt appears
informing you that the operation is done and allowing you to view the
transaction log.
To view the log, click on Yes. The log is displayed using Notepad. If you
choose No or when you exit the log, the program returns you to the desktop.
When done, close Notepad. You are finished adding the NT Users.
6—36
Line Scheduler
Administrator Utilities
Line Scheduler
The FaxPress Line Scheduler utility allows the FaxPress administrator to
automatically change the phone line configuration during a specified time period.
For example, FaxPress phone lines can be configured to be "bi-directional" for
both sending and receiving from 9am to 5pm. From 5pm to 9am the next day,
FaxPress lines can be automatically set to "receive only," effectively allowing
faxes to be sent only during business hours.
By allowing you to set fax line direction based on the time of day, the Line
Scheduler utility enables automatic, scheduled control of both inbound and
outbound faxing activity. Once activated, the Line Scheduler utility appears as a
small icon on the toolbar.
To configure the FaxPress’ Line Scheduler utility, follow these steps:
1.
To activate the Line Scheduler utility, go to Start>Programs>FaxPress>
Administration Tools>Line Scheduler.
2.
The Line Scheduler’s clock icon will now appear on your toolbar. Rightclick on the Line Scheduler icon and select Config.
6—37
FaxPress Administrator’s Guide
6—38
3.
In the Configuration window, with the Servers tab selected, add a server to
the Scheduled servers list by selecting a FaxPress server from the
Available servers list and clicking Add.
4.
With the Settings tab selected, use the pulldown menus to specify the fax
line, the day, time and line direction you require, then click OK.
Line Scheduler
Administrator Utilities
Stopping the Line Scheduler
To stop the Line Scheduler utility, follow these steps:
1.
Open the Windows Task Manager.
2.
Select the Processes tab.
3.
Select Line Scheduler.exe.
4.
Click the End Process button.
6—39
FaxPress Administrator’s Guide
6—40
Managing Users
7
What’s In This Chapter
Overview .......................................................................................................... 7-2
Configuring the User.................................................................................. 7-3
Creating Faxmain Users............................................................................. 7-2
Authenticating Users.................................................................................. 7-2
Creating User Accounts .................................................................................. 7-4
Using Microsoft Active Directory Services ................................................... 7-5
Installing ADSI .......................................................................................... 7-5
Importing NT Users ................................................................................... 7-6
Using Single Sign On (SSO).......................................................................... 7-15
Assign Users to Groups............................................................................ 7-16
Create a User Properties Template........................................................... 7-16
Login ........................................................................................................ 7-16
Configuring User Properties ........................................................................ 7-19
Configuring Basic User Properties .......................................................... 7-19
Configuring Delivery Options for Outgoing Faxes ................................. 7-22
Configuring Fax Receipt Parameters ....................................................... 7-24
Configuring a User Printer ....................................................................... 7-25
Archive Settings ....................................................................................... 7-30
Network Details ....................................................................................... 7-32
FaxPress Administrator’s Guide
Overview
Creating Faxmain Users
There are three ways to add user accounts:
•
Create an Individual Account— Parameters can be set in User Properties
dialog boxes.
•
Import NT Users— You can import NT users and place them in FaxPress
groups. In this case, FaxPress uses its own database of users, so you
administer the groups using FaxPress mechanisms.
•
Access Novell Users— You can use Novell NDS to authenticate users
through the Single Sign On mechanism.
Authenticating Users
If you create FaxPress users individually or import the user profiles from you NT
groups, FaxPress utilizes a login process that is specific to FaxPress and is not
integrated with the network operating system. A user account and mailbox is
manually created for each user and a password is maintained separately from the
network password. This type of mailbox is referred to as a “conventional
mailbox.”
If you create your FaxPress users by accessing your Novell network database
groups, the FaxPress login process can be integrated with your network login. This
allows an automatic log into FaxPress without the prompting the user for a
mailbox and password. Additionally, by utilizing network profiles and groups,
user maintenance is performed via the network operating system.
When a Novell network user with Single Sign on enabled opens Faxmain, the
network login is used and membership in network groups determines user
privileges. To use Single Sign On, you must first create FaxPress specific groups
in the network operating system (NDS objects or bindery groups depending on the
version/environment of Netware.)
7—2
Overview
Managing Users
Configuring the User
Regardless of which approach you use to create FaxPress users, each user can be
individually configured for access levels, delivery and receipt conditions and
printer configuration and usage. The following is an overview on the
configuration options and parameters.
•
User Account— Basic information, such as mailbox name, fax phone
number, privilege level, and so on. User accounts are based on privilege
levels. Your privilege level determines your access to faxes and FaxPress
functions. There are four privilege levels:
•
User–-Can send, list, hold, view, print, save, discard or cancel personal
faxes (faxes sent by or routed to the user). Users can create and edit their
personal phone directories, and also submit, list, re-sequence, and cancel
their own print jobs.
•
Router—Can do everything a User can; additionally, Router can view
the first page of any fax on the Unaddressed incoming faxes list, route
faxes to other users (but not themselves), and delete faxes from the Unaddressed incoming fax list.
•
Operator—Can do anything a Router can; additionally, Operator can
view, route, list, re-sequence, and delete all fax or print jobs. Also, Router
can edit the corporate phone directory.
•
Supervisor—Can do anything an Operator can; additionally, Supervisor
can add, delete, or edit users, set FaxPress' default settings, and print FaxPress' transaction logs.
•
Outgoing Faxes— Fax delivery information, such as when to send faxes and
whether to print after sending.
•
Incoming Faxes— Fax receipt information, such as whether to forward or
print incoming faxes.
•
Printer Configuration— Printer information, such as type of printer.
7—3
FaxPress Administrator’s Guide
Creating User Accounts
For an individual user, the account, delivery, receipt, and printer parameters are
set in a user management dialog box. There are two ways you can manually add a
new user, either from scratch using the “Guest” default parameters, or by copy the
parameters of an existing user account. Either way, the Add User dialog is
displayed for configuring the account parameters.
Before you can open a user management dialog, you must do the following.
1.
Open Faxmain and log into a server with Supervisor privileges.
2.
Expand the Administration branch.
3.
Click on Users. The list of current user mailboxes is displayed in the right
panel.
4.
To add a new user, right click on the Users branch and click on Add User
in the context menu.
The Add User dialog box will be displayed. For step by step procedures for
configuring user parameters refer to "Configuring User Properties" on
page 7-19.
5.
7—4
To add a new user and automatically configure the new user with the same
properties as an existing user, right click on the existing user and select
Add...
Using Microsoft Active Directory Services
Managing Users
Using Microsoft Active Directory Services
With a single utility, you can create a FaxPress user mailbox for every user on your
Windows NT network, which they can then use to send and receive personal faxes.
Microsoft Active Directory Service Interfaces software must be installed to access
NT user names on a network. If ADSI is not installed on your system, continue
with the next section "Installing ADSI" on page 7-5, otherwise skip the next
section and go to "Importing NT Users" on page 7-6.
Installing ADSI
1.
Go to your FaxPress installation CD. Under the directory path
Microsoft\ADSI, are two ADSI executable files:
Adsx86.exe— Use this if you are using a Windows NT, 2000, 2000
Professional operating systems.
Ads95.exe—Use this for a Windows 95/98/ME operating systems.
2.
Double-click on the appropriate executable for your operating system.
3.
You will see a welcome window, license agreement window, and
completion window.
Simply proceed through the windows to install ADSI. No decisions are
required.
4.
At the last step, either click on Yes in the Restart window to reboot or
reboot later.
7—5
FaxPress Administrator’s Guide
Importing NT Users
1.
Run the Import Network Users.exe file located in to your
FaxPress\Administration Tools directory. For a default installation this is
located at:
C:\Program Files\Castelle\FaxPress\Administrative
Tools.
The User Registration Wizard will walk you through the set up process.
2.
Enter the FaxPress Server Name, User name and Password.
You can use the FaxPress Server Name drop down list to enter your server
name.
When done, click Next>.
3.
7—6
The User Domain Information window will be displayed. This window
allows you to choose whether you want to add users from a domain or from
Using Microsoft Active Directory Services
Managing Users
a group within a domain and to select the specific user group or domain to
add to FaxPress.
a.
Select either a Domain or Group.
b.
Either enter the path for you user group or domain, or click on Browse
to use your Active Directory Service Interfaces (ADSI) to find groups.
7—7
FaxPress Administrator’s Guide
Note:
7—8
The path for your domain or group must conform to ADSI
standards; for example: WinNT://MyGroup/MyDomain
c.
When the ADSI Browser opens, click on WinNT.This initiates a
network-wide search for the NT domains and, if you selected group, the
groups within each domain. The search can take up to 15 minutes or
more depending on the size of your network.
d.
If you previously chose Domain, double-click on the domain in which
the users you want to synchronize with the FaxPress are located.
e.
If you previously chose Group, click once on the (+) selection box of
the domain directory containing the group that contains the users you
want to synchronize with the FaxPress. Double-click on the group you
want to use.
Using Microsoft Active Directory Services
4.
Managing Users
Specify privileges for new users in the User Setting for New Users dialog
box.
You can use the drop down list to choose an existing mailbox as the basis for
the new mailboxes.
7—9
FaxPress Administrator’s Guide
5.
If the FaxPress is configured for DID or DTMF automatic routing, you may
assign mailbox ID numbers to all users you want to have direct fax
numbers. DID and DTMF mailbox ID numbers must be 3 or 4 digits.
The program automatically generates an identifier number for each new user.
Mailbox identifiers may have up to four digits.
When done, click on Next.
7—10
Using Microsoft Active Directory Services
6.
Managing Users
From the group you have chosen, specify some or all users.
Click on the >> button to move selected users to the Add list. FaxPress
mailboxes will be created for all users in the Add list. To remove a user from
the Select Users to Add list, highlight the user you want to remove and click
on the << button.
When done, click Next.
7—11
FaxPress Administrator’s Guide
7.
If there are FaxPress users without NT privileges, you will have a chance to
correct the situation.
This screen presents users that you have added using individual FaxPress user
creation procedures who cannot (at least at this point) actually login to NT.
When done, click on Next.
7—12
Using Microsoft Active Directory Services
8.
Managing Users
Review your choices in the Option Verification Window.
If everything is right, click on Finish or click <Back to reset any of your
parameters.
7—13
FaxPress Administrator’s Guide
9.
After the program completes creating the new mailboxes, a prompt appears
informing you that the operation is done and allowing you to view the
transaction log.
To view the log, click on Yes. The log is displayed using Notepad. If you
choose No or when you exit the log, the program returns you to the desktop.
When done, close Notepad. You are finished adding the NT Users.
7—14
Using Single Sign On (SSO)
Managing Users
Using Single Sign On (SSO)
If you are using a Novell network and the users you want to provide access to
FaxPress are defined within the Novell network database, you can register new
users to FaxPress by accessing the Novell network through FaxPress using Single
Sign On (SSO).
Note:
You may still need to manually create user accounts if you need
access to FaxPress through a third party application or gateway
product such as MS-Word or Microsoft Exchange.
Using “Single Sign On” to register your user accounts automates the creation,
registration, and maintenance to your FaxPress user accounts. For more
information on the underlying mechanisms and concepts, refer to "Configuring
User Authentication (SSO)" on page 3-30.
In brief, the implementation steps are:
1.
Configure your FaxPress server to enable Single Sign On. Refer to
"Configuring User Authentication (SSO)" on page 3-30.
2.
Assign users to the FaxPress specific groups using your Novell
administrator utilities.
3.
Optionally, create one or more FaxPress user account template(s).
4.
Let users login. Their FaxPress accounts and mailboxes will be
automatically created the first time they login.
Note:
Some individual mailbox properties not defined in the template
must be manually configured.
The maintenance of you FaxPress users will now be performed through your
Novell network mechanism. You can periodically remove obsolete user accounts
and mailboxes at the click of a button through the server property "Configuring
Storage Reclamation" on page 3-16.
7—15
FaxPress Administrator’s Guide
Assign Users to Groups
Use your Novell administrative tools to assign users to the FaxPress groups. Refer
to "Configuring User Authentication (SSO)" on page 3-30 for details on
locating the FaxPress serial number and global groups.
If a particular user is a member of two or more groups, the privilege level assigned
to the serial number group takes precedence.
Create a User Properties Template
The first time a user of a group receives a fax, a default mailbox will be created
using properties specified in the Mailbox template based on box in the User
Authentication tab in your Server Properties dialog box. These properties
include parameters such as print confirmation page and printer configuration. You
can use any of the standard FaxPress templates: Guest, User, Router, Operator, and
Supervisor, or create a new user and configure it to your own specifications.
To create your own template, follow the instruction for creating a new user, and
then configure it accordingly. Refer to "Creating User Accounts" on page 7-4
and "Configuring User Properties" on page 7-19. Then add the new template in
the Mailbox template based on box in the User Authentication dialog box.
Once the user account is automatically created using a standard set of parameters,
they can be changed at any time by using the standard User edit process described
in "Configuring User Properties" on page 7-19.
Login
When a FaxPress server is configured to utilize Single Sign On the process of
logging into FaxPress changes dramatically.
7—16
Using Single Sign On (SSO)
Managing Users
1.
Based on the specified method of authentication, Faxmain will verify that
the user is logged into the network. If user is not logged in, Faxmain will
prompt the user to login to the network.
2.
Once the user is logged into the network, user information will be retrieved.
3.
If the user has never used Faxmain on this system before Single Sign On
was enabled, the Create or Convert Mailbox dialog box will appear.
4.
In the Create or Convert Mailbox dialog box:
a.
If you select I am an existing FaxPress User, please connect to and
specify the name of your mailbox in the mailbox edit box, your
network login will be associated with the designated FaxPress mailbox.
7—17
FaxPress Administrator’s Guide
b.
If you select I am a new FaxPress User, please create and specify the
name of the mailbox in the mailbox edit box, the FaxPress mailbox will
be created and your network login will be associated with the
designated FaxPress mailbox.
•
c.
Note:
5.
If you click Cancel, you will be prompted for conventional (non
Single Sign On) login information.
Click OK to login to the FaxPress. If your Novell user name and your
FaxPress mailbox user name are not identical, you will be prompted to
convert your FaxPress mailbox name to your Novell user name.
Be careful! The FaxPress user account that you rename will no
longer exist under that name and cannot again be accessed.
If this is not the first login since Single Sign On was enabled, then the user
is logged into FaxPress using the network user name without being
prompted for a user name or password.
Remove Network Association option
You can break the association between a FaxPress mailbox and a Novell network
user by removing the link from the FaxPress mail box to the fully qualified
network name or FNN. This may be necessary prior to removing obsolete
mailboxes. For example, if a user’s network account has been removed and you
remove obsolete mailboxes using the function in "Configuring Storage
Reclamation" in Chapter 3, the FaxPress user account will be deleted. If you
need to access this account later, you can just eliminate the link to the network
account. Now the FaxPress mailbox is a stand alone account requiring manual
login with user name and password.
For more information refer to "Remove Network Association option" on page
7-18.
7—18
Configuring User Properties
Managing Users
Configuring User Properties
Overview
There are six separate tabs for configuring the user:
•
User Account — Basic parameters.
•
Outgoing Faxes — Fax delivery parameters.
•
Incoming Faxes — Fax receipt parameters.
•
Printer Configuration — Printer parameters.
•
Network Details— If you have Single Sign On configured for this user, the
Novell network details are displayed here.
•
Archive Settings— Location of databases used to store archive settings when
this user is configured for archiving data.
Configuring Basic User Properties
Note:
To set or change the user password, you will need to be logged in as
that user and go to the mailbox: user properties and set the
password. To erase the password you must have Supervisor
privileges or log in as the user.
To configure the basic properties for your user account:
1.
Right click on the user account (or mailbox) and select Properties or right
click on the User folder in the Administration branch and select Add User
7—19
FaxPress Administrator’s Guide
from the context menu. The User Properties dialog box will be displayed
with the User Account tab activated.
7—20
2.
Enter the name you want assigned to this user's mailbox in the User Name
test box. This is the user's FaxPress login name.
3.
Optionally enter the user’s full name in the Full Name text box. This name
will appear in your cover pages for outgoing faxes if it exists.
4.
Optionally enter the voice telephone number in the Voice # text box. This
number will appear on the cover page of outgoing faxes if it is defined. If
you do not enter a number, the number that appears in the FaxPress Server
Settings dialog box will be used. Refer to "Configuring Server Settings"
on page 3-10.
5.
Enter the fax number that is associated with this user's mailbox in the Fax #
text box
6.
Select the user privilege level you want to assign this user in the Privilege
text box. To display the available privilege levels, open the drop-down list.
FaxPress users can have different operating privilege levels. A user's
privilege level determines access to faxes and FaxPress functions. There are
four privilege levels:
Configuring User Properties
•
Managing Users
User — Can send, list, hold, view, print, save, discard, and cancel per-
sonal faxes. Also can create and edit personal phone directories and
manage their own print jobs.
•
Router — Has User privileges plus the ability to view the first page of
any fax on the Unaddressed incoming faxes list, route faxes to other users
(but not themselves), and delete faxes from the Unaddressed incoming
fax list.
•
Operator — Has Router privileges plus the ability to view, route, list,
re-sequence, and delete all fax or print jobs. Also, can edit the corporate
phone directory.
•
Supervisor — Has Operator privileges plus the ability to add, delete, or
edit users, set FaxPress' default settings, and print transaction logs.
7.
Optionally enter an identifier number in the Mailbox ID text box. The
identifier number may contain up to 4 digits. A mailbox ID is necessary if
you want to be able to automatically route faxes to this user's mailbox.
FaxPress supports DID, DTMF and T-30 sub-addressing.
8.
Optionally enter a PBX access code in the PBX Access Code text box.
Many companies require users to provide a password when dialing numbers
in order to track phone usage per user. This may be required at the end of
the phone number or at the beginning. This password can be any digit string
(up to 10 digits long) like 1579.
9.
Optionally enter any comment that you want to associate with this user's
mailbox in the Comment text box.
10. Check the box Allow user to change mailbox settings to allow the user to
modify their own mailbox setting.
11. Optionally check the Enforce Bill Back Code box if you want to force the
user to enter a Bill Back Code each time a fax is sent. For information on
define Bill Back Codes, refer to "Defining Bill Back Codes" in Chapter 5.
12. If the user has forgotten his password, use the Erase Password button to
erase a user's password so a new one can be assigned.
13. The Original Settings Based On field appears only on the Add User dialog
and not on the User Properties dialog. If you entered the Add User box by
right clicking on an existing user, then that user's name will be in the field.
Otherwise, by default, the original settings will be based on the default
Guest user. You can use the drop down list to change the existing user
whose settings are to be used as a base point.
7—21
FaxPress Administrator’s Guide
Configuring Delivery Options for Outgoing Faxes
To configure the outgoing fax delivery options for a user account:
1.
Right click on the user account (or mailbox) and select Properties from the
context menu. The User Properties dialog box will be displayed.
2.
Select the Outgoing Faxes tab.
3.
In the Time to Send area, if you want faxes sent at the first available
opportunity, click on the As soon as possible radio button. This is the
default value. If you want to specify a particular time of day to send faxes,
click on the Send on radio button and set the time. The time entry must
retain the format of the default setting.
You can only set the start time. This feature works on a 24-hour basis and will
send the faxes in this mailbox every 24-hours. If you set the starting time
earlier than the current time, the FaxPress will send the faxes in this mailbox
the next day.
4.
7—22
In the After Sending Fax area, if you want to print each fax after being
sent, activate the Print entire fax radio button. If you want to print a
Configuring User Properties
Managing Users
notification that each time a fax is successfully sent, activate the Print
notification radio button. The notification will be a single page that
includes a scaled down version of the first fax page and transmission
details. See also, "Configuring Advanced Functions" on page 3-26.
If you do not want to print anything after a fax is successfully sent, click on
the Do not print radio button. This is the default value.
5.
If you have enabled FaxPress Approval the Fax Approval area will display
the conditions under which approval is required. For more information on
FaxPress Approval refer to, "Configuring Fax Approval" on page 5-19.
6.
If you want to set default fax transmission values, click on the Advanced
button. This opens the Advanced Options dialog.
•
Baud Rate — In the Baud Rate edit box, set the maximum baud rate at
which faxes are to be transmitted.
•
Number of retries — In the Retries section, optionally enter a number
in the Number of Retries edit box to set the default maximum number
of times the FaxPress will try to send faxes before returning a failure
message.
•
Time between — In the Retries section, optionally enter a number in the
Time between edit box to set an interval in minutes between each retry
attempt.
•
7.
Resolution — In the Resolution section, select a resolution mode for
outgoing faxes. Standard resolution is 200 X 100 dpi; Fine resolution is
200 X 200 dpi.
Click on OK to save your choices.
7—23
FaxPress Administrator’s Guide
Configuring Fax Receipt Parameters
To configure the forwarding and fax disposition option for the users faxes:
1.
Right click on the user account (or mailbox) and select Properties from the
context menu. The User Properties dialog box will be displayed.
2.
Select the Incoming Faxes tab.
3.
Select a forwarding option in the When I receive personal incoming faxes
section. Received faxes can be automatically forwarded to another
FaxPress user's mailbox, another fax number, or to the members of a
corporate phone book group. Automatically forwarded faxes do not remain
in a user's mailbox.
a.
Do not forward— If you want personal incoming faxes delivered to the
user's mailbox, select Do Not Forward.
b.
Forward to FaxPress user— If you want all personal incoming faxes
to be automatically forwarded to another FaxPress user, click on
Forward to FaxPress user and use the drop-down list to select the
FaxPress user to whom you want the faxes forwarded.
7—24
Configuring User Properties
Managing Users
c.
Forward to Remote Fax — If you want all personal incoming faxes to
be automatically forwarded to another fax number, select Forward to
Remote Fax and enter the fax number in the edit box.
d.
Forward to Shared Phonebook— If you want all personal incoming
faxes to be automatically forwarded to all the members in a Corporate
phone book group, select Forward to Shared Phonebook and select
the group to whom you want the fax forwarded. You cannot forward
faxes to the <ALL> group, so this group is not shown in the drop-down
list.
4.
In the Printing and Saving area, you can select both the Print Incoming
Fax and Save Incoming Fax options, but at least one option must be set.
•
Print Incoming Fax — If you want to automatically print incoming
faxes, click on Print Incoming Fax.
•
Save Incoming Fax — If you want to automatically save incoming
faxes, click on Save Incoming Fax.
Configuring a User Printer
To configure a printer for a user:
1.
Right click on the user account (or mailbox) and select Properties from the
context menu. The User Properties dialog box will be displayed.
7—25
FaxPress Administrator’s Guide
2.
3.
Select the Printer Configuration tab.
Select the type of printer device, i.e. printer port or a print queue, in the
Default Print Queue section.
a.
To print to a parallel printer attached to the FaxPress server click the
Parallel Port radio button.
b.
If you are attached to a Windows network and wish to print to a
network printer select the HOST Sharable Print Queue radio button
click on the Queue button to set the printer queue parameters.
This dialog box contains the information the FaxPress server uses to
send print jobs to an NT sharable printer.
7—26
Configuring User Properties
Managing Users
•
NT HOST Name— The name of the host computer on which the
printer you want to use is connected.
•
Printer Sharable Name— This is the name assigned to the printer.
•
IP Address— The IP address of the NT server that hosts the printer
queue.
•
Login Name— A valid login name the FaxPress can use to access
the printer.
•
Login Password— The password for the Login Name that you are
using to access the printer.
c.
If you are attached to a Novell Bindery network and wish to print to a
network printer select the Novell Bindery Print Queue radio button.
d.
Click on the Queue button to set the printer queue parameters.
This dialog box
contains the information the FaxPress
server uses to send
print jobs to a Novell Bindery network printer.
7—27
FaxPress Administrator’s Guide
•
Use Default FaxPress Print Queue— This is printer queue that was
created when you installed the FaxPress server software and in the
installation server. Because it is created on the FaxPress server, all
of your users will be able to access this printer. If you enable the
default printer, the data for the default printer will automatically to
inserted into the following printer parameters fields, and the boxes
will be grayed out.
•
Print Queue Name—The name of the Novell Bindery print queue
for the printer you want to use.
•
On File Server—The name of the file server where the print queue
you want to use is located.
•
Login Name—A login name required to log onto the print queue file
server.
•
7—28
Login Password—A password required to log onto the file server.
e.
If you are attached to a Novell NDS network and wish to print to a
network printer select the Novell NDS Print Queue radio button.
f.
Click on the Queue button to set the printer queue parameters.
Configuring User Properties
Managing Users
This dialog box contains the information the FaxPress server uses to
send print jobs to a Novell NDS network printer.
•
Use Default FaxPress Print Queue— This is printer queue that was
created when you installed the FaxPress server software and in the
installation context. Because it is created on the FaxPress server context, all of your users will be able to access this printer. If you enable
the default printer, the data for the default printer will automatically
to inserted into the following printer parameters fields, and the boxes
will be grayed out.
•
Print Queue Context—The name of the Context where the print
queue for the printer you want to use is located.
•
Print Queue Name—The name of the print queue that prints to the
printer you want to use.
•
Login Name Context—The name of a Context you can log onto that
will provide access to the print queue.
•
Login Name—A valid login name the FaxPress can use to log onto
the login Context.
•
Login Password—The password for the login name required to log
onto the login Context.
4.
In the Paper in Tray section, select the paper size for the standard fax you
expect to print: Letter, Legal, or A4.
5.
In the Scale section, select the scale of the fax image you want to print:
Full, Reduced, or Unscaled.
6.
In the Resolution section, select the print resolution you want to use for
printing faxes: 300 x 300 or 150 x 150.
Note:
7.
If the HPLJ4 radio button is set, resolution is grayed out and you
will print at 600 dpi.
In the Printer Type section, select the printer type that best describes the
printer to which you are sending the faxes. The available types are:
•
HP LJIIP/III/IIIP/IIISi— Select this radio button if the printer is one of
these HP models.
7—29
FaxPress Administrator’s Guide
•
Other PCL— Select this radio button if the printer is a non-HP printer but
is HP compatible.
Note:
For printers that are compatible with the HP LaserJet series, use
the Other PCL radio button.
•
PostScript— Select this radio button if using a postscript printer.
•
HP LJ4— Select this radio button if the printer is a LaserJet 4, 4M, or 4Si
set to 600 dpi. If using one of these printers set to 300 dpi or a 4L printer,
select the Other PCL setting.
Archive Settings
The Archive Settings dialog box allows you to change the location and type for
your archive database. The original configuration is set when the FaxPress
administrator configures the FaxPress Archive service.
This is particularly useful when you have moved an old database to different
location, but occasionally need to access it.
Note:
This tab is deactivated if you are an administrator and are viewing
or configuring other FaxPress user properties.
To change the user archive settings:
1.
7—30
Right click on the user account (or mailbox) and select Properties from the
context menu. The User Properties dialog box will be displayed.
Configuring User Properties
Managing Users
2.
Select the Archive Settings tab.
3.
To select a database, click either Microsoft Access Database or Microsoft
SQL server.
•
Microsoft Access Database— Use this type of database if you do not
have a database server.
•
•
File name— Enter the database name with path or select Browse to
find the database.
Password— If you database is password protected, enter the pass-
word here.
•
Microsoft SQL Server— Use this type of database if you have a resident
MS SQL Server.
•
Connect string— Enter you DSN connect string here. See Appen-
dix A.
•
Reset to Default— If you click the Reset to Default button the database
configuration and location originally set by your FaxPress administrator with
the Archive Configurator program will be restore.
7—31
FaxPress Administrator’s Guide
Network Details
To view the Network details for this user:
To configure a printer for a user:
1.
Right click on the user account (or mailbox) and select Properties from the
context menu. The User Properties dialog box will be displayed.
2.
Select the Network Details tab.
•
User Directory— This is the location of the users Mailbox on FaxPress the
server.
•
Phone book Directory— This is the location of the users Personal
Phonebooks on the FaxPress file server.
•
Full Network Name— If this FaxPress mailbox is associated with a network
user through Single Sign On, the Network Name will be displayed here.
•
7—32
Created Date— If this FaxPress mailbox is associated with a network user
through Single Sign On, the date the association was created will be displayed
here.
Configuring User Properties
•
Managing Users
Remove Network Association— If this FaxPress mailbox is associated with
a network user through Single Sign On, you can remove this association by
clicking on this button.
7—33
FaxPress Administrator’s Guide
7—34
Administering FaxPress
8
What’s In This Chapter
Overview .......................................................................................................... 8-2
Administration Folders................................................................................... 8-3
Managing Transaction Logs........................................................................... 8-6
Defining Bill Back Codes .............................................................................. 8-10
Configuring Fax Approval ........................................................................... 8-14
Configuring Fax Lines .................................................................................. 8-19
Creating Corporate Phone Books ................................................................ 8-21
Creating Corporate Cover Pages................................................................. 8-35
FaxPress Administrator’s Guide
Overview
FaxPress provides a host of functions for tailoring FaxPress to your system
environment directly through the Faxmain interface under the Administration
branch of the FaxPress Neighborhood.
To access the Administration branch of the FaxPress Neighborhood:
1.
Open Faxmain and login to your FaxPress server with Supervisor privileges
by double-clicking on the FaxPress server name or serial number, or by
right-clicking on it and selecting Login.
Note:
2.
8—2
If this is the first time you have logged into Faxmain, use username
“supervisor” and leave the password blank. Refer to "Configuring
FaxPress" in Chapter 5, to set user a password.
Expand the Administration branch to view all the main functional folders.
Administration Folders
Administering FaxPress
Administration Folders
The following is a brief discussion of each of the Administration folders:
Unaddressed Faxes
All unaddressed faxes are stored in this folder until a user with the appropriate
privileges forward these faxes to the appropriate user when automatic routing is
not used. (See "Automatic Routing: PBX and FaxPress Integration" on page 549 for more information on automatic routing.) The only users that can access
unaddressed faxes are users with supervisor, operator, or router privileges. This
folder can be configured by right clicking on it to display the Users Properties
dialog box. For more information on configuring the user account refer to
"Configuring User Properties" on page 7-19.
Lists the faxes in the Unaddressed Faxes mailbox. Users with supervisor privilege
can access this mailbox and route its contents to the appropriate users.
Users
Open this folder to display all the users that are configured for this server. To add,
delete or configure a user, right click on the specific user and select to appropriate
context word. You can also add a user by right clicking on the User folder or by
selecting the Edit pull down menu and clicking Add Ins. Refer to "Creating User
Accounts" in Chapter 4.
Logged In Users
Opening this folder displays all current users that are logged into your FaxPress
server.
Transaction Logs
Under the Transaction Logs folder there are two subfolders: Received Logs and
Transmitted Logs. To configure these logs, click on them to display the dialog box
for setting date and filters. Refer to "Managing Transaction Logs" on page 8-6.
8—3
FaxPress Administrator’s Guide
Allows you to view and manage the FaxPress transaction log files. FaxPress'
transaction logs contain information about all the faxes the fax server has sent and
received.
There are two transaction logs; one for outgoing faxes, and one for received faxes.
Every time you fax a document, FaxPress generates a log entry that indicates who
sent the fax, when it was sent, where it was sent, and other information about the
fax. The same type of information is recorded for every fax received by the fax
server. Only FaxPress users with Supervisor privilege can manage (View, Edit, or
Delete) the transaction logs.
Internet Fax
“Internet faxing” is sending a fax over the internet to a remote fax machine, which
then uses phone lines at its own location to send your fax at a lower cost. Refer to
"Defining Bill Back Codes" on page 8-10.
Billback Code Table
The FaxPress administrator can require FaxPress users to implement a bill back
code when sending a fax, and also specify the bill back codes that must be used.
The Billback Code Table folder is where you define your codes. Refer to
"Defining Bill Back Codes" on page 8-10.
Product Activation Key
The Product Activation Key directory allows you to activate your FaxPress 7.0
software and associated email gateway products. Refer to "Product Activation
Key" on page 8-12 for more information.
Approval
The Approval folder allows you to define fax approval requirements for individual
users and grant approver status specific FaxPress users. Refer to "Configuring
Fax Approval" on page 8-14.
8—4
Administration Folders
Administering FaxPress
Fax Lines
Through the Properties menu in this folder you can configure your fax lines. Refer
to "Configuring Fax Lines" on page 8-19. Fax Lines can also be configured from
the Server Properties’ Fax Line Settings tab. See "Configuring Line Settings" on
page 5-13 additional information.
Corporate Phone Books
This is where you create the corporate phone books used by all your FaxPress
users. Corporate phone books can be either native or external phonebooks. Only
the FaxPress supervisor or a user with Operator privilege can edit the corporate
phone book. Refer to "Creating Corporate Phone Books" on page 8-21.
FaxPress Archive
This is where all the archived faxes and transaction logs are available for review.
Refer to "Archiving Faxes" in Chapter 10 and "Archive Settings" on page 7-30.
8—5
FaxPress Administrator’s Guide
Managing Transaction Logs
The Transaction Logs folder in the Administration (Supervisor) branch of
Faxmain, allows you to view and manage the FaxPress transaction log files.
FaxPress' transaction logs contain information about all the faxes the fax server
has sent and received. There are two transaction logs: Received Logs, and
Transmitted Logs. Every time you fax a document, FaxPress generates a log
entry that indicates who sent the fax, when it was sent, where it was sent, and other
information about the fax. The same type of information is recorded for every fax
received by the fax server. Only FaxPress users with Supervisor privilege can
manage (view, edit, or delete) the transaction logs.
To select date ranges and define filters for your received and transmitted
transaction logs:
8—6
1.
Login to Faxmain with supervisor privileges.
2.
Expand the Transaction Logs folder under Administration (Supervisor).
Managing Transaction Logs
Administering FaxPress
3.
Click on either Received Logs or Transmitted Logs. The Transaction Log
dialog box will be displayed.
4.
Enter the Start Date from which you would like to view the transaction log
records. In the Days edit box, enter the duration for this view.
5.
Click on the Filters tab to define filters for each of your transaction log
folders.
6.
You can choose to display all records in the date range that you selected by
checking the Get all records option in the Filters tab. Alternatively, you
can filter records with the following characteristics by entering values in the
Choose records with section:
For received transactions:
•
To—Fax recipient
•
RTI—Remote Terminal Identity
8—7
FaxPress Administrator’s Guide
•
Line—FaxPress line number on which the fax was received
For transmitted transactions:
•
Sent by—Sender of the fax
•
To—Recipient of the fax
•
Bill Back—Bill Back code associated with the fax
•
Line—FaxPress line number used to send the fax
Viewing Transaction Logs
8—8
1.
To view an individual log record, you can either double click on the
transaction, or right-click on the record to display a context menu. Choose
Properties to display the Transaction Logs Property dialog box.
2.
This window provides details of the selected fax including status, date
received, RTI (Remote Terminal ID), number of pages, transmission time,
resolution, compression scheme, baud rate, recipient, and the FaxPress line
on which it was received.
Managing Transaction Logs
Administering FaxPress
To Save Transaction Logs
1.
Right click on the folder for either Transmitted Logs or Received Logs.
2.
From the context menu, select Save As. The Transaction Log dialog box
will be displayed.
3.
Define the date range and filters you want to employ for this log.
4.
Specify the file name and location where the records will be stored in the
Save As dialog box.
You can save your transaction logs as either text files or comma delimited files.
Printing Transaction Logs
You can print two types of Transaction Log list:
1.
Select the Received Logs or Transmitted Logs branch in the Faxmain tree
and right-click to display the context menu.
2.
Choose the Print option and select a printer (FaxPress/Network... or Local
printer driver).
3.
Define the date range and filters you want to employ for this log. The
FaxPress/Network Print dialog box will be displayed.
4.
Select number of copies and click OK.
5.
To change the configuration of your printer, click on the Printer button. The
Printer Configuration dialog box will be displayed. For detailed
information regarding the configuring of printers, refer to "Configuring a
User Printer" in Chapter 4.
8—9
FaxPress Administrator’s Guide
Defining Bill Back Codes
Although FaxPress users can designate a bill back codes whenever they are
sending a fax, the FaxPress administrator can make it mandatory that users include
a bill back code when sending a fax, and also specify which bill back codes to
used.
The administrator must first create a list of admissible bill back codes, then
implement them by checking the Enforce Bill Back Code option in the User
Properties dialog box. For more information about enforcing Billback codes refer
to "Configuring Basic User Properties" in Chapter 4.
To specify the admissible bill back codes:
1.
Login to FaxPress with supervisor privileges.
2.
Expand the Server tree.
If the Faxmain tree structure is not already expanded, click on the server on
which you want to create user mailboxes.
8—10
3.
Expand the Administration branch.
4.
Right click on Billback Code Table.
Defining Bill Back Codes
Administering FaxPress
5.
Select Add to display the Add New Bill Back Code dialog box.
6.
In the Bill Back Code edit box, enter a bill back code. The code can use up
to 26 alphanumeric characters.
7.
In the Description edit box, enter a description of up to 26 characters to
describe the bill back code.
8.
Click OK to add the bill back code. The new item will appear in the list of
Bill Back Codes displayed in the dialog box.
9.
To modify an existing bill back code, select (highlight) the bill back code in
the bill back code list and click on the Modify button to display the Modify
Bill Back Code dialog box. Enter the changed code name and description.
Importing Bill Back Codes
If you wish, you can import a comma delimited file with all your bill back code
information directly into your bill back code table.
1.
Right click on your Bill Back Code folder and select Import from the
context menu.
2.
The file locator screen will be displayed. Select the file with your bill back
code information.
3.
All the new data will be displayed in the list in the right panel.
Exporting Bill Back Codes
To export the data in your bill back code tables to a comma delimited file:
1.
Right click on your Bill Back Code folder and select Export from the
context menu.
2.
The Save As screen will be displayed. Name the file and designate the
destination directory.
8—11
FaxPress Administrator’s Guide
Product Activation Key
The FaxPress server's FaxPress 7.0 software must be activated with a Product
Activation Key, determined by your FaxPress unit's serial number, to enable the
FaxPress 7.0 software and any associated FaxPress email gateways to function.
To use the FaxMain utility to access Castelle's Activation Key request page and
obtain your Product Activation Key, follow these steps:
1.
8—12
Go to FaxMain's Product Activation Key directory,
(Start>Programs>FaxPress> FaxMain), then double-click on FaxPress 7.0
from the Product Name entries on the right.
Product Activation Key
2.
Administering FaxPress
Next, in the Product Activation Key screen, click the Obtain Key From
Web button to go to Castelle's Activation Key Request page for your
FaxPress unit's Activation Key code. Next, select either the Activate
Product or Enable 30 days evaluation radio button, then enter the 16-digit
Activation Key code exactly as given in the Activation Key field. Include
all hyphens, exclude spaces, then click Enable.
Note:
The Product Activation Key may also be obtained at any time by
going directly to the Activation Key Request page on the Castelle
web site, at http://www.castelle.com/cgi-bin/fp7keycode.pl. The
16-digit Product Activation Key code will then need to be entered
as specified above.
8—13
FaxPress Administrator’s Guide
Configuring Fax Approval
Fax Approval provides the administrator with an easy to use mechanism for
imposing approval requirements prior to processing a Send Fax request and for
appointing approval authorities. Approval requirements are based on telephone
access: local, long distance or international phone numbers. Approvers are
designated by their level of access privileges.
FaxPress has enhanced the approval mechanism to allow users to submit a fax,
view the rasterized fax image, and then decide if they approve of the appearance
and content before sending the fax. Fax Approval allows you to stipulate outgoing
fax approval criteria for each FaxPress user.
To implement Fax Approval, follow these steps:
1.
Define user approval requirements
2.
Select Approvers.
3.
Approve Faxes
Define Approval Requirements
To define user approval requirements:
1.
8—14
Login to Faxmain with supervisor privileges.
Configuring Fax Approval
Administering FaxPress
2.
Expand the Approval folder under Administration (Supervisor).
3.
Double click on the Users Need Approval folder to display the list of all
available users in the right panel, then right click on any user and select
Required approval for >.
4.
Select one of the following options to impose approval requirements:
•
All: All faxes local, long distance and international sent by users with this
approval requirement must be approved prior to transmittal.
•
Long Distance: All long distance and international faxes sent by these
users must be approved prior to transmittal.
•
International: Only international faxes sent by these users must be
approved prior to transmittal.
•
No Approval: No approval is required prior to transmittal.
8—15
FaxPress Administrator’s Guide
Select Approvers
Note:
FaxPress approvers must have either Supervisor or Operator
privileges.
To assign Fax Approvers, follow these steps:
8—16
1.
Login to Faxmain with supervisor privileges.
2.
Expand the Approval folder under Administration (Supervisor).
3.
Right click on the Approvers folder and select Assign Approvers.
Configuring Fax Approval
4.
Administering FaxPress
The new screen Approvers is displayed. The left panel displays all the
available users with Supervisor and Operator privileges.
Select any or all of these users by double click them or highlighting one or
more and click the Add>> or Add All>> button.
Approve Faxes
When the FaxPress user sends a fax that requires approval, FaxPress will place a
hold on the fax until it is approved by an authorized approver. The user will be
notified prior to sending the fax that the fax will require approval prior to
transmittal.
To approve faxes:
1.
Login to Faxmain with supervisor or operator privileges.
8—17
FaxPress Administrator’s Guide
2.
Expand your Mailbox and select the Outgoing Faxes Queue folder.
All the faxes currently in the queue will be listed in the right panel. The faxes
with a clip board and check mark icon are awaiting approval.
8—18
3.
Right click on the appropriate fax and select Approve and Yes. The fax will
be sent and the icon will be changed from awaiting approval to sent as
shown below.
4.
To reject the fax, right click on the fax and select Approve and No. The
status of in the originator’s Outgoing Fax Queue will show Not Approved.
Configuring Fax Lines
Administering FaxPress
Configuring Fax Lines
1.
Login to Faxmain with supervisor privileges.
2.
Expand the Administration branch and select the Fax Lines folder.
All of your fax lines that are configured for this FaxPress server will be
displayed in the right panel. The following column categories are included:
3.
•
Fax Line
•
Fax Number
•
Status
•
Line Direction
•
Routing Type
•
PBX
•
Remote ID
•
Imprint ID
•
Dialing Type
Right click on a fax line in list.
8—19
FaxPress Administrator’s Guide
8—20
4.
Select Properties from the context menu, and the following Fax Line
Settings dialog box will be displayed.
5.
The settings for this fax line can also be accessed through the Server
Properties. See "Configuring Line Settings" on page 5-13 for more
detailed information regarding the specific settings.
Creating Corporate Phone Books
Administering FaxPress
Creating Corporate Phone Books
There are two different types of Corporate Phone Books, FaxPress Phone Books
and External ODBC Database Phone Books.
Note:
For additional information regarding ODBC Database phone
books, see Appendix A, 32 Bit ODBC Data Sources.
8—21
FaxPress Administrator’s Guide
Create FaxPress Phone Books
To create Corporate FaxPress Phone Books:
Create a Group
1.
Log into your FaxPress server with supervisor privileges and expand the
Administration branch.
2.
Expand the Corporate Phone Books folder and right click on FaxPress
Phone Books and select Add Group from the context menu. The Add
Group dialog box will be displayed.
Group names can be used when sending faxes to broadcast your fax to any
number of recipients. FaxPress handles this as a single fax and in fact only
creates one raster file. This can significantly reduce the time necessary to
process faxes.
8—22
3.
Enter the name you want to give the new phone book in the Group Name
text box. A file will be create with your group name and will be stored in
your user directory on the FaxPress file server.
4.
Click OK to accept the values. A new folder will now be visible under the
Personal Phone Books folder.You now can add individual members to your
group.
Creating Corporate Phone Books
5.
Administering FaxPress
To add members to the group, right click on the Group name and select Add
Member. The Edit Member dialog box will be displayed.
6.
Fill in the Edit Member dialog box with the appropriate information.
You can continue adding individual members, or you can import members into
your phone book from a previously created phone book file. To import members
continue to the next section, Import FaxPress Phone Books.
Import a Phone Book File
You can import four types of phone book files:
•
Standard Comma Delimited Files (*.csv)
•
Custom Comma Delimited Files (*.csv)
•
dBase Files (*.dbf)
•
ExportPH Files (*.*)— This is a FaxPress 3.x exported phone book
To import a phone book file:
1.
Right click the FaxPress Phone Book folder and select Import and the file
format (i.e., CSV Default Format, CSV Custom Format, ExportPH, dBase)
from the context menu.
8—23
FaxPress Administrator’s Guide
2.
3.
If you are importing a CSV default format file, a dBase file, or a ExportPH
file, an Open import file screen will provide you the means for locating the
file.
a.
If you are importing a dBase file, after you use the Open import file
screen to locate your dBase file, the Convert dBase to Phone Book
dialog box will be displayed. Use this dialog box to map the dBase
fields (in Fields) to your FaxPress fields (in Target Phone Book
Fields).
b.
Use the Add Link button to establish a link between the fields selected
from the source dBase file and the target phone book (see above). The
link is shown in the View list. Click on this button to remove selected
item from the View list.
c.
Click on the Convert button to start the conversion process.
If you are importing a CSV custom format file, the Import File Field
Assignment dialog box will be displayed before the Open import file
screen.
Note:
8—24
The default values in this dialog box are 1 through 7 respectively.
Re-sequence the fields to correspond to your custom file. If you do
not a one of the default fields in your custom file, leave the field
blank. In the figure above, the custom file does not have fields for
Voice number, Comment or Group.
Creating Corporate Phone Books
4.
Administering FaxPress
After to have located the file, click OK to import the file. The phone book
number will all be located in the folder ALL (if not Group is defined in your
imported file) or the Group name (defined in the import file) folder under
the FaxPress Phone Book folder.
Export FaxPress Phone Books
To export a phonebook:
1.
Open Faxmain and login to a FaxPress server with supervisor privileges.
2.
Expand the Administration branch, expand the Corporate Phone Books
folder, and right click on FaxPress Phone Books.
3.
Select Export from the context menu. The SaveAs dialog box will be
displayed.
4.
Navigate to a directory, specify a name, and save the file. The file will be
exported as a comma delimited file.
ODBC Database Phone Book
To access an external ODBC database and use it as your phone book, follow these
steps:
1.
Open Faxmain.
2.
Expand the Administration branch and click on Corporate Phone Books.
8—25
FaxPress Administrator’s Guide
8—26
3.
Right click on External Database Phone Books and select Add Database
Phone Book from the context menu.
4.
The Database Phone Book dialog box is displayed. You can create a new
phone book, give it a name and select the type and location of the database
from this screen.
5.
To connect to either a Microsoft Access database or an Excel, FoxPro or
dBase database, enter or browse for a file name and path. If the database file
Creating Corporate Phone Books
Administering FaxPress
is password protected, you need to provide this password. The supported
ISAM file formats are:
6.
•
dBase versions III, IV, or V
•
Excel versions 3.0, 4.0, 5.0 and 8.0
•
FoxPro 2.0, 2.5, 3.0 and DBC
To connect to a DBMS server such as Microsoft SQL server, select an
existing or create a new connection string. This is done by clicking the
‘select’ button. The local ODBC user interface comes up to allow you to
select the “ODBC data source name”. For detailed instructions for
navigating in your ODBC 32 Bit setup program, refer to the Reference
section in this Guide.
Create Phone Book Views
To use an external database as a phone book, you must first link to the specified
database and then create associations or mapping between the database fields (or
columns) and the Phone book elements. The process of creating phone book views
facilitates the mapping process.
1.
Right click on the new database phone book and select Add View from the
context menu.
8—27
FaxPress Administrator’s Guide
The Database Phone Book dialog box will be displayed.
From the Database Phone Book dialog box you can select any table and
column in your phone book database and associate it with a phone book field.
2.
The Phone Book View tab will be activated by default. Use this tab to map
the FaxPress phone book fields to the external phone book. The following
FaxPress fields can be mapped into fields in the database phone book:
•
Table — The define tables in your database can be selected from the drop
down list.
•
First Name and/or Last Name— To associate the fax recipient with the
field or column in your table, select the appropriate column name from
the drop down list. As in the example screen above, we have associated
a LastName column in the phone book with the ContactName column
in the Customers table.
•
Fax No. — Refer to "Configuring Dialing Properties" in Chapter 3, for
fax number format requirements.
8—28
Creating Corporate Phone Books
Note:
Administering FaxPress
If your database table contains separate fields for country code,
area code and number you will need to select those separately, by
clicking the Build button to separately select each of those fields
and put them together to generate the fax number.
•
Company — Map this phone book field to the equivalent CompanyName column in your database table. This is an optional field.
•
Bill Back Code— Map this phone book field to the equivalent BillBack-
Code column in your database table. This is an optional field.
3.
To map the database table to your view, select one of the database tables in
the scroll down list for Table.
4.
Once you select the table, you will be able to select the table fields from the
drop-down list boxes next to each of the FaxPress phone book fields.
Note:
5.
If your database table does not contain a separate fields for first
and last name, just map one of them (either first or last name) to the
full name, as shown above.
You can define a filter on the database by clicking on the Build Criteria
button. The Criteria dialog box will be displayed.
As an example, you can set the criteria for all supplier in the United States by
selecting “Country” for Field Name, “equals” for Operator, and “USA” for
Value.
8—29
FaxPress Administrator’s Guide
Note:
8—30
You can use either ‘Logical AND’ or ‘Logical OR’ to define the
logical relationship between those conditions. The ‘Operator’
provides a rich variety of conditions such as: Begins with, Ends
with, contains, does not contain etc.
6.
You can view the SQL statement that is generated as a result of the mapping
and the criteria that you have set by clicking on the SQL Statement button.
This is an informational field only.
7.
Click OK when you are finished filling out the Phone Book View tab and
select the Dialing Rules tab.
8.
To apply the dialing rules that have been defined in Server Properties for
every fax number in this view, click the box. See "Configuring Dialing
Properties" in Chapter 3.
9.
Click OK to finish creating your view. The new view will be located under
the phone book folder.
Creating Corporate Phone Books
Administering FaxPress
Create Table Joins
To access multiple tables from one phonebook view, you must include a new table
in your view and define a join or an association between a column in one table
with a column in the new table. You must define a join for each of the tables from
which you want to include data for your phone book.
can include data from any number of tables, but at least one join has to be defined.
1.
Right click on any phone book view and select Properties from the context
menu. The Phone Book View tab will be activated.
2.
Select the table you want to join by finding it in the Table scroll down list.
In the above screen the Employees table was added to the Contacts view.
3.
Go to the FaxPress field name that you want to map to this Table, and find
the new table field. In our example, the Employee.FirstName and
Employee.LastName were mapped to the appropriate FaxPress fields. As
8—31
FaxPress Administrator’s Guide
soon as you enter a field from the new table the Table Joins button will
now be activated.
4.
Click on the Table Joins button. The Table Joins dialog box will be
displayed.
5.
Select the tables you want to join in Table 1 and Table 2.
6.
Select the field in Table 1 to join to the field in Table 2 in Field 1 and Field
2.
7.
Click the Add Join button. The view now includes data from two different
tables.
Build Fax Numbers
If your database table contains separate fields for country code, area code and
number you will need to add each of those fields together to create the fax phone
number.
1.
8—32
Right click on any phone book view and select Properties from the context
menu. The Phone Book View tab will be activated.
Creating Corporate Phone Books
Administering FaxPress
2.
Click the Build button (to the right of Fax Number). The Build Fax
Number dialog box will be displayed.
3.
To have FaxPress automatically build a fax number, you must map the
following FaxPress fields to the fields in your database table.
•
Table— The table that contains the phone number fields
•
Country Code— The country code to include with the fax number
•
Area Code— The area code to include with the fax number.
•
Fax Number— The base number to include with the fax number.
FaxPress will now automatically generate the your fax numbers.
Make Views Visible
To provide your users with access to the corporate phone book views you created,
assure the following requirements are met:
1.
ODBC drivers should be installed and properly configured on your users
workstations. We recommend that you upgrade the ODBC drivers to the
latest version 3.5 which we ship on the FaxPress CD (under
Microsoft/ODBC directory)
2.
Make sure that the users have access to the specific databases.
•
If you are using Microsoft Access or any other file based database, all
users must have access to the file server where the database file resides.
•
If you are using an SQL type database, then by default FaxPress will use
the account set up by the administrator to log into the database for all
users. If this log on fails, FaxPress will require each user to setup their
own data source name (DSN). For more information on setting up
DSN’s, refer to Appendix A.
8—33
FaxPress Administrator’s Guide
8—34
3.
If you are connecting to an SQL database such SQL server which requires a
‘Data Source Name’ (DSN) to be setup on the user’s workstation, and you
have followed the above process to first setup the DSN on your
(administrator) workstation and created the database connection and views.
4.
If you are connecting to a file based database such as Microsoft Access, you
need to specify a UNC path to the file such that all your users can use the
same path to access the file. You also need to make sure they sufficient
security privileges to access the file. You will need to provide Read/Write
access to the directory where the file is located, but Read Only privilege to
the file itself, since the users will not be able to change the database files,
not will they be able to add entries to that phone books through Faxmain.
Creating Corporate Cover Pages
Administering FaxPress
Creating Corporate Cover Pages
Corporate Cover Pages are created the same way as standard cover pages. Follow
the process detailed in "Creating a Master Cover Page" in Chapter 14.
8—35
FaxPress Administrator’s Guide
8—36
Developing Custom Software
9
Overview .......................................................................................................... 9-2
FaxPress Drop Directory ................................................................................ 9-3
FaxPress Software Developers’ Kit (SDK) ................................................. 9-12
Castelle SimpleFax Utilities..................................................................... 9-12
Castelle Programming Interface (CPI)..................................................... 9-14
FaxPress User’s Guide
Overview
Castelle's FaxPress Drop Directory, the Castelle Software Development Kit
(SDK) and the associated Castelle Programming Interface (CPI) software are
designed to allow developers easy deployment of production faxing in almost any
environment. These features enable automated inbound and outbound faxing from
many operating systems (MainFrame, AS400, UNIX based, etc), back end
accounting packages, and ERP packages. The SDK Programmer’s Manual is
available in the Administration Tools’ Documents folder if you chose to copy that
folder to your hard drive during setup, and in the Documents folder on the
Castelle FaxPress CD. See "Documents" on page 6-21 for more information.
The DropFax utility software is designed to offer developers convenient
deployment of inbound production faxing based on user specified inbound fax
folders. This allows third-party applications to retrieve inbound faxes in TIF
format from any file folder they prefer. For information on implementing the
DropFax utility, see "Inbound Faxes: Using the FaxPress DropFax Utility" on
page 6-22.
9—2
FaxPress Drop Directory
Developing Custom Software
FaxPress Drop Directory
Using Castelle's Drop Directory, FaxPress 7.0 server supports the sending of
outgoing faxes through special directories under the /Castelle/serial_number
directory, allowing faxes to be sent without user intervention. Drop Directories
must be created manually by the FaxPress administrator as the first step in setting
up the entire Drop Directory process.
Example: /Castelle/08206001/faxdir
Outgoing fax jobs are presented through a drop directory as a set of control and
fax data files. Periodically the FaxPress server searches for and selects control
files from the drop directories. Selected control files and the corresponding data
files are used by the server to define and launch outbound fax jobs. As these drop
directory jobs are completed, the call information for each job is reported back
through the drop directory in a series of notice files.
Note:
All the given data file formats (DCX, PCX, PCL) are automatically
converted into a fax format by FaxPress and then submitted to the
FaxPress outgoing fax queue. No FaxPress client software and
DCX print driver are involved in this process. All data file formats
must be submitted to the Drop Directory in DCX, PCX or PCL
file format.
The Drop Directory Configuration File - jobqueue.cfg
The castelle/serial_number/system/jobqueue.cfg configuration file specifies
how drop directories are to be handled by a FaxPress server. This configuration
file identifies the drop directories to be searched by the FaxPress, the order and
frequency of searches, and the FaxPress users associated with the jobs originating
from each directory. During FaxPress startup, a FaxPress reads through this
configuration file, and uses it to set up its drop directory handling. The FaxPress
interpretation of the jobqueue.cfg contents is echoed in the
castelle/serial_number/system/jobqueue.cfg log file.
The jobqueue.cfg file must exist in the castelle\serial_number\system directory
for drop directory to work. If the jobqueue.cfg file does not exist, the FaxPress
9—3
FaxPress User’s Guide
administrator should create this configuration file with the necessary command
lines. If jobqueue.cfg file already exists in the system directory then the FaxPress
administrator should edit this file to make sure that command lines relevant to the
Drop Directory process are included in the file.
The jobqueue.cfg configuration file consists of ASCII lines, which identify the
FaxPress drop directories and the FaxPress users associated with the jobs
processed through the drop directories. Each line of a jobqueue.cfg file contains
one configuration directive.
This configuration directive starts with a directive keyword and ends with an
ASCII line-feed (0x0A character. When parameters are included in a directive
line, the parameter text follows and are separated from the keyword by blanks.
The jobqueue.cfg directives are:
INTERVAL seconds - specifies the minimum number of seconds
between searches of drop directories - the default is the minimum, 10
seconds.
Example: INTERVAL 120
DIRECTORY name extension - specifies the name of the drop directory the FaxPress is to periodically search for job control files, and also
specifies the extension (.dir) used to distinguish a control file in this
directory.
Example: DIRECTORY HPFSCAN.HPF and DIRECTORY.DIR
USER username - specifies the login name of the FaxPress user to be
assigned jobs originating from the drop directories.
Example: USER SCANNER
DIRECTORY DROPDIR1 CTL
DIRECTORY DROPDIR2 CTL
PRIORITY ordinal - specifies an ordering value from 1 to 9999 with
which drop directories searches will be ordered. Directories are
searched in the increasing order of their priority values. Directories
with the same priority ordinal are searched in rotation (round robin).
Directories with no priority value are searched strictly in order of their
appearance within the configuration file.
9—4
FaxPress Drop Directory
Developing Custom Software
Example: PRIORITY 10
DIRECTORY SCANDIR1 FCF
PRIORITY 20
DIRECTORY SCANDIR2 FCF
DIRECTORY SCANDIR3 FCF
Example of
jobqueue.cfg file:
USER RIGHT_A_WAY
DIRECTORY HIPRI1 JCF
DIRECTORY HIPRI2 JCF
PRIORITY 1
DIRECTORY EXPRESS1 JCF
DIRECTORY EXPRESS2 JCF
USER SOMETIME_SOON
PRIORITY 4
DIRECTORY REGULAR1 JCF
DIRECTORY REGULAR2 JCF
USER ANY_TIME
PRIORITY 10
DIRECTORY LOWPRI JCF
Because there is no INTERVAL directive in this configuration file, the drop
directories will be searched at the default 10-second interval. The FaxPress will
search the drop directories for a control file with the .jcf extension.
The HIGHPRI1 jobs will all be serviced first. Then the HIGHPRI2 jobs will be
serviced as long as the HIGHPRI1 directory has no further jobs. When both
HIGHPRI1 and HIGHPRI2 have been fully serviced, jobs will be alternately taken
from EXPRESS1 and EXPRESS2 until their jobs have all been serviced. Jobs
from these drop directories will all be assigned to FaxPress user RIGHT_A_WAY.
9—5
FaxPress User’s Guide
When HIPRI1, HIPRI2, EXPRESS1, and EXPRESS2 jobs have all been
processed, jobs for user SOMETIME_SOON will be alternately taken from
REGULAR1 and REGULAR2. Only after no jobs remain in any of the other drop
directories, will jobs be taken from LOWPRI, for the FaxPress user ANY_TIME.
Note:
The JOBQUEUE.CFG file must contain strictly ASCII data. It
should not be edited with a word processing type of editor (such as
Microsoft WORD, WRITE, or WORD-PERFECT).
Drop Directory Users
Drop directory based jobs are processed for the FaxPress user that has been
assigned to the drop directory by a JOBQUEUE.CFG USER directive. If the user
assigned to a drop directory does not exist when the FaxPress starts up, then the
user is automatically created by the FaxPress. User parameters in effect at the time
the FaxPress starts up will be used as the default for all jobs originating through
that particular user’s drop directories.
If a user is deleted, then job processing from that user’s drop directories will stop.
If a user is blocked, then processing of unstated jobs from that user's drop
directories will be suspended until the user is unblocked. If a user is blocked when
the FaxPress starts up, then no jobs will be processed from the user's drop
directories until the user is unblocked.
Job Control Files
After the FaxPress has been configured to query a drop directory, the third party
application can put the job data and control files in the directory. The data files
should be put into the directory before the control files. The names of these files
must be DOS format (up to 8 characters long, followed by an extension of up to
three characters). Jobs are copied into drop directory one at a time and FaxPress
process the jobs one at a time.
The originators of drop directory jobs must ensure that names assigned to the
control and data files are unique within their directory for at least the duration of
the job's processing. The job control files in a drop directory are distinguished
from the other types of files in this directory by their filename extension, which
9—6
FaxPress Drop Directory
Developing Custom Software
must be the same as the extension specified along with the drop directory
pathname in JOBQUEUE.CFG. The first characters of a job control filename are
also used for the name of the notice files generated for the jobs originating from
the control file.
Each job control file consists of a series of ASCII lines (each terminated with an
ASCII line feed character) that specify how the job is to be handled. Each line
should contain a directive of the form:
##Directive [parameter 1] [parameter 2]
The directive must begin with a ## followed immediately by the directive
keyword (in either upper or lower case). The keywords may include an embedded
dash to enhance readability. If parameters are included in a directive line, the
parameter text follows and is separated from the directive keyword by a space.
A job control file may contain multiple (possibly overlapping) job control
streams. Each job control stream is concluded with a ##dial directive, and the most
closely proceeding (##cover/##nocover, ##message, ##billback/##nobillback,
etc.) parameter settings are applied to the job. Parameter directives do not need to
be repeated between ##dial directives if the parameter selection is not changed.
Note:
All control files are expected to contain strictly ASCII data. They
should not be edited with a word processing type of editor (such as
Microsoft WORD, WRITE, or NOTEPAD, or WORD-PERFECT).
Job Control file directives are:
•
##DIAL phone number - specifies the fax number to dial for a job -
one ##dial directive should be used for each fax to be sent. All the
other directives for the job need to proceed the ##DIAL directive.
•
##FILENAME filename -or- ##FILE filename - specifies a file containing the faxable document. This directive can only be used when
the faxable document is not contained in the job definition file.
•
##<File type> - specifies type of data in fax data source - default is
PCL.
Available file types are:
•
##ASCII
9—7
FaxPress User’s Guide
•
##PCL
•
##DCX
•
##PCX
•
##<Resolution> - specifies resolution for jobs to be standard or fine,
•
Available resolutions are:
•
##STANDARD (100 x 200 DPI)
•
##FINE (200 x 200 DPI)
•
##DELAY mm/dd/yy hh:mm - specifies date (mm/dd/yy) and time
(hh:mm) to delay sending for jobs.
•
•
##NODELAY - specifies sending is not to be delayed-default unless
##delay directive appeared earlier in job definition file.
##BILLBACK codeword - specifies billback codeword to be asso-
ciated with the fax job.
•
##NOBILLBACK - specifies no billback-default unless ##billback
directive appeared earlier in the job definition file.
•
##B<baudrate> - specifies maximum baud rate of jobs.
Available baud rates are:
##B4800
##B7200
##B9600
##Bl2000
##Bl4400
•
##ONLYLINE line # - specifies the fax line to be used for sending
this fax job.
•
##ANYLINE - specifies that all lines are to be used to send this fax
job.
•
##DESCRIPTION description text - specifies the description (also
known as log-reference) to be used for the job. This information
appears in notices, transaction logs, and the outgoing fax's list.
9—8
FaxPress Drop Directory
Developing Custom Software
•
##COVER -or- ##NOCOVER - specifies whether or not to include a
cover page for the job.
•
•
##COVERNAME name - specifies the name of the cover page to be
used to send the fax. This must be followed by ##COVER directive
to ensure cover page is included..
##FROM name - specifies name to appear in cover page sender
name field.
•
##SENDERFAX phone number - specifies the phone number to
appear in cover page Sender fax phone number field.
•
##SENDERVOICE phone number - specifies the phone number to
appear in cover page Sender voice phone number field.
•
##TO recipient name - specifies the name to appear in cover page
recipient name field.
•
##COMPANY company name - specifies the name to appear in the
cover page Recipient Company name field.
•
##RECEIVERVOICE phone number - specifies the phone number
to appear in cover page Recipient voice number field.
•
##MESSAGE<linenumber> message text - specifies up to 60 characters of text to appear on corresponding lines of cover page
message field. Message lines can be individually specified. If a
##message directive does not include message text, then the corresponding message line will be blank.
Available message lines are:
•
##MESSAGE1-through to-##MESSAGE16
•
##RETRYLIMIT limit [minutes] - specifies the maximum number of
retries before a job is classified as having failed, and optionally specifies minimum minutes between retry attempts.
•
##PRINTCONFIRM - specifies a confirmation page is to be printed
after fax has been successfully transmitted-default is no
confirmation.
•
##PRINTFAX - specifies a full fax image is to be printed after fax has
been successfully transmitted -default is fax is not printed.
9—9
FaxPress User’s Guide
•
##NOPRINT - neither a confirmation nor full fax image is to be
printed after fax has been transmitted.
Example: Job Control File containing Fax Data
##DIAL 1 408 496 0502
Dear John,
This is a demonstration of the drop directory mechanism of
FaxPress.
It allows you to send faxes without user intervention.
Regards,
Castelle
The above file will send out the text that starts with 'Dear John,' to the
fax number specified with ##DIAL.
Example: The Fax Data separate from the Job Control File
##FILENAME demo.pcl
##NOCOVER
##FINE
##PRINTFAX
##ONLYLINE 1
##DIAL 1 (408) 654 4689
##ANYLINE
##DIAL 1 (555) 123 4567
This will send the file called: DEMO.PCL to two fax numbers. The first number
will only be sent over FaxPress line 1. The second fax number can be dialed on
any available FaxPress line. Note that the actual fax to both these numbers will
appear exactly the same, since they both share the same settings parameters.
9—10
FaxPress Drop Directory
Developing Custom Software
Job Data Files
After the FaxPress has been configured to query a drop directory, the application
can put the job data and control files in the directory. The data files should be put
into the directory before the control files. This sequence of the data files being
deposited into the Drop Directory before the control files is crucial, and
cannot be emphasized enough. The names of data files must be DOS format (up
to 8 characters long, followed by an extension of up to three characters). The
originators of drop directory jobs must ensure that names assigned to the control
and data files are unique within their directory for at least the duration of the job's
processing. The job data files in a drop directory are distinguished from the other
types of files in this directory by their filename and extension.
Each job data file consists of one or more pages of fax image data. It must be in
either ASCII, PCL5 (as defined for a HP LaserJet II or III), or DCX (as defined
by the CAS specification).
Job Notice Files
During the processing of each drop directory job, a FaxPress provides status
feedback to the originator through ASCII job notice files. Each job notice file uses
the name of its job control file, and a three character decimal extension. These
extensions are start with 001 and continue up to 999 in chronological order. Every
status (Failed, Retry, OK and Active) is reported in a separate notice file. At the
end of a notice sequence, the FaxPress will create a drop directory file with the
control file name and the special extension: DAT. The .DAT file contains the serial
number of the FaxPress that handled the job. The appearance of the .DAT file
signals the conclusions of a notice file sequence. The originating application is
responsible for cleaning up these notice files.
The format of a notice file is:
Queued at: <hh:mm, month day year>
Sent at: <hh:mm, month day year>
Pages: <number of pages>
Status: <ACTIVE/OK/RETRY/FAILED>
Fax_Number: <phone number>
9—11
FaxPress User’s Guide
FaxPress Software Developers’ Kit (SDK)
Castelle offers the complimentary FaxPress Software Developers Kit (SDK) to
allow developers to add faxing capabilities to their existing applications and
develop custom faxing applications.
FaxPress Software Developers Kit includes:
•
Castelle SimpleFax utilities
•
Castelle Programming Interface (CPI)
•
C/C++ sample code
•
Visual Basic sample code
•
Programmer's Manual
Information regarding the Castelle SimpleFax utilities, Castelle Programming
Interface (CPI), C/C++ and Visual Basic sample code are provided in the SDK
Programmer’s Manual. The SDK Programmer’s Manual is available in both the
Administration Tools’ Documents folder if you chose to copy that folder to your
hard drive during setup, and in the Documents folder on the Castelle FaxPress
CD. See "Documents" on page 6-21 for more information.
Castelle SimpleFax Utilities
The SimpleFax utilities are designed to simplify the task of interfacing with
FaxPress in any Windows environment. Whether you are adding fax capabilities
to your existing application or developing a new fax application, using these
utilities will significantly shorten your learning curve and overall development
time and effort.
FaxPress SimpleFax Utilities is a set of executable routines that provide access to
FaxPress features with minimal integration effort. These utilities are designed for
non-programmers, allowing quick access to the most commonly used FaxPress
features with only a few functions.
The SimpleFax utilities are designed to address the most common faxing tasks:
•
9—12
Submitting outgoing faxes (single faxes or broadcast)
FaxPress Software Developers’ Kit (SDK)
Developing Custom Software
•
Retrieving incoming faxes
•
Checking status of outgoing faxes
•
Retrieving notifications
•
Retrieving incoming, outgoing and notification lists
•
Merging document templates with recipient data base and broadcasting
faxes (similar to Mail Merge)
•
Checking status of the server
These utilities require a much shorter learning curve and are simple to use. They
can be launched from a large variety of applications independent of the language
they are written in or the development environment. Example environments are:
•
Win32 C/C++
•
Visual Basic
•
Delphi
•
PowerBuilder
•
DOS applications running under Windows, DOS batch files etc.
•
CGI under Web servers
The SimpleFax utilities are pre-packaged 32 bit applications designed to run on
Windows95/98 and Windows NT. Each utility encapsulates the full functionality
required to accomplish a specific fax task.
For example: SubmitFax allows you to specify all the parameters for an outgoing
fax including the server and user account, a list (or a data base file) of fax
recipients, a cover page and text message, a list of file attachments and all the
outgoing fax options. If you are familiar with FaxPress 5.0x client, you will
recognize that the SubmitFax utility contains all the functionality covered by the
‘compose fax’ function without the user interface.
The SimpleFax Utilities use Castelle Programming Interface (CPI) to
communicate with FaxPress server. The following diagram illustrates the
architectural relationship between CPI and the SimpleFax utilities.
9—13
FaxPress User’s Guide
The Programmer’s Manual provides complete information on how to develop
applications using the utilities. The Software Developers Kit includes all the
source code for the utilities as well as Visual Basic sample code which
demonstrates how those utilities are being used from a Visual Basic application.
Castelle Programming Interface (CPI)
Castelle Programming Interface (CPI) is an extensive API that provides full
access to all of FaxPress server functionality. The API functions can be
categorized into the following functional groups: Castelle Programming Interface
(CPI) is an extensive API that provides full access to all of FaxPress server
functionality.
The API functions can be categorized into the following functional groups:
9—14
•
Sending faxes
•
Receiving faxes
•
Querying about the status of faxes
•
Receiving notifications
•
User management functions
•
Phone book management functions
FaxPress Software Developers’ Kit (SDK)
•
Server configuration functions
•
User settings functions
•
Printing functions
Developing Custom Software
CPI consists of a set of DLLs:
•
32 bit DLLs for Windows 95/98 and NT
•
16 bit DLLs for Windows 3.1 and 3.11
The Software Developers Kit includes:
•
CPI libraries, DLLs and include files for FaxPress versions 3.7.3, 40.1,
4.02, and 5.0 (5.01 CPI is the same as 5.0 version)
•
CPI Programmer's Reference
•
C/C++ sample code
•
Visual Basic sample code
We have provided the source code for all the SimpleFax utilities as sample code
for CPI developers. We highly recommend that before starting your development
with CPI, you review the SimpleFax utilities Programmer's Manual and the Visual
Basic sample code included in the SDK.
Whether you choose to develop your application using CPI or SimpleFax utilities,
we strongly recommend that you register as a FaxPress developer. As a registered
developer you will periodically receive updates to the SDK and utilities. This will
also give us the opportunity to get your feedback about the API, utilities and
enhancements that you would like in the future releases of the product and the
SDK.
To register as a FaxPress developer, visit the Castelle FaxPress developers’ page
at http://www.castelle.com/developers/default.htm.
9—15
FaxPress User’s Guide
9—16
Archiving Faxes
10
What’s In This Chapter
Overview ........................................................................................................ 10-3
Preparing for Installation............................................................................. 10-6
Environment Requirements...................................................................... 10-6
Databases ................................................................................................. 10-7
Creating a User Account for the FaxPress Archive ................................. 10-8
Installing FaxPress Archive........................................................................ 10-11
Configuring the FaxPress Archive............................................................. 10-17
Configure Microsoft Access Database................................................... 10-19
Configure MS SQL Database ................................................................ 10-20
Continue Configuring FaxPress Archive ............................................... 10-20
Starting Archive Services ........................................................................... 10-29
Updating FaxPress Archive........................................................................ 10-30
Changing the Archive Database............................................................. 10-30
Updating the Configuration ................................................................... 10-30
Managing Archived Faxes .......................................................................... 10-31
Archived Faxes ...................................................................................... 10-32
Filtering Archived Faxes........................................................................ 10-35
Managing Saved Faxes .......................................................................... 10-40
Using FaxPress Archive .............................................................................. 10-42
Creating Archived Transaction Log Filters ........................................... 10-42
Troubleshooting the Archive Service ........................................................ 10-47
Problems After Installing the Archive Service ...................................... 10-47
Problems Accessing the Archive ........................................................... 10-47
Why Can't I See My Archived Faxes? ................................................... 10-47
Information Storage.................................................................................... 10-49
Incoming Fax Information ..................................................................... 10-49
Outgoing Fax Information ..................................................................... 10-50
Transmitted Log Information................................................................. 10-51
Received Log Information ..................................................................... 10-52
FPFaxInfo Table .................................................................................... 10-53
FP Users Table ....................................................................................... 10-54
FaxPress Administrator’s Guide
FP Job Type Table.................................................................................. 10-54
FP File Info Table................................................................................... 10-55
FP UNC Table ........................................................................................ 10-56
FPMiscInfo Table................................................................................... 10-56
FPBillback Table .................................................................................... 10-57
FPTransactInfo Table ............................................................................. 10-57
FPReserved Table................................................................................... 10-59
Archive Table Relationships .................................................................. 10-60
10—2
Overview
Archiving Faxes
Overview
FaxPress Archive provides five essential archival functions:
•
All of your FaxPress servers can be backed up to a single database.
•
Archives outgoing faxes, incoming faxes, and transaction logs for all
FaxPress users.
•
Creates archival transaction information for each fax or log and stores the
data in a database.
•
Allows all of your users to view, sort, mail, print, and re-send archived
faxes directly through Faxmain.
•
Optimizes FaxPress performance by moving faxes from FaxPress
Queues into the archive database.
The archival configuration parameters for your FaxPress users are defined by the
FaxPress Administrator through a convenient configuration wizard, requiring the
following information:
•
Identify all the FaxPress servers to archive
•
Specify type(s) and condition(s) of faxes (or transaction logs) to archive
•
Specify the archival frequency and storage format
•
Specify type of database to store the archival information ( SQL server
or Access)
•
Define database housekeeping operations
Two modes are supported: Backup mode and On-line Archive mode. In backup
mode the purpose is archiving for off-line, long-term storage with backups done
once a day. In on-line archive mode, the faxes are continuously moved into the
database and are easily viewed, searched, and filtered by end users through
FaxMain.
Note:
For additional, user rather than administrative FaxPress Archive
information , please see Chapter 16, "Managing Stored Faxes".
10—3
FaxPress Administrator’s Guide
FaxPress Archive performs all the features necessary to manage and create fax
archives including:
•
Automatic scheduling of archive process as often as every 10 minutes.
•
Automatic purging of faxes upon successful completion of the archive
process.
•
A user friendly wizard automates the archive configuration process.
•
Ability to choose between two modes of operation, on-line and backup.
On-Line allows the end users to view, delete or resend their archive faxes
at anytime. The backup mode restricts these features to users with supervisor privileges.
•
Ability to select type of faxes or transaction logs for archival.
•
Ability to archive faxes on multiple servers through a single archive
service.
FaxPress Archive consists of three components:
The FaxPress Archive Program
The Archive program is run as a service on a Windows NT server or
workstation.The parameters for the Archive program are taken from the
registry and are set by a configuration program. This program can be installed
from your FaxPress setup CD by selecting Add On Products in the
Administrator Installation.
The FaxPress Archive Configuration Program
The configuration program lets the administrator determine which servers to
archive faxes from, which faxes to archive, when to archive, what format the
archived faxes should be stored as, whether to archive transaction logs, and
which database to use to store archive transaction information and whether to
purge old records from the database. The configuration program is
automatically launched from the installation program for the FaxPress
Archive program.
An MS SQL or Access Database
The database is used to store archive information about the faxes (e.g. when
it was sent/received, the fax owner, the remote terminal ID, etc.). If you wish
10—4
Overview
Archiving Faxes
to use MS SQL, you must create a database prior to starting the FaxPress
Archive installation. If you use MS Access, a database will be automatically
generated for you during the installation process. No MS Access application
program needs to be installed on your system.
Once the archive program is started, it goes through the outgoing and incoming
fax queues for all the users and stores all the faxes into a directory specified by the
administrator. The records for the corresponding faxes are stored into the specified
database. Once the faxes are archived successfully, the faxes are deleted from the
FaxPress.
To implement FaxPress Archive, four basic steps must be performed. They are:
1.
Preparation of your environment,
2.
Installation of the software and Archive service,
3.
Configuration of your archive system,
4.
Activation of the Archive service.
You may elect to modify the configuration parameters of your FaxPress Archive
at any time. It is, however, important to note that anytime you change the
configuration parameters, you must restart the Archive service.
10—5
FaxPress Administrator’s Guide
Preparing for Installation
Note:
Make sure that you read and understand the following information
before you attempt to install FaxPress Archive.
Environment Requirements
Note:
You can not configure your archive service remotely. This means
that you must configure your archive parameters on the same
workstation that you installed the archive program. Otherwise the
settings will not take effect. If you attempt to configure your Archive
service remotely an error message will be generated.
The following environment specifications are required to successfully implement
FaxPress Archive.
Operating System Requirements
•
Windows NT 4.0 and up workstation or server
•
Windows 2000/2000 Professional/XP
Permissions
On the FaxPress file server:
10—6
•
You must have read permission to the directories where the FaxPress server
is installed and write permission on the directory and subdirectories where the
faxes are stored. The FaxPress server account must have write permission to
the directories where the archived faxes are stored also.
•
The login account to the DBMS system must have permission to create tables
in the database and read/write access on the tables that are created. Depending
on the type of user authentication used by the DBMS, the service account may
also require these privileges.
Preparing for Installation
•
Archiving Faxes
If your are using an Access database, the service account that is used to run
the service must have read permission to the directories where the FaxPress
is installed and write permission on the directory and subdirectories where the
faxes are stored. The FaxPress serial number account must have write
permission to the directories where the archived faxes are stored also. In
addition, the service account and the FaxPress serial number account must
have write permission on the database file.
On the client workstation:
•
The login account to the DBMS system must have read permission on the
database where the archive tables are located and must have read access on
theses tables. Depending on the type of user authentication used by the
DBMS, the current login user account on the workstation may also require
these privileges.
•
If you are using an Access database, the current login user account on the
workstation must have read permission to the Access database file and
read/write permission on the directory where the database file is located. The
read/write permission is required because a temporary lock file is created
when the database is opened. The lock file is used to maintain database
integrity. It is deleted automatically when all users have closed the database.
This is the way Access databases operate.
Databases
FaxPress Archive generates fax and log file archive information data. This data is
stored in a database for subsequent archive retrieval operations. FaxPress supports
either MS SQL or MS Access database types.
During the installation process you are prompt to specify the database type. If you
wish to use an MS SQL database, you must first create a database and a DSN for
FaxPress Archive to access. Consult the documentation for your database server
for instructions on how to create new databases. For your convenience the
instructions are in Appendix A.
For the examples shown in this installation documentation we have named the MS
SQL database FaxPressArchive. If you choose MS Access a database will be
created for you.
10—7
FaxPress Administrator’s Guide
If you do not have a database server, select Microsoft Access and the install
program will create a database file for you.
Note:
You DO NOT need to have a Microsoft Access application installed
on your machine to use this feature.
Creating a User Account for the FaxPress Archive
The installation process will prompt you for a user account name and password
for the FaxPress Archive program (Windows NT service).
To create a user account for the Archive service, follow these steps:
1.
The FaxPress Archive service account must have the right to Log on as a
Service. This can be assigned by running the NT User Manager. To access
User Manager select the following from the Windows NT Start Menu:
Programs -> Administrative Tools -> User Manager
10—8
Preparing for Installation
Archiving Faxes
2.
From the Policies pull down menu, select User Rights. The Users Rights
Policy dialog screen is displayed.
3.
Click the box to Show Advanced User Rights.
4.
From the Right scroll down list, select Log On as a Service. The Add
Users and Groups dialog screen is displayed.
5.
Select the correct domain name from the List Names From scroll down list.
6.
Click the Show Users button and select your FaxPress Archive user name
from the Names scroll down list.
7.
If the service account or a group that the service account belongs to is not
listed in the Names list, add that account by clicking the Add button.
10—9
FaxPress Administrator’s Guide
For more information on adding user accounts and setting password and other
parameters, consult your Windows NT documentation for more detailed
instructions.
Note:
10—10
Make sure the password is correct. The archive program has no
way of testing this until the service is run.
Installing FaxPress Archive
Archiving Faxes
Installing FaxPress Archive
To install FaxPress Archive, follow these steps:
1.
Place the Castelle CD-ROM in the drive. The autorun program will be
launched from your CD ROM drive. The Castelle FaxPress Setup screen
will be displayed. Click Install FaxPress to begin in the installation
process. The FaxPress Project Setup will prepare the InstallShield® Wizard
to guide you through the rest of the installation process.
10—11
FaxPress Administrator’s Guide
10—12
2.
The Welcome screen requires you to click Next>
3.
In the Select Installation, click the Administrator Installation button to
install the FaxPress server software.
Installing FaxPress Archive
Note:
4.
Archiving Faxes
If the FaxPress client has previously been installed on the
workstation you will be prompted with an additional screenshot to
either “Install FaxPress Server, or its Add on Products. . ." or "To
uninstall the existing FaxPress client". Choose the first option, "To
install the FaxPress Server. . ."
Select Add On Products.
10—13
FaxPress Administrator’s Guide
10—14
5.
Select FaxPress Archive.
6.
Click Next>.
Installing FaxPress Archive
Archiving Faxes
7.
Enter the installation account name, password, and domain name that you
created in "Creating a User Account for the FaxPress Archive" on page
10-8 in the User Account Information dialog box. Click Next>.
8.
The next screen provides you the option of selecting the location where
FaxPress Archive will be installed.
To keep the default location click Next> or click Browse to specify a different
location.
10—15
FaxPress Administrator’s Guide
9.
Select the folder to install FaxPress Archive icons by clicking Next> to
accept the default path or Browse to specify a new path.
The FaxPress Archive service files will be copied to your machine. At the end, a
DOS prompt windows will be opened. Please wait for a few seconds for this
program to install the FaxPress Archive service. When this is complete the
FaxPress Archive configuration program will be automatically launched.
Proceed to "Configuring the FaxPress Archive" on page 10-17, for instructions
on configuring your FaxPress Archive.
10—16
Configuring the FaxPress Archive
Archiving Faxes
Configuring the FaxPress Archive
At the completion of the installation process the FaxPress Archive install program
will automatically launch the configuration program. However, you can also
launch the FaxPress Archive configuration program through Faxmain, by
selecting FaxPress Archive Configuration, or by clicking the Configure button in
the Storage Reclamation tab of the Server Properties Dialog Box, as described in
"Configuring Storage Reclamation" in Chapter 3.
Select Mode
1.
The first screen displayed after the FaxPress Archive service is installed is
the Mode of Operation screen.
Select the mode in which the archive database will be used.
•
Back-Up: In this mode the faxes in the archive can only be accessed by
FaxPress supervisors. Other users are not able to access the their archived
faxes.
•
On-Line Storage This mode allows all FaxPress users to access their
own archived faxes through Faxmain.
Click Next>.
10—17
FaxPress Administrator’s Guide
Select Database
1.
When archiving faxes, FaxPress Archive generates fax archive information
data. This data and the transaction log files (if selected for archival) is
stored in a database for subsequent archive retrieval operations. The
Database Selection dialog box prompts you to select the type of database
to use archive data storage.
•
SQL Database Server: Use this selection if a relational database server
(e.g. MS SQL Server, Oracle server, and IBM DB2 server, etc.…) is
available. This will give users the performance, reliability and security
that are available with the database server.
•
Note:
10—18
Microsoft Access database: Use this option if you want to use an
Access database, or if you do not have access to a relational database
server. An installation of the Microsoft Access program is not required.
A new database file with the appropriate tables will be created by the
installation process.
The FaxPress administrator can at anytime use the FaxPress
Archive configuration program to specify a different database, but
the information from the old database will not be imported into the
new one. For more information refer to "Updating FaxPress
Archive" on page 10-30.
Configuring the FaxPress Archive
2.
Archiving Faxes
If you selected Microsoft Access, proceed to "Configure Microsoft
Access Database" on page 10-19. If you selected SQL Database Server,
proceed to "Configure MS SQL Database" on page 10-20.
Configure Microsoft Access Database
To use a Microsoft Access database for storage of the archive information data
performing the following steps:
1.
If you selected Microsoft Access in step 1, on page 10-18, the Select New
or Existing Database dialog screen is displayed.
2.
Select Connect to an Existing FaxPress Archive database: if an archive
database already exists and you just want to change other parameters
unrelated to the database.
3.
Or, select Create a New Database: to create a new Access database.
The new Access database will be located in a new directory named
Archive\Database in the FaxPress server root directory. The archived faxes
will be located under Archive\Faxes.
For example:
C:\Castelle\Archive\Faxes
10—19
FaxPress Administrator’s Guide
Configure MS SQL Database
1.
If the SQL Database Server option is selected, the ODBC DSN dialog box
will be displayed.
The current ODBC connect string will be displayed in the edit box. The
connect string is generated automatically when a DSN is selected and a
connection to the server is successful.
2.
If a DSN is not displayed or you want to select an alternate DSN, click the
Browse button to launch the ODBC Data Source Administrator and select
a different existing DSN or to create a new one (refer to Appendix A).
Continue Configuring FaxPress Archive
After you have selected a database, the FaxPress Archive wizard will finish the
configuration process by prompting you for FaxPress Server selection and to
select archiving properties.
10—20
Configuring the FaxPress Archive
1.
Archiving Faxes
Select the FaxPress server you want to archive in the FaxPress Selection
dialog box.
The list of available FaxPress servers is displayed in the left column. Transfer
them to the right column by double clicking a server, by highlighting a server
and clicking the Add > button, or select all by click the Add All>> button.
Select Next>.
Note:
If multiple FaxPress servers are selected, the servers must all be
installed under the same Castelle directory. Only FaxPress 6.x and
above servers can be selected for archive.
10—21
FaxPress Administrator’s Guide
10—22
2.
The Fax Archive Location information screen shows you the location
where the archived faxes are stored.
3.
The Archiving Transmitted Faxes dialog box configures the options for
outgoing faxes.
Configuring the FaxPress Archive
•
Archiving Faxes
Archive Sent Faxes: If you select this option all faxes that have been
successfully transmitted will be archived.
•
Do not archive failed faxes: If you select this option failed faxes will not
be archived.
Note:
4.
If you choose to archive transmitted faxes, the FaxPress server
Advanced parameters will automatically be set to Keep Sent Faxes.
Otherwise, the sent faxes are automatically removed from the
outgoing queue after a successful transmission. See "Configuring
Advanced Functions" in Chapter 3 for more information
The Archiving Received Faxes dialog boxes allows you to archive
received faxes.
a.
Archive received faxes: This option specifies whether to archive
received faxes or not. If this option is checked, then received faxes will
be archived. Otherwise, received faxes will not be archived.
b.
Do not archive received faxes that have not been viewed: This
option specifies whether to archived unviewed faxes or not. If this
option is checked, then all unviewed faxes will not be archived.
Otherwise, all faxes will be archived.
10—23
FaxPress Administrator’s Guide
Note:
Archived faxes get deleted from the Incoming Fax Queue, therefore,
they will only be visible to the user through the Archived received
faxes folder in Faxmain. This is only available if the on-line mode is
selected. Refer to step 1, on page 10-17.
c.
Do not archive unaddressed faxes: This option specifies that all
faxes in the unaddresesed incoming queue are not archived. Archived
faxes are deleted from the FaxPress queue so it would be impossible to
route faxes afterwards. This option prevents unaddressed faxes from
being archived until after they are routed. After they are routed,
archiving options selected in a, b, and d are enforced.
d.
Archive received faxes older then x days: This specifies how long a
fax must be in the incoming queue before it is archived. This ensures
that a fax is in the incoming queue for a certain amount of time before
it is moved into the archive.
5.
Archiving Transaction Logs dialog box allows you to archive transaction
logs.
This option turns transaction log archival on or off. This includes both
transmitted and received logs. There is no option to specify one or the other.
10—24
Configuring the FaxPress Archive
Note:
6.
Archiving Faxes
FaxPress transaction logs are not deleted at the completion of the
archive process.
The Archive Options dialog box allows you to select the archive storage
format for your faxes and the user name and password for accessing your
archive database.
a.
What file format should the faxes be stored: Options for file format
include DCX or TIFF. TIFF files are usually smaller than DCX files.
b.
Encrypt archived faxes: Select this option to encrypt the archived
faxes. Faxes are stored as DCX or TIFF files on the file server.
Encryption prevents these files from being viewed without the proper
password and decryption.
•
Password: Specify a password to be used in the encryption of the faxes.
If you are using a Microsoft Access database to store the archived fax
information, this password is also used to protect the Access database.
The Access database file can be accessed by everyone with permission
to the database directory. Specifying a password will prevent the entire
contents of Access database from being viewed without the proper password. The password can only be specified once. It cannot be changed
once the configurator is finished.
10—25
FaxPress Administrator’s Guide
7.
The Specifying an Archival Schedule dialog box allows you to specify
when and how often the archive program will run.
•
Run FaxPress Archive every: Choose this option to run the archive pro-
gram periodically. The interval can be specified next to this option.
Intervals are specified by hours and minutes. Choose an interval that is
appropriate. This option is recommended when you have chosen to use
FaxPress Archive in on-line mode in step 1, on page 10-17.
•
8.
10—26
Run FaxPress Archive once a day at: Choose this option to run the
archive program once a day. The time can be specified next to this option.
Choose a time when there is minimal workload on the FaxPress server.
The option is recommended when have chosen to use FaxPress Archive
in the backup mode in step 1, on page 10-17.
The Purging Archive Faxes dialog box allows you to select options
regarding purging of old archived faxes.
Configuring the FaxPress Archive
Note:
Archiving Faxes
FaxPress Archive automatically deletes archived faxes from the
Faxmain Queues. Purging of Archive faxes applies to faxes
available through Archived Transmitted or Received Faxes folder
in Faxmain.
Purging should be enable if the archived faxes are not required to be kept
permanently or to prevent the database and disk space usage from growing
too large. Purging will remove the records from the database and the actual
fax files will be deleted.
9.
•
Purge Sent Faxes: Enable this option to purge sent faxes. All sent faxes
that are older than the number of days specified will be deleted.
•
Purge Received Faxes: Enable this option to purge received faxes. All
received faxes that are older than the number of days specified will be
deleted. This will purge the records for all FaxPress users.
The next two screens are information pages. Once the configurator is
finished, the settings are saved to the registry and to the FaxPress servers. If
a new Access database is selected, a new Access database is created with
the archive tables. If a DBMS server is selected, the tables are created in the
default database. If the tables already exist in the database, then the tables
10—27
FaxPress Administrator’s Guide
are verified to ensure the correct format. The tables are also verified if an
existing Access database is selected. If the archive program is already
running, it must be restarted for the changes to take effect.
10—28
Starting Archive Services
Archiving Faxes
Starting Archive Services
After you have installed and configured FaxPress Archive you need to start the
FaxPress Archive Service.
To start FaxPress Archive service:
1.
Go to your Windows NT Control Panel and open Services.
2.
Highlight FaxPress Archive and click the Startup button.
3.
Select Automatic for Startup Type and in Logon As: select This
Account:. Verify that the user account and password is the account name
you create in "Creating a User Account for the FaxPress Archive" on
page 10-8.
4.
Click OK and then from the Services screen click the Start button.
10—29
FaxPress Administrator’s Guide
Updating FaxPress Archive
Anytime you change the configuration of FaxPress Archive you must restart
the FaxPress service. For detailed instructions, refer to "Starting Archive
Services" on page 10-29.
You can change or create a new database, change the archive schedule, the mode
of operation, or what files are archived at any time by running the FaxPress
Archive configuration program.
Changing the Archive Database
If you wish to change the database, performing the following steps prior to
updating your FaxPress Archive configuration:
1.
Go to your FaxPress Archive directory. This is by default located under
your FaxPress server root directory in a directory called \Archive.
Example:
C:\Castelle\Archive
2.
Copy the files in both the subdirectories, \Faxes and \Database to another
drive or directory.
3.
If you are using a Microsoft SQL database, create a new database and DSN
as described in "Databases" on page 10-7.
4.
Proceed to "Updating the Configuration" on page 10-30.
At anytime you can restore a previous directory by moving both the \Database
and \Faxes directory back to your FaxPress Archive directory.
Updating the Configuration
10—30
1.
From the Control Panel, select Services and with the FaxPress Archive
service highlighted click the Stop button.
2.
Go To "Configuring the FaxPress Archive" on page 10-17 and follow the
steps to configure the new database.
3.
Go To "Starting Archive Services" on page 10-29 and follow the steps to
restart the service.
Managing Archived Faxes
Archiving Faxes
Managing Archived Faxes
Note:
Your faxes will only be archived if your FaxPress Administrator has
licensed the FaxPress Pro Package and configured the archive
service for your FaxPress servers.
Locating your Archived Faxes
FaxPress Archive can be configured to store archived faxes in two locations:
1.
At the individual user level, the user’s personal archived faxes are stored in
two folders under the user’s Mailbox branch.
Note:
If these folders are not displayed in your Mailbox, you may need to
reconfigure your start-up settings in your personal preference
Options. See "Setting Startup Options" in Chapter 10.
10—31
FaxPress Administrator’s Guide
2.
At the FaxPress Administrator level (logged in with supervisor privileges),
FaxPress archive stores all archived faxes for each server in two folders
under the Administration branch of Faxmain.
If configured for archiving transaction logs, the Fax Archive will have an
additional folder, Archived Transaction Logs. For more information on
archived logs refer to "Creating Archived Transaction Log Filters" on page
10-42.
Archived Faxes
Your archived faxes can be viewed, saved, converted to text, printed, e-mailed,
and sent through Faxmain.
Note:
1.
10—32
If your FaxPress server is installed on NT workstation and you
have chosen to use Microsoft Access as your archive database, a
maximum of ten users can access the FaxPress archive database at
any given time. This is a limitation of the NT workstation.
Open Faxmain and login to a FaxPress Server.
Managing Archived Faxes
2.
Archiving Faxes
Expand the server folder and open your Mailbox. Two folders will be
displayed if FaxPress Archive has been configured for your FaxPress
server: Archived Sent Faxes and Archived Received Faxes.
The Archived Sent Faxes folder contains all the archived faxes that has been
sent by you and the Archived Received Faxes folder shows all the faxes that
have been received by you.
3.
Open either of these folders and select the archived fax you wish to view.
Note:
4.
If you move your archived faxes to another location, their
parameters will still be displayed in the Archived Faxes folders,
however, when you try to view the archived fax, the Browse dialog
will be display for you to locate the fax.
To view the archived fax, either clicking the fax in the list, or by right
clicking and selecting view from the context menu. You can specify what
viewer application is used through your Personal Preferences Options in
Faxmain. Refer to "Selecting Viewer Application" in Chapter 10.
•
FaxPress users with supervisor privileges have a Fax Archive folder
under the Administration branch that allows them to view Archived
10—33
FaxPress Administrator’s Guide
Received Faxes and Archived Sent Faxes for all users and Archived
Transaction logs.
5.
To save your archived fax to a new name or location, right click on the
archived fax and select Save As. A Save As dialog box is launched. You
can specify a new name and location for the archived file.
6.
To print your archived fax, right click on the fax and select Print. This will
launch the standard print dialog box.
7.
To attach this fax to an email, right click on the fax and select Mail. Your
fax will be attached to your client MAPI mail for you to address.
8.
To send this fax again, right click on the fax and select Send. This opens the
Send Fax dialog box and attaches the archive file. In the case of an
outgoing archived fax, the fax will be automatically addressed with the fax
number that was stored in the record.
9.
To convert the archived fax to text format, right click on the fax and select
OCR from the context menu.
10. To display the properties for the archived fax record, right click on the fax
and select Properties. The information available for each of these faxes in
these lists is exactly the same as what was available before the faxes were
archived. These two folders will only show the personal archived items of
the current FaxPress user.
10—34
Managing Archived Faxes
Note:
Archiving Faxes
Deletion is done through the purging option in the archive program
itself.
11. To sort a list by a particular column, simply click on the column header and
the list will be sorted in ascending order by that column.
Filtering Archived Faxes
The Archived folders can be filtered so that only items that match a certain criteria
will be shown. On each of the archived folders, a context menu is available that
allows the user to set the filter.
Filtering Archived Sent Faxes
To define a filter for archiving sent faxes:
1.
Highlight the Archived Sent Faxes folder.
If you have supervisor privileges, archived faxes are located in two places in
Faxmain: one is under your Mailbox branch (these are your personal archived
faxes) and one is in the Administration branch under Fax Archive (these are
all the archived files for your FaxPress server).
2.
Right click on the folder to bring up the context menu.
10—35
FaxPress Administrator’s Guide
3.
Select Set Filter. The Archived Transmitted Faxes Filter dialog box will
be displayed.
For archived sent faxes, the following filter options are available:
•
List All Sent Faxes— Select this option to show all sent faxes for the current
FaxPress user.
•
Sent— Filters the list so that only faxes that were sent with a particular time
will be shown. Dropping the list allows options for selecting faxes from all
days, the last x number of days from the client workstation's current date, on
or before a certain date, on or after a certain date, between two different dates,
and of course, a specific date.
•
Pages— Filters the list so that only faxes with a particular number of pages
will be shown. Dropping the list allows options for selecting faxes with all
pages, less than or equal to a certain number of pages, greater than or equal
to a certain number of pages, and also the specified number of pages.
•
Company— Filters the list so that only faxes sent to a particular company will
be shown. Dropping the list allows options for selecting faxes from all
companies, companies whose names start, contain, and end with a particular
letter or word, and companies whose names match a specific name.
•
10—36
Description— Filters the list so that only faxes with a particular description
or subject field will he shown. Dropping the list allows options for selecting
faxes with all descriptions, faxes whose descriptions begin, contain, end with
Managing Archived Faxes
Archiving Faxes
a particular phrase, and also faxes whose descriptions that match the phrase
exactly.
•
Destination number— Filters the list so that only faxes sent to a certain fax
number will be shown. Dropping the list allows options for selecting faxes to
all destination numbers, fax numbers that begin, contain, or end with a certain
number, and faxes to a specific fax number.
•
Fax Status— Filters the list so that only faxes with a certain status will be
show. Dropping the list allows options for selecting faxes with any kind of
status, failed status, and sent status.
•
Users— Filters the list so that only faxes sent by the specified user will be
shown. Dropping the list allows options for selecting all uses or a particular
FaxPress user. This option is only available to FaxPress supervisors. This
item is shown only when the filter dialog is shown through the archived sent
faxes node under the administration folder node.
Filtering Archived Received Faxes
To define a filter for archiving received faxes:
1.
Highlight the Archived Received Faxes folder.
If you have supervisor privileges, archived faxes are located in two places in
Faxmain: one is under your Mailbox branch (these are your personal archived
faxes) and one is in the Administration branch under Fax Archive (these are
all the archived files for your FaxPress server).
2.
Right click on the folder to bring up the context menu.
10—37
FaxPress Administrator’s Guide
3.
Select Set Filter. The Archived Received Faxes Filter dialog box will be
displayed.
For archived received faxes, the following filter options are available:
•
List All Archived Incoming Faxes— Select this option to show all received
faxes for the current FaxPress user.
•
Sent— Filters the list so that only faxes that were received with a particularly
time will be shown. Dropping the list allows options for selecting faxes from
all days, the last x number of days from the client workstation's current date,
on or before a certain date, on or after a certain date, between two different
dates, and of course, a specific date.
•
Pages— Filters the list so that only faxes with a particular number of pages
will be shown. Dropping the list allows options for selecting faxes with all
pages, less than or equal to a certain number of pages, greater than or equal
to a certain number of pages, and also the specified number of pages.
•
RTI— Filters the list so that only faxes received from a particular remote
terminal ID (RTI) will be shown. Dropping the list allows options for
selecting faxes received from a RTI that begins, contains, ends, or matches the
specified phrase.
•
Comment— Filters the list so that only faxes with a particular comment field
will he shown. Dropping the list allows options for selecting faxes with all
10—38
Managing Archived Faxes
Archiving Faxes
comments, faxes whose comments begin, contain, end with a particular
phrase, and also faxes whose comments that match the phrase exactly.
•
Fax Status— Filters the list so that only faxes with a certain status will be
show. Dropping the list allows options for selecting faxes with any kind of
status, OK status, and not OK status.
•
Users— Filters the list so that only faxes received by the specified user will
be shown. Dropping the list allows options for selecting all users or a
particular FaxPress user. This option is only available to FaxPress
supervisors. This item is shown only when the filter dialog is shown through
the archived received faxes node under the administration folder node.
For all archived lists, multiple filters can be specified so that only faxes that meet
all of the conditions will be shown.
10—39
FaxPress Administrator’s Guide
Managing Saved Faxes
Saved faxes are not associated with a FaxPress database, so you do not have to
login to a FaxPress server to view or manage them.
10—40
1.
To access your saved faxes, first expand your Saved Faxes folder and (if
you have created them) any subfolders, to display your list of saved faxes.
2.
To create a new subfolder, right click on Saved Faxes and select Add Folder
from the context menu. The Add Folder dialog box will be displayed.
3.
Enter the title for your new saved faxes folder in the Folder Name text box
and the new folder will be created for you. In the future when you save a
fax, this folder will be displayed as a possible destination for your fax.
4.
To display the operations available for saved faxes, right-click on any of
your saved faxes.
Managing Saved Faxes
5.
Archiving Faxes
From the context menu, you can select:
•
View... — Open the saved fax in the Viewer. This viewer application is
set in your personal preferences options. See also "Selecting Viewer
Application" in Chapter 10.
•
Print— Print the fax.
•
Delete— Removes the fax from your Saved Faxes folder. The fax may
still be available through your incoming or outgoing fax queues or
through your archived faxes folders.
•
Send— This launches the Send Fax dialog box and attaches your saved
fax.
•
Mail— Depending on the settings in your profile and email client, this
either requests you to select an email service or directly launches your
email client. The saved fax will automatically be attached to a new
message.
10—41
FaxPress Administrator’s Guide
Using FaxPress Archive
To view archive faxes and/or transaction logs click on the Fax Archive folder
under either the Administration (Supervisor) or your Mailbox in Faxmain.
You can now view, resend, and define filters for your archived faxes and
transaction logs. For faxes the processes are identical to the processes for end
users. For more information on defining filters for faxes refer to your FaxPress
User’s Guide.
Note:
If your FaxPress server is installed on NT workstation, a maximum
of ten users can access the FaxPress archive database at any given
time. This is a limitation of the NT workstation.
Creating Archived Transaction Log Filters
Transaction log archived files are only available to FaxPress users with supervisor
privileges. Defining filters for transaction logs is very similar to defining filters for
archived faxes, but for your convenience this process is included here.
Filtering Archived Received Transaction Logs
To define a filter for archiving received transaction logs:
10—42
1.
Login in to Faxmain with supervisor privileges.
2.
Expand the Archive folder in the Administration branch.
3.
Expand the Transaction Logs folder.
4.
Highlight the Received Logs folder.
Using FaxPress Archive
5.
Archiving Faxes
Right click on the folder to bring up the context menu and select Set Filter.
The Received Transaction Logs dialog box will be displayed.
For archived received logs, the following filter options are available:
•
List All Received Transaction Logs— Select this option to show all received
logs in the archive. This may take a while to show depending on how many
transactions are stored in the archive.
•
Received— Filters the list so that only receive attempts that were made on a
particularly time will be shown. From the scroll down list, you can select
options for: attempts made on all days, the last x number of days from the
client workstation's current date, on or before a certain date, on or after a
certain date, between two different dates, and of course, a specific date.
•
Duration— Filters the list so that only receptions with a particular duration
will be shown. From the scroll down list, you can select options for:
receptions with all durations, receptions that take less than or equal to the
number of specified seconds, receptions that take greater than or equal to the
number of specified seconds, receptions that fall within the specified number
of seconds, and receptions that take exactly the specified number of seconds.
•
Pages— Filters the list so that only receptions with a particular number of
pages will be shown. From the scroll down list, you can select options for:
receptions with all pages, less than or equal to a certain number of pages,
10—43
FaxPress Administrator’s Guide
greater than or equal to a certain number of pages, and also the specified
number of pages.
•
RTI— Filters the list so that only receptions from a fax machine with a
particular remote terminal ID (RTI) will be shown. Dropping the list allows
options for selecting receptions from a machine with a RTI that begins,
contains, ends, or matches the specified phrase.
•
Baud Rate— Filters the list so that only receptions received at particular baud
rate will be shown. From the scroll down list, you can select options for:
receptions with all baud rates, baud rates that begin, contain, or end with a
particular number, and also baud rates that match the number exactly.
•
Line— Filters the list so that only receptions received via a particular
FaxPress line will be shown. From the scroll down list, you can select options
for: receptions received via any line or any of the lines available on the
FaxPress. The number of available lines will depend on the FaxPress.
•
Status— Filters the list so that only faxes with a certain status will be show.
From the scroll down list, you can select options for: faxes with any kind of
status, OK status, and not OK status.
•
Users— Filters the list so that only faxes received by the specified user will
be shown. From the scroll down list, you can select options for all uses or a
specific FaxPress user
Filtering Archived Transmitted Transaction Logs
To define a filter for archiving transmitted transaction logs:
10—44
1.
Login in to Faxmain with supervisor privileges.
2.
Expand the Archive folder in the Administration branch.
3.
Expand the Transaction Logs folder.
4.
Highlight the Transmitted Logs folder.
Using FaxPress Archive
5.
Archiving Faxes
Right click on the folder to bring up the context menu and select Set Filter.
The Transmitted Transaction Logs dialog box will be displayed.
For archived transmitted logs, the following filter options are available:
•
List All Transmitted Transaction Logs— Select this option to show all
transmitted logs in the archive. This may take a while to show depending on
how many transactions are stored in the archive.
•
Called— Filters the list so that only transmission attempts that were made on
a particularly time will be shown. From the scroll down list, you can select
options for: attempts made on all days, the last x number of days from the
client workstation’s current date, on or before a certain date, on or after a
certain date, between two different dates, and of course, a specific date.
•
Billback— Filters the list so that only transmissions with a particular billback
code will be shown. From the scroll down list, you can select options for:
transmissions with all billback codes, transmissions whose billback code
begin, contain, or end with a particular phrase, and also transmissions whose
billback match the phrase exactly.
•
Destination— Filters the list so that only transmissions sent to a certain fax
number will be shown. From the scroll down list, you can select options for:
transmissions to all destination numbers, fax numbers that begin, contain, or
end with a certain number, and transmissions to a specific fax number.
10—45
FaxPress Administrator’s Guide
•
RTI— Filters the list so that only transmissions sent to a fax machine with a
particular remote terminal ID (RTI) will be shown. From the scroll down list,
you can select options for: faxes sent to a machine with a RTI that begins,
contains, ends, or matches the specified phrase.
•
Baud Rate— Filters the list so that only transmissions sent at particular baud
rate will be shown. From the scroll down list, you can select options for:
transmissions with all baud rates, baud rates that begin, contain, or end with
a particular number, and also baud rates that match the number exactly.
•
Line— Filters the list so that only transmissions sent via a particular FaxPress
line will be shown. From the scroll down list, you can select options for:
transmissions sent via any line or any of the lines available on the FaxPress.
The number of available lines will depend on the FaxPress.
•
Status— Filters the list so that only faxes with a certain status will be show.
From the scroll down list, you can select options for: faxes with any kind of
status, failed status, and sent status.
•
Users— Filters the list so that only faxes sent by the specified user will be
shown. From the scroll down list, you can select options for: all uses or a
particular FaxPress user.
10—46
Troubleshooting the Archive Service
Archiving Faxes
Troubleshooting the Archive Service
Problems After Installing the Archive Service
You have installed the archive service, but the service is not listed in the services
applet of the control panel.
Perform the following steps:
1.
Go to the command prompt
2.
Change directory to the Program Files\Castelle\FaxPress\Fax Archiver
directory.
3.
Execute the following command: archive -u.
4.
Execute the following command: archive -i.
5.
Follow the steps on page 6-26 of the manual.
Note:
The account that is selected in step 3 on page 6-26 must be a
member of the administrator group.
Problems Accessing the Archive
You have installed the archive service successfully and are not able to access the
archive from within FaxMain.
Check the following:
Is Microsoft DAO (Database Access Objects) 3.6 installed on the system, if the
DAO is not installed, please refer to Appendix A, installing DAO
Why Can't I See My Archived Faxes?
Updating the Archive Database after a FaxPress unit has been replaced
The archive database is indexed by the FaxPress serial number. If the FaxPress is
replaced with a different unit then the serial number will have changed and the
archived faxes will appear to have vanished. The faxes are still stored in the
archive database, but are not displayed in FaxMain. To make the faxes visible, you
must change the FaxPress serial number in the archive database. Once the serial
10—47
FaxPress Administrator’s Guide
number has been changed from the old FaxPress serial number to the new
FaxPress serial number, the faxes will once again be displayed in FaxMain. To
change the FaxPress serial number in the archive database, perform the following
steps:
1.
Stop the archive service.
2.
Open the ARCHIVE.MDB file located in the
CASTELLE\ARCHIVE\DATABASE directory on your file server.
3.
Open the FPFAXINFO table in the database.
4.
Select the FAXPRESSSERIALNUMBER column by clicking on the
column header.
5.
Select the EDIT menu from the toolbar.
6.
Select the REPLACE menu item from the EDIT menu.
7.
In the FINDWHAT field, enter the serial number of the old FaxPress
8.
In the REPLACEWITH field, enter the serial number of the new FaxPress
9.
Select on the REPLACE ALL option
When the find/replace has completed, close the archive database and start the
archive service. When FaxMain is used to display the archive, all the faxes will
now be displayed.
10—48
Information Storage
Archiving Faxes
Information Storage
In order to keep track of the fax jobs, the information associated with the fax must
also be kept. The information is stored into databases as follows.
Incoming Fax Information
For incoming faxes the following information is available:
FaxPress Server
Serial # of FaxPress server
Job ID
Job ID of the incoming fax
Date/Time
Date and time fax was received
User
Recipient of the incoming fax
RTI
Remote Terminal ID of the sender
Pages
Number of pages of the fax
Status
Received status of the fax
Resolution
Resolution of the fax
Comment
Comment for the fax
File Name
Name of file used to archive the fax
10—49
FaxPress Administrator’s Guide
Outgoing Fax Information
For outgoing faxes the following information is available:
10—50
FaxPress Server
Serial # of FaxPress server
Job ID
Job ID of the outgoing fax
Date/Time
Date and time fax was submitted
User
Sender of the fax
Company
Company name of the recipient
Destination
Number
Fax number to send fax to
Pages
Number of pages of the fax
Status
Transmit status of the fax
Resolution
Resolution of the fax
Description
Description or subject of the fax
File Name
Name of file used to archive the fax
Information Storage
Archiving Faxes
Transmitted Log Information
For transmitted faxes the following information is available
FaxPress Server
Serial # of FaxPress server
Job ID
Job ID of the outgoing fax
Date/Time
Date and time of transmit attempt
User
Sender of the fax
Destination
Number
Fax number to send fax to
Pages
Number of pages of the fax
Resolution
Resolution of the fax
Description
Description or subject of the fax
Status
Status of the transmit attempt
RTI
Remote Terminal ID of the receiving fax machine
Duration
Duration of the transmission
Compression
Compression format used in transmission
Baud Rate
Transmission speed of the fax
Line
FaxPress Line used to do the transmission
Queued At
Time that the job was actually submitted to the
Faxpress
Bill Back Code
Billback code associated with the job
10—51
FaxPress Administrator’s Guide
Received Log Information
For received faxes, the following information is available:
FaxPress Server
Serial # of FaxPress server
Job ID
Job ID of the incoming fax
Date/Time
Date and time of the received fax
User
Recipient of the fax
Pages
Number of pages of the fax
Resolution
Resolution of the fax
Status
Status of the received fax
RTI
Remote Terminal ID of the transmitting fax machine
Duration
Time it took to receive the fax.
Compression
Compression format used in transmission
Baud Rate
Transmission speed of the fax
Line
FaxPress Line that received the fax
The following tables and fields are used to store the preceding archive
information.
10—52
Information Storage
Archiving Faxes
FPFaxInfo Table
The FPFaxInfo table is used to keep track of both incoming and outgoing fax
records. The FaxPress Serial Number field keeps track of which FaxPress this job
belongs to. The Resolution ID field points to a value in the FP Misc Info table that
contains the resolution field value. The JobTypeID points to the JobTypeID in the
FPJobType table that contains what type of job this is (incoming/outgoing fax).
The UserID field points to the UserID field in the Fpuses table that contains the
name of the user that this record belongs to. The FileID points to the FileID in the
FPFileInfo table that contains the file name of the archived image. The rest of the
field contains information specific to this fax.
FaxPressSerialNumber
FaxPress Serial Number
JobID
Job ID of the fax job
DateTime
Date and Time of fax in the format YYYY/MM/DD
HH:MM, e.g. 1999/12/15 23:30
JobTypeID
ID of the type of fax (incoming or outgoing). This
field points to the JobTypeID field in the
FPJobType table which keeps track of the types
of jobs that are stored in the tables. See the
FPJobType table for possible job types.
UserID
ID of owner or recipient of the fax. This points to
the UserID field in the FPUsers table which
contains all the user names.
CompanyRTI
This contains the recipient’s company name if the
job type is an outgoing fax or the sender’s RTI if
this is an incoming fax.
Pages
Number of pages
Status
Status of the fax
10—53
FaxPress Administrator’s Guide
ResolutionID
ID of the resolution. This points to the MiscInfoID
of the FPMiscInfo table that contains the value for
this field.
See the information about the
FPMiscInfo table.
Description
This contains the description or subject of the fax.
Destination Number
Destination fax number (outgoing only)
FileID
ID of the file name of the fax. This points to the
FileID field in the FPFileInfo table which identifies
the fax image name.
ReservedID
Reserved field
FP Users Table
The FPUsers table contains a list of all FaxPress archive users in the database.
For each username, there is a corresponding unique UserID number that identifies
it. The UserID field is used to relate to both the FPFaxInfo and FPTransactInfo
tables to identify the owner.
UserID
ID of the user
UserName
Name of the user
FP Job Type Table
The FPJobType table contains a list of the types of jobs in the database.
Currently, the possible job types that are available are Incoming Fax, Outgoing
Fax, Receive Log, and Transmit Log.
10—54
JobTypeID
ID of the job type
JobType
Text indicating the type of job
Information Storage
Archiving Faxes
FP File Info Table
The FPFileInfo table contains a list of the archived fax image file names The fax
image is located under the Castelle\Archive\Faxes\Year\Month directory which is
located on the file server that the FaxPress server is installed on. Year is a four
digit year that depends on the timestamp of the fax record. Month is a three-letter
abbreviation for the month that is also dependent upon the timestamp of the
record.
The UNCID points to the UNCID in the FPUNCInfo table. That table keeps track
of the full UNC path to the archive directory. E.g. For Windows NT systems, it
would be \\Server\Castelle\Archive, where Server is the name of the file server
where the FaxPress is installed, Castelle is the share name of the Castelle
directory, and Archive is the subdirectory name under the Castelle directory. The
Server and Share name will be different depending on the network configurations.
To reconstruct the full path to the image, the Faxes subdirectory must be appended
to the UNC path followed by the Year and Month subdirectories and then the
image name. E.g. If 1.DCX is the fax image name then the full path would
probably be \\Server\Castelle\Archive\Faxes\1999\Dec\1.dcx, depending on the
timestamp of the fax record.
Each image is assigned a unique FileID which is used by the FPFaxInfo table to
keep track of the file name of the incoming or outgoing fax. The reference count
contains a count of how many records reference this image.
FileID
ID of the file
UNCID
ID of the UNC Path
FileName
Archived File Name
Reference Count
Reference count of file (used to keep track of the
number of owners of this file)
10—55
FaxPress Administrator’s Guide
FP UNC Table
The FPUNCInfo table contains a list of UNC paths to the archive directory.
Currently, UNCPath should only point to the Archive subdirectory under the
Castelle directory on the file server that the FaxPress server is installed on. E.g.
For Windows NT systems, it would be \\Server\Castelle\Archive, where Server is
the name of the file server where the FaxPress is installed and Castelle is the share
name of the Castelle directory. For Novell Bindery servers, it would be
\\NovellServer1\Volume\Castelle\Archive, where NovellServer1 is name of the
Novell file server, Volume is the name of the volume, and Castelle\Archive is the
path from the root of the volume to the Archive directory. For Novell NDS
systems, it would probably be
\\Tree\Server_Volume.Context2.Context1\Castelle\Archive, where Tree is the
name of the NDS tree, Server is the name of the file server, Volume is the name of
the volume, Context1 and Context2 are the context names where the Volume is
located, and Castelle\Archive is the path from the root of the volume to the
Archive directory. You may have more or less contexts depending on network
configurations. The UNCID is used by the FPFaxInfo table to locate the UNC
path to the archived fax images. See FPFileInfo table for reconstructing the full
path to the fax images.
UNCID
ID of the UNC Path
UNCPath
UNC Path
ReservedID
Reserved ID
FPMiscInfo Table
The FPMiscInfo table contains miscellaneous information that is used often but
values for the fields change seldomly. The InfoName field contains the field name
and Infovalue field contains the field value. It is used to stored information such
as baud rate, compression type, etc… Currently, the possible values for the
InfoName are Resolution, Baud Rate, and Compression. The InfoValue field
contains the values specific to the type of the information. For example, if
InfoName is Resolution, InfoValue may be Fine or Standard, and if InfoName is
Compression, InfoValue may be MR, HR, etc… The MiscInfoID identifies the
10—56
Information Storage
Archiving Faxes
information name and value and is used by the FPFaxInfo and FPTransactInfo
tables to store these values.
MiscInfoID
ID of the miscellaneous information
InfoName
Name of the miscellaneous information
InfoValue
Value of the miscellaneous information
FPBillback Table
The FPBillBack table contains a list of all the bill back codes used in the
transaction logs. This is used by the transmit log records only. Each billback code
is identified by a unique BillBackID which is used by the FPTransactInfo table to
keep track of the corresponding billback codes for transmit jobs that have a
billback code assigned.
BillBackID
ID of the billback code
BillBackCode
Billback code
FPTransactInfo Table
The FPTransactInfo Table is used to stored transaction log records. The
FaxPressSerialNumber field identifies which FaxPress this record belongs to. The
JobTypeID identifies what type of log this is (transmitted/received). UserID
points to the user that sent/received the job in the FPUsers table. CompressID and
ResolutionID points to the resolution and compression type used in the
FPMiscInfo table. The rest of the fields contains information specific to the
record.
For receive logs, the DateTime and QueuedAt times are the same whereas for
transmit logs, they are different. For outgoing jobs, the job is queued only once,
but may have mutiple retry attempts in case they do not succeed the first time.
Each attempt generates a entry in the transmit log file. The DateTime contains the
timestamp of the retry attempt and the QueuedAt contains the timestamp of when
it was first submitted.
10—57
FaxPress Administrator’s Guide
10—58
FaxPressSerialNumber
Serial # of FaxPress server
JobID
Job ID of the job
DateTime
Date and time of transmit/receive attempt in the format
YYYY/MM/DD HH:MM, e.g. 1999/12/15 23:30
JobTypeID
ID of the job type. This points to the JobTypeID field in the
FPJobType table which identifies the type of job of the record.
UserID
ID of the sender or recipient. This points to the UserID field in
the FPUsers table that stores the names.
Destination Number
Fax number to send fax to (transmit logs only)
Pages
Number of pages of the fax
ResolutionID
Resolution of the fax. This points to the MiscInfoID in the
FPMiscInfo table that keeps track of the resolution used for
this job.
Description
Description or subject of the fax
Status
Status of the transmit/receive attempt
RTI
Remote Terminal ID of the sending/receiving fax machine
Duration
Duration of the transmission/reception
CompressionID
Compression format used in transmission/reception. This
points to the MiscInfoID in the FPMiscInfo table that keeps
track of the compression type used for this job.
BaudRateID
Transmission/reception speed of the fax. This points to the
MiscInfoID in the FPMiscInfo table that keeps track of the
baud rate used to send/receive this job.
Line
FaxPress Line used in transmission/reception
QueuedAt
Time that the job was actually submitted to the Faxpress in
the format YYY/MM/DD HH:MM, e.g. 1999/12/15 23:30
BillBackID
Billback code associated with the job (transmit logs only).
This points to BillBackID field in the FPBillBack table to stores
the BillBack codes.
ReservedID
Reserved ID
Information Storage
Archiving Faxes
FPReserved Table
The FPReserved table contains application defined values.
ReservedID
ID of the reserved entry
ReservedText1
1 reserved text entry
ReservedText2
2 reserved text entry
ReservedText3
3 reserved text entry
ReservedText4
4 reserved text entry
ReserveInt1
1 reserved long number
ReserveInt2
2 reserved long number
ReserveInt3
3 reserved long number
ReserveInt4
4 reserved long number
st
nd
rd
th
st
nd
rd
th
10—59
FaxPress Administrator’s Guide
Archive Table Relationships
The fax archive tables have the following overall relationships:
10—60
Information Storage
Archiving Faxes
A logical view of the table relationships for Incoming and Outgoing faxes would
look like the following:
10—61
FaxPress Administrator’s Guide
A logical view of the table relationships for Transmitted and Received logs
would look like the following:
10—62
Information Storage
Archiving Faxes
10—63
FaxPress Administrator’s Guide
10—64
Part 2
FaxPress
User’s
Guide
FaxPress User’s Guide
FaxPress Basics
11
What’s In This Chapter
Faxmain.......................................................................................................... 11-2
FaxPress Neighborhood................................................................................ 11-3
FaxPress Server........................................................................................ 11-3
Mailbox .................................................................................................... 11-3
Corporate Phone Books ........................................................................... 11-7
Personal Folders ............................................................................................ 11-8
Local Phone Books .................................................................................. 11-8
Saved Faxes.............................................................................................. 11-9
Favorite Documents ................................................................................. 11-9
Favorite Messages.................................................................................. 11-10
Cover Page Templates ........................................................................... 11-10
FaxPress User Privilege Levels .................................................................. 11-10
FaxPress User’s Guide
Faxmain
The primary FaxPress component is Faxmain. From Faxmain you can logon to
any of your FaxPress servers and send faxes. Faxmain adopts the standard tree
structure used by Windows Explorer™. This structure organizes the FaxPress user
interface in an easy-to-follow linear format for both the FaxPress administrator
and FaxPress clients. The top tier of the Faxmain tree is the FaxPress
Neighborhood. The branches and extensions of the Faxmain tree are described in
the following sections.
11—2
FaxPress Neighborhood
FaxPress Basics
FaxPress Neighborhood
The FaxPress Neighborhood allows you to access or register multiple FaxPress
servers from your workstation. Once you have added the FaxPress server to your
Neighborhood, the names of each server are displayed on the tree.
FaxPress Server
You can select any of the FaxPress servers from the list of available servers in your
FaxPress Neighborhood and log on to it. When you logon to a FaxPress server
with your FaxPress user account name, a FaxPress Mailbox with your user name
is displayed. For more information on types of FaxPress users, refer to "FaxPress
User Privilege Levels" on page 11-10. For information on adding and
configuring users, refer to "Managing Users" in Chapter 4.
Mailbox
Every FaxPress user is assigned a FaxPress mailbox. The mailbox is associated
with a number of resources and parameters you use to work with FaxPress. In the
Faxmain window, the user's mailbox appears in the Faxmain tree as the first
branch of the logged-in FaxPress server.
11—3
FaxPress User’s Guide
Your Mailbox houses all the folders associated with the creation, transmittal and
receipt of your faxes. By default, the Outgoing Faxes Queue, Incoming Faxes
Queue and Notices folders are displayed in your Mailbox. If you would like to
view the other available folders: e.g., Archived Transmitted Faxes, Archived
Received Faxes, Cover Pages, Print Queues and Personal Phone Books, you
can make them visible in your Personal Preferences Options. See "Setting
Personal Preferences" in Chapter 10.
Outgoing Faxes
The Outgoing Fax Queue resembles a stack of faxes in the 'IN' hopper of a fax
machine. When you use FaxPress to fax a document from your workstation, the
document first goes into this queue. The fax server faxes your document as soon
as it finishes with the other documents that were ahead of yours in the queue.
When the fax server finishes faxing your document, it sends you a notice telling
you whether or not your document was successfully faxed. Faxes that are
successfully sent are automatically dropped from the list unless the FaxPress
Administrator has previously set the option to save successfully transmitted faxes
(see "Configuring FaxPress" in Chapter 3). The fax server will also try to resend
failed faxes according to the retry settings specified in your user properties (see
"Configuring User Properties" in Chapter 4. For more information on sending
faxes, refer to "Sending Faxes" in Chapter 8.
Incoming Faxes
The Incoming Faxes Queue resembles a stack of faxes in an 'IN' basket that you
haven't dealt with yet. These are the faxes that have been routed to you. You can
view, print, save, route, fax, or discard faxes that are in your personal incoming
fax list. When a fax appears in your personal incoming fax list, view it and decide
what to do with it. If you want to keep it, either save it or print it, and then remove
it from the list. Leaving faxes in the list wastes disk space on the FaxPress' file
server which may impact performance. FaxPress can be configured to
automatically purge old faxes from all mailboxes using Automatic Storage
Reclamation or FaxPress Archive.
Incoming faxes are placed directly in the user’s mailbox when the FaxPress is set
up for any of the “Inbound fax routing”. If the FaxPress is not set up for direct
incoming fax routing, manual or ‘assigned line user’ routing can be used to
receive faxes in the Incoming Faxes Queue. Incoming Faxes that do not meet
11—4
FaxPress Neighborhood
FaxPress Basics
direct dialing criteria are send to the Unaddressed Mailbox and then must be
routed to the FaxPress recipient from a FaxPress user with router privileges. To
insure confidentiality, routers are only allowed to view the first page of a fax. For
more information on configuring inbound fax routing, refer to "Configuring Fax
Lines" in Chapter 3.
Archived Transmitted Faxes
If you have licensed FaxPress Pro, and configured the server for archiving
transmitted faxes, this folder will contain the list of all the archived faxes you have
sent. You can perform many operation on your archived faxes including: viewing,
sending, mailing, and saving. Refer to "Managing Archived Faxes" in Chapter
12.
Archived Received Faxes
If you have licensed FaxPress Pro, and configured the server for archiving
received faxes, this folder will contain the list of all the received faxes that have
been archived for you. You can perform many operation on your archived faxes
including: viewing, sending, mailing, and saving. Refer to "Managing Archived
Faxes" in Chapter 12.
Notices
The Notice folder contains the stack of notices sent to you by FaxPress. FaxPress
sends you notices to tell you about events such as faxes sent, received, routed, or
printed. If you are the FaxPress Supervisor, FaxPress also sends you notices and
system warnings, such as low disk space. You can view, print, or delete notices
from your notice list. When a notice appears in your Notice folder, view it and
decide what to do with it. If you want to keep it, print it and then delete it from the
list. Leaving notices in the list wastes the FaxPress' disk space. Also, the FaxPress
or its supervisor can clean out old notices from all mailboxes using Automatic
Storage Reclamation. Refer to "Using Notices" in Chapter 13.
You can also receive your notices through TrayFaxAlert. TrayFaxAlert is an
independent program that alerts you, with lights and sounds, when a notice arrives
in your Notice folder. TrayFaxAlert also allows you view notices without starting
Faxmain.
For more information, refer to "Using TrayFaxAlert" in Chapter 13
11—5
FaxPress User’s Guide
Print Queues
This folder lists the jobs in the logged-on FaxPress server’s Parallel print queues.
Users can manage only their personal jobs.
Cover Pages
Cover Pages can be included when you send a fax. FaxPress includes templates
for 42 different cover page designs (see "Personal Folders" on page 11-8). You
can download any of these templates to your FaxPress server. They will then be
available from the Cover Page folder in your Mailbox, or you can create new
ones. Refer to "Creating Cover Pages" in Chapter 14.
Personal Phone Books
The FaxPress phone book allows you to keep phone address information for
numbers that you frequently fax. This information can include the recipient's
name, fax number, company, voice number and more. This information is
automatically sent with the file when you send the fax.
The Personal Phone Book is stored on the FaxPress file server and thus can be
accessed by you (and only you) from any workstation that is logged onto the
server. Refer to "Creating Personal Phone Book" in Chapter 15.
You can also create local phone books. Local phone books are stored on your
workstation or any available volumn or network drive (see "Local Phone Books"
on page 11-8).
11—6
FaxPress Neighborhood
FaxPress Basics
Corporate Phone Books
This is a phone book that can be accessed by any FaxPress user; it contains the
phone numbers most often used by all FaxPress users. Only the FaxPress users
with supervisor or operator privileges can edit the corporate phone book.
There are two different types of Corporate Phone Books:
•
FaxPress Phone Book— This is a phone book file which resides on the
FaxPress file server and is managed by the FaxPress supervisor. The
supervisor can individually add members to the phone book, import and
export phone books to a variety of file formats. For more information, refer
to "Creating Corporate Phone Books" in Chapter 5.
•
ODBC External Database Phone Book — This is can be either an ODBC
compliant database such as MS-SQL, a Microsoft Access database or an
Excel, FoxPro or dBase database phone book and can reside on any server or
workstation. It is managed by your database Administrator, but is linked to
FaxPress and configured by the FaxPress supervisor. For more information,
refer to "Creating Corporate Phone Books" in Chapter 5.
11—7
FaxPress User’s Guide
Personal Folders
The Personal Folders branch of the Faxmain Tree lets you create and save
information for your personal use. All of the data contained in the personal folders
in stored on your workstation.
The setting for your Personal Folders (refer to "Setting Personal File Storage
Location" in Chapter 10) may be distinct for different users using the same
workstation. These settings are based on your Windows login settings; thus
providing unique instances.
The physical location for all of the folders in Personal Folders can be set by the
user in their Personal Preferences Options.
Note:
If the physical file locations are defined at the same location for
multiple users, any of the folders in Personal Folders can be
shared.
Local Phone Books
Allows you to create and manage local FaxPress phone books.
11—8
Personal Folders
FaxPress Basics
•
FaxPress Phone Book—This is a phone book file which resides on your
local machine and is managed by you. You can individually add members to
the phone book (or phone book group) and import and export phone books to
a variety of file formats. For more information, refer to "Creating Local
Phone Books" in Chapter 15.
•
ODBC External Database Phone Book — This is can be either an ODBC
compliant database such as MS-SQL, a Microsoft Access database or an
Excel, FoxPro or dBase database phone book and can reside on any server or
workstation. It is managed by your database Administrator, but is linked to
FaxPress and configured by the FaxPress supervisor. For more information,
refer to "Creating Corporate Phone Books" in Chapter 5.
Saved Faxes
This folder contains a directory structure that you can use to store and manage
your saved faxes. Under this folder you can create sub-directories for greater
granularity when filing your saved faxes. Saved faxes can be viewed, printed,
faxed, mailed, or deleted. These faxes are saved on your workstation and are no
longer associated with a FaxPress file server.
Favorite Documents
If you have documents that you need to fax repeatedly, you can add them to this
folder in faxmain. This avoids having to repeatedly browse the directory structure
to locate frequently used documents.
You can also import a document in fax format. If the document is frequently faxed,
converting the document to fax format reduces your process time by performing
the conversion from native to fax format only once rather than each time you send
the fax.
For more information, refer to "Favorite Documents and Messages" in Chapter
16.
11—9
FaxPress User’s Guide
Favorite Messages
Favorite Messages are short textual messages that appear in the Note field of the
cover page.You can create a set of favorite messages that can be used in outgoing
faxes. For more information, refer to "Using Favorite Messages" in Chapter 16.
Cover Page Templates
The Cover Page folder in your Personal Folders contains all the FaxPress Cover
Page templates that can be viewed, deleted, renamed or used to create a new cover
page template in the Castelle Cover Page Editor. For more information, refer to
"Creating Cover Pages" in Chapter 14.
FaxPress User Privilege Levels
FaxPress users can have different operating privilege levels. Your privilege level
determines your access to faxes and FaxPress functions. There are four privilege
levels:
•
User
Can send, list, hold, view, print, save, discard or cancel personal faxes (faxes
sent by or routed to the user). Users can create and edit their personal phone
directories, and also submit, list, resequence, and cancel their own print jobs.
•
Router
Can do everything a User can; additionally, Router can view the first page of
any fax on the Unaddressed incoming faxes list, route faxes to other users (but
not themselves), and delete faxes from the Unaddressed incoming fax list.
•
Operator
Can do anything a Router can; additionally, Operator can view, route, list,
resequence, and delete all fax or print jobs. Also, operator can edit the
corporate phone directory.
11—10
FaxPress User Privilege Levels
•
FaxPress Basics
Supervisor
Can do anything an Operator can; additionally, Supervisor can add, delete, or
edit users, set FaxPress' default settings, and print FaxPress' transaction logs.
11—11
FaxPress User’s Guide
11—12
Sending Faxes
12
What’s In This Chapter
Sending Faxes from Applications ................................................................ 12-2
Using FaxPress Icon in Word .................................................................. 12-5
Accumulate Fax: Sending Multiple Documents in One Fax Job.......... 12-3
Sending Faxes from Faxmain....................................................................... 12-8
Addressing the Fax................................................................................. 12-10
Attaching Files ....................................................................................... 12-12
Specifying Delivery Options.................................................................. 12-15
Sending the Fax...................................................................................... 12-16
Choosing Recipients from Your Phone Books ...................................... 12-16
Adding New Recipient........................................................................... 12-19
Sending Faxes Using the Broadcast Switch .............................................. 12-21
Sending Faxes with FaxTray...................................................................... 12-22
Sending Faxes from Explorer..................................................................... 12-23
Managing Sent Faxes .................................................................................. 12-24
Viewing Faxes........................................................................................ 12-24
Saving Faxes .......................................................................................... 12-25
Printing Faxes ........................................................................................ 12-26
Resending Faxes .................................................................................... 12-26
Deleting Faxes........................................................................................ 12-27
Holding Outgoing Faxes ........................................................................ 12-28
Releasing a Hold on Outgoing Faxes..................................................... 12-29
Changing Fax Transmission Order ........................................................ 12-29
Forwarding Faxes via Email .................................................................. 12-30
Approving Fax Transmission................................................................. 12-32
Viewing Fax Properties.......................................................................... 12-34
Refreshing the Queue............................................................................. 12-35
FaxPress User’s Guide
Sending Faxes from Applications
FaxPress supports native attachment faxing for most common applications this
means that for many applications you do not need to do a print from the document,
you do not need to even have the application opened. In this sense it is very much
like attaching a document when sending email. Refer to "Attaching Native
Documents" on page 12-13.
If your application is not supported, you can send a fax directly from many thirdparty applications by using the normal Print function in the application and
selecting the Castelle DCX print driver.
The FaxPress installation automatically installs the Castelle DCX print driver.
When you choose to print to the Castelle print driver, your file will be converted
to the faxable DCX format, and the Faxmain Send Fax dialog box will launch for
you to address and send the fax.
In detail, to fax from an application:
1.
2.
Open or create a document you want to fax; for example, a document
created with Microsoft Word.
From within the application, click on the File menu and select Print, then
Castelle DCX Driver.
3.
12—2
Faxmain will start and a Login dialog box may appear. Login to a FaxPress
server.
Sending Faxes from Applications
Note:
Sending Faxes
The Login dialog box will not appear if you set the third-party send
fax option in the Personal Preferences Options dialog to use the
previous login information.
When the Send Fax dialog box appears, enter the details for the fax transmission.
For more information on how to address faxes, refer to "Addressing the Fax" on
page 12-10
Accumulate Fax: Sending Multiple Documents in One Fax
Job
The Accumulate fax function allows users to send multiple files from different
applications in one fax job. With the Accumulate option enabled, all documents
printed to the Castelle DCX Driver will be included in one faxing activity, until
the Send Fax or Cancel button is selected in the Send Fax dialog box.
Follow these steps to use the Accumulate fax option:
1.
In Faxmain, select Fax, then Options, to confirm the Accumulate fax
function is enabled.
12—3
FaxPress User’s Guide
12—4
2.
Next, from an open application, print to the Castelle DCX Driver.
3.
Faxmain’s Send Fax dialog box will appear as it would even if the
Accumulate fax function were not enabled. With this function enabled,
however, the user can continue to open new applications and print
additional documents to the Castelle DCX Driver. All submitted Castelle
DCX print jobs will be accumulated as additional fax attachments until the
user clicks either the Send Fax or Cancel button.
Sending Faxes from Applications
4.
Sending Faxes
To bring the Send Fax dialog box to the front of your open applications,
click the Accumulated Fax icon to the right of the FaxPress icon in your
System Tray.
Using FaxPress Icon in Word
To make it even easier to fax from within Microsoft Word ‘97, you can add a
FaxPress icon to the Word Tools bar. When selected, the FaxPress icon will bring
up the FaxPress Send Fax dialog, where you can enter information and send the
fax. After the fax is sent, you will then be returned to Word. Using this approach
will have no effect on your default printer selection.
1.
To install this option, from your Start menu select:
FaxPress ->Microsoft Office Support ->Install Word Faxing.
Note:
You may be presented with a warning because the document has
macros. If you receive the warning, click the Enable Macros button.
12—5
FaxPress User’s Guide
12—6
2.
The Install Word Faxing Word document will be displayed.
3.
To install the FaxPress interface and insert the FaxPress icon in your tool
bar, click the Install button. When the installation is complete, the following
will be displayed:
Sending Faxes from Applications
Sending Faxes
4.
Close Word and then restart the application. The FaxPress Icon should now
appear on your Word Tool Bar.
5.
You can also access FaxPress by selecting Castelle FaxPress from the File
pull down menu.
12—7
FaxPress User’s Guide
Sending Faxes from Faxmain
There are many methods to send faxes even from within Faxmain. All of these
lead to the Send Fax dialog box.
1.
Click on Compose Fax in the Fax pull down menu.
2.
Click the Compose icon in the tool bar.
3.
Right click on any fax in your Saved Faxes list, and select Send in the
context menu. For more information about saved faxes, refer to "Managing
Saved Faxes" in Chapter 12.
4.
Right click on any fax in your Favorite Documents list, and select Send in
the context menu. For more information about Favorite Documents, refer to
"Using Favorite Documents" in Chapter 16.
5.
Right click on any fax in your Favorite Messages list, and select Send in
the context menu. For more information about Favorite Messages, refer to
"Using Favorite Messages" in Chapter 16.
6.
You can also create cover pages and include them with your faxes. For more
information To send a fax with a specific cover page, refer to "Creating
Cover Pages" in Chapter 14.
To send a fax from Faxmain, do the following.
1.
2.
3.
Click on the Compose icon in your Faxmain menu bar to open the Send
Fax dialog box. Three tab dialog boxes are available:
•
Fax
•
Attachments
•
Options
From the Fax tab you can:
•
Set Recipient. See "Addressing the Fax" on page 12-10.
•
Set Subject.
•
Specify a cover page. (Optional)
•
Compose a cover page message. (Only if using cover page.)
Click on the Attachments tab to do the following:
•
12—8
Add an attachment. See "Attaching Files" on page 12-12.
Sending Faxes from Faxmain
•
4.
5.
Sending Faxes
Arrange attachments.
Click on the Options tab if you want to set non-default delivery options:
•
Set delivery parameters. "Specifying Delivery Options" on page 12-15.
•
Set bill back parameters.
•
Set dialing parameters.
•
Set resolution.
•
Set print parameters.
Send the Fax by clicking on the Send Fax button.
Note:
When the FaxPress icon is displayed in color
in the Send Fax dialog page, all the required
information is available to send your fax.
Starting in FaxPress version 6.x, if you send a fax to five recipients and they are
all at the same phone number, the FaxPress will by default send a separate fax to
each recipient. If you would like to have only one fax sent and list the name of all
five recipients on the cover page you will have to do the following:
1.
Create a corporate or personal cover page that includes addressee fields 1
through 5.
2.
Edit the FaxPress .ini file on the workstation that you’ll be sending the fax
from (this file must be modified on every client that you want this to work
on.) Add the following to the FaxPress .ini:
[Outgoing Fax]
Merge_Recipients = 1 (or = 0, default if no entry)
1 = Recipients at same phone number will be merged up to five recipients
per fax.
Note 1:
If the cover page has only one addressee entry, then only the first recipient
will be listed, bu there will still be only one fax sent for the five recipients.
Note 2:
The merging of recipients only looks at 10 recipients at a time. If you have
twenty recipients and there are only two in the first ten that are at the same
fax number and three in the second ten that are at the same fax number, then
12—9
FaxPress User’s Guide
the two in the first ten will receive a single fax and the three in the second
ten will receive a second fax instead of all five recipients receiving a single
fax. 0 = Each recipient will receive a separate fax.
3.
Exit the FaxPress FaxMain client and restart it for the change to take effect.
Make sure that you use the cover page with multiple addresses when you
send to a list of recipients.
Addressing the Fax
To send a fax through the Faxmain interface:
1.
Click on the toolbar Compose button. The Send Fax dialog box will be
displayed.
Note:
2.
12—10
The only required field for sending a fax is the fax phone number if
you are attaching a file. If you are not attaching a file, you must, as
a minimum, include a cover page and message.
Enter the fax number in the To... text field in any of the following formats:
•
recipient_fax_number
•
Recipient name @ recipient_fax_number
Sending Faxes from Faxmain
•
Recipient name @ company @ recipient_fax_number
•
@ company @ recipient_fax_number
Sending Faxes
You can also click on User icon to pull up the New Recipient dialog box. See
"Adding New Recipient" on page 12-19.
Or click on the To... button to pull up the Phonebook dialog box.
3.
Click on the Cover Page list arrow to select a cover page. For more
information, see "Creating Cover Pages" in Chapter 14.
4.
If you have included a cover page, you can enter a message that appear on
your cover page. You can enter a message of up to 16 lines or 960 words in
the text box, or click on the Favorite Message list arrow to select a a
previously created message from the scroll down list.
Note:
–
You can only select a Message if you have previously created one
and saved it in your Favorite Messages folder. The message you
select will appear in the text box.
To save a new message as a Favorite Message, click on the Save Message button. The Message Name dialog box appears where you can
enter a name for the Favorite Message.
5.
In the Subject edit box, enter a subject. The description will appear in your
Outgoing fax list for the fax.
6.
You can immediately click the send icon or specify further options by
selecting either the Attachments or Options tabs. See "Attaching Files"
on page 12-12 and "Specifying Delivery Options" on page 12-15.
12—11
FaxPress User’s Guide
Attaching Files
The Attachments tab allows you to attach native documents without having to
convert them to fax format first. The conversion to fax format happens
automatically in the background. The only requirement is that the application
must be installed on your client PC.
Supported Applications
The following types of applications have been validated on FaxPress:
•
Word 6.0, 7.0, 97, 2000
•
Excel 5.0, 7.0, 97, 2000
•
PowerPoint 4.0, 7.0, 97, 2000
•
WordPerfect 7.0
•
Quatro Pro 7.0
•
Presentations 7.0
•
WordPro 96
•
Lotus 123 R5
•
Free Lance Graphics 96
•
Netscape Navigator
•
MS Internet Explorer
•
Adobe Acrobat
•
PaintBrush
•
WordPad
Output files from other applications that support Shell execution methods may
also be successfully attached. To determine whether your attachment works with
FaxPress:
12—12
1.
Highlight the file in Windows Explorer.
2.
Right click to display the context menu and verify that the Print option is
displayed.
Sending Faxes from Faxmain
Note:
3.
Sending Faxes
If the print options is not present, FaxPress will not support the
attachment.
Select Print. If the application prints, then it is likely that FaxPress supports
it.
Attaching Native Documents
You can attach one or more files to your fax.
1.
If you want to attach a document to the fax, click on the Attachment tab to
display the Attachments dialog box.
Note:
If you have previously placed attachments in your Favorite
Documents list, you can just highlight it and click on Add.
12—13
FaxPress User’s Guide
2.
3.
To add an attachment not in your Favorite Documents list, use the Browse
button to navigate to the directory containing the attachment, then highlight
it and click on Add.
The attachment will then appear on your Attachments list in the
Attachments window.
4.
Similarly, you can use the Remove button to remove items from the
Favorite Document list.
Note:
12—14
Files are only saved to or removed from the Favorite Document
list once a fax is sent. If you cancel the operation, the list is not
updated.
Sending Faxes from Faxmain
5.
Sending Faxes
If you have multiple attachments and want them to appear in a particular
order, use the Move Up and Move Down buttons to arrange the items listed
in the Attachments list.
Specifying Delivery Options
To set delivery options, click on the Options tab, which will open the Options
window.
In the Options tab you can set the following parameters:
•
Delivery Options — From this area you can specify immediate delivery or
delivery on a specified day and time. This is an optional setting.
•
Bill Back Options — From this area you can specify a bill back parameter
from a phonebook or database or find and specify a bill back option. For more
information, see "Defining Bill Back Codes" in Chapter 5.
•
Dialing Options — From this area you can use entry boxes to specify:
–
Number of retries,
–
Minutes between retries,
–
Modem baud rate, and
12—15
FaxPress User’s Guide
–
Fax line to use.
•
Resolution — In this area you can specify Fine (200 dpi) or Standard (100
dpi) resolution.
•
Printing — In this area you can use selection boxes buttons to specify:
–
Print fax — which will send the fax to the printer as well as the recipi-
ent.
–
Print confirmation — which will print a confirmation once the fax has
been sent successfully. Confirmation consists of the first page of the fax
compressed and a short notice of the transmission.
–
No print — which will suppress printing.
Note:
To configure for printing both the fax and the successful completion
confirmation, see "Configuring Advanced Functions" in Chapter
3.
Sending the Fax
On any window, when you are ready, you can send your fax by clicking on the
Send Fax button.
Note:
When the FaxPress icon is displayed in color
in the Send Fax dialog page, all the required
information is available to send your fax.
Choosing Recipients from Your Phone Books
To select a recipient from one of your phone books...
12—16
Sending Faxes from Faxmain
1.
Sending Faxes
Clicking on the To... button in the Send Fax dialog box to display the
Address Fax dialog.
You can select an addressee or groups of addressees from the corporate phone
book, your personal FaxPress phone book or a local phone book linked to
your workstation.
Note:
•
Note:
You can also address a fax—with full FaxPress address
parameters—to a party who is not listed in a FaxPress phone book
by clicking New. This pulls up the New Recipient dialog box. See
"Adding New Recipient" on page 12-19.
Phonebook—The name of the FaxPress phone book currently open for
perusal. The default phonebook is set in the Options Dialog Box. See
"Setting Default Phone Books" in Chapter 10.
The Personal (remote) phone book is the user’s exclusive mailbox
phone book.
12—17
FaxPress User’s Guide
•
Group—The name of the phone book group currently open. If you select
a group name from your phonebook, you can broadcast your fax to any
number of recipients.
•
Phone book Members—List the fax recipients associated with the
selected phone book group.
•
Name—The last and first name of the group member as listed in the
recipient’s profile. You can arrange the group entries in alphabetical
order by name by clicking on the Name button.
•
Company—The company name of the recipient listed in the recipient’s
profile. You can arrange the group entries in alphabetical order by company by clicking on the Company button.
•
Fax #—The recipient’s fax number as listed in the recipient’s profile.
You can arrange the group entries in fax number order by clicking on the
Fax # button.
•
•
Bill Back Code—The bill back code assigned to the recipient as listed in
the recipient’s profile. You can arrange the group entries in order by bill
back code by clicking on the Bill Back Code button.
Recipient List—The list of selected recipients the current fax will be
sent to.
•
Add—This button places the highlighted recipient in the Phone book
Members list in the Recipient List.
•
Add Group—This button places all of the members in the current group
in the Recipient List.
•
New—This button opens the New Recipient dialog box to allow you to
enter FaxPress fax address information for the party to whom you want
to send a fax.
12—18
•
Remove—Deletes the selected entry from the Recipient List.
•
Remove All—Deletes all entries in the Recipient List.
Sending Faxes from Faxmain
•
Sending Faxes
Properties—Displays the member profile for the highlighted entry in the
Recipient List.
If you have set the user Phonebooks option to use Exchange/Microsoft
Outlook contact lists, the following screen is displayed:
Note:
For more information on using Microsoft Outlook/Exchange
Address Book dialog box refer to the specific mail service’s
documentation.
Note:
For more information on setting user options for phone books,
including how to select an Outlook contact list as a default phone
book, refer to "Choosing Recipients from Your Phone Books" on
page 12-16.
Adding New Recipient
1.
You can add a new entry (recipient) to a phonebook, by either click the New
button in the Castelle FaxPress Phonebook dialog box or by clicking the
12—19
FaxPress User’s Guide
user icon in the Send Fax dialog box. Either way, the New Recipient dialog
box opens.
2.
Use the New Recipient dialog box to specify:
•
First Name— First name of new member
•
Last Name— Last name of new member
•
Company Name— The name of the recipient's company
•
Fax #— The recipient's fax number
•
Voice Phone— The voice phone number used to reach the recipient
•
Bill Back Code— The default Bill Back code you assign to the recipient's fax address
•
Comment— A commentary you want to assign to the recipient's fax
address
•
Add to— Choose one of the following options to add the new recipient:
–
Recipient List for current fax only— Add the details of the new recip-
ient to the To… recipient list edit box in the Send Fax dialog box.
–
12—20
Phone Book— Add the entry to the list of members in the currently
selected phone book and to the recipient list shown in the Phone book
edit box. You can also use the drop-down list in the edit box to select a
different phone book.
Sending Faxes Using the Broadcast Switch
Sending Faxes
Sending Faxes Using the Broadcast Switch
Castelle’s FaxPress broadcast switch feature allows you to switch from one fax
per recipient at the same number to one fax per up to five recipients at the same
phone number.
If you send a fax to five recipients and they are all at the same phone number the
FaxPress will send a separate fax to each recipient by default.
To have only one fax sent and list the name of all five recipients on the cover page,
follow these steps:
1.
Create a corporate or personal cover page that includes addressee fields 1
through 5.
2.
Edit the FaxPress.ini file on the workstation used to send the fax (this file
must be modified on every client used with the broadcast switch feature.)
Add the following to the FaxPress.ini:
[Outgoing Fax]
Merge_Recipients = 1 (or = 0, default if no entry)
1 = Recipients at same phone number will be merged up to five recipients per fax.
If the cover page has only one addressee entry, then only the first recipient
will be listed but there will still be only one fax sent for the five recipients.
The merging of recipients only looks at ten recipients at a time. If you have
twenty recipients and there are only two in the first ten that are at the same
fax number and three in the second ten that are at the same fax number then
the two in the first ten will receive a single fax and the three in the second ten
will receive a second fax instead of all five recipients receiving a single fax.
0 = Each recipient will receive a separate fax.
3.
Exit the FaxPress Faxmain client and restart it for the change to take effect.
Make sure that you use the cover page with multiple addressees when you
send to a list of recipients.
12—21
FaxPress User’s Guide
Sending Faxes with FaxTray
The FaxTray application allows you direct access to the FaxPress Send Fax form
from your system tray. To send faxes with FaxTray, you must have installed
FaxTray in your Windows Tray. (See "Setting General Options" on page 14-5.)
After you have installed FaxTray in your Window Tray, follow these steps:
1.
Click on the FaxPress Paper Airplane icon to bring up the FaxPress Server
Login screen.
2.
Select the FaxPress server from the scroll down list.
3.
If you configured your Personal Preference for Automatic Login, the
Send Fax dialog box will be immediately displayed. Refer to "Setting
Startup Options" on page 14-10.
4.
If you have not configured automatic login, the FaxPress login screen will
be displayed:
5.
Enter your user account name and password. If you by pass this step the
next time you login to the server, click the Save User Properties Box.
6.
The Send Fax dialog box will now be displayed. Follow the instructions in
"Sending Faxes from Faxmain" on page 12-8 for completing the Send
Fax dialog box.
12—22
Sending Faxes from Explorer
Sending Faxes
Sending Faxes from Explorer
You can send a fax from Windows Explorer by using its Send To feature, because
when you installed FaxPress, it was automatically added to your list of send
options.
Note:
1.
Before sending a file, verify that the file type is supported by
FaxPress. Refer to "Supported Applications" on page 12-12.
Right click on a file and then on Send To.
2.
Select FaxPress.
3.
If you have not already logged into FaxPress, the FaxPress server and user
login windows will be displayed. Select the appropriate server and fill in
your user name and password.
4.
The Send Fax dialog box will be displayed. For detailed information on
completely the Send Fax dialog box, refer to "Addressing the Fax" on
page 12-10.
12—23
FaxPress User’s Guide
Managing Sent Faxes
1.
All of the Outgoing Fax management functions are available through
Faxmain. To access them you must be logged into a FaxPress server.
2.
Open the Outgoing Faxes Queue and highlight a fax in your list.
Viewing Faxes
To view a fax in your Outgoing Faxes Queue:
•
12—24
Double click on the specific fax.
Managing Sent Faxes
•
Sending Faxes
Right click on the fax and select View from the context menu,
Which ever way you choose to view your fax, the viewer application will be
launched and the fax displayed. For information regarding the selecting of fax
viewer applications, refer to "Selecting Viewer Application" in Chapter 10.
Saving Faxes
You can save any fax that appears in the Outgoing Faxes Queue folder.
To save a fax, do the following.
1.
Right-click on the fax you want to save. The context menu will be
displayed.
12—25
FaxPress User’s Guide
2.
Choose Save As.... The Save As screen will be displayed.
3.
The top level directory shown in the scroll down area will be the last folder
you used to save faxes. Displayed in the center area will be all the
subdirectories you have created under you top level saved directory. Select
a subdirectory location or accept the default Saved Faxes directory.
4.
In the File name text box, enter a name for the new file.
5.
In the Save as file type, select either DCX or TIF from the scroll down
menu.
6.
When you are finished, click Save.
Your fax will be saved as a file in the directory you specified.
Printing Faxes
For details on how to print your faxes and lists of faxes refer to "Printing Faxes"
in Chapter 11.
Resending Faxes
Faxes that the FaxPress is unable to send remain listed in the Outgoing Faxes
Queue until you do something about them. The Status column shows that these
faxes have failed.
To resend a failed fax:
12—26
Managing Sent Faxes
Sending Faxes
1.
In the Outgoing Faxes Queue, right-click on the fax you want to resend. A
context menu appears.
2.
Select Send... from the context menu. The Resend Fax dialog appears.
3.
Verify the fax number in the Destination phone number edit box. The
default number is the number currently listed on the fax. If the number is
incorrect or if you want to send the fax to a different number, enter the new
number in the edit box.
4.
Click on OK. The Status changes to Active when the FaxPress sends the
fax.
Deleting Faxes
To delete fax entries from the Outgoing Faxes Queue do any of the following
•
Highlight a fax and press the <Delete> key.
•
Highlight a fax and use the menu choice File / Delete.
12—27
FaxPress User’s Guide
•
Right-click on the fax you want to delete and select Delete from the context
menu.
A message box will appear to let you confirm the delete action. Click on Yes to
delete the fax.
Holding Outgoing Faxes
You can place a hold on an outgoing fax by doing the following:
12—28
1.
In the Outgoing Faxes Queue, right-click on the fax you want to hold and
select Hold from the context menu.
2.
To view that the change has taken effect, check the Status column in the
Outgoing Faxes Queue. The Status column entry for the selected fax will
change from its present state to Held. The possible states for the Status
column are: Queued, Ready, Active and Held.
Managing Sent Faxes
Sending Faxes
Releasing a Hold on Outgoing Faxes
To release a hold on an outgoing fax:
1.
In the Outgoing Faxes Queue, right-click on the fax you want to release
for delivery.
2.
Select Unhold from the context menu.
3.
To view that the change has taken effect, check the Status column in the
Outgoing Faxes Queue. The Status column entry for the selected fax will
change from Held to Active.
Changing Fax Transmission Order
Faxes appear in the Outgoing Faxes Queue in the order that they are to be
processed. By default, the processing order is first-in, first-out.
A user with Supervisor or Operator privilege can change the processing order
for any fax.
If all faxes in the queue belong to the same user, that user can also change the
processing order regardless of privilege level.
To change the order in which faxes are sent:
12—29
FaxPress User’s Guide
1.
2.
In the Outgoing Faxes Queue, right-click on the fax you want to
re-sequence, select Sequence... from the context menu.
Enter a new sequence number and click OK. The Resequence outgoing
job dialog box will be displayed.
3.
The current sequence number will be the default value. Change the number
as appropriate. When you click OK, the selected job will move to the
specified position in the queue.
Forwarding Faxes via Email
Forwarding or sending faxes as attachments to your email message is support for
MAPI compliant email programs such as: Outlook, Exchange, Inbox, and
Windows Messaging.
You can select a fax from the Outgoing Faxes Queue and forward it using your
email program.
12—30
Managing Sent Faxes
Sending Faxes
4.
Bring up the context menu by right clicking on the fax you want to email
and select Mail....
5.
If you are using a MAPI email client (for example, Microsoft Outlook), the
email message window will appear and the selected fax will appear as an
attachment in the message text area of the window. You can then address
and forward the email.
12—31
FaxPress User’s Guide
6.
If your email client is not running, the Choose Profile dialog may be
displayed.
7.
Select a profile from the drop-down list, or accept the default that appears in
the edit box.
Note:
8.
If you are not sure which profile to use, consult your email system
administrator.
Click OK in the Choose Profile dialog to launch the email client.
Approving Fax Transmission
To approve faxes:
1.
Login to Faxmain with supervisor or operator privileges.
All the faxes currently in the queue will be listed in the right panel. The faxes
with a clip board and check mark icon are awaiting approval.
12—32
Managing Sent Faxes
Sending Faxes
2.
Right click on the appropriate fax and select Approve and Yes from the
context menu.
3.
The fax will be sent and the icon will be changed from awaiting approval to
sent as shown below.
4.
To reject the fax, right click on the fax and select Approve and No. The
status of in the originator’s Outgoing Fax Queue will show Not Approved.
12—33
FaxPress User’s Guide
Viewing Fax Properties
1.
To view information about a fax from the Outgoing Faxes Queue, rightclick on a fax and select Properties from the context menu.
The Outgoing Fax Properties screen will be displayed.
2.
12—34
You may add a comment in the Comment edit box.
Managing Sent Faxes
Sending Faxes
Refreshing the Queue
FaxPress lists update periodically. To update the list immediately, press the <F5>
key or select Refresh from the View menu bar. To change the refresh rate for your
Outgoing Fax Queue list, refer to "Setting General Options" in Chapter 10.
12—35
FaxPress User’s Guide
12—36
Receiving Faxes
13
What’s In This Chapter
Overview ........................................................................................................ 13-2
Viewing Faxes ................................................................................................ 13-6
Saving a Fax ................................................................................................... 13-8
Deleting a Fax ................................................................................................ 13-9
Forwarding Faxes.......................................................................................... 13-9
Sending a Fax............................................................................................... 13-15
Routing a Fax............................................................................................... 13-16
Forwarding a Fax via Email....................................................................... 13-17
Viewing Fax Properties............................................................................... 13-18
Refreshing the Queue.................................................................................. 13-18
FaxPress User’s Guide
Overview
FaxPress by default routes all incoming faxes into the Unaddressed User
Mailbox. This list of faxes can be seen by user’s with supervisor or router
privileges but, can not in general be seen by all users.
The user can get a fax by:
1.
Having a DID line set up for the faxpress (see "Configuring Fax Lines" in
Chapter 3) and having an individual fax number, and that fax number is
associated with that user. (See "Configuring User Properties" in Chapter 4).
Multiple users can share the same physical fax line and all receive
individually addressed faxes on the line.
2.
A specific line on the FaxPress being assigned permanently to a given user.
(See "Configuring Fax Lines" in Chapter 3.)
3.
A router manually routing an unaddressed fax to the user. The privacy is
maintained by the router being able to see only the 1st page.
4.
Another user routing one of his personal faxes to this user manually. (See
"Routing a Fax" on page 13-16.)
5.
Another user having a fax forwarding setting to automatically forward a fax
that he receives to another user (See "Forwarding Faxes" on page 13-9.)
Once a user has received a personal fax by any of the above means, it shows up in
the Incoming Fax Queue. It is first in an unviewed state and shows as bold in the
list. The fax may leave this queue and go into the fax Archive (depending on how
your Administrator has configured the FaxPress Archive, see "Configuring
FaxPress Archive" in Chapter 6).
Most of the actions you can perform on a fax are accessible through the context
menu when you right click on any of your faxes. You can also access these
13—2
Overview
Receiving Faxes
functions through the menu bar in Faxmain. For the discussions in the chapter, all
functions will be accessed through the context menu.
Elements of this menu are:
•
View... — View the fax in a viewer application. The viewer can be either the
Castelle Quick Router Viewer or the Windows DCX Viewer. For more
information on setting viewer options, see "Selecting Viewer Application" in
Chapter 10.
•
Save As... — Save the fax with a specified name and path. For more
information refer to "Saving a Fax" on page 13-8.
•
Print — Print the fax using a printer connected to the FaxPress, a printer on
the network, or a printer associated with your workstation. For more
information refer to "Printing Faxes" in Chapter 11.
A dialog will allow you to specify the print.
•
Delete — Delete the fax from the list of incoming faxes. For more
information refer to "Deleting a Fax" on page 13-9.
13—3
FaxPress User’s Guide
13—4
•
Send... — Send the fax to another fax machine or FaxPress user. A dialog
will allow you to specify the fax transmission data. For more information
refer to "Forwarding Faxes" on page 13-9.
•
Route... — Route the fax to another FaxPress user. A dialog box will let you
specify the user mailbox. This will cause the fax to show up in their Incoming
Fax Queue when they log in. Routing faxes can be used to share a fax with a
workgroup without having to send large files by email. For more information
refer to "Routing a Fax" on page 13-16.
Overview
Receiving Faxes
•
Mail... — Forward the fax via email. The email message window will appear
and the selected fax will appear as an attachment in the message text area of
the window. You can then address the email and send it.
If your email client is not running, the Choose Profile dialog will appear.
You can select a profile from the drop-down list or accept the default that
appears in the edit box. If you are not sure which profile to use, consult your
email system administrator.
Click OK to launch your email program. For more information refer to
"Forwarding a Fax via Email" on page 13-17.
Do not select the New... button in the Choose Profile dialog. This is provided
to set up a new Profile and should only be used by your email system
administrator.
•
OCR... — Convert the fax to editable text. You must have the Castelle OCR
utility installed to use this feature.
•
Properties — Display information about the current fax and optionally attach
a comment that will display in the Incoming Faxes Queue.
13—5
FaxPress User’s Guide
Viewing Faxes
FaxPress can place incoming faxes in your mailbox if you have automatic routing
or if another user routes a fax to you. The faxes you receive are listed in the
Incoming Faxes Queue folder in your Mailbox. From the Incoming Faxes
Queue, you can view, forward, resend, and print a fax.
To access and manage the faxes you receive:
1.
Double-click on Mailbox to expand the Mailbox branch.
2.
Click on Incoming Faxes Queue to display the list of incoming faxes.
Unviewed faxes appear as bold.
3.
13—6
Right-click on a fax and a context menu will appear.
Viewing Faxes
Receiving Faxes
4.
Select View from the menu. A Viewer opens and displays the first page of
the fax. Use the viewer's Page menu to display other fax pages.
The specific viewer application and format are defined when you set your
Personal Preferences. Incoming faxes are by default displayed in TIFF format,
although DCX format is also an option.
Note:
TIFFis ideal for annotating and resending a faxes. For more
information, refer to "Setting Personal Preferences" in Chapter 10.
13—7
FaxPress User’s Guide
Saving a Fax
You can save any fax that appears in the Outgoing Faxes Queue, Incoming
Faxes Queue, Archived Received Faxes, or Archived Sent Faxes folders.
To save a fax, do the following.
1.
Right-click on the fax you want to save. The context menu will be
displayed.
2.
Choose Save As.... The Save As screen will be displayed.
3.
The top level directory shown in the scroll down area will be the last folder
you used to save faxes. Displayed in the center area will be all the
subdirectories you have created under you top level saved directory. Select a
subdirectory location or accept the default Saved Faxes directory. For more
information on saved faxes and creating subdirectories, refer to "Managing
Saved Faxes" in Chapter 12.
4.
In the File name text box, enter a name for the new file.
5.
In the Save as file type, select either DCX or TIF from the scroll down
menu. If you need to annotate a fax and resend it, we recommend that you
save it as a TIFF file.
6.
When you are finished, click Save.
Your fax will be saved as a file in the directory you specified.
13—8
Printing Faxes
Receiving Faxes
Printing Faxes
For details on how to print your faxes and lists of faxes refer to "Printing Faxes"
in Chapter 11.
Deleting a Fax
To delete fax entries from the Incoming Faxes Queue do any of the following
•
Right-click on the fax you want to delete and select Delete from the context
menu.
•
Highlight a fax and press the <Delete> key.
•
Highlight a fax and use the menu choice File / Delete.
A message box will appear to let you confirm the delete action. Click on Yes to
delete the fax.
Forwarding Faxes
Incoming faxes may either be forwarded manually or automatically.
Incoming faxes are forwarded manually by selecting the fax to forward from the
Incoming Fax Queue, and specifying a recipient. (See "Forwarding Faxes
Manually" on page 13-13.) A copy of the incoming fax is sent to the specified
recipient; the incoming fax remains in the incoming queue.
You can set the FaxPress to automatically forward copies of a user’s incoming
faxes to another FaxPress user, a remote fax number, or phone book group, by
modifying the User Properties’ Incoming Faxes tab. (See "Forwarding Faxes
Automatically" on page 13-10.) When automatic forwarding is configured to
forward faxes to a remote fax number or phone book group, copies of the
incoming faxes are forwarded; the incoming faxes remain in the FaxPress mailbox
of the original recipient. When automatic forwarding is set to forward faxes to
another FaxPress user, however, the faxes are actually redirected, or bounced; the
fax will not be kept in the mailbox from which it was forwarded.
13—9
FaxPress User’s Guide
To enable a fax copy, a second copy rather than the original, to be automatically
forwarded to another FaxPress user, the FaxPress CC function must be enabled.
(See "Forwarding Faxes Automatically: The CC Function" on page 13-11)
Note:
Faxes may only be forwarded once via automatic forwarding or
CC. If an already automatically forwarded or CC’d fax lands in a
mailbox with forwarding enabled, it willnot be forwarded again.
Forwarding Faxes Automatically
To configure your automatic fax forwarding option:
1.
Right click on your user account (or mailbox) in FaxMain (Start >
Programs > FaxPress > FaxMain) then select Properties from the context
menu.
2.
In the User Properties window, select the Incoming Faxes tab.
3.
Select a forwarding option in the When I receive personal incoming faxes
section. Received faxes can be automatically forwarded to another
FaxPress user's mailbox, another fax number, or to the members of a
13—10
Forwarding Faxes
Receiving Faxes
corporate phone book group. Automatically forwarded faxes do not remain
in a user's mailbox.
a.
Do not forward— If you want personal incoming faxes delivered to the
user's mailbox, select Do Not Forward.
b.
Forward to FaxPress user— If you want all personal incoming faxes
to be automatically forwarded to another FaxPress user, click on
Forward to FaxPress user and use the drop-down list to select the
FaxPress user to whom you want the faxes forwarded.
c.
Forward to Remote Fax — If you want all personal incoming faxes to
be automatically forwarded to another fax number, select Forward to
Remote Fax and enter the fax number in the edit box.
d.
Forward to Shared Phonebook— If you want all personal incoming
faxes to be automatically forwarded to all the members in a Corporate
phone book group, select Forward to Shared Phonebook and select
the group to whom you want the fax forwarded. You cannot forward
faxes to the <ALL> group, so this group is not shown in the drop-down
list.
4.
In the Printing and Saving area, you can select both the Print Incoming
Fax and Save Incoming Fax options, but at least one option must be set.
•
Print Incoming Fax — If you want to automatically print incoming
faxes, click on Print Incoming Fax.
•
Save Incoming Fax — If you want to automatically save incoming
faxes, click on Save Incoming Fax.
Note:
Faxes may only be forwarded once via automatic forwarding or
CC. If an already automatically forwarded or CC’d fax lands in a
mailbox with forwarding enabled, it will not be forwarded again.
Forwarding Faxes Automatically: The CC Function
The FaxPress CC function enables FaxPress to automatically send copies of a
user’s incoming faxes to another specified FaxPress user. The CC function can
only be used to automatically forward faxes to one user; it is not able to CC to
multiple users.
13—11
FaxPress User’s Guide
To direct FaxPress to send a copy of your incoming faxes to another FaxPress
user:
1.
Select Forward to FaxPress User and specify a user in the Incoming
Faxes tab of your User Properties’ window. (Follow the steps in "Forwarding Faxes Automatically" on page 13-10.)
2.
Log into FaxMain (Start > Programs > FaxPress > FaxMain.)
3.
Right-click on the FaxPress server name or serial number and select
Properties to bring up the FaxPress Server Properties window.
4.
13—12
Select the Advanced Functions tab, then check the box next to Keep a
copy when forwarding an incoming fax to another user.
Forwarding Faxes
Receiving Faxes
5.
Click OK. An outgoing.cfg file will be created on the FaxPress master
file server in the Castelle\Serial_number\System directory.
6.
Using a text editor (e.g. Notepad), open the new outgoing.cfg file, add
"Keep forward ifax job=true" parameter to the third line, then save the
modified file.
7.
Reboot the FaxPress.
Note:
Enabling the CC function disables the Print Incoming fax option.
Forwarding Faxes Manually
A fax in the Incoming Faxes Queue may be forwarded whether it has been
viewed or not. If the fax is forwarded to recipient not on the same FaxPress server,
the fax will remain in the Incoming Fax Queue after being sent. If the fax is
13—13
FaxPress User’s Guide
forwarded to a FaxPress user on the same FaxPress server, however, the fax will
not remain in the incoming queue
To send a fax to a remote fax machine:
1.
Right-click on the fax you want to send. The context menu appears.
2.
Select Send... to display the Send Fax dialog.
3.
In the Send Fax dialog:
a.
Specify recipient.
Enter the name and fax number of the person to whom you want to forward the fax, or click on the To... button to use the Address Fax dialog box to address the fax.
b.
Optionally set subject.
If you want to display a description for the fax, enter the description in
the Subject edit box.
c.
Optionally set a message.
If you want to include a message on the cover page that you are sending, enter the message in the Messages edit box, or you can choose a
Favorite Message from the Favorite Message drop-down list.
d.
Optionally set other parameters.
To set other send options, click on the Options tab to display the
Options dialog.
4.
Once you have specified all the information for the fax transmission, click
on the Send Fax button, then click OK.
A copy of the fax in the Incoming Faxes Queue is sent as an attachment. The fax
remains in the Incoming Faxes Queue.
The fax copy will be sent in the same resolution as that in which it was received.
13—14
Sending a Fax
Receiving Faxes
Sending a Fax
You can send any fax that appears in your Incoming Faxes Queue.
To send a fax you have received:
1.
In the Incoming Faxes Queue, right-click on the fax you want to resend. A
context menu appears.
2.
Select Send... from the context menu. The Resend Fax dialog appears.
3.
Verify the fax number in the Destination phone number edit box. The
default number is the number currently listed on the fax. If the number is
incorrect or if you want to send the fax to a different number, enter the new
number in the edit box.
4.
Click on OK. The fax will now be visible in the Outgoing Faxes Queue.
13—15
FaxPress User’s Guide
Routing a Fax
You can route any fax from your Incoming Faxes Queue or from the
Unaddressed Faxes list to another FaxPress user. To route from the
Unaddressed Faxes list you must have Router, Operator or Supervisor
privilege.
To route a fax to another FaxPress user:
13—16
1.
Right-click on the fax you want to forward. A context menu appears.
2.
Select Route... The Route Fax dialog opens.
Forwarding a Fax via Email
3.
Receiving Faxes
Select recipient from the Distribution List which lists all current FaxPress
users.
You can Click on a single user, Ctrl-Click on multiple users, Shift-Click on a
range of users, or Click on <All Mailboxes>. Or, you can directly enter a
username in the Distribution Name dialog box.
4.
If you want a message to appear in the notice that appears in your own and
in the recipient's Notices list, enter the message in the Notification
message edit box.
5.
Click on the OK button to forward the fax.
Forwarding a Fax via Email
Forwarding or sending faxes as attachments to your email message is support for
MAPI compliant email programs such as: Outlook, Exchange, Inbox, and
Windows Messaging.
You can select a fax from the Incoming Faxes Queue and send it via email.
1.
Log into Faxmain and highlight the Incoming Faxes Queue.
2.
Right-click on the fax you want to forward. A context menu appears.
3.
If your email client (for example, Microsoft Outlook) is currently running,
the email message window will appear and the selected fax will appear as
an attachment in the message text area of the window. You can then address
the email and forward it.
4.
If your email client is not running, the Choose Profile dialog appears.
5.
You can select a profile from the drop-down list or accept the default that
appears in the edit box.
13—17
FaxPress User’s Guide
Note:
6.
If you are not sure which profile to use, consult your email system
administrator.
Click OK in the Choose Profile dialog to launch the email client.
Viewing Fax Properties
1.
To view information about a fax from the Incoming Faxes Queue, rightclick on a fax and select Properties from the context menu.
2.
The Incoming Fax Properties screen will be displayed.
3.
You may add a comment in the Comment edit box.
Refreshing the Queue
FaxPress lists update periodically. To update the list immediately, press the <F5>
key or select Refresh from the View menu bar.
13—18
Setting Personal Preferences 14
What’s In This Chapter
Overview ........................................................................................................ 14-2
Setting Personal File Storage Location ....................................................... 14-3
Setting General Options................................................................................ 14-5
Selecting Viewer Application ....................................................................... 14-7
Setting Default Phone Books ........................................................................ 14-8
Setting Startup Options .............................................................................. 14-10
Setting Tracing Criteria.............................................................................. 14-11
FaxPress User’s Guide
Overview
From the Personal Preferences dialog box you can configure your personal
options for the following categories:
•
Personal Folders— Specifies the locations for all your personal files
including messages, faxes, cover pages, etc.
•
Options—Specifies general user information including refresh rate,
notifications, login preferences, and FaxTray access.
•
Viewer—Specifies fax viewer application and format.
•
Phone Books—Specifies default phonebook used when composing a fax.
•
Startup Options—Specifies server login criteria and folder views.
•
Tracing—Specifies Tracer options.
These settings are specific to the workstation as opposed to the User Properties
which are stored on the server file server and are available from any workstation.
Your Personal Preferences are kept in the Windows registry and accessed based
on the user name when you log into the workstation.
14—2
Setting Personal File Storage Location
Setting Personal Preferences
Setting Personal File Storage Location
1.
From within Faxmain, select Fax from the Menu bar and click on Options.
The Personal Preferences dialog box will be displayed with the Personal
Folders tab activated.
2.
From here you can change the location of where your personal files are
stored on your PC or on the network. You can change the location of the
following file types:
•
Spool Folder— This is the temporary storage directory that FaxPress
usages for spooling and retrieving faxes. The default location for these
files is: C:\FaxPres.spl.
•
Saved Faxes— This is the directory where your saved faxes are stored.
The default location for these files is: C:\Program Files\Castelle\FaxPress\Personal Folders\Saved Faxes.
•
Local Phone Books— This is the directory where your local phonebooks are stored. The default location for these files is: C:\Program
Files\Castelle\FaxPress\Personal Folders\Local PhoneBooks.
14—3
FaxPress User’s Guide
•
Favorite Messages— This is the directory where your favorite messages are stored. The default location for these files is: C:\Program
Files\Castelle\FaxPress\Personal Folders\Favorite Messages.
•
Favorite Documents— This is the directory where your favorite documents are stored. The default location for these files is: C:\Program
Files\Castelle\FaxPress\Personal Folders\Favorite Documents.
•
Cover Page Templates— This is the directory where the FaxPress cover
page templates are stored. The default location for these files is: C:\Program Files\Castelle\FaxPress\Personal Folders\Cover Page
Templates.
Note:
3.
To specify a new location for a folder, click on the Browse button
associated with a particular folder to display the Browse for Folder dialog
box. Then choose a new location from the displayed list and click OK. All
new entries for that personal folder type will be written there.
Note:
14—4
If multiple users need to access a set of shared favorite documents
and messages, we recommend that you keep those on a network
drive accessible by those users and change physical location of the
folders to point to the shared directories.
The original folder remains in its original location together with
any data that has accumulated there.
Setting General Options
Setting Personal Preferences
Setting General Options
1.
From within Faxmain, select Fax from the Menu bar and click on Options.
The Personal Preferences dialog box will be displayed. Click on the
General tab.
2.
The Options dialog box lets you specify the following settings:
•
Refresh Rate (Minutes)—Specifies the frequency in minutes that the
specified lists will be refreshed.
–
Outgoing list—Specifies a value for the Outgoing Faxes Queue.
The default setting for refreshing the Outgoing Fax Queue is every
minute.
–
Other lists—Specifies a value for other lists–-Personal Incoming,
Notices, Print Queues, Unaddressed. The default setting for
refreshing these list is every 10 minutes.
•
Outgoing Faxes
14—5
FaxPress User’s Guide
–
Display confirmation message after sending a fax—Check this
option if you want FaxPress to display a message telling you that
the fax was successfully sent. If this is checked confirmation messages will also be displayed when faxing through a third party
application, such as MS-Word and Goldmine.
–
Display ‘Need approval warning’ before sending fax. If you
have configured your system with FaxPress Approval, you will be
alerted when approval is required prior to fax transmission when
this box is checked.
–
When faxing from a third party application, always use the previous login information— FaxPress lets you send a fax from
within a third-party application, such as Word 97. One of the steps
in this process is to login to a FaxPress server when you are ready
to send the fax. If you enable this option, you will only be
prompted to login to a FaxPress the first time. For the next login,
the previous (FaxPress) login information will be used. If this
option is checked, logins to FaxPress from Goldmine and MSWord will be automated.
–
Accumulate – enables the FaxPress fax enveloping function.
Allows users to submit multiple documents to the Castelle DCX
Driver as one fax job. Submitted jobs will be accumulated as one
fax attachment until user clicks either the Send or Cancel button.
•
FaxTray—This application allows you to directly access FaxPress func-
tionality from your system tray. To store the icon in your system tray for
ready access, click the check box for Run FaxTray in system tray. For
more information on using FaxTray, refer to "Sending Faxes with FaxTray" on page 12-22.
•
Protocol — You can use this function to change the protocol for your
FaxPress Client to enable it to communicate with a different FaxPress
Server. Make sure that the appropriate network drivers are installed on
your client prior to changing this setting.
14—6
Selecting Viewer Application
Setting Personal Preferences
Selecting Viewer Application
1.
From within Faxmain, select Fax from the Menu bar and click on Options.
The Personal Preferences dialog box will be displayed. Click on the
Viewer tab.
2.
The Viewer dialog box lets you specify a viewer to use for viewing or
routing faxes. There are three options:
•
Viewer—Click the appropriate radio button to use Castelle Quick
Router Viewer for viewing incoming faxes or to use a third party appli-
cation to view all faxes.
–
With the Castelle Quick Router Viewer the User/Router can immediately view the first page of an incoming fax without waiting for
the entire fax to be processed. The User can subsequently view
more pages of the fax using the viewer’s functionality. Using this
viewer option is more efficient for Routers, as they are only permitted to view the first page of an incoming fax.
14—7
FaxPress User’s Guide
•
Third Party Viewer— This allows you to select the third party viewer
application to view faxes:
•
–
Select Use the viewer associated with a DCX/TIFF extension to
allow automatic selection of third party application. On most Windows operating systems, this will be either Microsoft Fax Viewer,
Wang Imaging or Kodak viewer.
–
Select Use this viewer and enter a specific application file name in
the text box (or select Browse to locate the file) to specify the
application to use with all faxes.
File Format for Third Party Viewer applications: You can specify the
format for viewing faxes:
–
DCX—Recommended for faster viewing
–
TIFF—Recommended for fax annotation.
Setting Default Phone Books
This setting allows to select the phone book that is initially displayed when using
the Address Fax dialog box for addressing fax recipients. This information is
used both when selecting recipient, see "Choosing Recipients from Your Phone
Books" on page 12-16.
14—8
Setting Default Phone Books
Setting Personal Preferences
1.
From within Faxmain, select Fax from the Menu bar and click on Options.
The Personal Preferences dialog box will be displayed. Click on the
Phone Books tab.
2.
To specify the default phone book for the current server, click on the radio
button for any one of the following:
•
FaxPress Phone Book— You can chose to display from the Address
Fax dialog box either all the members in your Local FaxPress Phone
Book or a Corporate FaxPress Phone Book, or select a specific group
with the phone book. All the available options can be selected from the
scroll down list.
•
Database Phone Book— You can chose to display from the Address
Fax dialog box a specific database phonebook view from either your
Local External Database Phone Books or a Corporate External Database
Phone Book. All the available options can be selected from the scroll
down list.
•
Exchange/Microsoft Outlook contact lists—This option allows you to
display your Microsoft Outlook contact lists when using the Address
Fax dialog box.
14—9
FaxPress User’s Guide
Setting Startup Options
1.
Select Fax from the Faxmain Menu bar and click on Options. The
Personal Preferences dialog box will be displayed. Click on the Startup
Options tab.
2.
From the Startup Options tab you can configure automatic login in to a
specified server and what folders are viewable through Faxmain.
•
Note:
Startup Settings
To by pass the user login screen the next time you access a
FaxPress server, you can select Save Login Properties in the
Login dialog box. Otherwise, you will be prompted to login to the
server each time.
–
Automatic login to server—Click the box to allow automatic
login and select server in scroll down list.
14—10
Setting Tracing Criteria
Setting Personal Preferences
–
•
Note:
List to show—The folder you select in the scroll down list will
automatically be opened and its contents displayed when you login
to the server specified in the previous setting.
Folder Options—Check to select all the folders that will be viewable
when you access Faxmain. By default the Outgoing and Incoming Fax
Queues, Notices and all personal folders are viewable.
You must restart Faxmain for these changes to take effect.
Setting Tracing Criteria
Tracing is normally enable to help troubleshoot network or installation problems.
Under normal operating conditions, it is not recommended that you have this
function enabled as the process of capturing all detailed events can consume
valuable processing time.
1.
To enable tracing, from within Faxmain, select Fax from the Menu bar and
click on Options. The Personal Preferences dialog box will be displayed.
Click on the Trace tab.
14—11
FaxPress User’s Guide
2.
You can request the following levels of tracing for either Faxmain or for
TrayFaxAlert.
•
Tracer On— When this is selected normal events are captured and stored
in the logfile specified in Logfile Name.
•
Trace network packet dump—When this option is select, network
packet information used by the FaxPress client is captured and stored in
the logfile specified in Logfile Name.
•
Enable extended trace—If this option is select, a more extensive capture is performed and stored in the logfile specified in Logfile Name. We
recommend that this option is only used at the request of Castelle Customer Support.
•
Logfile Name—The default location where the trace log file (trace.txt) is
stored: C:\ProgramFiles\Castelle\FaxPress\trace.txt.
•
To view the log file, use the following application:—Notepad is the
default application. You can change this to any local text editor.
Note:
14—12
The performance of programs will be slower with tracing enabled.
Printing Faxes
15
What’s In This Chapter
Overview ........................................................................................................ 15-2
Printing a Fax ................................................................................................ 15-3
Printing a List ................................................................................................ 15-6
FaxPress User’s Guide
Overview
All FaxPress servers are equipped with a parallel printer port that allow users to
print incoming faxes via the FaxPress. The parallel port supports most HPcompatible (PCL) and postscript printers. A print driver is not required when the
FaxPress is used to print faxes. All of the configuration is done in the user's
FaxPress profile.
FaxPress has very sophisticated support for the printing of faxes. The following
are considerations that should be addressed prior to printing.
•
Where can we print— Printing is supported via network printing where the
FaxPress server acts as a print client and submits print jobs on the network.
In NT this is via host shareable printers and in Novell via print queues. NDPS
on Netware 5 is not currently supported.
•
Which printer— Which specific printer is used depends on user settings. If
no special selection is made, there is a FaxPress wide, default print queue For
Novell this is the queue named
serialnumber_printq.faxpresscontext. Each user can select a
different print queue if desired.
Note:
•
Users can also use any local printers directly available from their
workstations to print FaxPress faxes.
What can we print— Generally incoming faxes or outgoing faxes or
confirmations of outgoing faxes can be printed. Also, we can print notices,
transaction logs etc.
•
When can we print— Printing can be done automatically without user
intervention by the FaxPress performing network printing. This can be set up
for incoming faxes, outgoing faxes, confirmation pages. Otherwise printing
can be done by explicit user action on incoming faxes, outgoing faxes,
notices, transaction logs, phonebooks etc.
15—2
Printing a Fax
Printing Faxes
Printing a Fax
The following explains how to print a fax without opening it for viewing.
1.
From your Incoming or Outgoing Faxes list, right click on a fax. You will
see a context menu.
2.
You can select to print to a Local Printer on a FaxPress/Network printer.
To use a printer associated with your workstation, select Local printer driver
to open your familiar Print dialog. Then print normally. Or, print across a
FaxPress network printer.
3.
If you are connected to a Novell Binder network and want to print to a
network printer configured by your FaxPress administrator, select
FaxPress/Network... This opens the FaxPress/Network Print dialog.
To print with the default configuration, click OK.
15—3
FaxPress User’s Guide
a.
To select a different printer, click the Printer button. The Printer
Configuration dialog box will be displayed.
This is the same dialog box that is displayed for configuring the User
Properties. For more information, refer to "Configuring a User Printer" in
Chapter 4.
15—4
b.
After you have configured your printer, click OK. This will return you
to the FaxPress/Network Print dialog box.
c.
Select number of copies to print and click OK to send the job to the
printer queue.
Printing a Fax
Printing Faxes
4.
If you are connected to a Windows NT network and want to connect to a
network printer, select FaxPress/Network... This opens the
FaxPress/Network Print dialog.
To print with the default configuration, click OK.
a.
To select a different printer, click the Printer button. The Printer
Configuration dialog box will be displayed.
This is the same dialog box that is displayed for configuring the User
Properties. For more information, refer to "Configuring a User Printer" in
Chapter 4.
15—5
FaxPress User’s Guide
b.
After you have configured your printer, click OK. This will return you
to the FaxPress/Network Print dialog box.
c.
Select number of copies to print and click OK to send the job to the
printer queue.
Printing a List
To print a list displayed in the View List window, for example, the Outgoing
Faxes Queue or Incoming Faxes Queue, do the following.
1.
Click on any item in the list you want to print.
2.
From the File pull down menu, select Print List... to display the List print
dialog. The dialog box contains three tab dialogs: Page, Headers and
Footers, and Margins.
3.
Set page parameters.
On the Page dialog, you can set the following parameters (or accept the
defaults).
List font drop downs — font type and size.
Page number format drop down — format for page numbers.
Grid Lines check box — column and row lines.
Alternate row shading check box— shading to alternate rows.
15—6
Printing a List
Printing Faxes
4.
Set header/footer parameters.
On the Headers and Footers dialog, you can set the following parameters (or
accept the defaults).
Header parameters:
List font drop downs — font type and size.
Header text — text to appear in the report header.
Footer parameters
List font drop-downs — font type and size.
Footer text — text to appear in the report footer.
15—7
FaxPress User’s Guide
5.
On the Margins dialog, you can set the following parameters (or accept the
defaults).
Top, Bottom, Left, Right margins — enter a value in millimeters to adjust the
position of the report on the page. You can enter a value directly or use the
spin wheel controls.
6.
When done, click on Print or, if you want to configure your printer, Printer
Setup.
This is the standard Printer Setup screen for your Windows operating system.
Configure the printer as you like by clicking Properties. When everything is
setup properly, click OK to print your list.
15—8
Managing Stored Faxes
16
What’s In This Chapter
Managing Archived Faxes ............................................................................ 16-2
Archived Faxes ........................................................................................ 16-3
Filtering Archived Faxes.......................................................................... 16-5
Managing Saved Faxes................................................................................ 16-10
FaxPress User’s Guide
Managing Archived Faxes
Note:
Your faxes will only be archived if your FaxPress Administrator
has configured the archive service for your FaxPress servers. Also,
if your FaxPress server is installed on an NT workstation and you
have chosen to use Microsoft Access as your archive database, a
maximum of ten users can access the FaxPress archive database at
any given time. This is a limitation of the NT workstation. For
further, administrative information regarding FaxPress Archive,
see Chapter 10, "Archiving Faxes".
Locating your Archived Faxes
FaxPress Archive can be configured to store archived faxes in two locations:
1.
16—2
At the individual user level, the user’s personal archived faxes (when
configured in the On-Line Storage mode, see "Archiving Faxes" on page
10-1) are stored in two folders under the user’s Mailbox branch.
Managing Archived Faxes
Note:
2.
Managing Stored Faxes
If these folders are not displayed in your Mailbox, you may need to
reconfigure your start-up settings in your personal preference
Options. See "Setting Startup Options" on page 14-10. If they are
not available in your Start-up Options, request your FaxPress
Administrator to license FaxPress Archive.
At the FaxPress Administrator level (logged in with supervisor privileges),
FaxPress archive stores all faxes in two folders under the Administration
branch of Faxmain. If configured for archiving transaction logs, the Fax
Archive will have an additional folder, Archived Transaction Logs. For
more information on fax archiving see "Archiving Faxes" on page 10-1.
Archived Faxes
Your archived faxes can be viewed, saved, converted to text, printed, e-mailed,
and sent through Faxmain.
1.
Open Faxmain, login to a FaxPress Server, and expand the server folder and
open your Mailbox. Two folders will be displayed if FaxPress Archive has
been configured for your FaxPress server: Archived Sent Faxes and
Archived Received Faxes.
The Archived Sent Faxes folder contains all the archived faxes that has been
sent by you and the Archived Received Faxes folder shows all the faxes that
have been received by you.
16—3
FaxPress User’s Guide
2.
Open either of these folders and select the archived fax you wish to view.
Note:
3.
To view the archived fax, either clicking the fax in the list, or by right
clicking and selecting view from the context menu. You can specify what
viewer application is used through your Personal Preferences Options in
Faxmain. Refer to "Selecting Viewer Application" on page 14-7.
•
4.
16—4
If you move your archived faxes to another location, their
parameters will still be displayed in the Archived Faxes folders,
however, when you try to view the archived fax, the Browse dialog
will be display for you to locate the fax.
FaxPress users with supervisor privileges have a Fax Archive folder
under the Administration branch that allows them to view Archived
Received Faxes and Archived Transmitted Faxes for all users and
Archived Transaction logs.
To save your archived fax to a new name or location, right click on the
archived fax and select Save As. A Save As dialog box is launched. You
can specify a new name and location for the archived file.
Managing Archived Faxes
Managing Stored Faxes
5.
To print your archived fax, right click on the fax and select Print. This will
launch the standard print dialog box.
6.
To attach this fax to an email, right click on the fax and select Mail. Your
fax will be attached to your client MAPI mail for you to address.
7.
To send this fax again, right click on the fax and select Send. This opens
the Send Fax dialog box and attaches the archive file. In the case of an
outgoing archived fax, the fax will be automatically addressed with the fax
number that was stored in the record.
8.
To convert the archived fax to text format, right click on the fax and select
OCR from the context menu.
9.
To display the properties for the archived fax record, right click on the fax
and select Properties. The information available for each of these faxes in
these lists is exactly the same as what was available before the faxes were
archived. These two folders will only show the personal archived items of
the current FaxPress user.
Note:
Deletion is done through the purging option in the archive program
itself.
10. To sort a list by a particular column, simply click on the column header and
the list will be sorted in ascending order by that column.
Filtering Archived Faxes
The Archived folders can be filtered so that only items that match a certain criteria
will be shown. On each of the archived folders, a context menu is available that
allows the user to set the filter.
Filtering Archived Transmitted Faxes
To define a filter for archiving sent faxes:
1.
Highlight the Archived Transmitted Faxes folder.
If you have supervisor privileges, archived faxes are located in two places in
Faxmain: one is under your Mailbox branch (these are your personal archived
16—5
FaxPress User’s Guide
faxes) and one is in the Administration branch under Fax Archive (these are
all the archived files for your FaxPress server).
2.
Right click on the folder to bring up the context menu.
3.
Select Set Filter. The Archived Transmitted Faxes Filter dialog box will
be displayed.
For archived sent faxes, the following filter options are available:
•
List All Sent Faxes— Select this option to show all sent faxes for the current
FaxPress user.
•
Sent— Filters the list so that only faxes that were sent with a particular time
will be shown. Dropping the list allows options for selecting faxes from all
days, the last x number of days from the client workstation's current date, on
or before a certain date, on or after a certain date, between two different dates,
and of course, a specific date.
•
Pages— Filters the list so that only faxes with a particular number of pages
will be shown. Dropping the list allows options for selecting faxes with all
pages, less than or equal to a certain number of pages, greater than or equal
to a certain number of pages, and also the specified number of pages.
•
Company— Filters the list so that only faxes sent to a particular company will
be shown. Dropping the list allows options for selecting faxes from all
16—6
Managing Archived Faxes
Managing Stored Faxes
companies, companies whose names start, contain, and end with a particular
letter or word, and companies whose names match a specific name.
•
Description— Filters the list so that only faxes with a particular description
or subject field will he shown. Dropping the list allows options for selecting
faxes with all descriptions, faxes whose descriptions begin, contain, end with
a particular phrase, and also faxes whose descriptions that match the phrase
exactly.
•
Destination number— Filters the list so that only faxes sent to a certain fax
number will be shown. Dropping the list allows options for selecting faxes to
all destination numbers, fax numbers that begin, contain, or end with a certain
number, and faxes to a specific fax number.
•
Fax Status— Filters the list so that only faxes with a certain status will be
show. Dropping the list allows options for selecting faxes with any kind of
status, failed status, and sent status.
•
Users— Filters the list so that only faxes sent by the specified user will be
shown. Dropping the list allows options for selecting all uses or a particular
FaxPress user. This option is only available to FaxPress supervisors. This
item is shown only when the filter dialog is shown through the archived sent
faxes node under the administration folder node.
Filtering Archived Received Faxes
To define a filter for archiving received faxes:
1.
Highlight the Archived Received Faxes folder.
If you have supervisor privileges, archived faxes are located in two places in
Faxmain: one is under your Mailbox branch (these are your personal archived
faxes) and one is in the Administration branch under Fax Archive (these are
all the archived files for your FaxPress server).
2.
Right click on the folder to bring up the context menu.
16—7
FaxPress User’s Guide
3.
Select Set Filter. The Archived Received Faxes Filter dialog box will be
displayed.
For archived received faxes, the following filter options are available:
•
List All Archived Incoming Faxes— Select this option to show all received
faxes for the current FaxPress user.
•
Sent— Filters the list so that only faxes that were received with a particularly
time will be shown. Dropping the list allows options for selecting faxes from
all days, the last x number of days from the client workstation's current date,
on or before a certain date, on or after a certain date, between two different
dates, and of course, a specific date.
•
Pages— Filters the list so that only faxes with a particular number of pages
will be shown. Dropping the list allows options for selecting faxes with all
pages, less than or equal to a certain number of pages, greater than or equal
to a certain number of pages, and also the specified number of pages.
•
RTI— Filters the list so that only faxes received from a particular remote
terminal ID (RTI) will be shown. Dropping the list allows options for
selecting faxes received from a RTI that begins, contains, ends, or matches the
specified phrase.
•
Comment— Filters the list so that only faxes with a particular comment field
will he shown. Dropping the list allows options for selecting faxes with all
16—8
Managing Archived Faxes
Managing Stored Faxes
comments, faxes whose comments begin, contain, end with a particular
phrase, and also faxes whose comments that match the phrase exactly.
•
Fax Status— Filters the list so that only faxes with a certain status will be
show. Dropping the list allows options for selecting faxes with any kind of
status, OK status, and not OK status.
•
Users— Filters the list so that only faxes received by the specified user will
be shown. Dropping the list allows options for selecting all users or a
particular FaxPress user. This option is only available to FaxPress
supervisors. This item is shown only when the filter dialog is shown through
the archived received faxes node under the administration folder node.
For all archived lists, multiple filters can be specified so that only faxes that meet
all of the conditions will be shown.
16—9
FaxPress User’s Guide
Managing Saved Faxes
Saved faxes are not associated with a FaxPress database, so you do not have to
login to a FaxPress server to view or manage them.
16—10
1.
To access your saved faxes, first expand your Saved Faxes folder and (if
you have created them) any subfolders, to display your list of saved faxes.
2.
To create a new subfolder, right click on Saved Faxes and select Add Folder
from the context menu. The Add Folder dialog box will be displayed.
3.
Enter the title for your new saved faxes folder in the Folder Name text box
and the new folder will be created for you. In the future when you save a
fax, this folder will be displayed as a possible destination for your fax.
4.
To display the operations available for saved faxes, right-click on any of
your saved faxes.
Managing Saved Faxes
5.
Managing Stored Faxes
From the context menu, you can select:
•
View... — Open the saved fax in the Viewer. This viewer application is
set in your personal preferences options. See also "Selecting Viewer
Application" in Chapter 10.
•
Print— Print the fax.
•
Delete— Removes the fax from your Saved Faxes folder. The fax may
still be available through your incoming or outgoing fax queues or
through your archived faxes folders.
•
Send— This launches the Send Fax dialog box and attaches your saved
fax.
•
Mail— Depending on the settings in your profile and email client, this
either requests you to select an email service or directly launches your
email client. The saved fax will automatically be attached to a new
message.
16—11
FaxPress User’s Guide
16—12
Notices and Alerts
17
What’s In This Chapter
Using Notices.................................................................................................. 17-2
Using TrayFaxAlert ...................................................................................... 17-6
FaxPress User’s Guide
Using Notices
Overview
Notices are a general method used by FaxPress to provide information to the user
when certain events occur. There are four different type of notices:
•
Transmission Confirmation Notices
•
Receipt Notices
•
Error Notices
•
Approval Notices
About Transmit Confirmations
FaxPress posts a Transmit Confirmation message to your mailbox after it
completes a fax you send. The message contains the following information:
•
Notice For — The recipient.
•
Call to — The fax number to which the fax was sent,
•
Remote id — The ID of the receiving fax machine.
•
Queued at — The time and date the fax was sent to the FaxPress queue.
•
Sent at — The time and date the FaxPress sent the fax.
•
Phone line — The line the FaxPress used to send the fax.
•
Pages — The number of pages the fax contained.
•
Description — The comment that appeared in the Subject field.
•
Status — The final fax disposition. The disposition can be either successfully
transmitted or transmission failed.
About Receive Notices
FaxPress posts a Receive Notification message to your mailbox when you receive
a fax. The message contains the following information.
•
17—2
Notice for — The addressee.
Using Notices
Notices and Alerts
•
Remote id — The ID the receiving fax machine uses to identify itself.
•
Received at — The date and time the FaxPress received the fax.
•
Pages — The number of pages the fax contains.
•
Routed by — The source FaxPress that delivered the fax to you.
•
Routed at — The time the fax was routed and the notice dispatched to you.
About Approval Notices
FaxPress posts a Wait Approval for Job# message to your mailbox when you
receive a fax. The message contains the following information.
•
Notice For — The recipient.
•
User Name— The name of the FaxPress User that sent the fax.
•
Call to — The fax number to which the fax was sent,
•
Submit at — The time and date the FaxPress sent the fax.
•
Phone line — The line the FaxPress used to send the fax.
•
Pages — The number of pages the fax contained.
•
Status — The final fax disposition. The disposition can be Wait for Approval
or Not Approved.
About Error Notices
FaxPress posts a Error for Job# message to your mailbox when you receive a fax.
The message contains the following information.
•
Notice for— FaxPress User name.
•
Error at— The specific action that cause the error
The notice will also include the error type.
View a Notice
To view a notice, do the following.
17—3
FaxPress User’s Guide
1.
2.
Click on Mailbox to expand the branch, then click on Notices to display a
list of your notices.
To view a notice, double-click on it or right-click on it and select
Properties... from the context menu.
17—4
3.
View the Notice.
4.
Click on OK when done.
Using Notices
Notices and Alerts
Delete a Notice
To delete a Notice, do the following.
1.
Right-click on the Notice you want to delete.
2.
Select Delete from the context menu.
3.
Confirm the delete in the confirmation dialog.
Print a Notice
To print a Notice, do the following.
1.
Right-click on the Notice you want to print.
2.
Select Print from the context menu.
3.
Select a printing option from the Print dialog.
If you choose Local printer driver, you will see your familiar Print dialog.
If you choose FaxPress/Network..., you will see the FaxPress/Network
Print dialog.
17—5
FaxPress User’s Guide
4.
Optionally display the Printer Configuration dialog.
If you click on the Printer button, you will see the Printer Configuration
dialog, where you can specify the print queue and other print properties.
5.
Click OK to send the job to the print queue.
Using TrayFaxAlert
About TrayFaxAlert
TrayFaxAlert is an independent program that alerts you, with lights and sounds,
when a fax notice arrives. TrayFaxAlert places a notice in your Notices folder
under your Mailbox folder each time a fax is received.
TrayFaxAlert also allows you view notices without starting Faxmain.
Note:
17—6
TrayFaxAlert cannot be run in your startup group, and should also
not be run concurrently with either FaxPress Outlook Direct or
Citrix Published Applications.
Using TrayFaxAlert
Notices and Alerts
Setting Up TrayFaxAlert
1.
To invoke TrayFaxAlert, use your Start menu to navigate to the
TrayFaxAlert icon in your FaxPress program folders.
2.
Click on TrayFaxAlert. The TrayFaxAlert icon will installed in your system
tray with a big red ‘X’ and the following message will be displayed:
3.
Right click on the TrayFaxAlert icon in your system tray and select
Properties from the context menu.
The Properties dialog box will be displayed.
17—7
FaxPress User’s Guide
4.
In Notification, select the TrayFaxAlert notice type:
Personal Notices only – select this option if you have User or Router
privileges and want to be alerted only to the notices in your Personal FaxPress
mailbox.
Personal Outbound Failed Notices only – select this option to be alerted
only when an outbound job fails. With this option selected, the TrayFaxAlert
notice list will only display failed outbound job notices.
All Incoming Notices – select this option if you have Operator or Supervisor
privileges and want to be notified when a new notice appears in the
Unaddressed mailbox.
5.
If you want to automatically view a notice when it is received, check the
Automatically view notices when received option.
6.
Check the Sound On option if your workstation is configured with sound
capability and you want to receive an audible alert from TrayFaxAlert when
a notice is received.
7.
To specify the FaxPress server and mailbox you want TrayFaxAlert to
monitor, go to the FaxPress Servers Currently Connected section and
click on the Add Fax Server button to display the Add a Fax Server
Connection dialog.
8.
In the Fax Server Name edit box, select the FaxPress server that contains
the mailbox you want to monitor or use the edit box drop-down list to
display the FaxPress servers that can be identified from your workstation.
The list of FaxPress servers represents all FaxPress servers that are visible on
the network via IPX or TCP/IP. If a FaxPress has multi-protocol enabled, it
will appear as both an IPX and a TCP/IP entry, and you must select a server
17—8
Using TrayFaxAlert
Notices and Alerts
that is consistent with the network protocol stack installed on your
workstation.
9.
In the User Name edit box, enter the name you use to log onto the FaxPress
mailbox.
10. In the Password edit box, enter the password that is used to log onto the
specified user mailbox.
11. Optionally look for a Fax Server.
If the FaxPress you want to use is not shown and is on a different TCP/IP
segment, click on the Other button to display the Add TCP/IP FaxPress
dialog to add the FaxPress server to the list, then enter the Server Name and
TCP/IP Address.
12. Click on OK to accept the entries.
Modify a Monitored Mailbox Account
To modify a FaxPress server mailbox account that is being monitored:
17—9
FaxPress User’s Guide
1.
In the Properties dialog, go to the FaxPress Servers Currently
Connected section and click on the Server Properties button to display the
Modify a Fax Server Connection dialog.
2.
Change the FaxPress Server Name, User Name and/or Password settings.
3.
If the FaxPress you want to use is not shown and is on a different TCP/IP
segment, click on the Other button to display the Add TCP/IP FaxPress
dialog to add the FaxPress server to the list, then enter the Server Name and
TCP/IP Address.
4.
Click on OK to accept your changes.
Using TrayFaxAlert
Acknowledge Alerts
The Acknowledge Alert option is enabled when TrayFaxAlert signals that you
have received a new notice. You will see this option when you right-click on the
TrayFaxAlert icon.
Clicking Acknowledge Alert will turn-off the indicator lights.
17—10
Using TrayFaxAlert
Notices and Alerts
View Notices
To view the list of notices in the FaxPress mailboxes that you are monitoring:
1.
Right-click on the TrayFaxAlert icon to display the context menu.
2.
Select the View Notices... option to display the FaxPress Notices window.
The following information is provided for the notices displayed in the
Notices window:
•
Caption — The nature of the notice; for example, for a routing event the
message “Routed to User xx” may display. If you right-click on a notice
in the Caption column, you can view an incoming or routed fax. Viewing
depends upon your privilege level. For example, you can view your own
incoming faxes, but you may not be able to view those of other users.
•
Sent At — The time the notice was posted.
•
Source — The originator of the notice.
17—11
FaxPress User’s Guide
•
For User — The recipient of the notice.
•
Server — The name of the FaxPress server containing the monitored
mailbox.
You can re-sequence items in the list by heading type by clicking on a heading bar
title. For example, to re-sequence by posting date, click on the Sent At
heading-bar title.
Viewer Options
You can set the viewer application you wish to view your notices, alerts, and faxes
with in your Personal Preferences Options. For more information, refer to "Setting
Personal Preferences" in Chapter 10.
17—12
Creating Cover Pages
18
What’s In This Chapter
Overview ........................................................................................................ 18-2
Creating a Master Cover Page..................................................................... 18-3
Downloading the Cover Page to the FaxPress Server.............................. 18-12
Publishing Cover Pages .............................................................................. 18-14
FaxPress User’s Guide
Overview
A “cover page” is a prepared, fax-ready document that the FaxPress can attach, as
the first page, to an outgoing fax or send independently.
Typically, a cover page contains recipient and sender information. A cover
page can also include text, graphics, and substitution variables.
Typical substitution variables you might want to use are the recipient's name
and fax number, your return voice number and fax number, the date and time,
and a brief message. The variable information is supplied from the Send Fax
dialog you use to prepare the fax, the phone book information, and from your
User Account.
There are two types of cover page for FaxPress:
Personal Cover Page — You can create a personal cover page that is used
only for your own outgoing faxes. You can create up to eight personal cover pages
and choose among them at the time you send a fax.
Corporate Cover Page — If you are a FaxPress Supervisor, you can create a
corporate cover page that is used for faxes of all FaxPress users that do not have
a personal cover page. There is only one corporate cover page allowed.
18—2
Creating a Master Cover Page
Creating Cover Pages
Creating a Master Cover Page
Overview
The best way to make a cover page is to modify an existing template. Included
with FaxPress are 42 templates to get you started.
Any FaxPress user can create a cover page template: no special privilege level
is required.
Creating a FaxPress cover page is a four-part process:
1.
Create a cover page master with the Cover Page Editor.
2.
Compose the cover page.
3.
Save the cover page master to a file.
4.
Convert your cover page master to a fax-ready cover page.
The Castelle Cover Page Editor provides everything you need to create a cover
page master, including an 8.5" x 11" base page, FaxPress keywords, text tool,
drawing tools, and a conversion-to-fax-format utility.
Your cover page master can include FaxPress “keywords” (substitution variables
that FaxPress uses to import information from the outgoing fax onto the cover
page), permanent text, graphics, imported text and imported graphics.
A heavy, dark line is used to indicate page edges. The line may not appear on
monitors that use low resolution. If the lines do not appear, leave a quarter-ofan-inch for the top, bottom and left page borders and half-an-inch for the right
page border.
Designation and keyword information that appear in areas of the edit box that
extend beyond the page border will be truncated in the outgoing cover page.
Create a Cover Page Master
1.
To create a cover page master, first open the Cover Page Editor. You
can open it directly from your FaxPress programs folder. Or, you can
18—3
FaxPress User’s Guide
open it by clicking on Fax from the Faxmain menu and selecting
Compose Cover Page from the drop-down menu.
2.
The Cover Page Editor will open and look like this:
Base page — The blank 8 1/2” x 11" page with grid lines is the “base page”
on which you place elements to create your cover page. The grid lines are an
aid to help you place elements on the page and will not appear in the finished
cover page. You can disable the grid lines by deselecting Grid Lines in the
View drop-down menu.
18—4
Creating a Master Cover Page
3.
Creating Cover Pages
To add permanent text (text not affected by substitution variables) to
your Cover Page, click on the Insert menu and select the Text option.
A large plus sign (+) appears on the page. This tool allows you to draw a
text box into which you enter text.
4.
To create the text box, move the plus sign to where you want to place the
text box, then hold down the left mouse button and drag the mouse to the
right and down to produce a square.
18—5
FaxPress User’s Guide
5.
Release the button. Note that the box is still selected.
•
Repositioning — You can reposition the text box by clicking and
holding inside and then dragging it to a new location.
6.
•
Change size — You can change the size of the text box by triggering
the expansion tool along its borders.
•
Select and un-select — At any time, you can un-select the box by
clicking outside of it and reselect it by clicking inside it.
Double-click inside the box. Your cursor will change from an arrow to an
insertion point symbol. Click again, and your text insertion point will be at
the upper left corner of the text box. You can then enter text. Change the
font, font size and other font characteristics by selecting text and using the
Format bar. If you do not see the Format bar, enable in the View menu.
Importing Graphics
The Castelle Cover Page Editor allows you to import graphics in the process of
creating a custom cover page. Follow these steps to import an existing company
logo to a cover page created using the castelle Cover Page Editor:
18—6
1.
Save your logo in a Word document or similar application
2.
3.
4.
5.
Open the word document
Select the logo bitmap, and choose Edit>Copy.
Open the CCE and choose Insert OLE Object.
Choose Create New and select Bitmap Image.
6.
This will open a window on the CCE document. Choose Paste to paste the
bitmap on the CCE document.
Creating a Master Cover Page
Creating Cover Pages
Add Substitution Variables
There are numerous substitution variables that you can add to a cover page.
As an example, let's first add the Number of Pages substitution variable, which
provides a count of the total number of pages the outgoing fax contains.
1.
Add the variable to the page.
Click on the Insert menu, select the Message option and then Number of
Pages.
This will place two boxes onto your base page:
18—7
FaxPress User’s Guide
2.
•
Label box — The box labeled “Totl. Pages” contains the designator for
the Number of Pages element.
•
Value box — The box labeled “Totl” will contain the substitution value.
Move the variable boxes to the desired location. When either a label or
value box is selected, you can drag them to any desired location. To drop a
box, you can click anywhere in the blank page to deselect them. Initially,
both boxes will be selected. Later, you can select either one or, by
Ctrl-Clicking, both.
Note:
3.
You can treat a label box as any other text box by
double-clicking in it and editing the text.
You can use the same procedure to add the following variables, all
accessed through the Insert menu.
•
Insert Recipient Variables
•
Fax No. — The recipient fax number, as entered on the Send Fax
dialog or as entered in the phonebook or database used to select
the recipient.
•
Company Name — The company name, as entered in the phonebook or database used to select the recipient.
•
Phone No. — The recipient voice phone number, as entered in
the phonebook or database used to select the recipient.
18—8
Creating a Master Cover Page
•
Creating Cover Pages
Addressee1 - Addressee5 — Addresse1 is the recipient whose
address information appears on the cover page. The other
addressee's are other recipients to receive the fax.
•
•
Sender Variables
•
Name — Sender's name, the logged on FaxPress user.
•
Phone No. — Sender's phone number.
•
Fax No. — Sender's fax number.
Message Variables
Note:
You can enter a message of up to 16 lines.
•
Bill Back Code — Bill back code, as entered in your properties
field.
•
Time Stamp — Time and date when fax is sent.
18—9
FaxPress User’s Guide
•
Number of Pages — Total number of fax pages, not counting the
cover page.
•
Fax Description — The subject line of the Send Fax dialog.
•
Spool Time — Time in processing queue.
•
Account Code — Account code.
Sample Cover Page
Following is a sample Cover Page in the process of being constructed:
18—10
Creating a Master Cover Page
Creating Cover Pages
Save Cover Page Master
You can save your cover page master on any available volume. The master will be
saved in FaxPress.cce format, so that it can be opened and edited in the Castelle
Cover Page Editor. To save your Cover Page Master, use the File / Save As menu
choice to navigate to a directory, enter a name, and save. The saved file must
have.cce as a suffix.
Use European Characters
The Cover Page Editor supports extended (European) characters.
Your computer stores letters as numbers. When it makes conversions, it uses a
“code page”. A code page defines a set of characters available for your system to
use for screen displays and printed and fax output. In technical terms, FaxPress
can support either a U.S. code page (number 437) or a European code page
(number 850).
When you create the fixed text on a Cover Page, you automatically use whatever
code page has been set for your system. However, when data is merged into
FaxPress fields, by default the U.S. code page is used.
To see what code page is use on your system, go to a command prompt and run
the command “chcp”.
If your system responds Active code page: 437, then you are using the U.S. code
page, and you do not need to change the FaxPress defaults. If your system
responds Active code page: 850, then you must reset the FaxPress defaults. Code
pages other than 437 or 850 are not supported by FaxPress.
To change the code page used by FaxPress, do the following.
1.
Login to Faxmain and right-click on a server.
2.
Click on the Server Settings tab.
3.
In the Default symbol set code drop box, select one of the following:
PC-8: for U.S. code page.
PC-850: for European code page.
Note:
The FaxPress code page setting must be consistent for all server
and client installations that will communicate with each other.
18—11
FaxPress User’s Guide
Downloading the Cover Page to the FaxPress Server
After you have created and saved your Cover Page Master, you must download it
to your FaxPress server. This operation converts and stores your cover page.
1.
To open the Set FaxPress Cover Page dialog, from the Cover Page Editor
menus, select FaxPress / Set Cover Page.
2.
In the dialog, specify the following information.
•
Type of Cover Page — Click on the Personal radio button for a personal
cover page and Corporate for a corporate cover page. You must have
FaxPress supervisor privilege to install a corporate cover page.
•
Fax Server Name — Enter the name of a Fax Server Name or use the
drop-down list to select a server. If the FaxPress server you want to use
18—12
Downloading the Cover Page to the FaxPress Server
Creating Cover Pages
is not listed and is on a different segment than your workstation, enter the
FaxPress server's IP address or network name.
3.
•
User Name — Enter your FaxPress login name.
•
Password — Enter your FaxPress login password.
•
Cover Page Name — Enter a name for the cover page.
When you click on OK, you will be logged into the specified FaxPress
server with the specified name and password, and the cover page will be
converted to fax-ready format and placed in the appropriate folder.
18—13
FaxPress User’s Guide
Publishing Cover Pages
The FaxPress Cover Page publishing feature allows the FaxPress Supervisor, or
any user with Supervisor privileges, to distribute a customized personal cover
page to all FaxPress users.
To distribute a customized personal cover page to all FaxPress users, follow these
steps:
18—14
1.
Open FaxMain.(Start>Programs>FaxPress>FaxMain.)
2.
Expand the Mailbox branch and select the Cover Pages directory.
3.
Right-click on the personal cover page you’d like to make accessible to
your users. From the context menu select Publish.
Publishing Cover Pages
4.
Creating Cover Pages
In the Publish Cover Page window, select the cover page to distribute, and
click OK. This personal cover page will now exist as an additional cover
page option for all users.
18—15
FaxPress User’s Guide
18—16
Creating Phone Books
19
What’s In This Chapter
Overview ........................................................................................................ 19-2
What are Phone Books ............................................................................. 19-2
Formatting Phone Numbers ..................................................................... 19-5
Creating Local Phone Books ........................................................................ 19-6
Create Local FaxPress Phone Books ....................................................... 19-6
ODBC Database Phone Book ................................................................ 19-11
Creating Personal Phone Book .................................................................. 19-20
Create a Group ....................................................................................... 19-21
Import a Phone Book File ...................................................................... 19-22
Editing a FaxPress Phonebook................................................................... 19-24
FaxPress User’s Guide
Overview
What are Phone Books
FaxPress uses the concept of phone books to provide you access to commonly
used people and fax numbers when sending faxes and creating cover pages. There
are four basic phone books groups of phone books (two of which have
subcategories: Native phone books or database phone books). All the phone books
can be accessed through the Address Fax dialog box from the pull down menu,
refer to "Addressing the Fax" in Chapter 8. The groups are:
•
Personal Phone Books
These are individual FaxPress phone books (per user) that are managed by the
user and stored on the FaxPress server. These are available (because they are
stored on the FaxPress server) to you no matter where you login to FaxPress.
Your personal phone books are located under the Mailbox branch in the
Personal Phone Books folder.
•
Local Phone Books
These are individual FaxPress or database phone books that are managed by
the user and stored on the user’s desktop. These are only available if you login
to FaxPress from your own workstation. Local Phone Books are managed
through Faxmain under the Personal Folders branch in the Local Phone
Books folder. To access these phone books There are two types of Local
19—2
Overview
Creating Phone Books
Phone Books (as with Corporate Phone Books): FaxPress Phone Books
and External Database Phone Books.
•
Corporate Phone Books
Corporate phone books are shared by all. They are created by the FaxPress
supervisor or administrator. They are accessed under the Corporate Phone
Books branch for the general user. There are two different types of Corporate
Phone Books, the FaxPress Phone Books and the External ODBC
Database Phone Books. For more information, refer to "Creating Corporate
Phone Books" in Chapter 5.
19—3
FaxPress User’s Guide
•
Exchange and Outlook Contact Lists
You can access Exchange and Outlook contact list through Faxmain, but you
manage them through your email server or client. To access your contact lists
for sending a fax, change your phone books options in your personal
preferences to Exchange/Outlook. See "Setting Personal Preferences" in
Chapter 10.
Type of Phone Books
You have probably noticed by now that FaxPress has two different types of phone
books available within the phone book groups: FaxPress Phone Books and
External Database Phone Books. So, on to a description.
•
FaxPress Phone Books
The FaxPress Phonebooks are the internal phonebooks used by FaxPress. All
Internal phonebooks can be imported and exported. FaxPress phone books
can be managed from Local Phone Books, Personal Phone Books, and
Corporate Phone Books. You can import, export and manually add users
and groups to these phone books. The available file formats for importing into
FaxPress Phone Books are:
•
•
Standard Comma Delimited Files (*.csv)
•
Custom Comma Delimited Files (*.csv)
•
dBase Files (*.dbf)
•
ExportPH Files (*.*)— This is a FaxPress 3.x exported phone book
External ODBC Database Phonebooks
FaxPress can access your ODBC database phone books using an ODBC
driver. The database can be many types, Microsoft Access, Microsoft SQL
Server, or simply an Excel spreadsheet. You must have the specific ODBC
driver loaded on your client machine to access these phone books through
FaxPress database phone books. Database access is available through both
Corporate Phone Books and Local Phone Books.
19—4
Overview
Creating Phone Books
One More Thing
All though the previous discussion seems to detail all possible means of accessing
recipients for your faxes, there is one more. A FaxPress Pro options is an interface
to Goldmine for accessing the contact lists that you have developed. The
integration with Goldmine is a higher level integration involving not only
phonebooks but also fax documents and templates, merging data into documents,
reporting histories, etc. For more information on the FaxPress Goldmine
integration refer to the "Connecting to GoldMine" in Chapter 18.
Formatting Phone Numbers
You can configure FaxPress to automatically format phone numbers to include
area codes, external line access, international codes, PBX codes and passwords.
For more information, see "Configuring Dialing Properties" in Chapter 3.
If you would rather embed all the dialing rules in your phonebooks, the following
phone number format information is provided
Note:
We recommended that numbers have separators between the
various parts. Legal separators are:
•
A single or multiple space character(s)
•
A dash —
•
Brackets ()
Other, non numeric characters which may be in an entered number are:
•
$ (Dollar sign)— FaxPress replaces the PBX password with the dollar sign.
•
% —this can also be used for PBX password substitution.
•
# —by default this dials the # key like the one found on most phone keypads.
This character can also be used as the separator character to indicate T.30 sub
addressing.
•
*— by default this dials the * key like the one found on most phone keypads.
•
, (comma). This inserts a 3 second pause in the dialing. Note: No, is needed
in the PBX pre dial, there is already an implied pause
19—5
FaxPress User’s Guide
Creating Local Phone Books
Local Phone Books can contain either FaxPress Phone Books or Database Phone
Books. You do not have to be login to a FaxPress server to create or manage or
local phone books because they are stored and accessed from your local
workstation.
Create Local FaxPress Phone Books
To create a FaxPress Phone Book:
1.
Open Faxmain.
2.
Expand the Personal Folder branch and click on Local Phone Books.
Two folders will be visible: External Database Phone Books and FaxPress
Phone Books.
19—6
Creating Local Phone Books
3.
4.
Creating Phone Books
Right click on FaxPress Phone Books and select Add Phone Book from
the context menu.
Enter the name you want to give the new phone book in the PhoneBook
Name text box.
5.
Click Browse if you want to specify the path and filename of either a new
phonebook or an existing FaxPress phonebook file in another directory that
you want to attach. Otherwise the file will have a default name and be
stored in the Castelle\FaxPress\Personal Folders directory
on your desktop.
6.
Click OK to accept the values. A new folder will now be visible under the
FaxPress Phone Books folder. You now either create a Group and add
individual members or import a phonebook from a file.
Create a Local Phone Book Group.
1.
Right click on your new phonebook and select Add Group from the context
menu.
Group names can be used when sending faxes to broadcast your fax to any
number of recipients. FaxPress handles this as a single fax and in fact only
creates one raster file. This can significantly reduce the time necessary to
process faxes.
19—7
FaxPress User’s Guide
2.
3.
Enter a name for each group you want to define in the Add Group text box
and click OK.
To add members to the group, right click on the Group name and select Add
Member. The Edit Member dialog box will be displayed.
4.
Fill in the Edit Member dialog box with the appropriate information.
You can continue adding individual members, or you can import members into
your phone book from a previously created phone book file. To import members
continue to the next section, Import a Phone Book File.
Import a Phone Book File
As stated in the introduction to this chapter, you can import four types of phone
book files:
•
Standard Comma Delimited Files (*.csv)
•
Custom Comma Delimited Files (*.csv)
•
dBase Files (*.dbf)
•
ExportPH Files (*.*)— This is a FaxPress 3.x exported phone book
To import a phone book file:
19—8
Creating Local Phone Books
Creating Phone Books
1.
Follow the procedure in "Create Local FaxPress Phone Books" on page 196 to create a FaxPress Phone Book. But do not create a phone book group.
2.
Right click on the phone book you have created and select Import and file
format (i.e., CSV Default Format, CSV Custom Format, ExportPH, dBase)
from the context menu.
3.
If you are importing a CSV default format file, a dBase file, or a ExportPH
file, an Open import file screen will provide you the means for locating the
file.
4.
a.
If you are importing a dBase file, after you use the Open import file
screen to locate your dBase file, the Convert dBase to Phone Book
dialog box will be displayed. Use this dialog box to map the dBase
fields (in Fields) to your FaxPress fields (in Target Phone Book
Fields).
b.
Use the Add Link button to establish a link between the fields selected
from the source dBase file and the target phone book (see above). The
link is shown in the View list. Click on this button to remove selected
item from the View list.
c.
Click on the Convert button to start the conversion process.
If you are importing a CSV custom format file, the Import File Field
Assignment dialog box will be displayed before the Open import file
screen.
19—9
FaxPress User’s Guide
Note:
5.
The default values in this dialog box are 1 through 7 respectively.
Re-sequence the fields to correspond to your custom file. If you do
not a one of the default fields in your custom file, leave the field
blank. In the figure above, the custom file does not have fields for
Voice number, Comment or Group.
After to have located the file, click OK to import the file. The phone book
number will all be located in the folder ALL (if not Group is defined in your
imported file) or the Group name (defined in the import file) folder under
your new FaxPress Phone Book.
Export a Local FaxPress Phone Book
To export a phonebook:
19—10
1.
Open Faxmain.
2.
Expand the Personal Folder branch and click on Local Phone Books and
right click on the phone book you want to export.
3.
Select Export from the context menu. The SaveAs dialog box will be
displayed.
4.
Navigate to a directory, specify a name, and save the file. The file will be
exported as a comma delimited file.
Creating Local Phone Books
Creating Phone Books
ODBC Database Phone Book
FaxPress also supports ODBC based external phone books. This allows you to
connect to existing databases and use them as phone books for faxing. ODBC
Phone Book support allows the administrator to:
Specify the external database to use as a FaxPress phone book
Map FaxPress phone book fields and data base fields
Create different views of the database by specifying filters
The administrator can create any number of corporate phone books. Each
corporate phone book can connect to a different database and contain any number
of views (filters) of that database. Views can be created, for example, to show a
customer list in a specific state or country. ODBC Phone Book support provides
a sophisticated yet intuitive user interface for the administrator to create all those
views.
Once the views are created, they become visible to all the users. The end user can
use the Corporate phone books in exactly the same way they use the FaxPress
native Corporate Phone Books. The end user can also create local ODBC Phone
Books right from their desktop.
FaxPress ODBC phone books can work with any ODBC compliant database,
including:
Any SQL compliant DBMS servers, such as Microsoft SQL server, Oracle,
Informix etc.
ISAM type databases such as: dBase, Excel, FoxPro, Microsoft Access database
Personal & Corporate Cover Pages
FaxPress allows users to create their own cover pages while supporting a globally
accessible corporate cover page. FaxPress provides an easy-to-use cover page
editor to facilitate the cover page creation process.
19—11
FaxPress User’s Guide
To access an external ODBC database
To link to an external ODBC database phone book:
19—12
1.
Once the PRO package is licensed, open Faxmain.
2.
Expand the Personal Folder branch and click on Local Phone Books.
3.
Right click on External Database Phone Books and select Add Database
Phone Book from the context menu.
Creating Local Phone Books
Creating Phone Books
4.
The Database Phone Book dialog box is displayed. You can create a new
phone book, give it a name and select the type and location of the database
from this screen.
5.
To connect to either an Microsoft Access database or an Excel, FoxPro or
dBase database, enter or browse for a file name and path. If the database file
is password protected, you need to provide this password.
The supported ISAM file formats are:
6.
•
dBase versions III, IV, or V
•
Excel versions 3.0, 4.0, 5.0 and 8.0
•
FoxPro 2.0, 2.5, 3.0 and DBC
To connect to a DBMS server such as Microsoft SQL server, select an
existing or create a new connection string. This is done by clicking the
‘select’ button. The local ODBC user interface comes up to allow you to
select the “ODBC data source name”. For detailed instructions for
navigating in your ODBC 32 Bit setup program, refer to the Reference
section in this Guide.
19—13
FaxPress User’s Guide
Create Phone Book Views
To use an external database as a phone book, you must first link to the specified
database and then create associations or mapping between the database fields (or
columns) and the Phone book elements. The process of creating phone book views
facilitates the mapping process.
1.
19—14
Right click on the new database phone book and select Add View from the
context menu.
Creating Local Phone Books
Creating Phone Books
The Database Phone Book dialog box will be displayed.
From the Database Phone Book dialog box you can select any table and
column in your phone book database and associate it with a phone book field.
2.
The Phone Book View tab will be activated by default. Use this tab to map
the FaxPress phone book fields to the external phone book. The following
FaxPress fields can be mapped into fields in the database phone book:
•
Table — The define tables in your database can be selected from the drop
down list.
•
First Name and/or Last Name— To associate the fax recipient with the
field or column in your table, select the appropriate column name from
the drop down list. As in the example screen above, we have associated
a LastName column in the phone book with the ContactName column
in the Customers table.
•
Fax No. — Refer to "Configuring Dialing Properties" in Chapter 3, for
fax number format requirements.
19—15
FaxPress User’s Guide
Note:
If your database table contains separate fields for country code,
area code and number you will need to select those separately, by
clicking the Build button to separately select each of those fields
and put them together to generate the fax number.
•
Company — Map this phone book field to the equivalent CompanyName column in your database table. This is an optional field.
•
Bill Back Code— Map this phone book field to the equivalent BillBack-
Code column in your database table. This is an optional field.
3.
To map the database table to your view, select one of the database tables in
the scroll down list for Table.
4.
Once you select the table, you will be able to select the table fields from the
drop-down list boxes next to each of the FaxPress phone book fields.
Note:
5.
If your database table does not contain a separate fields for first
and last name, just map one of them (either first or last name) to the
full name, as shown above.
You can define a filter on the database by clicking on the Build Criteria
button. The Criteria dialog box will be displayed.
As an example, you can set the criteria for all supplier in the United States by
selecting “Country” for Field Name, “equals” for Operator, and “USA” for
Value.
19—16
Creating Local Phone Books
Note:
Creating Phone Books
You can use either ‘Logical AND’ or ‘Logical OR’ to define the
logical relationship between those conditions. The ‘Operator’
provides a rich variety of conditions such as: Begins with, Ends
with, contains, does not contain etc.
6.
You can view the SQL statement that is generated as a result of the mapping
and the criteria that you have set by clicking on the SQL Statement button.
This is an informational field only.
7.
Click OK when you are finished filling out the Phone Book View tab and
select the Dialing Rules tab.
8.
To apply the dialing rules that have been defined in Server Properties for
every fax number in this view, click the box. See "Configuring Dialing
Properties" in Chapter 3.
9.
Click OK to finish creating your view. The new view will be located under
the phone book folder.
19—17
FaxPress User’s Guide
Create Table Joins
To access multiple tables from one phonebook view, you must include a new table
in your view and define a join or an association between a column in one table
with a column in the new table. You must define a join for each of the tables from
which you want to include data for your phone book.
can include data from any number of tables, but at least one join has to be defined.
19—18
1.
Right click on any phone book view and select Properties from the context
menu. The Phone Book View tab will be activated.
2.
Select the table you want to join by finding it in the Table scroll down list.
In the above screen the Employees table was added to the Contacts view.
3.
Go to the FaxPress field name that you want to map to this Table, and find
the new table field. In our example, the Employee.FirstName and
Employee.LastName were mapped to the appropriate FaxPress fields. As
Creating Local Phone Books
Creating Phone Books
soon as you enter a field from the new table the Table Joins button will
now be activated.
4.
Click on the Table Joins button. The Table Joins dialog box will be
displayed.
5.
Select the tables you want to join in Table 1 and Table 2.
6.
Select the field in Table 1 to join to the field in Table 2 in Field 1 and Field
2.
7.
Click the Add Join button. The view now includes data from two different
tables.
Build Fax Numbers
If your database table contains separate fields for country code, area code and
number you will need to add each of those fields together to create the fax phone
number.
1.
Right click on any phone book view and select Properties from the context
menu. The Phone Book View tab will be activated.
19—19
FaxPress User’s Guide
2.
Click the Build button (to the right of Fax Number). The Build Fax
Number dialog box will be displayed.
3.
To have FaxPress automatically build a fax number, you must map the
following FaxPress fields to the fields in your database table.
•
Table— The table that contains the phone number fields
•
Country Code— The country code to include with the fax number
•
Area Code— The area code to include with the fax number.
•
Fax Number— The base number to include with the fax number.
FaxPress will now automatically generate the your fax numbers.
Creating Personal Phone Book
The process for creating Personal Phone Books is very similar to the process for
creating Local FaxPress Phone Books with some exception:
•
You must be logged into the FaxPress server to access the Personal Phone
Books folder.
•
You can not have multiple Personal Phone Books, however you can have
multiple groups within your Personal Phone Book.
To create personal phone books:
1.
19—20
Open Faxmain and login to your FaxPress server.
Creating Personal Phone Book
Creating Phone Books
2.
Expand the Mailbox Branch and click on Personal Phone Books.
3.
From here you can either create a Group or import a phone list file.
Create a Group
1.
Right click on Personal Phone Books and select Add Group from the
context menu. The Add Group dialog box will be displayed.
Group names can be used when sending faxes to broadcast your fax to any
number of recipients. FaxPress handles this as a single fax and in fact only
creates one raster file. This can significantly reduce the time necessary to
process faxes.
2.
Enter the name you want to give the new phone book in the Group Name
text box. A file will be create with your group name and will be stored in
your user directory on the FaxPress file server.
3.
Click OK to accept the values. A new folder will now be visible under the
Personal Phone Books folder.You now can add individual members to your
group.
19—21
FaxPress User’s Guide
4.
To add members to the group, right click on the Group name and select Add
Member. The Edit Member dialog box will be displayed.
5.
Fill in the Edit Member dialog box with the appropriate information.
You can continue adding individual members, or you can import members into
your phone book from a previously created phone book file. To import members
continue to the next section, Import FaxPress Phone Books.
Import a Phone Book File
As with Local FaxPress Phonebooks, you can import four types of phone book
files:
•
Standard Comma Delimited Files (*.csv)
•
Custom Comma Delimited Files (*.csv)
•
dBase Files (*.dbf)
•
ExportPH Files (*.*)— This is a FaxPress 3.x exported phone book
To import a phone book file:
1.
19—22
Right click the Personal Phone Book folder and select Import and the file
format (i.e., CSV Default Format, CSV Custom Format, ExportPH, dBase)
from the context menu.
Creating Personal Phone Book
Creating Phone Books
a.
If you are importing a CSV default format file, a dBase file, or a
ExportPH file, an Open import file screen will provide you the means
for locating the file.
b.
If you are importing a CSV custom format file, the Import File Field
Assignment dialog box will be displayed before the Open import file
screen.
Note:
2.
The default values in this dialog box are 1 through 7 respectively.
Re-sequence the fields to correspond to your custom file. If you do
not a one of the default fields in your custom file, leave the field
blank. In the figure above, the custom file does not have fields for
Voice number, Comment or Group.
After to have located the file, click OK to import the file. The phone book
number will all be located in the folder ALL (if not Group is defined in your
imported file) or the Group name (defined in the import file) folder under
your new FaxPress Phone Book.
Export FaxPress Phone Books
To export a phonebook:
1.
Open Faxmain and login to a FaxPress server.
19—23
FaxPress User’s Guide
2.
Expand the Mailbox Branch, right click on Personal Phone Books.
3.
Select Export from the context menu. The SaveAs dialog box will be
displayed.
4.
Navigate to a directory, specify a name, and save the file. The file will be
exported as a comma delimited file.
Editing a FaxPress Phonebook
To edit a phonebook file:
1.
Invoke a text editor or spreadsheet program.
2.
Select File / Open from the menu bar.
3.
Locate and open the phonebook.csv file.
If you use a spreadsheet to edit the file, the commas between the quotation marks
in the file are equivalent to the cell separators in your spreadsheet.
If you are using a text editor, you will see lines with the following general format:
“Last Name, First Name”, “Fax #”, “Company”, “Voice #”, “Bill back code”,
“Comment”, “Group”
Elements of this general format are:
19—24
Editing a FaxPress Phonebook
Creating Phone Books
•
Last Name, First Name— The recipient's name as it appears in the Group list.
The entry can contain up to 50 characters. The initial character must be
alphanumeric. You must have an entry in this field.
•
Fax #— The recipient's fax number. You can use numerals, parentheses (), the
dash, and the space only. You must have an entry in this field.
•
Company— Name of the recipient's company. This field is optional.
•
Voice #— The recipient's voice phone number. You can use numerals,
parentheses (), the dash, and the space only. This field is optional.
•
Bill back code— The bill back code that is assigned to the recipient. You can
use up to 26 characters in the bill back code. This field is optional. For more
information refer to "Defining Bill Back Codes" in Chapter 5.
•
Comment— You can have a comment that uses up to 50 characters. This field
is optional.
•
Group— The name of the Group in which the entry is found. Every entry
must have a valid group. This field is mandatory. If you do not want to put
this entry into a specific group, specify <ALL>.
You can edit the file content with a text editor or spreadsheet program, but you
must retain the order of fields format to import the file into your phone book. The
format uses quotation marks and commas to delineate the phone book entries. The
entries are fixed in the format, and you must represent each position, even when
there is no value assigned. The quotation marks and the order are used to represent
the position. For example, Voice # is always in the fourth position in the format.
19—25
FaxPress User’s Guide
19—26
Favorite Documents and Messages 20
What’s In This Chapter
Using Favorite Documents............................................................................ 20-2
Add a Favorite Document ........................................................................ 20-2
Import a Document in Fax Format........................................................... 20-5
Attach a Favorite Document .................................................................... 20-6
Send a Favorite Document as an Email Attachment................................ 20-7
View a Favorite Document ...................................................................... 20-8
Delete a Favorite Document .................................................................... 20-9
Using Favorite Messages............................................................................... 20-9
Add Favorite Message ........................................................................... 20-10
Include a Favorite Message on a Cover Sheet ....................................... 20-11
Rename a Favorite Message .................................................................. 20-11
Delete a Favorite Message ..................................................................... 20-11
View a Favorite Message....................................................................... 20-12
FaxPress User’s Guide
Using Favorite Documents
You can maintain and manage a list of frequently used (“Favorite”) documents
that can be easily accessed and attached to an outgoing fax. Or, you can use the
Favorite Document as the outgoing fax itself.
When you expand your Personal Folders branch in the Faxmain tree, you will
see the Favorite Documents branch. When you right click on the branch (to add
a document) or a document in the branch, you will see a context menu:
The menu choices are:
•
Send... — Attach a favorite document to an outgoing fax.
•
Mail... — Attach a favorite document to an email (MAPI only).
•
View... — View a favorite document.
•
Add... — Add a document to your list.
•
Import in Fax Format... — Import a document in DCX format.
•
Delete from list... — Remove a document from the list.
Add a Favorite Document
You can add a document to your Favorite Documents folder either of two ways:
by accessing the document directly through your Favorite Documents folder, or
by adding any attached document through the Send Fax dialog box.
To directly add a document to your of Favorite Documents folder:
20—2
1.
Right click on the Favorite Documents folder.
2.
Click on Add... from the context menu.
Using Favorite Documents
3.
Favorite Documents and Messages
Select a Favorite Document.
In the Add to Favorite Documents dialog, navigate to the directory and
document that you want to add to the Favorite Documents list. Select the
document.
4.
Click on Add.
The added document will be linked, not copied, to your Favorite Documents
list.
To add document attached to your fax to your list of Favorite Documents:
20—3
FaxPress User’s Guide
1.
2.
Perform the standard procedure for attaching documents to your fax as
detailed in "Attaching Files" in Chapter 8. After you have attached the file,
a screen similar to the following will be displayed.
Highlight the document you have attached in the Attachments List. The
Add to Favorite button will now be activated.
20—4
Using Favorite Documents
3.
Favorite Documents and Messages
Click on the Add to Favorite button. The attached document will now be
displayed in the Favorite Documents List.
Your new favorite document will now also be available through your Favorite
Documents folder.
Import a Document in Fax Format
You may want to import a document in fax format if the document is frequently
faxed. This way the conversion from native (e.g. MS-Word) to fax format only
occurs once rather than each time, speeding up your process time.
To import a document in DCX or TIFF, you must have the application used to
launch it, because it will be opened and then saved in either format. For example,
if you want to import a Word document, you must have Word installed.
To import a document in DCX format and add it to you Favorite Documents list
do the following.
20—5
FaxPress User’s Guide
1.
Right click on the Favorite Documents branch.
2.
On the context menu, click on Import in Fax Format.
3.
In the Import in Fax Format dialog, navigate to the directory and document
that you want to add to the Favorite Documents list. Select the document.
4.
Click on the Import button to start the conversion process. The application
associated with the document type you selected will open and print the
document in the DCX file format using the installed FaxPress DCX driver.
As the document is being converted, you will see:
The document, with a .dcx suffix, will be saved in your Favorite Documents
folder and appear in your Favorite Documents list.
Attach a Favorite Document
To attach a Favorite Document to an outgoing fax:
20—6
Using Favorite Documents
Favorite Documents and Messages
1.
Right click on a document in your Favorite Documents list.
2.
On the context menu, click on Send....
3.
In the Send Fax dialog box, click the Attachments tab.
Your selected document will appear in the Attachments List.
4.
Set any other parameters for the fax and click the Send Fax button.
Send a Favorite Document as an Email Attachment
To send a Favorite Document as an email attachment:
1.
Right click on a document in your Favorite Documents list.
20—7
FaxPress User’s Guide
2.
On the context menu, click Mail....
You email program will open and the attachment will be in the email message
area.
3.
Enter email details and send the e-mail.
If your email client is not running, the Choose Profile dialog will open, and
you will need to choose a profile. (Do not select the New... button in the
Choose Profile dialog, because it is used to set up a new profile and should
only be used by your email system administrator.)
View a Favorite Document
To view a Favorite Document:
1.
Right click on a document in your Favorite Documents list.
2.
On the context menu, click on View....
Your default word processor will open and display the selected document.
20—8
Using Favorite Messages
Favorite Documents and Messages
Delete a Favorite Document
To remove a document from the Favorite Documents list:
1.
Right click on a document in your Favorite Documents list.
2.
On the context menu, click on Delete.
Deleting an item from your Favorite Documents list (except for a document
imported in DCX format) does not delete the item from original location — you
are merely deleting a link to it.
Using Favorite Messages
A ‘Message’ is a text message that you can send in the ‘Note’ field on your fax
cover page. You can maintain and manage a list of frequently used “Favorite”
messages that can be easily accessed and attached to an outgoing fax.
When you expand your Personal Folders branch in the Faxmain tree, you will
see the Favorite Messages branch. When you right click on the branch (to add a
message) or a message in the branch, you will see a context menu:
The menu choices are:
•
Send... — Attach a favorite message to an outgoing fax.
•
Rename... — Rename a favorite message.
•
Add... — Add a message to your list.
•
Delete — Remove a message from the list.
•
Properties — View a message.
20—9
FaxPress User’s Guide
Add Favorite Message
To add a message to the list of Favorite Messages:
1.
Right click on the Favorite Messages branch.
2.
On the context menu, click on Add... to display the Cover Page Message
dialog.
3.
Type the new message in the message area of the dialog box and then click
OK.
4.
Enter a message name and click OK.
The new message will be saved in your Favorite Messages folder and appear on
your Favorite Messages list.
20—10
Using Favorite Messages
Favorite Documents and Messages
Include a Favorite Message on a Cover Sheet
To include a favorite message in an outgoing fax cover sheet:
1.
Right click on a Favorite Message, then from the context menu, click on
Send... to open the Send Fax dialog.
2.
The name of the selected message will appear in the Favorite Message
name box and the text will appear in the message area.
3.
To select a different favorite message, click on the Favorite Message name
box's drop down list to choose another message from the list.
4.
To send the fax, click on the Send Fax button.
Rename a Favorite Message
To change the name of a Favorite Message in the list:
1.
Right click on a Favorite Message.
2.
On the context menu, click on Rename to open the Message Name dialog.
3.
Enter a new name and click OK.
Delete a Favorite Message
To delete a message from the Favorite Messages list:
1.
Right click on a Favorite Message.
2.
On the context menu, click Delete.
20—11
FaxPress User’s Guide
View a Favorite Message
To view a favorite message:
20—12
1.
Right click on a Favorite Message.
2.
On the context menu, click Properties....
Merging Faxes
21
What’s In This Chapter
Overview ........................................................................................................ 21-2
Preparing for Installation............................................................................. 21-3
Installing FaxMerge ...................................................................................... 21-4
Creating a Main Document .......................................................................... 21-5
Attaching a Data Source ............................................................................... 21-8
Inserting Merge Fields ................................................................................ 21-11
Faxing the Merged Documents .................................................................. 21-13
FaxPress User’s Guide
Overview
You can create a template document that contains fields for individual recipient’s
and fax number, and merge the template with text documents or “data sources” to
fax a personalized letter to a large number of people. This is called Fax Merging.
If you know how to use Word’s Mail Merge, Fax Merging is easy; only requiring
two additional steps as shown in Table 21–1. But, for your convenience we have
included detailed steps for the complete process. The steps involved in Merging
Faxes are:
Table 21–1
FaxMerge Process
Step
#
Operation
Operation
Type
1
Install FaxMerge
FaxPress
2
Create a Main document
MailMerge
5
Attach the data source to your document.
MailMerge
6
Insert the fields into the Main document.
MailMerge
8
Fax merged documents
FaxPress
Note:
If you don't already know how to mail merge, you might want to use
the Word wizard to learn how.
If you know how to Mail Merge, then you really only need to look at the FaxPress
specific steps, which are marked with the identifier FaxPress. Other steps are
marked with MailMerge.)
Terms and Concepts
Following are explanations of some key terms and concepts.
•
21—2
Data model— Our data model is a table with rows and columns. A column
has a name and defines a category of data. A row contains values for each
Preparing for Installation
Merging Faxes
column. For example, there might be columns named “FirstName” and
“FaxNumber” and rows with values such as “Angelica” and “530-555-1212”.
•
Data source— We use the general term “data source” rather than “database,”
because the values might be stored in an ASCII file, another Word document,
an Excel spreadsheet, a FaxPress phonebook, or a dBase database.
•
Field— When you create a Word document, a “field” is a substitution variable
that you insert into a document.
•
Record— A “record” is either a database entry or a line in a text or document
file that contains values for the “fields” that you will use in a Word document.
•
Merged document— “Merged documents” are the end result and are what is
actually faxed out. In other words, documents have “fields,” data sources
have “records”, and when you fax merge, “record” values are placed in
“fields” to create multiple “merged documents.”
Preparing for Installation
ODBC Drivers
For merge operations to multiple recipients, the 32-bit ODBC with the appropriate
drivers needs to be installed and configured on your system. If ODBC is not
installed on your system or the appropriate drivers are not available in the Drivers
tab, then you need to install these options. For your convenience, step by step
instructions for doing this are available in Appendix A, Appendix.
The following lists some common data sources and the ODBC drivers that are
required.
Table 21–2
ODBC Drivers
Data Source
Driver
Excel Spreadsheet
Microsoft Excel Driver
Access Database
Microsoft Access Driver
Text or CSV file
Microsoft Text Driver
dBase file
Microsoft dBase Driver
21—3
FaxPress User’s Guide
Installing FaxMerge
Installation for mail merge functionality is provided by a Word document.
1.
Locate the Install FaxMerge document in the Microsoft Office Support
folder in your FaxPress Program folder. For the default installation, this
would be:
Start\Programs\FaxPress\Microsoft Office Support\Install FaxMerge
2.
Click on Install FaxMerge and a word doc will open with 2 buttons, Install
FaxPress FaxMerge Link, and Uninstall FaxPress FaxMerge Link.
3.
Click on the install button. The document contains two buttons: Install
FaxPress Mail Merge Link and Uninstall FaxPress Mail Merge Link.
Click on the Install button to install mail merge faxing.
4.
At the completion the following message will be displayed.
Click OK to complete.
21—4
Creating a Main Document
Merging Faxes
Uninstall Mail Merge
To uninstall, do the following.
1.
Reopen Install FaxMerge document.
2.
Click on the Uninstall FaxMerge Link button.
Creating a Main Document
MS-Word uses the term Main document to describe what can be called a template
or boiler plate. This is the document that is merge with a database or file to create
multiple, personalized documents or faxes.
To create a Main document, use the Mail Merge function in Word.
1.
Open MS-Word and select Mail Merge from the Tools pull down menu in
the menu bar. This will bring up Mail Merge Helper dialog box.
21—5
FaxPress User’s Guide
2.
In section 1, Main document, click on the Create button and a menu
appears below the button.
3.
Select Form Letters… from the menu.
The following dialog appears:
4.
Select Active Window to make the current document a merge template.
Or, if there are no documents opened or a new merge template is desired,
select New Main Document. This will create a new blank template.
21—6
Creating a Main Document
Merging Faxes
5.
To edit your new main document or your active window, select Edit form
the Mail Merge Helper dialog box. The appearance of your MS-Word tool
bar will now include new Mail Merge icons.
6.
Compose the document by entering text as desired.
Note:
Merged documents are faxed without a cover page, so if you want
one, then set up the first page of the document to be a cover page.
21—7
FaxPress User’s Guide
Attaching a Data Source
The most common usage for faxing merged document will be to create a Main
Document (or template/boilerplate), attach at contact list or phonebook, insert the
attached documents fields into your Main Document, compose the fax greeting or
body, and send the faxes addressed to each of the recipients.
Note:
Please remember that your data source must contain a field with
the fax number for each recipient.
Attach a Data Source to the Template
1.
21—8
From Mail Merge Helper, click on 2 Get Data. You will see the drop-down
menu:
Attaching a Data Source
2.
Merging Faxes
Select Open Data Source. The Open Data Source navigation dialog will
allow you to connect to an existing data source.
A data source can be any of the following types of files: Word document,
Excel spreadsheet, Access Database, dBase file, Text or CSV file, or MS
Query file.
3.
Change Files of Type to list the desired data source file, then navigate to
and select the desired data source file.
Other data sources can be accessed using MS Query provided that the ODBC
driver for that data source is installed.
21—9
FaxPress User’s Guide
4.
If you have mapped a database, a dialog box will ask you to select a Table
or Query. In this example, we have attached an Access database, so the
Microsoft Access dialog box is displayed.
Select a Table or Query.
Word will now try to import the table fields into your Main document. But because
we have not inserted the fields yet, the following message will be displayed
Now we edit the Main document to insert fields.
21—10
Inserting Merge Fields
Merging Faxes
Inserting Merge Fields
1.
From your Main document, select Mail Merge from the Tools pull down
menu. The Mail Merge Helper will again be displayed.
2.
In section 1, Main document, now select Edit.
3.
A drop down list will display all the available Main documents. Select the
one you just created. Two new fields are now displayed in your Word
toolbar, Insert Merge Field and Insert Word Field.
4.
To insert the fields from your attached filed or database into your document,
put your cursor where you want the field located in your Main document
and click on the Insert Merge Field button. You will see a drop-down list of
available fields.
The fields that appear in the drop down list will reflect the fields defined in
your data source.
5.
Click on the desired field. The field will be inserted into you document and
look like this:
<<FirstName>>
6.
Repeat until done.
7.
Preview results. You can use the << >> button on the toolbar to preview the
merged data. It will replace all merge fields with the data from the records.
21—11
FaxPress User’s Guide
The following is a sample template letter with field codes inserted.
Castelle
3255-3 Scott Blvd.
Santa Clara, CA 95054-3013
(408) 496-0474
<<FirstName>><<LastName>>
<<CompanyName>>
<<Address>>
<<City>>, <<StateOrProvince>> <<PostalCode>>
Dear <<FirstName>>,
Thank you for your interest in Castelle’s products. …
…
Yours truly,
John Smith
21—12
Faxing the Merged Documents
Merging Faxes
Faxing the Merged Documents
To fax your merged document, you select FaxPress Mail Merge from the Tools
menu item.
When you start the process of faxing, you will be first asked to map data source
names to FaxPress names. When you have finished the mapping, faxing be
automatically started.
To perform the mapping and fax your merged documents, do the following.
1.
Open the document that you have prepared for mail merging with the
attached a data source and embedded data source fields.
2.
From the Word Tools menu, select the FaxPress Mail Merge menu item.
FaxPress will first check for the presence of your data source and required
program files. If needed elements cannot be found, then the process will exit.
3.
Word will prompt you to save your document, if it needs saving, and then
minimize itself. The FaxPress Fields Map dialog will then be displayed.
21—13
FaxPress User’s Guide
4.
To create a mapping, select a pair of fields and click on Map >>.
The Mail Merge Fields drop-down list contains the field names that are
present in the data source.
The FaxPress Fields drop-down list contains fields that FaxPress
understands.
For each mapping, choose a pair from the drop-down lists and click on
Map >>.
The list box on the right will keep track of your mappings.
Each time you map a field, its name will be deleted from its list box and added
back when the mapping is deleted.
The FaxPress field Fax Number must be mapped.
5.
To delete a mapping, select a mapping and click on << Delete.
6.
When done, click on OK start the merging and faxing or Cancel to abort.
7.
The FaxPress Login maybe displayed if you have not configured FaxPress
for automatic login. You can select Configure FaxPress Login from the
Tools menu item in MS-Word to configure your login. If you want to
automate the login process, simply click the box for Use these settings
next time.
What Happens
When you press the OK button, the macros do the following.
•
Retrieve information from the data source for each field in the template
document.
•
Print each merged document to the Castelle DCX Driver.
•
Submit each merged document to FaxPress for faxing.
The time to merge and print each document may vary depending on how many
merge fields exist in the document, how large the document is, and how many
records are in the data source.
21—14
Connecting to GoldMine
22
What’s In This Chapter
FaxPress and GoldMine Integration ........................................................... 22-2
Preparing for Installation............................................................................. 22-3
Installing the Goldmine to MS-Word Link................................................. 22-3
Installing the Goldmine to FaxPress Link .................................................. 22-4
Faxing with the GoldMine/FaxPress Connection....................................... 22-5
Creating Templates ....................................................................................... 22-9
Updating GoldMine Templates.................................................................. 22-12
Configuring FaxPress Login ...................................................................... 22-13
Automated Faxing ....................................................................................... 22-14
FaxPress User’s Guide
FaxPress and GoldMine Integration
FaxPress now supports GoldMine 5.x and FrontOffice 2000. FaxPress’
integration with Goldmine enables:
22—2
•
users to broadcast customized faxes to a GoldMine contact list, with full
support of GoldMine fax merge.
•
easy broadcasting of fixed documents to GoldMine contacts
•
quick faxing to a GoldMine contact without needing entry of destination
fax number, name etc
Preparing for Installation
Connecting to GoldMine
Preparing for Installation
ODBC Drivers
For merge operations to multiple recipients, 32-bit ODBC needs to be installed on
the system. The Microsoft dBase driver for ODBC must be installed and made
available as a data source. If ODBC is not installed on your system or the
Microsoft dBase Driver is not available in the Drivers tab, then you need to install
these options. For your convenience, step by step instructions for doing this are
available in Appendix A, 32-Bit ODBC Data Resources.
Before Installing
1.
Confirm FaxPress client software is installed. To use a GoldMine/FaxPress
connection, you must be running FaxPress 6.0 or above client software.
2.
Start GoldMine.
3.
Start Microsoft Word.
4.
Exit all other programs.
You must exit all other programs before starting the FaxPress-GoldMine
installation.
Installing the Goldmine to MS-Word Link
To install the Goldmine to Microsoft Word link for managing contact information
with Word documents.
1.
Click on the Install Goldmine Faxing MS-Word document located in the
Goldmine Support folder in your FaxPress Program Start menu.
Note:
2.
If a warning about macros appears, choose Enable Macros.
Click the Install GoldMine Link button to install the FaxPress/GoldMine
link.
22—3
FaxPress User’s Guide
3.
Close the document to make the changes take effect.
The connection between FaxPress and GoldMine has now been established.
Uninstalling
To uninstall the Goldmine to MS-Word link:
1.
Click on the Install Goldmine Faxing MS-Word document located in the
Goldmine Support folder in your FaxPress Program Start menu.
Note:
If a warning about macros appears, choose Enable Macros.
2.
Click the Uninstall GoldMine Link button to remove the
FaxPress/GoldMine link.
3.
Close the document and restart GoldMine.
The connection between FaxPress and GoldMine has now been broken.
Installing the Goldmine to FaxPress Link
The Goldmine to FaxPress Link creates a menu item in Goldmine File menu that
connects to FaxPress. The menu item, Fax via FaxPress, launches the FaxPress
Send Fax dialog box and automatically connects it to your Goldmine Contacts
List.
To install the Goldmine to FaxPress link.
1.
Click on the Install Goldmine Faxing MS-Word document located in the
Goldmine Support folder in your FaxPress Program Start menu.
Note:
22—4
If a warning about macros appears, choose Enable Macros.
2.
Click the Install GoldMine to FaxPress Menu button to install the
FaxPress/GoldMine link.
3.
Close the document and restart GoldMine to make the changes take effect.
Faxing with the GoldMine/FaxPress Connection
Connecting to GoldMine
The connection between FaxPress and GoldMine has now been established.
Uninstalling
To uninstall the Goldmine to MS-Word link:
1.
Click on the Install Goldmine Faxing MS-Word document located in the
Goldmine Support folder in your FaxPress Program Start menu.
Note:
If a warning about macros appears, choose Enable Macros.
2.
Click the Uninstall GoldMine to FaxPress Menu button to remove the
FaxPress/GoldMine link.
3.
Close the document and restart GoldMine.
The connection between FaxPress and GoldMine has now been broken.
Faxing with the GoldMine/FaxPress Connection
There are several ways to fax with the link between FaxPress and Goldmine. From
within GoldMine, users can send faxes through Faxmain or can use the merge
mechanism provided by GoldMine. Additionally, automated processes can be set
up.
Faxing with the FaxPress Link
To Fax from Goldmine via FaxPress link:
1.
Open Goldmine and activate the contacts or groups that you want to send a
fax.
22—5
FaxPress User’s Guide
2.
Select the Fax via FaxPress... from the File pull down menu in your
Goldmine menu bar. The Goldmine Record Range screen will be
displayed.
3.
Select Current Contact to send the fax to the activated contact or All
Contacts to send to all.
Note:
4.
If you have not activated a contact or group this fax will be sent to
all contacts in the database.
If you have not activated automatic login to Faxmain, the FaxPress Login
screen will be displayed. Fill in your user name and password.
The Send Fax dialog box will pop up with the recipient information from the
GoldMine database already embedded.
22—6
Faxing with the GoldMine/FaxPress Connection
Connecting to GoldMine
5.
Complete the dialog box by adding a message, choosing a cover page or
adding any attachments.
6.
Once the dialog box is filled out, click on Send Fax.
The fax will be sent to the contact or list of contacts specified.
Entries will be added to each contacts history list indicating that the fax has
been sent, subject of the fax, and list of any attachments to the fax.
You will be able to obtain status information about the fax transmission by
checking the Outgoing Faxes or Notices list in FaxMain. See "Notices and Alerts"
in Chapter 13.
Faxing Merged Forms
With the merge feature, you can add specific information to documents that you
use frequently. Merging GoldMine data and a template document will allow you
to create customized faxes specifically made for that contact.
22—7
FaxPress User’s Guide
1.
Select the Merge Forms from the File pull down menu in your Goldmine
menu bar.
2.
Choose a document/form to merge. Any template may be used from any
user in the Forms of User combo box as long as the Documents option is
selected.
3.
Specify record selection from the following options:
•
•
This Contact —will fax to the currently active contact record,
All Contacts— will fax to the currently active filtered list or group of
contacts
•
Forward to Last— will fax to all contacts starting from the current active
record, taking all filters and groups into account.
•
Primary— will only fax to the primary contact of the record and selecting
•
Additional— will fax to the additional contacts of the same record.
If both Primary and Additional are selected, then faxes will be generated for
the Primary and Additional contacts.
4.
Click on FAX at the bottom of the screen.
The FaxPress/GoldMine connection software will automatically launch MSWord, merge information into the document and then send the document to all the
22—8
Creating Templates
Connecting to GoldMine
contacts specified. After the fax has been submitted to the FaxPress, a message
appears notifying the user that the fax has been sent successfully.
Entries will be added to each contacts history list indicating that the fax has
been sent and the name of the merged document.
Merging from MS Word
Faxing to a Single Contact from MS Word
The user can fax the current active MS Word document to the current contact in
GoldMine. The document may or may not be a GoldMine template.
1.
Make sure that the GoldMine contact who is to receive the fax is the current
contact in GoldMine. This means that the contact record is on top and is
being viewed.
2.
In Word, select Send to Contact via Fax… from the File pull down menu.
This will fax the document to the current contact using the name, company,
and fax information. The FaxPress login dialog box may appear depending on
the settings that were set using the FaxPress Login menu.
Creating Templates
You can create a GoldMine template, insert information into it from a GoldMine
contact database, and send the merged documents as faxes.
To create a template, follow the steps below. For more information about creating
templates, see the appropriate section in the GoldMine manual.
1.
Create a new Microsoft Word document and include all the text and
graphics that will stay the same for each version of the merged document.
22—9
FaxPress User’s Guide
2.
Place your cursor at the desired location and then, from the MS-Word
Insert menu, select GoldMine Field... The Insert GoldMine DDE Field
dialog will appear.
3.
Select the desired field names from the list and then press the OK button.
The selected fields will be placed into the template document.
4.
Repeat insertions as needed to add additional Goldmine fields.
5.
Save the template by selecting File / SaveAs GoldMine Template....
If the document has not been previously saved, you will be prompted for a
document title file name to save it. This will make an entry in the GoldMine
Merge Forms window.
22—10
Creating Templates
6.
Connecting to GoldMine
The template document you just created will now be available from your
list of merge forms.
To verify that this operation was successful, select Merge Forms... from
your GoldMine File menu to bring up the Merge Forms dialog:
The forms will be listed number the name of the current Goldmine user
displayed in the Forms of User scroll down list.
7.
Selecting the document and clicking the Properties button will bring up
the properties of the document:
•
Form Name field should contain the title of the document
22—11
FaxPress User’s Guide
•
Template Filename field should contain the full path to the Word
document
•
App Identifier field should contain “Word.Document.8”
•
DDE Command field should contain “[GoldMineLink()].” If these settings are not correct, a GoldMine merge using this template will not
work.
Updating GoldMine Templates
If you change a GoldMine template document, you must also update the
GoldMine form record for the template.
A form record contains a list of all the merge fields that are in the template, so that
GoldMine can export a dBase file containing the correct fields for merging
purposes.
If a document is changed and the form record is not updated, fax merge may not
work correctly because the exported file may or may not contain the necessary
fields that are required for the merge.
There are several ways to update the form record corresponding to the template.
Updating Templates from within MS Word
1.
From within Word, open the template.
2.
Make the changes: adding and/or deleting GoldMine fields as necessary.
3.
From the File menu, select Update GoldMine Template....
This will update the form record automatically and save the changes to the
template.
Updating Templates from within GoldMine
1.
22—12
From the GoldMine File menu, select Merge Forms... to bring up the
Merge Forms dialog.
Configuring FaxPress Login
2.
Connecting to GoldMine
Select the template that needs to be updated and then click on the
Properties button to bring up the Form Template Properties dialog.
3.
Click on the Edit button. This will launch Word with the template for
editing.
4.
Make the changes: adding and/or deleting GoldMine fields as necessary.
5.
From the File menu, select Update GoldMine Template.... This will update
the form record automatically and save the changes to the template.
Configuring FaxPress Login
To automate faxing, you can configure the login parameters that will be used to
send the faxes to FaxPress.
To configure FaxPress Login, do the following.
1.
From Word, select the Tools menu and then select Configure FaxPress
Login.... This will bring up the FaxPress Server Login dialog box.
2.
Specify the Server name, User Name and Password. You may need to
check with your system administrator to determine these items.
3.
Check the Use These Settings Next Time check box to retain these
settings.
4.
Click on the Login button
The next time you fax something from within GoldMine, these server settings will
be applied.
22—13
FaxPress User’s Guide
Automated Faxing
You can also send faxes to GoldMine contacts using GoldMine Automated
Processes, if you have previously set up the process to fax a document using the
Print Form option.
When a fax is sent using Automated Faxing, an entry is made to the contact
history.
For more information about Automated Faxing, see your GoldMine manual.
22—14
Part 3
Appendices
FaxPress Guide
Appendix
32 Bit ODBC Data Sources
A
FaxPress Guide
Installing 32 Bit ODBC and DAO
If you do not have a 32 Bit ODBC installed on your machine, you can install it
from your FaxPress CD.
To install a 32 Bit ODBC:
1.
If you are installing the 32 Bit ODBC on a Windows 95 operating system,
you must first install the distributed component object model. Go to the
\MICROSOFT directory on your FaxPress installation CD and click on
DCOM95.EXE. For all other Windows operating systems, proceed to step 2.
2.
To install the 32 Bit ODBC, click on MDAC_TYP.EXE. The 32 Bit ODBC
will be installed on your desk top.
Microsoft's Data Access Objects (DAO) 3.6
DAO contains the library files for Microsoft's Jet database engine, which is used
to access Microsoft Access databases.
DAO is already installed on Windows ME, Windows 2000 Professional and 2000
server, and may already be installed on your workstation or server. You may need
to verify if it is already installed. Do this by running a Search on the entire PC
where the Fax Archive is being installed, search for "DAO*. *"
DAO 3.6 is provided on the FaxPress installation CD, in the Microsoft folder in
the ODBC installation folder. You will only need to install the ODBC if it
doesn't already exist.
Follow these instructions for the installation of the ODBC, DAO drivers & Jet 4.0.
Windows 95 only
DCOM should be installed on Windows 95 systems that do not have DCOM
installed. DCOM is distributed in a file called Dcom95.exe. This is provided on
the FaxPress installation CD in the \Microsoft\odbc installation folder.
A reboot of the system is required after installing Dcom95.exe.
DCOM is pre-installed on Windows 98 and Windows NT systems.
A—2
Installing ODBC Drivers
Appendix A: 32 Bit ODBC Data Sources
Windows 95, 98 and NT 4.0
Run Mdac_typ25.exe, this is provided on the FaxPress installation CD in the
\Microsoft\odbc installation directory
For NT 4.0 prior to SP3 run Mdac_typ21.exe.
Registering DAO 3.6
Create a directory with the name DAO under System Drive:\Program
Files\Common Files\Microsoft Shared and copy Dao360.dll to this directory. This
.dll is provided on the FaxPress installation CD in the \Microsoft\odbc installation
directory.
In addition, Dao360.dll must be registered as a COM DLL. This can be
accomplished by using the Regsvr32.EXE utility, e.g.
RegSvr32 "C:\Program Files\Common Files\Microsoft Shared\DAO\Dao360.dll"
Installing ODBC Drivers
Check Status
To check that the required ODBC driver is installed, double-check on the ODBC
icon and inspecting the ODBC Data Source Administrator screen. Select the
Drivers tab and make sure that the driver corresponding to the data source you will
be using is available.
A—3
FaxPress Guide
Add a New Data Source Name
If your data source is a dBase file, then the Microsoft dBase driver must be
available as a User DSN or a System DSN. To check if the dBase driver is
available as a data source, do the following.
1.
Select the User DSN or System DSN tab.
A list with two columns is displayed, a Name column and a Driver column.
2.
Check to see if the .dbf driver is there.
Look through the list and make sure that the Driver column contains the
Microsoft dBase Driver(*.dbf). The corresponding Name does not matter.
If the driver is not present, look in the other tab (in the above case, check the
System DSN tab).
Where the dBase driver is located does not matter as long as it is present in
one of these locations. The only difference is that the User DSN can only be
seen by the current user that is logged into the workstation, while the System
DSN can be seen by all users who login to the same workstation.
3.
Install the dBase driver if needed.
If you need the dBase driver, you can add it by doing the following.
A—4
Installing ODBC Drivers
Appendix A: 32 Bit ODBC Data Sources
a.
Click on Add.
b.
Select either the User DSN or System DSN tab and click on the Add
button. The Create New Data Source dialog will be displayed.
The list of available drivers depends on the drivers that are currently
installed on the system.
4.
c.
Select the dBase driver.
d.
Select the Microsoft dBase Driver (*.dbf).
Click on Finish.
Click on the Finish button. The ODBC dBase Setup dialog will appear.
A—5
FaxPress Guide
5.
Enter a Name and, optionally, a Description.
Data Source Name— Enter a name for Data Source Name field. This is
required.
Description— Enter a description for the Description field. This is optional.
Version— Make sure that the Version corresponds to the version of the dBase
file or higher.
6.
When done, click OK.
Connecting FaxPress Archive to a DSN
When you configure FaxPress Archive with an MS-SQL database, you will be
asked to provide a DSN. If you click on the Browse button, you will be walked
through the following screens.
1.
The Data Source Administrator screen is displayed.
Note:
A—6
Do not select a DSN that points to a file based database (e.g.
Access, Dbase, Paradox, Excel, CSV, FoxPro, etc.…).
Connecting FaxPress Archive to a DSN
Appendix A: 32 Bit ODBC Data Sources
2.
Select the Machine Data Source tab. This screen lists all the user and
system DSNs installed on your workstation.
3.
Select a data source that connects to the database server and that is defined
as a System DSN type. The type of each DSN is denoted in the middle
column by User or System.
•
A User DSN is a DSN that can only be seen by the login user that created
it.
•
A System DSN is a DSN that is visible to all users on that workstation
no matter who created it.
Note:
The login account to the database server must have permission to
create tables in the database. The same DSN will be used by the
archive program to connect to the database to enter data. If the
appropriate DSN is not present, follow the instruction in
"Connecting FaxPress Archive to a DSN" on page -6.
To create a new DSN to a MS SQL server, perform the following steps:
1.
Click on the New button in the Machine Data Source tab shown in step 2,
on page A-7. A new wizard will be launched to walk you through the
A—7
FaxPress Guide
process of creating a DSN. The first page will ask what type of DSN to
create.
Select System Data Source.
2.
The next screen will display the list of available ODBC drivers that have
been installed on your system.
Select SQL Server.
3.
A—8
The next screen will display the new data source. Click Finish to complete
this portion and proceed to configuring the connection.
Connecting FaxPress Archive to a DSN
4.
Appendix A: 32 Bit ODBC Data Sources
The next wizard prompts you to configure the connect string.
For the new DSN, enter:
•
Name: The name of your new DSN.
•
Description: This is an optional field.
•
Server: The is the name of the SQL server.
Click Next>.
5.
Select either Windows NT or SQL server authentication method from the
next screen.
A—9
FaxPress Guide
Note:
The method you select will depend on how the database is
configure. Check with your Database Administrator if you are not
sure.
•
With Windows NT authorization using the network login. If the
authentication is by NT, then the current user logged into the workstation
is used for authentication and the UserID and password fields near the
bottom of this screen are grayed out.
•
With SQL Server authorization using a loginID and password
entered by the user. If the authentication is by SQL server, then a user
name and password are required in the text boxes near the bottom of this
screen.
Note:
•
6.
In either case, the user must have permission to create tables on the
database.
Click the Client Configuration button and select the appropriate
protocol.
The next screen allows you to specify the default database and when to
cleanup temporary stored procedures.
a.
Select Change the Default Database To and select the your database
from the scroll down list.
For the rest of the setting in this dialog box, we recommend that you select
the following:
A—10
Connecting FaxPress Archive to a DSN
7.
Appendix A: 32 Bit ODBC Data Sources
b.
Select Create temporary stored procedures for prepared SQL
statements and drop the stored procedures.
–
Select When you disconnect and as appropriate while you are connected.
c.
Select Use ANSI quoted identifiers.
d.
Select Use ANSI nulls, paddings, and warnings.
The next screen allows you to specify options for logging in and regional
settings. Specify these as appropriate for your environment. They do not
affect the operations of FaxPress Archive.
Select Finish.
8.
Select the Test Data Source button to test the connection to the data source.
Note:
We recommend that you test your new data source to ensure a
successful connection.
A—11
FaxPress Guide
Connect to Phone books
A—12
1.
From the ODBC Select Data Source dialog box, type in the data source path
and name:
2.
This is a standard Microsoft ODBC dialog box that allows you to specify
the data base you would like to connect to. If the data source is already
defined, select it. Otherwise, click ‘New’ to create a new data source
connection:
Connecting FaxPress Archive to a DSN
3.
Appendix A: 32 Bit ODBC Data Sources
Select System Data Source’ because this data source must be visible to all
FaxPress users. You are then prompted to select the ODBC driver
:
4.
The ODBC connection wizard will then present a summary of what you
have selected and proceed to create the connection.
A—13
FaxPress Guide
5.
A—14
If for example you have selected a SQL server, the following dialog would
come up to allow you to specify a name and description for this data base,
and the name of the SQL server to connect to:
Appendix
Troubleshooting
B
FaxPress Guide
Online Troubleshooting Help
FaxPress troubleshooting help is also available on Castelle’s web site.
Vist Castelle Technical Support’s tech notes and Frequently Asked Questions at:
http://www.castelle.com/support/documentation/tech.htm
and:
http://www.castelle.com/support/documentation/faq.htm
Powering Up the FaxPress
When you connect the new FaxPress to the network and power the unit on, the red
and green LEDs on the front panel flash for 15 to 30 seconds during the boot cycle.
The red LED stays on after the boot cycle completes. This indicates that it has
powered up successfully. If the LED marked “10BT” or the LED marked
“100BT” turns on, it indicates that the unit is connected to the network. You
should also see the appropriate green light on the hub.
Changing the FaxPress Fuse
For SBE, 2500, 5000, 7000 and 7500 units.
Warning: Disconnect the power cable before you remove the fuse holder in the
power switch
To check and replace the fuse:
B—2
1.
Switch-off the FaxPress SBE, 2500, 5000, 7000 or 7500 power switch and
remove the power cord.
2.
Locate the fuse housing between the power cable connector and the switch.
Use a flat blade screwdriver or similar device to pry the housing out.
Interpreting LEDs
Appendix B: Troubleshooting
3.
Check the fuse. If the filament is broken, replace the fuse. If the fuse is
cloudy or discolored, replace the fuse.
Note:
A spare fuse is provided by the factory in the tray in the middle of
the fuse holder. The FaxPress uses a 2 Amp, 250 Volt, SLO-BLO
fuse.
4.
Replace the fuse housing.
5.
Reconnect the power cord and power up the unit.
Interpreting LEDs
The Red Alert LED and the Green LED Do Not Flash after
Powering Up
You have plugged the power cable into the FaxPress but the LEDs do not flash:
•
Check the power cable connection. Make sure the cable is plugged into a
working power outlet.
•
Check the power supply. If you have a FaxPress 2500 or SBE, make sure that
you use the power supply that comes with the unit.
•
Check the power switch. If you have a FaxPress 5000, 7000, or 7500, make
sure the power switch is turned on.
•
Check the network connection. Connect the unit to a working network and the
“10BT” or “100BT” LED should turn on. If the LED is not on, try a different
power outlet.
•
Check to see if the FaxPress 5000, 7000 or 7500 fan is working. If the fan is
not working, try a different power outlet.
•
Check the 5000, 7000 or 7500 fuse. Disconnect power cord and check the
fuse in the unit’s power switch. Replace if necessary.
B—3
FaxPress Guide
Red Alert LED is On and Green LED is Off
If the red alert LED remains on (and the green LED is off), this indicates that the
FaxPress cannot connect to the file server.
•
Check whether the FaxPress is logged into its master file server. After it
completes its start up processing, during which red and green LEDs cycle on
and off for 10 to 30 seconds, the FaxPress should have at least one active
connection to its master file server.
•
Check the FaxPress’ physical connection to its network segment. Faulty
cables and poor cable connections can cause this condition.
•
From the same segment where the FaxPress is installed, check that you can
log onto the FaxPress master file server as the FaxPress serial number user.
Check that there are no restrictions on the FaxPress serial number user
account on the master file server. Ensure that no login script has been added
to this account, and no environment variables or parameter settings have been
altered. If you cannot log on, check for the existence of the FaxPress serial
number user and check the validity of any password assigned to the user. Also
check that the FaxPress serial number user has all rights to access its
installation directory (typically named \Castelle\serial number).
•
Connect the FaxPress to a network connection where a workstation has a
good connection.
•
Verify that the FaxPress network segment has full duplex access to the master
file server.
•
For FaxPress SBE, 2500, 5000, 7000 or 7500, connect a laser printer to the
parallel port. Wait approximately five minutes to check whether a diagnostic
report prints. For assistance with the report, call Castelle Technical Support.
•
If the FaxPress has just been installed, or if the contents of its installation
directory has been manually modified or overwritten, try reinstalling the
FaxPress server software.
Both LEDs Go Out During the Boot Sequence
Indicates that FaxPress failed to properly load its executables from its file server:
•
B—4
Try connecting FaxPress to an alternate power outlet.
Interpreting LEDs
Appendix B: Troubleshooting
•
If the fax has just been installed, or if the content of its installation directory
has been manually modified or overwritten, try reinstalling the FaxPress
server software.
Neither 10BT nor 100BT LED Turns On
The unit powers up but the network LED does not turn on:
•
Check the network connection. Make sure the network cable is connected to
the unit and its hub. Use only one of the connectors to connect the FaxPress
to your network.
•
Check the network cable. Try another network cable.
•
Check the network connection. Try connecting the FaxPress to another
location on the network.
•
Verify the transmission speed. Make sure the network is configured for
10BASE-T or 100BASE-T.
Red Alert LED and Green LED Are Both Off
If both front panel indicator lights are off, the FaxPress is probably not receiving
sufficient power.
•
Check whether the LEDs are all off.
•
Confirm that the FaxPress is connected to a working power outlet. Verify that
the power cable attached to the back of the FaxPress unit is properly inserted
into the power outlet.
•
If you have a FaxPress SBE, 2500, 5000, 7000 or 7500 ensure that the power
switch is turned on. Check if you can detect any movement of air out of the
fan vent to indicate that the fan is running and the unit is receiving power. If
power should be on and the fan is not operating, turn the power switch to the
OFF position, remove the power cord, and check the FaxPress external fuse
(inside the power switch panel).
If the fuse is intact, the glass should be clear and the filament clearly visible
and unbroken.
B—5
FaxPress Guide
•
Turn the power switch off and on to see if the LEDs will flash. If this is not
successful, connect the unit to a different power outlet and try again.
•
For a FaxPress that has just had its memory upgraded, verify that the memory
SIMM and FaxPress model are compatible.
•
If the LEDs initially illuminate, then disappear, verify that the FaxPress is
properly installed on the master file server.
•
Verify that the logged on FaxPress user associated with the FaxPress serial
number name has proper access rights to the master file server directory
where the FaxPress is installed.
Green LED and Red Alert LED are Both On
If both the red and green indicator lights are on:
•
Check to see if users can log on to the FaxPress. If the Supervisor can log on,
check for the presence of any jobs in the parallel print queue. Also check to
see if a printer is connected to the FaxPress parallel port.
•
If the FaxPress has no printer, select the Parallel queue from the
Mailbox/Print Queues branch of the Faxmain tree. Delete any jobs that are
listed in the view list window. You may need to reconfigure FaxPress users
who are printing to the FaxPress parallel queue.
•
If the FaxPress has a printer, verify that the FaxPress printer has paper, is online, and properly connected.
•
If immediately after power-on, the red and green indicator lights do not blink,
but go to a steady-on condition, the FaxPress prom(s) may have been
damaged—contact Castelle Technical Support.
•
If users can’t log into the FaxPress, check to see if the FaxPress is logged into
its master files server. After a reboot, the FaxPress goes through a verification
process which may take several minutes, during which no users will be able
to log into the FaxPress.
Green LED On and Red Alert LED is Flashing
Indicates a problem with the FaxPress file server.
B—6
Problems in Sending Faxes
•
Appendix B: Troubleshooting
Check file server disk space. If necessary, delete old faxes, logs, and notices
using Faxmain’s Storage Reclamation feature.
Red Alert LED is Flashing and Green LED is Off
This may be caused by a hardware problem. The condition is sometimes followed
by other indicator light sequences.
•
If this condition occurs during initial set up of a FaxPress, verify that the
FaxPress unit is compatible with its physical network type.
•
Try connecting FaxPress to an alternate power outlet.
•
Try rebooting the FaxPress. Attach a printer to the unit to print a diagnostic
report. Contact Castelle Technical Support.
Both the Green LED and Red Alert LED are Flashing
A FaxPress database may be corrupted or may have insufficient disk space. The
main FaxPress databases are: Fax Queue, Phone Books and Users directories. Try
attaching a printer to the FaxPress parallel port to get a diagnostic report and
reboot FaxPress.
•
If the master file server has less than five megabytes of disk space on the
volume where the FaxPress is installed, try running Storage Reclamation.
•
Irrecoverable network errors. Try rebooting the FaxPress.
•
In the directory where the FaxPress has been installed, check for and examine
files with extensions .LOG, .BAK, or .ERR.
Problems in Sending Faxes
Queued Faxes Not Becoming Ready or Active
All the faxes listed in the Outgoing Faxes view list window have Queued status,
but jobs do not advance to Ready or Active status:
B—7
FaxPress Guide
•
If the file server has less than five megabytes of disk space on the volume
where the FaxPress is installed, try running Storage Reclamation.
•
Make sure the FaxPress serial number user has access to the Castelle/PCL
Fonts Directory on the volume where the FaxPress is installed.
•
The FaxPress may have problems rasterizing the file at the head of the queue.
Try deleting the first file in the queue and rebooting the FaxPress. The file can
only be deleted by the FaxPress administrator or the user who sent the file.
Ready Faxes Not Becoming Active
All the faxes listed in the Outgoing Faxes view list have Ready status but no job
advances to Active status:
•
Verify the line direction settings for the FaxPress server. At least one fax line
should be configured for Bi-directional or Output Only and all unconnected
lines should be set to Not Connected.
•
Inspect the Red LEDs at the back panel beside the phone jack. If all of them
are on, wait until at least one goes off, and check the queue for the outgoing
fax status again.
Faxes Becoming Failed Faxes
Faxes the FaxPress is unable to send are assigned Failed status in the Outgoing
Faxes view list window. Faxes fail for various reasons. To obtain a failure
description, select the failed fax entry in the view list window, right-click to
display the context menu and choose the Properties option to display the
Outgoing Faxes Properties window.
Situations that can cause a user’s fax to fail include:
B—8
•
The pre-dial settings in the Line Settings dialog box may not be properly set.
If the FaxPress is connected through a PBX phone system that requires a predial number to reach an outside line, you can set the number in the Line
Settings dialog box or the user can enter the number with the fax number
when addressing faxes.
•
International access code was not included or is incorrect on international
calls. Re-dial the number with the international access code. See your phone
Problems in Sending Faxes
Appendix B: Troubleshooting
directory or contact your phone company for instructions on how to complete
international calls.
•
A PBX password code is required. When a PBX requires a password code for
calls, the user must include the password code symbol ($) in the fax number.
The user’s password code is set in the User Properties dialog box (tab).
•
Attached files are not in the proper format. The FaxPress native attachment
feature converts many document files to a format the unit can rasterize for
faxing. Document files the feature cannot convert must be printed to file using
and HP LaserJet II or HP LaserJet III print driver before you can attach them
to an outgoing fax.
•
The Cover Page file is not correct. If your cover page was not created
correctly, the FaxPress will not send the fax. Delete the current cover page
and create a new one.
•
The recipient is not a fax machine. Verify that the number you have is for a
fax machine.
•
The receiving fax machine does not comply with ITU-T Group III, T.4 or T.30
standards.
•
The FaxPress is sharing a line with another telephone device. The FaxPress
must have its own fax lines. It cannot share a line with another device.
•
The FaxPress times out while waiting for the recipient to answer. The
FaxPress waits up to 35 seconds after the last tone is dialed to receive a carrier
signal from the target machine. If the carrier is not received, the FaxPress
times out.
•
A FaxPress line configured as either Output Only or Bi-Directional is either
not connected to a phone line or is connected to an inbound only (DID) phone
line or non-telephone cable.
•
A modem has failed. Check that each modem line can answer by setting the
configuration to Bi-Directional or Input Only and dialing into it with either a
fax or voice phone set.
•
If you are using a Load Sharing configuration and the reason for failure is
poor line quality, check for compliance with load sharing requirements,
especially ensuring that load sharing FaxPresses are installed on the same full
duplex network segment.
B—9
FaxPress Guide
Problems in Receiving Faxes
FaxPress Cannot Receive Faxes
You have successfully installed the FaxPress, but it does not receive faxes.
•
Verify that the FaxPress is connected to an active phone line. Attach a phone
to the line and make sure it can receive a call.
•
Check the Line Direction settings. The FaxPress should have at least one line
configured as Incoming Only or Bi-Directional.
•
If the master file server has less than five megabytes of disk space on the
volume where the FaxPress is installed, try running Storage Reclamation.
•
Check the failure descriptions in the Received Transaction Log file.
•
If the reason indicated is poor line quality, ask the phone company to check
your lines.
•
If the fax was received, check the last line of the transaction log to see where
the fax was routed.
•
Check the Print Incoming Fax option in the Incoming Faxes dialog box,
which is accessed from the Users Properties dialog box. If the Print
Incoming Fax option is selected, check the printer for the fax.
Incoming Faxes Do Not Print
The user’s faxes are not automatically printed when they arrive:
•
Make sure that the Print Incoming Fax option is checked in the Incoming
Faxes dialog box.
If you want all manually routed faxes printed, check the setting in the
UNADDRESSED mailbox or the mailbox of the user assigned to the line.
B—10
•
If the FaxPress is configured to use a local printer, make sure a printer is
connected to the parallel port.
•
If the default printer is a network printer, make sure that the configuration
information is entered properly.
ZQ Directory Validation during the FaxPress Boot Sequence
Note:
Appendix B: Troubleshooting
When entering the configuration information, do not use preceding
‘.’ or ‘//’ marks or add syntax such as ‘ou=’.
•
Ensure that login information in the user’s set up for the printer is valid. Use
the information to log onto the network and try to print a large (100Kbyte or
more) file to the chosen queue. If you cannot print, neither can FaxPress.
•
Verify that the printer matches the printer type indicated in the Printer
Configuration setting for the user to whom the fax was routed.
•
Verify that the printer has enough memory. At least 1.5 MB is required.
•
If your FaxPress server is installed on a Novell NDS network, when you are
printing to the default network printer, ensure that the printer queue is served
by an active print server.
•
If you are using a parallel printer, attach it to the FaxPress and verify that the
printer is configured for parallel I/O. See the printer’s documentation for
more information.
ZQ Directory Validation during the FaxPress Boot
Sequence
During the FaxPress boot up sequence, the ZQ directory is automatically
validated. If any faxes in this directory are found to contain errors or are corrupt,
they will be removed from the directory and placed in the recovery directory
ZQrecov1.sav.
B—11
FaxPress Guide
B—12
Appendix
Server Directory Tree
C
FaxPress Guide
FaxPress File Server Directory Tree
The following directories and files are installed on the FaxPress file server.
Table C–1
FaxPress Server Directory Tree
\CASTELLE\[serial-number]
*.err, .log, *.bak — (ASCII) error/configuration reports
\fxdiag
FaxPress diagnostic files
\LOGS\YEAR
Directory of transaction logs for the year
\PHONEBKS
\CORPORATE
\userid — subdirectory of personal phonebook files
\SYSTEM
faxpress.sys —operating system executable for hardware platform
faxpress.out — (fax) application executable for hardware platform
*.cfg — (ASCII) service configuration settings
(includes jobqueue.cfg — optional boot-time job source specification)
*.log —(ASCII) service configuration status
jobqueue.log — confirmation (if booted with jobqueue.cfg)
*.fnt, *.fnl, *.fnp — standard HPLJII font files
coverpg — (PCL), corporate coverpage template
curjob — (binary) count of jobs
C—2
FaxPress File Server Directory Tree
Table C–1
Appendix C: Server Directory Tree
FaxPress Server Directory Tree
\USER
mboxid.dt — list of user mailboxes, personal coverpages, and
phonebooks
\1xxxxxxx, \2xxxxxxx, \3xxxxxxx — subdirectory of mailbox files
\ZQ
qm.sav or qma.sav — list of jobs in queues
*.pcl — (ASCII/PCL/DCX) fax image source files
*.pcx — (PCX) rasterized fax page files
\jobs — directory of job records
\CASTELLE\ADSI
Directory Microsoft Active Directory Services Interface installation.
Can be downloaded from the FaxPress Installation CD.
\CASTELLE\Archive
\Database
Directory for the fax archive database
\Faxes
Directory of all archived faxes
\CASTELLE\PCLFONTS
Directory of loadable font files
C—3
FaxPress Guide
C—4
Appendix
D
Agency Compliance
FCC and Telephone Company Notices
This appendix contains important notices about FaxPress' Ringer Equivalency
Number and FCC compliance, as well as a French safety advisory.
FaxPress Guide
Ringer Equivalency Number
This equipment complies with Part 68 of FCC rules. You will find the label on the
bottom of this equipment. This label contains the FCC Registration Number and
Ringer Equivalent Number (REN) for this equipment. You must, upon request,
provide this information to your telephone company.
The REN is useful to determine the quantity of devices you may connect to your
telephone line and still have all of those devices ring when your number is called.
In most, but not all areas, the sum of the RENs of all devices should not exceed
five (5.0). To be certain of the number of devices you may connect to your line, as
determined by the REN, you should call your local telephone company to
determine the maximum REN for your calling area.
Jack Type Needed
Connection to the telephone network should be made by using standard modular
telephone jack types (USOC) RJ11C or RJ11W.
•
Port—Line 1-4
•
Service Order Code—9.0F
•
Facility Interface Code—02LS2
•
Network Jacks—RJ11
Incidence of Harm
If your telephone equipment causes harm to the telephone network, the telephone
company may discontinue your service temporarily. If possible, they will notify
you in advance. If advance notice is not practical, you will be notified as soon as
possible. You will be advised of your right to file a complaint with the FCC.
D—2
FCC Part 15 Warning
Appendix D: Agency Compliance
FCC Part 15 Warning
This equipment generates, uses, and can radiate radio frequency energy and if not
installed and used in accordance with this manual, may cause interference to radio
communications. It has been type tested and found to comply with the limits for a
Class A computing device pursuant to Subpart J of Part 15 of FCC Rules, which
are designed to provide reasonable protection against such interference when
operated in a commercial environment. Operation of this equipment in a
residential area is likely to cause interference in which case the user, at his own
expense, will be required to take whatever measures may be required to correct
the interference.
FCC Part 68 Information
Castelle FaxPress products comply with Part 68 of the FCC Rules. The FCC Part
68 Label is located on the bottom of the enclosure. This label contains the FCC
Registration Number for this equipment and the Ringer Equivalence Number
(REN). If requested, this information must be provided to your telephone
company.
Connection to the telephone network should be made by using standard modular
telephone jacks, type RJ11. The plug and/or jacks used must comply with FCC
Part 68 rules.
Table 1: FaxPress 5000 System Port Identification
Table 2: FACILITY INTERFACE & SERVICE ORDER
CODES
Table C–23
MFGRS PORT
IDENTIFIER
FACILITIES
INTERFACE CODE
SERVICE
ORDER CODE
NETWORK
JACKS
LINE 1 – 8
02LS2
9.0Y
RJ11
D—3
FaxPress Guide
The REN is useful to determine the quantity of devices you may connect to your
telephone line and still have all of those devices ring when your telephone number
is called. In most, bur not all areas, the sum of the RENs of all devices connected
to one line should not exceed five (5.0). To be certain of the number of devices
you may connect to your line, as determined by the REN, you should contact your
local telephone company to determine the maximum REN for your calling area.
Fax Branding
The Telephone Consumer Protection Act of 1991 makes it unlawful for any person
to use a computer or other electronic device to send any message via a telephone
fax machine unless such message clearly contains in a margin at the top or bottom
of each transmitted page or on the first page of the transmission, the date and time
it is sent and an identification of the business or other entity, or individual sending
the message and the telephone number of the sending machine or such business,
or entity, or individual.
In order to program this information into your fax machine, you should:
•
Refer to the Chapter 14, Creating Cover Pages or Configuring Advanced
Functions in Chapter , for instructions on including date and time and
identification parameters.
Rights of the Telephone Company
Your telephone company may make changes in its facilities, equipment,
operations, or procedures that could affect the proper operation of your
equipment. If they do, you will be notified in advance to give you an opportunity
to maintain uninterrupted telephone service.
This equipment may not be used on coin service provided by the telephone
company. Connection to party lines is subject to state tariffs.
D—4
Electrical Safety Advisory
Appendix D: Agency Compliance
If trouble is experienced with this unit, please disconnect the unit from the
telephone line and contact customer service at the address and phone number
listed below. DO NOT DISASSEMBLE THIS EQUIPMENT. It does not contain
any user serviceable components.
Attn: Customer Service
Castelle
855 Jarvis Drive
Morgan Hill, CA 95037
Phone: (408) 852-8080
Electrical Safety Advisory
We recommend the installation of an AC surge arrestor in the AC outlet to which
this equipment is connected. Telephone companies report that electrical surges,
typically lighting transients, are very destructive to customer terminal equipment
connected to AC power sources. We recommend the installation of an AC surge
arrestor in the AC outlet to which this equipment is connected. Telephone
companies report that electrical surges, typically lighting transients, are very
destructive to customer terminal equipment connected to AC power sources.
Power Source
The Castelle FaxPress models operate from specific AC power sources. Refer to
Appendix C to find the right power source for your FaxPress model.
All FaxPress models operate from a single-phase power source. Operation from
power sources where both current-carrying conductors are live with respect to
ground (e.g. phase-to-phase on a 3-wire system) is not recommended.
CAUTION: Proper AC source grounding, and grounding circuit continuity
are vital for safe operation
CAUTION: Use only the 3-wire, 3-terminal power cord provided for the
FaxPress 3500, 5000, 7000 and 7500. Use the AC adapter provided for the
FaxPress SBE and 2500.
D—5
FaxPress Guide
CAUTION: To preclude the possibility of electrical shock, do not ever remove
the Faxpress case.
French Safety Advisory
Déclaration FCC
Cet appareil est conforme aux normes exigées pour les appareils digitaux de
Classe A, selon l'article 15 des réglementations FCC. Le fonctionement est soumis
à deux conditions :
Cet appareil ne causera pas d'interferences nausives
Cet appareil doit accepter quelquonque interference reçue, même si celle-ci
pourrait causer un disfonctionement.
Avertissement sur l'inscription CE
Cet appareil est de classe A. S'il est situé à l'interieur, il peut causer des parasites.
Dans ce cas, l'usager doit prendre des mesures en conséquences.
Mesures de securité :
Tension
Le FaxPress de Castelle fonctionne sur 90-250 volts et une source de cournant
alternatif de 60/50 Hz. Ne pas le connecter à aucune autre source de courant.
Attention : Toujours debrancher le cordon d'alimentation de n'importe quelle
source d'énergie avant l'entretien de l'appareil afin d'éviter tout risque
d'éléctrocution.
Source de courant :
Le FaxPresss de Castelle fonctione avec une source de courant monophasée.Le
fonctionement à partir de sources de courant dont les deux conducteurs de courant
sont porteurs d'éléctricité ( d 'une phase a l'autre sur un sytem a 3 fils) n'est pas
recommandée.
Attention : Pour un fonctionement sans risque, brancher l'appareil sur une source
de courant alternatif AC et s'assurer de la continuité de la base de circuit.
D—6
Electrical Safety Advisory
Appendix D: Agency Compliance
Cordon d'alimentation
Le FaxPress est liste UL et vendu avec un cordon détachable à 3 fils avec une prise
à trois becs afin de se connecter à la source de courant.
Attention: Utiliser seulement le cordon à trois fils vendu avec l'appareil.
Mise en garde
Pour éviter tout risque d'éléctrocution, de pas retirer le FaxPress sans avoir
débrancher le cordon de la source de courant alternatif auparavant.
Mode d'emploi pour les FaxPress 3500 & 5000
Voltage
Le voltage requis pour les FaxPress 3500 et 5000 est de 90a 250 Volts et le courant
doit etre d'une puissance de 60/50 Hz CA (courant alternatif)…Ne pas connecter
ses appareils a aucune autre source de courant. Consulter le tableau recapitulatif
sur les caracteristiques du serveur FaxPress dans l'appendice C pour de plus
amples informations.
Attention: Toujours debrancher le cable electrique de la prise avant de
eviter tout electrocution.
pour
Courant Electrique
Les FaxPress 3500 et 5000 fonctionnent sur un courant . . . . L'utulitsation
d'uncourant dont les deux conducteurs sont relies a une prise de terre n;est pas
recommendee. Seul le conducteur du cable electrique a des fusibles proteges.
Attention: Courant AC sont vitals pour un bon fonctionement.
Cable Electrique
Les FaxPress 3500 et 5000 possedent un cable compose de 3 fils electriques
detachables qui sont UL listed avec une prise a 3 tetes pour la connection au
courant electrique.
D—7
FaxPress Guide
Attention: Utiliser uniquement le cable electrique compose de 3 fils electriques
avec une prise a 3 tetes vendu avec le FaxPress.
Mise en Garde:
Pour eviter tout risque d'electrocution, ne pas detacher les FaxPress 3500 et 5000
sans avoir d'abord debrancher les appareils du courant alternatif.
Important Information for Canadian Customers
The Canadian “Industry Canada” (The Department of Communications) label
identifies certified equipment. This certification means that the equipment meets
certain telecommunications network protective, operational and safety
requirements. Industry Canada does not guarantee the equipment will operate to
the user's satisfaction.
Before installing this equipment, make sure you are permitted to connect to the
facilities of the local telecommunications company. You must install the
equipment using an acceptable method of connection. In some cases, you may also
extend the company's inside wiring for single line individual service by means of
a certified connector assembly (telephone extension cord). You should be aware,
however, that compliance with the above conditions may not prevent degradation
of service in some situations.
Repairs to certified equipment should be made by an authorized Canadian
maintenance facility designated by the supplier. Any repairs or alterations made
by the user to this equipment, or equipment malfunctions, may give the
telecommunications company cause to request the user to disconnect the
equipment.
Users should ensure for their own protection that the electrical ground connections
of the power utility, telephone lines and internal metallic water pipe system, if
present, are connected together. This precaution may be particularly important in
rural areas.
D—8
CTR21 Declaration
Note:
Appendix D: Agency Compliance
Users should not attempt to make such connections themselves, but
should contact the appropriate electric inspection authority, or
electrician, as appropriate.
LOAD NUMBER: The Load Number (LN) assigned to each terminal device
denotes the percentage of the total load to be connected to a telephone loop which
is used by the device to prevent overloading. The termination on a loop may
consist of any combination of devices subject only to the requirement that the total
of the Load Numbers of all the devices does not exceed 100.
CTR21 Declaration
Castelle FaxPress servers have been approved [Commission Decision 98/482/EC
- CTR21] for pan-European terminal connection to the Public Switched Telephone
Network (PSTN). However, due to differences between the individual PSTNs
provided in different countries, the approval does not, of itself, give an
unconditional assurance of successful operation on every PSTN termination point.
In the event of problems, you should contact your equipment supplier in the first
instance.
D—9
FaxPress Guide
D—10
Appendix
E
The FaxPress 7500-DID and E&M
The FaxPress 7500 is a rack-mountable 8-line fax server with a built-in, 4-channel
DID or E&M telecommunication converter and conversion interface. There are
two models in the FaxPress 7500 product family: the FaxPress 7500-DID, an 8line fax server with a built-in 4-channel DID converter, and the FaxPress 7500E&M, an 8-line fax server with a built-in 4-channel E&M converter. The DID
converter includes an auto-DID feature that detects the given DID trunk
parameters, then memorizes and matches them to the appropriate DID interface.
The FaxPress 7500-E&M provides convenient way to interface FaxPress with
E&M compatible PBXs.
The FaxPress 7500’s 8-line fax server runs Castelle’s FaxPress 7.0 software,
while the telecommunication converter, a purely hardware device, performs the
conversion functions between the fax server’s fax lines and the telephone
company’s specified telecommunication lines. All eight lines of the FaxPress
7500 can be connected to regular public telephone lines or up to four of the eight
fax lines can be connected to the built-in DID or E&M converter.
Be sure to see "Automatic Routing: PBX and FaxPress Integration" on page 549 for more information.
Online information regarding automatic routing and DID integration can be found
at:
http://www.castelle.com/support/documentation
FaxPress Guide
FaxPress 7500-DID
The FaxPress 7500-DID is an 8-line fax server with a built-in 4-line DID
converter.
AutoDID
The DID converter includes an autoDID feature. During the initial call after the
system is powered up, the autoDID detects the given DID trunk parameters, then
memorizes and matches them to the appropriate DID interface.
The parameters include:
E—2
1.
wink-start mode or Immediate-start mode.
2.
dial pulse digits or DTMF digits.
Appendix E: The FaxPress 7500-DID and E&M
3.
number of incoming DID digits.
Interface Connections
The FaxPress 7500 DID has two sets of interface connections, the fax server
interface and the DID conversion interface.
Fax Server Interface
All eight lines of the FaxPress 7500-DID’s fax server can be connected to public
switched telephone networks. Eight RJ11 phone jacks marked as LINE 1 to LINE
8 on the front panel and eight phone cables are provided for the phone line
connections. These eight phone line cables are 4-conductor, straight-through
cables, which means pin 2 of the the cable’s RJ11 plug connects to pin 5 of the
RJ11 plug on the end of the cable, pin 3 connects to pin 4 …and so forth.
Up to four of the eight fax server lines can be attached to the DID converter for
the DID trunk line connections. Use any four of the eight RJ11 phone jacks
marked as LINE 1 to LINE 8 on the front panel, and any of the four phone cables
to connect to the RJ11 phone jacks of the DID interface converter marked as LINE
A, LINE B, LINE C, and LINE D.
DID Conversion Interface
The DID converter provides four DID trunk line interfaces. The front panel’s four
RJ11 phone jacks (TRUNK A, TRUNK B, TRUNK C, and TRUNK D) and four
phone line cables are provided for the purpose of DID trunk connections. These
four phone line cables are 6-conductors, cross-wired, which means pin 1of the
RJ11 plug of the cable connects to pin 1 of the RJ11 plug on the end of the cable,
pin 2 connects to pin 2 …and so forth.
The RJ11 phone jacks marked as TRUNK A and LINE A on the front panel are a
matched input and output pair from the DID trunk line to the fax server. The same
applies for TRUNK B and LINE B, TRUNK C and LINE C, and TRUNK D and
LINE D.
E—3
FaxPress Guide
The DID interface is sensitive to the tip and ring polarities on the DID trunk line.
FaxPress 7500-DID requires the tip signal on pin 3 of the RJ11 phone jack and
ring on pin 4.
During the DID trunk line installation, however, the tip and ring polarities are
frequently not configured to follow the correct pin outs. The tip and ring pin outs
of the wall’s phone jack, therefore, do not always meet the requirements of the
FaxPress 7500-DID.
Note:
If the DID interface doesn’t seem to be working properly, try
replacing the 6-conductor, cross-wired phone cable with the 4conductor, straight-through phone cable provided. In most
cases, this will make the DID interface work.
DID Interface LEDs
Refer to these for DID equipment and operations status.
DID INTERFACE LEDS
DID LINE
LED
INDICATES
A
Green LED on
TRUNK A is waiting for a new call
Red LED on
TRUNK A is seized (in off-hook state)
Yellow LED on
LINE A is seized (in off-hook state)
Green LED on
TRUNK B is waiting for a new call
Red LED on
TRUNK B is seized (in off-hook state)
Yellow LED on
LINE B is seized (in off-hook state)
Green LED on
TRUNK C is waiting for a new call
Red LED on
TRUNK C is seized (in off-hook state)
Yellow LED on
LINE C is seized (in off-hook state)
Green LED on
TRUNK D is waiting for a new call
Red LED on
TRUNK D is seized (in off-hook state)
Yellow LED on
LINE D is seized (in off-hook state)
B
C
D
E—4
Appendix E: The FaxPress 7500-DID and E&M
DID trunks are powered by customer premise equipment. In this case, the
FaxPress 7500-DID provides power for connected DID trunks. The central office
will only provide service to DID trunks which are properly connected and
powered. A service call to the local telephone company might be required to
start up the DID operation. If the servicing central office attempts to place a call
on an un-powered or disconnected DID trunk, the central office switch will
recognize this as a failure condition, take the un-powered or disconnected trunk
out of service, then attempt to place the same call on another trunk if available.It
is, therefore, strongly recommended that all DID equipment be operated with
a backup power unit or uninterruptible power source (UPS) to avoid service
calls to your phone company’s central office. After the DID trunks are
connected and powered, the FaxPress 7500-DID is ready to process and convert
DID calls.
E—5
FaxPress Guide
FaxPress 7500-E&M
The FaxPress 7500-E&M is an 8-line fax server with a built-in 4-line E&M
converter.
Trunk interface: two wire, E&M Type I, originate on “E.”
The application of the FaxPress-E&M product should be limited to an E&M PBX
connection. FaxPress 7500-E&M is not intended for connection to the public
switched E&M telecommunication network. Per BellCore specifications, E&M
Type I interface operation requires a dedicated ground connection between the
FaxPress 7500-E&M and the associated E&M equipment.
E—6
Appendix E: The FaxPress 7500-DID and E&M
Interface Connections
The FaxPress 7500 DID has two separate sets of interface connections, the fax
server interface and the DID conversion interface.
Fax Server Interface
All eight lines of the fax server of the FaxPress 7500-E&M can be connected to
public regular telephone lines. Eight RJ11 phone jacks marked as LINE 1 to LINE
8 on the front panel and eight phone cables are provided for the phone line
connections. These eight phone line cables are 4-conductors, straight through
cables, which means pin 2 of the RJ11 plug of the cable connects to pin 5 of the
RJ11 plug on the end of the cable, pin 3 connects to pin 4 …and so forth.
Up to four of the eight fax server lines can be connected to the E&M converter for
the connections to the E&M trunk lines. The user can use any four of the eight
RJ11 phone jacks marked as LINE 1 to LINE 8 on the front panel and any of the
four phone cables as mentioned above to connect to the RJ11 phone jacks of the
E&M interface converter marked as LINE A, LINE B, LINE C, and LINE D.
E&M Conversion Interface
The E&M converter provides four E&M trunk line interfaces. Four 6-position
phone modular connectors marked as TRUNK A, TRUNK B, TRUNK C, and
TRUNK D are provided on the front panel and four phone line cables are provided
for the E&M trunk connections. These four phone line cables are 6-conductors,
cross-wired, which means pin 1of the phone plug of the cable connects to pin 1 of
the plug on the end of the cable, pin 2 connects to pin 2 …and so forth.
The phone connectors marked as TRUNK A and LINE A on the front panel are
the matched pair of the E&M trunk interface and the fax server line interface. This
is the same for TRUNK B and LINE B, TRUNK C and LINE C, and TRUNK D
and LINE D.
The FaxPress 7500 E&M requires a ground loop connection with the E&M PBX.
The preferred ground connection for the FaxPress 7500 E&M is a 4-40 screw
marked with “GROUND” on the bottom panel of the chassis.
E—7
FaxPress Guide
E&M Interface LEDs
Refer to these for E&M equipment and operations status.
E&M INTERFACE LEDS
E&M LINE
LED
INDICATES
A
Green LED on
TRUNK A is waiting for a new call
Red LED on
TRUNK A is seized (in off-hook state)
Yellow LED on
LINE A is seized (in off-hook state)
Green LED on
TRUNK B is waiting for a new call
Red LED on
TRUNK B is seized (in off-hook state)
Yellow LED on
LINE B is seized (in off-hook state)
Green LED on
TRUNK C is waiting for a new call
Red LED on
TRUNK C is seized (in off-hook state)
Yellow LED on
LINE C is seized (in off-hook state)
Green LED on
TRUNK D is waiting for a new call
Red LED on
TRUNK D is seized (in off-hook state)
Yellow LED on
LINE D is seized (in off-hook state)
B
C
D
After the E&M trunks are connected and powered the FaxPress 7500-E&M
is ready to process and convert calls.
E—8
•
E&M trunk supervision from the PBX to the FaxPress 7500-E&M is via
the “M” lead.
•
E&M trunk supervision from the FaxPress 7500-E&M to the PBX is via
the “E” lead.
•
The E&M trunk to the FaxPress 7500-E&M is in idle condition when the
“M” lead is at ground potential.
•
The E&M trunk to the FaxPress 7500-E&M is in seized condition when
the “M” lead is in battery potential.
•
The E&M trunk is in idle condition when the “E” lead is open.
•
The E&M trunk is in seized condition when the “E” lead is at ground.
Appendix E: The FaxPress 7500-DID and E&M
E&M TYPE 1 LEAD STATES
Idle
Active
Lead
From switch to FP7500-E&M
Ground
Battery
M
To switch from FP7500-E&M
Open
Ground
E
The figure below shows you what the wiring configuration is on both the PBX tie
card end and also the CTPX VP200.
E—9
FaxPress Guide
FaxPress 7500 Fax Server LEDs
The FaxPress 7500’s fax server LEDs are identical for both the FaxPress 7500DID and the FaxPress 7500 E&M.
Refer to these LEDs for fax server operations status.
LED
INDICATES
LINE 1 Red LED on
LINE 1 is seized
LINE 2 Red LED on
LINE 2 is seized
LINE 3 Red LED on
LINE 3 is seized
LINE 4 Red LED on
LINE 4 is seized
LINE 5 Red LED on
LINE 5 is seized
LINE 6 Red LED on
LINE 6 is seized
LINE 7 Red LED on
LINE 7 is seized
LINE 8 Red LED on
LINE 8 is seized
100BT LED on
100 Base-T network is linked.
10BT LED on
10 Base-T network is linked.
DATA LED on
Network activity.
ALERT LED on
Uninterrrupted, indicates the system is in an
alert condition. The ALERT LED may blink
during the power up boot sequence.
READY LED on
E—10
This LED should be continuously on showing
the system is in normal running mode. It may
blink during the power up boot sequence.
Appendix E: The FaxPress 7500-DID and E&M
Installing and Configuring the 7500
The FaxPress 7500 DID is mounted in a 19-inch rack mount case with two CTPX
DID interface cards. All eight lines of the FaxPress 7500-DID can be connected
to public switched telephone networks. The built-in DID converter provides four
DID trunk line interfaces. Up to four of the eight fax lines can be connected to the
built-in DID converter. The DID converter includes an auto DID feature that
detects the given DID trunk parameters, then memorizes and matches them to the
appropriate DID interface.
The FaxPress 7500 DID auto detects wink start or immediate start this state; third
party converters (i.e. those used with the FaxPress 7000) require manual
configuration or different hardware.
Before You Begin
Before beginning the steps described here, please make sure:
•
the FaxPress server and FaxPress Administrator client are installed
and operational. Confirm this by sending and receiving a test fax
through a standard telephone line connected to any of the FaxPress
modems..
•
you have one or more DID trunk lines, ordered from your local telephone company, ready to use.
•
you know how many digits will be passed to the DID converter module. FaxPress supports 3 or 4 digits. When a call comes in through the
DID trunk, the phone company sends a signal to the DID module specifying which phone number the call is for. This signal contains at least the
last 3 or 4 digits of the number dialed, but may contain more. If the
signal contains more than 3 or 4 digits, research the programming of
the PBX to determine if the extra digits can be removed. The FaxPress offers an Enabling DID receiving diagnostic mode utility for
determining the number of digits being sent.
•
you know the range of phone numbers assigned to the DID trunk. You
need to know what phone numbers are assigned to you so you can properly configure FaxPress mailboxes to associate them with those phone
numbers.
E—11
FaxPress Guide
Cabling the FaxPress 7500
The picture below shows the front panel of the FaxPress 7500 DID. The FaxPress
7500 DID is connected via the DID port on the 7500 to the DID trunk connection
terminated by the Telecom company as a wall mounted RJ11 socket. The Line #
connection is then linked to the appropriate FaxPress analog modem using the
cables provided.
On the 7500 DID’s left hand side, there are four sets of connections. These are the
four ports of two DID cards. Each of the sets has:
•
a Trunk connection – uses the 6-conductor, cross-wired cables Castelle provides to connect to the phone company’s incoming DID trunk.
These cables are shipped in a plastic bag labeled with DID and E&M
phone cables. They are wider than those cables for line connections.
•
a Line connection – uses the 4-conductor, straight-through cables
provided to go between the line of the incoming trunk and the line that
you would like to connect to on the FaxPress 7500 on the right side.
The only other connection to the front panel will be your network connection.
Power is provided to the unit on the backside.
The DID interface is sensitive to the tip and ring polarities on the DID trunk line.
FaxPress 7500-DID requires the tip signal on pin 3 of the RJ11 phone jack and
ring on pin 4. During the DID trunk line installation, however, the tip and ring
polarities are frequently not configured to follow the correct pin outs. The tip and
ring pin outs of the wall’s phone jack, therefore, do not always meet the
requirements of the FaxPress 7500-DID.
Important! If the DID interface isn’t working, replace the 6-conductor,
cross-wired phone cable with the 4-conductor, straight-through
phone cable. In most cases, this makes the DID interface work.
E—12
Appendix E: The FaxPress 7500-DID and E&M
Configuring the FaxPress Server for DID
FaxPress must be configured so that it recognizes that DID line routing is being
used for the line connected to the DID interface module, and does not attempt to
send faxes using the line connected to the DID interface module.
The PBX must also be configured to route DID calls to the FaxPress and transmit
only the 3 or 4 digits associated with the FaxPress mailboxes, and no other digits.
Follow these steps to configure FaxPress for DID routing:
1.
Log onto Faxmain with supervisor privileges.
(Start>Programs>FaxPress>Faxmain)
2.
Go to FaxMain's Main menu, select the fax server you are configuring for
DID, then right-click on the server name and left-click on Properties.
3.
Select the Line Settings tab. From the Fax Line drop down menu, choose
the line matching the connector on the back of the FaxPress to which the
DID interface module is connected.
Enter your unit’s information, making sure Line Direction is set for input only,
and Routing Type is set for DID. If necessary, enter a PBX Pre-Dial code
(typically 9, ) in the field provided.
E—13
FaxPress Guide
4.
Select the Advanced Functions tab. Check the I am using DID for
inbound fax routing box. Make sure the correct radio button is selected in
the Change Number of digits for DID trunk line field. Most systems will
be set for 4 digits but some applications may call for 3 digits only.
5.
Click OK to exit the FaxPress Properties and return to Faxmain. Next,
you’ll configure FaxPress mailboxes with DID IDs.
Note:
The To enable DID receiving diagnostic mode . . .option is a
troubleshooting aid. See "FaxPress 7500 Issues and Solutions"
on page -19 for more information on using this feature.
Configuring Mailbox IDs
To receive faxes through DID routing, FaxPress mailboxes must be assigned
mailbox IDs that associate them with their DID trunk phone numbers. All mailbox
IDs must consist of either three or four digits, depending on how many digits the
phone company is passing along on the DID trunk.
E—14
Appendix E: The FaxPress 7500-DID and E&M
Example 1 – 3 digit IDs: You are assigned the phone numbers 555-
9200 through 555-9299, and the phone company is passing along the
last three digits of the phone number. In this case, you would assign
mailbox IDs 200 through 299 to those FaxPress mailboxes using DID
fax routing.
Example 2 – 4 digit IDs: You are assigned the phone numbers 555-
8950 through 555-9050, and the phone company is passing along the
last four digits of the phone number. In this case, you would assign
mailbox IDs 8950 through 9050 to those FaxPress mailboxes that are to
use DID fax routing.
Follow these steps to associate a FaxPress mailbox with one of the DID trunk's
phone numbers:
1.
Log onto Faxmain with supervisor privileges.
(Start>Programs>FaxPress>Faxmain)
2.
Expand the Administration branch, then click on Users.
3.
Select a user to set up for DID from the list of users on the right. Right-click
on the user, then left click on Properties to bring up the User Properties
screen.
E—15
FaxPress Guide
4.
Enter the last 3 or 4 digits of the users DID number in the Mailbox ID field.
If the phone company is passing along the last 3 digits, enter the last 3 digits
of the phone number in the box. If the phone company is passing along the
last 4 digits, enter the last 4 digits of the phone number in the box.
5.
Click OK to save and close.
Receiving Misaddressed Faxes
If a fax is sent to a DID phone number for which there is no corresponding
FaxPress mailbox, FaxPress will, by default, reject the incoming fax.
In FaxPress 6.3 and above you may configure the FaxPress server to accept faxes
sent to a DID phone number without a corresponding FaxPress mailbox. The
received faxes will be stored in the FaxPress Unaddressed mailbox.
To configure the FaxPress server to accept incoming faxes sent to DID numbers
without FaxPress mailboxes, follow these steps:
1.
E—16
Open the Castelle System folder on your hard drive. The number of fxcfg
files in the System folder correspond to the number of fax lines.
Appendix E: The FaxPress 7500-DID and E&M
2.
Double-click on an fxcfg file to bring up the notepad file. Type:
did_failure=1
as shown in the example below to allow incoming faxes sent to DID numbers
without corresponding FaxPress mailboxes to be received and stored in the
FaxPress Unaddressed mailbox.
Conversely, type:
did_failure=0
to reject incoming faxes sent to DID numbers without corresponding FaxPress
mailboxes.
E—17
FaxPress Guide
Configuring the DID Timeout Range
To specify the number of seconds the FaxPress should allow for incoming digit
reception. The timeout range is 1 to 15 seconds. The default value is 15 seconds.
To customize the timeout interval, type:
did_timeout=9
as shown in the following example:
Verifying FaxPress DID Function
To verify that your FaxPress 7500 and its DID cards are functioning properly,
follow these steps:
1.
Temporarily configure FaxPress with Line 1 set for Input only and DID and
Line 5 set for Output only.
2.
E—18
Confirm at least two FaxPress users are configured for DID use. That is,
make sure each user is assigned a mailbox ID.
Appendix E: The FaxPress 7500-DID and E&M
3.
Using Faxmain, send a test fax to one of the DID-configured FaxPress
users. Use only the 3 or 4 digit mailbox ID to send the test fax.
4.
You should hear Line 5 call in through the Trunk and come out the Line-toLine 1 on the front panel.
5.
You should hear a clicking noise inside the 7500 which is the line ringing.
6.
The line will be picked up and the fax will be sent to the recipient’s
mailbox.
If the above process works, the FaxPress 7500 and its associated parts are
functioning properly. Any problems sending or receiving faxes indicates a Telco
problem with the DID Trunks
FaxPress 7500 Issues and Solutions
The following information is intended to provide solutions for common 7500
routing issues.
Note:
For more detailed information about routing or DID integration,
please refer to the automatic routing technical notes Castelle
provides at http://www.castelle.com/support/documentation
Issue: The FaxPress is receiving incoming faxes but they do not go to any of
the individual fax boxes.
Your phone equipment must actually be sending the same number of DTMF digits
as you have configured the FaxPress to receive, typically three or four digits.
E—19
FaxPress Guide
Castelle provides an Enable DID receiving diagnostic mode utility to confirm
that the correct number of DTMF digits are, in fact, being sent.
To use this diagnostic mode utility, follow these steps:
1.
Log onto Faxmain with supervisor privileges.
(Start>Programs>FaxPress>Faxmain)
2.
Go to FaxMain's Main menu, select the fax server you are configuring for
DID, then right-click on the server name and left-click on Properties.
3.
Scroll over to and select the Advanced Functions tab.
4.
Check the box next to Enable DID receiving diagnostic mode.
5.
Click OK. You’ll be prompted to reboot the workstation.
6.
A dtmf.log file will now be created in the Castelle\serial number\fxdiag
directory. Once you have rebooted the FaxPress server, the dtmf.log file
should start to capture the digits being sent through the CTPX cards to the
FaxPress.
View the log file from a command prompt by changing directories to:
Castelle\serial number\fxdiag
E—20
Appendix E: The FaxPress 7500-DID and E&M
If the dtmf.log does not begin capturing digits, take the line connected to the trunk
in question and disconnect it from the Line on the right side of the 7500.
Connect a standard household (analog) phone to the first line going from the PBX
to the FaxPress. Call a DID number and pick up the phone’s handset when it rings.
Listen to make sure you hear only the correct number of digits being sent by the
PBX.
Your phone system may be set up to add digits to the front or end of the numbers
sent to the FaxPress. It is imperative that the phone system not send these touch
tones. By listening, you can tell if they are being added. If so, research the
programming of the PBX to determine if these digits can be removed.
Issue: FaxPress cannot send outgoing faxes.
Make sure there are dial tones on all connections between the PBX and FaxPress.
Also, test to see if dialing “9” breaks the internal dial tone and connects you to the
phone company’s dial tone. If so, make sure that the FaxPress is configured to dial
“9,” first before sending any outbound faxes.
Technical Specifications and Safety Information
FaxPress 7500 Technical Data
TELEPHONE INTERFACE
Impedance
600/900 Ohm
Insertion Loss
< 3dB
Trunk Resistance
0 Ohm to 1800 Ohm
Trunk Loop Current
16mA to 60mA
Battery Feed
Voltage
-48VDC, +/-10%
TRUNK
Resistance
0 Ohm to 400 Ohm
Wink Duration
248ms nom.
Hook Flash
Duration
500ms
E—21
FaxPress Guide
FaxPress 7500 Technical Data
TERMINATION
RECEIVE SIGNALING
Trunk Side
4x RJ-11 for DID, 2 x 6
position 6 pin modular for
E&M
Line Side
4xRJ-11
Dial Pulse
Pulse Rate
8pps to 20pps
Percent Break
32% to 80%
Interdigit Time
150ms min
DTMF
TRANSMIT SIGNALING
RING GENERATION
ENVIRONMENTAL
DIMENSIONS
E—22
Sensitivity Range
-25dBm to +3dBm
Tone Duration
40ms min
Interdigit Time
40ms min
Maximum Twist
10dB
DTMF
FAST / SLOW
Digit Transfer
Delay
0.5s/1.0s
Tone Duration
50ms/100ms
Interdigit Time
50ms/100ms
Ring Voltage
70Vrms max. @no load
Ring Frequency
58Hz, +/-10%
Maximum Ringer
Load
1.5REN
Operating
Temperature
+32F to +104F (OC to +40
C)
Storage
Temperature
-40F to +185 F (-40C to
+85 C)
Humidity
5% to 95%, non
condensing
Length
16.73”
Height
3.47”
Depth
14”
Appendix E: The FaxPress 7500-DID and E&M
FaxPress 7500 Technical Data
APPROVALS
FCC part 68
FCC part 15, class
A
UL
POWER SUPPLY
50Hz/60Hz
90VAC-250VAC
auto-ranging
FCC Part 68 Information
This equipment complies with Part 68 of the FCC Rules. The FCC Part 68 Label
is located on the back of the unit’s case. This label contains the FCC Registration
Number for this equipment. If requested, this information must be provided to
your telephone company.
Connection to the telephone network should be made by using standard modular
telephone jacks, type RJ-11C.
The plugs and/or jacks used must comply with FCC Part 68 rules.
SYSTEM PORT IDENTIFICATION FACILITY INTERFACE & SERVICE
ORDER CODES
Port
Identifier
Facilities
Interface Code
Service Order
Code
Network
Jacks
REN/AS
Line 1 - 8
02LS2
9.ON
RJ11C
0.4A
DID Port 1 8
02RV2-T
6.ON
RJ11C
AS.2
If this telephone equipment compromises the telephone network, the telephone
company will notify you in advance of any temporary suspension of service that
might be required. If advance notice isn’t practical, however, the telephone
company reserves the right to notify the customer as soon as possible. You will
also be advised of your right to file a complaint with the FCC if you believe it is
necessary.
The telephone company may make changes in its facilities, equipment, operations
or procedures that could affect the proper functioning of your equipment. If so,
E—23
FaxPress Guide
you’ll be notified in advance to modify your system to accommodate the changes.
Advance modifications should allow for uninterrupted service.
Note:
DO NOT DISASSEMBLE THIS EQUIPMENT. It does not
contain any user serviceable components.
Direct Inward Dialing (DID)
Allowing this equipment to be operated without providing for proper answer
supervision is a violation of Part 68 of the FCC rules.
Proper supervision is provided when:
1.
2.
This equipment returns answer supervision to the PSTN when DID calls
are:
•
answered by the called station
•
answered by the attendant
•
routed to a recorded announcement that can be administered by the
CPE user
•
routed to a dial prompt.
This equipment returns answer supervision on all DID calls forwarded to
the PTSN. Permissible exceptions are:
•
a call is unanswered
•
a busy tone is received
•
a reorder tone is received
E&M
FaxPress 7500-E&M must not be connected to the Public Telephone Network.
The FaxPress 7500 E&M is not FCC Part 68 registered for connection to the
Telephone Company Network.
E—24
Appendix E: The FaxPress 7500-DID and E&M
FCC Statement
This device complies with the limits for a Class A digital device, pursuant to Part
15 of the FCC Rules. Operation is subject to the following two conditions:
This device may not cause harmful interference.
This device must accept any interference received, including interference that may
cause undesired operation.
Electrical Safety Advisory
Castelle recommends the installation of an AC surge arrestor in the AC outlet used
with this equipment. Telephone companies report that electrical surges, typically
lighting transients, are very destructive to customer terminal equipment connected
to AC power sources.
Safety Information
Voltage
The Castelle FaxPress 7500 operates only from a 90-250 volt, 60/50 Hz AC
source. Do not connect to any other power source.
Power Source
The FaxPress 7500 operates from a single-phase power source. Operation from
power sources where both current-carrying conductors are live with respect to
ground (e.g. phase-to-phase on a 3-wire system) is not recommended.
CAUTION: Proper AC source grounding, and grounding circuit continuity are
vital for safe operation
Power Cord
The FaxPress 7500 comes with a UL listed power cord.
CAUTION: Use only the 3-wire, 3-terminal power cord provided.
CAUTION: To preclude the possibility of electrical shock, do not ever remove the
Faxpress 7500 case.
E—25
FaxPress Guide
UL Safety Requirement
The FaxPress 7500 product chassis is connected to the earth ground prong of the
AC power supply connector for the purpose of safety protection. However, some
buildings do not have good earth ground connection to the AC power supply earth
ground prong. In order to provide a good protection from electrical shock, it is
required to use a cable to tie the product chassis to a known good earth ground of
the building. The required contact of the product chassis for the earth ground
cable is at a screw (4-40 screw size) marked as “GROUND” on the bottom panel
of the chassis.
E—26
Index
Index
Numerics
10Base-T
network connector
3 digit IDs F-15
4 digit IDs F-15
2-3
attaching files
sending faxes 12-12
AutoDID F-2
Automatic Fax Routing 5-49
Avision scanners 4-2
A
B
access rights 3-20
Accumulate fax option 12-3, 14-6
Add/Remove Programs 3-26
adding
favorite documents 20-2
favorite messages 20-10
addressing faxes 12-10
recipient 12-19
administration 3-20
Administrator Utilities 6-1
ADSI
installing 7-5
advanced settings
server properties 5-30
archived faxes
filter received faxes 10-37, 16-7
filtering 10-35, 16-5
filtering transmitted faxes 10-35, 16-5
archiving faxes 16-1
converting 10-34, 16-5
email 10-34, 16-5
managing 16-2
printing 10-34, 16-5
saving 10-34, 16-4
sending 10-34, 16-5
sorting 10-35, 16-5
user settings 7-30
viewing 10-33, 16-4
viewing properties 10-34, 16-5
area codes
constructing complex fax numbers 5-28
ASP custom database 3-36
assigned line user
fax line settings 5-15
attaching
favorite documents 20-6, 20-7
native documents 12-13
broadcast switch 12-21
building complex fax phone numbers
8-32, 19-19
C
Cabling F-12
Castelle Programming Interface (CPI) 9-14
Castelle Storage Server 2-54
CC function 13-11
change fax transmission order 12-29
Citrix
MetaFrame 3-21
NFuse 3-21
Published Applications 3-21
Citrix MetaFrame
about 3-21
client software
Faxmain 3-3
configuring
server
advanced properties 5-30
code set 5-11
dialing properties 5-25
fax lines 5-13
internet faxing 5-20
settings 5-11
storage reclamation 5-16
viewing properties 5-45
user 7-3
fax phone numbers 7-3
incoming faxes 7-3
operator 7-3
outgoing faxes 7-3
printer 7-3
privileges 7-3
router 7-3
supervisor 7-3
user account 7-3
connections
Index —1
FaxPress Administrator’s Guide
line F-12
trunk F-12
constructing complex phone numbers 5-25
Conversion Interface
DID F-3
E&M F-7
converting
master cover pages 18-12
converting faxes 13-5
archived 10-34, 16-5
OCR 13-5
corporate
FaxPress phone books 19-3
ODBC database phone book
19-3
phone books 19-3
Corporate Cover Page 18-2
corporate cover pages
creating 18-12
Corporate Phone Books
Faxmain folder 11-7
cover page
corporate 18-2
description 18-2
personal 18-2
publishing custom 18-14
templates 18-3
Cover Page Editor
creating cover pages 18-3
cover page master
creating 18-3
cover page templates
folder 11-10
cover pages 18-1
adding variables 18-7
converting master cover pages 18-12
corporate 18-12
Cover Page Editor 18-3
creating master 18-3
including favorite messages 20-11
personal 18-12
templates 11-10
creating 18-3
Index —2
using European characters 18-11
creating
corporate cover pages 18-12
cover page templates 18-3
cover pages
adding variables 18-7
Cover Page Editor 18-3
external phone book views 8-27, 19-14
Goldmine templates 22-9
local phone books 19-6
personal cover pages 18-12
personal phone books 19-20
phone book groups 19-7
phone books
importing 19-8
saved faxes folders 10-40, 16-10
user accounts 7-2
creating groups 19-7
CTPX F-11
D
databases
Microsoft Access 8-34
SQL 8-34
DCX
fax formats 20-5
define the fax merge variables 21-11
deleting
favorite messages 20-11
faxes 13-9
obsolete mailboxes 5-17
received faxes 13-3
saved faxes 10-41, 16-11
transmitted faxes 12-27
delivery
unaddressed faxes 13-2
delivery options
transmitting faxes 12-15
dialing properties
configuring 5-25
dialing rules
external database phone books 8-30, 19-17
DID
and unidentified mailbox IDs 5-57
Index
configuring the timeout interval of
routing
setting type 5-15
DID routing
configuring F-13
direction of fax line 5-15
documents
faxing repeatedly 11-9
Drop Directory 9-2
DropFax utility 9-2
DTMF
dialing procedure 5-59
routing
setting type 5-15
DTMF digits F-19
DupUser.exe 6-24
E
eCabinet 4-2
email
archived faxes 10-34, 16-5
forwarding faxes 12-30, 13-17
saved faxes 10-41, 16-11
Email Gateways
Lotus Notes Gateway 4-2
SMTP Gateway 4-2
Ethernet 6-8, 6-14
European characters
configuring server 5-11
cover pages 18-11
Exchange Connector 4-2
Exchange users
importing 6-19
exporting
personal phone books 19-23
phone books 19-8
external database phone books
description 19-4
dialing rules 8-30, 19-17
local 19-3
external database phonebooks
accessing 8-25, 19-12
external phone books
creating views 8-27, 19-14
5-57
F
FabSoft Reform 4-2
failed faxes
resending 12-26
favorite documents 20-1
adding to list 20-2
attaching 20-6
folder 11-9
importing 20-5
sending email 20-7
viewing 20-8
favorite messages
adding to list 20-10
deleting 20-11
folder 11-10
including in cover sheet 20-11
renaming 20-11
viewing 20-12
fax
Accumulate fax option 14-6
fax formats 20-5
DCX 20-5
TIFF 20-5
Fax Line F-13
fax lines
assigning 5-15
configure 5-13
configuring 5-13
dialing type 5-14
PBX prefix 5-14, 5-52
routing 5-15
setting direction 5-15
unaddressed faxes 5-15
fax merge 21-1
fax merge, define the variables 21-11
fax merge, install software 21-3
fax merge, overview 21-2
fax phone numbers
automatic build 5-25
building complex 8-32, 19-19
configuring user accounts 7-3
designating area codes 5-28
Fax Server Interface F-3
Index —3
FaxPress Administrator’s Guide
faxes
Accumulate fax option 12-3
addressing 12-19
archived properties 10-34, 16-5
archiving 16-1
converting archived 10-34, 16-5
converting format 13-5
creating saved faxes folders 10-40, 16-10
deleting 13-9
email archived 10-34, 16-5
filtering archived 10-35, 16-5
forwarding 13-9
forwarding via email 13-17
incoming
unaddressed 5-2
managing archived faxes 16-2
printing archived 10-34, 16-5
properties 13-5
refresh the queue 13-18
resend 13-15
routing 13-4
saved 16-1
saving 10-40, 16-10
saving archived 10-34, 16-4
saving incoming 13-8
sending archived 10-34, 16-5
sending multiple documents in one job 12-3
sorting archived 10-35, 16-5
transmitting 12-1
view fax propeties 13-18
viewing archived 10-33, 16-4
Faxmain F-15
FaxPress client 3-3
Faxmain folders 11-8, 11-10
Corporate Phone Books 11-7
Favorite Documents 11-9
Favorite Messages 11-10
FaxPress Neighborhood 5-5, 5-6
Local Phone Books 11-8
Notices 11-5
Outgoing Fax Queue 11-4
Personal Folders 11-8
Saved Faxes 11-9
Index —4
Faxmain tree 11-3
FaxPress 1500N 1-4
FaxPress 3500 1-4
FaxPress 6.3 F-1
FaxPress Accounts
locating a server 5-5, 5-6
FaxPress Client
uninstalling 3-49
FaxPress client
installing 3-24
removing 3-25
FaxPress mailbox 11-3
FaxPress Neighborhood
folder 5-5, 5-6
FaxPress phone books
corporate 19-3
description 19-4
local 19-3
FaxPress server
moving 6-5, 6-11
filtering
archived faxe 10-35, 16-5
archived received faxes 10-37, 16-7
archived transmitted faxes 10-35, 16-5
folders
FaxPress Neighborhood 5-5, 5-6
formatting
phone numbers 19-5
forwarding faxes 13-9
automatically 13-10
manually 13-13
via email 12-30
FP Configurator for TCPIP 6-3
frame type 6-9, 6-15
fxcfg file
and DID failure 5-57
G
global groups 5-41
Single Siign On 5-35
GoldMine
create templates 22-9
interface installation 22-3
update templates 22-12
Index
Goldmine
automated faxing 22-14
contact lists 19-5
groups
global 5-41
serial 5-40
H
holding faxes
12-28
I
IEEE standard. 6-8, 6-14
importing
favorite documents 20-5
personal phone books 19-22
phone books 19-8
importing Exchange users 6-19
importing NT groups
user accounts 7-2, 7-5
importing NT user groups 7-2, 7-5
incoming faxes
configuring user 7-3
saving 13-8
unaddressed 5-2
unadressed faxes 13-2
Information Storage 10-49
install
ADSI 7-5
Goldmine interface 22-3
NetWare Bindery server 2-43
NetWare NDS server 2-20, 2-31
server hardware 2-3
install fax merge software 21-3
install mode 3-26
installing the FaxPress client
preparing the Terminal Server 3-24
requirements 3-24
Interface Connections F-3
internet faxing
configuring 5-20
IP address
defining network segment 2-3
Windows NT 2-3
IPX
network protocols 2-43
IPX protocol
2-20, 2-31
J
jobqueue.cfg 9-3
joins in phone book view
8-31, 19-18
L
LAN 2-4
LED Indicators 2-4
LEDs
DID Interface F-4
E&M Interface F-8
Fax Server F-10
server 2-4
Line Direction F-13
line direction 5-15
Line Settings F-13
line settings 5-13
unaddressed faxes 5-15
Linux
installation documentation
list of send faxes 11-4
load balancing 3-21
Load sharing 5-47
load sharing 5-33
local phone books 19-2
creating 19-6
external database 19-3
FaxPress 19-3
Local Phonebooks
folder 11-8
locate the server 5-5, 5-6
logon
server 5-3
Lotus Notes Gateway 4-2
2-6
M
Mailbox IDs
configuring F-14
mailbox IDs 5-50
mailboxes
creating user acounts 7-2
importing NT users 7-2, 7-5
removing obsolete 5-17
unaddressed 5-2
user accounts 11-3
Index —5
FaxPress Administrator’s Guide
users 7-3
manage faxes
saved faxes 10-40, 16-10
managing 20-1
archived faxes 16-2
favorite documents 20-1
microprocessor 1-2
Microsoft Access 8-34
Microtek scanners 4-2
monitoring mailbox accounts 17-9
MS-Explorer
sending faxes 12-23
MS-Word
sending faxes 12-5
N
Native Attachment Gateway 4-2
native documents
attaching to faxes 12-13
Native phone books
see FaxPress phone books 19-4
NetWare Bindery
server installation 2-43
NetWare NDS
server installation 2-20, 2-31
network connectors
10Base-T 2-3
network details
user settings 7-32
Network Packet Type 6-8, 6-14
networks
protocol 2-43
Non-Standard Published Applications 3-21
Notices
events 11-5
folder 11-5
Novell Bindery
user authentication 5-42
Novell NDS
groups 5-40, 5-41
Novell users
creating users accounts 7-2, 7-15
Single Sign On 7-2, 7-15
Index —6
O
obsolete mailboxes
removing 5-17
OCR 13-5
ODBC database phone books
corporate 19-3
phone books
ODBC database 19-4
ODBC driver 19-4
ODBC drivers 8-33
ODBC phone books
see external database phone books
operator account
privileges 11-10
operator privileges
privilege levels
operator 7-3
optimizing
reclaiming storage 5-16
Outgoing Fax Queue
folder 11-4
outgoing faxes
configuring user 7-3
Outlook Direct 4-2
client-side option 3-34
overview 21-2
P
parallel printer 2-3
PBX
and automatic fax routing 5-49
fax line settings
prefix 5-14, 5-52
integration with FaxPress 5-49
personal cover page 18-2
personal cover pages
creating 18-12
Personal Folders 11-8
Personal Phone Books
Faxmain folders
Personal Phone Books 11-6
personal phone books 19-2
creating 19-20
creating groups 19-21
19-4
Index
exporting 19-23
importing 19-22
Phone Books
converting 6-16
phone books 19-7
accessing external database 8-25, 19-12
corporate 11-7, 19-3
FaxPress 19-3
ODBC external database 19-3
creating external views 8-27, 19-14
creating groups 19-21
creating local 19-6
creating personal 19-20
creating views
defining joins 8-31, 19-18
description 19-2
editing 19-24
exporting 19-8
exporting personal 19-23
formatting phone numbers 19-5
Goldmine contact lists 19-5
importing 19-8
importing personal 19-22
local 11-8, 19-2
external database 19-3
FaxPress 19-3
personal 11-6, 19-2
phone numbers
building complex 8-32, 19-19
contructing complex fax numbers 5-25
dialing rules 8-30, 19-17
formatting 19-5
specifying area codes 5-28
print fax
print a list 15-6
printer
configuring user 7-3
printer ports 15-2
printers
parallel 2-3
serial 2-3
printing
archived faxes 10-34, 16-5
saved faxes 10-41, 16-11
privilege levels
user 7-3
privileges
router account 11-10
supervisor account 11-11
user account 11-10
properties
archived faxes 10-34, 16-5
faxes 13-5
server
line settings 5-13
protocols
IPX 2-20, 2-31, 2-43
Published Appications
non-standard 3-21
pulse dial
line settings 5-14
R
receiving faxes
deleting 13-3
sending 13-4
Reform integration 4-2
refresh
fax queues 13-18
queue 12-35
Registering a FaxPress Server 8-35
releasing faxes 12-29
removing
obsolete mailboxes 5-17
renaming
favorite message 20-11
resending faxes 12-26, 13-15
Ricoh eCabinet 4-2
RJ11
phone jacks F-3
plug F-3
RJ-45 connector 2-3
rounter account
privileges 11-10
router privileges
privilege levels
router 7-3
Index —7
FaxPress Administrator’s Guide
routing
automatic PBX 5-49
DID 5-15, 5-49
DTMF 5-15
faxes 13-4
setting type 5-15
Routing Type F-13
S
SAP custom database 3-36
Saved Faxes
folder 11-9
saved faxes 12-25, 16-1
creating folders 10-40, 16-10
deleting 10-41, 16-11
email 10-41, 16-11
location 11-9
printing 10-41, 16-11
send 10-41, 16-11
viewing 10-41, 16-11
saving
archived faxes 10-34, 16-4
faxes 13-8
transmitted faxes 12-25
saving faxes
managing 10-40, 16-10
SBE
and FaxPress 7.0 1-10
scanners, and FaxPress 4-2
sending faxes 12-16
archived faxes 10-34, 16-5
attaching favorite documents 20-6
email
attaching favorite documents 20-7
forwarding 13-9
forwarding via email 13-17
Goldmine automated faxing 22-14
internet 5-20
multiple documents in one job 12-3
received faxes 13-4
resend 13-15
saved faxes 10-41, 16-11
see also transmitting faxes 12-30
using the braodcast switch 12-21
Index —8
serial groups 5-40
serial number groups
Single Siign On 5-35
serial printer 2-3
server
configuring properties
advanced settings 5-30
dialing properties 5-25
fax lines 5-13
internet faxing 5-20
line settings 5-13
server information 5-45
server settings 5-11
storage reclamation 5-16
LEDs 2-4
locating
FaxPress Accounts 5-5, 5-6
logon 5-3
NetWare Bindery 2-43
server hardware
installation 2-3
server installation
NetWare NDS 2-20, 2-31
SimpleFax utilities 9-12
Single Sign On
creating user accounts 7-2, 7-15
global groups 5-35
serial number groups 5-35
user accounts 7-2
slave server 5-47
SMTP Gateway 4-2
Software Developers Kit (SDK) 9-12
sorting
archived faxes 10-35, 16-5
SQL database 8-34
storage reclamation
automatic 5-18
manual 5-18
optimizing system 5-16
Storage Server 2-54
storing faxes 16-1
supervisor account
privileges 11-11
Index
supervisor privileges
privilege levels
supervisor 7-3
symbol set code
configuring server 5-11
T
Technical Specifications F-21
templates
cover page 18-3
cover pages
creating 18-3
Goldmine 22-9
update Goldmine 22-12
Terminal Server
and Add/Remove Programs 3-26
install mode 3-26
terminals 3-20
TIFF 13-7, 20-5
Token Ring 6-8, 6-14
Tone dial
fax line settings 5-14
transmitted faxes
forwarding via email 12-30
resending 12-26
saving 12-25
view fax properties 12-34
transmitting faxes 12-1
addressing 12-10
attaching files 12-12
attaching native documents 12-13
change send order 12-29
delivery options 12-15
from application 12-2
from Explorer 12-23
from MS- Word 12-5
holding 12-28
refreshing the queue 12-35
releasing a hold 12-29
transmitting faxes, deleting 12-27
TrayFaxAlert 17-7
setting up 17-7
using 17-10
Troubleshooting
100BASE-T B-5
10BASE-T B-5
Active B-7
active phone line. B-10
Attached files B-9
Bi-directional B-8
boot cycle B-2
carrier signal B-9
Cover Page file B-9
database corruption B-7
diagnostic report B-4, B-7
disk space B-7
failure description B-8
file server disk space B-7
full duplex access B-4
fuse B-3
fuse holder B-2
International access code B-8
Irrecoverable network errors B-7
LEDs do not flash B-3
Line Direction settings B-10
line direction settings B-8
line quality B-10
Line Settings dialog box B-8
memory B-11
memory SIMM B-6
network cable B-5
network connection B-5
network LED B-5
Not Connected B-8
Outgoing Faxes view list B-7
Output Only B-8
PBX B-8
physical network type B-7
power switch B-3
Powering Up B-2
pre-dial settings B-8
Print Incoming Fax B-10
printer type B-11
Queued Faxes B-7
rasterizing B-8
Ready B-7
replace the fuse B-2
Index —9
FaxPress Administrator’s Guide
sharing the line B-9
Storage Reclamation B-7
times out B-9
transmission speed. B-5
UNADDRESSED mailbox
ZQ Directory B-11
trunk parameters F-11
server properites
B-10
U
unaddressed mailbox
default incoming fax location 5-2
fax line settings
server 5-15
Unaddressed User Mailbox
routing 13-2
uninstalling
FaxPress Client 3-49
user accounts 7-2, 7-3, 7-5
accessing Novell user groups 7-2, 7-15
archive setting 7-30
configuring incoming faxes 7-3
configuring outgoing faxes 7-3
configuring printer 7-3
creating 7-2
fax phone numbers 7-3
mailboxes 7-3
network details 7-32
privileges 11-10
Single Sign On 7-2, 7-15
user authentication
Novell Bindery 5-42
Novell user groups 7-2
user mailboxes 11-3
user accounts 7-3
user privileges 7-3, 11-10
User Properties F-15
utilities 6-2
V
viewing
archived faxes 10-33, 16-4
favorite documents 20-8
favorite messages 20-12
fax properties 12-34, 13-18
saved faxes 10-41, 16-11
Index —10
5-45
W
Windows NT
IP Address 2-3
Windows-based Terminals
WNTCONF 6-5, 6-11
Z
ZQ directory
B-11
3-20