1
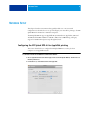
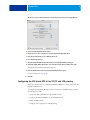
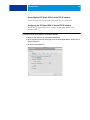
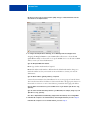
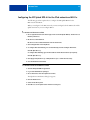
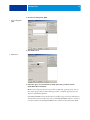
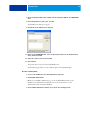
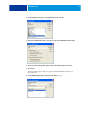
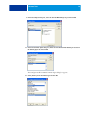
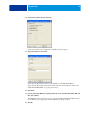
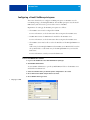
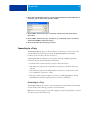
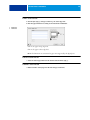
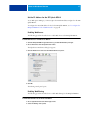
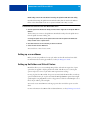
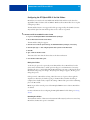
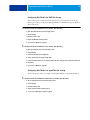
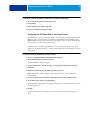
Splash RPX-iii
Xerox 700 Digital Color Press
Configuration Guide
© 2008 Electronics for Imaging, Inc. The information in this publication is covered
under Legal Notices for this product.
45073073
7 May 2008
CONTENTS
3
CONTENTS
INTRODUCTION
7
Terminology and conventions
7
About this document
7
NETWORK SETUP
8
Configuring the EFI Splash RPX-iii for AppleTalk printing
8
Configuring the EFI Splash RPX-iii for TCP/IP and LPR printing
9
Connecting the EFI Splash RPX-iii to the TCP/IP network
10
Configuring the EFI Splash RPX-iii for the TCP/IP network
10
Enabling TCP/IP printing from the EFI Splash RPX-iii
12
Configuring Windows 2000/XP/Server 2003/Vista for TCP/IP printing
12
Configuring the EFI Splash RPX-iii for the IPv6 network and 802.1x
13
Configuring the EFI Splash RPX-iii for NDPS Printing
14
Configuring a Novell NetWare print queue
20
Connecting to a Fiery
21
Connecting to a Fiery
21
Changing the Fiery connection
22
SETTING DEFAULT PREFERENCES
23
Setting default job settings
23
Editing default job settings
23
CONTENTS
Setting up EFI Splash RPX-iii preferences
4
24
Setting Server preferences
24
Setting Page preferences
27
Setting Network preferences
30
Setting Color preferences
31
Setting Appearance preferences
32
Setting Button Bar preferences
32
Setting Jobs preferences
32
Setting Job Log preferences and reading a log file
32
USING THE WEB QUEUE MANAGER
36
Preparing the Web Queue Manager
36
Configuring the Web Queue Manager
36
Set the IP Address for the EFI Splash RPX-iii
37
Enabling Web Access
37
Enabling Web Sharing
37
Controlling Web Queue Management privileges
ADMINISTERING THE EFI SPLASH RPX-iii
39
40
Changing the Administrator password
40
Managing users and accounts
41
Secure Access
43
Editing Secure Access client error messages
44
Using Secure Access at client workstations
44
Printing with Secure Access
44
Printing the Configuration Report
45
CONTENTS
5
Backing up and restoring preferences
45
Updating software
47
Downloading fonts
49
Setting up scan mailboxes
50
Setting up Hot Folders and Virtual Printers
50
Configuring the EFI Splash RPX-iii for Hot Folders
51
Configuring Hot Folders for SMB file sharing
52
Configuring Hot Folders for AppleTalk file sharing
52
Configuring the EFI Splash RPX-iii for Virtual Printers
53
Scanning for viruses
54
Energy considerations
54
INDEX
Power-On
54
Energy Saver
54
EnergyStar Compliance
54
Sleep Mode
54
55
INTRODUCTION
7
INTRODUCTION
This document describes how to set up network servers and clients to use the Splash RPX-iii
Xerox 700 Digital Color Press. For general information about using the digital press, your
computer, application software, or network, see the documentation that accompanies those
products.
Terminology and conventions
This document uses the following terminology and conventions.
Term or convention
Refers to
Digital press
Xerox 700 Digital Color Press
Fiery
Xerox EX Print Server and Integrated Fiery Color Server
Mac OS
Apple Mac OS X
EFI Splash RPX-iii
Splash RPX-iii Xerox 700 Digital Color Press
Titles in italics
Other documents in this set
Windows
Microsoft Windows 2000, Windows XP, Windows Server 2003,
Windows Vista
About this document
This document covers the following topics:
• Setting up the network environment
• Setting preferences for the EFI Splash RPX-iii
• Using the Web Queue Manager
• Administering the EFI Splash RPX-iii
N OTE : The EFI Splash RPX-iii server can run on Mac OS 10.5 or Mac OS 10.4. Differences
between the two operating systems are noted in instructions throughout this document.
NETWORK SETUP
8
NETWORK SETUP
This chapter describes environments that typically include one or more network
configurations. It describes how to set up and configure your network for printing to the EFI
Splash RPX-iii from Mac OS or Windows computers.
The EFI Splash RPX-iii supports AppleTalk, Bonjour/Rendezvous, AppleShare, Microsoft
TCP/IP, Novell NetWare NDPS for TCP/IP or LPR or Port 9100 Printing, and legacy
support for NetWare Print Queue setup through PConsole.
Configuring the EFI Splash RPX-iii for AppleTalk printing
This section describes how to configure the EFI Splash RPX-iii to receive jobs from
computers on an AppleTalk network.
TO CONFIGURE THE EFI SPLASH RPX-iii FOR APPLETALK PRINTING
1 Choose System Preferences from the Apple menu on the EFI Splash RPX-iii, and then choose
Network preferences.
2 For Mac OS 10.5, click Advanced and click AppleTalk.
NETWORK SETUP
9
Mac OS 10.4: Choose Built-in Ethernet from the Show menu and click the AppleTalk tab.
3 Select the Make AppleTalk Active option.
4 If more than one zone is displayed, select the appropriate AppleTalk Zone.
5 Click Apply Now (Mac OS 10.4) or OK (Mac OS 10.5).
6 Close Network preferences.
7 Start the EFI Splash RPX-iii application and log on with Administrator privileges.
8 In the EFI Splash RPX-iii application, choose Preferences from the Splash Server menu.
The Splash Server Preferences dialog box appears.
9 Click the Network icon and select the AppleTalk Registration option.
For more information, see page 30.
10 Click OK.
Configuring the EFI Splash RPX-iii for TCP/IP and LPR printing
This section describes how to configure the EFI Splash RPX-iii to receive print jobs from a
TCP/IP or LPR network.
To configure the EFI Splash RPX-iii and users’ computers for TCP/IP printing, complete
the following procedures:
• Connect the EFI Splash RPX-iii to the TCP/IP network.
• Configure the EFI Splash RPX-iii for the TCP/IP network.
• Enable TCP/IP printing.
• Configure users’ computers for TCP/IP printing.
NETWORK SETUP
10
Connecting the EFI Splash RPX-iii to the TCP/IP network
Connect the Local Area Network (LAN) card or Ethernet port to the network.
Configuring the EFI Splash RPX-iii for the TCP/IP network
The following procedure explains how to configure the EFI Splash RPX-iii for the
TCP/IP network.
TO CONFIGURE THE EFI SPLASH RPX-iii FOR THE TCP/IP NETWORK
1 Obtain a router address from your network administrator.
2 Choose System Preferences from the Apple menu on the EFI Splash RPX-iii, and then choose
Network Preferences.
3 Mac OS 10.5: Click Advanced.
NETWORK SETUP
11
Mac OS 10.4: Choose the local area network (LAN) card type or Built-in Ethernet from the
Show menu for the TCP/IP network.
4 To configure the TCP/IP address manually, choose Manually from the Configure menu.
Assigning the EFI Splash RPX-iii a static TCP/IP address allows users to locate the EFI
Splash RPX-iii reliably on the network. To set up the DHCP server to use the same TCP/IP
address, contact your network administrator.
Type the EFI Splash RPX-iii IP address.
N OTE : Type a Subnet mask number, if required.
N OTE : If the Subnet mask number is different than the default mask number, change it to
match the number used on your network. For more information, contact your network
administrator.
Type the Router address (gateway address), if required.
A network router maintains a list of IP addresses for two or more groups of network devices.
The router then uses the list of addresses to direct network data to the appropriate location on
the network. To enter two or more router addresses, press Return after typing each address.
Type the Name server address for your local DNS server on your network (Mac OS 10.4 only,
optional).
Type the search domain name that pertains to your DNS name; for example, design.corp.com
(Mac OS 10.4 only, optional ).
Or to have a TCP/IP address automatically assigned from the network, choose Using DHCP.
5 If the Mac OS computer is on an IPv6 network, click Configure IPv6 and proceed to step 6.
If the Mac OS computer is not on an IPv6 network, proceed to step 7.
NETWORK SETUP
12
6 To configure IPv6 manually, type the IPv6 address and Router address (if required), and
then click OK.
To configure IPv6 automatically, choose Automatically from the Configure IPv6 menu and
click OK.
7 Click Apply Now (Mac OS 10.4) or OK (Mac OS 10.5) to confirm the new setup.
8 Close the Network Control Panel.
Enabling TCP/IP printing from the EFI Splash RPX-iii
The following procedure explains how to enable TCP/IP printing from the EFI
Splash RPX-iii.
TO ENABLE TCP/IP DIRECT PRINTING
1 Start the EFI Splash RPX-iii application.
2 Choose Login from the Server menu.
3 Type the Administrator password and click OK.
4 Choose Preferences from the Splash Server menu.
The Splash Server Preferences dialog box appears.
5 Click the Network icon.
6 Select the Enterprise Networking option and click OK.
The EFI Splash RPX-iii is ready to check that the network status for LPR/IP is online.
Configuring Windows 2000/XP/Server 2003/Vista for TCP/IP printing
The EFI Splash RPX-iii accepts print jobs from the TCP/IP network on a Windows 2000/
XP/Server 2003/Vista or Novell NetWare NDPS LPR network. In addition, users on a
TCP/IP network can print files directly to the EFI Splash RPX-iii by using Drop folders or
Hot Folders.
N OTE : To print over the TCP/IP network, your computer must have Splash software
appropriate for your operating system installed, and must be connected to the EFI
Splash RPX-iii.
Windows computers are preconfigured with the Microsoft TCP/IP software installed. For
information about configuring Windows for TCP/IP printing to the EFI Splash RPX-iii, see
the Printing Guide.
NETWORK SETUP
13
Configuring the EFI Splash RPX-iii for the IPv6 network and 802.1x
The following procedure explains how to configure the EFI Splash RPX-iii for the
IPv6 network and 802.1x.
When you configure for the IPv6 network, you must configure both the Macintosh and the
Splash Server before you can configure 802.1x.
TO CONFIGURE THE MACINTOSH FOR IPV6
1 Choose System Preferences from the Apple menu on the EFI Splash RPX-iii, and then choose
Network preferences.
2 Mac OS 10.5: Click Advanced.
Mac OS 10.4: Choose Built-in Ethernet from the Show menu.
3 Click Configure IPv6 on the TCP/IP tab.
4 To configure IPv6 automatically, choose Automatically from the Configure IPv6 menu.
Click OK (Mac OS 10.4).
To configure IPv6 manually, type the IPv6 address and the Router address (if required).
Click OK (Mac OS 10.4).
5 Click Apply Now (Mac OS 10.4) or OK (Mac OS 10.5) to confirm the new setup.
6 Close the Network Control Panel.
TO CONFIGURE THE EFI SPLASH RPX-iii FOR IPV6
1 Start the EFI Splash RPX-iii application.
2 Log on with Administrator privileges.
3 Choose Preferences from the Splash Server menu.
The Splash Server Preferences dialog box appears.
4 Click the Network icon.
5 Select the Use IPv6 option.
6 Click OK to close the Splash Server Preferences dialog box.
NETWORK SETUP
14
TO CONFIGURE 802.1X (MAC OS 10.4)
1 Double-click Internet Connect in the Applications Folder.
2 Choose New 802.1X Connection from the File menu.
3 Choose Edit Configurations from the Configuration menu.
4 Choose Built-In Ethernet 1 from the Network Port menu.
5 Specify the other information on the pane as appropriate for your network.
TO CONFIGURE 802.1X (MAC OS 10.5)
1 Choose System Preferences from the Apple menu on the EFI Splash RPX-iii, and then choose
Network preferences.
2 Click Advanced.
3 Click 802.1X.
4 Specify the information on the pane as appropriate for your network.
Configuring the EFI Splash RPX-iii for NDPS Printing
The Novell NetWare server must be set up and configured prior to installing and configuring
the NetWare Client. The NetWare Client must be installed on the workstation being used to
configure the NetWare server for NDPS printing.
N OTE : Use the latest NetWare support pack and NetWare Client. For more information, see
the documentation that accompanies NetWare.
The following procedures assume NDPS has been installed on your NetWare server and is
properly configured. An NDPS Broker and NDPS Manager are required for configuring
NDPS printing. If these are not in place, contact your network administrator.
TO ADD THE EFI SPLASH RPX-iii PPD TO THE NOVELL NETWARE NDPS BROKER
1 Log on to the NetWare file server with Administrator privileges.
2 Start NetWare Administrator.
N OTE : To start NetWare Administrator, go to the Sys:Public\Win32 folder on the NetWare
server and click the nwadmin32 icon.
3 Double-click the Broker icon in the NetWare Admin window.
NETWORK SETUP
15
4 Click Resource Management (RMS).
1
Resource Management
(RMS)
1
5 Click Add Resources.
1
Add Resources
1
6 In Resource Types, select the Windows operating system that you want for the EFI
Splash RPX-iii Driver installation.
N OTE : You can add printer drivers for more than one Windows operating system, but you
must repeat this procedure and the following procedure to install the appropriate printer
driver for each Windows platform.
If the EFI Splash RPX-iii driver has already been installed, it appears in the installed printer
drivers listed in the Current Resources section. If the EFI Splash RPX-iii driver is not listed,
you must install it from the EFI Splash RPX-iii User Software and Documentation DVD.
NETWORK SETUP
16
7 Insert the EFI Splash RPX-iii User Software and Documentation DVD into the CD/DVD-ROM
drive.
8 In the Manage Resources dialog box, click Add.
The Add Resources dialog box appears.
9 Click Browse in the Add Resources dialog box.
10 Browse to the CD/DVD-ROM drive, select the appropriate driver from the Standard drivers
folder, and then click OK.
11 Verify the location of the file and click OK.
12 Click Continue.
The printer driver is copied to the Novell NDPS Server.
Use the following procedure to create a Printer Agent for the NDPS Manager.
TO CREATE A PRINTER AGENT
1 Log on to the NetWare file server with Administrator privileges.
2 Start NetWare Administrator.
N OTE : To start NetWare Administrator, go to the Sys:Public\Win32 folder on the
NetWare server and click the nwadmin32 icon. For more information, see the
documentation that accompanies NetWare.
3 In the NetWare Administrator window, choose Create from the Object menu.
NETWORK SETUP
4 In the New Object dialog box, select NDPS Printer and click OK.
5 In the Create NDPS Printer dialog box, type a name in the NDPS Printer Name field.
6 Select the Create a New Printer Agent option in the Printer Agent Source area.
7 Click Create.
The Create Printer Agent dialog box appears with the NDPS Printer Name you
chose displayed.
8 For the NDPS Manager Name, click the Browse button (“...”).
17
NETWORK SETUP
18
9 In the Select Object dialog box, select the desired NDPS Manager object and click OK.
10 In the Create Printer Agent dialog box, make sure that Novell Printer Gateway is selected in
the Gateway Types list and click OK.
The Configure Novell for NDPS for Printer Agent dialog box appears.
11 Select (Generic) PS for the Printer Type and click OK.
NETWORK SETUP
19
12 Select Remote (LPR on IP) and click Next.
A new user interface in the Configure Port Handler dialog box appears.
13 Select Host Address or Host Name.
If you select the Host Address field, type the IP address of the EFI Splash RPX-iii.
If you select the Host Name field, type the DNS name. You can leave Printer Name as the
default, PASSTHROUGH, or type any printer name.
14 Click Finish.
15 Click the appropriate Windows operating system tab, choose the EFI Splash RPX-iii PPD, and
then click Continue.
The NDPS Information dialog box appears. The current EFI Splash RPX-iii PPDs selected
for the Windows operating systems for this NDPS Printer Agent are listed.
16 Click OK.
NETWORK SETUP
20
Configuring a Novell NetWare print queue
This section describes how to configure a TCP/IP print queue on a NetWare server for
non-NDPS printing to the EFI Splash RPX-iii. The NetWare print queue uses the Novell
LPR Gateway and can be used to print via older versions of NetWare.
Requirements for setting up the NetWare print queue are as follows:
• The NetWare server must be configured for TCP/IP.
For more information, see the documentation that accompanies the NetWare server.
• NetWare Print Services for UNIX must be installed on the NetWare server.
For more information, see the documentation that accompanies the NetWare server.
• The NetWare Server must be able to resolve the IP address of the EFI Splash RPX-iii via
DNS.
Add an entry for the EFI Splash RPX-iii in the NetWare server’s HOSTS file, located in
the sys:\ETC folder, or add a DNS entry for the EFI Splash RPX-iii in your network’s
DNS server.
For more information, consult your network administrator.
TO SET UP NON-NDPS NOVELL PRINTING
1 Log on to the NetWare file server with Administrator privileges.
2 Start NetWare Administrator.
To start NetWare Administrator, open the Sys:Public\Win32 folder on the NetWare server
and click the nwadmin32 icon.
3 Select the Container where you want the printer configuration to be located.
4 Choose Print Services Quick Setup from the Tools menu.
5 Choose UNIX from the Type menu.
1
Change Type to UNIX
1
NETWORK SETUP
21
6 In the Unix Communication dialog box, type the EFI Splash RPX-iii Host name (DNS name or
IP address), type the Printer name, and then click OK.
7 At the NetWare Server Console, type “load pserver” and select the print server that you
just created.
8 At the NetWare Server Console, type “load unicon,” go to Start/Stop Services, click Insert,
and then start NetWare to Unix print services.
9 Browse for the print queue that you just created.
Connecting to a Fiery
The EFI Splash RPX-iii supports a direct connection to the Fiery or a connection over the
network. After the initial connection is made, the EFI Splash RPX-iii automatically
reconnects to the same Fiery each time it is started.
The EFI Splash RPX-iii installation process guides you through establishing the initial
connection. Keep in mind the following considerations:
• Determine if the connection is Direct Connect or Network Connect.
• If the Mac OS X computer has a single built-in network port, only Network Connect
is allowed.
• If the Mac OS X computer has multiple built-in network ports, verify that the second
port is available for connection to a Fiery.
• If the Fiery software requires an update to connect to the EFI Splash RPX-iii, the EFI
Splash RPX-iii downloads the update after the connection is established.
Connecting to a Fiery
The EFI Splash RPX-iii can connect to a Fiery by the Direct Connect method or the Network
Connect method. The following procedures cover both methods.
N OTE : Direct Connect is supported only with a digital press with an integrated Fiery. A standalone Fiery must use Network Connect.
NETWORK SETUP
22
TO CONNECT TO A FIERY USING THE DIRECT CONNECT METHOD
1 Start the EFI Splash RPX-iii application.
2 Click Direct Connect.
3 If the Connect dialog box appears, follow the on-screen instructions to set the copier
IP address.
The EFI Splash RPX-iii establishes a connection and displays the message “Connection OK.”
4 The EFI Splash RPX-iii prints a Startup Page.
TO CONNECT TO A FIERY USING THE NETWORK CONNECT METHOD FOR THE FIRST TIME
1 Start the EFI Splash RPX-iii application.
2 Click Network Connect.
The Fiery Chooser dialog box appears.
3 The EFI Splash RPX-iii scans for Fiery servers on the network.
Any Fiery on the same subnet appears in the list.
4 Select a Fiery or type the IP address and click Connect.
The EFI Splash RPX-iii establishes a connection and displays the message “Connection OK.”
5 The EFI Splash RPX-iii downloads the enabler.
6 The EFI Splash RPX-iii prints the Startup Page.
Changing the Fiery connection
To change the Fiery connection while the EFI Splash RPX-iii application is running, follow
the instructions in the following procedure.
TO CHANGE THE FIERY CONNECTION
1 Start the EFI Splash RPX-iii application and log on with Administrator privileges.
2 Click the Stop button to stop processing.
3 Choose Controller Connection from the Splash Server.
The Fiery Chooser dialog box appears.
4 The EFI Splash RPX-iii scans for Fiery servers on the network.
Any Fiery on the same subnet appears in the list.
5 Select a Fiery or type the IP address and click Connect.
The EFI Splash RPX-iii establishes a connection and displays the message “Connection OK.”
6 The EFI Splash RPX-iii downloads the enabler.
7 The EFI Splash RPX-iii prints the Startup Page.
SETTING DEFAULT PREFERENCES
23
SETTING DEFAULT PREFERENCES
This chapter describes how to set default preferences for jobs and EFI Splash RPX-iii
operation, using the Splash graphical user interface.
Setting default job settings
You can set default print options for jobs not sent with a EFI Splash RPX-iii PPD, such as
color correction, printing modes, and paper types. The interface is similar to the Job Options
dialog box when you print a job.
N OTE : The Number of Copies and Page Range options are not available in Default Job
Settings tabs.
Editing default job settings
The following procedure explains how to edit default job settings.
TO CUSTOMIZE DEFAULT JOB SETTINGS
1 Make sure that no jobs are currently printing or processing.
To stop a print job in the Active queue, press Start/Stop or choose Stop Processing from the
Server menu. To resume printing, press Start/Stop or choose Start Processing from the Server
menu.
2 Log on to the Splash Server with Administrator privileges.
3 Choose Edit Defaults from the Jobs menu.
The Default Job Settings dialog box appears.
4 Click each of the tabs (File, Page, Imposition, Tray, Output, Color, Quality, and Extras) and set
the options.
5 Click OK to save your custom set of default settings.
Job defaults for PostScript printing
Define default job settings at the EFI Splash RPX-iii. Defaults are applied to the following
types of jobs:
• Jobs from UNIX clients
• Jobs sent from Mac OS or Windows 2000/XP/Server 2003/Vista computers using
non-Splash PPDs
SETTING DEFAULT PREFERENCES
24
• Graphics files (EPS, JPEG, 1-bit TIFF, TIFF, TIFF/IT, DCS 2.0, ExportPS, CT/LW,
CT/NLW, PSD, PDF, PDF2Go, and PDF-X1/a formats) or PostScript files that are
placed in the Drop folder or dragged to the Active or Hold queues
• Jobs sent from the printer driver with Printer’s Default selected
Setting up EFI Splash RPX-iii preferences
The Splash Server Preferences dialog box allows you, as the administrator, to configure the
EFI Splash RPX-iii. The dialog box is configured with the following tabs:
• Server includes file converters, job processing preferences, job error preferences, and the
Server Name.
• Page allows you to choose settings for printing cover pages, previews, custom page sizes,
and mapping jobs.
• Network displays Remote Queue Management, Enterprise Networking, AppleTalk
Registration, and Enable Web Access settings.
• Color includes various options for color printing and calibration.
• Appearance includes options for displaying font styles in the job queues.
• Jobs allows spooled jobs to be deleted automatically based on given parameters of time or
number of jobs.
• Button Bar allows you to select the icons that appear in the Splash Server interface.
• Job Logging displays settings for starting, storing, and viewing Job Log files.
TO VIEW AND EDIT EFI SPLASH RPX-iii PREFERENCES
1 Make sure that no jobs are currently printing or processing.
If printing is in progress at the EFI Splash RPX-iii, do not modify the EFI Splash RPX-iii
preferences. Doing so may cause unexpected results in the printed output. Editing server
preferences does not cause jobs to be reRIPped.
2 Choose Login from the Server menu.
3 Type the Administrator password.
4 Click OK.
5 Choose Preferences from the Splash Server menu.
6 In the Splash Server Preferences dialog box, click the tab that corresponds to the preferences
that you want to set, as described in the following sections.
Setting Server preferences
The options on the Server tab in the Splash Server Preferences dialog box allow you to define
the Server Name and set file converter and job processing preferences.
SETTING DEFAULT PREFERENCES
25
Assigning a server name
The name you type in the Server Name field is visible to remote clients who connect to the
EFI Splash RPX-iii over an AppleTalk or Bonjour network. “Splash Server” is the default
name. If you connect more than one EFI Splash RPX-iii to the same network, you must
assign each a different name in order for both to appear on the network.
To change the server name, type a unique name in the Server Name field. Assign the EFI
Splash RPX-iii a name that clearly indicates that it is a color printer.
Print Startup Page prompts the server to print a Startup Page when the server starts.
The Startup Page displays a recognizable color pattern and basic printer and server
configuration information.
Always Hold Incoming Jobs places a temporary hold on all print jobs received. Incoming jobs
go to the top of the Hold queue and are not RIPped or printed. This allows the EFI
Splash RPX-iii administrator to review all jobs before they print.
N OTE : When this option is selected, you must drag a print job from the Hold queue to the
Active queue or select the job in the Hold queue and choose Remove Hold from the Jobs
menu to print it.
Secure Erase specifies whether the EFI Splash RPX-iii deletes files permanently, so that they
cannot be recovered. This option affects spool files for jobs, files generated by processing spool
files, and scan files.
Setting GA File Converter preferences
To start the GA (Graphic Arts) File Converter automatically, select the GA File Converter
option. When the Converter starts, it appears in the Mac OS X Dock. The Converter
supports the following formats: 1-bit TIFF, TIFF/IT, PDF-X1/a, CT-LW, CT/NLW,
PDF2Go, and ExportPS.
To configure GA File Converter preferences, select GA File Converter in the Dock, and then
choose Preferences from the GA File Converter menu. You can set the following options:
Conversion options
• Resolution: 200, 400, or 600 dpi
• Anti-Aliasing: Bilinear or Nearest Neighbor
Setting the Job Content (Define Errors) preferences
When you click Define Errors, you can specify how to manage jobs that contain errors and
may not print correctly. For each error type, you can select to Ignore the error and print the
job, Warn that there is an error condition, but print the job anyway, or simply Error the job
without printing. This allows you to prevent jobs from printing that have errors that may be
difficult to find the root cause.
SETTING DEFAULT PREFERENCES
26
Various conditions represent errors in some workflows and not others. For example, the
presence of spot colors in a job that is proofing a CMYK-only press almost always guarantees
incorrect results in the proof. RGB colors in a job in any press proof is likely to produce less
desirable output. Recognizing these errors before you print allows you to detect and correct
errors earlier in the process.
When errors and warnings occur, use other tools such as PreFlight and Color Postflight to
identify the errors. See Color Guide.
For each option, select one of the following:
Ignore (
) ignores error, prints, and follows normal File Handling settings.
Warn (
) prints the job and returns the job to the Error queue with a warning message
describing the problem.
Error (
) does not print the job and returns the job to the Error queue with an Error
message describing the problem.
Error handling options include:
Section
Option
Default setting
Color
RGB color
Ignore
Spot colors
Ignore
Spot color not defined
Ignore
Media type not calibrated
Ignore
Untagged RGB colors
Ignore
No output intent on
PDF/X-3 file
(This option is only selected if
the PDF/X-3 Compliant job
option is selected.).
Ignore
Not PDF/X-3 Compliant
Ignore
N OTE : Setting Not PDF/X-3
Compliant to Error or Warn
only affects jobs for which the
PDF/X-3 Compliant job option
is enabled.
Font
Quality
Font not available
Ignore
Not not included in job
Ignore
Low resolution images
Ignore
Minimum resolution
72
SETTING DEFAULT PREFERENCES
27
Finishing allows the EFI Splash RPX-iii to handle copier errors based on the following
preference settings: Strict and Relaxed.
Strict error handling means the job does not print if the job settings cannot be satisfied.
Relaxed error handling means the jobs will print if the conflict is handled in a reasonable
manner. When Relaxed is selected, the following conflict types will result in error:
• Page size and type are not available in the digital press.
• The job violates Booklet folding limitations.
All other jobs will print with finishing options disabled as necessary to make them print.
Most errors occur because paper sizes and types conflict with the selected finishing
options, in which case the job prints with the finishing options disabled.
Setting the Error Dialog Timeout preference
Type a unit of time (a minimum of one minute) in the Error Dialog Timeout field to specify
how long processing is delayed at the EFI Splash RPX-iii when a printing error occurs. If the
error is not corrected within this time limit, the job moves to the Error queue. To minimize
the delay of processing subsequent jobs when an error occurs, set the timeout to one minute.
To ensure that jobs remain active until the error is corrected, select Never Timeout.
Beep While Displayed alerts the EFI Splash RPX-iii to “beep” every 10 seconds when an error
message is displayed. The 10-second interval cannot be changed. If you close the dialog box
or the dialog box times out, the beep stops.
Setting Page preferences
The options on the Page tab in the Splash Server Preferences dialog box allow you to set
Page preferences, including the following:
Print Cover Page prints a standard cover page as the first page of any job.
Cover pages include the date and time printed, job owner’s name, job name, and number
of pages.
Handle Paper Errors at Print Time processes jobs when the correct paper size is not available on
the digital press. When the job is ready to print, EFI Splash RPX-iii prompts you to load the
correct paper. If this option is disabled, jobs that request a paper size that is not loaded in the
digital press are immediately moved to the Error queue. If this option is enabled, Map A4/
Letter and A3/Tabloid has no effect.
SETTING DEFAULT PREFERENCES
28
Map A4/Letter and A3/Tabloid is useful for frequent printing on Letter and Tabloid paper sizes
with occasional A4 or A3 jobs, or vice versa. If this option is selected and no A4 paper is
loaded at the digital press, an A4 job is automatically converted to print on Letter paper. If A4
paper is loaded, a Letter size job is converted to print on A4. If Tabloid paper is loaded, jobs
with A3 paper selected print on Tabloid paper. If A3 paper is loaded, jobs with Tabloid paper
selected print on A3 paper.
In each case, the job is scaled proportionally to fit the paper size and the image is centered on
the page to prevent clipping. After the job prints, a spool file for the job appears in the Error
queue with a message indicating that the paper size for the job was converted.
Relaxed Page Size for Dropped Files prints dropped files on a larger page size if an exact page
size match cannot be found. The option applies to dropped TIFF, EPS, or PDF files and files
processed by the GA File Converter.
If you select this option, the job prints centered on the page, but is not scaled to fit the page
size. Many dropped files are not exact matches for standard page sizes and produce printing
errors. For example, many PDF creators subtract margins when creating the PDF page size,
resulting in a page request for 8.2 x 10.7 or similar paper size. If this option is selected, and an
exact match for the requested page size is not available, the job prints on the first page size
loaded on the printer that is large enough to fit the job. If none of the available page sizes is
large enough, the job prompts a Page Size error message.
N OTE : Dropped PostScript and DCS 2.0 files are not affected by this option.
Previews allows the administrator to save previews for all pages or for the first page only and to
specify what quality level preview to generate.
The Previews control options are:
• Save: All Pages or First Page Only
• Quality: Higher or Lower
Custom Page Sizes allows the administrator to define new custom page sizes at the EFI
Splash RPX-iii and use them for printing and calibrating. The EFI Splash RPX-iii tracks the
custom page sizes that have been created by a client printer driver and printed to the EFI
Splash RPX-iii or the custom page sizes programmed into the digital press, and adds those to
the custom page size list.
N OTE : The list of custom page sizes at the server is not available through the EFI
Splash RPX-iii print driver. They are only accessible when you modify Job Properties at the
EFI Splash RPX-iii. Users must define their own custom page sizes in the print driver. For
instructions, see the Printing Guide.
SETTING DEFAULT PREFERENCES
29
TO ADD A CUSTOM PAGE SIZE
1 Click the plus sign (+) and type a name for your custom page size.
2 Enter the page dimensions according to the feed direction illustrated.
1
2
X dimension
Y dimension
1
2
If X > Y, the paper is long-edge feed.
If X < Y, the paper is short-edge feed.
N OTE : The dimensions are constrained to paper sizes supported by the digital press.
TO DELETE A CUSTOM PAGE SIZE
• Select the custom page name from the list and click the minus sign (-).
TO RENAME A CUSTOM PAGE SIZE
• Double-click the custom page from the list and type a new name.
SETTING DEFAULT PREFERENCES
30
Setting Network preferences
The options on the Network tab in the Splash Server Preferences dialog box allow you to set
network printing and queue management options.
Setting Network preferences
The Network preferences in the Splash Server Preferences dialog box allow you to set the
Enterprise Networking, AppleTalk Registration, Windows Workgroup, Allow RIP While
Receive, and Enable Web Access options, as follows.
Enterprise Networking: With this option selected, the EFI Splash RPX-iii can receive print
jobs from clients on TCP/IP networks via LPR, in addition to clients on an AppleTalk
network. The EFI Splash RPX-iii maintains both network connections simultaneously.
Parse for Document User Name: Document User Name is extracted from each print job as
it is received at the EFI Splash RPX-iii. When this option is cleared, Enterprise Networking
determines the owner name from the network connection.
Use IPv6: When IPv6 is selected, the EFI Splash RPX-iii allows entry of an IPv6 address for
selection of a Fiery in Network Connect mode in the Connection dialog box. It also allows
the use of IPv6 for both LPR and Port 9100 spooling and the connection to the Fiery.
N OTE : The IPv6 address for the Mac OS X must be configured and enabled in the Mac OS X
Network System Preferences.
AppleTalk Registration: Select this option to register the EFI Splash RPX-iii name on the
AppleTalk network. If this option is cleared, remote users cannot print over AppleTalk to the
EFI Splash RPX-iii. This option may be useful in network environments where it is not
desirable to route AppleTalk.
Allow RIP While Receive: If this option is selected, the EFI Splash RPX-iii processes the job
while it is being received over the network. If your printing environment includes both large
and small jobs, selecting this option uses the processing power of the EFI Splash RPX-iii most
efficiently.
Enable Web Access: For information about this option, see “Enabling Web Access” on
page 37.
Windows Workgroup: Type the name of the Windows Workgroup to which the EFI
Splash RPX-iii belongs. This is the name that appears on the network when Windows users
browse for the EFI Splash RPX-iii.
Setting Web Queue Management preferences
For information about setting the Web Queue Management preferences, see “Controlling
Web Queue Management privileges” on page 39.
SETTING DEFAULT PREFERENCES
31
Setting Color preferences
The options on the Color tab in the Splash Server Preferences dialog box allow you to set
the Print preferences. For more information about these options, see the Color Guide.
Digital Press Screening includes the following digital press screening settings:
• 200 Cluster Dot specifies 200 lpi cluster dot for text, objects, graphics, and images.
• 200 Rotated Line specifies 200 lpi rotated line for text, objects, graphics, and images.
• Enhanced Text and Graphics specifies 300 lpi cluster dot for text, objects, and graphics,
and 200 lpi cluster dot for images.
• Enhanced Text specifies 300 lpi cluster dot for text and 200 lpi cluster dot for objects,
graphics, and images.
Use the 200 Cluster Dot and 200 Rotated Line settings for general printing and proofing.
The Enhanced settings may provide better output for text and graphics, but midtone colors
may be less accurate.
N OTE : Recalibrate all profile sets after changing the Digital press Screening setting.
N OTE : The Digital press Screening option is ignored when the Screened job option is selected.
Grayscale As K in CMYK color corrects the black channel as CMYK black versus RGB black.
Select this option if most of your documents are designed using CMYK colors. Clear this
option if you print mostly from office applications that use RGB colors.
Progressives allows printing as many as four separate color passes per page. Users can examine
the result of progressively adding color to the output and can customize progressive prints to
match their workflow.
Select the number of sheets to print (Sheets 1- 4), and then select the number of colors to
print on each sheet (C, M, Y, or K). Choose Print Progressives in the job options before
printing jobs with the progressives defined here.
Setting Calibration preferences
Warn after _ Days allows you to select a specific number of days from the last calibration date
to remind you to recalibrate the printer. When the time set in Days Last Calibrated Warning
expires, the date and time listed in the Last Calibrated area of the EFI Splash RPX-iii
application main window are displayed in red.
Automatically launch ColorCal launches ColorCal automatically on the day you specified for
Warn after _ Days option.
Allow Remote Calibration allows you to run ColorCal on any Mac OS v10.4 computer or later
and update the EFI Splash RPX-iii remotely.
Disable this option if you only want to allow calibration from the EFI Splash RPX-iii and do
not want a remote calibration station to control calibration for your EFI Splash RPX-iii.
SETTING DEFAULT PREFERENCES
32
Setting Appearance preferences
The options on the Appearance tab in the Splash Server Preferences dialog box allow you to
set the color and size of the text that appears in each of the print queues.
Setting Button Bar preferences
To customize the icons that are displayed, drag the icons to or from the Loaded Buttons list.
Setting Jobs preferences
The options in the Splash Server Preferences dialog box allow you to set the
following preferences:
Auto Delete Jobs allows spooled jobs to be deleted automatically based on how long the job
has been at the server or number of jobs in the server queues.
Auto Delete Scans allows scans to be deleted automatically based on the parameters of time.
Daily Auto Delete Time allows you to specify a time to delete the jobs or scans as defined in the
other controls to allow for minimum disruption to the normal EFI Splash RPX-iii workflow.
If the EFI Splash RPX-iii is shut down at the time the deletion is scheduled to occur, the
deletion occurs the next time the EFI Splash RPX-iii is started.
For scan jobs, the EFI Splash RPX-iii connects to the Fiery and deletes the scans from the
Fiery. In the Network Connect configuration, use with caution because the results may not be
desirable.
Setting Job Log preferences and reading a log file
The Splash log file in the Splash folder records information about each print job. The file
name is “SplashPrint.log.” For more information, see “Reading the log file” on page 33.
If you quit the EFI Splash RPX-iii application and restart it, the log file continues to add
information to the log and does not reset it. If you move the log file out of the Splash folder,
the server automatically begins a new log file when it prints the next job.
TO MANAGE A LOG FILE
1 Start the EFI Splash RPX-iii application.
2 Log on with Administrator privileges.
3 Choose Preferences from the Splash Server menu.
The Splash Server Preferences dialog box appears.
4 Click the Job Logging tab.
The Job Log File dialog box appears.
SETTING DEFAULT PREFERENCES
33
5 In Delete Log Entries, specify how long the EFI Splash RPX-iii is to maintain the current print
log file.
6 Click OK.
The log file is saved in the Splash folder on the hard disk drive every time a print job is
completed. You can view the log file in any application that reads text files, or you can import
the log file into a spreadsheet application for billing purposes.
Reading the log file
The log file contains the following information about each job:
• User Name displays the network identity of the client that sent the job to the EFI
Splash RPX-iii.
• Document Name displays the name of the file sent.
• Status indicates whether a job was completed successfully (OK), or canceled, errored, or
placed on hold (CANCELED.
• Date indicates the date that the job was sent to the printer.
• Start Time displays the time that the EFI Splash RPX-iii started processing the job.
• RIP Time displays the amount of time (in the format minutes:seconds) that the EFI
Splash RPX-iii spent processing (RIPping) the job.
• Print Time displays the amount of time (in the format minutes:seconds) required to print
the job; starts from the time printing begins at the printer, and ends at the time printing
completes at the printer.
• Color Model indicates whether a job was printed in grayscale or color.
• Tray 5 shows Yes or No when Tray 5 was used for the job.
• Duplex indicates whether the job was printed as double-sided output using the Manual
Duplex feature.
• Paper Type displays the type of paper used for a job printed to Tray 5.
• Page Size displays the page size on which a job was printed.
• Copies display the number of job copies printed. This option is only displayed when the
log is exported, not when you print the log or use the Job Log Viewer.
• Bytes indicates the file length. This option is only displayed when the log is exported, not
when you print the log or use the Job Log Viewer.
• Serial Number displays the unique number assigned to the printed job. This option is only
displayed when the log is exported, not when you print the log or use the Job Log Viewer.
SETTING DEFAULT PREFERENCES
34
• Pages Rendered displays the number of pages in a document.This option is only displayed
when the log is exported, not when you print the log or use the Job Log Viewer.
• Status Code indicates the error status of job upon completion. This option is only
displayed when the log is exported, not when you print the log or use the Job Log Viewer.
• PPD Paper Type indicates the media type. For the Xerox 700 Digital Color Press this is
combined Media Type and Media Weight. This option is only displayed when the log is
exported, not when you print the log or use the Job Log Viewer.
• PPD Paper Size indicates the paper size. This option is only displayed when the log is
exported, not when you print the log or use the Job Log Viewer.
• Color Images Printed displays the total number of pages printed in color.
• Black Images Printed displays the number of pages that were printed using black ink only.
• Cover Page indicates if a cover page was printed for a job.
N OTE : The Cover Page is not counted as a Black Image Printed. To include the cover page in
billing records, it is necessary to add one to the Black Images Printed if the Cover Page entry is
set to Yes.
• Job Comment displays any information typed in the Document Comment field at the
printer driver.
• Account Number displays the account number associated with the file (if available).
Mixed Media and Set Builder jobs that use more than one paper type are displayed in the log
with one line per paper type.
Exporting the log file
To use the log file information in another application, you must export it. The exported file is
in a tab-delimited format that can be opened in other applications (for example, database or
spreadsheet applications, such as Microsoft Excel).
TO EXPORT THE LOG FILE
1 Choose Export Log from the File menu.
The Job Log is saved automatically to the desktop.
2 Open the exported file in a spreadsheet application as a tab-delimited text file.
Viewing the Job Log
Show Job Log allows you to view, sort, and print the Job Log. The toolbar icons are:
• Print: Print the job log entries currently shown.
SETTING DEFAULT PREFERENCES
35
TO VIEW THE JOB LOG
• Choose Show Job Log from the Splash File menu.
For more information about the Job Log, see the Job Management Guide.
Understanding Splash job entries in the Fiery Job Log
The Fiery Job Log contains entries for all jobs sent by the EFI Splash RPX-iii, as well as
jobs sent directly to the Fiery. In the Fiery Job Log, all Splash jobs have the format
SJNNNNNNNNjobname, where the eight Ns are a hexadecimal number unique to the job.
The user name for the job is the user name reported by the EFI Splash RPX-iii.
The Splash log file contains only jobs sent to the EFI Splash RPX-iii and does not contain
jobs sent directly to the Fiery.
Printing the Job Log
The Print Job Log option allows you to sort job information by customer, date, time, or
account number and add a subtotal for each customer or account number. You can print all
entries in the Job Log or only those entries added since the last Job Log printed.
USING THE WEB QUEUE MANAGER
36
USING THE WEB QUEUE MANAGER
This chapter explains how to configure the EFI Splash RPX-iii to allow remote users to
connect to the server. The Web Queue Manager installed with the EFI Splash RPX-iii server
software allows remote users on a TCP/IP network to view and control print jobs at the EFI
Splash RPX-iii.
With Web Queue Manager, you can perform the following functions:
• Review the status of print jobs sent to the EFI Splash RPX-iii.
• Hold print jobs.
• Release held print jobs.
• Review and change print options for a job in the print queue.
• Log on with Administrator privileges and change Server Preferences.
For information about using Web Queue Manager, see the Job Management Guide.
Preparing the Web Queue Manager
To prepare the Web Queue Manager for use with the EFI Splash RPX-iii, you must configure
the EFI Splash RPX-iii to run on a TCP/IP network and enable the Web Queue Manager
option. For more information, see “Configuring the EFI Splash RPX-iii for TCP/IP and LPR
printing” on page 9.
The Web Queue Manager uses Apple’s Web Sharing software. To use the Web Queue
Manager from a client computer, you must have an established intranet or Internet
connection, plus Safari v1.2 or later, or Microsoft Internet Explorer v6.0 or later.
The Web address (URL) for the Web Queue Manager is http:// followed by the EFI
Splash RPX-iii IP address. For more information, contact your network administrator.
Configuring the Web Queue Manager
To configure the Web Queue Manager for use with the EFI Splash RPX-iii, do the following:
• Set the IP Address for the EFI Splash RPX-iii.
• Enable Web Access in the EFI Splash RPX-iii Server Preferences.
• Enable Web Sharing in the Mac OS X System Preferences.
USING THE WEB QUEUE MANAGER
37
Set the IP Address for the EFI Splash RPX-iii
To use Web Queue Manager, you must acquire the manual IP address configured on the EFI
Splash RPX-iii.
To configure the manual IP address for the for the EFI Splash RPX-iii, see “To configure the
EFI Splash RPX-iii for the TCP/IP network” on page 10.
Enabling Web Access
The following procedure describes how to enable Web Access at the EFI Splash RPX-iii.
TO ENABLE WEB ACCESS AT THE EFI SPLASH RPX-iii
1 Start the EFI Splash RPX-iii application and log on with Administrator privileges.
2 Choose Preferences from the Splash Server menu.
The Splash Server Preferences dialog box appears.
3 Click the Network icon and select the Enable Web Access option.
4 Click OK.
The Sharing control panel opens.
Enabling Web Sharing
The following procedure describes how to enable Web Sharing for the EFI Splash RPX-iii.
TO ENABLE WEB SHARING FOR THE EFI SPLASH RPX-iii
1 Choose System Preferences from the Apple menu.
2 Select the Sharing control panel.
USING THE WEB QUEUE MANAGER
38
3 Mac OS 10.5: Select the Web Sharing option.
Mac OS 10.4: Click the Services tab, select the Personal Web Sharing option, and then
click Start.
The Personal Web Sharing On title appears and the Start button changes to a Stop button.
4 Close the Sharing control panel.
The Web Queue Manager is enabled. Remote users on a TCP/IP network with Safari or
Microsoft Explorer installed can connect to the Web Queue Manager to remotely view and
manage print jobs on the EFI Splash RPX-iii.
USING THE WEB QUEUE MANAGER
39
N OTE : The EFI Splash RPX-iii Administrator is usually also the Web Queue Manager
Administrator. The EFI Splash RPX-iii Administrator sets privileges for remote users to edit
print jobs in the EFI Splash RPX-iii print queues with the Web Queue Manager.
To use the Web Queue Manager with Administrator privileges, log on to the Splash Server
Preferences in the Web UI using "administrator" for the user name and the server
administrator password.
Controlling Web Queue Management privileges
The Web Queue Management options in the Network Preferences dialog box allow you to
control which users can change or delete jobs in the Splash print queue from the Web Queue
Manager.
TO CONFIGURE THE REMOTE QUEUE MANAGEMENT OPTION
1 Start the EFI Splash RPX-iii application and log on with Administrator privileges.
2 Choose Preferences from the Splash Server menu.
3 Click the Network icon.
The Splash Server Preferences dialog box appears.
4 Select a Web Queue Management option.
• Access All Files: Users can put any job on hold, delete any job, change its position in the
Print queue, and change print options for any job.
• Access Own Files: Users can hold, delete, edit, or change the position in the Print queue for
their own jobs. Users must log on to make changes to the Print queue.
• No Access: Users can view information for print jobs, but they cannot perform any Print
queue management functions.
5 Click OK.
ADMINISTERING THE EFI SPLASH RPX-iii
40
ADMINISTERING THE EFI SPLASH RPX-iii
This chapter describes EFI Splash RPX-iii administration tasks.
Changing the Administrator password
The default Administrator password for the EFI Splash RPX-iii is blank (no password). Set
the password to protect the EFI Splash RPX-iii against unauthorized changes.
TO CHANGE THE ADMINISTRATOR PASSWORD
1 Choose Login from the Server menu.
2 Click Change.
3 Type the old password, if any. Type the old password once and the new password twice.
N OTE : The default Administrator password for the EFI Splash RPX-iii is blank (no password).
4 Enter and verify the new password.
ADMINISTERING THE EFI SPLASH RPX-iii
41
Managing users and accounts
TO MANAGE USER ACCOUNTS
1 Log on to the EFI Splash RPX-iii with Administrator privileges.
2 Choose Users from the Server menu.
3 To add a user, click the plus sign “+” and type the user name in the Name field. Type the
password in both the Password and Verify fields.
1
2
Plus sign (for adding users)
Minus sign (for deleting
users)
1
2
A maximum of 24 characters is allowed in the Name field. A maximum of 8 characters
is allowed in the Password field. An unlimited number of users can be added to the Users list.
4 To remove a user, select the user name and click the minus sign “-”.
5 To set scanning privileges, click Scanning and type the appropriate information.
For more information, see the Job Management Guide.
6 Click OK.
ADMINISTERING THE EFI SPLASH RPX-iii
42
TO MANAGE ACCOUNT NUMBERS
1 Log on to the EFI Splash RPX-iii with Administrator privileges.
2 Choose Accounts from the Server menu.
The Accounts dialog box appears.
3 To add an account, click the plus sign “+” and type the account number in the Number field
and a description in the Description field.
1
2
Plus sign
(for adding accounts)
Minus sign
(for deleting accounts)
1
2
A maximum of 32 characters is allowed in the Account field. A maximum of 100 characters
is allowed in the Description field. The account description allows you to provide more
information about the account than can be stored in the account name. The account
description is not required and is not used elsewhere by Secure Access.
N OTE : Account names are limited to printable characters but may contain characters that are
not alphanumeric characters.
4 Click the account name in the list to change it.
5 To remove an account, select the account number and click the minus sign “-”.
6 Click OK.
ADMINISTERING THE EFI SPLASH RPX-iii
43
Secure Access
Secure Access allows the EFI Splash RPX-iii Administrator to limit who can print to the EFI
Splash RPX-iii by defining combinations of user names, passwords, and account numbers that
must be entered and verified before a job prints. You can define for each user whether they are
part of a Color group or Black and White only group to limit some users to print non-color
documents only.
You can also use Secure Access without the verification feature to improve job logging, by
requiring user names and account numbers before a job is printed.
Secure Access accounts are established and managed at the EFI Splash RPX-iii. You are
prompted for the required information at the workstation. Validation of the information, if
required, is performed by the EFI Splash RPX-iii. If the information is not valid, users are
prompted to reenter the correct information before the job prints.
TO START SECURE ACCESS
1 Log on to the EFI Splash RPX-iii with Administrator privileges.
2 Choose Secure Access from the Server menu.
The Secure Access dialog box appears.
3 Select the appropriate settings.
4 Select Verify to indicate whether you want the option to be verified.
If you select Password, you must select User, and both must be verified. For jobs printed using
the EFI Splash RPX-iii printer driver, the information is verified at the client before the job
prints. This ensures that the job prints successfully when it reaches the EFI Splash RPX-iii.
ADMINISTERING THE EFI SPLASH RPX-iii
44
When the Verify option is cleared, the EFI Splash RPX-iii processes any job for which the
selected information is not blank. The User and Account Number are output to the log file.
N OTE : Files placed in a Drop folder or Hot Folder, or dragged to one of the print queues,
always produce an error when Secure Access is selected, unless you also select Exempt Drop
Folder Jobs or enter the required information for the default job options or Hot Folder. If this
option is selected, files sent to the EFI Splash RPX-iii via drop-printing are printed, regardless
of the other Secure Access settings.
Editing Secure Access client error messages
When a user incorrectly enters Secure Access information, the EFI Splash RPX-iii returns an
error message to the user’s computer. To provide specific contact information for users of a
particular EFI Splash RPX-iii, you can edit this error message. A maximum of 255 characters
is allowed in the Error Message and E-mail Address fields.
Using Secure Access at client workstations
When Secure Access is configured at the EFI Splash RPX-iii, users must install the Secure
Access printer driver provided with the EFI Splash RPX-iii. For detailed installation
instructions, see Getting Started.
Printing with Secure Access
Printing with the Secure Access printer driver is the same as printing with the standard driver,
except that the driver prompts you for Secure Access information. Other job options work
similarly.
With the first job sent to a particular printer driver, the Secure Access printer driver prompts
you for the EFI Splash RPX-iii IP address if it cannot determine it automatically.
With every job, the Secure Access printer driver prompts you for the logon information that is
defined at the EFI Splash RPX-iii. If the information you enter is not correct, the printer
driver prompts you to re-enter the correct information, specifying what entry was first found
to be incorrect, along with the error message set up at the server. The prompt remains until
you enter the correct information or click Cancel. When you enter the correct information,
the job prints as it would with the standard printer driver.
ADMINISTERING THE EFI SPLASH RPX-iii
45
Printing the Configuration Report
The Configuration Report feature allows you to print saved preferences and other server
information. The Configuration Report is a PostScript file that is sent to the Drop folder and
printed on the digital press’s default paper size.
N OTE : All options set to factory default are displayed in black text. Any option that is not a
factory default setting is displayed in blue text. The file name is “Splash Config Report.ps.”
TO PRINT THE CONFIGURATION REPORT
1 Log on to the EFI Splash RPX-iii with Administrator privileges.
2 Choose Print Configuration Page from the File menu.
Backing up and restoring preferences
If you must reinstall server software, make a backup of the preferences so that you can restore
them after the software is installed. If you have more than one EFI Splash RPX-iii, you can
back up the preferences for one server and copy them so that other servers can use the same
preferences.
The following information is backed up:
• Server preferences
• Color profile settings and output profile settings
• Screening preferences
• Screening sets
• Tray Alignment
• Profile sets (server must be recalibrated)
• Job defaults
• Hot Folders
• Print info
• Secure Access
• Job Log
• RGB, CMYK, and Output profiles that have been added to the server
ADMINISTERING THE EFI SPLASH RPX-iii
46
TO BACK UP PREFERENCES
1 Log on with Administrator privileges.
2 Choose Preferences from the Splash Server menu.
3 Click the Server tab.
4 Click the icon in the lower-left corner.
5 Choose Export.
6 Name the preferences file, select a location to which to save the preferences file, and then
click OK.
TO RESTORE PREFERENCES
1 Log on with Administrator privileges.
2 Choose Preferences from the Splash Server menu.
3 Click the Server tab.
4 Click the icon in the lower-left corner.
5 Choose Import.
6 Select the preferences file and click OK.
The preferences are restored.
7 If prompted, select whether to replace the current server name with the server name from the
imported preferences.
ADMINISTERING THE EFI SPLASH RPX-iii
47
Updating software
The EFI Splash RPX-iii provides an easy mechanism to keep your Splash Server and Fiery
Controller software up to date. The EFI Splash RPX-iii automatically checks for updates once
a week, or you can check for updates manually.
When the EFI Splash RPX-iii checks for updates and new software is available, a dialog box
lists the updates. Download all updates or select only the ones that you want.
If you download Fiery updates and Splash Server updates, the Fiery updates are installed first.
If necessary, the Fiery restarts and prints a Start Page. Finally, Splash Server updates are
installed.
The Splash Server Macintosh must be configured for https access to the Internet:
• The Macintosh must be connected to a network with Internet access.
• If the network uses a proxy server, the https proxy must be configured correctly.
For information, see “To check for updates and configure proxy server settings” on
page 47.
TO CHECK FOR UPDATES AND CONFIGURE PROXY SERVER SETTINGS
1 Choose Login from the Server menu and log on with Administrator privileges.
2 Choose Check for Updates from the Splash Server menu.
ADMINISTERING THE EFI SPLASH RPX-iii
48
3 Click Proxy Info.
4 Click Open Network or choose System Preferences > Network from the Apple menu.
5 Configure the Proxy server settings, and then click Done.
6 To search for new updates, click Check Now.
7 If you want the Splash Server to search for updates automatically, select Check weekly for
updates.
To download updates automatically, select Automatically Update at and specify a time. The
EFI Splash RPX-iii queries the update server once a week at the specified time.
N OTE : The downloaded updates are not installed. You are asked to install them after the
download is complete.
8 Click Done to close the Software Update dialog box.
TO DOWNLOAD UPDATES
1 Select the name of the update to see a detailed description.
2 Select each update that you want to install.
3 Click Install.
All selected updates are downloaded and installed. If you cancel the update process or do not
select some of the updates, those updates are available the next time you check for updates.
If you select Splash Server updates, follow the on-screen instructions.
ADMINISTERING THE EFI SPLASH RPX-iii
49
Downloading fonts
The EFI Splash RPX-iii cannot process print jobs while font downloading is in process. If the
EFI Splash RPX-iii is processing a job, choose Stop Processing from the Server menu or click
Start/Stop.
Adding fonts to the EFI Splash RPX-iii
The EFI Splash RPX-iii provides 136 Roman PostScript fonts and two multi master fonts.
Print jobs that use the PostScript fonts provided with the EFI Splash RPX-iii print faster
because these fonts are resident at the EFI Splash RPX-iii and are not downloaded with the
print job. If you frequently use fonts that were not provided with the EFI Splash RPX-iii,
download these fonts to speed up printing.
Command WorkStation is used to download fonts from Windows computers. Splash Font
Downloader is used to download fonts from Mac OS X computers.
Downloading fonts from a Windows client using Command WorkStation
Download fonts from Windows clients by using Command WorkStation.
TO DOWNLOAD FONTS USING COMMAND WORKSTATION
1 Log on to the EFI Splash RPX-iii with Administrator privileges.
2 Log on to Command WorkStation with Administrator privileges.
3 Choose Manage Fonts from the Command WorkStation Server menu.
The Server Fonts dialog box appears.
4 Click Add.
5 Browse to the font that you want to add.
6 Select the font and click Add.
ADMINISTERING THE EFI SPLASH RPX-iii
50
Downloading fonts from a Mac OS X client using the Splash Font Downloader utility
Download fonts using the Splash Font Downloader utility that is located in the Utilities
folder on the client DVD. It can run on systems with Mac OS X 10.3.9 or later.
TO DOWNLOAD FONTS USING THE SPLASH FONT DOWNLOADER UTILITY
1 Start the Splash Font Downloader utility from Mac Finder > Application > EFI Splash RPX-iii >
Utilities.
The first time you connect to the Splash Font Downloader utility, select the Splash Server
from the Splash Connection dialog box.
To change the Splash Server, select Splash Connection from the Splash Font Downloader
menu, and then select a Splash Server.
2 Click Add and browse to the font that you want to download.
3 Select the font and click Download.
You can add one or more fonts at a time.
Setting up scan mailboxes
Before you can set up mailboxes for scan jobs, make sure that all users have been added.
For information about setting up mailboxes, see the Job Management Guide.
Setting up Hot Folders and Virtual Printers
Hot Folders allow you to create multiple Drop folders, each with an assigned set of print
options that are applied to all jobs placed in the folder. This allows you to control print
options and process a series of jobs with common printer driver settings.
For any job placed in a Hot Folder, the options associated with the Hot Folder override any
options included in the job. A job created with the EFI Splash RPX-iii printer driver might
specify Duplex, Long Edge Bind, but if it is dropped into a folder for which Duplex is set to
None, the job will not print as Duplex.
You can also create Virtual Printers and assign options that override the options set at the
client.
For more information about Hot Folders and Virtual Printers, see the Job Management Guide.
ADMINISTERING THE EFI SPLASH RPX-iii
51
Configuring the EFI Splash RPX-iii for Hot Folders
Hot Folders are created in the user’s Public:Hot Folders folder. Folders can be shared via
AppleTalk for Mac OS clients and via SMB for Windows clients. Hot Folders do not replace
existing Drop folders.
The Hot Folders feature is not supported for file types supported by the GA File Converter.
Any such files placed in a Hot Folder produce an error and are not printed.
TO CONFIGURE THE EFI SPLASH RPX-iii FOR HOT FOLDERS
1 Log on to the EFI Splash RPX-iii with Administrator privileges.
2 Choose Hot Folders from the Server menu.
The Hot Folders dialog box appears.
3 Click the lock to unlock options and log on with Administrator privileges, if necessary.
4 Click the plus sign “+” and configure printer driver options for the Hot Folder.
5 Click OK.
6 Type a name for the Hot Folder.
This name is the name that the client selects at the client workstation.
7 Close the Hot Folders dialog box.
Editing Hot Folders
To edit the job options for a previously created Hot Folder, choose Hot Folders from the
Server menu. Click the lock to unlock options and log in as an administrator, if necessary.
Click the plus icon “+”and double-click the Hot Folder that you want to edit from the list of
Hot Folders and specify your changes. The Job Options dialog box appears, allowing you to
change the options.
If the options for a Hot Folder are being edited, the exact set of options that is applied is
dependent on when the job finishes copying to the Hot Folder and when the editing is
completed. For reliable results, complete the editing of Hot Folder options before submitting
jobs to the Hot Folder.
N OTE : As part of the removal process of the EFI Splash RPX-iii server software, Hot Folders
are deleted.
For more information about configuring the EFI Splash RPX-iii for file sharing, see Getting
Started.
Renaming Hot Folders
The maximum number of characters in the Rename field is 255. If you have not created any
Hot Folders, the Rename option is unavailable.
ADMINISTERING THE EFI SPLASH RPX-iii
52
Configuring Hot Folders for SMB file sharing
You can allow a user on a Windows client workstation to view a Mac OS system. Use the
following procedure to configure the EFI Splash RPX-iii for SMB file sharing from Windows
client workstations.
TO CONFIGURE THE EFI SPLASH RPX-iii FOR FILE SHARING (MAC OS 10.4)
1 Open System Preferences from the Apple menu.
2 Select Sharing.
3 Click the Services tab.
4 Select the Windows Sharing option.
5 Log on from a Windows computer.
TO CONFIGURE THE EFI SPLASH RPX-iii FOR FILE SHARING (MAC OS 10.5)
1 Open System Preferences from the Apple menu.
2 Select Sharing.
3 Select File Sharing and click Options.
4 Select “Share files and folders using SMB”.
5 Select the name of the user account that will share files and type the password for that user.
6 Click Done.
7 Log on from a Windows computer.
Configuring Hot Folders for AppleTalk file sharing
Use the following procedure to configure the EFI Splash RPX-iii for AppleTalk file sharing.
TO CONFIGURE THE EFI SPLASH RPX-iii FOR APPLETALK FILE SHARING (MAC OS 10.4)
1 Choose System Preferences from the Apple menu.
2 Select Sharing.
3 Click the Services tab.
4 Select the Personal File Sharing option.
5 Log on from a Mac OS X computer as guest.
ADMINISTERING THE EFI SPLASH RPX-iii
53
TO CONFIGURE THE EFI SPLASH RPX-iii FOR APPLETALK FILE SHARING (MAC OS 10.5)
1 Choose System Preferences from the Apple menu.
2 Select Sharing.
3 Select “Share files and folders using AFP”.
4 Log on from a Mac OS X computer as guest.
Configuring the EFI Splash RPX-iii for Virtual Printers
The administrator can create additional printers on the network as individual AppleTalk and
LPR print queues. Virtual printers are accessible via AppleTalk for Mac OS clients and via
LPR for Windows clients. The virtual printers apply chosen options to all jobs while allowing
other options to be selected in the printer driver.
A print job sent to a virtual printer will have the corresponding virtual printer job options
applied to it. A default print queue, “_Splash”, (which applies the server's default job options)
is also present.
TO CONFIGURE THE EFI SPLASH RPX-iii FOR VIRTUAL PRINTERS
1 Log on to the EFI Splash RPX-iii with Administrator privileges.
2 Choose Virtual Printers from the Server menu.
The Virtual Printers dialog box appears.
3 To add a virtual printer, click the plus sign “+” and type the virtual printer name in the
Name field.
4 Publish the virtual printer on AppleTalk only, LPR only, or both.
N OTE : If AppleTalk or LPR is disabled in Server Preferences, the option is disabled for
virtual printers.
5 To remove a virtual printer, select the virtual printer name and click the minus sign “-”.
6 To set virtual printer options, click Edit Options.
The Default Job Settings dialog box appears, allowing you to configure printer driver options
for the virtual printer.
7 Click OK.
For more information about setting options for virtual printers, see the Job Management
Guide.
ADMINISTERING THE EFI SPLASH RPX-iii
54
Scanning for viruses
The EFI Splash RPX-iii is compatible with Norton AntiVirus 10.0 for Mac OS X and
McAfee Virex 7.7 for Mac OS X. You must disable the Auto Scan feature for these
applications, or problems may occur. For example, spool files may become corrupted and
server preference changes may not be retained.
Energy considerations
Power-On
The EFI Splash RPX-iii can be started before or after the digital press is powered on. No
power cycle of the digital press is required after the EFI Splash RPX-iii reboots. No power
cycle of the EFI Splash RPX-iii is required if the digital press power is cycled.
Energy Saver
When the digital press is in Energy Save mode, you can start and use the EFI Splash RPX-iii.
No power cycle of the digital press is required, even if the EFI Splash RPX-iii has been
rebooted.
EnergyStar Compliance
The Mac OS X computer is EnergyStar compliant. However, the EFI Splash RPX-iii as
configured at the factory is not compliant. If the EFI Splash RPX-iii is configured for
EnergyStar compliance, it can go into Sleep Mode and must be woken up before users can
print to it.
Sleep Mode
When the digital press is in Sleep Mode, you can start and use the EFI Splash RPX-iii. No
power cycle of the digital press is required, even if the EFI Splash RPX-iii has been rebooted.
INDEX
55
INDEX
Numerics
H
802.1x setup 13
Handle Paper Errors at Print Time
option 27
Hot Folders 50
A
Administrator password 40
Allow RIP While Receive option 30
Always Hold Incoming Jobs option 25
Appearance, setting preferences 32
AppleTalk printing 8
AppleTalk Registration option 9, 30
B
Beep While Displayed option 27
Bonjour networks 8, 25
Button Bar, setting preferences 32
I
IPv6 network setup 13
J
job settings
custom 23
default 23
Jobs, setting preferences 32
L
Color, setting preferences 31
Configuration Report 45
cover page 27
Custom Page Sizes option 28
log file
exporting 34
setting preferences and reading 32
viewing 34
LPR printing 9
configuring 9, 14
D
M
Days Last Calibrated Warning option 31
DNS server 11
drop printing, defined 44
dropped files, definition 28
Map A4/Letter and A3/Tabloid
option 28
C
E
Enable Web Access option 30
energy considerations 54
Energy Saver 54
EnergyStar Compliance 54
Enterprise Networking option 30
Error Dialog Timeout option 27
F
fonts, downloading 49
G
gateway address 11
gateway, NDPS 18
Grayscale As K in CMYK option 31
N
NDPS 14
NetWare print queue 20
network setup
IPv6 13
LPR printing 9, 14
Novell NDPS printing 14
Novell Netware print queue 20
TCP/IP 9, 14
TCP/IP printing f
or Windows 2000/XP 12
Network, setting preferences 30
Novell
configuring a print queue 20
network setup 14
Novell gateway, NDPS 18
INDEX
56
O
U
options
Configuration Report 45
Hot Folders 50
updating software automatically 47
Use IPv6 option 30
users, defining 41
P
V
Parse For Document User Name
option 30
PostScript printing, job defaults 23
Power-On 54
preferences
Appearance 32
backing up and restoring 45
Button Bar 32
Color 31
GA File Converter 25
Jobs 32
Network 30
Page 27
Server 24
setting 24
Previews option 28
Print Cover Page option 27
Print Startup Page option 25
printer agent, NDPS 16
Printer Screening option 31
printing, job defaults 23
Progressives option 31
Virtual Printers 50
virus scanning 54
R
Relaxed Page Size for Dropped Files
option 28
S
Secure Access 43
Secure Access client error messages 44
Secure Erase option 25
Server Name option 25
server, setting preferences 24
Sleep Mode 54
Software Update 47
Startup Page 25
T
TCP/IP
configuring 9, 14
printing 9
W
Web Access 37
Web Queue Manager
configuring 36
preparing 36
Remote Queue Management 39
Windows 2000/XP/Server 2003,
network setup 12
Windows Workgroup option 30