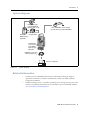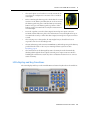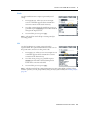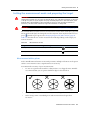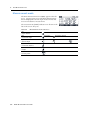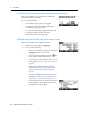
1
USER GUIDE
®
Trimble M3 Total Station
Version 1.00
Revision A
Part Number C192E
October 2005
Contact Information
Trimble Navigation Limited
Engineering and Construction Division
5475 Kellenburger Road
Dayton, Ohio 45424-1099
USA
800-538-7800 (toll free in USA)
+1-937-245-5600 Phone
+1-937-233-9004 Fax
www.trimble.com
Copyright and Trademarks
© 2005, Nikon-Trimble Co. Limited. All rights reserved. Trimble, the Globe
and Triangle logo, Elta, and Terramodel are trademarks of Trimble
Navigation Limited, registered in the United States Patent and Trademark
Office and in other countries. TRIMMARK, and TRIMTALK are trademarks of
Trimble Navigation Limited. Microsoft and Windows are either registered
trademarks or trademarks of Microsoft Corporation in the United States
and/or other countries. All other trademarks are the property of their
respective owners.
It is prohibited to alter this manual in part or whole without express
permission.
The contents of this manual are subject to change without notice. Although
every effort has been made to ensure the accuracy of this manual, please
contact your dealer if you find anything in it that is incorrect or unclear.
Release Notice
This is the October 2005 release of the Trimble M3 Total Station User Guide,
part number C192E. It applies to version 1.0x of the Trimble M3 total
station.
Notices
USA
FCC 15B Class B satisfied.
This equipment has been tested and found to comply with the limits for a
Class B personal computer and peripherals, pursuant to Part 15 of the FCC
Rules. These limits are designed to provide reasonable protection against
harmful interference in a residential installation. This equipment generates,
uses and can radiate radio frequency energy and, if not installed and used
in accordance with the instructions, may cause harmful interference to radio
communications. However, there is no guarantee that interference will not
occur in a particular installation.
If this equipment does cause harmful interference to radio or television
reception, which can be determined by turning the equipment off and on,
the user is encouraged to try to correct the interference by one or more of
the following measures:
– Reorient or relocate the receiving antenna.
– Increase the separation between the equipment and receiver.
– Connect the equipment into an outlet on a circuit different from that to
which the receiver is connected.
– Consult the dealer or an experienced radio/TV technician for help.
C
WARNING - This equipment has been certified to comply with
the limits for a Class B personal computer and peripherals,
pursuant to Subpart B of Part 15 of FCC Rules. Only peripherals
(computer input/output devices, terminals, printers, etc.) certified
to comply with the Class B limits may be attached to this
equipment. Operation with non-certified personal computer
and/or peripherals is likely to result in interference to radio and TV
reception. The connection of a non-shielded equipment interface
cable to this equipment will invalidate the FCC Certification of
this device and may cause interference levels which exceed the
limits established by the FCC for this equipment.
You are cautioned that changes or modifications not expressly
approved by the party responsible for compliance could void your
authority to operate the equipment.
European Union
EU EMC Directive satisfied.
Canada
This Class B digital apparatus meets all requirements of the Canadian
Interference-Causing Equipment Regulations.
Cet appareil numérique de la Class B respecte toutes les exigences du
Règlement sur le matériel brouilleur du Canada.
Recycling
Taiwan Battery Recycling Requirements
The product contains a removable battery. Taiwanese
regulations require that waste batteries are recycled.
Notice to Our European Union Customers
For product recycling instructions and more information, please go to:
www.trimble.com/environment/summary.html
Recycling in Europe
To recycle Trimble WEEE, call: +31 497 53 2430, and
ask for the WEEE associate, or mail a request for recycling
instructions to:
Trimble Europe BV
c/o Menlo Worldwide Logistics
Meerheide 45
5521 DZ Eersel, NL
Safety and Warnings
For your safety read the safety and warnings and this user guide carefully and
thoroughly before using the Trimble® M3 total station.
Although Trimble products are designed for maximum safety, using them incorrectly
or disregarding the instructions can cause personal injury or property damage.
You should also read the instruction manual for the battery charger, and the
documentation for any other equipment that you use with a Trimble M3 total station.
Note – Always keep the manual near the instrument for easy reference.
.1
Laser safety
C
1.1
1.2
WARNING – The Trimble M3 3” and 5” DR total stations are Class 1 laser instruments. The
laser beam is hazardous to the eyes and the body. Do not sight the instrument on the face
or body of a person. If you suspect an injury caused by exposure to the laser beam, seek
medical advice immediately. If the instrument housing is open and the instrument is
turned on, the laser emits a beam stronger than the Class 1 safety level.
Specifications for laser emission
Wave length
870 nm
Drive method
Pulse repetitive drive
Output power
< 6.4 W
Repetition rate
<5 ns
Conforming standards
EU
EN60825-1/Am.2:2001 (IEC60825-1/Am.2:2001), class 1
USA
FDA21CFR Part 1040 Sec.1040.10 and 1040.11
Except for deviations pursuant to Laser Notice No.50, dated July 26,
2001): class 1
CLASS 1 LASER PRODUCT
Complies with 21 CFR 1040, 10 and 1040,11
except for deviations pursuant to
Laser Notice No. 50, dated July 26, 2001
MADE IN JAPAN
NIKON-TRIMBLE CO., LTD.
16-2, MINAMIKAMATA 2-CHOME,
OTA-KU, TOKYO, JAPAN
Trimble M3 Total Station User Guide
i ii
Safety and Warnings
.2
Warnings and Cautions
The following conventions are used to indicate safety instructions:
C
WARNING – Warnings alert you to situations that could cause death or serious injury.
C
CAUTION – Cautions alert you to situations that could cause injury or property damage.
Always read and follow the instructions carefully.
2.1
Warnings
Before using the instrument, read the following warnings and follow the instructions
that they provide:
iv
C
WARNING – Never look at the sun through the telescope. If you do, you may damage or
lose your eyesight.
C
WARNING – The Trimble M3 total station is not designed to be explosion-proof. Do not
use the instrument in coal mines, in areas contaminated with coal dust, or near other
flammable substances.
C
WARNING – The Trimble M3 total station is a Class 1 laser instrument. The laser beam is
hazardous to the eyes and the body. Do not sight the instrument on the face or body of a
person. If you suspect an injury caused by exposure to the laser beam, seek medical advice
immediately. If the instrument housing is open and the instrument is turned on, the laser
emits a beam stronger than the Class 1 safety level.
C
WARNING – Never disassemble, modify, or repair the instrument yourself. If you do, you
may receive electric shocks or burns, or the instrument may catch fire.
C
WARNING – Use only the specified battery charger (part number Q-75U/E) to charge the
battery pack (part number BC-65). Using other chargers, such as a charger with part
number Q-7U/E or Q-7C, may cause the battery pack to catch fire or rupture. (The BC-65
cannot be charged by the Q-7U/E or Q-7C.)
C
WARNING – Do not cover the battery charger while the battery pack is being recharged.
The charger must be able to dissipate heat adequately. Coverings such as blankets or
clothing can cause the charger to overheat.
Trimble M3 Total Station User Guide
Safety and Warnings
2.2
C
WARNING – Avoid recharging the battery pack in humid or dusty places, in direct
sunlight, or near heat sources. Do not recharge the battery pack when it is wet. If you do,
you may receive electric shocks or burns, or the battery pack may overheat or catch fire.
C
WARNING – Although the battery pack (part number BC-65) has an auto-reset circuit
breaker, you should take care not to short circuit the contacts. Short circuits can cause the
battery pack to catch fire or burn you.
C
WARNING – Never burn or heat the battery. Doing so may cause the battery to leak or
rupture. A leaking or ruptured battery can cause serious injury.
C
WARNING – Before storing the battery pack or battery charger, cover the contact points
with insulation tape. If you do not cover the contact points, the battery pack or charger
may short circuit, causing fire, burns, or damage to the instrument.
C
WARNING – The battery BC-65 is not waterproof on its own. Do not get the battery wet
when it is removed from the instrument. If water seeps into the battery, it may cause a
fire or burns.
Cautions
Before using the instrument, read the following cautions and follow the instructions
that they provide:
C
CAUTION – Use of controls, adjustments, or performance of procedures other than those
specified herein may result in hazardous radiation exposure.
C
CAUTION – The tops of the tripod ferrules are very sharp. When handling or carrying the
tripod, take care to avoid injuring yourself on the ferrules.
C
CAUTION – Before carrying the tripod or the instrument in the carrying case, check the
shoulder strap and its clasp. If the strap is damaged or the clasp is not securely fastened,
the carrying case may fall, causing personal injury or instrument damage.
C
CAUTION – Before setting up the tripod, make sure that no-one’s hands or feet are
underneath it. When the legs of the tripod are being driven into the ground, they could
pierce hands or feet.
Trimble M3 Total Station User Guide
v
Safety and Warnings
vi
C
CAUTION – After mounting the instrument on the tripod, securely fasten the thumb
screws on the tripod legs. If the thumb screws are not securely fastened, the tripod may
collapse, causing personal injury or instrument damage.
C
CAUTION – After mounting the instrument on the tripod, securely fasten the clamp screw
on the tripod. If the clamp screw is not securely fastened, the instrument may fall off the
tripod, causing personal injury or instrument damage.
C
CAUTION – Securely fasten the tribrach clamp knob. If the knob is not securely fastened,
the tribrach may come loose or fall off when you lift the instrument, causing personal
injury or instrument damage.
C
CAUTION – Do not stack objects on the plastic carrying case, or use it as a stool. The
plastic carrying case is unstable and its surface is slippery. Stacking or sitting on the plastic
carrying case may cause personal injury or instrument damage.
C
CAUTION – Before charging the battery pack, read the instruction manual for the quick
charger (part number Q-75U/E).
C
CAUTION – Make sure the laser is disabled before disposing of the instrument.
Trimble M3 Total Station User Guide
Contents
Safety and Warnings. . . . . . . . . . . . . . . . . . . . . . . . . . . . . . . iii
Laser safety . . . . . . . . . . . . . . . . . .
Specifications for laser emission
Conforming standards . . . . . .
Warnings and Cautions . . . . . . . . . .
Warnings . . . . . . . . . . . . . . .
Cautions . . . . . . . . . . . . . . .
1
.
.
.
.
.
.
.
.
.
.
.
.
.
.
.
.
.
.
.
.
.
.
.
.
.
.
.
.
.
.
.
.
.
.
.
.
.
.
.
.
.
.
.
.
.
.
.
.
.
.
.
.
.
.
.
.
.
.
.
.
.
.
.
.
.
.
.
.
.
.
.
.
.
.
.
.
.
.
.
.
.
.
.
.
.
.
.
.
.
.
.
.
.
.
.
.
.
.
.
.
.
.
.
.
.
.
.
.
.
.
.
.
.
.
.
.
.
.
.
.
.
.
.
.
.
.
.
.
.
.
.
.
.
.
.
.
.
.
.
.
.
.
.
.
.
.
.
.
.
.
.
.
.
.
.
.
.
.
.
.
.
.
.
.
.
.
.
.
.
.
.
.
.
.
.
.
.
.
.
.
.
.
.
.
.
.
.
.
.
.
.
.
.
.
.
.
.
.
.
.
.
.
.
.
.
.
.
.
.
.
.
.
.
.
.
.
.
.
.
.
.
.
.
.
.
.
.
.
.
.
.
.
.
.
.
.
.
.
.
.
.
.
.
.
.
.
.
.
.
.
.
.
.
.
.
.
.
.
.
.
.
.
.
.
. iii
. iii
. iii
. iv
. iv
. v
.
.
.
.
.
.
.
.
.
.
.
.
.
.
.
.
.
.
.
.
.
.
.
.
.
.
.
.
.
.
.
.
.
.
.
.
.
.
.
.
.
.
.
.
.
.
.
.
.
.
.
.
.
.
.
.
.
.
.
.
.
.
.
.
.
.
.
.
.
.
.
.
.
.
.
.
.
.
.
.
.
.
.
.
.
.
.
.
.
.
.
.
.
.
.
.
.
.
.
.
.
.
.
.
.
.
.
.
.
.
.
.
.
.
.
.
.
.
.
.
.
.
.
.
.
.
. 8
. 8
. 9
. 9
10
10
Overview of the Trimble M3 Total Station . . . . . . . . . . . . . . . . . . 11
Hardware overview . . . . . . . . . . . . . . . . . . . . . . . . . . .
Maintenance . . . . . . . . . . . . . . . . . . . . . . . . . . . . . . .
LCD display and key functions. . . . . . . . . . . . . . . . . . . .
Key functions . . . . . . . . . . . . . . . . . . . . . . . . . .
Adjusting lighting, sound, and contrast . . . . . . . . . .
Status bar. . . . . . . . . . . . . . . . . . . . . . . . . . . . .
Software overview. . . . . . . . . . . . . . . . . . . . . . . . . . . .
MENU overview . . . . . . . . . . . . . . . . . . . . . . . .
HOT MENU overview . . . . . . . . . . . . . . . . . . . . .
Principles of display . . . . . . . . . . . . . . . . . . . . . . . . . .
Basic Measurement Screen (BMS) . . . . . . . . . . . . .
Input screen . . . . . . . . . . . . . . . . . . . . . . . . . . .
Menu screen . . . . . . . . . . . . . . . . . . . . . . . . . . .
Inputting data . . . . . . . . . . . . . . . . . . . . . . . . . . . . . .
Changing between alphanumeric and numeric input .
Stack. . . . . . . . . . . . . . . . . . . . . . . . . . . . . . . .
List . . . . . . . . . . . . . . . . . . . . . . . . . . . . . . . . .
3
.
.
.
.
.
.
Introduction . . . . . . . . . . . . . . . . . . . . . . . . . . . . . . . . . . . . 7
Welcome . . . . . . . . . . . . . . . . . . . . . .
About the Trimble Trimble M3 total station
System diagram . . . . . . . . . . . . . . . . . .
Related information . . . . . . . . . . . . . . .
Technical assistance . . . . . . . . . . . . . . .
Your comments . . . . . . . . . . . . . . . . . .
2
.
.
.
.
.
.
.
.
.
.
.
.
.
.
.
.
.
.
.
.
.
.
.
.
.
.
.
.
.
.
.
.
.
.
.
.
.
.
.
.
.
.
.
.
.
.
.
.
.
.
.
.
.
.
.
.
.
.
.
.
.
.
.
.
.
.
.
.
.
.
.
.
.
.
.
.
.
.
.
.
.
.
.
.
.
.
.
.
.
.
.
.
.
.
.
.
.
.
.
.
.
.
.
.
.
.
.
.
.
.
.
.
.
.
.
.
.
.
.
.
.
.
.
.
.
.
.
.
.
.
.
.
.
.
.
.
.
.
.
.
.
.
.
.
.
.
.
.
.
.
.
.
.
.
.
.
.
.
.
.
.
.
.
.
.
.
.
.
.
.
.
.
.
.
.
.
.
.
.
.
.
.
.
.
.
.
.
.
.
.
.
.
.
.
.
.
.
.
.
.
.
.
.
.
.
.
.
.
.
.
.
.
.
.
.
.
.
.
.
.
.
.
.
.
.
.
.
.
.
.
.
.
.
.
.
.
.
.
.
.
.
.
.
.
.
.
.
.
.
.
.
.
.
.
.
.
.
.
.
.
.
.
.
.
.
.
.
.
.
.
.
.
.
.
.
.
.
.
.
.
.
.
.
.
.
.
.
.
.
.
.
.
.
.
.
.
.
.
.
.
.
.
.
.
.
.
.
.
.
.
.
.
.
.
.
.
.
.
.
.
.
.
.
.
.
.
.
.
.
.
.
.
.
.
.
.
.
.
.
.
.
.
.
.
.
.
.
.
.
.
.
.
.
.
.
.
.
.
.
.
.
.
.
12
14
15
16
17
18
20
20
22
22
23
23
24
24
24
25
25
Before Going to the Field . . . . . . . . . . . . . . . . . . . . . . . . . . . . 27
Unpacking and packing the instrument . . .
Unpacking the instrument . . . . . . .
Packing the instrument . . . . . . . . .
Charging and discharging the battery pack.
Safety notices . . . . . . . . . . . . . . .
Charging the battery pack . . . . . . .
Discharging the battery pack . . . . .
.
.
.
.
.
.
.
.
.
.
.
.
.
.
.
.
.
.
.
.
.
.
.
.
.
.
.
.
.
.
.
.
.
.
.
.
.
.
.
.
.
.
.
.
.
.
.
.
.
.
.
.
.
.
.
.
.
.
.
.
.
.
.
.
.
.
.
.
.
.
.
.
.
.
.
.
.
.
.
.
.
.
.
.
.
.
.
.
.
.
.
.
.
.
.
.
.
.
.
.
.
.
.
.
.
.
.
.
.
.
.
.
.
.
.
.
.
.
.
.
.
.
.
.
.
.
.
.
.
.
.
.
.
.
.
.
.
.
.
.
.
.
.
.
.
.
.
.
.
.
.
.
.
.
.
.
.
.
.
.
.
.
.
.
.
.
.
.
.
.
.
.
.
.
.
.
.
.
.
.
.
.
.
.
.
.
.
.
.
.
.
.
.
.
.
.
.
.
.
.
.
.
.
.
.
.
.
.
.
.
.
.
.
.
.
.
.
.
.
.
.
.
.
.
28
28
28
28
28
30
30
Trimble M3 Total Station User Guide
1
Co nte nts
Detaching the BC-65 battery pack from the instrument . . . . . . .
Attaching the BC-65 battery pack to the instrument . . . . . . . . .
Selecting a language . . . . . . . . . . . . . . . . . . . . . . . . . . . . . . . . . .
Changing regional configuration presets . . . . . . . . . . . . . . . . . . . . .
Instrument settings. . . . . . . . . . . . . . . . . . . . . . . . . . . . . . . . . . .
Basic measurement settings . . . . . . . . . . . . . . . . . . . . . . . . .
Configuring data recording and external communication settings.
Frequently used settings (HOT MENU settings) . . . . . . . . . . . .
4
.
.
.
.
.
.
.
.
.
.
.
.
.
.
.
.
.
.
.
.
.
.
.
.
.
.
.
.
.
.
.
.
.
.
.
.
.
.
.
.
.
.
.
.
.
.
.
.
.
.
.
.
.
.
.
.
.
.
.
.
.
.
.
.
.
.
.
.
.
.
.
.
.
.
.
.
.
.
.
.
.
.
.
.
.
.
.
.
.
.
.
.
.
.
.
.
.
.
.
.
.
.
.
.
.
.
.
.
.
.
.
.
.
.
.
.
.
.
.
.
.
.
.
.
.
.
.
.
.
.
.
.
.
.
.
.
.
.
.
.
.
.
.
.
.
.
.
.
.
.
.
.
.
.
.
.
.
.
.
.
.
.
.
.
.
.
.
.
.
.
.
.
.
.
.
.
.
.
.
.
.
.
.
.
31
31
32
32
34
34
38
39
.
.
.
.
.
.
.
.
.
.
.
.
.
.
.
.
.
.
.
.
.
.
.
.
.
.
.
.
.
.
.
.
.
.
.
.
.
.
.
.
.
.
.
.
.
.
.
.
.
.
.
.
.
.
.
.
.
.
.
.
.
.
.
.
.
.
.
.
.
.
.
.
.
.
.
.
.
.
.
.
.
.
.
.
.
.
.
.
.
.
.
.
.
.
.
.
.
.
.
.
.
.
.
.
.
.
.
.
.
.
.
.
.
.
.
.
.
.
.
.
.
.
.
.
.
.
.
.
.
.
.
.
.
.
.
.
.
.
.
.
.
.
.
.
.
.
.
.
.
.
.
.
.
.
.
.
.
.
.
.
.
.
.
.
.
.
.
.
.
.
.
.
.
.
.
.
.
.
.
.
48
48
48
49
50
51
51
52
53
53
54
54
Basic Measurement Screen . . . . . . . . . . . . . . . . . . . . . . . . . . . 55
Measurement mode . . . . . . . . . . . . . . . . . . . . . . . . . . . . . . . .
Changing the screen display . . . . . . . . . . . . . . . . . . . . . . . . . . .
Changing the distance unit . . . . . . . . . . . . . . . . . . . . . . . . . . . .
Taking measurements . . . . . . . . . . . . . . . . . . . . . . . . . . . . . . .
Tracking mode . . . . . . . . . . . . . . . . . . . . . . . . . . . . . . .
Setting the horizontal angle (HA) . . . . . . . . . . . . . . . . . . . . . . . .
Setting target height (th) and instrument height (ih). . . . . . . . . . . .
Setting the station elevation . . . . . . . . . . . . . . . . . . . . . . . . . . .
Instrument height (ih) and station-Z coordinate (Zs) . . . . . . .
Measuring edges and corners using the Intersection program (INTS) .
Bearing-Distance . . . . . . . . . . . . . . . . . . . . . . . . . . . . . .
Corner-Angle . . . . . . . . . . . . . . . . . . . . . . . . . . . . . . . .
Intersection . . . . . . . . . . . . . . . . . . . . . . . . . . . . . . . . .
Eccentric Object . . . . . . . . . . . . . . . . . . . . . . . . . . . . . .
2
.
.
.
.
.
.
.
.
Getting Started in the Field. . . . . . . . . . . . . . . . . . . . . . . . . . . 47
Setting up the tripod . . . . . . . . . . . . . . . . . . . . . . . .
Centering . . . . . . . . . . . . . . . . . . . . . . . . . . . . . . .
Centering with optical plummet . . . . . . . . . . . .
Leveling . . . . . . . . . . . . . . . . . . . . . . . . . . . . . . . .
Focusing the telescope. . . . . . . . . . . . . . . . . . . . . . .
Setting the measurement mode and preparing the target
Measurement with a prism. . . . . . . . . . . . . . . .
Measurement in Direct-Reflex mode . . . . . . . . .
Turning the instrument on and off . . . . . . . . . . . . . . .
Turning on the instrument . . . . . . . . . . . . . . . .
Turning off the instrument . . . . . . . . . . . . . . . .
Sleep mode. . . . . . . . . . . . . . . . . . . . . . . . . .
5
.
.
.
.
.
.
.
.
Trimble M3 Total Station User Guide
.
.
.
.
.
.
.
.
.
.
.
.
.
.
.
.
.
.
.
.
.
.
.
.
.
.
.
.
.
.
.
.
.
.
.
.
.
.
.
.
.
.
.
.
.
.
.
.
.
.
.
.
.
.
.
.
.
.
.
.
.
.
.
.
.
.
.
.
.
.
.
.
.
.
.
.
.
.
.
.
.
.
.
.
.
.
.
.
.
.
.
.
.
.
.
.
.
.
.
.
.
.
.
.
.
.
.
.
.
.
.
.
.
.
.
.
.
.
.
.
.
.
.
.
.
.
.
.
.
.
.
.
.
.
.
.
.
.
.
.
.
.
.
.
.
.
.
.
.
.
.
.
.
.
.
.
.
.
.
.
.
.
.
.
.
.
.
.
.
.
.
.
.
.
.
.
.
.
.
.
.
.
.
.
.
.
.
.
.
.
.
.
.
.
.
.
.
.
.
.
.
.
.
.
.
.
.
.
.
.
56
57
58
59
59
60
60
61
62
63
63
64
65
66
Contents
6
Job Manager . . . . . . . . . . . . . . . . . . . . . . . . . . . . . . . . . . . 67
Creating a new job . . . . . . .
Opening an existing job . . . .
Deleting a job . . . . . . . . . .
Setting the Control Point job .
Displaying job information . .
Editing data . . . . . . . . . . .
7
.
.
.
.
.
.
.
.
.
.
.
.
.
.
.
.
.
.
.
.
.
.
.
.
.
.
.
.
.
.
.
.
.
.
.
.
.
.
.
.
.
.
.
.
.
.
.
.
.
.
.
.
.
.
.
.
.
.
.
.
.
.
.
.
.
.
.
.
.
.
.
.
.
.
.
.
.
.
.
.
.
.
.
.
.
.
.
.
.
.
.
.
.
.
.
.
.
.
.
.
.
.
.
.
.
.
.
.
.
.
.
.
.
.
.
.
.
.
.
.
.
.
.
.
.
.
.
.
.
.
.
.
.
.
.
.
.
.
.
.
.
.
.
.
.
.
.
.
.
.
.
.
.
.
.
.
.
.
.
.
.
.
.
.
.
.
.
.
.
.
.
.
.
.
.
.
.
.
.
.
.
.
.
.
.
.
.
.
.
.
.
.
.
.
.
.
.
.
.
.
.
.
.
.
.
.
.
.
.
.
.
.
.
.
.
.
.
.
.
.
.
.
.
.
.
.
.
.
.
.
.
.
.
.
68
70
70
71
72
72
.
.
.
.
.
.
.
.
.
.
.
.
.
.
.
.
.
.
.
.
.
.
.
.
.
.
.
.
.
.
.
.
.
.
.
.
.
.
.
.
.
.
.
.
.
.
.
.
.
.
.
.
.
.
.
.
.
.
.
.
.
.
.
.
.
.
.
.
.
.
.
.
.
.
.
.
.
.
.
.
.
.
.
.
.
.
.
.
.
.
.
.
.
.
.
.
.
.
.
.
.
.
.
.
.
.
.
.
.
.
.
.
.
.
.
.
.
.
.
.
.
.
.
.
.
.
.
.
.
.
.
.
.
.
.
.
.
.
.
.
.
.
.
.
.
.
.
.
.
.
.
.
.
.
.
.
.
.
.
.
.
.
.
.
.
.
.
.
.
.
.
.
.
.
.
.
.
.
.
.
.
.
.
.
.
.
.
.
.
.
.
.
.
.
.
.
.
.
.
.
.
.
.
.
.
.
.
.
.
.
.
.
.
.
.
.
.
.
.
.
.
.
.
.
.
.
.
.
.
.
.
.
.
.
.
.
.
.
.
.
74
79
80
81
83
83
83
83
84
84
86
87
89
90
91
Applications . . . . . . . . . . . . . . . . . . . . . . . . . . . . . . . . . . . 95
Connecting distance . . . . . . . . . . . . . . . . . .
Choosing 2D or 3D observation . . . . . . .
Start connecting distances . . . . . . . . . .
Remote object height . . . . . . . . . . . . . . . . .
Recording data from connecting distance
Station and offset . . . . . . . . . . . . . . . . . . . .
Shifting the coordinate axes y, x. . . . . . .
Vertical plane. . . . . . . . . . . . . . . . . . . . . . .
Compute area . . . . . . . . . . . . . . . . . . . . . .
9
.
.
.
.
.
.
Coordinates . . . . . . . . . . . . . . . . . . . . . . . . . . . . . . . . . . . . 73
Resection . . . . . . . . . . . . . . . . . . . . . . . . . . . . . . . . . . . . . .
Known Station . . . . . . . . . . . . . . . . . . . . . . . . . . . . . . . . . . .
Orientation using a known azimuth . . . . . . . . . . . . . . . . .
Orientation using known coordinates . . . . . . . . . . . . . . . .
Station elevation . . . . . . . . . . . . . . . . . . . . . . . . . . . . . . . . .
Measure topo. . . . . . . . . . . . . . . . . . . . . . . . . . . . . . . . . . . .
Confirming the station coordinates . . . . . . . . . . . . . . . . .
Confirming the backsight point angle . . . . . . . . . . . . . . . .
Confirming the instrument height and Station-Z coordinates
Sighting new points in the Topo observation screen. . . . . . .
Stakeout . . . . . . . . . . . . . . . . . . . . . . . . . . . . . . . . . . . . . . .
Stake out by coordinates (XY or XYZ) . . . . . . . . . . . . . . . .
Stakeout by angle and distance (HD or HDh) . . . . . . . . . . .
Stakeout by reference line . . . . . . . . . . . . . . . . . . . . . . .
Stakeout by dividing line . . . . . . . . . . . . . . . . . . . . . . . .
8
.
.
.
.
.
.
.
.
.
.
.
.
.
.
.
.
.
.
.
.
.
.
.
.
.
.
.
.
.
.
.
.
.
.
.
.
.
.
.
.
.
.
.
.
.
.
.
.
.
.
.
.
.
.
.
.
.
.
.
.
.
.
.
.
.
.
.
.
.
.
.
.
.
.
.
.
.
.
.
.
.
.
.
.
.
.
.
.
.
.
.
.
.
.
.
.
.
.
.
.
.
.
.
.
.
.
.
.
.
.
.
.
.
.
.
.
.
.
.
.
.
.
.
.
.
.
.
.
.
.
.
.
.
.
.
.
.
.
.
.
.
.
.
.
.
.
.
.
.
.
.
.
.
.
.
.
.
.
.
.
.
.
.
.
.
.
.
.
.
.
.
.
.
.
.
.
.
.
.
.
.
.
.
.
.
.
.
.
.
.
.
.
.
.
.
.
.
.
.
.
.
.
.
.
.
.
.
.
.
.
.
.
.
.
.
.
.
.
.
.
.
.
.
.
.
.
.
.
.
.
.
.
.
.
.
.
.
.
.
.
.
.
.
.
.
.
.
.
.
.
.
.
.
.
.
.
.
.
. 96
. 96
. 97
.100
.101
.102
.104
.105
.107
Data Transfer . . . . . . . . . . . . . . . . . . . . . . . . . . . . . . . . . . 109
Hardware interface . . . . . . . . . . . . . . . . . . . . . . . . . . . . . .
Specifications . . . . . . . . . . . . . . . . . . . . . . . . . . . . . . . . .
XON/XOFF Control . . . . . . . . . . . . . . . . . . . . . . . . . . . . .
Downloading internal memory to an office computer . . . . . . . .
Transferring recorded data to the office computer . . . . . . . . . .
Uploading data from an office computer to the internal memory
Nikon data fields . . . . . . . . . . . . . . . . . . . . . . . . . . .
.
.
.
.
.
.
.
.
.
.
.
.
.
.
.
.
.
.
.
.
.
.
.
.
.
.
.
.
.
.
.
.
.
.
.
.
.
.
.
.
.
.
.
.
.
.
.
.
.
.
.
.
.
.
.
.
.
.
.
.
.
.
.
.
.
.
.
.
.
.
.
.
.
.
.
.
.
.
.
.
.
.
.
.
.
.
.
.
.
.
.
.
.
.
.
.
.
.
.
.
.
.
.
.
.
.
.
.
.
.
.
.
.
.
.
.
.
.
.
.110
.111
.111
.111
.112
.113
.113
Trimble M3 Total Station User Guide
3
Co nte nts
Uploading a point name/number list from the office computer. . . . . . . . . . . . . . . . . . . .114
Uploading a point code list from the office computer . . . . . . . . . . . . . . . . . . . . . . . . . .114
10
Checking and Adjustment . . . . . . . . . . . . . . . . . . . . . . . . . . . 115
Checking and adjusting the plate level. . . . . . . . . . . . . .
Checking and adjusting the circular level . . . . . . . . . . . .
Checking and adjusting the optical plummet . . . . . . . . .
Checking the instrument constant . . . . . . . . . . . . . . . .
Checking and adjusting the compensator (C) and index (I)
Vertical index and HA collimation . . . . . . . . . . . .
Compensator adjustment . . . . . . . . . . . . . . . . .
A
.
.
.
.
.
.
.
.
.
.
.
.
.
.
.
.
.
.
.
.
.
.
.
.
.
.
.
.
.
.
.
.
.
.
.
.
.
.
.
.
.
.
.
.
.
.
.
.
.
.
.
.
.
.
.
.
.
.
.
.
.
.
.
.
.
.
.
.
.
.
.
.
.
.
.
.
.
.
.
.
.
.
.
.
.
.
.
.
.
.
.
.
.
.
.
.
.
.
.
.
.
.
.
.
.
.
.
.
.
.
.
.
.
.
.
.
.
.
.
.
.
.
.
.
.
.
.
.
.
.
.
.
.
.
.
.
.
.
.
.
.
.
.
.
.
.
.
.
.
.
.
.
.
.
.
.
.
.
.
.
.
.
.
.
.
.
.
.
.
.
.
.
.
.
.
.
.
.
.
.
.
.
.
.
.
.
.
.
.
.
.
.
.
.
.
.
.
.
.
.
.
.
.
.
.
.
.
.
.
.
.
.
.
.
.
.
.
.
.
.
.
.
.
.
.
.
.
.
.
.
.
.
.
.
.
.
.
.
.
.
.
.
.
.
.
.
.
.
.
.
.
.
.
.
.
.
.
.
.
.
.
.
.
.
.
.
.
.
.
.
.
.
.
.116
.116
.117
.118
.119
.119
.120
.
.
.
.
.
.
.
.
.
.
.
.
.
.
.
.
.
.
.
.
.
.
.
.
.
.
.
.
.
.
.
.
.
.
.
.
.
.
.
.
.
.
.
.
.
.
.
.
.
.
.
.
.
.
.
.
.
.
.
.
.
.
.
.
.
.
.
.
.
.
.
.
.
.
.
.
.
.
.
.
.
.
.
.
.124
.124
.124
.125
.125
.126
.126
.
.
.
.
.
.
.
.
.
.
.
.
.
.
.
.
.
.
.
.
.
.
.
.
.
.
.
.
.
.
.
.
.
.
.
.
.
.
.
.
.
.
.
.
.
.
.
.
.
.
.
.
.
.
.
.
.
.
.
.
.
.
.
.
.
.
.
.
.
.
.
.
.
.
.
.
.
.
.
.
.
.
.
.
.
.
.
.
.
.
.
.
.
.
.
.
.
.
.
.
.
.
.
.
.
.
.
.
.
.
.
.
.
.
.
.
.
.
.
.
.
.
.
.
.
.
.
.
.
.
.
.
.
.
.
.
.
.
.
.
.
.
.
.
.128
.128
.131
.134
.135
.136
.140
.140
.141
.143
.143
.144
Specifications. . . . . . . . . . . . . . . . . . . . . . . . . . . . . . . . . . 145
Telescope . . . . . . . . . . . . . . . .
Measurement range . . . . . . . . .
Distance measurement precision .
Measurement intervals . . . . . . .
Angle measurement . . . . . . . . .
Dual-axis tilt sensor . . . . . . . . .
Clamps/tangent screws . . . . . . .
Tribrach . . . . . . . . . . . . . . . . .
Level vial sensitivity . . . . . . . . .
4
.
.
.
.
.
.
.
Data Formats . . . . . . . . . . . . . . . . . . . . . . . . . . . . . . . . . . 127
M5 data format . . . . . . . . . . . . . . . . . . . . . . . . . . . . . . . . . . . . .
The M5 data line . . . . . . . . . . . . . . . . . . . . . . . . . . . . . . . .
Additional data lines of M5 data format – header/changed setting
Marking in the M5 format . . . . . . . . . . . . . . . . . . . . . . . . . .
Value blocks . . . . . . . . . . . . . . . . . . . . . . . . . . . . . . . . . . .
Recording data lines . . . . . . . . . . . . . . . . . . . . . . . . . . . . . .
Nikon data format . . . . . . . . . . . . . . . . . . . . . . . . . . . . . . . . . . .
Uploading coordinate data format . . . . . . . . . . . . . . . . . . . . .
Downloading Nikon raw format . . . . . . . . . . . . . . . . . . . . . .
Point number/name list and Point code list . . . . . . . . . . . . . . . . . . .
File format . . . . . . . . . . . . . . . . . . . . . . . . . . . . . . . . . . . .
Data example . . . . . . . . . . . . . . . . . . . . . . . . . . . . . . . . . .
C
.
.
.
.
.
.
.
Troubleshooting . . . . . . . . . . . . . . . . . . . . . . . . . . . . . . . . 123
Points . . . . . . . . . . . . . . . . . . . . . .
Settings interface . . . . . . . . . . . . . . .
Job Manager . . . . . . . . . . . . . . . . . .
Stakeout . . . . . . . . . . . . . . . . . . . . .
Uploading Point Name / Point Code list.
Adjustment C&I . . . . . . . . . . . . . . . .
Application . . . . . . . . . . . . . . . . . . .
B
.
.
.
.
.
.
.
Trimble M3 Total Station User Guide
.
.
.
.
.
.
.
.
.
.
.
.
.
.
.
.
.
.
.
.
.
.
.
.
.
.
.
.
.
.
.
.
.
.
.
.
.
.
.
.
.
.
.
.
.
.
.
.
.
.
.
.
.
.
.
.
.
.
.
.
.
.
.
.
.
.
.
.
.
.
.
.
.
.
.
.
.
.
.
.
.
.
.
.
.
.
.
.
.
.
.
.
.
.
.
.
.
.
.
.
.
.
.
.
.
.
.
.
.
.
.
.
.
.
.
.
.
.
.
.
.
.
.
.
.
.
.
.
.
.
.
.
.
.
.
.
.
.
.
.
.
.
.
.
.
.
.
.
.
.
.
.
.
.
.
.
.
.
.
.
.
.
.
.
.
.
.
.
.
.
.
.
.
.
.
.
.
.
.
.
.
.
.
.
.
.
.
.
.
.
.
.
.
.
.
.
.
.
.
.
.
.
.
.
.
.
.
.
.
.
.
.
.
.
.
.
.
.
.
.
.
.
.
.
.
.
.
.
.
.
.
.
.
.
.
.
.
.
.
.
.
.
.
.
.
.
.
.
.
.
.
.
.
.
.
.
.
.
.
.
.
.
.
.
.
.
.
.
.
.
.
.
.
.
.
.
.
.
.
.
.
.
.
.
.
.
.
.
.
.
.
.
.
.
.
.
.
.
.
.
.
.
.
.
.
.
.
.
.
.
.
.
.
.
.
.
.
.
.
.
.
.
.
.
.
.
.
.
.
.
.
.
.
.146
.146
.146
.147
.147
.147
.147
.147
.148
Contents
Optical plummet . . . . . . . . . . . . . .
Display and keypad . . . . . . . . . . . . .
Connections in the base of instrument
Battery pack BC-65 . . . . . . . . . . . . .
Environmental performance . . . . . . .
Dimensions. . . . . . . . . . . . . . . . . .
Weight . . . . . . . . . . . . . . . . . . . . .
.
.
.
.
.
.
.
.
.
.
.
.
.
.
.
.
.
.
.
.
.
.
.
.
.
.
.
.
.
.
.
.
.
.
.
.
.
.
.
.
.
.
.
.
.
.
.
.
.
.
.
.
.
.
.
.
.
.
.
.
.
.
.
.
.
.
.
.
.
.
.
.
.
.
.
.
.
.
.
.
.
.
.
.
.
.
.
.
.
.
.
.
.
.
.
.
.
.
.
.
.
.
.
.
.
.
.
.
.
.
.
.
.
.
.
.
.
.
.
.
.
.
.
.
.
.
.
.
.
.
.
.
.
.
.
.
.
.
.
.
.
.
.
.
.
.
.
.
.
.
.
.
.
.
.
.
.
.
.
.
.
.
.
.
.
.
.
.
.
.
.
.
.
.
.
.
.
.
.
.
.
.
.
.
.
.
.
.
.
.
.
.
.
.
.
.
.
.
.
.
.
.
.
.
.
.
.
.
.
.
.
.
.
.
.
.
.
.
.
.
.
.
.
.
.
.
.
.
.
.
.
.
.
.
.
.
.
.
.148
.148
.148
.148
.149
.149
.149
Glossary . . . . . . . . . . . . . . . . . . . . . . . . . . . . . . . . . . . . . 151
Softkey glossary . . . . . . . . . . . . . . . . . . . . . . . . . . . . . . . . . . . . . . . . . . . . . . . . . .151
Glossary of terms . . . . . . . . . . . . . . . . . . . . . . . . . . . . . . . . . . . . . . . . . . . . . . . . .153
Trimble M3 Total Station User Guide
5
Co nte nts
6
Trimble M3 Total Station User Guide
CHAPTER
1
Introduction
1
In this chapter:
Q
Welcome
Q
About the Trimble Trimble M3 total station
Q
System diagram
Q
Related information
Q
Technical assistance
Q
Your comments
Trimble M3 Total Station User Guide
7
1
1.1
Introduction
Welcome
Thank you for purchasing the Trimble® M3 total station.
Before you operate the instrument, read this manual carefully. In particular, pay
attention to the warnings and cautions that appear in the Safety section at the front of
the manual, see Safety and Warnings, page iii.
You should also read the maintenance section, see Maintenance, page 14.
1.2
About the Trimble Trimble M3 total station
The Trimble M3 total station is easy to use. The software for the Trimble M3 series has
been designed to make it easy for you to learn to operate one model of instrument and
apply that knowledge to the other models with little additional training.
The Trimble M3 total station offers reflectorless operation, allowing you to take
measurements to points inaccessible with a prism. This manual shows the unique
capabilities and features available in the Trimble M3 total station.
8
Trimble M3 Total Station User Guide
Introduction
1.3
1
System diagram
Battery charger
type Q-B4U/B4E
(with power cord)
115 V, 220/240 V quick charger
Q-75U (115 V), Q-75E (220/240 V)
External battery
cord type B4-2
External
NiCd battery
type B4E
Trimble M3
total station
with NiMH
battery type
BC-65M
DTM/PC connecting
cable (9 pin/25 pin )
Personal computer
Figure 1.1
1.4
System diagram
Related information
•
Contact your local Trimble dealer for more information about the support
agreement contracts for software and firmware, and an extended warranty
program for hardware.
•
Trimble training courses – Consider a training course to help you use your total
station to its fullest potential. For more information, go to the Trimble website
at www.trimble.com/training.html.
Trimble M3 Total Station User Guide
9
1
1.5
Introduction
Technical assistance
If you have a problem and cannot find the information you need in the product
documentation, contact your local dealer.
Technical support
If you need to contact Trimble technical support:
1.
Go to the Trimble website (www.trimble.com).
2.
Click the Support button at the top of the screen. The Support A–Z list of
products appears.
3.
Scroll to the bottom of the list.
4.
Click the submit an inquiry link. A form appears.
Alternatively, you can send an e-mail to [email protected]
1.1
Your comments
Your feedback about the supporting documentation helps us to improve it with each
revision. E-mail your comments to [email protected].
10
Trimble M3 Total Station User Guide
CHAPTER
2
Overview of the Trimble M3 Total
Station
2
In this chapter:
Q
Hardware overview
Q
Maintenance
Q
LCD display and key functions
Q
Software overview
Q
Principles of display
Q
Inputting data
Trimble M3 Total Station User Guide
11
2
Overview of the Trimble M3 Total Station
This chapter gives you an overview of the operation and controls of the Trimble M3
total station, as well as the programs which are a special feature.
2.2
Hardware overview
Figure 2.2 and Figure 2.3 show the main parts of the Trimble M3 total station.
Carrying
handle
Optical sight
(finder)
Battery
mounting button
Telescope
focusing ring
Battery pack
BC-65
Telescope
eyepiece
Diopter ring
Vertical tangent
screw
Rectical plate
cover
Vertical clamp
Plate level
Horizontal clamp
Face-1 display
and keyboard
Horizontal
tangent screw
The laser safety
label shown is
attached to the
underside of the
keyboard
Tribrach
clamp knob
Complies with 21 CFR 1040, 10 and 1040,11
except for deviations pursuant to
Laser Notice No. 50, dated July 26, 2001
MADE IN JAPAN
Figure 2.2
12
Trimble M3 total station – Face-1 (control side)
Trimble M3 Total Station User Guide
NIKON-TRIMBLE CO., LTD.
16-2, MINAMIKAMATA 2-CHOME,
OTA-KU, TOKYO, JAPAN
Overview of the Trimble M3 Total Station
2
The laser safety
label shown is
attached to the
telescope
CLASS 1 LASER PRODUCT
Objective
LASER LIGHT
IS EMITTED
FROM THIS PART
Horizontal axis
indication mark
Optical plummet
Data output /
external power
input connector
WARNING
Input voltage
7.2 - 11 V DC
Tribrach
Leveling screw
Circular level
Figure 2.3
Trimble M3 total station – Face-2
Trimble M3 Total Station User Guide
13
2
2.3
Overview of the Trimble M3 Total Station
Maintenance
Before using the instrument, read and follow the following maintenance instructions:
14
•
Do not leave the instrument in direct sunlight or in a closed vehicle for
prolonged periods. Overheating the instrument may reduce its efficiency.
•
If the Trimble M3 total station has been used in wet conditions, immediately
wipe off any moisture and dry the instrument completely before returning the
instrument to the carrying case. The instrument contains sensitive electronic
assemblies which have been well protected against dust and moisture. However,
if dust or moisture gets into the instrument, severe damage could result.
•
Sudden changes in temperature may cloud the lenses and drastically reduce the
measurable distance, or cause an electrical system failure. If there has been a
sudden change in temperature, leave the instrument in a closed carrying case in
a warm location until the temperature of the instrument returns to room
temperature.
•
Do not store the Trimble M3 total station in hot or humid locations. In
particular, you must store the battery pack in a dry location at a temperature of
less than 30 °C (86 °F). High temperature or excessive humidity can cause mold
to grow on the lenses. It can also cause the electronic assemblies to deteriorate,
and so lead to instrument failure.
•
Store the battery pack with the battery discharged.
•
When storing the instrument in areas subject to extremely low temperatures,
leave the carrying case open.
•
Do not overtighten any of the clamp screws.
•
When adjusting the vertical tangent screws, upper plate tangent screws, or
leveling screws, stay as close as possible to the center of each screw's range. The
center is indicated by a line on the screw. For final adjustment of tangent screws,
rotate the screw clockwise.
•
If the tribrach will not be used for an extended period, lock down the tribrach
clamp knob and tighten its safety screw.
•
Do not use organic solvents (such as ether or paint thinner) to clean the nonmetallic parts of the instrument (such as the keyboard) or the painted or printed
surfaces. Doing so could result in discoloration of the surface, or in peeling of
printed characters. Clean these parts only with a soft cloth or a tissue, lightly
moistened with water or a mild detergent.
•
To clean the optical lenses, lightly wipe them with a soft cloth or a lens tissue
that is moistened with alcohol.
Trimble M3 Total Station User Guide
Overview of the Trimble M3 Total Station
2.4
•
The reticle plate cover has been correctly mounted. Do
not release it or subject it to excessive force to make it
watertight.
•
Before attaching the battery pack, check that the contact
surfaces on the battery and instrument are clean. Press
the battery pack into place until the battery mounting
button rises up to the battery pack top surface. If the
battery pack is not attached securely, the instrument is
not watertight.
2
Reticle plate cover
•
Press the cap that covers the data output/external power input connector
terminal until it clicks into place. The instrument is not watertight if the cap is
not attached securely, or when the data output/external power input connector
is used.
•
The carrying case is designed to be watertight, but you should not leave it
exposed to rain for an extended period.
•
The BC-65 battery pack contains a NiMH battery. When disposing of the battery
pack, follow the laws or rules of your municipal waste system. See also
Recycling, page ii.
•
The instrument can be damaged by static electricity from the human body
discharged through the data output/external power input connector. Before
handling the instrument, touch any other conductive material once to remove
static electricity.
LCD display and key functions
The LCD display and keys on the Trimble M3 total station keyboard are shown below.
Trimble M3 Total Station User Guide
15
2
24.1
Overview of the Trimble M3 Total Station
Key functions
Table 2.1 summarizes the functions of the Trimble M3 series keys.
Table 2.1
Key
Key functions
Function
[Menu] key. Press to display the MENU screen which contains the following
options:
1. Job Manager
2. Adjustment
3. Applications
4. Coordinates
5. Setting Instrument
6. Setting interface
7. Data Transfer
Trimble key. Press to display the HOT MENU screen which contains the
following options:
1. EDM Settings
2. DR/PR Mode
3. Electronic Level
4. Setting Corrections
5. Point number / Point code
6. Target
7. Edit
Illumination key. Press to display the 3-switch window which
contains the following options:
1. Backlight on/off.
2. Sound on/off
3. Display contrast adjustment
See Adjusting lighting, sound, and contrast, page 17.
[PWR] button. Press to turn the instrument on or off.
See Turning the instrument on and off, page 53.
[ESC] key. Press to return to the previous screen. If you are in numeric or
alpha-numeric mode press this key to delete your input.
[MEAS/ENT] key. Press to do any of the following:
•
•
•
Proceed to the next step
Initiate a measurement and record the point
Confirm the input value/name/code when you are in input mode
[F1] - [F4] Function keys. When softkeys (for example Stack) are displayed at
the bottom of the screen, press the function key beneath the softkey
indication.
Note – The fields at the bottom of each screen relate to the function of the
keys situated below the display. They indicate the next possible setting, not
the current setting.
16
Trimble M3 Total Station User Guide
Overview of the Trimble M3 Total Station
Table 2.1
Key
2
Key functions
Function
[<] Left arrow key. Move the highlighted cursor to the left, or delete a
character when you are in the input mode.
[>] Right arrow key. Move the highlighted cursor to the right.
[^] [v] Up and down arrow keys. Move the highlighted cursor up or down in list
and MENU screens. Also used to move between the BMS screens.
The keypad is used to enter numbers and alphabetic characters.
In this example, press the key to enter [1] when the instrument is set for
numeric input, and press the key one or more times to enter P, Q, R, or S in
capitals or lower-case characters.
24.2
Adjusting lighting, sound, and contrast
You can adjust the lighting and sound levels from any
screen:
1.
Press the illumination key to display the 3-switch
window.
2.
To cycle through the settings for the backlight
and sound, press the number beside the switch.
For example, to turn the backlight on or off, press
[1]. Alternatively, to highlight the switch that you
want to set, press [^] or [v] and then press [<] or [>] to
change the setting.
3.
LCD backlight on
LCD backlight off
Sound on.
To adjust the contrast when the 3-switch window
is open:
Sound off
a.
Press [3], [<] or [>] to display the contrast
adjustment window.
Contrast
adjustment
window
b.
Press [^] or [v] to change the contrast level.
The arrow indicates the current contrast
level.
Trimble M3 Total Station User Guide
17
2
Overview of the Trimble M3 Total Station
c.
4.
20.1
To return to the 3-switch window, press [<]
or [>].
Press [ESC] to close the 3-switch window.
Status bar
The status bar appears on the right side of every screen. It contains indicators that
reflect the status of various system functions:
Signal indicator
Input mode indicator
DR/PR mode indicator
Backlight on indicator
Compensator indicator
Battery level indicator
Signal level indicator
The signal level indicator shows the reflected light intensity:
Indicator
Signal level
Level 4 (maximum)
Level 3
Level 2
Level 1 (minimum)
If this indicator is blinking, there is excessive signal for DR-mode
measurement.
If this indicator is blinking rapidly, there is no signal.
If this indicator is blinking slowly, the signal is low.
If there is no indicator, analog power for EDM is off.
18
Trimble M3 Total Station User Guide
Overview of the Trimble M3 Total Station
2
Input mode indicator
The input mode indicator only appears when you are entering points or coordinates. It
shows the following data input mode:
Indicator
Input mode
Input mode is numeric. Press a key on the number pad to enter the number
printed on the key.
Input mode is alphabetic (capital letters). Press a key on the number pad to
enter the first letter printed above the key. Press the key repeatedly to cycle
through all the letters assigned to the key. For instance, to enter the capital
letter O in alphabetic mode, press [6] three times.
Input mode is alphabetic (lower case). Press a key on the number pad to enter
the first letter printed above the key. Press the key repeatedly to cycle through
all the letters assigned to the key. For instance, to enter the lower case letter o
in alphabetic mode, press [6] three times.
DR/PR mode indicator
The mode indicator indicates the current measurement mode. The icon blinks when
you take a measurement.
Indicator
Measurement mode
Current measurement mode is DR-mode (Direct-Reflex mode).
Current measurement mode is PR-mode (Prism mode).
Backlight-ON indicator
When the backlight is on, the
indicator appears.
indicator appears. When the backlight is off, no
Compensator indicator
When the automatic compensator correction is set to on, the indicator appears.
When the automatic compensator correction is off, no indicator appears.
Battery level indicator
The battery level indicator shows the battery voltage level:
Indicator
Battery level
Level 4 (full)
Level 3
Level 2
Trimble M3 Total Station User Guide
19
2
Overview of the Trimble M3 Total Station
Indicator
Battery level
Level 1
Battery low
Note – When the Battery low icon starts to blink, the remaining battery level
is less than 10 minutes. Please replace the battery with a fully charged battery
immediately.
If the battery level is critically low, the following
message appears:
2.1
Software overview
There are two software menus, the main MENU and the HOT MENU.
21.1
MENU overview
To access the main MENU screen, press [MENU] and then select options from the menu
using the keypad. Use the MENU screen to access important functions and settings.
Menu item
Sub-menu
Description
1. Job Manager
1. New
Create a new job. See Creating a new job, page 68.
2. Open
Open an existing job. See Opening an existing job, page 70.
3. Delete
Delete a job. See Deleting a job, page 70.
4. Ctrl Point
Set a control point job. See Setting the Control Point job, page 71.
5. Info
Show job information (including free space, recorded points). See
Displaying job information, page 72
2. Adjustment C&I
3. Applications
20
Zero point adjustment for vertical scale, horizontal angle
corrections, and compensator. See Checking and adjusting the
compensator (C) and index (I), page 119.
1. Connect Distance See Connecting distance, page 96.
2. Remote Object
See Remote object height, page 100.
3. Station + Offset
See Station and offset, page 102.
4. Vertical Plane
See Vertical plane, page 105.
5. Compute Area
See Compute area, page 107.
Trimble M3 Total Station User Guide
Overview of the Trimble M3 Total Station
Menu item
Sub-menu
Description
4. Coordinates
1. Resection
See Resection, page 74.
2. Known Station
1. Hz - known station setup by BS Azimuth input.
2. YX - Known station setup by XYZ to BS.
See , page 79.
3. Station elevation
REM. See Station elevation, page 83.
4. Measure topo
Eccentricity (softkey) - In/Out, Right/Left offset distance input,
height and frequency settings. See Eccentric measurement,
page 85.
Input dSD (softkey).
See Measure topo, page 83.
5. Stake Out
1. XY - stakeout by coordinate, 2D. See Stake out by coordinates
(XY or XYZ), page 87.
2. HD - stakeout by angle and distance, 2D. See Stakeout by angle
and distance (HD or HDh), page 89.
3. XYZ - stakeout by coordinate, 3D. See Stake out by coordinates
(XY or XYZ), page 87.
4. HDh - stakeout by angle and distance, 3D. See Stakeout by
angle and distance (HD or HDh), page 89.
5. RefLine 2D - stakeout points from a line defined by Sta and O/S.
See Stakeout by reference line, page 90.
6. DivLine 2D - stakeout points after dividing a line by equal
distances. See Stakeout by dividing line, page 91.
5. Setting - Instrument 1. Angle
Set angle accuracy, display unit, VA reference and direction.See
Angle settings, page 34.
2. Distance
Set distance accuracy and display unit. See Distance settings,
page 35.
3. Coord. System
Set axis type and display order. See Coordinate system settings,
page 36.
4. Units
Set temperature and pressure. See Units settings, page 36
5. Turn Off
Set auto-power cut-off settings and sleep settings for the main
and EDM units. See Turn Off settings, page 36.
6. Clock
Set the built-in clock. See Clock settings, page 37.
7. Miscellaneous
Set default input modes in the code and point name fields. See
Miscellaneous settings, page 37.
6. Settings - interface
7. Data Transfer
2
Set the recording format. See Configuring data recording and
external communication settings, page 38.
1. MEM-Periph
Download data.See Downloading internal memory to an office
computer, page 111.
2. Periph-MEM
Upload data (coordinates).See Uploading data from an office
computer to the internal memory, page 113.
3. Upload Point List
Upload point-number list. See Uploading a point name/number
list from the office computer, page 114.
4. Upload Code List
Upload point-code list. See Uploading a point code list from the
office computer, page 114.
Trimble M3 Total Station User Guide
21
2
Overview of the Trimble M3 Total Station
HOT MENU overview
21.2
To access the HOT MENU, press
. In any measurement screen, you can use the HOT
MENU to change the point number and point code and the EDM mode, or check
recorded data.
Menu item
Sub-menu
Description
1. EDM Settings
Set distance precision. See Distance measurement settings (EDM),
page 39.
2. DR / PR Mode
Select measure mode. See Changing target mode (DR or Prism),
page 40.
3. Elec. level
Display the bubble and change tilt correction. See Bubble level
display (electric level), page 40.
4. Sett. Corr.
Prism const.
Input prism constant. See Configuring error corrections, page 40.
Temperature
Input temperature.
Pressure
Input pressure.
Scale
Input scale factor.
C&R corr.
Setting for curvature and refraction correction.
Sea level corr.
Select sea-level correction.
5. P/C
Input point number and code to prepare for the next recording
point. See Selecting a point name and point code, page 41.
6. Target
Select a target set (a combination of target height and measure
mode). See Selecting a target configuration, page 41.
7. Edit
2.2
Internal Memory
See Editing data, point number lists or point code lists, page 42.
Point Number List
See Managing your list of point names, page 44.
Point code list
See Managing your list of point codes, page 45.
Principles of display
The following are typical program screens:
22
•
Basic Measurement Screen (BMS)
•
Input screens
•
Menu screens
Trimble M3 Total Station User Guide
Overview of the Trimble M3 Total Station
22.1
2
Basic Measurement Screen (BMS)
The BMS is an observation screen. To take a measurement and store the point data,
press [MEAS/ENT].
Status bar area
Softkey area
The bottom part of the screen is the softkey area. To use the softkeys, press the
function key directly below the softkey command. For example, to reset the horizontal
angle to zero HA=0, press [F1].
The Status bar, page 18 shows indicators for the signal level, the character input mode,
operating mode, backlight and tilt status, and the battery level.
22.2
Input screen
An input screen enables you to enter data.
Currently set to numeric
input mode
Softkey area
In an input screen, the status bar displays the current input mode and the softkeys
provide different input options.
In the example shown here, press
•
[F1] <ABC> to change the input mode to capital alphanumeric letters
•
[F2] List to show the point name list
•
[F3] Stack to display the point stack
•
[F4] o.k. to complete both the point name and point code input
Trimble M3 Total Station User Guide
23
2
Overview of the Trimble M3 Total Station
22.3
Menu screen
A menu screen gives a list of options. When you have selected a menu item, a
secondary menu screen or input screen appears.
Down arrow indicator
To choose a menu item, use the number keys, or the [^] or [v] arrow keys.
On a menu screen, a down-arrow on the right bottom corner of the screen indicates
that there are more items in the menu. To see the other menu items, press [v].
2.3
Inputting data
23.1
Changing between alphanumeric and numeric input
You can enter characters into fields using the
numeric <123> or alphanumeric <ABC>/<abc>
mode. A 1, A, or a in the sidebar indicates the
current input mode.
The default input mode is numeric.
•
To change the input mode from numeric to
capital letter alphanumeric, press [F1].
•
To change the input from capital letter to
lower case alphanumeric, press [F1].
•
To change back to the numeric input mode,
press [F1] again.
Note – The alphanumeric mode includes the plus and
minus sign.
24
Trimble M3 Total Station User Guide
Overview of the Trimble M3 Total Station
23.2
2
Stack
Use the stack function to input a previously used
string.
1.
Press [F3] Stack when you are in an input
screen. A window appears that contains the
current contents in the stack memory.
2.
To select a string from the stack list, press [^] or
[v] and then press [MEAS/ENT] to insert the selected
string in the input screen.
3.
To cancel the process, press [ESC].
Note – The stack list can hold up to 5 strings used for
recording points.
20.1
List
Use the list function to input a string from the
registered list. The system maintains two lists: one for
the point name, and one for the point code.
1.
Press [F2] List when you are in an input screen.
A window appears that contains the current
contents in the list memory.
2.
To select a list, press [^] or [v] and then press
[MEAS/ENT] to insert the selected string in the
Point name or Point code field.
3.
To cancel the process, press [ESC].
Note – The lists can hold up to 254 point names or point codes. When you have a large
number of items, you can group them by using the Layer functionality. See Adding a layer,
page 46.
Trimble M3 Total Station User Guide
25
2
26
Overview of the Trimble M3 Total Station
Trimble M3 Total Station User Guide
CHAPTER
3
Before Going to the Field
3
In this chapter:
Q
Unpacking and packing the instrument
Q
Charging and discharging the battery pack
Q
Selecting a language
Q
Changing regional configuration presets
Q
Instrument settings
Trimble M3 Total Station User Guide
27
3
3.1
Before Going to the Field
Unpacking and packing the instrument
Note – Handle the Trimble M3 total station carefully to protect it from shocks and
excessive vibration.
31.1
Unpacking the instrument
To unpack the instrument, grip the carrying handle and
carefully remove the instrument from the carrying case.
31.2
Packing the instrument
Note – Store the instrument with the battery pack
attached.
To pack the instrument back into the carrying case:
1.
Set the telescope in the horizontal face-1
position.
2.
Align the ∇ storage mark on the bottom of the
face-1 keyboard with the ∇ mark on the tribrach
clamp knob.
3.
Lightly fasten the clamp knobs.
4.
Place the instrument in the carrying case.
Note – When packing the charger (Q-75U/E) in the
plastic carrying case, make sure that you store it as
shown on the sticker inside the case. Make sure that the
battery charger cable is not pinched when you close the
case cover.
3.1
Charging and discharging the battery pack
31.1
Safety notices
Before charging the battery pack, read the following warnings, cautions and notes.
28
C
WARNING – Use only the specified battery charger (part number Q-75U/E) to charge the
battery pack (part number BC-65). Using other chargers, such as a charger with part
number Q-7U/E or Q7C, may cause the battery pack to catch fire or rupture.
C
WARNING – Do not cover the battery charger while the battery pack is being recharged.
The charger must be able to dissipate heat adequately. Coverings such as blankets or
clothing can cause the charger to overheat.
Trimble M3 Total Station User Guide
Before Going to the Field
3
C
WARNING – Avoid recharging the battery pack in humid or dusty places, in direct
sunlight, or near heat sources. Do not recharge the battery pack when it is wet. If you do,
you may receive electric shocks or burns, or the battery pack may overheat or catch fire.
C
WARNING – Although the battery pack (part number BC-65) has an auto-reset circuit
breaker, you should take care not to short circuit the contacts. Short circuits can cause the
battery pack to catch fire or burn you.
C
C
WARNING – Never burn or heat the battery. Doing so may cause the battery to leak or
rupture. A leaking or ruptured battery can cause serious injury.
C
WARNING – The battery BC-65 is not waterproof on its own. Do not get the battery wet
when it is removed from the instrument. If water seeps into the battery, it may cause a
fire or burns.
C
CAUTION – Before charging the battery pack, read the instruction manual for the quick
charger (part number Q-75U/E).
WARNING – Before storing the battery pack or battery charger, cover the contact points
with insulation tape. If you do not cover the contact points, the battery pack or charger
may short circuit, causing fire, burns, or damage to the instrument.
Note – Charge the battery pack indoors where the ambient temperature is between 0 °C
and 40 °C (between 32 °F and 104 °F). If you try to charge the battery when the ambient
temperature is outside this range, the protective circuit will work and prevent it from being
charged normally.
Note – To prevent malfunction, keep the charging plug clean.
Note – If the CHARGE indicator blinks repeatedly after charging starts, there is a problem
with the battery pack. Do not use or charge the battery pack any further, and contact your
dealer.
Note – If the ambient temperature drops below 0 °C (32 °F) while the battery pack is
charging, the charger stops charging the battery pack. When the ambient temperature rises
above 0 °C (32 °F), charging resumes. Charging will be completed after restarting.
Note – If the CHARGE indicator remains lit for more than four hours, and the ambient
temperature during charging was within the specified operational range (0 °C through
40 °C or 32 °F through 104 °F), there is a problem with the battery pack. Do not use or
charge the battery pack any further, and contact your dealer.
Note – During charging or discharging, the battery pack and quick charger will become
warm. This is normal.
Note – After charging the battery pack, do not recharge it until it has been fully discharged.
Recharging a fully charged battery pack lowers its performance.
Note – If the battery pack is used at low temperatures (below -20 °C or -4 °F), its capacity is
reduced, and it will allow less operation time than a battery pack used at normal (room)
temperature.
Trimble M3 Total Station User Guide
29
3
Before Going to the Field
Note – If a battery pack is not used for a long period, it cannot be charged to its full
capacity again. To improve the battery pack's capacity, charge and discharge it several
times. See Discharging the battery pack, page 30.
Note – You can use a battery charger with part number Q-70U/E or Q-70C to partially
charge a battery pack with part number BC-65. However, these chargers cannot fully
charge the BC-65 battery pack.
31.2
Charging the battery pack
1.
Connect the power plug on the charger to an AC power outlet.
To AC outlet
Charge indicator
Discharge indicator
Discharge button
Air holes
2.
Connect the charging plug on the charger cable to the charging connector on
the battery pack.
The charge indicator lights up, and charging starts automatically.
When the battery pack is fully charged, the charge indicator turns off.
30.1
Discharging the battery pack
1.
Connect the power plug on the charger to an AC power outlet.
2.
Connect the charging plug on the charger cable to the charging connector on
the battery pack.
3.
Press the Discharge button on the battery charger.
The discharge indicator lights up, and the charger starts to discharge the
battery. When discharging is completed, the discharge indicator turns off. Then
the charge indicator lights up, and charging starts automatically.
4.
To stop discharging the battery pack, press the discharge button again.
Note – The battery pack can be recharged repeatedly. If you recharge the battery pack
while it still has enough power to operate the instrument, however, it will last for a shorter
period. This is called the memory effect. If you experience the memory effect, discharge the
battery pack as described above and then recharge it. This returns the battery pack to its
full capacity. Trimble recommends that you discharge the battery pack in this way at least
once every ten charges.
30
Trimble M3 Total Station User Guide
Before Going to the Field
30.1
Detaching the BC-65 battery pack from the instrument
C
30.1
3
CAUTION – Avoid touching the contacts on the battery pack.
1.
If the instrument is turned on, press [PWR] to turn it off.
2.
Depress the battery mounting button while holding the battery pack.
Attaching the BC-65 battery pack to the instrument
C
CAUTION – If the battery pack is not attached securely, this could adversely affect the
watertightness of the instrument.
1.
Before you attach the battery pack, clear any dust or other foreign particles from
the battery socket.
1
4
3
2
2.
Fit the two projections at the bottom of the battery pack into the concave
sections at the bottom of the socket on the instrument.
3.
Hold the instrument steady with one hand and push the battery pack against
the instrument.
4.
Make sure that the battery mounting button is securely locked.
Note – An external battery is available as an optional accessory for the Trimble M3 total
station. When the external battery is connected and the BC-65 battery pack is mounted on
the instrument, the instrument automatically uses the power source that has the most
available power.
Trimble M3 Total Station User Guide
31
3
3.1
Before Going to the Field
Selecting a language
The Trimble M3 total station provides three language
selections, depending on the language pack that you
have installed:
•
Language pack 1: English, Russian, and Spanish
•
Language pack 2: English, German, and French
Language pack 1 is the default language pack
installed at the factory. To have another language
pack installed, contact an authorized Trimble total
station service provider.
1.
To select a different language, power on the
instrument and at the TILT TELESCOPE
screen, press [ESC] and then press [3].
The SELECT LANGUAGE screen appears. The
screen shows up to three languages that are
currently available.
The current language selection is highlighted.
2.
Press [^] or [v] to highlight the required language
and then press [ENT].
The instrument reboots and displays the startup Tilt Telescope screen in the selected
language.
3.1
Changing regional configuration presets
You can quickly configure the Trimble total station to a pre-set combination of default
regional settings. The Regional Configuration screen appears only after the language is
selected.
To change the regional configuration pre-sets:
1.
Follow the steps in Selecting a language, page 32.
After the instrument is rebooted and the
telescope is tilted, the REGIONAL
CONFIGURATION screen appears.
2.
32
Press [^] or [v] to highlight the required regional
settings and then press [ENT].
Trimble M3 Total Station User Guide
Before Going to the Field
3.
3
If you do not want to change the current
settings, press [ESC]. The instrument will
continue to use the last settings that were
configured.
The settings affected by the REGIONAL CONFIGURATION screen are:
Table 3.2
Regional configuration pre-sets
Category
Setting
Europe
International
United States
Angle
Accuracy
0.2 mg - 0.5 mg
1”
1”
Unit
gon
DMS
DMS
VA-Reference
Zenith
Zenith
Zenith
AZ-Zero-Direct
North
North
North
HA Initialize
OFF
OFF
OFF
Accuracy
0.001 m
0.001 m
0.001 f
Unit
Meter
Meter
US-feet
(survey feet)
Time out EDM
30 s
30 s
30 s
Coord. System
Axis Type
X↑ → Y
N↑ → E
N↑ → E
Displ. Order
Y, X
N, E
N, E
Units
Temp
Centigrade (°C)
Centigrade (°C)
Fahrenheit (°F)
Press
hPa
mmHg
In Hg
Turn Off
Main Unit
OFF
OFF
OFF
EDM Unit
3 minutes
3 minutes
3 minutes
Distance
Miscellaneous
Settings Interface
EDM Settings
Settings
correction
Sleep
5 minutes
5 minutes
5 minutes
P Input
<123>
<123>
<123>
C Input
<ABC>
<ABC>
<ABC>
Add PT for S-O
0
0
0
Recording
MEM/3
MEM/3
MEM/3
Rec. Mode
All
All
All
Rec. Settings
No
No
No
Format
M5
Nikon
Nikon
Parity
None
None
None
Baud
4800
4800
4800
Position P
16
16
16
Position C
11
11
11
Position I
1
1
1
Mode
PREC
PREC
PREC
Ave
1
1
1
Prism constant
-18mm
-18mm
-18mm
Scale
1.000000
1.000000
1.000000
C & R corr.
0.142
0.142
0.142
Sea level corr.
OFF
OFF
OFF
Trimble M3 Total Station User Guide
33
3
3.1
Before Going to the Field
Instrument settings
The required instrument settings can be divided into the following groups:
•
Basic measurement settings – access the basic
measurement setting options from [MENU] [5]
Settings Instrument. See Basic
measurement settings, page 34.
•
Data recording and transfer related settings –
access the basic measurement setting options
from [MENU] [6] Setting Interface. See
Configuring data recording and external
communication settings, page 38.
•
Frequently used settings – the Trimble key
is
available in most observation screens and is used
to change the EDM mode, point number/code,
and target and correction settings. You can also
activate bubble indication to check leveling, and
check and edit data from this menu.
See Frequently used settings (HOT MENU
settings), page 39.
31.1
Basic measurement settings
Press [MENU] [5] Settings Instrument to enter or
change the basic measurement settings.
Angle settings
1.
From the Settings Instrument menu,
select [1] Angle,
To move from one line to the next, press [v].
2.
34
To change the settings in each line, press [<] or [>]
and then press [MEAS/ENT] to confirm the change.
Trimble M3 Total Station User Guide
Before Going to the Field
3
The angle settings are:
Options
Accuracy
Trimble M3 3"DR
1" / 0.0002° / 0.2mg / 0.01M
5" / 0.001° / 1mg / 0.1M
10" / 0.005° / 5mg / 0.5M
Trimble M3 5"DR
1" / 0.0005° / 0.5mg / 0.01M
5" / 0.001° / 1mg / 0.1M
10" / 0.005° / 5mg / 0.5M
Unit
DMS
Deg
gon
mil
V-Reference
Zenith
Vertical
± Elev
AZ-Zero-Direct
North
South
HA Initialize
ON
OFF
Note – When HA Initialize is set to ON, the horizontal angle needs to be
initialized (by rotating alidade) every time the vertical index is initialized
(that is, when you turn the instrument on). By doing this, the azimuth
direction will be kept after rebooting the instrument.
Distance settings
1.
From the Settings Instrument menu,
select [2] Distance,
To move from one line to the next, press [v].
2.
To change the settings in each line, press [<] or [>]
and then press [MEAS/ENT] to confirm the change.
The distance settings are:
Options
Accuracy
0.001 m / 0.001 ft
0.005 m / 0.01 ft
0.01 m / 0.02 ft
Unit
Meter
United States foot (U-ft)
International foot (I-ft)
Time out EDM
OFF
10 sec
30 sec
Trimble M3 Total Station User Guide
35
3
Before Going to the Field
Coordinate system settings
1.
From the Settings Instrument menu,
select [3] Coord-Syst,
To move from one line to the next, press [v].
2.
To change the settings in each line, press [<] or [>]
and then press [MEAS/ENT] to confirm the change.
The coordinate system settings are:
Options
Axis Type
X↑ → Y
Y↑ → X
N↑ → E
Displ.Order
Y, X
X, Y
N, E
E, N
Units settings
1.
From the Settings Instrument menu,
select [4] Units,
To move from one line to the next, press [v].
2.
To change the settings in each line, press [<] or [>]
and then press [MEAS/ENT] to confirm the change.
The coordinate system settings are:
Options
Temperature
Celsius
Fahrenheit
Pressure
mmHg
hPa
inHg
Turn Off settings
This option controls power saving.
1.
From the Settings Instrument menu,
select [5] Turn Off,
To move from one line to the next, press [v].
2.
36
To change the settings in each line, press [<] or [>]
and then press [MEAS/ENT] to confirm the change.
Trimble M3 Total Station User Guide
Before Going to the Field
3
The power savings settings are:
Options
Main Unit
OFF
10 min
30 min
EDM Unit
OFF
Once
6 sec
30 sec
3 min
10 min
Sleep
OFF
1 min
3 min
5 min
Clock settings
1.
From the Settings Instrument menu,
select [6] Clock,
To move from one element of the date or time
field ( for example from the year to the month
field), press [v], [^], or [MEAS/ENT].
2.
To change the settings of each date or time
element, press [<] to select a character and then
use the keypad to enter a number. Press [v] to
move to the next element.
3.
Press [MEAS/ENT] to confirm the change.
The clock settings are:
Options
Date
Enter in the order Year > Month > Day
Time
Enter in the order Hour > Minutes (24-hour clock)
Miscellaneous settings
1.
From the Settings Instrument menu,
select [7] Misc,
To move from one line to another press [v].
2.
To change the settings in each line, press [<] or [>]
and then press [MEAS/ENT] to confirm the change.
Trimble M3 Total Station User Guide
37
3
Before Going to the Field
The miscellaneous settings are:
Options
P Input
123
ABC
abc
C Input
123
ABC
abc
Note – P Input and C Input are the settings used to define the
default input mode when you enter a point number or name
(P Input) and point code (C Input). For example, if you often use a
point name such as K-101 or T3, you can change the setting to start
entering the point name in alphabetic mode.
S-O Add PT
0 - 999999 (numeric input)
Note – This field is a setting for recoding a point in stakeout
functions. It is used to specify an integer that is added to the point
number being staked to generate a new number for recording the
staked point. The default value is 0. For example, when you stake
out PT3 with an Add Constant of 1000, the default number for
stakeout recording is PT1003.
30.1
Configuring data recording and external communication settings
1.
Press [MENU] [6] Settings Interface to set
up data recording/transfer related settings.
To move from one line to the next, press [v].
2.
To change the settings in each line, press [<] or [>]
and then press [MEAS/ENT] to confirm the change.
The setting options are:
Options
38
Rec. Data Type
MEM/1 /2 /3 - record data to the internal memory, where:
• /1 records measured values
• /2 records computed values
• /3 records both measured and computed value
V24/1 /2 /3 - output data to external device via the RS232 interface,
where:
• /1 outputs measured values
• /2 outputs computed values
• /3 outputs both measured and computed value
OFF - no data recorded
Rec. Mode
All
Confirm
Rec. Settings
Yes
No
Trimble M3 Total Station User Guide
Before Going to the Field
3
Options
Format (output format) M5, see M5 data format, page 128
Nikon, see Nikon data format, page 140
Parity
None
Even
Odd
Baud rate
1200
2400
4800
9600
19200
38400
Position P (only for M5
format)
1 - 16
Position C (only for M5
format)
1 - 23
Position I (only for M5
format)
1 - 21
Note – As the remote control command, the Trimble M3 total station supports Nikon
External Commands. When you use your Trimble M3 total station with any data collector,
please set your equipment to use Nikon External Command.
30.1
Frequently used settings (HOT MENU settings)
Press the Trimble key
B
to access the HOT MENU.
Tip – When you hold down the Trimble key for one
second in any observation screen, a shortcut screen
appears that enables you to enter the point, code, target
height, and prism constant.
Distance measurement settings (EDM)
1.
Press [1] in the HOT MENU screen to open the
EDM Settings screen.
2.
Press [<] or [>] to change the Mode setting. The
options are PREC/STD where:
PREC is precise measurement mode
STD is fast measurement mode
Trimble M3 Total Station User Guide
39
3
Before Going to the Field
3.
Press [v] to move to the AVE field. AVE is the
number of measurements to average when
computing the measured distance value. Enter a
number between 1 and 99.
4.
To return to the HOT MENU screen, press [ESC].
Changing target mode (DR or Prism)
Press [2] in the HOT MENU screen to change the current
EDM mode. For example, if you are currently in Prism
measurement mode (PR), press [2] to change the mode
to Direct-Reflex mode (DR).
B
Tip – When you change the DR/PR mode, the prism
constant and target height is updated using the setting
value in [6] Target. In DR mode, the prism constant and
target height for DR is used. In PR mode, the values are
the last ones used in PR mode.
Bubble level display (electric level)
1.
Press [3] Elec. Level in the HOT MENU
screen to view the bubble level display.
2.
To change the tilt compensation settings, press [<]
or [>].
3.
To return to the HOT MENU screen, press [ESC].
Configuring error corrections
40
1.
Press [4] in the HOT MENU screen to open the
Settings Corrections screen. There are
seven settings related to distance corrections.
2.
In the first settings screen Correction is
updated when you change the temperature
and/or pressure value.
3.
Do one of the following:
–
To display the next screen, press [v] when
you are in the Pressure field.
–
To use values from the stack, press
[F3] Stack in any numeric input field.
–
To finish the settings, press [F4] o.k.
Trimble M3 Total Station User Guide
Before Going to the Field
4.
3
Press [ESC] to return to the HOT MENU screen.
Table 3.3
Allowable values for error corrections
Setting
Input range
Prism constant
-999 – 999 (numeric input)
Temperature
-40 °C – 70 °C
Pressure
440 hPa – 1460 hPa
Scale
0.995000 – 1.00500
C&R corr.
0.132, 0.142, 0.200, or OFF
Sea level corr.
ON/OFF
Selecting a point name and point code
1.
Press [5] in the HOT MENU screen to open the
Point number/Point code screen.
2.
Do one of the following:
3.
–
To change the input mode, press [F1] <ABC>.
–
To select the input from the list, press
[F2] List.
–
To select the input from a previously used
point name or code, press [F3] Stack.
Then do one of the following:
–
To return to the screen in which you
pressed
, press [F4].
–
To return to the HOT MENU screen, press
[ESC].
Selecting a target configuration
1.
Press [6] in the HOT MENU screen to open the
Set Target screen.
2.
Do one of the following:
3.
–
To move the cursor in the target list, press [^]
or [v] or [1] – [5] and then press [MEAS/ENT] to
select the highlighted item.
–
Press [F2] Edit to edit the target settings,
see Editing target settings, page 42.
To select the highlighted target, press [F4] o.k..
Trimble M3 Total Station User Guide
41
3
Before Going to the Field
Editing target settings
1.
Press [F2] Edit in the Set Target screen. The
Edit Target screen appears.
2.
Do one of the following:
3.
–
Use the keypad to enter a new value.
–
To use values from the stack, press
[F3] Stack.
–
To return to the previous screen, press [ESC].
To finish the edit, press [F4] o.k..
Note – Input the value that is shown on the prism into the
Prism const. field.
Editing data, point number lists or point code lists
1.
Press [7] in the HOT MENU screen to open the
Edit screen.
2.
Do one of the following:
3.
–
To view and edit data stored in the memory,
press [F1]. See Viewing and editing data in
internal memory, page 42.
–
To edit the point number list, press [F2]. See
Managing your list of point names, page 44.
–
To edit the point code list, press [F3]. See
Managing your list of point codes, page 45
To return to the HOT MENU screen, press [ESC].
Viewing and editing data in internal memory
This screen reports the current status of the internal
memory:
•
Free memory indicates how many more lines
you can record.
•
Last address is the address of the last
recorded line in the internal memory.
Do one of the following:
42
•
To open the view data screen, press [F1] Disp.
See Reviewing stored data, page 43.
•
To delete data lines, press [F2] Del. See Deleting
data, page 43.
•
To input coordinate data, press [F3] Inp.
Trimble M3 Total Station User Guide
Before Going to the Field
3
Reviewing stored data
1.
Press [F1] Disp in the Internal memory
screen.
2.
Do any of the following:
–
To edit point number and code, press [F2]
C+P.
–
To search data, press [F3] ?. See Searching
your data, page 44.
–
To display the previous data line in the
internal memory, press [^].
–
To display the next data line in the internal
memory, press [v].
–
To return to the previous screen, press [ESC].
Deleting data
1.
Press [F2] Del in the Internal memory
screen to delete data lines,
2.
Do any of the following:
–
To delete all points in the current job, press
[F1] All.
–
To define the point so that you can delete
by point number, press [F2] ?P.
–
To define the point so that you can delete
by point code, press [F3] ?C.
–
To define the point so that you can delete
by address, press [F4] ?A.
Note – When the address is specified by ?P, ?C, or ?A,
everything, from the specified data line to the end of the
file, will be deleted.
Trimble M3 Total Station User Guide
43
3
Before Going to the Field
Searching your data
1.
Press [F3] ? in the View data screen to open the
Search from Job screen.
2.
Do one of the following:
–
–
To search a point by point name or number,
press [F2] ?P. When you have selected or
entered a point name or number, press
[MEAS/ENT].
To search a point by point code, press
[F3] ?C.
–
To search a point by address, press [F4] ?A.
The search result screen appears.
3.
Do one of the following:
–
To search another point with the same
condition, press [F3] ?↓.
–
To define a new search, press [ESC] to return
to the previous screen.
Managing your list of point names
This screen shows the current point name list. Press the
[^] or [v] key to select the point name or number, or a
layer that you want to edit or delete.
Do one of the following:
44
–
To delete the highlighted point name or
number, press [F1] DEL. See Deleting a point
name or number, page 45.
–
To edit the highlighted point name or
number, press [F2] Edit. See Editing a point
name or number, page 45.
–
To add a point name or number, press [F3]
Add. See Adding a point name or number,
page 45.
–
To return to the previous screen, press [ESC].
Trimble M3 Total Station User Guide
Before Going to the Field
3
Editing a point name or number
1.
Press [F2] Edit in the point number list screen.
The Edit Point Number screen appears.
2.
Enter the required name or number. Press [F1]
<abc> to change the input mode.
3.
Press [MEAS/ENT]. A confirmation screen appears.
Do one of the following:
–
To return to the list without any change,
press [F1] No.
–
To accept the change and update the list,
press [F4] Yes.
Deleting a point name or number
1.
Highlight an item in the point number list screen
and then press [F1] DEL. A confirmation screen
appears.
2.
Do one of the following:
–
To return to the list without deleting the
item, press [F1] No.
–
To delete the item, press [F4] Yes.
Adding a point name or number
1.
Press [F3] Add in the point number list screen.
The Add screen appears.
2.
Do one of the following:
3.
–
Use the keypad to enter a new value.
–
To change the input mode, press [F1] <ABC>.
–
To return to the previous screen, press [ESC].
Press [MEAS/ENT] to update the list.
Managing your list of point codes
This screen shows the current point code list. Press [^] or
[v] to select the point name or number, or a layer that
you want to edit or delete.
Note – A layer is a group of point codes with an arrow
showing at the end of the string.
Trimble M3 Total Station User Guide
45
3
Before Going to the Field
All the procedures that are used to edit a point name
list, are also used to edit a point code. See Managing
your list of point names, page 44. In addition, you can
add a layer. See Adding a layer, page 46.
Adding a layer
A layer is a folder to categorize a set of point codes.
This is especially useful when you have many codes
and need to quickly find and input the point code that
you want to use in the field.
1.
Press [F4] Layer in the point code list screen.
The Add Layer screen appears.
2.
Do one of the following:
3.
46
–
Use the keypad to enter a new value.
–
To change the input mode, press [F1] <abc>.
–
To return to the previous screen, press [ESC].
Press [MEAS/ENT] to update the list.
Trimble M3 Total Station User Guide
CHAPTER
4
Getting Started in the Field
4
In this chapter:
Q
Setting up the tripod
Q
Centering
Q
Leveling
Q
Focusing the telescope
Q
Setting the measurement mode and preparing the target
Q
Turning the instrument on and off
Trimble M3 Total Station User Guide
47
4
4.1
Getting Started in the Field
Setting up the tripod
C
CAUTION – The tops of the tripod ferrules are very sharp. When handling or carrying the
tripod, take care to avoid injuring yourself on the ferrules.
Note – Do not carry the instrument while it is attached to a tripod.
4.1
1.
Open the tripod legs far enough for the instrument to be stable.
2.
Locate the tripod directly over the station point. To check the tripod's position,
look through the center hole in the tripod head.
3.
Firmly press the tripod ferrules into the ground.
4.
Level the top surface of the tripod head.
5.
Securely fasten the thumb screws on the tripod legs.
6.
Place the instrument on the tripod head.
7.
Insert the tripod mounting screw into the center hole of the base plate of the
instrument.
8.
Tighten the tripod mounting screw.
Centering
When you center the instrument, you align its central axis precisely over the station
point. To center the instrument, you can either use the optical plummet or a plumb
bob. The plumb bob is sold separately.
41.1
Centering with optical plummet
Note – If you require high accuracy, check and adjust the optical plummet before you
center the instrument. For detailed instructions, see Checking and adjusting the optical
plummet, page 117.
48
1.
After setting up the instrument on the tripod, look
through the optical plummet and align the reticle with
the station point. To do this, turn the leveling screws
until the center mark of the reticle is directly over the
image of the station point.
2.
While supporting the tripod head with one hand, loosen
the tripod leg clamps and adjust the lengths of the legs
until the air bubble is in the center of the circular level.
3.
Tighten the tripod leg clamps.
4.
Use the plate level to level the instrument. See Leveling, page 49. Look through
the optical plummet to check that the image of the station point is still in the
center of the reticle mark.
Trimble M3 Total Station User Guide
Getting Started in the Field
5.
4
If the station point is off center, do one of the following:
–
If the station point is slightly off center, loosen the tripod mounting screw
and then center the instrument on the tripod. Use only direct movement to
center the instrument. Do not rotate it.
When the instrument is centered, tighten the mounting screw.
–
4.1
If the displacement of the station point is major, repeat this procedure from
Step 2.
Leveling
When you level the instrument, you make the vertical
axis of the instrument exactly vertical.
To level the instrument, use the plate level.
1.
Loosen the upper plate clamp.
2.
Rotate the alidade until the plate level is parallel
with any two of the leveling screws (B and C).
3.
Use leveling screws B and C to move the bubble
into the center of the level.
4.
Rotate the alidade approximately 90°.
5.
Use leveling screw A to move the bubble into the
center of the level.
6.
Repeat Step 1 through Step 5 to center the bubble
in both positions.
7.
Rotate the alidade 180°.
8.
If the bubble in the plate level remains centered, the instrument is level. If the
bubble moves off center, adjust the plate level. For detailed instructions, see
Checking and adjusting the plate level, page 116.
Trimble M3 Total Station User Guide
49
4
4.1
Getting Started in the Field
Focusing the telescope
C
WARNING – Never look at the sun through the telescope. If you do, you may damage or
lose your eyesight.
When you sight the instrument, you aim the telescope at
the target, bring the target image into focus, and align the
image with the center crosshairs of the reticle.
Note – In DR-mode, the center circle of the crosshair is the
beam passing area. The diameter is about 15 cm at 100 m
distance from the instrument.
To sight the instrument:
1.
2.
Adjust the diopter:
a.
Aim the telescope at a blank area, such as the
sky or a piece of paper.
b.
Looking through the eyepiece, rotate the
diopter ring until the reticle crosshairs are in
sharp focus.
Eliminate parallax:
Diopter ring Telescope
focusing ring
a.
Aim the telescope at the target image.
b.
Rotate the focusing ring until the target image is in sharp focus on the
reticle crosshairs.
c.
Move your eye vertically and laterally to check whether the target image
moves relative to the reticle crosshairs.
If the target image does not move, there is no parallax.
d.
3.
50
If the target image does move, rotate the telescope focusing ring. Then
repeat from Step c.
Rotate the tangent screw. The final turn of the tangent screw should be in a
clockwise direction, to align the target accurately on the center crosshairs.
Trimble M3 Total Station User Guide
Getting Started in the Field
4.1
4
Setting the measurement mode and preparing the target
C
WARNING – The Trimble M3 3” and 5” DR total stations are Class 1 laser instruments. The
laser beam is hazardous to the eyes and the body. Do not sight the instrument on the face
or body of a person. If you suspect an injury caused by exposure to the laser beam, seek
medical advice immediately. If the instrument housing is open and the instrument is
turned on, the laser emits a beam stronger than the Class 1 safety level.
C
WARNING – Observe all other warnings and cautions. See Safety and Warnings, page iii.
The Trimble M3 total station has two measurement modes: Prism mode (Prism) and
Direct Reflex mode (DR). To change the mode at any time from any observation screen,
press
and then press [2]. See also Changing target mode (DR or Prism), page 40.
Table 4.4 describes how to set the measurement mode depending on the target you
want to measure.
Table 4.4
41.1
Measurement modes
Target
Target settings
Prism, reflector sheet
Prism (Prism mode)
Other, reflective materials
DR (Direct-Reflex mode)
Indicator on status bar
Measurement with a prism
As the Trimble M3 total station is extremely sensitive, multiple reflections on the prism
surface can sometimes cause a significant loss in accuracy.
To maintain the accuracy of your measurements:
•
Do not use a prism with scratches, a dirty surface, or a chipped center. Trimble
recommends that you use prisms with thin edges as shown below.
✕
✕
✓
Thin edges
Chipped center
Thick edges
•
When using a reflector sheet, take measurements longer than 5 meters.
•
When using a mini or standard prism, take measurements longer than
10 meters.
Trimble M3 Total Station User Guide
51
4
Getting Started in the Field
•
When measuring a short distance, incline the prism slightly so that the EDM
can ignore unnecessary reflections on the prism surface, as shown below.
Not completely square to
the sighting axis
Completely square to
the sighting axis
Hold the prism securely in place and do not move while taking measurements.
In Prism mode, in order to avoid false measurements on objects other than the prism
or reflector-sheet, targets that are less reflective than the prism or reflector sheet are
not measured. Even if you start a measurement, measured values are not displayed. To
measure less reflective objects, use the Direct-Reflex mode.
41.2
Measurement in Direct-Reflex mode
The intensity of the reflection from the target determines the distance the Trimble M3
total station can measure in this mode. The color and condition of the target surface
also affect the measurable distance, even if the targeted objects are the same. Some
less-reflective targets may not be measured.
Table 4.5 describes some examples of targets and approximate measurable distances.
Table 4.5
Targets and measurement distances
Target
You can measure approximately...
Traffic signs, reflectors
500 meters (1640 feet)
Paper (white), veneer (new)
200 meters (660 feet)
Wall (brightly painted), brick
50 to 100 meters (160 to 330 feet)
Measurable distances may be shorter or measurement intervals may be longer in the
following cases:
•
the angle of the laser against the target is small
•
the surface of the target is wet
In direct sunlight, the measurable distance may be shorter. In this case, try to throw a
shadow on the target.
Targets with completely flat surfaces, such as mirrors, cannot be measured unless the
beam and the target are perpendicular to each other.
52
Trimble M3 Total Station User Guide
Getting Started in the Field
4
Sighting a prism in Direct-Reflex mode may cause an
excessive signal error. In this case, change the prism
mode to PR - press
and then press [2].
In the Direct-Reflex mode, the beam passing area is
shown by a circle in crosshairs on the telescope reticle.
Beam passing area
If the target is smaller than the circle and there is
something highly reflective in the background, the
measured data may be affected by these adverse
conditions.
When an obstacle momentarily passes through the
beam between the instrument and the target ( for
example, passing cars on the road), the false data (short
distance) is deleted automatically. However, if the amount of reflection is almost the
same and the difference in distances between the correct and the false data is less than
two meters, it may cause an error in measurements.
Make sure there are no obstacles between the instrument and the target when taking
measurements. When you need to take measurements across a road or a place where
vehicles or other objects are frequently moving, take several measurements to a target
for the best result.
4.2
Turning the instrument on and off
42.1
Turning on the instrument
1.
To turn on the instrument, press [PWR]. The
start-up screen appears. This screen shows the
version of the program.
2.
When you tilt the telescope, current settings of
temperature, pressure, prism constant, and scale
appear for about two seconds.
3.
The Rec Current Settings screen
appears. Do one of the following:
–
To skip recording the current instrument
settings, press [F1] No.
Trimble M3 Total Station User Guide
53
4
Getting Started in the Field
–
To record current settings, press [F4] Yes. If
you select Yes, the Recording to screen
appears.
Note – To initialize the horizontal angle every time you
power on, set the HA initialize setting to ON. Select
MENU/Settings Instrument/Angle.
4.
40.1
After this, the instrument will automatically
return to the screen that was showing before the
instrument powered off.
Turning off the instrument
To turn the instrument off, press [PWR] and then press
[ENT].
Then do one of the following:
Press
to...
[ENT] again
turn off the instrument
[F2] Reset
reboot the program and restart the instrument
Note – If you press the Reset softkey, the software is rebooted and the
Basic Measurement Screen (BMS) appears.
40.2
[F4] Sleep
put the program into power-saving mode, see Sleep mode, page 54
[ESC]
cancel the power-off process and return to the previous screen
Sleep mode
If you press [F4] Sleep in the Press ENT OFF
screen, or enable the Power Save setting (select
MENU/[5] Settings Instrument/ [5] Turn-off ),
the instrument goes into sleep mode.
When the instrument is in sleep mode, it wakes up if
any of the following occurs:
54
•
You press any key.
•
The instrument receives any remote control
command via the serial interface.
•
You rotate the alidade.
•
You tilt the telescope.
Trimble M3 Total Station User Guide
CHAPTER
5
Basic Measurement Screen
5
In this chapter:
Q
Measurement mode
Q
Changing the screen display
Q
Changing the distance unit
Q
Taking measurements
Q
Setting the horizontal angle (HA)
Q
Setting target height (th) and instrument height (ih)
Q
Setting the station elevation
Q
Measuring edges and corners using the Intersection program (INTS)
Trimble M3 Total Station User Guide
55
5
5.1
Basic Measurement Screen
Measurement mode
The Basic Measurement Screen BMS appears after the
Tilt Telescope screen. The Basic Measurement
Screen displays the current angle measurements and
most recent distance measurement.
The measurement (MEAS) indicators are shown on the
left of the screen. They are:
Table 5.6
Measurement mode indicators
SD
Slope distance
HA
Clockwise
Counter-clockwise
Zenith
Vertical
Horizontal angle
VA
Vertical angle
HD
Horizontal distance
h
Height
V%
Percent grade
56
Trimble M3 Total Station User Guide
± Elev.
Basic Measurement Screen
5.2
5
Changing the screen display
There are four BMS screens. To move between
the screens, press [^] or [v].
[v]
[^]
[v]
[^]
[v]
[^]
The items that will appear in the next screen are
shown in the screen header (upper right corner).
You can also do the following using the Trimble menu
key and function keys:
•
To access the HOT MENU screen from any BMS
screen, press
.
•
From the startup BMS screen, press [F1] to go to
HA=O screen, see Setting the horizontal angle
(HA), page 60.
Trimble M3 Total Station User Guide
57
5
5.3
Basic Measurement Screen
•
To change VA to V %, press [F2] in either of the
first two screens.
•
To set the target or instrument heights, go to the
th/ih input screen. Press [F2] th/ih in the
third and fourth screens. See Setting target height
(th) and instrument height (ih), page 60.
•
To go to the INTS screen (Intersection function
menu), press [F3] INTS. See Intersection, page 65.
•
There are three sets of data. To display a different
set of data, press [F4] until the required data
appears.
Changing the distance unit
To change the distance unit:
58
1.
Press [F4] in the BMS screen. The second set of
data appears.
2.
To change the distance unit press [F1].
–
When the unit is set to meters, the softkey
is set to U-ft.
–
When the unit is set to US-feet, the softkey
is set to I-ft.
–
When the unit is set to international feet,
the softkey is set to m.
Trimble M3 Total Station User Guide
Basic Measurement Screen
5.1
5
Taking measurements
To take a measurement in any BMS screen:
1.
Press [MEAS/ENT]. The prism constant value
appears in small characters until the measured
value appears.
Note – When the average count is set to more than one,
the intermediate measurement process is shown in the SD
field by numbers in parentheses. For example if the
average count is set to 5, the following appears on screen
(1/5) (2/5) (3/5) (4/5) (5/5). To set the average count, press
, select [1] and set the Ave field to the required count.
2.
To stop measurement, press [F1] Stop or [ESC].
3.
If the Recording mode is set to Confirm
([Menu] / [6]) the Record As screen appears and
you are prompted to record the measurements.
To record the measurements, press [F4] Yes.
Note – If the Rec. Mode is set to All, the Recording to
Adr:xxxxx screen appears. See Configuring data
recording and external communication settings, page 38.
50.1
Tracking mode
Tracking mode initiates a continuous measurement
until you stop measurement by pressing [F4] END.
To initiate tracking mode, press [MEAS/ENT] for one
second.
Note – To change the EDM mode, press
select the required mode.
, select [2] and
Trimble M3 Total Station User Guide
59
5
5.1
Basic Measurement Screen
Setting the horizontal angle (HA)
To set or reset the horizontal angle:
5.1
1.
Press [F1] HA=0 in any BMS screen. The HA=0
screen appears.
2.
Sight the target and press [MEAS/ENT] to set or reset
the horizontal angle.
Setting target height (th) and instrument height (ih)
To set the target height and instrument height:
1.
Press [F2] th/ih in the third or fourth BMS
screen.
The STN Elevation screen appears. The
current values for target height (th), instrument
height (ih). and the Z-coordinate of the station
point (Zs) appear.
2.
60
Do one of the following:
–
To activate the station elevation function,
press [F1] Z. See Setting the station
elevation, page 61.
–
To input target height, press [F2] th.
–
To input the instrument height and/or a
new height for station-Z, press [F3] ih/Zs.
See Instrument height (ih) and station-Z
coordinate (Zs), page 62.
–
To confirm the current value and return to
the previous screen, press [F4] o.k..
Trimble M3 Total Station User Guide
Basic Measurement Screen
5.1
5
Setting the station elevation
The station elevation function defines the Z coordinate
of the station point after you have set up the
instrument by 2D.
To activate the station elevation function, press [F1] Z in
the STN Elevation screen.
To set the station elevation:
1.
2.
3.
Do one of the following:
–
To start the program, press [F1] Stat.
–
To activate the Adjustment C&I program,
press [F3] CHCK. See Checking and adjusting
the compensator (C) and index (I), page 119.
To select a benchmark point, do one of the
following:
–
To select the benchmark point from the
internal memory (database), press [F1].
–
To input a new benchmark point, press [F3].
Enter the station Z coordinate value and press
[MEAS/ENT]. The Input ih screen appears.
Enter the instrument height ih and press
[MEAS/ENT]. The Input th screen appears.
Enter the target height th and press [MEAS/ENT].
The Sight backsight point screen
appears.
Note – You can also press [F3] in any input screen (when
you input Z, ih, or th) to select a previously input value
from the Stack.
4.
To go directly to the bearing and distance
function, press [F4] BeaDist. See BearingDistance, page 63.
5.
The STN Elevation screen shows the result.
Do one of the following:
–
To exit the program without saving the
result, press [F1] No.
–
To record the result on the screen and finish
the program, press [F4] Yes.
Trimble M3 Total Station User Guide
61
5
50.1
Basic Measurement Screen
Instrument height (ih) and station-Z coordinate (Zs)
To input instrument height (ih) and station Z
coordinates (Zs):
1.
Press [F3] ih/Zs in the STN Elevation screen.
2.
Select a method to input Station height.
–
–
To input from recorded data, press [F1]
Internal memory.
To input directly using the keypad, press [F3]
Input.
3.
4.
5.
62
Input the Zs coordinate. Do one of the following:
–
Enter the coordinates using the keypad and
then press [MEAS/ENT].
–
To use previous input, press [F3] Stack,
select the required value and then press
[MEAS/ENT].
Input the instrument height. Do one of the
following:
–
Enter the instrument height using the
keypad and then press [MEAS/ENT].
–
To use previous input, press [F3] Stack,
select the required value and then press [MEAS/ENT].
The STN Elevation screen shows the result. Do
one of the following:
–
To exit the program without saving the
result, press [F1] No.
–
To record the result on the screen and finish
the program, press [F4] Yes.
Trimble M3 Total Station User Guide
Basic Measurement Screen
5.1
5
Measuring edges and corners using the Intersection program
(INTS)
To measure edges and corners, especially in DR mode,
Trimble recommends that you use the Intersection
program (INTS).
To access the INTS screen, press [F3] INTS in a BMS
screen.
51.1
Bearing-Distance
Use this method when you want to shoot to the exact
corner of a pillar or wall, or when it is difficult to place a
target at the point you need to measure. You can first
set the angle by sighting the point and then take a
measurement to the closest point where the distance is
almost the same.
1.
Press [1] to open the Bearing-Dist. screen.
2.
Press [<] or [>] to change the Mode setting. The
options are OFF/Once/Perm.
If Mode is set to Perm you can continue using
this offset measurement until you escape from
the function.
3.
Press [F4] o.k..
4.
Sight the point you need to record and press
[MEAS/ENT]. The horizontal and vertical angles are
fixed on the screen.
5.
Find a target at the closest possible point and
press [MEAS/ENT].
After taking a distance measurement, the BMS
screen appears from which you entered the INTS
program. The screen shows the new
measurements.
Note – When Record mode (Rec. mode) is set to Confirm,
a confirmation screen appears before you record a point.
See Taking measurements, page 59.
Trimble M3 Total Station User Guide
63
5
50.1
Basic Measurement Screen
Corner-Angle
Use this method to measure points, edges, and corners
on vertical planes. Any point of the plane can be
measured and measurements to points A and B can be
repeated.
1.
Press [2] in the INTS menu to open the
Corner-Angle screen.
2.
Press [<] or [>] to change the Mode setting. The
options are OFF/Once/Perm.
If Mode is set to Perm you can continue using
this offset measurement until you escape from
the function.
3.
Press [F4] o.k.
4.
Sight point A and then press [MEAS/ENT].
5.
Sight point B and then press [MEAS/ENT].
6.
Sight point P and then press [MEAS/ENT].
7.
If you want to repeat a measurement:
–
Press [F1] A to return to the point A
measurement screen.
–
Press [F2] B to return to the point B
measurement screen.
After you have completed your measurements,
the BMS screen appears from which you entered
the INTS menu. The BMS screen shows the new
measurements.
64
Trimble M3 Total Station User Guide
Basic Measurement Screen
50.1
5
Intersection
Use this method to determine the intersection point of
two vertical planes.
1.
Press [3] in the INTS menu to open the
Corner-Angle. screen.
2.
Press [<] or [>] to change the Mode setting. The
options are OFF/Once/Perm.
If Mode is set to Perm you can continue using
this offset measurement until you escape from
the function.
3.
Press [F4] o.k.
4.
Sight point A (on the first wall) and press
[MEAS/ENT].
5.
Sight point B (on the same wall) and press
[MEAS/ENT].
6.
When you have taken two measurements, sight
point C (on another wall) and press [MEAS/ENT].
7.
If you want to repeat a measurement:
–
Press [F1] A to return to the point A
measurement screen.
–
Press [F2] B to return to the point B
measurement screen.
After you have completed your measurements,
the BMS screen appears from which you entered
the INTS program. The BMS screen shows the
new measurements.
Trimble M3 Total Station User Guide
65
5
50.1
Basic Measurement Screen
Eccentric Object
Use this method to determine the radius and the center
point of a vertical round object.
1.
Press [4] in the INTS menu to open the Ecc.
Object screen.
2.
Press [<] or [>] to change the Mode setting. The
options are OFF/Once/Perm.
If Mode is set to Perm you can continue using
this offset measurement until you escape from
the function.
3.
Press [F4] o.k.
4.
Sight point A and press [MEAS/ENT].
5.
Sight point B and press [MEAS/ENT].
6.
If you want to repeat a measurement, press [F1] A
to remeasure to point A.
The calculated radius appears.
7.
66
Do one of the following:
–
To record the result, press [F4] o.k.
–
To change the point name or code before
you record the point, press .
–
To return to the first screen without
recording data, press [ESC].
Trimble M3 Total Station User Guide
CHAPTER
6
Job Manager
6
In this chapter:
Q
Creating a new job
Q
Opening an existing job
Q
Deleting a job
Q
Setting the Control Point job
Q
Displaying job information
Q
Editing data
Trimble M3 Total Station User Guide
67
6
Job Manager
The Trimble M3 total station is equipped with an intelligent data management system
called Job Manager. You can record survey data into a folder (a job) and categorize data
by day, by site, or zone-independent.
Up to 32 jobs can be created in the internal memory.
Use the Job Manager to open, create, delete, and manage jobs.
Note – The Trimble M3 total station can also operate without creating a job. In this case,
the system automatically creates a job called NONAME using the current instrument
settings.
To open the Job Manager, select MENU [1].
6.1
Creating a new job
1.
From the Job Manager menu, select [1] New.
2.
In the New Job screen, enter a job name and
press [MEAS/ENT].
3.
Enter the other job settings (11 settings
presented in three screens) by doing one of the
following:
4.
68
–
enter values using the keypad
–
press [<] or [>] to change settings
In the third screen, press [F2] CREATE to create
the job.
Trimble M3 Total Station User Guide
Job Manager
6
The job settings are:
Setting
Options
Job name
Consists of the date and a unique letter or number
Angle Unit
DMS
Deg
gon
mil
VA-Reference
Zenith
Vertical
±Elev.
AZ-Zero-Direct
North
South
Dist.Unit
Meter (m)
US feet (U-ft)
International feet (I-ft)
Coord.System
YX
XY
NE
Coord.Display
Y, X
X,Y
N,E
E,N
Temp.Unit
Celsius
Fahrenheit
Press.Unit
mmHg
hPa
inHg
Scale
0.995000~1.005000 (numeric input)
C&R Correction
0.132
0.142
0.200
OFF
Sea Level Correction
ON
OFF
Trimble M3 Total Station User Guide
69
6
6.1
Job Manager
Opening an existing job
1.
From the Job Manager menu, select [2] Open.
A list of all jobs stored in the internal memory
appears in descending date order.
A star (*) appears next to the job that is currently
open.
An arrow indicates the control-point job (if
specified).
Note – For more information on control point jobs, see
Setting the Control Point job, page 71.
2.
Press [^] or [v] to select a job from the job list and
then press [MEAS/ENT] to open the highlighted job.
Note – When you open a job, all job settings are
automatically imported to the instrument.
6.1
Deleting a job
C
CAUTION – There is no undelete function in the Job Manager. Before you press [F4] Yes on
this screen, make sure that the selected job is the one that you want to delete.
1.
From the Job Manager menu, select [3]
Delete.
A list of all jobs stored in the internal memory
appears in descending date order.
70
2.
Press [^] or [v] to select the job that you want to
delete and then press [MEAS/ENT].
3.
A confirmation message appears. Press [F4] Yes
to delete the selected job.
Trimble M3 Total Station User Guide
Job Manager
6.1
6
Setting the Control Point job
Especially for stakeout or station setup work, a Control Point job can be used as an
independent coordinate file when you have a list of coordinate data on your office
computer.
Before you go to the field, upload or input the list of coordinate data to a Control Point
job. See also Uploading data from an office computer to the internal memory, page 113.
In the field, create a working job and set the Control Point job by the process described
below.
If you search for a point when the Control PT job is specified, and the system cannot
find the point in the current job, the Control PT job is also searched. If the point is
found in the Control PT job, it is copied to the current job.
A control job has the same format as a standard job. You can open and modify it like
any other job, and you can use it to record any measured data when you open it as a
current job.
To identify the Control Point file, do the following:
1.
From the Job Manager menu, select [4] Ctrl
Point.
A list of all jobs stored in the internal memory
appears in descending date order.
2.
Press [^] or [v] to select the job to which you want
to assign a control point and then press
[MEAS/ENT].
3.
A confirmation message appears. To assign the
control point job, press [F4] Yes.
4.
To cancel the assigned control point job, open
the job list again, select the currently assigned
control point job, and press [MEAS/ENT].
5.
A confirmation message appears. To cancel the
assigned control point job, press [F4] Yes
Trimble M3 Total Station User Guide
71
6
6.1
Job Manager
Displaying job information
1.
From the Job Manager menu, select [5] Info.
A list of all jobs stored in the internal memory
appears in descending date order.
2.
Press [^] or [v] to select the job for which you want
to display job information and then press
[MEAS/ENT].
3.
The following fields appear:
Field
Lines
Lines of currently stored records.
Free memory
Number of records that can be stored additionally.
Created
The date on which this job was created.
Modified
The date on which the latest changes to the job where made.
4.
6.1
Description
Press [MEAS/ENT] again to return to the Job
Manager menu.
Editing data
To access the editor, press
and then select [7] Edit. See Editing data, point number
lists or point code lists, page 42.
72
Trimble M3 Total Station User Guide
CHAPTER
7
Coordinates
7
In this chapter:
Q
Resection
Q
Known Station
Q
Station elevation
Q
Measure topo
Q
Stakeout
Trimble M3 Total Station User Guide
73
7
7.2
Coordinates
Resection
A resection sets up the station using angle/distance measurements to known points.
If it is not possible to occupy a point with a known position in order to sight the points
to be surveyed or set out, you can carry out a free stationing (or resection). If all
backsight points have a known height, the Z coordinate can be determined
simultaneously.
Z
Known point 1
Known point 2
Instrument
height
Station point
Y
A maximum of 10 points can be measured. Measurements can be distance and angle,
or angle only. Calculations starts automatically when enough measurements are taken.
At least two sets of distance and angle measurement are required to determine the
station coordinate. After at least two measurements are taken, approximate
coordinates are calculated and residuals are displayed.
You can delete poor observations and recalculate if necessary. You can also select the
backsight (BS) point.
To go to the 3D station setup, press [F1] with. To go to the 2D station setup, press [F3]
without press [ESC] to return to the Coordinates menu.
Note – The “3-D station setup” is also referred to as "known height" and "Z-coordinate".
74
Trimble M3 Total Station User Guide
Coordinates
7
When you select [1] Resection in the
Coordinates menu screen, you are prompted to
select 2D setup without or 3D setup with before
starting the resection function.
1.
Press [F1] with in the Stationing of
elev. screen. You are prompted to input the
instrument height (ih).
2.
Use the number keys to input the ih value and
then press [MEAS/ENT].
3.
The Record as screen appears. Press [F4] Yes.
4.
The Resection screen appears.
A and B are backsight points with known
coordinates. S is the station. The coordinates of S
will be calculated after the measurement is
completed.
B
5.
Press [F1] A to take a measurement to Point A.
6.
Sight point A and then press [MEAS/ENT].
7.
Do the following:
–
The previously set target height will be used
with this measurement. If you need to
change the height of the target, in the
Backsight Point A screen, press [F2]
th.
–
Alternatively, open the bearing and
distance screen, press [F4] BeaDist. See
Bearing-Distance, page 63.
Tip – To change the point name, press
.
After you have taken the measurement to point A, the
box for point A changes to a black box, which means
that the measurement is done.
Trimble M3 Total Station User Guide
75
7
Coordinates
8.
You can now either proceed with point B
measurement, or remeasure point A. Do one of
the following:
–
To take a measurement to point B, press [F2]
B.
–
To remeasure point A, press [F1] A.
After at least two measurements, approximate
coordinates are calculated and the deviation to
the current measurement appears:
–
vy : residual in Y-direction
–
vx: residual in X-direction
–
vz: residual in Z-direction
Based on the quality of your residual data, you
may want to add more points to the resection, or
remeasure your last point (point B).
Note – If the angle between known point A and known
point B (measured from the station point) is extremely
acute or extremely oblique, the resulting solution will be
less reliable geometrically. For geometric reliability, select
known point locations (or station point locations) that are
widely spaced.
9.
Do one of the following:
–
To remeasure to point B, press [F1] B.
–
To measure to the next point, press [F2] C.
–
To finish observation and proceed to the
Residual screen, press [F4] END.
After completing the observation, the solution
residuals for each point are displayed for review. You
can delete points from the solution, add more points to
the calculation, or accept the current points.
10. In the Residuals check screen, do one of the
following:
76
–
To show the previous or next point
observation result, press [^] or [v].
–
To add more points to the observation,
press [F1] More.
Trimble M3 Total Station User Guide
Coordinates
–
To delete the point shown in this screen
( for example because of large residuals),
press [F3] Del.
–
To accept the current points and proceed to
the next screen, press [F4] o.k..
7
11. The Station Coordinates screen displays
the current station solution.
B
Tip – From the Station Coordinates screen or Scale screen,
you can change a point name or code or verify data by
pressing
.
12. To accept the computed station coordinates,
press [F4] o.k. in the Station
Coordinates screen.
The Resection screen shows a quality
summary. These values indicate how good your
computed station coordinates fit with the points
used in the resection. For example, if your are
using ground coordinates, and your scale value,
m, is close to 1, you have established good
control in your station setup.
13. In the Resection screen, do one of the following:
–
To return to the observation screen, press [F1] Rept.
Note – If you decide to go back and remeasure the
corresponding points, the observed points data after the
point you are going to remeasure is lost. Trimble
recommends that you complete the measurement after
three backsight points, and then delete and re-measure
the corresponding direction. New measurements are
added at the end. As a result, the assignments of the point
codes (A, B, etc.) are shifted.
–
To change the scale, m, press [F2] (m), where:
m - calculated scale
Om - orientation unknown
sO - standard deviation of the weighting
unit (mean point error)
–
To record the station data and finish the
setup, press [F4] o.k.
If the scale is outside the permissible range, an
error message appears. If you edit the scale value
the corr. field is updated when you press [ENT].
When you press [F2] in the previous screen, a
scale input screen appears.
Trimble M3 Total Station User Guide
77
7
Coordinates
14.
To display a previously used scale value, press [F3]
Stack.
After the scale has been confirmed, the station
coordinates are recalculated. When this has been done,
the residuals can be evaluated again.
Stored resection data
The following resection data is stored in internal memory and is available for
download:
78
•
Mode designation
•
Point numbers and code
•
Backsight points A, B, C, D, E, F, G, H, I, J
•
Y, X, and Z coordinates
•
SD, HA, and VA readings
•
vy, vx, and vz backsight point residuals (M5 format only)
•
Y, X, and Z coordinates of the station point (S)
•
Scale and circle orientation, m, Om (M5 format only)
•
Standard deviation of the weight unit, s0 (M5 format only)
Trimble M3 Total Station User Guide
Coordinates
7.1
7
Known Station
If you set up an instrument on a known point, use the known station function.
X
Circle
Hz=0
Om
AA
A (backsight)
XA
Xs
S
Known station
Ys
YA
Y
Given: (Y,X)S,A
Meas: (SD,Hz)S,A or (Hz,V)S,A
Requ: Om,m or Om
Set up the instrument on a known point (point S). By measuring to a known backsight
(point A), the instrument will calculate the circle orientation Om and the scale m.
1.
From the MENU screen, select [4] Coordinates
and then select [2] Known Station.
2.
Do one of the following:
–
To input the station coordinates or to select
them from internal memory, press [F1] S.
If the input point number or name is an
existing point, its coordinates are displayed.
If the point is new, select Internal
Memory to select coordinates from an
existing job, or select Input to enter
coordinates in the input screen.
–
3.
To activate the Adjustment C&I program,
press [F3] CHCK.
After you have input or selected the station
coordinates, do one of the following:
–
To return to the station coordinate input,
press [F1] S.
Trimble M3 Total Station User Guide
79
7
70.1
Coordinates
–
To input the azimuth value of the backsight
point, press [F3] Az. See also Orientation
using known coordinates, page 81.
–
To input coordinates of the backsight point,
press [F4] XY. See also Orientation using a
known azimuth, page 80.
Orientation using a known azimuth
When you press [F3] (Az) in the Backsight Point
screen, you are prompted to input the azimuth to the
backsight point.
1.
2.
To input the azimuth do one of the following:
–
Input the azimuth value.
–
Press [F3] Stack to select from previously
input values.
Sight the backsight point and then press
[MEAS/ENT].
Note – To change the point name, point code, or target
height, press
.
When you have taken a measurement to the
backsight point, the calculated station
coordinates and orientation appear.
3.
80
Do one of the following:
–
To return to the Backsight Point
screen, press [F1] No.
–
To record the result and complete the
station setup, press [F4] Yes.
Trimble M3 Total Station User Guide
Coordinates
70.1
7
Orientation using known coordinates
When you press [F4] YX in the Backsight Point
screen you can select to input coordinates of the
backsight point.
1.
In the Backsight Point screen, press
[F3] Input to input coordinates of the backsight
point.
2.
To sight the backsight by entering coordinates do
one of the following:
3.
4.
–
Input the coordinate values directly
–
Press [F3] Stack to select from previously
input values.
–
Press [F4] o.k. to accept new or existing
coordinates.
After you have input the coordinates, you can do
one of the following:
–
To measure distance and angle, press [F1].
–
To measure angle only, press [F3].
Sight the backsight point and then press
[MEAS/ENT].
Note – To change the point name, point code, or target
height, press
.
When you have taken a measurement to the
backsight point, the calculated station
coordinates and orientation appear.
5.
Do one of the following:
–
To return to the Backsight Point
screen, press [F1] No.
–
To record the result and complete the
station setup, press [F4] Yes.
Trimble M3 Total Station User Guide
81
7
Coordinates
6.
When distance and angle measurements are
taken to the backsight (press [F1] in the
Backsight Point screen), the Scale screen
appears. Do one of the following:
–
To return to the Select backsight
point input method screen, press [F1]
Rept.
–
To keep the old value for the scale and
record the station setup, press [F2] old.
–
To show the Scale Correction input
screen, press [F3] Inp.
–
To replace the scale with a new value and
record the station setup, press [F4] new.
Stored known station data
The following known station data is stored in internal memory and is available for
download:
82
•
Mode designation
•
Point numbers and code
•
Y and X coordinates of the station point
•
Y and X coordinates of backsight point A
•
SD, HA, and VA readings for backsight point A
(according to selection)
•
Scale, and circle orientation (according to
selection)
•
Set direction Az
•
V (vertical angle) at Az
Trimble M3 Total Station User Guide
Coordinates
7.1
7
Station elevation
In a conventional survey, use the station elevation function to determine the elevation
of the instrument point by making observations to points with known elevations. It is
also known as the remote benchmark function.
Note – The Station Elevation function can also be accessed from the BMS screen.
From the MENU screen, select [4] Coordinates and
then select [3] STN elevation.
For a detailed description of this function, see Setting
the station elevation, page 61.
7.2
Measure topo
After you have set up the station, you can calculate the
coordinates and heights of new points using distance
and angle measurements. This section will describe
how to measure topographic points.
From the MENU screen, select [4] Coordinates and
then select [4] Meas. topo.
The Station Coordinates screen appears.
72.1
Confirming the station coordinates
This screen enables you to confirm the station
coordinates.
Do one of the following:
72.2
•
To terminate the program, press [F1] No.
•
To show the Scale edit screen, press [F2] m.
•
To accept the station coordinates and proceed
to the reference direction confirmation screen,
press [F4] Yes.
Confirming the backsight point angle
This screen enables you to confirm the reference
direction.
Do one of the following:
•
To terminate the program, press [F1] No.
•
To accept the backsight point angle and proceed
to the instrument height and station-Z
coordinate screen, press [F4] Yes.
Trimble M3 Total Station User Guide
83
7
72.3
Coordinates
Confirming the instrument height and Station-Z coordinates
This screen enables you to confirm the instrument
height and station coordinates.
Do one of the following:
72.4
•
To terminate the program, press [F1] No.
•
To input the instrument height and station
coordinates, press [F3] ih/Zs,
•
To accept the instrument height and station Z
coordinates and proceed to the Topo
observation screen, press [F4] Yes.
Sighting new points in the Topo observation screen
This screen enables you to sight new points.
84
1.
Sight new points and press [MEAS/ENT].
2.
Do one of the following:
–
To take a tracking measurement, hold press
[MEAS/ENT] down for one second.
–
To access the HOT MENU, press the
from any Topo observation screen.
–
To go to the eccentric measurement screen,
press [F1] ECC, see Eccentric measurement,
page 85
–
To activate the INTS program press [F2]
INTS, see Measuring edges and corners
using the Intersection program (INTS),
page 63.
–
To run the Adjustment C&I program press
[F3] CHCK, see Checking and adjusting the
compensator (C) and index (I), page 119.
–
To change the screen to show the job name,
point number, code, height of target and
recording mode, press [F4] 2.
Trimble M3 Total Station User Guide
key
Coordinates
7
Eccentric measurement
If points cannot be measured directly, the eccentric measurement option can provide
the solution. This may also be called "taped offset measurement". You can select the
direction you are going to input the offset value.
Th
TI
Tr
Tv
Ts
Position eccentricities
Spatial eccentricity
Spatial eccentric target measurements are very helpful, especially for indoor surveys.
To enter offset distance values before you record the
point, in the Topo observation screen, press [F1] ECC.
1.
In the ECC measurement screen, do one of
the following:
–
To move the cursor to a different field, press
[v] or [^].
–
To change the setting in the Prism field,
press [<] or [>].
–
To change the setting in the Ofs. field, use
the keypad.
–
To change the setting in the Mode field,
press [<] or [>].
Note – If the mode is set to Once, the offset value will be
applied for only one measurement after the ECC setting. If
mode is set to Perm the offset will be applied until you
change the setting to OFF.
Trimble M3 Total Station User Guide
85
7
Coordinates
–
Press [F4] o.k. to finish the setting for
eccentricity. The TOPO ECC xx screen
appears.
Note – The last two characters in the screen name
indicate the prism direction.
2.
7.1
Press [MEAS/ENT] to take a measurement and
record the point with offset values.
Stakeout
You can search points or stake out points in a given system of coordinates.
X
P (set out point)
N2
-dc
dr
dx
-Hz
Xs
dy
dl
N1 (1st appr. point)
Station
Ys
86
1.
From the MENU screen, select [5] Stake out.
2.
The Stake Out menu screen appears. Do one
of the following:
–
To stake out points using 2D coordinates,
press [1] XY, see Stake out by coordinates (XY
or XYZ), page 87.
–
To stake out points using 2D angle and
distance, press [2] HD, see Stakeout by angle
and distance (HD or HDh), page 89.
–
To stake out points using 3D coordinates,
press [3] XYZ, see Stake out by coordinates
(XY or XYZ), page 87.
Trimble M3 Total Station User Guide
Y
Coordinates
70.1
–
To stake out points using angle, distance,
and height, press [4] HDh, see Stakeout by
angle and distance (HD or HDh), page 89.
–
To stake out points using reference line,
press [5] RefLine 2D, see Stakeout by
reference line, page 90.
–
To stake out using division line, press
[6] DivLine 2D, see Stakeout by dividing
line, page 91.
7
Stake out by coordinates (XY or XYZ)
1.
From the Stake out menu, select [1] XY or
[3] XYZ. A confirmation screen appears enabling
you to verify the current station coordinates.
2.
Do one of the following:
–
To terminate the program, press [F1] No.
–
To show the Scale edit screen, press [F2] m.
–
To accept the station coordinates and
proceed to the reference direction
confirmation screen, press [F4] Yes.
The Reference Dir screen enables you to
confirm the reference direction.
3.
Do one of the following:
–
To terminate the program, press [F1] No.
–
To accept the backsight point angle and
proceed to the Stake Out screen, press
[F4] Yes.
Note – When you select [3] XYZ, the station elevation
confirmation screen appears when you confirm the
reference direction.
4.
In the Stake Out screen, press [F3] Input to
input coordinates of the backsight point.
Trimble M3 Total Station User Guide
87
7
Coordinates
5.
6.
To input the coordinates do one of the following:
–
Input the coordinate values
–
Press [F3] Stack to select from previously
input values.
–
Press [F4] o.k. to accept new or existing
coordinates.
To take a measurement to the point. sight the
point and press [MEAS/ENT].
Note – If you are in the 3D coordinate stakeout screen
([3] YXZ from the Stakeout menu), press [F2] to input the
target height.
The stake out results appear on screen.
7.
Do one of the following:
–
To open the test screen, press [F2] TEST, see
Test screen, page 88.
–
To change the screen display, press [F3] DSP.
–
To record the point and return to the new
point input screen, press [F4] o.k..
Note – While a tracking measurement is taken, the softkey
shows DSP and END. To stop measurement, press [F4]
END. The Test and o.k. softkeys appear.
Test screen
In the S-O Results screen, press [F2] TEST.
Do one of the following:
88
•
To open a new Stake Out Point input screen,
press [F3] S-O.
•
To go to the Bearing Distances screen, press
[F4] BeaDist.
Trimble M3 Total Station User Guide
Coordinates
70.1
7
Stakeout by angle and distance (HD or HDh)
1.
From the Stake out menu, select [2] HD or
[4] HDh. A confirmation screen appears enabling
you to verify the current station coordinates.
2.
Do one of the following:
–
To terminate the program, press [F1] No.
–
To show the Scale edit screen, press [F2] m.
–
To accept the station coordinates and
proceed to the reference direction
confirmation screen, press [F4] Yes.
The Reference Dir screen enables you to
confirm the reference direction.
3.
Do one of the following:
–
To terminate the program, press [F1] No.
–
To accept the backsight point angle and
proceed to the Input HD & Az screen,
press [F4] Yes.
Note – When you select [4] HDh, the station elevation
confirmation screen appears when you confirm the
reference direction in the horizontal angle.
4.
In the Input HD & Az screen, do one of the
following:
–
Input the coordinate values.
–
To select from previously input values, press
[F3] Stack.
–
To accept new or existing values and move
to the observation screen, press [F4] o.k..
Note – If you press [F4] without having entered any value
in the field, the current HA reading will automatically be
set as AZ.
5.
Sight the point and press [MEAS/ENT] to take a
measurement to the point.
Note – The th softkey appears only when you have
selected [4] HDh.
Trimble M3 Total Station User Guide
89
7
70.1
Coordinates
Stakeout by reference line
The RefLine StakeOut function enables you to stake
out a point (P) based on the distance (x) from the base
point A and the offset value (y) from the line AB.
1.
From the Stake Out menu, select [5] RefLine
2D. The RefLine S-O screen appears.
2.
Do one of the following:
3.
4.
–
To open the point A observation screen,
press [F1] A.
–
To activate the Adjustment C&I program,
press [F3] CHCK.
In the second RefLine S-0 screen, do one of
the following:
–
To define A as the station point, press [F1]
A=S.
–
To measure the target height, press [F2] th.
In the Point A - Station? screen, do one
of the following:
–
To return to the RefLine screen, press
[F1] No.
–
To input the instrument height, press [F2] ih,
–
To define A as the station point (S), press
[F4] Yes.
5.
To take a measurement to point A, press
[MEAS/ENT]. The measurement is recorded, and the
next measurement screen appears.
6.
You can now define and measure point B in the
same way, and then proceed to point P input.
7.
Do one of the following:
8.
–
To stake out point A or B again, press [F1] A
or [F2] P.
–
To define point P, press [F3] P.
To define point P by entering the distance from A
(as x), and the perpendicular line A-B (as y).
You can also select a value from the stack, press
[F3] Stack.
9.
90
To go to the observation screen, press [F4] o.k.
Trimble M3 Total Station User Guide
Coordinates
7
10. Do one of the following:
–
To measure the target height, press [F2] th.
–
To activate the Adjustment C&I program,
press [F3] CHCK.
–
To measure point P, press [MEAS/ENT].
The following results are shown:
–
dl: errors in In/Out from the station point to
the target point
–
dc: errors in Right/Left from the station
point toward the target point
–
dr: errors in horizontal distance between
the measured and calculated value.
11. Do one of the following
70.1
–
To change the display, press [F3] DSP.
–
To record the result, press [F4] o.k.
Stakeout by dividing line
To stake out stations on a defined line at the stationing
intervals along the line, use the Stakeout by dividing
line function.
This function divides the line between the instrument
and the first target by an inputspan number. It then
guides you to stake out the points one by one.
1.
2.
From the Stake out menu, select
[6] DivLine 2D. Do one of the following:
–
To define point A, press [F1] A.
–
To activate the Adjustment C&I program,
press [F3] CHCK.
Sight point A and then press [MEAS/ENT] to take a
measurement.
Trimble M3 Total Station User Guide
91
7
Coordinates
B
3.
After taking a measurement to point A, enter the
number of spans you are going to use to divide
the distance from instrument to point A and
then press [MEAS/ENT].
4.
Sight the closest point from the station and press
[MEAS/ENT]. Do one of the following:
–
To change the target point to the previous
point (in this case, point 8/4),
press[F2] Prev.
–
To change the target point to the next point
(in this case, point 2/4), press[F3] Next.
Tip – If you measure to the end point at 100 m from the
instrument and set the span total to 2, the next four
points are calculated and can be staked.
After taking a measurement to each target, the
error between the calculated and measured point
are to be displayed.
5.
92
Do one of the following:
–
To record the point, press [F4] o.k.
–
To return to the Input Span Total
screen, press [ESC].
Trimble M3 Total Station User Guide
Coordinates
7
Stored stakeout data
The following stakeout data is stored in internal memory and is available for
download:
•
Mode designation
•
Point numbers and code
•
HD, HA, Z or Y, X, Z coordinates
•
SD, HA, and VA readings
•
dl, dc, and dr stake-out differences
•
dy and dx stake-out differences (only if nominal coordinates are used)
•
dz stake-out difference (only if the height is set out)
•
th reflector height (only if changed)
•
SD, HA, and VA readings and Y,X, and Z coordinates (actual coordinates of
check measurement)
Trimble M3 Total Station User Guide
93
7
94
Coordinates
Trimble M3 Total Station User Guide
CHAPTER
8
Applications
8
In this chapter:
Q
Connecting distance
Q
Remote object height
Q
Station and offset
Q
Vertical plane
Q
Compute area
Trimble M3 Total Station User Guide
95
8
8.1
Applications
Connecting distance
The Connecting Distance application enables you to measure the distance between
two points in situations where it is not possible to measure this distance directly.
HDA-P
HD P-P
SDA-P
th
SDP-P
Pi
SDA
th
SDP
SDP
th
A
Pi
ih
S
This option enables you to measure cross sections, and check the distances between
points, boundaries, and buildings.
If it is not possible to measure a distance between two points directly, the
measurement to the two points must be started at a station point (S). The program
calculates the distances (SD and HD) and the height difference (h) between the points.
This option enables you to measure cross sections, and check the distances between
points, boundaries and buildings.
To start the Connecting Distance option, select
[1] Conn.Dist from the Applications menu.
Note – In any measurement screen, you can press
to
change the point number and point code and the EDM
mode, or check recorded data.
81.1
Choosing 2D or 3D observation
From the Application menu, select [1] Conn.
Dist. The STN Elevation screen appears.
Do one of the following:
•
96
To define th, ih, and Zs, press [F1] with. See
Setting target height (th) and instrument height
(ih), page 60.
Trimble M3 Total Station User Guide
Applications
81.2
•
To start the connecting distance function in 2D
(XY) observation mode, press [F3] without. The
Connecting Distances screen appears.
•
To return to the previous screen, press [ESC].
8
Start connecting distances
In the Connecting Distances screen, do one of
the following:
•
To adjust C&I, press [F3] CHCK. See Checking and
adjusting the compensator (C) and index (I),
page 119.
•
To take a measurement to point A, press [F1] A.
In the Measure A screen, do one of the following:
•
To input the reflector height (th), press [F2] th.
•
To take a measurement, press [MEAS/ENT].
After taking a measurement to point A, you can select
the next point to measure.
Note – When you select without in the STN Elevation
screen, the Z value does not appear.
Do one of the following:
•
To remeasure point A, press [F1] A.
•
To take a measurement to point P, press [F2] P.
The first result screen appears. This shows the slope
distance, horizontal distance, and height difference (h)
or Z-coordinate.
Do one of the following:
•
•
To remeasure point A or to replace point A with
the previous observation (point P), press [F1] A. In
the Measure A screen:
–
To replace point A with P, press [F1] A=P.
–
To input the target height, press [F2] th.
–
To take an offset measurement by using the
Bearing and Distance function, press [F4]
BeaDist. See Bearing-Distance, page 63
To proceed with Radial Connecting Distance
function, press [F2] A-P. See Radial connecting
distance A - P, page 98.
Trimble M3 Total Station User Guide
97
8
Applications
•
To proceed with Polygonal Connecting Distance
function, press [F3] P-P. See Polygonal
connecting distance P - P, page 98.
Note – If you are taking 3D measurements, you can press
[F4] DSP to change the display between SD/HD/Z and
SD/HD/h.
Radial connecting distance A - P
The results always relate to point A.
In the first result screen, press [F2] A-P.
In the Radial Conn. Distance P screen, do one
of the following:
•
To take a measurement to point P, press
[MEAS/ENT].
•
To change target height, press [F2] th.
•
To go back to the Select A & P screen, press
[ESC].
Polygonal connecting distance P - P
The results always relate to the last two points
measured.
In the first result screen, do one of the following:
•
Press [F3] P-P.
•
To change the display between Z and h, press
[F4] DSP.
Note – This option is only available when you are taking
3D measurements.
98
Trimble M3 Total Station User Guide
Applications
8
In the Polygonal Conn. Distance P screen, do
one of the following:
•
To change target height, press [F2] th.
•
To measure a point and record, press [MEAS/ENT].
•
To go back to the Select A & P screen, press
[ESC].
•
To go to the bearing and distance function, press
[F4] BeaDist.
Recording data from connecting distance
The following lines are stored:
•
Mode designation
•
Point numbers and code
•
SD, HA, and VA
•
Polar coordinates A and P
•
Reflector height (th) and instrument height (ih),
only if changed.
•
SD, HD, h or Z
•
Connecting distance A-P/P-P
Trimble M3 Total Station User Guide
99
8
8.2
Applications
Remote object height
The Remote Object application allows you to determine heights of inaccessible points,
such as tree heights, the widths of tree tops and trunk diameters, power lines,
passageways, and bridge profiles. It also allows you to set out heights on vertical
objects.
Zp
P
Z set
Z
A
SD
-0
th
+0
x
HD
y
Note – Zset is the Z-coordinate value in this vertical plane direction. You can define the
Z-coordinate for any measuring point (P) when the design value is known or when you
want to define a reference point for other points.
Heights of inaccessible points are determined by measuring SD,V to an accessible
point in the plumb line. Only the angle V is measured to the inaccessible point.
This option enables you to determine tree heights, the widths of tree tops and trunk
diameters, power lines, passageways and bridge profiles, and enables you to set out
heights on vertical objects
To start the Remote Object option, select [2] Remote
Obj.
Note – In any measurement screen, you can press
to
change the point number and point code and the EDM
mode, or check recorded data.
1 00
Trimble M3 Total Station User Guide
Applications
8
The Remote Object Height screen appears.
Do one of the following:
•
To adjust C&I, press [F3] CHCK. See Checking and
adjusting the compensator (C) and index (I),
page 119.
•
To take a measurement to point A, press [F1] A.
After taking a measurement to point A, you can select
the next point to measure.
Do one of the following:
•
To remeasure point A, press [F1] A.
•
To take a measurement to point P, press [F2] P.
The Object Height and Width result screen
appears. This shows the horizontal distance to the
target slope distance (O), horizontal distance (HD), and
height difference (h) or Z-coordinate (Z).
Do the following:
1.
To go to the Z-coordinate input screen, press [F1]
Zset.
2.
When you have input the Z-coordinate of the
reference point, sight the point and press
[MEAS/ENT].
The Object Height and Width result
screen appears.
80.1
Recording data from connecting distance
The following lines are stored:
•
Mode designation
•
Point numbers and code
•
SD, HA, and VA readings
•
Polar coordinates A
•
HA, and VA readings
•
Measured point P
Trimble M3 Total Station User Guide
101
8
8.1
Applications
•
HD, O, and Z coordinates
•
Measured point P
•
Set value Z
Station and offset
You can determine the rectangular coordinates of any point in relation to a reference
line defined by points A and B.
SDP
th
SDA
Pi
th
y
ϖ
th
SDB
A
X
B
ih
S
This option enables you to check point distances from a reference line, check
boundaries, intersection of sight rails; determine the distances of buildings from
boundaries, footpaths or streets; check the alignment of long straight lines in the event
of visual obstacles on the line, surveying of supply lines and channel routes referred to
roads and buildings, and free stationing in a local system.
To start the station and offset option, from the
Application menu, select [3] STN+Offset.
Note – In any measurement screen, you can press
to
change the point number and point code and the EDM
mode, or check recorded data.
1 02
Trimble M3 Total Station User Guide
Applications
8
The STN Elevation screen appears.
Do one of the following:
•
To define th, ih, and Zs, press [F1] with. See
Setting target height (th) and instrument height
(ih), page 60.
•
To start the connecting distance function in 2D
(XY) observation mode, press [F3] without. The
Station + Offset screen appears.
•
To return to the previous screen, press [ESC].
In the Station + Offset screen, do one of the
following:
•
To adjust C&I, press [F3] CHCK. See Checking and
adjusting the compensator (C) and index (I),
page 119.
•
To take a measurement to point A, press [F1] A.
In the second Station + Offset screen, do one of
the following:
•
To define point A as the station point, press [F1]
A=S.
•
To input the reflector height (th), press [F2] th.
•
To take a measurement to point A, press
[MEAS/ENT].
After taking a measurement to point A, you can select
the next point to measure.
Do one of the following:
•
To remeasure point A, press [F1] A.
•
To take a measurement to point B, press [F2] B.
•
To change the display between Z and h, press [F4]
DSP.
Note – This option is only available when you are taking
3D measurements.
The first result screen appears. This shows the slope
distance, horizontal distance, and height difference (h)
or Z-coordinate (Z).
Do one of the following:
•
To remeasure point A, press [F1] A.
•
To measure point B, press [F1] B.
Trimble M3 Total Station User Guide
103
8
Applications
•
To change the display between Z and h, press [F4]
DSP.
Note – This option is only available when you are taking
3D measurements.
To measure to point B or to point P, do one of the
following:
81.1
•
To define point B or P as the station point, press
[F1] B=S/P=S.
•
To shift the coordinate axes y and x, press [F2]
CONS. See Shifting the coordinate axes y, x,
page 104.
•
To change the display between Z, h, and w, press
[F3] DSP.
•
To take a measurement to point P, press [MEAS/ENT].
Shifting the coordinate axes y, x
The result of a measurement to a point P is displayed as follows: The input of shift
values for y and x axes, for example x = 5,000 m. The change is recorded if a line does
not begin with the coordinate x=0,00. The corresponding value can be entered after
having the line. If it is a parallel line, the parallel distance y can be entered in the same
way. Consequently, the computation is always related to the new and parallel line.
B
B
yp
P
yp and x p
with constants
Xp
A
y = 3,00 x = 4,00
A
1 04
Trimble M3 Total Station User Guide
y = 0,00 x = 0,00
Applications
8
To accept the constants that appear, press [F4] o.k..
8.2
Vertical plane
A vertical plane is defined by angle and distance measurements to two points. The
coordinates of further points in this plane are determined by an angle measurement
only.
x Set
P
h
hSet
y
A
B
x
S
Note – xSet is the x-coordinate value in this plane direction. You can define the
x-coordinate for any measuring points (P). For h-axis direction, hSet performs the same
function.
This option enables you to determine coordinates in a vertical plane to compute
heights and volume. It also allows you to set out sectional planes for facade
construction.
To start the vertical plane option, from the
Application menu, select [4] V-Plane.
Note – In any measurement screen, you can press
to
change the point number and point code and the EDM
mode, or check recorded data.
Trimble M3 Total Station User Guide
105
8
Applications
The Vertical Plane screen appears. Do one of the
following:
•
To adjust C&I, press [F3] CHCK. See Checking and
adjusting the compensator (C) and index (I),
page 119.
•
To take a measurement to point A, press [F1] A.
In the Measure Point A screen, do one of the
following:
•
To change target height, press [F2] th.
•
To measure point A, press [MEAS/ENT].
The Select point A or B screen appears. Do one
of the following:
•
To remeasure point A, press [F1] A.
•
To measure point B, press [F2] B.
In the Measure Point A screen, do one of the
following:
•
To change target height, press [F2] th.
•
To measure point A, press [MEAS/ENT].
The Select point A, B, or P screen appears.
Do one of the following:
•
To remeasure point A, press [F1] A.
•
To remeasure point B, press [F2] B.
•
To measure point P, press [F3] P.
In the Measure Point P screen, do one of the
following:
1 06
•
To define the point P as the Station point, press
[F1] P=S.
•
To input the offset h, press [F2] hSet.
•
To input the offset x, press [F3] xSet.
•
To input the offset y, press [F4] y.
Trimble M3 Total Station User Guide
Applications
8.3
8
Compute area
The compute area function enables you to calculate an area by:
•
measuring to the corner points
•
input of the corner point coordinates of the area
•
calling them from the memory
The area is delimited by straight lines.
B
C
A
Pi
S
Meas: (SD, Hz, V) A,B,C,Pi
Given: (y,x) A,Pi (Y,X) A, Pi
Comp: F (A-B-C-Pi)
Any number of corner points can be used.
To start the Compute area option, from the
Application menu, select [5] Comp.Area.
Note – In any measurement screen, you can press
to
change the point number and point code and the EDM
mode, or check recorded data.
The Area Calculation screen appears. Do one of
the following:
•
To adjust C&I, press [F3] CHCK. See Checking and
adjusting the compensator (C) and index (I),
page 119.
•
To take a measurement to point A, press [F1] A.
In the Measure Point A screen, do one of the
following:
•
To input the XY coordinates, press [F1] XY. See
Orientation using known coordinates, page 81.
Note – You can input XY coordinates in each of the
Measure Point screens.
•
To measure point A, press [MEAS/ENT].
Trimble M3 Total Station User Guide
107
8
Applications
The Select Point screen appears. Do one of the
following:
•
To remeasure point A, press [F1] A.
•
To measure point B, press [F2] B and then press
[MEAS/ENT] in the Measure Point B screen.
The Select Point screen appears. Do one of the
following:
1 08
•
To measure point C, press [F1] C and then press
[MEAS/ENT] in the Measure Point C screen.
•
To measure point P, press [F2] P and then press
[MEAS/ENT] in the Measure Point P screen.
Trimble M3 Total Station User Guide
CHAPTER
9
Data Transfer
9
In this chapter:
Q
Hardware interface
Q
Specifications
Q
XON/XOFF Control
Q
Downloading internal memory to an office computer
Q
Transferring recorded data to the office computer
Q
Uploading data from an office computer to the internal memory
Q
Uploading a point name/number list from the office computer
Q
Uploading a point code list from the office computer
Trimble M3 Total Station User Guide
109
9
Data Transfer
To transfer data from the Trimble M3 total station to your office computer, use a cable
connection between the RS232 ports on the Trimble M3 total station and your office
computer.
9.4
Hardware interface
C
CAUTION – Make sure that the power supplied is within the rated input range (7.2 V to
11 V, 1 A maximum). Power supplied outside this range will damage the instrument.
The external device connector is a Hirose HR 10A-7R-6S female connector.
Hirose connector
The pinouts for connecting it to an external device connector
are as follows:
Pin
Signal
Description
1
RxD
Receive data (input)
2
TxD
Send data (output)
3
+
Power
4
-
Ground
5, 6
No connection
To communicate with an external device, connect the RS-232C signal from the
external device to Pin 1 (input terminal) and to Pin 2 (output terminal) on the
instrument.
To connect to an external power source, supply power to Pin 3 (power terminal) and
Pin 5 (ground terminal) on the instrument. The instrument will use the external power
source even if the carrying handle battery BC-65 is attached.
Note – Cap the data output/external power input connector securely while not in use. The
instrument is not watertight if the cap is not attached or not attached securely, and when
the data output/external power input connector is in use.
Note – The instrument can be damaged by static electricity from the human body
discharged through the data output/external power input connector. Before handling the
instrument, touch any other conductive material once to remove static electricity.
1 10
Trimble M3 Total Station User Guide
Data Transfer
9.5
9
Specifications
C
CAUTION – Use only the male connectors specified here. Using other connectors will
damage the instrument.
Input voltage: 7.2 V to 11 V DC
System: RS-232C
Signal level: ±9 V standard
Maximum baud rate: 38400 bps asynchronous
Compatible male connector: Hirose HR10A-7P-6P or HR10-7P-6P
9.6
XON/XOFF Control
The XON/XOFF protocol is a very simple, but efficient data transmission protocol
which is used by the Trimble M3 total station as well as terminal applications such as
Hyperterminal and Xtalk.
Make sure that your PC application is configured for XON/XOFF operation when
communicating with the Trimble M3 total station.
Transmitter
Receiver
9.7
Downloading internal memory to an office computer
To use data transfer functions, press [MENU] [7] Data
Transfer.
•
To transfer recorded data in the instrument to
the office computer, press [1] MEM-Periph. See
Transferring recorded data to the office
computer, page 112.
•
To upload data created on an office computer to
the instrument, press [2] Periph-MEM. See
Uploading data from an office computer to the
internal memory, page 113.
Trimble M3 Total Station User Guide
111
9
9.8
Data Transfer
•
To upload a point number/name list to the
instrument, press [3] Upload Point List.
See Uploading a point name/number list from
the office computer, page 114.
•
To upload a point code list to the instrument,
press [4] Upload Code List. See Uploading a
point code list from the office computer,
page 114.
Transferring recorded data to the office computer
1.
Press [1] MEM-Periph. in the DATA
TRANSFER menu to open the MEM-Periph
screen. The job that is currently open, and the
start and end address for downloading appears.
2.
Do one of the following:
–
To open the job list, press [F1] Job.
–
To go to the Setting Interface
screen, press [F2] Int. Use [<] or [>] to change
settings or input a new value.
–
To search for or define an address, press [F3]
Search. You can search the point by point
name, point code, or address. Press [F4]
o.k.to download data.
–
To start downloading data to the office
computer, press [F4] o.k.
To stop the process, press [ESC]. The number
of lines that have already been transmitted
appear on screen.
1 12
Trimble M3 Total Station User Guide
Data Transfer
9.1
9
Uploading data from an office computer to the internal
memory
1.
Press [2] Periph-MEM in the DATA TRANSFER
menu to open the MEM-Periph screen. The job
to which you will upload data appears.
2.
Do one of the following:
–
To open the job list, press [F1] Job and
select a job to upload data
–
To go to the Setting Interface
screen, press [F2] Int.
–
To start uploading data from the office
computer, press [F4] o.k.
To stop the process, press [ESC].
When the transmission is completed, the
result appears.
90.1
Nikon data fields
If you set the Format as Nikon in [MENU] [6] Setting
Interface, detailed format information appears in
the Periph.-MEM screen.
To edit the Nikon data fields:
•
In the Periph.-MEM screen, press [F3] Edit. The
Data Fields screen appears.
The Nikon format is a simple comma-delimiter or
space delimiter text file of coordinates. You can freely
define the elements and their order.
Do one of the following:
•
To change the item in each field, press [F2] or [F3].
•
To finish editing, press [F4] o.k.
Trimble M3 Total Station User Guide
113
9
9.1
Data Transfer
Uploading a point name/number list from the office computer
1.
Press [3] Upload Point List in the DATA
TRANSFER menu to open the Upload Point
Number List screen.
2.
Do one of the following:
–
To go to the Setting Interface
screen, press [F2] Int.
–
To proceed with uploading a point number
list, press [F4] o.k.
Before actual transmission starts, a
confirmation screen appears. Press [F4] Yes
to accept the import.
9.1
Uploading a point code list from the office computer
1.
Press [4] Upload Code List in the DATA
TRANSFER menu to open the Upload Point
Number List screen.
2.
Do one of the following:
–
To go to the Setting Interface
screen, press [F2] Int.
–
To proceed with uploading a point code list,
press [F4] o.k.
Before actual transmission starts, a
confirmation screen appears. Press [F4] Yes
to accept the import.
1 14
Trimble M3 Total Station User Guide
CHAPTER
10
Checking and Adjustment
10
In this chapter:
Q
Checking and adjusting the plate level
Q
Checking and adjusting the circular level
Q
Checking and adjusting the optical plummet
Q
Checking the instrument constant
Q
Checking and adjusting the compensator (C) and index (I)
Trimble M3 Total Station User Guide
115
10
Checking and Adjustment
Increased strain placed on the instrument by extreme measuring conditions,
transportation, prolonged storage and major changes in temperature may lead to
misalignment of the instrument and faulty measuring results. Such errors can be
eliminated by instrument adjustment or by specific measuring methods. This section
will guide you through such adjustments.
10.1
Checking and adjusting the plate level
The axis of the plate level vial must be at right angles to the vertical axis of the
instrument.
To check and adjust the plate level:
1.
Set up the instrument on the tripod.
2.
Follow the leveling procedures described in
Leveling, page 49.
3.
Rotate the alidade 180°.
4.
Check whether the bubble is in the center of the vial.
5.
If the bubble is not in the center of the vial, adjust the plate level:
6.
a.
Using the adjusting pin supplied, rotate
the plate level’s adjustment screw until
the bubble has moved half of the
distance back to the center.
b.
Using leveling screw A, move the
bubble into the center of the vial.
Repeat from Step 4.
A
B
C
2
10.1
Checking and adjusting the circular level
Once you have checked and adjusted the plate
level, check the circular level.
If the bubble is not in the center of the level, use the
adjusting pin to rotate the three adjustment screws
until the bubble is centered.
1 16
Trimble M3 Total Station User Guide
Checking and Adjustment
10.2
10
Checking and adjusting the optical plummet
The optical axis of the plummet must be aligned with
the vertical axis of the instrument.
To check and adjust the optical plummet:
1.
Place the instrument on the tripod. You do not
have to level the instrument.
2.
Place a thick sheet of paper marked with an X on the ground
below the instrument.
While you are looking through the optical plummet, adjust
the leveling screws until the image of the X is in the center of
the reticle mark.
3.
Rotate the alidade 180°.
P
If the marked image is in the same position in the
center of the reticle mark, no adjustment is required.
4.
If the image is not in the same position,
adjust the optical plummet: Use the supplied
hexagonal wrench to turn the adjustment
screws until the image of the X is in Position
P. Position P is the center point of the line
connecting the X and the center of the reticle
mark.
5.
Repeat from Step 2.
Trimble M3 Total Station User Guide
117
10
10.1
Checking and Adjustment
Checking the instrument constant
The instrument constant is a numerical value used to automatically correct for the
displacement between the mechanical and electrical centers when measuring
distances. The instrument constant is set by the manufacturer before the instrument is
shipped. However, to ensure the highest operational accuracy, we recommend that you
check the instrument constant several times a year.
To check the instrument constant, you can either compare a correctly measured base
line with the distance measured by the EDM, or follow the procedure below.
To check the instrument constant:
1.
Set up the instrument at Point P, in as flat an area as possible.
2.
Set up a reflector prism at Point Q, 100 m away from Point P. Make sure that you
take the prism constant into account.
3.
Measure the distance between Point P and Point Q (PQ).
4.
Install a reflector prism on the tripod at Point P.
5.
Set up another tripod at Point R, on the line between Point P and Point Q.
6.
Transfer the Trimble M3 total station to the tripod at Point R.
7.
Measure the distance from Point R to Point P (RP), and from Point R to Point Q
(RQ).
8.
Compare the value of PQ to the value RP + RQ. The difference should be within
the specified range of error for the instrument (±23 mm + 2 ppm × distance).
At 100 m distance, the error range is ±23.2 mm. If the error is out of range,
contact your dealer.
9.
Move the Trimble M3 total station to other points on the line between Point P
and Point Q.
10. Repeat Step 5 through Step 9 several times.
1 18
Trimble M3 Total Station User Guide
Checking and Adjustment
10
11. Calculate the average of all the values of RP, and the average of all the values of
RQ.
12. Compare the value of PQ to averaged RP + averaged RQ. The difference should
be within the specified range of error for the instrument (±23 mm + 2 ppm ×
distance).
At 100 m distance, the error range is ±23.2 mm. If the error is out of range,
contact your dealer.
10.1
Checking and adjusting the compensator (C) and index (I)
1.
To activate the Adjustment C&I program from
any screen that shows the CHCK softkey, press
[F3].
The electric level is shown in graphic format.
2.
B
100.1
Do one of the following:
–
To go to the angle adjustment screen, press
[F1] c/i, see Vertical index and HA
collimation, page 119.
–
To go to compensator adjustment, press
[F3] Comp, see Compensator adjustment,
page 120.
–
To turn the compensator adjustment on or
off, press [F4] C-no/C-yes.
Tip – Before starting this procedure, level the instrument
precisely.
Vertical index and HA collimation
1.
To open the Adjustment C&I screen, press
[F1] c/i in the Adjust. C&I screen. The
Adjustment C&I screen shows the current sight
axis correction and vertical index correction will
be shown.
2.
Do one of the following:
3.
–
To reset c to zero, press [F1] c=0.
–
To reset i to zero, press [F3] i=0.
–
To return to the previous screen, press [ESC].
To take an angle measurement on Face-1, press
[MEAS/ENT].
Trimble M3 Total Station User Guide
119
10
Checking and Adjustment
Note – If the reference target is placed too high or too low
(+/- 20 gon), a warning screen appears when you press
[MEAS/ENT].
4.
After taking a measurement on Face-1, turn to
Face-2 and sight the same target. Press [MEAS/ENT]
to take an angle measurement on Face-2.
The Results screen appears.
5.
Do one of the following:
–
To return to the Face-1 measurement, press
[F1] Rept.
–
To ignore the latest result and keep the
previous values, press [F2] old.
–
To update c and i by the latest result, press
[F4] new.
Note – When the result of c is larger than 30", or i is
larger than 3', a warning screen appears.
100.1
Compensator adjustment
1.
To activate the compensator adjustment
program, press [F3] Comp in the Adjust. C&I
screen.
2.
Do one of the following:
3.
–
To take an angle measurement on Face-1,
press [MEAS/ENT].
–
To return to the previous screen, press [ESC].
Turn to Face-2 and press [MEAS/ENT].
The Result screen appears, where:
–
sz is an error on the sighting axis (sighting
shaft inclinations)
–
1 20
skis an error on the vertical axis (vertical
shaft inclinations)
Trimble M3 Total Station User Guide
Checking and Adjustment
4.
10
Do one of the following:
–
To return to the Face-1 measurement, press
[F1] Rept.
–
To ignore the latest result and keep the
previous values, press [F2] old.
–
To update c and i by the latest result, press
[F4] new.
Trimble M3 Total Station User Guide
121
10
1 22
Checking and Adjustment
Trimble M3 Total Station User Guide
APPENDIX
A
Troubleshooting
A
In this chapter:
Q
Points
Q
Settings interface
Q
Job Manager
Q
Stakeout
Q
Uploading Point Name / Point Code list
Q
Adjustment C&I
Q
Application
Trimble M3 Total Station User Guide
123
A
A.1
Troubleshooting
Points
Error message
Cause
Point number not found.
Point code not found
You selected an invalid point number or Press any key to return to the
code.
previous screen, and then enter a
different point number or code.
XY-coordinate is
required.
Press any key to return to the
The point was a benchmark or
previous screen and then enter a
angle/distance data and you did not
enter a point that has an XY coordinate. point that has an XY-coordinate.
XY & Z-coordinate is
required
You input a benchmark point or 2D
coordinate point when the program
requires XYZ coordinate data.
Z-coordinate is required. The input point for the benchmark does
Same coordinate.
A.2
Solution
Press any key to return to the
previous screen and then enter a
point with 3D coordinates.
not have a Z coordinate.
Press any key to return to the
point input screen and then enter
a point that has a Z-coordinate.
The point or coordinate that you
entered is identical to the previous
input point.
Press any key to return to the
point input screen and then enter
a different point.
Settings interface
Error message
Cause
Solution
Err. Positions P/C
Default Values
The input value in Position P and
Position C for the M5 format does not
follow the rule.
Both values will be reset to the
default value
Error message
Cause
Solution
Total job number. Delete
old job.
You are creating a new job, and the
maximum number of jobs has been
reached.
Delete an old job
Can’t Create. Data area
is full.
You are creating a new job, and the
internal memory is full.
Do one of the following:
• Delete an old job
• Continue recording some
points until the internal
memory reaches the maximum
capacity.
Existing Job. Change job
name.
You are creating a new job, and the job Change the job name.
name you select already exists.
Invalid Job
You are creating a new job, and
necessary files for the job are missing.
A.3
Job Manager
1 24
Trimble M3 Total Station User Guide
Job files may mistakenly be
deleted when using service tool
software. You must contact
customer support as this cannot
occur during normal operation.
Troubleshooting
A
Error message
Cause
Solution
Can't assign CTRL PT Job
You are creating a new job and are
trying to assign the current open job as
the control point job.
Press any key to return to the
previous screen and specify a
different job as the control point
job.
Note – If you need to use the
current job as the control job,
then you need to create/open a
different job as the current job.
Cannot delete opened job
You are about to delete an open
(active) job.
Cannot delete NONAME job
You are about to delete a NONAME job. Press any key to return to previous
screen.
A.4
Press any key to return to previous
screen.
Stakeout
Error message
Cause
Solution
S-O point = STN
The stakeout point and the station
point have the same coordinates:
Input a different coordinate for
the stakeout.
A.5
Uploading Point Name / Point Code list
Error message
Cause
Solution
Up to 254 Labels
The point name/code lists can not
contain more than 254 items.
Press any key to return to the
previous screen and then delete
items from the list so that it has
less than 254 items.
Change Name Already Exist The list contains an item that has the
Press any key to return to the
previous screen and then change
the item name or delete one of
the items.
same name as the one your are
assigning.
Check Data Line nnn
There was a grammatical error in the
list.
Data full Change
Recording=OFF
When the internal memory is becoming Press any key. The system
full during the recording process.
automatically turns off the data
recording mode and continues the
process.
Data area is full
When the internal memory is getting
full while uploading coordinate, point
number list or point code list.
Press any key to return to the
previous screen.
Recording: OFF
Occurs when you hold down the
Trimble key for one second or select
[5] P/C in the HOT menu while the
Recording setting is OFF.
Press any key to return to the HOT
menu screen.
Press [ESC] to return to the
previous screen and check the
format in the indicated line.
Trimble M3 Total Station User Guide
125
A
A.6
Troubleshooting
Adjustment C&I
Error message
Cause
Solution
Value C was out of
tolerance.
The collimation axis error is out of
range.
Press any key to return to the
results screen and then repeat the
observation.
Value i was out-oftolerance.
The index axis error is out of range.
Press any key to return to the
results screen and then repeat the
observation.
Compensator oper.-range
exceeded.
The compensator was out-of-range
when the measurement was started in
Adjustment C&I.
Press any key to return to the
previous screen. Then, level the
instrument finely and repeat the
observation.
V-Difference too large%
In the Adjustment C&I program, the
observed target was more than +/20gon from the horizontal line.
Press any key to return to the
previous screen. Then, set a target
closer to the horizontal. Set
another target and remeasure.
Compensator Out of
tolerance.
The adjustment value for the
compensator is out of tolerance.
Press any key to return to the
previous screen.
Error message
Cause
Solution
Distance A-B too small.
The distance between point A and B is
less than 10 cm.
Press any key to return to the
Select point B screen.
Use a different point as point B.
Geometrical situation is
undefined.
The angle between A-B and S-A or the Press any key to return to the
angle between A-B and S-B is less than 9 Select point B screen.
degrees.
Use a different point as point B.
A.7
Application
1 26
Trimble M3 Total Station User Guide
APPENDIX
B
Data Formats
B
In this chapter:
Q
M5 data format
Q
Nikon data format
Q
Point number/name list and Point code list
Trimble M3 Total Station User Guide
127
B
Data Formats
The Trimble M3 total station supports two data formats for downloaded recorded
internal memory data: M5 format and Nikon raw format.
There is also a simple text file format for point number/name list and point code list.
The data output from the Trimble M3 total station can be used with the Trimble Total
Control™ software (TTC), Trimble Geomatics Office™ software (TGO), the
TerraModel® (TM) software, and the Trimble Data Transfer utility.
Trimble surveying instruments are used for measurement functions with different data
processing requirements.
The Trimble M3 total station allows densely packed internal measurement and result
data lines to be output in various formats.
This chapter describes the structure of data format and the type identifier of measured
and calculated values.
B
B.8
Tip – All instruments have a serial interface which ensures the data exchange.
M5 data format
The point identification in the M5 data format is 27-digit, of which 12 digits are used as
point numbers and 5 digits are used as the point code in the Trimble M3 total station.
The original Zeiss M5 data format is the common standard for the current TTrimble
M3 total stations, the Trimble 3300, and all former Elta® surveying systems.
All five data blocks are preceded by a type identifier. The three numerical data blocks
have a standard layout comprising 14 digits. In addition to the decimal point and sign,
they accept numeric values with the specified number of decimal places.
The information block is defined by 27 characters. It is used for point identification (PI)
and text information ( for example TI).
The address block is comprised of five digits ( from address 1 to 99999).
B8.1
The M5 data line
The data line of the M5 format consists of 121 characters (bytes). The multiplication of
this figure by the number of addresses (lines) stored shows the size of the project file in
bytes.
Blanks are significant characters in the M5 file and must not be deleted.
The example describes an M5 data line at address 176 with coordinates (YXZ)
recorded in unit m. The point identification of marking 1 is DDKS S402 4201. Column
119 includes a blank (no error code).
1 28
Trimble M3 Total Station User Guide
Data Formats
B
The end of the line has CR, LF (columns 120 and 121, shown here as <=). See also
Special characters, page 130.
1
10
20
30
40
50
60
1234567890123456 78901 234567890123456789012345678 9012 3456789012346
70
80
90
For M5 | Adr . 12345 | T2a . 123456789012345678901234567 | T3 . 12345678901234 . dim3 | T4 . 12345678901234
Value1
For M5 | Adr .
176 | PI1
Value 2
DDKS S402 4201
Value 3
|Y
100
110
121
78901234567890123456789 012345678 90123456789012 345678901
56590.405 m
. dim4 | T5 . 12345678901234 . dim5 | ?<=
Value 4
|X
Column
Description
120-121
Carriage Return <, Line Feed =
119
Blank field, in case of error “e“
114-117
Unit for block5
99-112
Block5 value block
96-97
Type identifier5 for block5
91-94
Unit for block4
76-89
Block4 value block
73-74
Type identifier4 for Block4
68-71
Unit for block3
74968.796 m
Value 5
|Z
334.784 m
| <=
53-66
Block3 value block
50-51
Type identifier3 for block3
22-48
Information block PI or TI (point identification PI or text information TI,
TO etc.)
18-20
Type identification2 PIa (a=1-0, for 10 Markings) or TI
12-16
Memory address of data line
8-10
Type identifier1 Adr for address
1-6
Defines M5 format
Trimble M3 Total Station User Guide
129
B
Data Formats
Explanation of the data line
Abbreviation Description
Digits
Characters
Meaning
For
Format identifier
3
alpha
Trimble M3 format
M5
Format type
2
alpha
Measured data blocks
Adr
Address identifier
3
alpha
Value1
Value 1
5
numeric
Memory address
T2
Type identifier
2
alpha
Value2 (Pla, TI, TO..)
a
Marking Value2
1
numeric
a =1, 2, 3, .. , 9, 0
27
alpha
PI or TI
T3
Type identifier
2
alpha
Value3
Value3
14
numeric
14-digit value
dim3
Unit
4
alpha
4-digit unit
T4
Type identifier
2
alpha
Value4
Value4
14
numeric
14-digit value
dim4
Unit
4
alpha
4-digit unit
T5
Type identifier
2
alpha
Value5
Value5
14
numeric
14-digit value
dim5
Unit
4
alpha
4-digit unit
?
Identifier
1
alpha
Error message or blank
space
Digits
ASCII code
Hex code
Separator
1
124
7C
Blank
1
32
20
Special characters
Special
characters
|
1 30
<
Carriage return
1
13
0D
=
Line feed
1
10
0A
Trimble M3 Total Station User Guide
Data Formats
B8.2
B
Additional data lines of M5 data format – header/changed setting
The additional M5 data lines are implemented to optimize transferring data (import /
export) from and to the Trimble office software. Trimble office software includes the
Trimble Total Control software, Trimble Geomatics Office software, and the
TerraModel software.
The Header is recorded after you switch ON the instrument and begins with START
and ends with END.
For M5 | Adr 00001 | TI START
|01
M3 5"DR
|02
For M5 | Adr 00002 | TI
|04
30
|
131500
|03
For M5 | Adr 00003 | TI
|05
1
|06
For M5 | Adr 00004 | TI
|20
1
|21
11
|22
For M5 | Adr 00005 | TI
|th
1.900 m
|ih
1.600 m
|
For M5 | Adr 00006 | TI
|i
-0.0005 grd
|c
0.0025 grd
|SZ
0.0005 grd |
For M5 | Adr 00007 | TI
|
|SK
0.0060 grd|
|PC
0.035 m |
1
|
For M5 | Adr 00008 | TI
|T_
20 C
|P
For M5 | Adr 00009 | TI END
|m
1.000000
|
1012 hPa
1.00 |
|
|
|
|
16 |
|
|
|
The new identifiers in the M5 Format – Header are:
Abbreviation
Description
Digits
Characters
01
Type instrument
7
M3 3"DR or M3 5"DR
02
Number of instrument
6
numeric
03
Version software
4
numeric
04
Language
See *2 Depending on the "Coord
System" settings, 1:YX/XY/EN,
2:XY/YX/NE, page 131.
2
numeric
05
Coord System
1
06
Order Coord. Syst
1
numeric*1
numeric*2
20
Position I
2
numeric
21
Position C
2
numeric
22
Position P
2
numeric
*1 1:XY, 2:YX, 3:NE
*2 Depending on the "Coord System" settings, 1:YX/XY/EN, 2:XY/YX/NE
Language codes
The two-digit language codes are:
Code
Language
23
German
30
English
31
Czech
32
Italian
Trimble M3 Total Station User Guide
131
B
Data Formats
Code
Language
33
Croatian
34
French
35
Dutch
36
Spanish
37
Danish
38
Polish
39
Hungarian
40
Japanese
41
Turkish
42
Russian
43
Finnish
44
Estonian
45
Portuguese
46
Serbo-Croatian
47
Chinese
48
Korean
The content of the header explanation of the example shown is as follows:
1 32
Abbreviation
Description
Meaning of example
01
Type instrument
M3 5"DR
02
Number of instrument
131500
03
Version software
1.00
04
Language
English
05
Coord System
xy
06
Order Coord. Syst
yx
20
Position I
Start position 1
21
Position C
Start position 11
22
Position P
Start position 16
th
Target height
1.90 m
ih
Instrument height
1.60 m
i
Vertical index cor.
-0.0005 gon
c
Sighting axis cor.
0.0025 gon
SZ
Run Center comp.
0.0005 gon
SK
Run Center comp.
0.0060 gon
T
Temperature
20 °C
P
Air Pressure
1012 hPa
PC
Prism constant
-0.035 m
m
Scale
1.000000
Trimble M3 Total Station User Guide
Data Formats
B
Record changed settings of the instrument
To permanently record change instrument settings, activate the Record Settings
menu. The following changed settings and adjustments are recorded when the
instrument is ON.
For M5 | Adr 00009 | TI INPUT
|th
For M5 | Adr 00011 | TI ADJUST
|
For M5 | Adr 00012 | TI ADJUST
|V1
92.4505 grd |V1
307.5515 grd |i
-0.0010 grd|
For M5 | Adr 00013 | TI ADJUST
|Hz
284.1015 grd |Hz
84.1060 grd |c
0.0025 grd|
For M5 | Adr 00015 | TI ADJUST
|
For M5 | Adr 00016 | TI INPUT
|T_
For M5 | Adr 00017 | TI INPUT
|m
For M5 | Adr 00018 | TI COM-OFF
2.000 m |ih
1.700 m |
|SK
0.0040 grd |SZ
|SK
25 C |P
0.0055 grd|
0.0040 grd |SZ
0.0055 grd|
1000 hPa |PC
-0.005 m|
1.000005 |
|
|
|
|
|
For M5 | Adr 00019 | TI COM-ON
|
|
|
|
For M5 | Adr 00020 | TI Hz=0
|
|Hz
0.0000 grd |
|
For M5 | Adr 00021 | TI HOLD
|
|Hz
300.000 grd |
For M5 | Adr 00022 | TI DR
|th
0.000 m |PC
0.000 m |A
0.035 m|
For M5 | Adr 00023 | TI PR
|th
2.000 m |PC
-0.005 m |A
0.030 m|
For M5 | Adr 00024 | TI KN STAT
For M5 | Adr 00025 | PI1
A
For M5 | Adr 00026 | PI1
S
|
1000
For M5 | Adr 00027 |TI
Record
|
BS1000 |
|Hz
|Y
1000.000 m |X
|
|Om
|
|
|
300.0035 grd |VI
|
92.4435 grd|
2000.000 m |Z
0.000 m|
200.0035 grd |
T1
T2
T3
Comment
INPUT
th
ih
-
input th/ih
ADJUST
V1(1)
V1(2)
i
adjustment V-index/Collimator
ADJUST
Hz(1)
Hz(2)
c
adjustment V-index/Collimator
ADJUST
-
SK
SZ
adjustment V-index/Collimator or Compensator
INPUT
T_
P
PC
Input Temp., Air Pressure, Prism constant
INPUT
m
-
-
Input scale
|
COM-ON
-
-
-
Compensator switched ON
COM-OFF
-
-
-
Compensator switched OFF
Hz = 0
-
Hz(=0)
HOLD
-
Hz
-
HA set to desired angle
DR
-
PC
A
DR mode switched on. PC=set, A=calculated (PC is the set
value in Target set.)
PR
-
PC
A
PR mode switched on. PC=set, A=calculated (PC is the set
value in Target set.)
Hz +
-
-
-
HA increment direction is set to clockwise.
Hz -
-
-
-
HA increment direction is set to counter-clockwise.
Trimble M3 Total Station User Guide
133
B
Data Formats
The point identification PI in M5 Format
The PI is comprised of 27 characters. It starts in column 22 and terminates in column
48 in the M5 data line. The data structure within the PI is defined by markings. A
maximum of 10 markings, marked in the preceding type identifier with PI1 to PI0
(columns 18, 19, 20), can be designated to the PI (depending on the instrument).
The type identifier in the M5 Format
Data format requirements have changed and increased over the years. For backwards
compatibility, the M5 Format carries most of the type identifiers of all available
formats, always based on the preceding format (Rec500).
Type identifiers are defined by two characters (except for Adr). If only one character is
necessary, the second character is a blank.
In the M5 Format there are five type identifiers (TK) defined:
•
TK1: Adr Identifier address (Value1)
•
TK2: T2 Identifier information (Value2)
•
TK3: T3 Identifier 3. Value field (Value3)
•
TK4: T4 Identifier 4. Value field (Value4)
•
TK5: T5 Identifier 5. Value field (Value5)
Example: PI for point identification or TI for text information can be used for T2. For
T3, T4, T5, D, Hz, V or Y, X, Z can be used.
The Special characters, page 130 are analogous to the M5 format.
B8.3
Marking in the M5 format
The Trimble M3 total station uses a mark which is saved internally in the instrument.
This mark consists of three blocks with clearly defined block lengths. The user can
change the order of the point number and point code blocks as well as the position of
the information block.
1 34
Trimble M3 Total Station User Guide
Data Formats
B
Example 1: PI dataline
Layout gage
1
10
20
27
123456789012345678901234567
Sample marking
PPPPPPPPPPPP
Sample marking
CCCCCPPPPPPPPPPPP
Where
PPPPPPPPPPPP
is a 12-digit point number
CCCCC
is a 5-digit point code
CCCCC
Example 2: TI dataline
Layout gage
1
10
20
27
123456789012345678901234567
IIIIIII
Sample marking
B
Sample marking
IIIIIII
Where
IIIIIII
is a 7-digit information block
Tip – The information block (I) is left-aligned, the code (C) and point number (P) are
right-aligned.
To change settings of the Trimble M3 total station in the M5 format, select [MENU] and [6]
Settings Interface.
B
B8.4
Tip – In case of overlapping information in the blocks, the instrument returns to the
default settings.
Value blocks
In the M5 format three value blocks are available:
Format
Value1 Value2 Value3 dim
M5
14
14
14
4
All value blocks are preceded by a type identifier which specifies the function of the
succeeding value.
In the M5 format for the value block there is a unit (dim), which follows the 4-digit
(divided by blanks) value block.
The values are typed right-aligned in the blocks. Decimal point, digits after the comma
and definitions of preceding characters correspond to the internal instrument
specifications.
Trimble M3 Total Station User Guide
135
B
Data Formats
The following units are defined:
C
Values
Units
Angle measurement
gon, DEG, DMS, mil,%
Distances, Coordinates
m, ft
Pressure
mmHg, hPa, inHg
Temperature
Centigrade, Fahrenheit
Standard, PR, etc.
No unit defined
CAUTION – If the files of the Trimble Elta formats are entered manually, it is important to
remember that when using the data in the instrument, the digits after the comma and
the units need to be adjusted correspondingly.
Recording data lines
B8.5
Table B.7 shows how data lines are recorded.
Table B.7
Recording data lines
Mode
Single meas.
Adjustment
c/i
Rec
1
Mode Content of record
2
P, C, I
Comments
T1
T2
T3
x
CCCCC PPPPPPPPPPPP
Hz
Vk
HA VA mode, k=1, 2, 3, 4
depending on V system
x
CCCCC PPPPPPPPPPPP HD
Hz
h/Z
horizontal distance mode
x
CCCCC PPPPPPPPPPPP SD
Hz
Vk
slope distance mode, k=1, 2, 3, 4
depending on V system
x
CCCCC PPPPPPPPPPPP y
x
h/Z
coordinates mode, sequence y,x
x
CCCCC PPPPPPPPPPPP x
y
h/Z
coordinates mode, sequence x,y
x
CCCCC PPPPPPPPPPPP n
e
h/Z
coordinates mode, sequence n,e
x
CCCCC PPPPPPPPPPPP e
n
h/Z
coordinates mode, sequence e,n
k=1, 2, 3, 4 depending on V
system
x
x
ADJUST
Vk
Vk
i
x
x
ADJUST
Hz
Hz
c
x
x
ADJUST
SK
SZ
Adjust comp.
x
x
ADJUST
SK
SZ
Input values
x
x
INPUT
th
ih
x
x
INPUT
T_
P
x
x
INPUT
m
Compensator
1 36
x
x
S
x
x
COM-ON
Compensator activated
x
x
COM-OFF
Compensator deactivated
Trimble M3 Total Station User Guide
PPPPPPPPPPPP
PC
Z
Z ... station height
Data Formats
Table B.7
Recording data lines (continued)
Mode
Point to line
(Station +
Offset)
Rec
1
Mode Content of record
2
P, C, I
x
x
T3
STA+OFF
point to line
PPPPPPPPPPPP
SD
Hz
Vk
reference point A
x
B
PPPPPPPPPPPP
SD
Hz
Vk
reference point B
x
A=S
if station is defined as A
x
B=S
if station is defined as B
SD
HD
h
base length
CCCCC PPPPPPPPPPPP SD
Hz
Vk
meas. pt. P
CCCCC PPPPPPPPPPPP y
x
h/Z/ω
meas. pt. P; y, x, e, n depending
on the coordinate system if
station is defined as P
x
P=S
Y
X
h/Z/ω
x
CON. DST.
x
A
SD
Hz
Vk
reference point A
x
x
x
A-B
PPPPPPPPPPPP
CCCCC PPPPPPPPPPPP SD
Hz
Vk
meas. pt. P
x
A-P
SD
HD
h/Z
connecting distance A-P
P-P
SD
HD
h/Z
connecting distance P-P
x
OBJ. HT
PPPPPPPPPPPP SD
Hz
Vk
reference point A
x
Object height
T2
A
x
Connect.
distance
Comments
T1
x
x
x
A
x
CCCCC PPPPPPPPPPPP
Hz
Vk
meas. pt. P, k=1...4, depending
on V system
CCCCC PPPPPPPPPPPP HD
O
Z
meas. pt. P
Z
Set Z value
Hz
Vk
k=1, 2, 3, 4 depending on V
system
x
x
%
x
Vertical
plane
B
x
PPPPPPPPPPPP
PPPPPPPPPPPP
x
x
x
x
x
x
x
VERT. PL
A
PPPPPPPPPPPP SD
Hz
Vk
reference point A
B
PPPPPPPPPPPP SD
Hz
Vk
reference point B
SD
HD
h
base length
CCCCC PPPPPPPPPPPP
Hz
Vk
meas. pt. P, k=1...4, depending
on V system
CCCCC PPPPPPPPPPPP y
x
h
meas. pt. P; y, x, e, n depending
on the coordinate system
A-B
P=S
if station is defined as P
x
x
%
PPPPPPPPPPPP
x
x
%
PPPPPPPPPPPP
x
y
h
PPPPPPPPPPPP
x
set value for y, x, or n
depending on the coordinate
system
Y
Hz
Vk
X
h
set value for h
Trimble M3 Total Station User Guide
137
B
Data Formats
Table B.7
Recording data lines (continued)
Mode
Area
Calculation
Unknown
station
Rec
1
Mode Content of record
2
P, C, I
x
x
T2
T3
CCCCC PPPPPPPPPPPP SD
Hz
Vk
meas. pt. P
x
CCCCC PPPPPPPPPPPP Y
X
Z
meas. pt. P
x
CCCCC PPPPPPPPPPPP Y
X
Z
input (or from MEM) pt. P
x
x
AREA
x
x
UN STAT
x
A
A
PPPPPPPPPPPP SD
Hz
Vk
measurement to A, B, C, D, E
x
A
PPPPPPPPPPPP vy
vx
vz
residual point A, B, C, D, E
x
x
S
PPPPPPPPPPPP Y
X
x
x
x
x
KN STAT
x
S
PPPPPPPPPPPP Y
X
station coordinates
x
A
PPPPPPPPPPPP Y
X
reference point A
x
A
PPPPPPPPPPPP
Hz
Vk
measurement to A (Hz, V mode)
x
A
PPPPPPPPPPPP SD
Hz
Vk
measurement to A (SD, Hz, V
mode)
x
x
Known station
Station
elevation
x
x
x
x
x
x
x
x
x
Meas. Topo.
AREA
PPPPPPPPPPPP Y
m
X
Om
reference point A, B, C, D, E
station coordinates
s0
scale, orient., standard
deviation
Om
orientation (Hz, V)
Om
scale, orientation (SD, Hz, V)
EL STAT
%
PPPPPPPPPPPP
A
PPPPPPPPPPPP SD
PPPPPPPPPPPP
x
x
S
x
POLAR
x
Fl
m
x
x
1 38
Comments
T1
Hz
Z
height of A
Vk
measurement of A
Z
computed station height
CCCCC PPPPPPPPPPPP SD
Hz
Vk
original readings
x
CCCCC PPPPPPPPPPPP Y
X
Z
coordinates
x
CCCCC PPPPPPPPPPPP T
Trimble M3 Total Station User Guide
eccentricity Tv, Th, Tl, Tr, Ts
Data Formats
Table B.7
Mode
Stake out
B
Recording data lines (continued)
Rec
1
Mode Content of record
2
P, C, I
x
x
ST-OUT
x
x
SO P-LN
x
x
SO D-LN
x
%
PPPPPPPPPPPP Y
X
x
%
PPPPPPPPPPPP Y
X
x
%
PPPPPPPPPPPP HD
Hz
x
%
PPPPPPPPPPPP HD
Hz
depending on stake-out
method
x
%
PPPPPPPPPPPP y
x
depending on stake-out
method (RefLine 2D)
x
%
PPPPPPPPPPPP HD
x
x
Comments
T1
T2
T3
RefLine 2D
DifLine 2D
Z
depending on stake-out
method
depending on stake-out
method
Z
depending on stake-out
method
depending on stake-out
method (DivLine 2D)
PPPPPPPPPPPP SD
Hz
Vk
k =1, 2, 3, 4, depending on the
V system
x
PPPPPPPPPPPP dy
dx
dz
stake-out difference depending
on meas. method
x
PPPPPPPPPPPP dy
dx
x
PPPPPPPPPPPP dl
dc
x
PPPPPPPPPPPP dz
x
PPPPPPPPPPPP dy
dx
h
stake-out difference depending
on meas. method (RefLine 2D)
x
PPPPPPPPPPPP Y
X
Z
verification
x
PPPPPPPPPPPP Y
X
stake-out difference depending
on meas. method
dr
stake-out difference depending
on meas. method
stake-out difference depending
on meas. method
verification measurement
x
A
PPPPPPPPPPPP SD
Hz
Vk
reference point A (RefLine 2D,
DivLine 2D)
x
B
PPPPPPPPPPPP SD
Hz
Vk
reference point B (RefLine 2D)
x
A=S
x
x
A=B
B=S
if station is defined as A
(RefLine 2D)
SD
HD
h
RefLine 2D A-B
if station is defined as B
(RefLine 2D)
Note – "Rec.mode" can be selected from the following: 1: MEM/1, V24/1; 2: MEM/2, V24/2;
3: 1+2
Trimble M3 Total Station User Guide
139
B
B.9
Data Formats
Nikon data format
The Trimble M3 total station can be used with any program that supports Nikon
formats.
B9.1
Uploading coordinate data format
You can upload coordinate records in the following formats:
P, X , Y , Z, C
P,X,Y,Z
P,X,Y,,C
P,X,Y,,
P,X,Y,
P,,,Z,C
P,,,Z
Data example
20100,6606.165,1639.383,30.762,RKBSS
20104,1165611.6800,116401.4200,00032.8080
20105 5967.677 1102.343 34.353 MANHOLE
20106 4567.889 2340.665 33.444 PT1
20107 5967.677 1102.343 34.353
20109,4657.778,2335.667,,PT2
20111,4657.778,2335.667
20113 4657.778 2335.667
20115,,,34.353,MANHOLE
20117,,,33.444
1 40
Trimble M3 Total Station User Guide
Data Formats
B9.2
B
Downloading Nikon raw format
Coordinate records
type ,
pt ,
type
(pt id) ,
northing ,
easting ,
elevation ,
code
One of the following codes:
UP
Uploaded point
MP
Manually input point
CC
Calculated coordinate
RE
Resection point
pt
Point number
(pt id)
(Point ID)
northing
Northing of the coordinate
easting
Easting of the coordinate
elevation
Elevation of the coordinate
code
Feature code
Station records
ST
,
stnpt ,
(stnid) ,
bspt ,
(bs id)
,
hi ,
ST
Station record identifier (fixed text)
stnpt
Station point number
(stn id)
(Station ID)
bspt
Backsight point number
(bs id)
(Backsight ID)
hi
Height of instrument
bsazim
Backsight azimuth
bsha
Backsight horizontal angle
bsazim
,
bsha
Control point records
CP
,
pt ,
(pt id) ,
ht ,
sd
,
ha ,
va
,
time ,
CP
Control point record identifier (fixed text)
pt
Point number
(pt id)
(Point ID)
ht
Height of target
sd
Slope distance
ha
Horizontal angle
va
Vertical angle
code
Trimble M3 Total Station User Guide
141
B
Data Formats
time
24-hour time stamp
code
Feature code
Sideshot records
SS
,
pt ,
ht ,
sd
,
ha ,
va
,
time ,
SS
Sideshot record identifier (fixed text)
pt
Point number
ht
Height of target
sd
Slope distance
ha
Horizontal angle
va
Vertical angle
time
24-hour time stamp
code
Feature code
code
Stakeout records
SO
,
pt ,
(sopt) ,
ht ,
sd
,
ha ,
va
,
SO
Stakeout record identifier (fixed text)
pt
Recorded point number
(sopt)
(Original number of point staked)
ht
Height of target
sd
Slope distance
ha
Horizontal angle
va
Vertical angle
time
24-hour time stamp
time ,
F1/F2 records
face
face
1 42
,
pt ,
ht ,
sd
,
ha ,
va
,
time
One of the following:
F1
Shot taken using Face-1 (fixed text)
F2
Shot taken using Face-2 (fixed text)
pt
Point number
ht
Height of target
sd
Slope distance
ha
Horizontal angle
va
Vertical angle
time
24-hour time stamp
Trimble M3 Total Station User Guide
Data Formats
B
Comment/note records
CO
,
text
CO
Comment record identifier (fixed text)
text
Comment text
Point number/name list and Point code list
B.10
PT lists and code lists use the same record format.
B10.1
File format
DEFAULT
{
String1 , Code1
Layer2
{
String2-1, Code2-1
String2-2, Code2-2
}
Layer3
{
Layer 3-1
{
String3-1-1, Code3-1-1
String3-1-2, Code3-1-2
}
String3-2, Code3-2
String3-3, Code3-3
}
String4, Code4
String5, Code5
String6, Code6
String7, Code7
}
Figure B.4
The first line of the file must contain
the text “DEFAULT” in capital letters.
Curly brackets { } group items together
under the preceding line.
For example, Layer 3-1 contains String
3-1-1 and String 3-1-2.
Layer 3 contains the five items from
Layer 3-1 to String 3-3.
“String” represents characters that are
displayed on the screen. “Code”
represents characters that are stored in
the database.
Record format for PT lists and code lists
Trimble M3 Total Station User Guide
143
B
Data Formats
B10.2
Data example
DEFAULT
{
“STRUCTURES”
{
“TREE”, “S0001”
“FENCE”, “S0002”
“MAIL BOX”, “S0003”
“FLOWER BED”, “S0004”
}
“ROADS”
{
“MANHOLE”, “R0001”
“CENTER LINE”
{
“WHITE”, “R002-W”
“YELLOW”, “R002-Y”
}
“SIDEWALK”, “R0003”
“CROSSING”, “R0004”
“BRIDGE”, “R0005”
“SIGNAL”, “R0006”
“HIGHWAY STAR”, “R0007”
}
“RAILWAY”
{
“CROSSING”, “RW001”
“STATION”, “RW002”
“SIGNAL”, “RW003”
“BRIDGE”, “RW004”
“TUNNEL”, “RW005”
}
}
1 44
Trimble M3 Total Station User Guide
APPENDIX
C
Specifications
C
In this chapter:
Q
Telescope
Q
Measurement range
Q
Distance measurement precision
Q
Measurement intervals
Q
Clamps/tangent screws
Q
Dual-axis tilt sensor
Q
Clamps/tangent screws
Q
Tribrach
Q
Level vial sensitivity
Q
Optical plummet
Q
Display and keypad
Q
Connections in the base of instrument
Q
Battery pack BC-65
Q
Environmental performance
Q
Dimensions
Q
Weight
Trimble M3 Total Station User Guide
145
C
Specifications
Telescope
C.11
Tube length
153 mm (6.02 inch)
Magnification
26×
Effective diameter of
objective
40 mm (1.57 inch)
EDM 50 mm (1.97 inch)
Image
Erect
Field of view
1°30'
2.6 m at 100 m (2.6 ft at 100 ft)
Resolving power
3.0"
Measurement range
C.12
Distances shorter than 1.6 m (5.25 ft) cannot be measured with this EDM.
Measurement range with no haze, visibility over 40 km (25 miles)
Prism Mode
Reflector sheet (5 cm x 5 cm)
300 m (984 ft)
Mini prism
3,000 m (9,800 ft)
Standard prism (1P)
5,000 m (16,400 ft)
Direct-Reflex mode
Reference target
200 m (656 ft)
Note – The target should not receive direct sunlight.
Note – “Reference target” refers to a white, highly reflective material.
Note – For measurements at short range (approximately 1.6 m to 5 m (5.2 ft to 16.4 ft) to
the mini prism, or 1.6 m to 10 m (5.2 ft to 33 ft) to the standard prism), it is recommended
that you use a Nikon original prism to maintain accuracy.
Distance measurement precision
C.13
Precise mode
Prism mode
± (3 + 2 ppm × D) mm* (–10 °C to +40 °C)
± (3 + 3 ppm × D) mm* (–20 °C to –10 °C), (+40 °C to +50 °C)
Direct-Reflex
± (5 + 2 ppm × D) mm (–10 °C to +40 °C)
± (5 + 3 ppm × D) mm (–20 °C to –10 °C), (+40 °C to +50 °C)
Standard mode
Prism mode
± (10 + 5 ppm × D) mm
Direct-reflex mode
± (10 + 5 ppm × D) mm
* These precision settings apply to measurements of 5 m (16 ft) or more to a reflector
sheet and 10 m (33 ft) or more to a mini or standard prism. For measurements at
shorter distances than these, the precision is ± 5 mm.
1 46
Trimble M3 Total Station User Guide
Specifications
C
Measurement intervals
C.14
Measurement intervals may vary with the measuring distance or weather conditions.
Precise mode
Prism mode
1.3 sec. (initial 2.6 sec.)
Direct Reflex mode
1.6 sec. (initial 3.5 sec.)
Standard mode
Prism mode
0.5 sec. (initial 2.2 sec)
Reflectorless
0.8 sec. (initial 3.2 sec.)
Prism offset correction
–999 mm to +999 mm
(1 mm step)
Angle measurement
C.15
Reading system
Photoelectric incremental encoder
Circle diameter (reading)
88 mm (3.46 in.) (79 mm (3.11 in.))
Minimum display increment
DMS
1''/5''/10''
DEG
Trimble M3 3"DR: 0.0002°, 0001°, 0.005°
Trimble M3 5"DR: 0.0005°, 0001°, 0.005°
400G
Trimble M3 3"DR: 0.2mg / 1mg / 5mg
Trimble M3 5"DR: 0.5mg / 1mg / 5mg
MIL6400
0.01M / 0.1M / 0.5M
DIN18723 accuracy
Trimble M3 3"DR: 3"/ 1.0 mgon
Trimble M3 5"DR: 5"/ 1.5 mgon
Dual-axis tilt sensor
C.16
Method
Liquid-electric detection
Compensation range
±3'
Clamps/tangent screws
C.17
Type
Coaxial tangent/clamp knobs
Range
±3.5°
Type
Detachable
Tribrach
C.18
Trimble M3 Total Station User Guide
147
C
Specifications
Level vial sensitivity
C.19
Plate level vial
30'' / 2 mm
Circular level vial
10' / 2 mm
Optical plummet
C.20
Image
Erect
Magnification
3×
Field of view
5°
Focusing range
0.5 m (1.6 ft) to infinity
Display and keypad
C.21
Display type
Graphical LCD
Resolution
128 × 64
Display illumination
Backlight
Keys
25
Supplied on
face-1 side (face-2 side is optional)
Connections in the base of instrument
C.22
Communications
Type
RS-232C
Maximum baud rate
38400 bps asynchronous
External power supply
input voltage
7.2 V through 11 V DC
Battery pack BC-65
C.23
Output voltage
7.2 V DC rechargeable
Continuous operation time
Continuous distance/angle measurement
6.5 hours (PR mode)
7.0 hours (DR mode)
Distance/angle measurement every 30 seconds 15 hours (PR mode)
16 hours (DR mode)
Continuous angle measurement
27 hours (both)
Note – Tested at 25 °C (normal temperature). Operation times may vary depending on the
condition and deterioration of the battery.
1 48
Trimble M3 Total Station User Guide
Specifications
C
Environmental performance
C.24
Operating temperature range
–20 °C through +50 °C
(–4 °F through +122 °F)
Storage temperature range
–25 °C through +60 °C
(–13 °F through +140 °F)
Dimensions
C.25
Main unit
168 mm W × 173 mm D × 347 mm H
(6.6 inch W x 6.8 inch D x 13.7 inch H)
Carrying case
470 mm W × 350 mm D × 231 mm H
(18.5 inch W x 13.8 inch D x 9.1 inch H)
Main unit
5.0 kg (11.02 lbs), approx. (including tribrach)
Battery BC-65
0.4 kg (0.88 lbs), approx.
Carrying case
3.2 kg (7.05 lbs), approx.
Quick charger Q-75U/E
0.45 kg (0.99 lbs)
Weight
C.26
Trimble M3 Total Station User Guide
149
C
1 50
Specifications
Trimble M3 Total Station User Guide
Glossary
This section explains the softkeys and some of the terms used in this manual.
.27
Softkey glossary
The following softkeys are used in the software.
?A
Search a point by address.
?C
Search a point by point code.
?P
Search a point by point number/name.
?↓
Search for another point with the same condition.
A=P
Replace point A with point P.
A=S
Define point A as the station point (S).
Add
Add an item ( for example a point name or number).
A-P
Proceed with the radial connecting distance function.
Az
Input the azimuth value.
B=S
Define point B as the station point (S).
BeaDist
Open the bearing distance screen.
c/i
Set the angle adjustment
CHCK
Adjust C and I.
C-no / C-Yes
Turn the compensator adjustment on and off.
Comp
Set the compensator adjustment.
CRAT
Create a job.
Del
Delete data lines.
Disp
Open a view data screen.
DISP
Change the display between Z, h, and w.
ECC
Open the eccentric measurement screen.
Edit
Enables you to edit data fields.
HA=0
Set or reset the horizontal angle to zero.
hSet
Input offset h.
Trimble M3 Total Station User Guide
1 51
Glossary
I-ft
The unit is currently set to US-feet. Press the softkey to set the unit to
international feet.
ih
Set the instrument height.
ih/Zs
Set the instrument height and station-Z coordinate.
Inp
Open an input screen, for example to input coordinate data.
Input
Input data.
Int
Open the set interface screen.
INTS
Open the intersection function menu.
Job
Open the job list.
Layer
Add a layer ( for example to a point name list).
List
Open the point name or point code list.
m
The unit is currently set to international feet. Press the softkey to set the unit to
meters.
Open the scale edit screen.
More
Add more points.
o.k.
Confirm changed or existing settings or input.
old
Retain old (existing) values.
Om
Orientation unknown.
P=S
Define point P as the station point (S).
P-P
Proceed with the polygonal connecting distance function.
Rept
Return to the observation screen.
Reset
Reboots the program to restart the instrument.
Search
Search for a defined address.
Sleep
Initiates power-saving mode.
Stack
Open the point name or point code stack to use previously input values.
Stop
Stop measurement.
Test
Open a test screen.
th
Set the target height.
Set the reflector height.
1 52
Trimble M3 Total Station User Guide
Glossary
th/ih
Set or change the target height/instrument height.
V%
Percentage grade between two points.
V-ft
The unit is currently set to meters. Press the softkey to set the unit to US-feet.
xSet
Input offset x.
XY
Input XY coordinates.
y
Input offset y.
Z
Set the Z coordinate.
.28
Glossary of terms
This glossary describes surveying terms used in the manual.
2D observation
Two-dimensional observation, X and Y.
3D observation
Three-dimensional observation, X, Y, and Z.
accuracy
The closeness of a measurement to the actual (true) value of the quantity being
measured.
adjusted values
Values derived from observed data (measurement) by applying a process of
eliminating errors in that data in a network adjustment.
adjustment
The process of determining and applying corrections to observations for the
purpose of reducing errors in a network adjustment.
algebraic sign
The sign (+ or -) associated with a value that shows whether it is a positive or
negative number.
algorithm
A set of rules for solving a problem in a finite number of steps
alidade
In this manual, alidade refers to the housing part of the instrument. It includes die
cast body part, H/V encorders, optical plummet, circular/plate levels, display and
keyboard, and H/V tangent screw and clamp.
The EDM part is independent from the alidade part.
ambient temperature
The current overall temperature.
angles and distance
Conventional measurement of horizontal and vertical angles and a slope distance.
attribute value
A particular value for a feature, chosen from the domain of an attribute. For
example: surface type is an attribute; bitumen, gravel, and concrete are domains;
and gravel is an attribute value.
axis
One of the reference lines of a coordinate system.
azimuth
The horizontal direction reckoned clockwise from the meridian (north) plane.
Trimble M3 Total Station User Guide
1 53
Glossary
backsight
Point with known coordinates or known azimuth from the instrument point that
is used to orient the instrument during station setup.
baseline
The position of a point relative to another point.
baud
Used to describe serial communications data transfer speed from one binary
digital device to another. Baud rate is generally one bit per second.
bearing
The angular value defining the direction of a line, based on the local datum used in
the survey.
benchmark point
A survey mark made on a monument having a known location and elevation,
serving as a reference point for surveying.
bubble level
See circular level.
calibrate (equipment)
Adjustments made to the incoming raw decoded data values. For example,
applying an orientation correction to the heading data
calibrate (local site
adjustment)
A method of calculating local site coordinates based on ECEF Cartesian
coordinates.
checksum
A method for checking the integrity of transmitted data. A checksum is an integer
value computed from the data string.
circular level
A spirit level with the inside surface of its upper part ground spherical to form a
circular bubble, and with graduations consisting of concentric circles, for
application where high precision is not required.
compensator
A sensor mounted on the alidade aligned with the horizontal axis and the sighting
axis internally. It detects the angular error and returns to the system to make
necessary corrections.
component
One of the three surveying observations used to define a three-dimensional
baseline between two control points. The same baseline can be defined by
azimuth, delta height, and distance (in ellipsoid coordinates); by delta X, delta Y,
and delta Z (in Earth-Centered Cartesian coordinates); and by delta north, delta
east, and delta up (in local plane coordinates).
control point / control
station
A monumented point to which coordinates have been, or are being, assigned by
the use of surveying observations.
coordinate system
A mathematically defined method for specifying the locations of points. Distances
or angles from suitable references located the points within the system.
coordinates
A set of numbers used in specifying the location of a point.
correction
Changes to the measured slope distance or vertical angle to correct for
atmospheric conditions and the curvature of the earth.
1 54
Trimble M3 Total Station User Guide
Glossary
DDDMMmmm
A format for entering angles or latitudes and longitude values. With this option
selected the values are entered as degrees, minutes, and decimal minutes. For
example, 45°21.457' is entered as 45.21457. Southern latitudes and western
longitudes are entered as negatives.
DDDMMSSsss
A format for entering angles or latitudes and longitude values. With this option
selected the values are entered as degrees, minutes, seconds and decimal seconds.
For example, 45°21'45.7" is entered as 45 21 457. Southern latitudes and western
longitudes are entered as negatives.
delta elevation
The difference in elevation between two points.
delta N, delta E, delta U
Coordinate differences expressed in a Local Geodetic Horizon coordinate system.
delta X, delta Y, delta Z
Coordinate differences expressed in the earth-centered Cartesian coordinate
system.
direct reflex (DR)
The measurement mode for non-prism measurement.
direction
The angle between a line and an arbitrarily chosen reference line. When the
reference line is north or south and the angle is measured east or west, the
direction is called a bearing. When the reference line is south and the angle is
clockwise, the direction is called an azimuth
distance
The (changing) amount of separation between any two points. For example, as
someone moves toward a point, the distance changes.
eccentric measurement
When the target point cannot be measured directly from the station point, you can
use some functions in the "eccentric measurement" program to find a way to
calculate the target point based on the result from alternative measurements.
EDM
Electronic Distance Measurement (telescope part of the instrument).
elevation
The vertical distance from a datum, generally mean sea level, to a point or object
on the earth’s surface. The terms “elevation” and “altitude” have sometimes been
used synonymously, but in modern surveying practice the term “elevation” is
preferred to indicate heights on the earth’s surface whereas “altitude” is used to
indicate the heights of points in space above the earth’s surface.
error
The difference between the measured value of a quantity and its true value.
Surveying errors are generally divided into three categories: blunders, systematic
errors, and random errors. Least squares analysis is used to detect and eliminate
blunders and systematic errors, and least squares adjustment is used to measure
and properly distribute random error.
h
Height.
HA
Horizontal angle.
HD
See horizontal distance.
horizontal
A plane perpendicular to the plumbline at the point of consideration or origin.
Trimble M3 Total Station User Guide
1 55
Glossary
horizontal distance
The distance between two points, computed horizontally from the elevation of
either point.
input mode
Data received by observation and measurement, or manual input.
instrument height (ih)
1) The height of the center of the telescope (horizontal axis) above the ground or
station mark.
2) The height of the line of sight of the leveling instrument above the adopted
datum.
intersection
A series of calculation functions to define new points by using a combination of
observations.
known station
One of the methods to set up a station in the field. It uses a known coordinate
point as the station point. The backsight point to define the orientation can be an
angle point or a point with coordinates.
M5 format
The original Zeiss M5 data format is the common standard for all former Elta
surveying systems and current Trimble 3600 and M3 systems.
M5“ refers to the five measuring data blocks per data line:
All 5 data blocks are preceded by a type identifier. The 3 numerical data blocks
have a standard layout comprising 14 digits. In addition to the decimal point and
sign, they accept numeric values with the specified number of decimal places.
The information block is defined by 27 characters. It is used for point
identification (PI) and text information (TI e.g.).
measure topo
A topographic survey which has for its major purposes the determination of the
configuration (relief) of the surface of the earth (ground) and the location of
natural and man-made objects thereon.
MEM-Periph
Downloading internal memory to an office computer.
NiMH
Abbreviation for Nickel-MetalHydride, the material used in some battery packs.
Unlike NiCad batteries, NiMH batteries do not use heavy metals that may have
toxic effects. In addition, they can store up to 50% more power than NiCad
batteries and do not suffer from memory effects.
polygonal connecting
distance
A function to calculate the horizontal distance, vertical difference and slope
distance between two points. "Polygonal connecting" uses the latest two points for
calculation.
prism constant
A constant value subtracts from the measured distance when you measure to the
prism. The value is unique to each prism manufacture.
prism mode (PR)
The measurement mode for prism measurement.
radial connecting
distance
A function to calculate the horizontal distance, vertical difference and slope
distance between two points. "Radial connecting" always uses the first measured
point as the base point for calculation.
1 56
Trimble M3 Total Station User Guide
Glossary
recording mode
In the Settings Interface menu, recording mode can be set as [ALL] or [Confirm].
When you set recording mode to [ALL], press [MEAS/ENT] takes a measurement and
records the point with the default point number/code by one key press.
When you set recording mode to [Confirm], the program will show you the recording
contents before it returns to the observation screen.
Recording settings can be set to [Yes] or [No].
If the recording settings are set to [Yes], a series of observation condition settings
will be recorded whenever you reboot the program. See Configuring data
recording and external communication settings, page 38.
reflector
The target (usually refers to a prism).
reflectorless
Refers to direct-reflex mode.
regional configuration
presets
Three regional configuration presets are recorded on the Trimble M3 total station.
When you first start using the instrument, and you have selected the language, the
REGIONAL CONFIGURATION screen appears from which you can select a
region. See Changing regional configuration presets, page 32.
remote object
Heights of inaccessible points are determined by measuring SD, V to an accessible
point in the vertical line. See Remote object height, page 100.
resection
One of the methods to set up the station. By measuring to two or more known
points, the program will calculate the station coordinate and its orientation.
residuals
The indicator for the observation accuracy and reliability in resection result. If this
is small enough, you can judge the new station setup is successfully done.
reticle
A system of wires, hairs, threads, etched lines, or the like, placed in a telescope
perpendicular to its axis and at its principal focus, to define the line of sight of the
telescope, to permit specific pointings to be made on a target or signal, or readings
to be made on a rod or scale.
RS-232
This was originally a nine-wire interface standard for teletype machines from the
Electronics Industry Association. It is the standard for computer serial-port
transfers
scale
A multiplier used on coordinate and other linear variables, such as for map
projections and transformations.
scale factor
A map projection parameter used to convert ellipsoid distances to projection
(grid) distances, and vice versa.
SD
Slope distance.
sea-level correction
One of the coordinate conversion corrections referring to the sea-level. You can
set it to ON or OFF. See Configuring error corrections, page 40.
spatial eccentricity
One of the eccentricity application function. It calculates the point by using the
input spatial distance Ts. See Eccentric measurement, page 85.
Trimble M3 Total Station User Guide
1 57
Glossary
stakeout
An application function to place the pin to the designed coordinate in the field.
Also referred to as the set-out function.
station
Instrument position.
target height
Height of the target.
target set
Combination of target height and measure mode.
targeting
The distinctive marking of a ground point with material of any kind, placed in a
symmetrical contrasting pattern about the point to facilitate the identification
and precise recovery of that point on an aerial photograph.
temperature correction
An amount added algebraically to a measurement to account for length changes
due to thermal variance from standard conditions.
topo
See topographic.
topographic
The features of the surface of the earth considered collectively as to form. A single
feature, such as a mountain or valley, is termed a “topographic feature.”
tribrach
The three-arm base of a surveying instrument which carries the foot-screws used
in leveling the instrument.
VA
Vertical angle.
X, Y, or Z
An expression for coordinates, with separate meanings for EC Cartesian and
rectangular coordinates. In the EC Cartesian system, X refers to the (direction of
the) coordinate axis running from the system origin to the Greenwich Meridian, Y
to the axis running from the origin through the 90-degree east longitude meridian,
and Z to the polar ice cap. In rectangular coordinate systems, X refers to the eastwest axis, Y to the north-south axis, and Z to the height axis.
XON/XOFF
Data transmission protocol.
zenith
The point of the sky directly above the observer’s head.
zenith angle
An angle measured from a vertical reference. Zero degrees is a vertical line
pointing up, 90 degrees is horizontal, and 180 degrees is straight down.
1 58
Trimble M3 Total Station User Guide