1
REPAIR SERVICE
REQUIRED ITEMS FOR COMPLETION
Repair service is available anytime.
• After the 90 day warranty, you can still have your Axis
repaired for a small charge by the experts at DuraTrax’s
authorized repair facility, Hobby Services, at the address
listed on the front page of this manual.
To operate the Axis these items are required:
•
•
•
•
•
•
Glow plug starter (Hobbico Hot-Shot 2 -HCAP2520).
Fuel bottle (DuraTrax Kwik-Pit Bottle - DTXP0125)
Fuel (DuraTrax Red Alert fuel - DTXP0520)
Air Filter Oil
Glow plug wrench (DTXR1170)
It is also helpful to have a couple of extra glow plugs
on hand (O.S. #A3 plug - OSMG2690)
• Hobby knife (HCAR0105), #11 blades (HCAR0211)
To speed up the repair process, please follow the
instructions listed below.
1. Under most circumstances return the ENTIRE system:
buggy and radio. The exception would be sending in a
Stress-Tech part. See the instructions under Stress-Tech
Guarantee.
2. Make sure the transmitter is turned off, all batteries are
removed and fuel is drained from the tank.
3. Send written instructions which include: a list of all items
returned, a THOROUGH explanation of the problem, the
service needed and your phone number during the day. If
you expect the repair to be covered under warranty, be
sure to include a proof of date of purchase (your store
receipt or purchase invoice).
4. Also be sure to include your full return address.
SPECIFICATION & DESCRIPTION CHANGES
All pictures, descriptions and specifications found in this
instruction manual are subject to change without notice.
DuraTrax maintains no responsibility for inadvertent errors
in this manual.
(All of these items are available in a Nitro Starter Pack
from DuraTrax - DTXP0200).
For the Pre-Built version of the Axis, you will also need:
• 2-channel radio with (1) standard servo and (1) high
torque (70+ oz./in.) servo (for steering).
• (12) “AA” batteries - (4) for the receiver and (8) for the
transmitter.
• Small bottle of thread locking compound (GPMR6060).
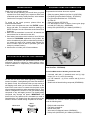
SCREW INFORMATION
Do not use too much force when tightening self-tapping
screws into plastic. Overtightening will cause the threads in
the plastic to strip. We recommend that you stop turning a
self-tapping screw when you feel some resistance as the
head of the screw comes in contact with the plastic. Avoid
using powered screwdrivers when assembling this kit. They
tend to overtighten the screws. Do not use thread locking
compound on any self-tapping screws. The thread locking
compound may damage the plastic. IMPORTANT: Use
thread lock on any fastener that is threaded into metal or
fastened with a nut. Vibration from the engine will cause the
screws to loosen if thread locking compound is not used.
To assemble the Pre-built version (DTXC0070), you will
need the following tools:
M3x14
Self-Tapping
Screw
M3x14 Screw
3mm
14mm
TOOLS YOU WILL NEED
•
•
•
•
•
3mm
14mm
3
Phillips head screwdriver
Flat blade screwdriver
Needle-nose pliers
Wire cutters or diagonal cutters (HCAR0630)
Hobby knife (HCAR0105), #11 blades (HCAR0211)