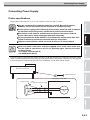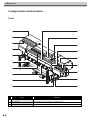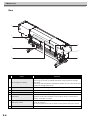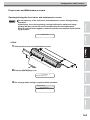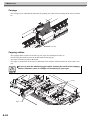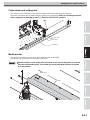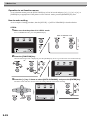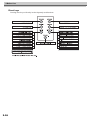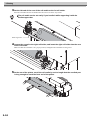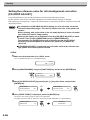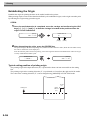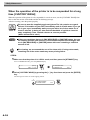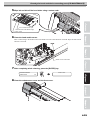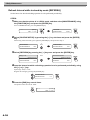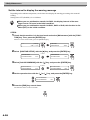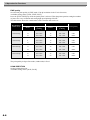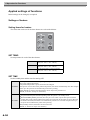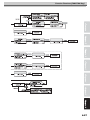
1
COLOR INKJET PRINTER OPERATION MANUAL This Operation Manual is usable for the firmware version 7.50 and later. MIMAKI ENGINEERING CO., LTD. URL: http://eng.mimaki.co.jp/ D201515-21 Foreword Congratulations on your purchase of MIMAKI color ink jet printer “JV5-130S/160S” . The JV5-130S/160S is a color ink-jet printer for high quality printing with solvent ink (4-color, 6-color, and 7-color) or water-based ink (4-color, 6-color, and 7-color). How to read this Operation Manual The following documents are attached to JV5-130S/160S: Operation Manual (this document) Explains how to operate JV5-130S/160S. Read this Operation Manual carefully and make the most effective use of your printer. Request for daily care (separate volume) Explains how to perform daily maintenance of JV5-130S/160S. CAUTION DISCLAIMER OF WARRANTY THIS LIMITED WARRANTY OF MIMAKI SHALL BE THE SOLE AND EXCLUSIVE WARRANTY AND IS IN LIEU OF ALL OTHER WARRANTIES, EXPRESS OR IMPLIED, INCLUDING, BUT NOT LIMITED TO, ANY IMPLIED WARRANTY OF MERCHANTABILITY OR FITNESS, AND MIMAKI NEITHER ASSUMES NOR AUTHORIZES DEALER TO ASSUME FOR IT ANY OTHER OBLIGATION OR LIABILITY OR MAKE ANY OTHER WARRANTY OR MAKE ANY OTHER WARRANTY IN CONNECTION WITH ANY PRODUCT WITHOUT MIMAKI’S PRIOR WRITTEN CONSENT. IN NO EVENT SHALL MIMAKI BE LIABLE FOR SPECIAL, INCIDENTAL OR CONSEQUENTIAL DAMAGES OR FOR LOSS OF PROFITS OF DEALER OR CUSTOMERS OF ANY PRODUCT. Requests This Operation manual has been carefully prepared for your easy understanding. However, please do not hesitate to contact a distributor in your district or our office if you have any inquiry. Description contained in this Operation manual are subject to change without notice for improvement. It is also necessary to keep this Operation manual on hand. In the case where this Operation manual should be illegible due to destruction or lost by fire or breakage, purchase another copy of the Operation manual from our office. Generally, names and designations referred to in this Operation manual are trade marks or registered trade marks of the manufacturers or suppliers. You can also download the latest manual from our website. Reproduction of this manual is strictly prohibited. All Rights Reserved. Copyright © 2014 MIMAKI ENGINEERING Co., Ltd. Not for use in a computer room as defined in the Standard for Protection Of Electronic Computer/Data Processing Equipment, ANSI/NFPA 75 National Devision. FCC Statement (USA) This equipment has been tested and found to comply with the limits for a Class A digital device, pursuant to Part 15 of the FCC Rules. These limits are designed to provide reasonable protection against harmful interference when the equipment is operated in a commercial environment. This equipment generates, uses and can radiate radio frequency energy and, if not installed and used in accordance with the Operation manual, may cause harmful interference to radio communications. Operation of this equipment in a residential area is likely to cause harmful interference in which case the user will be required to correct the interference at his own expense. In the case where MIMAKI-recommended cable is not used for connection of this device, limits provided by FCC rules can be exceeded. To prevent this, use of MIMAKI-recommended cable is essential for the connection of this printer. Interference to televisions and radios The product described in this manual generates high frequency when operating. The product can interfere with radios and televisions if set up or commissioned under improper conditions. The product is not guaranteed against any damage to specific-purpose radio and televisions. The product’s interference with your radio or television will be checked by turning on/off the power switch of the product. In the event that the product is the cause of interference, try to eliminate it by taking one of the following corrective measures or taking some of them in combination. Change the orientation of the antenna of the television set or radio to find a position without reception difficulty. Separate the television set or radio from this product. Plug the power cord of this product into an outlet which is isolated from power circuits connected to the television set or radio. About media Please follow the local regulations to dispose of roll sheets or other media. ii Structure of this Operation Manual This manual consists of the following six chapters. TABLE OF CONTENTS Shows the contents of this manual. CHAPTER 1 Safety Precautions Describes the precautions to be taken for safe use of the printer. CHAPTER 2 Before Use Describes the names of parts and how to use the operation panel. CHAPTER 3 Printing Describes a series of operations and settings, ranging from power-on to end of printing. CHAPTER 4 Daily Care Describes the recovery procedure from ink clogging and the cleaning procedure for the printer. CHAPTER 5 In Case of Trouble Describes the actions to be taken when the printer develops any trouble. CHAPTER 6 Operation for Functions Describes the operating procedure for major functions, showing sample messages on the display. iii iv TABLE OF CONTENTS CAUTION FCC Statement (USA)........................................................................................ ii Interference to televisions and radios ......................................................... ii About media................................................................................................ ii Structure of this Operation Manual ................................................................ iii CHAPTER 1 Safety Precautions Checking the accessories .............................................................................1-2 Dry fan unit Box .......................................................................................1-3 Features...........................................................................................................1-4 Symbols...........................................................................................................1-7 Notes on Installation ......................................................................................1-8 Where to install the printer .......................................................................1-8 Notes on Location ....................................................................................1-9 Moving the printer ..................................................................................1-10 Connecting Power Supply ...........................................................................1-11 Printer specifications..............................................................................1-11 Warning for Use............................................................................................1-12 Precautions in Use.................................................................................1-13 CAUTIONS and NOTES ........................................................................1-14 Types of media that can be used...........................................................1-16 Warning labels ..............................................................................................1-17 Basic specifications .....................................................................................1-18 Specifications for ink ..............................................................................1-20 Notes on USB 2.0 Interface ...................................................................1-22 CHAPTER 2 Before Use Configurations and Functions ......................................................................2-2 Front.........................................................................................................2-2 Rear .........................................................................................................2-4 Front cover and Maintenance covers.......................................................2-5 Relationships between ink station and head row.....................................2-6 Cartridge control ......................................................................................2-8 v Carriage .................................................................................................2-10 Capping station ......................................................................................2-10 Cutter blade and cutting line ..................................................................2-11 Media sensor .........................................................................................2-11 Pinch rollers and Feed rollers ................................................................2-12 Heater ....................................................................................................2-13 Operation Panel ............................................................................................2-14 Display ...................................................................................................2-15 How to read the display .........................................................................2-15 How to read the LED indications............................................................2-17 How to use the keys...............................................................................2-18 Modes and Menu Screens ...........................................................................2-20 Modes ....................................................................................................2-20 About Function Menus.................................................................................2-21 Basic operation of a menu screen .........................................................2-21 Outline of menu hierarchy......................................................................2-24 Setting values in function menus ...........................................................2-27 CHAPTER 3 Printing Operation flow ................................................................................................3-2 Turning the power on.....................................................................................3-3 Power Switches .......................................................................................3-4 Adjusting the head gap..................................................................................3-5 How to check the head gap .....................................................................3-6 Setting the media on the printer ...................................................................3-7 Changing the angular position of the drying fan ......................................3-8 Setting roll media on the printer ...............................................................3-9 How to operate the take-up device ........................................................3-17 Setting cut sheet media on the printer ...................................................3-18 Selecting and checking printing conditions ..............................................3-20 How to select a user type.......................................................................3-20 How to check the user type....................................................................3-20 Operating the heaters ..................................................................................3-21 Turning on the power to the heaters ......................................................3-21 Checking the preset temperature and setting a temperature during printing....................................................................3-22 What is beading ? (When solvent ink is used) .......................................3-23 Temperature adjustment (When solvent ink is used).............................3-24 In case of heater trouble ........................................................................3-25 vi Setting the reference value for dot misalignment correction [PG DROP ADJUST.] ....................................................................................3-26 Checking for nozzle clogging, and unclogging nozzles...........................3-28 Printing a test pattern (test printing).......................................................3-28 Relationship between head row and test pattern...................................3-29 If the printed pattern is abnormal (Cleaning)..........................................3-29 If nozzles cannot be unclogged [FILL UP INK] ......................................3-31 Correcting the media feed rate [MEDIA COMP.]........................................3-33 If dots are not in alignment [DROP.POScorrect] .......................................3-35 Effective Plotting Area .................................................................................3-37 Establishing the Origin ................................................................................3-38 Printing an image .........................................................................................3-39 Starting the printing operation................................................................3-39 Interrupting the printing operation ..........................................................3-40 Cutting the media after completion of printing .......................................3-41 Automatic cleaning.................................................................................3-43 Maintenance while Printing (When sublimation transfer ink is used).....3-45 Display of [INK NEAR END] or [INK END] ..................................................3-48 Indication of remaining amount of ink for each cartridge .......................3-48 Change the operation condition of the ambient temperature ..................3-51 Extension of Ink Expiry Month ....................................................................3-53 When a cartridge extended the expiry month is set...............................3-54 When an ink expiry month is extended ..................................................3-54 Switch Setting of Ink Supply Path ..............................................................3-55 When both ink cartridge and MBIS1 are used .......................................3-56 Turning the power off...................................................................................3-57 CHAPTER 4 Daily Care Routine Maintenance .....................................................................................4-2 Precautions in cleaning............................................................................4-2 Notes on cleaning solution.......................................................................4-3 Cleaning exterior surfaces .......................................................................4-3 Cleaning the platen ..................................................................................4-3 Cleaning the media sensor ......................................................................4-4 Cleaning the media press ........................................................................4-4 Opening the maintenance cover ..............................................................4-5 Cleaning the wiper and ink caps [CARRIAGE OUT]....................................4-7 Cleaning the nozzle [NOZZLE WASH] ........................................................4-10 Cleaning the ink discharge passage [DISWAY WASH].............................4-14 vii When the operation of the printer is to be suspended for a long time [CUSTODY WASH]........................................................................................4-16 Before executing the [PUMP TUBE WASH] ...............................................4-20 PUMP tube cleaning .....................................................................................4-23 Wiper cleaning ..............................................................................................4-25 Cleaning the heads and their surrounding parts [CR.MAINTENANCE] ....................................................................................4-28 Preventing nozzle clogging while power is off [SLEEP SET UP].............4-31 Refreshing interval during sleep mode [REFERSH] ..............................4-31 Tube cleaning interval during sleep mode [TUBE WASH].....................4-32 Cleaning interval during sleep mode [CLEANING] ................................4-33 Setting periodical operations in stand-by mode [ROUTINE SETUP] ........................................................................................4-34 Preventing the bedewing of ink on the nozzle surface. [ROUTINE WIPING] (When solvent ink is used.) ..................................4-34 Refresh Interval while in stand-by mode [REFERSH]............................4-36 Tube cleaning interval while in stand-by mode [TUBE WASH]..............4-37 Cleaning interval while in stand-by mode [CLEANING] .........................4-39 Other maintenance functions......................................................................4-41 Changing warning time of wiper replacement [WIPER LEVEL].............4-41 Changing warning time of flushing BOX cleaning or replacement [BOX EXCHANGE LV]...........................................................................4-43 When the waste ink tank is full ...................................................................4-44 Cleaning of Flushing Box ............................................................................4-46 Maintenance when using sublimation transfer ink ...................................4-49 Replacing F-Box filters...........................................................................4-49 Cleaning the flushing tray ......................................................................4-51 Changing the time for issuing warning of flushing Box filter replacement. [FILTER EXC. LV.].................................................................................4-53 To use sublimation transfer ink with more stable quality ........................4-55 Set the interval to display the warning message....................................4-56 Replacing the wiper [WIPER EXCHANGE] .................................................4-57 Replacing the cutter blade...........................................................................4-59 CHAPTER 5 In Case of Trouble Before taking a phenomenon as a failure ....................................................5-2 Power does not turn on............................................................................5-2 The printer cannot perform printing..........................................................5-2 Media jamming arises / media is soiled ...................................................5-3 [HEAT] or [CONSTANT] LED does not light up .......................................5-3 viii If image quality is poor ..................................................................................5-4 White lines / blur (sprayed ink) / dark stripes (in the moving direction of the heads)......................................................5-4 Characters are double- or triple-printed in the media feed direction........5-4 Disagreement in print positions between outward trip and homeward trip (jet deviation) ...........................................................................................5-5 There is staggered print or nozzle missing ..............................................5-5 Ink drops falling on media during printing (ink drops falling)....................5-5 If nozzles are still clogged even after head cleaning ...............................5-6 When nozzle clogging is not corrected [HEAD SELECT] ......................5-10 Ink cartridge trouble.....................................................................................5-12 Displaying the description of ink cartridge trouble .................................5-12 If ERROR 202 [DEVICE CONSTRUCTION] is displayed......................5-13 Troubles for which error messages are displayed....................................5-14 Checking error history [ERROR HISTORY]...........................................5-14 Warning messages ................................................................................5-15 Error messages......................................................................................5-18 CHAPTER 6 Operation for Functions Functions Invoked by [FUNCTION] Key .......................................................6-2 Invoking SET UP functions............................................................................6-2 Registering printing conditions in a lump (type registration) ....................6-2 List of functions ........................................................................................6-2 Outline of the setup functions ..................................................................6-4 Invoking MAINTENANCE functions ............................................................6-12 List of functions ......................................................................................6-12 Setting a maintenance function..............................................................6-13 Make setting of the media remaining amount display function [MEDIA RESIDUAL]...............................................................................6-14 Moving the printer safely [BeforeMovingIt.]............................................6-15 Invoking MACHINE SETUP functions.........................................................6-17 List of functions ......................................................................................6-17 Functions of [INFORMATION] key.........................................................6-18 Setting a MACHINE SETUP ..................................................................6-18 Outline of the machine setup functions..................................................6-19 Invoking NCU functions...............................................................................6-26 List of functions ......................................................................................6-26 Setting a NCU functions.........................................................................6-26 Outline of the NCU functions .................................................................6-27 DISPLAY setting ...........................................................................................6-29 ix Applied settings of functions ......................................................................6-30 Settings of heaters .................................................................................6-30 Detailed settings of heaters ...................................................................6-31 How to operate function menus..................................................................6-33 Functions related to the cutter....................................................................6-34 When the media is to be cut at a desired position .................................6-34 When [] key is allocated to direct cut key ...........................................6-34 Functions related to print quality................................................................6-35 Correcting media feed during printing [FEED COMPENSATION.] ........6-35 Functions related to ink ...............................................................................6-36 When ink sets (4-color, 6-color or 7-color) are to be changed..............6-36 Function Flowchart [BOOT].........................................................................6-38 Function Flowchart [LOCAL mode] ............................................................6-40 Function Flowchart [REMOTE mode] .........................................................6-44 Function Flowchart [FUNCTION Key].........................................................6-46 x CHAPTER 1 Safety Precautions This chapter describes the precautions to be taken for safe use of the printer. Checking the accessories ......................................................1-2 Features .................................................................................1-4 Symbols .................................................................................1-7 Notes on Installation ..............................................................1-8 Connecting Power Supply ....................................................1-11 Warning for Use ...................................................................1-12 Warning labels .....................................................................1-17 Basic specifications ..............................................................1-18 1 Safety Precautions Checking the accessories The articles illustrated below are supplied with your printer as accessories. Check them for correct quantities and appearance. If you find any problems, please contact your distributor. Wire management mount (used with cable tie) : 4 Binding bands : 4 Hose band : 4 Connecting duct : 1 Software CD-ROM (for JV5) : 1 Operation Manual (JV5 series) : 1 Protective glasses : 1 Request for daily care : 1 Power cable (6m) : 1 Phillips screwdriver : 1 Adjustable end wrench 200 MM : 1 Hexagonal wrench : 1 Screw : 6 Screw : 4 P4x12SMW (Black) 4 pcs. (for waste ink tank bracket assembly) 2 pcs. (for waste ink tray) B4x10 (for wire management mount) Waste ink tank 4L : 1 1-2 Waste ink tray : 1 Checking the accessories Waste ink tank bracket assembly : 1 Duct : 2 Duct hose : 2 Solvent pre-fill up solution cartridge (200 cc) : 8 Accessories Box : 1 SPC-0475 (Supplied only for solvent ink use) Cleaning Solution 200 for Solvent Ink kit : 1 SPC-0369 (Supplied only for solvent ink use) Dry fan unit Box Roll screen 160 (130) : 1 Dry fan assembly 160 (130) : 1 Open and close cover assembly 160 (130) : 1 Dry fan unit Box :1 1-3 1 Safety Precautions Features The features of the printer are described below. Understanding them together with the operating instructions given in this manual will help you use the machine properly. A new generation of print heads arranged in 4 staggered rows realize high-resolution super-high-speed printing Newly developed print heads each of which has 1,440 nozzles (180 nozzle x 8 rows) are employed and 1inch heads are arranged in four rows staggered from each other, realizing 4-inch print head width. Variable dot technology are employed to enable high-speed printing. The double cartridge automatic switching function and the high-capacity ink cartridges of 1760 cc for one color release the user from worrying about running out of ink during printing The function for automatic switching between two ink cartridges integrated as one unit and the ink cartridge capacity of a maximum of 1760 cc for one color (440 cc x 4) permit the operator to perform continuous printing for an extended period of time without worrying about running out of ink. ES3 ink - free of stink and safe/ HS ink and SS21 ink - best suited for print for outdoor use/ Eco-HS1 ink - eco-friendly are available (When solvent ink is used) ES3 ink requires no special deodorizing equipment, does not emit irritating smell that could generally be emitted from solvent, so that it can be used without annoying any designer or operator who even dislikes the smell of ink. It is a worker-friendly and ecologically designed ink. HS ink is best suited for print for outdoor use, realizes excellent abrasion resistance and high density. This ink requires local exhaust ventilation, but does not require any special handling or license that is any of the handling and license which are specified in Japan's Ordinance on Prevention of Organic Solvents Poisoning. SS21 ink is best suited for outdoor sign, realizing excellent water resistance and weather resistance. This ink does not require any special handling or license that is any of the handling and license which are specified in JapanÅfs Ordinance on Prevention of Organic Solvents Poisoning. Eco-HS1 ink is the safe ink that does not have environmental toxins. The effect for PVC film is reduced, and good coloration and shiny finishing can be obtained. With light black ink, tone for printing has improved. Sublimation transfer ink - high resolution, high speed printing/ Water-based pigment ink/ Eco-water-based pigment ink (Eco-PA1 ink) are available. (When water-based ink is used) Sublimation transfer ink is used to transfer the printed image the different media. Water-based pigment ink resists lighting and friction better than dye ink, and is suited for printing indoor articles such as sign displays. (advertising display) Eco-water-based pigment ink has good coloration and wide-ranged color reproduction. With light black ink, tone for printing has improved. 1-4 Features Indication of the INK Remains Since the amount of ink that remains can be checked even during operation of the printer, you can use the ink and media without waste. The large-sized post-heater permits high-speed printing Equipped with a large-sized post-heater, the machine promotes the drying of the media printed at high speed and enables the take-up. Standby mode and automatic off intelligent function are available. The printer detects the ambient temperature and controls the heaters to set their temperature best suited to the media used. Easy maintenance The automatic capping system for the heads eliminates the need of head cleaning before turning off the power. Nozzles can be unclogged by performing the cleaning function. If the printer is not in use for a prolonged period of time, it automatically performs nozzle clogging preventive operation at fixed intervals. However, the main power must be left turned on. The printer counts the time when not in use. When the power is turned on or when printing is started, the printer automatically performs head cleaning to prevent nozzle clogging. Easy-to-see display The LCD panel displays the printer setting menu on two screens, so that the display is easier to see. Since the LCD panel is provided with a backlight, the display can be clearly seen even in a dark place. The LCD panel is available in seven different languages, including English and Spanish. Convenient direct keys Use of the direct keys permits quick access to the respective various built-in functions. Printing information can be checked The print length can be displayed on the LCD panel during printing and the information of printing conditions can be checked by printing it. High-speed interface The “USB 2.0” interface allows for high-speed data reception from the computer. Take-up Device permits printing over a long length Even a long sheet of media can be used, since the take-up device interlocked with the printer winds up the printed part of the sheet during printing. A media support bar newly provided The printer is provided with a media support bar at the back. It is useful when a heavy roll of media, such as Tarpaulin, is set on the printer. 1-5 1 Safety Precautions The media feed control function ensures a constant feed rate media transport, thus realizing reliable high picture quality The printer is provided with a media encoder that permits transporting the media at a preset constant feed rate irrespective of the roll weight, thus realizing reliable high-quality printing. Lifting of the media at its both ends is prevented The use of the media press prevents the wide sheet of media from lifting at its both ends and coming in contact with the head unit. The nozzle missing automatic detection function reduces waste of media and ink that could be caused by faulty printing The printer automatically checks the printing result for nozzle missing after cleaning and during printing. And if necessary, it requires another cleaning or interruption of printing to prevent a waste of media and ink. Optimum printing is realized thanks to the media thickness automatic detection function and automatic head height adjustment mechanism The printer automatically detects the thickness of the sheet of media, and automatically adjusts the head height to ensure the specified head gap. For different thicknesses of media to be used, printing is performed with a constant head gap, and thus optimum printing is always realized. 1-6 Symbols Symbols Pictorial signs are used in this Operation Manual for safe operation and for prevention of damage to the printer. Pictorial signs and their meanings are given below. Read and fully understand before reading the text. Icon Meaning Failure to observe the instructions given with this symbol will pose an imminent danger of death or serious injury to personnel. Be sure to read and observe the instructions for proper operation. Failure to observe the instructions given with this symbol can result in death or serious injuries to personnel. Be sure to read and observe the instructions for proper operation. Failure to observe the instructions given with this symbol can result in injuries to personnel or damage to property. This symbol indicates that it is important to know of the information on proper operation of the printer. This symbol indicates that the information is helpful in proper operation of the printer. (See 1-8) Indicates the reference page for related contents. The symbol “ ” indicates that the instructions must be observed as strictly as the CAUTION instructions (including DANGER and WARNING instructions). A sign representing a precaution (the sign shown at left warns of hazardous voltage) is shown in the triangle. The symbol “ ” indicates that the action shown is prohibited. A sign representing a prohibited action (the sign shown at left prohibits disassembly) is shown in or around the circle. The symbol “ ” indicates that the action shown must be taken without fail or the instructions must be observed without fail. A sign representing a particular instruction (the sign shown at left instructs to unplug the cable from the wall outlet) is shown in the circle. 1-7 1 Safety Precautions Notes on Installation Where to install the printer 500 mm 1000 mm 500 mm JV5-130S : JV5-160S : 3860 mm 4120 mm Model Width Depth Height Gross weight (with exhaust unit) JV5-130S 2860 mm 900 mm (1050 mm) 1551 mm 292 kg max. (324 kg max.) JV5-160S 3120 mm 900 mm (1050 mm) 1551 mm 298 kg max. (333 kg max.) Working environmental temperature Use the printer in an environment of 20-35 °C to ensure reliable printing. Depending on the ambient temperature, the heater temperature may not rise to the set value. 1-8 2900 mm (3050 mm) 1000 mm Secure a suitable installation space before assembling the printer. The place of installation must have enough space for not only the printer itself but also for printing operation. Notes on Installation Notes on Location Do not locate the printer in any of the places listed below. A place exposed to direct sunlight A place where temperature or humidity varies significantly A place exposed to direct air flow from an air conditioner or the like. Use the printer under the fol- lowing environmental conditions: Operating environment: 68 to 95°F (20 to 35°C) 35 to 65% (Rh) On an inclined surface A place that vibrates Around a place where flame is used Locking the casters and fixing the printer with leveling feet Each of the casters on the stand is provided with a stopper and leveling foot. Before turning the power ON, make sure that the casters are locked and the printer body is fixed with the leveling feet. The printer body may start moving during operation if it is not fixed with the leveling feet. Fix the printer body with the leveling feet Lock position 1-9 1 Safety Precautions Moving the printer When the printer is to be moved by necessity, moving it is permitted only on the same floor where there is no steps. To move it, however, be sure to observe the following instructions: Before moving the printer, unlock the casters. When moving the printer, take care not to give a significant impact on it. After moving the printer, be sure to lock the casters again. When the printer is to be moved to any place other than on the same step-free floor, contact your distributor or a sales office of MIMAKI. If you move it by yourself, failure or damage may occur. Be sure to request your distributor or a sales office of MIMAKI to move the printer. Method of moving the printer When moving the printer, it must be held up by several people as illustrated below. Do not press the front cover (grey part of the illustration below) hard since it may break. 1-10 Connecting Power Supply Connecting Power Supply Printer specifications Single-phase 200 to 240 Vac 15 A or less (cannot be used with 100 V system) You are not allowed to install the printer by yourself. Be sure to request MIMAKI’s service personnel and an electrician to install the printer. For the power supply to the main body of the printer, electrical work is required as described below. Request an electrician to perform electrical work. Ensure that a wall outlet is available near the printer. Also ensure that the power cable can be easily unplugged whenever necessary. To prevent electrical shock hazard, it is prohibited for anyone other than electrician licensees to perform the electrical work for this printer. Take care not to miswire, which can result in a fire or an electric shock. When any power cable other than the supplied one is to be used, make sure that the cable is equivalent to one of the following types. Connect the cable as shown below. • VCT-2mm² x3 cores (600 V) • UL-AWG14x3C (600 V) For power supply connection, this printer uses the Type B plug and socket in compliance with IEC 60309. When a socket construction meeting the plug of the power cable of this printer is required, use the supplied socket and perform construction between your switchboard or wall outlet and the socket. Rear of the printer body Socket construction Socket Switchboard or wall outlet Supplied socket Cable: UL AWG14 or the equivalent 1-11 1 Safety Precautions Warning for Use WARNING Be sure to install a ventilator, if necessary, to ensure good ventilation in the room where the printer is to be operated. Be sure to use the printer with the power supply meeting the specifications. The power supply voltage of this printer is single phase 200-240 Vac, 15 A or less. (It cannot be used with 100 V system) Take care not to damage, break or work upon the power cable. If a heavy material is placed on the power cable, or if it is heated or pulled, the power cable can break, thus resulting in fire or electric shocks. The ink used for this printer contains organic solvent. Since the ink is flammable, never use flame in or around the place where the printer is used. (only when solvent is used) Avoid locating the printer in a damp environment. Do not splash water onto the machine. Use in such an environment can give rise to fire, electric shocks or breakdown of the machine. Use of the printer under an abnormal condition where it produces smoke or strange smell can result in fire or electric shocks. If such an abnormality is found, be sure to turn off the power switch immediately and unplug the socket from the printer. Check first that the machine no longer produces smoke, and then contact your distributor or a sales office of MIMAKI for repair. Never repair your printer by yourself since it is very dangerous for you to do so. Never disassemble or remodel the main unit of the printer or the ink cartridge. Disassembly or remodeling can result in an electric shock or breakdown of the machine. Take care that no dust or dirt sticks to platen heaters. Dust and dirt sticking heaters can cause fire. 1-12 Warning for Use Precautions in Use CAUTION Power supply Leave the breaker turned ON. Do not turn OFF the main power switch on the rear face. Heater Do not spill liquid on the platen as this may cause failure of the heater or firing. Do not touch platen heaters with bare hand while it is hot; otherwise, you can get burned. When the printer is to be moved, wait until the heater temperature drops adequately. As a criterion, wait at least 30 minutes after you turn off the power to the heater. Moving the printer must be limited to on the same floor where there is no steps. When the printer is to be moved to any place other than on the same step-free floor, contact your distributor or a sales office of MIMAKI. Handling of ink If you get ink in your eyes, immediately wash your eyes with a lot of clean water for at least 15 minutes. In doing so, also wash the backside of eyelids to rinse ink away completely. Then, consult a doctor as soon as possible. If anyone drinks ink by mistake, keep him or her quiet and see a doctor immediately. Do not allow him or her drink vomit. After that, contact the Poison Control Center. If you inhale a lot of vapor and feel bad, immediately move to a location where fresh air is present and then keep yourself warm and quiet. Then, consult a doctor as soon as possible. The ink contains organic solvent. If ink settles on the skin or clothes, immediately wash it off with detergent or water.(only when solvent is used) Note on maintenance When cleaning the ink-station or the heads, make sure to wear the attached goggle and gloves. Laser sensor The printer incorporates a laser sensor. The laser sensor is equivalent to the laser product of IEC CLASS 1. Do not look at the laser beam through an observation optical system such as lens, since looking at a laser beam can cause a pain in your eye or impair eyesight. Use of controls or adjustments or performance of procedures other than those specified herein may result in hazardous radiation exposure. Laser Diode 645 - 660nm, max. 10mW Maximum output : 0.86 nW 1-13 1 Safety Precautions CAUTIONS and NOTES CAUTIONS and NOTES Handling of ink cartridges Use the JV5 genuine ink. Remember that the user shall be charged for a repair to correct any damage resulting from the use of ink other than the exclusive type. The printer does not operate with any ink other than the JV5 genuine ink. Do not use the JV5 genuine ink with other printers, as doing so may cause damage to such printers. Never refill the ink cartridge with ink. Refilling the ink cartridge can cause a trouble. Remember that MIMAKI assumes no responsibility for any damage caused by the use of the ink cartridge replenished with ink. If the ink cartridge is moved from a cold place to a warm place, leave it in the room temperature for three hours or more before using it. Open the ink cartridge just before installing it in the printer. If it is opened and left for an extended period of time, normal printing performance of the printer may not be ensured. Make sure to store ink cartridges in a cold and dark place. Store ink cartridges and waste ink tank in a place that is out of the reach of children. Be sure to thoroughly consume the ink in the ink cartridge, once it is opened, within three months. If an extended period of time has passed away after opening the cartridge tank, printing quality would be poor. Neither pound the ink cartridge nor shake it violently, as doing so can cause leakage of ink. Do not touch or stain the contacts of the ink cartridge, as doing so may cause damage to the print circuit board. Waste ink is equivalent to waste oil of industrial waste. Request an industrial waste disposal company for disposal of waste ink. Front cover and lever Never open the front cover or raise the lever during printing. Opening the cover or raising the lever will abort printing. Handling of media Use media recommended by MIMAKI to ensure reliable, high-quality printing. Set the heater temperature to meet the characteristics of the media. Set the temperature of the preheater, print heater and post-heater according to the type and characteristics of the media used. Automatic temperature setting can be made on the operation panel by setting the profile on the dedicated RIP. For setting on the RIP, refer to the instruction manual for your RIP. Pay attention to the expansion and contraction of the media. Do not use media immediately after unpacking. The media can be affected by the room temperature and humidity, and thus it may expand and contract. The media have to be left in the atmosphere in which they are to be used for 30 minutes or more after unpacked. Do not use curled media. The use of curled media can not only cause a media jam but also affect print quality. Straighten the sheet of media, if significantly curled, before using it for printing. If a regular-sized coated sheet of media is rolled and stored, the coated side has to face outside. Protection of media from dust Store media in a bag. Wiping off dust accumulated on media will adversely affect the media due to static electricity. When leaving the workshop after the working hours, do not leave any media on the roll hanger. If any media is left on the roll hanger, it can get dusty. 1-14 Warning for Use CAUTIONS and NOTES Notes on maintenance It is strongly recommended to use the printer in a room that is not dusty. Set the Refresh level 2 or 3 when the printer is to be used in an unfavorable environment. (Refer to ?REFRESH (p.6-9)? ) Keep the front cover closed even when the printer is not printing. If not, dust can accumulate on the nozzles in the heads. Dust in the heads can also cause drops of ink to fall suddenly down on the media during printing. In such a case, be sure to clean up the heads. (Refer to ?Automatic cleaning (p.3-43)? ) Perform wiping (removal of dust and paper powder) of the capping station and wiper frequently. Regularly replaced parts Some parts of this printer must be replaced with a new one periodically by service personnel. Be sure to make a contract with your distributor or dealer for after-sale service to ensure a long life of your printer. 1-15 1 Safety Precautions Types of media that can be used The types of media that can be used with the printer are roll media and cut sheet media. The types and sizes of media that can be used with the printer are explained below. Recommended types of media When solvent ink is used. When water-based ink is used. Tarpaulin Photo-paper FF (Flexible Face) PET Weatherproof PVC Synthetic paper Duplex paper Sizes of media that can be used JV5-130S Roll media Maximum width 1375 mm (54.13 inch) 1630 mm (64.17 inch) Minimum width 297 mm 297 mm Maximum printing width 1365 mm 1620 mm Thickness 1.0 mm or less 1.0 mm or less Roll weight *1 38 kg or less 38 kg or less Roll outside diameter φ 200 mm or less Roll inside diameter 3 or 2 inches Side printed Side facing outward Roll end treatment The roll end is gently fixed to the core with weak-adhesive tape or weak glue for easy removal. Maximum width 1375 mm (54.13 inch) Cut sheet Minimum width 297 mm media Maximum printing width 1365 mm *1 Without deflection of the roll when it is retained at both ends. 1-16 JV5-160S 1630 mm (64.17 inch) 297 mm 1620 mm Warning labels Warning labels Warning labels are stuck on the printer body. Be sure to fully understand the warning given on the labels. If a warning label is illegible due to stains or has come off, purchase a new one from your local distributor or our office. Locations of labels Front (Reorder: No.903239) (Reorder: No.903405) (Reorder: No.903330 Only when solvent ink is used.) (Reorder: No.901549) Rear (Reorder: No.903239) (Reorder: No.903968) (Reorder: No.904130) 1-17 1 Safety Precautions Basic specifications Item Print head Method Drop-on-demand piezoelectric print heads Specification 4-heads Staggerds JV5-160S Drawing mode (scan x feed) 720 x 540dpi 540or720 x 720dpi 540 x 900dpi 540or720 x 1080dpi 720 x 1440dpi 1440 x 1440dpi Usable inks Dedicated solvent ink. ES3 ink, HS ink, SS21 ink or Eco-HS1 ink ES3 ink, HS ink, SS21 ink: 4 colors (Y,M,C,K) / 6 colors (Y,M,C,K,Lc,Lm) Eco-HS1 ink: 4 colors (Y,M,C,K) / 6 colors (Y,M,C,K,Lc,Lm)/ 7 colors (Y,M,C,K,Lk,Lc,Lm) Dedicated water-based ink Water-based pigment ink, Eco-water-based pigment ink, or sublimation transfer ink Water-based pigment ink:4 colors (Y,M,C,K) / 6 colors (Y,M,C,K,Lc,Lm) Eco-water-based pigment ink:4 colors (Y,M,C,K) / 6 colors (Y,M,C,K,Lc,Lm) / 7 colors (Y,M,C,K,Lk,Lc,Lm) Sublimation transfer ink :4 colors (Y.M.Bl.K) / 6 colors (Y,M,Bl,K,LBl,Lm) Ink supply Capacity of ink cartridge Media type Automatic switching between two ink cartridges integrated as one unit Dedicated solvent ink 6-color set of cartridges: Two 440 cc cartridges for each color, that is, 880 cc for each color (However, four 440-cc cartridges for each of magenta and cyan, that is, 1760 cc for each of them) 4-color set installed: Four 440-cc cartridges for each color, that is, 1760 cc for each color 7-color set installed: 440 cc cartridge; 2 cartridges for each color 880 cc/1 color (4 cartridges for Lk only, 1760cc or 880cc) Dedicated water-based ink 6-color set of cartridges: 440 cc or 220 cc cartridge; 2 cartridges for each color 880 cc/1 color or 440 cc/1 color ( 4 cartridges :only for M,C or M,Bl,1760cc or 880cc) 4-color set installed: 440 cc or 220 cc cartridge; 4 cartridges for each color 1760 cc/1 color or 880 cc/1 color 7-color set installed: 440 cc cartridge; 2 cartridges for each color 880 cc/1 color (4 cartridges for Lk only, 1760cc or 880cc) Dedicated solvent ink Tarpaulin, FF, PVC Dedicated water-based ink Photo-paper , Synthetic paper , Duplex paper 1365 mm 1620 mm Maximum 1375 mm (54.13 inch) 1630 mm (64.17 inch) Minimum 297 mm 297 mm Thickness 1.0 mm or less Roll outside diameter φ 200 mm or less Roll weight *1 38 kg or less Max. printing width Roll Media size Leaf media size Margin 1-18 JV5-130S Roll inside diameter 3 or 2 inches Plotting surface Side facing outward Roll end treatment The roll end is gently fixed to the core with weak-adhesive tape or weak glue for easy removal. Maximum 1375 mm (54.13 inch) 1630 mm (64.17 inch) Minimum 297 mm 297 mm Leaf media Left end and right end : 15 mm (Default) Front : 150 mm Rear : 200 mm Roll media Left end and right end : 15 mm (Default) Front : 150 mm Rear : 0 mm Basic specifications Item Distance accuracy JV5-130S JV5-160S Absolute accuracy Whichever the larger one of ± 0.3 mm or ± 0.3 % of the designated Reoroducibility Whichever the larger one of ± 0.2 mm or ± 0.1 % of the designated Perpendicularity ± 0.5 mm / 1000 mm Media skew 5 mm or less / 10 m variable Head height adjustment Can be set by user steplessly in the range of 1.5 mm to 7 mm (media thickness is automatically recognized) Cutting of media Cutting of Y direction by the head cutter, Cutting accuracy (steps) : 0.5 mm or less. Media delivery Take-up device supplied as a standard accessory (switching possible between take-up with print side inside and take-up with print side outside), which can be used only with a 3-inch core Waste ink tank Bottle type ( 4,000 cc) FULL state is detected with sensor Interface USB 2.0 Command MRL-III Noise during standby Less than 58 dB (FAST-A, Front & Rear & Left & Right 1 m) during continuous printing Less than 65 dB during discontinuous printing Less than 70 dB Nozzle check unit Laser beam type (CLASS 1 or below) Safety Standard VCCI-Class A, FCC-Class A, UL 60950, CE Marking (EMC, ), CB Report, RoHS, CLASS 1 Laser Power AC 200 - 240 V ± 10%, 50/60 Hz ± 1 Hz 15A or less Power consumption *2 3600 VA or less Recomended Environment Available temp. Humidity Weight Outside dimensions 20 °C to 35 °C 35 to 65 % Rh (No condensation) Guaranteed temp. 20 °C to 25 °C Temperature change ± 10 °C / h or less Dust Equivalent to normal office level Main unit 292 kg (324 kg *3) 298 kg (333 kg *3) Width 2860 mm 3120 mm Depth 900 mm (1050 mm *3) 900 mm (1050 mm *3) Height 1551 mm 1551 mm *1 Without deflection of the roll when it is retained at both ends. *2 Main unit and heater *3 Without front exhaust unit 1-19 1 Safety Precautions Specifications for ink Item Specifications Supply Dedicated solvent ink cartridges Water-based pigment ink cartridge Sublimation transfer ink cartridge Color Black ink cartridge Cyan ink cartridge Magenta ink cartridge Yellow ink cartridge Light cyan ink cartridge Light magenta ink cartridge (Light black ink cartridge *a) Black ink cartridge Cyan ink cartridge (Blue ink cartridge *b) Magenta ink cartridge Yellow ink cartridge Light cyan ink cartridge (Light blue ink cartridge*b) Light magenta ink cartridge (Light black ink cartridge *c) Ink capacity 220 cc / 440 cc per cartridge Shelf life Water-based pigment ink HS Ink 2 years from the date of manufacture 20 months from the date of manufac(at room temperature) ture (at room temperature) Sublimation transfer ink ES3 Ink 1 year from the date of manufacture Two year from the date of manufac(at room temperature) ture (at room temperature) Eco-water-based pigment ink Eco-HS1 Ink 2 years from the date of manufacture 14 months from the date of manufac(at room temperature) ture (at room temperature) SS21 Ink Black, Cyan, Light cyan 12 months from the date of manufacture (at room temperature) Yellow, Magenta, Light magenta 18 months from the date of manufacture (at room temperature) Within three months after opening the package Storage temperature Storage 1 to 40°C (Storage at temperature of 40°C is permitted within a month.) Transportation 1 to 60°C (Storage at temperature of 60°C is only permitted within 120 hours, and at temperature of 40°C is permitted within a month.) *a.When Eco HS1 ink is used *b.When sublimation transfer ink is used *c.When Eco-water-based pigment ink is used Do not disassemble ink cartridges or refill them with ink. Ink could freeze if kept in a cold place for an extended period. If the ink freezes, thaw it at room temperature (25°C) spending more than three hours before use. • When water-based ink is used, if the ink freezes, the quality is changed and the ink becomes unusable. Store the ink in an environment that will not freeze the ink. 1-20 Basic specifications To use Eco-HS1 ink with a good image quality Head gap (the length between media and head nozzle) is recommended to set less than 1.5mm. If printing with over 2.0mm setting, the image quality is not guaranteed for ink-splash. Recommended heater temperature for PVC sheet are PRE/PRINT 40 degree or below, AFTER 50 degree or below. Please set difference of temperature of heater temperature and the environmental temperature to less than 30 degrees. When difference of temperature was used in more than 30 degrees , the dew condensation of the ink solvent ingredient is generated on the head surface, and we cannot guarantee a image. Please do not remove the cartridge until ink was exhausted, there is the possibility that the ink may leak. When removing an ink cartridge from a printer, please do not turn an ink outlet upside down. There is possibility that ink hangs from an ink outlet. To use Eco-PA1 ink with a good image quality Head gap (the length between media and head nozzle) is recommended to set less than 2.0mm. If printing with over 2.0mm setting, the image quality is not guaranteed for printing misalignment. If printing under a high temperature (more than 30°C, set the reflesh level to "3". Print within the available temperature of this machine (20°C to 35°C). If printing under the temperature out of the range, the image quality is not guaranteed for spattering of ink droplet. When media is jammed, remove the jammed media immediately and execute cleaning. If leaving the machine for some time with the media jammed, the nozzle may be difficult to recover, or may not recover. To avoid media jam, when executing unattended operation, take care of the media such as using a cockle-resistant media, or setting a media without a lift or misalignment. For the cockled media, the image may be misaligned at bi-direction printing, and it may worsen the image quality. In this case, printing by uni-direction is recommended. 1-21 1 Safety Precautions Notes on USB 2.0 Interface Your RIP must be compatible with USB 2.0. When two or more JV5 printers are connected to one personal computer When two or more JV5 printers are connected to one personal computer, the personal computer may not recognize all the JV5 printers normally. Reconnect the unrecognized JV5 printer to another USB port, if available, and check to see if it is recognized. If the JV5 printer is not recognized even through the newly connected USB port, use USB 2.0 repeater cables available on the market. USB 2.0 repeater cables Notes on peripheral devices in USB high speed mode When a peripheral device (USB memory or USB HDD) to be operated in USB high speed mode is connected to the same personal computer that a JV5 printer is connected to, the USB device may not be recognized. When a JV5 printer is connected to the personal computer to which an externally installed USB hard disk drive is connected, the data output speed to the JV5 printer may drop. That can cause the head unit to stop temporarily at the right or left end during printing. Removing USB memory If a USB memory module is inserted in the personal computer to which a JV5 printer is connected, click “Stop” in the “Safely Remove Hardware” window by following the instructions given there first and then remove the module. Leaving a USB memory module inserted can cause [ERROR 10 COMMAND ERROR]. Copy the data onto the hard disk before outputting it for printing. 1-22 Basic specifications Notes on data output from USB memory When spool data stored on USB memory is to be output for printing, the data is transferred to the JV5 printer at a low speed. That can cause the head unit to stop temporarily at the right or left end during printing. 1-23 1 Safety Precautions 1-24 CHAPTER 2 Before Use This chapter describes the names of parts and how to use the operation panel. Configurations and Functions ................................................2-2 Operation Panel ...................................................................2-14 Modes and Menu Screens ...................................................2-20 About Function Menus .........................................................2-21 2 Before Use Configurations and Functions Front 1 11 2 12 3 13 4 14 5 15 6 16 7 17 8 18 9 10 19 Name 2-2 Function 1 Ink station Set the specified ink cartridges in the ink station. 2 Ink cartridges Each cartridge contains an ink of a particular color. 3 Cartridge LEDs The LEDs (green and red) in each slot indicate the cartridge status. Configurations and Functions Name Function 4 Maintenance cover L Open the maintenance cover L and/or maintenance cover R when doing so is required for maintenance. Even when the power switch is off, keep all covers closed. 5 Platen The printed media is sent out, sliding on the platen. Three heaters are installed inside the platen. 6 Post-heater Dries the ink on the printed media. 7 Print heater Fixes and dries the ink on the currently produced print. (Located inside the platen) 8 Front exhauster This unit consists of the drying fan to accelerate drying the ink during printing and the exhaust fan to blow out the odor of ink. 9 Clamp lever (front) Moves the pinch rollers up and down to hold or release the media. 10 Take-up device Automatically winds up the roll media printed. 11 Front cover Open this cover when media is to be set or the jammed media is to be removed. Even when the power switch is off, keep this cover and the other covers closed. 12 Carriage Moves the print head unit from side to side. 13 Operation panel This panel has the operation keys required for operating the printer and the LCDs for displaying setting items, etc. It is also provided with the power switch for the heaters and the LEDs for indicating the heater status. 14 Power switch Turns on/off the power to the printer. While the main power switch is on, the operation to prevent ink clogging is performed periodically even when the power switch is off. (Flushing function) 15 Maintenance cover R Open the maintenance cover R and/or maintenance cover L when doing so is required for maintenance. Even when the power switch is off, keep all covers closed. 16 Capping station Incorporates the ink caps, with which the heads are covered, and the wiper, etc. 17 USB 2.0 connector USB 2.0 interface. 18 Stand Supports the main body of the printer. It is provided with casters that are used to move the printer. 19 Waste ink tank Waste ink gathers in this tank. 2-3 2 Before Use Rear 1 2 5 3 6 4 7 Name 2-4 Function 1 Ink cartridge for cleaning Use this cartridge when performing maintenance. When using solvent ink, use MILD SOLVENT cleaning solution cartridge (SPC-0294). When using water-based ink or sublimation transfer ink, use water-based cleaning solution cartridge (SPC-0259). 2 Clamp lever (rear) Interlocked with the clamp lever in the font of the printer. 3 Media support bar This bar facilitates setting a roll media in position. 4 Pre-heater Preheats the media before printing. (Located inside the platen) 5 Roll holders Roll holders are inserted into the right and left ends of the core of the roll media to hold the media. The roll holders can be used for media cores that have a diameter of 2 inches or 3 inches. 6 Main power switch Turns on/off the main power for the printer. Leave the main power turned on to prevent ink clogging. Turn off the power switch in front, before turning off the main power switch. 7 AC inlet Connect the power cable to the AC inlet. Configurations and Functions Front cover and Maintenance covers Opening/closing the front cover and maintenance covers Do not open any of the front cover and maintenance covers during printing operation. Opening any cover during printing, carriage will stop for safety and image printing will stop, which can not be resumed from the interrupted point. When the screen below appears, restart the printer and computer by the following procedure. Close a cover. STEPS: 1 Close the front cover and maintenance covers. 2 Press the [ENTER] key once. ( Cover Open ) PRESS <ENT> KEY 3 The carriage starts moving to perform initial operation. ∗Being Initialized∗ NOT POW-OFF !! PLEASE WAIT 2-5 2 Before Use Relationships between ink station and head row The carriage mounts four heads each with eight rows of nozzles. One color ink is applied to each row of nozzles. Remember these relationships when checking the heads for clogged nozzles, replacing ink cartridge and replenishing inks. And cartridges of ink station are different from the selection of ink set (4 color ink set, 6 color ink set, 7 color ink set) when the full up ink is performed. When solvent ink is used K Black M Magenta C Cyan Y Yellow Lc Light Cyan Lm Light Magenta Lk Light Black 4 color ink set 6 color ink set 7 color ink set Lk Lk Head when ink is set 4 colors Head when ink is set 6 colors Head when ink is set 7 colors 4 color ink set Four ink cartridges for each color. 6 color ink set Two ink cartridge for each of K, Y, Lc and Lm and four ink cartridges for each of M and C. 7 color ink set Two ink cartridges for each of M, C, K, Y, Lc, Lm and four ink cartridges for Lk. 2-6 Configurations and Functions When water-based ink is used K M C or BL Y Lc or LBL Lm Lk 4 color ink set Black Magenta Cyan or Blue Yellow Light Cyan or Light Blue Light Magenta Light Black C C C C BL BL BL BL C C or or or 6 color ink set C C Lc C C BL BL LBL LBL BL BL 7 color ink set C C k k C (BL) or or C (BL) Head when ink is set 4 colors Lc or or or k C Lc (BL) (LBL) k C (BL) Head when ink is set 6 colors or or C Lk Lk Lc Head when ink is set 7 colors 4 color ink set Four ink cartridges for each color. 6 color ink set Two ink cartridge for each of K, Y, Lc (LBL) and Lm and four ink cartridges for each of M and C (BL). 7 color ink set Two ink cartridges for each of M, C, K, Y, Lc, Lm and four ink cartridges for Lk. Available ink colors differ from the ink type. When dedicated water-based pigment ink is used: Cyan and Light cyan When dedicated Eco-water-based pigment ink: Cyan, Light cyan, Light black When dedicated sublimation transfer ink is used: Blue and Light blue 2-7 2 Before Use Cartridge control The printer uses two ink cartridges for each supply system (each nozzle row), i.e., 16 cartridges in total. For each supply system, always only one cartridge of the two works as the supply cartridge. Switching is made between the two cartridges so that the two cartridge locations are selected alternately for the supply cartridge. Cartridge LED Cartridge LEDs The LEDs (green and red) in each slot indicate the cartridge status. Green LED lit Indicates that the cartridge is currently serving as a supply cartridge. Red LED flashing Indicates that the cartridge is in the [INK END], [INK NEAR END], [Expiration:1MONTH] or [Expiration] state. Red LED lit Indicates that the cartridge is in the ink IC warning status or it is a remaining amount zero cartridge or no cartridge has been set. Cartridges that cannot be used Ink IC warning Error related to ink cartridges, namely, [NON-ORIGINAL INK], [WRONG INK IC], [Kind of INK], [Color of INK], [WRONG CARTRIDGE] or [Expiration:2MONTH] Cartridge in which there is no ink remaining as a result of execution of the Remaining amount zero cartridge ink use-up cleaning function (this function, when performing cleaning, uses first the cartridge that is in the [INK NEAR END], [INK END] status) Conditions for cartridge switching The supply cartridge is switched at the detection of any of the following conditions: [INK END] during printing [INK NEAR END] during ink charging Ink IC warning The cartridge has been removed Ink use-up cleaning 2-8 Configurations and Functions Relationship between warning and operation When switching in one supply system is impossible, the LCD panel displays the warning concerning the current supply cartridge. Local/remote idle warning display (status of the supply system) Guidance function warning detailed display (status of the cartridge) Cleaning Ink charging Printing NEAR END INK NEAR END X X *1 INK END INK END X X X X X X NO CARTRIDGE NON-ORIGINAL INK WRONG INK IC CARTRIDGE !CAR Kind of INK Color of INK WRONG CARTRIDGE Expiration:2MONTH INK REMAIN ZERO Expiration: (1M) Expiration:1MONTH O O O Expiration Expiration O O O X : Not permitted O : Permitted *1 The printer returns to LOCAL mode every completion of printing. 2-9 2 Before Use Carriage The carriage is provided with the ink heads for printing, the cutter unit for cutting off the sheet of media, etc. Cutter unit Capping station The capping station consists of the ink caps, the wiper for cleaning the heads, etc. The ink caps prevent the nozzles in the ink heads from drying up. The wiper cleans the nozzles in the heads. The wiper is consumable. If the wiper is deformed or the media is stained, replace the wiper with a new one. Be sure to wear the attached goggles while cleaning the inside of the capping station. Otherwise, there is a danger of ink entering in your eyes. Ink cap Wiper 2-10 Configurations and Functions Cutter blade and cutting line The carriage is provided with a cutter unit for cutting off the media that has been printed on. The cutter cuts off the sheet of media along the cutting line on the platen. (Refer to ?Cutting the media after completion of printing (p.3-41)? ) , (Refer to ?AUTO CUT (p.6-8)? ) Cutter unit Cutter blade Cutting line Media sensor The media sensor detects the presence of the media and the media length. This printer has media sensor on the platen (in the rear). Set the media so that media sensor located in the rear of the platen is covered with the media without fail. The media can not be detected unless it is placed over the sensor. Media sensor Platen 2-11 2 Before Use Pinch rollers and Feed rollers This printer retains the media with the pinch rollers and feed rollers. During printing operation, the feed rollers feed the media forward. While the printer is not being used, raise the clamp lever to keep the pinch roll- ers in the raised position. If the pinch rollers are left lowered for an extended period of time, they can be deformed and fail to securely retain the media. Pinch roller Feed roller Keep the clamp lever and pinch rollers raised when not in use v Clamp lever 2-12 Configurations and Functions Heater The following three heaters are built in platen. When solvent ink is used. When water-based ink is used. Pre-heats the media being drawn and prevents the sharp increase of temperature at the printing part. Not used. pre-heater print heater Improves the quality of images at the time of printing. Not used. post-heater Dries the ink after printing. LEDs indicate the turning ON/OFF and status of the respective heaters. Turning off the power switch of the printer body turns off also the power to the heaters. Pre-heater Print heater Post-heater Media Front While the heater is on, the platen is very hot. When the front cover is to be opened or media is to be replaced, lower the heater temperatures and wait until the platen temperature drops; otherwise, you can get burned. When the media is to be replaced with a thin one, lower the heater temperatures and wait until the platen temperature drops adequately. Setting a thin sheet of media while the platen is hot may cause the media to stick to the platen or cause wrinkling or curling of the media. Do not leave the media being heated with the heaters for a long time without performing printing. Otherwise, the surface of the media may rise like a wave and thus the heads may rub on the media. If the media is found having risen like a wave, feed the media with the [] key until the surface free from the rise comes to the printing position, and then start printing. 2-13 2 Before Use Operation Panel Use the operation panel to make settings for printing or operate the printer. The operation panel is equipped with one lamps (a) to indicate the status of the printer, two displays (b), eight keys (c) to be used for various operations, seven direct keys (d) to facilitate invoking various functions, and two keys and seven lamps (e) to control the three heater. (a) (b) (d) (c) (e) 2-14 Operation Panel Display Each setting or message displayed on the LCDs is enclosed in [ ], like [TYPE 1], [PLEASE WAIT], etc. in the text of this manual. The operation keys are shown enclosed in brackets [ ]. [] indicates that the down JOG key is to be pressed. The name of any other operation key is shown enclosed in brackets [ ], like [FUNCTION]. How to read the display The LCDs give information as shown below depending on the status of the printer. Ready for printing status PRE PRT POST OFF OFF OFF L. ∗ > [JV5-01] width : ∗∗∗∗ mm Display 1 Display 2 Display 1 : Shows the temperatures of the heaters inside the printer. Display 2 : The indication in the upper left area shows the mode of the printer. The sample display above shows LOCAL mode. (See 2-20) The indication in the upper right area shows the machine name assigned to this printer. (Refer to ?MACHINE NAME (p.6-23)? ) The indication in the lower right area shows the width of the media detected by the printer. Function menu indicating status Display 1 MAINTENANCE HD.MAINTENANCE <ent> Display 2 Display 1 : The temperatures of the heaters are kept displayed until the top level of the menu hierarchy or the [SET UP] function is selected. There may be a case where nothing is displayed, depending on the selected item; this does not mean a malfunction of the display. Display 2 : The indication in the upper area shows the selected item. The indication in the lower left area shows the job name or the like. The indication such as <ent>, if any in the lower right area, means that you are asked whether or not to select the displayed job or that there is a lower level of hierarchy. For the operation of function menus, refer to “Outline of menu hierarchy” (See 2-24). 2-15 2 Before Use Item / setting value indicating status The LCDs show the particular operation for a selected job. Choose a head to fill. FILL UP INK HEAD SELECT : 12. 34 Display 1 Display 2 Display 1 : There may be a case where nothing is displayed, depending on the selected item; this does not mean a malfunction of the display. Display 2 : The indication in the upper area shows the job name or the like. The indication in the lower left area shows the selected item for the job. The indication in the lower right area shows the item or setting value or the like. Input a setting value by jog keys. The sample display above shows [HEAD SELECT] in [HD.MAINTENANCE]. For the operation of function menus, refer to “Outline of menu hierarchy” (See 2-24). Job processing status FILLING UP NOW. PLEASE WAIT FILL UP INK ∗∗∗∗∗∗∗−−−−−−−−−−− Display 1 Display 2 Display 1 : Shows the current operation of the printer. Display 2 : The indication in the upper area shows the job name or the like. The sample display above shows [FILLING UP NOW.] in [HD.MAINTENANCE]. The indication in the lower area shows the progress of the job or the like. Message indicating status The LCDs show a message to ask the operator to do some work, if necessary. Be sure to follow the message. Close a cover. 2-16 Operation Panel How to read the LED indications The LEDs light up to indicate the status of the printer as described below. BUSY lamp Pre-heater Print heater HEAT SW lamp Post-heater Heater Name Name -- -Pre-heater Print heater Post-heater Function BUSY lamp Lights up when the printer is currently executing some processing. While this lamp is lit, never open any cover of the printer and never operate any key; otherwise, the printer may develop trouble. HEAT SW lamp Lights up orange when power to the heater is turned on. HEAT lamp Lit orange while the pre-heater is in heating operation. CONSTANT lamp Lights up green when the temperature of the pre-heater reaches the preset temperature. HEAT lamp Lit orange while the print heater is in heating operation. CONSTANT lamp Lights up green when the temperature of the print heater reaches the preset temperature. HEAT lamp Lit orange while the post-heater is in heating operation. CONSTANT lamp Lights up green when the temperature of the post-heater reaches the preset temperature. 2-17 2 Before Use How to use the keys The functions of the operation panel are described below. 10 8 6 15 7 16 9 11 12 1 13 2 4 3 5 2-18 14 Operation Panel Name 1 JOG keys [] , [] , [] , [] Function Use these keys to shift the carriage or the media in [LOCAL mode]. Also use them to select an item of printing conditions. 2 [FUNCTION] key Use this key to display function setting menu. 3 [REMOTE] key Use this key to switch between [REMOTE mode] and [LOCAL mode]. 4 [END] key Cancels the last input value or returns the setting menu to the immediate higher level of the hierarchy. 5 [ENTER] key Registers the last input value as the setting value or goes to the immediate lower level of the hierarchy. 6 [TEST DRAW] key Use this key to print a test pattern and check to see if there is no faulty print due to clogged nozzles. 7 [DATA CLEAR] key Erases the data that have been received. 8 [CLEANING] key Use this key to select a cleaning type and execute the cleaning of the heads. 9 [USER TYPE] key Changes the user type. 10 [ST.MAINT] key Use this key to perform maintenance of the station. This key activates directly [ST.MAINTENANCE] of the maintenance functions. 11 [INFORMATION] key Displays and/or prints various information. 12 [FEED COMP.] key Activates directly [MEDIA COMP.] of the SET UP function for the currently set type. 13 [HEATER] key Use this key to set the temperatures of the pre-heater, print heater and postheater or check the current temperature of the platen. 14 [HEAT SW] key Turns on/off the power to the heaters. 15 Display 1 Displays the status of this printer, a setting item, menu name or the like. Usually displays the current temperatures of the heaters. 16 Display 2 Use this display to indicate input setting values when various detailed settings are necessary for this printer. Functions of the JOG keys Each of the JOG keys varies in function according to the condition of the printer under which the key is used. The functions of the JOG keys are as follows: Before the detection of media After the detection of media When selecting a function When selecting a setting value Detects the width of the Shifts the carriage to the media. left. Detects the width and length of the media. Shifts the carriage to the right. Shifts the media away from you. Indicates the previously Indicates the previously indicated function again. indicated value again. Moves the media toward Indicates the next func- Indicates the next value. you. tion. 2-19 2 Before Use Modes and Menu Screens Modes This printer is provided with the following four modes: NOT-READY mode This is the mode in which the media has not been detected yet. The keys other than the [REMOTE] key and the [TEST DRAW] key are effective. LOCAL mode The printer enters this mode when the media has been detected. All the keys are effective. The printer can receive data from the computer. However, it does not perform printing. This mode permits the following operations: Pressing the appropriate [JOG] keys to detect the media or set the origin. Pressing the [FUNCTION] key to set functions. (FUNCTION mode) Pressing the [REMOTE] key to switch between [REMOTE mode] and [LOCAL mode]. Pressing the [ENTER] key to check the remaining amount of ink, the description of the cartridge error, the model name, the firmware version, and so on. Pressing the [TEST DRAW] key to print a test pattern and checking to see if there is no faulty print. Pressing the [DATA CLEAR] key to erase the printing data the printer has received. Pressing the [CLEANING] key to execute the cleaning of the heads. Pressing the [USER TYPE] key to change the user type. Pressing the [ST.MAINT] key to activate directly [ST.MAINTENANCE], one of the [MAINTENANCE] functions. Pressing the [INFORMATION] key to activate directly [INFORMATION] of the [MACHINE SETUP] function. Pressing the [FEED COMP.] key to activate directly [MEDIA COMP.]. Pressing the [HEATER] key to set the temperature of the heaters. Pressing the [HEAT SW] key to turn on/off the power to the heaters. REMOTE mode The printer prints the data it receives. Pressing the [REMOTE] key during printing interrupts the printing temporarily and returns the printer to LOCAL mode. FUNCTION mode To set FUNCTION mode, press the [FUNCTION] key when the printer is in LOCAL mode. In this mode, printing conditions can be set. 2-20 About Function Menus About Function Menus Basic operation of a menu screen This printer incorporates various functions, which can be operated on the operation panel. The [FUNCTION Mode] permits operating the functions for settings of the system and optional units, cleaning of the heads, test printing and so on. In addition, pressing direct keys will invoke various built-in functions quickly. Priority sequence of the printer functions The settings which are made on the operation panel are applied to all printing jobs as the initial values. In addition, whether priority is given to the settings on the operation panel or those on the computer (host) is determined by the setting of [PRIORITY] in the [SET UP] function of the printer. Structure of function menus Items of each menu are hierarchized as follows: The [FUNCTION] key or [], [], [] or [] key selects an item, the [ENTER] key displays the item or value in the next lower level of the hierarchy, and the [END] key displays the immediate higher level of the hierarchy. Press the [ENTER] key to execute the selected value of each item. 2-21 2 Before Use Operation to set function menus To set a function menu, press the [FUNCTION] key in LOCAL mode and press [], [], [] or [] or [ENTER] key as appropriate. If the printer is not in LOCAL mode, press the [REMOTE] key once. How to make setting As an example of setting procedure, that for [SET UP] → [AUTO CLEANING] is described below. STEPS: 1 Make sure that the printer is in LOCAL mode. If it is in REMOTE mode, press the [REMOTE] key. When in REMOTE mode 2 Press the [FUNCTION] key. Once the following screen is displayed, press the [ENTER] key twice to go to the lower level of the hierarchy. 3 Press the [] key 13 times to select [AUTO CLEANING], and press the [ENTER] key. The menu screen will turn into the screen for setting ON/OFF of automatic cleaning. 13 times 2-22 About Function Menus 4 Press the [] or [] key to set ON/OFF of automatic cleaning. 5 Press the [FUNCTION] key again if the setting of [CLEANING INTERVAL] and [CLEANING TYPE] is needed. This setting is permitted only when automatic cleaning [ON] is selected. 6 Press the [FUNCTION] key to go to the lower level of hierarchy and press the [] or [] key to input [CLEANING INTERVAL]. Press the [] or [] key to display the setting screen for [CLEANING TYPE] and press the [] or [] key to set a cleaning type. 7 Press the [ENTER] key twice to finalize the setting. Press the [END] key several times to return to LOCAL mode. 2-23 2 Before Use Outline of menu hierarchy Function menu Press the [FUNCTION] key to invoke the function menu. *3 Only when solvent ink is used. 2-24 About Function Menus *1 Only when sublimation transfer ink is used. *2 To be displayed only when the warning or error message for "Flushing BOX Cleaning" POST 2-25 2 Before Use Direct keys Pressing direct keys will easily invoke frequently used functions. 2-26 About Function Menus Setting values in function menus The menus contain the following functions. SET UP functions Function name Sub function Setting value Function MEDIA COMP. (p. 3-33) -255 to 255 Corrects the feed rate of media. MediaFeed SETUP (p. 6-4) FEED METHOD DIRECT, NORMAL Switches between methods for detecting the feed rate of media. SPEED SWITCHING 200% to 10% Sets the media feed rate. MOVEMENT TEST HEATER (p. 3-21) (p. 6-30) SET TEMP. SET TIME PRINT MODE (p. 6-5) Performs testing whether or not the media is compatible with the direct detection method using the media encoder. Pre-heater OFF, 20 to 60 °C (OFF, 68 to 140 °F) Print heater OFF, 20 to 60 °C (OFF, 68 to 140 °F) Post-heater OFF, 20 to 70 °C (OFF, 68 to 158 °F) STANDBY (NONE, 0- 90 min / In steps of 10 minutes) OFF TIME (NONE, 0 - 90 min / In steps of 10 minutes) FINE quality STD., FINE, FAST DRAFT quality STD., FINE, FAST SCAN DIRECTION Uni-D Sets heater conditions. Sets a print quality level and printing direction. Bi-D LOGICAL SEEK ON, OFF INK LAYERS (p. 6-7) 1 to 9 Sets the number of layers in which ink is to be applied. DRYING TIME (p. 6-7) SCAN 0.0 to 19.9 sec. Sets the time to wait for ink drying. Draw.END 0 to 999 sec. AUTO CUT (p. 6-8) ON, OFF Cuts the media automatically after printing. PRE-FEED (p. 6-8) ON, OFF Feeds the media back and forth before printing. MARGIN (p. 6-8) -10 to 85 mm Sets a non-printing area along the right and left edges of the media. COLOR PATTERN (p. 6-8) ON, OFF Prints a color pattern for nozzle missing check near the right edge of the media. REFRESH (p. 6-9) LEVEL 0 to 3 Refreshes the print heads during printing. 2-27 2 Before Use Function name VACUUM (p. 6-9) Sub function STRONG, STANDARD, Little WEAK, WEAK STOP TIMER Setting value 0 - 60 min, CONTINUE Function Sets the absorbability of the media. Also sets the time to stop the vacuum fan after printing. Press [FUNCTION] key to switch to independent operation, and to set items on the right. PRIORITY (p. 6-9) OFF Media is not vacuumed. ALL HOST Sets the priority of settings (host / panel). ALL PANEL INDIVIDUALLY AUTO CLEANING (p. 3-43) ON MEDIA COMP., HEATER, PRINT MODE, INK LAYERS, DRYING TIME, AUTO CUT, PRE-FEED, MARGIN, COLOR PATTERN, REFRESH, VACUUM, FD.SPEED, FD.METHOD CLEANING Press [FUNCINTERVAL TION] key to CLEANING switch to independent operation, and TYPE to set items on the right. 10 to 30000 mm Cleans the print heads automatically every completion of printing. SOFT, NORMAL, HARD OFF Print. MAINTE. (p. 3-45) CLEANING CLEANING Press [FUNCINTERVAL TION] key to CLEANING switch to indepen[Only when dedident operation, and TYPE cated sublimation transfer ink is used.] to set items on the right. Cleans the print heads automatically every completion of printing. SOFT, NORMAL, HARD 10 to 9990 times The heads are automatic wiped while printing. HEAD GAP (p. 3-5) 1.5 to 7.0 mm Sets the head gap (height from the media to the nozzle plane of the heads). MEDIA DETECT DETECT METHOD (p. 6-11) SELECT Sets the method for detecting the media. WIPING SCAN COUNT 0.1 to 100.0 m Press [FUNCTION] key to switch to independent operation, and to set items on the right. OFF CUTTING DETECT SETUP RESET 2-28 WIDTH BOTH EDGE, LEFT EDGE, RIGHT EDGE, NONE Resets the setting values to the default values. About Function Menus MAINTENANCE functions Function name ST.MAINTENANCE Sub function CARRIAGE OUT (Can be selected directly by pressing [ST.MAINT] key.) (p. 4-7) Setting value Function Move the carriage when cleaning the inside of the station and replacing consumables. Do not move the carriage out of the capping station by hand. Select the [ST.MAINTENANCE] - [CARRIAGE OUT] to move the carriage. WIPER EXCHANGE (Can be selected directly by pressing [ST.MAINT] key.) (p. 4-57) When the display shows that the wipers must be replaced, perform this operation and replace the wipers. NOZZLE WASH (Can be selected directly by pressing [ST.MAINT] key.) (p. 4-10) Washes the nozzles with a cleaning kit to correct nozzle clogging and jet deviation. DISWAY WASH (Can be selected directly by pressing [ST.MAINT] key.) (p. 4-14) Washes the ink discharge passages (pump tubes) to prevent their clogging. CUSTODY WASH (Can be selected directly by pressing [ST.MAINT] key.) (p. 4-16) When the operation of the printer is to be suspended for more than one week, wash the nozzles in the heads and ink discharge passages and make arrangements for storage. PUMP TUBE WASH (Can be selected directly by pressing [ST.MAINT] key.) (p. 4-23) Washes the ink suction pumps. WIPER WASH (Can be selected directly by pressing [ST.MAINT] key.) (p. 4-25) Washes the wiper. Sub-INK MAINTE. [Only when dedicated sublimation transfer ink is used.] INK TRAY CLEAN. (p. 4-51) Moves the carriage when cleaning the ink tray of the flushing box. FILTER EXCHANGE (p. 4-49) Moves the carriage when replacing the filter on the flushing box. CR.MAINTENANCE (p. 4-28) HD.MAINTENANCE Move the head unit to the left end of the printer and perform maintenance of the heads and related parts. FILL UP INK (p. 3-31) The heads are charged with ink. Use this function if nozzles are not unclogged by [CLEANING] and [NOZZLE WASH]. DISCHARGE&WASH (p. 5-6) Discharges ink from the heads, dampers and ink tubes, and washes them with an cleaning solution cartridge (option). MaintWashLiquid (p. 4-20) FILLING UP Supplies the cleaning liquid for the wiper and pump tubes. DISCHARGE Discharges the cleaning liquid for the wiper and pump tubes. 2-29 2 Before Use Function name Sub function Setting value FLUSHING BOX CLEANING COMP. (p. 4-46) BOX EXCHANGE LV (p. 4-43) To be performed in order to let the equipment recognize that the cleaning of the flushing box has been performed. 5/5 to 1/5 5/5 to 1/5 FILTER EXC. LV. (p. 4-53) [Only when dedicated sublimation transfer ink is used.] 2-30 Function Changes the time for cleaning or replacing of flushing box. Changes the time for replacing the filter on the flushing box. DROP.POScorrect PATTERN 1 to 4 (p. 3-35) -40.0 to 40.0 dot Correct the difference in the ink fall points between outward trip and homeward trip. When the media thickness, head height or ink type is changed, dot positions may be slightly in misalignment. This function corrects the dot positions to ensure that the accurate printing result is obtained. Print two test patterns at the standard speed and at a high speed, respectively. Then compare the ink fall points of outward trip and those of homeward trip and correct dot positions. PG DROP ADJUST. (p. 3-26) PATTERN 1 to 8 -40.0 to 40.0 dot Set the reference value for correcting the misalignment of the ink fall points between outward trip and homeward trip in bi-directional printing when the head gap has been changed. SLEEP SET UP REFRESH (p. 4-31) REFRESHinterval OFF, 1 to 168 h While the power switch is off, the printer performs refreshing operation at fixed intervals to prevent ink clogging or the like. Set the interval (in hours) at which refreshing operation that discharges ink from the heads is to be performed. TUBE WASH (p. 4-32) WASH INTERVAL OFF, 1 to 168 h Set the interval (in hours) at which pump tube cleaning operation is to be performed. CLEANING (p. 4-33) CLEAN. INTER- OFF, 1 to 168 h VAL Set the interval (in hours) at which cleaning operation is to be performed. CLEAN. TYPE Set a type of cleaning. Normal, Soft, Hard About Function Menus Function name Sub function ROUTINE SETUP ROUTINE WIP- SCAN COUNT ING (p. 4-34) Setting value Function 0 to 9990 times With the power turned on, the printer performs various operations at fixed intervals to prevent such trouble as nozzle clogging, nozzle missing, ink drops falling or ink spraying. Set the number of times scanning can be performed before the nozzle surface wiping operation is to be performed to remove condensation. TEMP.difference 1 to 60°C (In units having been set by [MACHINE SET] function) Set the value of a difference in temperature between the print heater and the ambient temperature at which wiping operation is to be performed. REFRESH (p. 4-36) REFRESHinterval OFF, 1 to 168 h Set the interval (in hours) at which refreshing operation is to be performed. TUBE WASH (p. 4-37) WASH INTERVAL OFF, 1 to 168 h Set the interval (in hours) at which pump tube cleaning operation is to be performed. CLEANING (p. 4-39) CLEAN. INTER- OFF, 1 to 168 h VAL Set the interval (in hours) at which cleaning operation is to be performed. CLEAN. TYPE Set a type of cleaning. [Only when solvent ink is used.] Normal, Soft, Hard OFF, 12 to 120 h Sub-INK WARNING (p. 4-56) [Only when dedicated sublimation transfer ink is used.] Set the interval (in hours) at which cleaning operation is to be performed to prevent color change because this machine has been left and color material has settled. WIPER LEVEL (p. 4-41) 10/10 to 1/10 The wipers are consumables. The heads can get dirty easily in a dusty atmosphere. The heads cannot be cleaned adequately with curled or worn wipers. This printer gives the wiper replacement warning earlier than standard depending on the operating environment. (10/10 = Default) HEAD SELECT (p. 5-10) [1234] [123–] , [–234] [12––] , [–23–] , [––34] [1–––] , [–2––] , [––3–] , [–––4] Select the head(s) to be used for printing. Any of the combinations of heads shown at left is available. MEDIA RESIDUAL (p. 6-14) ON, OFF Set ON/OFF of the media remaining amount display function. Input the media length (initial value of remaining amount ) when the roll media is detected. BeforeMovingIt. (p. 6-15) Use this function to lock the station when the printer is to be transported. 2-31 2 Before Use MACHINE SET functions Function name DRY & EXHST. FAN (p. 6-19) Sub function DRYNESS FAN STOP TIME RENEW Setting value 0 to 240 Min, CONTINUE ON, OFF Outside EXHST STOP TIME 0 to 240 Min, CONTINUE Displays about dryRENEW ness fan interlock if SETUP INTERit is interlocked. Press [FUNCLOCK TION] key to switch to independent operation, and to set items on the right. ON, OFF Built-in EXHST STOP TIME 0 to 240 Min, CONTINUE Displays about dryRENEW ness fan interlock if SETUP INTERit is interlocked. Press [FUNCLOCK TION] key to switch to independent operation, and to set items on the right. ON, OFF DRYNESS FEED (p. 6-20) CONFIRM. FEED ON Press [FUNC(p. 6-20) Function Set the operation of the dryness fan. [STOP TIMER] sets the time from the completion of the printing to the stopping of the rotation of the fan. [RENEW] switches over the current status of the fan. Set the operation of the outside exhaust fan. [STOP TIMER] sets the time from the completion of the printing to the stopping of the rotation of the fan. [RENEW] switches over the current status of the fan. [SETUP INTERLOCK] interlocks the operation to the dryness fan. Set the operation of the built-in exhaust fan. [STOP TIMER] sets the time from the completion of the printing to the stopping of the rotation of the fan. [RENEW] switches over the current status of the fan. [SETUP INTERLOCK] interlocks the operation to the dryness fan. ON, OFF Change the feed operation after printing. BACK FEED ON, OFF Set whether or not to perform feeding the media after test printing for checking of the printing result. LENGTH 10mm to 1000mm Switches the pre-feed operation. TION] key to set items on the right. OFF PRE-FEED METHOD (p. 6-21) [Only when dedicated sublimation transfer ink is used.] FORE (**mm) Press [FUNCTION] key to set items on the right. FORE&BACK HEATER SETUP (p. 6-21) STD, set -5°C, set -10°C, set -15°C, Change the temperature range of the set -20°C post-heater that determines whether the temperature is reached. MEDIA CUT (p. 6-21) ASSIGN CUT KEY ON, OFF Allocate [>] key to DIRECT CUT key of MEDIA CUT. MOVE.DROP MEDIA ON, OFF Switch the dropping operation of the media after cutting media. TIME SET (p. 6-21) ON, OFF Set the date and time on the printer. UNIT SETUP (p. 6-22) TEMP. °C or °F LENGTH mm or inch Change the units of temperature, length and area to be used with the printer. STAMP SETUP (p. 6-22) 2-32 ON, OFF Make settings for outputting the date and time and printing conditions after printing. About Function Menus Function name Sub function Setting value Function CART.PRIORITY (p. 3-55) INK LEVEL, EXP. DATE Set the cartridge status to use first in the double cartridge automatic switching function. Test Draw Arrange (p. 6-23) FEED Dir, SCAN Dir. Set the arrange direction of the test pattern to be drawn when performing test drawing repeatedly. MEDIA DETECT ThicknessDETECT (p. 6-23) AUTO, MANUAL Set how to detect media thickness performed prior to the detection of media width. ON, OFF Set how to detect the end of media when using roll media. MACHINE NAME (p. 6-23) 01 to 99 When the printer is connected through the USB 2.0 interface to a system to which two or more machines are connected, set the identifier of the printer to have the system recognize it. ENV. TEMP. (p. 3-53) Not wait ARR., Wait arrival Set the operation when drawing was tried to start with the temperature of the place where this machine has been installed being outside the range of usable temperature. FEED ERR. DETECT INFORMATION ERROR HISTORY (p. 6-24) Displays error history information (Can be selected directly by pressing up to now by selecting from [ALL], [INFORMATION] key.) [ONLY ERROR] or [ONLY WARNING]. Two or more errors, if any, can be displayed in turn by pressing the [] or [] key. Display various information. The items in [INFORMATION] can be set individually by pressing the [INFORMATION] key. MAINTE. HISTORY (p. 6-24) Displays the records of the mainte(Can be selected directly by pressing nance function that have been exe[INFORMATION] key.) cuted up to now. Two or more records, if any, can be displayed in turn by pressing the [] or [] key. PRT.modeHISTORY (p. 6-24) Displays the history of information (Can be selected directly by pressing (printing conditions) of the online [INFORMATION] key.) printing that has been performed up to now. Two or more pieces of information, if any, can be displayed in turn by pressing the [] or [] key. LIST (p. 6-25) (Can be selected directly by pressing [INFORMATION] key.) Ink REPL. report (p. 6-25) (Can be selected directly by pressing [INFORMATION] key.) VERSION (p. 6-25) (Can be selected directly by pressing [INFORMATION] key.) Serial&DealerNo (p. 6-25) (Can be selected directly by pressing [INFORMATION] key.) 2-33 2 Before Use NCU functions Function name Sub function NOZZLE CHECK (p. 6-27) Setting value ON, OFF NG ACTION (*1) CONTINUE [DURING THE CLEANDRAW] (p. 6-27) ING&CONT CLEANING TYPE NORMAL, SOFT, HARD CLEANING&STOP CLEANING TYPE NORMAL, SOFT, HARD Function Set whether or not to perform nozzle missing detection. Set the operation of the printer to be performed during printing in case a certain level of nozzle missing is detected and thus NG judgment is made. (*2) RETRY COUNT 0 to 3 STOP NG ACTION (*1) CONTINUE [AFTERtheCLEANDRAWend] (p. 6- ING&CONT 28) CLEANING&STOP CLEANING TYPE NORMAL, SOFT, HARD CLEANING TYPE NORMAL, SOFT, HARD Set the operation of the printer to be performed after completion of printing of one file in case a certain level of nozzle missing is detected and thus NG judgment is made. (*2) RETRY COUNT 0 to 3 STOP NG JUDGEMENT CLOGG NZL/color (*1) (p. 6-28) 1 to 180 Set the number of missing nozzles per row for judging the nozzle check NG . (*2) CLOGG NZL/ALL 1 to 180 Set the total number of missing nozzles for judging the nozzle check NG . (*2) COND.INDICATION (p. 6-28) Displays the status of the NCU. Pressing [FUNCTION] key, it displays every error that has occurred in the NCU and between NCU ↔ Main Unit. Using the [] or [] key, the errors can be displayed one by one in the order of occurrence. NG (*1): Bad nozzle condition. NG (*2): One or more bad nozzles have been located on print head. 2-34 CHAPTER 3 Printing This chapter describes a series of operations and settings, ranging from power-on to end of printing. Operation flow ........................................................................3-2 Turning the power on .............................................................3-3 Adjusting the head gap ..........................................................3-5 Setting the media on the printer .............................................3-7 Selecting and checking printing conditions ..........................3-20 Operating the heaters ..........................................................3-21 Setting the reference value for dot misalignment correction [PG DROP ADJUST.] ..........................................................3-26 Checking for nozzle clogging, and unclogging nozzles .......3-28 Correcting the media feed rate [MEDIA COMP.] .................3-33 If dots are not in alignment [DROP.POScorrect] ..................3-35 Effective Plotting Area ..........................................................3-37 Establishing the Origin .........................................................3-38 Printing an image .................................................................3-39 Display of [INK NEAR END] or [INK END] ...........................3-48 Change the operation condition of the ambient temperature ............................................................3-51 Extension of Ink Expiry Month .............................................3-53 Switch Setting of Ink Supply Path ........................................3-55 Turning the power off ...........................................................3-57 3 Printing Operation flow The following shows a series of operations and settings, ranging from power-on to end of printing. For details, refer to the appropriate page. Turning the power on p. 3-3 Adjusting the head gap p. 3-5 Setting the media on the printer p. 3-7 Operating the heaters p. 3-21 Checking for nozzle clogging, and unclogging nozzles p. 3-28 3-2 Correcting the media feed rate [MEDIA COMP.] p. 3-33 Printing an image p. 3-39 Extension of Ink Expiry Month p. 3-53 Turning the power on Turning the power on Turn the power on. Make sure that the front cover and maintenance covers are all closed. If any of the covers is open, the printer does not start up properly. STEPS: 1 Turn on the power to the printer. Press the power switch located on the front of the printer once. When the power is turned on, the LCD panel displays [BOOT] first and then displays the firmware version number. BOOT ∗Being Initialized∗ NOT POW-OFF !! JV5-160S(S) V ∗.∗∗ 2 The message [PLEASE WAIT] appears flashing. The printer performs initial operation. PLEASE WAIT 3 The printer enters the LOCAL mode. If media has been set on the printer, the media select display appears. L. ∗ > [JV5-01] 4 On making sure that the display shown below has appeared, turn on the power to the computer that is connected to the printer. MEDIA SELECT ROLL < > LEAF 3-3 3 Printing Power Switches The printer is provided with the following two power switches. Power switch Main power switch Front of the printer body Rear of the printer body Main power switch : Located on the rear of the printer. Normally, leave this switch turned on. If this switch is left turned off, nozzles in the heads may be clogged. There may be a case where nozzles cannot be unclogged easily. Power switch : Located on the front of the printer. Normally, use this switch. Press this switch once to turn on the power to the printer. Press it again to turn off the power. Even when the power switch is off, the power is turned on periodically and the nozzle clogging preventive function is activated. When the main power switch is turned ON with the power switch set to OFF, power to the printer is automatically turned ON. 3-4 Adjusting the head gap Adjusting the head gap Set the head gap (height from the media to the nozzle plane of the heads). When the carriage is to move above the platen for printing or maintenance, it moves while keeping the head gap at the preset value. The upper limit of the head gap varies with media thickness. Available setting values: [1.5 mm to 7.0 mm] (in units of 0.1 mm / Default : 1.5 mm) This function performs only setting the head gap; this function does not move the heads up and down. STEPS: 1 Make sure that the printer is in LOCAL mode. If it is in REMOTE mode, press the [REMOTE] key. L. ∗ > [JV5-01] width : ∗∗∗∗ mm 2 Select [SET UP] using the [FUNCTION] key and press the [ENTER] key. FUNCTION SET UP <ENT> Twice 3 Select [HEAD GAP] by pressing the [] key 14 times and press the [ENTER] key. 14 times [1] MEDIA COMP. [1] <ent> HEAD GAP <ent> 4 Input a value of the head gap using the [] or [] key and press the [ENTER] key. [1]HEAD GAP GAP VALUE : 2.0mm 5 Press the [END] key several times. The printer returns to LOCAL mode. L. ∗ > [JV5-01] width : ∗∗∗∗ mm 3-5 3 Printing How to check the head gap Check the head gap by the following procedure. STEPS: 1 Make sure that the printer is in LOCAL mode. If it is in REMOTE mode, press the [REMOTE] key. L. ∗ > [JV5-01] width : ∗∗∗∗ mm 2 Press the [ENTER] key twice. The information of the current head status is displayed. MEDIA WIDTH Twice 1000mm HEAD GAP 2.0 mm MEDIA THICK 0.3 mm 3 Press the [END] key. The printer returns to LOCAL mode. L. ∗ > [JV5-01] width : ∗∗∗∗ mm 3-6 Setting the media on the printer Setting the media on the printer This printer can be used with roll media and cut sheet media. Use the media recommended by MIMAKI. (Refer to ?Sizes of media that can be used (p.1-16)? ) If a transparent media is set, the message [ERROR 50 MEDIA DETECT] is dis- played and the media may not be detected. If the media is exposed to direct sunshine, the media width may not be detected correctly. Do not use printed media; otherwise, ink can adhere to pinch rollers and thus media may be stained or may not be detected. Significantly or internally curled media must be straightened so that it will be fed properly without floating above the platen. Media may form an irregular surface because of the heat from the post-heater if it is left set on the printer for a significant period of time. If printing is started on the irregular surface of the media, the heads may rub on the media. Therefore, if an irregular surface is found on the media, feed the media with the [] key and set a new origin to avoid printing on the irregular surface. 3-7 3 Printing Changing the angular position of the drying fan The angular position of the drying fan can be changed in two steps to meet the drying condition of the media. Change the position if necessary. Set the media with both the covers of the printer body and front exhaust unit open. STEPS: 1 Loosen the upper knob screws at both sides of the drier fan. 2 Select a angle as setting. 3 Retighten the knobs. 3-8 Setting the media on the printer Setting roll media on the printer The procedure for setting roll media on the printer is described below. The roll media is heavy in weight. Take care not to drop it on your foot. Also take care not to throw out your back. Take care in operating the Clamp Lever. If the Clamp Lever is handled carelessly, you can get injuried as a result of an impact caused by the lowered Clamp Lever. Installation procedure 1 Raise the clamp lever in the front of the printer. Clamp lever 2 Loosen the screw securing the left roll holder, and determine the position of the roll holder. The inside diameter of the roll media core is 2 inches or 3 inches. Roll holder securing screw 3-9 3 Printing 3 Set the left end of the core of the roll media on the let roll holder. Push the roll media onto the roll holder until the roll core is all the way seated. The roll media can be set easily if you handle it while supporting it with the media support bar. Media support bar 4 Loosen the screw for the right roll holder, and insert the right roll holder into the core of the roll media. Make sure that the roll holder is in a proper position, and tighten the roll holder securing screw. 5 At the rear of the printer, unroll the roll media by such a length that the unrolled part is long enough to reach the front end of the platen. 3-10 Setting the media on the printer 6 Insert the unrolled part of the roll media between the platen and the pinch rollers and pull the unrolled part until its leading edge is positioned on the front of the printer. Pinch roller Platen 7 Push down the clamp lever at the rear of the printer. The clamp lever in the front is lowered to hold the media (for temporary setting). Clamp lever 8 Open the front cover and pull up the clamp lever in the front of the printer. 3-11 3 Printing 9 Pull out the roll media gently and then stop pulling when locked lightly. 10Pull the roll media from side to side evenly and push down the clamp lever. 3-12 Setting the media on the printer 11Hold the medium with the media press gently. Take care not to cut your finger with the media press. Make setting so that the suction hole at the right end of the platen is covered with the right end of the madia, and adjust the position of the roll holder. When using a thick media, remove the media press from the media before printing. Media press Media end Suction hole Rightmost pinch roller 12Set a free paper tube on the take-up device. 13Adjust the level adjusters of the take-up device so that the bottom of each of them rests on the floor and secure them by tightening the thumb screws. 3-13 3 Printing 14Close the front cover and press the [ENTER] key. The printer performs initial operation and displays the screen for media selection. 15Press the [] key to select [ROLL]. After detecting the media, the printer returns to LOCAL mode. (Refer to ?LOCAL mode (p.2-20)? ) 16Press the Jog key [] to feed the media up to the paper tube of the take-up device. 17Fix the media to the free paper tube with adhesive tape. 3-14 Setting the media on the printer When the media thickness cannot be detected There may be a case where the media thickness cannot be detected properly depending on the media. In such a case, the media thickness must be input manually. STEPS: 1 An error is displayed, and the carriage returns to the station. ∗∗∗∗∗ ERROR 50 ∗∗∗∗∗ THICKNESS DETECT 2 Input a value of the media thickness using the [] or [] key and press the [ENTER] key. Initial value: 0.1 mm; Input range: 0.1 mm to 1.0 mm The thickness of the media is inputted. (range : 0.1 - 1.0 mm) thickness = 0.1 mm 3 Press the [] key twice to select ROLL. (Press the [] key twice to select LEAF.) The carriage moves and detects the media width. Thickness detection is also performed here if the [END] key is pressed at step 2 above. MEDIA SELECT ROLL < > LEAF When [ThicknessDETECT] of [MACHINE SET] function has been set to MANUAL The detected thickness of the media is always input manually. Even if the same media is used, when the thickness is different, it is convenient to set to MANUAL. STEPS: 1 Select [Roll] 2 Input a value of the media thickness using the [] or [] key and press the [ENTER] key. Initial value: 0.1 mm; Input range: 0.1 mm to 1.0 mm The thickness of the media is inputted. (range : 0.1 - 1.0 mm) thickness = 0.1 mm 3 The carriage moves and detects the media width. 3-15 3 Printing When [MEDIA RESIDUAL] of [MAINTENANCE] function has been set to ON STEPS: 1 Detection is completed, and the carriage returns to the station. 2 Input a value of the media length using the [] or [] key and press the [ENTER] key. Input of MediaLength MEDIA LENGTH = 50 m 3 However, only press the [END] key when the value to be input is identical with the previously input value. Initial value: 50 m; Input range: 1 m to 500 m (in units of 1 m) 4 The printer returns to LOCAL mode. 3-16 Setting the media on the printer How to operate the take-up device The take-up device is equipped with a switch that selects the direction in which the media is to be wound. Torque limiter Switch Lever in top position (REVERSE) The take-up device winds the media with the printed side facing in. Lever in middle position (OFF) The take-up device does not wind the media. Lever in bottom position (FORWARD) The take-up device winds the media with the printed side facing out. Setting the torque limiter The take-up device is provided with a torque limiter. The take-up torque can be adjusted with the torque limiter.(The printer is shipped with the torque limiter set to 50% of the maximum torque.) If the tension is too strong to use a thin sheet of media, lower the take-up torque with the torque limiter. If the take-up torque is too low, the take-up device cannot wind the media prop- erly. If the take-up torque is too high, the sheet of media may slacken so that the image quality can be affected. Adjustment nut 50% of maximum torque Torque indicator Clockwise turn Increases torque (For heavy and thick media) Counterclockwise turn Decreases torque (For light media) 100% of maximum torque 3-17 3 Printing Setting cut sheet media on the printer Unlike roll media, cut sheet media need not be retained with the roll holders. Take care not to set cut sheet media skew. STEPS: 1 Open the front cover and raise the clamp lever. 2 Insert the cut sheet media between the platen and the pinch rollers. Pinch roller Platen 3 Hold the media with the media press lightly, not to be lifted the media. Make setting so that the suction hole at the right end of the platen is covered with the right end of the madia, and adjust the position of the roll holder. Media press Media end Suction hole Rightmost pinch roller 3-18 Setting the media on the printer 4 Push down the clamp lever. Clamp lever 5 Press the [ENTER] key and close the front cover. The printer performs initial operation and displays the screen for media selection. 6 Press the [] key and select [LEAF]. After detecting the media, the printer returns to LOCAL mode. (Refer to ?LOCAL mode (p.2-20)? ) 3-19 3 Printing Selecting and checking printing conditions When the Type 1 to Type 4 printing conditions have already been registered, only selecting an appropriate Type is required to switch between the settings to meet the desired printing. How to select a user type STEPS: (Setting by [FUNCTION] key) 1 Make sure that the printer is in LOCAL mode, and then select [SET UP] using the [FUNCTION] key and press the [ENTER] key. If it is in REMOTE mode, press the [REMOTE] key. L. ∗ > [JV5-01] width : ∗∗∗∗ mm FUNCTION SET UP <ENT> 2 Select an appropriate one of Type 1 to Type 4 using [] or [], and press the [ENTER] key. SET UP SET UP SELECT : TYPE 1 SELECT : TYPE 2 STEPS: (Setting by [USER TYPE] key) 1 Make sure that the printer is in LOCAL mode, and then press the [USER TYPE] key. The user type can be changed in the order of 2 → 3 → 4 → 2... by pressing the [USER TYPE] key. It can also be changed using the [] or [] key. Press the [ENTER] key to return to LOCAL mode. L. ∗ > [JV5-01] width : ∗∗∗∗ mm USER TYPE CHANGE TYPE (1) −> <2> : ent The number in the ( ) following Type represents the current type. How to check the user type The user type currently used for printing can be identified by such an indication as [L.1] or [R.1] that is displayed in LOCAL mode or REMOTE mode. L. 1 > [JV5-01] width : ∗∗∗∗ mm [LOCAL mode] 3-20 R. 1 > [JV5-01] ∗∗.∗∗ m [REMOTE mode] Operating the heaters Operating the heaters When shipped from the plant, all heaters are set to OFF. Switch the heater ON and set the temperature as required. Turning on the power to the heaters Press the [HEAT SW] key on the operation panel to turn on the power to the heaters. The HEAT lamps are lit orange while the heaters are in heating operation, respectively. The CONSTANT lamps light up green when the temperatures of the heaters reach the preset temperature, respectively. 3-21 3 Printing Checking the preset temperature and setting a temperature during printing This section describes how to adjust the heater temperatures which have already been set in FUNCTION mode (Refer to ?Setting the temperatures and standby time of heaters (p.6-32)? ). STEPS: 1 Make sure that the Heater Switch is turned ON. The HEAT lamps are lit orange while the heaters are in heating operation, respectively. The CONSTANT lamps light up green when the temperatures of the heaters reach the preset temperature, respectively. Current temperature ( PRE PRT POST 25°C 25°C 35°C OFF OFF 50°C OFF OFF 35°C) Temperature that has been set Temperature to be set 2 Press the [HEATER] key. Select the PRE-heater, PRINT heater and POST-heater one by one with the [] or [] key, and set temperature for each of them with the [] or [] key. Temperature setting can be selected to OFF or in the range from 20 to 60 °C for Pre-heater and Print heater and in the range from 20 to 70 °C for Post-heater. Pressing the [HEATER] key will restore the original display, and if 30 seconds have passed without any key pressed, the printer goes into LOCAL mode or REMOTE mode. ( PRE PRT POST 25°C 25°C 35°C OFF OFF 50°C OFF OFF 35°C) 3 Press the [END] key to return to LOCAL mode. PRE PRT POST 25°C 25°C 50°C L. ∗ > [JV5-01] width : ∗∗∗∗ mm The display shown below will be kept until the temperatures of all the heaters reach their respective preset levels. When the temperatures of all the heaters have reached their respective preset levels, the buzzer sounds and the CONSTANT lamps for the Pre-heater, Print heater and Post-heater light up. Then the printer enters REMOTE mode. PRE PRT POST 25°C 25°C 50°C TEMPERATURE CONTROL! PLEASE WAIT When printing is to be started before the preset temperatures are reached, press the [ENTER] key to enter REMOTE mode. 3-22 Operating the heaters What is beading ? (When solvent ink is used) Beading is a phenomenon that adjacent dots attracts each other and join. Beading causes speckled patterns or stripes along printing passes (banding.) Example of beading The area in 100% magenta looks fine. Generally, the area in 70-100% single color is easily affected by the unevenness of media feed rate. The print shown here, free from unevenness of color in the vicinity of 100% magenta area, signifies that media feeding has been adjusted properly. Fine looking print In the blue area (100% magenta + 100% cyan), however, speckled patterns and banding occur. This banding is a result of beading. If heater temperatures are low or the ink capacity (ink limit) of the media is low, the first dot does not solidify before the second dot lands on the media. As a result, dots bond to each other and unevenness or banding occurs. In order to avoid beading, it is recommended to raise the heater temperatures, to raise the ink capacity (ink limit) of the media, to adjust the ink volume per dot for the media, to increase the number of printing passes and decrease the ink amount for one shot, and/or to gain time by scan wait. Change media if none of the above-mentioned measures works to prevent beading. Print with banding 3-23 3 Printing Temperature adjustment (When solvent ink is used) This section describes the procedure for setting the heater temperatures properly. The proper heater temperatures depend on the media type and ambient temperature. Set temperatures that are appropriate to the media. For non-coated media or media on which ink is slow to dry, set the heater temperatures so that the ink fixing and drying characteristics will be improved. Set the heater temperatures (p. 6-30) Move the media back and forth with [] and [] keys. Wait until the CONSTANT lamps light up. Yes Is media wrinkled? No Yes Lower the heater temperatures Does media stick to platen? No Correct the media feed rate (p. 3-33) Test printing Yes Raise the heater temperatures Does beading occur? No END 3-24 Initially, set higher temperatures Operating the heaters In case of heater trouble When the Power Switch of the heaters is turned off, or if heaters have developed problem, the display turns as shown below. For recovery from trouble, refer to “Warning messages” of “CHAPTER 5 In Case of Trouble”. (Refer to ?Warning messages (p.5-15)? ) *1 Heater Power OFF PRE PRT POST PRE PRT POST BREAK ∗∗ °C ∗∗ °C THERM ∗∗ °C ∗∗ °C *1 : In case of using water-based ink, if the heaters are all set to “OFF", nothing will be displayed. 3-25 3 Printing Setting the reference value for dot misalignment correction [PG DROP ADJUST.] Correct the difference in the ink fall points between outward trip and homeward trip. Set the reference value for the automatic adjustment to be made when the head gap is changed. Print eight types of test patterns, compare the ink fall points of outward trip and those of homeward trip and adjust dot positions. On completion of [PG DROP ADJUST.] during use of a roll media, the media returns to the printing origin. Then the roll media in the rear of the printer will slacken. Before printing, take up the slack in the roll media by hand; a loose roll media can result in an inferior image quality. Dots may be slightly out of alignment even after [PG DROP ADJUST.] is made. In such a case, perform [DROP.POScorrect] of [MAINTENANCE]. The procedure for [DROP.POScorrect] is the same as that for [PG DROP ADJUST.], but the test patterns to be used are [Pattern 1] to [Pattern 4]. (See 3-35) If [PG DROP ADJUST.] is performed, the correction value of the selected user type [DROP. POS correct] will be cleared. STEPS: 1 Make sure that the printer is in LOCAL mode. If it is in REMOTE mode, press the [REMOTE] key. L. ∗ > [JV5-01] width : ∗∗∗∗ mm 2 Select [MAINTENANCE] using the [FUNCTION] key and press the [ENTER] key. FUNCTION MAINTENANCE <ENT> 3 Select [PG DROP ADJUST.] by pressing the [] key three times and press the [ENTER] key. 4 times MAINTENANCE ST.MAINTENANCE <ent> MAINTENANCE PG DROP ADJUST. 4 Once [PRINT START] is displayed, press the [ENTER] key. <ent> The printer starts printing eight test patterns for adjustment. The eight test patterns that are output are sequentially named [PATTERN 1] to [PATTERN 8]. PG DROP ADJUST. PRINT START 3-26 PRINTING : ent PLEASE WAIT Setting the reference value for dot misalignment correction [PG DROP ADJUST.] 5 Press the [] or [] key to correct the dot position of pattern 1. Select the correct dot position on [PATTERN 1] using the JOG key [] or []. Select the dot position where the dots of outward trip and those of homeward trip form a straight line on the test pattern. Input COMP value. -40.0 - +40.0 PG DROP ADJUST. PATTERN1 = 0.0 Input range: Patterns 1 to 8 -40.0 to 40.0 The dots at the fourth position counted from the zero position in the positive direction form a straight line. In this case, the adjusted value is 4.0. Output direction 6 Press the [ENTER] key. 7 Subsequently repeat Steps 5 and 6 seven times to make PG DROP ADJUSTMENT on Pattern 2 to Pattern 8. Select the correct dot position on each of the patterns. Enter the adjusted values on Patterns 1 to 8 and then terminate PG DROP ADJUSTMENT. Input COMP value. -40.0 - +40.0 PG DROP ADJUST. PATTERN2 = 0.0 Input range: Patterns 1 to 8 -40.0 to 40.0 8 Press the [END] key several times. The printer returns to LOCAL mode. L. ∗ > [JV5-01] width : ∗∗∗∗ mm 3-27 3 Printing Checking for nozzle clogging, and unclogging nozzles Print a test pattern and check to see if there is no faulty print due to clogged nozzles. If any, execute the cleaning function. To print a test pattern on a cut sheet media, use a media whose size is not smaller than 350 mm in width and 600 mm in length (dimension in the media feed direction). After test printing on a roll media, pressing the [REMOTE] or [FUNCTION] key will return the media to the printing origin. Then the roll media in the rear of the printer will slacken. Before next printing, take up the slack in the roll media by hand; a loose roll media can result in an inferior image quality. Printing a test pattern (test printing) STEPS: 1 Make sure that the printer is in LOCAL mode. If it is in REMOTE mode, press the [REMOTE] key. L. ∗ > [JV5-01] width : ∗∗∗∗ mm 2 Press the [TEST DRAW] key, and press the [ENTER] key. The printer starts printing the test pattern. After performing test printing, the printer returns to LOCAL mode. ∗∗ TEST DRAW ∗∗ TEST DRAW <ENT> 3 Check the printed test pattern. If there is any abnormality in the pattern, see “If the printed pattern is abnormal” (See 3-29). No further operation is needed when there is no abnormality in the printed pattern. Nozzles are dirty Normal pattern 3-28 Clogged with ink Abnormal pattern Checking for nozzle clogging, and unclogging nozzles Relationship between head row and test pattern The relations between head row and test pattern print position are as follow. Head 1 Head 2 Head 3 Pattern of head 1 Head 4 Pattern of head 2 Media advance direction Pattern of head 1 Pattern of head 4 If the printed pattern is abnormal (Cleaning) STEPS: 1 Make sure that the printer is in LOCAL mode. If it is in REMOTE mode, press the [REMOTE] key. L. ∗ > [JV5-01] width : ∗∗∗∗ mm 2 Press the [CLEANING] key. CLEANING HEAD SELECT : 12. 34 3 Select the heads to be cleaned using the [] and [] or [] and [] keys, and press the [ENTER] key. Select a set of Head 1 and Head 2 or Head 3 and Head 4. CLEANING HEAD SELECT : 12. 34 3-29 3 Printing 4 Select a cleaning method using the [] or [] key. Type: NORMAL SOFT HARD CLEANING TYPE NORMAL SOFT HARD : NORMAL Select this if any line is missing. Select this if any line is bent. Select this if inferior printing cannot be improved even by [NORMAL] or [SOFT] cleaning. 5 Press the [ENTER] key. Cleaning starts. The second line of the lower LCD shows the progress of the operation as increase in the number of * marks . On completion of cleaning, the printer returns to LOCAL mode. More than 20 seconds remaining CLEANING ACTIVE 00:40 Less than 20 seconds remaining CLEANING ACTIVE L. ∗ > ∗∗∗∗∗∗∗−−−−−−−−−−− [JV5-01] width : ∗∗∗∗ mm If there is a problem with the waste ink tank, the display will show either of the following messages. Follow the displayed instructions to restore the normal conditions. No waste ink tank, Replace a or a tank is FULL. waste ink tank. <ENT>keyHIT is after <ENT>keyHIT is after theTANK set or exchg the TANK exchange. 6 Perform test printing again, and check the result. (See 3-28) Repeat steps 1 to 5 until normal printing result is obtained. ∗∗ TEST DRAW ∗∗ TEST DRAW <ENT> If a normal print of the test pattern cannot be obtained even after executing the cleaning function above, clean the wiper and ink caps. (Refer to ?Cleaning the wiper and ink caps [CARRIAGE OUT] (p.4-7)? ) 3-30 Checking for nozzle clogging, and unclogging nozzles If nozzles cannot be unclogged [FILL UP INK] Execute the [FILL UP INK] function when the blocked nozzles are not unclogged even by executing head cleaning (See 3-29) and nozzle washing (Refer to ?Cleaning the nozzle [NOZZLE WASH] (p.410)? ). STEPS: 1 Make sure that the printer is in LOCAL mode, and then select [MAINTENANCE] using the [FUNCTION] key and press the [ENTER] key. If it is in REMOTE mode, press the [REMOTE] key. L. ∗ > [JV5-01] FUNCTION width : ∗∗∗∗ mm MAINTENANCE <ENT> 2 Select [HD.MAINTENANCE] by pressing the [] key Twice and press the [ENTER] key. Twice MAINTENANCE ST.MAINTENANCE MAINTENANCE <ent> HD.MAINTENANCE <ent> 3 Press the [ENTER] key, select the heads to be cleaned using the [], [], [] or [] key, and press the [ENTER] key. Select a set of Heads 1 and 2 or Heads 3 and 4. HD.MAINTENANCE FILL UP INK FILL UP INK <ent> HEAD SELECT : 12. 34 If there is a problem with the waste ink tank, the display will show either of the following messages. Follow the displayed instructions to restore the normal conditions. No waste ink tank, or a tank is FULL. Replace a waste ink tank. <ENT>keyHIT is after <ENT>keyHIT is after theTANK set or exchg the TANK exchange. 3-31 3 Printing 4 Press the [ENTER] key. Ink filling is started automatically. On completion of ink filling, the printer returns to the following display. More than 20 seconds remaining FILL UP INK 00:40 Less than 20 seconds remaining FILL UP INK HD.MAINTENANCE ∗∗∗∗∗∗∗−−−−−−−−−−− FILL UP INK 5 Press the [END] key several times. The printer returns to LOCAL mode. L. ∗ > [JV5-01] width : ∗∗∗∗ mm 3-32 <ent> Correcting the media feed rate [MEDIA COMP.] Correcting the media feed rate [MEDIA COMP.] The media feed rate changes when the media type or any heater temperature is changed, or depending on whether the take-up device is used or not. Be sure to correct the media feed rate. If the correction value is not appropriate, stripes may appear on the print, thus resulting in a poor print. When any heater temperature is changed, first make sure that the CONSTANT lamps are lit and the preset temperatures have been reached, and then start correction. On completion of [MEDIA COMP.] during use of a roll media, the media returns to the printing origin. Then the roll media in the rear of the printer will slacken. Before printing, take up the slack in the roll media by hand; a loose roll media can result in an inferior image quality. When printing is to be performed while using the take-up device, set the media first and then perform [MEDIA COMP.]. CORRECTION PATTERN Print two bands. Adjust so that an even color density is obtained around the boundary between the two bands. (Available setting values : -255 - 255) Second band Media advance direction First band STEPS: 1 Make sure that the printer is in LOCAL mode. If it is in REMOTE mode, press the [REMOTE] key. L. ∗ > [JV5-01] width : ∗∗∗∗ mm 2 Press the [FEED COMP.] key, select a Type using the [] or [] key, and press the [ENTER] key. The printer will print the pattern. Pattern drawing and input of Comp.value. MEDIA COMP. (−> TYPE ∗) PRINT START : ent PLEASE WAIT PRINTING 3-33 3 Printing 3 By judging from the output pattern, enter a correction value using the [] or [] key. A change of the value of [VALUE] by 6 will move the band by about 0.01 mm. Remember this when determining the correction value. About 0.01mm changes with 6. [1]MEDIA COMP. VALUE Correction value: -255 ~ 255 =0 Clearance Overlap Correction value is too large Correction value is too small 4 Press the [ENTER] key to register the correction value. About 0.01mm changes with 6. [1]MEDIA COMP. VALUE =0 Repeat steps 2 to 4 until normal printing result is obtained. 5 Press the [END] key several times to return to LOCAL mode. L. ∗ > [JV5-01] width : ∗∗∗∗ mm 3-34 If dots are not in alignment [DROP.POScorrect] If dots are not in alignment [DROP.POScorrect] Dots may be slightly out of alignment even after [PG DROP ADJUST.] is made. In this case, execute [DROP.POScorrect] to correct the dot position. [DROP.POScorrect] corrects the difference in the ink fall points between outward trip and homeward trip. Correct the difference in the ink fall points between outward trip and homeward trip. When the head gap is changed, dot positions are adjusted automatically. However, there may be a case where dots are slightly out of alignment. Dot positions can be adjusted manually to get proper printing result. Print four types of test patterns, compare the ink fall points of outward trip and those of homeward trip and correct dot positions. Save the correction value for each selected user type. On completion of [DROP.POScorrect] during use of a roll media, the media returns to the printing origin. Then the roll media in the rear of the printer will slacken. Before printing, take up the slack in the roll media by hand; a loose roll media can result in an inferior image quality. If you changed the head gap, perform [DROP. POS correct] again. If [PG DROP ADJUST.] is performed to change the adjustment value, the correction value of the selected user type will be cleared. STEPS: 1 Make sure that the printer is in LOCAL mode. If it is in REMOTE mode, press the [REMOTE] key. L. ∗ > [JV5-01] width : ∗∗∗∗ mm 2 Select [MAINTENANCE] using the [FUNCTION] key and press the [ENTER] key. FUNCTION MAINTENANCE <ENT> 3 Select [DROP.POScorrect] by pressing the [] key three times and press the [ENTER] key. 3 times MAINTENANCE ST.MAINTENANCE <ent> MAINTENANCE DROP.POScorrect <ent> 4 Once [PRINT START] is displayed, press the [ENTER] key. The printer starts printing four test patterns for dot position correction. The four test patterns that are output are sequentially named [PATTERN 1] to [PATTERN 4]. DROP.POScorrect PRINT START PRINTING : ent PLEASE WAIT 3-35 3 Printing 5 Press the [] or [] key to correct the dot position of pattern 1. Select the correct dot position on [PATTERN 1] using the JOG key [] or []. Select the dot position where the dots of outward trip and those of homeward trip form a straight line on the test pattern. Input COMP value. -40.0 - +40.0 DROP.POScorrect PATTERN1 = 0.0 Input range: Patterns 1 to 4 -40.0 to 40.0 The dots at the fourth position counted from the zero position in the positive direction form a straight line. In this case, the dot position correction value is 4.0. Output direction If no correction value for straight line pattern is found within the range from -40 to +40, adjust the head height and then execute the [DROP.POScorrect] function again. 6 Press the [ENTER] key. 7 Subsequently repeat Steps 5 and 6 three times to correct the dot positions on Pattern 2 to Pattern 4. Select the correct dot position on each of the patterns. Enter the dot position correction values on Patterns 1 to 4 and then terminate dot position correction. Input COMP value. -40.0 - +40.0 DROP.POScorrect PATTERN2 = 0.0 8 Press the [END] key several times. The printer returns to LOCAL mode. L. ∗ > [JV5-01] width : ∗∗∗∗ mm 3-36 Input range: Patterns 1 to 4 -40.0 to 40.0 Effective Plotting Area Effective Plotting Area The printer has an area where printing is not permitted, for mechanical reasons. This area is called “non-printing area”. 0 mm 15 mm Effective printing area 200 mm 15 mm 15 mm Effective printing area 15 mm Media feeding direction 150 mm *1 Roll media 150 mm Cut sheet media The initial value of the right and left non-printing area of media is 15 mm each. The effective printing area can be changed by changing the non-printing area. Set the non-printing area using [MARGIN] in FUNCTION mode. *1 When [DIRECT] has been selected as FEED METHOD, a maximum of 127 mm is added. Margin This function adjusts the right and left margins of the media. Use this function when margines other than 15 mm, which is the standard margin, are required. Each of the right and left margins of the media can be set independently. (-10 to 85 mm) 3-37 3 Printing Establishing the Origin Establish the origin for printing the data on the media loaded on the printer. When printing requires an area other than that defined by the established origin, set the origin at another point by following the origin setting procedure again. STEPS: 1 Once the media detection is completed, move the carriage and media using the JOG keys [], [], [] and [] so that the carriage is located at the position where the origin is to be established. L. ∗ > [JV5-01] ORIGIN SET UP width : ∗∗∗∗ mm 0.0 −−−− Origin (Length) Origin (Width) 2 After determining the origin, press the [ENTER] key. The printer displays the effective printing area, and then returns to LOCAL mode. (When the roll media is used, the value in X direction is not displayed.) From the time the printer starts next printing, it uses the origin that has been established here unless the origin is newly established at another point. ORIGIN SET UP L. ∗ > ∗ ∗ ORIGIN ∗ ∗ [JV5-01] width : ∗∗∗∗ mm Typical setting position of printing origin The printing origin in the depth direction (X’) is positioned at about 140 mm rearward from the cutting line. The printing origin in the scanning direction (Y’) is positioned at 15 mm from the right end of the media. The value in the scanning direction (Y’) can be changed using [MARGIN] in FUNCTION mode. 15 mm (Y’) Cutting line 3-38 About 140 mm (X’) Printing an image Printing an image Starting the printing operation The following describes mode switching for receiving data from the computer and indications on the LCDs during printing. For settings for various functions, refer to “Chapter 6 Operation for Functions”. Before printing on a roll media, make sure that the roll media in the rear of the printer is not slackened. Before printing, be sure to take up the slack, if any, in the roll media by hand; a loose roll media can result in an inferior image quality. Provide the following information when you consult MIMAKI’s service center on problems about printing. Do not print when the media is removed from the paper core of the roll holder. Because tension changes and it may cause poor print quality. When printing is started, the LCDs display the following information. Printing resolution Number of passes Media feed correction during printing can be expressed in numerals R. ∗ +> 720x1080 Bd. Vd. x1. 1L : .12 ∗∗.∗∗ m Number of layers The display indicating that data is being received is alternated with the normal display. Scanning speed: x1=Standard speed x2=Double speed Data type : Vd=Variable data Nd=Normal data Scan direction: Ud=Unidirectional Bd=Bidirectional 3-39 3 Printing STEPS: 1 Check the heater temperatures. Make sure that the CONSTANT lamps on the heater panel are lit. (See 3-22) 2 Press the [REMOTE] key. The printer enters REMOTE mode. The currently selected type (printing conditions) can be confirmed. (Refer to ?Registering printing conditions in a lump (type registration) (p.6-2)? ) R. ∗ > [JV5-01] ∗∗.∗∗ m 3 Transmit the data from the computer. The printing conditions that have been set for the data are displayed. For the method of data transmission, refer to the instruction manual for the output software. R. ∗ +> 720x1080 Bd. Vd. x1. 1L : .12 ∗∗.∗∗ m 4 The printer start printing. During printing, the length of the printed part of the media is displayed. Interrupting the printing operation To interrupt the printing operation, stop the carriage by pressing the [REMOTE] key and erase the received data from the printer. The next time the printer enters REMOTE mode, it would start printing with the data that was interrupted if the data has not been erased. STEPS: 1 Press the [REMOTE] key to stop the printing operation. The printer returns to LOCAL mode. If data is being transmitted from the computer to the printer, stop the data transmission. L. ∗ > [JV5-01] width : ∗∗∗∗ mm 2 Press the [DATA CLEAR] key. The data that has been received is erased. ∗ ∗ DATA CLEAR ∗ ∗ DATA CLEAR <ENT> 3-40 Printing an image Cutting the media after completion of printing After completion of printing, cut the media at any desired position without using the [AUTO CUT] function. Do not turn off the main power switch at the rear of the printer even after com- pletion of printing. If the main power switch is turned off, nozzles may be clogged. When the current head height is 4.0 mm or more, media cutting cannot be performed. (When the ink used is other than sublimation transfer ink) Head height is equal to [head gap] + [thickness of media]. (See 3-5) With [AUTO CUT] function turned on, the printer automatically cuts the media every completion of printing each image. (Refer to ?AUTO CUT (p.6-8)? ) STEPS: 1 Make sure that the printer is in LOCAL mode. If it is in REMOTE mode, press the [REMOTE] key. L. ∗ > [JV5-01] width : ∗∗∗∗ mm 2 Press a JOG key the appropriate number of times until the display turns as shown below, and then press the [FUNCTION] key. The position to cut is decided by JOG key. Any of the JOG keys can be used. ORIGIN SET UP 0.0 MEDIA CUT −−−− <ENT> 3 Press the [ENTER] key. The printer cuts the media. MEDIA CUT MEDIA CUTTING <ENT> PLEASE WAIT 4 The printer returns to LOCAL mode. The printer restores the same status as before entering printing mode. L. ∗ > [JV5-01] width : ∗∗∗∗ mm 3-41 3 Printing When [] key is allocated to Direct Cut Key in [MEDIA CUT] of [MACHINE SET] function. STEPS: 1 Make sure that the printer is in LOCAL mode. If it is in REMOTE mode, press the [REMOTE] key. L. ∗ > [JV5-01] width : ∗∗∗∗ mm 2 Press the [] key. MEDIA CUT <ENT> 3 Press the [ENTER] key. The media is fed automatically until the printed image passes the cut line and then cut. MEDIA CUT MEDIA CUTTING <ENT> PLEASE WAIT 4 The printer returns to LOCAL mode. The printer restores the same status as before entering printing mode. L. ∗ > [JV5-01] width : ∗∗∗∗ mm 3-42 Printing an image Automatic cleaning Setting can be made to select whether or not to clean the heads automatically during printing. Reliable output results are always ensured if the heads are always kept clean. The first cleaning is performed immediately before the first printing after the printer is started. Then subsequent cleaning is performed every printing on the specified length of media. When five copies of an image 80 cm long are printed in series, cleaning is repeated before printing each of the 1st, 3rd, and 5th copies. Print length: 1.6 m Cleaning (3rd time) Print length: 0.8 m No cleaning Print length: 1.6 m Cleaning (2nd time) Print length: 0.8 m No cleaning Print length: 0.0 m Cleaning (1st time) When operation interval is 1000 mm (example) STEPS: 1 Make sure that the printer is in LOCAL mode. If it is in REMOTE mode, press the [REMOTE] key. L. ∗ > [JV5-01] width : ∗∗∗∗ mm 2 Select [SET UP] using the [FUNCTION] key and press the [ENTER] key. Select type 1 to 4 and press the [ENTER] key. FUNCTION SET UP SET UP <ENT> SELECT : TYPE 1 3 Select [AUTO CLEANING] by pressing the [] key 13 times and press the [ENTER] key. When [AUTO CLEANING] is to be set to OFF, select ON using the [] or [] key and confirm the selection by pressing the [ENTER] key. DECIDE 13 times DETAIL SET [1] AUTO CLEANING = [ENTER] = [FUNC.] [1]AUTO CLEANING <ent> SET UP : ON 3-43 3 Printing 4 Press the [FUNCTION] key. CLEANING INTERVAL 10 - 30000mm INTERVAL : TYPE 1000mm : NORMAL 5 At this point, either of [CLEANING INTERVAL] and [CLEANING TYPE] can be selected by pressing the [] or [] key. CLEANING INTERVAL CLEANING TYPE 10 - 30000mm SOFT / NORMAL / HARD INTERVAL : TYPE INTERVAL : TYPE 1000mm : NORMAL 1000mm : NORMAL 6 Set the value of [CLEANING INTERVAL] using the [] or [] key. Change the display by pressing the [] or [] key, select a type on the [CLEANING TYPE] display using the [] or [] key, and press the [ENTER] key. The initial value of [CLEANING INTERVAL] is 1000 mm. [CLEANING TYPE] : SOFT, NORMAL, HARD CLEANING INTERVAL SOFT / NORMAL / HARD INTERVAL : TYPE INTERVAL : TYPE 1000mm : NORMAL 1000mm : NORMAL 7 Press the [END] key several times. The printer returns to LOCAL mode. L. ∗ > [JV5-01] width : ∗∗∗∗ mm 3-44 Twice CLEANING TYPE 10 - 30000mm Printing an image Maintenance while Printing (When sublimation transfer ink is used) The auto cleaning or auto wiping while printing will be set. Head cleaning or wiping will be performed while printing, preventing the defective printing in advance. CLEANING : Cleaning of the head is automatically performed while printing WIPING : Wiping of the head is automatically performed while printing. OFF : No cleaning or wiping will be performed while printing. When you set to "CLEANING", you can set the cleaning method and the interval for performing the automatic cleaning: Cleaning method : SOFT, NORMAL, STRONG Interval : 0.1m to 00.0m (set in increment of 0.1m) When you set to "WIPING", you can set the interval for performing the automatic wiping. Interval : 10~9990 (set in increment of 10 scans) The cleaning function does not work when Ink-near-end is generated. Depending on the conditions of the heads, etc., the defective printing could not be recovered even performing this function. When setting to CLEANING. STEPS: 1 Make sure that the printer is in LOCAL mode. If it is in REMOTE mode, press the [REMOTE] key. L. ∗ > [JV5-01] width : ∗∗∗∗ mm 2 Select [SET UP] using the [FUNCTION] key and press the [ENTER] key. When the following display is shown, press the [ENTER] key. FUNCTION SET UP SET UP <ENT> SELECT : TYPE 1 3 Select [AUTO CLEANING] by pressing the [] key 14 times and press the [ENTER] key. With [],[] keys, select CLEANING. When cleaning method and cleaning interval are not changed, press [ENTER] key. DECIDE 14 times DETAIL SET [1] Print. MAINTE = [ENTER] = [FUNC.] [1]Print. MAINTE <ent> SELECT : CLEANING 3-45 3 Printing 4 Press the [FUNCTION] key. CLEANING INTERVAL 0.1 - 100.0m INTERVAL : TYPE 0.1m : NORMAL 5 At this point, either of [CLEANING INTERVAL] and [CLEANING TYPE] can be selected by pressing the [] or [] key. CLEANING INTERVAL CLEANING TYPE 0.1 - 100.0m SOFT / NORMAL / HARD INTERVAL : TYPE INTERVAL : TYPE 0.1m : NORMAL 0.1m : NORMAL 6 Set the value of [CLEANING INTERVAL] using the [] or [] key. Change the display by pressing the [] or [] key, select a type on the [CLEANING TYPE] display using the [] or [] key, and press the [ENTER] key. The initial value of [CLEANING INTERVAL] is 1.0 m. [CLEANING TYPE] : SOFT, NORMAL, HARD CLEANING INTERVAL SOFT / NORMAL / HARD INTERVAL : TYPE INTERVAL : TYPE 0.1m : NORMAL 0.1m : NORMAL 7 Press the [END] key several times. The printer returns to LOCAL mode. L. ∗ > [JV5-01] width : ∗∗∗∗ mm 3-46 Twice CLEANING TYPE 0.1 - 100.0m Printing an image When setting to WIPING. STEPS: 1 Make sure that the printer is in LOCAL mode. If it is in REMOTE mode, press the [REMOTE] key. L. ∗ > [JV5-01] width : ∗∗∗∗ mm 2 Select [SET UP] using the [FUNCTION] key and press the [ENTER] key. When the following display is shown, press the [ENTER] key. FUNCTION SET UP SET UP <ENT> SELECT : TYPE 1 3 Select [AUTO CLEANING] by pressing the [] key 14 times and press the [ENTER] key. With [],[] keys, select CLEANING. When cleaning method and cleaning interval are not changed, press [ENTER] key. DECIDE 14 times DETAIL SET [1] Print. MAINTE. = [ENTER] = [FUNC.] [1]Print. MAINTE <ent> SELECT : CLEANING 4 Press the [FUNCTION] key. WIPING INTERVAL 10 - 9990 count WIPING SCAN COUNT = 0 5 After setting [WIPING INTERVAL] with [],[] keys, press [ENTER] key. The Default value of [WIPING INTERVAL] is 50 times. Twice WIPING INTERVAL 10 - 9990 count WIPING SCAN COUNT = 0 6 Press the [END] key several times. The printer returns to LOCAL mode. L. ∗ > [JV5-01] width : ∗∗∗∗ mm 3-47 3 Printing Display of [INK NEAR END] or [INK END] A message appears when one of the two ink cartridges in a set is completely empty and the other is nearly empty. Once the [INK NEAR END] message appears, printing can be continued but the ink may run out during printing. Immediately replace the relevant ink cartridge with a new one. Once the red one of Cartridge LEDs starts flashing or [NEAR END] is indicated on the LCD, replace the ink cartridge without delay. Never remove any cartridge if there is no cartridge to be installed in place of the cartridge to be removed. If any cartridge is kept removed without another one installed instead of the removed one, the ink supply path will dry, thus resulting in a malfunction of the printer. If ten minutes have passed with any cartridge removed and without another one installed, the printer will warn the operator by sounding the warning buzzer. Before starting continuous printing, be sure to check the ink level for adequacy. The printer will stop printing if ink runs out during printing. A change in color may be found when printing is resumed. The cause is the difference in drying time between the print area before the stop of printing and that after the resumption of printing. Indication of remaining amount of ink for each cartridge Pressing the [ENTER] key in REMOTE mode or LOCAL mode will display the remaining amount of ink. When an ink-related error has occurred, pressing the [INFORMATION] key will display the warning concerning the current supply cartridge. (Refer to ?Function Flowchart [LOCAL mode] (p.6-40)? ) FLUSHING BOX 12.3% ErrorDetail = [INFO] ES3-INK MCYKKYCM REMAIN 23456789 INK NEAR END: displayed when a color of ink has been nearly used up. The display indicates the color of ink that has been nearly used up. The display shown below indicates that the black ink has been nearly used up. Ink will be finished soon. Exchange it. INK NEAR END −−−− −−KK −−−− −−−− [INK NEAR END] INK END: displayed when a color of ink has been completely used up. The display indicates the color of ink that has been completely used up. The display below indicates that the magenta ink has been completely used up. Ink was finished Exchange it. INK END MM−− −−−− −−−− −−−− [INK END] 3-48 Display of [INK NEAR END] or [INK END] STEPS FOR REPLACEMENT When a cartridge LED (red) is lit or flashing, replace the cartridge immediately. Never remove any cartridge if there is no cartridge to be installed in place of the cartridge to be removed. If any cartridge is kept removed without another one installed instead of the removed one, the ink supply path will dry, thus resulting in a malfunction of the printer. If ten minutes have passed with any cartridge removed and without another one installed, the printer will warn the operator by sounding the warning buzzer. The replacement procedure described below is applied to a case where an error has occurred in both cartridges. 1 A message [INK NEAR END] or [INK END] appears during printing. Once [INK NEAR END] appears, the printer returns to LOCAL mode and stops operation every completion of printing a single image. Go to Step 2 after a stop of printing. Once [INK END] appears, printing cannot be continued. When replacement of a cartridge is required during printing, replace the cartridge for which the cartridge LED (red) is lit or flashing. Take care not to remove the cartridge for which the cartridge LED (green) is lit; removing it would discontinue printing. R. 1 > [JV5-01] INK Near END MCYKKYCM [INK NEAR END] R. 1 > [JV5-01] INK END MCYKKYCM [INK END] 2 Replace the ink cartridge with a new one. Pull out the ink cartridge of the indicated color and then set a new ink cartridge. 3 Set the printer in REMOTE mode. Printing of the remaining images can be resumed. 3-49 3 Printing Display ink information The remaining amount of ink can be checked. STEPS: 1 Press the [ENTER] key while the printer is in REMOTE mode. The remaining amount of ink is displayed in nine steps using numbers 1 to 9. “1” indicates that only a little amount of ink is remaining. The higher the number, the more the remaining amount of ink. Also you can check the ink type currently used. R. ∗ > [JV5-01] HS-INK MCYKKYCM ∗∗.∗∗ m REMAIN 34567899 2 Press the [ENTER] key. The printer returns to REMOTE mode. Even when the ink remaining amount indicates “ 1 ”, printing can continue. If it indicates [INK NEAR END], change the ink. 3-50 Change the operation condition of the ambient temperature Change the operation condition of the ambient temperature If you print in the status that the temperature of the place in which the machine has installed (ambient temperature) is out of the usable temperature range, ink discharging defect or changing color may occur, and it adversely affects the printing quality. To prevent such an adverse effect, if the ambient temperature is outside the usable range, this machine displays an error message to inform you of it. In the initial condition, the machine displays the error message, but it continues drawing. However, you can set the machine so that it may start drawing after the ambient temperature becomes within the usable temperature range to prevent an adverse effect on the drawing quality. For the details of the usable temperature range, refer to (Refer to ?Available temp. (p.1-19)? ). If the ambient temperature is outside the usable range, the error message below is displayed: ∗∗∗∗ ERROR 120 ∗∗∗∗ ∗∗∗∗ ERROR 121 ∗∗∗∗ ENVIRONMENT TEMP (LO) ENVIRONMENT TEMP (HI) The error message is displayed: 1. When you move from the local mode to the remote mode by pressing the [REMOTE] key 2. When receiving the online data and starting drawing STEPS: 1 Make sure that the printer is in LOCAL mode. If it is in REMOTE mode, press the [REMOTE] key once. L. ∗ > [JV5-01] width : ∗∗∗∗ mm 2 Select [MACHINE SETUP] using the [FUNCTION] key and press the [ENTER] key. FUNCTION MACHINE SETUP <ENT> 3 Select [ENV. TEMP.] by pressing the [] key once and press the [ENTER] key. 12 to 14 times MACHINE SETUP DRY & EXHST.FAN <ent> MACHINE SETUP ENV. TEMP. <ent> 4 Select the operation with the [] or [] key and press the [ENTER] key. Not wait ARR. : Only displays the error and continues drawing. Wait arrival : Waits until the ambient temperature becomes within the usable range. ENV. TEMP. SEL : Not wait ARR. 3-51 3 Printing 5 Press the [END] key several times. The printer returns to LOCAL mode. L. ∗ > [JV5-01] width : ∗∗∗∗ mm Operation when selecting [Wait arrival] • After displaying the error, the machine displays the message to inform you that it waits until the ambient temperature becomes within the usable rage. ∗∗∗∗ ERROR 120 ∗∗∗∗ ENVIRONMENT TEMP (LO) ENVIRONMENT TEMP (LO) ENVIRONMENT TEMP (LO) PLEASE WAIT • When you start drawing while the machine waits for arrival, press the [ENTER] key. The machine terminates the waiting operation and moves to the remote mode or starts drawing. • When you change the machine to the local mode while it waits for arrival, press the [REMOTE] key. 3-52 Extension of Ink Expiry Month Extension of Ink Expiry Month Ink expiry month can be extended for six months from the expired month. When used without extension, ink becomes unusable after two months of the expiry month. The following setting or confirmation screen appears when the power of this machine is turned on, or when expired ink cartridge is set. An ink cartridge that is once set [YES] for extension cannot be changed the set- ting. To extend multiple inks' expiry month at a time, set the expired ink cartridges, and then set the extension. Extension of ink expiry month may lower the print image quality or print quality such as color difference or banding. Please understand them when extending ink expiry month. When initial filling, the ink expired more than two months ago cannot be used. STEPS: 1 When the setting is required, the screen below is displayed: EXTEND EXPIRE DATA ? YES < > NO NOT RECOMMENDED !! alternately displayed YES < > NO 2 Press the [][] key to select [YES]. When the ink expiry month is not extended, select [NO]. In this case, the ink will be disabled after two months of the expiry month. EXPIRE DATA EXTENDED PRESS [ENT] 3 Press the [ENTER] key. Ink expiry month is extended. When extended six months (six months from the ink expired month) have passed, a message "COMPLETELY EXPIRED" appears and the ink becomes unusable. Immediately replace the ink cartridge with a new one. If ink expiry month is extended, the cartridge LED blinks in green while supplying ink from the extended cartridge. 3-53 3 Printing When a cartridge extended the expiry month is set When a cartridge extended the expiry month is set and the power is turned on, or when a cartridge extended the expiry month is set to this machine, the following screen appears. EXPIRED INK IN USE PRESS [ENT] alternately displayed NOT RECOMMENDED !! PRESS [ENT] To check expired ink, press the [FUNCTION] key while displaying the screens above alternately. When an ink expiry month is extended Example: If expiry month of your ink cartridge is February 2010. • When the expiry month is not extended February March April May or later Printable con- Printable con- Not printable tinuously tinuously continuously Not printable (Unusable) A message "Expiration:2MONTH" or "COMPLETELY EXPIRED" appears on the display, and the cartridge lamp lights in red. A message "Expiration:1MONTH" appears on the display, and the cartridge lamp blinks in red. A message "Expiration" appears. • When the expiry month is extended (When extended at the time of February March Printable continuously Printable continuously Printable continuously Printable continuously April Not printable continuously ) May or later September Not printable (Unusable) Printable continuously Not printable continuously Not printable (Unusable) Printable continuously Not printable (Unusable) A message "COMPLETELY EXPIRED" appears. Even if extended at any time from April to August, it is extended for six months from the expiry month. 3-54 Switch Setting of Ink Supply Path Switch Setting of Ink Supply Path For the ink supply, condition of the ink cartridge to be used first by the double-cartridge automatic switching function can be selected. When expired ink cartridge is set, the expired cartridge is used first regardless of the setting below. When the optional bulk ink system (MBIS1) is used and the MBIS1 is set in both slots, the setting below is effective. When both an ink cartridge and the bulk ink system (MBIS1) are set in the supply paths of the same color, see the next page. STEPS: 1 Make sure that the printer is in LOCAL mode. If it is in REMOTE mode, press the [REMOTE] key. L. ∗ > [JV5-01] width : ∗∗∗∗ mm 2 Select [MACHINE SETUP] using the [FUNCTION] key and press the [ENTER] key. FUNCTION MACHINE SETUP MACHINE SETUP <ENT> DRY & EXHST.FAN <ent> 3 Select [CART. PRIORITY] by pressing the [] key and press the [ENTER] key. 8 to 10 times MACHINE SETUP CART. PRIORITY <ent> 4 Select the condition of ink to be used first by pressing the [][] keys and press the [ENTER] key. INK LEVEL : Low ink cartridge is used first EXP. DATE : Close-to-date ink cartridge is used first CART. PRIORITY SELECT : INK LEVEL 5 Press the [END] key several times. The printer returns to LOCAL mode. L. ∗ > [JV5-01] width : ∗∗∗∗ mm 3-55 3 Printing When both ink cartridge and MBIS1 are used When both an ink cartridge and the optional bulk ink system (MBIS1) are set in the supply paths of the same color, you can select the ink to be used first. Usually, when both an ink cartridge and the bulk ink system (MBIS1) are set in the supply path of the same color, the ink in the bulk ink system (MBIS1) is used first. If supply path does not have both ink cartridge and the bulk ink system (MBIS1), this function cannot be set. Pull out the ink cartridge selected on this function or turn the power on again to disable the setting. STEPS: 1 Press the [ENTER] key in LOCAL or REMOTE of the printing mode. Sb52-INK MBYKKYBM REMAIN 34567899 2 Press the [REMOTE] key. Displays the currently supplying ink. B : Bulk ink system (MBIS1) C : Ink cartridge - : Only one type is set BULK/CART SELECT B - - B - B - C 3 Press the [][][][] key to set the supply path and the ink to be used first. Select the supply path : Press the [][] key. Select the ink to be used first : Press the [][] key. BULK/CART SELECT C 4 Press the [ENTER] key. - - It enters in the LOCAL or the REMOTE mode. 3-56 B - B - C Turning the power off Turning the power off After completing all desired operations with the printer, press the power switch on the front of the printer to turn the power off. Before turning the power off, make sure that the printer is not receiving any data from the computer and that the printer has no data that has not been output yet. Also make sure that the heads are located at the capping station. Do not turn off the main power switch on the rear face. The power is turned on periodically and the nozzle clogging preventive function is activated. (Flushing function) If the main power switch is left turned off for an extended period of time, nozzles will be clogged. In such a case, the printer must be repaired by MIMAKI’s service engineer. Keep the front cover and maintenance covers all closed. If any of the covers is open, the nozzle clogging preventive function will not be activated. At turning off the power switch, the exhaust fan of the printer also stops. For ventilation, do not turn off the power switch immediately after printing. If the power to the printer was turned off without the heads capped, turn the power on again. The heads will return to the capping station, where they will be capped and prevented from drying. If the power is turned off while the printer is engaged in printing, the heads may fail to be retracted in the capping station. If the heads are left without capped for an extended period of time, nozzles may be clogged. Even when the main power switch is put off for moving the equipment, make sure to press the power switch on the front of the equipment and confirm that the power is off and then put off the main power switch. STEPS: 1 Press the power switch on the front. The lamp of the power switch goes out. 3-57 3 Printing 3-58 CHAPTER 4 Daily Care This chapter describes the recovery procedure for ink clogging and the cleaning procedure for each section. Routine Maintenance .............................................................4-2 Cleaning the wiper and ink caps [CARRIAGE OUT] ..............4-7 Cleaning the nozzle [NOZZLE WASH] ................................4-10 Cleaning the ink discharge passage [DISWAY WASH] .......4-14 When the operation of the printer is to be suspended for a long time [CUSTODY WASH] ......................................................4-16 Before executing the [PUMP TUBE WASH] ........................4-20 PUMP tube cleaning ............................................................4-23 Wiper cleaning .....................................................................4-25 Cleaning the heads and their surrounding parts [CR.MAINTENANCE] ...........................................................4-28 Preventing nozzle clogging while power is off [SLEEP SET UP] .................................................................4-31 Setting periodical operations in stand-by mode [ROUTINE SETUP] ..............................................................4-34 Other maintenance functions ...............................................4-41 When the waste ink tank is full .............................................4-44 Cleaning of Flushing Box .....................................................4-46 Maintenance when using sublimation transfer ink ...............4-49 To use sublimation transfer ink with more stable quality .....4-55 Replacing the wiper [WIPER EXCHANGE] .........................4-57 Replacing the cutter blade ...................................................4-59 4 Daily Maintenance Routine Maintenance Be sure to perform maintenance of the printer periodically or whenever necessary so that the printer can be used with its inherent accuracy for a long time. Precautions in cleaning Icon Meaning When using the cleaning solution, be sure to wear the supplied protective glasses. (When solvent ink is used.) The ink contains an organic solvent. When performing cleaning, be sure to wear gloves so that no ink will come in contact with your skin. (When solvent ink is used.) Never disassemble the printer. Disassembling it can result in electric shock hazards or damage to the machine. Before starting maintenance work, be sure to turn off the main power switch and unplug the power cable; otherwise, an unexpected accident may occur. Prevent moisture from entering the printer. Moisture inside the printer can cause electric shock hazards or damage to the machine. To ensure reliable ink jetting, it is necessary to have the printer perform ejection of a fine amount of ink (flushing) periodically while printing (output) is suspended for an extended period of time. When printing is to be suspended for a long time, turn off only the power switch in the front of the printer; leave the main power switch at the rear of the printer turned ON (in the position of | ) and leave the power cable connected. If organic solvent ink is mixed with water or alcohol, coagulation occurs. Do not wipe the nozzle face of the heads, the wiper or caps with water or alcohol. Doing so can cause nozzle clogging or printer failure. (When solvent ink is used.) Do not use benzine, thinner, or any chemical agent containing abrasives. Such materials can deteriorate or deform the surface of covers. Do not apply lubricating oil or the like to any part inside the printer. Doing so can cause printing failure. Be careful not to allow the cleaning solution or ink to adhere to covers, as this may cause deterioration or discoloring of the surface of covers. 4-2 Routine Maintenance Notes on cleaning solution Use the cleaning liquid dedicated for the ink being used. Solvent ink Cleaning solution 200 for Solvent Ink kit (SPC-0369) MILD SOVENT WASHING LIQUID (SPC-0294) Water-based ink Cleaning Liquid Bottle Kit A29 (SPC-0137) [Sold separately] Water-based Cleaning Liquid Cartridge (SPC-0259) [Sold separately] Cleaning exterior surfaces If exterior surfaces of the printer is stained, dampen a soft cloth with water or a neutral detergent diluted with water, squeeze it and wipe the surfaces with the cloth. Cleaning the platen The platen may be stained with lint or paper dust produced by media cutting. Brush or wipe dust from the platen with a soft brush, a dry cloth or paper towel. If it is stained with ink, wipe it off with a paper towel containing a little amount of the cleaning solution. When cleaning the platen, remember that dust and dirt can accumulate easily in the groove for the media press and the groove (cutter line) for media cutting. Before starting to clean the platen, make sure that the platen has cooled ade- quately. 4-3 4 Daily Maintenance Cleaning the media sensor Using a cotton swab, clean the surface of the sensor of dust and dirt. Cleaning the media press If media chips and dust accumulate between the media press and platen, there may be a case where media cannot be fed normally or chips or dust may adhere to nozzles, thus disturbing normal printing. To avoid such trouble, be sure to perform cleaning frequently. 4-4 Routine Maintenance Opening the maintenance cover Remove a maintenance cover to clean the inside of the printer. It is necessary to remove the appropriate one of the right and left maintenance cover, depending on the part to be cleaned. Remove one of the maintenance covers by the following procedure. After removing the maintenance cover, take care not to touch the reading sur- face of the linear encoder scale. In addition, take care that the reading surface is not soiled or scratched. The print quality may be degraded if skin grease adheres to the wiper. Do not touch wiper with your bare hand. Wiper Linear encoder scale 4-5 4 Daily Maintenance STEPS: 1 Remove the top two screws for the maintenance cover. 2 With the shaft of the frame as the fulcrum, turn over the maintenance cover toward the front so that it is placed in the vertical position. 3 Pull out the maintenance cover upward. 4-6 Cleaning the wiper and ink caps [CARRIAGE OUT] Cleaning the wiper and ink caps [CARRIAGE OUT] The ink caps prevent the nozzles in the heads from drying and thus being clogged. The wiper wipes off the ink adhering to the surface of nozzles. As the printer is used, the wiper and ink caps gradually become stained with ink and dust. If nozzle missing cannot be corrected even after executing the CLEANING function (Refer to ?If the printed pattern is abnormal (Cleaning) (p.3-29)? ) , use Cleaning kit and cotton swab. Tools necessary for cleaning. When water-based ink / sublimation transfer ink is used When solvent ink is used Cleaning solution (SPC-0369) Cleaning Liquid Bottle Kit A29 (SPC-0137) Cotton swab Cotton swab Dropper Dropper Gloves Gloves Goggle Goggle You are recommend to perform cleaning frequently in order to maintain a high image quality and keep the printer in good condition. When cleaning the ink station or heads, be sure to wear supplied gloves (When solvent ink is used) and goggle . If you do not use the goggle, you may get ink in your eyes. Do not move the carriage out of the capping station by hand. Follow the following procedure to move the carriage. For cleaning, we recommend the use of the clean stick. If using cotton swab, remaining lint of the cotton swab may cause printing failure. STEPS: 1 Make sure that the printer is in LOCAL mode. If it is in REMOTE mode, press the [REMOTE] key. L. ∗ > [JV5-01] width : ∗∗∗∗ mm 2 Press the [ST.MAINT] key and press the [ENTER] key. When [CARRIAGE OUT] is displayed, press the [ENTER] key. Then the carriage moves to above the platen. ST.MAINTENANCE CARRIAGE OUT <ent> 4-7 4 Daily Maintenance 3 Open the right maintenance cover. 4 Pull out the wiper by holding the projections at both ends. 5 Remove the ink from the wiper and the bracket using a cotton swab dampened with the cleaning solution. Replace the wiper with a new one if it is badly soiled or curled. To replace the wiper, terminate the work instructed here first and then follow the wiper replacement procedure. (See 4-57) 4-8 Cleaning the wiper and ink caps [CARRIAGE OUT] 6 After cleaning the wiper, install it in position by holding the projections at both ends. Be careful of the direction of the wiper. 7 Wipe off ink or dirt adhering to the rubbers of the caps and the wiper cover using a cotton swab dampened with the cleaning solution. Be careful not to leave lint of the cotton swab. Lint may cause printing failure. Ink cap 8 Close the maintenance cover, and press the [ENTER] key. After performing the initial operation, the printer returns to LOCAL mode. ∗Being Initialized∗ ST.MAINTENANCE COMPLETED :end PLEASE WAIT 4-9 4 Daily Maintenance Cleaning the nozzle [NOZZLE WASH] Perform cleaning of the nozzles in the heads to prevent them being clogged with coagulated ink. Be sure to wear the supplied goggle and gloves.The ink contains an organic solvent. If ink settles on your skin or gets in your eyes, immediately and completely wash them off with water. Then, consult a doctor as soon as possible. (When solvent ink is used) If nozzle clogging cannot be corrected even after repeating the cleaning proce- dure described here several times, execute the [FILL UP INK] (Refer to ?If nozzles cannot be unclogged [FILL UP INK] (p.3-31)? ) , [DISCHARGE&WASH] (Refer to ?[DISCHARGE&WASH] (p.5-6)? ) functions. If the remedies instructed here do not work, contact your dealer or an office of MIMAKI. If both of the two cartridges in a set are in [INK NEAR END] or [INK END] status, the nozzle cleaning function (ink suction) is not activated. Replace the cartridges that are in [INK NEAR END] or [INK END] status with ones containing a sufficient amount of ink. For cleaning, we recommend the use of the clean stick. If using cotton swab, remaining lint of the cotton swab may cause printing failure. STEPS: 1 Make sure that the printer is in LOCAL mode, and then press the [ST.MAINT] key. If it is in REMOTE mode, press the [REMOTE] key. L. ∗ > [JV5-01] ST.MAINTENANCE width : ∗∗∗∗ mm CARRIAGE OUT <ent> 2 Select [NOZZLE WASH] by pressing the [] key twice and press the [ENTER] key. The carriage will come out of the capping station. Twice ST.MAINTENANCE NOZZLE WASH 4-10 <ent> Cleaning the nozzle [NOZZLE WASH] 3 Open the right maintenance cover. 4 Pull out the wiper by holding the projections at both ends. 5 Remove the ink from the wiper, bracket and the vicinity of the wiper insertion hole using a cotton swab dampened with the cleaning solution. Replace the wiper with a new one if it is badly soiled or curled. To replace the wiper, terminate the work instructed here first and then follow the wiper replacement procedure. (See 4-57) 4-11 4 Daily Maintenance 6 After cleaning the wiper, install it in position by holding the projections at both ends. Be careful of the direction of the wiper. 7 Press the [ENTER] key. Clean a wiper and bracket. WIPER CLEANING COMPLETED(NEXT) : ent 8 Fill the caps with the cleaning solution using a dropper. Ink cap 9 Close the maintenance cover and press the [ENTER] key. Fill a cap with washing liquid fully Fill the liquid. COMPLETED(NEXT) : ent 10Set the time to wait using the [] or [] key. Normally set 1 minute. Input leaving time. 1 - 99 min ST.MAINTENANCE LEAVING TIME 4-12 : 1 min Input range: 1 to 99 minutes (In steps of 1 minute) Cleaning the nozzle [NOZZLE WASH] 11With [] [] key, set the automatic power-off selection after the nozzle cleaning. [POWER OFF] : No(default) Yes : No power off. : Power off automatically after the end of the nozzle cleaning. CLtypeSetWithFUNCkey ST.MAINTENANCE POWER OFF :No When you press [FUNCTION] key in the automatic power-off selection screen, the cleaning type after the nozzle cleaning can be selected. [CLEANING TYPE] : NORMAL, SOFT, HARD ST.MAINTENANCE CLEANING TYPE :Normal 12Press the [ENTER] key. The carriage returns to the station. The nozzles are capped and the display shown below continues for the set waiting time during which suction of cleaning liquid and cleaning are performed. On the lapse of the set waiting time, the printer performs the initial operation and returns to LOCAL mode. ∗Being Initialized∗ PLEASE WAIT More than 20 seconds remaining During The PostProc PLEASE WAIT ST.MAINTENANCE 01:00 Less than 20 seconds remaining During The PostProc PLEASE WAIT ST.MAINTENANCE ∗∗∗∗∗∗∗−−−−−−−−−−− L. ∗ > [JV5-01] width : ∗∗∗∗ mm 4-13 4 Daily Maintenance Cleaning the ink discharge passage [DISWAY WASH] Use this function when the [PUMP TUBE WASH] function cannot be used. There may be a chance that the ink discharge passage can be clogged with coagulated ink. To avoid clogging, clean the ink discharge passage periodically. (When solvent ink is used, clean once a week.) Be sure to wear the supplied goggle and gloves.The ink contains an organic solvent. If ink settles on your skin or gets in your eyes, immediately and completely wash them off with water. Then, consult a doctor as soon as possible. (When solvent ink is used) Do not move the carriage out of the capping station by hand. Select the [ST.MAINTENANCE] function to move the carriage. First make sure that the pump is not clogged. If the pump is clogged, the cleaning function does not work normally. When the [DISWAY WASH] function is executed, there may be a case where the cleaning liquid keeps staying in the caps without flowing out. In such a case, the pump may be clogged. If the pump is clogged, contact your dealer or a sales office of MIMAKI. STEPS: 1 Make sure that the printer is in LOCAL mode, and then press the [ST.MAINT] key. If it is in REMOTE mode, press the [REMOTE] key. L. ∗ > [JV5-01] ST.MAINTENANCE width : ∗∗∗∗ mm CARRIAGE OUT <ent> 2 Select [DISWAY WASH] by pressing the [] key three times and press the [ENTER] key. The carriage will come out of the capping station. Idle suction is performed in cycles of 5-second suction followed by 10-second pause. 3 times ST.MAINTENANCE DISWAY WASH <ent> If there is a problem with the waste ink tank, the display will show either of the following messages. Follow the displayed instructions to restore the normal conditions. No waste ink tank, or a tank is FULL. 4-14 Replace a waste ink tank. <ENT>keyHIT is after <ENT>keyHIT is after theTANK set or exchg the TANK exchange. Cleaning the ink discharge passage [DISWAY WASH] 3 Open the right maintenance cover. 4 Take the cleaning solution into the dropper. During a pause of idle suction, drop cleaning liquid into a cap until just before it starts overflowing from the cap. Repeat dropping the cleaning liquid into each of the other caps the same way. Ink cap 5 Close the maintenance cover and press the [ENTER] key. Fill a cal while absorption stops. ST.MAINTENANCE COMPLETED : ent 6 The printer performs idle suction for 30 seconds, and after initial operation, returns to LOCAL mode. ∗Being Initialized∗ PLEASE WAIT L. ∗ > [JV5-01] width : ∗∗∗∗ mm 4-15 4 Daily Maintenance When the operation of the printer is to be suspended for a long time [CUSTODY WASH] When the operation of the printer is to be suspended for a week or more, use the [CUSTODY WASH] function to clean the nozzles in the heads and the ink discharge passage. After the cleaning, store the printer properly. Be sure to wear the supplied goggle and gloves.The ink contains an organic solvent. If ink settles on your skin, immediately wash it off with water. If you get ink in your eyes, immediately wash your eyes with a lot of clean water for at least 15 minutes. In doing so, also wash the backside of eyelids to rinse ink away completely. Then, consult a doctor as soon as possible. (When solvent ink is used.) If there are cartridges that are in [INK NEAR END] or [INK END] status, the noz- zle cleaning function (ink suction) is not activated. Replace the cartridges that are in [INK NEAR END] or [INK END] status with ones containing a sufficient amount of ink. For cleaning, we recommend the use of the clean stick. If using cotton swab, remaining lint of the cotton swab may cause printing failure. STEPS: 1 Make sure that the printer is in LOCAL mode, and then press the [ST.MAINT] key. If it is in REMOTE mode, press the [REMOTE] key. L. ∗ > [JV5-01] ST.MAINTENANCE width : ∗∗∗∗ mm CARRIAGE OUT <ent> 2 Select [CUSTODY WASH] by pressing the [] key four times and press the [ENTER] key. The carriage will come out of the capping station. 4 times ST.MAINTENANCE CUSTODY WASH 4-16 <ent> When the operation of the printer is to be suspended for a long time [CUSTODY WASH] 3 Open the right maintenance cover. 4 Pull out the wiper by holding the projections at both ends. 5 Remove the ink from the wiper and the bracket using a cotton swab dampened with the cleaning solution. Replace the wiper with a new one if it is badly soiled or curled. To replace the wiper, terminate the work instructed here first and then follow the wiper replacement procedure.(See 4-57) 4-17 4 Daily Maintenance 6 After cleaning the wiper, install it in position by holding the projections at both ends. Be careful of the direction of the wiper. 7 Press the [ENTER] key. Clean a wiper and bracket. WIPER CLEANING COMPLETED(NEXT) : ent 8 Fill the caps with the cleaning solution using a dropper. Ink cap 9 Close the maintenance cover and press the [ENTER] key. Fill a cap with washing liquid fully Fill the liquid. COMPLETED(NEXT) : ent 10Set the time to wait using the [] or [] key. Normally set 1 minute. Input leaving time. 1 - 99 min ST.MAINTENANCE LEAVING TIME 4-18 : 1 min Input range: 1 to 99 minutes (In steps of 1 minute) When the operation of the printer is to be suspended for a long time [CUSTODY WASH] 11Press the [ENTER] key. Perform the nozzle cleaning. On completion of the nozzle cleaning, the carriage moves to above the platen. ∗Being Initialized∗ PLEASE WAIT More than 20 seconds remaining During The PostProc. PLEASE WAIT During The PostProc PLEASE WAIT ST.MAINTENANCE 01:00 Less than 20 seconds remaining During The PostProc. Fill a cap while PLEASE WAIT absorption stops. ST.MAINTENANCE ST.MAINTENANCE ∗∗∗∗∗∗∗−−−−−−−−−−− COMPLETED :ent 12Open the maintenance cover, and fill the caps with the cleaning solution using a dropper. Since the printer performs idle suction operation intermittently, repeat this work several times to clean the ink discharge passage. Perform this operation with all the caps. Ink cap 13Close the maintenance cover and press the [ENTER] key. The printer performs idle suction for 30 seconds. The heads return to the station and after performing the initial operation, the printer returns to LOCAL mode. ∗Being Initialized∗ PLEASE WAIT L. ∗ > [JV5-01] width : ∗∗∗∗ mm 4-19 4 Daily Maintenance Before executing the [PUMP TUBE WASH] Before executing the [PUMP TUBE WASH] or [Wiper cleaning] function, the tubes must be filled with the cleaning solution. Filling the tubes with the cleaning solution [MaintWashLiquid] Supply and discharge the cleaning liquid for the wiper and pump tubes. If there is a problem with the waste ink tank, the display will show either of the following messages. Follow the displayed instructions to restore the normal conditions. No waste ink tank, Replace a or a tank is FULL. waste ink tank. <ENT>keyHIT is after <ENT>keyHIT is after theTANK set or exchg the TANK exchange. STEPS: 1 Make sure that the printer is in LOCAL mode, and then select [MAINTENANCE] using the [FUNCTION] key and press the [ENTER] key. If it is in REMOTE mode, press the [REMOTE] key once. L. ∗ > [JV5-01] FUNCTION width : ∗∗∗∗ mm MAINTENANCE <ENT> 2 Select [HD.MAINTENANCE] by pressing the [] key twice and press the [ENTER] key. Twice MAINTENANCE ST.MAINTENANCE MAINTENANCE <ent> HD.MAINTENANCE <ent> 3 Select [MaintWashLiquid] by pressing the [] key once and press the [ENTER] key. Twice HD.MAINTENANCE FILL UP INK HD.MAINTENANCE <ent> MaintWashLiquid <ent> 4 At this point, either of [FILLING UP] and [DISCHARGE] can be selected by pressing the [] or [] key. MaintWashLiquid FILLING UP To step 5 4-20 MaintWashLiquid <ent> DISCHARGE To step 11 <ent> Before executing the [PUMP TUBE WASH] 5 Press the [ENTER] key to go to the lower level of hierarchy and supply the cleaning solution. Once the cartridge is installed, the supply of the cleaning liquid will start. Cleaning liquid is drawn up and the tubes are filled with the cleaning liquid. Go to step 6 when the cleaning liquid is to be supplied for the first time or to step 9 when it is to be supplied after the discharge of the old cleaning liquid. Remove a wash liquid Remove a filling cartridge. up cartridge. There is a CARTRIDGE There is a CARTRIDGE Supply for the first time (To Step 6) Supply after discharge (To Step 9) Supply for the first time 6 Set a filling liquid cartridge according to the instruction on the display. Remove a wash liquid Set a filling up cartridge. cartridge. There is a CARTRIDGE CARTRIDGE : none Either of the following displays will appear if a problem with the filling liquid cartridge is detected. Set a filling up Set a filling up cartridge. cartridge. or CARTRIDGE : END CARTRIDGE : WRONG 7 The cleaning solution is supplied. FILLING UP NOW. PLEASE WAIT ∗∗∗∗∗∗∗−−−−−−−−−−− 8 Press the [END] key several times. The printer returns to LOCAL mode. L. ∗ > [JV5-01] width : ∗∗∗∗ mm 4-21 4 Daily Maintenance Supply after discharge 9 Set a cleaning liquid cartridge according to the instruction on the display. Remove a filling Set a washing up cartridge. liquid cartridge. There is a CARTRIDGE CARTRIDGE : none Either of the following displays will appear if a problem with the cleaning liquid cartridge is detected. Set a washing Set a washing liquid cartridge. liquid cartridge. CARTRIDGE : END CARTRIDGE : WRONG 10The cleaning solution is supplied. More than 20 seconds remaining Less than 20 seconds remaining It is being absorbed It is being absorbed PLEASE WAIT PLEASE WAIT ∗∗∗∗∗∗∗−−−−−−−−−−− 00:30 11The cleaning solution is discharged. Remove all washing liquid cartridges. There is a CARTRIDGE More than 20 seconds remaining Less than 20 seconds remaining It'sBeingDischarged. It'sBeingDischarged. PLEASE WAIT PLEASE WAIT ∗∗∗∗∗∗∗−−−−−−−−−−− 00:30 12Press the [END] key several times. The printer returns to LOCAL mode. L. ∗ > [JV5-01] width : ∗∗∗∗ mm 4-22 PUMP tube cleaning PUMP tube cleaning Wash the two ink suction pumps of the four pumps installed in this printer. By driving the cleaning liquid suction pump, wash the ink caps, ink exhaust passages, and the inside of the tubes of the ink suction pumps. Washing will not be started if the cleaning liquid has not been supplied or if a warning is generated for the cleaning liquid cartridge or waste ink tank. Into the cleaning liquid cartridge slot, do not insert any cartridge other than the cleaning solution cartridge. Before executing the [PUMP TUBE WASH] function, the tubes must be filled with the cleaning solution. For how to fill the tubes with the cleaning solution, refer to following page. (Refer to ?Before executing the [PUMP TUBE WASH] (p.4-20)? ) If there is a problem with the waste ink tank, the display will show either of the following messages. Follow the displayed instructions to restore the normal conditions. No waste ink tank, Replace a or a tank is FULL. waste ink tank. <ENT>keyHIT is after <ENT>keyHIT is after theTANK set or exchg the TANK exchange. STEPS: 1 Make sure that the printer is in LOCAL mode, and then press the [ST.MAINT] key. If it is in REMOTE mode, press the [REMOTE] key. L. ∗ > [JV5-01] ST.MAINTENANCE width : ∗∗∗∗ mm CARRIAGE OUT <ent> 2 Select [PUMP TUBE WASH] by pressing the [] key five times and press the [ENTER] key. 5 times ST.MAINTENANCE PUMP TUBE WASH <ent> The following display will appear if supply of cleaning liquid is required. Fill with the maint. washing liquid. ∗ ∗ ∗ ∗ ∗ ERROR 30 ∗ ∗ ∗ ∗ ∗ OPERATION ERROR 4-23 4 Daily Maintenance 3 The inside of the pump tubes is washed. More than 20 seconds remaining WASHING WASHING PLEASE WAIT PLEASE WAIT PUMP TUBE WASH PUMP TUBE WASH 00:30 4-24 Less than 20 seconds remaining ∗∗∗∗∗∗∗−−−−−−−−−−− Wiper cleaning Wiper cleaning Bring the wiper into the wiper box and wash the wiper. Washing will not be started if the cleaning liquid has not been supplied or the cleaning liquid cartridge has not been installed. Before executing the [WIPER WASH] function, the tubes must be filled with the cleaning solution. For how to fill the tubes with the cleaning solution, refer to following page. (Refer to ? Before executing the [PUMP TUBE WASH] (p. 4-20)? ) For cleaning, we recommend the use of the clean stick. If using cotton swab, remaining lint of the cotton swab may cause printing failure. STEPS: 1 Make sure that the printer is in LOCAL mode, and then press the [ST.MAINT] key. If it is in REMOTE mode, press the [REMOTE] key. L. ∗ > [JV5-01] ST.MAINTENANCE width : ∗∗∗∗ mm CARRIAGE OUT <ent> 2 Select [WIPER WASH] by pressing the [] key five times and press the [ENTER] key. 6 times ST.MAINTENANCE WIPER WASH <ent> The following display will appear if supply of cleaning liquid is required. Fill with the maint. washing liquid. ∗ ∗ ∗ ∗ ∗ ERROR 30 ∗ ∗ ∗ ∗ ∗ OPERATION ERROR 3 The cleaning solution is dripped onto the wiper. After completion of the dripping, the carriage moves to above the platen. WASHING PLEASE WAIT WIPER WASH ∗∗∗∗∗∗∗−−−−−−−−−−− 4-25 4 Daily Maintenance 4 Open the right maintenance cover. 5 Pull out the wiper by holding the projections at both ends. 6 Remove the ink from the wiper and the bracket using a cotton swab dampened with the cleaning solution. Replace the wiper with a new one if it is badly soiled or curled. To replace the wiper, terminate the work instructed here first and then follow the wiper replacement procedure. (See 4-57) 7 After cleaning the wiper, install it in position by holding the projections at both ends. Be careful of the direction of the wiper. 4-26 Wiper cleaning 8 Wipe off ink or dirt adhering to the wiper cover using a cotton swab dampened with the cleaning solution. Be careful not to leave lint of the cotton swab. Lint may cause printing failure. 9 Close the maintenance cover, and press the [ENTER] key. After performing the initial operation, the printer returns to LOCAL mode. Clean a wiper and bracket. COMPLETED ∗Being Initialized∗ PLEASE WAIT WIPER WASH : ent 4-27 4 Daily Maintenance Cleaning the heads and their surrounding parts [CR.MAINTENANCE] Take great care, especially during cleaning, not to damage the heads, which employ very precise mechanisms. Using a cotton swab, rub off the gelatinous ink that may be adhering to the lower part of the slider and surrounding parts of the heads. In doing so, never rub the nozzle part of the heads. Be sure to wear the supplied goggle and gloves.The ink contains an organic solvent. If ink settles on your skin or gets in your eyes, immediately and completely wash them off with water. Then, consult a doctor as soon as possible. (When solvent ink is used) STEPS: 1 Make sure that the printer is in LOCAL mode, select [MAINTENANCE] using the [FUNCTION] key, and press the [ENTER] key. If it is in REMOTE mode, press the [REMOTE] key. L. ∗ > [JV5-01] FUNCTION width : ∗∗∗∗ mm MAINTENANCE <ENT> 2 Select [CR.MAINTENANCE] by pressing the [] key once and press the [ENTER] key. Once MAINTENANCE ST.MAINTENANCE MAINTENANCE <ent> CR.MAINTENANCE 3 When [CARRIAGE OUT] is displayed, press the [ENTER] key. The carriage moves to the left end of the printer body. CR.MAINTENANCE CARRIAGE OUT : ent 4 Open the left maintenance cover and the front cover. 4-28 <ent> Cleaning the heads and their surrounding parts [CR.MAINTENANCE] 5 Wipe ink and dirt off the head sides using a cotton swab. Never rub the nozzle part. Clean the sides of the heads using a cotton swab. 6 Clean the head media sensor. Dust or ink sticking to the media sensor at the heads can cause a false detection of media. Wipe the dust and ink off with a soft cloth. Media sensor at the heads 7 After completing whole cleaning, press the [ENTER] key. CR.MAINTENANCE COMPLETED Close a cover. : ent 8 Close the maintenance cover and the front cover. 4-29 4 Daily Maintenance 9 Press the [ENTER] key. The printer performs the initial operation and returns to LOCAL. ∗Being Initialized∗ PLEASE WAIT 4-30 L. ∗ > [JV5-01] width : ∗∗∗∗ mm Preventing nozzle clogging while power is off [SLEEP SET UP] Preventing nozzle clogging while power is off [SLEEP SET UP] Even while the power switch is off, the printer starts periodically and executes various functions to prevent nozzle clogging. [SLEEP SET UP] includes the following functions. REFRESH Set the interval at which refreshing operation is to be performed periodically. TUBE WASH Set the interval at which cleaning of the pump tubes is to be performed periodically. CLEANING Set the cleaning type and the interval at which cleaning operation is to be performed periodically. Refreshing interval during sleep mode [REFERSH] Set the interval at which the nozzles will eject a little volume of ink to prevent nozzle clogging. STEPS: 1 Make sure that the printer is in LOCAL mode, and then select [MAINTENANCE] using the [FUNCTION] key and press the [ENTER] key. If it is in REMOTE mode, press the [REMOTE] key. L. ∗ > [JV5-01] FUNCTION width : ∗∗∗∗ mm MAINTENANCE <ENT> 2 Select [SLEEP SET UP] by pressing the [] key five times and press the [ENTER] key. Press 5 times MAINTENANCE ST.MAINTENANCE MAINTENANCE <ent> SLEEP SET UP <ent> 3 Press the [ENTER] key, set the interval time using the [] or [] key, and press the [ENTER] key. Input range: OFF, 1 to 168 Refresh interval in the sleep is set up. SLEEP SET UP REFRESH SLEEP SET UP <ent> REFERSHinterval = 1h 4 Press the [END] key several times. The printer returns to LOCAL mode. L. ∗ > [JV5-01] width : ∗∗∗∗ mm 4-31 4 Daily Maintenance Tube cleaning interval during sleep mode [TUBE WASH] Set the interval at which cleaning of the caps and pump tubes is to be performed using the cleaning solution during sleep mode. STEPS: 1 Make sure that the printer is in LOCAL mode, and then select [MAINTENANCE] using the [FUNCTION] key and press the [ENTER] key. If it is in REMOTE mode, press the [REMOTE] key. L. ∗ > [JV5-01] FUNCTION width : ∗∗∗∗ mm MAINTENANCE <ENT> 2 Select [SLEEP SET UP] by pressing the [] key five times and press the [ENTER] key. 5 times MAINTENANCE ST.MAINTENANCE MAINTENANCE <ent> SLEEP SET UP <ent> 3 Select [TUBE WASH] by pressing the [] key once and press the [ENTER] key. Refresh interval in Washing interval in Once the sleep is set up. the sleep is set up. SLEEP SET UP REFRESH SLEEP SET UP <ent> TUBE WASH <ent> 4 Input the interval at which interval time is to be performed periodically, using the [] or [] key. Input range: OFF, 1 to 168 Register the setting by pressing the [ENTER] key. TUBE WASH WASH INTERVAL = 1h The following display will appear if supply of cleaning liquid is required. ∗∗ Washing liquid ∗∗ 5 Press the [END] key several times. The printer returns to LOCAL mode. 4-32 Preventing nozzle clogging while power is off [SLEEP SET UP] Cleaning interval during sleep mode [CLEANING] This function is to be executed instead of TUBE WASH after the cleaning solution has been used up. Set the cleaning type and the interval at which cleaning operation is to be performed during sleep mode. STEPS: 1 Make sure that the printer is in LOCAL mode, and then select [MAINTENANCE] using the [FUNCTION] key and press the [ENTER] key. If it is in REMOTE mode, press the [REMOTE] key. L. ∗ > [JV5-01] FUNCTION width : ∗∗∗∗ mm MAINTENANCE <ENT> 2 Select [SLEEP SET UP] by pressing the [] key five times and press the [ENTER] key. 5 times MAINTENANCE ST.MAINTENANCE MAINTENANCE <ent> SLEEP SET UP <ent> 3 Select [CLEANING] by pressing the [] key twice and press the [ENTER] key. Refresh interval in Clean.worksAtTheTime Twice the sleep is set up. of the WashLiquidEND SLEEP SET UP REFRESH SLEEP SET UP <ent> CLEANING <ent> 4 Select the interval at which cleaning is to be performed periodically, using the [] or [] key. Select [CLEAN. TYPE] using the [FUNCTION] key and set a cleaning type using the [] or [] key. Register the setting by pressing the [ENTER] key. [CLEAN. INTERVAL] Input range: OFF, 1 to 168 [CLEAN. TYPE] : SOFT, NORMAL, HARD DECIDE = [ENTER] CL.type SEL = [FUNC. ] SLEEP SET UP CLEAN. INTERVAL SLEEP SET UP =1h CLEAN. TYPE = NORMAL 5 Press the [END] key several times. The printer returns to LOCAL mode. L. ∗ > [JV5-01] width : ∗∗∗∗ mm 4-33 4 Daily Maintenance Setting periodical operations in stand-by mode [ROUTINE SETUP] While the printer is waiting for the next printing job, it can perform various operations at fixed intervals to prevent ink clogging or the like. In addition, when you use sublimation transfer ink, you can set the interval at which cleaning operation is to be performed to prevent color change. The [ROUTINE SETUP] function is available for the following items: ROUTINE WIPING While printing, the nozzle surface is wiped with a certain interval to remove dew drops. It is possible to set [SCAN COUNT] and [TEMP difference]. (When Solvent ink is used) REFRESH Set the interval at which refreshing operation is to be performed periodically. TUBE WASH Set the interval at which cleaning of the pump tubes is to be performed periodically. CLEANING Set the cleaning type and the interval at which cleaning operation is to be performed periodically. Sub-INK WARNING Set the interval at which cleaning operation is to be performed to prevent color change. (See 4-56) Preventing the bedewing of ink on the nozzle surface. [ROUTINE WIPING] (When solvent ink is used.) With the temperature of the print heater having been set high or use of a larger amount of ink (high concentration, two-layer application, etc.) having been set, “ink splaying”, “ink drops falling”, or “nozzle missing” may occur. The cause of these phenomena is such that the ink of the print is heated by the print heater immediately after printing and resultantly evaporated solvent may condense on the nozzle face. The greater the difference between the setting temperature of the print heater and the ambient temperature is, the more easily ink can condense. This function wipes the condensed ink off the nozzle face at intervals during printing. STEPS: 1 Make sure that the printer is in LOCAL mode, and then select [MAINTENANCE] using the [FUNCTION] key and press the [ENTER] key. If it is in REMOTE mode, press the [REMOTE] key. L. ∗ > [JV5-01] FUNCTION width : ∗∗∗∗ mm MAINTENANCE <ENT> 2 Select [ROUTINE SETUP] by pressing the [] key six times and press the [ENTER] key. 6 times MAINTENANCE ST.MAINTENANCE 4-34 <ent> MAINTENANCE ROUTINE SETUP <ent> Setting periodical operations in stand-by mode [ROUTINE SETUP] 3 Press the [ENTER] key. Once [SCAN COUNT] is displayed, press the [ENTER] key. Wiping in the The interval of drawing is set up. wiping is set up. ROUTINE SETUP ROUTINE WIPING ROUTINE WIPING <ent> SCAN COUNT <ent> 4 Input the value of SCAN COUNT using the [] or [] key. Register the setting by pressing the [ENTER] key. 0 - 9990cnt (0 = OFF) ROUTINE WIPING SCAN COUNT = 50 The initial value of SCAN COUNT is 0 (no wipe). Change the setting value according to the conditions of use. Set SCAN COUNT to about 30 to 50 when the heater temperature is set to 50 °C or above or ink is to be applied in two or more layers. 5 Press the [] key to go to the lower level of hierarchy and input the value of TEMP.difference. Input a value of temperature difference using the [] or [] key, and register the setting by pressing the [ENTER] key. Set up a difference 1 - 60 °C in Temperature. ROUTINE WIPING TEMP.difference ROUTINE WIPING <ent> TEMP.DIFF. = 20 °C The ROUTINE WIPING function is activated when the setting temperature of the print heater is higher than the ambient temperature and the difference is larger than the value of “TEMP.difference”. 6 Press the [END] key several times. The printer returns to LOCAL mode. L. ∗ > [JV5-01] width : ∗∗∗∗ mm 4-35 4 Daily Maintenance Refresh Interval while in stand-by mode [REFERSH] Set the interval at which refreshing operation is to be performed periodically. STEPS: 1 Make sure that the printer is in LOCAL mode, and then select [MAINTENANCE] using the [FUNCTION] key and press the [ENTER] key. If it is in REMOTE mode, press the [REMOTE] key. L. ∗ > [JV5-01] FUNCTION width : ∗∗∗∗ mm MAINTENANCE <ENT> 2 Select [ROUTINE SETUP] by pressing the [] key six times and press the [ENTER] key. When using water-based ink, press again the [ENTER] key and proceed to Step 4. 6 times MAINTENANCE ST.MAINTENANCE MAINTENANCE <ent> ROUTINE SETUP <ent> 3 Select [REFRESH] by pressing the [] key once and press the [ENTER] key. Wiping in the RefreshIntervalInThe Once drawing is set up. stand by is set up. ROUTINE SETUP ROUTINE WIPING ROUTINE SETUP <ent> REFRESH <ent> 4 Input the interval at which refreshing operation is to be performed periodically, using the [] or [] key. Input range: OFF, 1 to 168 Register the setting by pressing the [ENTER] key. ROUTINE SETUP REFRESHinterval = 1h 5 Press the [END] key several times. The printer returns to LOCAL mode. L. ∗ > [JV5-01] width : ∗∗∗∗ mm 4-36 Setting periodical operations in stand-by mode [ROUTINE SETUP] Tube cleaning interval while in stand-by mode [TUBE WASH] There may be a chance that ink tubes can be clogged with coagulated ink. To avoid clogging, clean the ink tubes at regular intervals. To prevent clogging in the flushing BOX, this machine puts the cleaning solu- tion into the flushing BOX with PUMP tube cleaning function. Depending on the amount of ink put into the flushing BOX, PUMP tube cleaning is automatically executed STEPS: 1 Make sure that the printer is in LOCAL mode, and then select [MAINTENANCE] using the [FUNCTION] key and press the [ENTER] key. If it is in REMOTE mode, press the [REMOTE] key. L. ∗ > [JV5-01] FUNCTION width : ∗∗∗∗ mm MAINTENANCE <ENT> 2 Select [ROUTINE SETUP] by pressing the [] key six times and press the [ENTER] key. 6 times MAINTENANCE ST.MAINTENANCE MAINTENANCE <ent> ROUTINE SETUP <ent> 3 Select [TUBE WASH] by pressing the [] key twice and press the [ENTER] key. WashingIntervalInThe Twice stand by is set up. ROUTINE SETUP TUBE WASH <ent> 4 Input the interval at which cleaning operation is to be performed periodically, using the [] or [] key. Input range: OFF, 1 to 168 Register the setting by pressing the [ENTER] key. ROUTINE SETUP WASH INTERVAL = 1h The following display will appear if supply of cleaning liquid is required. ∗∗ Washing liquid ∗∗ 4-37 4 Daily Maintenance 5 Press the [END] key several times. The printer returns to LOCAL mode. L. ∗ > [JV5-01] width : ∗∗∗∗ mm 4-38 Setting periodical operations in stand-by mode [ROUTINE SETUP] Cleaning interval while in stand-by mode [CLEANING] This function is to be executed instead of TUBE WASH after the cleaning solution has been used up. Set the cleaning type and the intervals at which cleaning operation is to be performed. This function does not operate when the error message relating to ink, such as INK NEAR END or INK END, is displayed. While this function is being executed, the display indicates the progress of cleaning and no key operation is available. (Refer to ?If the printed pattern is abnormal (Cleaning) (p.3-29)? ) This function operates only when the printer is left with the display as shown below: L. ∗ > R. ∗ > [JV5-01] [JV5-01] width : ∗∗∗∗ mm ∗∗.∗∗ m STEPS: 1 Make sure that the printer is in LOCAL mode, and then select [MAINTENANCE] using the [FUNCTION] key and press the [ENTER] key. If it is in REMOTE mode, press the [REMOTE] key. L. ∗ > [JV5-01] FUNCTION width : ∗∗∗∗ mm MAINTENANCE <ENT> 2 Select [ROUTINE SETUP] by pressing the [] key six times and press the [ENTER] key. 6 times MAINTENANCE ST.MAINTENANCE <ent> MAINTENANCE ROUTINE SETUP <ent> 3 Select [CLEANING] by pressing the [] key three times and press the [ENTER] key. 3 times Clean.worksAtTheTime of the WashLiquidEND ROUTINE SETUP CLEANING <ent> 4-39 4 Daily Maintenance 4 Select the interval at which cleaning is to be performed periodically, using the [] or [] key. Select [CLEAN. TYPE] using the [FUNCTION] key and set a cleaning type using the [] or [] key. [CLEAN. INTERVAL] Input range: OFF, 1 to 168 [CLEAN. TYPE] : SOFT, NORMAL, HARD Register the setting by pressing the [ENTER] key. DECIDE = [ENTER] CL.type SEL = [FUNC. ] ROUTINE SETUP CLEAN. INTERVAL ROUTINE SETUP =1h CLEAN. TYPE 5 Press the [END] key several times. The printer returns to LOCAL mode. L. ∗ > [JV5-01] width : ∗∗∗∗ mm 4-40 : NORMAL Other maintenance functions Other maintenance functions Changing warning time of wiper replacement [WIPER LEVEL] The wiper is consumable. The heads are easily soiled in a dusty environment. The heads cannot be cleaned adequately with a curled or worn wiper. This printer gives the wiper replacement warning earlier than standard depending on the operating environment. Soiled wiper Curled wiper Examples of defective wiper 10/10 Displays the wiper replacement warning when wiping has been performed the standard number of times. (Initial value) 9/10 Displays the wiper replacement warning when wiping has been performed nine tenths of the standard number of times. 8/10 Displays the wiper replacement warning when wiping has been performed eight tenths of the standard number of times. 1/10 Displays the wiper replacement warning when wiping has been performed one tenth of the standard number of times. Available setting values of time for warning of wiper replacement STEPS: 1 Make sure that the printer is in LOCAL mode, and then select [MAINTENANCE] using the [FUNCTION] key and press the [ENTER] key. If it is in REMOTE mode, press the [REMOTE] key. L. ∗ > [JV5-01] FUNCTION width : ∗∗∗∗ mm MAINTENANCE <ENT> 2 Select [WIPER LEVEL] by pressing the [] key seven times and press the [ENTER] key. 7 times MAINTENANCE ST.MAINTENANCE <ent> MAINTENANCE WIPER LEVEL <ent> 4-41 4 Daily Maintenance 3 Input the WIPER LEVEL, using the [] or [] key. Register the setting by pressing the [ENTER] key. 10/10 - 1/10 WIPER LEVEL LEVEL 4 Press the [END] key several times. The printer returns to LOCAL mode. 4-42 : 10/10 Other maintenance functions Changing warning time of flushing BOX cleaning or replacement [BOX EXCHANGE LV] Flushing BOX becomes tainted earlier than standard depending on using condition, operating condition, or using ink type. This function sets flushing BOX cleaning or replacement time that is earlier than standard. You can set by 5 levels (5/5 to 1/5). Level 5/5 warns at standard time. Level 1/5 warns about twice earlier than standard. Change the setting to the dirt around the station. STEPS: 1 Make sure that the printer is in LOCAL mode, and then select [MAINTENANCE] using the [FUNCTION] key and press the [ENTER] key. If it is in REMOTE mode, press the [REMOTE] key. L. ∗ > [JV5-01] FUNCTION width : ∗∗∗∗ mm MAINTENANCE <ENT> 2 Select [FLUSHING BOX] by pressing the [] key three times and press the [ENTER] key. 3 times MAINTENANCE ST.MAINTENANCE <ent> MAINTENANCE FLUSHING BOX <ent> 3 Select [BOX EXCHANGE LV] by pressing the [] key and press the [ENTER] key. When no cleaning warning or error occurs for flushing BOX. FLUSHING BOX BOX EXCHANGE LV <ent> When cleaning warning or error occurs for flushing BOX. 1 time FLUSHING BOX CLEANING COMP. <ent> FLUSHING BOX BOX EXCHANGE LV <ent> 4 Input the BOX EXCHANGE LEVEL, using the [] or [] key. Register the setting by pressing the [ENTER] key. DirtCond. of the ST. is seen and changed. BOX EXCHANGE LV LEVEL : 5/5 5 Press the [END] key several times. The printer returns to LOCAL mode. 4-43 4 Daily Maintenance When the waste ink tank is full Waste ink, which was used for cleaning the heads and other parts, gathers in the waste ink tank. When either of the following error message is displayed, replace the waste ink tank with a new one without delay. L .1 > ! WasteTANK [ JV5-01 ] FULL/NONE L .1 > [ JV5-01 ] ! NearFULL WASTE TANK Use only the waste ink tank dedicated for JV5 (SPC-0128). If any tank other than the dedicated one is used, the remaining capacity for waste ink cannot be detected properly, so that waste ink may leak out from the tank. STEPS: 1 Remove the screw for the waste ink tank guard and open the waste ink tank guard. 2 Raise the waste ink tank by holding the larger handle. With the tank raised, turn the tank by 90 degrees. Then pull the tank down and toward you. When pulling out the waste ink tank, hold the opening of the waste ink tank with paper and then slowly pull it out with care not to let waste ink spatter out. Before replacing the waste ink tank, spread a sheet of paper on the floor to prevent it from being stained with ink. 3 Replace the waste ink tank with a new one. By holding the handle, insert the new tank. Put the cap on the tank that is full of waste ink and dispose of the tank. 4-44 When the waste ink tank is full 4 By holding the larger handle of the new waste ink tank, put the tank into the bracket from the right direction. 5 Raise the inserted waste ink tank and turn it by 90 degrees rearward. Make sure that the smaller handle is positioned in the front. 6 Close the waste ink tank guard, and secure it with the screw so that the waste ink tank is secured. 4-45 4 Daily Maintenance Cleaning of Flushing Box When the following warning message appears, quickly clean the lid of the suction fan box. L .1 > [ JV5-01 ] ! Flush. BOX CLEANING When the warning message above appears 6 times (8 times for water-based ink except sublimation transfer ink), replace the flushing BOX. The message for replacing flushing BOX appears at 3 levels. When replacement time is coming, following message appears. L .1 > [ JV5-01 ] ! NearExcg. Flush.BOX When replacement time comes, following message appears, it becomes local mode every time of print- ing a data and stops the operation. Replace flushing BOX. Please call our Sales or Service Agent for servicing. L .1 > [ JV5-01 ] ! Flush. BOX EXCHANGE When keeping using it without exchanging after the time above, following message appears and you cannot print. Replace flushing BOX. Please call our Sales or Service Agent for servicing. **** ERROR 145 **** FlushingBOX EXCHANGE **** ERROR 145 **** FlushingBOX EXCHANGE L*> CONFIRMATION : ent [JV5-01] width : ∗∗∗∗ mm When the ink adheres to your skin or enters in your eyes, immediately rinse off completely with water. Make sure to wear attached gloves (When solvent ink is used) and goggle to perform the works. When the flushing BOX is continuously used without washing, the following error message will appear and each time one data is printed the machine turns to Local Mode and stops operation. In this case, stop the use and quickly clean the lid of suction fan BOX. **** ERROR 145 **** FlushingBOX CLEANING L*> **** ERROR 145 **** FlushingBOX CLEANING 4-46 CONFIRMATION: ent [JV5-01] width : ∗∗∗∗ mm Cleaning of Flushing Box STEPS: 1 Press the power switch on the front and make sure that the power is off. 2 Turn off the main power switch on the rear side of the unit. Be sure to turn off the main power switch since there is the control board and heater supply harness etc. in the pump cover T. 3 Open the pump cover T. Pump cover T 4 Pull out the lid of the suction fan box. Remove the grip fixing the suction fan box and then pull out the lid of the box. Grip Pull out the lid of the box 4-47 4 Daily Maintenance 5 Remove the stains stuck on the lid of the box and fix it as originally. 6 Close the pump cover T and turn the power on. 7 Make sure that the printer is in LOCAL mode, and then select [MAINTENANCE] using the [FUNCTION] key and press the [ENTER] key. If it is in REMOTE mode, press the [REMOTE] key. L. ∗ > [JV5-01] FUNCTION width : ∗∗∗∗ mm MAINTENANCE <ENT> 8 Select [FLUSHING BOX] by pressing the [] key three times and press the [ENTER] key. 3 times MAINTENANCE ST.MAINTENANCE MAINTENANCE <ent> FLUSHING BOX <ent> 9 Select [Cleaning COMP.] and press the [ENTER] key. FLUSHING BOX CLEANING COMP. <ENT> Not displayed when the cleaning of the flushing box is not necessary. 10Press the [ENTER] key. If it’s cleaned, a [ENTER]key is hit FLUSHING BOX CLEANING OK? : ent 11Press the [END] key several times. The printer returns to LOCAL mode. When the printer is in local mode, if you press the [ENTER] key, you will be able to check if the cleaning or replacing of the flushing box is required soon. FLUSHING BOX L*> [JV5-01] width : ∗∗∗∗ mm 4-48 HS-INK REMAIN 12.3% MCYKKYCM 23456789 When this figure reaches 100%, the warning or error messages will appear. Maintenance when using sublimation transfer ink Maintenance when using sublimation transfer ink When you use sublimation transfer ink, the maintenance below is required in addition to the normal maintenance. Replacing F-Box filters (See 4-49) Cleaning the flushing tray (See 4-51) Changing the time for issuing warning of flushing Box filter replacement (See 4-53) Displaying the warning preventing color change due to color material settling and changing the interval (See 4-53) Replacing F-Box filters When you use sublimation transfer ink and if the warning message below is displayed, quickly replace the filters on the suction fan box. L.1> [JV5-01] ! NearExcg. Fbox FILTER If you continue to use for some time after the above warning message was indicated and the time for replacement of the filter has come, the following warning message appears and each time one data is drawn, the operation is switched to local mode and stopped. Stop the use and quickly replace the filters on the suction fan box. ∗∗∗∗ ERROR 145 ∗∗∗∗ F.BOX FILTER EXCHG ∗∗∗∗ ERROR 145 ∗∗∗∗ L.1> F.BOX FILTER EXCHG. CONFIRMATION [JV5-01] width : ∗∗∗∗mm : ent When the ink is in contact with skin or gets in the eye, immediately wash it out completely with water. STEPS: 1 Make sure that the printer is in LOCAL mode, and then press the [ST.MAINT] key. If it is in REMOTE mode, press the [REMOTE] key. L. ∗ > [JV5-01] ST.MAINTENANCE width : ∗∗∗∗ mm CARRIAGE OUT <ent> 2 Select [Sub-INK MAINTE.] by pressing the [] key and press the [ENTER] key. 7 times ST.MAINTENANCE WIPER WASH <ent> 4-49 4 Daily Maintenance 3 Select [FILTER EXCHANGE] by pressing the [] key and press the [ENTER] key. The carriage will come out of the capping station. 1 times Sub-INK MAINTE. FILTER EXCHANGE <ent> 4 Open the maintenance cover and remove the F-BOX filter from F-BOX filter base. F-BOX filter F-BOX filter base 5 Attach new F-BOX filter to F-BOX filter base. 6 Close the maintenance cover and press the [ENTER] key. Filter of the F.BOX avobe is replaced. FILTER EXCHANGE COMPLETED : ent 7 The operation returns to the Local Mode. ∗ Being Initialized ∗ PLEASE WAIT 4-50 L. ∗ > [JV5-01] width : ∗∗∗∗ mm Maintenance when using sublimation transfer ink Cleaning the flushing tray When sublimation transfer ink is used, each time when the power is put on, the following messages are indicated. Perform the cleaning of the ink tray. The ink tray of the Flush. BOX is cleaned INK TRAY CLEANING CANCEL < > EXEC When the ink is in contact with skin or gets in the eye, immediately wash it out completely with water. STEPS: 1 Press [] key. The carriage moves and goes off the station. INK TRAY CLEANING CANCEL < > EXEC 2 Open the maintenance cover and remove the F-BOX filter and F-BOX filter base. 3 Remove the flushing tray and clean the ink accumulated in the tray. Flushing tray 4-51 4 Daily Maintenance 4 Fix the flushing tray. Also, fix the F-BOX filter and F-BOX filter base in the same manner. 5 Close the maintenance cover, and press the [ENTER] key. An ink tray is removed and cleaned. INK TRAY CLEAN. COMPLETED : ent 6 The operation will return to the local mode. ∗ Being Initialized ∗ L. ∗ > PLEASE WAIT [JV5-01] width : ∗∗∗∗ mm Clean the ink on the flushing tray every day. When it is continuously used without cleaning, there could arise material fail- ure to the machine from functional decline due to the stains. 4-52 Maintenance when using sublimation transfer ink Changing the time for issuing warning of flushing Box filter replacement. [FILTER EXC. LV.] When you use the sublimation transfer ink, the filter on the flushing BOX could be stained, depending on the use environment and working conditions, earlier than the standard time for replacement. This function makes it possible to accelerate the time for replacement of the filter earlier than the standard. The replacement level can be set in 5 stages (From level 5/5 to 1/5). At level 5/5, the warning is issued at the standard time. At level 1/5, the warning is issued around twice earlier than the standard time. Change the level checking the status of the stains on the filter. When you use the sublimation transfer ink, the replacement of the flushing BOX filter is notified by messages. When the time for replacement of the filter is approaching: L. ∗ > When the time for replacement has been reached: [JV5-01] ! NearExcg. Fbox FILTER ∗∗∗∗ ERROR 145 ∗∗∗∗ F.BOX FILTER EXCHG. It is recommended to replace the filter Replace the filter immediately. promptly. STEPS: 1 Make sure that the printer is in LOCAL mode, and then select [MAINTENANCE] using the [FUNCTION] key and press the [ENTER] key. If it is in REMOTE mode, press the [REMOTE] key. L. ∗ > [JV5-01] FUNCTION width : ∗∗∗∗ mm MAINTENANCE <ENT> 2 Select [FLUSHING BOX] by pressing the [] key and press the [ENTER] key. 3 times FUNCTION ST. MAINTENANCE <ENT> FUNCTION FLUSHING BOX <ENT> 3 Select [FILTER EXC. LV.] by pressing the [] key and press the [ENTER] key. (When the warning for flushing BOX cleaning or error has not been issued.) 1 times FLUSHING BOX BOX EXCHANGE LV <ENT> FLUSHING BOX FILTER EXC. LV. <ENT> (When the warning for flushing BOX cleaning or error has been issued.) 2 times FLUSHING BOX CLEANING COMP. <ENT> FLUSHING BOX FILTER EXC. LV. <ENT> 4-53 4 Daily Maintenance 4 Input the BOX replacement level, using the [] or [] key. Fix with [ENTER] key. DirtCond. of The Filter is seen and changed. FILTER EXC. LV. LEVEL 5 Press [END] key several times. It returns to the local mode. 4-54 : 5/5 To use sublimation transfer ink with more stable quality To use sublimation transfer ink with more stable quality When you print with sublimation transfer ink after you have left this machine, color may change due to color material settling. By shaking the ink cartridge or performing ink filling periodically, the status will be improved. (Before performing ink filling, it is necessary to shake the ink cartridge.) In the firmware version 6.40 and later, when the time to shake the ink cartridge or to perform ink filling has come, a message (warning preventing color material settling) is displayed to inform you of it. When the time to shake the ink cartridge has come SHAKE INK CARTRIDGE. L*> : ent [JV5-01] width : ****mm When the time to perform ink filling SHAKE INK CARTRIDGE. : ent Carry out a [FILL UP INK]. L*> : ent [JV5-01] width : ****mm This message is displayed when the machine is in the local mode or when you switch it from the remote mode to the local mode. This does not terminate printing or interfere with continue printing, however, as this is not displayed during remote mode, it is recommended to switch to the local mode by pressing the [REMOTE] key between printings. How to shake the ink cartridge Holding the long side of the ink cartridge with both hands, tilt to right and left by turns to make ink flow, and repeat it about twenty times. waste cloth If you shake the ink cartridge too strong, it may damage the inside pack and it may cause ink leakage. Be careful about it. When the cartridge is new, shake it before taking it out of bag. When the cartridge is in-use, be sure to wear the gloves, press waste close to the inserted side and shake it. If the remaining amount of ink is less, tilt it until it becomes vertical, as you cannot shake it enough in some cases. 4-55 4 Daily Maintenance Set the interval to display the warning message Depending on the ambient temperature, set the interval to display the warning preventing color material settling. Setting time: OFF (disabled), 12 to 120 hours When you use sublimation transfer ink Sb52, the display interval of the mes- sage is set to 72 hours in the initial condition. When you use sublimation transfer ink Sb51, Sb53 or Sb60, this function is disabled (OFF) in the initial condition. STEPS: 1 Check that the machine is in the local mode and select [Maintenance] with the [FUNCTION] key. Then, press the [ENTER] key. When it is in the remote mode, press the [REMOTE] key. L*> [JV5-01] FUNCTION width : ****mm 2 Select MAINTENANCE <ENT> [ROUTINE SETUP] with the [] key, and press the [ENTER] key. 7 times MAINTENANCE ST.MAINTENANCE <ent> MAINTENANCE ROUTINE SETUP <ent> 3 Select [Sub-INK WARNING] with the [] key, and press the [ENTER] key. 4 times ROUTINE SETUP ROUTINE WIPING <ent> ROUTINE SETUP Sub-INK WARNING <ent> 4 Set the operation time with the [] or [] key, and press the [ENTER] key. Sub-INK WARNING Sub-INK WARNING 5 Press the [END] key several times. The machine returns to the local mode. 4-56 : 84 h Replacing the wiper [WIPER EXCHANGE] Replacing the wiper [WIPER EXCHANGE] The wiper is consumable. When the display indicates that it is necessary to replace the wiper, immediately replace the wiper with a new one. (Solvent wiper kit : SPA-0125) Do not select [WIPER EXCHANGE] at any time other than when the wiper is to be replaced. Once it is selected, the number of wiper operations that is counted in the printer will be reset. The wiper to be newly installed is available as an option. Order it from your dealer or a sales office of MIMAKI. For cleaning, we recommend the use of the clean stick. If using cotton swab, remaining lint of the cotton swab may cause printing failure. STEPS: 1 Make sure that the printer is in LOCAL mode, and then press the [ST.MAINT] key. [CARRIAGE OUT] is displayed. L. ∗ > [JV5-01] ST.MAINTENANCE width : ∗∗∗∗ mm CARRIAGE OUT <ent> 2 Select [WIPER EXCHANGE] by pressing the [] key once and press the [ENTER] key. The carriage will come out of the capping station. Once ST.MAINTENANCE WIPER EXCHANGE <ent> 3 Open the right maintenance cover, and remove the wiper. Pull out the wiper by holding the projections at both ends. Use the gloves that are supplied as an item of the cleaning kit to protect your hands from stains. 4-57 4 Daily Maintenance 4 Clean the wiper guide shaft using a cotton swab or cloth. If dirt is hard to remove, use a cotton swab dampened with the cleaning solution. 5 Install the wiper by holding the projections at both ends. Be careful of the direction of the wiper. 6 Close the maintenance cover, and press the [ENTER] key. ST.MAINTENANCE COMPLETED : ent 7 The printer returns to LOCAL mode. ∗Being Initialized∗ PLEASE WAIT 4-58 L. ∗ > [JV5-01] width : ∗∗∗∗ mm Replacing the cutter blade Replacing the cutter blade The cutter blade is consumable. When the cutter blade gets dull, replace it with a new one (SPA-0126). The blade is sharp. Be careful not to hurt yourself or anyone else. Keep the cutter blades away from the reach of children. Be sure to dispose of the worn-out cutter blades according to the applicable national and local laws and regulations. When replacing the cutter blade, it is recommended to place a sheet of paper under the cutter blade. This will help pick up the cutter blade if it drops. STEPS: 1 Make sure that the printer is in LOCAL mode, and then press the [ST.MAINT] key. If it is in REMOTE mode, press the [REMOTE] key. L. ∗ > [JV5-01] width : ∗∗∗∗ mm ST.MAINTENANCE CARRIAGE OUT <ent> 2 Press the [ENTER] key. The carriage will come out of the capping station. 3 Open the front cover. 4-59 4 Daily Maintenance 4 Loosen the screw securing the cutter unit and remove the cutter unit. 5 Remove the roller, and install it on the new cutter blade holder assembly. Roller of cutter unit 6 Install the new cutter unit. Tighten the screw to secure the new cutter unit. 7 Close the front cover, and press the [ENTER] key. The printer returns to LOCAL mode. ∗Being Initialized∗ PLEASE WAIT 4-60 L. ∗ > [JV5-01] width : ∗∗∗∗ mm CHAPTER 5 In Case of Trouble This chapter describes the actions to be taken when the printer develops any trouble. Before taking a phenomenon as a failure ..............................5-2 If image quality is poor ...........................................................5-4 Ink cartridge trouble .............................................................5-12 Troubles for which error messages are displayed ...............5-14 5 In Case of Trouble Before taking a phenomenon as a failure This section describes the corrective actions to be taken at the occurrence of trouble without any error message displayed. Take appropriate actions as described below before taking the trouble as a failure. If still the problem cannot be solved, contact your dealer or an office of MIMAKI. Power does not turn on In most cases, this is due to improper connection of the power cable for the printer or computer. Check that the power cable is connected properly. Is the power cable connected to the printer? No Securely connect the power cable. No Turn on the main switch. (p. 3-3) Yes Is the main switch ON? Yes Does the power turn off immediately after initial operation? Yes Turn on the power switch on the front of the printer. (p. 3-3) The printer cannot perform printing This occurs when the data is not being transmitted to the printer properly. It can also occur when the printing function does not work properly or the media is not set correctly. Is the correct interface cable used? No Use the cable exclusive for the device. No Securely connect the interface cable. Yes Is the interface cable properly connected? Yes Is the message on the display indicating that ink has run out? Yes Replace the ink cartridge with a new one. (p. 3-48) 5-2 Before taking a phenomenon as a failure Media jamming arises / media is soiled Media jamming or stained media is considered to be due to the use of an unsuitable media or improper setting of media. Is a recommended media used? No Use recommended media. (p. 1-16) No Avoid using any media with curls or bent ends. No Use a take-up device or re-load the media on the printer. (p. 3-7) Yes Is the media free of curls and bent ends? Yes Is the media hanging down along the platen? [HEAT] or [CONSTANT] LED does not light up Check the basic operation. Is the power to the printer ON? No Turn on the power to the printer. (p. 3-3) Yes Is the power to the heater ON? No Turn on the power to the heater. Yes Is the heater temperature setting effective? No Set the heater temperature. (p. 6-30) 5-3 5 In Case of Trouble If image quality is poor This section describes the corrective actions to be taken in case the image quality is not satisfactory. Take remedy for particular problems with image quality. If the remedy does not work, contact your dealer or an office of MIMAKI. White lines / blur (sprayed ink) / dark stripes (in the moving direction of the heads) Remedy 1. Execute the head cleaning.(Refer to ?If the printed pattern is abnormal (Cleaning) (p.3-29)? ) 2. Perform maintenance of the inside of the station. (Refer to ?Cleaning the wiper and ink caps [CARRIAGE OUT] (p.4-7)? ) 3. Execute the [FEED COMP.] function. (Refer to ?Correcting the media feed rate [MEDIA COMP.] (p.3-33)? ) 4. Remove pieces of paper or the like, if any, from the path of the heads, for example, above the media plate. 5. Lessen the head gap, and check printing. (Refer to ?Adjusting the head gap (p.3-5)? ) Characters are double- or triple-printed in the media feed direction Remedy Execute the [FEED COMP.] function. (Refer to ?Correcting the media feed rate [MEDIA COMP.] (p.3-33)? ) 5-4 If image quality is poor Disagreement in print positions between outward trip and homeward trip (jet deviation) Remedy Execute the [DROP.POScorrect] function. (Refer to ?If dots are not in alignment [DROP.POScorrect] (p.3-35)? ) There is staggered print or nozzle missing Staggered print Nozzle missing Remedy Execute the head cleaning [NORMAL]. (Refer to ?If the printed pattern is abnormal (Cleaning) (p.3-29)? ) Ink drops falling on media during printing (ink drops falling) Remedy 1. Execute the wiper cleaning. (Refer to ?Wiper cleaning (p.4-25)? ) 2. Execute the ink cap cleaning. (Refer to ?Cleaning the wiper and ink caps [CARRIAGE OUT] (p.4-7)? ) 3. Execute the head cleaning [NORMAL]. (Refer to ?If the printed pattern is abnormal (Cleaning) (p.3-29)? ) 5-5 5 In Case of Trouble If nozzles are still clogged even after head cleaning Execute the following two functions if blocked nozzles are not unclogged even by executing HEAD CLEANING (Refer to ?If the printed pattern is abnormal (Cleaning) (p.3-29)? ) and NOZZLE WASH (Refer to ?Cleaning the nozzle [NOZZLE WASH] (p.4-10)? ) . FILL UP INK Supplies ink to correct nozzle clogging. (Refer to ?If nozzles cannot be unclogged [FILL UP INK] (p.3-31)? ) DISCHARGE&WASH Discharges ink from the heads, dampers and ink tubes, and washes them with an cleaning solution cartridge (option). [DISCHARGE&WASH] Discharge ink from the heads, dampers and ink tubes, and washe them. If there is a problem with the waste ink tank, the display will show either of the following messages. Follow the displayed instructions to restore the normal conditions. No waste ink tank, Replace a or a tank is FULL. waste ink tank. <ENT>keyHIT is after <ENT>keyHIT is after theTANK set or exchg the TANK exchange. STEPS: 1 Make sure that the printer is in LOCAL mode, and then select [MAINTENANCE] using the [FUNCTION] key and press the [ENTER] key. If it is in REMOTE mode, press the [REMOTE] key once. L. ∗ > [JV5-01] FUNCTION width : ∗∗∗∗ mm MAINTENANCE <ENT> 2 Select [HD.MAINTENANCE] by pressing the [] key twice and press the [ENTER] key. Twice MAINTENANCE ST.MAINTENANCE <ent> MAINTENANCE HD.MAINTENANCE <ent> 3 Select [DISCHARGE&WASH] by pressing the [] key once and press the [ENTER] key. Once HD.MAINTENANCE FILL UP INK 5-6 <ent> HD.MAINTENANCE DISCHARGE&WASH <ent> If image quality is poor 4 Remove the ink cartridges. Ink is discharged to the waste ink tank. Ink discharge. Remove Remove cartridges. More than 20 seconds remaining Being discharged PLEASE WAIT MMCC YYKK KKYY CCMM 00:40 Less than 20 seconds remaining Being discharged PLEASE WAIT ∗∗∗∗∗∗∗−−−−−−−−−−− 5 When the display shown below appears, set the cleaning liquid cartridge in the ink station. Cleaning liquid is drawn up. Set all washing Set More than 20 seconds remaining It is being absorbed liquid cartridges. PLEASE WAIT 1234 5678 9ABC DEFG 00:40 Less than 20 seconds remaining It is being absorbed PLEASE WAIT ∗∗∗∗∗∗∗−−−−−−−−−−− 6 When the display shown below appears, remove the cleaning liquid cartridge from the ink station. The cleaning liquid drawn up is discharged to the waste ink tank. Remove all washing liquid cartridges. 1234 5678 9ABC DEFG Remove More than 20 seconds remaining It'sBeingDischarged. PLEASE WAIT 00:40 Less than 20 seconds remaining It'sBeingDischarged. PLEASE WAIT ∗∗∗∗∗∗∗−−−−−−−−−−− 5-7 5 In Case of Trouble 7 When the display shown below appears, set the cleaning liquid cartridge in the ink station. Cleaning liquid is drawn up. Set all washing More than 20 seconds remaining Set It is being absorbed liquid cartridges. PLEASE WAIT 1234 5678 9ABC DEFG 00:40 Less than 20 seconds remaining It is being absorbed PLEASE WAIT ∗∗∗∗∗∗∗−−−−−−−−−−− 8 When the display shown below appears, remove the cleaning liquid cartridge from the ink station. The cleaning liquid drawn up is discharged to the waste ink tank. Remove all washing More than 20 seconds remaining Remove It'sBeingDischarged. liquid cartridges. PLEASE WAIT 1234 5678 9ABC DEFG 00:40 Less than 20 seconds remaining It'sBeingDischarged. PLEASE WAIT ∗∗∗∗∗∗∗−−−−−−−−−−− 9 On completion of one washing process, the display shown below appears. If the heads are to be washed again, return to step 5 by pressing the [] key. To terminate washing, press the [] key. The display changes as shown below when all steps have been completed. Please select according to situation. COMPLETED < >WASH 10Press the [] key when this function is to be terminated without discharging the cleaning solution. Press the [] key when this function is to be terminated after discharging the cleaning solution. If the washing procedure is to be terminated, press the [] key to go to step 12. Do you discharge a mainte.Wash.liquid ? No < 5-8 > Yes If image quality is poor 11When the display shown below appears, remove the cleaning liquid cartridge from the ink station. The cleaning liquid drawn up is discharged to the waste ink tank. Remove a maint.wash. More than 20 seconds remaining Remove It'sBeingDischarged. liquid cartridge. PLEASE WAIT There is a CARTRIDGE 00:40 Less than 20 seconds remaining It'sBeingDischarged. PLEASE WAIT ∗∗∗∗∗∗∗−−−−−−−−−−− 12Press the [END] key several times. The printer returns to LOCAL mode. L. ∗ > [JV5-01] width : ∗∗∗∗ mm An adjustment by a service engineer is required if you change ink types when performing ink filling. 5-9 5 In Case of Trouble When nozzle clogging is not corrected [HEAD SELECT] If nozzles cannot be unclogged, make setting so that the printer will not use the head(s) with clogged nozzles. However, this function is available for printing operation (including TEST DRAW) and cleaning; ink filling function is applied to all the heads. Printing with all 4 staggered heads Printing with 3 staggered heads, excluding head 4 Printing with 3 staggered heads, excluding head 1 Printing with 2 staggered heads, excluding heads 3 and 4 Printing with 2 staggered heads, excluding heads 1 and 4 Printing with 2 staggered heads, excluding heads 1 and 2 Printing with one head, excluding heads 2, 3 and 4 Printing with one head, excluding heads 1, 3 and 4 Printing with one head, excluding heads 1, 2 and 4 Printing with one head, excluding heads 1, 2 and 3 The default is “printing with all 4 staggered heads”. 5-10 If image quality is poor STEPS: 1 Make sure that the printer is in LOCAL mode, and then select [MAINTENANCE] using the [FUNCTION] key and press the [ENTER] key. If it is in REMOTE mode, press the [REMOTE] key. L. ∗ > [JV5-01] FUNCTION width : ∗∗∗∗ mm MAINTENANCE <ENT> 2 Select [HEAD SELECT] by pressing the [] key eight times and press the [ENTER] key. 8 times MAINTENANCE ST.MAINTENANCE MAINTENANCE <ent> HEAD SELECT <ent> 3 Select the head(s) to be used for printing, using the [] , [] , [] or [] key. Register the setting by pressing the [ENTER] key. HEAD SELECT SELECT : 1234 Combinations of heads: [1234] [123-], [-234] [12--], [-23-], [--34] [1---], [-2--], [--3-], [---4] 4 Press the [END] key several times. The printer returns to LOCAL mode. L. ∗ > [JV5-01] width : ∗∗∗∗ mm 5-11 5 In Case of Trouble Ink cartridge trouble If an ink cartridge trouble is detected, a warning message appears and none of printing, cleaning and all the other operations that use ink is available. When this is the case, replace the ink cartridge in question immediately. Once cartridge trouble is displayed, do not leave the ink cartridge without replacing it for a long time; otherwise, the printer will lose the nozzle clogging prevention function. If nozzles are clogged, the printer must be repaired by MIMAKI’s service engineer. Displaying the description of ink cartridge trouble The type of the cartridge trouble can be identified. (See 5-15) STEPS: 1 Press the [ENTER] key while the printer is in LOCAL mode. L. ∗ > [JV5-01] width : ∗∗∗∗ mm 2 Press the [INFORMATION] key. Two or more cartridge troubles, if any, can be displayed in turn by pressing the [] or [] key. Press the [INFORMATION] key or [END] key to return to the display of the remaining amount of ink. FLUSHING BOX ErrorDetail 5-12 12.3% = [INFO] Set a Mimaki Original ink. HS-INK MCYKKYCM NON-ORIGINAL INK REMAIN 34567899 Y−C− −−−K −−−− C−Y− Ink cartridge trouble If ERROR 202 [DEVICE CONSTRUCTION] is displayed This printer checks its configuration every time it starts. The configuration checking function checks the resource configuration necessary for use of this printer. When there is an error in any element of the printer, the printer can be started by disconnecting the faulty element. 1 HDC check Checks for any error in the HDC. 2 Head connection check Checks for any error in connection of any of Head 1 to 4. 3 Head memory check Checks for any error in access to head memory. 4 SDRAM check Checks for any error in SDRAM. If the results of the checks 1 to 4 above show that any error has occurred, the display shows the configuration error (ERROR 202), and the printer discontinues starting. By pressing the [ENTER] key with the configuration error displayed, you can check the detailed results of the checks and restart the printer with a limited resource configuration. ∗ ∗ ∗ ∗ ERROR 202 ∗ ∗ ∗ ∗ DEVICE CONSTRUCTION Wrong Point Was Found To The Composition. :ent Checking the detailed results of the checks If the checks 1 to 3 shows any error, an element developing an error is marked with “ X ”, while a questionable element is marked with “ ? ”. The check 4 result shows the available size of SDRAM. RESULTof DIAGNOSIS HDC : 123x HEAD12 . . is Not-USE! HEAD : 12x? HEAD-MEM : 12x4 SDRAM : 0.5GB (1GB) Possible composition HEAD . . 34 OK ? :ent Confirming the starting with a limited configuration The available configuration is displayed. Pressing the [ENTER] key will restart the printer. If there is any error detected by the checks 1 to 3, limited heads are available. If an error has been detected by the check 4, the error (ERROR 203) is displayed at transition from LOCAL mode to REMOTE mode and at start of printing. The settings of an limited configuration are not stored in memory, and thus the printer checks its configuration every time it starts. When the printer has been started with a limited configuration, you can check the detailed results of the checks using the guidance function. If the display shows the message [ERROR203 SDRAM SIZE], turn off the power to the printer and turn it on after a while. If the same error message appears again, contact your local distributor to call for service. (When there is available SDRAM mounted, the printer can be started without expanding SDRAM. However, printing speed may drop depending on the resolution.) 5-13 5 In Case of Trouble Troubles for which error messages are displayed If some trouble occurs, the buzzer sounds and the display shows a corresponding error message. Take an appropriate remedy for the displayed error. Checking error history [ERROR HISTORY] The information about the error or warning status the printer is currently in and the history of errors and warnings the printer has developed up to now can be checked by opening the [ERROR HISTORY] display. STEPS: 1 Make sure that the printer is in LOCAL mode, and then press the [INFORMATION] key. When [ERROR HISTORY] is displayed, press the [ENTER] key. L. ∗ > [JV5-01] INFORMATION width : ∗∗∗∗ mm ERROR HISTORY 2 The history of errors can be displayed using the [] or [] key. ERROR HISTORY [01] 05. 09. 29 08 : 18 ∗ ∗ ∗ ∗ ∗ ERROR 09 ∗ ∗ ∗ ∗ ∗ HDC ERROR 3 Press the [END] key several times. The printer returns to LOCAL mode. L. ∗ > [JV5-01] width : ∗∗∗∗ mm 5-14 <ent> Troubles for which error messages are displayed Warning messages Warning messages will appear chiefly to warn of the conditions of heaters or ink cartridges. Warning message Cause An open cover was detected. Check the front cover and maintenance covers. If the same error message appears again even after closing all the covers, contact your local distributor to call for service. No media was detected. Set media. (See 3-7) The battery of RTC has run down. Contact your local distributor to call for service. Close a cover. ∗∗ NO MEDIA ∗∗ !EXCHANGE BATTERY L.1> !Replace a WIPER [JV5-01] L.1> !Do TEST DRAW [JV5-01] Remedy Time to replace the wiper in the cap- Replace the wiper with a new one. ping station with a new one has come. (Execute [ST.MAINTENANCE] [WIPER EXCHANGE].) (See 4-57) (The wiping count has reached the specified value.) The nozzle recovery cannot be expected because the printer has been left standing for a prolonged period of time. Perform test printing. If nozzle missing is serious, (See 3-28) execute [ST.MAINTENANCE] - [NOZZLE WASH] for maintenance.(See 4-10) The power to the heaters is off. Turn on the power to the heaters. (See 3-21) If the same error message appears again even after turning on the power to the heaters, contact your local distributor to call for service. Heater Power OFF PRE BREAK PRT ∗∗°C POST ∗∗°C A heater is disconnected. Contact your local distributor to call (This example shows that preheater is for service. disconnected.) PRE THERM PRT ∗∗°C POST ∗∗°C The thermistor of a heater is defective. Contact your local distributor to call (This example shows that the therfor service. mistor of preheater is defective.) ∗Media can't be CUT∗ The heads are positioned too high to permit media cutting. Cut the media by manual operation. (See 6-10) Ink for one supply path has been nearly Replace the cartridge for the supply used up. path corresponding to the indicated color. (See 3-48) Printing is permitted without replacing the cartridge (until INK END is displayed). However, the printer returns to local mode every completion of printing one file. L.∗> INK Near END [JV5-01] MCYK - - - - R.∗> INK Near END [JV5-01] MCYK - - - - L.∗> INK END [JV5-01] - - - - KYCM Ink for one supply path has been com- Replace the cartridge for the supply pletely used up. path corresponding to the indicated color. (See 3-48) [JV5-01] - - - - KYCM Ink cartridge for one supply path has a Check the content of the warning by problem. displaying it using the guidance function. Replace the cartridge for the supply path corresponding to the indicated color. (See 3-48) L.∗> CARTRIDGE 5-15 5 In Case of Trouble Warning message 5-16 L.∗> !CAR [JV5-01] R.∗> !CAR [JV5-01] L.∗> !TNK [JV5-01] R.∗> !TNK [JV5-01] L.∗> !WSH [JV5-01] R.∗> !WSH [JV5-01] L.∗> !NC [JV5-01] R.∗> !NC [JV5-01] R.∗> !DEW [JV5-01] Cause Remedy There is a problem with installed ink Check the content of the warning by displaying it using the guidance funccartridges. (If this occurs together with any other tion. (See 5-12) warning, the display shows [L.∗> !CAR/TNK/WSH/NC instead of [JV5∗∗].) There is a problem with the waste ink Check that the waste ink tank has been installed and it is not full. tank. (If this occurs together with any other warning, the display shows [L.∗> !CAR/TNK/WSH/NC instead of [JV5∗∗].) There is a problem with the installed Check that the cleaning solution cartridge has been set properly. cleaning solution cartridge. (If this occurs together with any other warning, the display shows [L.∗> !CAR/TNK/WSH/NC instead of [JV5∗∗].) There is a problem with the NCU. It appears when any trouble detected turning the power on, even when [NCU]-[NOZZLE CHECK] is off.) On the [NCU]-[COND.INDICATION] display, check the current error in the NCU. Operation can be resumed after turning off the nozzle missing detection function. Low ambient temperature may build up condensation on the head. Raise the ambient temperature. INK NEAR END MMCC - - - - - - - - - - - - The ink of the ink cartridge has been nearly used up. Replace the cartridge generating the warning with a new one. INK END - - - - YYKK - - - - - - - - The ink of the ink cartridge has been completely used up. Replace the cartridge generating the warning with a new one. NON-ORIGINAL INK - - - - - - - - KKYY - - - - The ink cartridge is not MIMAKI gen- Replace the cartridge generating the uine. warning with a MIMAKI genuine. WRONG INK IC - - - - - - - - - - - - CCMM The IC chip of the ink cartridge cannot Remove the cartridge generating the be read normally. warning once and install it again. If the same warning message still appears, contact your local distributor to call for service. Kind of INK ---- ---- ---- ---- The ink of the ink cartridge is different Check the ink type of the cartridge in type from the ink currently supplied. generating the warning. Color of INK ---- ---- ---- ---- The ink of the ink cartridge is different Check the ink color of the cartridge in color from the ink currently supgenerating the warning. plied. WRONG CARTRIDGE ---- ---- ---- ---- There is trouble with an installed ink cartridge. NO CARTRIDGE ---- ---- ---- ---- An ink cartridge has not been installed Install an appropriate cartridge in the in the slot. slot generating the warning. Expiration ---- ---- ---- ---- The specified expiration date of an ink Replace the cartridge generating the cartridge has passed. warning with a new one. The cartridge may be used until one month passes after the specified expiration date. Check the cartridge generating the warning. Troubles for which error messages are displayed Warning message Cause Remedy Expiration:1MONTH ---- ---- ---- ---- The expiration date of an ink cartridge The red LED blinks. Replace the carhas passed (one month has passed after tridge generating the warning with a the specified expiration date). new one. The cartridge may be used until two months pass after the specified expiration date. Expiration:2MONTH ---- ---- ---- ---- The expiration date of an ink cartridge Replace the cartridge generating the has passed (two months have passed warning with a new one. after the specified expiration date). EXPIRED INK IN USE ---- ---- ---- ---- The expiration date of an ink cartridge has been extended. COMPLETELY EXPIRED ---- ---- ---- ---- The specified expiration date of an ink cartridge has passed. (The expiration date has been extended.) INK REMAIN ZERO ---- ---- ---- ---!WasteTANK FULL/NONE !NearFULL WASTE TANK !Wash Liquid END Remaining amount of ink in an ink car- Replace the cartridge generating the tridge is zero. warning with a new one. The waste ink tank is full or has not been installed. Check the waste ink tank.(See 4-44) The waste ink tank is nearly full. Replace the waste ink tank with a new one. (See 4-44) The cleaning liquid cartridge is empty. Replace the cleaning solution cartridge with a new one. !WashLiquidCart.NONE The cleaning liquid cartridge has not been installed. Install the cleaning solution cartridge. !WRONG WASH CART. There is trouble with cleaning liquid cartridge. Check the cleaning solution cartridge. !Flush.BOX CLEANING The time for cleaning the flushing box. Perform the cleaning operation of the flushing box. (See 4-46) Time to replace the flushing box will soon come. It can be used continuously, but when replacement time comes after using, it becomes local mode every time of printing a data and stops the operation. !Flush.BOX EXCHANGE Time to replace the flushing box has come. Replace the flushing box. Contact your local distributor to call for service. ! NearExcg. FboxFILRTER When Sublimation transfer ink is used, It is recommended to replace the filter. the time for replacement of the filter on the flushing box is approaching. !NearExcg. Flush.BOX !NCU is separated. ! NearExcg. FboxFILRTER ∗∗ Washing liquid ∗∗ ∗∗ un-filling up. ∗∗ There is a problem with the NCU. It appears when any trouble detected turning the power on, even when [NCU]-[NOZZLE CHECK] is off.) On the [NCU]-[COND.INDICATION] display, check the current error in the NCU. Operation can be resumed after turning off the nozzle missing detection function. When Sublimation transfer ink is used, It is recommended to replace the filter. the time for replacement of the filter on the flushing box is approaching. cleaning solution has not been supplied. Supply the cleaning solution. Execute [MAINTENANCE] [HD.MAINTENANCE] - [MaintWashLiquid]. (See 4-20) 5-17 5 In Case of Trouble Error messages Error messages indicates error numbers. If any error message is displayed, turn off the power to the printer and turn it on after a while. If the same error message appears again, contact your dealer or an office of MIMAKI to call for service. Error message 5-18 Cause ∗∗∗∗∗ ERROR 01 ∗∗∗∗∗ MAIN ROM An error occurred in the circuit board system. ∗∗∗∗∗ ERROR 02 ∗∗∗∗∗ MAIN RAM An error occurred in the circuit board system. ∗∗∗∗∗ ERROR 03 ∗∗∗∗∗ POWER +3.3V An error occurred in the circuit board system. ∗∗∗∗∗ ERROR 03 ∗∗∗∗∗ POWER +5V An error occurred in the circuit board system. ∗∗∗∗∗ ERROR 03 ∗∗∗∗∗ POWER +24V An error occurred in the circuit board system. ∗∗∗∗∗ ERROR 03 ∗∗∗∗∗ POWER +42V An error occurred in the circuit board system. ∗∗∗∗∗ ERROR 04 ∗∗∗∗∗ F-ROM An error occurred in the circuit board system. ∗∗∗∗∗ ERROR 06 ∗∗∗∗∗ SD-RAM An error occurred in the circuit board system. ∗∗∗∗∗ ERROR 07 ∗∗∗∗∗ HEAD (----) An error in heads was detected. ∗∗∗∗∗ ERROR 07 ∗∗∗∗∗ VOLTAGE (----) An error in heads was detected. ∗∗∗∗∗ ERROR 07 ∗∗∗∗∗ POWER 01 (----) An error occurred in the head power supply during preparation of this machine. ∗∗∗∗∗ ERROR 07 ∗∗∗∗∗ POWER 02 (----) An error occurred in the head power supply during printing. ∗∗∗∗∗ ERROR 08 ∗∗∗∗∗ LinearENCODER:SENSOR An error occurred in the linear encoder. ∗∗∗∗∗ ERROR 08 ∗∗∗∗∗ LinearENCODER:DIR. An error occurred in the linear encoder. ∗∗∗∗∗ ERROR 08 ∗∗∗∗∗ LinearENCODER:COUNT An error occurred in detection by the linear encoder. (Read-out count error) ∗∗∗∗∗ ERROR 09 ∗∗∗∗∗ FPGA ERROR An error occurred in the circuit board system. (FPGA PDC) ∗∗∗∗∗ ERROR 09 ∗∗∗∗∗ HDC ERROR (----) An error occurred in the circuit board system. (FPGA HDC) ∗∗∗∗∗ ERROR 09 ∗∗∗∗∗ HEAT SINK (----) Abnormal temperature is detected at the control panel. ∗∗∗∗∗ ERROR 09 ∗∗∗∗∗ Slight VIBRAT. (----) An error occurred in the circuit board system. (FPGA HDC) Remedy Turn off the power to the printer and turn it on after a while. If the same error message appears again, contact your local distributor to call for service. Troubles for which error messages are displayed Error message Cause Remedy The printer received some data other than command data. Securely connect the interface cable in position. Use an interface cable conforming to the specifications. Any parameter outside the range of acceptable numeric values was received. Turn off the power to the printer and turn it on after a while. If the same error message appears again, contact your local distributor to call for service. An error occurred in the control system. Transmit data that is compatible with the command system supported by this printer. ∗∗∗∗∗ ERROR 20 ∗∗∗∗∗ I/F BOARD 01 An error occurred in the control system. ∗∗∗∗∗ ERROR 20 ∗∗∗∗∗ I/F BOARD 02 An error occurred in the control system. ∗∗∗∗∗ ERROR 20 ∗∗∗∗∗ I/F BOARD 03 An error occurred in the control system. Turn off the power to the printer and turn it on after a while. If the same error message appears again, contact your local distributor to call for service. ∗∗∗∗∗ ERROR 20 ∗∗∗∗∗ I/F BOARD 04 An error occurred in the control system. ∗∗∗∗∗ ERROR 10 ∗∗∗∗∗ COMMAND ERROR ∗∗∗∗∗ ERROR 11 ∗∗∗∗∗ PARAMETER ERROR ∗∗∗∗∗ ERROR 16 ∗∗∗∗∗ MRL COMMAND ∗∗∗∗∗ ERROR 21 ∗∗∗∗∗ I/F NONE ∗∗∗∗∗ ERROR 23 ∗∗∗∗∗ HOST I/F ∗∗∗∗∗ ERROR 24 ∗∗∗∗∗ I/F INITIAL ∗∗∗∗∗ ERROR 25 ∗∗∗∗∗ FULL-SPEED An error occurred in the control system. Turn off the power to the printer and turn it on after a while. If the same error message appears again, contact your local distributor to call for service. Timeout error occurred during communication between the host computer and the interface board for IEEE-1394 connection. Check that the cable is securely connected to the host computer and interface board. Also, check to see if any error has occurred on the host computer. An error occurred in the control system. Turn off the power to the printer and turn it on after a while. If the same error message appears again, contact your local distributor to call for service. An error occurred in communication between the host computer and the interface board for USB2.0 connection. (Full-Speed mode connection) Check that the host PC supports the USB2.0 interface. (Communication can be resumed without changing any setting. However, it is recommend to use the connection in High-Speed mode.) 5-19 5 In Case of Trouble Error message 5-20 Cause Remedy Check that the cable is securely connected to the host computer and interface board. Also, check to see if any error has occurred on the host computer. ∗∗∗∗∗ ERROR 25 ∗∗∗∗∗ PACKET SIZE OVER An error occurred in communication between the host computer and the interface board for USB2.0 connection. ∗∗∗∗∗ ERROR 25 ∗∗∗∗∗ USB PROTOCOL An error occurred in communication between the host computer and the interface board for USB2.0 connection. ∗∗∗∗∗ ERROR 25 ∗∗∗∗∗ USB ENVIRONMENT An error occurred in communication between the host computer and the interface board for USB2.0 connection. ∗∗∗∗∗ ERROR 25 ∗∗∗∗∗ USB DATA An error occurred in communication between the host computer and the interface board for USB2.0 connection. ∗∗∗∗∗ ERROR 30 ∗∗∗∗∗ OPERATION ERROR Improper operation was conducted on Remove the cause, and perform a proper operation. the operation panel. The Display 1 shows the cause of the error. ∗∗∗∗∗ ERROR 34 ∗∗∗∗∗ DATA REMAIN It is being tried to change settings for functions though there remains received data that has not yet been printed. Print all the received data or execute the data clear function. Then, change settings. ∗∗∗∗∗ ERROR 40 ∗∗∗∗∗ MOTOR ALARM X An error occurred in the control system. ∗∗∗∗∗ ERROR 41 ∗∗∗∗∗ MOTOR ALARM Y An error occurred in the control system. ∗∗∗∗∗ ERROR 42 ∗∗∗∗∗ X OVER CURRENT An error occurred in the control system. Turn off the power to the printer and turn it on after a while. If the same error message appears again, contact your local distributor to call for service. ∗∗∗∗∗ ERROR 43 ∗∗∗∗∗ Y OVER CURRENT An error occurred in the control system. ∗∗∗∗∗ ERROR 45 ∗∗∗∗∗ CAPPING : SENSOR An error occurred in the control system. ∗∗∗∗∗ ERROR 45 ∗∗∗∗∗ CAPPING : PARAMETER An error occurred in the control system. ∗∗∗∗∗ ERROR 46 ∗∗∗∗∗ WIPER An error occurred in the control system. ∗∗∗∗∗ ERROR 47 ∗∗∗∗∗ STATION An error occurred in the control system. ∗∗∗∗∗ ERROR 49 ∗∗∗∗∗ CUTTER SOLENOID An error occurred in the control system. ∗∗∗∗∗ ERROR 50 ∗∗∗∗∗ MEDIA DETECT Paper could not be detected. The media If the same error message appears set position or media itself is not again even after setting the media proper. properly, contact your local distributor to call for service. ∗∗∗∗∗ ERROR 50 ∗∗∗∗∗ THICKNESS DETECT Media thickness could not be detected. Input the media thickness or select the END key and execute media detection again. Troubles for which error messages are displayed Error message Cause ∗∗∗∗∗ ERROR 51 ∗∗∗∗∗ Y-ORIGIN Y-origin could not be detected. ∗∗∗∗∗ ERROR 53 ∗∗∗∗∗ HEAD HEIGHT ORIGIN Head height origin could not be detected. Remedy Turn off the power to the printer and turn it on after a while. If the same error message appears again, contact your local distributor to call for service. Paper jam was detected. Open the front cover and raise the clamp lever, and remove the jammed paper. If the same error message appears again even after clearing the paper jam status, contact your local distributor to call for service. ∗∗∗∗∗ ERROR 58 ∗∗∗∗∗ POSITION ENCODER:DIR An error occurred in the control system. ∗∗∗∗∗ ERROR 58 ∗∗∗∗∗ POSITION ENCODER:CNT An error occurred in the control system. ∗∗∗∗∗ ERROR 59 ∗∗∗∗∗ CUTTER ENCODER An error occurred in the control system. Turn off the power to the printer and turn it on after a while. If the same error message appears again, contact your local distributor to call for service. ∗∗∗∗∗ ERROR 64 ∗∗∗∗∗ TAKE-UP VOLTAGE An error occurred in the control system. ∗∗∗∗∗ ERROR 64 ∗∗∗∗∗ FEEDER VOLTAGE An error occurred in the control system. ∗∗∗∗∗ ERROR 54 ∗∗∗∗∗ MEDIA JAM ∗∗∗∗ ERROR 116 ∗∗∗∗ NCU I/F 00 ∗∗∗∗ ERROR 116 ∗∗∗∗ NCU I/F 01 An error occurred in the control system. An error occurred in the control system. Operation can be resumed after turning off the nozzle missing detection function. Turn off the power to the printer and turn it on after a while. If the error occurs frequently, contact your local distributor to call for service. ∗∗∗∗ ERROR 120 ∗∗∗∗ ENVIRONMENT TEMP(LO) The ambient temperature is outside the Adjust the ambient temperature within permissible temperature range (too a range of available ambient temperalow). ture. ∗∗∗∗ ERROR 121 ∗∗∗∗ ENVIRONMENT TEMP(HI) The ambient temperature is outside the permissible temperature range (too high). As the ambient temperature is low, head condensation may occur. Raise the ambient temperature. (To use without changing the setting, press the [ENTER] key.) ∗∗∗∗ ERROR 134 ∗∗∗∗ MEDIA ENCODER:SENSOR An error occurred in detection by the media encoder. (Counting impossible) ∗∗∗∗ ERROR 134 ∗∗∗∗ MEDIA ENCODER:DIR. An error occurred in detection by the media encoder. (Wrong orientation) ∗∗∗∗ ERROR 134 ∗∗∗∗ MEDIA ENCODER:ORIGIN An error occurred in detection by the media encoder. (Origin detection impossible) Select “NORMAL” in [MediaFeed SETUP] - [FEED METHOD] or turn off the power to the printer and turn it on after a while. If the same error message appears again, contact your local distributor to call for service. ∗∗∗∗ ERROR 122 ∗∗∗∗ ENV.TEMP.LO:DewDrops 5-21 5 In Case of Trouble Error message Cause An error occurred in media feed. Check that the media has been set properly, and the media still remains. Using [SET UP] - [MediaFeed SETUP] - [MOVEMENT TEST], perform testing to see if the media is compatible with direct feed. If the error status is not cleared even with a proper media, select “NORMAL” in [SET UP] - [MediaFeed SETUP] - [FEED METHOD] or turn off the power to the printer and turn it on after a while. If the same error message appears again, contact your local distributor to call for service. Ink leakage was detected. Turn off the power to the printer and turn it on after a while. If the same error message appears again, contact your local distributor to call for service. ∗∗∗∗ ERROR 135 ∗∗∗∗ MEDIA FEED UNUSUAL ∗∗∗∗ ERROR 142 ∗∗∗∗ INK LEAK (--/--) ∗∗∗∗ ERROR 143 ∗∗∗∗ CARTRIDGE SOLENOID An error occurred in the control system. ∗∗∗∗ ERROR 143 ∗∗∗∗ WASH CART. SOLENOID An error occurred in the control system. ∗∗∗∗ ERROR 144 ∗∗∗∗ CARTRIDGE SET ! An error occurred in the control system. Set a cartridge. ∗∗∗∗ ERROR 145 ∗∗∗∗ FlushingBOX EXCHANGE Time for replacing the flushing box has Make a call for services. passed. ∗∗∗∗ ERROR 145 ∗∗∗∗ FlushingBOX CLEANING Time for cleaning the flushing box. ∗∗∗∗ ERROR 145 ∗∗∗∗ F.BOX FILTER EXCHG. ∗∗∗∗ ERROR 146 ∗∗∗∗ It can't be CLEANING ∗∗∗∗ ERROR 160 ∗∗∗∗ NCU DETECT 00 ∗∗∗∗ ERROR 160 ∗∗∗∗ NCU DETECT 01 ∗∗∗∗ ERROR 160 ∗∗∗∗ NCU DETECT 02 5-22 Remedy Promptly clean the flushing box. (See 4-46) When Sublimation transfer ink is used, Replace the filter immediately. the time for replacement of the filter on (See 4-46) the flushing box has come. Cleaning can not be performed as the Confirm the supply channel in the quantity of ink per one supply channel local mode and replace the cartridge. is too little or finished. (See 3-48) An error occurred in the control system. An error occurred in the control system. An error occurred in the control system. Printing can be resumed after turning off the nozzle missing detection function. Turn on the nozzle missing detection function again before starting to print the next and subsequent print files. If the error occurs frequently, contact your local distributor to call for service. Turn off the power to the printer and turn it on after a while. If the same error message appears again, contact your local distributor to call for service. Troubles for which error messages are displayed Error message ∗∗∗∗ ERROR 160 ∗∗∗∗ NCU DETECT 03 ∗∗∗∗ ERROR 160 ∗∗∗∗ NCU DETECT 04 ∗∗∗∗ ERROR 161 ∗∗∗∗ NCU EXCHANGE ∗∗∗∗ ERROR 161 ∗∗∗∗ NCU CONSUMPTION ∗∗∗∗ ERROR 162 ∗∗∗∗ NCU LINE VOLTAGE ∗∗∗∗ ERROR 163 ∗∗∗∗ NCU SENSOR ∗∗∗∗ ERROR 163 ∗∗∗∗ NCU SENSOR DETECT ∗∗∗∗ ERROR 164 ∗∗∗∗ NCU FPGA ERROR Cause An error occurred in the control system. An error occurred in the control system. Operation can be resumed. If the error occurs frequently, contact your local distributor to call for service. An error occurred in the control system. Turn off the power to the printer and turn it on after a while. If the same error message appears again, contact your local distributor to call for service. Operation can be resumed after turning off the nozzle missing detection function. An error occurred in the control system. An error occurred in the control system. Operation can be resumed. If the error occurs frequently, contact your local distributor to call for service. An error occurred in the control system. Turn off the power to the printer and turn it on after a while. If the same error message appears again, contact your local distributor to call for service. Operation can be resumed after turning off the nozzle missing detection function. An error occurred in the control system. An error occurred in the circuit board system. ∗∗∗∗ ERROR 201 ∗∗∗∗ BACKUP MEMORY An error occurred in the circuit board system. ∗∗∗∗ ERROR 202 ∗∗∗∗ DEVICE CONSTRUCTION Printing can be resumed after turning off the nozzle missing detection function. Turn on the nozzle missing detection function again before starting to print the next and subsequent print files. If the error occurs frequently, contact your local distributor to call for service. An error occurred in the control system. ∗∗∗∗ ERROR 200 ∗∗∗∗ HEAD MEMORY (----) ∗∗∗∗ ERROR 201 ∗∗∗∗ BACKUP DATA Remedy Turn off the power to the printer and turn it on after a while. If the same error message appears again, contact your local distributor to call for service. An error occurred in back-up data. The continued use is possible. If the error message appears frequently, please call for services. An error occurred in the control system. Contact your local distributor to call for service. Press the [ENTER] key to display the details of the error. Press the [ENTER] key again to enable the system to be started after changing the configuration to a supported one. (See 5-13) 5-23 5 In Case of Trouble Error message Cause An error occurred in the control system. Turn off the power to the printer and turn it on after a while. If the same error message appears again, contact your local distributor to call for service. (When there is available SDRAM mounted, the printer operation can be resumed without expanding SDRAM. However, printing speed may drop depending on the resolution.) An error occurred in the wave shape control during printing. Turn off the power to the printer and turn it on after a while. If the same error message appears again, contact your local distributor to call for service. An error occurred in the control system. Turn off the power to the printer and turn it on after a while. If the same error message appears again, contact your local distributor to call for service. ∗∗∗∗ ERROR203 ∗∗∗∗ SDRAM SIZE ∗∗∗∗ ERROR 207 ∗∗∗∗ SLEW RATE (----) Remedy ∗∗∗∗ ERROR 207 ∗∗∗∗ OVERFLOW (----) ∗∗∗∗ ERROR 207 ∗∗∗∗ UNDERFLOW (----) ∗∗∗∗ ERROR 207 ∗∗∗∗ COM ABN. (----) ∗∗∗∗ ERROR 210 ∗∗∗∗ INTERLOCK SENSOR ∗∗∗∗ ERROR 211 ∗∗∗∗ HeaterTEMP(--/--/--) ∗∗∗∗ ERROR 211 ∗∗∗∗ HeadWARM.TEMP.(----) ∗∗∗∗ ERROR 211 ∗∗∗∗ HeadWARM.BREAK(----) ∗∗∗∗ ERROR 211 ∗∗∗∗ HeadWARM.THERM(----) ∗∗∗∗ ERROR 212 ∗∗∗∗ WASTE INKtank SENSOR ∗∗∗∗ ERROR 250 ∗∗∗∗ Y COORDINATES ∗∗∗∗ ERROR 251 ∗∗∗∗ SYSTEM ERROR 5-24 An abnormal temperature of the media Turn off the power to the printer and heater was detected. turn it on after a while. If the same An abnormal temperature of the head error message appears again, contact your local distributor to call for serheater was detected. vice. The head heater is disconnected. Trouble has occurred with the thermistor of the head heater. An error occurred in the control system. Turn off the power to the printer and turn it on after a while. If the same error message appears again, contact your local distributor to call for service. An error was detected during scanning Turn off the power to the printer and operation. turn it on after a while. If the same error message appears again, contact A system error occurred. your local distributor to call for service. CHAPTER 6 Operation for Functions This chapter describes the operating procedure for frequently used functions from the printer function menu, showing sample messages on the display. Functions Invoked by [FUNCTION] Key ................................6-2 Invoking SET UP functions ....................................................6-2 Invoking MAINTENANCE functions .....................................6-12 Invoking MACHINE SETUP functions ..................................6-17 Invoking NCU functions .......................................................6-26 DISPLAY setting ..................................................................6-29 Applied settings of functions ................................................6-30 How to operate function menus ...........................................6-33 Functions related to the cutter .............................................6-34 Functions related to print quality ..........................................6-35 Functions related to ink ........................................................6-36 Function Flowchart [BOOT] .................................................6-38 Function Flowchart [LOCAL mode] ......................................6-40 Function Flowchart [REMOTE mode] ..................................6-44 Function Flowchart [FUNCTION Key] ..................................6-46 6 Operation for Functions Functions Invoked by [FUNCTION] Key The following five types of functions can be invoked by pressing the [FUNCTION] key. Function name Description Refer to p. 6-2 SET UP Make various settings concerning print quality. MAINTENANCE Maintenance functions are to be executed to keep the printer in good condip. 6-12 tion. MACHINE SETUP Display various information of the printer or set time or units of measure. p. 6-17 NCU Set operations concerning the nozzle missing detection function. p. 6-26 DISPLAY Set a language to be used with the printer. p. 6-29 Invoking SET UP functions Registering printing conditions in a lump (type registration) FUNCTION mode provides 17 setup functions.(In the case of usage, it is 18 items about sublimation transfer ink.) The setting value of each of the 16 functions other than SETUP RESET can be registered as any of the following four types.(In the case of usage, it is 17 items about sublimation transfer ink.) If the types are registered for different kinds of media, respectively, printing conditions can be easily changed when the media is replaced with another kind of media. When solvent ink is used. When water-based ink is used. Type 1 For Tarpaulin 1 Photo-paper Type 2 For Tarpaulin 2 For PET 1 Type 3 FF (Flexible Face) For PET 2 Type 4 PVC Synthetic paper Example of type registration List of functions This section describes briefly the setup functions and their setting values. Name 6-2 Function Refer to MEDIA COMP. Corrects the feed rate of media p. 6-4 MediaFeed SETUP Set particulars related to media feed. p. 6-4 HEATER Sets heater conditions p. 6-4 PRINT MODE Sets a print quality level and printing direction p. 6-5 INK LAYERS Sets the number of layers in which ink is to be applied p. 6-7 DRYING TIME Sets the time to wait for ink drying p. 6-7 AUTO CUT Cuts the media automatically after printing p. 6-8 PRE-FEED Feeds the media back and forth before printing p. 6-8 MARGIN Sets a non-printing area along the right and left edges of the media p. 6-8 COLOR PATTERN Prints a color pattern on the right edge of the media to check nozzle missing p. 6-8 Invoking SET UP functions Name Function Refer to REFRESH Refreshes the print heads during printing p. 6-9 VACUUM Sets the absorbability of the media. p. 6-9 PRIORITY Sets the priority of settings (host / panel) p. 6-9 Cleans the print heads automatically every completion of printing p. 6-10 Automatically cleans or wipes the heads regularly while printing. p. 6-10 HEAD GAP Sets the head gap (height from the media to the nozzle plane of the heads). p. 6-10 MEDIA DETECT Sets the method for detecting the media p. 6-11 SETUP RESET *2 Resets the setting values to the default values p. 6-11 AUTO CLEANING Print. MAINTE *1 *1. Only when dedicated sublimation transfer ink is used, [Print. MAINTE.] can be set. *2. Each item excluding [SETUP RESET] can be registered on the type. Settings of the setup functions The operation described below on the operation panel is required to execute the setup functions. STEPS: 1 Make sure that the printer is in LOCAL mode, and then select [SET UP] using the [FUNCTION] key and press the [ENTER] key. If it is in REMOTE mode, press the [REMOTE] key. L. ∗ > [JV5-01] width : ∗∗∗∗ mm FUNCTION SET UP <ENT> 2 Select an appropriate one of Type 1 to Type 4 by means of [] or [], and press the [ENTER] key. Set the printing conditions. SET UP SELECT SET UP : TYPE 1 SELECT : TYPE 2 3 Select a setup function and make setting. 6-3 6 Operation for Functions Outline of the setup functions MEDIA COMP. (See 3-33) When the media type or any heater temperature is changed, be sure to correct the feed rate to meet the media thickness. (Correction value: -255 ~ 255) MediaFeed SETUP Set particulars related to media feed. The table below shows the setting items. FEED METHOD Switches between methods for detecting the feed rate of media. SPEED SWITCHING Sets the media feed rate. MOVEMENT TEST Performs testing whether or not the media is compatible with the direct detection method using the media encoder. FEED METHOD Select a method for detecting the feed rate of media. Available setting values: [DIRECT, NORMAL] DIRECT Feed rate control with the motor encoder + Location detection with the media encoder (Default) NORMAL Feed rate control with the motor encoder The setting values for each user type are stored separately from those for other user types. SPEED SWITCHING Set the feed speed level. Available setting values: [200% ~ 10%] The setting values for each user type are stored separately from those for other user types. MOVEMENT TEST Perform testing to see whether or not the media is compatible with the direct detection method using the media encoder. When the feed error is not within 0.4 %, the display shows a recommended feed method. HEATER (See 6-31) Make settings of the pre-heater, print heater and post-heater built in the platen. 6-4 Invoking SET UP functions PRINT MODE Sets various conditions of printing. DRAFT quality Set a desired print quality in DRAFT mode (540 dpi resolution in the Y-axis direction). Available setting values: [STD., FINE, FAST] Press the [FUNCTION] key while the quality item is selected. Then the printer permits setting the number of passes for every resolution and setting high-speed printing ON/OFF. The table below shows the combinations of the elements that can be set. Resolution in DRAFT mode 540x720 dpi 540x900 dpi 540x1080 dpi 4 colors 6 colors Passes High-speed printing Passes High-speed printing DRAFT quality 4 ON / OFF 8 ON / OFF FAST 8 ON / OFF 16 ON / OFF STD. 16 ON / OFF 32 ON / OFF FINE 10 ON / OFF 10 ON / OFF FAST 20 ON / OFF 20 ON / OFF STD. 40 ON / OFF 40 ON / OFF FINE 6 ON / OFF 12 ON / OFF FAST 12 ON / OFF 24 ON / OFF STD. 24 ON / OFF 48 ON / OFF FINE Table 6-1 : Element that can be set in DRAFT quality mode 6-5 6 Operation for Functions FINE quality Set a desired print quality in FINE mode (720 dpi resolution in the Y-axis direction). Available setting values: [STD., FINE, FAST] Press the [FUNCTION] key while the quality item is selected. Then the printer permits setting the number of passes for every resolution and setting high-speed printing ON/OFF. The table below shows the combinations of the elements that can be set. Resolution in FINE mode 540x720 dpi 720x720 dpi 720x1080 dpi 720x1440 dpi 4 colors 6 colors Passes High-speed printing Passes High-speed printing FINE quality 6 ON / OFF 6 ON / OFF FAST 12 ON / OFF 12 ON / OFF STD. 24 ON / OFF 24 ON / OFF FINE 4 ON / OFF 8 ON / OFF FAST 8 ON / OFF 16 ON / OFF STD. 16 ON / OFF 32 ON / OFF FINE 6 ON / OFF 12 ON / OFF FAST 12 ON / OFF 24 ON / OFF STD. 24 ON / OFF 48 ON / OFF FINE 8 ON / OFF 16 ON / OFF FAST 16 ON / OFF 32 ON / OFF STD. 32 ON / OFF 64 ON / OFF FINE Table 6-2 : Element that can be set in FINE quality mode The print quality in Super fine mode (1440x1440) is fixed. SCAN DIRECTION Set the printing direction. Available setting values: [Bi-D, Uni-D] 6-6 Invoking SET UP functions LOGICAL SEEK Set LOGICALseek ON / OFF. Available setting values: [ON, OFF] UNI-DIRECTIONAL BI-DIRECTIONAL Movement of heads when LOGICALseek is OFF UNI-DIRECTIONAL BI-DIRECTIONAL Movement of heads when LOGICALseek is ON INK LAYERS Set the number of layers in which ink is applied. Available setting values: [1 to 9 layers] The setting values for each user type are stored separately from those for other user types. DRYING TIME Set the time to wait for ink drying. SCAN Set the time to wait for ink drying after each pass. During bidirectional printing, the printer stops temporarily after every outward trip and every homeward trip. Available setting values: [0.0 ~ 19.9 sec] (in steps of 0.1 sec) Draw.END Set the time to wait for ink drying after completion of printing. Available setting values: [0 ~ 999 sec] (in steps of 1 sec) The setting values for each user type are stored separately from those for other user types. 6-7 6 Operation for Functions AUTO CUT Set whether or not to cut the media automatically after completion of printing. Available setting values: [ON, OFF] The media will be cut after the lapse of the time to wait for ink drying after completion of printing, if having been set. The setting values for each user type are stored separately from those for other user types. PRE-FEED Set whether or not to feed the media back and forth before printing to prevent the media from sticking to the platen. Available setting values: [ON, OFF] The setting values for each user type are stored separately from those for other user types. MARGIN Set a non-printing area along the right and left edges of the media Left margin Set the width of the non-printing area along the left edge of the media. Available setting values: [-10 ~ 85 mm] (In steps of 1 mm) Right margin Set the width of the non-printing area along the right edge of the media. Available setting values: [-10 ~ 85 mm] (In steps of 1 mm) The setting values for each user type are stored separately from those for other user types. COLOR PATTERN Set whether or not to print a color pattern for nozzle missing check near the right edge of the media. Available setting values: [ON, OFF] When the pattern is to be printed, the printing location of image data is shifted by 18 mm from the origin in the scanning direction. The setting values for each user type are stored separately from those for other user types. 4-color mode 6-color mode Image Origin 18 mm Check pattern 6-8 Invoking SET UP functions REFRESH Set the head refreshing level (running flush interval). Available setting values: [0 ~ 3] ( Enhancing the level shortens the interval) The setting values for each user type are stored separately from those for other user types. VACUUM Set the attracting force of the vacuum fan. Irrespective of the setting, the vacuum level is always [STANDARD] during media detection, media cutting or JOG operation. Available setting values: [STRONG, STANDARD, Little WEAK, WEAK, OFF] The setting values for each user type are stored separately from those for other user types. Pressing [FUNCTION] key when the item other than OFF is selected, the time from the finish of online printing to the stop of vacuum fan. (Only in the remote mode) Available setting values: [0- 60min, CONTINUE] (unit 10min.) If 0min is set, the vacuum fan stops when finishing printing. If CONTINUE is set, the vacuum fan keeps rotating in the remote mode regardless of the printing status. The setting values for each user type are stored separately from those for other user types. PRIORITY Concerning the following setup functions, select whether priority is given to the settings made on the printer or to the designation from the host. [MEDIA COMP.] , [HEATER] , [PRINT MODE] , [INK LAYERS] , [DRYING TIME] , [AUTO CUT] , [PRE-FEED] , [MARGIN] , [COLOR PATTERN] , [REFRESH] , [VACUUM] , [FD.SPEED] , [FD.METHOD] Available setting values: [INDIVIDUALLY, ALL HOST, ALL PANEL] The setting values for each user type are stored separately from those for other user types. INDIVIDUALLY For each function, set whether priority is given to the printer or to the host independently. ALL HOST For all the functions, priority is given to the settings on the host. ALL PANEL For all the functions, priority is given to the settings on the printer. Even when setting has been made to give priority to the host, the settings made on the printer become effective if there is no instruction from the host. 6-9 6 Operation for Functions AUTO CLEANING (See 3-43) Set whether or not to clean the heads automatically before printing. Available setting values: [ON, OFF] The cleaning will be performed prior to the first printing after the printer is put on. Subsequently, the cleaning is made for each meter of drawing prior to each drawing. The detail setting menu is displayed by pressing the [FUNCTION] key during automatic cleaning ON/OFF selection. CLEANING INTERVAL Set the interval at which cleaning is to be performed periodically during printing. Available setting values: [10 ~ 30000 mm] ( Default: 1000 mm) CLEANING TYPE Set a type of automatic cleaning. Available setting values: [SOFT, NORMAL, HARD] The setting values for each user type are stored separately from those for other user types. Maintenance while printing (See 3-45) While printing, set whether to perform automatic cleaning or wiping the heads. Available setting values: [CLEANING , WIPING , OFF] Cleaning will be performed at a movement interval as a unit after starting each drawing. When cleaning is selected, the details setting menu is obtained with [FUNCTION] key. Wiping will be performed at each scanning times as a unit after starting each drawing. When wiping is selected, the details setting menu is obtained with [FUNCTION] key. The setting values for each user type are stored separately from those for other user types. CLEANING INTERVAL Set the interval at which cleaning is to be performed periodically during printing. Available setting values: [0.1 ~ 100.0 m] ( Default: 1.0 m) CLEANING TYPE While printing, the cleaning type is set. Available setting values: [SOFT, NORMAL, HARD] WIPING INTERVAL Set the drawing interval for performing the wiping. Available setting values: [10 ~ 9990] (10 time unit/ Default 50 times) HEAD GAP (See 3-5) Set the head gap (height from the media to the nozzle plane of the heads). Available setting values: [1.5 mm ~ 7.0 mm] (In steps of 0.1 mm / Default: 1.5 mm) The upper limit of the head gap varies with media thickness. The setting values for each user type are stored separately from those for other user types. 6-10 Invoking SET UP functions MEDIA DETECT Detection method Set the method for detecting the media Available setting values: [SELECT, WIDTH] ( Default: SELECT) SELECT Select whether to detect a roll media (detect only the width) or to detect a cut sheet media (detect the width and length). WIDTH The printer will detect only the width without requireing any key input. Detection at media cutting Set the detection method at media cutting. Available setting values: [BOTH EDGE, LEFT EDGE, RIGHT EDGE, NONE] ( Default: BOTH EDGE) The setting values for each user type are stored separately from those for other user types. SETUP RESET Reset the settings of the setup functions assigned to the user types 1 to 4 to the default values. 6-11 6 Operation for Functions Invoking MAINTENANCE functions The maintenance functions described here are to be executed to keep the printer in good condition. To carry out maintenance of the printer, select [MAINTENANCE] from the FUNCTION menu and make the necessary settings. The maintenance of the station can be performed independently by pressing the [ST.MAINT] key. List of functions This section describes briefly the maintenance functions and their setting values. Name Refer to ST.MAINTENANCE Clean the inside of the station and ink discharge passage and replace the wiper. (CARRIAGE OUT, WIPER EXCHANGE, NOZZLE WASH, DISWAY WASH, CUSTODY WASH, PUMP TUBE WASH, WIPER WASH) CR.MAINTENANCE Move the head unit to the left end of the printer and perform maintenance of p. 4-28 the heads and their surrounding parts. HD.MAINTENANCE 6-12 Function Perform various maintenance operations of the heads. (FILL UP INK, DISCHARGE&WASH, MaintWashLiquid) p. 4-7 p. 3-31 p. 4-20 p. 5-6 FLUSHING BOX To be performed to let the equipment realize the execution of cleaning after p. 4-46 the cleaning of the flushing box. DROP.POScorrect Once the head height or ink type is changed, correct the dot position. PG DROP ADJUST. Set the reference value for correcting the misalignment of the ink fall points between outward trip and homeward trip in bi-directional printing when the head height has been changed. p. 3-26 This function must be executed whenever the ink type has been changed or initial charge with ink has been performed. SLEEP SET UP Perform head cleaning and flushing operation to prevent nozzle clogging. (REFRESH, TUBE WASH, CLEANING) ROUTINE SETUP Set the functions to be executed periodically while the printer is in stand-by mode. p. 4-34 (ROUTINE WIPING, REFRESH, TUBE WASH, CLEANING, Sub-INK WARNING) WIPER LEVEL Make setting so that the printer gives the wiper replacement warning earlier p. 4-41 than standard depending on the operating environment. HEAD SELECT Select the head(s) to be used for printing. p. 5-10 MEDIA RESIDUAL Make setting of the media remaining amount display function. p. 6-14 BeforeMovingIt. Use this function to lock the station when the printer is to be transported. p. 6-15 p. 3-35 p. 4-31 Invoking MAINTENANCE functions Setting a maintenance function Take the following steps on the operation panel to execute a maintenance function. STEPS: 1 Make sure that the printer is in LOCAL mode, and then select [MAINTENANCE] using the [FUNCTION] key and press the [ENTER] key. If it is in REMOTE mode, press the [REMOTE] key once. L. ∗ > [JV5-01] FUNCTION width : ∗∗∗∗ mm MAINTENANCE <ENT> 2 Select a maintenance function and make setting. Operation procedure with the [ST.MAINT] key (ST.MAINTENANCE) 1 Make sure that the printer is in LOCAL mode. If it is in REMOTE mode, press the [REMOTE] key once. L. ∗ > [JV5-01] width : ∗∗∗∗ mm 2 Press the [ST.MAINT] key. As [ST.MAINTENANCE] is displayed, perform each maintenance operation. ST.MAINTENANCE CARRIAGE OUT <ent> 6-13 6 Operation for Functions Make setting of the media remaining amount display function [MEDIA RESIDUAL] Set ON/OFF of the media remaining amount display function. (Normally OFF) With the media remaining amount display function set to ON, the media remaining amount is displayed in REMOTE mode. (With this function set to OFF and with a cut sheet, the print length is displayed.) The media feed during printing or with any of the JOG keys is reflected on media remaining amount. Input the media length (initial value of remaining amount) when the roll media is detected. When no media length is input, the print length is displayed. STEPS: 1 Make sure that the printer is in LOCAL mode, and then select [MAINTENANCE] using the [FUNCTION] key and press the [ENTER] key. If it is in REMOTE mode, press the [REMOTE] key once. L. ∗ > [JV5-01] FUNCTION width : ∗∗∗∗ mm MAINTENANCE <ENT> 2 Select [MEDIA RESIDUAL] by pressing the [] key 9 times and press the [ENTER] key. 9 times MAINTENANCE ST.MAINTENANCE MAINTENANCE <ent> MEDIA RESIDUAL <ent> 3 Set the setting of remaining amount to ON or OFF by pressing the [] or [] key. Register the setting by pressing the [ENTER] key. MEDIA RESIDUAL SET UP <ent> 4 Press the [END] key several times. The printer returns to LOCAL mode. L. ∗ > [JV5-01] width : ∗∗∗∗ mm 6-14 Invoking MAINTENANCE functions Moving the printer safely [BeforeMovingIt.] Use this function to lock the station when the printer is to be moved. Use this function when the printer is to be moved in such a way that some vibration is expected. However, when the printer is to be moved, be sure to contact your dealer or an office of MIMAKI. Move the printer with the level adjusters of the take-up device in the raised position. STEPS: 1 Make sure that the printer is in LOCAL mode, and then select [MAINTENANCE] using the [FUNCTION] key and press the [ENTER] key. If it is in REMOTE mode, press the [REMOTE] key once. L. ∗ > [JV5-01] FUNCTION width : ∗∗∗∗ mm MAINTENANCE <ENT> 2 Select [BeforeMovingIt.] by pressing the [] key 10 times and press the [ENTER] key. 10 times MAINTENANCE ST.MAINTENANCE <ent> MAINTENANCE BeforeMovingIt. <ent> 3 Make preparation for moving the printer. When preparation has been made, press the [ENTER] key. ∗ PLEASE POWER-OFF ∗ ThePreparation which a device is moved to BeforeMovingIt. START BeforeMovingIt. : ent ∗∗ COMPLETED ∗∗ 4 Press the power button in the front. The lamp on the power switch is put off. 6-15 6 Operation for Functions 5 Turn the main power supply OFF, unplug the power cable, and move the printer. When moving the printer, it must be held up by several people as illustrated below. The cover of the printer may break if it is pressed hard. 6-16 Invoking MACHINE SETUP functions Invoking MACHINE SETUP functions List of functions This section describes briefly the machine setup functions and their setting values. Name Function Refer to DRY & EXHST.FAN Make operation / interlock / independent settings of the Dryness fan and the p. 6-19 Outside /Built-in exhaust fan. DRYNESS FEED Change the feed operation after printing. p. 6-20 CONFIRM. FEED Set whether or not to perform feeding the media after test printing for checking of the printing result. p. 6-20 PRE-FEED METHOD*1 Switch the pre-feed operation method. p. 6-21 HEATER SETUP Change the temperature range of the post-heater that determines whether the temperature is reached. p. 6-21 MEDIA CUT Allocate [] key to direct cut key. p. 6-21 TIME SET Set the date and time on the printer. p. 6-21 UNIT SETUP Change the units of temperature, length and area to be used with the printer. p. 6-22 STAMP SETUP Make settings for outputting the date and time and printing conditions after p. 6-22 printing. CART. PRIORITY Set the cartridge status setting to be used first using the double cartridge automatic switching function. p. 3-55 Test Draw Arrange You can set the deployment direction of the test pattern to be printed when performing test printing repeatedly. p. 6-23 MEDIA DETECT The media thickness detection is switched to Automatic or Manual. p. 6-23 MACHINE NAME When the printer is connected through the USB 2.0 interface to a system to which two or more machines are connected, set the identifier of the printer p. 6-23 to have the system recognize it. ENV. TEMP. Set the operation when drawing was tried to start with the temperature of the place where this machine has been installed being outside the range of usable temperature. p. 3-53 INFORMATION Display various information. The items in [INFORMATION] can be set individually by pressing the [INFORMATION] key. p. 6-24 *1. Available to set only when dedicated sublimation transfer ink is used. 6-17 6 Operation for Functions Functions of [INFORMATION] key This section describes briefly the [INFORMATION] functions and their setting values. Name Function Refer to p. 6-24 ERROR HISTORY Displays the history of errors. MAINTE. HISTORY Displays the records of the date and time when maintenance functions were p. 6-24 used. PRT.modeHISTORY Displays the history of information (printing conditions) of the online printp. 6-24 ing that has been performed up to now. LIST Prints the data for the operator to check the settings of the printer. p. 6-25 Ink REPL. Report Draws ink cartridge replacement information. p. 6-25 VERSION Displays various version information of the equipment. p. 6-25 Serial&DealerNo Displays serial No. and dealer No. of the printer. p. 6-25 Setting a MACHINE SETUP The operation described below on the operation panel is required to execute machine setup functions. STEPS: 1 Make sure that the printer is in LOCAL mode, and then select [MACHINE SETUP] using the [FUNCTION] key and press the [ENTER] key. If it is in REMOTE mode, press the [REMOTE] key once. L. ∗ > [JV5-01] width : ∗∗∗∗ mm FUNCTION MACHINE SETUP 2 Select a machine setting function and make setting. 6-18 <ENT> Invoking MACHINE SETUP functions Outline of the machine setup functions DRY & EXHAUST FAN DRYNESS FAN Set operation of the dryness fan. STOP TIME Set the time from the completion of printing to the stop of the fan. Available setting values: [ CONT. , 0 ~ 240 min ] ( Default: 120 min [In steps of 1 minutes] ) [CONT.] means that the fan is always kept operating. RENEW Change fan operation. ( The fan motor operates according to the setting.) Available setting values: [ON , OFF] The setting is not stored in memory. The dryness fan operates during printing and behaves according to the setting of the stop timer after completion of printing. OUTSIDE EXHAUST FAN Set the operation of the outside exhaust fan when the fan is equipped. As a default, the outside exhaust fan operates in conjunction with the dryness fan setting. If switched to independent operation, different setting from the dryness fan is available. STOP TIME Set the time from the completion of printing to the stop of the fan. Available setting values: [ CONT. , 0 ~ 240 min ] ( Default: 120 min [In steps of 1 minutes] ) [CONT.] means that the fan is always kept operating. RENEW Change fan operation. ( The fan motor operates according to the setting.) Available setting values: [ON , OFF] The setting is not stored in memory. The outside exhaust fan operates during printing and behaves according to the setting of the stop timer after completion of printing. SETUP INTERLOCK Switch to the operation that is interlocked with the dryness fan setting. 6-19 6 Operation for Functions BUILT-IN EXHAUST FAN Set the operation of the built-in exhaust fan when the fan is equipped. As a default, the built-in exhaust fan operates in conjunction with the dryness fan setting. If switched to independent operation, different setting from the dryness fan is available. STOP TIME Set the time from the completion of printing to the stop of the fan. Available setting values: [ CONT. , 0 ~ 240 min ] ( Default: 120 min [In steps of 1 minutes] ) [CONT.] means that the fan is always kept operating. RENEW Change fan operation. ( The fan motor operates according to the setting.) Available setting values: [ON , OFF] The setting is not stored in memory. The built-in exhaust fan operates during printing and behaves according to the setting of the stop timer after completion of printing. SETUP INTERLOCK Switch to the operation that is interlocked with the dryness fan setting. DRYNESS FEED Set whether or not to perform feeding for media drying. Available setting values: [ON, OFF] With DRYNESS FEED set to ON, the printer feeds the media up to the location of the post-heater where the media is dried. After waiting for a period of time that has been set by the setup Function (DRYING TIME - DRAWend), the printer performs the next printing (media cutting). No back feed is performed. (Printing will be started at the position to which the media has been fed for media drying.) CONFIRM. FEED Set whether or not to perform feeding the media after test printing for checking of the printing result. Available setting values: [ON , OFF] With CONFIRM. FEED set to ON, the media after completion of printing will be fed up to a position where the print result can be checked on the platen. In addition, when CONFIRM. FEED has been set to ON, [BACK FEED] can be set to ON using the [FUNCTION] key. The [BACK FEED] function returns to the original position the media that has been fed by the [CONFIRM. FEED] function. Available setting values: [ON , OFF] 6-20 Invoking MACHINE SETUP functions PRE-FEED METHOD Switch the operation method of pre-feeding. Available setting values: [FORE (***mm), FORE&BACK] When FORE (***mm) is set, a media is pre-feeded at specified amout, to remove the media that has waved by the heat of the heater. Change the feeding length of the media with [FUNCTION] key when FORE is selected. Available setting values: [10 to 1000mm] When FORE&BACK is set, a media is pre-feeded back and forth at specific amout, to avoid media sticking. HEATER SETUP Set the temperature that determines whether the post-heater is reached to the specified temperature. Available setting values: [STD, set -5°C, set -10°C, set -15°C, set -20°C] When STD is set, this machine assumes the post-heater temperature has been reached when it reaches to the specified temperature. When Set -5°C, Set -10°C, Set -15°C, or Set -20°C is set, this machine assumes the post-heater temperature has been reached when the temperature is more than the set one subtracted the selected one. Post-heater temperature easily lowers after printing. In case of printing some data continuously with STD is set, if the temperature does not reach between completion of one data printing and a start of next printing, it displays “Temperature controlling.” It does not start printing until the temperature reaches. If you want to print continuously at low temperature, select other than STD. MEDIA CUT Set a key assignment for media cutting and the operation after cutting. ASSIGN CUT KEY Set whether to assign [] key to direct key of media cut. Set Value: [ON, OFF] When assigned to direct key, media cut is selected with [] key in the local mode, and when it is executed, feeding is performed automatically until the printed image passes the cut line and then automatically cut. MOVE DROP MEDIA Set the ejecting operation of a media on the platen after cutting. Set Value: [ON, OFF] When OFF is set, the media is not moved back and forth after cutting. TIME SET Set the date and time on the printer. A past date and time up to 8 o’clock can be input. If you have set a time in the future by mistake, the setting value can be returned to the previous setting value by pressing the [FUNCTION] key. However, it is only the last previous setting value that the setting made by mistake can be returned to. The actually indicated last previous setting time is the last previous setting value plus the actually elapsed time. 6-21 6 Operation for Functions UNIT SETUP Set the units of measure to be used with the printer. Temperature Set the unit of temperature. Available setting values: [° C ( Centigrade) , ° F ( Fahrenheit) ] Length Select the unit system for the units of length and area. Available setting values: [mm , inch] Unit system Units Millimetre mm m m² Inch inch , mil ft ft² STAMP SETUP Set whether or not to output the printing conditions and the date and time of printing. With STAMP SETUP set to ON, the printer prints the conditions and the date and time after completion of printing one file. Available setting values: [ON , OFF] With STAMP SETUP set to ON, the printer outputs the following particulars after printing on each page. Machine name F / W Version Resolution Number of divisions Printing direction Scanning speed Number of layers Media feed correction value Head gap Ink type & number of colors Heater setting temperatures PRE / PRINT / POST Date and time of printing 6-22 Invoking MACHINE SETUP functions Test Draw Arrange You can select the deployment direction of the test pattern to be printed when performing test printing repeatedly. Set value : [FEED DIR. , SCAN DIR.] : When the set value is “FEED DIR.” : When the set value is “SCAN DIR.” Detection of media Thickness Detection Set whether to perform automatically or manually the detection of media thickness performed prior to the detection of media width. Even the same media is used, the thickness could be different due to detection error. In such instance, if you make the setting to MANUAL you can always set the same thickness. Set value: [AUTO, MANUAL] FEED Error Detection If ERROR 135 is displayed when NORMAL is set in FEED METHOD and the media still remains, set OFF. Set value: [ON, OFF] MACHINE NAME When the printer is connected through the USB 2.0 interface to a system to which two or more machines are connected, set the identifier of the printer to have the system recognize it. As a machine name, enter only the printer number in the form [JV5 - ∗∗ (printer number) ]. Available setting values: [01 ~ 99] ( Default: 01) 6-23 6 Operation for Functions INFORMATION INFORMATION, one of the MACHINE SETUP functions, consists of menus for checking the information of the printer. This function can be activated directly by pressing the [INFORMATION] key. Item Description ERROR HISTORY Displays the history of errors and warnings. MAINTE. HISTORY Displays the history of the use of maintenance functions PRT.modeHISTORY Displays printing history. LIST Prints the printer setting information. Ink REPL. Report Draws ink replacement history. VERSION Displays the equipment versions. Serial&DealerNo Displays serial No. and dealer No. of the printer. ERROR HISTORY Displays the history of the errors and warnings the printer has developed up to now. Using the [] or [] key, the errors and warnings can be displayed one by one in the order of occurrence. Display: Date and time (YY, MM, DD, hh, mm) of occurrence, Description of error or warning You can select from [ALL], [ONLY ERROR] or [ONLY WARNING]. MAINTE. HISTORY Displays the records of the date and time when maintenance functions were used. The display relates chiefly to manual cleaning functions or automatic cleaning functions (by SLEEP SET UP or ROUTINE SETUP). One LCD shows the record of one maintenance operation. PRT.modeHISTORY Displays the information (printing conditions) of the online printing that has been performed up to now since power-on. (Max. 50) Using [] or [] key, the display can be changed in the order of printing. Display: Date, history number, resolution, number of passes, printing direction, data format (Variable / Normal), scanning speed, number of layers, print lenght (at completion of printing) 6-24 Invoking MACHINE SETUP functions LIST Prints the settings of the printer. The output format is as shown below. (The format, however, varies with the settings of [DISPLAY] and [UNIT SETUP].) Ink replacement report Draws ink cartridge replacement history. You can select ink color without nozzle clogging. VERSION Displays version information of the equipment. Item Display Model JV5-1x0S(X) Main F / W Version ∗ . ∗∗ NCU F / W Version ∗ . ∗∗ I / F type USB I / F I / F F / W Version ∗ . ∗∗ MRL-III command Version ∗ . ∗∗ Remarks USB 2.0 Serial&DealerNo Displays the serial No. and dealer No. of the printer. 6-25 6 Operation for Functions Invoking NCU functions List of functions This section describes briefly the NCU functions and their setting values. Name Function Refer to p. 6-27 NOZZLE CHECK Set whether or not to perform nozzle missing detection. NG ACTION (*1) Set the operation of the printer to be performed in case the preset number of p. 6-27 or more missing nozzles are detected and thus NG judgment is made. (*2) NG JUDGEMENT (*1) Set the number of missing nozzles for NG judgment. (*2) p. 6-28 COND.INDICATION Displays the status of the NCU. p. 6-28 NG (*1): Bad nozzle condition. NG (*2): One or more bad nozzles have been located on print head. Setting a NCU functions The operation described below on the operation panel is required to execute NCU functions. STEPS: 1 Make sure that the printer is in LOCAL mode, and then select [NCU] using the [FUNCTION] key and press the [ENTER] key. If it is in REMOTE mode, press the [REMOTE] key once. L. ∗ > [JV5-01] width : ∗∗∗∗ mm 2 Select an NCU function and make setting. 6-26 FUNCTION NCU <ENT> Invoking NCU functions Outline of the NCU functions The NCU functions consist of operations concerning the nozzle missing detection function. Setting Make settings of the function that monitors nozzle missing with the nozzle check unit. Nozzle check Set whether or not to perform nozzle missing detection. Available setting values: [ON, OFF] (Default: ON) NG ACTION (*1) NG ACTION [DURING THE DRAW] (*1) Set the operation of the printer during printing in case a preset number of missing nozzles or more are detected and thus NG judgment is made. (*2) NG (*1): Bad nozzle condition. NG (*2): One or more bad nozzles have been located on print head. CONTINUE The printer keeps on printing. (Default) CLEANING&CONT Corrects clogged nozzles by cleaning. Whether the printer succeeds or fails in cleaning, it restarts printing. CLEANING&STOP Corrects clogged nozzles by cleaning. If the printer fails in cleaning, it does not restart printing. STOP Stops printing. The detail setting menu for cleaning is displayed by pressing the [FUNCTION] key with [CLEANING&CONT] or [CLEANING&STOP] selected. CLEANING TYPE [CLEANING&CONT], [CLEANING&STOP] Set a type of cleaning. Available setting values: [NORMAL, SOFT, HARD] ( Default: NORMAL) RETRY COUNT [CLEANING&STOP] Set the number of times cleaning is to be retried. Available setting values: [0 ~ 3] (Default: 3) With RETRY COUNT set to 3, the printer will perform cleaning operation a maximum of four times (as long as clogged nozzles are not corrected) including the first cleaning operation. 6-27 6 Operation for Functions NG ACTION [AFTERtheDRAWend] (*1) Set the operation of the printer after completion of printing of one file in case a preset number of missing nozzles or more are detected and thus NG judgment is made. (*2) NG (*1): Bad nozzle condition. NG (*2): One or more bad nozzles have been located on print head. CONTINUE The printer keeps on printing. (Default) CLEANING&CONT Corrects clogged nozzles by cleaning. Whether the printer succeeds or fails in cleaning, it restarts printing. CLEANING&STOP Corrects clogged nozzles by cleaning. If the printer fails in cleaning, it does not restart printing. STOP Stops printing. The detail setting menu for cleaning is displayed by pressing the [FUNCTION] key with [CLEANING&CONT] or [CLEANING&STOP] selected. CLEANING TYPE [CLEANING&CONT], [CLEANING&STOP] Set a type of cleaning. Available setting values: [NORMAL, SOFT, HARD] ( Default: NORMAL) RETRY COUNT [CLEANING&STOP] Set the number of times cleaning is to be retried. Available setting values: [0 ~ 3] (Default: 3) With RETRY COUNT set to 3, the printer will perform cleaning operation a maximum of four times (as long as clogged nozzles are not corrected) including the first cleaning operation. Turn off the external heater when cleaning operation by NG ACTION [DURING THE DRAW] or NG ACTION [AFTERtheDRAWend] is to be performed. (*2) NG JUDGEMENT (*1) Set the number of missing nozzles for judging the nozzle check NG .(*2) NG (*1): Bad nozzle condition. NG (*2): One or more bad nozzles have been located on print head. CLOGG NZL/color Set the number of missing nozzles per row for judging the nozzle check NG . (*2) Available setting values: [1 ~ 180] (Default: 10) CLOGG NZL/ALL Set the total number of missing nozzles for judging the nozzle check NG . (*2) Available setting values: [1 ~ 180] (Default: 10) COND.INDICATION Displays the status of the NCU. NCU works at present. NCU is available. NCU is separated due to the ERROR. There is a problem with NCU. Operation can be resumed after turning off the nozzle missing detection function. Pressing [FUNCTION] key, it displays every error that has occurred in the NCU and between NCU ↔ Main Unit. Using the [] or [] key, the errors can be displayed one by one in the order of occurrence. 6-28 DISPLAY setting DISPLAY setting Set a language to be used with the printer. Language Japanese English German French Spanish Italian Portuguese The setting is reflected on the indications on the LCDs. 6-29 6 Operation for Functions Applied settings of functions Initial settings can be changed, as required. Settings of heaters Setting items for heaters The items that can be set for the three heaters are as described below. SET TEMP. Set temperature for each of the three heaters. PRE HEAT Set the temperature of the pre-heater. (OFF, 20 ~ 60° C / 68 ~ 140° F) PRINT HEAT Set the temperature of the print-heater. (OFF, 20 ~ 60° C / 68 ~ 140° F) POST HEAT Set the temperature of the post-heater. (OFF, 20 ~ 70° C / 68 ~ 158° F) SET TIME Set the standby time and the time for turning OFF. STANDBY OFF TIME Set the period of time from when printing is completed to when the heater temperature begins to drop to the preheat temperature. The preheat temperature is preset and cannot be changed. If the printer receives data at the preheat temperature, the heaters automatically raise their temperatures up to the preset levels and then the printer starts printing. When [NONE] is selected, the temperatures do not drop to the preheat level. (NONE, 0- 90 min / In steps of 10 minutes) The heaters are turned off in the following case: If a preset time has passed without printing while the printer is in standby mode. With STANDBY-[NONE] selected, there may be a case where a preset time passes without printing after some printing and thus the heaters are turned off. If the printer receives data with the heaters turned off, the heaters are automatically turned on to raise their temperatures up to the preset levels and then the printer starts printing. With [NONE] selected, the heaters are not turned off. (NONE, 0 - 90 min / In steps of 10 minutes) 6-30 Applied settings of functions Detailed settings of heaters Make settings of the pre-heater, print-heater and post-heater built in the platen. The temperatures of heaters can be adjusted even during printing so that optimum temperatures can be obtained. However, it takes a heater a few minutes to more than ten minutes to reach the set temperature depending on the ambient temperature. Use this printer at 20-35° to ensure reliable printing. The heater temperatures may not rise to the set values depending on the ambient temperature. The temperature settings made here will be kept until the power is turned off or they are changed under any of the following conditions: Types are changed in FUNCTION mode. Heater temperatures are changed in FUNCTION mode. The heater temperatures are set on the computer. The heater temperatures can be controlled on your application software if it has a function to do so. For setting on the application software, refer to the instruction manual for your application software. Setting value of temperature °C OFF, 20~60 (70) ° C (In steps of 1 ° C) °F OFF, 68~140 (158) ° F (In steps of ° F) * There may be some values that cannot be set in steps of 1 ° F. Rough guide for temperature setting Heater ES3 ink (media) HS ink Eco-HS1 ink SS21 ink PVC Tarpaulin FF All types of media All types of media All types of media Pre-heater 40 40 40 40 35 35 Print-heater 40 40 40 40 35 35 Post-heater 50 50 50 50 50 50 Adjust each heater temperature to the best suited value to the media condition. When using water-based ink, rough guide for temperature setting is not needed. 6-31 6 Operation for Functions Setting the temperatures and standby time of heaters Set the temperatures and standby time of heaters by the following procedure: STEPS: 1 Make sure that the printer is in LOCAL mode. If it is in REMOTE mode, press the [REMOTE] key once. L. ∗ > [JV5-01] width : ∗∗∗∗ mm 2 Select [SET UP] using the [FUNCTION] key and press the [ENTER] key. Select type 1 to 4 and press the [ENTER] key. FUNCTION SET UP SET UP <ENT> SELECT : TYPE 1 3 Select [HEATER] by pressing the [] key twice and press the [ENTER] key. [SET TEMP.] is displayed. Twice [1] MEDIA COMP. [1] <ent> HEATER <ent> 4 Press the [ENTER] key to go to the lower level of hierarchy and input the setting val- ues of heater temperatures using appropriate ones of the [], [], [] and [] keys. Use the [] or [] key to change the setting values of temperatures, the [] or [] key to move the cursor, and the [ENTER] key to register the setting values in memory. Input range: PRE [OFF, 20 - 60] ° C PRT [OFF, 20 - 60] ° C POST [OFF, 20 - 70] ° C INPUT RANGE OFF, 20 - 60 °C PRE PRT POST OFF OFF 50°C 5 Press the [] key, select [SET TIME], and set [SET TIME]. Use the [] or [] key to change the seting value of the time, the [] or [] key to move the cursor, and the [ENTER] key to register the setting values in memory. (0 ~ 90 min (In steps of 10 minutes) ) StandbySwitchoverTIM NONE, 0 - 90 min [1] HEATER SET TIME STANDBY <ent> 10 min 6 Press the [END] key several times. The printer returns to LOCAL mode. L. ∗ > [JV5-01] width : ∗∗∗∗ mm 6-32 : OFF TIME : NONE How to operate function menus How to operate function menus The following pages show the operating procedures and the messages displayed on the LCDs, using the following icons. For detailed information of operation procedures, refer to the relevant pages. Icon Description This icon means pressing the [FUNCTION] key once. This operation is used to enter [FUNCTION mode] or to go to the lower level of hierarchy. This icon means using appropriate ones of the [], [], [] and [] keys. This icon means pressing the [] or [] key to switch between the alternate sub setting displays or to change the setting value or item. This icon means pressing the [] or [] key to switch between setting values or items. This icon means pressing the [ENTER] key once to execute the setting value or item that is currently displayed. This kind of icon means pressing the indicated key once. ( This icon means pressing the [ST.MAINT] key once.) This icon means pressing the [END] key to cancel the execution. This graphic represents the display. This graphic shows the behavior of the printer activated as a result of key operation. This graphic shows the set value of a menu item. This graphic shows the message displayed as a result of operation. This graphic shows the work other than the menu operations on the operation panel which you are required to do for the printer. This graphic is used together with the icon . 6-33 6 Operation for Functions Functions related to the cutter When the media is to be cut at a desired position Cut the media at any desired position without using the [AUTO CUT] function. (Refer to ?Cutting the media after completion of printing (p.3-41)? ) L. ∗ > [JV5-01] width : ∗∗∗∗ mm ORIGIN SET UP Move the carriage and media using JOG keys so that the carriage is located at the position where cutting is to be started. When [HEAD GAP] has been set to 4.1 mm or more, media cutting cannot be performed. (Only when the ink used is other than sublimation transfer ink) MEDIA CUT <ENT> MEDIA CUTTING PLEASE WAIT The media is cut. L. ∗ > [JV5-01] width : ∗∗∗∗ mm When [] key is allocated to direct cut key L. ∗ > [JV5-01] width : ∗∗∗∗ mm MEDIA CUT <ENT> Movement of the media can not be made. Cutting can not be made when the [HEADGAP] is 4.1 mm or above. (Only when the ink used is other than sublimation transfer ink) MEDIA CUTTING PLEASE WAIT The media is cut. L. ∗ > [JV5-01] width : ∗∗∗∗ mm 6-34 Functions related to print quality Functions related to print quality With function menus of the printer, the print quality can be checked and setting can be changed to improve the print quality. Correcting media feed during printing [FEED COMPENSATION.] With the [MEDIA COMP.] function, as already described, operation is executed in LOCAL mode. However, the operation described here is to be executed to correct the media feed rate in REMOTE mode or during printing of image data. L. ∗ > [JV5-01] width : ∗∗∗∗ mm R. ∗ > [JV5-01] ∗∗.∗∗ m FEED COMPENSATION. 0 FEED COMPENSATION. 0 -500 ∼ 500 1 R. ∗ > Change is [JV5-01] ∗∗.∗∗ m canceled FEED COMPENSATION. SAVE :ent The correction value is valid temporarily. The correction value will be canceled when media detection is performed again or power is turned off. L. ∗ > [JV5-01] width : ∗∗∗∗ mm 6-35 6 Operation for Functions Functions related to ink When ink sets (4-color, 6-color or 7-color) are to be changed L. ∗ > [JV5-01] width : ∗∗∗∗ mm or MAINTENANCE <ENT> ST.MAINTENANCE <ent> or HD.MAINTENANCE <ENT> FILL UP INK <ent> or DISCHARGE&WASH Ink discharge. Being discharged PLEASE WAIT <ent> Remove the ink car- Remove cartridges. tridges. ∗ ∗ ∗ ∗ ∗ ------------------------------ MMCC YYKK KKYY CCMM Check the condition Processing completed Set all washing It is being absorbed liquid cartridges. Set the cleaning liquid PLEASE WAIT cartridge. ∗ ∗ ∗ ∗ ∗ ------------------------------ 1234 5678 9ABC DEFG Processing completed Check the condition Remove all washing It'sBeingDischarged. PLEASE WAIT liquid cartridges. Remove the cleaning liquid cartridge. ∗ ∗ ∗ ∗ ∗ ------------------------------ 1234 5678 9ABC DEFG Processing completed Check the condition Set all washing It is being absorbed liquid cartridges. Set the cleaning liquid PLEASE WAIT cartridge. 1234 5678 9ABC DEFG Check the condition ∗ ∗ ∗ ∗ ∗ -----------------------------Processing completed (Continued to the next page) 6-36 Functions related to ink When ink sets (4-color, 6-color or 7-color) are to be changed (continued) Remove all washing It'sBeingDischarged. PLEASE WAIT liquid cartridges. Remove the cleaning liquid cartridge. ∗ ∗ ∗ ∗ ∗ ------------------------------ 1234 5678 9ABC DEFG Processing completed Check the condition Please select according to situation. COMPLETED < > WASH Do you discharge a Remove all washing mainte.Wash.liquid ? liquid cartridges. Remove the cleaning liquid cartridge. No < > Yes There is a CARTRIDGE Check the condition It'sBeingDischarged. PLEASE WAIT ∗ ∗ ∗ ∗ ∗ -----------------------------Processing completed HD.MAINTENANCE DISCHARGE&WASH An adjustment by a service engineer is required if you change ink types when performing ink filling. <ent> Choose an ink type. InkType ES3 Sol Choose an ink type. ES3 InkSet 4-Color (MCYKKYCM) 4-Color (MCYKKYCM) 6-Color (MCcKYCMm) Set all ES3 INK cartridges. ES3-4Color MMCC YYKK KKYY CCMM FILLING UP NOW. PLEASE WAIT ES3-4Color ∗ ∗ ∗ ∗ ∗ ------------------------------ 6-37 6 Operation for Functions Function Flowchart [BOOT] 6-38 Function Flowchart [BOOT] 6-39 6 Operation for Functions Function Flowchart [LOCAL mode] 6-40 Function Flowchart [LOCAL mode] 6-41 6 Operation for Functions 6-42 Function Flowchart [LOCAL mode] 6-43 6 Operation for Functions Function Flowchart [REMOTE mode] 6-44 Function Flowchart [REMOTE mode] 6-45 6 Operation for Functions Function Flowchart [FUNCTION Key] 6-46 Function Flowchart [FUNCTION Key] 6-47 6 Operation for Functions 6-48 Function Flowchart [FUNCTION Key] 6-49 6 Operation for Functions DECIDE = [ENTER] TIMER SET = [FUNC.] 6-50 Function Flowchart [FUNCTION Key] 6-51 6 Operation for Functions 6-52 Function Flowchart [FUNCTION Key] 6-53 6 Operation for Functions 6-54 Function Flowchart [FUNCTION Key] CLtypeSetWithFUNCkey Yes 6-55 6 Operation for Functions 6-56 Function Flowchart [FUNCTION Key] 6-57 6 Operation for Functions 6-58 Function Flowchart [FUNCTION Key] 6-59 6 Operation for Functions 6-60 Function Flowchart [FUNCTION Key] 6-61 6 Operation for Functions 6-62 Function Flowchart [FUNCTION Key] 6-63 6 Operation for Functions 6-64 Function Flowchart [FUNCTION Key] 6-65 6 Operation for Functions DRY & EXHST.FAN DRY & EXHST.FAN DRYNESS FAN <ent> :CONTINUE, OFF When interlocked with dryness fan DRY & EXHST.FAN Outside EXHST <ent> Outside EXHST (ChangedWith a FUNC) InWorkWithTheDryness Fan together.OK? :ent Outside EXHST CHNGToTheIndependent action. OK? :ent When running independently Outside EXHST STOP TIME <ent> Outside EXHST STOP TIME :CONTINUE, OFF Outside EXHST RENEW <ent> Outside EXHST RENEW Outside EXHST Outside EXHST SETUP INTERLOCK<ent> InWorkWithTheDryness Fan together. OK? :ent When interlocked with dryness fan DRY & EXHST.FAN Built-in EXHST <ent> Built-in EXHST (ChangedWith a FUNC) InWorkWithTheDryness Fan together.OK? :ent Built-in EXHST CHNGToTheIndependent action. OK? :ent When running independently Built-in EXHST STOP TIME <ent> Built-in EXHST STOP TIME :CONTINUE, OFF Built-in EXHST RENEW <ent> Built-in EXHST RENEW Built-in EXHST Built-in EXHST SETUP INTERLOCK<ent> 6-66 InWorkWithTheDryness Fan together. OK? :ent Function Flowchart [FUNCTION Key] 6-67 6 Operation for Functions MACHINE SETUP PRE-FEED METHOD<ent> Only FORE-FEED. (LengthSET= [FUNC.] ) PRE-FEED METHOD SELECT:FORE( 150mm ) :FORE&BACK INPUT RANGE 10 - 1000mm PRE-FEED METHOD LENGTH = 150mm 10 to 1000 FORE-> BACK-> FORE PRE-FEED METHOD SELECT:FORE&BACK MACHINE SETUP HEATER SETUP <ent> TheSetupReachRangeOf POSTHeatTEMP is CHNG HEATER SETUP POSTReachRange:STD MEDIA CUT ASSIGN CUT KEY <ent> MEDIA CUT ASSIGN CUT KEY :OFF :ON MEDIA CUT MOVE.DROP MEDIA <ent> 6-68 Function Flowchart [FUNCTION Key] 6-69 6 Operation for Functions 6-70 Function Flowchart [FUNCTION Key] 6-71 6 Operation for Functions 6-72 Function Flowchart [FUNCTION Key] 6-73 6 Operation for Functions 6-74 Function Flowchart [FUNCTION Key] 6-75 6 Operation for Functions 6-76 Function Flowchart [FUNCTION Key] 6-77 6 Operation for Functions D201515-21-31102014 6-78 Printed in Japan ©2014 MIMAKI ENGINEERING CO., LTD. IT FW:7.5