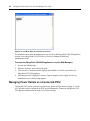
1
MergePoint™
5224/5240
User Guide
For Technical Support:
www.avocent.com/support
Avocent Corporation
4991 Corporate Drive
Huntsville, Alabama 35805-6201
USA
Tel: +1 256 430 4000
Fax: +1 256 430 4031
Avocent Asia Pacific
Singapore Branch Office
100 Tras Street, #15-01
Amara Corporate Tower
Singapore 079027
Tel: +656 227 3773
Fax: +656 223 9155
Avocent International Ltd.
Avocent House, Shannon Free Zone
Shannon, County Clare, Ireland
Tel: +353 61 715 292
Fax: +353 61 471 871
Avocent Germany
Gottlieb-Daimler-Straße 2-4
D-33803 Steinhagen
Germany
Tel: +49 5204 9134 0
Fax: +49 5204 9134 99
Avocent Canada
20 Mural Street, Unit 5
Richmond Hill, Ontario
L4B 1K3 Canada
Tel: +1 877 992 9239
Fax: +1 877 524 2985
590-675-501A
USA Notification
Warning: Changes or modifications to this unit not expressly approved by the party responsible for compliance
could void the user’s authority to operate the equipment.
Note: This equipment has been tested and found to comply with the limits for a Class A digital device, pursuant to Part 15 of the FCC Rules. These limits are designed to provide reasonable protection against harmful
interference when the equipment is operated in a commercial environment. This equipment generates, uses and
can radiate radio frequency energy and, if not installed and used in accordance with the instruction manual, may
cause harmful interference to radio communications. Operation of this equipment in a residential area is likely to
cause harmful interference in which case the user will be required to correct the interference at his own expense.
Canadian Notification
This class A digital apparatus complies with Canadian ICES-003.
Cet appareil numérique de la classe A est conforme à la norme NMB-003 du Canada.
Safety and EMC Approvals and Markings
FCC Class A; EN55022 Class A/CISPR 22 Class A; EN55024/CISPR 24 (EN61000-4-2, EN61000-4-3,
EN61000-4-4, EN61000-4-5, EN 61000-4-6, EN 61000-4-11); EN60950/IEC60950-Compliant; CSA Listed
(USA and Canada); CE Marking (Europe)
MergePoint™ 5224/5240
Service Processor Manager
User Guide
Avocent, the Avocent logo, The Power of Being There, Cyclades,
DSView and MergePoint are trademarks or registered trademarks of
Avocent Corporation or its affiliates. All other marks are the property of
their respective owners.
© 2007 Avocent Corporation. All rights reserved. 590-675-501A
Instructions
This symbol is intended to alert the user to the presence of important operating and maintenance
(servicing) instructions in the literature accompanying the appliance.
Dangerous Voltage
This symbol is intended to alert the user to the presence of uninsulated dangerous voltage within the
product’s enclosure that may be of sufficient magnitude to constitute a risk of electric shock to persons.
Power On
This symbol indicates the principal on/off switch is in the on position.
Power Off
This symbol indicates the principal on/off switch is in the off position.
Protective Grounding Terminal
This symbol indicates a terminal which must be connected to earth ground prior to making any other
connections to the equipment.
iii
T A B L E O F C ON T E N T S
Table of Contents
List of Figures ................................................................................................................ vii
List of Tables ................................................................................................................... ix
Chapter 1: Introduction ................................................................................................... 1
Supported Target Devices.................................................................................................................. 2
MergePoint 5224/5240 SP Manager’s Advantages for Target Device Management ....................... 2
Web Manager..................................................................................................................................... 4
Types of Users.................................................................................................................................... 4
SP console management option .................................................................................................. 5
Device console (SoL) management option ................................................................................. 6
Event log (SEL) management option .......................................................................................... 6
Access to native features on a target device............................................................................... 7
DirectCommand requirements.................................................................................................... 7
Native IP requirements ............................................................................................................... 8
Power management options........................................................................................................ 9
Reset commands........................................................................................................................ 10
Sensor management options ..................................................................................................... 10
Authentication .................................................................................................................................. 13
Security Profiles’ Effects on Users’ Actions.................................................................................... 14
Options for Accessing the MergePoint 5224/5240 SP Manager, Managing User Passwords and
Managing IPDU Power Outlets and Target Devices ............................................................... 15
Command Line Access Through Console Logins ............................................................................ 15
Accessing the MergePoint 5224/5240 SP Manager Console .......................................................... 16
User Shell (rmenush) ....................................................................................................................... 16
SP Shell (spshell) ............................................................................................................................. 17
Using SSH Management Commands ............................................................................................... 17
ssh command line format .......................................................................................................... 18
Management commands for use with the ssh command........................................................... 18
Dial-in Access .................................................................................................................................. 19
Power Management Options ........................................................................................................... 19
Information Users Need................................................................................................................... 20
iv
MergePoint 5224/5240 Service Processor Manager User Guide
Chapter 2: Accessing the MergePoint 5224/5240 Appliance and Target Devices ... 21
Accessing the MergePoint 5224/5240 SP Manager’s Console ....................................................... 21
Accessing Management Features From the User Shell Menu......................................................... 22
Accessing the Console of a Target Device....................................................................................... 24
Creating an SSH Tunnel .................................................................................................................. 25
Creating a VPN Tunnel.................................................................................................................... 27
Routing requirements for VPN connections ............................................................................. 28
Summary of VPN-related requirements for native IP access ................................................... 29
Creating IPSec VPN connections ............................................................................................. 30
Creating PPTP VPN connections............................................................................................. 31
Accessing native features of an SP when a VPN tunnel exists ................................................. 32
Obtaining and Using One Time Passwords for Dial-ins ................................................................. 33
Chapter 3: Web Manager for All Users......................................................................... 35
Prerequisites for Using the Web Manager ...................................................................................... 36
Requirements for Java Plug-In Availability .................................................................................... 36
Logging Into the Web Manager for Regular Users ......................................................................... 37
Features of Regular Users’ Windows .............................................................................................. 39
Using the Target Devices Screen..................................................................................................... 39
Accessing a Service Processor’s Console ....................................................................................... 40
Accessing a Target Device’s Console.............................................................................................. 41
Managing Power Through a Service Processor.............................................................................. 41
Viewing Sensor Data ....................................................................................................................... 42
Viewing and Clearing Event Logs ................................................................................................... 44
Accessing Native Features on a Target Device ............................................................................... 45
Managing Native IP.................................................................................................................. 46
Managing DirectCommand connections .................................................................................. 47
Creating VPN connections for Native IP access ...................................................................... 49
Accessing the MergePoint 5224/5240 SP Manager Console (Web Manager)................................ 51
Managing Power Outlets on a Connected IPDU ............................................................................ 52
Using the Outlets Manager tab to power up and down and check power status ..................... 53
Viewing IPDU information....................................................................................................... 56
Using the Software Upgrade screen to view the IPDU’s current software version................. 57
Configuring Your Password ............................................................................................................ 58
Appendices..................................................................................................................... 59
Table of Contents
v
Appendix A: MindTerm Applet Reference ....................................................................................... 59
Appendix B: Technical Support ....................................................................................................... 66
Index................................................................................................................................ 67
vi
MergePoint 5224/5240 Service Processor Manager User Guide
vii
LIST OF FIGU RES
List of Figures
Figure 1.1: Secure Path to a Connected SP ...................................................................................... 3
Figure 1.2: Example Graph for Readings From a Fan Sensor ....................................................... 11
Figure 2.1: Device Access Menu ..................................................................................................... 23
Figure 2.2: MergePoint 5224/5240 Appliance VPN Example Using IPSec ................................... 27
Figure 3.1: Web Manager Login Screen ......................................................................................... 38
Figure 3.2: User Options on the Web Manager .............................................................................. 39
Figure 3.3: Target Devices Web Manager Screen .......................................................................... 40
Figure 3.4: Device Console Example .............................................................................................. 41
Figure 3.5: Example of Unformatted Sensor Data.......................................................................... 42
Figure 3.6: Sensor Plotter Page ...................................................................................................... 43
Figure 3.7: Example Event Log Web Manager Screen ................................................................... 44
Figure 3.8: Example HP iLO Native Web Interface........................................................................ 46
Figure 3.9: Direct Command: Connected and Go to DirectCommand Interface ........................... 48
Figure 3.10: DirectCommand Connection List ............................................................................... 48
Figure 3.11: Appliance Console Login Screen................................................................................ 51
Figure 3.12: User Menu When Connected to the Console .............................................................. 52
Figure 3.13: AUX Port Not Configured Error Message ................................................................. 53
Figure 3.14: IPDU Tabs .................................................................................................................. 53
Figure 3.15: IPDU Access Failed Message from Outlets Manager................................................ 54
Figure 3.16: Access - IPDU - Outlets Manager Screen .................................................................. 54
Figure 3.17: Outlets Manager Outlets State Close-up .................................................................... 55
Figure 3.18: View IPDU Info Screen .............................................................................................. 56
Figure 3.19: IPDU Software Upgrade Screen on the Web Manager.............................................. 57
Figure 3.20: Password Screen......................................................................................................... 58
Figure A.1: Root Log into MindTerm Running an SSH Console Session ....................................... 60
Figure A.2: Terminal Menu ............................................................................................................. 61
viii
MergePoint 5224/5240 Service Processor Manager User Guide
ix
LIST OF TABLES
List of Tables
Table 1.1: Supported Target Device Types and Management Options ............................................. 5
Table 1.2: SP Console Power Management Options ........................................................................ 5
Table 1.3: Device Console (SoL) Management Options ................................................................... 6
Table 1.4: Event Log (SEL) Management Options............................................................................ 6
Table 1.5: Native IP Management Options ....................................................................................... 8
Table 1.6: Power Management Options ............................................................................................ 9
Table 1.7: Possible Power Management Command Effects.............................................................. 9
Table 1.8: Reset Options.................................................................................................................. 10
Table 1.9: Sensor Graph Parameters .............................................................................................. 11
Table 1.10: Sensor Management Options........................................................................................ 13
Table 1.11: Services and Other Functions Controlled by Security Profiles ................................... 14
Table 1.12: User Shell Default Menu Options ................................................................................ 16
Table 3.1: Supported Browser and JRE Versions ........................................................................... 36
Table 3.2: Differences Between Accessing Native IP and DirectCommand from the
Web Manager ................................................................................................................. 45
Table 3.3: Information on the View IPDU Info Screen ................................................................... 56
Table 3.4: IPDU Information Under Unit Information ................................................................... 56
Table A.1: Console Session Terminal Menu Options ...................................................................... 61
Table A.2: Hotkeys Available During Console Sessions ................................................................. 65
x
MergePoint 5224/5240 Service Processor Manager User Guide
1
CHAPTER
1
Introduction
All users and administrators need the introductory information in the sections listed below for
understanding how to use the MergePoint service processor (SP) manager:
•
Supported Target Devices on page 2
•
MergePoint 5224/5240 SP Manager’s Advantages for Target Device Management on page 2
•
Web Manager on page 4
•
Web Manager on page 4
•
Types of Users on page 4
•
Authentication on page 13
•
Security Profiles’ Effects on Users’ Actions on page 14
•
Options for Accessing the MergePoint 5224/5240 SP Manager, Managing User Passwords and
Managing IPDU Power Outlets and Target Devices on page 15
•
Command Line Access Through Console Logins on page 15
•
Accessing the MergePoint 5224/5240 SP Manager Console on page 16
•
User Shell (rmenush) on page 16
•
SP Shell (spshell) on page 17
•
Using SSH Management Commands on page 17
•
Dial-in Access on page 19
•
Power Management Options on page 19
•
Information Users Need on page 20
2
MergePoint 5224/5240 Service Processor Manager User Guide
Supported Target Devices
A target device managed by the MergePoint 5224/5240 SP manager can be one of the following:
•
An SP on a server. SPs are out-of-band management controllers that many vendors include in
their servers.
•
A server or other type of device that does not have an SP but that provides access to its
command line through a dedicated Ethernet port. This type of device includes servers that
redirect their serial console output to dedicated Ethernet ports (which provide a type of access
generally referred to as serial over LAN or SoL).
•
A device with a dedicated Ethernet port that supports management access via Telnet, SSH,
SNMP or by means of the MergePoint 5224/5240 SP manager’s native IP access capability.
NOTE: The terms target device and connected device are used in this guide when referring to an SP, server or
other connected device, unless otherwise stated.
MergePoint 5224/5240 SP Manager’s Advantages for Target
Device Management
The MergePoint 5224/5240 SP manager, also called the appliance, controls access to
server-management services that are provided by direct connected SPs and to other types of
services that may be provided by other connected devices without SPs. Connected and configured
devices are referred to as target devices.
A MergePoint 5224/5240 SP manager may be managed and target devices may be accessed
through DSView 3 management software, as described in the document Managing MergePoint
5224/5240 Service Processor Managers Using DSView 3 Management Software. Alternately, a
standalone MergePoint 5224/5240 SP manager may be managed and its target devices may be
accessed using the Web Manager or console connections.
When managed as a standalone, the MergePoint 5224/5240 SP manager provides a single source
for authentication, authorization-checking and management for multiple types of SPs. When
managed using DSView 3 management software, the DSView 3 software acts as the single source.
Whichever way users access the MergePoint 5224/5240 SP manager, users can manage multiple
servers with SPs from a single point without having to learn how to use multiple SP-management
interfaces. For example, power management is provided by most SPs but each SP has its own
interface and its own commands for power management. The MergePoint 5224/5240 SP manager
allows an authorized user to manage power on multiple servers with SPs from multiple vendors
using a single interface and a single set of power commands.
The security features provided by the MergePoint 5224/5240 SP manager work together to create a
secure path between a user and a managed server or target device.
Chapter 1: Introduction
3
Figure 1.1 is a conceptual illustration of a secure path between a remote user and an SP through the
MergePoint 5224/5240 SP manager. A remote user is shown, but users may also be locally located,
on the same LAN. In Figure 1.1, the remote user accesses the MergePoint 5224/5240 SP manager
through a network connection to the public Ethernet port. Users may also dial into the MergePoint
5224/5240 SP manager through an optional external modem or PC modem card.
Remote User Workstation
Key
Secure path
Route/Optional Firewall/DSView
3 Management Software Server
MergePoint 5224/5240
SP Manager
SP’s Dedicated
Ethernet Port
Public Network Ethernet Port
Private Network Ethernet Port
Server
Figure 1.1: Secure Path to a Connected SP
In Figure 1.1, the dedicated Ethernet port of an SP is separate from the server’s Ethernet ports. The
SP’s dedicated Ethernet port is connected to one of the SP manager’s private Ethernet ports.
The IP address of the public Ethernet port is the only publicly defined IP address used for
out-of-band management of all connected SPs, which reduces the deployment costs for the SPs.
Each target device is configured with a private designated IP address and, at the administrator’s
discretion, each target device may also have a virtual IP address. If virtual addresses are defined,
users may be allowed to see a target device’s virtual IP address but not to see the target device’s
privately defined IP address.
After the user selects the desired management action, the MergePoint 5224/5240 SP manager then
creates a secure connection between the user and the SP, acting as a proxy on behalf of the user.
While the user is performing any SP management action, the connection between the MergePoint
5224/5240 SP manager and the SP is kept separate and protected from the connection between the
user and the MergePoint 5224/5240 SP manager. Nothing that happens on the private network is
exposed to the public network. Depending on the mode of access (either by browser or by SSH),
either HTTPS or SSH is always being used to protect communications that are transported on the
public network between the user and the MergePoint 5224/5240 SP manager.
4
MergePoint 5224/5240 Service Processor Manager User Guide
Web Manager
The Web Manager may be used when the MergePoint 5224/5240 SP manager is managed as a
standalone. If the MergePoint 5224/5240 SP manager is managed through DSView 3 management
software, access to the Web Manager is usually disabled.
When the Web Manager is enabled, both authorized and administrative users can launch the Web
Manager from a supported browser using HTTP or HTTPS. Authorized users can use the Web
Manager to perform management actions on target devices, manage power on devices plugged into
optional Intelligent Power Distribution Units (IPDUs) and change their own passwords. Only
administrative users have access to the MergePoint 5224/5240 SP manager screens used for
configuring users or target devices.
See Chapter 3 for information about using the Web Manager that is required for authorized and
administrative users.
Browser access to the Web Manager is achieved in one of the following ways:
•
Through the Ethernet port
•
Through dialing into one of the modem or PC phone card types described in Dial-in Access on
page 19
Types of Users
Two predefined administrators are root and admin, and they cannot be deleted. Either root or admin
can add regular user accounts and can authorize users to access management features on target
devices. Any regular users added to the admin group become administrative users able to perform
MergePoint 5224/5240 SP manager administration as described in the MergePoint 5224/5240
Service Processor Manager Installer and Administrator Guide. The default password for root and
admin is cyclades and should be changed immediately to prevent unauthorized access.
The admin user (and any optionally added administrative users) can do the following:
•
Access the Web Manager and use any of its functions
•
Access the MergePoint 5224/5240 SP manager’s console and use the unrestricted shell
•
Invoke the MergePoint 5224/5240 SP manager configuration utility, cli
•
Invoke any Linux commands available to the non-root user
•
Invoke any Linux commands available to the root user by using the sudo command
The root user can do the following:
•
Access the MergePoint 5224/5240 SP manager’s console and use the unrestricted shell
•
Invoke the MergePoint 5224/5240 SP manager configuration utility, cli
•
Invoke any Linux commands available to the root user
The root user cannot access the Web Manager.
Chapter 1: Introduction
5
Only one administrative user can be connected to the MergePoint 5224/5240 SP manager at a time.
Regular users may be authorized for access to management features available on the connected SPs
or other types of target devices.
NOTE: The administrator may create and enable a custom security profile that has the override authorization
feature set, which causes all authenticated users to have all access to all target devices. For details, see Security
Profiles’ Effects on Users’ Actions on page 14.
Table 1.1 shows which management options are available on the supported SP types and on
supported devices without SPs.
Table 1.1: Supported Target Device Types and Management Options
SP
Console
Target
Device
Console/
SoL
Power
Event
Logs
Sensors
NativeIP and
DirectCommand
ALOM
Y
Y
Y
Y
Y
N
Device
N
Y
N
N
N
Y
DRAC
Y
Y
Y
Y
N
Y
iLO
Y
Y
Y
Y
N
Y
IPMI 1.5
Y
N
Y
Y
Y
N
IPMI 2.0
Y
Y
Y
Y
Y
N
RSA II
Y
Y
Y
Y
Y
Y
Supported Service
Processors/
Devices
NOTE: When a target device does not have an SP, Target Device Console, native IP and DirectCommand are
the only management options available by default. The target device types may be customized to make other
management features available.
SP console management option
Table 1.2 shows the SP console management option names and command names used either when
you are logged into the Web Manager, when you have selected a target devices from the spshell
menu on the MergePoint 5224/5240 SP manager console or when you are entering the ssh
command on a remote workstation. All options give access to the SP console and are only available
for managed servers with SPs.
Table 1.2: SP Console Power Management Options
Method
Option or Command Name
Web Manager
SP Console
6
MergePoint 5224/5240 Service Processor Manager User Guide
Table 1.2: SP Console Power Management Options (Continued)
Method
Option or Command Name
spshell menu in the MergePoint 5224/5240 SP
manager console
Access the service processor’s console
ssh command
spconsole
Device console (SoL) management option
Table 1.3 shows the device console management (SoL) option names and command names used
when you are logged into the Web Manager, when you have selected a target device from the
spshell menu on the MergePoint 5224/5240 SP manager console and when you are entering the ssh
command on a remote workstation.
Table 1.3: Device Console (SoL) Management Options
Method
Option or Command Name
Web Manager
SoL Console
spshell menu in the MergePoint 5224/5240 SP
manager console
Access the device’s console via SoL
ssh command
devconsole
Event log (SEL) management option
Events are messages logged when system management events are detected. The events can be
logged either by the SP or by the server. Table 1.3 shows the event log management option names
and command names used when you are logged into the Web Manager, when you have selected a
target device from the spshell menu on the MergePoint 5224/5240 SP manager console and when
you are entering the ssh command on a remote workstation. These options display the system event
log (SEL) menu from the server where the SP resides. The user can view or clear event logs
directly on the SP using the ssh command. All options are only available for managed servers with
SPs.
Table 1.4: Event Log (SEL) Management Options
Method
Option or Command Name Action
Web Manager
Event Log
Brings up a screen with the event log
management options
• View event log
• Clear event log
Chapter 1: Introduction
7
Table 1.4: Event Log (SEL) Management Options (Continued)
Method
Option or Command Name Action
spshell menu in the MergePoint 5224/
5240 SP manager console
Manage the event log
Brings up a menu with the event log
management options
• View event log
• Clear event log
ssh command
sel
clearsel
•
•
Displays the event log
Clears the event log
Access to native features on a target device
Both Native IP and DirectCommand management options provide native access to target devices
and enable an authorized user to connect directly either to the web management interface of a target
device or to the command line of a device that redirects console output to a dedicated Ethernet port.
When users are configured for target device management actions, the same permission authorizes
the user for both Native IP and DirectCommand.
The authorized user obtains authenticated access to a target device’s native features such as native
applications, integrated web servers and other proprietary interfaces that are available over IP.
Native applications are proprietary SP management applications provided by some server vendors,
such as HP InSight Manager, IBM Director and Dell Open Manage. Access to a native application
usually requires the application to be installed on the user’s workstation. Some management
applications reside on the SP itself.
Access to native functions on some SPs is through a proprietary web interface on the SP. HP iLO,
Dell DRAC and IBM RSA II SPs have a local web server running and provide a web interface that
allows administrators remote access for provisioning, monitoring and managing the server. The
web interface is accessed through a specific port number. The monitoring and management features
supported by some SPs through native web interfaces include access to the server’s serial or
graphical user interface, power control, access to sensor data and server event logs, SNMP agents
and virtual media.
DirectCommand requirements
The DirectCommand option is available only through the Web Manager. DirectCommand creates a
Java applet that runs in the background to start a secure SSH tunnel and to connect to the native
web interface on the target device. Therefore, the Java Runtime Environment must be installed on
the user’s workstation. The JRE is also a requirement for Web Manager access.
The Web Manager allows the administrator to configure up to 20 ports and associate them with
other services that may also be invoked by DirectCommand. As described in the troubleshooting
appendix in the installer and administrator guide, the administrator must take care to ensure that
local applications are not using the same TCP ports that are used by DirectConnect.
8
MergePoint 5224/5240 Service Processor Manager User Guide
Native IP requirements
Native IP access requires a pre-existing secure tunnel between the user’s workstation and the
MergePoint 5224/5240 SP manager. Table 1.5 shows the native IP parameters and command
names available when you are logged into the Web Manager, when you have selected a target
device from the spshell menu on the MergePoint 5224/5240 SP manager console and when you are
entering the ssh command on a remote workstation.
Table 1.5: Native IP Management Options
Method
Parameter or Command Name
Web Manager
Native IP
spshell menu in the MergePoint 5224/5240 SP manager
console
•
•
ssh command
• nativeipon
• nativeipoff
Enable native IP
Disable native IP
After an authenticated and authorized user establishes a secure tunnel and selects the Native IP
option, the user can bring up a native web interface or launch a native web management application
from where it resides on the user's workstation or from the SP’s console.
Native IP access depends on the following being true:
•
The SP must provide the desired native management functionality. For example, SPs using
IPMI protocols do not provide native web access.
•
The user is authorized to access the Native IP option on an SP.
•
The user has created a secure tunnel to the MergePoint 5224/5240 SP manager. An SSH tunnel
gives access to native web applications only while a VPN tunnel gives access to both native
web and native management applications.
Tasks for creating secure tunnels and obtaining native IP access
See Chapter 2 for creating information on creating secure tunnels and obtaining Native IP access.
Chapter 1: Introduction
9
Power management options
Table 1.6 shows the power management option names and command names used when you are
logged into the Web Manager, when you have selected a target device from the spshell menu on the
MergePoint 5224/5240 SP manager console and when you are entering the ssh command on a
remote workstation. The power management options are only available for managed servers with
SPs.
Table 1.6: Power Management Options
Method
Option or Command Name Action
Web Manager
•
•
•
•
spshell menu in the
MergePoint 5224/5240 SP
manager console
Manage power
Brings up a menu of power management options
• Turn power on
• Turn power off
• Turn power off then on
• Get power status
ssh command
power
Power management options are performed using
the following power management commands
• poweron
• poweroff
• powercycle
• powerstatus
Power On
Power Off
Power Cycle
Power Status
•
•
•
•
Turn power on
Turn power off
Power cycle
Check power status
The effects of the SP power management commands differ from one vendor’s SP to another. Table
1.8 describes the options. If an SP provides more than one of the options shown, the hard power
option is performed.
Table 1.7: Possible Power Management Command Effects
Power Command
Option
Power off
•
•
Power cycle (turn power off, •
then on again, to reboot
•
the server)
Hard power off: remove the power
Soft power off: shut down the operating system before removing the power
Hard power cycle: remove the power, wait several seconds and then turn the
power on again (to reboot the server)
Soft power cycle: shut down the operating system, wait several seconds and
then turn power on again
See Power Management Options on page 19 for an overview of all the types of power management
that users can perform.
10
MergePoint 5224/5240 Service Processor Manager User Guide
Reset commands
Table 1.8 shows the reset options available when you are logged into the Web Manager, when you
have selected a target device from the spshell menu on the MergePoint 5224/5240 SP manager
console and when you are entering the ssh command on a remote workstation. The reset
management options are only available for managed servers with SPs.
Table 1.8: Reset Options
Method
Command or Option
Web Manager
Reset
spshell menu in the MergePoint 5224/5240 SP
manager console
reset
ssh command
reset
The effects of the reset command differ from one vendor’s SP to another and sometimes between
firmware versions from the same vendor. In addition, some SPs have more than one type of reset,
as described in the following list:
•
Warm reset (or warm boot): only the server’s operating system is restarted
•
Cold boot: the server is fully restarted (the same effect as issuing a Power cycle command)
If an SP has more than one type of reset option, the MergePoint 5224/5240 SP manager Reset
command performs the highest level of reset: the cold boot option if available.
If the administrator is configuring an SP that provides multiple reset options, the administrator can
customize an associated SP management script to cause the reset command to perform one of the
lower levels of reset available on the SP. Customizing SP management scripts is described in the
MergePoint 5224/5240 Service Processor Manager Installer and Administrator Guide.
Sensor management options
An authorized user or administrative user can view graphical displays of sensor data collected from
servers by their SPs. These users can also modify graph display settings through the Web Manager
or the user shell menu or by using the ssh command with the sensor commands.
Figure 1.2 shows an example graph. The sensor value in a graph’s heading varies with the type of
data being measured and the type of SP. The example fan sensor reading in Figure 1.2 has a
heading Time Vs. % because the sensor is measuring the percentage of total possible fan speed.
Examples of other possible values for sensor_value are Volts, Degrees Centigrade and
Degrees Fahrenheit.
For procedures for monitoring sensors, see To view a server’s sensor data from an SP (Web
Manager): on page 43.
Chapter 1: Introduction
11
Graph Area
Graph Heading
Sensors List
Display Graph Button
Figure 1.2: Example Graph for Readings From a Fan Sensor
Table 1.9 shows graph features that can be modified. An error message appears if you enter a value
that is greater than or lower than the supported range of values.
Table 1.9: Sensor Graph Parameters
Field/Menu
Use
Default
Allowed Values
y-Axis Boxes
Specify a different number of rows.
10
1-55
x-Axis Boxes
Specify a different number of columns.
Each graph cell represents the interval
between readings.
300
1-999
Min Y Value
Specify a different minimum sensor value to be plotted Varies with the
type of sensor
on the x axis. The only valid keys are numeric keys,
period (.) and hyphen (-).
Varies with the
type of sensor
Max Y Value
Specify a different maximum sensor value to be
plotted on the y axis. The only valid keys are numeric
keys, period (.) and hyphen (-).
Varies with the
type of sensor
Varies with the
type of sensor
12
MergePoint 5224/5240 Service Processor Manager User Guide
Table 1.9: Sensor Graph Parameters (Continued)
Field/Menu
Use
Mean Y Value
Varies with the
Specify a different mean value to use as a basis for
type of sensor
comparison with the actual detected value. The only
valid keys are numeric keys, period (.) and hyphen (-).
In line graphs, the Mean Temp is indicated by a black
horizontal line. In bar graphs, the colors of the bars
indicate the following:
• Blue – Less than the mean Y value.
• Red – Greater than mean Y value.
• Black – Equal to the mean Y value.
Varies with the
type of sensor
Time Interval
Specify a different frequency in seconds for fetching
sensor data. The only valid keys are numeric keys.
5
5-300
Graph Type
Choose another graph type.
Line Graph
Line Graph or Bar
Graph
Grid Line Color
Choose another color for the lines.
•
white
•
•
•
•
•
•
•
•
•
•
•
light gray
• yellow
• green
• cyan
• gray
• darkgray
• lightgray
• magenta
• orange
• pink
• white
Graph BG Color Select the background color.
Default
Allowed Values
yellow
green
cyan
gray
darkgray
lightgray
magenta
orange
pink
white
Table 1.10 shows the sensor management options available when you are logged into the Web
Manager, when you have selected a target device from the spshell menu on the MergePoint 5224/
5240 SP manager console and when you are entering the ssh command on a remote workstation.
The sensor options display unformatted sensor data collected from the server by its SP. The page
that appears provides a button that when clicked displays graphs of data from individual sensors.
Chapter 1: Introduction
13
The sensor management options are only available for managed servers with SPs.
Table 1.10: Sensor Management Options
Method
Command or Option
Web Manager
Sensors
spshell menu in the MergePoint 5224/5240 SP
manager console
sensors
ssh command
sensors
Authentication
Anyone accessing the MergePoint 5224/5240 SP manager must log in by entering a username and
password. Controlling access by requiring users to enter names and passwords is called
authentication. The usernames and passwords entered during login attempts are checked against a
database. Access is denied if the username or password is not valid.
The password database being checked can reside either locally (on the MergePoint 5224/5240 SP
manager) or on an authentication server on the network.
The user is required to enter a username and password in the following cases:
•
When logging into the MergePoint 5224/5240 SP manager.
The authentication method chosen for the MergePoint 5224/5240 SP manager is used for all
access through Telnet, SSH or the Web Manager. By default, logins to the MergePoint 5224/
5240 SP manager use local authentication.
•
When accessing an SP or other target device.
Users may be required to enter different usernames and passwords when accessing the MergePoint
5224/5240 SP manager than when accessing a target device.
14
MergePoint 5224/5240 Service Processor Manager User Guide
Security Profiles’ Effects on Users’ Actions
When the MergePoint 5224/5240 SP manager is being managed without DSView 3 management
software, the administrator needs to select a security profile based on the security requirements of
the organization.
NOTE: All of the features and procedures described in this guide work when the Moderate security profile is
in effect.
Table 1.11: Services and Other Functions Controlled by Security Profiles
Service
Other Functions That May Be Allowed/Disallowed
FTP
N/A
HTTP, HTTPS
Redirect HTTP automatically to HTTPS
ICMP
N/A
IPSec
N/A
PPTP
N/A
RPC
N/A
SNMP v1, v2c, v3
N/A
SSH v1, SSH v2
Allow root login using SSH
Assign an alternate port to SSH
Telnet
Allow Telnet to MergePoint 5224/5240 SP manager
Services may also be turned on and off independently from the security profile. For more details,
see the MergePoint 5224/5240 Service Processor Manager Installer and Administrator Guide.
In addition to turning services on and off, an administrator may select the security profile option to
override authorizations, which enables access based on authentication only.
NOTE: If you are prevented from using a service you need to use, such as FTP or SNMP, talk with the
administrator to find out if the service can be enabled or if another way of performing a necessary task is
available that is consistent with your site’s security policies.
16
MergePoint 5224/5240 Service Processor Manager User Guide
When a user connects to any console using the Web Manager, a window running a MindTerm
applet appears with an encrypted SSH connection between the user’s workstation and the console.
MindTerm is an SSH client that includes an integrated xterm/vt100 terminal emulator and runs as a
Java applet within a browser window.
To use MindTerm, the user’s browser must have a Java plug-in enabled, as described in
Requirements for Java Plug-In Availability on page 36.
See MindTerm Applet Reference on page 59 for details about use and configuration and about
hotkeys that can be used during console sessions through the Web Manager.
Accessing the MergePoint 5224/5240 SP Manager Console
Administrators and authorized users can access the MergePoint 5224/5240 SP manager console, in
the following ways:
•
Through the DSView 3 management software, if it is being used to manage the SP manager.
•
By local logins through the console port: Local administrators or authorized users can access
the command line by logging in through the console port. This requires the user or
administrator to have physical access to a terminal or workstation that is connected to the
MergePoint 5224/5240 SP manager’s console port. The user or administrator logs in through a
terminal or through a terminal emulation program running on a connected workstation.
•
By using SSH: Remote administrators and authorized users can access the MergePoint 5224/
5240 SP manager’s command line through an SSH connection between the user’s workstation
and the MergePoint 5224/5240 SP manager. See Using SSH Management Commands on
page 17.
•
By clicking Appliance - Connect on the Web Manager: After logging into the Web Manager,
any type of user can access the console by clicking Appliance in the left menu and then
clicking the Connect button.
The following sections describe the menus available to regular users and administrative users
after they log into the MergePoint 5224/5240 SP manager console.
User Shell (rmenush)
The default login shell for non-administrative users is /usr/bin/rmenush. After logging in as
described in Accessing the MergePoint 5224/5240 SP Manager’s Console on page 21, regular
users see the menu options described in the following table. See Accessing Management Features
From the User Shell Menu on page 22 for more details.
Table 1.12: User Shell Default Menu Options
Menu Option
Function
Access devices
Executes spshell to display a list of devices the user can access. See SP Shell
(spshell) on page 17.
Chapter 1: Introduction
17
Table 1.12: User Shell Default Menu Options (Continued)
Menu Option
Function
Change password
Allows the user to set a new password.
Logout
Logs the user out of the MergePoint 5224/5240 SP manager’s console.
NOTE: An administrator may modify the menu options and commands shown in Table 1.12 so that you may be
presented with a different menu of choices.
SP Shell (spshell)
When you select Access devices from the login menu shown in Table 1.12, the MergePoint 5224/
5240 SP manager shell, /usr/bin/spshell, displays a list of target devices you are authorized to
access, as shown in the following example.
Select a device
-rack1_dev2_compaq_proliant_ilo
rack1_dev1_ibm_e306_rsa
au_rack1_dev1_ilo
Exit
An administrative user can access a similar list of all target devices by entering /usr/bin/spshell on
the command line. A submenu lists the management actions available to the user. See Accessing
Management Features From the User Shell Menu on page 22 for more details.
Using SSH Management Commands
Both SSH v1 and SSH v2 services are supported on the MergePoint 5224/5240 SP manager. The
administrator may disable either version; if only one version of SSH is enabled, authorized users
can use only a client running the same version.
If SSH is enabled, authorized users can use ssh in the following ways:
•
For accessing the MergePoint 5224/5240 SP manager console using an SSH client or the ssh
command, then connecting through the MergePoint 5224/5240 SP manager to perform
management actions. See Accessing the MergePoint 5224/5240 SP Manager’s Console on
page 21.
•
Using the ssh command with special management commands to perform management actions
without having to log into the MergePoint 5224/5240 SP manager first. See Management
commands for use with the ssh command on page 18. See Accessing Management Features
From the User Shell Menu on page 22 and Accessing the Console of a Target Device on
page 24.
18
MergePoint 5224/5240 Service Processor Manager User Guide
ssh command line format
The general format of the ssh command line is shown in the following example.
% ssh -t username:[devicename]@SPmanager_IPaddress_or_DNS_name [command]
where:
The -t option is required to launch an interactive session.
The username is the account name of the authorized user.
The devicename is the name/alias that was assigned to the target device by the MergePoint 5224/
5240 SP manager administrator (used only when accessing a target device).
NOTE: To access the MergePoint 5224/5240 SP manager console, omit the target device name.
The SPmanager_IP_or_DNS_name is the IP address of the MergePoint 5224/5240 SP manager or
its DNS name.
The command is one of the MergePoint 5224/5240 SP manager-specific management commands
described in Management commands for use with the ssh command on page 18.
For details, see Access to native features on a target device on page 7.
Management commands for use with the ssh command
Users can perform management actions directly on a target device by using the ssh command along
with one of the following MergePoint 5224/5240 SP manager-specific management commands:
•
spconsole
•
devconsole
•
poweron, poweroff, powercycle, powerstatus
•
reset
•
sensors
•
sel, clearsel
•
native_ip_on, native_ip_off
DirectCommand is not available when using ssh. For details about the management actions
performed by the commands, see Using SSH Management Commands on page 17.
The following example command line allows an authorized user whose username is fred to turn on
the power for a server whose alias is configured on the MergePoint 5224/5240 SP manager as drac,
when the IP address of the MergePoint 5224/5240 SP manager is 192.168.29.22:
% ssh -t fred:[email protected] poweron
This next example shows how the root user could invoke the rmenush command when logging into
the MergePoint 5224/5240 SP manager to bring up the user login shell menu:
Chapter 1: Introduction
19
% ssh -t root:@192.168.44.111 rmenush
Dial-in Access
Authorized users can dial into the MergePoint 5224/5240 SP manager through either of the
following types of optional modems and phone cards:
•
An external modem connected to the AUX port
•
A modem, GSM or CDMA PCMCIA card inserted into one of the front PC slots
The MergePoint 5224/5240 SP manager can be accessed using PPP when the following
prerequisites are completed:
•
The modem or phone card has been configured on the MergePoint 5224/5240 SP manager for
PPP or Autodetect and for optional callback
•
The PPP application at the remote caller’s end has been configured for dialing into the
MergePoint 5224/5240 SP manager and optionally for callback from the MergePoint 5224/
5240 SP manager
•
The user account has been configured for PPP access and the user knows the PPP username
and password configured by the MergePoint 5224/5240 SP manager administrator
The MergePoint 5224/5240 SP manager can be accessed from a terminal emulation program on the
user’s workstation if the modem or phone card is configured for Login or autodetect. The one-time
password authentication method can be configured for login access to PC modem or phone cards.
Power Management Options
The MergePoint 5224/5240 SP manager provides the following two types of power management
options for administrators and authorized users:
•
IPDU power management
Allows the user to manage power for any type of AC device that may be plugged into a
Cyclades PM IPDU, when the IPDU is connected to the MergePoint 5224/5240 SP manager
AUX port.
For details about the Web Manager-IPDU screen that is used to manage power outlets and for
links to procedures, see Managing Power Outlets on a Connected IPDU on page 52.
•
SP power management
Allows the user to manage power for a server whose SP is connected to the MergePoint 5224/
5240 SP manager when the SP provides power management capabilities. See Power
management options on page 9 for details about power management of connected servers that
have SPs.
20
MergePoint 5224/5240 Service Processor Manager User Guide
Information Users Need
Users need to obtain the following information from the MergePoint 5224/5240 SP
manager administrator:
•
The user’s name and password.
•
The names of target devices that the user is authorized to manage and the management actions
that the user may perform.
•
Information about services that are enabled or disabled on the MergePoint 5224/5240 SP
manager. For example, the administrator may have configured the MergePoint 5224/5240 SP
manager so that HTTP or SSH v1 are disabled.
•
A list of any IPDU power outlets the user is authorized to manage.
•
For native IP users using PPTP VPN connections, the PPTP password, which may be different
from the password used to access the MergePoint 5224/5240 SP manager.
•
For native IP users using IPSec VPN connections, authentication information for either shared
secret or RSA key authentication.
21
CHAPTER
2
Accessing the MergePoint 5224/
5240 Appliance and Target Devices
The following topics describe how to access the MergePoint 5224/5240 SP manager and
target devices:
•
Accessing the MergePoint 5224/5240 SP Manager’s Console on page 21
•
Accessing Management Features From the User Shell Menu on page 22
•
Accessing the Console of a Target Device on page 24
•
Creating an SSH Tunnel on page 25
•
Creating a VPN Tunnel on page 27
•
Obtaining and Using One Time Passwords for Dial-ins on page 33
NOTE: Chapter 3 describes using the Web Manager to manage target devices. This chapter contains
procedures that must be performed on the command line.
Accessing the MergePoint 5224/5240 SP Manager’s Console
As described under User Shell (rmenush) on page 16 and SP Shell (spshell) on page 17, authorized
users who connect to the MergePoint 5224/5240 SP manager’s console are presented with a menu
of choices. From the initial menu, users can bring up a list of target devices that they are authorized
to access and then access a submenu of management actions they can perform on the selected
target device.
This section describes how to access the MergePoint 5224/5240 SP manager’s console using SSH.
The following procedure requires the listed prerequisites to be met:
•
The user must know the IP address of the MergePoint 5224/5240 SP manager.
•
The user must have a username and password for the MergePoint 5224/5240 SP manager.
•
The user’s workstation must be running an SSH client and either has an SSH application such
as PuTTY or access to the command line.
•
If using the ssh command, the user must know the correct format, which is described in ssh
command line format on page 18.
22
MergePoint 5224/5240 Service Processor Manager User Guide
To access the MergePoint 5224/5240 SP manager console:
1.
If you are using a terminal or terminal emulation program installed on a workstation that is
physically connected to the console port of the MergePoint 5224/5240 SP manager, start the
terminal session with the following factory-default console port settings.
Serial Speed: 9600 bps
Parity: None
Flow Control: None
Data Length: 8 bits
Stop Bits: 1
ANSI emulation
2.
In an SSH application or in an ssh command line, enter the username and the MergePoint
5224/5240 SP manager IP address or DNS name.
The following example shows entering an ssh command with francisco as the username and
192.168.44.111 as the IP address.
% ssh [email protected]
3.
Log in when prompted.
After authentication and login, a shell prompt appears for administrative users (root, admin or
other users who are members of the admin group). For authorized non-administrative users, the
user shell menu appears.
Accessing Management Features From the User Shell Menu
After logging in as described in Accessing the MergePoint 5224/5240 SP Manager’s Console on
page 21, non-administrative users see a menu like the one shown in the following example.
-Access Devices
Change Password
Logout
Administrative users can get to the same menu either by entering the rmenush command on the ssh
command line or by entering /usr/bin/rmenush on the command line after login. You can move
from one item to another on the menu and submenus by using the keyboard arrow keys. A line (-)
appears next to the selected item.
As described in User Shell Default Menu Options on page 16, if a regular user selects Access
Devices, a menu appears with a list of target devices that the user is authorized to access, as shown
in Figure 2.1.
Chapter 2: Accessing the MergePoint 5224/5240 Appliance and Target Devices
23
Figure 2.1: Device Access Menu
After a target device is selected, pressing the Enter or Return key brings up the list of actions the
user is authorized to perform on the target device.
Not all listed actions are supported for all SPs. The following example shows the SP action menu
for an rsa-type SP.
rsa
Access the service processor's console
Access the device's console via SoL
Manage power
Reset
Manage the event log
Enable native IP
Disable native IP
Exit
Back
24
MergePoint 5224/5240 Service Processor Manager User Guide
Accessing the Console of a Target Device
Chapter 3 tells how to access an SP or device console through the Web Manager. Any type of
authorized user can access the console of a connected SP, server or other type of supported device
using one of the two additional methods listed below:
•
Connecting to the MergePoint 5224/5240 SP manager’s console and accessing the SP console
or the device console
•
Invoking the ssh command along with either the spconsole or devconsole command
See Management commands for use with the ssh command on page 18 for the format of the ssh
command line when a device management command is used, if desired.
The prerequisites for using the ssh command line to access a device console are shown in the
following list:
•
The user has access to the ssh command on the command line of the remote workstation
•
The user is authorized to access the console of a device or SP
•
The user knows the alias of the target device that allows console access
•
The user knows know the IP address or DNS name of the MergePoint 5224/5240 SP manager
To use an ssh command to connect directly to a device’s or SP’s console:
1.
To connect directly to a device’s console, enter the ssh command with the
devconsole command.
The following format example shows entering ssh with the -t option, the username francisco,
the alias rsa_au, the MergePoint 5224/5240 SP manager IP address 192.168.44.111 and the
devconsole command.
% ssh -t francisco:[email protected] devconsole
2.
To connect directly to an SP’s console, use the ssh command with the spconsole command.
The following example shows entering ssh with the -t option, the username francisco, the IP
address 192.168.44.111 with the spconsole command.
% ssh -t francisco:[email protected] spconsole
3.
When the login prompt appears, log into the console using the username and password
configured for the device or SP.
To use the MergePoint 5224/5240 SP manager console menus to access
management options:
1.
Log into the MergePoint 5224/5240 SP manager console. If you have connected to the
MergePoint 5224/5240 SP manager console as a regular user, the user shell menu displays.
2.
If you are a regular user, use the arrow keys on your keyboard to navigate to the Access
Devices option on the menu and press Enter or Return.
Chapter 2: Accessing the MergePoint 5224/5240 Appliance and Target Devices
25
3.
If you have connected to the MergePoint 5224/5240 SP manager console as an administrative
or root user, type /usr/bin/spshell on the command line.
4.
Select the name of the target device to access.
5.
Press Enter or Return. A list of actions displays.
6.
Select the desired action from the menu that displays.
7.
If you have selected either Access the service processor’s console or Access the device's
console when the console login prompt appears, log into the console.
To exit from a console session:
Perform one of the two following steps to exit from the console of an SP, server or device before
closing the terminal window:
•
On the command line of the terminal, type the exit command
[root@rdqailo /]# exit
-or•
Enter the hotkey combination Ctrl+e+c.
The terminal window closes.
Creating an SSH Tunnel
As an alternative to using DirectCommand through the Web Manager, an authorized user can
access a native web application after creating an SSH tunnel using local port forwarding. An
arbitrarily chosen TCP port number on the user’s host is forwarded to the IP address of a target
device managed by the MergePoint 5224/5240 SP manager.
The prerequisites are shown in the following list:
•
The user’s workstation must be running an appropriate SSH client.
•
The authentication type configured for the target device must be the same as the authentication
method configured for the MergePoint 5224/5240 SP manager.
•
The user must be authorized for native IP access to the target device.
After the user creates the SSH tunnel and the user is authenticated, the user can launch a browser
that runs the native web application on the target device.
PuTTY on Windows and OpenSSH on Linux are some of the SSH clients available for creating an
SSH tunnel. The feature works with SSH protocol v1 and v2. See http://www.openssh.com tor
additional clients.
Common port numbers are: HTTP 80 and HTTPS 443
Our examples use port 443 for HTTPS for a target device whose IP address is 10.10.1.181.
The example local TCP port number used is 8080. You can select a random number over 1000.
26
MergePoint 5224/5240 Service Processor Manager User Guide
To use OpenSSH on a Linux workstation to create an SSH tunnel:
1.
If the workstation is running SSH v2, enter the following command line.
$ ssh -l username -f -N -L 8080:10.10.1.181:443
SPmanager_IPaddress_or_DNS_name
2.
If the workstation is running SSH v1, enter the following command line.
$ ssh -1 -l username -L 8080:10.10.1.181:443 \
SPmanager_IPaddress_or_DNS_name
3.
Enter your username and password when prompted.
To use PuTTY on a Windows PC to create an SSH tunnel to a target device:
1.
Open PuTTY.
2.
In the Category pane, select Tunnels under Connection - SSH.
3.
In the main pane, perform the following steps in the Port Forwarding section.
a.
Type the number of the local TCP port to forward in the Source port field. This example
uses 8080. You can select a random number over 1000.
b.
In the Destination field, type the IP address of the target device. Follow it with a colon
then the port number of the service you want to access through the SSH tunnel.
c.
Click Add.
4.
In the Category pane, select Session.
5.
Enter the IP address or DNS-managed name of the MergePoint 5224/5240 SP manager in the
Host Name (or IP address) field.
6.
Select SSH as the protocol.
7.
Click Open.
8.
Enter your username and password when prompted.
To bring up a native web application after an SSH tunnel exists:
1.
Bring up a browser.
2.
In the location bar enter http://localhost:portnumber where portnumber is the TCP port
number you specified for forwarding when you created the tunnel.
http://localhost:8080
In this step, use the local port number you specified for forwarding. In the examples, we
used 8080.
3.
The native web application appears in the browser.
Chapter 2: Accessing the MergePoint 5224/5240 Appliance and Target Devices
27
Creating a VPN Tunnel
The authorized user creates a VPN tunnel using either IPSec or PPTP. A user authorized for native
IP can access native IP functionality through the Web Manager or through using ssh management
commands after creating a tunnel using either IPSec or PPTP.
Figure 2.2 shows an illustration of a single user’s workstation running IPSec on the right end and
the MergePoint 5224/5240 SP manager on the left end, with a router and the Internet between the
MergePoint 5224/5240 SP manager and the user’s workstation.
Internet
Workstation
and IPSec Gateway
Router
Figure 2.2: MergePoint 5224/5240 Appliance VPN Example Using IPSec
Typically, the user configures a named VPN connection profile (or shortcut) on the user’s
workstation, using either IPSec or PPTP. The name on the user’s end for a preconfigured VPN
connection profile might be the name of the MergePoint 5224/5240 SP manager. The name on the
MergePoint 5224/5240 SP manager end for a VPN connection profile might simply be the name
and location of the user.
NOTE: Most systems, including the MergePoint 5224/5240 SP manager, refer to configuring a VPN connection,
but until the connection is actually made, what is informally called a VPN connection is actually a named
connection profile or connection shortcut, which stores the information the computer needs in order to establish
the connection.
The prerequisites for creating a VPN connection are shown in the following list:
•
The user on the remote workstation and the MergePoint 5224/5240 SP manager administrator
have configured VPN connection profiles from both sides to support the VPN connection. See
Creating a VPN Tunnel on page 27 for more details.
•
The user has created a VPN tunnel between the user’s workstation and the MergePoint 5224/
5240 SP manager.
•
The user has logged into the MergePoint 5224/5240 SP manager, either through the Web
Manager or through the command line and has been authenticated.
28
MergePoint 5224/5240 Service Processor Manager User Guide
An authorized user can enable native IP access in one of the following two ways:
•
If the authorized user is connected to the MergePoint 5224/5240 SP manager’s console, the
user can select the Enable native IP option that appears in the spshell menu for the selected SP.
•
If the authorized user is logged into the Web Manager, the user can choose Enable Native IP
for the desired target device on the Target devices screen.
The VPN connection must remain active for the duration of the native IP session.
CAUTION: To prevent unauthorized users from accessing the native IP features of the target device, when you
are finished, always disable any native IP sessions and then close the VPN connection.
Routing requirements for VPN connections
All routing requirements assume the user’s workstation and the MergePoint 5224/5240 SP manager
can exchange packets.
IPSec VPN routing requirements
If a route is necessary for the MergePoint 5224/5240 SP manager and the user’s workstation to
exchange packets, a route can be specified by setting one or both of the Right and Left nexthop
parameters to the IP address of a host route and selecting Add and route as the boot action. This
should be configured by the MergePoint 5224/5240 SP manager’s administrator and the
configuration should be shared with the user. Once packets can be exchanged between the
MergePoint 5224/5240 SP manager and the user’s workstation, IPSec automatically creates the
routes needed to get packets flowing through an IPSec VPN tunnel, so neither the user nor the
administrator need to create routes to support IPSec VPN tunnels to target devices.
PPTP VPN routing requirements
If a network or host route is needed to enable communications between the user’s workstation and
the MergePoint 5224/5240 SP manager, the user must manually add the route on the user’s
workstation before creating the PPTP VPN tunnel.
In addition, the user must manually create a static route after the PPTP connection is established to
inform the workstation that the target device to be contacted is at the other end of the point-to-point
link. The route must include the PPTP address assigned to the MergePoint 5224/5240 SP manager,
which the user can discover by running the ifconfig or ipconfig command.
The following example shows the PPTP interface IP address output from the ipconfig command on
an Windows NT operating system when PPTP has assigned an IP address of 192.168.2.1.
C:\> ipconfig
...
PPP adapter MergePoint5224/5240_PPTP_VPN
...
IP Address.. . . . . . . . . : 192.168.2.1
Chapter 2: Accessing the MergePoint 5224/5240 Appliance and Target Devices
29
...
If the user needs to communicate with target devices on two separate private subnets, the user must
create a route to each private subnet or to each target device.
For example, to communicate with all target devices on a private subnet whose IP address is
192.168.4.0, when the network mask is 255.255.255.0 and the PPTP-assigned IP address for the
MergePoint 5224/5240 SP manager is 192.168.2.1, the following route would be needed:
route add -net 192.168.4.0 mask 255.255.255.0 via 192.168.2.1
If additional target devices must be accessed on additional private subnets, additional routes must
be created to each of the subnets.
To communicate with three target devices on a virtual network whose IP address is 172.20.0.0,
whose network mask is 255.255.0.0 via the MergePoint 5224/5240 SP manager and PPTP has
assigned to the MergePoint 5224/5240 SP manager the IP address 192.168.2.1, the user would need
to configure a route like the one shown in the following example:
route add -net 172.20.0.0 mask 255.255.0.0 via 192.168.2.1
If a virtual network is configured, the user needs to only add a single network route to the virtual
network. Check with the MergePoint 5224/5240 SP manager’s administrator about which routes
you need to configure to connect to the target devices for which you are authorized.
Creating a default route on the user’s workstation to the MergePoint 5224/5240 SP manager is not
a viable approach. The route would cause the loss of DNS and other local services (such as Internet
and mail service) for the user’s workstation.
Summary of VPN-related requirements for native IP access
The following list summarizes the requirements for configuring a VPN connection:
•
Obtain from the MergePoint 5224/5240 SP manager’s administrator the values used in creating
the VPN connection profile on the MergePoint 5224/5240 SP manager end and use these
values to configure the connection profile on the user’s end. Obtain the PPTP password if
PPTP is being used. If IPSec is being used, the user may obtain the relevant portion of the
MergePoint 5224/5240 SP manager’s ipsec.conf file and insert it into the ipsec.conf file on the
user’s workstation.
•
Before attempting to access the native IP feature on the MergePoint 5224/5240 SP manager,
the user must start the VPN connection from the user’s workstation.
The MergePoint 5224/5240 SP manager listens for the connection attempt from the IP addresses
specified in its connection profiles and grants the access.
NOTE: The VPN connection must remain active for the duration of the native IP session.
30
MergePoint 5224/5240 Service Processor Manager User Guide
Creating IPSec VPN connections
For an IPSec VPN connection, the following authentication information is required:
•
Username and password
•
Connection keys or certificates
The ESP and AH authentication protocols (also called encapsulation methods) are supported. RSA
Public Keys and Shared Secret are also supported.
If the RSA public key authentication method is chosen, the generated keys are different on each
end. When Shared Secret is used, the secret is shared on both ends.
The MergePoint 5224/5240 SP manager administrator needs to give the user a copy of the
configuration parameters used to configure the IPsec connection profiles on the MergePoint 5224/
5240 SP manager, usually by providing a copy of the relevant portions of the ipsec.conf file, which
the user can insert into the ipsec.conf file on the user’s workstation.
To create an IPSec VPN tunnel:
The authorized user must perform the following actions to enable the IPSec client running on the
user’s workstation to bring up the VPN tunnel that enables access to native IP features on
target devices.
1.
2.
Make sure your workstation can exchange packets with the MergePoint 5224/5240 SP
manager.
a.
Test whether your workstation can access the MergePoint 5224/5240 SP manager by
entering the MergePoint 5224/5240 SP manager’s public IP address in a browser to try to
bring up the Web Manager.
b.
If a network or host route is needed to enable communications with the MergePoint 5224/
5240 SP manager, configure the route.
Create an IPSec VPN connection profile on your workstation, using the values supplied by the
MergePoint 5224/5240 SP manager administrator.
If the MergePoint 5224/5240 SP manager’s administrator sends the relevant portions of the
ipsec.conf file from the MergePoint 5224/5240 SP manager’s IPSec configuration, use it to
replace the same section in your workstation’s ipsec.conf file.
3.
Bring up the IPSec VPN tunnel.
Depending on the platform and IPSec client being used, you may use a GUI to create the IPSec
VPN connection or execute the ipsec auto -up command.
4.
Enable native IP access as described in the following procedure.
Chapter 2: Accessing the MergePoint 5224/5240 Appliance and Target Devices
31
To enable native IP access through an IPSec VPN tunnel:
NOTE: The MergePoint 5224/5240 SP manager’s administrator must provide the appropriate IP address for this
procedure, which is not the same as the public IP address assigned to the MergePoint 5224/5240 SP manager’s
public interface. The IP address is either the appliance side IP address configured for the private subnet where
the target device resides or a virtual IP address configured for the MergePoint 5224/5240 SP manager.
1.
Create a VPN tunnel. See To create an IPSec VPN tunnel: on page 30 or To create a PPTP
VPN tunnel: on page 31 if needed.
2.
To enable native IP access through a browser, perform the following steps.
3.
a.
Enter the private IP address or virtual IP address assigned to the MergePoint 5224/5240
SP manager in a browser.
b.
Log into the MergePoint 5224/5240 SP manager.
c.
Select Target devices in the Web Manager’s left menu.
d.
Find the entry for the desired target device and click Enable Native IP access.
To enable native IP access using the ssh command, perform the following steps.
a.
Enter the ssh command with the following syntax: ssh -t username:@privateIP.
The following command line example uses user AllSPs and a virtual IP address of
172.20.0.1.
% ssh -t AllSPs:@172.20.0.1
b.
Select Access Devices from the menu.
c.
Select the target device from the target devices menu.
d.
Select Enable native IP from the list of management actions.
Creating PPTP VPN connections
An authorized user can create PPTP VPN connections on Linux, Windows or Macintosh
operating systems.
To create a PPTP VPN tunnel:
1.
2.
Configure a PPTP VPN connection profile with the following information obtained from the
MergePoint 5224/5240 SP manager administrator:
•
The IP address assigned to the MergePoint 5224/5240 SP manager’s public interface.
•
The PPTP username and password assigned to the user.
Create the PPTP VPN connection.
To enable native IP access through a PPTP VPN tunnel:
1.
After creating a PPTP VPN tunnel, enter the ifconfig or ipconfig command on your
workstation to discover the PPTP address assigned from the MergePoint 5224/5240 SP
manager’s IP address pool in the PPTP connection.
32
MergePoint 5224/5240 Service Processor Manager User Guide
2.
Set up one of the following types of static routes to enable VPN connections:
•
A network route to the private subnet where the target device resides via the
PPTP-assigned address for the MergePoint 5224/5240 SP manager.
•
If a virtual network is configured, a network route to the virtual network where the target
device resides via the PPTP-assigned address for the MergePoint 5224/5240 SP manager.
•
A host route to each target device, using the real or virtual IP address assigned to the
target device.
3.
Enter the PPTP address either in a browser or with ssh on the command line to access the
MergePoint 5224/5240 SP manager.
4.
Access the target device and enable native IP access.
See To access a native web application (Web Manager): or To access a native management
application that resides on your workstation: on page 32.
Accessing native features of an SP when a VPN tunnel exists
The following procedures describe how to access native features on an SP after either a PPTP,
IPSec or SSH tunnel exists.
To access a native web application (Web Manager):
1.
Enter the private or virtual IP address of the MergePoint 5224/5240 SP manager in a browser.
The Web Manager appears.
2.
Log into the Web Manager.
3.
Select Access - Target devices.
4.
Click the Enable link next to Native IP.
5.
Click the Go to native web interface link that appears.
To access a native web application (from a remote browser):
On your workstation, enter the IP address of the target device in a browser’s location field. The
native web application appears.
To access a native web application (using the ssh command):
On the command line of your workstation, enter the ssh command with the name/alias of the target
device along with the IP address of the MergePoint 5224/5240 SP manager. The native web
application appears.
For example, the following ssh command line gives the user named allSPs access to a target device
called sp2 using the MergePoint 5224/5240 SP manager’s virtual IP address 172.20.0.1.
% ssh -t allSPs:[email protected]
To access a native management application that resides on your workstation:
Bring up the management application on your workstation.
Chapter 2: Accessing the MergePoint 5224/5240 Appliance and Target Devices
33
To access a native management application (from an SP):
If the management application resides on an SP and is an executable that can be invoked on the
command line, do one of the following to access the SP’s console and launch the
management application:
•
To use ssh to get to the SP’s console to launch the management application, do the
following steps.
a.
Enter ssh with the spconsole command on the command line of your workstation in the
following format.
% ssh
b.
-t allSPs:[email protected] spconsole
Bring up the management application from the SP’s command line.
-or•
To use the Web Manager, perform the following steps:
a.
Log into the Web Manager on the MergePoint 5224/5240 SP manager.
b.
Select Access - Target Devices, and find the entry for the target device to access on
the screen.
c.
Select the SPConsole link.
d.
Log into the SP if prompted.
e.
Bring up the management application from the SP’s command line.
Obtaining and Using One Time Passwords for Dial-ins
This section is for users authorized to dial into the MergePoint 5224/5240 SP manager through an
external modem, PC modem or phone card when the one time password (OTP) authentication
method is configured for logins to that target device. With OTP authentication, you supply a
different password every time you dial-in, so no one who discovers the password used for one
session can use that password later to access your account. An OTP is a group of six English words
that are entered all on the same line at the prompt.
When you dial into the MergePoint 5224/5240 SP manager and enter a username, the system
provides a challenge string starting with otp-md5, which tells opiekey to use the MD5 algorithm,
followed by a sequence number and a key and waits for a response.The key includes the first two
letters of the hostname and a pseudo random number. In the following example, the sequence
number is 499 and the seed is on93564.
login: username
otp-md5 499 on93564
Response:
The user copies the challenge and pastes it into the command line on a non-networked workstation.
The opiekey program then prompts the user for the user’s secret pass phrase.
34
MergePoint 5224/5240 Service Processor Manager User Guide
Each OTP user needs a local user account on the MergePoint 5224/5240 SP manager, must be
registered with the OTP system and must be able to obtain the OTP username, OTP secret pass
phrase and OTP passwords needed for logins. The following procedure is for users who have the
opiekey program running on a non-networked workstation, who know the secret pass phrase and
are able to generate their own passwords.
To generate an OTP when prompted at dial-in:
1.
Dial into the MergePoint 5224/5240 SP manager through an external modem, a PC modem or
phone card that has been configured to use OTP authentication.
2.
Obtain an OTP by performing the following steps.
a.
Copy the challenge into a window on a non-networked workstation where the opiekey
program is installed, as shown in the following example.
% otp-md5 499 on93564
b.
3.
Enter your secret pass phrase when prompted. The opiekey program generates a six
word OTP.
Copy the OTP password to the window where the login program is waiting with the
Response prompt.
35
CHAPTER
3
Web Manager for All Users
The following sections describe how all types of users (authorized and administrative) can use the
Web Manager to access the MergePoint 5224/5240 appliance, manage connected SPs and other
devices, manage power outlets on any connected IPDUs and manage their own passwords:
•
Prerequisites for Using the Web Manager on page 36
•
Requirements for Java Plug-In Availability on page 36
•
Logging Into the Web Manager for Regular Users on page 37
•
Features of Regular Users’ Windows on page 39
•
Using the Target Devices Screen on page 39
•
Accessing a Service Processor’s Console on page 40
•
Accessing a Target Device’s Console on page 41
•
Managing Power Through a Service Processor on page 41
•
Viewing Sensor Data on page 42
•
Viewing and Clearing Event Logs on page 44
•
Accessing Native Features on a Target Device on page 45
•
Accessing the MergePoint 5224/5240 SP Manager Console (Web Manager) on page 51
•
Managing Power Outlets on a Connected IPDU on page 52
•
Configuring Your Password on page 58
36
MergePoint 5224/5240 Service Processor Manager User Guide
Prerequisites for Using the Web Manager
This section describes the required browsers, preparation and browser plug-ins needed for different
types of access.The prerequisites described in this section must be complete before anyone can
access the Web Manager. If you have questions about any of the following prerequisites, contact
your site’s system or network administrator:
•
The IP address of the MergePoint 5224/5240 appliance must be known. Entering the IP
address of the MergePoint 5224/5240 appliance into the address field of one of the supported
browsers listed in Table 3.1 is the first step required to access the Web Manager.
When DHCP is enabled, a target device’s IP address may or may not be fixed. When the
address is not fixed, anyone wanting to access the MergePoint 5224/5240 appliance must find
out the currently assigned IP address each time. If DHCP is enabled and you do not know how
to find out the current IP address of the MergePoint 5224/5240 appliance, contact your system
administrator for help.
•
A user account must be defined on the Web Manager. By default, the admin user has an
account on the Web Manager. Any administrator can add regular user accounts to access target
devices using the Web Manager.
For accessing the Web Manager, you can use any type of workstation that has access to the network
where the MergePoint 5224/5240 Service Processor Manager is installed and any browser (such as
Internet Explorer 5.5 or above, Netscape 6.0 or above, Mozilla or Firefox) with a Java 2 plug-in.
Table 3.1: Supported Browser and JRE Versions
Browser
Version
JRE Version
Firefox
1.0.7
JRE 1.5.0_01
Internet Explorer
6.0
JRE 1.5.0_02
Mozilla
1.7
JRE 1.5.0_01
Netscape
7.1
JRE 1.5.0_02
Requirements for Java Plug-In Availability
The Web Manager launches Java applets in the following situations:
•
When establishing console access to the MergePoint 5224/5240 appliance and to SPs and other
target devices.
•
When establishing an SSH tunnel to a target device when a user enables the
DirectCommand feature.
•
When displaying sensor data.
Chapter 3: Web Manager for All Users
37
The Java applets rely on the Java plug-in being installed on the workstation and registered with the
browser being used.
Installing the Java 2 Runtime Environment (J2RE) Standard Edition software automatically installs
the needed Java plug-in. After you download and install the JRE software, you then must make sure
the Java plug-in is registered with the browser. See the http://java.sun.com website for
more information.
Logging Into the Web Manager for Regular Users
Both authorized users and MergePoint 5224/5240 appliance administrators can access the Web
Manager from a browser using HTTP or HTTPS over the Internet or through a dial-in or callback
PPP connection.
After being authenticated during login, authorized users can use the Web Manager to log into target
devices, manage power and change their own passwords, but they cannot use the Web Manager for
configuring users or target devices. Any number of regular users can connect to the Web Manager
at the same time.
MergePoint 5224/5240 appliance administrators can perform additional user and target device
configuration tasks through the Web Manager. See the MergePoint 5224/5240 Service Processor
Manager Installer and Administrator Guide for details.
Figure 3.1 shows the login screen for the Web Manager that appears when the MergePoint 5224/
5240 appliance IP address is entered in a Microsoft Internet Explorer browser.
38
MergePoint 5224/5240 Service Processor Manager User Guide
Figure 3.1: Web Manager Login Screen
See Power Management Options on page 19 for more about how to use the Web Manager and
Prerequisites for Using the Web Manager on page 36 for the required browsers, preparation and
browser plug-ins needed for different types of access.
To log into the Web Manager:
This procedure assumes you have a valid username and password and that your workstation has a
network connection or a PPP connection to the MergePoint 5224/5240 appliance.
1.
Enter the IP address of the MergePoint 5224/5240 appliance in a supported browser. See Table
3.1 on page 36 for a list of supported browsers, if needed. The Web Manager login
screen appears.
2.
Enter your username and password.
3.
Click the Login button.
Chapter 3: Web Manager for All Users
39
Features of Regular Users’ Windows
Figure 3.2 shows features of the Web Manager that appear when regular users log in.
Logout Button and MergePoint 5224/5240 SP Manager Information
Screen Area
Left Menu
Help Button
Figure 3.2: User Options on the Web Manager
A menu of options appears on the left. The fields, buttons and menus in the screen area in the
middle differ according to which option is selected.
MergePoint 5224/5240 appliance administrators see the same list of options shown in Figure 3.2
under the administrator’s Access tab. The Access tab is one of multiple tabs that are available on
the Web Manager whenever an administrator logs in. Administrators can refer to the MergePoint
5224/5240 Service Processor Manager Installer and Administrator Guide for more details.
Using the Target Devices Screen
The Target devices screen lists device groups and individual target devices that are not in groups
for every target device the user is authorized to access. Clicking the plus (+) sign next to the name
of a group expands the list of target device entries. Clicking a minus (-) sign hides the list of target
device entries.
The entry for each target device has the following:
40
MergePoint 5224/5240 Service Processor Manager User Guide
•
Links to the management features the user is allowed to access on that target device
•
The name (alias) assigned to the target device
•
A real IP address (if a virtual IP address is not assigned to the target device)
•
A virtual IP address (if one is assigned to the target device)
•
A description of the target device
Target Device
Entry
Management Action Links
Figure 3.3: Target Devices Web Manager Screen
Links to management actions are active only when the current user is authorized to use them and
when they are supported for associated selected target device.
Accessing a Service Processor’s Console
Clicking the Service Processor Console link on the Target devices screen gives you access to the
command line of the SP. A window running a MindTerm Java applet appears.
To connect to an SP’s console (Web Manager):
1.
Log into the Web Manager.
2.
Select the SP Console link from the Action pull-down menu associated with the SP whose
console you wish to access. A MindTerm window displays with an SSH connection to the
target device.
3.
If authentication is enabled for the SP, log in as prompted.
Chapter 3: Web Manager for All Users
41
Accessing a Target Device’s Console
Clicking the Device Console link on the Target devices screen launches a terminal window running
a Java applet and creates a console connection with the target device. Figure 3.4 shows an example
terminal window with a connection to the console of a Compaq Proliant server with an iLO
type SP.
Figure 3.4: Device Console Example
To connect to a device’s SoL console (Web Manager):
1.
Log into the Web Manager.
2.
Select the Sol Console link from the Action pull-down menu associated with the target device
whose console you wish to access. A MindTerm window displays with an SSH connection to
the device.
3.
If authentication is enabled for the device, log in as prompted.
Managing Power Through a Service Processor
Clicking the Power button on the Target devices screen gives you access to a menu of power
management options that are available on the SP.
If an SP supports both a hard power off and a soft power off option, the Turn power off and Power
cycle buttons perform the hard power option. If an SP has more than one type of reset option, the
Reset command on the Target devices screen performs the highest level of reset, which is the cold
boot option (if available). See Table 1.8 on page 10 for more information.
Clicking the Check power status button brings up a dialog box that shows the server’s power status.
42
MergePoint 5224/5240 Service Processor Manager User Guide
To manage a server’s power through its SP (Web Manager):
1.
Log into the Web Manager.
2.
Select the Power link from the Action pull-down menu associated with the target device for
which you want to manage power.
3.
To power up the server, click the Power on link.
4.
To power down the server, click the Power off link.
5.
To reboot the server, click the Power cycle link.
6.
To check the power status of the server, click the Power status link.
7.
To reset a server from an SP, click the Reset link.
Viewing Sensor Data
Clicking the Sensors button on the Target devices screen displays the SP’s sensor plotting page.
Figure 3.5 shows the Sensors screen that displays unformatted data.
View Sensor Plotter Button
Figure 3.5: Example of Unformatted Sensor Data
Clicking the View sensor plotter button in Figure 3.5 brings up a screen allowing you to view data
from individual sensors on the server.
The sensor plotter page is shown in Figure 3.6 in the default graph format. Click the radio button
next to the desired sensor and click Display Graph to display the data from the selected sensor in
the graph area.
Chapter 3: Web Manager for All Users
43
Users can bring up multiple instances of the sensor plotter page and view different sensors in
different graphs at the same time. The graph displays a new reading at a specified interval. The
default, which is user-configurable, is five seconds.
Sensors List
Graph Area
Display Graph Button
Figure 3.6: Sensor Plotter Page
To view a server’s sensor data from an SP (Web Manager):
1.
Log into the Web Manager.
2.
Click the Sensors link associated with the server whose sensors you wish to view. A MindTerm
Java applet appears showing unformatted sensor data.
3.
Click the View sensor plotter button. A list of sensors appears on the left with the main graph
area empty.
4.
Click the radio button next to the name of the sensor you wish to view.
5.
Click the Display Graph button. A graph of data from the selected sensor displays in the
default graph format.
44
MergePoint 5224/5240 Service Processor Manager User Guide
Viewing and Clearing Event Logs
Clicking the Event Log button on the Target devices screen displays the system event log (SEL)
menu from the server where the SP resides. Event messages are sent by the SP when system
management events are detected. The events may be being logged either by the SP or by the server.
The Clear event log button appears at the top of the screen, as shown in Figure 3.7.
Clear Event Log Button
Figure 3.7: Example Event Log Web Manager Screen
To view or clear event logs:
1.
Click the Event Log button on the Target devices screen. The SEL menu from the server where
the SP resides appears.
2.
View the log, if desired.
3.
Click the Clear event log button to clear the log, if desired.
4.
Close the screen by clicking the X in the upper right.
Chapter 3: Web Manager for All Users
45
Accessing Native Features on a Target Device
As mentioned in Access to native features on a target device on page 7, the Native IP and
DirectCommand privilege authorizes users for both Native IP and DirectCommand actions. If the
user is not authorized, the Action pull-down menu for a device on the Web Manager Target
devices screen does not list either Native IP or DirectCommand. Some differences between Native
IP and DirectCommand options that appear for authorized users are described in the following table
with links to sections that provide more details. (Continued)
Table 3.2: Differences Between Accessing Native IP and DirectCommand from the Web Manager
Native IP
DirectCommand
The Action pull-down menu for a target device initially
The Action pull-down menu for a target device
displays Native IP Enable only if a secure tunnel exists displays DirectCommand Enable.
between the user’s workstation and the MergePoint
5224/5240 SP manager. See To enable access to
Native IP on a target device (Web Manager): on
page 46 for more details.
If a secure tunnel does not exist, the Action pull-down
menu displays Native IP: Unavailable.
Clicking the Native IP Enable link has the
following effects:
• Enables Native IP and makes the Disable
link active.
• Causes the Go to native web interface link
to appear.
The authorized user can then do one of the
following actions:
• Click the Go to native web interface link to launch a
browser that brings up the native web application
on the target device.
-or• Launch an SP management application from the
user’s remote workstation.
See Managing Native IP on page 46 for more details.
Clicking the DirectCommand Enable has the
following effects:
• Enables DirectConnect and makes the Disable
link active.
• Launches a Java applet that creates a secure SSH
tunnel and manages the DirectConnect connection.
• Causes a Go to Direct Command Interface link
becomes active on the Action menu.
• Causes the DirectCommand Connected link to
appear in the upper right of the Web Manager
under the IP address.
• The SP or device’s web interface comes up in a
separate window, with a login prompt if login
is required.
Clicking the DirectCommand Disable link closes the
window and causes the DirectCommand Connected
link to change to DirectCommand: Idle. See Managing
DirectCommand connections on page 47 for
more details.
46
MergePoint 5224/5240 Service Processor Manager User Guide
Managing Native IP
Tasks for creating secure tunnels and obtaining native IP access on page 8 describes tasks for
creating the secure tunnel that must exist between the user’s workstation and the MergePoint 5224/
5240 SP manager before an authorized user can enable Native IP and the Go to native web interface
can be active. Figure 3.8 shows an example of a HP iLO web interface as it might appear after an
authorized user has the needed tunnel and clicks the Go to native web interface link.
Figure 3.8: Example HP iLO Native Web Interface
CAUTION: When finished with management tasks performed using native IP, the authorized user should always
click the Disable link. Leaving native IP enabled creates a security risk.
To enable access to Native IP on a target device (Web Manager):
1.
Create a secure tunnel between your workstation to the MergePoint 5224/5240 appliance. See
Tasks for creating secure tunnels and obtaining native IP access on page 8 for overview and
Creating VPN connections for Native IP access on page 49 for how to create a VPN tunnel.
2.
If the VPN connection is made using IPSec, enter the IP address that is assigned to the public
interface into a browser to bring up the Web Manager.
Chapter 3: Web Manager for All Users
3.
47
If the VPN connection is made using PPTP, discover and use the IP address that is assigned on
your workstation to the PPTP interface.
a.
If your workstation has a Windows operating system, enter the ipconfig command on the
workstation’s command line.
-orIf your workstation has a UNIX-based operating system, enter the ifconfig command on
the workstation’s command line.
b.
In the command output, locate the IP address assigned to the connection.
c.
Enter the PPTP IP address in a browser to bring up the Web Manager.
4.
Log into the Web Manager as an authorized user and select the Target devices menu option.
5.
On the Action pull-down menu for the target device on which you want native IP access, click
the Native IP Enable link.
The Go to native web interface link becomes active.
6.
Perform one of the following actions, as desired:
•
Click the Go to native web interface link to bring up the native web application.
-or-
•
7.
From your local workstation, launch a previously installed SP management application for
the server, if desired.
When you are done, always click the Disable link as a security precaution.
Managing DirectCommand connections
After a DirectCommand connection is created during a Web Manager session, the Java applet that
creates the secure tunnel between the user and the MergePoint 5224/5240 SP manager and that
manages DirectCommand connections stays loaded until the Web Manage login session is ended,
even if all DirectCommand connections are closed.
The Web Manager provides two ways to manage DirectCommand connections, which are listed
below and described in this section:
•
Through the Direct Command connection list
•
Through the Go to Direct Command Interface link
As mentioned in Accessing Native Features on a Target Device on page 45, the first time a user
creates a DirectCommand connection by clicking the DirectCommand Enable link in the Action
pull-down menu, a DirectCommand Connected link appears in the upper right of the Web Manager
under the IP Address and a Go to DirectCommand Interface link becomes active in the Action
pull-down menu, as shown in Figure 3.9 on page 48.
48
MergePoint 5224/5240 Service Processor Manager User Guide
Figure 3.9: Direct Command: Connected and Go to DirectCommand Interface
DirectCommand connection link
Users can see information about and manage all currently active DirectCommand connections by
clicking the DirectCommand Connected link, which brings up the dialog shown in Figure 3.10.
Figure 3.10: DirectCommand Connection List
Chapter 3: Web Manager for All Users
49
Go to DirectCommand Interface link
After all DirectCommand connections are terminated, the following occur:
•
The DirectCommand Connected link changes to Direct Command: Idle.
•
The Go to DirectCommand Interface link persists in the Action pull-down menu, and the SSH
tunnel between the user and the MergePoint 5224/5240 SP manager remains active. The user
can select the Go to DirectCommand Interface link to from the Action pull-down menu to
create a new DirectCommand connection without having to relaunch the Java applet.
To use DirectCommand to gain native web access to a target device
(Web Manager):
1.
Log into the Web Manager as an authorized user.
2.
The first time during a Web Manager login session, click the DirectCommand Enable link in
the Action pull-down menu for the target device on which you want DirectCommand access. A
Java applet launches a window and connects to the device’s native web interface.
3.
When you are done, always click the Disable link in the target device’s pull-down menu as a
security precaution.
4.
To disconnect from any DirectCommand connections, click Direct Command: Connected. The
dialog displays listing the currently active DirectCommand connections.
5.
Select the desired connection from the list, and then click Disconnect.
6.
To reconnect later in the same Web Manager login session, click the Go to DirectCommand
Interface from the target device’s Action pull-down menu.
Creating VPN connections for Native IP access
The rules for bringing up the Web Manager for Native IP access through the Target devices screen
differ between IPSec and PPTP VPN connections as indicated in the following list:
•
If the VPN connection is being made using IPSec, the authorized user may use the MergePoint
5224/5240 appliance’s IP address to bring up the Web Manager first and go to the Target
device screen before making the VPN connection. After subsequently making the VPN
connection, the user can reload the form to see the Enable Native IP link active.
•
If the VPN connection is made using PPTP, the VPN connection must be made before the Web
Manager can be launched, because the Web Manager must be launched using the PPTP
IP address.
The user obtains the IP address assigned to the PPTP interface by entering the ifconfig or
ipconfig command on the workstation’s command line (which command to use depends on the
operating system). In the command output, the IP address assigned to the connection appears
in the lines following the words PPP adapter, as shown in the following.
C:\> ipconfig
...
50
MergePoint 5224/5240 Service Processor Manager User Guide
PPP adapter MergePoint5224/5240_PPTP_VPN
...
IP Address. . . . . . . . . . : 172.0.0.0.100
...
The user then enters the PPTP IP address in a browser to bring up the Web Manager and enable
native IP access.
See Tasks for creating secure tunnels and obtaining native IP access on page 8 for more details.
The following procedures assume the following prerequisites:
•
You are running Windows NT on your remote workstation. Use this procedure as an example if
configuring a PPTP VPN connection profile on another type of operating system.
•
The MergePoint 5224/5240 appliance administrator has done all of the following:
•
Authorized your MergePoint 5224/5240 appliance user account for PPTP access
•
Provided you with the PPTP password if it is different from your MergePoint 5224/5240
appliance password
•
Enabled the PPTP service
•
Configured the MergePoint 5224/5240 appliance for VPN PPTP connections
•
Provided you with an IP address that was assigned while configuring VPN PPTP access
on the MergePoint 5224/5240 appliance
To create a PPTP VPN connection profile on Windows:
1.
Login in as an administrator on Windows NT.
2.
From the start menu, select My Network Places --view network connections - Create a new
connection. The New Connection Wizard appears.
3.
Click the Next button.
4.
On the next dialog that appears, click the radio button next to Connect to the network at
my workplace.
5.
Click the Next button.
6.
On the next dialog that appears, click the radio button next to Virtual Private
Network connection.
7.
Click the Next button.
8.
On the next dialog that appears, enter a name for the connection.
9.
Click the Next button.
10. If the Public Network dialog appears, click the radio button next to Do not dial the
initial connection.
11. Enter an IP address for the VPN Server Selection on the next dialog that appears.
Chapter 3: Web Manager for All Users
51
NOTE: The IP address is the one assigned to the public interface of the MergePoint 5224/5240 appliance.
12. Click the Next button.
13. Click the Finish button.
Accessing the MergePoint 5224/5240 SP Manager Console
(Web Manager)
Selecting the Appliance option on the Web Manager menu, then clicking the Connect button brings
up a window running a MindTerm Java applet with an SSH connection to the MergePoint 5224/
5240 appliance, as shown in Figure 3.11.
Figure 3.11: Appliance Console Login Screen
Regular users by default are not able to access the shell and they cannot do anything on the console
that they could not do from the Web Manager menu options. Users are encouraged to use the Web
Manager options instead of going through the Web Manager to use the console.
After authentication, the regular user sees the two following choices to access target devices or
change the user’s password, which are similar to the Web Manager menu options.
52
MergePoint 5224/5240 Service Processor Manager User Guide
Figure 3.12: User Menu When Connected to the Console
For information about what the administrative user can do on the MergePoint 5224/5240 appliance
console, see the MergePoint 5224/5240 Service Processor Manager Installer and
Administrator Guide.
To access the MergePoint 5224/5240 appliance’s console (Web Manager):
1.
Log into the Web Manager.
2.
Select the Appliance option in the left menu.
3.
Click Connect. A terminal window displays and establishes a console connection to the
MergePoint 5224/5240 appliance.
4.
Enter the password, if prompted. A menu of options displays for the regular user. For an
administrative user a shell prompt appears.
Managing Power Outlets on a Connected IPDU
Clicking the IPDU option on the Access menu brings up the message shown in Figure 3.13 if the
AUX port has not been configured for IPDU power management. Contact the MergePoint 5224/
5240 appliance administrator for help if you see this message.
Chapter 3: Web Manager for All Users
53
Figure 3.13: AUX Port Not Configured Error Message
Clicking the IPDU option on the Access menu when the AUX port has been configured for IPDU
power management brings up the Outlets Manager, the View IPDUs Info and the Software
Upgrade tabs, as shown in Figure 3.14. For more information, see Using the Outlets Manager tab
to power up and down and check power status on page 53 and Viewing IPDU information on
page 56.
NOTE: Only an administrative user can edit the Software Upgrade screen.
Figure 3.14: IPDU Tabs
Using the Outlets Manager tab to power up and down and check
power status
If a regular user clicks the Outlets Manager tab under the Access - IPDU menu option, the message
shown in Figure 3.15 appears if the user is not authorized to manage power on any outlets or if the
MergePoint 5224/5240 appliance cannot detect an IPDU connected to the AUX port. Contact the
MergePoint 5224/5240 appliance administrator for help if you receive this message.
54
MergePoint 5224/5240 Service Processor Manager User Guide
Figure 3.15: IPDU Access Failed Message from Outlets Manager
If a regular user clicks the Outlets Manager tab under the Access - IPDU menu option, the screen
displays a list of all the outlets the user is authorized to manage. If an administrative user clicks
Outlets Manager under the Access - IPDU menu option, all the power outlets on all connected
IPDUs are listed, as shown in Figure 3.16.
Figure 3.16: Access - IPDU - Outlets Manager Screen
Both regular users authorized for IPDU power management and administrative users can do the
following for any of the listed outlets:
•
Cycle power
•
Lock outlets in the on or off state to prevent accidental changes
•
Unlock the outlets
•
Turn power off
•
Turn power on
•
Save any changes made to the outlets state
Chapter 3: Web Manager for All Users
55
The name that appears on the screen is either the default s1, which is the port number of the AUX
port or an administrator-defined name. A yellow bulb indicates that the outlet’s power is on. A gray
bulb indicates that the outlet’s power is off. An open padlock indicates that the outlet is unlocked.
A closed padlock indicates a locked outlet. An orange Cycle button is active next to each outlet that
is on; the Cycle button is grayed when the outlet is off. The Save outlets state button allows the user
to save any changes made on this screen.
Figure 3.17: Outlets Manager Outlets State Close-up
To manage power outlets on a connected IPDU:
1.
Log into the Web Manager.
2.
Click the IPDU left menu option. The IPDU screen displays with the Outlets Manager
screen active.
3.
To switch an outlet on or off, click the adjacent light bulb.
4.
To lock or unlock an outlet, click the adjacent padlock.
5.
To cycle power, click the adjacent Cycle button.
6.
To save the state of the outlet(s), click Save Outlets State.
56
MergePoint 5224/5240 Service Processor Manager User Guide
Viewing IPDU information
When a regular user or administrative user selects Access - IPDU - View IPDU Info, the View
IPDU Info screen appears.
Figure 3.18: View IPDU Info Screen
The following table shows the information displayed on the View IPDU Info screen for each IPDU.
Table 3.3: Information on the View IPDU Info Screen
Field
Description
Name
Administrator-configured name or the default (s1), which is assigned to the
AUX port.
Number of units
The number of IPDUs connected to the port. The first IPDU is referred to as the
master. Any other IPDUs daisy-chained off the first IPDU are referred to as slaves.
Number of outlets
Total number of outlets on all connected IPDUs.
Buzzer
Whether a buzzer has been configured to sound when a specified alarm threshold
is exceeded.
Syslog
Whether syslogging has been configured for messages from this IPDU.
Over current protection
Whether over current protection is enabled (to prevent outlets from being turned on
if the current on the IPDU exceeds the specified threshold).
You can view the following information underneath the name of each IPDU (under
Unit Information).
Table 3.4: IPDU Information Under Unit Information
Field
Description
Model
IPDU model number
Chapter 3: Web Manager for All Users
57
Table 3.4: IPDU Information Under Unit Information (Continued)
Field
Description
Software Version
IPDU firmware version
Alarm Threshold
Number of amperes that triggers an alarm or syslog message if it is reached
Current
Current level on the IPDU
Maximum Detected
Maximum current detected
Temperature
Temperature on the IPDU (only available on selected models that have
temperature sensors)
Maximum Detected
Maximum temperature detected
To view IPDUs information:
1.
Log into the Web Manager.
2.
Click the IPDU option in the left menu. The IPDU screen displays.
3.
Click the View IPDU Info tab.
4.
If desired, clear the Maximum Detected value displayed for current by clicking the Clear max
detected current button.
5.
If desired, clear the Maximum Detected value displayed for temperature by clicking the Clear
max detected temperature button.
Using the Software Upgrade screen to view the IPDU’s current
software version
An administrative user can upgrade software on a connected IPDU from this screen. Regular users
can use this screen only to view the software version.
Figure 3.19: IPDU Software Upgrade Screen on the Web Manager
58
MergePoint 5224/5240 Service Processor Manager User Guide
Configuring Your Password
Clicking the Password option on the Web Manager left menu brings up the Changing password for
user <username> screen, as shown in Figure 3.20.
Figure 3.20: Password Screen
NOTE: Your password cannot exceed 30 characters.
To change your password:
1.
Log into the Web Manager.
2.
Click the Password option in the left menu. The Password screen appears.
3.
Enter the new password in the Password field.
4.
Enter the password again in the Retype password field.
5.
Click the Set Password button to save the changes in memory.
59
APP ENDICE S
Appendices
Appendix A: MindTerm Applet Reference
MindTerm is an SSH client that includes an integrated xterm/vt100 terminal emulator and that runs
as a Java applet within a browser window. When a user connects to any console using the Web
Manager, a window running a MindTerm applet appears with an encrypted SSH connection
between the user’s workstation and the console.
Java plug-in requirements for MindTerm
To use MindTerm, the user’s browser must have a Java plug-in enabled, as described in
Requirements for Java Plug-In Availability on page 36.
Customizing MindTerm
MindTerm saves session settings in a folder that it creates in the user’s home folder on the user’s
workstation. For example, in a Windows system, the folder is created in C:\Documents and
Settings\username\mindterm.
Actions you can perform with the terminal window are listed below:
•
Resize the window.
•
Edit text with options that include: copy, paste, select all, find and clear screen.
•
Change the background and foreground colors.
•
Save the contents of the terminal window and buffer to a file.
NOTE: You can make use of this option if you want to print the window’s contents, by saving the file and then
printing it from another application.
•
Re-use saved settings like the scroll buffer size.
Example MindTerm window
Figure A.1 shows an example window that appears when the root user is connected to the console
of an SP with an alias of rdqailo. The same terminal window appears whether the connection is
being made to the console of an MergePoint 5224/5240 appliance, an SP, a server or another type
of device.
60
MergePoint 5224/5240 Service Processor Manager User Guide
MindTerm home: C:\Documents and Settings\username\mindterm\
Figure A.1: Root Log into MindTerm Running an SSH Console Session
MindTerm terminal menu options
As is shown in first line of the screen output shown in Figure A.1, you can bring up the terminal
menu by pressing Ctrl and the right mouse button at the same time: Ctrl+mouse right-click. Figure
A.2 shows the terminal menu that displays if you enter Ctrl+mouse right-click and then drag the
cursor to pull down the File menu options.
Appendices
Figure A.2: Terminal Menu
Table A.1: Console Session Terminal Menu Options
1st-level Option
2nd-level Option
Description
File
Save Settings (Ctrl+Shift+s)
Saves current settings to a user-selected file.
Capture to File (Ctrl+Shift+c)
Starts capturing terminal output to a file, or if this
menu option is selected when output is currently
being captured, stops capturing.
Send ASCII File
Sends the contents of a selected file to the
terminal as input, as if the contents were being
typed on the keyboard.
Close (Ctrl+Shift+c)
Closes the current window.
NOTE: If you close a window without logging out,
you abort the SSH connection abnormally. The
recommended procedure is to log out in the shell
before closing or exiting the MindTerm window.
61
62
MergePoint 5224/5240 Service Processor Manager User Guide
Table A.1: Console Session Terminal Menu Options (Continued)
1st-level Option
2nd-level Option
Description
File (continued)
Exit (Ctrl+Shift+x)
Closes the window without logging out.
Closing windows without logging out aborts the
SSH connection. Enter the exit command in the
terminal before using this option.
Edit
Settings
Copy (Ctrl+Insert)
Copies selected text to the clipboard. Select text
by clicking and holding down the left mouse button
and then dragging the mouse over the area to
select, releasing the mouse when the desired area
is selected.
Paste (Shift+Insert)
Pastes the clipboard’s contents to the screen as
input, as if the contents were being typed on
the keyboard.
Copy & Paste
Copies selected text and pastes it.
Select All (Ctrl+Shift+a)
Selects all contents in the scrollback buffer and in
the terminal.
Find (Ctrl+Shift+f)
Displays the Find dialog box, which can be used to
search the scrollback buffer and the currently
displayed text for strings.
Clear Screen
Clears the screen and positions the cursor at the
top left corner.
Clear Scrollback
Clears the contents of the scrollback buffer.
VT Reset
Resets terminal settings to the defaults.
Connection
Displays a dialog box for setting SSH preferences.
General:
• Server
• Username
• Authentication
Proxy:
• Proxy type
• Server
• Port
• Authentication
• Username
• Password
Appendices
Table A.1: Console Session Terminal Menu Options (Continued)
1st-level Option
2nd-level Option
Description
Settings
(continued)
Connection (continued)
Security
• Protocol
• Host key type
• Cipher
• Mac
• Compression
Features
• X11 forward
• Local display
• Send keep-alive
• Interval
Terminal (Ctrl+Shift+t)
Displays a dialog box for setting
terminal characteristics.
General:
• Terminal type
• Columns
• Rows
• Encoding
• Font
• Size
• Scrollback buffer
• Scrollback buffer position
Colors
• Foreground color
• Background color
• Cursor color
Misc
• Paste button
• Select delimiter (characters for click-selection)
VT 1
• Enable Passthrough Print
• Copy <cr><nl> line ends
• Copy on select
• Reverse Video
• Auto Wraparound
• Reverse Wraparound
• Insert mode
• Auto Linefeed
• Scroll to Bottom On Key Press
63
64
MergePoint 5224/5240 Service Processor Manager User Guide
Table A.1: Console Session Terminal Menu Options (Continued)
1st-level Option
2nd-level Option
Settings
(continued)
Description
VT 2
• Scroll to Bottom On Tty Output
• Visible Cursor
• Local Echo
• Visual Bell
• Map <CTRL>+<SPC> to ^@
• Local PgUp/PgDown
• Use ASCII for line draw
• Backspace sends: del, bs, erase
• Delete sends: del, bs, erase
Auto Save Settings
Enables and disables the automatic saving of
settings. When this option is enabled [default],
settings are saved automatically whenever you
disconnect from a server or exit the terminal.
When this option is disabled, you must explicitly
save settings to a file in order to preserve them.
Tunnels
Setup
Displays a dialog box listing any previously
configured tunnels. Clicking the Add button
displays a dialog box for configuring a tunnel.
Type
• Local
• Remote
Bind address
• localhost
• all (0.0.0.0)
• ip
Bind port
Dest. address
Dest. port
Plugin
• None
• ftp
Help
About MindTerm
Displays a dialog box with information about the
Mind Term build date, version, platform you
are running.
Using hotkeys during console sessions
MindTerm hotkeys have two components: an escape sequence and a command key. The escape
sequence for all the console session hotkeys is Ctrl+e+c (shown as ^Ec). As shown in Figure A.1,
Appendices
65
the applet displays hotkey combinations that you can use to get help (^Ec?) or disconnect (^Ec.).
The following table shows all the available hotkeys, which are entered after the escape sequence.
Table A.2: Hotkeys Available During Console Sessions
Key
Action
Key
Action
.
Disconnect
a
Attach read/write
b
Send broadcast message
c
Toggle flow control
d
Down a console
e
Change escape sequence
f
Force attach read/write
g
Group info
i
Information dump
l?
Break sequence list
10
Send break per config file
l1-9
Send specific break sequence
o
(Re)open the tty and log file
p
Replay the last sixty (60) lines
r
Replay the last twenty (20) lines
s
Spy read-only
u
Show host status
v
Show version info
w
Who is on this console?
x
Show console baud info
z
Suspend the connection
Enter
Ignore/Abort command
?
Print this message
^R
Replay the last line
\too
Send character by octal code
For example, to send a broadcast message, you would enter Ctrl+e+c b and to tell the applet to
abort, you would enter Ctrl+e+c Enter on a Windows keyboard. To exit the session, press Ctrl+_.
66
MergePoint 5224/5240 Service Processor Manager User Guide
Appendix B: Technical Support
Our Technical Support staff is ready to assist you with any installation or operating issues you
encounter with your Avocent product. If an issue should develop, follow the steps below for the
fastest possible service.
To resolve an issue:
1.
Check the pertinent section of this manual to see if the issue can be resolved by following the
procedures outlined.
2.
Check our web site at www.avocent.com/support to search the knowledge base or use the
online service request.
3.
Call the Avocent Technical Support location nearest you.
67
INDE X
Index
A
B
AC devices 19
browsers
Add and route IPSec VPN option 28
accessing a native web application 25
admin user
from a remote browser 32
capabilities 4
through an SSH tunnel 26
administrative users
through the Web Manager 32
accessing the SP manager 4
accessing the Web Manager
creating 4
methods for 4
defined 4
through 37
administrators 16, 37
enabling native IP access through 31, 50
AH authentication protocol 30
MindTerm applet running in 16
ALOM device type and management features 5
authenticated users 5
prerequisites for console access and for sensor
data display 37
authentication
supported 36
using
overview 13
HTTPS for secure access through 3
the SP manager as the single source for 2
the IPSec IP address 46
authentication methods
using to
requirement for SSH tunnels 25
authentication servers 13
bring up a native web application 45
authorizations
test packet exchange between user
workstation and MergePoint 5224/
5240 SP manager 30
the SP manager as a single source for 2
types 5
authorized users
accessing the SP manager console 16
accessing the Web Manager 4, 37
autodetect modem and phone card configuration
option 19
AUX ports with IPDUs connected 19
C
callback
accessing the Web Manager through 37
configuring at the remote caller’s end 19
Caution about disabling native IP access 28
CDMA PCMCIA card 19
clearsel SSH management command 18
68
MergePoint 5224/5240 Service Processor Manager User Guide
commands
DEVCONSOLE 5
cycli 4
devconsole SSH management command 18
ifconfig 28, 31, 47
device management
ipconfig 28, 31, 47
actions 17
ssh 15
commands 15, 17
ssh management commands
devices
clearsel 18
accessing 36
devconsole 18
authorizing access to ??–5
native_ip_off 18
list for authorized users 16
native_ip_on 18
list in spshell menu 17
powercycle 18
management features 5
poweroff 18
See target devices
poweron 18
Web Manager screen 39
reset 18
DHCP effects on IP address 36
sel 18
dial-ins
example 3
spconsole 18
sudo 4
for accessing the Web Manager 37
telnet 13
options 19
connected devices 36
See target devices
DirectCommand 18, 25, 45
DRAC device type
and management features 5
console
and native web application access 7
access by the admin user 4
logout through user menu 17
port 16
three ways to access 16
DSView management software 2
E
encrypted communications 15
custom security profile with the override
authorizations feature set 5
ESP authentication protocol 30
Cyclades PM IPDUs
Ethernet ports of connected devices, illustrated 3
accessing through Web Manager 4
external modems 3
power management options through 19
F
cycli utility, who can use 4
FTP
D
enabling in a security profile 14
dedicated Ethernet ports 2, 3
when it is not available 14
Dell DRAC 7
Index
G
69
IPMI protocols 8
GSM PCMCIA card 19
IPSec
client on user’s workstation 30
H
service in security profiles 14
host route 28
VPN
HP iLO 7
authentication information required 30
HTTP
making connections 27
routing requirements 28
availability as an access method 20
port number to access 25
security profiles’ control of availability 14
using for Web Manager access 37
HTTPS
port number to access 25
security profiles’ control of availability 14
J
Java plug-in required for MindTerm 16
L
LAN 3
using for Web Manager access 37
Linux command line, availability to different user
types 4
using to protect communications 3
local port forwarding for SSH tunnel creation 25
login shell 16
I
IBM RSA II 7
logins
authentication requirements for 13
ICMP 14
ifconfig command 28, 31, 47
MergePoint 5224/5240 SP manager, supported
access methods 15
iLO devices
Web Manager prerequisites 36
native Web access on 7
supported management features 5
information users need 20
Internet access to the MergePoint 5224/5240 SP
manager 15
M
management
actions 3
features
IP addresses 3
availability on target device types 5
ipconfig command 28, 31, 47
configuring access to 4
IPDUs
user authorizations for 5
accessing through Web Manager 4
power management option 19
power outlets a user is authorized to manage 20
Web Manager screen 19
IPMI device types and management features 5
MergePoint 5224/5240 SP manager as a single
point for 2
services on SPs 2
managing power 4, 37
Index
PPTP
71
security features, introduction 2
assigned MergePoint 5224/5240 SP manager IP
address 29
security profiles
password 29
SEL
service 14
VPN
connections 27
disabling when done 20
routing requirements 28
prerequisites
user introduction 14
options for viewing 6
sel SSH management command 18
sensors
monitoring overview 10
sensors SSH device management command 18
serial over LAN 2
for creating a VPN tunnel 27
server-management services 2
for creating PPTP VPN tunnels 50
servers 2
for dialing-in using PPP 19
service processors
for using the Web Manager 36
private Ethernet ports 3
private network 3
private subnets
configuring PPTP VPN to communicate with
more than one 29
routing to 29
proxied communications 3
public network 3
R
See SPs
services
when unavailable 14
shared secret 30
single source 2
SNMP
agents 7
in security profiles 14
using to access events 2
what to do if access unavailable 14
regular user accounts 4
reset SSH management command 18
root user responsibilities 4
routing requirements for VPN connections 28
RPC 14
RSA II device type
and management features 5
RSA public keys 30
SoL 2
spconsole device management command
accessing a native management application 33
spconsole SSH management command 18
SPs
defined 2
dedicated Ethernet ports on 3
management commands 15
power management 19
S
secure connection 3
types of user authorizations for 5
72
MergePoint 5224/5240 Service Processor Manager User Guide
system event log
spshell
See SEL 6
list of devices 16–17
submenu
management commands 17
T
device console management command 6
target devices 2
native IP management commands 8
TCP port number for creating an SSH tunnel 25
power management command 9
Technical support 66
reset command 10
Telnet 2, 14
SEL management command 6
telnet command 13
sensor management command 12
terminal emulator 19
SP console management command 5
tunnels
required for native IP access to a device 8
SSH 3
tasks for creating 8
example of a disabled service 20
in MindTerm 16
requirement for managed devices 2
service controlled by security profiles 14
using to protected communications on public
network 3
U
username for authentication 13
users
types and authorizations, defined 4
account types 4
SSH clients
accounts 36
accessing the MergePoint 5224/5240 SP
manager console 16
authorized 37
default shell 16
connecting to the MergePoint 5224/5240 SP
manager 15
for different platforms 25
ssh command
on the MergePoint 5224/5240 SP manager 15
management commands 18
ssh management commands
sensors 18
SSH tunnel
creating 25
requirement for native IP access to a device 8
static route 28
sudo command 4
information they need 20
/usr/bin/rmenush login shell introduction 16
/usr/bin/spshell shell 17
V
virtual IP addresses, introduction 3
virtual media 7
virtual network, creating a network route to during
PPTP VPN tunnel creation 32
VPN connections
configuring a profile 29
duration requirements 28
making using IPSec or PPTP 27
Index
73
regular users
VPN tunnel
accessing native SP/device features through 32
features 39
creating with IPsec 30
option for accessing the MergePoint 5224/
5240 SP manager, connected devices
and power 15
requirement for native IP access to a device 8
W
who can access 37
Web Manager
introduction 4
accessing the MergePoint 5224/5240 SP
manager console through 16
web server providing native web access to a
connected SP 7
Windows NT operating system 28
X
authentication requirements 13
prerequisites for using 36
xterm/vt100 terminal emulator 16
74
MergePoint 5224/5240 Service Processor Manager User Guide
USA Notification
Warning: Changes or modifications to this unit not expressly approved by the party responsible for compliance
could void the user’s authority to operate the equipment.
Note: This equipment has been tested and found to comply with the limits for a Class A digital device, pursuant to Part 15 of the FCC Rules. These limits are designed to provide reasonable protection against harmful
interference when the equipment is operated in a commercial environment. This equipment generates, uses and
can radiate radio frequency energy and, if not installed and used in accordance with the instruction manual, may
cause harmful interference to radio communications. Operation of this equipment in a residential area is likely to
cause harmful interference in which case the user will be required to correct the interference at his own expense.
Canadian Notification
This class A digital apparatus complies with Canadian ICES-003.
Cet appareil numérique de la classe A est conforme à la norme NMB-003 du Canada.
Safety and EMC Approvals and Markings
FCC Class B, EN 55022 Class B, EN 61000-3-2/-3-3, CISPR 22 Class B, EN 55024/CISPR 24, (EN 61000-42, EN 61000-4-3, EN 61000-4-4, EN 61000-4-5, EN 61000-4-6, EN 61000-4-8, EN 61000-4-11), EN 60950/
IEC 60950-Compliant, UL Listed (USA), CUL Listed (Canada), TUV Certified (Germany), CE Marking (Europe)
MergePoint™
5224/5240
User Guide
For Technical Support:
www.avocent.com/support
Avocent Corporation
4991 Corporate Drive
Huntsville, Alabama 35805-6201
USA
Tel: +1 256 430 4000
Fax: +1 256 430 4031
Avocent Asia Pacific
Singapore Branch Office
100 Tras Street, #15-01
Amara Corporate Tower
Singapore 079027
Tel: +656 227 3773
Fax: +656 223 9155
Avocent International Ltd.
Avocent House, Shannon Free Zone
Shannon, County Clare, Ireland
Tel: +353 61 715 292
Fax: +353 61 471 871
Avocent Germany
Gottlieb-Daimler-Straße 2-4
D-33803 Steinhagen
Germany
Tel: +49 5204 9134 0
Fax: +49 5204 9134 99
Avocent Canada
20 Mural Street, Unit 5
Richmond Hill, Ontario
L4B 1K3 Canada
Tel: +1 877 992 9239
Fax: +1 877 524 2985
590-675-501A