1
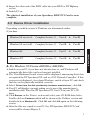
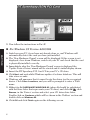
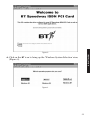
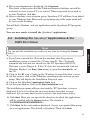
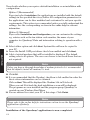
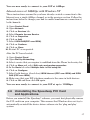
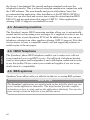
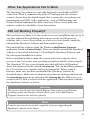
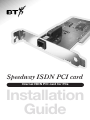
Speedway ISDN PCI card
Internal ISDN PCI card for PCs
Installation
Guide
Contents
1. Welcome to the Speedway!
2
2. Before you start
3
2.1 Check the Contents
3
2.2 PC System Requirements
3
2.3 About the Speedway! CD
4
3. Installation
5
3.1 Determine what version of Windows
you are using
5
3.2 Installing the Speedway
ISDN PCI Card
6
3.3 Device Driver Installation
7
3.4 Installing the Speedway! Applications
& the CAPI Port Driver
13
3.5 Setting up Internet access
15
3.6 Uninstalling the Speedway PCI Card
and Applications
18
4. Typical use examples
19
5. Troubleshooting and Support
21
6. Technical Information
25
6.1 CAPI Port Drivers
25
6.2 Internet Access
26
6.3 ISDN Information
27
6.4 Product Specifications
29
7. Software Licence Agreement
30
8. Index
32
1
1.Welcome to the
Speedway!
The Speedway ISDN PCI Card is an internal PC card which enables fast data
communications to and from your PC via ISDN or BT Highway service.
You will be able to browse the Internet and download files, images and
programs at speeds unavailable via modems connected to the analogue
network. You can also access other remote sites that have both access to the
ISDN and compatible terminal equipment.
Your Speedway ISDN PCI Card can combine both ISDN channels to provide a
data speed of up to 128Kbps.
WELCOME
Note
The actual data speed obtained is dependent upon the data speed offered by
your Internet service provider or that of the remote site you connect to.
You can install the supplied software under Windows 95, 98 and NT. For
further information, please refer to the relevant installation sections.
Also included is a suite of applications that form an integrated
communications package. These programs enable you to make the best use of
your Speedway ISDN PCI Card:
Speedway! data
allows you to transfer data at high speed to and from other
PC users who have access to the ISDN and have a
compatible terminal adapter and software.
Speedway! fax
allows transmission of faxes very quickly and directly from
a word processing program.
Speedway! phone
is a virtual ISDN desktop telephone, providing ISDN
voice communication via your PC’s soundcard.
Speedway! answer gives you an ISDN answering machine on your PC if you
have a sound card installed.
Speedway! term
allows you to quickly load information from an ISDN
Bulletin Board Service.
See ‘Typical use examples’ on page 18 for more information on the use of
these applications.
2
2. Before you Start...
Please take a few minutes to read this guide and acquaint yourself with both
the installation process and the features of your card. Installation is simple but
you must take care to follow the instructions carefully in order to get the best
from your Speedway ISDN PCI Card.
Note
BEFORE YOU START
This guide assumes that you have a basic understanding of PCs and MS
Windows. If you are new to PCs, please make sure that you read and
understand any documentation that was delivered with your machine.
If you are new to MS Windows, make sure you try the various Windows
tutorials before attempting any installations.
2.1 Check the Contents
After opening and unpacking the box, you will find the following items:
•
•
•
•
Speedway ISDN PCI Card
ISDN cable (6m)
Speedway! CD-ROM
Installation Guide (this document)
2.2 PC System Requirements
Before attempting installation, please check that your PC meets the following
requirements:
•
•
•
•
•
A Pentium processor with a recommended minimum 16Mb RAM
A Microsoft Windows 95, 98 or NT (Workstation i386) operating system
10Mb hard disc space
A CD-ROM drive
A free PCI plug-in slot
If you are unsure of your PC’s specification or compatibility, please refer to
your PC manual or equipment supplier.
3
Note
If your PC is already equipped with an ISDN adapter, you must first un-install
it and its drivers before you can successfully install the Speedway ISDN PCI
Card and its software. The un-installation process of ISDN adapters may vary
depending on the manufacturer. Please follow the manufacturer’s guidelines
for removal.
2.3 About the Speedway! CD
BEFORE YOU START
The CD includes an introduction which provides you with information about
its contents and assists you with the installation of your card in Windows 95,
98 or NT. The introduction should start automatically when you insert the CD
into your computer. If not, you can start the introduction manually by going
into Explorer (or using Start - Run menu) and then double-clicking on the
intro.hlp file in the root directory of the CD.
The CD contains the Speedway ISDN PCI card installation program for
Windows 95, 98 and NT. It also contains the installation program for the
Speedway! applications as well as additional software that may be useful.
Note
Some of the documents on the CD are .pdf (Portable Document Format) files.
You can read, search and print these documents by using the Adobe Acrobat
Reader. If your PC has not been loaded with Adobe Acrobat you will find an
installable copy on the CD.
Software updates are available via the Speedway website:
www.speedway.bt.com
4
3.Installation
Installation consists of five stages:
3.1 Determine what version of Windows you are using.
3.2 Physical installation of your card into to your PC and ISDN socket
connection.
3.3 Device driver installation.
3.4 Speedway! applications and CAPI port driver installation.
3.5 Internet access set-up
Important
INSTALLATION
It is important to follow the sequence of installation steps as specified. If you
fail to follow these instructions you may not be able to successfully install your
card. You will not be able to access the Internet until you have completed stages
3.1 to 3.5 above!
It is a good idea to view the Readme files on the CD before installing your card
for the latest product information and installation advice.
3.1 Determine what version of Windows you are using
If you are using Windows 98 or Windows NT, you will be aware of this from
the Windows start-up screen.
If you are using Windows 95 it is essential that you determine what version
you are using before you physically install your PCI card.
1. Double-click the My Computer icon on the Desktop, double-click the
Control Panel icon and then double-click the System icon.
2. Under the tab General will be a description of what version of Windows is
installed.
For example:
Microsoft Windows 95 4.00.950 B
Make a note of this for use in Section 3.3.
5
3.2 Installing the Speedway ISDN PCI Card
1. Switch off your PC and unplug the power connector cable.
2. Remove the cover from your PC.
3. Select an appropriate slot (Figure 1) and with a suitable screwdriver,
carefully remove the screw from the adjacent protective plate from the rear
of the PC. Do not allow this screw to drop into the computer.
INSTALLATION
Figure 1 indicates a typical PC board showing how your card connectors
may be arranged. Note that the PCI card should be installed in one of the
smaller sockets.
Figure 1
4. Gently insert the card into the slot with the back plate facing the rear of the
PC. Press down until the card is fully located into the slot. Do not disturb
the PC’s internal wiring during installation.
5. Replace the retaining screw in order to secure the card back-plate to the
rear of the PC.
6. Replace the cover of your PC, tighten any retaining screws and reconnect
the power connector cable.
Warning
If you are in any doubt about how to access the inside of your PC, you should
contact your PC supplier for advice.
ISDN Connection
1. Take the ISDN cable supplied and insert the plug on one end of the ISDN
cable into the socket on the rear plate of the Speedway ISDN PCI Card.
6
2. Insert the other end of the ISDN cable into your ISDN or BT Highway
socket.
3. Switch PC on.
The physical installation of your Speedway ISDN PCI Card is now
complete.
3.3 Device Driver Installation
Depending on which version of Windows you determined earlier:
If you have:
Complete Section 3.3,
Part A
&
Part E.
Windows 95 version B:
Complete Section 3.3,
Part B
&
Part E.
Windows 98:
Complete Section 3.3,
Part C
&
Part E.
Windows NT:
Complete Section 3.3,
Part D
&
Part E.
INSTALLATION
Windows 95 version A:
A For Windows 95 Version 4.00.950 or 4.00.950a
1. Switch on your PC, if you have not already done so, and Windows will
automatically detect the card you have just installed.
2. The ‘New Hardware Found’ screen will be displayed, announcing that it has
recognised the BT Speedway PCI card as a ‘PCI Network Controller’. If this
screen is not displayed, close down Windows, switch off your PC and check
that the card is physically installed correctly.
3. Select ‘Driver from the disk provided by hardware manufacturer’, click OK.
4. Your PC will display a prompt asking you to insert the manufacturer’s
installation disk. Place the BT Speedway PCI Card CD in your PC’s CD
drive.
5. Click Browse, in the ‘Drives’ section and select your CD ROM drive letter.
Double-click on Cardware which will be shown in the ‘Folders’ section and
double-click on Windows.95. Click OK and click OK again on the following
screen.
6. After the files are copied to your PC, the ‘BT Speedway ISDN PCI Card’
screen will be shown (Figure 2).
7
Figure 2
7. Now follow the instructions in Part E.
B For Windows 95 Version 4.00.950b
INSTALLATION
1. Switch on your PC, if you have not already done so, and Windows will
automatically detect the card you have just installed.
2. The ‘New Hardware Found’ screen will be displayed. If this screen is not
displayed, close down Windows, switch off your PC and check that the card
is physically installed correctly.
3. Immediately after the ‘New Hardware Found’ screen is displayed the
‘Update Device Driver’ wizard will be started and it’s initial display shown.
4. Insert the BT Speedway PCI Card CD in your PC’s CD drive.
5. Click Next and wait whilst Windows updates it’s driver database. This will
take a few seconds.
6. Windows will announce that it cannot locate the driver for the recognised
device. Click Other Locations, and you will be prompted to enter a ‘Path’
name.
7. Either type D:\CARDWARE\WINDOWS.95 (where D should be substituted
with the drive letter that represents your CD drive) and click OK Or click
Browse, in the ‘Drives’ section and select your CD drive drive letter.
Double-click on Cardware which will be shown in the ‘Folders’ section and
double-click on Windows.95.
8. Click OK and click Finish again on the following screen.
8
Note
Sometimes Windows may have difficulty finding and loading files on the CD.
This is due to how Windows was originally installed. You must use the Browse
function in order to select the correct file path, including the correct drive letter
for the CDROM.
9. After the files are copied across, the ‘BT Speedway ISDN PCI Card’ screen
will be shown (Figure 2).
INSTALLATION
Figure 2
10. Now follow the instructions in Part E.
C For Windows 98
1. Switch on your PC, if you have not already done so, and Windows will
automatically detect the card you have just installed.
2. Immediately after the ‘New Hardware Found’ screen is displayed the ‘Add
New Hardware’ wizard will be started and it’s initial display shown.
3. Insert the BT Speedway PCI Card CD in your PC’s CD drive.
4. Click Next and in the new window select Search for the best driver for your
device and click Next.
5. In the next window, click on box marked Specify a Location. Either type
D:\CARDWARE\WINDOWS.98 (where D should be substituted with the drive
letter that represents your CD drive) and click Next Or click Browse and in
the ‘Drives’ section select your CDROM drive letter. Double-click on
Cardware which will be shown in the ‘Folders’ section and double-click on
Windows.98. Click OK and click Next on the following screen.
9
6. You will be informed that ‘Windows is now ready to install the best driver
for this device’. Click Next.
7. Windows will inform you that ‘Windows has finished installing the software
INSTALLATION
that your new hardware device requires’.
Click Finish.
8. The ‘BT Speedway ISDN PCI Card’ screen will be shown (Figure 2).
Figure 2
9. Now follow the instructions in Part E.
D For Windows NT
1. Make sure that you have administrator rights before starting installation.
2. Switch on your PC, if you have not already done so, and Windows will
automatically detect the card you have just installed.
3. Insert The Speedway PCI Card CD into the CD drive. If the CD does not
start automatically, then you can start the introduction manually by going
into NT Explorer (or using Start - Run menu) and then double-clicking on
the intro.hlp file in the root directory of the CD. This will show the ‘BT
Speedway ISDN PCI Welcome’ screen (Figure 3).
10
Figure 3
INSTALLATION
4. Click on the BT icon to bring up the ‘Windows System Selection’ view,
(Figure 4).
Figure 4
11
5. Click on the Windows NT icon. This will display the ‘Installation Selection’
view, (Figure 5).
Figure 5
7. Click on the BT Speedway ISDN PCI Card icon.
8. A new window provides installation instructions. Click on Install button.
INSTALLATION
‘BT Speedway ISDN PCI Card’ screen will be shown (Figure 2).
Figure 2
9. Now follow the instructions in Part E.
E When the BT Speedway ISDN PCI Card screen is displayed
(Figure 2)
1. Click on Continue.
2. The following window allows you to select the installation folder. Standard
default setting is C:\IDRIVER. Click on Continue.
3. In the next window select DSS1 (the default option) and click on Continue.
12
4. The setup information is displayed, click Continue.
The driver is then entered in the Windows Registry database and will be
activated as soon as your PC is re-started. When requested if you wish to
re-start Windows click Yes.
5. After re-starting a new program group ‘Speedway PCI’ will have been added
to your Windows Start Menu and a program group of the same name will
be seen on the Desktop.
You will find a ‘Readme’ and two applications in the Speedway PCI program
group.
You are now ready to install the Speedway! applications.
3.4 Installing the Speedway! Applications & the
CAPI Port Driver
Note
INSTALLATION
You can quit the installation procedure at any time by clicking the Cancel
button.
1. If you have removed the CD from the machine after the previous
installation section, re-insert the CD into your PC. The CD should
automatically load and you should see the ‘BT Speedway ISDN PCI
Welcome’ screen (Figure 4). If the CD does not automatically load use
Windows Explorer (or Start - Run menu) to open the intro.hlp file on
the CD.
2. Click on the BT icon to bring up the ‘Windows System Selection’ screen.
3. On this screen, click on the Windows operating system version you are
using. This will display the ‘Installation Selection’ view.
4. Click on the Speedway! Applications Suite icon.
5. On the next window, click on the Start Installation icon.
The installation program will now start and the ‘BT Speedway’ screen is
displayed. It is best to follow the on-screen instructions that are now
displayed, but you may find it easier to refer to the instructions below:
6. Click Next. Here you can specify the directory in which the applications
will be installed with the Browse button. The default is
C:\PROGRAM\FILES\SPEEDWAY!\.
7. Click Next. In the next window displayed, choose a program folder group
for your applications. The default is Speedway! Then click Next.
13
Now decide whether you require a default installation or an installation with
configuration:
Option 1 (Recommended)
If you just select Installation, the applications are installed with the default
settings in the specified directory/folder. All configuration parameters for
the applications can be later modified and customised to suit your specific
requirements. This option is recommended unless you fully understand the
settings. See the corresponding sections in the online help for relevant
information.
Option 2 (Advanced)
If you select Installation and Configuration, you can customise the settings
e.g. entries such as the fax station code number, the name of your
computer for Speedway! Data and information relating to operation with a
PBX.
8. Select either option and click Next. System files will now be copied to
INSTALLATION
your PC.
9. Leave the Install CAPI port driver check box enabled and click Next.
10. A list of virtual modems that will be installed is displayed. The default
setting selects all options. The user can choose to un-check those that are
not required.
Note
Unless you have a thorough knowledge of modem protocols it is recommended
that the default (install all modems) is used.
11. Click OK.
12..It is recommended that the ‘Readme’ checkbox is left enabled in order the
latest release information can be obtained.
Click on Next. This will be displayed the ‘Readme’ file in Notebook.
When you exit Notebook the final installation screen will be displayed.
The programs are now installed and the program group Speedway! is
created on your Windows Start Menu.
13. You are advised to restart your PC at this stage. Click Finish.
Note
Please refer to the on-line help for instructions on how to use the Speedway!
applications effectively.
Installation of the Speedway! applications is now completed.
14
3.5 Setting up Internet access
Note
Please make sure that you Internet Service Provider (ISP) can provide ISDN
access. This may require that you call them before attempting to establish a
connection with your Speedway PCI Card.
Internet access at 64Kbps with Windows 95/98
After restarting your PC, double-click My Computer on the desktop.
Double-click Dial Up Networking.
Double-click Make New Connection.
Type in your choice of name for your new connection icon.
From the ‘Select modem list’ select the ISDN Internet (PPP over ISDN)
virtual modem.
6. Click Next.
7. Enter your Internet service provider’s phone number.
8. Click Next again and Finish.
1.
2.
3.
4.
5.
INTERNET
Your new Connection icon will now be displayed in the ‘Dial-Up Networking’
window.
You are now ready to connect to your ISP at 64Kbps.
Note
If connection is made directly from your Internet browser application, it will be
necessary to re-configure your browser to use your newly created Dial-Up
connection.
Internet access at 128Kbps with Windows 95/98
The Dial Up Networking on your PC must support ‘Multi-Linking’.
1. If you are using Windows 98, move directly to step 7.
2. To ensure that you have the correct version of Dial Up Networking in
Windows 95 follow the next steps.
3. If you have already created a connection icon, as described above, Right
Click on the icon. Otherwise create a 64Kbps access connection as
described above.
4. Select Properties from the menu.
5. If you can see a tab labelled Multilink then your PC can connect at 128Kbps
and you should move to step 7. Otherwise continue to step 6.
15
6. It is necessary to install a new version of MS Dial Up Network (msdun13).
This can be found on the CD in the Tools folder (or on the Speedway web
site). Open the msdun13 folder and Double Click on the msdun13 file and
follow the instructions given to complete the installation. Note the
installation may request files from your Windows 95 installation CD.
You are now ready to create a new dial up network connection.
7. Follow the instructions in Setting up Internet access at 64Kbps above.
8. Right mouse click over the new icon you have just created and select
Properities.
9. Click on Multilink tab
10. Click on ‘Use additional devices’. Click Add.
11. From the list select ‘ISDN RAS (PPP over ISDN)’, click OK.
12. Click OK.
You are now ready to connect to your ISP at up to 128Kbps.
Note
INTERNET
To avoid disappointment, make sure that your Internet service provider can
provide a 128Kbps connection!
Internet access at 64Kbps with Windows NT
After restarting your PC, double click My Computer on the desktop.
Double-click Dial Up Networking.
Click New.
Type in your choice of name for your new connection. Click Next.
Select I am calling Internet.
Click Next.
6. Enter your Internet service provider’s phone number.
Click Finish.
7. Click More and select menu item Edit entry and modem properties.
8. In ‘Dial using’ box select ISDN Internet (PPP over ISDN).
9. Click OK and then click Close.
1.
2.
3.
4.
5.
To dial your Internet Service Provider:
1. Double-click My Computer on the desktop.
2. Double-click Dial Up Networking.
3. Select ‘Phone book entry to dial’ for your Internet Service Provider. Click
Dial.
4. Enter your user name and password. Click OK.
16
You are now ready to connect to your ISP at 64Kbps.
Internet access at 128Kbps with Windows NT
These instructions assume the you have already created a connection to the
Internet over a single 64Kbps channel, as in the previous section. Follow the
instructions below to change your link to enable simultaneous connection of
both channels.
1.
2.
3.
4.
5.
6.
7.
8.
9.
10.
Open Control Panel.
Open Network.
Click on Services tab.
Select Remote Access Service.
Click on Properties.
Click on Add.
Select ISDN RAS(PPP over ISDN).
Click on Continue.
Click on Close.
Restart PC as requested.
After the PC has rebooted -
You are now ready to connect to your ISP at up to 128Kbps.
3.6 Uninstalling the Speedway PCI Card
and Applications.
Before you uninstall the Speedway! software, you must first physically remove
the PCI card from your computer. This ensures that Windows does not try to
automatically re-install the device driver software via the ‘plug and play’
system.
17
INTERNET
Open Control Panel.
Open Dial-Up Networking.
Select service that you require to multilink from the Phone book entry list.
Click on More and select Edit entry and modem properties.
In the Basic tab select Multiple lines in Dial using list.
Click on Configure.
Select both devices (check box) ISDN Internet (PPP over ISDN) and ISDN
RAS (PPP over ISDN).
8. Make sure that your ISP telephone number is the same in both devices.
9. Click on OK and then click OK again.
1.
2.
3.
4.
5.
6.
7.
1. Turn your PC off and remove the power cable.
2. Removal of your PCI card is the reverse process of that outlined in
Section 3.2.
3. Remember to replace the rear panel blanking plate that you removed
previously.
The software uninstall process for all versions of Windows is very similar.
1. Open the Control Panel. This can be done from either clicking on My
Computer on the Desktop or Clicking on Start - Settings - Control Panel
from the Windows button (normally on the bottom left corner of
the screen).
UNINSTALLING
2. Double-click on Add/Remove Programs. There may be up to three entries
seen in the list; ISDN CAPI Port, Speedway PCI and Speedway! (all will be
seen if complete Speedway! installation process has been followed).
3. Click on specific entry in list to be removed and then click on
Add/Remove button.
4. Confirm uninstall by clicking Yes.
5. You will then be requested to restart your PC. If you want to remove other
entries in the list click on the Do not Restart option and select another
entry. When all entries are uninstalled restart your PC.
18
4.Typical Use
Examples
The Speedway ISDN PCI Card enables you to establish a wide range of
connections with various services and remote sites via ISDN. The basic
principle for successful remote connections and transfer operations is: the
remote site must have a terminal device, which is either of the same type or
compatible.
Here are some examples of how you can use your Speedway ISDN Card in
conjunction with the Speedway! applications.
4.1 Internet
EXAMPLES
The Speedway ISDN PCI Card along with the virtual modems that you have
installed will provide fast communication to and from the Internet. You can
link your PCI Card software with your browser to provide ‘one-click’ access.
Further information about the settings and configuration can be obtained
from your Internet service provider.
4.2 ISDN file transfer
Speedway! data provides a way of transferring data between two PCs at very
high speed. Just set one machine to server mode and another as a client and
you will be able to exchange files at up to 128Kbps. Speedway! data has the
capability of transferring this data with either Idtrans or Eurofile transfer
protocols. The use of data compression at both terminals will increase the
data speed considerably. The basic principle for successful remote
connections and transfer operations is: the remote site must have a terminal
device, which is either of the same type or compatible.
4.3 Fax
The user-friendly and practical Speedway! fax is the recommended PC fax
application. Our software is capable of communicating with fax devices using
19
the Group 3 fax standard (the normal analogue standard used over the
telephone network). This is achieved using fax emulation in conjunction with
the CAPI software. The user-friendly and practical Speedway! fax is the
recommended fax application. After installation of the BT ISDN CAPI Port
Driver, you can also send and receive faxes using the virtual modem ISDN
FAX (G3) and fax applications that support CAPI 2.0. Other applications
offering CAPI 2.0 support can similarly be used.
4.4 Answering machine
The Speedway! answer ISDN answering machine allows you to automatically
answer and record incoming voice messages. It is supplied in order to use the
voice functions of your Speedway PCI Card. In addition to this, you can use
telephony software from other suppliers offering CAPI 2.0 support. Note that
it is necessary to have a compatible sound card and supporting software to
enable replay of the messages.
EXAMPLES
4.5 ISDN Telephone
The Speedway! phone ISDN telephone enables you to make voice calls via
your soundcard over your ISDN service. You will need a telephone headset
(and/or microphone and loudspeakers) and a full duplex soundcard in order
to use this facility. Please contact your soundcard supplier if you are in any
doubt about it’s compatibility.
4.6 BBS systems
Speedway! term will provide you with the facility for accessing BBS systems.
Hints & Tips
The Speedway! applications are supplied with on-line help files which you can
access via the applications themselves. This help function provides complete
instructions on how to set-up and use the applications effectively. You can also
print out topics from the help files if you find this easier.
20
5.Troubleshooting
& Support
Note
It is a good idea to view the Readme file on the CD for the latest product
information and installation advice.
No Connection to ISDN
Failure to Connect to an Internet Service Provider
If the Speedway PCI Card fails to connect your Internet Service Provider
(ISP) check the following:
• Your ISP supports ISDN connection.
• The telephone number that you are dialling is correct for connecting to
your service provider using ISDN.
• You are using the correct ‘Dial-Up networking connection’ you installed
with the PCI Card.
• Which protocols are supported by your ISP. It is possible that the ISP
recommends that the protocol used may be V.120 and asynchronous PPP.
If this is the case the Dial-Up networking connection may be configured as
follows:
1. Create a Dial-Up connection as described in Section 3.5 ‘Setting up
Internet Access’. Where the Select modem option is shown choose ISDN
Custom Config.
2. Click on the Configure button. Select the tab Connection and click on
Advanced. Under Extra settings type in the characters ATS31=7; S51=0
21
TROUBLESHOOTING
If a problem is found in connecting to the ISDN (when using Dial-Up
connections, Speedway! fax etc.) check that the ISDN connection cable is
inserted correctly at both the Speedway PCI Card and the ISDN outlet socket.
Re-try the dial or connect command.
(this should be typed exactly as shown). Click OK to confirm and click
OK again to close the window that is showing.
3. Click Next and enter the ISP telephone number. Click Next and then
Finish. The new icon for the connection will now be displayed.
4. Click with the right mouse button on the new icon and select Properties.
Click on the tab Server Types. In the drop down menu click on Type of
Dial-Up Server, select the server recommended by your ISP (as an
example, CompuServe is likely to be CISPPP:PPP connection using
CompuServe Networks). Click on OK.
This configuration is now available for Internet access.
Note
If you have any doubts about what protocols are used by your ISP; contact your
ISP directly for advice.
TROUBLESHOOTING
Failure to Connect to your ISP using 128Kbps
If you suspect that the Speedway PCI Card is only operating using 64Kbps
when you have configured the system to use both ISDN B channels
(e.g. Multilink PPP), please check the following:
• Your ISP supports MPPP, i.e. a simultaneous PPP connection over two
ISDN channels at 128 Kbps.
• If using Windows 95, make sure you have loaded the msdun13 patch
(a copy is available on the CD). This is described in Section 3.5
‘Setting Up Internet Access’.
• You have followed the instructions shown in Setting Up Internet Access at
128Kbps.
Hints & Tips
Because there is no direct visual feedback to the status of the connection it is
necessary to check by right-clicking your mouse on the Dial Connection icon at
the bottom right of your Windows screen. This will show Status and
Disconnect. Click on Status and the status screen will show. The number
of devices should read 2, if this is not the case the connection is not running
at 128Kbps.
22
Other Fax Applications Fail to Work
The Speedway! fax software is especially designed to work with an ISDN
connection. When it communicates with a G3 analogue fax, the software
converts the fax data into digital signals that correspond to an analogue fax
transmission over ISDN. Other applications, such as MS Exchange and
Delrina WinFax implement the data conversion. Please check with your
software vendor for suitability of your fax software.
Still not Working Properly?
Most problems are likely to be the result of incorrect installation and set up. If
you have followed the installation instructions exactly and the previous
solutions fail to correct the problem, as a last resort you should completely
un-install the Speedway! software and then install it again.
If the re-installation fails to make the system work after using the above
process it may be because your operating system has failed to clear properly.
The Speedway! CD has a special application that will delete all Speedway!
driver information from the system: clearreg.exe. You can find this program in
the CD tools directory together with its document file. Before using it
however, make sure you have un-installed the Speedway! software as
described above. Make sure no windows programs are running and then run
the clearreg.exe program as advised in the clearreg.doc file. Make sure you
re-start your PC after you have used the application. Then you must re-install
the Speedway! software as before.
Warning
This process directly edits the System Registry that controls your Windows
operating system and therefore should only be used if the Add/Remove
Programs function has not been effective.
Note
It may be necessary to un-install completely if you are upgrading the
Speedway! software in the future.
23
TROUBLESHOOTING
First un-install the software using the Windows Add/Remove Programs
application (found in Control Panel). Then you should re-install the Speedway!
software as described in Section 3.4 ‘Installing the Speedway! Software’ and
the subsequent installation sections.
Note
The latest drivers for the Speedway ISDN PCI Card are available for download
from the Speedway web site: www.speedway.bt.com
Still Having Problems?
If you are still having problems you can contact the Speedway! Helpline
on 0845 6040195.
Before you do this:
• If you have Internet access, please look at the FAQs on the Speedway
web site: www.speedway.bt.com.
• Make sure you have followed the installation instructions properly.
• Try un-installing your Speedway PCI Card and re-installing as
described earlier.
SUPPORT
• Make a note of your problem including any on-screen messages you
may have seen.
• Make sure you have your product serial number available.
24
6.Technical
information
6.1 CAPI Drivers
These drivers enable the ISDN integration of operating system functions
under Windows 95 and 98. They also permit the use of Remote Access
Service (RAS) and allow you to connect your PC to the server of an Internet
service provider by way of the TCP/IP stack and the Dial-Up Networking
application of Windows 95 and 98.
The BT system drivers make it possible for you to utilise communications
programs (such as Speedway!) via the Windows Dial-Up Networking
application in parallel with CAPI-based ISDN software, for example for dialling
in to the Internet.
The BT ISDN CAPI Port driver
The BT ISDN CAPI Port driver allows programs with a suitable interface
(VCOM/Modem) to also use the communications interfaces of Windows for
ISDN.
A full description of the functions of the BT ISDN CAPI Port Driver along
with detailed installation instructions may be found in the CAPIPORT.HLP file
in the respective folder WINPORT\CAPIPORT.W95 or CAPIPORT.NT on the CD.
25
TECHNICAL INFORMATION
Windows 95 and 98 offer two communications models with similar
functionality: ISDN CAPI Port Driver and NDIS WAN CAPI Driver. Both
drivers are implemented in VxD technology as Windows system drivers and
are addressed through the Dial-Up Networking application, but utilise
different mechanisms and interfaces/protocols in the operating system.
Basically the same transfer rates are attained in data communications with the
two drivers. Both drivers can be installed in parallel on one system.
The BT NDIS WAN CAPI Driver
The BT NDIS WAN CAPI Driver permits the integration of the operating
systems Windows 95 and 98 and the ISDN.
The BT NDIS WAN CAPI Driver permits the use of Remote Access Services
(RAS) via ISDN. NDIS is the abbreviation for Network Device Interface
Specification and is a standard for interfacing network cards (hardware) to
network protocols (software). NDIS WAN is a Microsoft extension of this
standard in respect of wide area networking (WAN). The NDIS WAN CAPI
Driver for ISDN thus permits the use of the ISDN controller as a WAN card,
in which case the ISDN controller is addressed via the COMMON-ISDN-A.
TECHNICAL INFORMATION
A full description of the functions of the BT NDIS WAN CAPI Driver along
with detailed installation instructions may be found for Windows 95 and 98 in
the file NDIS_95.HLP in the folder WINPORT\NDISWAN.W95 on the Speedway
ISDN PCI Card CD.
Hints & Tips
It is a good idea to view the Readme file on the CD for the latest product
information and installation advice.
6.2 Internet Access
For successful access to the Internet or for RAS connections, your provider or
the remote site (in the case of RAS connections) should provide digital access
and use the same protocol mechanisms as you.
In particular, the following requirements should be met:
• The Internet service provider/remote site must provide ISDN access.
• The access should support synchronous PPP (Point to Point Protocol).
Registration with your provider can take place by checking your telephone
number and/or by PAP/CHAP authentication.
Optional allocation of a static or dynamic Internet address
The deployment opportunities for the respective driver concept are described
in detail in the associated documentation (.HLP files).
The following recommendations for use with ISDN and Windows can be made
to start with on the basis of a benefit-oriented comparison:
26
For Internet service providers offering PPP over ISDN (synchronous PPP
according to RFC 1618), both the ISDN CAPI Port Driver and the NDIS WAN
CAPI Driver are suitable. You should ask your Internet service provider
whether PPP over ISDN protocol is supported.
In the case of Internet service providers not offering PPP over ISDN, it is
normally possible to dial in via the CAPI Port modem PPP asynchronous.
With the ISDN CAPI Port Driver, it is also possible to support special
solutions by way of register settings. You should ask your Internet service
provider. Due to the system design, the NDIS WAN CAPI Driver does not
offer this functionality.
Both drivers are suitable for access to RAS servers and Non-Internet
applications such as MS Money 97 or terminal.
6.3 ISDN Information
Your ISDN service may have a number of MSNs (Multiple Subscriber
Numbers) associated and so it will be necessary during the installation phase
of the Speedway ISDN PCI Card to enter the MSN you require to operate with
your PCI Card.
All incoming calls from the ISDN are distinguished not only by their MSN but
also by their service indicator. No such differentiation takes place for calls
coming in from the analogue network, in which case voice, data and fax calls
share the same network service. This is why it is important to specify which
call is to be accepted with MSN by an application module or by an ISDN
telephone. Please refer to the Speedway! online help for further details.
If you wish to receive faxes as well as data with the Speedway ISDN PCI Card,
you do not need to assign different Multiple Subscriber Numbers to these
applications because Speedway! fax is responsible for calls with the voice
indicator and Speedway! data for calls with the data indicator. Speedway! fax
and Speedway! answer both use the same service indicator (voice). However,
if you use Speedway! fax at the same time as Speedway! answer, you must
allocate different Multiple Subscriber Numbers to the two modules in order
that incoming calls can be assigned without ambiguity.
27
TECHNICAL INFORMATION
The Speedway ISDN PCI Card may be connected to any suitable ISDN
termination. Typically this would be either ISDN2e or BT Highway. Network
Termination Equipment (NTE) will generally have two sockets available for
connection of the cable and either socket can be used.
If in doubt about the features and functions of your ISDN service, please
contact your ISDN service provider.
Note
TECHNICAL INFORMATION
It is a good idea to view the Readme file on the CD for the latest product
information and installation advice.
28
6.4 Product specifications
Industry standard Plug and
Play PCI card
System requirements
Pentium processor or greater.
16 MB RAM or greater.
10Mb spare hard drive space
Windows 95 or 98 or NT O.S.
D-Channel Protocol
DSS1
B-Channel Protocols
X.75.
HDLC transparent.
X.25
ISO 8208 (X.25 DTE-DTE).
T.90
Fax G3
V.120
X.75/V.42
Application Interface
CAPI 2.0
NDIS WAN
CAPI Port
Hayes AT
SPECIFICATIONS
Hardware Characteristics
29
7. Software Licence
Agreement
THIS LEGAL DOCUMENT IS AN AGREEMENT BETWEEN YOU,THE END-USER, AND
BRITISH TELECOMMUNICATIONS PLC (BT). BEFORE INSTALLING THE SOFTWARE, YOU
SHOULD READ THE TERMS PRINTED BELOW. BY INSTALLING THE SOFTWARE YOU
ARE BOUND BY THE TERMS OF THIS AGREEMENT. IF YOU DO NOT AGREE TO THESE
TERMS, YOU SHOULD RETURN THE CD TOGETHER WITH ANY ITEMS THAT ARE PART
OF THE PRODUCT, SUCH AS MANUALS AND HARDWARE, TO THE PLACE FROM WHICH
YOU OBTAINED THEM, FOR A FULL REFUND.
This End-User Licence Agreement comes with a BT software product (Program(s)) and related
written materials (Documentation). The term Program(s) also includes any upgrades, modified
versions or updates of the Program(s) licensed to you by BT.
LICENCE
BT non-exclusively licenses this copy of the Program(s) to you as the End-User for as long as you
comply with the terms of this licence. You must read this Agreement carefully.
1 The Program(s) and all copyright in them and the copyright in the Documentation are
protected by United Kingdom copyright law and international copyright treaty provisions. This
Licence is not a sale of the Program(s) recorded on the CD or any copyright in them.
2 You may:
• use the Program(s) on a single machine (this licence covers all users on that machine); or
• remove the Program(s) from one machine and load them onto another; and
• make copies of the Program(s) for the sole purpose of backing-up.
3 You must not:
•
•
•
•
•
use the Program(s) on more than one machine at a time;
electronically transfer the Program(s) to another machine over a network;
rent, lease or sub-license the Program(s);
translate, modify, adapt or create derivative works from the Program(s); or
reverse engineer, decompile, disassemble, or attempt to do so except as expressly permitted
by and subject to all the conditions laid down by law.
4 You may physically transfer the Program(s) to another person provided the other person
accepts the terms of this Agreement. If you transfer the Program(s) you must at the same time
either:
• transfer all copies of the Program(s) and Documentation to the same person; or
• destroy any copies not transferred, including any updates and previous versions.
30
5 The Program(s), their code, is their structure and all ideas and principles underlying them
are, except where they are in the public domain, the confidential information of BT or its
licensors, and you must not disclose them or use them without permission.
6 DISCLAIMER AND LIMITED WARRANTY
EXCEPT AS EXPRESSLY SET OUT IN THIS AGREEMENT, THE PROGRAM(S) AND
DOCUMENTATION ARE SUPPLIED TO YOU WITHOUT WARRANTY OF ANY KIND. BT
AND ITS SUPPLIERS DO NOT WARRANT, GUARANTEE OR MAKE ANY
REPRESENTATIONS REGARDING THE USE, OR THE RESULTS OF USE, OF THE
PROGRAM(S) OR DOCUMENTATION. BT AND ITS SUPPLIERS MAKE NO WARRANTIES,
EXPRESS OR IMPLIED, AS TO THE SUITABILITY OR FITNESS FOR ANY PARTICULAR
PURPOSE OF THE PROGRAM(S). IN NO EVENT WILL BT OR ITS SUPPLIERS BE LIABLE
TO YOU FOR ANY CONSEQUENTIAL OR INCIDENTAL DAMAGES INCLUDING ANY
LOST PROFITS OR LOST SAVINGS, EVEN IF A BT REPRESENTATIVE HAS BEEN
INFORMED OF THE POSSIBILITY OF SUCH DAMAGES, OR FOR ANY CLAIM BY ANY
THIRD PARTY.
7 BT warrants to its original Licensee that the CD on which the Program(s) are recorded are
8 BT has no obligation to support or maintain the Program(s).
9 BT does not exclude or limit its liability for death or personal injury caused by its own
negligence.
10 This licence shall be construed and governed by English law. If any part of this Agreement is
found void or unenforceable, the balance of the Agreement remains valid and enforceable
according to its terms.
11 This Agreement automatically terminates if you fail to comply with its terms. On termination
you must destroy or irrevocably delete all copies of the Program(s) including modified copies.
12 This Agreement may only be modified in writing signed by a duly authorised representative
of BT.
31
LICENCE
free from defects in materials and workmanship under normal use and service for a period of
90 days from the date of delivery as evidenced by the receipt. BT’s entire liability and your
only remedy under this warranty is, at BT’s option, either: return of the purchase price; or
replacement of the CD which is returned to BT postage paid with a copy of the receipt.
This limited warranty does not apply to CDs, which fail as a result of accident, misapplication
or abuse not the fault of BT. If BT replaces CDs, BT will warrant them for the rest of the
original warranty period or 30 days, whichever is the longer.
INDEX
Index
Answering machine
20
BBS systems
20
CAPI Port Driver
25
BT ISDN
25
BT NDIS WAN
26
CD
4
Contents of box
3
Data speed
15, 16, 17, 19
Device driver
7
Fax
19, 20
File transfer
19
Helpline
24
Installing
applications
13, 14
CAPI Port Driver
13, 14, 15
device driver
7
PCI Card
6
Internet access
dynamic address
26, 27
static address
26, 27
64Kbps, Windows 95/98
15
128Kbps, Windows 95/98 15, 16
64Kbps, Windows NT
16, 17
128Kbps, Windows NT
17
Internet Service Provider
21, 22
ISDN connection
6, 7
Licence agreement
30, 31
32
PC
compatibility
memory size
requirements
PCI Card
RAM
Specifications
Speedway! answer
Speedway! data
Speedway! fax
Speedway! phone
Speedway! term
System requirements
Technical information
Telephone
Un-install
applications
PCI Card
Warranty
Website
Windows
determine version
NT
95 V 4.00.950
95 V 4.00.950 a
95 V 4.00.950 b
98
3
3
3
6
3
29
20
19
19, 20
20
20
3, 4
25
20
18
18
31
4
5
10, 11, 12
7, 8
7, 8
8, 9
9, 10
Offices in Europe, North America,
Japan and Asia Pacific.
The telecommunications services described in this publication
are subject to availability and may be modified from time to time.
Services and equipment are provided subject to British
Telecommunications plc’s respective standard conditions of contract.
Nothing in this publication forms any part of any contract.
Speedway, Speedway!, BT and the piper logo are registered
trademarks of British Telecommunications plc in the UK.
Microsoft, Windows, and Windows NT are registered trademarks of
the Microsoft Corporation in the United States and other countries.
Adobe and Acrobat are trademarks of Adobe Systems, Inc.
© British Telecommunications plc 1999.
Registered Office: 81 Newgate Street, London EC1A 7AJ.
Registered in England No. 1800000.
BT Speedway ISDN PCI card Issue 2 (5/99). 2.5
Printed in West Germany.
Designed by The Art & Design Partnership Limited.