1
5.0 SAFETY & PRECAUTIONS
1.0 INSTALLATION
•
Ensure the correct battery type has been selected before charging begins
•
Before connecting or disconnecting the SBC1205 to a battery, ensure that it is disconnected from the
240VAC supply.
•
NOTE disconnecting the battery from the vehicle will cause some components in the vehicle to lose
stored memory or information, such as time on your stereo.
•
Ensure electrolyte levels in the battery to be charged are sufficient to cover the plates (if accessible).
The charger must be placed in a well ventilated position to allow air flow to cool the charger for greater
charging efficiency. The charger is best placed on top of the air filter if charging the battery in the vehicle. If
that is not possible then find a convenient safe place where the charger is secure and not likely to fall down.
NOTE: Never place the charger on top of the battery.
Leave the vent caps closed as modern automotive batteries have a gas recombination design built into the
cap to allow the retention of the gassed electrolyte and its return to the battery cell. All vent caps also have a
venting system to allow excessive gasses to escape. Coin screwed cap designs also have a “manifold”
venting system, which works in the same way as a screwed vent cap.
•
DO NOT attempt to charge NON RECHARGEABLE batteries.
•
DO NOT use the charger to charge a battery near a naked flame. The gasses emitted by the battery
whilst charging may ignite, causing a life threatening fire or explosion.
•
Always wear eye protection if working close to a charging battery.
•
Never smoke in the vicinity of a charging battery.
•
Take care whilst handling a lead acid battery, as the electrolyte is acidic and may cause permanent
damage to skin or clothing.
•
The charger is designed to be used indoors and to be protected from the elements. Do not expose the
battery charger to the weather, particularly rain or dampness.
2.0 SELECTING A BATTERY TYPE
•
Provide adequate ventilation whilst charging lead-acid batteries. This will ensure the charger will work
at maximum efficiency and that any gasses emitted from the battery are safely dissipated.
You will have 60 seconds from the moment the charger is turned on to make the selection.
Do not extend the 12V output cables supplied between the charger and the battery to be charged,
otherwise efficiency of operation will be compromised. Ensure the output clamps are firmly attached
to the battery poles.
Flooded cell:
•
•
Incorrectly connecting the Positive (+ Red wire) and Negative (- Black wire) at the battery will switch
off the battery charger to protect it’s internal electronics. Output and consequent charging will only
recommence when the (+) and (-) are correctly attached to the corresponding (+) and (-) poles on
the battery.
•
Do not obstruct the fan. Note that the fan will run continuously during the charging cycle.
•
The SBC1205 contains hazardous voltages internally and contains no user serviceable parts. Return to
supplier for any service needs.
•
If the power cord is damaged, it must be replaced by the manufacturer or its service agent or a
similarly qualified person in order to avoid hazard.
•
The charger is designed to charge batteries constructed with 6 cells only.
•
The charger must only be plugged into an earthed mains socket outlet.
•
For in-vehicle charging,
1.
2.
The battery charger must be connected first to the battery terminal which is not connected to the
vehicle chassis. The other connection is to be made to the chassis, remote from the battery and
fuel line. The battery charger is then to be connected to the supply mains.
After charging, disconnect the battery charger from supply mains. Then remove the chassis
connection and the battery connection, in this order.
•
The appliance is not intended for use by young children or infirm persons without supervision.
•
Young children should be supervised to ensure that they do not play with the appliance.
•
This appliance is not intended for permanent mounting onto a vehicle.
1.1 Connections
Ensure the connections are tight and sound. Then connect the 240VAC three pin plug to the power point and
switch on the power. Then switch on the Smart Battery Charger power switch (located on the rear panel).
Once turned ON, the charger will pause momentarily, then light up all the indicators in a sequence so you
can see that they are all functional. The cooling fan will also be run up and tested during this sequence.
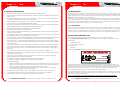
Using the Battery Type Selector button, select the battery type to be charged. The battery options are;
Standard Lead Acid
Calcium content Lead Acid
Non-flooded cell:
Gel/AGM
By default, a Gel/AGM battery type is selected (Green Indicator ON).
BATTERY TYPE SELECTOR
Press button to select the battery type
pb ca gl
Press
Gel/AGM
gl
Calcium Flooded ca
Standard Flooded pb
During the selection period, the selected battery type LED will flash. Once 60 seconds has expired, the
selection is locked in for the remainder of the charging period and the selected battery type LED will remain
permanently illuminated. Should an incorrect battery be selected, the battery charger should be turned off for
approximately 10 seconds, then turned back on. The correct battery selection can now be made.
When the Ready indicator (GREEN) is ON, the battery has finished charging.
If the Fault indicator (RED) is flashing, a fault has caused the charging process to terminate. The number of
quick flashes, followed by a longer OFF period indicates the nature of the fault. The fault indication will be
reset when the charger is switched OFF.
NOTE: For safety reasons, always switch OFF the battery charger before disconnecting the battery.
FOR FREE TECHNICAL
ASSISTANCE - Ph: (08) 8322 4848 Fax: (08) 8387 2889 Email: [email protected]
6
FOR FREE TECHNICAL
ASSISTANCE - Ph: (08) 8322 4848 Fax: (08) 8387 2889 Email: [email protected]
3