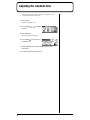
1
Newly Added Functions Ver.1.5
As the result of recent upgrades, the descriptions in the Owner's Manual may not accurately
represent the performance of some of the features of the CDX-1. To make sure you are fully
aware of the newly added functionality, please read this booklet in conjunction with the
Owner's Manual while you use the CDX-1.
❖ CONTENTS ❖
Sample Pad
Compressing/expanding a sample according to the tempo at which playback was stopped ..........2
Modifying the pitch of a sample to create a new sample—Pitch Change .......................... 3
Making fine adjustments to the location at which a sample starts/ends............................. 4
Adjusting the crossfade time .............................................................................................. 6
Sequence Track
Exchanging the contents of sequence tracks—Exchange Track ....................................... 7
Copying the contents of a sequence track—Copy Track ................................................... 8
Editing a specified region of a sequence track—Region In/Out ......................................... 9
Multitrack Recorder
Muting (silencing) a specific audio track........................................................................... 13
Using [STATUS] to select the track whose parameters you want to adjust ..................... 14
Preventing tempo data from being read from a CD-RW disc ........................................... 15
Using the tempo of a sample to modify the tempo map ................................................... 16
Using Pads/Sequences while you mix down.................................................................... 17
Effect
Editing the Mastering Tool settings .................................................................................. 18
Saving the mastering tool settings ................................................................................... 19
Mastering Tools parameter list ......................................................................................... 20
Others
Remembering the icon that was last selected in a menu screen ..................................... 23
Synchronization with a Sequence or Drum Machine........................................................ 24
Copyright © 2001 ROLAND CORPORATION
All rights reserved. No part of this publication may be reproduced in any form without the
written permission of ROLAND CORPORATION.
Roland Web Site: http://www.roland.co.jp/
Compressing/expanding a sample according
to the tempo at which playback was stopped
While playback is stopped, you can adjust the length of the sample according to the
tempo of the location at which playback was stopped.
This function makes it easy to adjust the sample length to match the tempo of a
sequence track. This provides an easy way by which the length of a sample recorded
in a sequence track can be made to match the length of a measure in that sequence
track.
The tempo at the point that playback is stopped will be one of the following.
Compression/expansion
requires more processing time
than other sample editing
operations. Also, the audio
quality of the stretched sample
may be inferior to that of the
original sample.
• The tempo displayed in “Tempo” of the Rhythm Guide screen.
• If the “Beat” parameter in the Rhythm Guide screen is set to “TEMPO MAP,” the
tempo of the Tempo Map.
Since this function needs to accurately calculate the tempo in order to perform a
high-quality compression or expansion, you must first perform the procedure of
“Displaying the correct tempo of a sample” (Owner’s Manual; p. 77) to specify
the number of beats in the original sample.
In the case of samples for which it is difficult to calculate a tempo, such as a
narration, vocal part, or a long sustained sound, set the number of beats to 0.
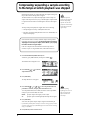
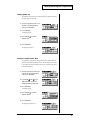
1. Press PAD RECORDING [TEMPO MATCH] twice.
Alternatively, press [TEMPO MATCH] and then press CURSOR [
].
fig.31-03
The Pad Edit menu are displayed as icons.
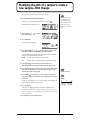
fig.33-07
2. Press CURSOR [
][
Tempo Match Now icon.
] to select the
3. Press [YES/ENTER].
fig.33-08
The Tempo Match Now screen appears.
4. Press CURSOR [
][
][
][
] to select the pad bank number and
pad number for each item, and specify the desired number for each.
To set the pad bank number, turn the TIME/VALUE dial. To set the pad number,
either press a pad or turn the TIME/VALUE dial.
Source:
Specify the sample whose length you want to adjust.
To:
Specify the pad to which the length-adjusted sample will be assigned.
5. Press [YES/ENTER].
After a while, the expand/compress sample is assigned to the destination pad.
* If the destination pad already contains a sample, the “Overwrite?” message appears. If it is OK to
overwrite the existing sample, press [YES/ENTER]. If you do not want to overwrite the existing
sample, press [NO/EXIT].
6. Press [DISPLAY] to return to the Basic screen.
2
In case the expanding/
expanding level is in excess of
134% or less than 67%, the
sample will not be made
correct tempo.
Modifying the pitch of a sample to create a
new sample—Pitch Change
You can modify the pitch of a sample to create a new sample.
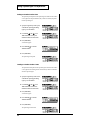
1. Press PAD RECORDING [TEMPO MATCH] twice.
Alternatively, press [TEMPO MATCH] and then press CURSOR [
].
fig.31-03
The Pad Edit menu are displayed as icons.
Pitch Change requires more
processing time than other
sample editing operations.
Also, the audio quality of the
stretched sample may be
inferior to that of the original
sample.
fig.33-07
2. Press CURSOR [
Pitch Change icon.
][
] to select the
3. Press [YES/ENTER].
fig.33-08
The Pitch Change screen appears.
4. Press CURSOR [
][
][
][
] to select the pad bank number and
pad number for each item, and specify the desired number for each.
To set the pad bank number, turn the TIME/VALUE dial. To set the pad number,
either press a pad or turn the TIME/VALUE dial.
Source:
Specify the sample whose pitch you want to adjust.
To:
Specify the pad to which the pitch-adjusted sample will be assigned.
5. Press CURSOR [
] to move the cursor to “NewPitch” line. Turn to
TIME/VALUE dial to set the interval of the pitch changing by semitone unit.
6. Press CURSOR [
] to move the cursor to “P.Fine” line. Turn the TIME/VALUE
dial to make fine adjustments in one-cent units (1/100th of a semitone) to the
amount of change from the original pitch.
7. Press CURSOR [
] move the cursor to “Grade” line. Turn to TIME/VALUE
dial to select the quality of the sound after the pitch changing process, adjustable
in three levels.
“Grade” can be set in three levels (1–3) to specify the quality of the resulting sound.
Higher settings will require more processing time.
8. Press [YES/ENTER].
1 semitone = 100 cents
"Grade"
1
For sound with
a sharp attack.
2
3
For sound with
a dull attack.
After a while, the changing pitch sample is assigned to the destination pad.
* If the destination pad already contains a sample, the “Overwrite?” message appears. If it is OK to
overwrite the existing sample, press [YES/ENTER]. If you do not want to overwrite the existing
sample, press [NO/EXIT].
9. Press [DISPLAY] to return to the Basic screen.
3
Making fine adjustments to the location at
which a sample starts/ends
When you arrange samples in a sequence track to create a song, you will sometimes
need to make fine adjustments to the sample's start/loop points, or to its length. By
using the {Preview function} or {Scrub function}, you can make precise and detailed
adjustments while listening to the sound.
Specifying a point while you listen to the sound
before and after it—Preview
For details on the Start/Loop
point and Length, refer to
“What are the Start/Loop
point and Length” (Owner’s
Manual; p. 78).
The preview button [TO] means “To Now” (to the point). Each time you press [TO],
a brief region of sound (one second) ending at that point will be played. By turning
the TIME/VALUE dial to move the point back and forth while listening to this
sound, you can easily make accurate adjustments to the point.
When you press the preview button [FROM], the preview function will play “From
Now” (from the point), allowing you to hear a brief region of sound (one second)
beginning at that point.
1. Press PAD RECORDING [TEMPO MATCH] twice.
Alternatively, press [TEMPO MATCH] and then press CURSOR [
].
fig.31-03
The Pad Edit menu are displayed as icons.
fig.33-07
2. Press CURSOR [
Pad Parameter icon.
][
] to select the
3. Press [YES/ENTER].
The Pad Parameter screen appears.
fig.33-08
4. Press CURSOR [
][
] to move the
cursor to the point “Start Point,” “Loop
Point,” or “Length(→End)” you want to
adjust.
5. Press PREVIEW [TO] or [FROM] to play back the sound as described below.
[TO]:
Playback once from one second before the current point to the current
point.
[FROM]:
Playback once from the current location to one second after the
current location.
6. While listening to the sound, turn the TIME/VALUE dial to make fine
adjustments to the current point.
7. Press [DISPLAY] to return to the Basic screen.
4
The sample waveform will not
be displayed for PREVIEW
[TO] [FROM] operations.
Making fine adjustments to the location at which a sample starts/ends
Using scrub to set a point—Scrub Preview
Scrub Preview repeatedly plays an extremely brief region (45 milliseconds) either
before or after the point. At the same time, the sample waveform will be displayed
in the screen. While monitoring the displayed waveform and the sound, you can
turn the TIME/VALUE dial to easily make precise adjustments to the point.
1. Press PAD RECORDING [TEMPO MATCH] twice.
Alternatively, press [TEMPO MATCH] and then press CURSOR [
].
fig.31-03
The Pad Edit menu are displayed as icons.
fig.33-07
2. Press CURSOR [
Pad Parameter icon.
][
] to select the
3. Press [YES/ENTER].
The Pad Parameter screen appears.
fig.33-08
4. Press CURSOR [
][
] to move the
cursor to the point “Start Point,” “Loop
Point,” or “Length(→End)” you want to
adjust.
5. Press [SCRUB].
fig.33-08
[SCRUB] lights, the Wave View screen
appears.
45 msec
The sound either before or after the point will
play repeatedly.
6. While monitoring the sound and the screen, turn the TIME/VALUE dial to make
fine adjustments to the point.
As necessary, you can switch the region that is repeated, or switch the screen display.
[TO]:
Repeatedly play from a point 45 milliseconds before the current point,
up to the current point.
[FROM]:
Playback once from the current point to one second after the current
point.
CURSOR [
]:
Expand the waveform vertically (amplitude axis).
CURSOR [
]:
Shrink the waveform vertically (amplitude axis).
CURSOR [
]: Expand the waveform horizontally (time axis).
CURSOR [
]: Shrink the waveform horizontally (time axis).
7. Press [SCRUB].
[SCRUB] go out, the Pad Parameter screen reappears.
8. Press [DISPLAY] to return to the Basic screen.
5
Adjusting the crossfade time
You can adjust the time over which two pads will be exchanged by the Pad
Crossfade function (Owner's Manual; p. 71).
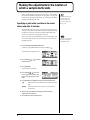
1. Press [UTILITY].
The Menu are displayed as icon.
fig.1-06
2. Press CURSOR [
System icon.
][
] to select the
3. Press [YES/ENTER].
The System Parameter screen appears.
fig.5-01
4. Press CURSOR [
] to move the cursor to
“X-Fade Time” line.
5. Turn the TIME/VALUE dial to select the crossfade time: “1sec”–”10sec”
(units: second).
6. Press [DISPLAY] to return to the Basic screen.
6
Exchanging the contents of sequence tracks
—Exchange Track
A sequence track and its corresponding audio track cannot be played back at the
same time. For example, sequence track A and audio tracks 1-2 cannot be played
back simultaneously. In such cases, you can exchange the contents of the sequencer
track with another track, so that the sequence track and audio tracks can be played
simultaneously.
For details, refer to “Playing
sequence tracks and audio
tracks simultaneously”
(Owner’s Manual; p. 97).
1. Press PAD SEQUENCING [EDIT].
[EDIT] lights, and the Sequence Edit menu are displayed as icons.
fig.34-10
2. Press CURSOR [
][
Exchange Track icon.
] to select the
3. Press [YES/ENTER].
When you carry out the
Exchange Track procedure, the
entire contents of the sequence
tracks will be exchanged. It is
not possible to specify a region
of time that will be exchanged.
fig.34-10
The Exchange Track screen appears.
4. Press CURSOR [
][
] to move the cursor, and turn the TIME/VALUE dial to
specify the two sequence tracks that are exchanged.
5. Press [YES/ENTER].
The two sequence tracks are exchanged.
The status data of the sequence
tracks will also be exchanged.
6. Press [DISPLAY] return to the Basic screen.
7
Copying the contents of a sequence track
—Copy Track
The contents of a sequence track can be copied to another sequence track.
1. Press PAD SEQUENCING [EDIT].
[EDIT] lights, and the Sequence Edit menu are displayed as icons.
fig.34-10
2. Press CURSOR [
Copy Track icon.
][
] to select the
When you execute the Copy
Track operation, the entire
contents of the sequence track
will be copied. It is not
possible to copy only a
specified time region.
3. Press [YES/ENTER].
fig.34-10
The Copy Track screen appears.
4. Press CURSOR [
] to move the cursor to “Copy from Track.”
5. Turn to TIME/VALUE dial to select the copy-source track.
6. Press CURSOR [
] to move the cursor to “Copy from Track.”
7. Turn to TIME/VALUE dial to select the track-copy destination.
8. Press [YES/ENTER].
The contents of the copy-source sequence track is copied to the copy-destination
track.
9. Press [DISPLAY] return to the Basic screen.
8
f the copy-destination
sequence track has already
been recorded, the entire
contents will be lost.
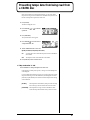
Editing a specified region of a sequence track
—Region In/Out
In the Sequence Play List screen, you can specify a region, then edit only that region.
You can also edit multiple tracks at once.
Specifying the editing region
1. Press PAD SEQUENCING [SEQ PLAY].
[SEQ PLAY] lights, and the Sequence Play
List screen appears.
2. Select the sequence tracks for playback as described in “Playing back sequence
tracks” (Owner’s Manual; p. 96).
Get the “Tr.SEL” (track select) box to be highlighted in black for the track(s) in which
you want to specify a region. You may select more than one track.
In case edit region is specified,
you cannot execute editing
phrase by phrase basis (Quick
Edit). If you want to do such
editing, please cancel the
editing region as described in
“Canceling an editing region”
(p. 10).
For details of Quick Edit, refer
to “Edit on Sequence Play List
screen—Quick Edit” (Owner’s
Manual; p. 106).
fig.34-10
3. Use the REW[
] /FF [
] or the
TIME/VALUE dial to move the “NOW”
(current location) to the starting point of
the segment.
If a region has already been
specified in step 4, press
4. Press [YES/ENTER].
fig.34-10
A mini-menu “SET REGION IN” appears.
CURSOR[
] to select “SET
REGION IN.”
5. Press [YES/ENTER] to specify the beginning (in point) of the segment.
ig.34-10
6. Use the REW [
] /FF [
] or the
TIME/VALUE dial to move the “NOW”
(current location) to the end point of the
segment.
Press [YES/ENTER] in step 5,
the specified region will be
cancelled, and the In point will
be newly set.
7. Press [YES/ENTER].
A mini-menu appears.
fig.34-13
8. Press CURSOR [
REGION OUT.”
] to select the “SET
9. Press [YES/ENTER] to specify the end (out point) of the segment.
9
Editing a specified region of a sequence track
Canceling an editing region
To cancel an editing region that you've specified, perform the following.
1. Press PAD SEQUENCING [SEQ PLAY].
[SEQ PLAY] lights, and the Sequence Play
List screen appears.
2. Press [YES/ENTER].
A mini-menu appears.
3. Press CURSOR [
REGION.”
] to select the “CLEAR
4. Press [YES/ENTER].
The specified region are canceled.
Editing the specified region
Erasing Segments—Erase
This operation erases the phrases of the specified region, creating silence. If phrases
exist following the region, they will not move forward.
1. Specify the region that you want to erase,
as described in “Specifying the editing
region” (p. 9) of this booklet.
2. Press [YES/ENTER].
A mini-menu appears.
3. Press CURSOR [
] to select the
“REGION ERASE?”
4. Press [YES/ENTER].
The specified region are erased.
10
Editing a specified region of a sequence track
Cutting Segments—Cut
This operation cuts the phrases of the specified region. Any phrases that followed
the region will be moved forward.
1. Specify the region that you want to cut, as
described in “Specifying the editing
region” (p. 9) of this booklet.
2. Press [YES/ENTER].
A mini-menu appears.
3. Press CURSOR [
“REGION CUT?”
] to select the
4. Press [YES/ENTER].
The specified region are cut.
Moving to a Another Location—Move
This operation moves the phrases of the specified region to another location. The
phrases in the specified region will be erased; i.e., they will change to silence. If there
were any phrases in the move-destination, they will be overwritten by the phrases
from the specified region.
1. Specify the region that you want to move,
as described in “Specifying the editing
region” (p. 9) of this booklet.
2. Use the REW[
] /FF [
] or the
TIME/VALUE dial to set the movedestination “NOW” (current location).
3. Press [YES/ENTER].
A mini-menu appears.
4. Press CURSOR [
] to select the
“REGION MOVE?”
5. Press [YES/ENTER].
The specified region are moved.
11
Editing a specified region of a sequence track
Pasting to a Another Location—Paste
This operation pastes the phrases of the specified region to another location. If there
were any phrases in the paste-destination, they will be overwritten by the phrases
from the specified region.
1. Specify the region that you want to paste,
as described in “Specifying the editing
region” (p. 9) of this booklet.
2. Use the REW[
] /FF [
] or the
TIME/VALUE dial to set the pastedestination “NOW” (current location).
3. Press [YES/ENTER].
A mini-menu appears.
4. Press CURSOR [
] to select the
“REGION PASTE?”
5. Press [YES/ENTER].
The specified region are pasted.
Inserting to a Another Location—Insert
This operation inserts the phrases of the specified region to another location. If there
ware any phrases in the inserting location of backward, they will be moved back for
duration of specified region.
1. Specify the region that you want to insert,
as described in “Specifying the editing
region” (p. 9) of this booklet.
2. Use the REW[
] /FF [
] or the
TIME/VALUE dial to set the insertdestination “NOW” (current location).
3. Press [YES/ENTER].
A mini-menu appears.
4. Press CURSOR [
] to select the
“REGION INSERT?”
5. Press [YES/ENTER].
The specified region are inserted.
12
Muting (silencing) a specific audio track
During playback, you can switch audio tracks between muted (silent) and playing
statuses.
1. During playback, press [STATUS] for the audio track that you want to mute
(silence).
[STATUS] will change from green to blinking, and the sound of that audio track will
be muted (silenced).
An audio track whose
[STATUS] was dark when
playback began cannot be
switched to Play status by
pressing [STATUS] during
playback. ([STATUS] will not
light in green.)
2. Once again, press the [STATUS] key that you caused to blink in step 1.
[STATUS] will change from blinking to lighting solidly in green, and that audio track
will resume playing.
13
Using [STATUS] to select the track whose
parameters you want to adjust
When you want to adjust an audio track's mixer settings (pan, equalizer), or loop
effect settings, you can also press [STATUS] for that audio track to select it directly.
Setting the left/right position (pan) of each audio track
1.
Hold down TRACK EDIT [PAN] and press AUDIO TRACK [STATUS] that you
want to adjust.
fig.43-01
The pan setting screen appears.
2. Turn the TIME/VALUE dial to set the pan.
3. Press [DISPLAY] to return to the Basic screen.
Adjusting the tone of each audio track
1.
Hold down TRACK EDIT [EQ] and press AUDIO TRACK [STATUS] that you
want to adjust.
fig.43-02
The equalizer setting screen appears.
2. Press CURSOR [
want to adjust.
][
] to move the cursor to the line of the parameter you
3. Turn the TIME/VALUE dial to change the value.
➔ For details on the parameters, refer to “Mixer effect parameter functions”
(Owner’s Manual; p. 174).
4. Press [DISPLAY] to return to the Basic screen.
Editing the loop effect settings
Chorus/delay/doubling
1.
Hold down LOOP EFFECT [DELAY], and press AUDIO TRACK [STATUS] that
you want to adjust.
fig.43-02
The equalizer setting screen appears.
In step 1, you can hold down
[DELAY] and press PAD
[STATUS] to select “PAD.”
2. Turn the TIME/VALUE dial to adjust the send level.
3. Press [DISPLAY] to return to the Basic screen.
Reverb
For details on setting the effect
parameters, refer to “Editing
the loop effect settings”
(Owner’s Manual; p. 145–146).
1. Hold down LOOP EFFECT [REVERB], and press AUDIO TRACK [STATUS] that
you want to adjust.
fig.43-02
The equalizer setting screen appears.
2. Turn the TIME/VALUE dial to adjust the send level.
3. Press [DISPLAY] to return to the Basic screen.
14
In step 1, you can hold down
[REVERB] and press PAD
[STATUS] to select “PAD.”
Preventing tempo data from being read from
a CD-RW disc
When pads or sequences are stored in internal memory, you can specify that the
tempo data of a song saved on a CD-RW disc not be loaded when you insert a CDRW disc on which pads or sequences have been saved.
1. Press [UTILITY].
The Menu are displayed as icon.
fig.1-06
2. Press CURSOR [
System icon.
][
] to select the
3. Press [YES/ENTER].
The System Parameter screen appears.
fig.5-01
4. Press CURSOR [
] to move the cursor to
“T.Map LoadCinfirm” line.
5. Turn the TIME/VALUE dial to select “ON.”
● T.Map LoadCinfirm (Tempo Map Load Confirm):
ON:
You will be able to select whether the tempo data saved on the CD-RW disc
will be loaded.
OFF:
The tempo data saved on the CD-RW disc will be loaded.
6. Press [DISPLAY] to return to the Basic screen.
If “T.Map LoadConfirm” is “ON”
Insert a CD-RW disc on which pads/sequences have been saved.
If internal memory contains pads/sequences, a message of “Load PAD/SEQ data?”
will be displayed.
If you press [NO/EXIT] at this time, a message of “Use song's tempo map?” (use the
tempo data of the song saved on the CD-RW disc?) will be displayed. Press either
[NO/EXIT] or [YES/ENTER] to select whether to load the tempo data from the song
on the CD-RW disc.
[NO/EXIT]:
The tempo data in internal memory will be preserved. The tempo
data of the song saved on the CD-RW disc will not be loaded.
[YES/ENTER]:
The tempo data of the song saved on the CD-RW disc will be
loaded. The tempo data in internal memory will be overwritten.
15
Using the tempo of a sample to modify the tempo map
Here's how you can easily modify the tempo map to match a drum loop sample on
which your song is based.
1. Press [UTILITY].
The Menu are displayed as icon.
The tempo of a sample is
displayed in the upper right of
the pad parameter screen. For
details, refer to “Displaying
the correct tempo of a sample”
(Owner's Manual; p. 77).
fig.1-06
2. Press CURSOR [
Tempo Map icon.
][
] to select the
3. Press [YES/ENTER].
The Tempo Map Setting screen appears.
fig.5-01
4. Press CURSOR [
][
] to move the
cursor to tempo whose tempo you want to
change.
5. Press the pad that contains the desired tempo data.
For example, if the sample tempo is “65.57”, a message of “Tempo → 65.57 Are you
sure? (OK to change the tempo to 65.57?) will be displayed.
6. Press [YES/ENTER].
The tempo map will be changed to the tempo
of the sample.
If you press [NO/EXIT], the tempo map will
not be changed.
7. Press [DISPLAY] to return to the Basic screen.
16
For the procedure used to
create a tempo map, refer to
“Setting the tempo and rhythm
pattern of the song—Tempo
Map” (Owner's Manual; p. 117).
Using Pads/Sequences while you mix down
You can play sequence tracks and pads while mixing down. This can be done in any
combination: for example, you can mix down sequence tracks and pads together
with audio tracks, or mix down only pads and/or sequences.
Even if a CD-RW disc is not inserted, you can mix down just pads/sequences if
internal memory contains pads/sequences.
* When you mix down using pads/sequences, the time available for the mixdown will
be the remaining amount of sampling memory. For this reason, if you need to perform
lengthy mixdowns, we recommend that you expand the memory. The time available for mixdown
can be checked in the Song Information screen (Owner's Manual; p. 39).
When CD recorder screen or
CD player screen is appearing,
you cannot switch to mix down
eves pressing [MIX DOWN].
If you mix down without a
CD-RW disc, the “Data Type”
will be “Standard.”
1. Press AUDIO TRACK RECORD [MIX DOWN].
If the pads/sequences contained in the CDX-1’s internal memory, a message of
“Also use PAD/SEQ for Mixdown?” appears, [MIX DOWN] blinks.
If you press [YES/ENTER], you will be able to use pads/sequences, and
[MIX DOWN] will light.
If you do not want to use pads/sequences, press [NO/EXIT]. For the subsequent
steps, refer to step 1 of “Mixing down” (Owner's Manual; p. 133).
2.
If you mix down without a
CD-RW disc in step 1, a
message of “Also use
PAD/SEQ for Mixdown?” will
not appears.
If you want to use sequence tracks, press [SEQ PLAY] to make it light.
For sequence tracks that you want to include in the mixdown. For details, refer to
“Playing sequence tracks and audio tracks simultaneously” (Owner’s Manual; p. 96).
3. For audio tracks that you want to include in the mixdown, press [STATUS] to
make the button light in green.
4. Make sure that master track [STATUS] light in red.
5. Press ZERO [
the song).
] to return the SONG POSITION to “00:00:00-00” (beginning of
Alternatively, you can move to a desired location so that recording will start from
that point.
6. Press PLAY [
If you mix down without a
CD-RW disc, step 3 will not be
necessary.
].
Mixdown begins.
If you play samples pressing pads during mix down is processing, the sample
sounds in pads will be mixed down together. However, please be careful that sample
sound dose not come out in case four stereo (incl. audio track and sequence track)
are outputted. In such case, the pads goes out.
7. When mixdown is finished, press STOP [
].
The screen will ask “Do you want to burn a CD? “
If you want to create an audio CD, press [YES/ENTER] and continue with the
procedure “Writing to a CD-R disc” (Owner’s Manual; p. 135).
A sequence track and its
corresponding audio track
cannot be played back
simultaneously. If you are
unable in step 3 to select an
audio track that you want to
mix down, you must first
exchange sequence tracks so
that the desired tracks can be
played back simultaneously.
For details, refer to
“Exchanging the content of
sequence tracks—Exchange
Track” (p. 7) in this booklet.
If you want to make sure that the result of mixdown, press [NO/EXIT]. For details,
refer to “Listen to the result of Mixing down” (Owner’s Manual; p. 135).
17
Editing the Mastering Tool settings
You can edit the mastering tool settings while you listen to the mixdown. Select one
of the preset patches (P01–P21) that is closest to what you have in mind, and edit the
patch settings
Mastering Tools
The mastering tools are a convenient set of tools that divide the sound into highfrequency, mid-frequency, and low-frequency ranges, and make the volume
consistent so that the audio CD can be created with the optimal levels.
You can also edit the
mastering tool settings in the
CD Burning screen or CD
Recorder screen. However, it
will not be possible to audition
the results of the mastering
tool before writing to the CD-R
disc.
fig.4-05
1. In step 1 of “Listen to the result of Mixing
down” (Owner’s Manual; p. 133), the
Mastering track screen appears.
2. Make sure that [MASTERING TOOLS] lights in red.
If [MASTERING TOOLS] is dark, press [MASTERING TOOLS], and it will go light
in red.
3. Press CURSOR [
] to move the cursor to “MTK” line.
4. Turn the TIME/VALUE dial to select the mastering tool patch that you want to
edit.
5. Press [YES/ENTER].
The mastering tools effect block screen appears.fi
fig.4-06e
6. Press CURSOR [
][
][
][
]
to select an effect, and turn the
TIME/VALUE dial to turn the effect on/off.
Effect on (solid line)
Effect off (dotted line)
7. Press CURSOR [
][
][
][
] to select the effect whose parameters
you want to edit, and press [YES/ENTER].
fig.4-07
The parameter setting screen for the selected
effect appears.
8. Press CURSOR [
to edit the value.
][
] to select a parameter, and turn the TIME/VALUE dial
For details on each parameter, refer to “Mastering Tools parameter list” (p. 20–22) in
this booklet.
9. If you would like to edit another effect, press [NO/EXIT] to return to the previous
screen, and repeat steps 6-8.
If you want to save the current effect settings, perform the procedure described in
“Saving mastering tools settings,” below.
fig.4-08
* Edited effect settings are temporary. If you return to the previous
screen without saving the edited patch, “TMP” will be displayed
in front of the patch name. While “TMP” is displayed, newly
selecting a different patch will cause the edited patch to revert to
its previous state, and your edits will be lost.
18
“IN” (input), “MIX” (mixer),
and “OUT” (output) of the
effect block are always on.
These cannot be turned off.
Saving the mastering tool settings
You can assign a name (patch name) to the mastering tool settings you've edited, and
save your settings. This procedure is a continuation of “Editing the mastering tool
settings,” above.
Your edited patch can be saved at one of twenty-one patch numbers U01–U21, and
recalled at any time, just like a preset patch.
fig.4-09
1. In the mastering tools effect block screen,
press CURSOR [
] to select “NAME.”
2. Press [YES/ENTER].
fig.4-10
The Patch Name input screen appears.
You can input a patch name of
up to eight characters.
3. Press CURSOR [
][
] to move to the desired character location, and
turn the TIME/VALUE dial to input patch name.
4. When you are finished inputting the patch name and editing the settings of each
effect, press [NO/EXIT] to return to the effect block screen.
fig.4-11
5. Press CURSOR [
] to select “WRITE.”
fig.4-12
6. Press [YES/ENTER].
The Patch-save screen appears.
Patches are stored in internal
memory.
7. Turn the TIME/VALUE dial to select the patch-save destination (U01–U21).
8. After you have specified the patch-save destination, press [YES/ENTER].
When the data has been saved, you’re returned to the Mastering track screen.
19
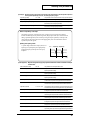
Mastering Tools parameter list
The Mastering Tools is compressor that splits sounds into different frequency band to unify their volumes.
Equalizer
Bass Cut
Filter
Compressor
Enhancer
Mixer
Input
Limiter
Expander
* Below shows the signal form "INPUT" to "MIXER."
Output
Input
Parameter (full name)
Setting
Expander
Compressor
High Freq
High Freq
Mid Freq
Mid Freq
Low Freq
Low Freq
Mixer
Function
● EQ (Equalizer): A 4-band equalizer.
Effect On/Off (Effect On/Off)
OFF, ON
This parameter turns the equalizer effect on/off.
Input Gain (Input Gain)
-24–+12 dB
This parameter sets the overall volume before passing through the equalizer.
Low Type (Low Type)
SHELV, PEAKING
This parameter sets the type of the low frequency band equalizer
(Shelving type or peaking type).
Low Gain (Low Gain)
-12–+12 dB
This parameter sets the gain (amount of boost or cut) for the bass
equalizer.
Low Freq (Low Frequency)
20 Hz–2.00 kHz
This parameter sets the central frequency for the low equalizer.
Low Q (Low Q) *1
0.3–16.0
This parameter sets the range of change in gain for the frequency set by
“Low Freq.” A larger value results in a narrower range of change.
Low-Mid Gain (Low Middle Gain)
-12–+12 dB
This parameter sets the gain (amount of boost or cut) for the low-midrange
equalizer.
Low-Mid Freq (Low Middle Frequency) 20 Hz–8.00 kHz
This parameter sets the central frequency for the low-midrange equalizer.
Low-Mid Q (Low Middle Q)
0.3–16.0
This parameter sets the range of change in gain for the frequency set by
“Low-Mid Freq.” A larger value results in a narrower range of change.
High-Mid Gain (High Middle Gain)
-12–+12 dB
This parameter sets the gain (amount of boost or cut) for the high-midrange
equalizer.
High-Mid Freq (High Middle Frequency) 20 Hz–8.00 kHz
This parameter sets the central frequency for the high-midrange equalizer.
High-Mid Q (High Middle Q)
0.3–16.0
This parameter sets the range of change in gain for the frequency set by
“High-Mid Freq.” A larger value results in a narrower range of change.
High Type (High Type)
SHELV, PEAKING
This parameter sets the type of the High frequency band equalizer
(Shelving type or peaking type).
High Gain (High Gain)
-12–+12 dB
This parameter sets the gain (amount of boost or cut) for the treble
equalizer.
High Freq (High Frequency)
1.40–2.00 kHz
This parameter sets the central frequency for the high equalizer.
High Q (High Q) *1
0.3–16.0
This parameter sets the range of change in gain for the frequency set by
“High Freq.” A larger value results in a narrower range of change.
Output Level (Output Level)
-24–+12 dB
This parameter adjusts the volume after the equalizer stage.
Effect On/Off (Effect On/Off)
OFF, ON
This parameter turns the bass cut filter effect on/off.
Bass Cut Freq (Bass Cut Frequency)
THRU, 20 Hz–2.00 kHz
This parameter sets the frequency for cutting off undesired low frequency
band sounds such as pop noise.
● B CUT (Bass Cut Filter):
● ENH (Enhancer): This effect enhances the definition of the sound, and pushes it to the forefront.
20
Effect On/Off (Effect On/Off)
OFF, ON
This parameter turns the enhancer effect on/off.
Sensitivity (Sensitivity)
0–100
Adjusts the manner in which the enhancer will be applied relative to the
input signals.
Enhancer Freq (Enhancer Frequency) 1.00 –10.0 kHz
Adjusts the frequency at which the enhancer effect will begin to be applied.
The effect will be made apparent in the frequencies above the frequency
set here.
Mix Level (Mix Level)
Adjusts the amount of phase-shifted sound of the range set by “Frequency”
that is to be mixed with the input.
-24–+12 dB
Mastering Tools parameter list
● IN (Input): Specify the frequency points at which the original sound will be divided, so that the expander/compressor
can be applied independently to the low, mid, and high frequency ranges.
Input Gain (Input Gain)
-24– +12dB
This parameter sets the overall volume before entering expander/compressor.
Input Delay (Input Delay)
0–10 ms
This parameter sets the length of delay to add to the direct sound input.
Lo Split Freq (Low Split Frequency)
20–800 Hz
This parameter sets the frequency at which the direct sound is split into
three bands (on the low frequency band side).
Hi Split Freq (High Split Frequency)
1.60–16.0 kHz
This parameter sets the frequency at which the direct sound is split into
three bands (on the High frequency band side).
Effect of “Input Delay” under Input
With ordinary compressors, a moment of delay occurs to suppress a level over instance after it has been
detected. With Mastering Tool, this problem is bypassed by using the input sound only for level detection and
adding a specified length of delay to the sound for processing and output. “Input Delay” under Input is the
setting of the delay time for this purpose. Note that supplying Delay Time causes time difference between
input and output of audio signals.
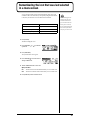
Splitting into frequency bands
To split into High, middle and low frequency bands, “Low
Split Freq” (Low Split Frequency) and “High Split Freq”
(High Split Frequency) under Input are used to specify
frequencies.
fig.42-1e
Level
"Lo Split Freq" "Hi Split Freq"
Low Freq
Mid Freq
High Freq
Freq
● EXP (Expander): Expands the dynamic range (the proportion between the loudest and softest sounds) at
a certain ratio.
Effect On/Off (Effect On/Off)
OFF, ON
This parameter turns the expander effects on/off.
Low Threshold (Low Threshold)
-80–0 dB
This parameter sets the volume at which the expander for the low
frequency band starts working.
Mid Threshold (Middle Threshold)
-80–0 dB
This parameter sets the volume at which the expander for the middle
frequency band starts working.
Hi Threshold (High Threshold)
-80–0 dB
This parameter sets the volume at which the expander for the high
frequency band starts working.
Low Ratio (Low Ratio)
1:1.0–1:16.0, 1:INF
This parameter sets the ratio at which the output in the low frequency band is
increased when the input level has dropped below the low threshold level.
Mid Ratio (Middle Ratio)
1:1.0–1:16.0, 1:INF
This parameter sets the ratio at which the output in the middle frequency band is
increased when the input level has dropped below the middle threshold level.
High Ratio (High Ratio)
1:1.0–1:16.0, 1:INF
This parameter sets the ratio at which the output in the middle frequency band
is increased when the input level has dropped below the High threshold level.
Low Attack (Low Attack)
0–100 ms
This parameter sets the time until when the low frequency band expander starts
working after the input level has exceeded the low threshold level.
Mid Attack (Middle Attack)
0–100 ms
This parameter sets the time until when the middle frequency band expander
starts working after the input level has exceeded the middle threshold level.
High Attack (High Attack)
0–100 ms
This parameter sets the time until when the High frequency band expander
starts working after the input level has exceeded the High threshold level.
Low Release (Low Release)
50–5000 ms
This parameter sets the time until when the low frequency band expander stops
working after the input level has dropped below the low threshold level.
Mid Release (Middle Release)
50–5000 ms
This parameter sets the time until when the middle frequency band expander stops
working after the input level has dropped below the middle threshold level.
High Release (High Release)
50–5000 ms
This parameter sets the time until when the High frequency band expander
stops working after the input level has dropped below the High threshold level.
21
Mastering Tools parameter list
● COMP (Compressor) *2: Compressor the entire output signals when the input volume exceeds a specified value.
Effect On/Off (Effect On/Off)
OFF, ON
This parameter turns the compressor effects on/off.
Low Threshold (Low Threshold)
-24–0 dB
This parameter sets the volume at which the compressor for the low
frequency band starts working.
Mid Threshold (Middle Threshold)
-24–0 dB
This parameter sets the volume at which the compressor for the middle
frequency band starts working.
Hi Threshold (High Threshold)
-24–0 dB
This parameter sets the volume at which the compressor for the high
frequency band starts working.
Low Ratio (Low Ratio)
1:1.0–1:16.0, 1:INF
This parameter sets the ratio at which the output in the low frequency band
is suppressed when the input level has exceeded the low threshold level.
Mid Ratio (Middle Ratio)
1:1.0–1:16.0, 1:INF
This parameter sets the ratio at which the output in the middle frequency band
is suppressed when the input level has exceeded the middle threshold level.
High Ratio (High Ratio)
1:1.0–1:16.0, 1:INF
This parameter sets the ratio at which the output in the High frequency band is
suppressed when the input level has exceeded the High threshold level.
Low Attack (Low Attack)
0–100 ms
This parameter sets the time until when the low frequency band compressor
starts working after the input level has exceeded the low threshold level.
Mid Attack (Middle Attack)
0–100 ms
This parameter sets the time until when the middle frequency band compressor
starts working after the input level has exceeded the middle threshold level.
High Attack (High Attack)
0–100 ms
This parameter sets the time until when the High frequency band compressor
starts working after the input level has exceeded the High threshold level.
Low Release (Low Release)
50–5000 ms
This parameter sets the time until when the low frequency band compressor
stops working after the input level has dropped below the low threshold level.
Mid Release (Middle Release)
50–5000 ms
This parameter sets the time until when the middle frequency band compressor
stops working after the input level has dropped below the middle threshold level.
High Release (High Release)
50–5000 ms
This parameter sets the time until when the High frequency band compressor
stops working after the input level has dropped below the High threshold level.
● MIX (Mixer): Adjust the volume of the low, mid, and high frequency ranges, and mix them.
Low Level (Low Level)
-80–+6 dB
This parameter sets the volume in the low frequency band after passing
through the expander and compressor.
Mid Level (Middle Level)
-80–+6 dB
This parameter sets the middle frequency band volume after passing
through the expander and compressor.
High Level (High Level)
-80–+6 dB
This parameter sets the volume in the High frequency band after passing
through the expander and compressor.
● LMT (Limiter): Prevents distortion by suppressing signals at High levels.
Effect On/Off (Effect On/Off)
OFF, ON
This parameter turns the limiter effects on/off.
Threshold (Threshold)
-24–0 dB
This parameter sets the volume at which the limiter starts working.
Attack (Attack)
0–100 ms
This parameter sets the time until when the limiter starts working after the
input level has exceeded threshold level.
Release (Release)
50–5000 ms
This parameter sets the time until when the limiter stops working after the
input level drops below the threshold level.
● OUT (Output): Provides settings concerning overall output.
Level (Level)
-80– +6 dB
This parameter sets the overall volume after passing through the limiter.
Soft Clip (Soft Clip)
OFF, ON
By turning this ON, suppresses conspicuous distortion that may occur
when the effect of compressor/limiter has been applied excessively.
Dither (Dither)
OFF, 8–24 bit
This parameter smooths the transition where the sound disappears.
*1 If “Low Type” or “High Type” is set to “SHELV” (Shelving Type), the setting for “Lo Q “or “High Q” is invalid.
*2 With Compressor (COMP), the level is automatically adjusted to the optimal with the settings for “Threshold” and “Ratio”. Setting
“Attack” to a relatively long time may cause distortion. For this reason, a margin of -6 dB is provided. Adjust the Mixer (MIX) level as
required.
22
Remembering the icon that was last selected
in a menu screen
You can cause the icon that was last selected in the following menu screens to be
remembered. This is convenient when you are repeatedly using the same menu item
to edit, since you will not have to re-select the desired icon each time.
Button
Screen
[UTILITY]
Utility Menu Screen
PAD SEQUENCING [TEMPO MAP]
Pad Edit Menu Screen
PAD SEQENCING [EDIT]
Sequence Edit Menu Screen
The data identifying the lastselected icon in each screen
will be discarded when the
power is turned off. The next
time the power is turned on,
the icon at the beginning of the
menu will always be selected
when you open a menu screen.
1. Press [UTILITY].
The Menu are displayed as icon.
fig.1-06
2. Press CURSOR [
System icon.
][
] to select the
3. Press [YES/ENTER].
The System Parameter screen appears.
fig.5-01
4. Press CURSOR [
] to move the cursor to
“Keep Last Menu” line.
5. Turn the TIME/VALUE dial to select “ON.”
● Keep Last Menu:
ON:
The last-selected icon will be remembered when you access a menu screen.
OFF:
The first icon of the menu will be selected when you access a menu screen.
6. Press [DISPLAY] to return to the Basic screen.
23
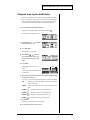
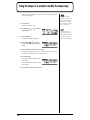
Synchronization with a Sequence or Drum Machine
You can cause a MIDI sequencer or rhythm machine to operate in synchronization
with the button operations of the CDX-1.
1. Use a MIDI cable to connect the CDX-1 and your MIDI sequencer as shown in
the diagram.
fig.5-02e
MIDI IN
MIDI OUT/THRU
MIDI Sequencer
CDX-1
2. Press [UTILITY].
The Menu are displayed as icon.
3. Press [YES/ENTER].
The MIDI settings screen appears.
fig.5-03
4. Press CURSOR [
MIDI icon.
][
] to select the
fig.5-04
5. Press CURSOR [
“Sync Out” line.
] to move the cursor to
6. Turn the TIME/VALUE dial to select “MIDI CLK.”
● Sync Out:
Select weather or not the synchronization signals that will sent from the MIDI
OUT/THRU connector.
OFF:
Synchronization signals are not sent.
MTC:
MIDI Time Code is sent.
MIDI CLK:
MIDI Clock is sent.
fig.5-05
7. Press CURSOR [
“Out/Thru” line.
] to move the cursor to
8. Turn the TIME/VALUE dial to select “OUT.”
9. Press [DISPLAY] to return to the Basic screen.
10. Make settings on your MIDI sequencer so that it can receive MTC from an
external device, and prepare it to play back MIDI song data.
For details on using, refer to the Owner’s Manual for your MIDI sequencer.
11. When the CDX-1 begins playing, the MIDI sequencer will also begin playing in
sync with it.
24
40455612
’01-11-E2-21KS