1
Fir
eL
td
&
Leviathan DVR Range User Guide
Int
ell
ige
nt
Se
c
uri
ty
V1.1
By Michael J Archer
© 2003 Michael J Archer
v1.1
-1-
Fir
eL
td
Index
1. System Overview
1.1
1.2
1.3
1.4
Contents
System connection
Connect Cameras
Power on
2. Configuration
&
2.1 Getting started
2.2 Preferences
2.3 Camera Setup
2.4 Video Capture Card
2.5 Motion Detection
2.6 DELTA
2.7 Sound
2.8 Video Database
2.9 Users
2.10 Server
2.11 About system
4. Scheduler
uri
nt
Common Functions
The Scheduler Interface
The Scheduler Structure
Recording
Address Book
System Events
Options
ige
4.1
4.2
4.3
4.4
4.5
4.6
4.7
Se
c
3.1 Selection
3.2 Video Fragment
3.3 Zoom time
3.4 Play Back
3.5 Save Fragment
3.6 Open Database
3.7 Bookmarks
3.8 Save Picture
3.9 Search Motion
3.10 Pic Tools
ty
3. Video Explorer
5. Remote Client
Overview
Installation
LAN connection
Modem / ISDN (option)
Int
ell
5.1
5.2
5.3
5.4
© 2003 Michael J Archer
v1.1
-2-
Chapter 1
Fir
eL
td
System Overview
1.1 Contents.
Leviathan Lite DVR
Se
c
uri
ty
&
Your Leviathan DVR system will either the Rack Case as shown on the Front Cover,
which can be a 4 8 12 and 16 camera unit, or one of the following 4 Camera systems:
Leviathan Shuttle DVR
Int
ell
ige
nt
Keyboard for System Unit
© 2003 Michael J Archer
v1.1
-3-
Fir
eL
td
Chapter 1 – System Overview
Mouse for System Unit
Mouse will vary due to availability.
Quick Start Guide
System Manual
This Manual.
Software CD
Se
c
Quick start manual.
uri
ty
&
Power lead for Base Unit
Int
ell
ige
nt
CD Contains the LJD Server Software, LJD Client Software, Adobe Acrobat Reader,
PDF files of All Documents including this guide.
The Leviathan Lite and Shuttle are installed with windows XP and do not require
additional an CD Burning application, other windows2000 systems will either come
with Nero CD Burning tool, or equivalent.
© 2003 Michael J Archer
v1.1
-4-
1.2 System Connection.
Fir
eL
td
Chapter 1 – System Overview
Connect the Power lead to Base Unit. The power lead is only able to plug into one socket.
The connector is the same type of connector as a Kettle lead which you’ll find at home.
Plug in the Keyboard and mouse, which are normally colour coded. See below.
Attach your VGA monitor to the VGA Monitor connection unit.
Connect to your LAN / Wan to the Ethernet Port. (Optional requirement). Ethernet cable is not
supplied
You may wish to add a printer to the system, so it’s a good time to add this to the system.
Please follow instructions supplied with your device.
Printer Port
ty
&
Ethernet Port
Se
c
uri
Mouse
&
Keyboard
USB 1.1
Serial
VGA Monitor
Mic In.
If you have a Leviathan Lite system, then the back of the unit will look 90° rotated clockwise
from the diagram above. As the light system is an upright case.
The Shuttle system is also a different back, and will look like the diagram below.
Ethernet Port
Mic In.
Int
ell
ige
nt
Serial
VGA Monitor
USB 1.1
Mouse &
Keyboard
The system is now ready to be powered on, the power on button is behind the glass front
door on the rack mount Leviathan systems, or the Big Silver button on the Lite system. With
the industrial case system, the door is lockable and key is supplied with the packaging.
© 2003 Michael J Archer
v1.1
-5-
1.3 Camera Connection
Fir
eL
td
Chapter 1 – System Overview
Connecting all your cameras to the camera ports see diagram below, which are located at the
rear of the DVR system unit. Depending on the System you have, there will only be
connections for that number camera unit.
The connector is the standard BNC or Bayonet type. Camera signals should be of the
standard 1v vpp using 75Ω cable. We recommend good quality cable, talk to your camera
supplier for advice.
We suggest connecting the cables before you put power to the camera/s. The DVR has no
voltage protection inside the system unit.
Back of a Typical DVR
16
|
15
|
14
|
13
ty
12
|
11
|
10
|
09
uri
08
|
07
|
06
|
05
Se
c
04
|
03
|
02
|
01
&
Spot Output
S1 S2 S3 S4
4Camera
8Camera 12Camera 16Camera
nt
The camera inputs are numbered from the bottom to top, working from left – right. We may give better spacing
between the inputs shown above, as the BNC connectors can be cumbersome when close together. So if there is a
gap between the inputs do not worry this makes not difference to the system it’s purely cosmetic.
Note that the BNC’s can be detached. As this can give a little protection against leads being pulled from the system
by accident.
DVR Card jumper setting
Int
ell
ige
The Spot Outputs (S1 – S4) give a standard composite -video signal on the first camera input
for each DVR card. The default output is the bottom most input on each DVR card, only by
modifying a jumper on the capture board can you change this. We do no recommend you
change this setting.
© 2003 Michael J Archer
v1.1
-6-
Fir
eL
td
Chapter 1 – System Overview
1.4 Power On
Se
c
uri
ty
&
When you power up the system it will eventually display as Figure 1. It is possible that the
colour scheme could be slightly different then shown. This has not effect on the DVR software.
Figure 1
nt
You do not need to change any of the system BIOS settings. The factory settings are correct,
and users do not need to modify these. We do supply the Motherboard manual for the system,
so future expansion or user own devices may wish to be added. This should be included with
the other materials inside your packaged system.
ige
Because the software is running in the background, it is automatically loaded when the DVR system is
powered on. In event of power failures or such, the system when re-powered, on will auto correct and
verify its own settings and the video database. No user knowledge is required as this is all automatic.
Int
ell
Please note this can possibly take a few seconds of time to check the data, it does depend on a variety
of factors. Such as how the system was powered off, if it was recoding at the time. Normally however
this will not even be noticed. The system does keep track of events in a log file in “c:\Program
Files\LJD-Video Server\VServer.log”. You can look at the file with notepad to check system events.
These events are also available as electronic messages via an email, which is discussed in the Scheduler
section of this manual.
When the system is set to a recording mode, you may notice the Yellow icon
will have
a Dark Red background. This will change to Light Red when the system is recording. So this flashing
is normal operation. It is only an indicator if you choose to leave the application running whilst
minimised.
© 2003 Michael J Archer
v1.1
-7-
Chapter 2
2.1 Getting started
Click on the little yellow camera icon on the bottom right panel
as show in Figure 1
ige
nt
Se
c
uri
ty
&
This will now bring up the main Video server software (Figure 2).
Fir
eL
td
Configuration
Figure 2
At the top of the screen shows five icons, explained below. The main bulk of the display below, is a
picture of all current camera inputs, the default is set to display 16. Don’t worry is you have only a four
camera unit, this is a configurable display. The system ships with the Camera inputs not enabled, so
you will see as Figure 2. Do worry that you have connected the cameras and expect to see the inputs. You
Int
ell
should read the quick start guide to quickly show you how these are activated.
Configuration Save
Log off
Layout
Video
Explorer
Start / Stop
Recording
These Icons are the main control to access to the system settings and configurations.
© 2003 Michael J Archer
v1.1
-8-
Fir
eL
td
Chapter 2 –Configuration
Top right Icons, are standard windows icons.
Min. Max. Close.
Minimise, Maximise, and Close Window/application.
Clicking the 5th top left Icon
button on the top display so it highlights to
uri
Start / Stop Recording
ty
&
“Stream information above is highlighted in Red when system is recording. The “0 Mh” is the value in
Megs / Hour which data is being recorded to hard drive, 0 will change when the system is setup and
recording a video stream. The “11:19:19” is the system current time. The default is this master
recording is disabled. The 0 at the bottom left is the time in hours the system has been running for.
this will
now activate the recording status of the Leviathan system.
Se
c
Now to make sure your cameras are recording, you need to check that the recoding icon, which is the
“Recoding” in red, as shown in the graphic.
nt
At any point when a camera is doing a recoding the system will show a Red marker in the Bottom of
the screen C1-C16 Icons. The example here has the Camera “Shop” doing a recording. Also when a
camera is recording, and this camera is on the main layout display, a “REC” message will appear at the
bottom right of the camera image.
Int
ell
ige
The status below gives the duration of the amount of recorded video information on hard disk. The
recording will automatically just start from the oldest recorded material, in a circular way when full. So
the system records in a “first in first out” way, or FIFO as it is known. Of course the default will have
no recording; all systems are shipped with the video database already to record. (See2.8). you’ll see the
clock like graphic which is a representation of the storage available, as below shows.
© 2003 Michael J Archer
v1.1
-9-
Fir
eL
td
Chapter 2 –Configuration
The bottom and the bottom right icons on the Figure 2 are the main layout controls.
X1 X4
Layouts
&
Auto Switch
Layouts
Figure A
X 16
&
X8
These bottom right icons above refer to the display camera layout selection. This gives you the control
of how you like the layout of the main camera display to be presented.
ty
The bottom icons refer to the camera inputs, names, and also to layout selection settings.
uri
The default Icons show the camera names, which are “C1-C16”
Icon as shown in Figure A above, you change these icons to the
Se
c
If you click the “Layout”
following:
These are user layouts, which are default names of “L1-L16”; by clicking any of the Icons you change
nt
the display to the saved layout. You can click this Layout
options
to toggle between both sets and
Save Layout
Int
ell
ige
To saves a layout, all you need to do it click the Layout save Icon
This will now bring up the following save Layouts dialog box.
© 2003 Michael J Archer
v1.1
- 10 -
2nd Icon top of Display.
Fir
eL
td
Chapter 2 –Configuration
What you are now able to do is save the screen layout in any of the L1-L16 save positions. Just by
clicking the L1-L16 Icon you want you layout to be saved under. This will highlight the “Layout
name:” box which you can enter a meaningful name into.
You’ll notice this will as show in example above will change what was L1 to “Mylayout”. Click the
ok to accept your choice.
ty
&
There is another option within the Layouts called “Auto switch Layouts”. If you click this options
you’ll get the follow window appear.
clock graphic. This shows you that the Auto switch time is
Se
c
change to a highlighted
uri
What you do here is to click you choice of switching layouts which you want to happen on the main
screen.
Just by click the named layout L1-L16 in this case, you tell the system which layout you want to cycle
through. The default “Auto switch time:” is set to off. By using the slider you set this to 1 – 30
second(s)
Once you have set the auto switch time to any setting other than off. You’ll see the bottom right Icon
available. To activate the Switching Layouts you click the
Active Clock Icon
Icon. This will now change to an
. Now your timer switching layouts will run. To disable these, just re-click the
Icon, and the green highlight will switch back for the normal
ell
ige
nt
If you already have a layout saved, you’ll be prompted to overwrite the current one, which a warning
screen will come up and give you the choice. Click Yes No as required.
Camera Views in built
Int
The system has a very flexible way to change camera views to suite your needs. The quick views which
are the Icons see Figure A. Let you change quickly the display into that amount of cameras. Once you
have clicked one of the four view icons you’ll see that icon change to green. And the camera display
will change to that layout.
Within the main camera display, you’ll see that you have an active camera number, which is indicated
by an outlined border, this is red as a default setting. (Changeable in latter settings)
© 2003 Michael J Archer
v1.1
- 11 -
Fir
eL
td
Chapter 2 –Configuration
The Bottom camera number Icons will change colour to reflect their displayed status. All Icons in
Green are those which are on the display, with the current active Camera is highlighter in Gold/Yellow
colour.
By clicking the C1-C12 Icons, you’ll change the camera number on the active camera display. Simply
by clicking any of the camera images on the main display, you’ll change the active camera number to
that camera. Again this is shown by the change of the outline and the Icon at the bottom.
Now here comes the fun part, you also can now simply left click and whilst holding the click down on
the mouse you drag a camera position to another camera position. This in effect swaps over the camera
positions within in the display area. At this point we recommend you give this a go, to see how easily it
is to have a quick setup of how you wish to view your camera.
&
With the larger DVR systems 8//12/16 cameras, it’s nice to group cameras perhaps to follow a logical
path or an area which is being monitored. This saves you having to put the camera inputs onto the DVR
in any logical order.
Camera Views user defined
ty
So we have quick setup and simple display, with mouse clicks, and simple drag and drop.
uri
Now you can see the quick way to almost instantly have camera views. However there only a 4 quick
views, and if you have save five camera, you don’t want to use the eight view and have blank images.
The way this is done is simple, when the system is in a quick view, single click the current highlighted
view Icon
the camera layout will normally change, this is not a problem.
Se
c
outline
for example, it’ll be the only one which is outlined in green. So it goes too grey
nt
What you now have is the ability to select any of the C1-C16 camera, and the system will
automatically add this to the camera area, the shape and the design of the layout will change for
however many cameras you select, this is automatically set to best fit the amount of cameras you have
chosen.
Camera Icons
ige
To unselect a camera just again click the Camera Icon. You still have the same drag drop swap, to
change what camera position is best suitable for your purposes.
This user defined selection is where the layouts are best suited. As you can see you can create a flexible
selection of layout design. Will very simply and with almost all mouse clicks.
Int
ell
Lastly now one thing you may like is the ability to see just the cameras on the screen, and of course this
is done by a simple key press of the F9 key, this toggles full screen mode of the cameras. And one
other shortcut to mention here is the F10 key this is the save layout dialog box, as you may now like to
save your new layout selection.
© 2003 Michael J Archer
v1.1
- 12 -
Fir
eL
td
Chapter 2 –Configuration
Hidden Options
ty
&
Like most applications the Leviathan has a wealth of hidden options, which might otherwise make the
software seem too complicated. So here we introduce the last option which is available from the main
display. All you need to do is right click anywhere the camera display area, and the following pop up
windows will then be shown as below:
uri
Here we see the first two options are shortcuts to the F9 and F10 function keys, previously mentioned.
This is so you don’t need to use the keyboard, as the software tries to do its best to have only mouse
action for all key functions.
Se
c
The “Limit size to 382x288” tick option sets the system to only display the camera images as the same
resolution as they are captured at. Because a computer VGA screen is normally at a much higher
resolution than a Camera signal, the images can be seen as only small windows, almost looking like
they have been shrunk. This is not the case, and depending on the screen resolution and the size of
your monitor you may find these images too small. This option uses the hardware of the Leviathan
graphics card to expand the image, with the effect that you may notice some blocking on the images,
this has no bearing on the image recorded to the hard drive, and it is only a visual aid. It does not mean
the system is saving low quality images, the blocking is how the hardware expands an image.
ige
nt
The “Antialias filter” is another visual aid to try to smooth any jagged lines from the displayed images.
Default setting is enabled.
ell
The “Camera alert” has two options.
This is a setting which is individual for each
camera on the system, to change this you need to right click the options over the selected camera, from
the main display area.
The two options are valid settings for the “Schedule” Section of this manual. Please refer to this. The
is a separate section because all Leviathan DVRs will function 24x7 with its defaults in exactly what
95% of users require. Which is without the need to any schedules, so it is considered a more advanced
topic and setup procedure?
System Performance
Int
This is a system performance display. As all Leviathans are custom build systems designed for the task
as a DVR, users do not normally need to know how the system is performing.
© 2003 Michael J Archer
v1.1
- 13 -
2.2 Preferences
First step for the initial setup is preferences, so simply click the
configuration, and the following will be displayed.
Icon. This is the system
icon will be automatically selected to show the option you are in.
nt
Se
c
uri
ty
&
The
Fir
eL
td
Chapter 2 –Configuration
Figure 3
ell
ige
You now have a variety of settings to be changed, most which are cosmetic, to give a look and feel
of the main display area. Most Icons which are an on/off setting are show as either a Green
background for on, and a Grey background for Off. This is common feature throughout all areas of
the software. All you need to do to change between each setting is a single mouse click.
Int
Toggles the display of camera number and caption name. The camera names C1-C16 can be
changed, explained in next Section 2.3. The camera number is show in the top left, and the name is
bottom left.
Toggles the display of camera refresh rate in Frames Per Second. (FPS)
© 2003 Michael J Archer
v1.1
- 14 -
Enables the font type to be set. Used for the displayed information.
Fir
eL
td
Chapter 2 –Configuration
Defines display refresh rate in FPS. The rate can’t be higher than the maximal refresh rate setting of
an individual camera. To change you click on the slider, or once clicked as active, you can use the
keyboard left and right arrow keys. (This is true for all slider controlled settings)
uri
Preset the colour of the of the active camera frame.
ty
&
This is Switches on/off the direct use of the video memory for the camera display. To chose the
optimal mode refer to the description of “Refresh Time” command in the “Command Line console
Interface” section
Se
c
Adjust the contrast range of a black and white camera display. This setting does not influence record
quality.
nt
Select to make a backup of current configuration to a file. (“.CFG”) This file should be saved to a
removable media like floppy disk, so you can once you have the system set correct, any tampering
with settings can be restored to how you had them. The contents of this file can’t be edited it is not
a text file. You need to enter a filename and select a location for the backup file to be stored too.
ell
ige
Select the restore process of a “.CFG” file which was previously made from the backup process.
You need select the location of the file via he standard windows file selection screen.
Int
The slider determines the main thread CPU priority for the DVR software. There are four settings.
“Lowest”, “Normal”, “Highest” and “Real time”.
When “Real-time” position is chosen all procedures of less priority would be suspended until LJDVideo™ system is active. This mode is applicable if the standard CPU loading is not higher than 80%.
Your system will come with this normally set to Highest, as by design a system is a stand alone
DVR. If you choose to use the system for multiple tasks, you can set this to Lowest; this allows
other applications to obtain more priority on processing power of the overall system.
© 2003 Michael J Archer
v1.1
- 15 -
Fir
eL
td
Chapter 2 –Configuration
2.3 Camera Setup
now select the
Icon.
Se
c
uri
ty
&
From the main display, select the configuration Icon
nt
Figure 4
ige
To select a camera to change its setting you need to click camera slider icon or you can click on the
camera boxes, which will be highlighted with a Red border. Once the system is running, you can
quickly just click the camera this way rather than having to remember the number. Note that you can
change and modify multiple camera settings in one go, and save the setting for all at once. You do not
need to change one and save, change another and save, just use the selector to change all you need.
Int
ell
is the camera enabled status, once Green
The icon
camera input is now set to an enabled status.
© 2003 Michael J Archer
v1.1
- 16 -
shows this
Fir
eL
td
Chapter 2 –Configuration
This should now give a picture in the box. Depending on the system you have, i.e. 4 8 12 16 camera
unit, you only need to select up to the amount you have installed. Leave unused cameras un-connected,
otherwise you will see Fault appear on the window and the windows will appear with a Blue
background: As below.
Camera Name
Camera Contrast
Camera Brightness
&
Each camera has a few additional setting which the user is able to modify.
ty
Camera Saturation
uri
The first setting is the Caption. This gives a meaningful name to each camera on the system. And will
be used on both the display for the camera, and also on the Bottom screen camera select Icons.
Se
c
The Contrast, Brightness and Saturation slider, give you the ability to change the image of the camera
input. The Leviathan system works in a way that what you see on the screen is what the system will or
has recorded digitally. This means that we give a true “What you see is what you get”.
This setting set the maximum that a camera would be able to record too. If you want say 1fps for a
camera just set the slider to this value, and this camera will only be recorded at that rate.
nt
This sets the colour of the text around the camera, used when the text information is lost in the picture.
ell
ige
After you have set the camera to the configuration, you are required to save the settings, by clicking the
graphic on the right of the screen, or the tick icon.
Int
If you do not wish to save the settings then you just click the
the main system screen (Figure 2)
© 2003 Michael J Archer
v1.1
- 17 -
.
icon. This will return you back to
Fir
eL
td
Chapter 2 –Configuration
2.4 Video Capture Card
From the main display, select the configuration Icon
Se
c
uri
ty
&
now select the
Figure 5
nt
The Leviathan system comes with Video Capture card/s which each supports four Camera inputs.
So for an 8 camera system, there are two cards and four cards in a 16 camera system.
The Video Capture settings affect the settings for each card in it own right. As with the camera settings
you can select each card, change the settings, and then save these settings for all cards in one go.
ige
To select a different card using the slider setting to change the card number
Use the mouse to move the little marker to the card number you wish to modify the settings for.
Int
ell
Specifies the camera resolution.
[384x288 / 320x240] (Pal / NTSC)
Enables the highest video processing and record compactness. It is highly recommended for
inexpensive cameras with low resolution.
[768x288 / 640x240] (Pal / NTSC)
Video processing and record compactness are high in this resolution. It is suitable for all camera types
including high-resolution category. This is the default, and the only recommended setting.
[768x576 / 640x480] (Pal / NTSC)
This resolution enables the highest picture quality and is mostly favourable for high-resolution camera
types in case of low motion speed. However this mode is processing time mostly consuming and has
side effects while recording fast motion. Unless required only used 768x288 mode.
© 2003 Michael J Archer
v1.1
- 18 -
Fir
eL
td
Chapter 2 –Configuration
Switches the video signal format (PAL / NTSC) set to PAL for UK systems. Should be set to PAL.
Determines video processing thread CPU priority. When “Real-time” position is chosen all procedures
of less priority would be suspended until LJD-Video™ system is active. This mode is applicable if the
standard CPU loading is not higher than 80%. We set to Highest as standard.
uri
ty
&
Specify the number of skipped fields to enable signal stabilization after commutation procedure. This
parameter is valuable when two or more asynchronous cameras are connected to the system. The result
of this skip fields is that the frame rate recorded will decrease, because the system has to ignore a frame
capture to stabilize the picture. Remember you need to adjust this value for all cards, sometimes you
may find a camera has very bad jumping, this we’ve seen and found the input sync from that camera
was found to be faulty. We do suggest that you can move around the camera inputs in the case of
multiple card systems, to try to give the lowest skip fields, resulting in a better frame rate.
Se
c
Switches the hardware video filtering (smoothing). Picture is clearer and sharp when filtering is not
selected but the noise level becomes noticeable as well.
Keep this setting enabled, because it reduces size of recording frame while keeping details legible
enough. If recording of slight differences in small details is required (especially when high optical
zoom is used), one may disable this feature to improve quality (sharpness) of details as much as
possible.
nt
TURBO MODE is a special regime that gives the possibility to record video streams around real-time
speed (25 fps in PAL and 30 fps in NTSC). It is available for a configuration where only one camera is
connected to each capture card/s. If you connect more than one camera you will not be able to select
the TURBO MODE. So it is possible to have four cameras at 25fps with a 16 camera system.
ige
The selection between B&W and Colour cameras is by the Icon
which is B&W and
for
colour.
Each card can be only B&W or Colour, so in groups of four channels or camera inputs can you select
what each input is able to support. If you use black and white cameras, the recording data requirement
is half as much as colour.
Int
ell
So for a four camera system, you can only have all colour or all Black & White cameras.
For a Eight camera system, you can have 100% colour 100% Black & White, or 50 – 50 split
And logically for a 12 and 16 you can mix between either. With the 12 camera system having three
cards, and the 16 camera system having four cards respectively.
© 2003 Michael J Archer
v1.1
- 19 -
Fir
eL
td
Chapter 2 –Configuration
2.5 Motion detection
now select the
Se
c
uri
ty
&
From the main display, select the configuration Icon
Figure 7
ell
ige
nt
The Leviathan DVR is a motion based recording system. This means that only when it detects a change
in a cameras image will it record the data.
Although you may think I need 24hour recording. In the world of computers data and storage are a
premium.
So if you think about this, if a image stays the same from frame to the next, there is no need to store
two copies of the same image, all you need to do is say,” just use the last image as it’s the same”.
This is basically what the Leviathan software does, all be it in a computer data structure.
Additional to this image information storage, the Leviathan only stores information which has changed
from one frame to the next frame. This increases the storage capacity of the system.
There are a few bonuses to this smaller data set or as it is called in the system as VideoDatabase. One
being that playback of imagery is processed quicker. And because of a smaller amount of data required
to rebuild the movement of a frame when you have remote clients, the data sent is much smaller than
would otherwise be needed. So higher frame rates are achieved, with small data streams.
You can think of this much like many of Internet based video streaming system. However the
Leviathan system is totally propriety.
Int
The camera Motion detection setting is used to enable the system to prevent the recording activation by
creating a masked area. The default is no mask is set for any camera.
The mask creation is created using simple mouse drawing of boxes. When you select the Draw the
mouse changes to a box icon
when you place over the camera window.
© 2003 Michael J Archer
v1.1
- 20 -
Set.
•
Cut
Clear
Invert
Fir
eL
td
Chapter 2 –Configuration
Colour
To set a mask click the “Set Mask” button of Mask Editor and mark by means of the mouse
those zones were motion detection is not required.
To remove mask excesses choose “Cut Mask” button and mark zones for motion detection.
To remove the whole mask push on “Clear Mask” button and click on the video frame.
To invert the mask select the “Invert Mask” button.
To change the colour of the mask net use the “Change Mask”
•
•
•
•
&
It is recommended to have a quick test with the editing, just simply click the Set, and draw a box in the
window area. Click an area holding the left mouse button, and dragging the box that it makes. If you
right click and draw this is a short way to the cut and area of the mask, without selecting the Cut Icon.
ty
You will note that only one camera can be shown in the Motion Detection configuration. To change
camera you can select the camera using the bottom screen Icons. C1-C16 or whatever they may be
named too, as the Caption if you recall will be displayed rather than the default C1-C16 names.
uri
Also it’s now worth pointing out that in the configuration, you are able to select back to
Se
c
without the system loosing the information between each section. This in
And back to
effect allows you to modify parameters for a camera, and not commit unless you are happy with the
selection. This does mean you can select a different camera and modify all parameters without the need
to keep saving every camera setting, until you are satisfied with the settings.
“Motion Sensitivity (Y-Level)” slider defines motion detection threshold based on brightness
sensitivity. Threshold exceeding is calculated in every detection grid block (8x8 pixels).
nt
“Motion Zone (Blocks)” slider defines the minimal number of threshold-exceeded blocks to activate
the record.
ige
To assist in the activation the system offers a few indicators, below.
ell
"Highlight" button highlights on the display window the threshold-exceeded blocks. An example is on
the next page.
Int
"Beep" button enables sound notification when motion is detected for convenient configuration.
Lastly this defines recording deactivation delay (in seconds). The time during which the recording
continues after the event has happened.
© 2003 Michael J Archer
v1.1
- 21 -
uri
ty
&
Fir
eL
td
Chapter 2 –Configuration
Figure 8
Se
c
This is an example of an active motion detection camera. (Figure 8)
So you can see that the window area on the camera has been masked out, so for this case the
traffic passing past the window would not trigger the recording. Other good examples are trees,
and if you only want to activate when a door is opened.
nt
If in the case that you want only activation of a small area, the best way to do this is make a
box over the area, and just click the invert.
Int
ell
ige
The Highlight option is set, and what you can see the pink lines created around the person. This
is the area which has been detected as motion.
© 2003 Michael J Archer
v1.1
- 22 -
Fir
eL
td
Chapter 2 –Configuration
2.6 DELTA
now select the
Se
c
uri
ty
&
From the main display, select the configuration Icon
Figure 8
ige
nt
Delta settings, is the setting of each camera, which allows you to modify the quality of the frames
recorded. By carefully choosing an acceptable quality of each image, you maximize the storage
space, and the overall recording period. These settings affect the Stream value on the main display.
ell
“Picture quality” slider specifies video picture quality based on video compression intensity. The
higher the picture quality, the larger the storage space it requires.
Int
"Delta sensitivity" slider determines sensitivity of delta algorithm based on video frame differences.
The lower the sensitivity - higher compression rate is and the square pattern of delta blocks gets more
noticeable.
For delta-compression setting convenience the frame size and average compression rate are displayed.
© 2003 Michael J Archer
v1.1
- 23 -
Fir
eL
td
Chapter 2 –Configuration
“Noise pre-filter” button enables noise pre-filter before delta is being calculated. This option has no
direct influence on picture quality; it is applied to the compression algorithm only.
If recording of changes in very high details of picture is required, disabling this feature will increase
sharpness detection. By default this option is enabled.
“Highlight” button highlights blocks with differences detected (delta).
Int
ell
ige
nt
Se
c
uri
ty
&
“Use compression” button enables delta video compression to be active. You can turn this on and off
to see how much the frame data size would normally be as.
© 2003 Michael J Archer
v1.1
- 24 -
Fir
eL
td
Chapter 2 –Configuration
2.7 Sound
now select the
Se
c
uri
ty
&
From the main display, select the configuration Icon
A Sound card is required to enable sound recording feature. The sound part of the Leviathan range
enables camera recording to be activated on a peak volume.
nt
Pushing the “Sound Recording” button and choosing the codec activates audio recording. At the
present moment only mono mode codec’s are supported by the system. The “Microsoft ADPCM”
codec with different quality settings is recommended.
ige
Sound recording level is shown by the indicator and to adjust it use "Volume control" button. Sound
recording is activated on the threshold basis that can be adjusted by threshold slider, which is below the
indicator. Threshold exceeding may trigger recording of chosen cameras. Cameras are selected from
the "Camera record activation" list.
Int
ell
Sound is not recorded with the image data, and there is currently no easy way for this to be play backed
at the same time.
© 2003 Michael J Archer
v1.1
- 25 -
Fir
eL
td
Chapter 2 –Configuration
2.8 Video Database
now select the
Se
c
uri
ty
&
From the main display, select the configuration Icon
Your system will be provided in a setup condition, ready to go, however if you had the need to reinstall the software from scratch it is worth knowing how this database is created
Close up of database list
Int
ell
ige
nt
The Video Database consists of two file types: VDB and VMB.
• VDB file is used for storage content and is automatically handled by system.
• VMB files stores compressed video information. The system supports any number of VMB
files. User defines their number and sizes.
Creating Video Database would be the first step after starting the system.
In the Database file list the first line is determined for the VDB format file. Its size is handled by the
system and depends on the video frames number in recycle recording loop. The default name and
location is - "c:\VServer\VServer.vdb". You have an option to change file name if another location is
preferred. Following lines refer to VMB files describing video archive location and size. There is one
defaulted VMB file under the name“c:\VServer\VServer.vmb” with 4000MB capacity.
© 2003 Michael J Archer
v1.1
- 26 -
Fir
eL
td
Chapter 2 –Configuration
The reason why the Leviathan systems come with Windows 2000 and Windows XP is that on older
Windows versions 98/95 they have a limit on the filing system of 4GB data file sizes. Because we are
looking at potentially larger files we always use the NTFS filing system, which has no such limits.
So for our system any size is acceptable for the VMB files. All VMB files irrespectively of their
number, size and location are considered by the system as one virtual VMB file. This allows the
effective spanning of the video database across multiple hard drives to be installed into a system.
&
To add new VMB file click on the last VMB file in the list and right click on the mouse button.
You’ll get an option menu as below show.
Se
c
uri
ty
You note the “Remove file from list” is greyed out; this is because you must have at least one VMB
file in the database, before you are able to remove one from the list. So select the “Add new file to list”
option. The following will then show on the database list.
ige
nt
Also you’ll get a popup window with the following information.
ell
This is a prompt to make sure you correct and put the right details about the file you are to add to the
database. Just click the ok button. Now click on the highlight file name box to enable this name and
location to be modified. Now you need to enter a size for the database file you want, to do so you click
in the “File size (MB) box to change, to enable this value to be set.
Int
After you have set the values and the name of the database all you need to do now is click the “create
video database” as below.
© 2003 Michael J Archer
v1.1
- 27 -
Fir
eL
td
Chapter 2 –Configuration
Once you have done this, then you will be prompted with a warning message, the reason is that you
should only initialize a database as a first instance of the software, because any recorded information
will be removed, and all data will be cleared.
&
Click “Yes” or “No” as required.
Se
c
uri
ty
The creation process will take a few seconds, and a window with a status of the creation progress will
be show like below.
ige
nt
Once completed you’ll get a popup box to show the final size of the database.
ell
During the creation process you’ll notice that the status on free space about drive volumes (see below),
will in real time give you an ever decreasing value, to show free space on that drive volume. This gives
a fair indication of how much storage you can fit onto that drive.
Int
We do not recommend you fill your boot drive, normally the C: drive so no space is free. We
recommend leaving a minimum of 1gig of space to allow windows swap file to be dynamic, and spool
space for other system resources.
If you’ve entered a value for the database which is loo large, the system will automatically fill the size
too the largest value it could fit into the drive. It is normally that a few Megs will still be unused.
© 2003 Michael J Archer
v1.1
- 28 -
Add / Remove File Option
Fir
eL
td
Chapter 2 –Configuration
ty
&
You’ll now be able to remove this created data file, as above shows that now when you right click the
name the “Remove file from list” is now no longer greyed out.
uri
Remove File Confirmation
Se
c
When you remove a file, you will get a prompt before you commit to the removal (as below). Please
note that removing a file from the database does NOT remove it from the location it was created from.
To physically remove the file you must use the windows explorer or whatever tool you would normally
use to delete a file with.
ige
nt
The check and Pack option, set the system to do a quick process of the video database set, to verify its
integrity, and repair any oddities that may have occurred. For example if the system was recording, and
during this time a power failure happened, it’s possible that a fragment of data was not correctly
written to the database. The following will appear showing the progress.
Int
ell
After the completion you’ll get a status box with the results of the process activity.
© 2003 Michael J Archer
v1.1
- 29 -
Fir
eL
td
Chapter 2 –Configuration
The “Auto check time:” is a built in system event in which the system will do a quick database scan. It
does not do a pull check and pack which is a separate option. The time can be set in the standard 24
hour clock format. hh:mm. Just click inside the time and you’ll be able to set this value. When the
check is operational, the system will stop the recording process. However this is normally only a few
seconds of time.
VDB Backup is a feature which allows the Video database data to be backed up to an additional
location, this in effect allows for an almost unlimited amount of recording data to be archived.
Se
c
uri
ty
&
Clicking the above option will bring up a further selection of options which are as follows:
Int
ell
ige
nt
Backup to is the drive:\path to where you wish to store the data.
© 2003 Michael J Archer
v1.1
- 30 -
Fir
eL
td
Chapter 2 –Configuration
2.9 Users
now select the
Se
c
uri
ty
&
From the main display, select the configuration Icon
nt
The users section lets you configure the system and remote users. By default an administrator user is
created on the system, which has a blank password. Please note we recommend you change this to a
more meaningful password.
icon, this will bring up the following display
Int
ell
ige
To add users to the system click the
As you see there is a simple set of options which you need to set for each user. The “view camera”
section lets you set which cameras are available to be visible by this user.
© 2003 Michael J Archer
v1.1
- 31 -
Fir
eL
td
Chapter 2 –Configuration
The
icon toggles the ability to view the Video Database. This is an important
setting as this lets you configure the system, so that you know only authorised personnel have the
ability to view historic information. This allows you to comply with the “Data Protection Act”
requirements.
Name: Is where you put a name in, password is of course the user password.
ty
&
When you click the
option, this sets the user to Supervisor status, in that you by
default view all cameras, and of course views the Archive. When you click this option it will show the
user information as below:
Icon.
uri
You can just toggle between the two settings, by re-clicking the
When you are happy with the settings for the user, click the “Ok” or “Cancel” as required.
ige
nt
Se
c
The
Icon brings up the following, which is the same as the add user, but allows the
modification of a current users settings.
Int
ell
To select what user you want to configure click in the “Registered users:” list box show at the top left
of the display window. Below is an example.
Note that you are unable to configure a currently connected user on the system. And trying to modify a
connected user will show you an error window.
© 2003 Michael J Archer
v1.1
- 32 -
Fir
eL
td
Chapter 2 –Configuration
&
A connected user is a user who is connected to the system via the Client software. “Connected users:”
are shown on the top right of the display as below shows an example:
Se
c
uri
ty
icon. This naturally allows the deletion of a configured
The last user option is the
user. As with the configure user, you select the user from the “Registered user” list box. You will be
prompted to confirm a deletion of a user as below shows.
ige
nt
Also as with configure user you are unable to delete a connected user. The following will be displayed
if this is attempted.
this brings up the following dialog box.
Int
ell
The last setting on the Users section is the
By default the DVR software system will auto start. You can change the default user to any registered
user. However we recommend you keep administrator, as this the DVR should be a secure device.
© 2003 Michael J Archer
v1.1
- 33 -
Fir
eL
td
Chapter 2 –Configuration
2.10 Server
now select the
Se
c
uri
ty
&
From the main display, select the configuration Icon
nt
The settings here are for the remote abilities of the DVR system. Remote users fall into two categories.
The first is a Client version of the DVR software; this is covered in chapter 4. The 2nd remote user type
is a web or Internet Browser type of connection.
ige
Firstly the Client server has a status indicator
this is default setting. This means the
remote connections are NOT enabled. Only when the Activate status is disabled are you able to modify
the Server parameters. The standard single click toggles the status, as with all leviathan system settings
the green is show as on/active or selected.
Int
ell
When you click to disable the active status, you are giving a warning as below:
© 2003 Michael J Archer
v1.1
- 34 -
Fir
eL
td
Chapter 2 –Configuration
So the first parameter you can modify for Client remote access is the “Server name:”
This name is used to identify each Server. It will be shown in the Video Client software to distinguish
established connections. The default is “VServer” when only one DVR system is available. There is
no need to change this unless you feel you want to call it something special. e.g. “DVR Server”,
“Liberator”, “Dark star”, “Top banana” etc.
The next parameter is the TCP port number
&
Using the up / down arrows you can change this setting.
The first TCP port number is used for remote operations. The Video Server listens to two TCP ports for
each connection. The software defines the second automatically by adding “1”.
uri
ty
A special mention here about port numbers, we suggest you do not modify this value unless you are
100% sure about what a TCP port number is. For most companies with a LAN network, you must
make sure the IT department knows about these values, and any potential Firewall devices or software
is set to allow or block as required these “Port numbers”. Again under normal use there is no need to
worry about this setting.
Se
c
Defines maximum number of simultaneous users allowed to connect to the Server. This setting stops
too many concurrent connections. We found that even with the largest of installations, only a few users
would be normally allowed to use the remote client connection software.
ige
nt
Defines the regime of transmitting live video stream to remote clients. When it is activated (as below
shows) the picture quality and frame rate are able to be set to permanent basis for all remote
connections. Clicking the sliders allows values to be changed.
In opposite mode each connected client can choose his appropriate settings.
ell
Remote connections are the “Registered users” configured in chapter 2.9. Only one instance of a
single “Registered user” can be connected at a time.
Web Clients
Int
The Video server software has build-in web server for enabling web operation through a HTTP
browser. To have the service up and running correctly you should manually edit the “index.html” file
in “c:\program files\LJD-Video Server\WEB” directory. Please refer the “readme.txt” file placed in
this directory for more information.
The Web service function is controlled from the box as shown next:
© 2003 Michael J Archer
v1.1
- 35 -
Fir
eL
td
Chapter 2 –Configuration
&
The “Active” is the standard toggle icon to enable and disable the service. Again a warning is
presented when you from the Active setting want to disable the service as show below:
ty
WEB Cameras, are the camera which you wish to present to a Browser client. Using the scroll bar, and
the Tick boxes allow you to choose which cameras you wish to enable.
Int
ell
ige
nt
Se
c
uri
The TCP port number for the web server is default of 80. This need not be changed unless you have a
requirement which demands otherwise. All web browsers default to look at this port. The following is
an example of a non standard port. http://myserver.com:100 in this case the web browser would try to
look at port 100. Unless you understand port number we do no recommend you change this value, it
can interfere with other systems especially on a LAN network, again we suggest talking to your IT
department. And also the same rules apply about Firewall hardware and software.
© 2003 Michael J Archer
v1.1
- 36 -
Fir
eL
td
Chapter 2 –Configuration
2.11 About
now select the
Se
c
uri
ty
&
From the main display, select the configuration Icon
Int
ell
ige
nt
This is a stand list of information about the system software version, memory space etc.
© 2003 Michael J Archer
v1.1
- 37 -
Chapter 3
Fir
eL
td
Video Explorer
3.1 Selection
The Video Explorer is where all recorder video activity is available to be interrogated. Firstly when you
look at historic video data you do not affect the systems current recording abilities. The Leviathan
DVR systems are called duplex or triplex whatever you consider correct.
A common thing in most technology industries is to come up with new words to promote a feature
which everyone now seems to offer, but neglect to mention. So just because you are looking at
yesterdays recordings, be this remotely or on the DVR system it will still be recording as per all current
settings.
&
To enter the Video Explorer select the
icon from the main page, see Figure 2 You click the 4th
Icon on the top line. And once you are in the Video Explorer you again have this icon which will be
available as the 2nd Icon on the Top selection of options.
Se
c
uri
ty
This will bring up now a history Calendar window in the middle of the main screen display area.
nt
Once here you have a few choices to make, by default the system remembers the last selection days
which were selected. In the above example you can see it has more than just one day.
ige
Now recorded days which have data available are in the Black bold font, clearly visible in the above
example, and of course where there is nothing recorded you are not able to select this, and these days
are greyed out.
which will select every recording which remains recorded on
So you have the option to
the system, as we mentioned before the oldest recording is the first to be recorded over.
Int
ell
is back one month, and
is
You have the two arrow buttons which select thought the month,
forward one month.
You normally need only select a single day, unless you need to a search over a longer period of time.
To select a single day you just click over the numbered day you wish to look at. If you wish to select
say three days you can use the Shift Click option. What you do is click the first date, and whilst holding
the shift key on the keyboard click on another date, the system will then select all the days between the
two selections. You can also achieve the same by clicking the first day and holding the mouse button
down and moving the pointer to another day, you’ll see the system will automatically select all days
either before or after that first clicked date.
© 2003 Michael J Archer
v1.1
- 38 -
Fir
eL
td
Chapter 3 –Video Explorer
To accept your selection you need to click the
explorer you can of course click the
Icon, if you do not wish to use the
cancel Icon
For convenience the current date is displayed at the bottom of the window, as if you recall the system
does remember the last selection you made, and it can be easy to forget that you are on the wrong
month.
Once you have your explorer selection made the system then retrieves this from storage. You’ll notice
at the top of the display area you’ll get a display like below. Sometimes the data is very small, and
you’ll not even notice this information. However if you use a remote client and are retrieving over a
slow data path, this will be more noticeable.
ige
nt
Se
c
uri
ty
&
Once the data is retrieved, the display will change to something like below.
ell
The main area is pretty much the same as normal viewing, camera positions etc, are all still movable,
and your layouts can all be selected. However now we have a few new options available.
Int
At the top left of screen now the below.
Open Video Save video Save
Search
Database
Fragment Picture Motion
The top right of the display will now the below:
Back
Select Forward Reverse
Calendar
© 2003 Michael J Archer
v1.1
- 39 -
Stop
Play
Run
Fir
eL
td
Chapter 3 –Video Explorer
3.2 Video Fragment
ige
nt
Se
c
uri
ty
&
At far right of the screen will now show the video fragment much like below:
ell
This is a graphical representation of the recorded events.
Int
The very top information as below shows the information about the fragment that is displayed. This
information is dynamic, in that when you move the mouse pointer over the area within the fragment
the information will change to give you a reading at that position.
© 2003 Michael J Archer
v1.1
- 40 -
Fir
eL
td
Chapter 3 –Video Explorer
So what the information tells us this following:
22.11 Is the current date that is 22nd of November (11th)
11:59:59 Is the start time (Or the top of the fragment)
0000 This value shows how many extra days worth of data is available. Our example there is only one
day, so 0 is show.
23:59:59 Is the end time. Or the last bit of video data on the fragment. (The bottom most portion)
The
Icon will take you back one page worth of video data. And also at the bottom
Icon to take you forward one page worth of video data.
&
You have an
Se
c
uri
ty
Now this page worth is the same size as the current selection. So if you have three days selected then
the date will change back three days. Of course if there is no data available, then the system will go
back to the first part. As you’ll see shortly, the size of the display is not limited to any time scale, and
you can have a selection which is of any size, down to minutes or even seconds.
nt
The video fragment data itself (a portion shown above) gives an indicator about the recorded activity.
Firstly in our example there are three columns of information, these are basically the cameras which
are shown on the display area. This means that you are able to use your selection and layouts to look at
only the camera you are interested in. So when you do this the Graphic will dynamically change to
reflect the amount of cameras which are on the main display. Regardless if there is a recorded event it
will just show whatever you select.
ell
ige
In the examples below you’ll notice it just shrinks or expands the selection to fit the same width.
3 Cameras
4 Cameras
8 Cameras
12 Camera
16 Cameras
Int
The colour Green shows that recorded video is present, and Blue shows nothing was recorded, and
lastly Red if there was a fault on the camera. As shown in first example. Note that a camera fault can
be when a camera is not connected to the system, but is enabled and set to record within the software.
© 2003 Michael J Archer
v1.1
- 41 -
Fir
eL
td
Chapter 3 –Video Explorer
Moving the mouse pointer over the video fragment with results in a few changes to the display, firstly
the camera windows on the display area will be selected, shown by the coloured border, and also a
larger border will flash around to show you this is now a new selection. We recommend you just move
the mouse around and you’ll see the effect. Also when you move the mouse below the pointer will give
a “Time hint” like this one
so when you move the mouse around it changes to the
time date of that position. This you’ll gather is an excellent way to find an event at a certain time.
Also the top status of the video fragment will change to a white text, and also give the date/time status
for that position.
uri
ty
&
A quick mention about this highlight and time hint, that you may decide you don’t like this feature.
Bother are enabled by default, and there is of course a way to remove these. Whilst in the video
fragment area use the right click on the mouse. This will bring up the following options.
Int
ell
ige
nt
Se
c
Now you’ll see that “Show Time Hint” is selected. To unselect this, just move to the position and left
click. The same applies to the “Highlight autoselection” and this will stop the border flash when you
move to a different camera on the video fragment. Personally we don’t see this need to be disabled.
The other options will be covered later in this chapter.
© 2003 Michael J Archer
v1.1
- 42 -
Fir
eL
td
Chapter 3 –Video Explorer
3.3 Zoom Time
Now as soon as you left click within the Video fragment, the system will present the cameras with the
video images recorded at that time. Each camera will show at the bottom right of the image the date
and time stamp which is the last recorded image nearest that time. Because it is possible that no data is
recorded exactly at that time the system tries to get the nearest. You’ll notice that each camera may
have a slight different time stamp; because each camera is recorded independently it will show the time
relative to its own recoded information. Lastly if the system can not find a close full frame of data, the
words SYNC will be displayed where the date/time stamp is normally. This is not a problem as the
system will catch up with that camera as soon as information is available.
No because the fragment can be a large segment of information, you will find trying to get to a time a
little tricky. This is where the zoom function comes into play. What you do is when you left click a
fragment you hold down the selection and drag an inverted box to zoom into fragment.
&
When you select a zoom area, the system automatically changes the Fragment status to show the first
selected area on the top line, which is also puts a “>” in from off. And second line then changes to
white and give the time and how many days on from that selection, this can be forward or backwards,
depending on if you select from top – bottom or bottom – top.
ty
As soon as you let go of the mouse, the selection then becomes the entire fragment displayed graphic.
ell
ige
nt
Se
c
uri
Below is a highlight fragment about to be zoomed into. Here we see the selection is from 02nd
November, start time of 05:33:28, and the selected area is 04days from that till 19:19:34
Int
Now as soon as you have zoomed into an area, a few options are now available to the user.
You may recall the following options, which are selected when you right click on the fragment
window.
© 2003 Michael J Archer
v1.1
- 43 -
Fir
eL
td
Chapter 3 –Video Explorer
&
As you now can see, the top option “Back” is now no longer greyed out. Clicking this option will take
the zoomed area back to the original selection, from the instance which you first selected the Video
Explorer.
This “Back” function will now work for every zoom that you do on the video fragment. That means
you can zoom into the fragment as much as you wish down too the point where only seconds are
displayed on the fragment, and the system remember each time the selection you had made. The back
function will recall back every step.
ty
Also now the top right Icons will now have the Back
Icon available, this icon is the same as the
“Back” function on the menu above, and personally I find it quicker to use.
Int
ell
ige
nt
Se
c
uri
Icon becomes available. This allows you
After you have used the Back function, the Forward
to go forward to the previous back video fragment. So this is a perfect way to find a time position
when you are not sure off. Once you have used it becomes very simple and quick to find a time date on
a camera. The back and forward make it simple and very flexible to find events.
© 2003 Michael J Archer
v1.1
- 44 -
Fir
eL
td
Chapter 3 –Video Explorer
3.4 Play Back
Once you have a video segment selected, trying to look at single frame is seems a slow process to get it
at the correct time. So much like a Video recorder, the software has a very simple to use set of
playback tools.
Firstly as soon as you are in the video explorer, you can use the Keyboard Cursor Up, and cursor down
keys to change the current active camera a single frame at a time. Note that because different cameras
are recorded at different times, the other cameras can jump more than one frame, or as you may notice
the times are not all exactly the same. This is because the system is trying to match a time line against
the current active camera. And the system only records when the motion detection is activated. This is
normal and is by design; after all there is no point recording information when nothing has changed. So
in essence you are shown the last recorded frame at each of the other cameras.
&
The same frame forward and back process can be done if you have a “Scroll Wheel” mouse on your
system, by using the scroll mouse button. This is very simple and a quick way to find a frame. And
again makes the keyboard not seem part of the system.
uri
ty
Animation playback is achieved using the very simple set of control Icons at the Top right of the
screen.
Once you use them you’ll see it’s easier than setting your home VCR clock time.
Icon, and the system will start playing through the video segment. The status of
Click the Play
Se
c
playback is indicated as the Icon changed to the standard green background, like this
clicking again will de-activate the playback.
as normal
Note that you still can zoom into the segment and go back and forth; the system will just keep playing
what is the selected video segment. Normally you’ll just stop the playing.
The normal playback tries to playback in real-time as recorded, which is naturally very slow. To speed
Icon. This changes to green.
Again as normal
Icon, the system will pay naturally in reverse. Again green when active
ige
Clicking the
nt
up this playback you need to select the
clicking again will de-activate this.
As soon as you select either play – reverse Icons, the stop Icon will be available to select.
This as you would expect will stop all the playback activity.
Int
ell
You’ll notice on the playback a white line which moves. This it is the marker to the point which is
being played. When this marker reaches the bottom of the segment, the system will either select the
next segment, or start the playback again from the top of the current selection. If you look at the
options menu on the previous page, you’ll see the “Play Loop” at the bottom, this define what the
system will do with the playback. Having a tick against the option the system will re-play the current
segment.
© 2003 Michael J Archer
v1.1
- 45 -
Fir
eL
td
Chapter 3 –Video Explorer
3.5 Save Fragment
Once you have an event which you want to keep as evidence or such. The system has a function which
saves the current Video Fragment selection, and creates this into a small Video Database.
This option is the 2nd Icon on the top of the display
when the system is not doing a Video Playback.
these top left Icons, are only available
ty
&
One selected you are presented with an information box about the video segment to be made.
ige
nt
Se
c
uri
Once selected you are happy and this database is small enough to fit your needs, you click the yes
button. You’ll then be presented with a Save video fragment dialog box:
ell
As you see the file name it automatically generates is made up from the date and time information of
the start of the segment. A more descriptive name can be used here. You’ll notice that the “Save in:” I
have created a “Fragment” Windows Folder which. We suggest you make such a folder for you own
such saved data. This is because the Database it creates is made of three individual files.
The Leviathan system depending on the cameras installed will have approximately 1gig+ of free space
on the C: drive on the system. We recommend you do not keep lots of these saves, because the system
comes with a CD Writer so you can saves these databases onto permanent media.
Int
When you click the Save Option the system will now start to process the data into a Video database.
© 2003 Michael J Archer
v1.1
- 46 -
You’ll notice now the following in the middle of the display area:
And also you’ll have a status line at the top of the display as shown:
Fir
eL
td
Chapter 3 –Video Explorer
&
This shows how the process is doing, with the blue line giving a indication of % done. The value at the
right of this graphic is the remaining time left. This value will change as the system tries to judge as it
processes the information.
uri
ty
You can as shown previous image cancel the save process, by clicking the mouse, or using the ESC
key on the keyboard. If you do a dialog box will be shown:
Se
c
This of course will confirm the cancel of the process. So you select as required.
Int
ell
ige
nt
Once the system has completed the save process and return back to the normal explorer display.
© 2003 Michael J Archer
v1.1
- 47 -
Fir
eL
td
Chapter 3 –Video Explorer
3.6 Open Database
To now open a saved Video Database you only need to select the 1st Icon on the top of the display once
inside the explorer.
uri
ty
&
This will bring up the following dialog box:
Se
c
All you need to do is select the path of the database. This can be from the CD Drive on the system, and
even the floppy drive, assuming the file created is small enough to fit onto a floppy disk.
Once the database has been accepted, the system may present you with the Calendar option, depending
if the database saved covered data across more than one day/month.
Normally you’d not save such large files, and the system will just load the data without any prompts.
nt
You’ll notice at the top status has a change to show this current explorer session is from a database file.
ige
All functions within the explorer will now work. Keep in mind that this database is a complete set of
day / months whatever it contained, so even selecting the Calendar will show information with this
database.
To get back to the normal system database, you’ll need to go back to the normal DVR screen, which
Int
ell
you can do at anytime by clicking the Tick Icon
© 2003 Michael J Archer
v1.1
- 48 -
Fir
eL
td
Chapter 3 –Video Explorer
3.7 Bookmarks
Like most feature rich applications the DVR system looks simple, but does contain as lot of functions
which don’t at first time seem to be present. We feel that once you start to use these you’ll find that it
indeed is very capable.
The part we are interested here is the Bookmarks and like reading a book this computerised version
removes the need for paper to keep writing down times and dates. With this in mind the system has a
very simple to use bookmark system.
nt
Se
c
uri
ty
&
To bring up the book marks, from the Video Explorer playback, right click the mouse over any active
video window and the following popup selection will be displayed.
ige
As you’ll see there is a new selection of nine new options which are not available on the normal DVR
display screen options. Note some may or may not be highlighted, or selectable, this does depend on a
few factors. Each will be dealt with in later sections.
Int
ell
So click “Bookmarks” the following image will appear on the camera display area.
Once the book marks have been selected, they become a floating window which will re-appear if you
re-enter the Video Explorer. By clicking the icon on the bookmark popup
remove from coming up again all the time.
© 2003 Michael J Archer
v1.1
- 49 -
is the only way to
Fir
eL
td
Chapter 3 –Video Explorer
To save a book mark all that you need to do is to set the video fragment to the position you wish to
remember, of course this is done by just clicking the green area which will be shown by a white line.
Then you just need to click one of the Red numbers 1 – 0.
This will then highlight the Green to a light shade as below shows, and dull the Red to show it has
been used.
To restore a book mark you only need to click the Highlight green bookmark number. By just moving
graphic to show you
&
the mouse over the number that has been used you’ll get a
the information where the bookmark was set.
uri
ty
If you select an already used Bookmark the system will prompt you for an overwrite option as below:
Se
c
With the mouse over the Bookmarks window, making sure that the “Bookmarks” text is not grey, as
this needs to be the active window, you can use the right click to bring up a few options as shown
below:
ell
ige
nt
The first option is to remove all bookmarks; the system will prompt you for a confirmation before this
happens as below shows.
Int
The Select fragment option is used for selecting time interval (on graphical scale) between two events
previously saved into bookmarks. This is convenient way for defining and then saving fragments
of video database. The procedure may consist of the following steps:
1.
2.
3.
4.
-
Find the start of event through play of search motion function.
Save it for example into the first bookmark.
Find the end of event through play of search motion function.
Save it for example into the second bookmark.
© 2003 Michael J Archer
v1.1
- 50 -
5.
6.
-
7.
-
Fir
eL
td
Chapter 3 –Video Explorer
Click right button and choose Select Fragment option.
Then point to start of event (Select fragment Start :) in our example this is
the first bookmark.
Point to end of event (Select fragment Stop :) in our example it is the second
bookmark.
Int
ell
ige
nt
Se
c
uri
ty
&
As result on the graphical bar the will be shown the entire event. Then using the “Save video fragment”
function one can easily save exactly defined fragment into file.
© 2003 Michael J Archer
v1.1
- 51 -
Fir
eL
td
Chapter 3 –Video Explorer
3.8 Save Picture
The save picture option is the way to capture a single from any of the displayed camera views. The
system saves the picture in a high quality JPG file. JPG is the only format for single frames. JPG is one
of the most widely accepted formats that exists, and is platform independent. This is you can use the
same file on a multitude of Computer Systems, be this MAC, IBM, SUN, etc.
&
Remember that you can not choose
To invoke the save option you click the 3rd Icon top left.
this any of these top options if you have the playback animation working. All Icons will be a light
shade of grey as below:
Once you click the save icon, the system will indicate you are on save picture mode by making the
Icon a standard shaded of green
ty
Now to save an image of any of the current displayed frames, you move the mouse to any of the
Int
ell
ige
nt
Se
c
uri
cameras displayed. You’ll then notice the system will put a box
at the cursor position, when you
move it around. Now what you do is using the standard left click and drag the box to outline the area
you wish to save. Below is an example of a box:
You’ll see the box is expanded to fit the selected area. All you need to do now is just let go of the
mouse button and the following save dialog box will open:
© 2003 Michael J Archer
v1.1
- 52 -
&
Fir
eL
td
Chapter 3 –Video Explorer
ty
This is similar to most saves in all window type applications. All you need to do here is enter the file
name what you want to call the image. And click the “Save” and the image will be saved.
You may notice the (None) at the right of “Save picture” dialog box, and also at near the top right there
.
uri
is a preview Icon
ige
nt
Se
c
Now take a look at Same “Save Picture” dialog box when a file has been saved to the folder.
Int
ell
to active. And where the (None) use to be
You’ll notice the preview Icon is now highlighted
there is a scaled clip of the image. You can now click the Preview Icon, and the system will bring up a
full scale version of that image. If you had multiple files in the directory by left mouse clicking the
name you can preview any file previously saved. On the next page is a full preview of the image as
above.
Icon is the selected image pixel resolution. In this example the size
You’ll also notice before the
is (288x288). These are the xsize & ysize. Depending on how much you selected dictates this size of
this image saved.
© 2003 Michael J Archer
v1.1
- 53 -
Fir
eL
td
&
Int
ell
ige
nt
Se
c
uri
ty
You’ll notice that when you save an image the systems will put the Camera name mark at the bottom
left of the image, and also the Date and time stamp on the bottom right of this image. You can’t disable
this feature. This is because you can prove that you can re-create the same file as many times as you
wish from the Leviathan system, and that the image is authentic.
It is impossible to edit the System Video Database to change an image because it is not stored in any
format which is understandable by any software.
© 2003 Michael J Archer
v1.1
- 54 -
Fir
eL
td
Chapter 3 –Video Explorer
3.9 Search Motion
Search motion is one of the most powerful functions on the Leviathan system. The ability to search any
recorded motion within an area of any camera thought any section of the video database, makes this a
very powerful tool.
Where as traditionally on a VCR based security tape you’ll need to watch the tapes because most time
lapse systems do not allow searching with visuals. Being the video data on the leviathan is in digital
form, searching thought this take only minutes or seconds to do.
ige
nt
Se
c
uri
ty
&
To do a search you only need to click the search motion Icon,
which is the rightmost icon on
the top left selection.
You can also select the “Search Motion” option from the popup selection menu, which is activated
from right click when mouse is on any video display layout.
As soon as you activate the Search the Icon will change its state to reflect the current setting to the
standard green background
.
ell
As soon as you activate the search, you’ll notice also that the system now brings up a popup floating
windows, which is the search motion window. Will shows the results of a motion search. As shown
on next page.
Int
This window much like all floating windows will stay active on the screen until you click the close
button
at the top right of the window, or if you exit from the Video Explorer section which is of
. The reason for this is of course is you may wish to do
course the tick at the top right of the screen
other functions like save a picture of just keep the results to hand without bookmaking the positions.
By holding a left click on the top portion and moving the mouse, you can re-position this window.
© 2003 Michael J Archer
v1.1
- 55 -
nt
Se
c
uri
ty
&
Fir
eL
td
Chapter 3 –Video Explorer
ige
Now to search for motion you move the mouse to any of the cameras displayed. You’ll then notice the
at the cursor position, when you move it around. This same way as the save
system will put a box
picture option works.
Now what you do is using the standard left click and drag the box to outline the area you wish to
search for motion within that area:
ell
As soon as you have a selected area you just left go of the mouse click, and the system will then start
to search that area.
Int
On the nest page is a perfect example of a search for motion with the results shown. Here what we
have selected is the door frame, so every time the door is detected as open the results are shown.
© 2003 Michael J Archer
v1.1
- 56 -
uri
ty
&
Fir
eL
td
Chapter 3 –Video Explorer
Se
c
You’ll notice the “Search motion” text next to the Search Icon, next to this is the search results graphic
which gives you an indication of how much data to search through. Also notice the fragment time
marker will reflect the search position.
You’ll see how simple it is to find any movement of anything within a camera position.
With most tools there are a few options. And you’ll notice a few of these on the “Search Motion”
nt
time. You can change this value by clicking the up and
popup. Firstly is the
down arrows next to the value. You’ll see 30 is the default. This controls how many seconds of time
will be skipped (i.e. not included in the search results) after a successful finding of an image.
ige
The next setting is the Search sensitivity - defines changes in brightness level while comparing
pictures. With the rightmost value function will catch slightly changes in the brightness level, with the
leftmost value - only significant changes will be considered. Use the mouse to move the sliders position.
at the bottom controls weather when you do a search the searched window is
The
animated as the search carried out. That is to say every frame is displayed as fast as the system is able
ell
to do the search. Turning off the Animation is a matter of click the tick box.
make the search process slight faster.
This will
Int
At anytime during the search you wish to stop the process, you only need to click the left mouse button,
or you can press the ESC key on the keyboard.
Now as soon as you have search results. You’ll notice the
highlighted as
popup.
Icon will be
. This of course will clear the contents of the “Search Motion”
© 2003 Michael J Archer
v1.1
- 57 -
Fir
eL
td
Chapter 3 –Video Explorer
Now when you click any of the images with the results window, the system put the position market on
the video database fragment. Remember this is a while line, and of course the image will be display on
the active layout camera windows. Also the system takes itself off from search mode, and you are back
to normal Video Explorer. Notice that the popup window will not disappear until closed.
Because you may have a variety of results in the Motion popup the system keeps this window available
until you wish to discard it. And of course you may wish to look at all the other results, again just
scroll the scroll bars on the popup window to the frame you want and click the frame, as before the
system will change the video fragment pointer to reflect this position.
You may notice you if had more than one camera on the display, the system will of course open all the
other cameras to the same time line as the select one.
&
Within the “Search Motion” popup if you right click you also get a small menu of options.
ty
The “Clear Search Results” is the same as the Graphic on the main popup windows. And if you
mistakenly do a clear, the “Undo Clear” will become available;
uri
Clicking this will bring back the last results within the “Search window”
nt
Se
c
It is of course possible that doing a search will yield no results. And the system will bring up a window
to let you know.
You just click the Ok to close this window.
Int
ell
ige
The search is very powerful and combined with the simple moving forward and backward single
frames using the mouse, gives a powerfully combination to find quickly an event.
© 2003 Michael J Archer
v1.1
- 58 -
Fir
eL
td
Chapter 3 –Video Explorer
3.10 Pic Tools
Se
c
uri
ty
&
Pic tools are a small set of useful tools to try to give more detail within a frame of video.
To activate the tools you select from the menu which is right click in anywhere in the Layout area.
ell
ige
nt
You’ll see it is just below the “Search Motion”. Once selected you get a floating window much the
same as the “Search Motion” popup it will remain until you close.
Int
These tools will act on the current selected camera view, as we know is the one highlighted with an
outlined coloured border.
The first tool is the “Sharpen” this attempts to give a better edge detail. You can click this twice and
the system will have another go, clicking again will revert to original image.
© 2003 Michael J Archer
v1.1
- 59 -
Fir
eL
td
Chapter 3 –Video Explorer
The “Restore original” will return the image back to its original state when any tool has been applied.
Deinterlace (O) and Deinerlace (E) will show the image as a single field. “O” is the odd, and “E” is
the even field.
Now the system by default only records at a resolution of 768x288. If you recall in Chapter 2.4 you
can set the system to record at 768x576. When this is active these options will allow you to look at
each field recorded for the camera. And the “Merge fields” will bring the image as a single frame.
As we mentioned in Chapter 2.4 unless you have a really requirement for this option we do not set the
system to record at this resolution.
Now the last Pic option is the Zoom function, clicking this will set the status to active, and the Zoom
icon will be outlined in green.
ell
ige
nt
Se
c
uri
ty
&
Now as with both save picture and search functions a box
at the cursor position, will be present,
when you move it around in a camera windows.
Now as normal what you do is using the standard left click and drag the box to outline the area you
wish to zoom into. To show you the results of such option the following two pictures are from this
function.
You see here, how small an area we have selected for the function. It is about on 20th of the image area.
Int
And the results from this as show on next page.
© 2003 Michael J Archer
v1.1
- 60 -
uri
ty
&
Fir
eL
td
Chapter 3 –Video Explorer
Se
c
You’ll notice the Zoom function is now taken off. But you can see the results of the number plate in
this case we are getting a closer look at. Notice that the image is not as blocky as you might expect, it
still has artefacts but generally the image is smooth. The reason is that we use the hardware functions
of the graphics chip inside the Leviathan system to give the best possibly results.
When the zoom window is open, you can still use the Sharpen function. The Restore Original will
return the active camera window back to the previous un-zoomed state.
You may wonder if you can save this zoomed picture, and of course this is possible. All you need to do
nt
is select the “Save Image” Icon
and follow the instructions in Chapter 3.8
Int
ell
ige
If you choose any playback function or move the frame back / forth with the scroll mouse of keyboard,
the zoomed image to revert back to its normal state also.
© 2003 Michael J Archer
v1.1
- 61 -
Chapter 4
4.1 Common Functions
Fir
eL
td
Scheduler
The scheduler functionality supposes to bring a flexibility and user-level customization for recording,
alarming and maintenance capabilities.
User Interface Functions
There are several common things to control the all Scheduler operations.
&
Trigger-button
Dialog-button
ty
This type of a button has two states: enabled and disabled.
The greened out state means enabling parameter or function, which is written on it (i.e. the
greened out button on the left means enabling beep sound).
In the opposite state the background of a button has normal or grey colour and a function or
parameter is disabled (i.e. the same button on the left with disabling beep sound).
Action-button
uri
Brings up another menu or dialog box to enter additional settings (i.e. the button on the left
activates a dialog box to set up custom settings).
Se
c
A button of action type calls some procedures (i.e. the button on the left makes new task).
Greyed out button and fields
Button types and fields can be greyed out when a function or parameter is
unacceptable under certain conditions. This is usually depends on other settings.
Check box
Int
ell
ige
nt
A check box is used to select which of listed items should be connected or related to a
particular procedure or function. A checked out state means enabling an item and unchecked
state means non-used or non-included item (i.e. checked out and unchecked boxes)
© 2003 Michael J Archer
v1.1
- 62 -
Fir
eL
td
Chapter 4 – Scheduler
4.2 The Scheduler Interface
The scheduler functions can be accessed through “Scheduler” item of the right-click
menu (right-click on the main VServer screen) or through the System
, Camera Section.
ty
&
Configuration
uri
The all scheduler operations are based on tasks. Each task from system point of view
is processed independently from the others and do not affect them.
ige
nt
Se
c
The common task options are as follows:
• A task unique name to distinguish one another (i.e. “New Alert”).
• A task status (a check box before the name). Checking out this box enables
a corresponding task for processing. When it is unchecked the system will
ignore it. This is useful option to disable some of the tasks temporarily.
“Activation time” option defines the time schedule for a task. The system
will execute the task in the defined periods only. This setting is available
in two modes: “24x7” and “Custom”.
Int
ell
•
•
“24x7” means that 24 hours a day and 7 days of week this task will be
active.
© 2003 Michael J Archer
v1.1
- 63 -
In the “Custom” mode one can define desired period of time and days
schedule. To have an access to this dialog one should disable at first
“24x7” setting.
ty
&
•
Fir
eL
td
Chapter 4 – Scheduler
uri
To operate on tasks each scheduler dialog has action-buttons. “New” is used to create
new task and “Delete” removes existing one.
Int
ell
ige
nt
Se
c
NOTE:
• The Scheduler interface has no cancel operation, thus any entered
modifications are automatically saved.
© 2003 Michael J Archer
v1.1
- 64 -
Fir
eL
td
Chapter 4 – Scheduler
4.3 The Scheduler Structure
The Scheduler structure can be divided by its functions, as follows:
Se
c
uri
ty
&
Alerts: Notifies operator/s or remote users about motion detection events arising in
one or more cameras.
Int
ell
ige
nt
The alert tasks have the following parameters:
• Activation time schedule.
• The list of cameras, which trigger this alarm event when motion is detected.
• “Zoom in” setting gives possibility to maximize an alarming camera on the
whole screen.
• “Highlight” feature intensifies an alarming camera by colour border in case it
is displayed on the screen or by changing colour of a corresponding camerastate button.
• In the Sound options one can choose “Beep” or custom sound file (“Custom”
dialog-button) that will be sound if motion is detected. To have an access to
the “Custom” sound file dialog box one should disable the “Beep” option at
first.
• The “Send E-mail” list gives possibilities to send e-mail or SMS messages
(through the e-mail) to required recipients. To enable the sending e-mail one
should check out corresponding boxes. This list shows the preliminary entered
in the “Address Book” recipients only. Adding new recipients is described
below in the “Address Book” section.
© 2003 Michael J Archer
v1.1
- 65 -
Fir
eL
td
Chapter 4 – Scheduler
Int
ell
ige
nt
Se
c
uri
ty
&
The “Zoom in”, “Highlight”, Sound and “Send E-mail” options have so called
guard time to limit repeated notifications of continuously emergent alerts. These
values define a time interval in seconds in which the only alert notification is
allowed. The guard time values are applied to each task autonomously. One can
adjust them in the “Options” section of the Scheduler interface.
NOTE:
• An alert is enabled only when its status box is checked out.
© 2003 Michael J Archer
v1.1
- 66 -
Fir
eL
td
Chapter 4 – Scheduler
4.4 Recording
Se
c
uri
ty
&
These functions give possibility to schedule recording of cameras.
Int
ell
ige
nt
The recording tasks have the following parameters:
• Activation time schedule.
• The list of cameras, for which the recording task are applied.
• “Enabled” and “Disabled” trigger-button defines mode of operation.
“Enabled” button means switching on recording on predetermined in the
“Activation Time” period and switching it off for rest of time. “Disabled”
intends the reverse functionality.
One should take into account that the recording mode of the Video Server is
switched on by the “Start Recording” button in the main menu. If no one
recording task is defined, the system will record all cameras by default.
Therefore there is no need to create tasks, which toggle on recording in every
camera.
The main purpose of the recording tasks can be considered disabling recording
of particular cameras in a desired interval of time. “Enabled” and “Disabled”
functions make easier this functionality.
NOTES:
• While system is in non-recording state, any defined recording task will bring
no results.
• If there are several overlapped tasks for same cameras with opposite actions,
the task with DISABLED recording will have precedence.
A recording task is enabled when its status box is checked out only.
© 2003 Michael J Archer
v1.1
- 67 -
Fir
eL
td
Chapter 4 – Scheduler
4.5 Address Book
Se
c
uri
ty
&
The Address Book provides a place to store e-mail addresses and settings for easy
access by the Scheduler interface.
Int
ell
ige
nt
Although the entries in the address book are not the scheduling tasks, the common
task options such as Name, Status, Activation Time and action-buttons are also applied
to them.
In the context of the Address Book the Status and Activation Time options enable or
disable using a corresponding entry throughout the all the Scheduler tasks, despite
that the tasks themselves can have links to it.
Alongside with the Name option the Address Book has the Description field to
provide more convenient information about registered recipients.
“E-Mail address” field allows entering an e-mail address or addresses of chosen
recipients. To direct messages to the multiple recipients by the only entry, one should
insert the e-mail names by separating them with semicolon (;). (e.g.:
[email protected]; [email protected] )
“Attach pictures” parameter defines the size of camera images that will be attached to
the e-mail message. “Large” option corresponds to original picture size while
“Small” one is quarter of it. If no one is chosen the messages will contain only a
notification. “Attach pictures” parameter is applied to the alerts task only and
consequentially will contain pictures of cameras in which motion has been detected.
© 2003 Michael J Archer
v1.1
- 68 -
Fir
eL
td
Chapter 4 – Scheduler
SMS (Short Message Service) is supported through SMTP e-mail only. To provide
SMS support the Mobile Service Provider should have the SMTP e-mail (Email-toSMS) gateway implemented. From the VServer point of view SMS messages are
ordinary e-mail messages that are directed to SMS gateway. For example the
common syntax of the e-mail address of SMS message is as follows:
[email protected] where xxxxxxxx is a mobile phone number and sms.co.za – the
registered domain name of a Mobile Service Provider gateway.
Int
ell
ige
nt
Se
c
uri
ty
&
NOTE:
• The e-mail notifications operate only when SMTP server setting, which can be
found in the “Option” section described below, is turned on.
© 2003 Michael J Archer
v1.1
- 69 -
Fir
eL
td
Chapter 4 – Scheduler
4.6 System Events
Se
c
uri
ty
&
Using the Systems Events one can receive information about operation,
problems and system security events.
nt
The System Event tasks have the following parameters:
• Activation time schedule
• The list of the “system events” to monitor
• The system events are as follows:
ige
Start Up / Shut Down:
Start/Stop Record:
Int
ell
User Connected / Disconnected:
Software malfunction:
Check VDB results:
Warn about every starting up and shutting down of the
VServer application. These events arise by operator
Intervention as well unexpected restarting or resetting
of whole system.
Inform about changes in the recording state that are
happened by any condition.
Notify about audited security access of remote users.
Send information about a software error if any.
Transmit result of checking the Video Database, which
is contains recorded video information.
© 2003 Michael J Archer
v1.1
- 70 -
Fir
eL
td
Chapter 4 – Scheduler
•
Required recipients whom the system events should be delivered are listed in
the “Send E-Mail” list. To enable the sending e-mail one should check out
corresponding boxes. This list shows preliminary entered in the “Address
Book” recipients only. Adding new recipients is described in the “Address
Book” section.
Int
ell
ige
nt
Se
c
uri
ty
&
NOTES:
• A System Event task is enabled when its status box is checked out only.
• All of above events are also recorded in the system log and can be found in the
“VServer.log” file, which is placed in the VServer installation directory.
© 2003 Michael J Archer
v1.1
- 71 -
Fir
eL
td
Chapter 4 – Scheduler
4.7 Options
Se
c
uri
ty
&
The Options section contains various Scheduler settings.
•
nt
•
Int
ell
ige
•
•
•
“SMTP server” specifies registered domain name of SMTP server for
outgoing e-mail messages. One can get this information from ISP (Internet
service Provider) or LAN administrator.
“Sender” specifies address that should be used as sender’s e-mail address for
outgoing messages. The e-mail address must be in the standard email format
name@domain
“Active” trigger-button turns on the e-mail service for all Scheduler tasks.
When one pushes it the system will check accessibility of SMTP service of a
given host. If the service is available the button will have been greened out,
otherwise the error message will appear. While the e-mail service is activated
the “SMTP server” and “Sender” fields are greyed out and unavailable. To
change these settings one should turn off the active service at first.
“SMTP log” dialog-button provides error reporting on e-mail operations.
“Alert guard time” values are used to limit repeated notifications of
continuously emergent tasks. These values define a time interval in seconds in
which the only notification is allowed. The “Zoom in”, “Highlight” and
“Sound” values are relevant to the Alert tasks only, while “Send E-mail”
interval is applied to all kind of tasks, which have an e-mail sending option.
The guard time intervals are applied to each existing task autonomously and
have no correlation between each other.
© 2003 Michael J Archer
v1.1
- 72 -
Fir
eL
td
Chapter 4 – Scheduler
Int
ell
ige
nt
Se
c
uri
ty
&
NOTE:
• One should keep in mind that significantly decreasing the E-Mail guard time
and/or creating too many tasks with e-mail notification will cause increasing
outgoing SMTP traffic that negatively affect on a network performance. Also
some ISPs (Internet Service Providers) consider too frequent e-mail sending as
spam and can deny access to the SMTP service.
© 2003 Michael J Archer
v1.1
- 73 -
Chapter 5
Fir
eL
td
Remote Client
5.1 Overview
The remote client is an application with allows connection to the Server DVR system.
The system is based on a user / password entry and only operates only over a TCP/IP
network. The users and password settings are covered in section 2.9
The remote application has a few features with are helpful in monitoring and viewing your
system from a remote station. The software almost behaves like looking at the server directly,
with the look and feel the same. It provides the following features:
ty
&
View of all configured cameras:
Remote recording of cameras to local storage:
Ability to view the video calendar (depending on user name security)
Configure own display and layout settings.
Unique On-top display monitor.
Ability to run more than one instance, for multiple site viewing.
uri
In an ideal world you would always use the remote to monitor and extract data, as your DVR
System should be in a safe secure location.
Se
c
The minimum requirements to connect remotely are a data link between the Server DVR and
the Client software. This can be a LAN / Wan / Internet connection. As long as you can talk
between both machines over an IP network, then you will be able to connect to the Server
unit.
Int
ell
ige
nt
The IP number which you used to connect to the server unit is a value which the user must
setup firstly.
If you are using broadband connections like ADSL then we recommend you have a Fixed IP
number for your DVR server unit side, this is because if you are remotely connecting you
need to know this number, and of course if this changes then you will not be able to talk to
your DVR unit. Fixed IP’s are dealt with by your Broadband connection Provider.
LAN and Wan connections in a corporate or small business setup should seek advice from
your IT department, and they will assist in the information.
Also connection across a firewall setup or within a DMZ requires ports to be opened; again
we suggest seeking advice from your IT Manager / IT Department / Networking operations
section.
© 2003 Michael J Archer
v1.1
- 74 -
5.2 Installing
Fir
eL
td
Chapter 5 – Remote Client
Firstly to Install the LJD Client software, which is able to run on Windows 9x, 2000 and XP, You
look on the CD which accompanies the UNIT. All current versions are also available on the
website. www.digitalvideos.co.uk
The file name on the CD is currently called “vclient_4_1_11_84.exe”
&
To install click this file name from the windows explorer, and follow the prompts, which will be a
standard Next, Next, and a Yes answer, the install is totally automatic, and will just end. A shortcut
will be made to the desktop to show this software as shown below. Depending on your windows
background the colour may be different.
ige
nt
Se
c
uri
ty
The standard double click on this icon will invoke the client software.
ell
We do not put any restriction on the client software, and are more than happy that is can be copied
as part of evidence or installed at multiple locations. The system allows for more than one remote
connection at a time.
Int
We also suggest that you don’t let just anybody have copies of the client, as of course this
eliminates the potential of someone trying to guess passwords and look at your DVR unit.
© 2003 Michael J Archer
v1.1
- 75 -
Fir
eL
td
Chapter 5 – Remote Client
5.3 LAN Connection
Requirements are a Cat5 LAN cable, which the connector is at the rear of the unit. See Chapter 1.2
for diagram.
If you system was pre-configured with an IP then you must talk to your system administrator who
will be able to assist in setting the IP of the DVR system, or assist you in the IP number information
which is correct for your LAN enjoinment.
uri
ty
&
We don’t recommend the DVR system to be part of a DHCP unless this is a set for a fixed IP value.
We suggest talking to your IT Manager to assist in this information if you are unsure of these
numbers.
Clicking the Client software will bring up the software, and the middle of the screen will have a
connection box as shown below, enter the number as show in graphic. 192.168.0.1 Which is the
default value of the DVR Server unit.
nt
Se
c
Click the “Connect”, and the following box will be extended to show additional information.
ige
The name of the Selected Server of your unit/s will be show, the default name is “VServer”, and
you’ll need to enter the “Name” and “Password” which was configured on the Server Software side.
This name is set in the Server settings see Chapter 2.10 we recommend you read this section.
Note: name and password are case sensitive.
ell
The “administrator” user password has a default blank password. We recommend this be changed.
Click “Log On” and the system should connect you to this unit.
Int
If you have errors trying to connect on the first connection screen, make sure that the Server
configuration has the Enabled status on the Server Software configuration page. See Chapter 10.2
© 2003 Michael J Archer
v1.1
- 76 -
5.4 Modem / ISDN
Fir
eL
td
Chapter 5 – Remote Client
To talk to this unit via a modem or ISDN, the following steps will need to be followed.
1. Create a Dial Up connection to talk to the Server Unit
2. Install and run the Client
Because the recommended way to talk to the Server Unit is via a LAN / High Speed link, modems
are not the most flexible way to transmit video information; however it still is possible, with the only
limitation is slow frames of video, and the delay of previewing previous events. We strongly
recommend the use of ADSL or Broadband, which give better performance.
&
Users must be familiar with the use of creating a dial up connection, as this is done in the same
way which you would create one for say access to your Internet provider.
The use of Windows 95/98/ME, Windows 2000 Professional, Windows XP Home, and Windows
XP Professional have slight different dialog boxes for make a new connection, with windows XP
having a direct Wizard to do this.
uri
ty
All that you normally require to know is the phone number where the Server unit is connected too.
And that you need to talk using TCP/IP and have the “Client for Microsoft” as part of the
connection.
The user name to log onto this connection has been set to “remote”. And a password of
“remoteljd”
And that when you need to Specify Protocol’s, only TCP/IP is all that needs to be enabled. The
server will auto assign the IP to the Client connection, so leave this to default settings.
Se
c
To talk to the DVR Server box, you firstly make a connection to this via the Dial – Up – Network
which has been created. And after this connection is make you be told that it is connected. And
now you can run the Client shortcut as show on in chapter 5.3
Int
ell
ige
nt
If your system was a pre-configured this unit, there is a difference in the IP for a Modem
connection. This number which will need to be entered in the Client application is 192.168.0.2
© 2003 Michael J Archer
v1.1
- 77 -


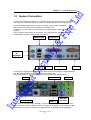
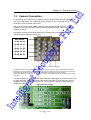


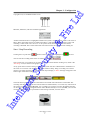
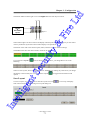
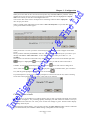


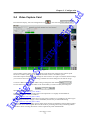


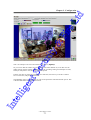
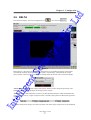


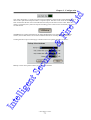

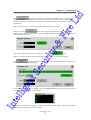
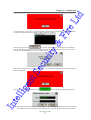


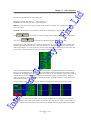

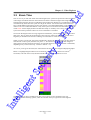
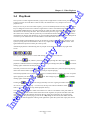


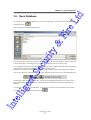


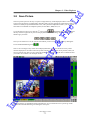


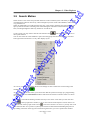
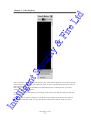
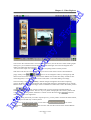
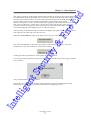

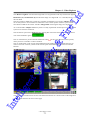
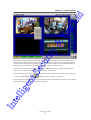


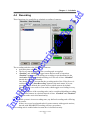


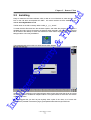


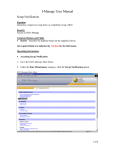


![[MANUAL] GuardNVR Installation Manual 4.4.0.0](http://vs1.manualzilla.com/store/data/005799040_1-22ffd5d438f0b0c95843f8ff9431bc2d-150x150.png)