1
Normfall Manager 4.0
Copyright by Normfall GmbH 2009
2
Normfall Manager 4.0
Contents
9
I Overview
12
II Preparation
................................................................................................................................... 12
1 Introduction
How Normfall Manager
.........................................................................................................................................................
4.0 Can Support You
Adapted to the .........................................................................................................................................................
Human Working Method
Structuring Complex
.........................................................................................................................................................
Subjects with Normfall Manager
Managing Extensive
.........................................................................................................................................................
Quantities of Information
Creating a Knowledge
.........................................................................................................................................................
Management System
For Whom Has.........................................................................................................................................................
Normfall Manager 4.0 Been Developed?
12
12
13
14
15
15
Overview
15
2 Function...................................................................................................................................
Advantages .........................................................................................................................................................
Functionality .........................................................................................................................................................
Highlights
.........................................................................................................................................................
Improvements .........................................................................................................................................................
16
16
17
18
Information Management
19
3 Normfall ...................................................................................................................................
Digital Files and
.........................................................................................................................................................
Databases
Paper Documents
.........................................................................................................................................................
Scanning..................................................................................................................................................
Optical Character
..................................................................................................................................................
Recognition
19
19
20
20
................................................................................................................................... 20
4 Getting Started
System Requirements
.........................................................................................................................................................
Installation Process
.........................................................................................................................................................
and Update
Downloading
..................................................................................................................................................
from the Internet
Installing ..................................................................................................................................................
from a CD
Installation
..................................................................................................................................................
Updating ..................................................................................................................................................
Normfall Manager 3
Current Updates
..................................................................................................................................................
Deinstallation
..................................................................................................................................................
Further Required
..................................................................................................................................................
Components
Activating your.........................................................................................................................................................
License
Importing Existing
.........................................................................................................................................................
Folder Structures
20
21
21
22
22
22
23
23
24
24
26
29
III Introduction
...................................................................................................................................
of the Application Window
29
1 The Structure
Structure View.........................................................................................................................................................
List View
.........................................................................................................................................................
Tabs in the
..................................................................................................................................................
List View
Sorting Lists
..................................................................................................................................................
Selecting..................................................................................................................................................
Several Reference Rows or Structure Nodes
Showing ..................................................................................................................................................
and Hiding the List View
Detail View
.........................................................................................................................................................
30
30
30
33
33
34
34
...................................................................................................................................
Concepts of the Normfall Software
35
2 The Basic
Normfall Manager
.........................................................................................................................................................
4.0
The Project
.........................................................................................................................................................
The Structure .........................................................................................................................................................
Reference List .........................................................................................................................................................
The Project Folder
.........................................................................................................................................................
The Root Folder
.........................................................................................................................................................
35
35
35
36
36
36
© 2008 Normfall GmbH
Normfall Manager 4.0
Contents
3
3 Tutorial ................................................................................................................................... 36
Creating a New.........................................................................................................................................................
Project
Creating and Designing
.........................................................................................................................................................
the Structure
Inserting Documents
.........................................................................................................................................................
into the Structure
Searching Attached
.........................................................................................................................................................
Documents
IV User Guide
37
39
41
44
49
New Projects
49
1 Creating ...................................................................................................................................
................................................................................................................................... 52
2 Special Folders
Folders in the File
.........................................................................................................................................................
System
Project Folder
..................................................................................................................................................
Auto Folder
..................................................................................................................................................
Inbox Folder
..................................................................................................................................................
Export Folder
..................................................................................................................................................
Backup Folder
..................................................................................................................................................
Maximum..................................................................................................................................................
Length of Filenames
Folders in Microsoft
.........................................................................................................................................................
Outlook
Normfall ..................................................................................................................................................
Normfall Transfer
..................................................................................................................................................
52
52
53
54
55
55
55
56
56
56
...................................................................................................................................
Attaching Files
57
3 Saving and
Storing Files .........................................................................................................................................................
Manual Storage
..................................................................................................................................................
Automatic..................................................................................................................................................
Storage
Attaching Files.........................................................................................................................................................
Attachment
..................................................................................................................................................
Functions within the Normfall Manager Window
Commands
...........................................................................................................................................
Found in Menus and Toolbars
Commands
...........................................................................................................................................
Found in the Tabs
Attachment
..................................................................................................................................................
Functions outside of Normfall Manager
The Normfall
...........................................................................................................................................
Button
Plug-ins for
...........................................................................................................................................
Attaching Documents (to a Specific Target)
Activating
......................................................................................................................................
and Deactivating Plug-ins
Commands
......................................................................................................................................
in the Plug-ins
Plug-in for
......................................................................................................................................
Microsoft Outlook
Moving Linked
......................................................................................................................................
Outlook Elements
Plug-in for
......................................................................................................................................
Microsoft Word
Plug-in for
......................................................................................................................................
Microsoft Excel
Plug-in for
......................................................................................................................................
Microsoft PowerPoint
Plug-in for
......................................................................................................................................
Microsoft Internet Explorer
Plug-in for
......................................................................................................................................
Adobe Acrobat
Attaching......................................................................................................................................
Documents from Windows Explorer
The Attach
..................................................................................................................................................
Box
Attaching..................................................................................................................................................
from External Systems
Juris Documents
...........................................................................................................................................
(for Users based in Germany)
Saving Juris
......................................................................................................................................
Access Data in Normfall Manager
Attaching......................................................................................................................................
with Internet Explorer
Attaching......................................................................................................................................
with other Browsers
Attach URL
...........................................................................................................................................
Editing Attached
.........................................................................................................................................................
Documents
57
57
58
58
59
59
61
61
61
62
63
64
65
67
67
70
72
72
73
74
75
78
79
79
79
80
81
81
...................................................................................................................................
Structured Text Documents
81
4 Converting
Creating a Normfall
.........................................................................................................................................................
Structure from a Word Document
Creating a Document
.........................................................................................................................................................
out of a Normfall Structure
81
84
................................................................................................................................... 88
5 Text Editing
Paste Options of
.........................................................................................................................................................
the Text Editor
89
...................................................................................................................................
Copy Operations
90
6 Move and
Attaching Files.........................................................................................................................................................
by Pulling onto a Normfall Project with the Mouse
Drag & Drop in.........................................................................................................................................................
a Normfall Project
© 2008 Normfall GmbH
91
91
4
Normfall Manager 4.0
Inserting Contents
.........................................................................................................................................................
with "Copy & Paste"
Paste Options .........................................................................................................................................................
Paste Options
..................................................................................................................................................
of the Structure View
Paste Options
..................................................................................................................................................
of the List View
92
92
93
94
...................................................................................................................................
Functions
96
7 Further Structuring
Converting Rows
.........................................................................................................................................................
Shared Content.........................................................................................................................................................
Locations
Shortcuts
.........................................................................................................................................................
Hyperlinks
.........................................................................................................................................................
Node Types .........................................................................................................................................................
96
97
97
98
99
...................................................................................................................................
and Finding
101
8 Searching
Find in Project.........................................................................................................................................................
Find in Text .........................................................................................................................................................
Show Shared .........................................................................................................................................................
Content Locations
Manage Document
.........................................................................................................................................................
101
102
103
103
...................................................................................................................................
Monitors
104
9 Using Two
Together on a Network
106
10 Working...................................................................................................................................
Copies
107
11 Backup...................................................................................................................................
...................................................................................................................................
Server
107
12 Database
Administration
.........................................................................................................................................................
of a Database Server
SQL Server
..................................................................................................................................................
FAQ
Working with .........................................................................................................................................................
a Database Server
108
111
112
...................................................................................................................................
Module
114
13 The Relation
Overview
.........................................................................................................................................................
Setting up the.........................................................................................................................................................
Relation Module
The Structure.........................................................................................................................................................
of the Application Window in the Relation Module
The Relation
..................................................................................................................................................
Tab
Inserting Documents
.........................................................................................................................................................
and assigning them to Tracks
The Attach Box
.........................................................................................................................................................
in the Relation Module
Commenting Contents
.........................................................................................................................................................
Node Commentary
..................................................................................................................................................
Track Commentary
..................................................................................................................................................
Reference
..................................................................................................................................................
Commentary
Free Commentary
..................................................................................................................................................
115
116
116
117
118
119
120
120
120
121
122
124
V Reference
...................................................................................................................................
Overview
124
1 Command
Functions in the
.........................................................................................................................................................
File Menu
New Project
..................................................................................................................................................
New from
..................................................................................................................................................
Word
New from
..................................................................................................................................................
Folder Structure
Open Project
..................................................................................................................................................
Open Read-only
..................................................................................................................................................
Connect..................................................................................................................................................
to Server
Reload Structure
..................................................................................................................................................
View
Open Backup
..................................................................................................................................................
Copy
Save as..................................................................................................................................................
Close ..................................................................................................................................................
Print Current
..................................................................................................................................................
Text
Convert ..................................................................................................................................................
to Document
Properties
..................................................................................................................................................
Opening..................................................................................................................................................
Recent Projects
Exit
..................................................................................................................................................
Functions in the
.........................................................................................................................................................
Edit Menu
History Back
..................................................................................................................................................
History Forward
..................................................................................................................................................
124
124
124
124
124
125
125
125
125
125
125
126
126
126
128
129
129
129
129
© 2008 Normfall GmbH
Normfall Manager 4.0
Contents
Undo ..................................................................................................................................................
Redo ..................................................................................................................................................
Undo (Text)
..................................................................................................................................................
Redo (Text)
..................................................................................................................................................
Cut
..................................................................................................................................................
Copy ..................................................................................................................................................
Paste ..................................................................................................................................................
Select All
..................................................................................................................................................
Rename..................................................................................................................................................
Find in Text
..................................................................................................................................................
Functions in the
.........................................................................................................................................................
Structure Menu
Find in Project
..................................................................................................................................................
Find in Selected
..................................................................................................................................................
Branch
Up
..................................................................................................................................................
Down ..................................................................................................................................................
Sort
..................................................................................................................................................
Change ..................................................................................................................................................
Type
Delete Branch(es)
..................................................................................................................................................
Convert ..................................................................................................................................................
to Row
New Node
..................................................................................................................................................
New Subnode
..................................................................................................................................................
Insert from
..................................................................................................................................................
Microsoft Word
Functions in the
.........................................................................................................................................................
List Menu
View ..................................................................................................................................................
New Annotation
..................................................................................................................................................
Delete Entry/Entries
..................................................................................................................................................
Convert ..................................................................................................................................................
to Node
Show Shortcut
..................................................................................................................................................
Target
View Attached
..................................................................................................................................................
Document
Print File..................................................................................................................................................
Show Original
..................................................................................................................................................
Windows
..................................................................................................................................................
Explorer
Document
..................................................................................................................................................
References
Export Document(s)
..................................................................................................................................................
ZIP
..................................................................................................................................................
Send To..................................................................................................................................................
Attach Box
..................................................................................................................................................
View Juris
..................................................................................................................................................
Database
Attachment
..................................................................................................................................................
Launch ..................................................................................................................................................
Normfall PDF Editor
Functions in the
.........................................................................................................................................................
Tools Menu
Set/Change
..................................................................................................................................................
Password
Plug-In Installer
..................................................................................................................................................
Settings..................................................................................................................................................
for other Applications
Manage..................................................................................................................................................
Database Server
User List..................................................................................................................................................
File Maintenance
..................................................................................................................................................
Editor Formatting
..................................................................................................................................................
Options
Options ..................................................................................................................................................
Folders ...........................................................................................................................................
Language
...........................................................................................................................................
Prompts...........................................................................................................................................
Juris
...........................................................................................................................................
Attach Settings
...........................................................................................................................................
Database
...........................................................................................................................................
Server
Other ...........................................................................................................................................
Current Project
...........................................................................................................................................
New Projects
...........................................................................................................................................
Functions in the
.........................................................................................................................................................
Help Menu
© 2008 Normfall GmbH
5
129
129
129
130
130
130
130
131
131
131
131
132
132
132
132
132
133
133
133
133
133
134
134
134
134
134
134
135
135
135
135
135
136
136
136
137
137
137
137
138
138
138
139
139
140
140
140
140
141
142
143
143
146
147
148
149
151
152
152
6
Normfall Manager 4.0
View Help
..................................................................................................................................................
Normfall ...........................................................................................................................................
Manager 4.0 User Manual
Check for
..................................................................................................................................................
Update
License ..................................................................................................................................................
Structure
..................................................................................................................................................
License
Info on Software
..................................................................................................................................................
Special Commands
.........................................................................................................................................................
of the Three Views
Special ..................................................................................................................................................
Functions in the Main Tool Bar
Special ..................................................................................................................................................
Functions in the Structure View
Special ..................................................................................................................................................
Functions in the List View
Attach ...........................................................................................................................................
Folder Up
...........................................................................................................................................
Rename...........................................................................................................................................
Delete File
...........................................................................................................................................
and all References
Move File
...........................................................................................................................................
Moving Files
...........................................................................................................................................
within the Project Folder
Delete ...........................................................................................................................................
Remove ...........................................................................................................................................
from Recent Docs
Attach Copy
...........................................................................................................................................
Locate ...........................................................................................................................................
Remove ...........................................................................................................................................
all
Show Shared
...........................................................................................................................................
Content Locations
Special ..................................................................................................................................................
Commands of the Detail View
Navigation .........................................................................................................................................................
152
152
153
153
153
153
153
154
154
155
155
155
155
155
156
156
156
156
156
157
157
157
157
160
...................................................................................................................................
Tables
161
2 Key Combination
General Key Combinations
.........................................................................................................................................................
Key Combinations
.........................................................................................................................................................
in the Structure View
Key Combinations
.........................................................................................................................................................
in the List View
Key Combinations
.........................................................................................................................................................
in the Detail View
Combinations.........................................................................................................................................................
for Keyboard and Mouse Actions
161
162
163
165
165
...................................................................................................................................
of Use
166
3 The Basics
Elements of the
.........................................................................................................................................................
User Interface
Button ..................................................................................................................................................
Check Box
..................................................................................................................................................
Command
..................................................................................................................................................
Context ..................................................................................................................................................
Command Bar
Context ..................................................................................................................................................
Menu
Dialog Box
..................................................................................................................................................
Drop-down
..................................................................................................................................................
List
Icon
..................................................................................................................................................
Menu ..................................................................................................................................................
Menu Bar
..................................................................................................................................................
(Main Menu)
Normfall..................................................................................................................................................
Button
Radio Button
..................................................................................................................................................
Row Selection
..................................................................................................................................................
Box
Scroll Bar
..................................................................................................................................................
Separator
..................................................................................................................................................
Switch ..................................................................................................................................................
Tab
..................................................................................................................................................
Text Box..................................................................................................................................................
Toolbar ..................................................................................................................................................
Tree Structure
..................................................................................................................................................
Window..................................................................................................................................................
Title Bar
Working with .........................................................................................................................................................
the Mouse
Working with .........................................................................................................................................................
the Keyboard
The Clipboard.........................................................................................................................................................
VI Appendix
166
166
166
167
167
167
168
168
169
169
169
170
170
170
171
171
172
172
172
172
173
173
173
174
176
178
© 2008 Normfall GmbH
Normfall Manager 4.0
Contents
7
...................................................................................................................................
- Problems and their Solutions
178
1 Troubleshooting
Pasting Text in
.........................................................................................................................................................
the Text Editor
Different Acrobat
.........................................................................................................................................................
Versions
2 FAQ
................................................................................................................................... 179
Access Conflicts
.........................................................................................................................................................
with Several Users
Error Messages
.........................................................................................................................................................
© 2008 Normfall GmbH
178
178
179
180
1
Overview
Overview
1
Overview
Welcome to Normfall Manager 4.0. By purchasing this program
you have acquired an individual tool which supports information
management for an array of sophisticated activities.
This manual provides you with information concerning all
functions provided by Normfall Manager.
If you wish to obtain help concerning individual
functions while working with Normfall Manager, move
the mouse pointer to the corresponding buttons or
respective commands and then press the function key
F1. The corresponding help section will then open in
the help window.
For further information on the help function, please refer to the
section User Guide 152 .
The structure of the manual
This manual is divided into the following main sections:
Preparation 12 : Information required for using the software as
well as the guide to getting started 20 (installation, activation,
import of existing folder structures).
Introduction
software.
29
: Familiarization with the basic concepts of the
User Guide 49 : A thematically structured presentation of the most
important functions of the software.
Reference 124 : A detailed explanation of the function of each
command as well as the basic concepts involved in the use of the
command.
User types
Computer novices: We recommend you to work through the
tutorial 36 in the introduction as well as the basic principles of use
166 in the Reference section.
Power user: We recommend that you read the function overview
15
and skim over the introduction 29 including the tutorial 36 .
You should define which topics in the user guide 49 are
interesting for you. You can experiment with the software and
view topics from the Reference 124 section by invoking the
context-sensitive help file concerning the selected menu
commands by means of F1.
Administrators: the sections Functionality 15 , Getting Started 20
and all sections from the User Guide 49 beginning with Special
Folders 52 .
Normfall Manager 3 users: Read the Improvements 18 section
from the Function Overview in the chapter Preparation 12 .
© 2008 Normfall GmbH
F1
9
10
Normfall Manager 4.0 User Manual
Undecided persons: In the sections Introduction 12 , Function
Overview 15 and Information Management 19 found in the
chapter Preparation 12 , you can find all required information on
Normfall Manager.
© 2008 Normfall GmbH
2
Preparation
12
Normfall Manager 4.0 User Manual
2
Preparation
2.1
Introduction
2.1.1 How Normfall Manager 4.0 Can Support You
Before beginning with the technical details, we want to explain
what Normfall Manager 4.0 consists of and how you can put it to
use.
Normfall Manager 4.0 is an IT tool perfectly adapted to the
human working method that every individual applies when
performing sophisticated tasks.
Normfall Manager 4.0 allows you
· to display complex subjects in the form of structures and
· to manage all kinds of files in a multidimensional manner.
Furthermore, Normfall Manager 4.0 offers you further functions
such as the possibility to convert structures including comments
into structured Word files and vice versa to convert Word files
into structures; Normfall Manager thus makes it possible to
create an individualized knowledge management system.
2.1.2 Adapted to the Human Working Method
What’s your usual working method like when you are dealing
with a complex subject – such as a court case, a scheduled
publication, the management of a development project or team
leadership?
Firstly, you get an overview. To do so, you study documents,
hold conversations, edit notes, consider plans and figures, refer
to literature, make phone calls, make visits and thus, familiarize
yourself with the respective topic.
Shortly, you will recognize that the subject is associated with a
series of different categories. Such categories concern, for
example, people or facts or they can be legal, literary, technical,
economic, aesthetic or other categories. You choose names for
these categories, namely descriptive names for the purpose of
fast orientation. For example, you could name these categories
“Facts”, “Persons”, “Smith”, “Defects in the construction”, “Noise
protection”, “Meyer”, “Burden of proof”, “Plagiarism”, “Threshold”,
“Events”, “Legal status”, “Dispute”, “Aims”, “Interests” or the like.
Generally, the categories are subsections of other broader
categories. Thus, a category hierarchy is created. “Smith“ is, for
example, one of several “Experts” (the superior category) and this
category has subcategories such as "Order”, “Contract”, “Content
of Expert Opinion” etc. The “Experts“ in turn belong to a group of
persons which consists among other categories such as
“Attorneys at Law”, “System Analysts”, “Witnesses”, “Principal”.
All categories of your subject are interconnected. ”Categories“
(elements) and ”connections“ (relations) result in a structure. At
© 2008 Normfall GmbH
Preparation
the beginning, this structure is still very broad. In a legal case, for
example, complexes of facts are distinguished from points of law.
In the case of a publication, it is recommended to design a
rudimentary structure of the intended work before expanding your
writing in detail. In the case of a development project, it is
recommended to define the as-is state and draft a target state.
You permanently think about possible improvements to the
structure.
In the course of being processed, the system created proves to
be dynamic. New information is added, existing information
proves to be unfounded, important information is still missing and
must still be collected. Emails are exchanged, correspondence
and phone calls yield new factors, things happen – in short, you
are in a dynamic process.
In the course of further processing your subject, you change and
refine your structure continuously. The complexity of the
structure increases rapidly.
Furthermore: Again and again, you have to interrupt the work on
your subject because you have to conclude other tasks. Later you
have to continue the work on your subject. After weeks or even
months, you have to regain an overview. Legal cases can, for
example, last several years.
And things continue like this. Up to now, the foregoing occurs
essentially in your head. There has hardly been any tool
available which can effectively assist you in this task. Neither
notes nor tabs are efficient. It is very difficult to process flipcharts
and transparencies. The quantity of files increases and even the
popular post-it is not efficient. This results in arduous searching
efforts and duplication of work. Sometimes, it is easier to
reprepare a certain topic, such as a point of law in a written
document, rather than to search and find an already existing
elaboration on the same topic. It is substantially necessary to
count on your memory – however, the human memory’s capacity
is easily reached. Humans are intelligent and creative beings but
not massive storage databases.
Therefore Normfall Manager proves to be useful. Normfall
Manager does not want you to change your working method. In
fact, Normfall Manager adapts itself to your pre-existing working
method and assists you where up to now no help existed.
2.1.3 Structuring Complex Subjects with Normfall
Manager
Normfall Manager has been specifically designed for the
aforementioned situation and your usual working method in
order to fundamentally improve your ability to process complex
subjects. With Normfall Manager's aid you can create your
structure on the screen and continuously revise it. In this way,
things which have nearly been impossible to carry out on paper namely to “play" with a structure, to move individual items within
the hierarchy, to attach whole branches to other locations, to
delete and/or paste sections, to edit comments, to copy, link,
change or delete structure sections and much more– will be
possible without any technical difficulties to disturb you.
© 2008 Normfall GmbH
13
14
Normfall Manager 4.0 User Manual
Normfall Manager doesn’t imply any subordination to technology.
You are the master, Normfall Manager is the servant – namely a
loyal servant who will always be at your service, who will never be
exhausted, who will always be available, who will never be in a
bad mood or ill and who will never abandon you.
There is no need to complete an extensive “training”. You can
immediately use the core functions of Normfall Manager and you
will intuitively understand the other functions in the course of your
work.
2.1.4 Managing Extensive Quantities of Information
Besides the structuring of your subject, the Normfall structure
also serves as a key by means of which you access quickly and
specifically extensive quantities of information. Normfall Manager
can even deal with hundreds or thousands of conventional office
folders.
All digital file types (text files, e-mails, PDF files, Excel tables,
PowerPoint presentations, audio and video files, internet pages,
database contents...) can be managed using a uniform user
interface. The use of Normfall Manager suppresses the
annoying need to, for example, use a different filing system for
text files than for e-mails.
All files, in particular text documents, can be attached in a
multidimensional
manner.
Thus,
Normfall
Manager
accommodates the fact that almost all text documents imply a
multitude of uses. In order to accommodate each type of use in
conventional document management, it would be necessary to
create a copy of the document for each categorization that
applies to that document, which would be completely impossible.
In the Normfall information system, however, each document is
saved only once and can be provided with any number of
references to different structure nodes.
Your files, in particular your documents, can be attached to any
number of structure nodes. This works with both whole
documents and individual text passages - in short with all relevant
information.
Specially-created Normfall plug-ins for all Microsoft Office
Tools, PDF files and Internet pages facilitate the attachment
process. A mouse click is sufficient to create an attachment.
The attachments can be done such that they refer to a specific
target. If, for example, a relevant text passage is found on page
85 of a text document, it is possible to attach this document such
that it later opens to page 85 by simply clicking on the reference
to the document with the mouse.
Displaying files occurs in a matter of seconds, even when
dealing with a very large number of files. This speed is critical for
many applications. If, for example, you participate in a telephone
conference during which a certain process is mentioned you can
display this process on the screen from a large database even
before your interlocutor has finished his sentence. Or, during a
hearing of witnesses in the courtroom, you can immediately
present a relevant document, even if you have not expected that
© 2008 Normfall GmbH
Preparation
exactly this document could play a role.
It is possible to copy important sections of attached documents to
the Normfall Manager interface. A five-level information
architecture (name of the structure node, comments to the
structure node, title in the reference row, comments to the
reference row and the original document) guarantees that you
always find the required information with ease and that you only
have to focus on the original document and open it if this is
absolutely necessary.
The whole system architecture is designed such that you are
informed in a reliable and fast manner. Note that knowledge and
time - next to your know-how - are your most important assets.
2.1.5 Creating a Knowledge Management System
Normfall Manager 4.0 allows you to create an individualized
Knowledge Management System. You and/or your team will
have long-term access to all the information created by yourself
or resulting from research. Your structure serves as a key to this
information.
This key can take any shape or form. For attorneys, for example,
a clause of a law would be suitable.
2.1.6 For Whom Has Normfall Manager 4.0 Been
Developed?
Originally, Normfall Manager was developed for lawyers. In many
law firms, Normfall Manager has proved to be efficient and is
characterized by high quality software engineering.
Meanwhile, it has been shown that Normfall Manager is a
universal tool for any person who has to deal with complex
information management in private or professional life.
Normfall Manager allows you to collect ideas, to structure
thoughts, to create drafts, to realize creative brainstorming and
much more. You can convert broad ideas into convincing
strategies. You easily control complex subjects using Normfall
Manager.
The application possibilities are diversified. You can schedule
projects, draft publications, realize meetings, collect texts and
much more. Normfall Manager supports your work with a legal
case as well as in other activities which require the control of
complex information.
Normfall Manager 4.0 is very convenient due to its user-friendly
and attractive user interface.
2.2
Function Overview
Normfall Manager 4.0 allows you to create an index of contents
(structure) for documents. It is possible to create document
references and to edit text comments for each structure node.
References can refer to targets within documents, e.g. a page
number. Documents can be saved on the hard disc, in the
Internet or on a supported DMS.
© 2008 Normfall GmbH
15
16
Normfall Manager 4.0 User Manual
In addition, Normfall Manager 4.0 allows you to create structured
documents out of a structure.
The user interface layout corresponds to the standard which is
known from e-mail programs, having a structure on the left, a list
(reference list) to each structure node on the top right, and a text
editor for comments to each structure node and each reference
at the bottom right.
2.2.1 Advantages
The structure of a Normfall project is similar to the creation of a
folder structure. However:
· The structuring tools are substantially more comfortable and
allow you to, for example, alter the order of structure nodes and
to subordinate documents with respect to other documents (not
only to folders).
· It is possible to comment each structure node, each document
and each text passage. If a document or a text passage is
attached to the structure several times, the comment always
remains the same (this is known as the shared content
feature).
· It is also possible to attach text passages in supported
applications (e.g. Microsoft Office, Adobe Acrobat) to the
structure.
In comparison to simple structuring tools:
· Normfall Manager is construed for very large quantities of
documents. The project data can be saved on a database
server such that any number of users can work with it
simultaneously.
· Normfall Manager offers a full text search in the attached
documents by means of Microsoft Indexing Search.
In comparison to Document Management Systems (DMS):
· Normfall Manager can easily be installed and maintained and it
can operate in a completely decentralized manner based on
project files. In this case, project folders are closed units which
can easily be copied to other computers or storage media in
order to use them there.
2.2.2 Functionality
The data of a project (structure, references, texts) is saved in a
project folder or on a database server. The folder in which the
project file is located is considered as the project folder. The
references are saved as relative pathways to this folder such that
the project folder is "closed" and able to be “transported“. Thus, it
is impossible to include references to documents outside the
project folder, unless they can be accessed by means of a URL
or a supported DMS.
Normfall Manager 4.0 has been developed on the .NET platform.
© 2008 Normfall GmbH
Preparation
2.2.3 Highlights
· References to text passages (currently supported applications:
Adobe Acrobat, Microsoft Office).
· Comfortable attaching of PDF files using integrated Normfall
PDF Editor.
· Plug-ins (Adobe Acrobat, Microsoft Office, Internet Explorer,
Windows Explorer) allow for quick attachments and automatic
copying of files to the project folder. Also recently opened
documents from the Recent Docs (System) can be attached
(this is optional). By simply placing a checkmark you can attach
to several structure nodes simultaneously.
· Simple document import/export by pulling the mouse or
copying/pasting in Windows Explorer and Outlook.
· Simple management of attached documents (print, copy, zip,
send).
· Comfortable structuring tools which allow you to establish
references between structure nodes, show partial structures at
several locations and synchronize contents between structure
nodes.
· References to structure nodes between different structures
(projects) are possible.
· Hyperlinks from the running text in other applications (e.g.
e-mail) to structure nodes are possible.
· Full text search in the project data and, by means of the
Microsoft Indexing Service, even in attached documents.
· Individual design possibilities for structure nodes by assigning
user-defined icons and using colored nodes.
· Standard Options settings for user groups by means of
Normfall Manager Administration Kit.
Authors
· Convert commented structures into structured texts, convert
structured texts into commented structures.
· Editor with extensive formatting options.
Organisation
· Support of the division of work by the Inbox Folder in which files
are saved for the purpose of being attached.
· Possibility of closed project folders which contain all project
data and documents and can easily be transferred to other
storage media and computers. In addition, source references
can maintain the connection to a central DMS.
· Simple installation, management and operation, attractive user
interface, extensive documentation.
· Very robust, even in case of extremely large databases and
multiple access if the project is saved on a database server.
· Future support by an own Web Client (Read-Only).
© 2008 Normfall GmbH
17
18
Normfall Manager 4.0 User Manual
· Simple import of existing folder structures.
Legal Application
· Automatic attachment of documents resulting from research
within the Juris database.
2.2.4 Improvements
This section provides information for users of Normfall Manager
Version 3 (“NF3”) or an older version. Please take note of the
section "Important Changes” at the end.
· New optically attractive user interface.
· Built-in and custom icons for defining structure node types.
· Plug-ins (Adobe Acrobat, Microsoft Office, Internet Explorer,
Windows Explorer) simplify the attaching process.
· Automatic copying of documents to the project folder when
attaching references.
· Quick attaching from Recent Docs (System) of the recently
opened documents.
· Quick attaching from File Inbox Folder (supports division of
work).
· Fast actuating of Normfall projects by means of the "Normfall
Button” in hover mode which remains permanently visible on
the screen (optional).
· Multiple references: refer to several structure nodes
simultaneously by placing checks appropriately in the "Attach
Box".
· Multiple selection: several structure nodes can be selected
simultaneously.
· Convert structure nodes into reference rows and vice versa.
· Shared Content Locations: the contents of several structure
nodes or reference rows are automatically synchronized.
· Shortcut: By creating a shortcut to a structure node its branch
(partial structure) will be shown at another location.
· Hyperlinks in the structure: references to structure nodes in
other structures (projects) are possible.
· Hyperlinks from the running text: references to structure nodes
in other applications (e.g. Email) are possible.
· Improved formatting options in Editor.
· Pulling of documents by means of the mouse, copying and
pasting: Each direction is possible (to/from Windows Explorer
and Outlook).
· Management functions for documents: export, zip, print, send,
delete completely.
· Integrated representation of the project folder.
© 2008 Normfall GmbH
Preparation
· Improved search function: search in attached documents by
means of Microsoft Indexing Service, search in partial structure
and date search.
· Support of a database server: robust performance when
dealing with large databases and multiple user access.
· For System Administrators: Possibility of defining standard
options settings for user groups by means of the Normfall
Manager Administration Kit.
Important Changes
· Renaming: in NF4, the document folder is called the Project
Folder; the structure file is called the Project File.
· System requirements: please refer to the amended System
Requirements 20 .
· Index function deleted.
· Initially, an updatable author structure is not possible.
2.3
Normfall Information Management
Using Normfall Manager you can manage information in the form
of documents and files in an efficient manner.
A prerequisite to managing information with Normfall Manager is
that all documents (a few examples would be text documents,
figures, photos, freehand sketches, drawings, dictations, etc.) are
available in digital form.
You don't need to worry about memory capacity. Modern PCs
and notebooks have hard discs with sufficient space for several
thousand office folders. Thus, it is possible to copy all processes
including all folders into your notebook and to keep your
notebook at your side, you can even open any desired document
at any place in a matter of seconds by means of a simple mouse
click.
In this section we will show you how you too can reach this goal.
2.3.1 Digital Files and Databases
You already have access to many documents, for instance, Word
documents, e-mails or Excel tables in digital form. You can
easily handle and manage these files with the help of Normfall
Manager.
You can also save databank files (e.g. Access, dBase) as PDF
files, which can then be managed by Normfall Manager without
any problems.
2.3.2 Paper Documents
Paper documents, such as incoming written material, can be
taken up using a scanner to create so-called PDF files.
The abbreviation PDF stands for Portable Document Format and
was developed by Adobe Systems. With this versatile file format
© 2008 Normfall GmbH
19
20
Normfall Manager 4.0 User Manual
you can capture documents (fonts, formatting, colors and
graphics), regardless of which program and operating system
was used to create the document, almost as a photographic copy
of the original. PDF is well-known throughout the world in the
Internet and is nowadays considered as the industrial standard
for electronic document distribution.
Thereto, a corresponding software is required. The most
important software for creating and editing PDF files is the
commercial program package Adobe Acrobat. You should not
confuse this program with Adobe Reader, which is available free
of charge in the Internet and allows you only to view and print
PDF files. For the full version of Acrobat (beginning with Version
7), Normfall Manager offers a special Plug-in for Attaching
Documents 73 .
Scanning
In case you would like to scan your documents yourself, it is
recommended to use modern scanners which operate fast and
can handle several pages of input simultaneously. If your
employees scan all incoming mail and other documents daily, you
can realize the paper-free office with minimal additional effort.
The advantages thereof by far outweigh the effort put into it.
There are also companies that will scan documents for you on
site. This option is helpful when you have to process large
volumes of documents, maybe even in a distant city.
Optical Character Recognition
You can also use character recognition with suitable documents
(particularly with laser prints) while using PDF files. There are
several advantages associated with OCR. It allows you to, for
example, search for given terms in the document.
It also allows you to copy important text passages to the text
editor (comment editor) of Normfall Manager. From there you can
copy the citations directly to your written documents (e.g. Word
documents) without having to open the original document again.
You can also use character recognition at any time after creating
the PDF document. In Adobe Acrobat this can be done by using
the commands "Document" and "OCR Text Recognition".
2.4
Getting Started
2.4.1 System Requirements
In order to use Normfall Manager, one of the following operating
systems as well as a computer with performance capabilities
corresponding to the given operating system are required:
Windows XP / Vista./ Windows 7. In addition, Microsoft Internet
Explorer 7.0 must be installed on your computer.
© 2008 Normfall GmbH
Preparation
2.4.2 Installation Process and Update
You can install Normfall Manager 4 from the Internet 21 or from a
CD 22 . Therefor, it is required to install the component ".NET 2.0
platform 24 " from Microsoft which is pre-installed in Windows
Vista.
The section "Installation
installation procedure.
22
" provides information about the
The section "Updating Normfall Manager 3
Normfall Manager 3 on how to proceed.
22
" informs users of
The section "Current Updates 23 " describes how you can obtain
Normfall Manager 4 updates from the Internet, which correct
errors and/or contain additional features for free.
The section "Deinstallation 23 " describes how to remove the
software from your computer.
The section "Further Required Components 24 " contains
information on the software components of your computer on
which Normfall Manager depends and which you have to install.
Downloading from the Internet
In the Internet, you can always find the latest version of the
software that you can use with your license. You can find further
information on our web page www.normfall.com.
In the download section of the web page, you will find the
installation package for Normfall Manager 4. Right click 174 on the
corresponding link or the http or ftp button (FTP is generally more
reliable) and select the command Save as... in order to save the
file on your computer.
Most Internet browsers show warnings in order to
prevent users from opening files from an unkown
source. Since the file is directly downloaded from the
site of your producer in this case, this warning is not
relevant.
The downloaded file (ManagerSetup_x.xx.xxx.exe) is the
installation package for Normfall Manager. It contains the
complete software which, however, still has to be installed on
your computer before you can use it.
Start the installation 22 by opening the installation package (e.g.
by double clicking 173 ).
The installation packages of Normfall Manager can be used for
updates in order to update an existing installation. The procedure
remains the same.
Always keep installation packages saved on your
computer. If an update contains an error you can
return easily to the previously installed version if you
have it available on your computer.
© 2008 Normfall GmbH
21
22
Normfall Manager 4.0 User Manual
In order to return to an older version, first deinstall
version and install the older version.
23
the current
Installation of the .NET 2.0 Framework
If during the installation you are requested to install the .NET
Framework, download it directly from Microsoft or our web page
and execute the downloaded software in the same way that you
installed the Normfall Manager installation package.
For further information, please refer to Further Required
Components 24 .
Installing from a CD
Insert the CD into your CD ROM drive. If the CD does not
automatically start, double click on the CD icon 169 found under
My Computer.
Follow the instructions in order to start the installation
Normfall Manager.
22
of
The software cannot be used before the installation process is
completed; during the installation process any necessary further
required components 24 are also installed.
Installation
The installation procedure is executed by opening the installation
package 21 or starting the installation from a CD 22 . To do so,
administrator rights are required.
Normfall Manager 4 is then available to all users of the computer.
During the installation process, you can select an application
structure and select which plug-ins 62 should be installed (see:
plug-in installer 139 ).
If the installation procedure stops, minimize all
open windows and move the installation window to
check whether a dialog box is waiting to be completed
behind the installation window.
Updating Normfall Manager 3
When installing Normfall Manager 4, older versions are not
automatically deinstalled. However, you can do this manually in
order to save memory capacity. To do so, please proceed as
follows:
First, close all programs. Then, open the Normfall Manager folder
by means of the programs folder found in the Windows Start
menu and execute the command Remove or Repare Normfall
Software.
Existing Normfall project files are not affected by this procedure.
They remain available for use with the newer version 4.0. Older
project files that are opened in Normfall Manager will
automatically be converted. Converted files, however, cannot be
opened in older versions of the software.
© 2008 Normfall GmbH
Preparation
Current Updates
We are continuously developing and improving Normfall Manager
4.0. On our web page we provide you with the current version
(the most recent "build") of Normfall Manager. At any moment, it
is possible to update your version of Normfall Manager 4.0 by
installing the newest version in a similar manner to the
downloading process. To do so, it is not necessary to deinstall
the previous version. In the event of an update, your Normfall
project files and your license data remain untouched.
If you wish to know the build number of your Normfall Manager,
execute the command Info on Software found in the help menu. In
the window that appears you will find the Installed Version in the
form of a sequence of numbers (e.g. 4.03.0141); the last part of
this sequence corresponds to the build number (for example
141). If you find a higher build number on our web page an
update is recommended.
It is also possible to execute this check automatically by means of
the command Check for Update 153 in the help menu.
Tip: Use the command Check for Update 153 in order
to search for updates for free which you can
immediately download and install.
Rarely, an update can contain an error. Then, it may be
necessary to return to a previous version of the software. In this
exceptional case, it is necessary to manually deinstall 23 the
higher version before reinstalling the previous version.
Notice: Always keep downloaded installation
packages. If you wish to remove an update you need
the installation package of the previous version.
Deinstallation
At any time, you can remove Normfall Manager 4 from your
computer. To do so, two options are available:
Deinstallation by means of the start menu (recommended)
Select in the Windows start menu the command 167 Programs |
Normfall Manager 4 | Deinstall.
Deinstallation by means of the control panel
Select the Control Panel from the Windows start menu and then
Add/Remove Programs (under Windows Vista: Programs and
Features). Select Normfall Manager 4 in the list and click on the
deinstallation button.
Remaining data
Generally, all created projects, user settings and license
information remain after the deinstallation process such that it is
© 2008 Normfall GmbH
23
24
Normfall Manager 4.0 User Manual
possible to continue to use the software in case of a
reinstallation.
Experienced users can remove the software completely by
deleting the folder %Appdata%\Normfall as well as the registration
key Software\Normfall\Manager\4.0 from the user profiles. Due
to the very small quantity of data, this step is normally not
required.
Due to the distribution of user profiles in organizations with
Windows Server, it is not recommended to remove this data
yourself.
Further Required Components
.NET Framework 2.0 or higher
The .NET Framework from Microsoft is an environment for
executing programs using a virtual machine (a concept
introduced by Java). Windows Vista and Windows 7 include it
directly out of the package; Windows XP, however, does not.
Normfall Manager 4 requires the .NET Framework version 2.0 or
higher. Whether future versions will also be compatible, is not
certain at the time of the creation of this manual.
If no .NET Framework has already been installed on your
computer, the installation procedure of Normfall Manager 22 will
request its installation. It is possible to directly download the
desired language version of the installation package of the .NET
Framework.
Jet and MDAC
The databased database Management System (DBMS) Jet 4.0
and Microsoft Data Access Components MDAC are already
included with all supported Windows versions. Check that you
have the latest Service Pack for your Windows version installed
so that you also have the latest versions of Jet and MDAC.
It is rare but possible that such components are damaged, e.g.
due to improper installation procedures of Third-Party Software,
such that Normfall Manager doesn't function properly. At the time
of the creation of this manual, it is easy to find information on
repairing a damaged MDAC on the Internet.
2.4.3 Activating your License
When you log in on a computer on which Normfall Manager 4 has
been installed, you can activate your license when starting the
software for the first time. That means, the license that you or
your company have/has purchased, that is, the 30-Day-Demo
license for free (included) or the Basic license which is also free
and allows you to use the software without any temporary
restriction but with limited functionality.
Detailed activating procedure
After successfully installing Normfall Manager, the Normfall Icon
169 named Normfall Manager 4.0 can be found on your desktop
© 2008 Normfall GmbH
Preparation
(the area of your screen behind windows applications).
Furthermore, you will find a folder called Normfall Manager 4.0 in
the folder Programs of your Windows start menu.
You can start Normfall Manager by double clicking on the icon or
the corresponding entry in your Windows start menu.
Alternatively, you can also open the corresponding context menu
by right clicking and selecting the command Open.
After starting Normfall Manager, the license wizard will open
which assists you in activating your product:
Select one of the following options and click on Next:
Normfall Manager BASIC
Generally, you can use Normfall Manager as the Basic Edition.
Please note the limited functionality of this version of the
software.
Normfall Manager ENTERPRISE 30-Days-Demo
This option allows you to test the Enterprise Edition for free with
its entire functionality for a time period of 30 days.
Load license file
If you have received your license file (filen extension ".nl4") by
e-mail, we recommend you to save it to your file system. For the
purpose of activating Normfall Manager with this license file,
select this option and click on Next. The file list box will now open
where you can select the license file.
© 2008 Normfall GmbH
25
26
Normfall Manager 4.0 User Manual
Alternatively, you can also activate Normfall Manager by double
clicking on the license file.
Enter license key
If your license file is no longer available to you and if you have
the detailed license information, you can also activate Normfall
Manager manually using this option. The following dialog box will
open:
Enter the required license information and confirm your entries by
clicking on OK.
2.4.4 Importing Existing Folder Structures
If you already have folder structures in which you manage your
documents you can convert the folder structures to Normfall
structures.
The folder structure itself will not be changed but rather a new
structure is created; the structure nodes of this new structure
correspond to the existing folders and the reference rows refer to
the documents found in the folders. In principle, you obtain a true
copy of the folder structure but from now on you can use the
possibilities provided by Normfall Manager.
First of all, you should determine on which level the conversion
should occur. If, for example, you have a folder structure
containing clients and projects, whereas several project folders
are contained in one client folder, it should be determined
whether to create a Normfall structure for each client or each
project.
It is supposed that the project is the correct element to focus on
© 2008 Normfall GmbH
Preparation
for the creation of your new structure, but finally this decision is
left to your discretion. If there are a lot of cross references and
shared documents between the projects of a client, we
recommend you to create the Normfall structure on the level of
the client. However, you will no longer have the option of copying
a folder containing a client project including its Normfall project
file, e.g. for the purpose of a presentation on a memory stick; you
will have to select at least the entire client folder.
It is not required to convert all folder structures immediately. You
can wait until you want to work with the given structure.
Please follow the instructions in the section New from Folder
Structure 124 to execute a conversion.
© 2008 Normfall GmbH
27
3
Introduction
Introduction
3
Introduction
3.1
The Structure of the Application Window
The following figure shows the application window (the user
interface, the main window, the Normfall window) of Normfall
Manager with an open project 35 the name of which can be found
next to the Normfall icon in the title bar. For further explanations
concerning the individual elements view below.
Title bar of the window (A)
Menu bar (main menu) (B)
In the main menu 169 you will find the menus of Normfall Manager
(File, Edit, Structure, etc.). Clicking on a menu will open it. For
details on the menu commands please refer to the chapter
Functions Overview 124 .
(Main) Toolbar (C)
The toolbar 172 contains icons 169 and edit boxes which allow you
to execute certain commands 167 by simply clicking with the
mouse. To see which command will be executed by a given icon,
you can move your mouse over an icon, which will call up a short
explanation of the command (known as a "tooltip").
Structure view (D)
The structure view
key of your project.
© 2008 Normfall GmbH
30
represents the structure, thus the central
29
30
Normfall Manager 4.0 User Manual
List view (E)
The list view 30 represents lists of documents and positions in
documents attached to the structure.
Detail view (F)
The detail view 34 shows information and comment texts
concerning structure nodes or attached documents or
respectively positions in documents.
It is possible to modify the size of structure, list and detail views
by means of the separators 171 .
3.1.1 Structure View
The structure view is the left portion of the application window
(fig.) 29 of Normfall Manager.
Within the structure view, you create and edit the Normfall
structure, which represents the systematic key to any digitally
saved information. This view can be scrolled 171 such that your
structure can adopt any size.
3.1.2 List View
The list view is the right top portion of the application window
(fig.) 29 of Normfall Manager.
The list view represents the content of your project. A toolbar
including commands for said view is on the upper edge. It lists all
reference rows of the files you have attached thereto as well as
comment rows concerning the respective structure node marked
in the structure view.
Above the toolbar, it is possible to show different tabs
representing different window contents once you click on them.
For further information please refer to the chapter tabs in the List
View 30 .
Tabs in the List View
The list view
Generally, information and different folder contents will be
represented in the form of tables in the list view. The folder
contents are represented by the individual tabs that will be
explained in the following section.
You can sort the individual lists by ascending or descending order
according to date or title by clicking on the corresponding
heading of the column. By clicking on a tab you can switch
between the contents of the individual lists.
Depending on which tab is currently active, different commands
are available on the buttons of the toolbar - for further information
thereto please refer to the chapters concerning Functions in the
List Menu 134 and special commands in the List View 155 .
The tabs
© 2008 Normfall GmbH
Introduction
In the List menu you can choose the individual tabs (each of
which contains different content) will be shown under View. The
View menu can also be called up in the context menu of the list
view. You can remove a tab by double clicking on the appropriate
icon. By default the tab Current Node will be shown. By right
clicking on the bar containing the tabs the View menu is shown.
The shown tabs will have a colored background.
Fig.: The View menu with colored backgrounds behind all currently displayed tabs:
Project Folder and File Inbox.
Current Node
Current Node
The tab Current Node, which is shown by default, lists all
reference rows belonging to the structure node that is currently
marked in the structure view to the left. A toolbar with commands
followed by a table of all reference and comment rows, in the first
row of which the structure node itself is shown (which is
distinguished by a colored background) follows. Then, all
references are listed.
In the first column of the table, icons represent the various file
types.
The next column shows the following icon:
This icon shows whether or not the reference is a so-called
shared content location 97 .
In the third column, the
icon shows, whether or not the
attached document opens to a specific target. For further
information about how to attach documents that open to a
specific target please refer to the chapter Plug-ins for Attaching
Documents 62 . The last two columns contain the date as well as
the title of the document. In the date column you can manually
enter the date into the given row using the numeric keypad. The
symbol used to separate days, months and years (by default "."
or "/", depending on the regional settings of your computer) does
not have to be entered.
Project folder
Under this tab the content of your project folder is shown. Thus,
you can directly access to the project folder and move files from
Windows Explorer directly to the project folder using, for
example, drag & drop 91 without having to navigate to the project
© 2008 Normfall GmbH
Project Folder
31
32
Normfall Manager 4.0 User Manual
folder in Explorer. Provided that your project folder contains
several nested subfolders, it is possible to open the superior
register by clicking on Upwards. Further details concerning the
project folder can be found in the section called project folder 36 .
Relation
Relation
When activating the Relation Module, the tab Relation is
additionally shown. More information on this function can be
found in the section The Relation Tab 117 within the chapter The
Relation Module 114 .
File Inbox
File Inbox
Under the tab File Inbox all documents are listed that are
currently in the file inbox. Further information can be found in the
section File 54 Inbox 54 of the chapter Folders 142 .
Recent Docs (Project)
Recent Docs (Project)
The tab Recent Docs (Project) lists all files that have recently been
used (e.g. opened) in the current project.
Recent Docs (System)
Recent Docs (System)
The window content of the tab Recent Docs (System) lists all files
that have recently been used on your computer, independently of
Normfall Manager.
Shared Content Locations
Shared Content Locations
This tab provides information about the number and location of
shared content locations of an attached file or structure node.
The content always refers to the element that is currently
selected in the list view. Alternatively, it is possible to obtain this
information by double clicking on the shared content locations
icon.
For further information concerning this command, please refer to
the chapter Show Shared Content Locations 103 .
Document References
To determine to which structure node a document is attached,
select it and then select the Document References tab from the
List | View menu. Alternatively, you can use the key combination
Ctrl + Shift + F6.
Document References
Ctrl + Shift + F6
If this tab was shown using the key combination, this
will not be made evident in the View menu.
New Search
© 2008 Normfall GmbH
Introduction
The New Search tab is open when you want to search your
project or attached documents for certain terms. Details on the
search function can be found in the chapter Searching and
Finding 101
Sorting Lists
The entries of the lists in the list view can be sorted in ascending
or descending order according to date or alphabetically according
to title. To do so, simply click on the heading of the column in
which you would like to sort the list. Clicking again allows for
switching between ascending and descending order.
To sort according to several criteria, e.g. according to date and
within this sort also by title, first click on the column Date, then
press the Shift key and click on the column Title. Whether the list
is currently being sorted by ascending or descending order is
made visible by the small arrows in the heading of the column.
To completely deactivate the sort function you may click on the
left upper edge of the table where the total number of entries is
displayed.
Fig.: Deactivating the sort function
Selecting Several Reference Rows or Structure
Nodes
You can select several reference rows at the same time by
pressing and holding the Ctrl key and clicking on the grey square
on the beginning of the row of the corresponding row with the
mouse.
The row selection field, which can be recognized by the blue
arrow at the beginning of the row
, always marks the currently
selected row.
Accordingly, you can select several structure nodes. Press and
hold the Ctrl key and click on the desired structure nodes. Please
note that only structure nodes found on the same level can be
selected at the same time.
Alternatively, after having selected the first reference row (or
respectively the first structure node), it is possible to press the
Shift key and click on a reference row (structure node) located
several rows (structure nodes) below or above the first reference
row (structure node) in order to select a continuous group of rows
(structure nodes).
Selecting several rows simultaneously allows you to copy, move
or delete entire blocks of reference rows. This option is
particularly useful because a reference to several structure nodes
enables multi-dimensional access to documents. Thus, the
© 2008 Normfall GmbH
33
34
Normfall Manager 4.0 User Manual
chances to find important documents, if required, quickly, are
increased.
Showing and Hiding the List View
The list view can be completely hidden. This setting is user and
project specific and is particularly advantageous when working
with text heavy projects because hiding the list view considerably
increases the size of the text editor, which allows large text
passages to be displayed more comfortably.
Hide List View
To hide the list, please use the menu List | View | Hide List View.
Alternatively, you can use the command found in the context
menu of the list view.
Hiding the list view by default
Under File | Properties the option for hiding the list view is
activated by default. However, it is possible to change this setting
at any time.
Under Tools | Options | New Projects, it is possible to determine
whether the list view should be hidden by default for new
projects.
In the Basic Version of Normfall Manager 4.0 the
option Hiding the list view is activated by default,
which means that new projects will be shown with the
list view hidden.
3.1.3 Detail View
The detail view is the bottom right area of the application window
(fig.) 29 of Normfall Manager.
Here, you can find comments on the currently activated structure
node on the left. You can directly edit comments or copy them
from saved documents or from the notes made to the text editors
of other nodes. You can directly copy text passages from these
notes, for example quotations, to your written documents.
It is also possible to scroll the content of this view such that the
dimension of the content is not restricted in any manner.
Furthermore, it is possible to reduce or enlarge the size of the
comment text by means of the zoom functions 88 . Beneath the
toolbar 172 you find a data and title row followed by another
toolbar which contains commands for formatting text. The text
editor itself, which contains further Editor 88 functions, can be
found below. On the right edge of the window, a Button 166 with a
yellow plus sign is shown next to the title Field 172 . Clicking on this
plus will show another row which indicates the exact path of the
file in the File field. In case of a Word or PDF document attached
in order to open to a specific target the field Pos. will indicate the
page or bookmark which was defined when attaching the file. For
further information on this topic, please refer to the chapter
Saving and Attaching Files 57 .
© 2008 Normfall GmbH
Introduction
If the text displayed in the text editor is an original excerpt from
an email, Word document or PDF file (if attached by means of
Normfall PDF Editor), the text editor (grey shaded in this case) is
locked for editing and solely highlighting passages is possible by
clicking on the Highlight button. Yet, by using the Change to
Comment button the text editor is unlocked so that you can add
your own annotations.
3.2
The Basic Concepts of the Normfall Software
3.2.1 Normfall Manager 4.0
Normfall Manager 4.0 is the program that you are currently using.
It allows you to create structures, manage files and link directly to
the contents thereof.
3.2.2 The Project
The project is the totality of data which you can display and edit in
a Normfall application window and save within one file or on the
database server.
A project consists (always) of a structure 35 as well as (usually)
references 36 to the attached files (Word, PDF, e-mails, etc.).
When creating a new project a project file will be created by
Normfall Manager (recognizable in your file system by the file
ending .nf4), which you manage in a subfolder of your Normfall
project folder 36 . The project file carries the same name as the
project folder that it belongs to (e.g. "Construction Project
Smith").
3.2.3 The Structure
The structure is the key with which you can master complex
subjects and navigate through large quantities of data in a matter
of seconds. The structure nodes form together with all sub nodes
partial structures which are also called branches.
A structure node is an element of the Normfall structure. You can
name a structure node using a word or word combination. It is
also possible to mark structure nodes with your own icons or with
different colors. For more details please refer to Defining Node
Types 99 .
By clicking on a structure node, its references and comment rows
will be shown in the list view.
Fig.: Structure nodes with subnodes
© 2008 Normfall GmbH
35
36
Normfall Manager 4.0 User Manual
Refer also to structure view
30
.
3.2.4 Reference List
The Reference List shows for each structure node the documents
and document passages "attached" thereto.
The list entries are called reference rows.
For each reference row, date, title and comments can be
recognized.
It is also possible that reference rows are empty and thus are
mere comment rows where you can add notices without
referring to a document.
A reference which opens to a specific target is a reference which
does not only refer to a whole document, which rather refers to a
certain passage such that the site is shown immediately after the
opening of the document.
See also: List view
30
, tab structure node
30
.
3.2.5 The Project Folder
The project folder for a given Normfall project is the folder in your
file system that contains all documents that are attached to said
project.
If you are not working with a database server, the project folder
will also contain the project file in which all data of the project (i.e.
the structure, reference rows and comments) are saved.
Further details can be found in the project folder
chapter Special Folders 52 .
52
section of the
3.2.6 The Root Folder
The root folder (also: project root folder) is the folder in your file
system that contains the project folders of all projects that you
are managing with Normfall Manager.
We recommend naming this folder for example "Normfall
Projects" and creating a project folder for each project with a
corresponding name (e.g. "Construction Project Smith", "Contract
of Sale Pepulator Inc." or "Trial Johnson vs. Jones").
Further details can be found in the project folder
chapter Special Folders 52 .
3.3
36
section of the
Tutorial
In the following chapters, you will familiarize yourself with the
basic functions of Normfall Manager. Subsequently you will be
able to create projects, edit structures and put complex structures
to use in an optimal and efficient manner.
Normfall Manager provides you with several ways to execute a
command 167 . The Tutorial is limited to the presentation of the
most important options. For the purpose of a more global
overview of all commands, please read the corresponding
chapters under Command Overview 124 .
© 2008 Normfall GmbH
Introduction
3.3.1 Creating a New Project
This chapter shows you how to create a new project by means of
the corresponding command found in the file menu and what you
should take into consideration when doing so. For further
information on creating a new project e. g. by converting a
structured Word document 81 or an existing folder structure 50
please refer to chapter Creating New Projects 49 found in the
User Guide.
1. Start Normfall Manager by double clicking on the program icon
on your desktop.
2. Select the command 167 New from the File Menu 169 or click on
New Project in the toolbar 172 .
Alternatively, use the key combination 174 Ctrl + n.
If there is a database server installed on your system, the
following dialog box will open:
3. Select where the new project should be created: in your file
system or on a database server.
If there is no database server installed, the dialog box shown
above will not appear and you can go on with step number 4.
In our example we assume creating a new project file in the file
system. More information on database servers can be found in
the chapter Working with a Database Server 112 .
4. If necessary, create a folder in which you collect all Normfall
projects.
© 2008 Normfall GmbH
Ctrl + n
37
38
Normfall Manager 4.0 User Manual
In our example, this folder is called "Normfall Project Folder".
5. Create a subfolder for the current project (here: "New Project").
6. Open the newly created subfolder.
7. Give the project file a name and then click on Save.
A prompt will be displayed which asks you to determine whether
the new project should be saved within a project folder of the
same name to be automatically created. As you already have
created a project folder as described under number 5 you should
answer the question by clicking on No.
Normfall Manager will open with your newly created project. The
title bar of the program shows the project name.
The white area on the left (called the structure view) contains the
first structure node which is automtically created by Normfall
Manager and named "Sample Structure Node". Clicking on the
plus sign to the left of the node will display existing subnodes.
The further structure can now be build based on this first
structure node. Further details concerning the structure of the
application window 29 can be found in the corresponding chapter.
In the following chapter of the Tutorial, you learn more about the
functions for Creating and Designing the Structure 39 .
© 2008 Normfall GmbH
Introduction
3.3.2 Creating and Designing the Structure
Normfall Manager is a tool which assists you in structuring any
type of information in a useful manner.
Deciding how to structure your information is entirely at your
discretion and due to the various functions of the software, you
are always able to change the structure and adapt it to new
developments.
The structure corresponds to a content index or an organization.
Each structure node represents an organization element. For the
purpose of, e.g. organizing information in the categories
"Persons", "Expert opinion", "Procedure" etc., create structure
nodes with these names in Normfall Manager.
The relevant commands for this purpose can be found in the
Structure menu 169 . The most important functions for creating and
designing the structure can also be found in the toolbar 172
directly located above the structure view 30 .
Fig.: The Structure menu with its corresponding commands
Creating new structure nodes
1. Click on the Structure menu 169 and select the New Node
command 167 (1) found there or press the function key F9 if you
are working with the keyboard.
A new structure node will be added to the structure which you can
rename immediately:
2. Enter the desired name, e.g. "Persons".
3. Press the Enter key.
© 2008 Normfall GmbH
New Node
F9
39
40
Normfall Manager 4.0 User Manual
4. If you wish to change the name once again, you can select the
Rename command by means of the function key F2.
F2
Create other structure nodes following this manner.
Creating new subnodes
New Subnode
For the purpose of creating groups within one organization
element you create subnodes:
1. Mark the structure node for which the subnode should be
created.
Ctrl + F9
2. Click on the Structure Menu and select the command New
Subnode (2) or alternatively press the key combination Ctrl +
F9
For naming the newly added subnode, please proceed as
described above.
To create other nodes on the level of the recently created
subnode, select it and execute the New Node command from the
Structure menu.
Deleting structure nodes
To delete individual structure nodes, select them and then
execute in the Structure menu the Delete Branch(es) command
(3). You can also execute the comand by means of the key
combination Shift + Del.
Delete Branch(es)
Shift + Del
For the purpose of deleting several structure nodes
simultaneously press and hold the Ctrl key and click on the
corresponding nodes. Please note that only several nodes on the
same level can be selected simultaneously. For further
information on this topic, please refer to the chapter Selecting
Several Reference Rows or Structure Nodes 33 .
Moving structure nodes
Up
© 2008 Normfall GmbH
Introduction
For the purpose of moving a structure node one position upwards
or downwards within one level, select it and and then select the
command Up or Down (4) from the Structure menu respectively or
press the function keys F7 (Up) and F8 (Down).
F7
Down
F8
The plus sign in front of the structure node indicates that
subnodes exist. Click on the plus sign for expanding the
subnodes. By clicking on the minus sign, you can collapse the list
again.
You can create any number of structure nodes or subnodes and
reposition them if necessary. Thus, you are completely flexible
concerning the design of the structure.
In the following chapter of the tutorial, you will learn more about
inserting documents into the structure 41 .
Change Type
It is possible to define different structure node tpyes 99 . Mark the
concerned structure node and choose the command Change type
found in the Structure menu (5) or execute it by using the key
combination Ctrl + k. A list of all available node types will be
displayed from which you can select the desired type to assign it
the concerned structure node.
3.3.3 Inserting Documents into the Structure
You have created the basic organization of your structure and
wish to manage information in the form of documents and files by
attaching them to single or several structure nodes. The files to
be attached must be present in a digital form. For further
information on the measures to be taken in advance, please refer
to the chapter Normfall Information Management 19 . We also
recommend to manage files to be attached in document folders
within your project folder so that they can also quickly be found
within your file system even without Normfall Manager. For more
information on the several folders please refer to this 52 section.
The content of your project folder, i.e. the documents you saved
to it (within sub folders), is displayed by the project folder tab 31 .
Attaching files with the Attach Box
The attach box is the most comfortable way to attach a reference.
1. Open the attach box in Normfall Manager by clicking on the
corresponding icon found in the main tool bar: .
Below, you see an illustration of the Attach Box.
© 2008 Normfall GmbH
Change type
Ctrl + k
41
42
Normfall Manager 4.0 User Manual
2. Select the file to be attached by means of the Document field
found in the upper part of the right column. The currently open file
is already pre-selected if it has been opened using Windows
Explorer or the file list box of the corresponding application.
· If the corresponding file is not pre-selected, open the dropdown list by clicking on the arrow symbol next to the field.
The list contains an overview of all recently opened documents. If
the list does not contain the desired document,
· click on Browse and select the desired document from the
project folder or another folder.
3. Choose the structure nodes to which the document should be
attached. To do so, activate the check marks in the check boxes
in front of the structure nodes in the window on the left.
All selected nodes are listed in the bottom right field.
4. Click on Attach in order to assign the document to the selected
structure nodes.
If you have selected several nodes for attaching a document, socalled shared content locations of the document are created.
That means that all comments appear automatically at each
structure node to which the document is attached and that each
subsequent change also has an impact on all other shared
content locations. For further information, please refer to the
chapter Shared Content Locations 97 .
Further functions of the Attach Box
The procedure described above is useful for quickly and simply
© 2008 Normfall GmbH
Introduction
attaching documents. The Attach Box also provides other
functions by means of which you can easily select documents
and characterize the references individually.
èFilter for certain file types:
Enter in the Filter field e.g. ".doc", so that you can only select
between Word documents.
èAttach a Word or PDF file so that a specific target opens:
Select the "target" (e.g. a page) in the field Target within the
Document which should be targeted directly when opening the
document.
Enter the desired page number in the next field.
èAssign a date to the reference:
Enter manually the desired date in the Date field or enter it by
means of the calendar. It will be expanded as soon as you
click on the arrow symbol.
èAssign an alternative title to the reference:
To do so, overwrite the automatically generated filename from
the Title field.
èMake comments and annotations to your reference:
These can be entered in the Notes field.
For more detailed information on the Attach Box 75 , please refer
to the corresponding chapter under the topic on attaching
documents 57 .
© 2008 Normfall GmbH
43
44
Normfall Manager 4.0 User Manual
After the attachment process, the structure node ("Third Node")
and the attached document ("Sample Document No. 1.doc") are
shown on the right side of the Normfall application window in the
so-called list view.
In the field below, the detail view, you see the information which
you have entered while attaching, such as notes.
Fig.: Application window of Normfall Manager with structure and list view.
Learn more about using Plug-Ins for Attaching Documents (to a
Specific Target) 62 in the chapter Attaching Files 58 , Attaching
Documents from Windows Explorer 74 , and which further
Attachment Functions within the Normfall Manager Window 59
can be found.
How you can find attached documents - especially in complex
structures - is described in the following chapter of the Tutorial:
Searching Attached Documents 44 .
3.3.4 Searching Attached Documents
The more complex your work will be, the more complex your
structure will be, especially if various documents have to be
attached. To allow you to quickly search for desired information
and files even in extensive structures, in this section we will
present the search functions as well as the Document references
command (the key combination Shift + F6) by means of which
you get an overview of the structure nodes to which the
documents searched for are attached.
Search functions
1a) Find in Project
Two options are available to you to search the structure or
attached documents.
For an extensive search including the possibility of defining
different search criteria, proceed in the following manner:
1. Press the key combination 174 Ctrl + s or, alternatively, use
the Find in Project command 167 from the Structure menu 169 .
Ctrl + s
In the list view, a new tab with the name New Search will open.
2. Enter the search term in the field Find what: (e.g. the
filename or parts thereof).
© 2008 Normfall GmbH
Introduction
Normfall Manager does not distinguish between
upper and lower case letters.
3. Refine your search and select a certain period of time by
means of the calendar function. To do so, place a check
before From in the Date section.
For more detailed information on further search criteria, please
refer to the chapter Searching and Finding 101 .
4. Start the search by pressing the Enter key, or, alternatively,
clicking on Go.
Normfall Manager lists all search results:
In our example, we searched for files with the name "Statement".
A Word document with the filename "Statement Miller.doc" has
been found. On the left in the structure view, the structure node
to which the document is attached has a colored background
(green). In our example this is the structure node "Witnesses":
It is possible that your search returns an entire list of results; if
you click on the individual search results in the list view the
background of the corresponding "location" (thus, the structure
node) in the structure view will be colored (green).
Click on Locate to arrive directly at the location in the structure
view where the document is attached to.
1b) Quick Search
Use the search field in the toolbar 172 to execute a quick search
within the structure. Special search criteria cannot be entered
here. The quick search is particularly useful if, e.g., the name of a
desired file or parts of the name are known and thus only the
© 2008 Normfall GmbH
45
46
Normfall Manager 4.0 User Manual
structure has to be searched.
1. Enter the term to be searched for in the search field:
2. Press the Enter key, or, alternatively, click on the
magnifying glass icon next to the input field.
In the list view, a tab with the search result will open.
When you do not need the tabs for the search any more (for each
search, a new tab will open) close them by clicking on the x.
If you have executed different searches you can display them by
clicking on the arrow symbol next to the search field. In order to
search for a term again, click on it in the list and start the search
as described above.
2) Document references
Ctrl + Shift + F6
If a document has been attached to a structure node some time
ago or if the structure is particularly complex containing various
documents, it can be useful to have an overview once the search
finishes to know whether the document is assigned to other
structure nodes. In this case, proceed in the following manner:
1. Click on the corresponding document in the list view.
2. Click on View in the List menu and then on Document
references to show the corresponding tab.
Alternatively, you can execute this command with the key
combination Ctrl + Shift + F6.
© 2008 Normfall GmbH
Introduction
Fig.: Document references tab with all locations of the attached document
Here, all structure nodes to which the document has been
attached are listed under the corresponding document. If you
click on a structure node in the list view, it will have a colored
background (green).
Next to the filename of the document you find information in
parentheses which defines whether it is a shared content location
and how many of these exist. In our example, the file "Statement
Miller.doc" exists as a simple copy at the two structure nodes
"Witnesses" and "Miller".
© 2008 Normfall GmbH
47
4
User Guide
User Guide
4
User Guide
4.1
Creating New Projects
New Normfall projects can be created by means of different
functions. Thus, you can use the file command New Project,
create a project from a structured Word document or also from
your folder structure in the file system. You can also create a new
project by copying another project or by means of Windows
Explorer. In the following section you will find more information on
this topic.
New Normfall Project
To create a new Normfall project file, click on the menu File and
then on New Project.
Alternatively, you can use the key combination Ctrl + n, or click
on New Project in the toolbar if a project has not been loaded yet.
A dialog box will appear in which you will be requested to select
where the new project should be created. You can choose
between a new project file in your file system and a new project
on the SQL Server.
· Creating a new project file
A dialog box will appear in which you will be requested to enter
the name and location under which you would like to save the
new project file. It is recommended that you create a separate
project folder 52 for each project and place each project folder
within another root folder (named, for example, "Normfall
Projects").
· Give your project file a name and save it in the project folder.
If you create several project files, please take note to
place each file in its own (project) folder since the
documents attached to the structure of the project will
be saved in this folder.
When saving a project file a prompt will be displayed which asks
you to determine whether a new project folder of the same name
should be automatically created for the new project.
© 2008 Normfall GmbH
New Project
Ctrl + n
49
50
Normfall Manager 4.0 User Manual
If you always create project folders for your projects on your own,
you can answer the question by clicking on the No button and
activate the option Recall my response such that the prompt will
not be displayed when creating a new project any more. You can
(de-)activate this setting under Tools | Options | Prompts.
If there is still no corresponding project folder for the new project
you can answer the question by clicking on Yes in order to
automatically create a folder.
· Creating a new project on the SQL Server
You will find detailed information about this function in the chapter
Projects on a Database Server. 112
New from Word Document
New from Word Document
You can convert a document structured by means of the
structuring function of Microsoft Word to a Normfall structure. For
further information please refer to the section Converting
Structured Text Documents 81 .
New from folder structure
New from Folder Structure
With this function you can creat a Normfall project from a folder
structure found in your file system; this structure will be adopted
by Normfall Manager one to one. Folders and subfolders will be
represented as structure nodes and subnodes in the new
Normfall project.
The files saved in the folders will appear as references to the
given structure nodes in the reference list. You can convert a
folder structure into a Normfall project in the following manner:
1. In the main menu 169 , click on the button 166 New From Folder
Structure or execute the command found in the File menu.
2. A dialog box will open in which you are required to select the
folder to be imported.
3. Click on OK and define in the following dialog box where the
new project is to be created. You can choose between your file
system and the SQL server.
4. Give a name to the project that you are creating in the next
© 2008 Normfall GmbH
User Guide
dialog box and confirm by clicking on OK.
5. The folder structure will be converted to a new Normfall
project, which will then be opened.
The Normfall project file will automatically be created in the folder
that was used for the base of the structure.
Creating new projects by copying project files
It is also possible to create a new project by copying an already
existing project file in your file system and pasting it to a new
project folder to be created. If your projects generally have a
similar structure, you can easily create new projects of similar
structure in the following manner:
1. Create a new Project Folder
52
in your file system.
2. Copy the desired "master" template of the project file.
3. Paste the copy from the Clipboard 176 to the new project folder.
4. Rename the new file.
When opening a project file created by copying for the first time,
the following warn dialog box will appear:
Since when creating a new project with Normfall Manager a
unique file name in the form of an identification number required
for the hyperlink functionality 98 is distributed, Normfall Manager
proposes - when opening a copied file - a unique name which you
confirm by clicking on OK. The File menu allows to change this
name under Properties 126 .
If the copy only exists temporarily, click on Cancel.
In order to prevent the warn dialog box completely delete or move
the original file.
© 2008 Normfall GmbH
51
52
Normfall Manager 4.0 User Manual
Creating a new project in Windows Explorer
To create a new project in Windows Explorer select the Normfall
Manager 4 Project command from the File | New menu.
4.2
Special Folders
4.2.1 Folders in the File System
Project Folder
When creating a new project you are requested to define a
location for the project. First of all, you create the project folder
which contains the project file and in most cases all documents
as well - thus, it is also the document folder. Normfall Manager is
also able to automatically create a new project folder. Please
refer to chapter Creating New Projects 49 for more information on
this feature. However, you can create any number of subfolders
within this folder to save documents. Please take note
· that the Normfall project file is saved on the uppermost level of
this folder and
· that you select a drive with sufficient free memory capacity.
Extensive projects with several hundreds or even thousands of
scanned office folders can require several gigabyte.
Advantageously, all project folders are collected in a subfolder
(the folder that they are found in is called the root folder).
Under Tools | Options | Project you can determine for
the current project as well as for future projects
whether the project file should be saved in this project
folder or in an alternative folder. For further
information, please refer to the chapter Current
Project 151 .
© 2008 Normfall GmbH
User Guide
Fig.: Project folder with a subfolder for saving documents, the auto folder, the
inbox folder and the project file.
Normfall Manager automatically saves documents to be attached
in the project folder. You do not have to determine this location
as the save location for files that you would like to attach in
advance. Thus, if you attach a file which is not yet in your project
folder, Normfall Manager automatically creates a special folder
named Auto Folder 53 and saves the corresponding file at this
location.
The Project Folder tab in the list view of Normfall Manager shows
the content of the project folder.
Auto Folder
The Auto Folder is a subfolder of your project folder and is
created with the name "_Auto" by Normfall Manager (the
preceding underline guarantees that the folder appears at the
beginning of alphabetical order). All documents which are not yet
in the Project Folder 52 are automatically copied there when
being attached. Thus, for example, e-mails are generally taken
over to the Auto folder by means of the Outlook plug-in (see the
chapter Plug-In for Microsoft Outlook 65 ) during the attachment
process.
The Auto folder can be deactivated under Tools | Options | Attach
settings such that you are requested to enter the desired location
within the project folder when attaching a reference.
The Auto folder is displayed by default under the project folder
tab. Thus, this setting can be deactivated by system
administrators by means of the Normfall Manager Administration
Kit.
© 2008 Normfall GmbH
53
54
Normfall Manager 4.0 User Manual
Filename conflict
If Normfall Manager notes during an attachment process that a
document with the same name already exists in the Auto folder, it
executes a complete file comparison. If it is the same file, the
already existing copy will be attached.
Even if the files differ minimally, a new copy will be automatically
created by adding a number to the filename.
Inbox Folder
Normfall Manager creates the Inbox Folder in your project folder
52
automatically and has the name "_Inbox" (the preceding
underline guarantees that the folder appears at the beginning of
alphabetical order). You can save to this folder, e.g., all scanned
documents which are relevant in the course of your work and
should be attached to the project later on.
Note: The name of the inbox folder (English:
"_Inbox", German: "_Eingang") is saved invisibly in
the project options and therefore always depends on
the language setting that was activated when creating
a new project.
If you work with Normfall Manager in a network you can
determine that a folder located at a central location in the file
system will be used as the Inbox folder such that other users can
access it (see below). Thus, it is possible that your colleagues
can save documents for you. It is also recommended to save
edited documents which are to be newly saved in the Inbox folder
and to attach them again later on. For further information, please
refer to the section Editing Attached Documents 81 .
The content of the Inbox folder represents the corresponding tab
of the list view 30 named File Inbox. Files arrive in the Inbox
folder by saving them there. Alternatively, files can also be pulled
directly from Windows Explorer to the list view by means of drag
& drop 91 (see the corresponding chapter). To do so, the File
Inbox tab has to be in the foreground.
You can also save linked documents to the inbox
folder. In this case the document to which the link
refers will be attached. This function is especially
helpful if the respective tasks of a working process (e.
g. saving and attaching documents) are executed by
several members of a team.
Global Inbox Folder vs. project related Inbox folder
The Tools | Options | Folders 142 menu allows you to select a
global File Inbox at any location in the Windows Data System
and to give it any name. In this case, the inbox folder is applied to
all Normfall project folders which you have created. Then, the
© 2008 Normfall GmbH
User Guide
inbox folder created by Normfall Manager in your project folder
remains empty. This possibility allows you to centrally save
different types of documents. You or your employees can decide
to which Normfall project folder these documents should be
transferred.
To do so, it is still necessary to activate the checkmark in front of
Use Global File Inbox under Project | Current Project.
Alternatively, you can create a project related Inbox Folder by
keeping the check box described above in the Tools Menu empty.
In this case, the File Inbox will be applied to the currently used
Normfall project folder.
Export Folder
Documents which are further edited outside of Normfall Manager
to, for example, send them as an e-mail, are copied to the Export
Folder. This is a temporary folder where the content will
automatically be deleted after a pre-defined number of days.
Normfall Manager creates this folder in a folder which is
independent of your Project Folder 52 and manages it
automatically.
The menu Tools | Options | Folder 142 allows you to change
settings with respect to the Export folder.
Backup Folder
If you do not work on a database server a Backup copy 107 of the
project file will optionally be created each time you close it.
The Backup folder is by default the TEMP folder of the system.
The contents of this folder will be deleted from the system in the
process of data media clean up. If this is not desired, another
Backup Folder can be selected in the options.
Maximum Length of Filenames
If a project is to be burned, for example for data backup on a CD
or a DVD, the maximum length of filenames may not exceed 64
characters since CDs and DVDs work with the so-called Joliet file
system which can process only filenames of up to 64 characters.
During the burning process, the filenames are reduced if
necessary and, thus, the references to these attached documents
may be lost.
When attaching files with longer filenames, a corresponding
warning notice will appear in Normfall Manager:
© 2008 Normfall GmbH
55
56
Normfall Manager 4.0 User Manual
You can deactivate this dialog box in the menu Tools | Options |
Prompts.
When attaching e-mails, the filenames are
automatically reduced to a maximum length for Joliet
(64 characters).
4.2.2 Folders in Microsoft Outlook
Normfall
It is possible to automatically collect e-mails in a special folder in
Microsoft Outlook when attaching. This folder is called
"_Normfall" and is created in the Inbox once you attach e-mails
by means of the Plug-In for Microsoft Outlook 65 to your project.
To do so, activate the corresponding option under Tools | Options
| Attach settings 147 . The corresponding e-mail will thus be moved
to the _Normfall folder.
Normfall Transfer
The folder "_Normfall Transfer" is automatically created by
Normfall Manager in the "Sent Items" folder of Microsoft Outlook
as soon as you attach elements with a command of the plug-ins
for Microsoft Outlook 65 to your project. When being attached,
the elements are transferred from the "Outbox" folder to the
_Normfall transfer folder and are attached within the same step provided that a Normfall project is currently open.
However, it is also possible to manually copy e-mails to this
folder. In this case, the Attach Box 75 will open automatically by
means of which you can select structure nodes to which you want
to attach references. If you define special filter rules in Outlook,
you can automatically move certain e-mails to the _Normfall
transfer folder and attach them subsequently.
© 2008 Normfall GmbH
User Guide
4.3
Saving and Attaching Files
When you connect documents in the form of files to structure
nodes 35 in Normfall Manager, this is called attaching files 58 to a
structure or in a Normfall project 35 . Attaching to a structure node
works essentially like copying files to a folder. Additionally,
Normfall Manager makes certain commands available to you that
make working with these files efficient and comfortable.
Before attaching files, you should decide whether you would like
to keep the files in a folder structure or whether you would like to
allow Normfall Manager to completely take over the task of
managing the files - or copies thereof. For more on this topic,
read the chapter Storing Files 57 .
4.3.1 Storing Files
During the attaching process you have the option to attach a
document as an original or copy. To attach an original document,
one of the following conditions must be fulfilled:
· The document is already in the project folder
to which it should be attached.
52
of the project
· The document is available on the Internet or a document
management or e-mail system that distributes unambiguous
document IDs and is explicitly supported by Normfall Manager.
If one of these conditions is not fulfilled, a copy of the document
can be created in the project folder during the attaching process.
When doing so, you should be certain whether this copy should
be used as the original in the future, meaning that you will edit
this file in the future, or left simply as a copy (for example, for
archival purposes).
The following sections, Manual Storage 57 and Automatic
Storage 58 , provide an overview on this subject.
Manual Storage
There are many documents that you regularly use and edit and
that you would like to be able to quickly open from an application
(e.g. text processing). Think of, for example, letter templates or
drafts that with time turn into complete documents and elaborated
texts.
These documents should also be available using the folder
structure of a file system (i.e. Windows Explorer) because other
applications cannot see inside the structure of a Normfall project
to open the needed file.
For this to be possible, you must manually move your
documents to the project folder 52 (for example, in a
corresponding subfolder found there); or you can work in the
opposite direction by turning the existing folder structure into the
project folder 124 .
Documents that are not in the project folder can automatically be
copied to the Auto folder 53 of the project folder during the
attaching process. More on this can be found in the chapter
© 2008 Normfall GmbH
57
58
Normfall Manager 4.0 User Manual
Folders 142 .
Likewise you should manually save those files in the project
folder to which you would like to create a reference using a
specific target. These can be, for example, extensive Word,
Excel, PowerPoint or PDF files that you would like to later open
directly to a specific passage, comment or page.
For attaching to a target you can use so-called plug-ins or
add-ins. More information can be found in the section Plug-ins for
Attaching Documents to Specific Targets 62 .
Automatic Storage
Documents that are not already in the project folder will
automatically be copied to a collection folder (the Auto Folder 53 )
within the project folder when being attached 58 .
The Auto folder can contain many documents over
time. You can find them however quickly and easily in
the structure of your Normfall project!
This possibility is ideal when you
· want to open the document only in your Normfall project or
· want to make a snapshot of or archive the document in the
project folder.
Please take note that Normfall Manager does not delete
documents when you delete references from a project! To delete
documents, go about this in one of the following ways:
· use the command Windows Explorer 135 .
· use the key combination Shift + F6 to show the Document
References Tab
You can deactivate automatic storage in the Options 141 . There
you can also determine whether the original location of the file
should be recorded.
If a copy of a document has been created in the Auto
folder, you can use the Original button found in the
toolbar 172 of the detail view 34 to display the original
document.
4.3.2 Attaching Files
To attach documents you can use different functions which can
be divided into two groups:
· attachment functions that are found in the application
window of Normfall Manager 59
and
· attachment functions that are available outside of Normfall
Manager 61 .
Furthermore there are attachment commands that immediately
© 2008 Normfall GmbH
User Guide
create a document in the list or structure and attachment
commands that call up the Attach Box 75 to attach the document
to several locations of the structure at the same time.
Files that you would like to attach are typically found in the file
system of your computer or a file server that is supported by
Normfall Manager, but can also be found in several external
document sources 78 such as document management systems
(DMS) and online databases (e.g. Juris).
Attachment Functions within the Normfall Manager
Window
In the following section you will find a summary of the functions
with which you can attach documents from within the Normfall
Manager application window 29 . For more detailed information,
references to the command overview are provided.
Commands Found in Menus and Toolbars
Attach
Attach
In the toolbar of the detail view you will find the Attach button with
which you can attach a file to a new (empty) row in the list view or
to a new structure node. This function is also found in the List
menu and can be called upon using the function key F12.
You usually use this command with one of the following
commands: New Annotation 134 (F11) or New Node 133 (F9).
Proceed as follows:
1. Create a new empty reference row by clicking on New
Annotation in the list view.
2. Execute the command Attach.
3. Select the file that you wish to attach from the window that
opens and then click on Open.
To attach a file to a new structure node 133 , create a new structure
node using, for example, the function key F9, name it and then
execute steps 2 and 3.
Using this same method you can also insert URL
references 79 to the list view.
81
and Juris
Quick Attachment List
In the toolbar of the main menu there is a drop-down list in which
recently used documents are displayed:
© 2008 Normfall GmbH
F12
59
60
Normfall Manager 4.0 User Manual
This is also referred to as the Quick Attachment List.
To display a document from the list, select it 168 and click on the
icon next to it (which is marked by a magnifying glass).
To attach a document to several locations of the structure
simultaneously, select it and click on the next command to open
the attach box 137 .
To attach a document directly to the list or structure view, select
the two buttons To Row and To Node described below. They can
also be found in the tool bars of the Plug-ins 62 and offer the
same functionality.
Depending on where the files are saved, they are highlighted in
different colors:
Files within the project folder are highlighted in lilac color.
External files (e. g. linked Outlook elements) are hightlighted in
light blue color.
Documents that are not in the project folder are not highlighted
but remain in white color within the list.
To Row
To Row
With this function you can attach the given document from the
drop-down list (see above) directly to the currently selected
structure in the list view.
To Node
To Node
With this command the given document from the drop-down list
will be pasted as a structure node in the stucture view.
You can convert a file attached to the structure to a row in the
reference list at any time; likewise you can convert a row to a
structure node. How to do this is explained in the section
Converting References 96 .
Holding the Shift button when attaching with this button will
attach the file as a subnode in the structure.
Attaching several files
To attach several documents at the same time, click on the
button Attach Files. A file selection dialog box will appear in which
you can select individual files by pressing and holding the Ctrl
key while clicking on the files that you would like to attach.
Attach Files
Ctrl + Shift + A
To select a sequence of several files one directly after another,
click on the first file in the list, press the Shift key and then click
on the last file of the list so that the entire list of files is selected.
Attach to the list
Click on Open to attach the selected files to the currently selected
structure node in the list view.
© 2008 Normfall GmbH
User Guide
Attach to the structure
61
Ctrl + Open
To attach the files in the structure view, click on Open while
simultaneously pressing Ctrl.
Attach to the structure as a subnode
Ctrl + Shift + Open
To paste the files as subnodes of the currently selected structure
node, click on Open while simultaneously pressing Ctrl and Shift.
Commands Found in the Tabs
Depending on which tab is selected in the list view
different functions available to you.
30
you will have
The following table is a short summary of the commands found in
tabs that are relevant for attaching documents.
Command
Tab
Attach
Project Folder, Recent Docs (Project)
Move File
File Inbox
Attach Copy
Recent Docs (System)
Attach Box
all tabs
How to attach documents from the tab lists can be found in detail in
the corresponding reference chapter of each command: Attach 155 ,
Move File 156 , Attach Copy 156 and Attach Box 137 .
Attachment Functions outside of Normfall Manager
In the following section you will find a summary of the functions
with which you can attach documents outside of the Normfall
Manager application window 29 .
The Normfall Button
After opening a project the Normfall button will appear in the
lower right corner of your screen in the Windows task bar. With
this button you can attach a document that is currently open
directly to your project using the attach box.
Fig. 1: The Normfall Button in the Windows task bar
The position of the button can be changed; additionally the button
can be entirely hidden from view. To do so, click on the Normfall
button with the right mouse button and choose between the three
operation modes found in the context menu: Show in Task Bar,
Hover mode and Hide.
Under Tools | Options | Attach Settings 148 you can use the option
Activate Normfall Button on Desktop to show or hide the button
© 2008 Normfall GmbH
62
Normfall Manager 4.0 User Manual
by default.
Fig. 2: The Normfall button in hover mode
In the context menu you will find a list of all active projects. Here
you can choose for which projects the Attach Box 137 should be
opened as soon as you click on the button.
If you press and hold the Shift key while clicking on a project, the
project will merely be activated (moved to the foreground) but its
attach box will not be opened. There you can create a reference
using, for example, the Quick Attachment List 59 or the
commands found in the Recent Docs tabs 32 .
Plug-ins for Attaching Documents (to a Specific
Target)
What are plug-ins?
Normfall Manager allows you to install so-called plug-ins, which
are also known as add-ins.
Plug-ins are complementary modules of a piece of software (in
this case Normfall Manager) that are embedded in other
applications; that is, they are integrated into the interface of the
software. You can install plug-ins and add-ins for the full version
of Adobe Acrobat 7.0 (and higher) as well as Microsoft Office
Package (beginning with the 2003 Version) and Microsoft Internet
Explorer (beginning with Version 7.0), with which you can attach
documents and files to your Normfall project directly from each
application.
Plug-ins are typically displayed in a new toolbar found in the
application window of the programs for which they are installed.
The plug-ins are activated in the Tools menu using the command
Plug-in Installer 139 .
What can the plug-ins of Normfall Manager do?
Attaching to a specific target is made particularly comfortable
with plug-ins. You can use plug-ins to determine a specific
location within an extensive document of several hundred pages
as target of a reference so that the attached document will
automatically be opened to this location in the future.
This function is very useful in various situations, e.g.
· if a witness deposes at a court and you wish to object a certain
document
· if you are searching for certain documents during an arbitration
procedure
· in case of an extrajudicial hearing procedure
· during a telephone conference
· during dictation of a pleading
© 2008 Normfall GmbH
User Guide
· etc.
You save time and are always perfectly informed.
Since plug-ins are intended for attaching to a specific target and it
is often the case that you would like to attach to more than one
target in large documents, it is recommended that you manually
save documents that you would like to attach using a specific
target to your project folder. Further information on this topic can
be found in the sections Storing Files 57 and Special Folders 52 .
Under Tools | Options | Folders 141 you can activate the Auto
folder as the location to which documents that are not currently
found in your project folder will automatically be moved when
being attached to your structure.
If the Auto folder is not activated, a dialog box will appear, with
which you can save the document to your project folder. This
method will save a copy to your project folder which you will be
able to edit in the future.
What do plug-ins look like?
If Normfall Manager has already been started, the plug-ins
appear in the form of a toolbar in each application and typically
offer the following commands:
If Normfall Manager has not already been loaded, the button
Launch Normfall Manager with the plug-ins for the Microsoft Office
Package which allows you to load the application appears.
Activating and Deactivating Plug-ins
Installation
To be able to use a plug-in it first has to be installed on your
computer. If you have administrator rights on your computer, you
can install and deinstall plug-ins quickly and easily using the
command Tools | Plug-in Installer 139 .
Show/Hide
You can show or hide the toolbar 172 of the plug-ins in each
application; thus activating or respectively deactivating efficiently
the plug-in.
This setting is valid for you personally on all computers that you
© 2008 Normfall GmbH
63
64
Normfall Manager 4.0 User Manual
log on to with the same Windows account.
To show or hide the toolbar, click with the right mouse button
on any toolbar of the application where you would like to show or
hide the plug-in. A context menu 167 will open in which you can
select the toolbars that you would like to show. Select the toolbar
that is denoted with Normfall.
Commands in the Plug-ins
Each plug-in has a toolbar 172 that typically contains the following
commands 167 :
Launch Normfall Manager
Launch Normfall Manager
Use this command to choose a project to be opened to which you
would like to attach documents.
The following commands affect the active Normfall project. This
is the currently open project in which you have last carried out an
action (more precise: the application window that has lastly had
focus).
Normfall Manager
Normfall Manager
This command opens the Attach Box 137 of the active project.
This allows you to attach the document to several locations of the
structure simultaneously; any entries within the comment editor
will automatically be synchronized for all references.
To Row
To Row
Use this command if a structure node of your structure is already
selected and the document should be attached as a reference
row 36 of this structure node.
To Node
To Node
Use this command if a structure node of your structure is already
selected and the document should be attached as a structure
node 35 under the currently selected one.
Hold the Shift key long enough during the attaching process and
the structure node will be created as a subnode.
If the document that you would like to attach is
not located in the project folder, it will be saved
there during the attaching process. This has the same
effect as the Save as command for the Microsoft
Office plug-ins (with the exception of Outlook); this
means that you will edit a copy of the document in the
future.
© 2008 Normfall GmbH
User Guide
Plug-in for Microsoft Outlook
Types of Outlook windows
Outlook has a main window and opens another window for each
so-called element. An element can be, for example, an e-mail, a
contact, a note or an event.
The toolbar of the plug-ins is available in both types of
windows. In the main window many of the plug-in commands
can be applied to several selected elements of a list at the
same time.
Normfall Manager attempts to find the optimal type of attachment
for each type of element: unsent e-mails will, for example, be
sent 66 and elements with frequently updated contents (e.g.
contacts) are linked 66 , so that the attachment refers to the
updated version of the element in Outlook's saved data.
Attaching e-mails
In the chapter Commands in the Plug-ins 64 , the basic function of
the three attach commands Normfall Manager, To Row and To
Node is explained.
When attaching e-mails via the plug-ins the text of the e-mail
message is automatically copied into the text editor of the detail
view and locked for editing, which is indicated by the grey shaded
text editor area. For more details please refer to the chapter
Detail View 34 .
Copying e-mails to the Inbox Folder
The Outlook plug-in has the special command To Inbox. Apply
this command to pre-sort emails that you would like to attach
later.
The elements will be copied to the inbox folder 54 of the active
project. This can also be, depending on the project settings, the
global inbox folder.
Attaching e-mails with attachments
When attaching e-mails with file attachments, the file attached to
the e-mail will be extracted - that is, separated from the e-mail and displayed indented in the list view:
In this way it becomes clear in the list view, which file
attachments belong to an e-mail so that these can be directly
opened using Normfall Manager.
© 2008 Normfall GmbH
To Inbox
65
66
Normfall Manager 4.0 User Manual
With e-mails that are not attached using the plug-in
but rather with the drag and drop 91 technique, the email attachments remain in the e-mail and are not
extracted. In addition, all Outlook elements attached
in this manner appear with e-mail icons.
Moving e-mails while attaching
Under Tools | Options | Attach settings 147 you can determine
whether e-mails are moved to a special subfolder of the inbox
during the attaching process. You then manage these e-mails
only in the project structure and keep merely a "backup copy" in
Outlook.
Automatically attaching e-mails when sending
Concerning unsent e-mails the function of the attach commands
change to "Send and Attach". The e-mail will first be sent, then a
copy of the sent e-mail will be attached to your structure.
Linking elements instead of copying
With element types with frequently updated contents such as
notes, contacts and events, the function of the attach commands
changes to "Attach as Link", so that the reference refers to the
current version of the element in Outlook's saved data.
The link can however be "broken", if you move the element within
Outlook. For more on this read the section Moving Linked
Outlook Elements 67 .
Tabular Overview of the Outlook Attachment Types
The following table provides an overview of what happens when
executing each attachment command for each type of element:
Buttons of the Plug-ins
Outlook Element
Element Type
sent/received
Normfall Manager
To Row
To Node
- Saves the e-mail
to the Normfall
project folder.
- Saves the e-mail
to the Normfall
project folder.
- Saves the e-mail
to the Normfall
project folder.
-Opens the attach
box.
- Attaches it to the
current structure
node.
- Adds it to the
current structure
node as a
subnode.
- Sends the email.
- Sends the email.
- Sends the email.
- Saves it to the
Normfall project
folder.
- Saves it to the
Normfall project
folder.
- Saves it to the
Normfall project
folder.
-Opens the attach
- Attaches it to the
- Adds it to the
Copy To Inbox
E-mails
not yet sent
Saves the element
to the file inbox
folder.
© 2008 Normfall GmbH
User Guide
Notes, Contacts,
Events, etc.
all
box.
current structure
node.
current structure
node as a
subnode.
- Opens the attach
box.
- Creates a link in
the reference list
of the current
structure node.
- Creates a link as
a subnode of the
current structure
node.
- Creates a link.
Tip for attaching from the Drafts folder:
Elements that can be sent cannot be attached directly from this
folder. This is made clear by the inactive plug-in commands in the
Outlook toolbar. Attaching will be possible as soon as the given
element is opened for sending or editing.
If a linked element is moved in Outlook (for example, a note or a
contact), whether or not the reference to this element remains
valid in Normfall Manager depends on the type of message store
used.
In an Outlook PST file links remain valid even if the element is
moved. On an exchange server this is not the case. With third
party message storage this depends on the architecture of the
message storage.
When moving linked elements between several message
storages (for example, during the archiving process in Outlook),
any links will be lost.
Tip: Since all Outlook elements contain unambiguous
identification numbers, moved elements can generally
be found again and the links to these elements
restored.
If you would like to open an Outlook element with Normfall
Manager, but the element cannot be found, a dialog box will
appear with the title "Select Folder", in which you can select the
Outlook folder or a superior folder of the Outlook folder or
respectively the message store, which will search for the element
in that folder. You can cancel the search, which can be fairly
lengthy, at any time. As soon as the element has been found the
link will be restored.
Please take note that the project has to be open with
write access so that a reference to an element that
has been found again can be restored.
Plug-in for Microsoft Word
The Word plug-in has two different application areas: creating
attachments and converting structured text to a Normfall
Manager structure 68 . First, the attachment of documents will be
handled:
Attaching documents
© 2008 Normfall GmbH
67
68
Normfall Manager 4.0 User Manual
The Normfall plug-in for Microsoft Word makes it possible to refer
to any section of a Word document marking them by so-called
bookmarks.
It is recommended to show bookmarks in Microsoft
Word. To do so, refer to the Tools | Options |View
menu and check the Bookmarks checkbox.
In the chapter Commands in the Plug-ins 64 the basic functions
of the three attach commands Normfall Manager, To Row and To
Node is explained.
If a text passage is selected when attaching, this passage will
automatically be attached using a bookmark generated with the
name "Normfall" and a number determined by increasing
numerical order. Additionally, the passage will be copied into the
text editor of Normfall Manager and the beginning of the passage
is pasted into the title field.
If a text marker (text cursor) is already in an area of the document
marked by a bookmark, the reference will refer to this bookmark.
If no text passage has been selected (and if no bookmark exists
at the current text passage) the document will be attached as a
whole. Thus, in order to refer for example to any page in the
document when attaching it, at least one word must be selected
on the desired page.
Inserting a bookmark is an alteration to the document.
Therefore, a corresponding warning will appear when
attaching the document:
Click on OK. To no longer receive this message, place a check in
front of Don't show again. In the menu Tools | Options | Prompts
you can change this setting again.
If the document is not yet in the project folder a further dialog box
will appear that asks you to save the file to the project folder.
Creating a Normfall structure
© 2008 Normfall GmbH
User Guide
Using the command To Structure you can create a Normfall
structure out of a structured Word file (for more see the chapter
Creating a Normfall Structure from a Word Document 81 ).
If a project file is already open the following dialog box will
appear:
The path of the document that you wish to convert is given under
"Source". You can determine whether the entire document,
selected text, or a section beginning with a given bookmark
should be converted.
Additionally you can determine to which location in your structure
the text should be inserted. You have the option of replacing the
currently selected structure node, inserting the text below this
structure node on the same level or as a subnode.
If there is no project file open, the following dialog box appears:
© 2008 Normfall GmbH
To Structure
69
70
Normfall Manager 4.0 User Manual
a) Under "Source" you will find the path of the Word file that you
would like to convert. You can decide whether the complete
document, selected text or a section of the text after a certain
bookmark should be converted.
b) Click on Browse after "Path", to define the name and location
of the project file that you would like to create.
c) Select the text formatting under "Options" that should be
imported.
You can also select an existing project file. This will
then irreversibly be overwritten during the input
process.
Plug-in for Microsoft Excel
The Normfall Manager plug-in for Microsoft Excel makes it
possible to refer to specific targets in worksheets or cell ranges in
extensive Excel tables with several table sheets. A sheet, cell
range, name or local name can be defined as the target of the
reference.
Attaching with the plug-in
In the chapter Commands in the 64 plug-ins 64 the basic function
of the three attach commands Normfall Manager, To Row and To
Node are explained.
On the left side of the plug-ins toolbar there is a so-called toggle
button with the name Generate Name, which can be activated or
deactivated. The possible states are "Generate cell range names
(OFF/ON)". If this button is activated, a new global name will
automatically be created for each attachment in the Excel
workbook to which the reference will refer (e.g. "normfall5"). A
reference can also be created for a local name which has to be
© 2008 Normfall GmbH
User Guide
entered in combination with the table sheet.
If the toggle button is deactivated, a reference of the type
"range" will be created. For this range, you can define a name in
Excel that can be entered as the reference target in Normfall
Manager.
Select a range that should be attached and then select the
desired attach command from the Normfall toolbar.
Creating a name for a cell range is an alteration to the document.
Therefore, a corresponding warning will appear when
attaching the document:
Click on OK. To no longer receive this message, place a check in
front of Don't show again. In the menu Tools | Options | Prompts
you can change this setting again.
If the document is not yet in the project folder a further dialog box
will appear that asks you to save the file to the project folder.
Attaching manually
All cell ranges can also be entered manually in the attach box as
reference targets. In this case a special syntax needs to be taken
into consideration. The following table provides an overview of
this syntax:
Reference Target
Syntax
Example
Sheet
Sheet
"Table1"
Range
Sheet!Range
"Table1!A10:D10"
(Global) Name
No Syntax
"normfall12"
Local Name
Sheet!Name
"Table4!normfall8"
If you show the file information in the detail view by clicking on
the plus button, you can also enter the reference target manually
into the field Pos. using the syntax found above.
© 2008 Normfall GmbH
71
72
Normfall Manager 4.0 User Manual
Plug-in for Microsoft PowerPoint
The Normfall Manager plug-in for Microsoft PowerPoint makes it
possible to refer to a specific slide within a presentation.
In the chapter Commands in the Plug-ins 64 the basic function of
the three attach commands Normfall Manager, To Row and To
Node is explained. Each of these creates a reference to the
currently selected slide.
Using Normfall Manager with Microsoft PowerPoint for
presentations
Using Normfall manager you can arrange your presentations in a
more flexible manner by opening presentations directly to specific
slides. You can return to slides that have already been presented
or skip to slides that would usually come later in the presentation.
The following instructions describe how to do this using a laptop
and projector:
1. Create a structure of your presentation using Normfall
Manager.
2. Attach the individual slides of your presentation to the
thematically corresponding structure nodes.
For the presentation:
3. Start Normfall Manager.
4. Open the first slide of the presentation and start the
presentation mode in PowerPoint using function key F5.
You can now call up individual slides of the presentation and
navigate flexibly forward and backward through your
presentation.
Manually attaching PowerPoint slides
If you attach PowerPoint slides by hand (by filling out the
corresponding boxes in the reference window or in the detail view
34 ), you have two types of targets available:
· A slide ID will automatically be created by PowerPoint and
remains available even if the numerical order of the slides
changes due to the insertion or removal of slides. With the slide
ID you always have the option of attaching directly to a specific
slide. Therefore, the plug-in always attaches the slide ID.
· You can also enter the slide number as reference target but if
you change the order or number of slides in your presentation
this reference could be moved to another slide.
Plug-in for Microsoft Internet Explorer
For Microsoft Internet Explorer beginning with version 7.0 there is
a plug-in that can be used to attach entire web pages by default
as offline versions (in the form of a copy of the web page in
HTML format) to your project. Sole exception are offline versions
of Juris Documents 79 which are saved as PDF files.
© 2008 Normfall GmbH
User Guide
Additionally there is the option of attaching an online version of
the web page in the form of a bookmark to the corresponding
web page.
Tip: When attaching web pages as offline versions
you can however open and view the web page online
by using the Original button found in the toolbar of the
detail view . In this way actually both functions (offline
and online versions) are used.Further information on
this function can be found in the chapter Show
Original 135 .
To attach web pages in this way use the functions found in the
Normfall toolbar:
In the chapter Commands in the Plug-ins 64 the basic functions
of the three attachment commands Normfall Manager, To Row
and To Node are explained.
Plug-in for Adobe Acrobat
The Normfall Manager plug-in for Adobe Acrobat makes it
possible to attach directly 36 to a page, comment, or entire text
passage in an extensive PDF document of several hundred
pages.
In addition this plug-in makes it possible to attach to special PDF
targets (called Named Destinations): This type of target doesn't
only refer to a specific page, but to a given display detail with a
Zoom factor, that will be recreated when opening the attached
document. This feature is most useful in cases where, for
example, very large Excel sheets are displayed in a very small
form that fits on a DIN/ISO A4 PDF page.
Attaching this type of PDF target is the default setting in this plugin. Since the target is first created with the reference, you must
have write access to the document that you would like to attach.
In the chapter Commands in the Plug-ins 64 the basic function of
the three attach commands Normfall Manager, To Row and To
Node is explained.
Selecting the target type
Please see the chapter Different Versions of Acrobat
178 , which contains more information about opening
attached PDF files.
In the drop-down list on the left of the buttons, the target type that
is most appropriate for the current selection will automatically be
displayed:
If you have, for example, used text tools to select a text passage,
Attach Text will appear in the drop-down list.
If a note was created and you have selected it by clicking on it in
the document, Attach Annotation will appear
© 2008 Normfall GmbH
73
74
Normfall Manager 4.0 User Manual
Fig.: Drop down menu of the Acrobat plug-in
As soon as you click on one of the attachment commands to the
right, an attachment of the corresponding type will be created.
You can also choose a different type in advance to attach, for
example, the entire document instead of the current display
detail or you can refer to the page instead of creating a target, so
that the document does not have to be changed.
Creating a target or an emphasis for a text passage is a change
to the document, which will call up the following dialog box
requiring you to save the file:
Confirm by clicking on OK. To no longer receive this message,
place a check in front of Don't show again. (In the menu Tools |
Options | Prompts you can change this setting again.)
Attaching Documents from Windows Explorer
To attach files directly from Windows Explorer to an open
Normfall project, click on the given files with the right mouse
button to open the context menu:
© 2008 Normfall GmbH
User Guide
In the chapter Commands in the Plug-ins 64 the function of the
three attach commands Normfall Manager, To Row and To Node is
explained (the command Open Project does not exist here).
The commands To Row and To Node also work when
several documents are selected! In this case all
selected documents will be attached.
The Attach Box
With the attach box multi-dimensional references can be created
for several structure nodes at the same time. The reference
rows created for a file are created as shared content locations 97 ,
such that later changes to the comment text will have general
impact.
The attach box can be displayed using different commands 167
within the Normfall window 29 , for example, in the tabs 30 Project
Folder, File Inbox, Recent Docs (Project) and Recent Docs (System)
, as well as by clicking on the Normfall button 170 , which is located
outside of the application window 29 , or by means of the plug-ins
62 in other applications.
The interface of the attach box is divided into three views like the
application window of Normfall Manager. The size of each view
can be changed by pulling the separators 171 found between the
views with the mouse.
To the left is the structure view. On the small toolbar you will find
the commands New Node and New Subnode, which you can use
to add new structure nodes to your structure. You can expand
and collapse structure nodes that have subnodes by clicking on
the plus and minus buttons.
© 2008 Normfall GmbH
Attach Box
75
76
Normfall Manager 4.0 User Manual
In the upper window to the right of the attach box you will find the
following fields and buttons:
Filter
Here you can filter recent documents in the field Document
according to the type of the file needed. If you enter, for example,
"*.xls" into the Filter field, you will only find results in the
Document field that are in xls format.
You can also search for an entire document name and use "?" as
a replacement for an individual letter. If you cannot remember the
exact name of the person that you would like to search for, you
can search for, for example, "?on". This will return all documents
with "Ron", "Jon", "Don", etc. in the file name.
To replace several letters, use the "*" character as a filter.
Example: With the filter "com*", all results will be listed that
contain "com" in their name. The following results could be
returned, for example, "computer", "comport", "communication".
Document
In the field Document the last used document is generally found.
On the other hand, if you open a file using the corresponding
command of a certain program, the file name does not
necessarily appear automatically in the field Document (this
depends on the program). By clicking on the arrow symbol next to
the field you can choose the desired file from a drop-down list.
This list contains documents that have recently been opened and
are marked with colored backgrounds. Files that have already
been attached have a yellow background, files that have not yet
been attached have a white background. Links to external
systems have a blue background (the blue entries in a list exist
only for one Normfall "session").
If the file that you would like to attach is of a document type for
which target-specific reference is supported, the field Target
within document will be visible in the next row.
Target within document
Some types of documents can be attached to a structure node
using a specific target. This is facilitated by plug-ins. Sometimes,
however, it is useful or necessary to set this setting here or later
in the detail view 34 "by hand". To do so, select the
corresponding target type (e.g. "page") from the list under Target
within document and enter the desired page number. The next
time you open this file with Normfall Manager the document will
open directly to the given page so that you do not have to page
through the document to find the passage that you are looking
for.
© 2008 Normfall GmbH
User Guide
If you call up the attach box from a plug-in, the target
is usually displayed by default; you can, however,
change it. A target has already been created by the
plug-in at this point and cannot be reversed.
An example: If text is selected, the Word plug-in
creates a bookmark, the Acrobat plug-in an emphasis
.
Date
When attaching a file the date of the last change to the file will
automatically be used here. E-mails that are attached by plug-in
are automatically assigned to their send or receive dates; any file
attachments to the e-mail will be marked with the date of the
e-mail.
You can assign to a reference a given date by entering it by hand
or by clicking on the arrow symbol which displays a calendar from
which you can select a date.
Title
By default the complete file name will be displayed in the field
Title, but can be replaced by another title.
Notes
When attaching from a Word document, the Normfall PDF Editor
or an e-mail, the text (which, if necessary, must previously be
selected by dragging it) is automatically copied into the text editor
and locked for editing (however, it is possible to mark passages
by using the Highlight button). This is indicated by the grey
shaded text editor area. Use the Change to Comment button to
write your own comments.
Change to Comment
Click on the Change to Comment button to enter your own
comments on attached files in the Notes field. The notes field will
then be unlocked so that you can add your own comments into
the text editor. For this purpose, a text editor with formatting
functions 88 is available.
Browse
Click on Browse to choose a file from your hard drive, a
connected piece of equipment or another computer (file server).
Attaching a reference
If you have selected a file you can attach it to one or more
structure nodes simultaneously. To do so, place a check in front
of the corresponding structure node, to which you would like to
© 2008 Normfall GmbH
77
78
Normfall Manager 4.0 User Manual
attach the file (in the structure view to the left).
On the right side of the bottom window of the attach box there is,
in addition to the buttons Remove all and Attach, a field with the
list of all structure nodes, that you have already selected. This list
remains intact until your next reference. This allows you to select
new subnodes for a reference under the same structure nodes
(such as, for example, "contacts" or "people") by clicking on the
(X) behind the corresponding node in the list. In the structure
view the structure node on the level above the current node will
be selected and the check at the subnode of the last attachment
will be removed. In this way you can quickly navigate between
structure nodes to which you would like to regularly attach files.
Individual checks on the left side of the structure can be removed
manually. Click on Remove all, if a file should not be attached to
any of the selected structure nodes and you would like to make
an entirely new selection.
If you have selected all desired structure nodes for a reference,
click on Attach. The attach box will then close and the reference
will be created.
The Attach Box in Relation Mode
With the relation mode set in the current project, additional
functions are available. You can find more information on this
topic in the chapter The Attach Box in Relation Mode 119 .
Attaching from External Systems
Normfall Manager is generally capable of attaching documents
from external systems, such as document management systems
(DMS) and articles from online databases.
Which external systems are supported can be found on our
homepage www.normfall.com, or by contacting our support (see
our homepage).
As this user manual was created, support was as follows:
Direct Support:
· Juris databases
79
· Exchange Server using Outlook
65
Indirect Support:
· WebDAV, particularly Microsoft SharePoint Services, using
drive mapping from Windows.
· All systems on which documents can be referred to using URLs
81 .
© 2008 Normfall GmbH
User Guide
79
Juris Documents (for Users based in Germany)
Juris is the legal information system for the Federal Republic of
Germany belonging to juris GmbH in Saarbrücken.
You can easily attach documents which you have researched
there to corresponding structure nodes of a Normfall project. With
a click of the mouse you can open the documents again in the
Internet.
To do so, you need a vaild Juris account and Microsoft Internet
Explorer. (For other browsers see the section Attaching with other
Browsers 80 .)
In the Tools | Options | Juris menu you can deactivate the option
Enable references to Juris DBs if you do not want to attach Juris
references. Then, the juris button will be hidden in the Normfall
Manager toolbar.
Saving Juris Access Data in Normfall Manager
You can save your Juris access data in Normfall Manager so that
you do not have to enter them on the Juris home page.
To do so, execute the Options command in the Tools menu. Click
on the point Juris in the dialog box which will open, enter your
Juris access data, activate Remember Password and confirm your
entries by clicking on OK.
Attaching with Internet Explorer
Before your juris research, click on the Juris icon in the toolbar of
Normfall Manager (below the menu bar).
If you have saved your access data, Microsoft Internet Explorer
will open the Juris web page where you are already logged into
your user account. Otherwise, the Juris web page will open and
you will be required to enter your Juris identification including
password.
Now, you can research with Juris. If you have found a document
which you want to attach to your project, use the toolbar
commands of the Plug-ins for Internet Explorer 72 . Here, "Juris"
with the option Copy local is already pre-defined as reference
type. With this setting, a juris document is saved and attached in
pdf format.
Normfall Manager
1.) By clicking on this button, the attach box will open.
In the Document field you find the name of the Juris document
to be attached. The Juris document number is selected as
Target within the document.
2.) Select the corresponding nodes to which the document
should be attached in the structure view.
3.) Click on Attach in the attach box.
© 2008 Normfall GmbH
-View Juris Database
80
Normfall Manager 4.0 User Manual
To Row
Select this command if you have already selected a node in your
structure and wish to attach the Juris document to this structure
node.
To Node
For the purpose of pasting a Juris document as a new structure
node to the project, click on To Node. Normfall Manager then
pastes the file as a subnode of the currently selected structure
node.
If you double click on the attached document in the
corresponding reference row, the document will be displayed with
a pdf viewer (in case you attached it offline as a local copy), or
Microsoft Internet Explorer as well as the attached juris document
will automatically open through your Juris account (if you
attached the document as an online version).
Attaching with other Browsers
If you use a browser other than Microsoft Internet Explorer (e.g.
Mozilla Firefox, Netscape or Opera) by default the automatic login
described above is not possible.
In this case, proceed in the following manner:
1. Open the juris document which you wish to attach in your
browser.
2. Then copy the number of the document to the clipboard
(e.g. by selecting the number and then pressing the key
combination Ctrl + c).
The document ID corresponds to the scheme "id=XYZ00000"
and can be found in the address line of your browser:
Fig.: A juris document ID in the browser address line
3. Create a new reference row in Normfall Manager by clicking
on New Annotation in the list view.
4. Click on Attach juris Doc in the detail view.
A dialog box will open into which you can enter the document
number from the clipboard (e.g. by means of the key combination
Ctrl + v).
To open your attached references to juris documents with your
default browser it is necessary to activate in the menu
Tools|Options under the juris setting Use default browser to open
linked documents (no automatic log-in).
© 2008 Normfall GmbH
User Guide
Attach URL
The abbreviation URL stands for Uniform Resource Locator and
represents exact addresses in the Internet.
In the Internet you find various forms of information, such as
legally relevant information, e.g. standards, court decisions as
well as all kind of data. You will often wish to save existing
research results. Normfall Manager allows you to do this easily.
In order to refer to a web page in the Internet, create a new
empty row to the list view. To do so, click on New Annotation.
Then click on Attach URL. In the following dialog box you are
requested to enter the desired URL you would like to refer to.
If the desired web page is currently open in your browser, select
and copy it using the key combination Ctrl + c and paste it with
Ctrl + v to the input row. Confirm by clicking on OK.
In the reference list, you recognize the URL reference by the
following icon:
In the title column, the URL appears as the title of the reference.
4.3.3 Editing Attached Documents
Generally, you can edit a document by selecting the command
View Document 135 from the context menu of the list view, then
editing the open document and saving it normally.
If you want to record the state of editing by means of continuous
copies of the document, use the following procedure after editing
an attached document:
1. Select "Save as" in the file menu of the corresponding
application.
2. Select your Inbox folder 54 as the location and select a new
filename, e.g Document_2008_03_18.
3. Switch to the Normfall application window and attach the
document again using the Move File command found in the
File Inbox tab.
4.4
Converting Structured Text Documents
4.4.1 Creating a Normfall Structure from a Word
Document
You can convert a Word document to a new Normfall structure
or paste it as a branch to an existing project file. To do this, an
outline of the document with uniform Word formatting is
necessary. The headings of the outline are converted to structure
nodes of the Normfall structure depending on their outline-depth.
The flowing text of the document will be inserted into the
comment editor of each structure node.
To read a Word document into a project file you can use any of
the following three commands: New from Word document, Insert
© 2008 Normfall GmbH
Attach URL
81
82
Normfall Manager 4.0 User Manual
from Microsoft Word and To Structure (found on the plug-in for
Microsoft Word).
It is recommended to show bookmarks in Microsoft
Word. To do so, refer to the Tools | Options |View
menu and check the Bookmarks checkbox.
New from Word Document
New from Word Document
You will find this command in the File menu. It allows you to
create a structure of a new Normfall project out of an outlined
Word document.
If a project file is not loaded you can also click on the
corresponding button found in the toolbar.
The following dialog box will appear:
1) Click on Browse under "Source" to select the Word file that you
would like to convert.
You can determine whether the complete document, selected text
or a section based on a given bookmark should be converted.
2) Select the text formatting that should be used under "Options".
3) Confirm by clicking on OK.
4) Choose where the new project should be created in the next
window. You can choose between a file system and a SQL
Server.
Creating a new project file on a file system
Click on File to define the name and save location of the project
file that you would like to create in the next dialog box.
© 2008 Normfall GmbH
User Guide
You can also select an existing project file. This will
then be overwritten during the input process.
Creating a new project on a SQL-Server
Click on Server to create a new project on a database server.
Further information can be found in the chapter Working with a
database Server 112 .
Insert from Microsoft Word
Use this command found in the Structure menu to insert an
outlined Word document to an existing project file:
1) Click on Browse under "Source" to select the Word file that you
would like to convert. You can determine whether the complete
document, selected text or a section based on a given bookmark
should be converted.
2) Unter "Target" you can determine whether the text that you
would like to insert should replace the currently selected structure
node, be inserted below or as a subnode of the currently selected
structure node.
To Structure (found on the plug-in for Microsoft Word)
Using the plug-in a project file can be directly created from Word.
Click on the command To Structure found in the toolbar to do so.
The following dialog box will appear:
© 2008 Normfall GmbH
83
84
Normfall Manager 4.0 User Manual
Under "Source" the path of the file that is currently open in Word
will be displayed.
You can set several settings here, just as found under the topic
New from Word document 82 .
If a new project should be created, click on the corresponding
Radio Button 170 and confirm with OK. The selection dialog box
will open again in which you can determine whether a project file
on your file system 82 or a project on a server 83 should be
created.
4.4.2 Creating a Document out of a Normfall Structure
Normfall Manager allows you to create Word documents or html
files from entire or partial structures. Outlined files with all
structure levels will be created which can be edited further with
the commands of Microsoft Word. Using an html file you can first
see how a Normfall structure appears as flowing text.
This function is also available for partial structures.
Convert to Document
To convert a partial structure to a document, click on the
corresponding structure node with the right mouse button and
select the command Convert to Document from the context menu.
© 2008 Normfall GmbH
User Guide
The individual functions will be explained in the next section.
Convert to Document
To convert the entire structure to html format or to a Word
document, select the command Convert to Document found in the
File menu.
To fully deploy the following options, it is
recommended to show bookmarks in Microsoft Word.
To do so, refer to the Tools | Options |View menu and
check the Bookmarks checkbox.
Fig.: Dialog "Create Document from Structure" with the option "Microsoft Word" set.
If the option "Microsoft Word" is selected, the following settings
can be set here (if the selected output format is html, non
required options are hidden):
© 2008 Normfall GmbH
85
86
Normfall Manager 4.0 User Manual
File format
Here you can determine the format of your target file. You can
choose between an html or Word file.
Selection
Depending on which command you have executed, a selection is
pre-defined so that either the whole project or the currently
selected nodes will be converted. This setting can also be
manually altered.
Target
If the file format html is selected a new document will
automatically be created. Click on Browse to define the save
location and name of the file.
If a Word document is to be created you have the option of
selecting a new document that is yet to be created or a preexisting document.
o New document
A new Word document will automatically be created. As soon
as you have set all settings and clicked on OK, a Save as
dialog box will appear with which you can save the new
document.
o Existing Word document
Click on Browse to open the file into which you would like to
insert the document that you wish to convert.
Path
By clicking on Browse you can open a pre-existing document or
save a new document that you would like to create.
Bookmark (only available when converting to an existing Word
document)
When converting to a Word document the entire text will be
marked with a bookmark; in the text box Bookmark name either
the name of your project file or the name of the currently selected
structure node will appear, provided that only a partial structure
should be converted. Using this name, which you can freely alter,
you can directly open the Word document to the given passage.
If you have an existing document set as the target, you can
determine to which location of the document the (partial)
structure that you would like to convert should be inserted. As
soon as the existing document contains bookmarks, they will be
listed under Existing bookmarks. Select the desired bookmark
from the drop-down list and then click on one of the following
option fields:
o Insert before this bookmark
© 2008 Normfall GmbH
User Guide
o Insert after this bookmark
o Replace this bookmark
For the command
o Add to end of document
it is not necessary to have selected an existing bookmark. The
created text will then be inserted at the end of the Word
document.
Options
Under Initial heading level you can determine with which heading
level the formatting of the structure nodes should begin in Word.
Selecting, for example, "4" as the initial heading level, will format
all structure nodes of the first level in your Word document using
the "heading 4" style. All subnodes on the next level will have the
formatting "heading 5", etc.
To use the following options, place a check in the given check
boxes:
o Include notes
This setting converts the notes of each structure node to the
Word document along with the structure.
o Open document when finished
Opens the created document directly after the conversion
process.
o Include rows (as hyperlinks)
This option converts all references to hyperlinks in the Word
document, which you can click on to open the attached
document. Additionally, all comment rows will be converted.
© 2008 Normfall GmbH
87
88
Normfall Manager 4.0 User Manual
Abb.: The beginning of a structure that has been converted to a Word document
Please note that links refer to documents in your
project folder. If the converted Word or html
document is opened on another computer, the
references will be lost.
o Apply text styles
This option is only available when a new document is selected
as the target.
Relation: Select Tracks
If in the current project the relation mode is set, it is possible to
select the tracks which you like to be converted into a document.
More information on the Relation Mode can be found here.
The option Conflicts only (entries in at least two tracks) allows you
to limit the conversion to those nodes which show entries in
various tracks in order to obtain an overview of the related
contents.
4.5
Text Editing
Normfall Manager 4 provides you with a text editor in the detail
view 34 with its own toolbar 172 for formatting text.
© 2008 Normfall GmbH
User Guide
Default text settings
In these settings you can define a default formatting (font type
and size, etc.), which is valid for the entire project. In each
comment editor, the text entered will automatically be formatted
according to these criteria unless you apply direct formatting in
the comment editor. How to set this setting can be found in the
chapter Commands in the Tools Menu | Text Options 140 .
Direct Formatting
A direct formatting is a formatting that you apply directly in the
comment editor. For such formatting you have a toolbar, which
you are familiar with from other text editing programs. This allows
you to, for example, edit the font type and size, add bold or italic
text, set the alignment to left or right, create lists, etc.
Likewise you can create hyperlinks to web pages and remove
previously applied direct formatting.
If you change the default text settings at a later time, your
previously applied individual formatting within the comment editor
remains unchanged.
This is also valid for formatting that "comes with" text that you
have pasted from other applications. You can avoid this by
selecting the command Paste with editable formatting from the
context menu. For more details on pasting text to the editor see
Paste Options of the Text Editor 89 .
If you apply text formatting directly using the toolbar
of the comment editor, the text no longer "reacts"
to changes made to the default text settings (with
regard to the given setting, e.g. font type).
The Remove Formatting command from the toolbar reformats the
text according to the default text settings.
Zoom Function
The size of the text editor can be enlarged or reduced using the
two magnifying glass symbols found in the toolbar of the text
editor. Alternatively, you can execute these commands using the
context menu by right clicking in the comment editor.
Print Function
You can print the text of the comment editor using the context
menu. Likewise, you can use the command Print Current Text
from the File menu. For more on this function click here 126 .
4.5.1 Paste Options of the Text Editor
Pasting with the context menu
To paste formatted text to the detail view, for example from
Microsoft Word or a web page, you have three commands
© 2008 Normfall GmbH
89
90
Normfall Manager 4.0 User Manual
available in the context menu:
Paste with original formatting
Select this option to receive an exact copy of the original text. It is
possible, however, that some formatting has been included in the
pasting process that is later not editable using the editor.
Formatting that is not copied directly from the source application
(e.g. Word) - because it corresponds to the default settings of
Word - will be replaced by the default text settings 140 of the
editor.
Only select this type of paste if you do not want to
make changes to the pasted text later.
Paste with editable formatting (recommended):
The formatting of the text copied with this command can be
edited using the commands of the text editor. Formatting that
cannot be edited with the editor will be removed.
Formatting that is not copied directly from the source application
(e.g. Word) - because it corresponds to the default settings of
Word - will be replaced by the default text settings 140 of the
editor.
Select this type of paste if you would like to use the
existing formatting, but would also like to edit the text.
Paste as plain text:
The original formatting will be removed. Sometimes editors from
which you copy text include, for example, the font type formatting.
Select this type of paste if you want to avoid direct
formatting such as font type. The text pasted in this
manner will be edited according to your default text
settings 140 .
Paste with Ctrl + v
In the menu Tools | Options | Other you can determine which of
the three commands from above should be executed when using
the key combination Ctrl + v.
4.6
Move and Copy Operations
In this chapter the functions will be explained that you can
execute by pulling with the mouse 174 (drag & drop) or by using
the clipboard (copy & paste).
© 2008 Normfall GmbH
User Guide
4.6.1 Attaching Files by Pulling onto a Normfall Project
with the Mouse
Normfall Manager allows you to attach any files or even folders
from Windows Explorer to structure nodes using "drag & drop".
Similarly, it is possible to attach elements from Microsoft Outlook
to the desired structure nodes or copy them to the list view. Doing
this will copy the files to the auto folder. (You can find more
detailed information in the section Folders 52 .) The target
structure node under your cursor will be denoted by a colored
background.
1. Position the Normfall Manager window and the Windows
Explorer window next to each other so that both can be seen
on the screen.
2. Click on the file to be attached, pull it to the desired
structure node and release the mouse button. The file will be
attached as a new reference.
If you do not wish to position the Normfall Manager application
window next to the Windows Explorer window, proceed as
follows:
1. Minimize the Normfall Manager window and open Windows
Explorer.
2. Click on the file to be attached, pull it onto the minimized
Normfall window and wait a short moment until the Normfall
window appears in the foreground.
3. Place the file to be attached on the desired structure node.
This command also works in the opposite direction: to move files
from the list view of Normfall Manager to Windows Explorer, pull
them as described above to the desired folder.
4.6.2 Drag & Drop in a Normfall Project
Using Drag & Drop you can copy or move structure nodes with all
subnodes and references as well as reference rows in a Normfall
structure. The command is also available in all list views so that,
for example, even files listed under the tab Recent Docs (Project)
or Recent Docs (System) can be pulled to the desired structure
nodes. Additionally, you can directly attach files from Windows
Explorer or elements from Microsoft Outlook to individual
structure nodes or "pull" them into the file inbox. To do so the File
Inbox tab has to be in the foreground.
You can move structure nodes by clicking on them and pulling
them to the desired structure node while holding the mouse
button. When you release the mouse button on the target, the
pulled structure node will be cut and inserted on the same level
under the target node.
· If you press and hold the Alt key while pulling, the node will be
inserted as a subnode.
© 2008 Normfall GmbH
91
92
Normfall Manager 4.0 User Manual
· If you press and hold the Control key (Ctrl), the pulled node
will not be moved, but rather copied.
· If you press and hold the Shift key while pulling, the structure
node will be inserted as a shared copy 97 on the same level.
You can also combine the keys mentioned above:
· If you press and hold the Control key (Ctrl) and the Shift key
while pulling, a shortcut 97 will be created.
· In order to create a hyperlink 98 , it is necessary to press and
hold the Control key (Ctrl), the Shift key as well as the Alt key
while pulling.
Further information on shared copies, shortcuts and hyperlinks
can be found here 96 .
· You can move reference rows by clicking on them and pulling
them to the desired structure node with the mouse button
pressed. If you press and hold the Control key (Ctrl) while
pulling, the reference rows will not be moved, but rather copied.
4.6.3 Inserting Contents with "Copy & Paste"
The "copy & paste" function is available at any location in
Normfall Manager where you can edit or insert contents; this
includes all list views as well. In this way it is possible, for
example, to copy text passages from Word documents to the text
editor of the detail view or from there to written work or the like.
Similarly, you can, for example, attach elements from Microsoft
Outlook to structure nodes or copy them to the different list views.
Ctrl+ c
Ctrl+ v
To do so, select the desired text and copy it using the key
combination Ctrl + c. Insert it to the desired location using Ctrl +
v.
Further information on the paste options
corresponding chapter.
92
can be found in the
Using this command you can also copy files of the reference list
to any folders of Windows Explorer: Select and copy the desired
rows in the list view and afterward paste them to the desired
folder in Windows Explorer.
4.6.4 Paste Options
After cutting out or copying structure nodes, reference rows and
text passages these elements are moved to the clipboard 176 .
There are several options that allow you to insert the objects at
another location. You can, for example, create shared content
locations 97 or shortcuts 97 (see the chapter Further Structure
Functions 96 ) from the individual elements or paste them as
subnodes or new root structure nodes. In creating your structure
you are free to choose the organization of information and can
easily adapt your structure to new developments and changes in
the data.
Elements that have been copied or cut out can also be pasted to
other projects, that is from Project A to Project B. To do so, both
projects must be open simultaneously.
© 2008 Normfall GmbH
User Guide
Any attached files will also be copied. Provided that there are
already references to these files available at the target location a
dialog box will appear which you can use to determine whether
these references should be overwritten or whether the reference
should point to the existing files.
Paste Options of the Structure View
Structure nodes and reference rows that have been cut or copied
are moved to the clipboard 176 and can be pasted into your
structure in several ways. You can choose to which location of
the structure the nodes should be pasted:
1. on the first level
2. on the same level
3. as a subnode of another structure node
Additionally you can determine as what type of data the structure
nodes should be pasted:
Copy: The given structure nodes will be copied and pasted with
all references.
Shared content location: The given structure nodes will be copied
and pasted with all references and converted into shared content
locations.
Shortcut: The given structure nodes will be copied and pasted
with all references and will then refer to another structure node.
Hyperlink: The given structure nodes will be pasted as hyperlinks,
which refer to the corresponding nodes.
Explanations to the terms shared content location 97 , shortcut 97
and hyperlink 98 can be found in the section further structure
functions 96 .
Please note the following information when pasting elements as
hyperlinks:
Depending on the location where you open the
context menu to execute the command Paste as
Hyperlink the copied element will either be pasted as
a structure node in the structure view or as a row in
the list view.
Paste on the First Level
With this option structure nodes that have already been cut out or
copied will be pasted to the last position of the first level of your
structure. Open the context menu 167 by right clicking 174 on the
white area of the structure view and select either the command
Paste on the first level in order to create a simple copy or select in
the submenu Paste Special one of the options in order to create a
Shared Content Location on the first level, Shortcut on the first
© 2008 Normfall GmbH
93
94
Normfall Manager 4.0 User Manual
level or a Hyperlink on the first level.
Paste to the Same Level
Ctrl + v
To paste a structure node that has been cut out or copied to a
position directly under a target structure node on the same level,
click on the desired structure node and execute the command
Paste from the Edit menu.
Alternatively you can use the key combination Ctrl + v.
To determine as what type of data the structure nodes should be
pasted, use the context menu as described above and select
there the command Paste node or one of the paste options to
create a shared content location, a shortcut or a hyperlink from
the submenu Paste Special.
Paste as Subnode(s)
To paste copied or cut out structure nodes as subnodes of
another node, open the context menu of the target structure node
by right clicking and select one of the paste options to create a
shared content location, a shortcut or a hyperlink from the
submenu Paste as Subnode(s).
Pasting Reference Rows
Ctrl + v
Likewise, you can paste rows that you have cut out of or copied
from your reference list to other structure nodes.
To do so, click on the target structure node and then execute the
command Paste from the Edit menu.
Alternatively, you can use the key combination Ctrl + v.
In order to paste reference rows as shared content locations,
shortcuts or hyperlinks, use the context menu and select there
the desired option from the submenu Paste Special.
Please note that reference rows that are pasted as a
shortcut cannot be commented in the comment editor
since they simply refer to the original. You can only
add notes in the comment editor to the original row!
Paste Options of the List View
The list view contains all documents and files that you have
attached to a certain structure node. Similar to your structure, you
can form your reference list as desired and take changes to data
into consideration here. Therefore you have the possibility to cut
out or copy rows from the reference list; these are then moved to
the clipboard 176 and can be pasted to other structure nodes.
Depending on whether you use the Paste command from the Edit
menu or the context menu, there will be different commands
available.
© 2008 Normfall GmbH
User Guide
Pasting Reference Rows
You can paste rows that you have cut out or copied from your
reference list to other structure nodes in your structure.
To do so, click on the target structure node and then execute the
command Paste from the Edit menu.
Alternatively, you can use the key combination Ctrl + v.
Paste Special
Here you can determine as what type of data the reference rows
should be pasted:
Paste Row: The given rows will be copied and pasted to another
node.
Shared Row: The given rows will be copied, pasted and
converted to shared content locations.
Shortcut: The given rows will be copied and pasted and will then
refer to other rows of another structure node.
Hyperlink: The given rows will be pasted as hyperlinks, which
refer to the given rows.
Please note that reference rows that are pasted as a
shortcut cannot be commented in the comment editor
since they simply refer to the original. You can only
add notes in the comment editor to the original row!
You can execute the paste options described above by using the
context menu:
1. Copy or cut out the given reference rows.
2. Click on the desired target structure node with the right mouse
button.
3. Select one of the following commands from the context menu
or respectively there from the submenu Paste Special:
· Paste Row
· Paste as Shared Row
· Paste as Shortcut
· Paste as Hyperlink
Please note the following information when pasting elements as
hyperlinks:
Depending on the location where you open the
context menu to execute the command Paste as
Hyperlink the copied element will either be pasted as
a structure node in the structure view or as a row in
© 2008 Normfall GmbH
Ctrl + v
95
96
Normfall Manager 4.0 User Manual
the list view.
4.7
Further Structuring Functions
Normfall Manager 4 offers you extensive possibilities to structure
contents.
The basis is the structure 35 on the left side, to which documents
or locations within documents can be attached in the reference
list 36 to the right.
The individual rows of the reference list are called reference rows
36 . They can however do much more than simply represent a
reference.
The first entry of the reference list is always a row that represents
the current structure node. Further rows are attached documents.
You can also create empty rows for notes. For each row there is
a detail view in which you can add text to the given row.
In this section you will be introduced to further functions that can
be used to work with structure nodes and reference rows.
· Convert 96 reference rows to structure nodes showing the
document icon in the structure or convert structure nodes to
empty reference rows for notes.
· Create shared content locations 97 of structure nodes or
reference rows such that the changes made in the detail view
can be transferred to all copies.
· Create shortcuts 97 with structure nodes or reference rows to
refer to another branch of the structure.
· Create hyperlinks 98 to refer to structure nodes in other
projects or to refer to a structure node from the running text (in
the detail view or from another application, e.g. e-mail).
4.7.1 Converting Rows
Since documents and notes can principally be added to structure
nodes or to reference rows, it is not clear which option should be
preferred. In case of a longer list of short notes, empty reference
rows can be more useful than structure nodes. Nevertheless,
what happens if you change your opinion while creating the
structure? Then, you need the following functions for the
conversion.
Converting rows to structure nodes
The Convert to Node 134 command allows you to convert
reference rows selected in the list view to structure nodes.
In this context, the rows are pasted as subnodes of the current
structure node. If the row refers to a document, the icon of the
document appears in the structure. Then you can add subnodes
and reference rows for the document which it represents, e.g.
text passages in the document or metadata (author, keywords).
Converting structure nodes to rows
© 2008 Normfall GmbH
User Guide
The Convert to Row 133 command allows you to convert structure
nodes selected in the structure view to reference rows.
Structure nodes subjected to this command are pasted as rows
of their mother node. If a structure node contains subnodes or
reference rows, they become "subrows". Since the list view
supports only one level of subrows conversions which require
further levels cannot be executed.
Normal structure nodes which do not represent a document thus
become empty rows for notes.
4.7.2 Shared Content Locations
During your daily work, it is possible that a document is relevant
for several structure nodes and that you wish to attach it
simultaneously to these nodes. Imagine, for example, a written
document which is important both for the structure node "Author"
and for the node "Correspondence".
Likewise, a branch of your structure can be important at another
location such that you want to paste this branch at this location.
In such cases you create a so-called Shared Content Location of
documents or branches. These Shared Content Locations
represent a group of elements which are permanently
synchronized such that e.g. each note which you edit for a
document appears automatically in the comment editor of all
shared content locations of this document and is updated if
changed later.
There are several ways to create shared content locations. In the
case of a document which you wish to attach several times we
recommend you to use the Attach Box. For further information on
the Attach Box, please refer to the chapter Attaching Documents
57 .
In order to paste structure nodes as shared content locations,
copy them and use the commands described in the chapter Paste
Options 92 .
Note that the subnodes of a structure node will not be
copied and pasted again. In order to avoid this, use
the Shortcut 97 function which offers you the
possibility of showing one and the same branch at
several locations in the structure.
A group of elements synchronized in this way will lose its shared
content location status when the second to last element of the
group is deleted and thus there are no more existing elements
that need to be synchronized. In this case it is not important
whether the "original" or a copy thereof remains.
4.7.3 Shortcuts
Unlike shared content locations 97 , shortcuts allow you to refer to
other documents or structure nodes. It is possible to add
shortcuts to structure nodes if, e.g. you wish to define
overlapping groups of persons within your structure. Your
structure already contains a list of persons and each person is
© 2008 Normfall GmbH
97
98
Normfall Manager 4.0 User Manual
represented by its own structure node (e.g. the structure node
"Persons" includes the subnodes "Smith", "Meyer", etc.). To
group people according to certain criteria or assign them to other
structure nodes, create further structure nodes (e.g. "Experts",
"Witnesses", etc.) and paste shortcuts to the names listed under
"Persons" as subnodes of these nodes.
Or: You would like to list all participants of a conference in an
existing project. To do so, create a new structure node (e.g.
"Minutes") and paste all persons which have participated in the
conference as shortcut under this structure node.
For detailed information, please refer to the chapter Paste
Options 92 .
Since shortcuts always refer to an original, please note the
following aspects:
· If you delete the original, all shortcuts belonging to it will be
deleted! Keep this fact in mind whenever you execute a
deletion. In order to avoid this, use the function of Shared
Content Locations 97 .
· If you change the original, e.g. by changing its name or pasting
subnodes, the shortcuts will also change.
· Shortcuts always show the references and subnodes of the
original.
4.7.4 Hyperlinks
Generally spoken, a hyperlink, also called a link, is a reference to
another document within a hypertext which can automatically be
tracked through the "hyper text system". The concept of
hyperlinks corresponds to cross references or footnotes known
from conventional literature where the reference target, however,
must be searched manually.
Normfall Manager allows you to create cross references within
your structure via hyperlinks. To do so, copy, for example,
structure nodes and rows and paste them to another location
using the Paste as Hyperlink command. For more detailed
information, please refer to the section Paste Options 92 .
Whether the hyperlink will be pasted as a structure node in the
structure view or as a row in the reference list, depends on the
location where the context menu is opened.
Hyperlinks allow you also to refer to structure nodes and rows in
other project files. The "Target" of the hyperlink is always the
original, i.e. the element copied; furthermore, hyperlinks contain
information on which project file they belong to. If, for example,
you wish to copy two structure nodes S1 and S2 from project A to
project B, wherein S2 refers to S1 via a hyperlink, the hyperlink in
project B will not refer to the node S1 in project B but rather to the
node S1 in the original project, A.
Furthermore, it is possible to paste hyperlinks as text in an editor
which supports hyperlinks such as the text editor of Normfall
Manager, Microsoft Word or e-mail editors. By clicking on
structure nodes or rows, they can be pasted to the text editor
using the Paste with original formatting command from the
© 2008 Normfall GmbH
User Guide
context menu. In other applications, use the corresponding paste
commands or, alternatively, the key combination Ctrl + v.
Thus, it is possible to paste links to certain structure nodes as
"bookmarks" in Word documents.
Fig.: Hyperlink in the text editor of Normfall Manager.
Please check when pasting links to e-mail messages,
that you have selected the message format html
(Hypertext Markup Language) since the link will not
function otherwise. For further information on setting
the message format, please refer to the help function
of your e-mail program.
In order to enable hyperlink functionality, each project file
requires a unique name. Normfall Manager will create this name
automatically when creating a new project; it consists of a long
identification number to which the hyperlink will refer. The
Properties command in the File menu, however, allow to enter an
alternative name (descriptive name).
The number should be changed either when creating
a new project or when no hyperlinks have been
created in a project yet. If hyperlinks already exist
they are lost when the project ID is altered!
For further information, please refer to the chapter Project
Properties 126 .
4.7.5 Node Types
A new structure node is always represented by a blue square.
However, you can create an optical distinction between nodes by
assigning other colors and specific icons. This is done by
assigning a type to a node. A node type always consists of an
icon and a type name which will be displayed when moving the
mouse pointer to the concerned structure node.
Normfall Manager comes with a built-in package of colored
structure nodes and icons, but you can also use your own icons
which should best be available as icon (.ico) files with 16 x 16
pixels. However, nearly every other image file format is
supported.
Example of use:
Usually, many people are involved in a law case. These people
© 2008 Normfall GmbH
99
100
Normfall Manager 4.0 User Manual
can be grouped, e.g., into defense counsels, defendants,
witnesses, experts, and so on. Thus, in your project there are
structure nodes named "Defense counsels", "Defendants",
"Witnesses" etc. Now you can assign a certain node type to each
of these nodes; in this case it would be advisable to assign the
type "Person" which should be represented by an appropriate
icon (e.g. a man icon).
Assigning the type
In order to assign a specific type to one or more nodes you can
either use the built-in types provided by Normfall Manager or your
own icons. To do so, select the concerned structure nodes with
the mouse and then choose the Change type command found in
the Structure menu. Alternatively you can also use the key
combination Ctrl + k or call up the context menu. Subsequently a
list of all available node types will be displayed from which you
can choose the desired type by clicking on it or by entering the
respective (numeric) character belonging to the node type by
means of the keyboard (e.g. "2" to assign the red type).
Change Type
Ctrl + k
Using built-in types
Follow the instructions as described above under "Assigning the
type" in order to select the desired type from the list of built-in
types.
Using custom types
If you would like to use your own types in addition to the built-in
types, the image files must be saved in a specific folder within
your file system and given the name of the node type that you
wish them to represent. This folder may contain several
subfolders.
To make icons used in a project available to other users, they are
automatically copied to the project folder when you assign them
to a node. They can be found in the "_Icons" folder of a project.
Note: You can copy icons directly to a project's
_Icons folder if you want to define node types that are
unique to this project.
If one ore more users wish to use the same set of node types on
multiple projects, the image files must be saved in a special
folder available to all those users; this folder can be selected in
the Tools | Options | Folders menu. Please also refer to chapter
Tools | Options | Folders.
In order to assign a user-defined icon to a structure node, select
the node by right clicking and choose the desired icon from the
list displayed under Change type.
© 2008 Normfall GmbH
User Guide
Note: Changes within the icon folder have direct
effects on the node types used in all concerned
projects.
When you replace an icon with another one within an image
folder, the icon will also be replaced in the structure view of the
concerned projects.
When you delete an icon from the folder, the concerned node
type will “lose” its icon and be represented by the standard blue
node.
Renaming or moving an icon to another subfolder has the same
effect on the node type as deleting the icon and defining a new
node type.
4.8
Searching and Finding
The more complex a project is, the more difficult it becomes to
find certain information or nodes. Normfall Manager therefore
offers you comfortable search functions with which you can
search your project data quickly.
4.8.1 Find in Project
With this command you can search all structure nodes, reference
rows and comments in your Normfall structure for certain terms. It
also allows you to search the full text of all attached documents.
You can also limit the search to the structure nodes or the
reference rows or you can define a certain period of time as
search criteria. To do so use the command Find in Project or the
key combination Ctrl + s. On the right side of the list view the
New Search tab will then appear.
In the field Find what you can enter your search term(s). You also
have several search options available.
Selecting the option All Words will display all search results in
which all terms that you have entered into the search field (in any
order) are found. Words should be thought of as character
strings, each of which is separated from others by an empty
space. To be displayed as a search result, the location only has
to contain a part of each character string that you have entered
into the field.
The option Any Words returns all search results that contain at
least one of the words entered into the search field. It is sufficient
that a part of the character strings entered into the search field is
found.
© 2008 Normfall GmbH
Find in Project
Ctrl + s
101
102
Normfall Manager 4.0 User Manual
The option Exact Phrase returns all search results containing the
exact character string, with empty spaces, that is entered into the
search field.
The option Whole Words Only returns only results that match the
entire words searched for.
To run a full text search throughout the entire project and within
all attached documents, select the option In Documents. Please
note that to do so it is required that Mircrosoft Indexing Service is
activated on your operating system. With this setting (In
Documents) the option Whole Words Only is presumed to be
activated. However, additional search results which may be found
within the structure follow the user's individual settings.
Activate the check mark concerning Reference rows in order to
search for terms in the reference list.
If you would like to search for results based on date, place a
check mark in the box From, which allows you to select dates
from the calendar between which you would like to search.
The search results will be displayed as a list which you can sort
by ascending or descending order by date or title of the
document. To do so, click on the heading Date or Title.
The structure node to which the search result belongs will be
marked with a colored background, if you click on an individual
row in the search result list. The currently selected structure node
in the structure view will likewise remained colored.
After the search, you will have the following commands available
in the toolbar:
161 : The given file will be shown along with the structure
node that it belongs to.
- Locate
- Export Document(s): Copies of the given documents will be
placed in a temporary folder, namely the export folder. Details
can be found in the chapter Export Document(s) 136 .
- ZIP: Compresses the selected files.
- Send To: Opens the Send To menu, with which the given files
can be, for example, sent to an e-mail recipient. Further
information can be found in the chapter "Send To" Commands 137
.
For a quick search you enter a search term directly into the text
box of the toolbar.
If you would like to search only a given branch of your structure,
click on the structure node and then select the command Find
here from the context menu.
4.8.2 Find in Text
Find in Text
Use this command found in the Edit menu to search comments
for text passages or words. Alternatively, you can execute the
command using the key combination Ctrl + f or by clicking on the
button in the toolbar of the detail view.
Find in Text
Ctrl + f
In the dialog box you can enter your search text and choose
© 2008 Normfall GmbH
User Guide
103
between three options:
· Match whole word searches for character strings
correspond exactly to your search text.
that
· Choose the option Match Case in order to make your search
case-sensitive.
· If you do not select either of the options from above, you will
receive partial matches to your search term. For example: You
enter "structure" as a search term; as a search result you could
find "structured", "Structure example", etc.
Here you can also choose the direction of your search: Up or
Down.
4.8.3 Show Shared Content Locations
This function allows you to show a list of all existing shared
content locations of a file or a structure node. To do so, double
click on the Shared Content Locations icon of the given element
which is displayed at the beginning of the row in the list view. This
will activate the Shared Content Locations tab. Alternatively, you
can select the given element and then click on the Shared
Content Locations tab in the List | View menu. This guarantees
that the tab is displayed permanently, i.e. also when opening a
new project.
Shared Content Locations
In the row with the blue background you will find the document as
well as the number of shared content locations in parenthesis.
Under that the structure nodes will be shown to which the shared
content locations are attached. By clicking on the minus sign in
front of the file icon, you can hide the list. Clicking on an element
of the list will color the corresponding structure node in the
structure view to the left. This list is similar to the Document 103
list in its form.
By clicking on Locate 157 , the corresponding file will be selected in
the reference list and the structure node it is attached to will be
shown.
Using the command Remove all in the toolbar you can delete the
entire group of shared content locations.
A dialog box will open, indicating which shared content locations
will be affected and requests that you confirm the deletion.
4.8.4 Manage Document
To receive an overview of the structure nodes to which a
document is attached, you can create a list of these by using the
Manage Document command from the List menu. The command
is always applied to the currently selected document regardless
of which tab is currently active.
Alternatively, you can show the tab Document References using
the menu List | View or you can press the key combination Ctrl +
Shift + F6. This will show all of the attachments made to the
document that is currently selected in the first tab.
Under the tab Project Folder you will find the References
© 2008 Normfall GmbH
Manage Document
Ctrl + Shift + F6
104
Normfall Manager 4.0 User Manual
command in the context menu, which likewise executes the
Manage Document command.
Fig.: Contents of the active tab "Document References"
In the row with the document icon you will find the document and
be informed whether or not it is shared content. Under this the
structure nodes to which the document is attached are shown. By
clicking on the minus sign in front of the file icon you can collapse
the list. Clicking on a structure node in the list colors the
corresponding node in the structure view.
The following commands are available in the toolbar:
157 : The corresponding file will be shown as attached to
its structure node.
- Locate
- Delete File and all References: After clicking on this button you
will be requested to confirm the deletion.
This function not only deletes all references to the
document but also all subnodes and subordinated
rows of the corresponding references. This is
particularly relevant when a document has been
attached to several structure nodes in a structure.
- Windows Explorer: With this command the folder in which the
file is stored will be opened in Windows Explorer. You can find
more information on this topic in the section Show Files in
Windows Explorer 135 .
4.9
Using Two Monitors
You can use Normfall Manager with two monitors on one PC.
This allows you to use one monitor for displaying Normfall
manager with an open project file and another for displaying
documents that you would like to attach.
When using two monitors you have several modes of use
available to you. You can display the same picture on both
monitors or you can expand the Windows desktop over the
second monitor.
When working with Normfall Manager this second option is
interesting. This means that you have a wider area to work with,
which is stretched over two monitors - which are ideally placed
next to one another. If you leave the edge of the first monitor with
the mouse pointer moving in the direction of the second monitor,
your movement will be continued on the second monitor.
The Windows taskbar (the bar on the bottom edge of the screen)
will appear on the first, or main, monitor; the second monitor will
© 2008 Normfall GmbH
User Guide
appear "empty", that is, only a background picture will be
displayed.
Generally the second monitor is to the right of the main monitor.
From the view of the main monitor, the desktop will then be
expanded to the right.
To be able to use two monitors with one PC you have to have a
graphics card with two monitor outputs. A system administrator or
hardware dealer can help you to find an appropriate model for
your PC if your computer does not already support this option.
How you configure your graphics card for use with an expanded
desktop depends mainly on the driver of your graphics card. The
necessary settings can be found in the user manual of your
graphics card.
When using Normfall Manager with two monitors it is
recommended to open Normfall Manager on the second monitor.
To do so, start Normfall Manager, click on the title bar of Normfall
Manager and pull the window with a pressed mouse button to the
desktop of the second monitor.
To always start Normfall Manager on the second monitor, pull the
Normfall window to the second monitor and change the size of
the window so that it is ideal for you. Then close Normfall
Manager and open the program again.
If Normfall Manager is on the second monitor you can use the
main monitor to view documents that can be attached directly to
© 2008 Normfall GmbH
105
106
Normfall Manager 4.0 User Manual
the structure in Normfall Manager without changing windows with
the Windows taskbar.
4.10 Working Together on a Network
Normfall Manager is fully network-compatible and is therefore
also suitable for work in large offices and firms where several
users may need access to the same file at the same time. Project
files can be stored on a server and made available to several
users simultaneously.
Clients with licenses for the Enterprise version (which is not free
of charge) can work on a project simultaneously, clients with the
free of charge Basic version and the Professional version (not
free of charge) cannot. Project files can be opened on a network
in the Basic and Professional versions of the software but the
access to the file is then exclusive, which prevents other users
on the network from accessing the project file.
Generally you have the option of opening a project file with read
or write access.
Write access (or working actively) means that you have opened
the project file with the Open Project File command from the File
menu. In this mode you have write rights with respect to a project
file and you can make changes thereto.
Read access (or working passively) means that you have
opened a project file with the Open Read-only command from the
File menu. In this mode you cannot make any changes to a
project file.
Each user that has write access to a project file can edit the file.
As soon as a user performs changes to a text editor, this field is
blocked for all other users. Any attempt to enter text into this field
will result in a prompt and the Record Locked Icon appears in the
row. Blocking the current data record is automatically set back to
the original setting after a given period of time which allows all
users to edit the data record.
The following symbols can appear while working on a network
with other users:
: Marks the currently selected data record
: Shows the editing of the current data record
: Shows the blocking of the current data record, because it is
being edited by another user
: Shows the content update of the current data record (after
being edited by another user)
Structure nodes and references that are deleted by other users
are no longer editable and will automatically be updated when the
file is next opened or can be manually updated using the function
key F5. Generally the structure can be updated according to any
changes made by other users working with the file by pressing
the F5 key or using the command Reload Structure View from the
File menu.
© 2008 Normfall GmbH
User Guide
A list of all users that are currently working on a project file can
be viewed in the Enterprise version using the command User List
140 found in the Tools menu.
4.11 Backup Copies
By default, Normfall manager creates a backup copy of a project
file that is closed by the user (this does not apply to projects on a
database server). This option can be activated or deactivated
individually for each project or all new projects.
If you do not set your own folder for storage, the backup copy will
be placed in the TEMP folder of your user profile. You cannot
directly see this folder in Windows Explorer. You can however
call it up by entering the character string %TMP% into the
address line of Windows Explorer.
As an alternative to this default folder you can choose any other
folder to use as the backup folder. Furthermore, you can also
disable the backup file function altogether. More on this can be
found in the chapter Commands in the menu Tools| Options |
Folders 142 . If a project file is damaged and no longer capable of
being opened, you will automatically be given the option of
opening the backup copy (given that one exists).
If you would like to open a backup copy and the original project
file is no longer available, you must open the backup copy
manually.
To do so, start Normfall Manager and select the command Open
Backup Copy from the File menu. A dialog box will open in which
you can choose the backup copy that you would like to open.
4.12 Database Server
For professional use in a multiple user environment, the higher
product variations of Normfall Manager (Enterprise) enable
connecting to a database server.
While project files can be a good solution in small teams, a
database server provides the best performance and stability
when dealing with many users with simultaneous write access.
As of the creation of this user manual or respectively the help
function, the only server system (DBMS) supported is Microsoft
SQL Server 2005 and 2008. For further information on other
supported systems please refer to our website or consult our
support.
Microsoft SQL Server 2005 is available as a free Express edition,
which can be installed on servers and normal computers and can
be a sufficient database server for teams and smaller companies.
Before you choose to save your projects on a database server,
please note the following drawbacks:
· The administration of projects on a database server is less
flexible than in a file system. There is no folder structure
available, only categorization.
· Transporting project data, e.g. with a data medium, is much
© 2008 Normfall GmbH
107
108
Normfall Manager 4.0 User Manual
more difficult because at each system boundary an import or
respectively export into (out of) the file system has to take
place.
· Project data and attached documents are no longer stored in
the same place. While you can usually move a project folder
with a project file as desired on your system, with a database
server moving the project folder with attached files requires you
to specify the new location of the project folder.
· The automatic backup system of Normfall Manager is no longer
effective on a database server. You have to execute regular
backups of the server manually.
Except in particular scenarios where project data needs to be
moved between systems frequently, companies with a
professional IT infrastructure will not only be able to handle but
will also require the use of a database server, because the
advantages concerning performance and stability exceed the
disadvantages concerning maintenance and application as soon
as a certain number of users is working simultaneously on a
project.
Many characteristic scenarios for the use of Normfall Manager do
not depend on a higher number of users working simultaneously
on a structure. For these cases the software still offers a solution
using project files and self-contained project folders, which can
hardly be surpassed due to its simplicity and lack of necessary
maintenance.
4.12.1 Administration of a Database Server
Creating a Database
In order to create a Normfall database on a Microsoft SQL
Server, proceed as follows:
1. Click on the command Manage database Server in the Tools
menu. Alternatively, you can execute this command using the
menu File | Connect to Server.
2. If a standard server has not yet been defined, or if the standard
server is currently unavailable, a dialog box will appear in which
you can enter the server to which you would like to connect, for
example ".\SQLEXPRESS"; afterwards, click on Create Database.
© 2008 Normfall GmbH
User Guide
3. Enter your access information for the administrator account in
the next dialog box. Since the SQL Server is installed by default
with an administrator account called "sa", this should be entered
in the Login field.
Under Tools | Options | database server you can store these
settings.
If SQL Server Authentication is selected as the
authentication mode, you are required to enter an
administrator login, which is typically "sa" + password.
With Windows Authentication the account of the
current user will always be used for login. In this
case, it is not necessary to enter a password.
4. Click on OK to create the Normfall database.
If the database was created, its initialization will automatically be
carried out.
Initialization note: It is also possible to manually
create a database on the server and to allow Normfall
Manager 4.0 to carry out the initialization. The
process to do so is exactly the same as the process
used to create a database.
Defining the Project Root Folder
After successfully creating a database you can define the project
root folder by clicking on Browse.
© 2008 Normfall GmbH
109
110
Normfall Manager 4.0 User Manual
This folder is a default root folder for all project folders, i.e. when
creating a new project the new project folder will be defined as a
subfolder of the project root folder as default (the subfolder
carries the name of the project). However, when creating a
project, the user can opt to change this folder.
Entering a project root folder is strongly
recommended in order to maintain a uniform filing
structure of the project folders on the file system.
Deleting a Database
To delete a database you must be logged in as an administrator.
To do so the database cannot be in use by any user.
In particularly, you may not have any project open on
the server when deleting a database. Open projects
will not automatically be closed.
Updating a Database
For future program versions of Normfall Manager, it may be
necessary to update the database scheme. The currently used
scheme as well as the newest version are shown herein. In order
to update the newest version, click on Upgrade.
Setting read and write access
© 2008 Normfall GmbH
User Guide
As administrator, it is possible to give Windows user groups
either global access or restricted Read-Only access to the
database. Using the button Browse you can define a group which
you want to have the corresponding access and using the button
Reset you can revoke this authorization if necessary.
Normfall Manager does not allow to set administrator rights. Only
the system administrators of the server (the Sysadmin role - by
default all members of the local Windows administrator group of
the computer on which the server is running as well as the sa
login) have these rights - and partially the user that has created
the database.
However, it is possible to use administration tools for the SQL
server (e.g. SQL Server Management Studio Express) to add
further administrators to the database.
SQL Server FAQ
A) Which versions of Microsoft SQL Server are supported?
All versions of Microsoft SQL Server 2005 and 2008.
B) Are other database servers supported?
Not at the moment, but generally it is possible to offer support for
other DBMSs (other than Microsoft SQL Server). If you have
interest in support for a particular database server, please
contact Normfall GmbH.
C) What happens when creating a database on the server?
A database with the name "Normfall" will be created and the
Normfall data structures will be set up there.
D) Can I prevent the application from working with
administrator privileges?
Generally, yes. Turn to the support at Normfall GmbH to receive
more information on manually creating a database. You can
create an additional user on the database or give a Windows
user group write access to the database to make use of the
function "Log-in as administrator" in the application for the given
user or Windows user group.
The application does not save the login data, but rather
temporarily holds the data in memory during the administration
processes.
E) How do I connect to an SQL Server outside of my
Windows domain by specifying an IP address?
You need to launch the application with the "/oledb:sqlncli"
command line option, and SQL Server Client Components need
to be installed on your computer. Enter your login credentials in
the Normfall Manager Options in the Database section. Use "SQL
Server Authentication" mode and enter the IP address for the
© 2008 Normfall GmbH
111
112
Normfall Manager 4.0 User Manual
server name, or "IpAddress\NamedServerInstance" to connect to
a named instance.
4.12.2 Working with a Database Server
On networks where more than 5 people access simultaneously
Normfall Manager, the use of a database server is recommended
in order to ensure stable performance of Normfall Manager. In
this case the projects are saved and managed on a special
database server, which all users in the network can access.
Please refer to the section Setting up a Database 108 to find out
what prerequisites this entails and how you or your system
administrator create a database server.
In order to work with projects on a database server, click on
Connect to Server in the File menu. The following dialog box will
open:
Fig.: Dialog box for working with a database server.
First, click on Browse to connect to the database server that you
would like to access.
Under Tools | Options | database server 148 you can also define
or delete the default server. In addition, you can save the
password for the connection with the server.
If the free Express Edition of Microsoft SQL Server is used at
© 2008 Normfall GmbH
User Guide
your company, the server name ".\SQLEXPRESS" is set by
default. By clicking on the small box with the same name, you
can set this server as your Home Server; when working with a
database your home server will be accessed by default.
The white field marked with Normfall Projects shows the content
of the database server, thus all projects available on the server.
Creating a new project
New Project
To create a new project on the database server, click on the
button with the same name.
In the window that opens subsequently please enter the name of
the project next to Name.
You can assign the new project to a Category. If you, for
example, would like to develop a knowledge management system
out of several projects on a topic, name the category "Knowledge
Base" and assign all projects on this topic to this category. If no
category is set, the project will be created on the first level.
As a Project Folder you can either accept the default setting or
choose another folder by clicking on Browse.
The project folder can be set to any location on the
file system and is not found on the databaseserver!
Importing a project file
To import an existing project file from the file system to the
database server, click on Import Project. A dialog box will open in
which you can define the project file to be imported by clicking on
Browse. Set the Name, Category (optional) as described above
and confirm your entry by clicking on OK. The folder in which the
project file to be imported is found is set as the default project
folder.
Exporting in file
© 2008 Normfall GmbH
Import Project
113
114
Normfall Manager 4.0 User Manual
By means of this command, a database project is saved as
Normfall project file 35 . The project file is always created in the
existing project folder which will open subsequently.
Copying projects
Copy Project
In order to copy a database project, click on the corresponding
button. A dialog box will open in which the currently selected
project on the SQL server is set as default source. In order to
copy another database project, click on Browse. The default
Name of the project is "New Project"; the default category is
already set as Category which you can still change. Confirm by
clicking on OK. Similarly, a new project folder is created.
Opening/deleting projects
First select the corresponding projects in the field Normfall
Projects and then open or respectively delete them by clicking on
the corresponding buttons.
Open Project
Delete Project
Project properties
By clicking on Properties you open a dialog box that contains
further information about the given project. These properties can
be altered by clicking on Edit.
Using the menu File | Properties the dialog box can also be
opened. Detailed information can be found in the chapter Project
Properties 126 .
By clicking on Edit you can change individual properties. In this
way you can, for example, select another project folder or change
category assignment. Confirm your changes by clicking on OK.
Managing the server
Manage Server
To make changes to the database settings, click on the
corresponding button.
In order to use this function, you will have to verify
your status as system administrator.
4.13 The Relation Module
The Relation Module supports lawyers and judges when using
the "Relationstechnik" ("relationship technique"), a German legal
technique of applying law to facts.
The module allows the user to compare and comment texts in a
simple manner. The following Overview 115 provides a summary
of the most important characteristics.
The functions described here are only displayed within the user
interface if they are activated via a special license.
© 2008 Normfall GmbH
User Guide
4.13.1 Overview
Support of individual working methods
You can work with original file excerpts as well as with your own
comments and annotations; you may even combine both
methods.
Perfect ergonomics
In Normfall PDF Editor you highlight the text to be attached by
dragging it with the mouse. In the structure view, you select the
node to which the text should be attached. Then you click on the
Attach button. The software has pasted the text and displays a
juxtaposition of all texts at the given structure node.
Easy to use
In a manner of speaking, the handling is self-explanatory. Each
element of the software that supports the comparison of contents
indicates this by differently colored buttons which serve to select
the track you would like to work with at the moment.
Full text search
All attached text passages are directly ready for full text search.
Add-ons like the Microsoft Indexing Service are not required.
Reference to the document
At any time it is possible to display the originial text passage of a
juxtaposed file excerpt.
Output as juxtapositions similar to file excerpts
File excerpts and/or own annotations can be output in table form
at any time for a single topic, a partial structure or the whole file
("juxtaposition similar to file excerpts").
Classic view in Normfall Manager
The Relation Module is smoothly integrated into the classic
Normfall Manager. All elements of the relation view can also be
found in the classic view of Normfall Manager and are editable as
usual.
Requirements from practice
The requirements to the Relation Module resulted from the
strategic partnership between Normfall GmbH and the justice of
the Land Hessen in order to optimize the existing software for its
use in civil proceedings. Also in criminal cases and other legal
proceedings the users can benefit from the module.
© 2008 Normfall GmbH
115
116
Normfall Manager 4.0 User Manual
Application areas
Any area where texts should be juxtaposed when structuring
complex subjects.
4.13.2 Setting up the Relation Module
Settings for the current project and for new projects
The Relation Module requires a special license which you must
activate first. Then you can either activate the Relation Module
functions for each project separately or determine that these
should be activated for every new project by setting the
corresponding option.
For more information on how to set up the Relation Module
functions for the current project, please refer to the section
Relation Module 127 in the chapter Project Properties 126 ; detailed
information on settings for new projects can be found in the
chapter Options 141 under New Project 152 .
When activating the Relation Module functions for a
project, this project must possibly be converted.
However, after a callback this step is automatically
executed and the project can furthermore be opened
with previous versions of the software.
Settings for projects on a Database Server
Projects on a database server must first be converted by the
system administrator before they can be used with the Relation
Module.
4.13.3 The Structure of the Application Window in the
Relation Module
The following figure shows the application window of Normfall
Manager with the activated Relation Module:
Tip: The Relation Module can be (de-)activated in the
Project Properties.
© 2008 Normfall GmbH
User Guide
Relation tab (A)
A new tab was added to the list view. By activating the relation
tab the relation view will be displayed; here you can select the
tracks whose contents should be juxtaposed (six tracks at most).
For more details, please refer to the section The Relation Tab 117 .
Track icon (B)
The track icon at the end of the row indicates which track each
attachment or entry belongs to.
Relate button (C)
By clicking on this button the relation view will be displayed and
its content will be refreshed. It is also possible to display this view
by pressing the key combination Ctrl + J.
Track selection bar (D)
The track selection bar shows all available tracks. Unlike the
relation view, here you can always select just one track for
editing. The number and names of the tracks can be defined in
the Project Properties 126 .
Track icon (B')
This track icon also shows which track the current reference/entry
belongs to. However, by using this button you can change the
assignment.
The Relation Tab
By clicking on the Relation Tab or Relate 117 Button found in the
detail view, the contents of the tracks assigned to the selected
structure node will be juxtaposed and displayed in tabular form.
By pressing the key combination Ctrl + J the relation view will
also be activated. In both cases the tab will only be shown while
working on the current project.
To display the tab permanently (i.e. also when opening a project
© 2008 Normfall GmbH
Ctrl + J
117
118
Normfall Manager 4.0 User Manual
next time), select the corresponding command from the List |
View menu.
Fig.: Juxtaposition of the track contents
You can hide and display the available tracks by pressing the
track buttons.
Each track entry shows a headline (bold) and a date, as well as a
shortcut icon (document with arrow), an editing icon (structure
node and pencil) and possibly a note icon. The note icon
represents an entry row. By clicking on the shortcut icon, the
attached document opens to the specific target to which the
attachment refers or rather the original document opens to the
respective page.
By means of the Relate button 117 in the tool bar of the detail view
you can refresh the track contents.
How to hide and display tabs is explained here
30
.
4.13.4 Inserting Documents and assigning them to Tracks
Documents can be attached to selected structure nodes in the
usual way. If in the list view the Relation tab is active, the
attached text is immediately displayed there. Select the track to
which the content should be attached by means of the tool bar in
the detail view.
Fig.: Detail view with track selection bar
If you attach text from a Word document, the Normfall PDF Editor
or an e-mail, the text (which, if necessary, at first must be
selected by dragging it with the mouse) is automatically pasted
© 2008 Normfall GmbH
User Guide
into the detail view or rather the relation view. In the example
figure shown above, the text is attached to track 3.
Changing the track
If by mistake text was attached to the wrong track, the
assignment can easily be changed by means of the track icon 117
which is located next to the date field. By clicking on the small
arrow symbol next to the track icon a drop-down list opens
showing all available tracks. Change the assignment by simply
selecting the right track number from the list.
Output to Word document
Please refer to the chapter Creating a Document out of a
Normfall Structure 88 to learn how to output track contents to a
Word document.
4.13.5 The Attach Box in the Relation Module
If the Relation Module is active, it is possible to attach selected
text from a Word document or the Normfall PDF Editor via the
attach box directly to a track. The text will then be displayed in
the text editor where it is locked for editing; yet, it is possible to
mark passages with the help of the Highlight button. Once
attached, in the relation view the text will appear in italics which
indicates an excerpt from an original file. In the detail view, an
excerpt from an original file is displayed on a grey shaded area.
If you would like to enter your own comments, simply click on the
Change To Comment button. The text editor will then be unlocked
for editing such that it is possible to add text.
Fig.: The functions of the Attach Box in Relation Mode
© 2008 Normfall GmbH
119
120
Normfall Manager 4.0 User Manual
4.13.6 Commenting Contents
There are three different levels on which comments can be
entered, beginning with the structure node on the highest level,
continuing with the single tracks until finally reaching the
respective references/entries and free comments. Subsequently,
these possibilities are explained.
Node Commentary
When clicking on a structure node with the Relation Module being
activated, Normfall Manager does not necessarily show the node
commentary first but the track commentary 120 to the current track
(i.e. the track which is currently selected in the track selection bar
of the detail view).
So, in order to create a node commentary, select the Node button
from the track selection bar and then enter your annotations in
the text editor.
Track Commentary
The track commentary allows you to add your own summaries to
each track assigned to a structure node.
The track commentary in the relation view
Click on the structure node to which you would like to write track
comments and select the track to be commented in the detail
view by means of the track selection bar.
As soon as you start to enter text in the text editor of the detail
view, the color of the text editor will change from grey to white.
When you have finished commenting a track you can directly
select the next one from the track selection bar. At the same time
your annotation will be displayed above in the relation view (if the
corresponding track is activated).
Finally, click on the Relate button to transfer the text to the
relation view. The track commentary is always displayed at the
top of the respective column in the relation view.
Note: The track commentary cannot be changed
afterwards. This guarantees that there is always just
one track commentary for each track.
The track commentary in the list view
Track commentaries can also be created in the list view. To do
so, activate the Current Node tab in the list view and select the
track to be commented in the detail view. As soon as you start
writing in the (still grey colored) text editor, a new entry will be
created in the list view showing the corresponding track icon at
the end of the row and the text editor (which then appears white
colored) will display the text you just entered.
© 2008 Normfall GmbH
User Guide
Filter properties of the track commentaries
When selecting a track from the track selection bar in the detail
view, the corresponding track comment will be displayed in the
text editor. When navigating (clicking) through the structure view
the track comment to the currently selected node will always be
displayed.
If there does not exist any track comment to a track yet, the text
editor will appear grey colored.
In the list view (Current Node tab) the structure node row will be
displayed and the text editor appears in grey color until you start
to create a comment there.
Deleting track commentaries
Track comments can be deleted like any other row/entry. Simply
select the corresponding row with the track comment from the list
view and delete it.
In the relation view you first have to click on the note icon which
indicates the track comment in order to change to the list view
where you can delete the comment as described above.
Afterwards, return to the relation view.
Reference Commentary
To create a comment to a reference row, activate the Current
Node tab and select the corresponding row/attachment to add
your comments in the text editor of the detail view.
If there has been attached an original file excerpt, click on the
Change to Comment button to unlock the text editor and add your
annotations.
© 2008 Normfall GmbH
121
122
Normfall Manager 4.0 User Manual
Fig. 1: Reference commentary in the text editor of the detail view
As soon as you change to the relation view, your comment will be
displayed below the attached document in the corresponding
track.
Fig. 2: Reference commentary in track 3
To edit your comment click on the pencil icon at the beginning of
the text. You will then automatically change to the corresponding
row in the list view so that you can enter you changes in the text
editor.
Free Commentary
Free comments are not directly related to a structure node, a
track or a reference, but they can be created on structure nodes
in any number. Use the New Annotation button in the list view to
add a new row and name it with a title. Then you can add your
comment in the text editor of the detail view.
© 2008 Normfall GmbH
5
Reference
124
Normfall Manager 4.0 User Manual
5
Reference
5.1
Command Overview
5.1.1 Functions in the File Menu
New Project
This command allows you to create a new Normfall project file in
your file system and a new Normfall Project on the database
server. For further information concerning the detailed procedure,
please refer to chapter Creating New Projects. 49
New Project
Ctrl + n
New from Word
With this command you can create a project out of an outlined
and structured Word document. The individual headings will be
converted into structure nodes and the text belonging to the
heading will appear in the text editor. For more on this topic read
the chapter Creating a Normfall Structure from a Word Document
81 .
New from Word
New from Folder Structure
This command allows you to create a new Normfall Project on the
basis of an existing folder structure in your file system, converting
folders and sub folders into structure nodes and sub nodes. Files
saved in these folders will be converted into attachments in the
reference list. For more detailed information refer to this 50
section.
New from Folder Structure
Open Project
To open an existing Normfall Project, click on the command Open
Open Project
Project.
Alternatively, you can use the key combination Ctrl + o or,
provided that it is available, you can click on Open Project in the
toolbar.
Ctrl + o
If a project file is already loaded and another project is opened,
Normfall Manager automatically closes the project that is
currently loaded. To simultaneously work on several structures,
you can get around this by pressing and holding the Shift key
while opening the project. Under certain circumstances it is
necessary to release the mouse button only a short moment after
clicking on the control element thus opening the project. The
newly loaded project will then open in a new window.
© 2008 Normfall GmbH
Reference
Open Read-only
To open a project file in read-only mode, select the command
Open Read-only. In this mode you cannot make any modifications
to a project file. Read access only allows you to passively work
on a project file. This command is available depending on the
product version.
Open Read-only
Connect to Server
Normfall Manager supports Microsoft SQL Server so that projects
can also be created and managed on database servers. To work
with a database server, click on Connect to Server. More detailed
information can be found in the chapter Working with a database
Server 112 .
Connect to Server
Reload Structure View
If you make changes to individual structure nodes or rows that in
turn have an effect on other nodes (for example when working
with shared content locations 97 or shortcuts 97 ), you can update
the view of your structure using the command Reload Structure
View or alternatively by pressing the function key F5. This
function is also useful when several users on a network are
simultaneously working on a project and making changes.
Open Backup Copy
With a project loaded you can open the backup copy of the
current project file with the command Open Backup Copy. Further
information can be found in the chapter Backup Copy 107 .
If no project file is loaded, this command allows you to open the
folder in which the backup copies are saved by default. It is
possible to make settings concerning this folder in the menu
Tools | Options | Folders.
Save as
The command Save as is only shown when a Normfall project file
is open. This command allows you to save the current project file
to any location with any desired name.
Please note that every change made to a project file
is automatically saved immediately. Manually saving
changes to a structure is neither necessary nor
possible. Accidental deletion of structure nodes or
reference rows from your structure is prevented by a
security warning which occurs before each deletion.
Close
To finish your work on the current project and close it, select the
command Close. Normfall Manager automatically saves any
made changes and still remains open after closing a project.
When closing, a backup copy of the project is created. You can
© 2008 Normfall GmbH
F5
125
126
Normfall Manager 4.0 User Manual
deactivate this function in the Tools | Options | Project | Current
Project menu, by clicking on and removing the check in front of
Create backup copy when closing.
Print Current Text
You can print the text of the current comment editor using the
command Print current text. Alternatively, you can invoke the
context menu in the comment editor and execute there this
command, press the key combination Ctrl + Shift + p or click on
the corresponding button in the toolbar of the detail view.
Print Text
Ctrl + Shift + p
You can adjust your print settings (for example, setting landscape
orientation) in Internet Explorer using the menu command Page
Setup. Such adaptations are permanently valid for both the
Internet Explorer and the text editor.
Convert to Document
This function allows you to convert the whole structure or parts of
it into a Word document or HTML file. For detailed information on
this function please refer to the chapter Converting Structured
Text Documents 81 .
Convert to Document
Ctrl + Shift + d
Properties
Clicking on Properties opens a dialog box with the following
information on the corresponding project. Below you see the
properties dialog for a project which is stored in the file system:
Fig.: Properties dialog box for a project in the file system
Location:
© 2008 Normfall GmbH
Reference
Shows where the project file is saved.
Item Count:
Shows how many structure nodes the project contains.
Unique structure name for settings and hyperlink resolution:
Here you can find the project identification number, which is
automatically created by Normfall Manager and necessary for the
use of hyperlinks. Further information on hyperlinks can be found
in the section Hyperlink 98 .
You can replace this number with a chosen name by entering the
name in the text box and clicking on OK.
Since hyperlinks that already exist will be rendered invalid by
altering the unique project name, a dialog box appears with a
corresponding warning:
Confirm the change of the name by clicking OK or if necessary,
cancel the action.
Using the Generate guaranteed unique name you can likewise
change an existing project ID.
Hide the list view by default
This command allows you to hide the list view by default. Using
the Tools | Options menu you can change the setting at any time.
See the chapter Showing and Hiding the List View 34 .
Relation Module
In this section it is possible to define the number of tracks you
would like to use when working with the relation module. If, for
example, you want to use three tracks, named "Plaintiff",
"Defendant" and "Verdict", simply increment the Number of tracks
to "3" and insert the track names separated by commas. More
information can be found in the chapter Relation Module 114 .
For projects on a database server 107 , the following additional
properties will be shown:
Name:
© 2008 Normfall GmbH
127
128
Normfall Manager 4.0 User Manual
The project name is shown here.
Category:
Provided that the project is assigned to a category, this will be
shown herein. The category assignment can be changed here.
Project Folder:
Shows the location of the project folder, in which all documents
belonging to the project are saved.
If the properties dialog box was invoked for a project
on a database server, you first have to click on Edit
to change information.
Fig.: Properties dialog box for a project on a database server
Opening Recent Projects
On the end of the menu the last five Normfall Projects that you
have worked on will be shown.
You can open a project by clicking on it; any project that was
already loaded when selecting the project will be closed (and any
changes made to the project will automatically be saved).
To work on several projects simultaneously, you can press and
hold the Shift key while clicking to open the project. Under
certain circumstances it is necessary to release the control
element a short moment after clicking to open the project. The
newly loaded structure will then open in a new window.
© 2008 Normfall GmbH
Reference
The Recent Projects List is being synchronized in all program
windows of Normfall Manager 4.0 when working on several
projects simultaneously.
Exit
Click on the Exit command in order to finish your work with
Normfall Manager. Any changes made to your project will
automatically be saved.
5.1.2 Functions in the Edit Menu
History Back
When navigating through your structure or the reference list,
Normfall Manager keeps track of the order in which you select
nodes and rows. Click on the command History Back to page
through your history one move backwards.
History Back
Alt + left
Alternatively, you can click on the corresponding button in the
toolbar or use key combinations.
History Forward
When navigating through your structure or the reference list,
Normfall Manager keeps track of the order in which you select
nodes and rows. Click on the command History Forward to page
through your history one move forwards.
History Forward
Alt + right
Alternatively, you can click on the corresponding button in the
toolbar or use key combinations.
Undo
Click on Undo to cancel the last change made to the structure
(e.g. the creation or deletion of a new structure node or row).
Alternatively, you can click on the icons in the toolbar or use a
key combination with the keys Ctrl, Shift and z.
Undo
Ctrl + Shift + z
Redo
Click on Redo to execute a command once again which resulted
in a change to the structure or the reference list. Alternatively,
you can click on the icons in the toolbar or use a key combination
with the keys Ctrl, Shift and y.
Redo
Ctrl + Shift + y
Undo (Text)
This command allows you to undo changes made to a structure
node or a row. Alternatively, it is possible to execute these
commands by means of a key combination.
Thus, it is easily possible to undo text changes in the text editor.
Furthermore, you can also use the icons in the toolbar of the
detail view for editing text.
© 2008 Normfall GmbH
Undo (Text)
Ctrl + z
129
130
Normfall Manager 4.0 User Manual
Redo (Text)
This command allows you to redo changes made to a structure
node or a row. Alternatively, it is possible to execute these
commands by means of a key combination. Text changes in the
text editor can be redone in this manner. Furthermore, you can
also use the icons in the toolbar of the detail view for editing text.
Redo (Text)
Ctrl + y
Cut
This command allows you to cut the selected structure nodes,
reference rows or text passages.
· Select the corresponding elements/text passages.
Cut
Ctrl + x
· Select the command Cut from the Edit menu.
The cut elements can be found in the clipboard 176 of your
operating system and can be inserted again to any location by
invoking the Paste command. You can also insert structure nodes
to another Normfall structure that is open simultaneously.
The command is also available in the context menu 167 or via the
key combination Ctrl + x.
Copy
This command allows you to copy the selected structure nodes,
reference rows or text passages.
· Select the corresponding elements/text passage.
Copy
Ctrl + c
· Select the command Copy from the Edit menu.
The copied objects can be found in the clipboard 176 of your
operating system and can be inserted again to any location by
invoking the Paste command. You can also insert structure nodes
to another Normfall structure that is open simultaneously.
The command is also available in the context menu 167 or via the
key combination Ctrl + c.
Paste
With this command it is possible to paste different contents from
the clipboard at other locations within your project. Use this
function to paste
Paste
· text into the comment editor
· structure nodes to the same level
94
and
· reference rows
within the detail view, structure view or list view respectively.
For further information please consult Paste Options
Options of the Text Editor. 89
92
or Paste
© 2008 Normfall GmbH
Reference
Select All
In the structure view, this command allows you to simultaneously
select all structure nodes of the same level. To do so, click on a
structure node and execute the command Select all.
Ctrl + a
In the list view, this command causes that all elements of the list
will be selected .
Alternatively, you can also use the key combination Ctrl + a.
Rename
To rename a structure node or a reference row, proceed in the
following manner:
F2
Select the element and execute the command Rename.
Selectively, you can also use the function key F2 or click on the
text area of an already selected element without moving the
mouse. The command is also available in the context menu.
If you would like to copy text (for example, from a Word
document) when renaming a structure node with, follow these
instructions:
1. First, select and copy the text to the clipboard (using the key
combination Ctrl + c is usually the easiest way to do so).
2. Select the given structure node and press the F2 key.
3. Click on the text line with the right mouse button and select the
Insert command from the context menu.
Shortcuts cannot be renamed. To rename a
shortcut, simply rename the structure node that is the
target of the shortcut and the shortcut itself will also
receive the new name.
If a shared content location is renamed, any
changes made to it will be visible as soon as the File
command Reload Structure View is executed, which
can also be done by pressing the function key F5.
Find in Text
Use this command to search for certain terms. Here 102 you will
find further details.
Find in Text
Ctrl + f
5.1.3 Functions in the Structure Menu
© 2008 Normfall GmbH
131
132
Normfall Manager 4.0 User Manual
Find in Project
With this command you can search the entire project and all
attached documents for certain terms. See Searching and
Finding 101 for more detailed information.
Find in Project
Find in Selected Branch
If you would like to search only a given branch of your structure,
click on the corresponding structure node and then select the
command Find in Selected Branch which can also be found in the
context menu.
Find in Selected Branch
Here you have all functions available that are described under
Find in Project 101 .
Note: In the context menu of the given structure node
this command is called Find here.
Up
You can move a selected structure node including all comments
and subnodes one position upwards within one level.
To do so, click on the desired structure node and select the
command Up.
Up
F7
You can also use the context menu for this, or alternatively, the
function key F7.
Down
You can move a selected structure node including all comments
and subnodes one position downwards within one level.
Down
To do so, click on the desired structure node and select the
command Down.
F8
You can also use the context menu for this, or alternatively, the
function key F8.
Sort
This command allows you to sort all structure nodes of the same
level in ascending order. Alternatively you can execute this
command via the context menu or by means of the key
combination Ctrl + l.
You can also sort the nodes in reversed order by additionally
pressing the Shift key.
Ctrl + l
(ascending)
Ctrl + Shift + l
(descending)
© 2008 Normfall GmbH
Reference
Change Type
You can define different node types by using this command. More
details can be found in the chapter Node Types. 99
Delete Branch(es)
There are several ways to delete structure nodes including all
subnodes, references and comments belonging to them, after
you have clicked on the nodes to be deleted:
· The Delete Branch(es) command.
Delete Branch(es)
Shift + Del
· A click on the icon in the toolbar.
· The key combination Shift + Del.
Convert to Row
You can convert a structure node to a row by selecting the
corresponding structure node and then choosing the command
Convert to Row. Alternatively, you can invoke the command using
the context menu.
Convert to Row
Ctrl + right
However, this command is not available, when
· the given structure node is found on the first level of the
structure or
· the structure node to be converted contains several
sublevels of subnodes.
Alternatively, you can use the key combination Ctrl + right.
New Node
In order to insert a new structure node after the currently selected
node on the same level, several options are possible:
· The command New Node.
New Node
F9
· A click on the icon in the toolbar.
· The command with the same name found in the context menu.
· Pressing the function key F9.
New Subnode
You can insert a new structure node as a subnode of the selected
node (that is, one level lower than the selected node) in the
following ways:
· Using the command New Subnode
· Clicking on the icon in the toolbar.
· Selecting the command with the same name in the context
menu.
· Pressing the key combination Ctrl + F9.
© 2008 Normfall GmbH
New Subnode
Ctrl + F9
133
134
Normfall Manager 4.0 User Manual
Insert from Microsoft Word
This function allows you to paste a structured Word document
into the currently opened project. In the chapter Converting
Structured Text Documents 81 you will find more detailed
information in the section Creating a Normfall Structure from a
Word Document 81 .
Insert from Microsoft Word
5.1.4 Functions in the List Menu
View
In this sub menu there are functions which allow you to show or
hide the list view 34 and the tabs in the list view. 30
New Annotation
With the New Annotation command you can add a new row to the
reference list without referring to a document.
Alternatively, you can press the right mouse button in the
reference list and select the command New Annotation from the
context menu or use the function key F11. This command is only
available if the mouse pointer is located in the list view.
New Annotation
F11
Delete Entry/Entries
You can delete several rows from the reference list
simultaneously. To do so, click on the row that you would like to
delete so that it is marked with blue. To select several rows at the
same time, press and hold the Ctrl key while clicking on all rows
that you would like to delete. Then execute the command Delete
Entry/Entries from the List menu or context menu, which will open
a dialog box, which will ask you to confirm the command. The
rows and all comments belonging to them will be irrevocably
deleted; the documents in your project folder will however remain
untouched.
Delete Entry/Entries
Alternatively, you can click on the button in the toolbar of the list
view.
Convert to Node
To convert a row from the reference list into a structure node,
click on the given row and execute the command Convert to Node
, either from the context menu or the List menu. Normfall
Manager will then add the row as a new subnode of the node in
your structure that the row was attached to before the command
was executed.
Convert to Node
Ctrl + left
Alternatively, you can use the key combination Ctrl + left.
© 2008 Normfall GmbH
Reference
135
Show Shortcut Target
Click on a shortcut in the reference list and execute the command
Show Shortcut Target in order to find out to which document
under which structure node the shortcut refers. Alternatively, you
can find this command in the context menu.
Show Shortcut Target
View Attached Document
Using the command View Attached Document, you can view or
respectively open documents found in the reference list (the
commands vary depending on which tab is currently active); click
on the appropriate row and then execute the command.
Alternatively, you can open the document by double clicking on
the file icon found at the beginning of the row or by using the
command found in the context menu.
View Attached Document
By clicking on the appropriate button in the toolbar of the detail
view you can also open the desired document.
Print File
To print an attached document directly, execute the Print
Document command found in the List menu. You will also find this
button in the toolbar of the detail view.
Print File
Ctrl + p
Show Original
In the detail view you will find the Original command by means of
which you can display the originally attached file in Window
Explorer. Attached e-mails will be shown in Outlook - provided
that they are still available in the saved messages of Microsoft
Outlook. Attached websites will be shown online in your browser.
To do so, select the desired row in the list view and then click on
the button in the toolbar.
Show Original
F4
Alternatively, you can execute this command using the context
menu or with the function key F4.
The original file cannot be moved since this alters the
source path and therefore makes the orginal no
longer available to be shown.
Windows Explorer
The command Windows Explorer allows you to open exactly the
folder in Windows Explorer that contains the concerned file. This
file will automatically be marked there.
You will not only find this command under the Current Node tab
but also under Recent Docs (Project) and Recent Docs (System).
In this way, individual documents located in folders with
numerous files can also be found quickly.
Alternatively to the menu command, you can also use the
function key F6.
© 2008 Normfall GmbH
Windows Explorer
F6
136
Normfall Manager 4.0 User Manual
Document References
To have an overview of the structure nodes to which a document
is attached you can use this function which is also available via
the key combination Ctrl + Shift + F6. Alternatively, you can
show the Document References tab 32 . For further information
please refer to the section Manage Document 103 .
Document References
Ctrl + Shift + F6
Export Document(s)
To use attached files outside of Normfall Manager (for example,
to make them available to others), simply export them by means
of the export function. You can find this function in the list view as
well as in the search view (this means with an active search tab,
which can be invoked using Ctrl + s or by means of the Find in
Structure command from the Structure menu).
Export Document(s)
· Select the desired documents by clicking on the beginning of
the reference row in the reference list. (For further information
about how to simultaneously select several reference rows
please refer to the chapter Selecting Several Reference Rows
or Structure Nodes 33 .)
· Click on Export Document(s) in the toolbar of the list or search
view.
Alternatively, you can execute the command found in the List
menu or the context menu.
Normfall Manager saves copies of the documents in a temporary
folder known as the export folder. This folder opens automatically
after the export.
Normfall Manager creates the export folder and
manages it in a temporary folder. Objects in this
folder will automatically be deleted according to the
settings of the software in regular intervals.
ZIP
The ZIP function allows you to compress large files or several
documents as a ZIP file.
ZIP
· Select the corresponding documents in the reference list.
· Click on ZIP in the toolbar of the list view.
Normfall Manager will create a ZIP file in a temporary export
folder that will automatically be opened in Windows Explorer.
Normfall Manager creates the export folder and
manages it in a temporary folder. Objects in this
folder will automatically be deleted according to the
settings of the software in regular intervals.
© 2008 Normfall GmbH
Reference
137
Send To
This submenu offers you all the functions that you are already
familiar with from the "Send To" menu of the Windows Explorer
context menu. Depending on the configuration of your computer
you have the option here of, for example, sending a document
directly as an e-mail attachment or creating a desktop shortcut.
· Select the corresponding documents in the reference list.
· Click on Send To in the toolbar of the list view.
Alternatively, you can invoke the corresponding command by
means of the context menu:
· Select the corresponding documents in the reference list.
· Click on the grey area in the list view with the right mouse
button.
· Select the desired option from the Send To menu.
Attach Box
This command opens the attach box which allows you to attach
documents in a multidimensional way. See The Attach Box. 75
Attach Box
View Juris Database
This command opens the Juris website with Internet Explorer.
After your research Normfall Manager allows you to attach your
search results to your project. For more detailed information on
Attaching Juris Documents 79 and Saving Juris Access Data 79
please refer to the chapter Juris Documents 79 .
View Juris Database
Attachment
Attach Document
Attach Document
With this command you can add a reference to a new (empty)
row in the list view or to a new structure node in the list view.
Details are given here 59 .
Attach Juris Doc
Create a reference to a researched Juris document
F12
Attach Juris Doc
79
.
Attach URL
Attach URL
Create a link to a website. Further information can be found here
81 .
Detach Document
With this command you can remove a reference from a structure
node. Click on the corresponding document in the list view and
select the command Detach Document. In the list view the file icon
will be removed from the beginning of the row.
© 2008 Normfall GmbH
Detach Document
138
Normfall Manager 4.0 User Manual
Launch Normfall PDF Editor
With this command you can launch the integrated Normfall PDF
Editor. The Editor is a free additional module for Normfall
Manager 4.0 and allows you to view and create references to
specific pages within the PDF files in a comfortable manner
without the files to be modified.
Launch Normfall PDF Editor
For more information on Normfall PDF Editor please refer to the
corresponding manual which is available for download on our
webite: www.normfall.com.
5.1.5 Functions in the Tools Menu
Set/Change Password
You can prevent others from accessing your project files. Click on
Set/Change Password in the Tools menu to open the following
dialog box:
To create a new password enter it into the text box New
Password, repeat it in the next box and confirm your entries by
clicking on OK.
To change an existing password enter it into the text box Old
password and then create the new password. Repeat the
password and confirm by clicking on OK.
To delete an existing password without replacing it, enter it into
Old password and leave the other fields empty. Confirm by
clicking on OK.
Passwords only apply to project files but not to
projects on a database server!
© 2008 Normfall GmbH
Reference
Plug-In Installer
Using this function you install plug-ins for the full version of the
program Adobe Acrobat 7.0 and higher as well as for the
applications of the Microsoft Office package. The plug-ins allow
you to directly create references from the given programs. To
learn more about this topic see the chapter Plug-Ins for Attaching
Documents 62 .
In the column State you can see whether or not a plug-in is
installed or not at the moment.
In the column Activate you can see which plug-ins will be installed
or deinstalled by clicking on Apply. If a check is visible, the
plug-in will be installed, given that this is not already the case. If
the check is not visible, the plug-in will be deinstalled, given
that it is already installed. To exit the installation click on Close.
Since the settings are valid for all users of the
computer or server, you need Administrator rights,
to be able to change them. Otherwise the checks will
appear with a grey background and cannot be
changed.
In most applications for which Normfall plug-ins exist, each
individual user has the option of hiding the Normfall toolbar and
consequently deactivating the plug-in itself, even if it has been
installed by the administrator.
Settings for other Applications
Normfall Manager 4.0 allows you to paste hyperlinks 98 to
structure nodes as "bookmarks" in an editor which supports
hyperlinks such as Microsoft Word or Adobe Acrobat. When
clicking on such link to reach the desired structure node within a
project, the respective application may display a warning
message.
© 2008 Normfall GmbH
139
140
Normfall Manager 4.0 User Manual
Warning messages which are shown when clicking on a hyperlink
out of a Microsoft Office application can be suppressed by means
of the command Settings for other Applications. Furthermore,
when clicking on a hyperlink, Normfall Manager 4.0 will show a
notice which points to the above mentioned command. You can
configure the settings for this dialog in the Tools | Options |
Prompts 143 menu.
In Adobe Acrobat those warning messages can be deactivated
with 'Edit | Settings | Trust Manager | Change Web Settings |
Allow all web sites'.
Manage Database Server
Normfall Manager supports Microsoft SQL Server so that
structures can also be created and managed on a database
server. Detailed documentation on these functions can be found
in the chapter Database Server 107 .
Manage Database Server
User List
With this command an overview of all users will be displayed that
are working on a project file simultaneously. This command is
particularly useful when jointly working on a project within a
network. The table shows on which computer the user is logged
in, which access type the user has (write acces or read only) and
whether the project file is exclusively open. However, users that
do not have write access on the file system or database level are
not recorded.
User List
File Maintenance
File maintenance corrects errors in project files that can result
from multiple user access. Additionally it defragments the project
files so that they are smaller and memory is saved. We
recommend this for extensive projects when you would like to
archive or send them by e-mail. The information of your project is
not lost during this process.
File Maintenance
Editor Formatting Options
Herein, default text settings such as font type and size,
alignment, line spacing etc. can be changed.
© 2008 Normfall GmbH
Reference
These settings will be applied globally for all texts of the detail
view 34 . To format individual passages differently use the
commands of the toolbar found in the text editor 88 .
Options
In the options box you can individually change general as well as
project related settings. The general settings are arranged into
the following categories: Folders 142 , Language 143 , Prompts 143 ,
Juris 146 , Attach Settings 147 , Database Server 148 , Other 149 .
Project settings can be altered for the current project 151 as well
as new projects 152 .
In the following chapters these functions will be explained in
detail.
Also, system administrators can control settings for user groups
by means of the Normfall Manager Administration Kit, which can
be downloaded from our website www.normfall.com.
The Administration Kit allows administrators to define the options
settings for a user group (on all computers of an organisation).
For every single setting it is possible to define whether it should
© 2008 Normfall GmbH
141
142
Normfall Manager 4.0 User Manual
have a one-time effect (i.e. they can be changed by the user) or a
permanent effect (cannot be changed). Permanent settings can
only be changed temporarily for the current project by the user;
they will be reset when the project is closed or when the options
dialog is opened by the user again.
Folders
Backup Folder
Windows has a so-called TEMP folder for each user on the
computer. Here files will be buffered that can be deleted when
cleaning up the hard drive. The folder can be viewed by typing
%TMP% into the Address bar of Windows Explorer.
You can determine in which folder the backup copy of your
structure should be saved. You can accept the pre-defined folder
or, by clicking on Browse after selecting Specify, you can define
an alternative location for storage.
Global File Inbox (optional)
You can either accept the pre-defined folder or, by clicking on
Browse, you can define an alternative (global) location for this
folder. This is particularly recommended when working on a
network (see the chapter Inbox Folder 54 in the section Folders
52 ). To do so, you must active the option Use Global File Inbox
by placing a check in the box under Project | Current Project.
Node Icon Folder (for "Node Types")
Here you can select the folder which contains custom icons for
structure node types. You may choose a folder that you share
with other users. If you want your icons to be displayed in other
users’ structure view, they need to have the same icon files
available. More details can be found in the chapter Node Types
99 .
© 2008 Normfall GmbH
Reference
Export Folder
By clicking on Browse you can replace the pre-defined export
folder with a new folder of your choice. Since the export folder is
a temporary folder that is automatically deleted in regular
intervals, you can choose how often this should happen. Further
information can be found in the chapter Export Folder 55 .
Language
Here the language setting for Normfall Manager can be set. If the
option System default is activated with a check, Normfall Manager
will automatically use the language setting of your operating
system. Deactivate this option to change to the German or
English user interface.
Prompts
© 2008 Normfall GmbH
143
144
Normfall Manager 4.0 User Manual
Here you can determine which prompts and warnings should be
displayed when working with Normfall Manager:
· Ask about project folder creation when creating new project file
When creating a new Normfall project this prompt will ask you
whether you would like to automatically create a project folder of
the same name for the new project in case there does not exist a
project folder yet.
· Warn when the file name is too long for CD (Joliet)
If file names contain more than 64 characters this can lead to a
loss of references when later burning the project on a CD/DVD
because file names are automatically reduced to a maximum of
64 characters when burning. More can be found in the section
Maximum Length of File Names 55 .
· Warn before changing unique project name (Project ID)
A unique project name (the Project identification number) is a
prerequisite for hyperlink functionality. If hyperlinks already exist
in a project, they will be lost when changing the project name.
More on this can be found in the chapters Hyperlink 98 and
Project Properties 126 .
· Show notice about Office warnings on hyperlink resolution
This dialog points to the Settings for other Applications 139
command, by means of which you can deactivate warning
messages that are shown when following hyperlinks out of
Microsoft Office applications.
Notices when working with plug-ins
When attaching files with plug-ins for Adobe Acrobat, Microsoft
Word, Excel and PowerPoint and when creating a new structure
out of a Microsoft Word document, a corresponding notice
appears before saving. There is also a notice about reduced
Word functionality when importing to and exporting text from
Word.
The details on plug-ins can be found in the chapter Plug-Ins for
Attaching Documents (to a specific target) 62 .
Prompts for formatted text in the editor (text editor)
· Prompt before changing text with original formatting
If you try to alter the formatting of a text that was pasted with
original formatting a corresponding prompt appears.
· Prompt before normalizing formatting of pasted text
© 2008 Normfall GmbH
Reference
If pasting a text into the text editor using the option Paste with
editable formatting, the original formatting that cannot be edited
by the editor will be removed.
· Warn before pasting text with original formatting
When trying to paste text with original formatting into the text
editor, a corresponding warning will appear because the text may
contain some formatting that cannot be edited by the editor.
You can find further information on formatting in the chapter
Paste Options in the Detail View 89 .
Prompts on Folder Management
· Warn on multiple project files per folder or overlapping project
folders 36
When creating a new project you should take note to create a
separate folder for each individual project in the file system.
When doing so the Normfall project file must always be saved on
the first level of the project folder. If Normfall Manager notices
that several project files are already in a folder, a corresponding
warning appears.
Further information can be found in the chapter Project Folder
52
.
· Show notice on project folder change
You will be notified when trying to change the settings for the
project folder in the Options Menu.
More information concerning the folder management can be
found in the chapter Project Folder 52 .
· Show notice before copying files between projects
You will be notified that attached documents from the branch that
you would like to copy will be copied to the project folder of the
project that you are pasting to.
· Show notice when pasting RTF text on Vista with UAC on
You will be notified about the possibility to deactivate the UAC
(User Account Control) when having problems with copying and
pasting text under Vista.
· Show notice when project is opened read-only due tu license
restrictions
With the versions Basic or Professional it is possible to only edit
projects with a maximum of 500 and 1000 entries respectively. If
a project exceeds the maximum number of entries, with Basic or
Professional it will be opened in read-only mode.
© 2008 Normfall GmbH
145
146
Normfall Manager 4.0 User Manual
Juris
Provided that you have a user account for the Juris database,
you can enter your access information here, which allows you to
manage documents from your Juris research directly with
Normfall Manager.
To do so activate Enable references to Juris DBs and enter your
account name and password in the provided boxes. The
password can also be saved.
Since Microsoft Internet Explorer is always used to view and
attach Juris documents you can activate the option Use default
browser to open linked documents (no automatic log-in) to display
documents with, for example, Mozilla Firefox.
If you do not have a Juris account and do not wish to use Juris to
research, you can deactivate Enable references to Juris DBs; the
Juris button will be hidden from the toolbar of the main menu by
doing so.
Normfall Manager Administration Kit 141
more settings for Juris company accounts.
provides
© 2008 Normfall GmbH
Reference
Attach Settings
Enable Auto folder
With this option you can determine in which cases files should
automatically be saved in the Auto folder 53 during the attaching
process.
This option notes a difference between attaching documents by
means of the respective plug-ins and the functions available
within Normfall Manager.
Activate for Plug-Ins in viewer applications:
This option refers to attachments provoked by means of plug-ins
for the applications Microsoft Word, PowerPoint, Excel and
Adobe Acrobat.
Activate for all other instances, except when target within
document was specified:
This option is set by default and refers to attachments being
provoked directly via the functions available in Normfall Manager
4.0 (Attach Box 137 , To Row 154 , To Node 154 ) and by means of
Microsoft Internet Explorer, Windows Explorer and Microsoft
Outlook, provided that no target within the document (in the
attach box) was specified.
Documents being attached by means of the
commands found in Normfall Manager and Windows
Explorer will not be copied into the auto folder if
there already exists an identical document. The
existing document will be attached instead.
Move e-mails to Normfall e-mail folder after attaching
Activating this option will automatically move e-mails that you
attach using the Normfall plug-in from your Outlook inbox to a
sub folder with the name "Normfall".
© 2008 Normfall GmbH
147
148
Normfall Manager 4.0 User Manual
Activate Normfall button on the desktop
With this option you can set the Normfall button 170 to be shown
or hidden by default.
Include original file system path in reference
When attaching files from the file system Normfall Manager
automatically records the original save location of the file. This
can be deactivated here. Please note that when using the
command Show Original 135 the original document can no longer
be displayed in Windows Explorer.
For other systems such as, for example, Juris attachments this
option cannot be deactivated.
Database Server
The following settings for working with a database server 112 can
be changed here:
Create new projects
Here you can define how Normfall Manager should go about
creating new projects (using the commands New Project, New
from Word Document or New from Folder Structure ):
· As file
Creates a project file in the file system.
· On database server
Creates a new project on a database server.
· Prompt
When executing one of the "new" commands from above a
prompt will appear, asking you where the new project should be
created.
© 2008 Normfall GmbH
Reference
Save log-in information for a database server
Log-in information for a database server can be saved here:
Server: Enter the database server here with which you will be
working by default (the standard server).
Authentication: Choose between
· Windows Authentication, with which you are always
recognized as the user logged on to the computer at the
moment and therefore do not need to enter a password
or
· SQL Server Authentication, which requires administrator
log-in information. This typically consists of "sa" +
password.
Depending on the authentication mode, you enter the necessary
information into the following fields Login and Password.
Details on logging-in to a database server can be found in the
section Administration of a Database Server 108 .
Other
Here the following settings for tooltips and operations of Normfall
Manager are possible:
Tooltips
Here you can determine whether Menu and Dialog Tooltips
should be shown. The tooltips contain short help messages on
the respective control elements, which is why it is recommended
to activate both of these options as long as you are still becoming
familiar with the functions of Normfall Manager.
Keep text formatting of pasted text
© 2008 Normfall GmbH
149
150
Normfall Manager 4.0 User Manual
When pasting formatted text into the text editor you have the
possibility of choosing between different formatting settings:
· Keep all
· Only what is supported for editing (recommended)
· Remove all
Further information can be found in the chapter Paste Options in
the Detail View 89 .
Node Types
With the option Show Default Icon Set you can decide whether
Normfall Manager should show its built-in icons for structure node
types 99 by default.
Auto-set date value on:
Here you can determine whether the current date should
automatically be set when attaching Documents or when creating
new Comments or structure Nodes (not activated by default).
Open projects in new window
Determine whether a project should Always (default setting) be
opened in a new window or solely When the shift key is pressed.
Always use Normfall PDF Editor for opening PDF documents
(if installed)
With this option you can determine that Normfall PDF Editor is
always used for opening PDF documents via Normfall Manager
(if Normfall PDF Editor is installed on your system).
This option is activated by default. If it is not activated PDF
documents will always be opened with the default application for
viewing PDF files installed on your system.
© 2008 Normfall GmbH
Reference
Current Project
Create backup copy when closing
When closing an open project Normfall Manager automatically
creates a backup copy of the project (see the chapter Backups
107 ). Here you can deactivate this function as needed by
removing the check before Create backup copy when closing.
Project file path
Here you can determine whether the project file should be saved
in the project folder. This is pre-defined by default. If you would
like to separate documents and the project file folders, you can
do so here. Activate Specify and then click on Browse to define a
new project folder in which all documents will be placed.
Note: When working with projects on an SQL Server
this option is called Use Project Properties.
Use Global File Inbox (see Folder settings)
If you have entered a global file inbox in the section Folders, you
must activate Use Global File Inbox.
© 2008 Normfall GmbH
151
152
Normfall Manager 4.0 User Manual
New Projects
Here the same settings can be altered that are found under
Current Project 151 . However, these settings are only valid for
future projects to be created.
Project Properties - Relation Module
Here you can determine the number and names of the tracks you
want to work with in new projects. More information on the
Relation Module is provided here 114 .
Hide the list view by default
With this option you can determine whether new projects should
show or hide the list view. See also the chapter Showing and
Hiding the List View 34 .
5.1.6 Functions in the Help Menu
View Help
Using the Help menu, which is marked by the "?" symbol, you
can call upon the help function of Normfall Manager and find
further information. For more information see the section User
Manual 152 .
Normfall Manager 4.0 User Manual
To view this user manual in the help window of Normfall
Manager, select the command View Help from the ? menu.
Alternatively, you can call upon the command using the function
key F1.
F1
To receive information on a particular command 167 or button,
© 2008 Normfall GmbH
Reference
move your mouse cursor over it and press the F1 key. This will
open the corresponding section of the help file in the help
window.
In the help window you will find the contents of the user manual.
By clicking on the headings you arrive at the corresponding
sections, which will be accompanied by explanatory text in the
text window to the right.
The small plus sign buttons to the left of the headings show you
that there are subsections available under the given heading.
These will be displayed by clicking on the plus sign.
Passages written in blue and underlined are so-called hyperlinks
(cross references). By clicking on the hyperlink you arrive at the
location of the user manual that the hyperlink refers to.
Check for Update
With this command you can find out whether an update is
available. Normfall Manager will automatically check our web
page for an update appropriated for the version of the software
installed on your computer.
You can then download and install the current build without any
problems.
License
With this command you open the license wizard of Normfall
Manager which supports you to enter license information for your
product version. You can find more detailed information in the
chapter Activating your License 24 .
Structure License
This function is intended for future versions of Normfall Manager.
Info on Software
Here you can find the following information:
· the version of the software that is installed
· the licensee
· the type of license
· the license key
5.1.7 Special Commands of the Three Views
You will not find some commands in the menus 169 but rather only
in the context menus 167 or on buttons 166 of the given views and
in toolbars. In the following sections an overview of these
additional commands will be presented.
© 2008 Normfall GmbH
153
154
Normfall Manager 4.0 User Manual
Special Functions in the Main Tool Bar
Attach Documents
This command allows you to simultaneously attach several
documents by contrast to the attach box 137 . For further
information, please click here 59 .
Attach Documents
Ctrl + Shift + A
Alternatively, you can execute the command using a key
combination, by pressing the keys Ctrl + Shift + A at the same
time.
To Row
This function allows you to attach a document from the selection
list 168 directly to the list view. For further information, please click
here 60 .
To Node
This command allows you to attach a file as a structure node to
your project. For further information please click here 60 .
Relationsmodul aktivieren
Set Relation Module
This command allows you to activate the Relation Module. More
information on this topic please click here. Einrichten des
Relationsmoduls.
Special Functions in the Structure View
New Root Node
This command can be found in the context menu of the structure
view. In order to create a new structure node on the first level,
open the context menu by right clicking on the white area and
select the command Create New Root Node. Normfall Manager
then inserts a new structure node at the end of your structure.
Paste Special
Structure nodes that you have been cut out or copied can be
pasted to your project as hyperlinks 98 , shared nodes 97 or
shortcuts 97 . Use the corresponding commands in the submenu
Paste Special of the corresponding context menu. Further
information on these paste options can be found here 93 .
Paste Node/Row
To paste a cut out or copied structure node as a subnode to other
structure nodes, select the corresponding command from the
submenu Paste Node of the context menu. Further information on
these paste options can be found here 94 .
© 2008 Normfall GmbH
Reference
155
Special Functions in the List View
If the tab Current Node 31 is active in the foreground you can use
the following commands found in the context menu:
Paste Row
With this command you can paste a cut out or copied reference
row to the list view of another structure node. Further information
can be found in the chapter Paste Options of the List View 94 .
Paste Special
To paste elements as Shared Rows 97 , Shortcuts 97 or
Hyperlinks 98 , select the desired option from the submenu Paste
Special of the context menu.
Attach
This command is available under the tabs Recent Docs (Project)
and Project Folder.
Attach
To attach documents to the currently selected structure node,
select them and click on the button in the toolbar.
Alternatively, you can execute this command using the context
menu.
Folder Up
With this command found in the Project Folder 52 tab you can
open the subordinated folder. Since you can save your
documents as you wish in subfolders of the project folder, you
can navigate through the folder hierarchy using this command.
Rename
Under the Project Folder tab you will find the Rename command
with which you can rename files in your project folder without
references to the attached documents being lost.
Changing the file name of attached documents in
your file system - that is, without using this command
in Normfall Manager - will cause the references to no
longer function.
Delete File and all References
This command is available under the tabs Project Folder and
Document References. It allows to delete individual documents
from your project.
Delete File and all References not only deletes all
references to the document, but each subnode and
subrow of each reference. This is in particular
© 2008 Normfall GmbH
Delete File and all References
156
Normfall Manager 4.0 User Manual
relevant if documents have been attached to the
structure as structure nodes.
Move File
The Move File command is available under the tab File Inbox and
allows you to move the currently selected document from your file
inbox to the project folder 52 and simultaneously attach this
document to the currently selected structure node. In doing so,
the document will automatically be moved to the auto folder 53 .
Move File
Alternatively, you can execute this command using the context
menu.
To attach a copy of the currently selected document from the file
inbox to the desired structure node press the Shift key while
clicking on Move File. A copy of the document will then remain in
the file inbox.
Moving Files within the Project Folder
The Move Files command found under the Project Folder tab
allows you to move the currently selected documents within your
project folder 52 , without losing any pre-existing references to
the files in the project.
If you move attached documents within your file
system - that is, without using the command provided
by Normfall Manager - any references to the
attachment will be lost!
Delete
This command allows you to remove documents from the file
inbox or your project folder. To do so, click on the respective tab,
select the concerned file and click on Delete in the toolbar.
Delete
Alternatively, you can execute the command using the context
menu.
Remove from Recent Docs
The command Remove from Recent Docs is available under the
tabs Recent Docs (Projects) and Recent Docs (System) and allows
you to delete entries from the corresponding list. The recent docs
list is a list of all documents recently used.
Remove from Recent Docs
Using the context menu you can also execute this command.
Attach Copy
Under the Recent Docs (System) tab, you will find the Attach Copy
command. All documents are listed here that have recently been
used on your system - regardless of your work with Normfall
Manager.
Attach Copy
© 2008 Normfall GmbH
Reference
157
This procedure will automatically copy the documents to the auto
folder 53 .
Alternatively, this command can also be executed using the
context menu.
Locate
The Locate command is available under the tabs Document
References, New Search and Shared Content Locations. Select the
desired element from the given list and click on the button in the
toolbar to arrive directly at the location in the structure view where
the document is attached to.
Locate
Remove all
This command is available under the tab Shared Content
Locations and makes it possible to delete the group of all shared
content locations of a file.
Remove all
Before the deletion process is carried out a dialog box reminds
you of all shared content locations and requires you to confirm
the command.
Show Shared Content Locations
This function allows you to show a list of all existing shared
content locations of a file or a structure node. This command is
not accessible by means of a menu, rather only by means of
showing the tab Shared Content Locations or by double clicking
on the corresponding icon in the reference list. For further
information, please refer to the section Searching and Finding 101
under Show Shared Content Locations 103 .
Shared Content Locations
Special Commands of the Detail View
Hide/Show File Info
In the detail view there is a small button with a plus sign on the
right border next to the title box. Clicking on it will display
additional information about the selected file in the list view (for
example, the exact location where the file is saved).
Change to Comment
By clicking on this button it is possible to add annotations to
original file/document excerpts. For more details, please refer to
the chapter Detail View 34 .
Highlight
Selected text passages from original file excerpts can be
highlighted by using this command.
The following list contains the commands of the toolbar of the text
© 2008 Normfall GmbH
Hide/Show File Info
158
Normfall Manager 4.0 User Manual
editor that you can use for the direct formatting 89 of the text of
your comments. To make global formatting changes select
Editor Formatting Options 140 from the Tools menu. More on this
subject can be found in the chapter Text Editing 88 .
Undo
Undo alterations made to text.
See the chapter Undo (Text) 129 from the section Functions in the
Edit Menu 129 .
Redo
Redo alterations that you have made to the text.
See the chapter Redo (Text) 130 from the section Functions in the
Edit Menu 129 .
Font Type
Here you can choose between different types of font such as
Times New Roman, Arial Narrow or Courier New.
Font Size
Here you can change the size of individual areas of the text, for
example Size
4, Size
5.
Bold
Format the selected text as bold.
Italic
Format the selected text as italic.
Underline
Format the selected text as by underlining it.
Font Color
Format the selected text in a given color.
Background Color
Format the selected text with a background color.
Justify Left
Format the text so that the beginning of each line begins
uniformly on the left side of the text editor and ends freely on the
right side.
© 2008 Normfall GmbH
Reference
Justify Center
Format the text so that it is centered exactly in the middle of the
editor.
Justify Right
Format the text so that the end of each line ends uniformly on the
right side of the text editor and begins freely on the left side.
Justify Full
Format the text so that lines are uniformly formatted at the
beginning and the end of the each line.
Numbered List
Number selected paragraphs consecutively and indent them or
create a numbered list while entering text.
Bullet List
Places a list symbol in front of the selected paragraphs or creates
a list without numbers while entering text.
Increase Indent
Indents the paragraph or selected text to the right.
The indent of this sentence has been increased.
Decrease Indent
Reduces the size of the indent of text that has already been
indented.
Insert Hyperlink
Opens a dialog box that makes it possible to add different types
of hyperlinks, e.g. http, ftp, etc.
Show Html Source Code
Shows the html source code of the text in the text editor.
Remove Formatting
Removes all formatting of the selected text.
Zoom In
Increases the displayed size of the comment text.
For more on this topic see the chapter Text Editing
© 2008 Normfall GmbH
89
.
159
160
Normfall Manager 4.0 User Manual
Zoom Out
Decreases the displayed size of the comment text.
For more on this topic see the chapter Text Editing
89
.
Paste with original formatting
Pastes the text from the clipboard with original formatting. Please
see the chapter Paste Options of the Text Editor 89 .
Paste with editable formatting
Pastes the text from the clipboard with editable formatting. For
more information please see the chapter Paste Options of the
Text Editor 89 .
Paste as plain text
Pastes the text from the clipboard as unformatted text. Please
see the chapter Paste Options of the Text Editor 89 .
5.1.8 Navigation
You can move through the views and structure of Normfall
Manager using the mouse or keyboard.
To navigate through the views of Normfall Manager or to activate
a tab without the mouse, press the key combination Ctrl + F6 to
activate the so-called keyboard focus 175 .
The contents of each tab can be shown by pressing the key
combination Control key + Tabulator key or by clicking on the
tab with the mouse.
Within the lists you can either click on the individual rows or
alternatively, you can navigate up and down using the arrow
keys. To do so, you must have already selected a row so that the
keyboard focus is on it.
History Back, History Forward
When navigating through your structure or the reference list,
Normfall Manager keeps track of the order in which you select
nodes or rows. Click on the commands History Back and History
Forward in the Edit menu to page through your history one move
backwards or forwards.
Alternatively, you can click on the corresponding button in the
toolbar or use key combinations.
Ctrl + F6
Ctrl + Tab
Arrow key upwards/
downwards
History Back
History Forward
Alt + left
Alt + right
Navigation with Hyperlinks
Structure nodes and rows can be added as hyperlinks within the
project and are therefore another means of navigation. Further
© 2008 Normfall GmbH
Reference
161
information can be found in the section Hyperlink 98 . In the
structure and list views, hyperlinks that have been added are
depicted with the following icon:
To arrive at the target of the link, simply double click on the icon;
in the list view you can also use the command View Attached
Document found in the context menu.
Hyperlinks pasted to the text editor that link to structure nodes or
rows will be underlined and colored blue.
Locate
Locate
The command Locate is available under the tabs Document
References, New Search as well as Shared Content Locations.
Select the desired element in the corresponding list and click on
the button in the toolbar in order to directly arrive at the location
where the document is attached to in the structure view.
5.2
Key Combination Tables
In the following chapters you will find a compilation of all possible
key combinations that you can use when working with the
keyboard 173 in Normfall Manager.
5.2.1 General Key Combinations
Ctrl + n
49
Create new project
Ctrl + o 124
Open an existing project
Ctrl + s 132
Search in project
Ctrl + Shift + s 132
Search in selected branch(es)
Ctrl + f
Search in text editor
Alt + F3 126
Show the Project Properties
F1 152
Open the Help menu
F3 141
Open the submenu Options from the Tools
menu
Ctrl + F3 140
Open the submenu Editor Formatting Options
in the Tools menu
F5 125
Update the structure view according to
changes made to the structure
Ctrl + F6 174
Keyboard focus:
© 2008 Normfall GmbH
162
Normfall Manager 4.0 User Manual
In order to move through the views of
Normfall Manager without a mouse, press
this key combination.
Ctrl + Tab
Press this key combination to navigate
between the individual tabs.
Alt + left 129
A step backwards in the navigation history
Alt + right 129
A step forwards in the navigation history
Ctrl + z 129
Undo changes made to the text
Ctrl + y 130
Repeat changes made to the text
Ctrl + Shift + z 129
Undo changes made to a project
Ctrl + Shift + y 129
Repeat changes made to a project
Ctrl + w
Invoke View menu
30
Ctrl + u 140
Show User List
Ctrl + Shift + Alt + p 138
Set/Change password
Ctrl + Shift + Alt + a
Open Attach Box
75
Ctrl + Shift + F12 125
Save as
Ctrl + Shift + a 154
Attach the currently selected document to the
selected structure node
Shift + F12
Alt
Invoke Main Menu (for keyboard control)
F10
Connect to SQL Server
F12 112
5.2.2 Key Combinations in the Structure View
Ctrl + x 130
Cut structure node
Ctrl + c 130
Copy structure node
Ctrl + v
Paste structure node on the same level
93
Ctrl + a 131
Select all structure nodes on the same level
Ctrl + m
Paste structure node as a shared content
location
97
© 2008 Normfall GmbH
Reference
Ctrl + b
97
Paste structure node as a shortcut
Ctrl + q
98
Paste structure node as a hyperlink
Ctrl + Shift + d
84
163
Convert to document
Rename structure node
F2 131
Ctrl + Shift + v
Ctrl + Shift + m
93
93
Paste structure node as subnode
Paste shared content location as a subnode
Ctrl + Shift + b
93
Paste shortcut as a subnode
Ctrl + Shift + q
93
Paste hyperlink as a subnode
Ctrl + Shift + F12 125
Save as
Shift + F4
Show Shortcut Target
97
F7 132
Ctrl + up
F8 132
Ctrl + down
Move the selected structure node up one
position
Move the selected structure node down one
position
Ctrl + l 132
Sort all nodes of the same level in ascending
order.
Ctrl + Shift + l 132
Sort all nodes of
descending order.
Shift + Del 133
Delete structure node
Ctrl + right 133
Convert the selected structure node to a row
F9 133
Create a new structure node
Ctrl + F9 133
Create a new subnode
Enter 174
Open the selected document
5.2.3 Key Combinations in the List View
Ctrl + x 130
Cut row
Ctrl + c 130
Copy row
Ctrl + v
Paste row
93
© 2008 Normfall GmbH
the
same
level
in
164
Normfall Manager 4.0 User Manual
Ctrl + a 131
Select all
Del 134
Delete row
Ctrl + m
Ctrl + b
Paste row as a shared content location
94
Paste row as a shortcut
94
Ctrl + e 136
Export document(s)
Ctrl + Shift + e 136
Compress document(s) (create ZIP folder)
Ctrl + t 137
Show the "Send To" menu
Ctrl + l
Show/hide list view
34
Ctrl + w
Open View menu
30
Ctrl + j
Show the Relation tab
F2 131
Rename row
F4 135
Show document
F6 135
Open Windows Explorer
Ctrl + r 103
Show
temporarily
the
Shared
Content
Locations tab
Ctrl + h
Show temporarily the Recent Docs (Project)
tab
30
Ctrl + Shift + h
Show temporarily the Recent Docs (System)
tab
30
Ctrl + Shift + F6 103
Show the Document References tab
Ctrl + tab
Switch tabs
Shift + F6 135
Show Original
F11 134
Create New Annotation
Ctrl + F12 137
Attach reference
Ctrl + left 134
Convert reference row to structure node
In Search lists (lists under the tabs New Locate
Search, Manage Document,
Content Locations)
Show
Shared
Ctrl + left 160
© 2008 Normfall GmbH
Reference
165
In File List (lists under the tabs Project Folder, Attach the currently selected document in the
File Inbox, Recent Docs (Project) and Recent list to the selected structure node
Docs (System))
Ctrl + left 155
In File List (under the tab File Inbox)
Ctrl + Shift + left
Attach a copy of the currently selected
document in the list to the selected structure
node
In File List (lists under the tabs Project Folder, Open the Attach Box in the file list
File Inbox, Recent Docs (Project) and Recent
Docs (System))
Ctrl +Alt + left
75
Open the current document
Enter 174
5.2.4 Key Combinations in the Detail View
Ctrl + c
Copy selected text
Ctrl + x
Cut the selected text
Ctrl + v
Paste the copied/cut text
Tip: The formatting of the pasted text can be
determined under Tools | Options | Other.
Ctrl + f 102
Find in text
Ctrl + Shift + p 126
Print current comment text
Ctrl + p
Print current document
Ctrl + "+/-"
Zoom in/out (Enlarge/Reduce view)
89
Ctrl + Shift + Alt + h
Show html source code
5.2.5 Combinations for Keyboard and Mouse Actions
For Drag & Drop actions:
Ctrl
Copy the “pulled” element
91
Shift
Create a shared content location of the
“pulled” element
91
Ctrl + Shift
Ctrl + Shift + Alt
© 2008 Normfall GmbH
Create a shortcut of the “pulled” element
91
91
Create a hyperlink of the “pulled” element
166
Normfall Manager 4.0 User Manual
Other combinations:
5.3
Shift + Open Project 124
When project loaded, open another project in
a new application window.
Shift + Double click on attached file
Change between primary function (e. g.
"Open") and secondary function (e. g. "Open
Original")
The Basics of Use
Here we will explain the terms that are important for an
understanding of the other chapters found in this user manual.
So far as these explain commands, we recommend trying the
corresponding functions out in Normfall Manager.
5.3.1 Elements of the User Interface
For an explanation of each concept see the following chapters.
Button
A button consists of an icon ("picture", "symbol") or text and
represents a command 167 . By clicking on the button the
command will be executed. For example, by clicking on the New
Subnode button, a new subnode will be created in the structure
view.
You can find buttons in the toolbars 172 of all three views
well as in all dialog boxes 168 .
29
as
In order to make use of buttons in dialog boxes using the
keyboard, move the keyboard focus 175 using the Tab key to the
desired button and then press the space bar to execute the
command.
If among many buttons one is highlighted, the highlighted button
can be activated by pressing the Enter key without having to
move the keyboard focus previously onto the button.
Examples of buttons:
New Subnode,
Justify Full
Check Box
A check box is a box in which yes/no questions (options) are
answered. By marking the square box in front of the given
option, you affirm the option. With each mouse click on the box
you can toggle between the states of marked and unmarked.
Fig.: The check box for (de)activating the option "Use Global File Inbox"
When the keyboard focus 175 is on the check box, you can
change your selection with the space bar.
© 2008 Normfall GmbH
Reference
Command
A Command is an instruction to execute a given function.
Most commands are accessible using the main menu 169 and its
submenus. For example, if the command Mail Recipient (used to
send documents by e-mail) is found in the Send to submenu of
the List menu, the command will be shortened to Links | Send to |
Mail Recipient in the user manual.
Many commands can also be activated using key combinations
174 .
Context Command Bar
A context command bar is a special toolbar 172 that contains
certain commands 167 dependent upon which element is currently
active.
Fig. 1: The context command bar of the tab "Structure Node"
Fig. 2: The context command bar of the tab "File Inbox"
Context Menu
A context menu is a menu 169 that you can open on certain areas
of the user interface by right clicking 174 . Depending on the
previous action and where the context menu is being called up
(e.g. at a structure node, row, or in the text editor of the detail
view), different context-dependent commands are made
available.
© 2008 Normfall GmbH
167
168
Normfall Manager 4.0 User Manual
Fig.: A context menu that is called by right clicking on a structure node
Dialog Box
A dialog box is a window that appears in certain situations to
request inputs or confirmations from the user. When installing
Normfall Manager, for example, a first dialog box appears with
the setup wizard for Normfall Manager, which guides you through
the installation process. Other examples of dialog boxes are
inquiries about the confirmation of certain commands (e.g.
deletions) or the window used to set the default font, which can
be called upon in the Tools menu.
Fig.: A dialog box with a confirmation request for a deletion
Drop-down List
A drop-down list is a list, from which an entry can be selected.
They are found either in a list box or a combo box (the latter is a
combination of a text box 172 and a list box).
The list can be expanded by clicking on the button on the right
side with the small arrow symbol.
© 2008 Normfall GmbH
Reference
You can select an element from the list by clicking on it.
Fig.: A drop-down list with fonts for texts in the comment editor
As soon as your keyboard focus 175 is placed on the list, you can
switch between the entries using the navigation keys on your
keyboard and select an entry with the return key without having to
expand the list.
Provided that the key combination Alt-down isn't being used for
any other function, you can use this key combination to expand
the list.
Icon
An icon (also: "symbol") is a small picture that represents, for
example, applications, file types or commands 167 in toolbars 172 .
Fig.: Icons for the commands "View Document" and "Attach Box"
Menu
A menu is a list of commands 167 , switches 172 and submenus that
are usually represented by a button 166 .
The most important menus can be found in the menu bar 169 , that
is, they can be called upon as context menus 167 by clicking the
right mouse button. The menus can be expanded by clicking the
mouse button.
You can navigate through the menu with the navigation keys on
the keyboard and select an entry with the Enter key.
Menu Bar (Main Menu)
Alt + F, E, S,...
In Normfall Manager six menus 169 are available in the menu bar,
which can be found directly below the window title bar: File, Edit,
Structure, List, Tools and the Help menu (marked by a "?"). This
menu bar is also known as the main menu.
You can open the menu by either clicking on its name or using a
key combination consisting of the Alt key and the underlined
letter found in the name of the given menu.
© 2008 Normfall GmbH
169
170
Normfall Manager 4.0 User Manual
Fig.: The Normfall Manager menu bar
You can also move through menus using the navigation keys of
the keyboard and select an entry using the Enter key.
Normfall Button
The Normfall Button is an interface outside the application
window on your desktop which allows you to attach a document
in a Normfall structure.
Fig. 1: The Normfall button in the Windows taskbar
You find the Normfall Button in the Windows taskbar or in the
hover mode over the desktop - the context menu allows for
switching between the two states.
Fig. 2: The Normfall button in hover mode
For further information about the Normfall Button please refer to
the chapter The Normfall Button in section User Guide.
Radio Button
A radio button is a field in which you can answer "either/or
questions". The radio button can take on two states: marked or
unmarked.
In contrast to a check box, only one of several radio buttons in a
group can be marked. This way you can make a selection out of
several options.
Fig.: A radio button used to select the system language with two possible settings:
either English or German
If the keyboard focus 175 is on the option group, you can select a
radio button with the navigation buttons of the keyboard and
change its state using the space bar.
Row Selection Box
The row selection box is the rectangular area on the left edge of
the currently selected row in the list view.
It is mainly used to select several rows simultaneously (by
clicking with the mouse while pressing and holding the Ctrl or
Shift key) or to pull 174 selected rows with the mouse.
© 2008 Normfall GmbH
Reference
This is necessary because clicking on the content area of the row
sometimes calls a different function, that is the processing of the
content.
Scroll Bar
A scroll bar is a bar with which you can show information that
doesn't fit into one of the three views of Normfall Manager. As
soon as this is the case, a horizontal or vertical scroll bar will
become visible. You can move it with a touch pad, mouse wheel,
the arrows on the end of the beam or by pulling 174 the position
marker.
Fig.: Horizontal and vertical scroll bars in the structure view
Separator
A relocatable separator is a horizontal or vertical line that
separates one of the three Normfall Manager windows from
another.
Fig.: Separators between the three windows of Normfall Manager
When the mouse pointer is above a relocatable separator, it
© 2008 Normfall GmbH
171
172
Normfall Manager 4.0 User Manual
changes into a beam with two arrows. Now you can "grab" the
beam and pull 174 it to another position by means of the mouse.
Switch
A switch serves to activate or deactivate an application mode,
thus, for example, the purpose of showing and hiding a specific
view.
Switches appear in menus 169 (e.g. the View menu).
Tab
A tab is a group of elements 166 , which are pulled into the
foreground (that is, it is shown on the screen) when you click on
the tab. A tab is generally found within a group of other tabs, in
which only one tab is in the foreground at a time.
Using the menu List | View in the menu bar (main menu) you can
show and hide the following tabs in the list view next to the tab
Current Node, which is shown by default: Project Folder, File Inbox
, Recent Docs (Project), Recent Docs (System), Shared Content
Locations as well as Document.
Fig.: Tabs in the list view
Executing a search within the project will open the New Search
tab.
Text Box
A text box is a field in which you can enter or change text. An
example of a text box is the title box in the detail view.
Fig.: An example of the text box "Title" in the detail view
Toolbar
A Toolbar is a panel on which buttons 166 and other elements 166
are arranged.
The buttons are often indicated as icons 169 only, in order to save
space - the text will be shown when you move your mouse
pointer onto the button.
The purpose of the toolbar is to provide you with quick access to
frequently required commands.
Fig.: The main toolbar of the program interface
When minimizing the application window or the three views of
Normfall Manager (for example, by pulling the separators 171 ) the
© 2008 Normfall GmbH
Reference
toolbars and menu bars are shown incompletely. Instead of that
on the right side of the concerning bar a button is shown by
means of which you can call up the hidden functions and
commands.
Tree Structure
A tree structure is a representation of a hierarchically organized
structure. On the left side of Windows Explorer, for example,
there is a tree structure of all file folders on the system.
In Normfall Manager tree structures can be found, for example,
as a representation of your Normfall structure, in the Tools |
Options menu as well as in the attach box 75 .
Window Title Bar
The window title bar is the bar at the top of the application
window. On the left side it shows the application icon, the name
of the Normfall project that is currently open (provided that one is
open), the name of the application ("Normfall Manager 4.0") as
well as the type of license (e.g. "Enterprise"). On the right side of
the window title bar are the common commands for minimizing,
maximizing and closing the application window.
Fig.: The window title bar of Normfall Manager with an open project named "Sample"
5.3.2 Working with the Mouse
Most modern computer mice have a left (1) and right (3) button
as well as a scroll wheel (2). Depending on with which button and
how often an element is clicked, different functions can be
executed.
Clicking and Double-clicking
The terms "clicking" or "double-clicking" will always refer to the
© 2008 Normfall GmbH
173
174
Normfall Manager 4.0 User Manual
left mouse button. By single-clicking, that is, by simply clicking
and releasing the mouse button once, certain elements can be,
for example, marked or certain commands can be executed, as
soon as the required button 166 is clicked.
By double-clicking files can be opened.
Right-clicking
A click with the right mouse button (also called a "right-click") on
an element or work surface opens a menu with further
commands and options known as the so-called context menu 167 .
The functions available here can then be selected with a simple
click (with the left mouse button).
Pulling
In order to "pull" an element, first click on it and while holding the
mouse button, pull the mouse to the desired position and release
the mouse button. In this manner files can be moved from one
folder into another in Windows Explorer. This functionality is also
known as drag & drop.
By means of this function you can, for example, move structure
nodes or also attach files.
Further information can be found here
90
.
5.3.3 Working with the Keyboard
Like most modern applications, Normfall Manager is optimized for
the use with the mouse. However, frequently occurring activities
can be accelerated by learning how to use the keyboard to carry
out these tasks.
Key Combinations
Most commands 167 are not only available in a menu 172 or toolbar
172 but can also be executed by using a key combination.
A key combination consists of a certain key (called the command
key herein) and one or more modifier keys (see below). An
example: Alt + F4 to close the application window. Alt is the
modifier key and F4 the command key. To execute a key
combination you press and hold all given modifier keys while
pressing the command key as usual.
Also a single function key (without modifier keys) falls in the
category of key combinations.
An overview of key combinations 161 can be found by following
the link.
Modifier Keys
A modifier key is a key on the keyboard that (with exceptions)
does not have its own function, but has to be pressed in
conjunction with another key to execute a key combination.
© 2008 Normfall GmbH
Reference
The most important modifier keys are (the description is valid for
the normal layout of an office keyboard, but not necessarily for
laptops) as follows:
Ctrl (Control) - can be found in the far left as well as the far right
corner on the bottom row of the keyboard.
Alt - can be found on the left and right sides of the space bar (the
large key at the bottom). Its special feature: The Alt key activates
the main menu if no command key is pressed before releasing.
Shift - this key is the key used to enter capital letters. It is
generally characterized by an up-pointing arrow.
Keyboard focus
If an element 166 is activated, it usually has the keyboard focus on
it. This means that it is the single element that will react to
keyboard input. For example, you click with the mouse on a text
box 172 in order to activate it and to place the text cursor there so
that you can enter text.
However, many commands that you can execute using key
combinations are global, meaning that they will be executed
regardless of which element has the keyboard focus on it.
The concept of keyboard focus essentially means that you first
need to click on a position on the screen with the mouse in order
to be able to enter input at said position using the keyboard.
If you want to use the keyboard more intensively, you will come to
appreciate using the Tab key or respectively the key combination
Shift + Tab to move the keyboard focus from one input box to the
next, for example in a dialog box 168 .
Further Important Keys
Enter - the large key on the right side of the keyboard (formerly
the "Return" key) with the arrow pointing down and to the left. Its
general function is the confirmation of input and activation of the
highlighted button 166 found in dialog boxes 168 .
Tab - the tabulator key in the upper left with the two arrows
pointing in opposite directions. Its general function is to switch the
keyboard focus in dialog boxes 168 .
Space bar - the large key on the bottom of the keyboard used to
insert spaces. Its general function is to toggle elements 166 on
and off when the keyboard focus is on them.
Navigation keys - keys used to move the text cursor, a
drop-down list 168 or the keyboard focus. These keys are above
all the arrow keys left, right, up and down, but also include the
Page Up and Page Down keys for skipping over several
elements and the keys Home and End used to jump to the
beginning or end.
Function keys - the number keys indicated by a "F" on the top
row of the keyboard.
On special Windows keyboards:
© 2008 Normfall GmbH
175
176
Normfall Manager 4.0 User Manual
Context menu - this key marked by a symbol for the context
menu next to the right Ctrl key is used to open a context menu 167
for the element 166 that currently has the keyboard focus on it.
5.3.4 The Clipboard
The clipboard of the system allows you to intermediately save
virtual objects such as structure nodes 35 or reference rows 36
as well as text passages in order to paste them into another
position. The basic commands 167 are:
Copy (Ctrl +C) - creates a copy of the object on the clipboard.
Cut (Ctrl +X) - moves the object to the clipboard, removing it
from its former position.
Paste (Ctrl + V) - Inserts a copy of the object found on the
clipboard at the desired location.
Using these commands you can, for example, cut out a branch of
the structure and "stuff" it back into the structure at another
location. Likewise, you can create a copy of the branch.
Using the clipboard you can also exchange objects between
different programs. However, because a text editor, for instance,
cannot display structures, structure nodes will be represented as
text.
The basic commands of the clipboard can also be called on using
the Edit menu 169 ; however, it is usually easier to use the
corresponding key combinations (see above) or the context menu
167 .
Copying or cutting does not always occur immediately. If you, for
example, copy a branch of a structure, at first the programm only
takes into consideration which structure node you have selected
to copy. Only when you execute the paste command the copy will
actually be created. This means that changes made to the branch
between copying and pasting the branch will not be taken into
consideration in the pasted copy.
Which objects can be exchanged between your Normfall project
and other programs can be found here 90 .
© 2008 Normfall GmbH
6
Appendix
178
Normfall Manager 4.0 User Manual
6
Appendix
6.1
Troubleshooting - Problems and their Solutions
In this chapter you will find a compilation of known problems that
can show up when working with Normfall Manager as well as
their removal. These problems are primarily due to program
versions and individual settings of the installed programs.
6.1.1 Pasting Text in the Text Editor
In the text editor problems with the paste command can occur
due to a certain security setting in Internet Explorer.
In IE6 this setting is as follows:
"Allow Paste Operations Via Script"
In IE7 as follows:
"Allow Programmatic clipboard access"
Until now the following is problematic:
- The setting in IE6 has an effect on the paste function; the
setting in IE7 does not.
- In IE6 the setting also takes effect when it is set only for the
Internet, although you are currently working strictly with the local
harddrive.
The problem can be avoided by switching the security option off.
In company networks these settings are usually centrally defined
and cannot be altered by users.
6.1.2 Different Acrobat Versions
The Normfall Manager plug-in for Adobe Acrobat 73 is only
available for the full version of Adobe Acrobat 7.0 and higher.
Thus, we recommend purchasing this product for a comfortable
attachment process.
If several versions of Acrobat or Adobe Reader are installed on a
computer, which of these versions is used for opening of
documents depends on the type of reference (document, page,
comment, text or target). Generally, the latest installed version
is used.
In case of references of the Annotation type - if any - a full
version (i.e. not the Reader version) is always used to open
documents.
If only Adobe Reader is installed on a computer, there will be the
following insignificant restriction of functionality when opening
references of the Annotation type:
Since the Reader supports only the reference types Page and
Target, Normfall Manager also creates in the case of Annotation
references a target in the PDF document indicating zoom factor
© 2008 Normfall GmbH
Appendix
and display detail such that the Reader can target it.
However, if no write access is available in the moment of the
attachment process this option is omitted and the document can
be opened only at a specific page in the Reader version (i.e.
zoom factor and display detail are not taken in consideration).
6.2
FAQ
6.2.1 Access Conflicts with Several Users
When other users are working on the same data as you, it is
possible that the software will warn about access conflicts. In this
case the alteration that you just attempted to make will be
abruptly brought to an end.
There are two types of access: content alterations (made to
"items") and structure alterations (made to "nodes"). Only
content alterations (changes made to text) render an element
(structure node or row) inaccessible for a prolonged period of
time. The content of inaccessible elements cannot be changed
during the period of time that the element is considered
inaccessible. You can, however, move the element, since doing
so is merely considered a temporary structure alteration and does
not come into conflict with content alterations.
Content alterations
That a row is rendered inaccessible by your actions is made clear
by the edit icon found on the left side of the row, which appears
as soon as you enter text. If you try to enter text although another
user is working on the given row a notification will appear and
instead of the edit icon the inaccessibility icon is displayed. You
can attempt to enter text again at any time - as soon as the row is
"free" your entry will be accepted.
If the current row has been edited by another user you will
receive a corresponding notification when attempting to enter text
and the row will be refreshed. The green refresh icon will appear
instead of the edit icon.
So that a row cannot be permanently rendered inaccessible, it will
automatically be made accessible after a given period of time
(less than a minute) if it is not currently being altered.
Structure alterations
If an access conflict occurs when, for example, moving a
structure node, the type of error is a structure alteration conflict.
Structure alterations are usually finished within a few seconds so
that you can immediately attempt to move the structure node
again.
If several users frequently make structure alterations, the
probability of such conflicts increases since when a structure
node is moved all nodes above the level of the given node are
rendered inaccessible to make certain that the given structure
© 2008 Normfall GmbH
179
180
Normfall Manager 4.0 User Manual
node is not inserted under a structure node that has been moved
in the meantime by another user. At the location where the node
is to be inserted all nodes at this same level are rendered
inaccessible since their positions (distance between the other
nodes on this level) are changed.
Alterations to the structure are not immediately visible for all
users. They will first see the alterations when these users make
an alteration to the structure or use the Reload Structure View
command found in the File menu.
6.2.2 Error Messages
When working with Normfall Manager there might occur errors
due to unknown problems. Below you see how an error message
would look like:
Click on
More - to show detailed information on the error. If you would like
to contact our telephone support hotline in such situation, these
details are useful for our support team to get an idea of what kind
of error ocurred.
- to directly send the error report via mail
[email protected].
E-Mail
to
Help - to get general information on error messages in the
corresponding chapter of the online help.
Terminate - to force the immediate abortion of the application
(and all running Normfall sessions).
Continue - to continue working with Normfall Manager. Your
changes will not be lost due to the error.
By clicking on Terminate all currently loaded project
files are being closed! This may cause damages to
the project files.
With projects on a database server this program
termination, in turn, makes it impossible to save
changes made to the text editor.
© 2008 Normfall GmbH


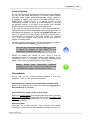

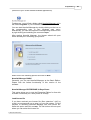
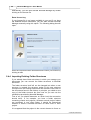


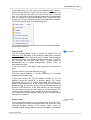

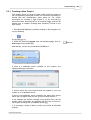


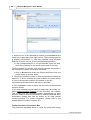


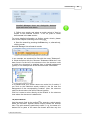
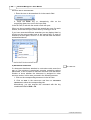
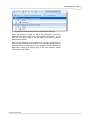


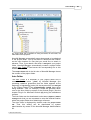


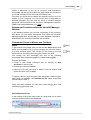

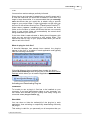


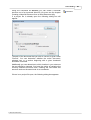
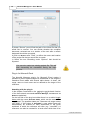


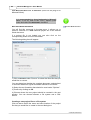


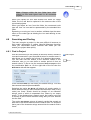


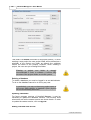


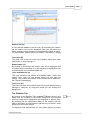


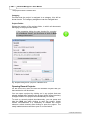

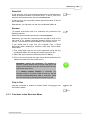


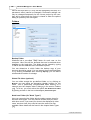
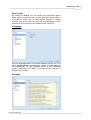

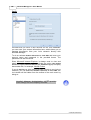
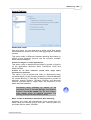

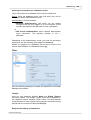

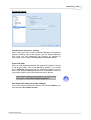
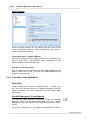
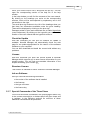


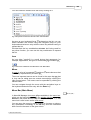


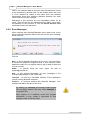


![VTW Software Operation manual[PDF:17.4MB] - FOR](http://vs1.manualzilla.com/store/data/005725901_1-df2c6d7f9199f46fcf33ffa12e63545b-150x150.png)