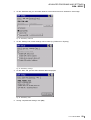
1
User Guide
skeye.allegro / skeye.allegro LS
HW 90250/V3 / HW 90260/V3
with Windows CE
Version 1.0
Unless consent is given explicitly, any forwarding or copying of the documentation herein, its use and disclosure of the contents is not
permitted. Any violations shall be subject to damages. All rights reserved in the case of a patent or utility patent registration.
© Höft & Wessel AG 2009
Subject to amendment, errors excepted
BHB_skeye-allegro_V3_1-0_EN.doc
TABLE OF CONTENTS
Table of Contents
1.
Introduction .............................................................................................................................................. 6
1.1
Intended Use ...................................................................................................................................... 7
1.2
Safety Notes ....................................................................................................................................... 8
1.2.1
General Safety Notes ................................................................................................................. 8
1.2.2
Safety Notes on the Lithium-Ion Battery..................................................................................... 9
1.2.3
Safety Notes on the Docking Station/Battery Charger ............................................................. 10
1.2.4
Safety Notes on the Power Supply........................................................................................... 11
1.2.5
Safety Notes on the Laser ........................................................................................................ 11
1.2.6
Safety Notes on the Imager with Laser Aimer.......................................................................... 12
1.2.7
Safety Notes on the Imager with LED Aimer............................................................................ 12
1.2.8
Safety Notes for the Infrared Interface ..................................................................................... 12
1.2.9
Safety Notes on GSM/GPRS.................................................................................................... 13
1.2.10
Safety Notes on Wireless LAN ................................................................................................. 13
1.2.11
Safety Notes on Bluetooth........................................................................................................ 13
1.2.12
Safety Notes on Using RFID 134 kHz ...................................................................................... 14
1.2.13
Safety Notes on Using RFID 13.56 MHz.................................................................................. 14
1.2.14
Safety Notes on Using GPS ..................................................................................................... 14
1.2.15
Safety Notes on Data Loss....................................................................................................... 14
1.3
Disposal............................................................................................................................................ 14
1.4
Explanations on this Manual ............................................................................................................ 15
1.4.1
Note Pictograms ....................................................................................................................... 15
1.4.2
Registered Trademark.............................................................................................................. 16
2.
The skeye.allegro ................................................................................................................................... 17
2.1
Variants ............................................................................................................................................ 17
2.2
Accessory......................................................................................................................................... 17
2.3
Docking Stations .............................................................................................................................. 17
2.4
Options ............................................................................................................................................. 17
2.5
Views ................................................................................................................................................ 18
2.5.1
Front View................................................................................................................................. 18
2.5.2
Rear View ................................................................................................................................. 19
2.5.3
Variants..................................................................................................................................... 20
3.
Initial Steps ............................................................................................................................................. 21
3.1
Operating the skeye.allegro with the Stylus ..................................................................................... 21
3.2
Using the Navigation Key ................................................................................................................. 22
3.3
Microsoft Windows CE – Basics ...................................................................................................... 22
3.3.1
Start Screen.............................................................................................................................. 22
3.3.2
Desktop Symbols...................................................................................................................... 23
3.3.3
Start Menu ................................................................................................................................ 23
3.3.4
Taskbar..................................................................................................................................... 24
3.3.5
Right Mouse Button Function ................................................................................................... 24
3.3.6
Storing further Symbols on the Desktop................................................................................... 25
3.3.7
Showing/Hiding the Keyboard .................................................................................................. 26
3.3.8
Setting the Properties of the Input Panel (Keyboard)............................................................... 26
3.3.9
Regional/Language Settings .................................................................................................... 28
3.3.10
Setting Date and Time.............................................................................................................. 29
3.3.11
Setting Volume and Sounds ..................................................................................................... 30
3.3.12
Entering Owner Properties ....................................................................................................... 31
3.4
Switching Off the skeye.allegro ........................................................................................................ 32
3.4.1
Suspend Mode ......................................................................................................................... 32
3.4.2
Automatic Standby – Power Supply ......................................................................................... 32
3.4.3
Complete Power Off by Removing the Battery......................................................................... 34
4.
Further Functions and Settings............................................................................................................ 35
4.1
Display.............................................................................................................................................. 35
4.1.1
Calibrating the Touch Screen ................................................................................................... 35
4.1.2
Setting the Brightness .............................................................................................................. 37
1.0 • 18.12.2009
3
TABLE OF CONTENTS
4.2
The Battery....................................................................................................................................... 38
4.2.1
Charging the Battery................................................................................................................. 38
4.2.2
Replacing the Battery ............................................................................................................... 39
4.3
Using the SD Card ........................................................................................................................... 40
4.4
Using the SIM Card .......................................................................................................................... 41
4.5
Scanner Operation ........................................................................................................................... 42
5.
Advanced Programs and Settings ....................................................................................................... 43
5.1
System Information .......................................................................................................................... 43
5.1.1
SysInfo Report File ................................................................................................................... 44
5.2
Changing the Memory Size .............................................................................................................. 45
5.3
Activating Password Protection........................................................................................................ 46
5.4
Shell Config ...................................................................................................................................... 47
5.5
The BarcodeConfig Tool .................................................................................................................. 48
5.6
Installing Software ............................................................................................................................ 49
5.7
Wireless LAN* .................................................................................................................................. 50
5.7.1
Wireless LAN Network Settings................................................................................................ 50
5.7.2
WLAN Configuration................................................................................................................. 51
5.7.3
Preventing Unauthorised Intrusion into a Wireless Network .................................................... 54
5.8
Bluetooth* ......................................................................................................................................... 55
5.9
GSM / GPRS*................................................................................................................................... 58
5.9.1
GSM Setup ............................................................................................................................... 58
5.9.2
Establishing an Internet Connection......................................................................................... 60
5.10 RfID 134 kHz*................................................................................................................................... 63
5.11 RfID 13.56 MHz* .............................................................................................................................. 63
5.12 GPS*................................................................................................................................................. 63
5.13 Updating the Operating System ....................................................................................................... 64
6.
Data Backup ........................................................................................................................................... 65
6.1
General Data Backup ....................................................................................................................... 65
6.2
SysBackup ....................................................................................................................................... 66
6.2.1
Calling SysBackup.................................................................................................................... 67
6.2.2
Creating a Backup .................................................................................................................... 68
6.2.3
Restoring the Backup ............................................................................................................... 69
6.2.4
Deleting a Backup .................................................................................................................... 70
7.
Docking Station HW 50250 (Standard) ................................................................................................ 71
7.1
7.2
7.3
8.
Connections of the Docking Station ................................................................................................. 71
Connecting the Docking Station to the Desktop .............................................................................. 72
Technical Data ................................................................................................................................. 72
Communication/Data Exchange ........................................................................................................... 74
8.1
General Information on Exchanging Data with the Desktop PC ...................................................... 74
8.2
Exchanging Data using ActiveSync ................................................................................................. 74
8.2.1
System Requirements for the ActiveSync Program: ................................................................ 74
8.2.2
Installing ActiveSync on Your Desktop PC............................................................................... 74
8.3
Sending and Receiving Data............................................................................................................ 75
8.3.1
skeye.allegro ⇔ Desktop-PC ................................................................................................... 75
8.3.1.1
No - Login as Guest .......................................................................................................... 77
8.3.1.2
Yes – Setting up a Partnership ......................................................................................... 78
8.4
Internet Explorer ............................................................................................................................... 81
9.
Technical Data........................................................................................................................................ 83
10. Troubleshooting..................................................................................................................................... 85
10.1 Reset via Software ........................................................................................................................... 85
10.2 Reset via Hardware.......................................................................................................................... 85
10.3 An Internet Connection cannot be Established ................................................................................ 86
10.3.1
Checking Connection Settings on the Desktop PC .................................................................. 87
10.3.2
Checking Registry Entries ........................................................................................................ 88
11. Annex ...................................................................................................................................................... 89
4
1.0 • 18.12.2009
TABLE OF CONTENTS
11.1
11.2
11.3
11.4
11.5
11.6
Dialling Patterns ............................................................................................................................... 89
Taskbar / Symbol Description .......................................................................................................... 91
Special Commands .......................................................................................................................... 92
Manufacturer's Address ................................................................................................................... 93
Glossary ........................................................................................................................................... 94
Index................................................................................................................................................. 96
1.0 • 18.12.2009
5
INTRODUCTION
Intended Use
1.
Introduction
General
The skeye.allegro is a mobile data capture device. It supports all kind of applications in the retail & logistics industry and the field service. The skeye.allegro
meets all the requirements for modern data capture:
• Connection to a wireless LAN network, Bluetooth devices and GSM/GPRS
networks
• Use of SD memory cards
• Data capture via laser scanner, imager or RFID
Designed for one-hand operation, the powerful skeye.allegro ensures for an
ergonomic working situation. It is handy and the advanced power management
makes it the ideal solution for long fatigue-free working sessions. Due to its
IP65 rating it can be used in even demanding environments.
The skeye.allegro supports common standard applications for mobile terminals
and modern Windows CE software with a graphical user interface as well as the
use of standard applications such as Internet browsers, TCP/IP protocols and
the ActiveSync link to a PC.
The current generation of the mobile data capture devices skeye.allegro and
skeye.allegro LS are equipped with a powerful Marvell PXA-270 processor and
the Microsoft Windows CE operating system 5.0.
All modules and antennas required for radio transmission are integrated. The
SD and SIM card slots accessible for the user are protected by a protective
cover. The RfID antennas for 134 kHz or 13.56 MHz are mounted at the front
area of the device. Their special design increase the robustness of the system.
Characteristics
The current versions of the skeye.allegro HW 90250/V3 and HW 90260/V3
differ from the previous models HW 90250 and HW 90260 by the following features:
• Operating System Windows CE 5.0
• Marvell PXA 270 624 MHz (Bulverde) processor
Identification:
Having removed the battery (see chapter 4.2.2) the sticker with the serial number becomes visible.
HW 90250/V3… or HW 90260/V3...
On the "HWI-Block" tab (Start ⇒ Programs ⇒ System ⇒ Sysinfo) "Revision
2.x" is displayed (x = 0 / 1 / 2 ...).
6
Purpose of the
document
The documentation provided describes the functions and settings of the
skeye.allegro, contains important usage instructions and information on the
peripheral devices and technical data.
Readership
The documentation is intended for people operating the skeye.allegro.
Terminology
skeye.allegro
or HW 90250/V3
Portable Data Terminal (in the following also referred as PDT or handheld).
skeye.allegro LS
or HW 90260/V3
Portable Data Terminal with landscape display.
Battery
HW 19200
Rechargeable lithium-ion battery (storage battery) to
supply the mobile device with power.
Battery
HW 19201
Rechargeable lithium-ion battery (storage battery)
with double capacity to supply the mobile device
with power.
1.0 • 18.12.2009
INTRODUCTION
Intended Use
Type
Battery charger
HW 16200
Charging device for no more than 2 batteries of type
HW 19200 or HW 19201
Docking station
HW 50250
USB- Docking station for the PDT (HW 90250/V3
and HW 90260/V3).
Docking station
HW 50251/V1
Ethernet docking station for HW 90250/V3 and
HW 90260/V3.
Power Supply Unit
HW 14200
Wide range switched mode power supply unit to
provide the mobile terminal, battery charger and
docking station with power.
Battery charger
HW 16250/4
Battery charger (4x) for HW 90250/V3 and
HW 90260/V3.
Docking station
HW 50250/4
USB docking station (4x) for HW 90250/V3 and
HW 90260/V3.
Docking station
HW 50251/4
Ethernet docking station (4x) for HW 90250/V3 and
HW 90260/V3.
Power Supply Unit
HW 14204
Wide range switched mode power supply unit to
provide the docking stations (4x) and battery chargers with power.
Motor vehicle adapter
HW 51250
Holds the device and supplies the HW 90250/V3
and HW 90260/V3 with power inside the motor vehicle.
SD card slot
SD memory cards
There are two variants of the skeye.allegro:
skeye.allegro and skeye.allegro Landscape
see chapter 2.1 or 2.5.3.
1.1
Intended Use
The skeye.allegro respectively skeye.allegro LS has been designed for use in the commercial sector
and for acquiring and transferring data within buildings or vehicles or outside under moderate climate
conditions.
The skeye.allegro respectively skeye.allegro LS is not intended for use in private households.
Please pay attention to the information of this user guide, especially the safety notes. Intended use
means that the device must only be used and operated in accordance with the information contained
herein. Any other use is not an intended use and may lead to property damage or even personal injury. Höft & Wessel does not accept any liability for damages caused by a usage other than the intended usage.
1.0 • 18.12.2009
7
INTRODUCTION
Safety Notes
1.2
Safety Notes
Carefully read and follow the user manual and the safety information mentioned in this chapter before performing further steps. You have to:
•
•
read
keep the information in mind during work.
This is the precondition for
• secure working with the product
• undisturbed handling
1.2.1
General Safety Notes
♦ Protect the skeye.allegro against theft and abuse.
Transport and Storage:
♦ Keep the skeye.allegro out of the reach of small children.
♦ The device must only be shipped in original or comparable robust packaging. Shipping the device e.g.
in a normal padded bag does not provide sufficient impact and pressure protection.
Such improper packaging would fall under the definition of the term Negligence.
Connection:
♦ The device has to be connected to a USB 1.1 or higher interface. Otherwise, short circuit and fire may
be caused.
Handling:
♦ Never expose the skeye.allegro to very high temperatures e.g. behind the windscreen of a motor vehicle.
♦ Never insert any objects not intended for use with this device in the instrument’s openings.
Operation:
♦ Do not use the skeye.allegro permanently in an environment with high humidity. Do not dip it into fluid
or wet it completely.
♦ Only use your skeye.allegro with original equipment. Non-compliance voids the warranty.
♦ Do not operate your skeye.allegro when you are in explosive areas, for instance in petrol stations, fuel
depots, chemical plants, below deck in ships, near blasting operations, in locations where a large volume of dust particles (such as flour, wood or metal) is present in the air, LPG-operated vehicles, etc.
We recommend to switch off the device completely. This also applies to places where you are usually
advised to switch off your vehicle motor.
♦ Do not operate in close range of strong electromagnetic fields. Failures may be caused.
♦ Interference may be noticed near electric devices. Therefore, always pay attention to local safety
regulations.
♦ Users with hearings aids must note that radio signals of electronic devices (with radio equipment) may
launch into hearing devices causing an unpleasant noise.
Maintenance, Service and disturbances:
♦ The skeye.allegro is – apart from charging of the battery and the mentioned comments – lifetime
maintenance-free and does not need special care.
♦ Do not try to open, repair or modify your skeye.allegro. The manufacturer will not be liable for any
damage caused in that way. Apart from other things, the function for correctly charging the battery
8
1.0 • 18.12.2009
INTRODUCTION
Safety Notes
may be influenced. As a result, excessive charging voltage, uncontrolled charging and discharge current, leakage of harmful substances, excessive heat generation, bursting or fire may occur.
♦ Any tampering by non-authorised persons will invalidate the warranty.
♦ If your skeye.allegro needs to be repaired or maintained, please contact your specialised dealer.
♦ Clean the housing only with damp cloth and mild detergent.
1.2.2
Safety Notes on the Lithium-Ion Battery
Carefully read the following safety notes to prevent an incorrect handling of the battery and to avoid
possible dangers.
Non-observance of the safety information or incorrect use of the battery can lead to excessive current flow, to the discharge of harmful substances, excessive heat development, explosion or fire.
Transportation and storage:
♦ The temperature may not be outside the admissible operating and storage temperature range of -20
to + 60 degrees centigrade. The temperature may be within the range of 0 °C to + 40 °C during charging.
♦ Do not transport or store the battery together with metal objects such as necklaces, hairpins, etc. Doing so may short circuit the battery, which could result in excessive current flow and possibly cause
leakage of battery fluid, heat generation, bursting or fire. When carrying or storing batteries, use an
electrically nonconductive (insulated) case.
♦ Do not discard the battery into fire and do not leave it in a hot place such as near a fire or on a heater.
Doing so melt the insulation, damage the sealing parts or protective devices, cause leakage of battery
fluid (Electrolyte) from the batteries, bursting or fire.
♦ Do not immerse batteries in water or seawater, and do not allow them to become wet. Batteries which
have become wet must always be replaced with new ones because internal short-circuits can cause
dangerous heat emissions if further used.
♦ Do not throw batteries, and do not allow them to fall on hard surfaces.
Handling:
♦ Protective devices to prevent danger are built into the battery. To ensure for a proper operation, do
not disassemble the battery or modify parts of it.
♦ Do not disassemble Li-ion bare cells of the battery. There is the danger of flammable fluid being spilt.
♦ Do not directly solder the battery. Doing so melt the insulation, damage the sealing parts or protective
devices, cause leakage of battery fluid (Electrolyte) from the batteries, bursting or fire.
♦ Do not short-circuit the battery by directly connecting the positive (+) and negative (-) terminals with
objects such as wire. Short circuiting generates heat which may damage the equipment.
♦ Do not put the battery into a microwave oven or pressurised container.
♦ Do not pierce the battery with a nail or other sharp object, hit it with a hammer, or step on it.
Operation:
♦ For operation of the device use the delivered battery only. Please use the battery only for the determined purpose.
♦ If the battery becomes discoloured or deformed, or in any way appears abnormal, stop using it. Return
it to the distributor or manufacturer from whom you purchased it.
1.0 • 18.12.2009
9
INTRODUCTION
Safety Notes
Return:
♦ Lithium-ion battery is a designated product of Recycle. The battery after using is a valuable resource.
The return of the batteries ensures reuse of the chemicals contained. This recycling process avoids
any impact to the environment. Höft & Wessel guarantees that all batteries returned are fed to the recycling process.
When a battery is no longer usable, discharge it. When you dispose of the Lithium battery, insulate it
by wrapping the terminals with tape. Mixing the battery with other metals or batteries may lead to fire,
heat, or explosion.
Then, return the battery to Höft & Wessel. As a part of its normal service, Höft & Wessel guarantees
that all used batteries are fed to the recycling process.
See also extract from BattV (Decree for the return and disposal of used batteries and accumulators,
Germany) as of 09.09.2001:
„The manufacturers are obliged to take back and reuse toxic containing batteries according to the
regulations and dispose of non-reusable batteries that have been handed in by distributors (§5) or
public disposal departments (§9).“
Health hazards:
♦ If a battery leaks, and the electrolyte enters the eye, do not rub but rinse out thoroughly under flowing
water and then seek medical assistance. Otherwise, eye damage can result.
♦ If a battery leaks and the electrolyte makes contact with clothing or the skin, the skin or clothing must
be rinsed out under flowing water in order to prevent damage to the skin.
1.2.3
Safety Notes on the Docking Station/Battery Charger
♦
The batteries may only be charged with the battery charging device recommended by the manufacturer. The utilisation of another battery charger might be dangerous and leads to an end of the warranty.
♦
Do not try to open, repair or modify your device. The manufacturer will not be liable for any damage
caused in that way. Apart from other things, the function for correctly charging the battery may be influenced. As a result, excessive charging voltage, uncontrolled charging and discharge current, leakage of harmful substances, excessive heat generation, bursting or fire may occur.
♦
If the docking station changes shape or colour, generates heat or in any way appears abnormal stop
using it. Return it to the distributor or manufacturer from whom you purchased the docking station.
♦
Use the docking station only with the supplied power supply. The main voltage must correspond to
the technical data mentioned on the power supply.
♦
Use the docking station only in dry, closed rooms and not in direct sunlight, e.g. behind windows.
♦
The device has to be connected to a USB 1.1 or higher interface. Otherwise, short circuit and fire
may be caused. Otherwise, excessive heat generation, bursting or fire may occur.
♦ Keep the device out of the reach of small children.
10
1.0 • 18.12.2009
INTRODUCTION
Safety Notes
1.2.4
1.2.5
Safety Notes on the Power Supply
♦
Do not try to open and/or repair and/or alter the power supply. The manufacturer will not be liable for
any damage caused in that way.
♦
Use the power supply only with the power cable delivered.
♦
The power cable has to be inserted completely into the table power supply. The other end is inserted
into a socket. Be sure to push the prongs all the way in.
♦
The outlet of the power supply has to be put all the way into the current supply of the device.
♦
Be sure to push the power cable cord always into an easily accessible socket.
♦
Always connect the power cable to the device before plugging it into the wall outlet.
♦
Check that the plug is clean before plugging it in.
♦
Do not place any objects on top of the cord.
♦
Do not place the cord near heating equipment.
♦
Do not connect cables other than those specified in this manual. Doing so may result in fire or improper operation.
♦
Do not use a damaged cord.
♦
Handle the power cord with care. Improper handling may lead to fire or shock.
♦
Avoid excessive bending, twisting, and pulling of the cord.
♦
When disconnecting the power cable, hold the plug firmly. Do not tug on the cord itself.
♦
Use power supply and power cable only in dry rooms.
Safety Notes on the Laser
If the type designation of your skeye.allegro contains option S5, your skeye.allegro is equipped with
a laser (e.g.HW 90250/V3S5), please observe the following notes:
The laser beam is classified as a class 2 laser according to the following standards:
EN60825-1:1994+A1:2002+A2:2001 and
IEC60825-1:1993+A1:1997+A2:2001.
It is presumed that a short contact with this kind of laser beam does not do any harm, however, the
following precautions are recommended:
♦
Do not direct the laser beam to persons intentionally.
♦
Do not look directly into the laser beam.
♦
Do not manipulate the laser.
♦
Do not attach optical accessory at the laser beam exit.
♦
Do not observe the laser beam with optical instruments like magnifier, telescope or binoculars.
♦
Be careful that no unintentional reflections at the surface are caused by the laser beam, which may
lead to a focusing of the beam.
♦
If you do not use the device store it in a place without access for trespassers.
1.0 • 18.12.2009
11
INTRODUCTION
Safety Notes
1.2.6
Safety Notes on the Imager with Laser Aimer
If the type designation of your skeye.allegro contains option S6, your PDT is equipped with an
imager module with integrated laser aimer (e.g. HW 90250/V3S6). Please observe the following
notes:
The laser beam is classified as a class 2 laser according to the following standard:
IEC60825-1:1993+A1:1997+A2:2001.
It is presumed that a short contact with this kind of laser beam does not do any harm, however, the following precautions are recommended: see chapter 1.2.5).
1.2.7
Safety Notes on the Imager with LED Aimer
If the type designation of your skeye.allegro contains option S7, your PDT is equipped with an
imager module with integrated LED aimer (e.g. HW 90250/V3S7). Please observe the following
notes:
The LED light source is classified as a class 1 LED according to the following standard: IEC60825-1
ED 1.2:2001.
A class 1 LED is presumed to be safe under reasonably foreseeable conditions of operation. Even
looking directly into the light beam by accident does not do any harm.
Caution: When changing the settings of the imager/aimer module except for those described in the
user guide the LED radiation may exceed the harmless area of class 1.
1.2.8
Safety Notes for the Infrared Interface
The skeye.allegro is equipped with an infrared interface on its narrow edge that also contains the system
interface. Using an LED (Light Emitting Diode) the interface emits invisible radiation according to class 1
of the international standard IEC 60825-1.
Although this class is presumed to be safe, the following precautions are recommended:
12
♦
Please avoid direct eye contact with the infrared-beam.
♦
Take into account that the beam consists of invisible light which cannot be perceived.
1.0 • 18.12.2009
INTRODUCTION
Safety Notes
1.2.9
Safety Notes on GSM/GPRS
A GSM/GPRS communication can be realised via CF or PC card. If your device features such equipment
pay attention to the safety notes.
Radio devices (such as GSM) are subject to certain restrictions when used in proximity to electronic
instruments:
When being in an aircraft completely power off your skeye.allegro (see chapter 3.4.2). Using the
skeye.allegro in an aircraft interferes with the electronic equipment on board and might be dangerous.
The use is illegal. Non-compliance with this safety instructions may lead to prosecution.
♦ Switch off your skeye.allegro in hospitals or similar places to prevent an interference with medical devices.
♦ Switch off your skeye.allegro at places where you are advised to switch off your mobile phone.
♦ The unit may affect heart pacemakers.
The Federal Office for Radiation Protection recommends a distance of no less than 20 cm between a
mobile phone and a heart pacemaker to ensure no interference takes place. This recommendation is
also in line with studies and recommendations issued by independent institutes.
Users with heart pacemakers must ensure a distance of at least 20 cm between the skeye.allegro and
the heart pacemaker.
♦ The unit may affect hearing aids.
♦ Interference may be noticed in close proximity to televisions, radios, PCs.
♦ The mobile terminal should be used with a headset only, do not hold your ear directly to the device.
1.2.10
Safety Notes on Wireless LAN
A Wireless LAN communication can be realised using an integrated module. If the your
skeye.allegro is equipped with a WLAN module, please pay attention to the safety notes.
Radio facilities – as well as WLAN - are subject to certain restrictions during use near electronical
devices. In this connection please read the safety notes of the previous chapter.
Wireless LAN data communication can be easily intercepted and recorded. Anyone who is operating
a Wireless LAN card in the same subnet can “sniff out” and decrypt any sent data packets with the
appropriate software.
In order to make unauthorised access to your Wireless LAN more difficult, Wireless LAN functions
such as Wired Equivalent Privacy (WEP) or WiFI Protected Access (WPA) should be enabled.
Using a VPN allows encryption of the transmitted data and authentication of the user on the other
end.
See also chapter 5.7.3.
1.2.11
Safety Notes on Bluetooth
A Bluetooth communication via mobile terminal can be realised via an integrated module. If the type
designation of your skeye.allegro contains option B2, your mobile terminal is equipped with a Bluetooth module (e.g. HW 90250/V3B2). Please observe the following notes:
Radio devices (such as Bluetooth) are subject to certain restrictions when used in proximity to electronic instruments. Thus, please read the safety notes on GSM/GPRS in the following chapter 1.2.9.
Bluetooth data communication can be easily intercepted and recorded. Please take the same precautions (encryption, authentication) for Bluetooth as you do for Wireless LAN.
Besides this, Bluetooth operation may be influenced near the following devices:
− Microwave ovens
− Electronic garage doors, lifts and so on.
1.0 • 18.12.2009
13
INTRODUCTION
Disposal
1.2.12
Safety Notes on Using RFID 134 kHz
An RFID communication via mobile terminal can be realised via an integrated module. If the type
designation of your skeye.allegro contains option T5, your mobile terminal is equipped with an RfID
134 kHz module (e.g. HW 90250/V3T5).
1.2.13
Safety Notes on Using RFID 13.56 MHz
An RFID communication via mobile terminal can be realised via an integrated module. If the type
designation of your skeye.allegro contains option T8, your mobile terminal is equipped with an RfID
13.56 MHz module (e.g. HW 90250/V3T8).
1.2.14
Safety Notes on Using GPS
An GPS communication can only be realised with the skeye.allegro LS via integrated module. If the
type designation of your skeye.allegro contains option E3 your mobile terminal is equipped with an
GPS module (e.g. HW 90260/V3E3). Please observe the following note:
Do not operate your navigation system while driving. Note that there may be different regulations for
using such devices within vehicles in other countries. Please observe the respective regulations.
1.2.15
Safety Notes on Data Loss
♦ It is very much recommended that all important data be backed up as durable hardcopy. It is very
much recommended to store all recorded data to flash disk and to regularly back up the data on an
external medium. Given certain conditions, loss or modification of data can occur in practically any
electronic storage system. Therefore, we do not accept any liability for loss of data or data being otherwise rendered unusable following incorrect use, repairs, faults, battery problems, software errors or
for any other reason.
We shall not be held liable either directly or indirectly for any financial loss or third party compensation
claims which arise on foot of the use of this product and all and any of its functions, such as stolen
credit card numbers, loss or modification of data, etc.
1.3
Disposal
The skeye.allegro is not intended for use in private households. The device must not be disposed of
via a public waste disposal system. For disposal, return the device to the Höft & Wessel AG.
14
1.0 • 18.12.2009
INTRODUCTION
Explanations on this Manual
1.4
Explanations on this Manual
The User Manual is designed to enable you to get your skeye.allegro up and running quickly and is
structured as follows:
♦
Introduction
♦
Taking into operation
♦
Software
♦
Communication/Data exchange
♦
Troubleshooting
♦
Annex
It is assumed that your are familiar with Microsoft Windows 2000 or Windows XP.
In case of problems refer to the corresponding Microsoft documentation.
1.4.1
Note Pictograms
Safety notes in the text are always illustrated in the same way.
In this manual three different safety notes are used.
NOTE!
A note points out tips on simplified use of the system / device for example by describing a
simplified workflow using a certain tool.
CAUTION!
A CAUTION warning sign points out potential dangers relating to the equipment (i.e. short
circuit) or loss of data.
WARNING!
The WARNING sign draws the user's attention to potential dangers that could be harmful to
the health/life of the user (i.e. electric shock) or seriously damage the equipment (the equipment could be destroyed).
Indicates an alternative method to complete a task or additional information on a topic.
1.0 • 18.12.2009
15
INTRODUCTION
Explanations on this Manual
1.4.2
Registered Trademark
The following terms and names used in this manual are registered trademarks and products of the
corresponding companies:
•
Microsoft , Windows , Windows NT , Windows , Windows CE , Windows CE.NET and Ac®
tiveSync are registered trademarks of the Microsoft Corporation, USA.
•
Other product and company names may be trademarks of other companies.
®
®
®
XP
®
®
All trademarks mentioned and possibly protected by third parties are subjected to the ownership of
the corresponding registered owners.
16
1.0 • 18.12.2009
THE SKEYE.ALLEGRO
Variants
2.
The skeye.allegro
2.1
Variants
1 skeye.allegro
up to 128 MB SD-RAM; up to 512 MB Flash | including battery,
SD slot and Windows CE license; 24 keys
2 skeye.allegro LS
up to 128 MB SD-RAM; up to 512 MB Flash | including battery,
SD slot and Windows CE license, landscape display; 28 keys
2.2
Accessory
•
•
•
•
•
•
2.3
Docking Stations
•
•
•
•
•
•
2.4
HW 16250/4 battery charger (4x) including power supply unit
Battery charger HW 16200 for 2 batteries (incl. power supply unit HW 14200 with EU cable)
Battery HW 19201 with 3400 mAh
Battery for skeye.allegro
Strap
Charging adapter
Docking station HW 50250 USB (Standard)
(including power supply unit and USB cable)
Docking station HW 50250 modem
(USB/serial, including power supply unit and USB cable)
Docking station HW 50250 ISDN
(USB/serial, including power supply unit and USB cable)
Docking station HW 50251 Ethernet
(including power supply unit)
Fourfold USB docking station HW 50250/4
(including power supply unit and USB cable)
Fourfold Ethernet Docking station HW 50251
(including power supply unit)
Options
•
•
•
•
•
•
•
•
•
Laser scanner*
integrated 2D Imager (either LED or laser aimer)*
Integrated Wireless LAN module, 802.11 b/g
Integrated Bluetooth module (BT 2.0 + EDR, class 2)
Integrated GSM-/GPRS module (GPRS class 10)
RFID module 134 KHz
RFID module 13.56 MHz
GPS module (skeye.allegro LS only)
different memory capacities available
* either laser scanner or imager
1.0 • 18.12.2009
17
THE SKEYE.ALLEGRO
Views
2.5
Views
2.5.1
Front View
LED*
Display
Scanner button
Stylus
Scanner button
Power-onbutton
Cursor keys
Infrared
port
Keypad
Serial interface
Fig. 1: Front view
*Definition: The red LED indicates the battery charging status (shines permanently while loading,
flashes when the battery is fully charged). The green LED shines respectively flashes when the
system starts. In addition, the LEDs can be controlled by applications; e g. green = barcode read
successful (BarcodeConfig program).
18
1.0 • 18.12.2009
THE SKEYE.ALLEGRO
Views
2.5.2
Rear View
Stylus
Strap
Loud
speaker
Battery compartment
Fig. 2: Rear view
1.0 • 18.12.2009
19
THE SKEYE.ALLEGRO
Views
2.5.3
Variants
The skeye.allegro is available in two variants: These only differ by their display format and soft keys.
Fig. 3: skeye.allegro (HW 90250/V3)
Fig. 4: skeye.allegro LS (HW 90260/V3)
The displays shown in this documentation correspond to the portrait format of the
skeye.allegro and the landscape format of the skeye.allegro LS.
20
1.0 • 18.12.2009
INITIAL STEPS
Operating the skeye.allegro with the Stylus
3.
Initial Steps
1. Insert the battery (see chapter 4.2.2)
2. Press
to switch on the skeye.allegro.
3. Take out the stylus ( see Fig. 2)
3.1
Operating the skeye.allegro with the Stylus
The stylus functions as a computer mouse. It is used to navigate on the screen and to select elements.
Remove the stylus from its clamp and put it back when you do not need it.
Tapping
Tap the screen with the stylus once to open elements and to select
options.
Dragging
On screen, keep the stylus pressed and drag it over the screen to
select text and pictures. Move the stylus to a list to select several
elements.
Double-tap
A double-tap is the same as double-clicking the mouse.
Tap and hold
Tap on an element and keep the stylus pressed onto the screen to
display a list of actions for the element. In a context menu, select
the action to be performed.
Tapping (close menu)
To close a menu (e.g. the start menu) tap a free space on the
desktop.
1.0 • 18.12.2009
21
INITIAL STEPS
Using the Navigation Key
3.2
Using the Navigation Key
With the navigation key you can move to the top, to the bottom right, and to the
bottom left in the menu. This function is especially useful when operating the device with one hand only.
To move the cursor to a certain direction simply press the corresponding side of the key.
To confirm the selection press the key in the middle (OK).
3.3
Microsoft Windows CE – Basics
This mobile terminal supports Windows CE 5.0 (copy deadline, subject to changes).
3.3.1
Start Screen
Apart from the application program the PDT features the Windows CE surface. The following figure
shows the standard Windows CE workspace which may vary.
Task bar
Start
menu
Fig. 5: Start Screen
22
1.0 • 18.12.2009
Desktop
Further
program
symbols
Systray
INITIAL STEPS
Microsoft Windows CE – Basics
3.3.2
Desktop Symbols
The following list contains an explanation of the symbols which can usually be found on a Windows
CE surface:
Symbol
3.3.3
Program
Description
My Computer
Displays the available memory devices e.g. CD ROM and disk drives as
well as the network. Due to its link to the system control the My Computer
also provides for a direct access to the system management tools.
My documents
This is your personal folder. Windows creates personal folders for each
computer user.
Recycle bin
Here, Windows stores deleted files. Files deleted by mistake may be restored.
Internet Explorer
Searches web and WAP sites and downloads new programs and files
from the internet.
Word Pad
Creates new documents and displays Word documents created on the
desktop PC for further editing.
Active
Sync
Synchronises files between the device and the desktop PC.
Start Menu
Use the Start menu to call programs, change settings, manage favourites etc.
•
In the task bar tap the
•
Tap
and then select Programs to call further programs.
•
Tap
and then select Settings to perform further settings.
symbol to open the Start menu.
1.0 • 18.12.2009
23
INITIAL STEPS
Microsoft Windows CE – Basics
3.3.4
Taskbar
The taskbar is a special workspace component which can be used to switch between open windows
and to access global commands and frequently used objects.
Symbols of the taskbar (examples):
Tap this symbol in the taskbar and select the desired keypad (show keypad)
Tap one of these symbols in the taskbar (depending on the activated keypad) and select "Eingabebereich ausblenden" (Hide input panel).
To display all activated programs tap this symbol which can be found in the bottom right
area of the taskbar.
To minimise all open windows tap in the bottom right area of the taskbar and then
select "Desktop".
3.3.5
Right Mouse Button Function
The right mouse button is used to open popup menus that support functions like Copying, Deleting,
and Sending.
To call the functions of the right mouse button tap the element for which you want to perform the action and keep the stylus pressed.
The popup window of the right mouse button displays. Here, you can select the desired function.
If you do not wish to perform an action tap any position outside the menu.
24
1.0 • 18.12.2009
INITIAL STEPS
Microsoft Windows CE – Basics
3.3.6
Storing further Symbols on the Desktop
Frequently used functions can be stored as symbols on the desktop. If you miss a frequently used
function on the desktop proceed as follows:
1. Double-tap the My Computer symbol.
The Workspace directory opens up.
2. In the workspace directory double-tap the folder in which the program/function is stored.
The corresponding folder opens up.
3. Search and mark the file for the function to be stored on the desktop.
4. Open the File menu and select Send To.
Fig. 6: File | Send to
5. In the submenu, select Desktop as Shortcut.
The shortcut will be created.
1.0 • 18.12.2009
25
INITIAL STEPS
Microsoft Windows CE – Basics
3.3.7
Showing/Hiding the Keyboard
Showing:
Tap
Hiding:
Tap
or
in the taskbar (depending on the activated keypad) and select
"Hide input panel".
Show/Hide
3.3.8
in the taskbar and select the desired keyboard.
For many devices the on-screen keyboard can be shown/hidden using this button
which can be found next to the ON button (depends on keyboard assignment of the device).
Setting the Properties of the Input Panel (Keyboard)
1. Launch: Start ⇒ Settings ⇒ Control Panel
The Control Panel window appears.
Fig. 7: Control Panel
2. In the Control Panel window double tap
the following symbol:
The Input Panel Properties window appears.
26
1.0 • 18.12.2009
INITIAL STEPS
Microsoft Windows CE – Basics
Fig. 8: Input Panel Properties
3. In the Input Panel Properties window select the current input method (Keyboard, Large Keyboard, skeye keyboard) and the Options button.
Depending on the selected input method the Skeye Keyboard Options window appears.
Fig. 9: Soft Keyboard Options | Keyboard
4. Perform the desired settings.
5. Click OK to confirm.
1.0 • 18.12.2009
27
INITIAL STEPS
Microsoft Windows CE – Basics
3.3.9
Regional/Language Settings
Under Regional Settings Properties you may set the country and language for the user interface.
1. Launch: Start ⇒ Settings ⇒ Control Panel
The Control Panel window appears
2. In the Control Panel window double tap
the following symbol:
The Regional Settings window appears.
Fig. 10: Regional Settings Properties
3. Under Your locale set your country. This way, country-specific formats like digits, currency, data
and time are applied automatically.
4. Under User Interface Language set your language.
5. Click OK to confirm.
6. Go to Start ⇒ Programs⇒
⇒ System ⇒ Reset and perform a reset. The settings will take effect.
28
1.0 • 18.12.2009
INITIAL STEPS
Microsoft Windows CE – Basics
3.3.10
Setting Date and Time
1. Launch: Start ⇒ Settings ⇒ Control Panel.
The Control Panel menu appears.
2. In the Control Panel window double tap the Date/Time
symbol.
The Date/Time Properties window appears.
Fig. 11: Date/Time Properties
3. In this window, set
• the current date
• the corresponding time zone
• the correct time
4. Click Apply to confirm the settings.
5. Click OK to close the window.
1.0 • 18.12.2009
29
INITIAL STEPS
Microsoft Windows CE – Basics
3.3.11
Setting Volume and Sounds
By default, all sounds of your skeye.allegro are activated. For screen taping option Loud is activated.
To save energy, deactivate the sounds.
1. Launch: Start ⇒ Settings ⇒ Control Panel.
The Control Panel menu appears.
2. In the Control Panel menu double tap the symbol for
volume and sound.
The Volume & Sounds Properties window appears.
Fig. 12: Volume & Sounds | Sound
3. Perform the desired settings.
4. Click OK to confirm.
30
1.0 • 18.12.2009
INITIAL STEPS
Microsoft Windows CE – Basics
3.3.12
Entering Owner Properties
Entering owner properties is required for identifying the device. This is required for a connection to
the desktop PC using ActiveSync.
In addition, you may enter information in the Notes area displayed when you switch on the device.
Under Owner Properties enter the network ID (see chapter 5.8).
1. Launch: Start ⇒ Settings ⇒ Control Panel.
The Control Panel menu appears (see Fig. 7: Control Panel).
2. In the Control Panel window double tap the
Owner symbol.
The Owner Properties window appears.
Fig. 13: Owner Properties
3. In the Owner Properties window fill in the fields and confirm with OK.
1.0 • 18.12.2009
31
INITIAL STEPS
Switching Off the skeye.allegro
3.4
Switching Off the skeye.allegro
There are three ways to switch off your skeye.allegro:
♦
♦
♦
3.4.1
Suspend mode
Automatic Standby (AutoOff)
Complete Power Off by Removing the Battery
Suspend Mode
Suspending a device means that it is inactive and thus consumes less power. A suspended
skeye.allegro can be activated any time.
While suspending information in the RAM is maintained. If the power supply is interrupted
e.g. due to a discharged battery, information in the RAM gets lost.
It is thus recommended that you store all current data prior to suspending the skeye.allegro.
Suspending the skeye.allegro:
1. Tap the “Start” symbol in the task bar.
The Start menu opens up.
Task bar
Fig. 14: Start menu
2. Tap Suspend.
3. The skeye.allegro will be suspended in its current state. All open windows, documents, workbooks etc. are not closed but maintained in the working memory.
The skeye.allegro is suspended.
If the power supply was not interrupted e.g. due to a discharged battery the data will be available
again when you switch on/start the device.
3.4.2
Automatic Standby – Power Supply
Use the Power Supply function to save battery life. If you do not operate the unit for a certain time
e.g. the display will be dimmed or the unit is set to suspend mode.
1. Launch: Start ⇒ Settings ⇒ Control Panel.
The Control Panel menu appears.
2. In the Control Panel menu double tap Power.
The Power Properties window appears.
32
1.0 • 18.12.2009
INITIAL STEPS
Switching Off the skeye.allegro
3. Select the Schemes tab.
Fig. 15: Automatic power off
4. Perform the desired settings.
The entered times are added up.
(Example: after 1 min user idle, after 6 min idle)
5. Click OK to confirm the changes.
6. Close the Control Panel menu.
See also chapter 4.1.2.
1.0 • 18.12.2009
33
INITIAL STEPS
Switching Off the skeye.allegro
3.4.3
Complete Power Off by Removing the Battery
Completely power off your skeye.allegro in the following situations:
♦ if you do not operate your skeye.allegro for a longer period of time (battery saving)
♦ when entering an aircraft.
♦ in explosive areas
♦ for shipping the skeye.allegro
Removing the battery will delete the RAM after a while (see the following section). In this
case, all data in the RAM e.g. installed programs, settings or stored files are lost!
In case of a fully recharged buffer, the RAM data is stored for 10 minutes. The required charging
time is 20 minutes. If the buffer is not completely loaded, the time decreases correspondingly.
We recommend that you perform the following tasks before you remove the battery:
• Store important data in the "FlashStorage" folder of your skeye.allegro (see chapter 6.2.2).
•
Mirror your data via ActiveSync to your desktop PC (see chapter 8.2 ff.).
•
Back up your data via SysBackup (see chapter 6.2).
Performing a complete power off:
1. Did you back up your data via SysBackup (see chapter 6.2)?
2. Did you store all important data and programs in the "FlashStorage" folder?
3. Did you mirror all important data to your desktop PC?
4. Did you remove the battery as described in chapter 4.2.2.
34
1.0 • 18.12.2009
FURTHER FUNCTIONS AND SETTINGS
Display
4.
Further Functions and Settings
4.1
Display
4.1.1
Calibrating the Touch Screen
This function is required to fine-tune the touch screen; the better the touch screen is calibrated the
more precisely it will react.
When calibrating the touch screen note the following:
• Touch the cross and keep the stylus pressed at the middle of the cross until the cross moves
to the next marking.
•
Do not drag the stylus over the touch screen.
•
Do not rest your hand on the touch screen!
1. Launch: Start ⇒ Settings ⇒ Control Panel
2. Double-tap the Stylus symbol.
The Stylus Properties window appears.
Fig. 16: Stylus Properties
1.0 • 18.12.2009
35
FURTHER FUNCTIONS AND SETTINGS
Display
3. In the Stylus Properties window tap the Calibration tab.
Fig. 17: Stylus Properties | Calibration
4. On the Calibraton tab select Recalibrate.
The window for calibrating the touch appears.
5. Position the stylus in the centre of the cross displayed (the more precise, the better the touch
screen will respond later) and hold the position until the cross changes its position.
6. Click OK to confirm.
7. Close the Stylus Properties menu.
Over time, the touch screen, and thus its calibration, may reset somewhat. Should you notice that
the touch screen does not respond as precisely as before, repeat the calibration procedure.
36
1.0 • 18.12.2009
FURTHER FUNCTIONS AND SETTINGS
Display
4.1.2
Setting the Brightness
The skeye.allegro supplies no contrast settings as the contrast of a TFT screen cannot be changed.
1. Launch: Start ⇒ Settings ⇒ Control Panel
The Control Panel menu appears
2. In the Control Panel menu double-tap the
backlighting symbol.
The Backlight window appears.
Fig. 18: Backlight | Brightness
3. In this window, adjust the brightness of the backlight with the slider.
To conserve battery power, keep the brightness setting as low as possible.
4. Then, change to the "Idle 1" tab.
Fig. 19: Backlight | User Idle Brightness
5. In this window, use the slider to set the brightness.
6. If required, change to the Idle 2 tab.
7. In this window, dim the brightness according to your needs.
8. Click [OK] to confirm the setting.
1.0 • 18.12.2009
37
FURTHER FUNCTIONS AND SETTINGS
The Battery
4.2
The Battery
4.2.1
Charging the Battery
The battery in the skeye.allegro is automatically recharged if the skeye.allegro is
• In the charging or docking station (with connected power supply unit),
• In the motor vehicle adapter or
• In the power supply unit with charging adapter
The Systray displays one of the following symbols:
Battery is charging
The battery is below the first voltage level.
The battery is below the second voltage level.
There is an external power supply but the battery is not charged (full battery)
If the battery inserted in the mobile terminal is sufficiently loaded, no battery symbol displays.
Always recharge the battery in time. If the battery is discharged data loss may occur.
38
1.0 • 18.12.2009
FURTHER FUNCTIONS AND SETTINGS
The Battery
4.2.2
Replacing the Battery
Back up your data before changing the battery.
Switch off the device before changing the battery.
1. Rotate the upper clamp of the rubber band by 90° to the right
or left to loosen it.
2. Move the slider to the top and remove the battery.
3. Insert the new battery and move the slider downwards.
The battery audibly locks into place.
Fig. 20: Changing the battery
4. Re-insert the upper clamp of the rubber band.
Always recharge the battery in time. If the battery is discharged data loss may occur.
1.0 • 18.12.2009
39
FURTHER FUNCTIONS AND SETTINGS
Using the SD Card
4.3
Using the SD Card
At the front of the mobile terminal there is an extension slot for SD memory cards. This slot is protected by a removable cover.
Protection class IP 65 is only guaranteed if the protective cover is correctly mounted.
Remove the screws at the protective cover.
Insert the SD card in the upper slot as shown in the
figure (push-push function).
Screw down protective cover.
Fig. 21: Insert SD card
40
1.0 • 18.12.2009
FURTHER FUNCTIONS AND SETTINGS
Using the SIM Card
4.4
Using the SIM Card
If your skeye.allegro is equipped with a GSM/GPRS module it also has a slot for the required card.
This slot can be found on the front side near the SD card slot.
Remove the protective cover prior to removing the SIM card.
Protection class IP 65 is only guaranteed if the protective cover is correctly mounted.
There is an additional yellow cover in front of the SIM card slot which can be mounted using special
screws. During installation, which sometimes requires the replacement of the SD card, this additional
cover makes it more difficult to access the SIM card.
Only with a properly mounted inner protective cover, the SIM card is held in the slot in case of
high impact load.
Remove the screws at the protective cover.
Remove the special screws of the inner protective
cover.
With the contacts facing downwards, insert the SIM card
into the lower slot as shown in the figure (push-push
function).
Screw together inner and outer protective cover.
Fig. 22: Insert SIM card
1.0 • 18.12.2009
41
FURTHER FUNCTIONS AND SETTINGS
Scanner Operation
4.5
Scanner Operation
When using the scanner, the PDT should be positioned as shown in the following figure:
Fig. 23: PDT, scanning position
The following figures show the positions for directing the scanner beam onto the bar codes.
Laser scanner:
Imager:
The following figures show incorrect scanner positions. With these positions it is hardly possible to
scan successfully.
Laser scanner:
42
1.0 • 18.12.2009
Imager:
ADVANCED PROGRAMS AND SETTINGS
System Information
5.
Advanced Programs and Settings
5.1
System Information
1.
Launch: Start ⇒ Programs ⇒ System ⇒ SysInfo
The SysInfo window appears.
Fig. 24: SysInfo
♦
The Versions tab displays information on operating system, serial number, and battery parameters.
♦
The Memory tab displays information on physical memories, drives and data memories.
♦
Operating system and system programs can read the hardware configuration of the devices from
the HWI-Block (Hardware Information Block).
♦
The KDI-Block (Customer information block) stores customer specific settings.
♦
The GSI-Block tab (device specific information block) contains device specific information.
Tap [OK] to close the window.
1.0 • 18.12.2009
43
ADVANCED PROGRAMS AND SETTINGS
System Information
5.1.1
SysInfo Report File
When calling the system information a report file is automatically created containing the same information as SysInfo.
When you tap [OK] the Save as dialog box opens up and you can save the file as "SysInfoReport.txt".
Fig. 25: Report file creation
Please include the report file in case of a support request.
44
1.0 • 18.12.2009
ADVANCED PROGRAMS AND SETTINGS
Changing the Memory Size
5.2
Changing the Memory Size
1. Launch: Start ⇒ Settings ⇒ Control Panel
The "Control Panel" menu appears.
2. In the Control Panel window double-tap
the following symbol:
The System Properties window appears.
3. Select the Memory tab.
Fig. 26: System properties | Memory
4. Use the slider to change the memory for data and programs.
5. Click OK to confirm the changes.
1.0 • 18.12.2009
45
ADVANCED PROGRAMS AND SETTINGS
Activating Password Protection
5.3
Activating Password Protection
You can protect your skeye.allegro data by using a password.
1. Launch: Start ⇒ Settings ⇒ Control Panel
The Control Panel menu appears
2. In the Control Panel window double-tap
the following symbol:
The Password Properties window appears.
Fig. 27: Password Properties
3. Enter the password.
4. Confirm the password.
5. Activate at least one of the functions.
6. Click OK to confirm the changes.
46
1.0 • 18.12.2009
ADVANCED PROGRAMS AND SETTINGS
Shell Config
5.4
Shell Config
Shell Config can be used to perform some useful changes:
♦
♦
♦
♦
♦
♦
♦
Hide/show Start button or additional menu
Activate/deactivate quick launch symbols
Show keyboard activated/deactivated
Show/Hide My Computer or Recycle Bin
Display information on the battery status
Display information on Wireless LAN connection
etc.
These configurations are useful if users are only allowed to call certain programs via the "Start"
menu. You may also set specific displays for Systray.
1. Launch: Start ⇒ Settings ⇒ Control Panel
The Control Panel menu appears.
2. Double-tap the ShellCfg symbol.
The ShellCfg window appears.
Further tabs
Fig. 28: ShellCfg
3. Perform the required changes.
4. Tap Apply to confirm.
5. Tap OK to close the window
You are only prompted to enter the password when the program is called via
„LaunchShell.exe“.
⇒ For further information please enquire for a separate Shell Config user guide.
1.0 • 18.12.2009
47
ADVANCED PROGRAMS AND SETTINGS
The BarcodeConfig Tool
5.5
The BarcodeConfig Tool
The BarcodeConfig offers the following functions:
♦
♦
♦
BarcodeConfig activates and configures the scanner.
Using BarcodeConfig the scanner can be triggered via the scan keys.
BarcodeConfig works like a keyboard wedge: Like a text entry, the scanned barcodes are e.g.
output in a text field.
1. Call: Start ⇒ Programme (Programs) ⇒ System ⇒ BarcodeConfig.
The"BarcodeConfig" window displays.
Context Sensitive Help:
First, tap any field and then tap the [?] button. The system displays the help text for
this topic.
Fig. 29: BarcodeConfig
⇒ For further information please enquire for a separate BarcodeConfig user guide.
48
1.0 • 18.12.2009
ADVANCED PROGRAMS AND SETTINGS
Installing Software
5.6
Installing Software
You may
•
•
download software from the Internet or LAN and install it on your skeye.allegro, or
download and install software via a connection to your desktop PC (with docking station and ActiveSync).
When choosing software, always ensure that it is supported by the relevant processor and that it is
suitable for the installed operating system.
1. Pay attention to chapter 6.2 (Data backup).
2. Regardless of the selected installation folder, some programs will install additional components in the \Windows folder.
It is recommended that you back up these components with SysBackup (see chapter 6.2)
to ensure that they can be restored after a complete power off.
1.0 • 18.12.2009
49
ADVANCED PROGRAMS AND SETTINGS
Wireless LAN*
5.7
Wireless LAN*
*optional
If the type designation of your skeye.allegro contains option R7, your mobile terminal is equipped
with a WLAN module 802.11b/g (HW 90250/V3R7).
5.7.1
Wireless LAN Network Settings
Set up a Wireless LAN access point that provides access to a LAN or the Internet. Follow the instructions of your Wireless LAN access point documentation.
1. Launch on the skeye.allegro: Start ⇒ Settings ⇒
Control Panel ⇒ Network and Dial-up Connections
or
Start ⇒ Settings ⇒ Network and Dial-up Connections
2. Double-tap the WiFi module.
3. Activate Obtain an IP address via DHCP. DHCP is activated by default.
Fig. 30: Wireless LAN | IP address
4. To manually set the IP addresses enter the addresses under IP address, Subnet mask, Gateway and Nameservers.
5. Tap [OK] for all queries to exit the dialog.
6. Change to the Internet Explorer, select View, and then click Internet Settings.
7. Select the Connection tab.
50
1.0 • 18.12.2009
ADVANCED PROGRAMS AND SETTINGS
Wireless LAN*
Fig. 31: Internet Explorer | Connection
If your LAN uses a proxy server for Internet connections activate the options Bypass proxy
server for local addresses and Access the Internet using a proxy server and enter the address of the proxy server.
8. Tap OK to close the window.
The network symbol displays in the taskbar.
5.7.2
WLAN Configuration
1. Double-tap the network symbol.
The following window appears
The header bar displays the name
of the module used
Fig. 32: Internet protocol (TCP/IP)
2. Select the Wireless Information tab.
The following tab appears:
1.0 • 18.12.2009
51
ADVANCED PROGRAMS AND SETTINGS
Wireless LAN*
Fig. 33: Wireless information
Symbol
Meaning
Network not available
Available network connected
Network available
Fig. 34: Network symbols
3. On the Wireless Information tab select a network and double-tap the corresponding selection
for further options.
The following window appears:
52
1.0 • 18.12.2009
ADVANCED PROGRAMS AND SETTINGS
Wireless LAN*
Fig. 35: Wireless – Properties
4. If you selected Add new... as the network on the Wireless Information tab fill in the fields.
•
SSID is the name of the network used to determine your Wireless LAN network. To ensure a
communication between all network computers be sure to use the same SSID for all. SSID is the
address set in the access point.
•
When accessing via an access point, option This is a computer-to-computer (ad hoc) network is not activated.
•
The network key must be the same as used for the configuration of the access point.
•
Supported encryption and authentication types depend on the integrated radio module. The implemented WLAN module supports: WEP; WPA-PSK, WPA2-PSK:TKIP, AES-CCMP; WPAEAP, WPA2-EAP: TKIP, AES-CCMP
Be sure to protect your Wireless LAN network. We recommend that you consult a specialist
(see also chapter 1.).
1.0 • 18.12.2009
53
ADVANCED PROGRAMS AND SETTINGS
Wireless LAN*
5.7.3
Preventing Unauthorised Intrusion into a Wireless Network
•
Change the password for the router respectively the access point (very important). The devices are shipped with a default password. If you do not change it, anyone can access your access point settings and change them.
•
Change the address area. If you do not use DHCP (automatic address assignment) changing
the address area will increase security as the standard area no longer works.
•
Specify an SSID name. This is the network name of the radio network. Change the default and
enter a new name.
•
Switch off the SSID broadcast. By default, wireless routers send the name of the network. This
simplifies the configuration (e.g. for Windows XP). Unfortunately, this also makes your network
visible in all Wireless LAN-enabled devices. If you switch off the SSID broadcast, the network
name will no longer be sent.
•
Set MAC filters. Many access points support the filtering of MAC addresses. Activate this filter
and enter the allowed MAC addresses of your network devices. This way, the access points only
supports connections with your PC. Connection will be denied to any other devices.
Please note that despite all these tips, the Wireless LAN is not fully secure; however, intruders
will have a much harder job breaking into your network.
If you wish to operate your Wireless LAN to a higher safety standard, please contact an IT security consultant (such as Systemhaus).
54
1.0 • 18.12.2009
ADVANCED PROGRAMS AND SETTINGS
Bluetooth*
5.8
Bluetooth*
*optional
If the type designation of your skeye.allegro contains option B2, your mobile terminal is equipped
with a Bluetooth module (e.g. HW 90250/V3B2).
1. Mobile terminal: Start ⇒ Settings ⇒ Control Panel ⇒ Bluetooth-Geräteeigenschaften (Bluetooth
device properties)
The "Bluetooth Manager" window appears.
2.
3. Switch on the Bluetooth device to be connected and place it near the mobile terminal.
4. Tap [Scan Device].
Fig. 36: Bluetooth Manger
The system searches for Bluetooth devices.
5. When the skeye.allegro can access a Bluetooth device, corresponding data is displayed in the
“Bluetooth Manager “.
The crossed out key
indicates that no device has been authenticated yet.
Fig. 37: Bluetooth Manger | Scan Device
1.0 • 18.12.2009
55
ADVANCED PROGRAMS AND SETTINGS
Bluetooth*
6. Double tap the line containing your device.
Fig. 38: Bluetooth-Manger | Trusted
7. Select "Trusted".
8. Select [Yes].
Fig. 39: Bluetooth | PIN
9. Enter the PIN of your Bluetooth device and tap [OK].
Now, the key symbol is no longer crossed-out and the Bluetooth device can be accessed via the
mobile terminal .
56
1.0 • 18.12.2009
ADVANCED PROGRAMS AND SETTINGS
Bluetooth*
Fig. 40: Bluetooth Manager | Device authenticated
Depending on the Bluetooth device used, a software usually needs to be installed (e.g. driver) on
the skeye.allegro. For more information refer to your Bluetooth device documentation or contact
the manufacturer.
When selecting software always ensure that it is supported by the corresponding operating system and the Marvell PXA 270 processor.
Example: When you use a Bluetooth printer you have to install the printer driver on the
skeye.allegro. Then, the printer will be available in applications like Microsoft Word Pad (File ⇒
Print).
1.0 • 18.12.2009
57
ADVANCED PROGRAMS AND SETTINGS
GSM / GPRS*
5.9
GSM / GPRS*
*optional
If the type designation of your skeye.allegro contains option G6, your mobile terminal supports the
use of a GSM/GPRS module (HW 90260/V3G6).
Insert the SIM card of your provider into the mobile terminal. See also chapter 4.4, page 41.
When establishing a GSM connection ensure your provider offers a time tariff.
Please note:
Establishing a GSM connection is with costs. For more information please
contact your provider.
5.9.1
GSM Setup
The GSM setup is explained with the help of an example (Vodafone SIM card).
1. Double tap the following symbol in Systray:
If the symbol is not displayed in Systray, go to the Windows directory: Mein Gerät (My device)
⇒ Windows ⇒ GSM Setup
GSM Setup opens:
Fig. 41: GSM Setup
58
1.0 • 18.12.2009
ADVANCED PROGRAMS AND SETTINGS
GSM / GPRS*
2. On the "SIM-PIN” tab, you can select whether a PIN number has to be entered for each usage.
Fig. 42: GSM-Setup | SIM-PIN
3. On the “Settings” tab, further settings can be made (e.g. GSM icon in Systray).
Fig. 43: GSM-Setup | Settings
4. On the “Misc” tab, specific Höft & Wessel data is displayed.
Fig. 44: GSM-Setup | Misc
5. Having completed the settings, click [OK].
1.0 • 18.12.2009
59
ADVANCED PROGRAMS AND SETTINGS
GSM / GPRS*
5.9.2
Establishing an Internet Connection
The data for provider Vodafone (Germany) is preconfigured on the mobile terminal, so an Internet
connection can easily be established.
1. Mobile terminal: Start ⇒ Settings ⇒
Control Panel ⇒ Network and Dial-up Connections
or
Start ⇒ Settings ⇒ Network and Dial-up Connections
2. Double tap the GSM/GPRS symbol
FIg. 45: GSM/GPRS symbol
3. If required by your provider, enter the data for the dial-up connection.
Fig. 46: GSM/GPRS | Dial-up connection
4. Enter the dialling parameters in the following window. See also chapter 11.1, page 89.
60
1.0 • 18.12.2009
ADVANCED PROGRAMS AND SETTINGS
GSM / GPRS*
Fig. 47: Dialling properties
When using dialling parameter “Home” no preceding zero is required.
5. Having completed the settings, click [Connect].
Fig. 48: GSM/GPRS | Connection
1.0 • 18.12.2009
61
ADVANCED PROGRAMS AND SETTINGS
GSM / GPRS*
Fig. 49: GSM/GPRS | Status messages
The new connection is established. The following symbol displays in Systray:
6. To check this, start the Internet Explorer on the mobile terminal by clicking the relevant symbol
on the desktop.
Enter an Internet address in the address bar.
Fig. 50: Internet connection
62
1.0 • 18.12.2009
ADVANCED PROGRAMS AND SETTINGS
RfID 134 kHz*
5.10
RfID 134 kHz*
*optional
If the type designation of your skeye.allegro contains the option T5, your mobile terminal is equipped
with an RfID 134 kHz module (e.g. HW 90250/V3T5).
Software not released at date of printing.
5.11
RfID 13.56 MHz*
*optional
If the type designation of your skeye.allegro contains the option T8 (your mobile terminal is equipped
with an RfID 13,56 MHz module (e.g. HW 90250/V3T8).
Software not released at date of printing.
5.12
GPS*
*optional (skeye.allegro LS only)
If the type designation of your skeye.allegro contains option E3, your mobile terminal is equipped
with a GPS module (e.g. HW 90260/V3E3).
Please note:
GPS (Global Positioning System) is provided by the government of the USA.
Thus, the accuracy of the system can be influenced by the USA under certain conditions (war zone
or restricted area) .
GPS performance gets influenced if the area covered by satellites is near high buildings, in a tunnel
or below roofs.
The navigation software is available on request.
1.0 • 18.12.2009
63
ADVANCED PROGRAMS AND SETTINGS
Updating the Operating System
5.13
Updating the Operating System
If you update the operating system all data in the memory of the skeye.allegro will be deleted.
Prior to an update back up all data to an external memory.
⇒ Please enquire for current operating system version.
1. Copy the files of the update program to an SD card and insert it into the SD slot of your
skeye.allegro.
2. Double-tap on My Computer.
The My Computer window appears.
3. Navigate to the directory of the SD card.
4. Double-tap the "updateCE.exe" file to execute it.
5. Tap Update.
Do not interrupt this process! While updating, the skeye.allegro
needs to be connected to the battery charger. If the power
supply of the skeye.allegro is interrupted during the update, the
system software might get damaged.
6. The old operating system image will be overwritten with the
new image.
Caution: All RAM data gets lost!
7. Tap Yes to terminate the update.
The system reboots and the new operating system image will
be loaded.
Fig. 51: Update
64
1.0 • 18.12.2009
DATA BACKUP
General Data Backup
6.
Data Backup
6.1
General Data Backup
Windows CE stores the following in the RAM:
• Working memory
• Files
• Databases
• Registry
RAM allows for a fast access. If the battery is removed or discharged, the RAM memory contents will
be lost.
The flash memory contains all data saved in the \FlashStorage folder and subfolders. The data
stored in flash memory will persist even if the battery is discharged.
This is why important data and programs should be stored in the "FlashStorage" folder. See
chapter 6.2.
Back up your data on the skeye.allegro as often as possible.
In addition, we recommend mirroring important data to your PC or other storage media.
1.0 • 18.12.2009
65
DATA BACKUP
SysBackup
6.2
SysBackup
Using "SysBackup" you can
• create
• restore and
• delete a backup.
NOTES:
⇒ Backup data saved with SysBackup should only be restored to the image under which they
were created.
⇒ If the option for asking the user is deactivated before the backup is created your are not
prompted for confirmation after the booting process (see Fig. 52) .
⇒ SysBackup only stores and restores data but does not delete them. This might be important in the following szenario:
When you need a cleaned up desktop you can delete the "My Computer" and "Recycle Bin"
symbols using a setting in "ExplorerConfig" as the symbols are created on the desktop via
RegistryKey. However, all other symbols on the desktop are created in the
\windows\desktop directory using *.Ink-files. From there, they have to be deleted in the
autostart directory using a corresponding batch file as after a cold start of the device these
files are automatically stored at this location while booting and are not deleted when you
restore a backup.
66
1.0 • 18.12.2009
DATA BACKUP
SysBackup
6.2.1
Calling SysBackup
Start SysBackup via
•
Start ⇒ Run ⇒ SysBackup (enter SysBackup) or
•
Start ⇒ Programs ⇒ System ⇒ SysBackup
The "SysBackup" window appears.
Fig. 52: SysBackup
Select autobackup settings to perform further settings.
Backup controlled by battery status
Backup is time-controlled (every 15 min.)
An automatic backup interval that is too short will have a negative effect on the performance.
1.0 • 18.12.2009
67
DATA BACKUP
SysBackup
6.2.2
Creating a Backup
Copy all important data to the "\FlashStorage" folder or its subfolders.
Everything must be backed up to ensure system settings are not lost after a battery has fully discharged or there has been a total shutdown.
1. Open the "SysBackup" program (see chapter 6.2.1).
2. In the SysBackup window tap create.
The message "Execute backup?" appears.
Fig. 53: Execute backup?
3. Click Yes to confirm.
The SysBackup is performed. After completion the following message displays:
Fig. 54: Backup completed
4. Click OK to close the message.
5. Click Exit to close the window.
NOTE!
If you change your system settings e.g. after a new calibration of the touch you will have to
perform a SysBackup.
If not, the settings will no longer be available e.g. after a complete power off.
68
1.0 • 18.12.2009
DATA BACKUP
SysBackup
6.2.3
Restoring the Backup
1. Open the "SysBackup" program (see chapter 6.2.1).
2. Select restore.
The message "Execute restore?" appears.
Fig. 55: Execute restore?
3. Click Yes to confirm the message.
The backup will be imported.
If there is no backup after a restart or if a backup is not required (e.g. after a warm start) the "Sysbackup" program searches all flash media (including the "FlashStorage" memory card) for the
"autostat.exe" application. If such application is found it will be executed. There is an autostart
mechanism independent from the registry as Sysbackup will always be automatically performed after
the system start.
Please note:
RAM data will possibly be overwritten. All data will be updated to the state prevailing at the
time of backup creation.
1.0 • 18.12.2009
69
DATA BACKUP
SysBackup
6.2.4
Deleting a Backup
1. Open the "SysBackup" program (see chapter 6.2.1).
2. Tap delete.
The message "Erase backup files?" appears.
Fig. 56: Erase backup files
3. Click Yes to confirm the message.
The content of the \FlashStorage\SYSBAK directory will be deleted.
70
1.0 • 18.12.2009
DOCKING STATION HW 50250 (STANDARD)
Connections of the Docking Station
7.
Docking Station HW 50250 (Standard)
Slot for PDT with
battery
Slot for
spare battery
LEDs*
yellow-yellow-green
Fig. 57: Docking station
The red LED* shows the
battery charging status. (shines permanently during charging process, flashes
when the battery is fully charged)
* For more information on the LEDs please refer to the user guide of the respective docking station.
7.1
Connections of the Docking Station
Several connections can be found at the rear side of the docking station.
USB-Device to connect
to the desktop PC using
ActiveSync
Power supply:
Power supply unit
connection HW 14200
Serial interface
Fig. 58: Docking station, connections
1.0 • 18.12.2009
71
DOCKING STATION HW 50250 (STANDARD)
Connecting the Docking Station to the Desktop
7.2
Connecting the Docking Station to the Desktop
PC
Power supply unit
USB cable
Fig. 59: Connection docking station PC
1. Establish a connection between the docking station and the desktop PC at an USB port.
2. Connect the power supply unit to the docking station.
3. Insert the mains plug into the socket.
7.3
Technical Data
Casing:
•
•
•
Slots:
• One slot for the PDT including battery.
The following interfaces are used:
- PDT device power supply, 9 V +/-5 %, 2.0 A
- USB device
- Serial interface
• Charging slot for HW 19200 or HW 19201 battery
Ports & Connectors
• Power supply:
- Connection for HW 14200 power supply,
DC voltage input Mini DC Power Jack ∅1,3 mm, 9 V / 2.5 A
• Data interfaces:
- serial interface RS232
- USB device
USB 1.1 standard
Connection to a PC to communicate via ActiveSync
possible
Displays:
•
•
72
1.0 • 18.12.2009
Shock resistant plastic, self-extinguishing according to UL94V-0
Bottom plate made from galvanised sheet steel
Back made from stainless steel
1 green LED and 2 yellow LEDs on the front panel signal docking station
operating status
1 red LED for spare battery charging process
DOCKING STATION HW 50250 (STANDARD)
Technical Data
Battery charging:
•
•
•
In accordance with manufacturer's instructions
Charging in PDT: controlled by PDT charging electronics
Charging in spare battery charging slot: controlled by Ethernet docking station charging electronics
•
When inserted battery is recognised, first charging using constant current
charging, subsequently switches over to constant voltage charging.
Charging start with reduced charging current for rechargeable batteries with
low voltage.
Automatic switch-off of charging process when battery fully charged.
Automatic switch-off if battery overheats.
Charging duration:
approx. 2.5 h (HW 19200) or
approx. 5 h (HW 19201)
•
•
•
•
•
•
Ambient conditions:
Operate only indoors
Ensure good ventilation is available
Operating temperature:
limit values:
0 °C to +40 °C,
recommended range:
10 °C to +30 °C,
• Storage temperature:
-20 °C to +60 °C
• Humidity: up to 85 % (non-condensing)
Rules and Standards:
• CE conformity
• ElektroG and RoHs conformity
Dimensions:
• about 180 mm x 110 mm x 95 mm (L x W x H)
Weight:
• about 700 g
Further docking stations:
Please enquire for a separate user guide for the docking stations.
1.0 • 18.12.2009
73
COMMUNICATION/DATA EXCHANGE
General Information on Exchanging Data with the Desktop PC
8.
Communication/Data Exchange
8.1
General Information on Exchanging Data with the Desktop PC
You may connect your mobile terminal to the USB client port of your desktop PC using a docking
station.
To establish a connection between the skeye.allegro and a desktop PC install the ActiveSync program on your desktop PC (see chapter 8.2.2).
Then you can establish a connection between the devices and setup a partnership between the
skeye.allegro and the desktop PC.
8.2
Exchanging Data using ActiveSync
Using the ActiveSync program you can perform the following tasks (between your desktop PC and
your skeye.allegro):
8.2.1
•
Save and restore your skeye.allegro data
•
Add and remove programs on your skeye.allegro
•
Synchronise files
•
Transfer and copy files
System Requirements for the ActiveSync Program:
To use ActiveSync, you need a PC with USB interface and one of the following operating systems:
Windows 2000, Windows Server 2003 or Windows XP. For detailed information on the system requirements for ActiveSync please refer to the information in the Microsoft Download Center.
8.2.2
Installing ActiveSync on Your Desktop PC
1. Start the Internet-Explorer on your desktop PC.
2. Enter the following Internet address: "www.microsoft.com".
3. Under Product Resources select Downloads.
4. Enter ActiveSync into the search mask and click Go.
5. Click the download link of the required ActiveSync software version.
6. In the following window click Download.
7. Follow the instructions on screen to install ActiveSync.
8. Restart your desktop PC.
9. After the restart the Establish connection window appears. Here, you are prompted to establish a connection to your skeye.allegro.
74
1.0 • 18.12.2009
COMMUNICATION/DATA EXCHANGE
Sending and Receiving Data
8.3
Sending and Receiving Data
8.3.1
skeye.allegro ⇔ Desktop-PC
We recommend using the ActiveSync program for a PC communication (for information on the installation see chapter 8.2)
1. Place the skeye.allegro into the docking station connected.
2. Switch on the skeye.allegro.
3. Switch on the desktop PC.
4. On the skeye.allegro go to: Start ⇒ Programs ⇒ Communication ⇒ PC-to-PC connection
The "Connecting to USB" window appears.
Fig. 60: Connect to USB
As soon as the connection to the desktop PC has been established the window is hidden.
If a connection cannot be established check the cable position and the position of the
skeye.allegro in the docking station. In addition, check the settings and then try again (see chapter 10.3) .
If a connection has been established the "New partnership” window is displayed on your desktop
PC
(see next page).
1.0 • 18.12.2009
75
COMMUNICATION/DATA EXCHANGE
Sending and Receiving Data
Fig. 61: New Partnership window
Here, you may
• select Yes to synchronize your skeye.allegro with your desktop PC or
• select No to logon as guest to the desktop PC.
Select Yes.
or No
76
1.0 • 18.12.2009
(See chapter 8.3.1.2)
(See chapter 8.3.1.1) and click [Next] to confirm.
COMMUNICATION/DATA EXCHANGE
Sending and Receiving Data
8.3.1.1
No - Login as Guest
If you log in as Guest to your desktop PC with your skeye.allegro you can copy or move files from
the desktop computer to the skeye.allegro and vice versa.
No automatic synchronisation of calendar and files will take place. This would require setting up a
partnership.
1. If you selected No in the New Partnership wizard, you will see the following window:
Fig. 62: Microsoft ActiveSync | Login as guest
2. You may now access your skeye.allegro from your
desktop PC. Click the following symbol on your PC:
The My Computer window opens up displaying all available directories and devices.
3. Select the mobile device symbol for your skeye.allegro as well as a working directory
on your desktop PC.
mobile Device
1.0 • 18.12.2009
77
COMMUNICATION/DATA EXCHANGE
Sending and Receiving Data
8.3.1.2
Yes – Setting up a Partnership
If you set up a partnership between the skeye.allegro and your desktop PC, you will be able to copy
or move files from the desktop computer to the skeye.allegro and vice versa
as well as automatically synchronise calendar and files.
1. If you selected Yes in the New Partnership wizard, you will see the following window:
Fig. 63: New Partnership | Select Synchronisation Settings
2. Activate the check boxes you want to synchronize with your skeye.allegro.
To display appointments, contacts or tasks on your skeye.allegro you require additional software
not included in delivery.
3. Then, select Settings to define the synchronization settings.
The following window appears (see next page).
78
1.0 • 18.12.2009
COMMUNICATION/DATA EXCHANGE
Sending and Receiving Data
Fig. 64: Synchronising files
7. In this window select the desired settings for synchronization and click OK to confirm.
The New Partnership, Select Synchronization Settings window appears again.
8. Select Next.
The following window appears:
Fig. 65: New partnership | Setup Complete
1.0 • 18.12.2009
79
COMMUNICATION/DATA EXCHANGE
Sending and Receiving Data
9. Select Finish.
Having completed the setup, the following window appears:
Fig. 66: Microsoft ActiveSync
The synchronisation has been completed successfully.
80
1.0 • 18.12.2009
COMMUNICATION/DATA EXCHANGE
Internet Explorer
8.4
Internet Explorer
To change Internet options in the Internet Explorer proceed as follows:
1. Double-tap the following symbol:
The Internet Explorer opens up.
2. In the menu bar of the Internet Explorer select View.
Fig. 67: Internet Explorer | View
3. In the View menu select Internet Options.
The Internet Settings window appears.
Fig. 68: Internet Settings
4. In the Internet Settings window select the Connection tab.
The following tab appears:
1.0 • 18.12.2009
81
COMMUNICATION/DATA EXCHANGE
Internet Explorer
Fig. 69: Internet Settings | Connection
5. On the Connections tab set the connection type.
- If you use the skeye.allegro in a network environment (e.g. via WLAN or Ethernet card) select
Use LAN (no autodial).
- If you use the Internet via dial-up connection (e.g. modem) select the corresponding connection
under "Autodial name". This dial-up connection will be automatically started when you open the
Internet Explorer.
6. To setup Internet connections via proxy server in the network select Access the Internet using
a proxy server and enter the network address of the proxy server.
7. Click OK to confirm.
8. Close the Internet Explorer.
82
1.0 • 18.12.2009
TECHNICAL DATA
Internet Explorer
9.
Technical Data
Casing:
•
•
Processor:
Memory:
Upper shell, lower shell and Interface cap in impact-resistant plastic,
self-extinguishing in accordance with UL94V-0
Housing protection IP 65
• Marvell PXA 270 624 MHz (Bulverde)
• up to 512 MB NAND Flash
• up to 128 MB SDRAM RAM
Display:
Type:
Size /
Resolution:
Amount of colours:
QVGA colour TFT with touch screen
skeye.allegro: 2,8" / 240 x 320 pixels
skeye.allegro LS:
3,5" / 320 x 240 pixels
65,536 Colours
Touch:
Technology:
Battery:
Connectors & Ports:
Temperature
range:
Analogue Resistive
exchangeable Lithium-Ion battery,
1700 mAh.
Optional: 3400 mAh
• Extension slot for SD memory cards
• SIM card for integrated GSM module (optional)
• System connectors for
- Charging power connection
- USB device
- Serial communication
2-Wire RS232 port with V24 levels
- Barcode reader
- Headset
• Infrared port
Working:
Storage:
Relative humidity:
-10°C - +50°C
-20°C - +60°C
10-90%, not condensing
Dimensions:
W 54/73 mm, H 27/47 mm, L 201 mm
W 54/117 mm, H 27/48 mm, L 201 mm
Weight:
about 350 or 410 g (incl. battery)
Rules and Standard:
• ElektroG and RoHs conformity
1.0 • 18.12.2009
83
TECHNICAL DATA
Internet Explorer
Options:
The mobile terminal can be equipped with different optional modules (see chapter 2.4, page 17). The
equipment is indicated by a letter code (e.g. R7). If one of the optional modules has been integrated,
the relevant letter code can be found on the serial number sticker..
Having removed the battery (see chapter 4.2.2) the serial number sticker becomes visible. Example:
HW 90250/V3B2S7 or HW 90260/V3G6S5...
WLAN:
Letter code: R7
Integrated WLAN module
802.11b/g (11/54 Mbit/s)
Integrated antenna
Bluetooth:
Letter code: B2
Integrated Bluetooth module
Class 2
According to Bluetooth specification V2.0 + EDR
Integrated antenna
GSM / GPRS:
Letter code: G6
Dual band 900 MHz/1800 MHz
GPRS: multislot class 10
Integrated antenna
RFID:
134.2 kHz Letter code: T5
According to ISO 11784, ISO 11785, ISO 18000-2
Read Distance:
About 100 mm (depends on tag type, tag size and
antenna size)
13.56 MHz Letter code: T8
According to ISO 14443A, ISO 14443B, ISO 15693, ISO 18000-3,
NFC enabled, ICODE
Read Distance:
About 50 mm (depends on tag and antenna)
GPS:
skeye.allegro only
Letter code: E3
Receiver type:
Time To First Fix (TTFF):
Cold start (autonomous):
Hot start (autonomous):
Sensitivity:
Tracking:
Cold start (autonomous):
50 channels
29 s
<1s
-160 dBm
-145 dBm
Scanner/ Imager:
Scanner Letter code: S5
Barcode scanner of laser class 2
Imager Letter code: S7
2-D imager: To record common barcodes and 2D barcodes
Protection class IP 65 of the mobile terminal is only ensured if the battery is inserted and the
protective cover at the top end of the device is mounted.
84
1.0 • 18.12.2009
TROUBLESHOOTING
Reset via Software
10.
Troubleshooting
In case there is no problem solution in this chapter
• open our homepage (www.skeye.com) and change to the support forum http://forum.skeye.com)
or
• or contact our service line. The phone numbers can be found in chapter 11.4.
10.1
Reset via Software
If an application does not react use the software to perform a restart.
Select Start ⇒ Programs ⇒ System ⇒ Reset
NOTE!
After a software reset, all data and settings will still be available on your skeye.allegro.
10.2
Reset via Hardware
If the touch screen does not react or if you cannot switch on the device, press the reset button in the
battery compartment of the device.
To initiate a reset, proceed as follows:
1.
2.
Remove the battery.
Press the reset key located underneath the battery.
Press the reset key carefully with low expenditure of force.
You can do this using an opened paper clip or similar.
Fig. 70: skeye.allegro, reset
3. Insert the battery.
The skeye.allegro switches on automatically.
NOTE!
After a hardware reset, all data and settings in RAM are deleted from your PDT. Data and settings in FLASH are not deleted.
1.0 • 18.12.2009
85
TROUBLESHOOTING
An Internet Connection cannot be Established
10.3
An Internet Connection cannot be Established
General:
86
Connections settings
available?
Go to Start Settings Network Dial-up connection:
There must be at least one connection created. If there is no connection
available create a new one. Use either a modem or Wireless LAN.
Internet explorer connection OK?
Open the Internet Explorer.
Open the View menu and select Internet Options. Select the Connections tab. If required, activate Use Auto Dial or Local Network. If required, activate Access the Internet using a proxy server and enter its
address.
Is the Internet Explorer
set to online?
Open the Internet Explorer and deactivate Work Offline in the File menu.
1.0 • 18.12.2009
TROUBLESHOOTING
An Internet Connection cannot be Established
10.3.1
Checking Connection Settings on the Desktop PC
1. Start ActiveSync on the desktop PC.
Fig. 71: ActiveSync I Datei
2. Select Connection Settings... in the File menu.
The Connection settings window appears.
Activate this
check box
Fig. 72: Connection Settings
3. Check the settings and change if required.
4. Click OK to confirm.
If your desktop PC is protected by a firewall note that those programs might prevent ActiveSync connections.
1.0 • 18.12.2009
87
TROUBLESHOOTING
An Internet Connection cannot be Established
10.3.2
Checking Registry Entries
If you are unable to establish an ActiveSync connection between the skeye.allegro and the PC via
the serial interface, Microsoft recommends checking that the following Registry entries are present,
and if not, editing the Registry accordingly.
CAUTION!
Registry entries must only be changed by experienced and authorised users (administrator).
Höft & Wessel as the producer does not accept any liability for damages (e.g. data loss, security vulnerability and so on) caused by registry changes.
Procedure for serial connections:
•
On your PC call Start ⇒ Run ⇒ enter Regedit and execute.
•
Select HKEY_LOCAL_MACHINE or HKEY_CURRENT_USESR.
•
Open "Software\Microsoft\Windows CE Services".
⇒ Do you see the following entries?
1. [HKEY_LOCAL_MACHINE\Software\Microsoft\
Windows CE Services]
"SerialPort"= <Valuet> "COM1" (or <Value> COM2)
2. [HKEY_CURRENT_USER\Software\Microsoft\Windows CE Services]
"SerialBaudRate"=0001c200 (115200) (for 115 kbit/s)
If the entries are not present, add them.
Under HKEY_LOCAL_MACHINE click "Windows CE Services".
Call Edit ⇒ New ⇒ String Value.
Enter SerialPort (no quotation marks)
Double-tap SerialPort.
The Modify String window appears.
Enter COM1 (or the COM port you use).
Under HKEY_CURRENT_USER click Windows CE Services.
Call Edit ⇒ New ⇒ DWORD Value.
Enter SerialBaudrate (no quotation marks)
Double-click SerialBaudRate to open the Modify DWORD Value window.
Select Decimal and enter 115200 (no quotation marks).
Close the registry editor.
Restart your PC to enable changes.
88
1.0 • 18.12.2009
ANNEX
Dialling Patterns
11.
Annex
11.1
Dialling Patterns
A dialling pattern defines the dialling location and dialling type.
1. Launch: Start ⇒ Settings ⇒ Control Panel
The Control Panel menu appears.
2. Double-tap the Dialing symbol.
The Dialing Properties window appears.
Select 'Office' or 'Private'
Example: If you are in your office, the dialling patterns ensures that the number you will call is
preceded by a zero. If you are at home, no preceding zero will be dialled.
Use the [New] button to define new locations, use the [Remove] button to delete them.
3. Select either Office or Private and then tap [Edit].
•
If you only enter a G in all 3 rows, the telephone number you entered in the Telephone number
field of the Make New Dial Up Connection window will be dialled exactly. In this case, the remaining fields for the country and area are of no significance.
1.0 • 18.12.2009
89
ANNEX
Dialling Patterns
This is the simplest way of adjusting.
Fig. 73: Edit Dialing Patterns
•
If you enter additional entries, the telephone number will be composed of the additional entries
for country code and area code.
The example shows dialling via outside line access.
Here, the preceding zero must be entered (0,G).
Fig. 74: Dialing pattern | Further settings
Here, the "Country code" and "Area code" fields are compared to the local settings (e.g. Office)
and will only be dialled when the number of the location and the number of the destination are
different.
If you are at a different location as entered in your local settings dialling problems might occur as the
program always compares the number to be dialled with the local settings.
90
1.0 • 18.12.2009
ANNEX
Taskbar / Symbol Description
11.2
Taskbar / Symbol Description
The following symbols may appear in the taskbar:
Symbol
Meaning
Battery is charged
Battery is below the first voltage level
Battery needs recharging
Show keyboard (see chapter 3.3.7)
Hide keyboard (see chapter 3.3.7)
Call desktop (see chapter 3.3.4)
ClickRight function (See chapter 3.3.5)
Indicates an online connection
Network connection established
No network connection
ActiveSync connection established (see chapter 8.2).
1.0 • 18.12.2009
91
ANNEX
Special Commands
11.3
Special Commands
The table below contains the special commands not part of the default Windows CE command set:
Launch via the Start menu:
Start Run <Enter call command> or
Start Programs System
Special command
Reset
92
Result
resets the skeye.allegro.
Terminates all running programs and restarts the skeye.allegro. RAM data is maintained.
Suspend
Switch off: RAM content is maintained (battery remains on)
SysBackup
Backs up all programs and data present in RAM to the flash disk or restores programs and data from the flash disk. This is recommended prior to a total shutdown.
SysInfo
Displays the operating system version and the device number
1.0 • 18.12.2009
ANNEX
Manufacturer's Address
11.4
Manufacturer's Address
Höft & Wessel AG
Rotenburger Str. 20
D-30659 Hannover
Phone: 0511 / 6102 - 0
Fax:
0511 / 6102 - 713
www.hoeft-wessel.com
[email protected]
Service line:
within Germany:
01803 / 23 28 29
( 0.09 € per min)
from abroad:
+49/511/6102-600
1.0 • 18.12.2009
93
ANNEX
Glossary
11.5
94
Glossary
AES
Advanced Encryption Standard
A symmetric encryption system declared as standard by the National Institute of Standards and Technology (NIST).
The algorithm is freely available and can be used in software respectively hardware.
No license fee.
Bluetooth
Industrial standard according to IEEE 802.15.1 for a wireless network of devices over
a short distance.
COM
Communication Port
Communication ports are the serial interfaces COM1 and COM2.
DECT
Digital Enhanced Cordless Telecommunications
A cordless phone standard widely used in Europe with a range of up to 300 m.
DFÜ
Short for German Datenfernübertragung (Remote data transfer).
Generic term for transferring data either by wire or wireless over large distances.
DRAM
Dynamic Random Access Memory
dynamic, volatile direct access memory (working memory)
EDR
Enhanced Data Rate
An up-to-date Bluetooth standard that triples the Bluetooth data rate (from 723 kbit/s
to 2.169 Mbit/s.
Flash memory
The flash-memory is a non-volatile memory type with a block-orientated way of work.
GPS
Global Positioning System
A system that uses satellites for position determination.
GPRS
General Packet Radio Service.
Packet-oriented radio service used for mobile communication.
GSM
Global System for Mobile Communications
Technology of D-Net- and E-Net-mobile telephones widely spread in Europe and other
parts of the world.
Calibration
Optimisation/fine adjustment of the touch
LED
Light Emitting Diode
RAM
Random Access Memory
volatile (working) memory with random access
Registry
A central hierarchical database storing important information on system configuration,
user, applications, and hardware devices.
Reset
Resets the computer to a defined state.
SDRAM
Synchronous Data Random Access Memory
SSID
Service Set Identifier
SVGA
Super Video Graphics Array]
Graphics standard with a resolution of 800 x 600 pixel
VPN
Virtual Private Network
defines the construction of a secure communication channel (also called tunnel) via
the Internet. VPN encrypts data packages of any protocol and transmits them via the
Internet.
1.0 • 18.12.2009
ANNEX
Glossary
USB
Universal Serial Bus
A bus system to connect a computer to external USB peripheral devices for exchanging data.
VPN
Virtual Private Network
Used to connect devices of different networks where the networks do not have to be
compatible to each other.
WEP
Wired Equivalent Privacy
Encryption type used in wireless local area networks according to IEEE standard
802.11.
WPA
Short for WiFi (Wireless Fidelity) Protected Access]
a specification for standardised compatible security improvements improving data
protection (encryption) and access control (authentication) for existing and future wireless WiFi LAN systems.
WPA2
Wi-Fi (Wireless Fidelity) Protected Access 2
Implementation of a security standard for radio networks according to
WLAN standard IEEE 802.11a, b, g on the base of the Advanced Encryption STandard (AES).
It replaces the WPA which bases on the Wired Equivalent Privacy (WEP) which is
supposed to be unsecure..
von WPA dar, das wiederum auf dem mittlerweile als unsicher gel-tenden
Wired Equivalent Privacy (WEP) basiert. WPA2 is an additional protection measurement that uses dynamic keys on the base of the Temporal Key Integrity Protocol
(TKIP). To authenticate user Pre-Shared Keys (PSK) or Extensible Authentication
Protocol (EAP) IEEE 802.1x is used.
1.0 • 18.12.2009
95
ANNEX
Index
11.6
Index
—A—
Accessory 17
ActiveSync
Datenaustausch 75
Guest login 77
Install 74
installieren 74
Setting up a Partnership 78
System requirements 74
Systemvoraussetzungen 74
Tasks 74
Arbeitsspeicher ändern 45
Automatic Standby 33
—K—
Kennwortschutz aktivieren 46
Keyboard 26, Siehe Tastatur
Kommunikationsstation 71
an PC anschließen 72
Anschlüsse 71
—L—
Ländereinstellungseigenschaften 28
—B—
—N—
Backup
Create 66, 68
Delete 70
Restore 69
BarcodeConfig 48
Battery 38
Changing 39
Charging 38
Besitzereigenschaften 31
Bluetooth 55
Navigation key 22
—C—
Complete power off 34
Power supply 32
Problembehebung 85
Programmspeicher ändern 45
—D—
—R—
Data Backup 65
Datenspeicher ändern 45
Desktop
Store new smybol 25
Display 35, See also: Touch screen
RAM 65
Registry 88
Report file 44
Report-Datei 44
Reset
Hardware 85
Software 85
RfID 63
Right mouse button 24
—E—
Eingabebereich Siehe Tastatur
Entsorgung 14
Erste Schritte 21
—F—
Flash memory 65
—G—
GPRS 58
GPS 63
GPS* 63
GSM 58
GSM Setup 58
GSM-Setup 58
—I—
Internet
No connection 86
96
Internet connection 60
Internet Explorer 81
Internetverbindung 60
1.0 • 18.12.2009
—O—
Operating system
Update 64
Options 17
—P—
—S—
Safety notes
RFID 14
Safety Notes
GPS 14
Scanner operation 42
Setting the Brightness 37
Setting the date 29
Setting the time 29
Shell Config 47
ShellCfg See Shell Config
Sicherheitshinweise
Akku 10
Allgemein 8
Bluetooth 13
Datenverlust 14
GPS 14
GSM/GPRS 13
Imager mit Laseraimer 12
Imager mit LED-Aimer 12
ANNEX
Index
Infrarotschnittstelle 12
Kommunikationsstation/Akkuladegerät 10
Laser 11
Netzteil 11
RfID 14
WLAN 13
skeye.allegro
Front view 18
Frontansicht 18
Rückansicht 19
Technical data 83
Varianten 17, 20
Software
Install 49
System requirements 49
Special commands 92
Speicherbereich ändern 45
Start menu 23
Start Screen 22
Stylus
Dragging 21
Tap and hold 21
Tapping 21
Suspend mode 32
Switching off 32
Symbole
Taskleiste 91
Symbols
Network 52
SysBackup 66
Call 67
SysInfo 44
—T—
Taskbar 24
Taskleiste
Symbole 91
Tastatur
Eigenschaften einstellen 26
Touch screen
Calibrating 35
Recalibrating 36
Trademarks 16
Troubleshooting 85
—W—
Wireless LAN
Configuration 51
Protection 54
Wireless-LAN Siehe WLAN
1.0 • 18.12.2009
97