1
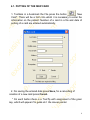
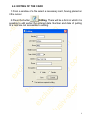
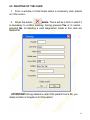
Open Company «exclusiv-store», Pavlograd, Ukraine
The USER MANUAL
SOFTWARE PACKAGE
«DiaDens-PC»
exclusiv-store.com
CONTENTS
Part 1. ASSIGNMENT .................................................................................
Part 2. SYSTEM REQUIREMENTS ............................................................
Part 3. PREPARATION For WORK ............................................................
Part 4. WORK WITH THE CARD INDEX ....................................................
1. Putting of a new card .............................................................................
2. Editing of a card .....................................................................................
3. Deleting of a card ...................................................................................
4. Search of a card on a Last name ...........................................................
5. Sorting of cards ......................................................................................
6. Review of contents of a card ..................................................................
Part 5. DIAGNOSTICS BIOREPER ............................................................
1. Window of diagnostics the BIOREPER. ..................................................
2. New reception and diagnostics ..............................................................
3. Automatic mode of measurement ..........................................................
4. Manual mode of measurement ..............................................................
5. Customizations of the report ..................................................................
6. The anamnesis .......................................................................................
7. Creation and printing of the report ..........................................................
8. Statistics .................................................................................................
9. Customization of the route .....................................................................
10. Data entry from the keyboard ...............................................................
11. Deleting of reception ............................................................................
Part 6. DIAGNOSTICS VOLL ....................................................................
1. Window of diagnostics VOLL .................................................................
2. New reception and diagnostics ..............................................................
3. Continuation of diagnostics ....................................................................
4. Medicamental testing .............................................................................
5. The anamnesis ......................................................................................
6. Creation and printing of the report .........................................................
7. Circular Diagrams ..................................................................................
8. Deleting of reception ..............................................................................
Part 7. DIAGNOSTICS BIOVOLL ..............................................................
1. Window of diagnostics BIOVOLL ...........................................................
2. New reception and diagnostics ..............................................................
3. Medicamental testing .............................................................................
4. The anamnesis ......................................................................................
5. Circular Diagrams ..................................................................................
6. Creation and printing of the report ..........................................................
7. Deleting of reception ..............................................................................
Part 8. SHORTCUTS ..................................................................................
Part 9. OPERATION WITH FILES OF THE DATABASE ...........................
Part 10. POSSIBLE PROBLEMS AND THEIR SOLUTIONS ....................
4
5
7
7
8
9
10
11
11
12
13
13
15
18
18
20
21
22
22
23
24
26
27
27
29
33
33
34
35
36
37
38
39
40
44
46
46
48
49
50
51
52
2
NOTES
TO THE ENGLISH VERSION OF DIADENS-PC PROGRAM
The English version of program you are use is the first translation
of the DiaDens-PC software and you are one of the first owners of
this program
Be aware this is beta version of translation patch and in it remain
some words in Russian. Now it is necessary to program work as
usual but in the next version of the patch all will be in English.
Also in the next version of the path English help for the program will
be available. H ere some words you can see in Russian and they
translation
Название точки – The Name of the Point
Диагностика БИОРЕПЕР(полное обследование) – Diagnostics
BIOREPER(full inspection)
Левая Ушная раковина – Left Auricle
Правая Ушная раковина – Right Auricle
Маршрут1 – Route1
To obtain new versions of English patch and DiaDens-PC program
send us email for address [email protected]
3
PART 1.
ASSIGNMENT
The hardware-software complex is intended for carrying out
electropunctur diagnostics on methods "BIOREPER", «VOLL»,
«BIOVOLL», and also for Medicamental testing.
The structure of the complex includes device DiaDens-PC, a set of
electrodes and the software for a personal computer.
Device DiaDens-PC allows to spend diagnostics and therapy in a
local mode. The software of the complex fulfils following functions:
• Support of a file of patients;
• Carrying out of diagnostics (methods the BIOREPER, VOLL,
BIOVOLL);
• Carrying out of Medicamental testing (VOLL, BIOVOLL);
• Storage of results of diagnostics;
• Listing of results of diagnostics.
4
THE PART 2.
SYSTEM REQUIREMENTS
The operating system: recommended operating systems - Microsoft
Windows 98, Microsoft Windows XP.
The processor: the processor of Intel Celeron of 800 MHz (Pentium
III and above).
Memory (RAM) 128 megabyte (not less).
Hard disk: the free space on a disk - 50 megabytes.
Sound system: a sound card.
Videocard: resolution 1024x768 points and a mode of color graphic
palette High Color - 16 bits.
The display: color, supporting the resolution 1024x768 points.
CD-ROM: not less than 16 X
The interface: connection of the device to a computer is carried out
through COM-port (RS-232). In case of absence in a computer of slot
for COM-port (for example, in a notebook in which is only USB-port),
connection of the device through the special device - adapter USBCOM-port is admissible.
ATTENTION! The given device (adapter USB-COM-port) in a
package is not delivered.
5
PART 3. PREPARATION FOR WORK
Preparation DiaDens-PC for operation does not demand special
skills. The device is connected to a personal computer through
standard port COM-port (RS-232).
The order of preparation for operation:
1.Switch off a computer.
2.Connect the device to a computer by means of an applied cable.
3.Connect a diagnostic electrode to appropriate plugs of a cable.
4.Include a computer.
5.Insert CD with program DiaDens-PC into the drive.
6.Open contents of a disk, start a file
Read_before_instalation.txt and follow instructions.
7.Switch On the device.
After installation of the program on a desktop of
Windows will appear two shortcuts.
Start program
ДиаДЭНС-ПК-VOLL or the
ДиаДЭНС-ПК-BIOREPER and through the menu Service specify
COM-port to which the device is connected.
Ports accessible to a choice in the
menu are displayed by a usual font,
and unavailable - pale.
6
PART 4.
WORK WITH THE CARD INDEX
Program DiaDens-PC complex allows to carry on an electronic file
of patients. Programs DiaDens-PC-VOLL and the DiaDens-PC
BIOREPER have the common file of patients, and the identical
interface of access to it. The window of a file opens automatically as
soon as you start any of programs of DiaDens-PC complex.
The file has following fields:
•
•
•
•
•
•
•
•
•
Number of a card (it is filled automatically);
Last name (required field);
Name;
Middle name;
Year of a birth (required field);
The address;
Phone;
Occupation;
Sex.
Window of a card index:
shortcuts by operation with a file:
F1 - the help;
F3 - search on a Last name;
F4 - to edit a card;
F5 - to create a new card.
7
4.1. PUTTING OF THE NEW CARD
1. Toolbars in a bookmark the File press the button
New
Card*. There will be a form into which it is necessary to enter the
information on the patient. Number of a card in a file and date of
putting of a card are entered automatically.
2. For saving the entered data press Save, for a cancelling of
creation of a new card press Cancel.
* On each button there is a ToolTip with assignment of the given
key, which will appear if to guide at it the mouse pointer.
8
4.2. EDITING OF THE CARD
1.From a window of a file select a necessary card, having placed on
it the cursor.
2.Press the button
Editing. There will be a form in which it is
possible to edit earlier the entered data. Number and date of putting
of a card are not accessible to editing.
9
4.3. DELETING OF THE CARD
1. From a window of Card Index select a necessary card, placed
on it the cursor..
2. Press the button
delete. There will be a form in which it
is necessary to confirm deleting, having pressed Yes or to cancel pressing No. At deleting a card diagnostics made in this card are
deleted all.
ATTENTION! Having deleted a card of the patient from a file, you
delete all data of receptions for this patient.
10
4.4. SEARCH OF THE CARD ON THE LAST NAME
1. For search of a card on a Last name it is necessary to press The
button
Search. There will be a window with string of input.
2. Enter a required Last name and press Enter or the button
Search. In case of absence of a required Last name in a file all file is
output, and the search string is cleared. If the required Last name is
present at a file the cursor is installed on a card with a required Last
name.
4.5. SORTING OF CARDS
Cards can be sorted appropriate buttons on the control panel of
Card Index :
by number of a card;
by name (on a Last name);
by date of putting a card.
Sorting by number is default
11
4.6. REVIEW OF CONTENTS OF THE CARD
For review of contents of a card (results before made diagnostics)
come into a card of the patient any of next ways:
• place the cursor on the necessary card and make double click the
mouse;
• place the cursor on the necessary card and press the enter;
• place the cursor on the necessary card and pass to a bookmark
Diagnostics.
Depending on what of programs you have loaded, the bookmark
Diagnostics the BIOREPER or Diagnostics VOLL/BIOVOLL will
open. In a left table are displayed: number of reception, date and the
measured power of testing (U test). The power of testing in mode
VOLL always is 1.27 V, at carrying out of research in mode BIOVOLL
the power of testing steals up individually. For review of diagnostic
data it is enough to make click a mouse on a line with the necessary
reception.
12
PART 5.
DIAGNOSTICS BIOREPER
The BIOREPER is a method electropunctur auricular diagnostics.
Research is spent with selection of individual power of testing for
each patient. A method allow to estimate the functional state of
bodies and systems to reveal a pathology at early stages, to select
the optimal scheme of treatment and inspection. Carrying out of
repeated diagnostics allows to estimate dynamics of the revealed
violations and efficiency of treatment.
ATTENTION! The method is intended for an estimation of the
functional state of internal bodies and systems, instead of for
installation of the diagnosis of disease.
5.1. THE WINDOW OF DIAGNOSTICS THE BIOREPER
The window of diagnostics opens right after an input in a card of the
patient.
13
Key assignment on the panel:
New reception - creates in a card of the patient record about
reception. Number and date are put automatically. After creation of
new reception the program switches the device in a mode the
BIOFRAME. After creation of 10 receptions an option New reception
becomes unavailable.
Save - saves all the measured results of current reception. The
option To save there are accessible right after definitions Utest.
Delete reception - deletes earlier the saved reception with results
of diagnostics.
Cancel - deletes record of current reception with results of
diagnostics.
On/OFF an automatic mode - at the pressed key the program
works in a mode of automatic fixing results of measurements, in not
pressed state to fix results of measurement the operator should,
using button " МОЩНОСТЬ-CAPACITY" «+» on the device.
To show/hide a picture of an auricle - allow to show/hide a
picture of an auricle. The picture substitutes the table with the list of
receptions.
The manual mode of data entry - is intended for depositing in
the program of data of diagnostics lead in a local mode (without
connection to a computer) and fixed on the paper. After pressing the
button the operator should enter earlier certain Utest and further to
bring data in the table with measurements.
ATTENTION! At creation of new reception presence of the on-line
device is checked. If the device is absent, the mode of Manual data
entry is unavailable.
14
The choice of the route - calls the menu of a choice of the
route. The operator can take advantage of three standard diagnostic
paths (the express, complete inspection, inspection on systems) or to
create up to five custom paths.
The report - calls the menu of a choice of the form of the report.
The operator can make preview of the report before printing. In the
table with the name of points in brackets numbers of points on
classification Tabeeva are specified.
5.2. NEW RECEPTION AND DIAGNOSTICS
Carrying out of diagnostics
1. Come into a card of the patient to which needs to lead
diagnostics, using following variants:
• place the cursor on the necessary card and make double click the
mouse;
• place the cursor on the necessary card and press the enter;
• place the cursor on the necessary card and pass to a bookmark
Diagnostics.
Be convinced, that you have come into the card necessary to you in a window title are specified Name of the patient.
2.Switch On the device, having pressed on it the button ВКЛ-ON.
New diagnostics. The program will
3.Press the button
switch the device in a mode the BIOREPER. There will be a menu of
a choice of the route of inspection.
4.Select the necessary route:
• The route the Express - the list of points for the general
estimation of a state inspected;
• The route On systems - the list of points, grouped on systems.
The doctor can independently select systems on which diagnostics
will be lead;
• The route Full inspection - the list of points;
15
• The individual route - in advance customized, at will of the
doctor, the route of inspection.
5. Define individual power of testing (Utest).
Active electrode place in point In-Tan which is on centerline
between eyebrowes on a bridge of the patient.
Press button " МОЩНОСТЬ-CAPACITY " «+» - process of
definition of power of testing which values are displayed in the right
lower corner of the screen of the device will start; in the left lower
corner the value of a proceeding current through point In-Tan is
shown. In the program more to the right of the table with points there
are the histograms displaying process of definition Utest.
16
After definition of power of testing in the upper string of the screen of
the device there will be its value « Uт = », in lower - the value of a
proceeding current in microamperes. It also will be individual power
for the given patient on the given procedure. The device is ready to
diagnostics.
ATTENTION! If the current will not reach 10 mkA value, the message
« МАЛ ТОК-SMALL CURRENT » is output is small. It means, that you
have not hit the nail In-Tan, it is necessary to change position of an
active electrode and to repeat procedure of definition of individual
power of testing.
After definition of power of testing it is possible to start
measurements in that point which specifies the cursor in the list.
6. Select a mode of measurement.
In the program two modes of diagnostics are stipulated:
• Automatic (automatic fixing of results of measurement);
• Manual (fixing of results by means of the button on the device).
17
5.3. THE AUTOMATIC MODE OF MEASUREMENT
By default the program works in an automatic mode. After
installation of an active electrode on its researched point it is
necessary to hold till the moment of automatic fixing result and
translation of the cursor on a following point. Dynamics of change of a
diagnostic current can be observed on the graphics.
At presence of a sound card and speakers fixing of result will be
accompanied by short beep.
For disconnecting a sound make click a mouse on "tick" opposite to
an inscription "Sound" which is on the panel of customization.
For disconnecting an automatic mode make click a mouse on "tick"
opposite to an inscription « the Automatic mode » which is on the
panel of customization. At disconnecting an automatic mode the
sound is disabled and the Manual mode of measurement switches
on.
5.4. THE MANUAL MODE OF MEASUREMENT
After installation of an active electrode on a researched point, on the
device it is necessary to press button " МОЩНОСТЬ-CAPACITY "
«+». While button " МОЩНОСТЬ-CAPACITY " «+» is pressed, the
measured current is displayed in the table with results.
For fixing a current it is necessary to let off the button
«МОЩНОСТЬ-CAPACITY + ». After fixing the cursor will
automatically be translated to a following point.
Lead measurements.
At carrying out of measurements inspected should hold a passive
electrode in a palm on the side of a tested auricle. An active
electrode place in a necessary point on an auricle. It is necessary,
that pressings on a point were uniform, identical, without slide off an
electrode from a point.
18
ATTENTION! It is not recommended to make measurements in the
same point more than two times successively.
Below the table of correspondence of numerical values of a current
with graphics interpretation is resulted.
Values of currents from 0-0.3 mkA and 0.3-0.7 are rounded off
automatically.
Conformity of sizes of a current in auricular points (AP) And degrees of expressiveness of a
pathology in points And orientations of functional changes.
Current intensity, in
AP mkA
Degree of expressed
pathology
Directivity of funcional
changes
<1
1-2
2-3
4-7
Moderate
and
Slighty
norm
Slighty
expresse
expresse d
d
hupofunction
8-11
Moderat
e
12-15
Express
ed
express
ed
norm
hupofunction
19
ATTENTION! Irrespective of a choice of the initial route of inspection
the doctor can change it during diagnostics. If earlier the measured
points have not got in the new route measurements will be saved. For
change of the route of diagnostics press the button
.
For saving all results of diagnostics press the button save.
5.5. CUSTOMIZATIONS OF THE REPORT
Through the menu File come into section Adjustments of the
report.
In this window surnames of the doctors who are carrying on
reception, and the name of the organization in which reception of
patients is carried on are entered.
Name accepting doctor and the name of the organization automatic
it will be printed on the form of the report.
20
5.6. THE ANAMNESIS
On a bookmark the Anamnesis are present three text weeding:
• The anamnesis;
• The conclusion;
• Recommendations.
It is possible to bring in the given fields appropriate text data about
the patient. In the further these data it is possible to output in the
general report about the lead reception. The information on the
selected patient is placed to the right of text boxes.
21
5.7. CREATION AND PRINTING OF THE REPORT
Given diagnostics can be displayed or on the printer. For this
purpose:
1.Enter into a card of the patient and guide the cursor at reception
for which it is required to print out the report
2.Press the button
the Report.
You can select various forms of the report, and also customize
output of additional data, such as the anamnesis, Recommendations
and the conclusion. Besides you can print out empty forms of the
report for carrying out of diagnostics by device DiaDens-PC in a local
mode. The information on the accepting doctor and the name of the
organization should be entered in customizations of the report, the
menu the File> Adjustments of the report.
5.8. STATISTICS
In the program possibility to compare results of different receptions
for one person that allows the doctor to observe a state of the patient
in dynamics is stipulated.
For this purpose from the menu Card Index select the necessary
patient and pass to a bookmark Statistics.
For each point all results write in one line of the table. Results of
later diagnostics are added in the same line from below. Thus, it is
possible to observe dynamics of measurements for any auricular
points. Also it is possible to output given statistics on the printer.
For this purpose press the button in a bookmark Statistics.
ATTENTION! The output list of points fixed, and its sequence
cannot be changed. In the list points auricular diagnostics are
presented all.
22
5.9. CUSTOMIZATION OF THE ROUTE
Program DiaDens-PC allows to create some individual paths
auricular diagnostics. This floppy customization allows any doctor to
customize the program in correspondence with the wishes.
For customization of paths pass in a bookmark Routes. From a
column Available points it is necessary to drag necessary points in a
column of the Point of the route. It is possible to move at once
group of points. For this purpose it is necessary, having pressed the
keyboard button Ctrl to mark by click of a mouse the necessary
points and further to press the button with the sign «>». Portable
points are always added by the end of the list. In the similar way it is
possible to move points back.
The polymarker in a column of the Point of the route does not
vary. If there was such necessity, move all points back, having
pressed the button « <<», and bring points in necessary sequence.
The Polymarker of the individual route during diagnostics will be such
to what it is presented in a column of the Point of the route. In the
dropping out list the Name of the route you can set the name for the
personal route. After points are entered into the list, and its name is
brought, press Save route.
23
ATTENTION! The Maximum quantity of customized routes - five.
5.10. INPUT DATA FROM THE KEYBOARD
Spending diagnostics by device DiaDens-PC in a local mode
without connection to a computer (for example, in field conditions),
you can fix results on a paper and in the further to enter given
diagnostics into a database from the keyboard.
For this purpose:
1. Come into a card of the patient which data it is required to enter.
To enter into a card it is possible in the next ways:
• place the cursor on the necessary card and make double click the
mouse;
• place the cursor on the necessary card and press the enter;
• place the cursor on the necessary card and pass to a bookmark
Diagnostics.
Be sure, that you have come into the card necessary to you, in a
window title are specified Name the patient.
New reception. There will be a window
2.Press the button
of a choice of the route. Select the route.
3.After a choice of the route press the button Manual input.
On the right there will be a window of input of individual power of
testing (Utest). Enter into it earlier the measured power of testing. At
input of a fractional part of value Utest the comma in string of input is
put automatically.
In the table at the left automatically there will be a record in which
will be:
• Number of reception for given cards (Number).
• Date of carrying out diagnostics (Date).
• Power of testing (Utest).
24
4. After input Utest there will be a following message:
Press OK, to the left of the cursor there will be an additional field for
data entry.
Enter value of a current into an appropriate cell and press Enter.
Numerical value will be transformed to the color histogram.
Below the table of correspondence of numerical values of a current
with graphics interpretation is Shown
Each rectangle of the diagram corresponds to value of a current in
one microampere. The current from 0.5 up to 1 microampere is
displayed as half of a rectangle. If the measured value of a current is
less 0.3 mkA it is necessary to enter value 0 into the table. If the
measured value of a current lays in a range 0.3-0.7мкА it is
necessary to enter into the table value 0.5 mkA. The operator can
bring remarks and remarks to each diagnostics in a window the
Note.
25
5. After input of all values it is necessary to press the button save.
For a cancelling of diagnostics to press the button cancel.
ATTENTION! The Maximum quantity of diagnostics written to one
card, is equal 10.
shortcuts:
F1 - the help
F2 - to save data
F5 - to start data entry
Del - to delete data
Esc - to cancel data entry
5.11. DELETING OF RECEPTION
In a bookmark Diagnostics the BIOREPER is the button
Delete reception by means of which it is possible to delete
receptions, not deleting a card of the patient. Receptions are deleted
one by one. At deleting reception are deleted: record about reception
in the table of receptions, all results of diagnostics made on this
reception.
For deleting reception from a card of the patient it is necessary:
1.To enter into a card.
2.With receptions to select from the table what it is necessary to
delete, and to press the button
ATTENTION! Remote data are not a subject to restoring.
26
PART 6. DIAGNOSTICS VOLL
VOLL is a method electropunctur meridional diagnostics. Research
is spent at standard power of testing 1.27 Century the Method allows
to estimate the functional state of twenty pair meridians and, mediate,
bodies and systems of an organism of the person, concerning them to
reveal a pathology at early stages, to select the optimal scheme of
treatment and inspection. Carrying out of repeated diagnostics allows
to estimate dynamics of the revealed violations and efficiency of
treatment.
The method also is intended for individual selection of biologically
active substances, homeopathist preparations, medicines.
ATTENTION! The mode is intended for an estimation of the
functional state of internal bodies and systems, instead of for
installation of the diagnosis of disease.
Researches can be made in several ways:
1.The express-estimation of the functional state on end points of
meridians (there is enough for carrying out of diagnostics in house
conditions).
2.Estimation of the functional state on check and other points of
meridians.
3.Medicamental testing.
6.1. THE WINDOW OF DIAGNOSTICS VOLL
The window of diagnostics opens right after an entrance in card of
the patient.
Key assignment on the panel:
New reception - creates in a card of the patient record
about reception. Number and date are put automatically. After
creation of new reception the program switches the device in mode
VOLL. After creation 10 receptions, an option New reception
becomes unavailable. The power of testing in the given mode
27
constant (1.27 V), is brought in column Utest of the table of
receptions automatically.
New diagnostics with selection of power of testing
(BIOVOLL) - includes mode BIOVOLL. Creates in a card of the
patient record about reception. Number and date are put
automatically. Switches the device in mode BIOVOLL. After definition
of power of testing, its value will be brought in a column Utest tables
of receptions.
To save - saves all the measured results of current reception.
To delete reception - deletes earlier the saved reception with
all measured results.
To continue measurements - allows to continue earlier the
saved reception in mode VOLL.
To cancel - deletes record of current reception with all
measured results.
To show/hide a picture - allows show/hide a picture of a
palm/foots. The picture appears instead of the table with the list of
diagnostics.
Mode of Medicamental testing - switch the program in a mode
- Medicamental testing.
The report - calls the menu for a choice of the form of the
report. The operator can make preview of the report before printing.
Output of Circular Diagrams - making of Circular Diagrams
(on KTI).
28
6.2. NEW RECEPTION AND DIAGNOSTICS
Opening of new reception
Come into a card of the patient for which it is required to lead
diagnostics. To enter into a card it is possible in the next ways:
• place the cursor on the necessary card and make double click the
mouse;
• place the cursor on the necessary card and press the enter;
• place the cursor on the necessary card and pass to a bookmark
Diagnostics.
Be sure, that you have come into the card necessary to you - in a
window title name and data of the patient are specified.
1.Switch On the device, having pressed on it the button ВКЛ-ON.
New diagnostics. The program will
2.Press the button
switch the device in mode VOLL.
ATTENTION! During carrying out of diagnostics bookmarks Card
Idex and Results of Medicamental testing are unavailable.
3. Select the route of inspection.
Review and choice of points of meridians can be carried out by means
of buttons on the panel which is below the list of points.
On the same panel it is possible to select variants of routes. For this
purpose press a key Routes.
Variants of routes:
• KTI (check measuring points of a meridian);
• Distal points (end points);
• All points.
29
For review and a choice of points of the necessary meridian it is
necessary to press a key with the name of this meridian.
By default in the list of points are output all KTI (check measuring
points of a meridian), 10 meridians on paintbrushes, and 10
meridians on legs.
In columns Left, Right the measured values of a current in
standard units (SU) in appropriate points on the left and right palms
and foots are displayed. Values below norm are displayed by dark
blue color, normal values are displayed by green color, and values
exceeding norm - red color.
In columns D1 and D2 values of " falling arrow », D1 for the first
second, D2 for the second are fixed.
To output the list of points of the necessary meridian, guide the
cursor on KTI this meridian and press enter or make double click a
mouse. That will return to list KTI, move the cursor on the uppermost
line where the name of a meridian is specified, and press Enter.
4. Lead measurements.
The express-estimation of the functional state:
Working part of an active dot electrode before each setting on a
skin moisten in physiological solution. Place an active dot electrode in
a projection of a point of measurement, step-by-step increasing
pressure an electrode before reaching stable digits on the display
screen. The same data are displayed in the program on «arrow»
indicator and on the graphics.
The recommended operating procedure: metrics KTI are measured;
if the operator considers, that any meridian needs to be inspected in
detail, he opens the list of points of this meridian and spends
additional inspection. Then it is possible to return to list KTI and to
continue diagnostics.
30
In the program two modes of diagnostics are stipulated:
• Automatic (automatic fixing of results of measurement);
• Manual(fixing of result by means of the button on the device).
To select a mode of measurement it is possible through the main
menu Service> Customizations.
ATTENTION! The patient holds a passive electrode in a hand on the
side opposite tested (for example, at testing the left hand or the left
foot the passive electrode is in the right hand of the patient). During a
session it is not allowed to touch the patient simultaneously with two
hands.
Diagnostics in an automatic mode
By default the program works in an automatic mode. After
installation of an active electrode on its researched point it is
necessary to hold till the moment of automatic fixing result and
translation of the cursor on a following point. On the screen of the
device there will be a maximum value « МАХ =... », and then the
device makes two measurements with an interval in one second,
showing a difference of current and maximum value of a current in
view of the sign. Within 3-4 seconds data are saved on the screen.
Data will be written in an appropriate cell in the table after that the
cursor will be translated to a following point.
Diagnostics in a Manual mode
For inclusion of a Manual mode it is necessary to come into the
menu Service> Customizations. After installation of an active
electrode on a researched point after reaching maximum value, not
separating an active electrode from a point of measurement and not
changing force of pressure an electrode on a skin, press button "
МОЩНОСТЬ-CAPACITY" «+». On the screen of the device there will
be a maximum value «МАХ =... », and then the device makes two
measurements with an interval in one second, showing a difference
of current and maximum value of a current in view of the sign. Within
3-4 seconds data are saved on the screen of the device. The result of
31
measurement will be written in that cell of the table on which the
cursor is placed. After data record in an appropriate cell, the cursor it
will be translated to a following point. Then the device will return to
the initial state, will produce the message «VOLL» - procedure of
measurement can be repeated on a following point of measurement.
ATTENTION! It is not recommended to spend samplings in the
same point more than three times successively as thus it is broken
hemodynamic in this point, that leads to deviation of metrics. Thereof
they will not have any more diagnostic value.
5. For saving all measured results of current reception press the
button save.
The analysis of the received results:
For the express-diagnostics: the norm makes approximately 50-65
units. Values over 65 units testify to hyperfunction or an inflammation;
values below 50-30 units characterize hypofunction or a state of a
degeneration; below 20 units - a state of an atrophy or complete
fallout of function.
For the express-diagnostics with usage of effect of " falling arrow »:
the difference between maximum and the subsequent values should
be no more than 5 units. If the difference exceeds 5 units it speaks
about activation of pathological processes in the bodies which are a
part of the given meridian.
ATTENTION! All (a choice of the route or a meridian) with lists of
points can be carried out manipulations during diagnostics. To make
intermediate saving of data it is not required.
32
6.3. CONTINUATION OF DIAGNOSTICS
For continuation before saved diagnostics press the button
CONTINUE After all necessary measurements press the button
Save. To spend measurements it is possible on all points, including
on earlier inspected. New results will write instead of old.
6.4. MEDICAMENTAL TESTING
The first measurement of parameters is spent without a medicine.
Then in an outline of a passive diagnostic electrode the tested
substance is located and repeated measurement in the same points
is spent. Comparing the received metrics, it is possible to draw
outputs on how the tested substance influences a state of researched
meridians. If necessary we can continue testing with other substance.
1. For carrying out of Medicamental testing after measurement in
necessary points (background inspection without tested substance)
press the button MT. Instead of arrow the indicator there will be a
panel for control of Medicamental testing.
And in the main list of points instead of a column with values of the
right side there will be columns with the name the Preparation 1 and
D (falling of an arrow through 1 sec). At the left there will be
background measurements for a left-hand side.
ATTENTION! During carrying out of Medicamental testing
bookmarks Card Index and Results of Medicamental testing are
unavailable.
2. On the panel it is necessary to select the inspected side, and
also to enter the name of a tested preparation and to press the enter
or button Ok. After that it is possible to start testing.
ATTENTION! Do not place researched samples inside of a passive
electrode unpacked as to wash an electrode is not recommended, and
particles of the sample, remaining on a surface of an electrode, will
distort values of measurements at subsequent diagnostics.
33
The program provides data storage for 3 preparations. After testing
one preparation it is possible to pass to another. For this purpose on
the control panel Medicamental testing select a following preparation,
having click with a mouse on a white circle to the left of an inscription
« the Preparation 1...3 ».
3. For review of a pivot table of results of Medicamental testing pass
to a bookmark Results of Medicamental testing. On this table
background measurements and data of Medicamental testing are
presented. Under the table there is a control panel review. With its
help it is possible to display only those data who you interest.
Interpretation of results
If the received metrics for the researched sample are in a corridor of
norm for the given patient the tested substance will render optimal
effect on an organism. If metrics strongly differ from average value
the tested substance for the given patient is undesirable.
6.5. THE ANAMNESIS
On a bookmark the Anamnesis are present three text weeding.
• The anamnesis;
• The conclusion;
• Recommendations.
It is possible to bring in them appropriate text data about the patient.
The information on the selected patient is placed to the right of text
boxes. In the further these data it is possible to output in the general
report about the lead reception.
34
6.6. CREATION AND PRINTING OF THE REPORT
Given diagnostics can be displayed or printed. For this purpose:
1. Enter into a card of the patient and guide the cursor on
reception, for which it is required to print out the report.
2. Press the button
open.
Report, the menu of the report will
You can select various forms of the report, such as
The anamnesis, Recommendations and the conclusion. The
information on the accepting doctor and the name of the organization
should be entered in customizations of the report, the menu the File>
Adjustments of the report.
35
6.7. CIRCULAR DIAGRAMS
For output of a pie chart press the button Diagram. On a window
title number and date of reception is displayed.
Under diagrams data of the patient are displayed. In the menu Sort
it is possible to change sort of the diagram - color/black-white. The
current graph it is possible to print out Printing through the menu.
Simultaneously on the screen it is possible to output diagrams only
for one reception. By operation with the diagram other functions of the
program become unavailable.
36
6.8. DELETING OF RECEPTION
In a bookmark Diagnostics VOLL/BIOVOLL is the button
delete reception. With its help it is possible to delete receptions
without deleting a card of the patient. Receptions are deleted one by
one. At deleting reception are deleted: record about reception in the
table of receptions, all results of diagnostics made in this reception.
For deleting reception from a card of the patient it is necessary to
enter into a card. Further to select from the table with receptions that,
which is necessary for deleting, and to press the button
ATTENTION! Remote data are not a subject to restoring.
37
PART 7.
DIAGNOSTICS BIOVOLL
BIOVOLL is the advanced modification of classical method VOLL.
Distinctive feature of method BIOVOLL is that measurements are
spent at individually picked up power of testing. The given refinement
allows to consider individual electroresistance the patient that causes
obtaining more exact results of diagnostics on matching with classical
method VOLL.
Research is spent with selection of individual power of testing for
each patient. The method allows to estimate the functional state of
meridians, bodies and systems, to reveal a pathology at early stages,
to select the optimal scheme of treatment and inspection. Carrying
out of repeated diagnostics allows to estimate dynamics of the
revealed violations and efficiency of treatment.
The method also is intended for individual selection of biologically
active substances, homeopathist preparations, medicines.
ATTENTION! The mode is intended for an estimation of the
functional state of internal bodies and systems, instead of for
installation of the diagnosis of disease.
Researches can be made in several ways:
1.The express-estimation of the functional state on end points of
meridians (there is enough for carrying out of diagnostics in house
conditions).
2.Estimation of the functional state on check and other points of
meridians.
3.Medicamental testing.
38
7.1. THE WINDOW OF DIAGNOSTICS BIOVOLL
The window of diagnostics BIOVOLL is the common with a window
of diagnostics VOLL and opens right after an entrance in a card of
the patient.
Keys assignments on the panel:
New reception - creates in a card of the patient record about
reception. Number and date are put automatically. After creation of
new reception the program switches the device in mode VOLL. After
creation 10 receptions, an option New reception becomes
unavailable. The power of testing in the given mode constant (1.27
V), is brought in a column Utest tables of receptions automatically.
New diagnostics with selection of power of testing
(BIOVOLL) - includes mode BIOVOLL. Creates in a card of the
patient record about reception. Number and date are put
automatically. Switches the device in mode BIOVOLL. After definition
of power of testing, its value will be brought in a column Utest tables
of receptions.
To save - saves all the measured results of current reception.
To delete reception - deletes earlier the saved reception with all
measured results.
To continue measurements - allows to continue earlier the
saved reception in mode VOLL.
To cancel - deletes record of current reception with all measured
results.
To show/hide a picture - allows show/hide a picture of a
palm/foot. The picture appears instead of Tables with the list of
diagnostics. A mode of Medicamental testing - installation of the
program in a mode of Medicamental testing.
39
Output of results to printing - calls the menu for a choice of the
form of the report. The operator can make preview of the report
before printing.
Output of Circular Diagrams - making of Circular Diagrams
(on KTI).
7.2. NEW reception AND DIAGNOSTICS
Opening of new reception
Come into a card of the patient for which it is required to lead
diagnostics. To enter into a card it is possible in the next ways:
• place the cursor on the necessary card and make double click the
mouse;
• place the cursor on the necessary card and press the enter;
• place the cursor on the necessary card and pass to a bookmark
Diagnostics.
Be sure, that you have come into the card necessary to you - in a
window title name and data of the patient are specified.
1.Switch On the device, having pressed on it the button ВКЛ-ON.
New diagnostics with definition of
2.Press the button
power of testing (BIOVOLL). The program will switch the device in
mode BIOVOLL.
3. Define individual power of testing (Utest).
Active electrode place in point In-Tan which is on centerline
between eyebrowes on a bridge of the patient.
40
Press the button « МОЩНОСТЬ-CAPACITY + » on the device process of definition of power of testing which will be displayed on
histograms will start.
ATTENTION! During carrying out of diagnostics the bookmark Card
Index is unavailable.
4. Select the route of inspection.
Review and choice of points of meridians can be carried out by
means of buttons on the panel which is below the list of points.
On the same panel it is possible to select variants of paths. For this
purpose press a key Routes.
Variants of routes:
• KTI (check measuring points of a meridian);
• Distal points (end points);
• All points.
For review and a choice of points of the necessary meridian it is
necessary to press a key with the name of this meridian.
By default in the list of points are output all KTI (check measuring
points of a meridian), 10 meridians on Palms, and 10 meridians on
Foots.
In columns Left, Right the measured values of a current in
standard units (SU) in appropriate points on the left both right hands
and foots are displayed. Values below norm are displayed by dark
blue color, normal values are displayed by green color, and the
values exceeding norm - red color.
In columns D1 and D2 values « falling of an arrow - D1 for the first
second, D2 - for the second second are fixed.
41
To output the list of points of the necessary meridian, guide the
cursor on KTI this meridian and press the enter or make double click
a mouse. To return to list KTI, move the cursor on the uppermost line
where the name of a meridian is shown, and press Enter.
5. Lead measurements.
The express-estimation of the functional state:
Working part of an active dot electrode before each setting on a
skin moisten physiological solution. Place an active dot electrode in a
projection of a point of measurement, step-by-step increasing
pressure an electrode before reaching stable digits on the display
screen. The same data are displayed in the program on «arrow»
indicator and on the graphics.
The recommended operating procedure. Metrics KTI are measured:
if the operator considers, that any meridian needs to be inspected in
detail, he opens the list of points of this meridian and spends
additional inspection. Then it is possible to return to list KTI and to
continue diagnostics.
In the program two modes of diagnostics are stipulated:
• Automatic (automatic fixing of result of measurement);
• Manual(fixing of result by means of the button on the device).
To select a mode of measurement it is possible through the main
menu Service> Customizations.
ATTENTION! The patient holds a passive electrode in a hand on the
side opposite tested (for example, at testing the left hand or the left
foot the passive electrode is in the right hand of the patient). During a
session it is not allowed to touch the patient simultaneously with two
hands.
42
Diagnostics in an automatic mode
After installation of an active electrode on its researched point it is
necessary to hold till the moment automatic fixings of result and
translation of the cursor on a following point. On the screen of the
device there will be a maximum value « MAX=... », and then the
device makes two measurements with an interval in one second,
showing a difference of current and maximum value of a current in
view of the sign. Within 3-4 seconds data are saved on the screen.
Data will be written in an appropriate cell in the table after that the
cursor will be translated to a following point.
Diagnostics in a Manual mode
At detection of maximum value, not separating an active electrode
from point of measurements and not changing force of pressure an
electrode on a skin, press the button « МОЩНОСТЬ-CAPACITY + ».
On the screen of the device there will be a maximum value « MAX=...
», and then the device makes two measurements with an interval in
one second, showing a difference of current and maximum value of a
current in view of the sign. Within 3-4 seconds data are saved on the
screen of the device. The result of measurement will be written in that
cell of the table on which the cursor is placed. After data record in an
appropriate cell, the cursor will be translated to a following point.
Then the device will return to the initial state, will produce the
message «VOLL» - procedure of measurement can be repeated on a
following point of measurement.
ATTENTION! It is not recommended to spend samplings in the
same point more than three times successively as thus it is broken
hemodynamics in this point, that leads to deviation of metrics. Thereof
they will not have any more diagnostic value.
6. For saving all measured results current reception press the
button save.
ATTENTION! At saving results of current research carrying out of
Medicamental testing is impossible also continuation of diagnostics in
43
mode BIOVOLL impossible, as each new diagnostics is made with
selection of individual power of testing.
The analysis of the received results:
For the express-diagnostics : the norm makes approximately 50-65
units. Values above 65 units testify to hyperfunction or an
inflammation; values below 50-30 units characterize hypofunction or
a state of a degeneration; below 20 units - a state of an atrophy or
complete fallout of function.
For the express-diagnostics with usage of effect of “falling arrow”:
the difference between maximum and the subsequent values should
be no more than 5 units. If the difference exceeds 5 units it speaks
about activation of pathological processes in the bodies which are a
part of the given meridian.
ATTENTION! All (a choice of the route or a meridian) with lists of
points can be carried out manipulations during diagnostics. To make
intermediate saving of data it is not required.
7.3. Medicamental TESTING
ATTENTION! At saving results of current research carrying out of
Medicamental testing is impossible.
The first measurement of parameters is spent without a medicine.
Then in an outline of a passive diagnostic electrode the tested
substance is located and repeated measurement in the same points
is spent. Comparing the received metrics, it is possible to draw
outputs on how the tested substance influences a state of researched
meridians. If it is required we can continue testing with other
substance.
1. For carrying out of Medicamental testing after measurement in
necessary points (background inspection without tested substance)
press the button Instead of «arrow» indicator there will be a panel for
control of Medicamental testing.
44
And in the main list of points instead of a column with values of the
right side there will be columns with the name the Preparation 1 and
D (« falling arrow » through 1 sec). At the left there will be
background measurements for a left-hand side.
ATTENTION! During carrying out of Medicamental testing
bookmarks Card Index and Results of Medicamental testing are
unavailable.
2. On the panel it is necessary to select the inspected side, and also
to enter the name of a tested preparation and to press the enter or
button Ok. After that it is possible to start carrying out of testing.
ATTENTION! Do not place researched samples inside of a passive
electrode unpacked as to wash an electrode it is not recommended,
and particles of the sample, remaining on a surface of an electrode,
will distort values of measurements at subsequent diagnostics.
The program provides data storage for 3 preparations. After testing
one preparation it is possible to pass to another. For this purpose on
the control panel Medicamental testing select following Preparation,
having click with a mouse on a white circle to the left of an inscription
« the Preparation 1...3 ».
3. For review of a pivot table of results of Medicamental testing pass
to a bookmark Results of Medicamental testing. On this table
background measurements and data of Medicamental testing are
presented.
Under the table there is a control panel review. With its help it is
possible to display only those data who you interest.
Interpretation of results
If the received metrics for the researched sample are in a corridor of
norm for the given patient the tested substance will render optimal
effect on an organism. If metrics strongly differ from average value
the tested substance for the given patient is undesirable.
45
7.4. THE ANAMNESIS
On a bookmark the Anamnesis are present three text weeding:
• The anamnesis;
• The conclusion;
• Recommendations.
It is possible to bring in them appropriate text data about the patient.
The information on the selected patient is placed to the right of text
boxes. In the further these data it is possible to output in the general
report about the lead reception.
7.5. Circular Diagrams
For output of a pie chart press the button Diagram On a window
title number and date of reception is displayed.
Under Diagram data of the patient are displayed. In the menu Sort it
is possible to change sort of the diagram - color/black-white. The
current graph it is possible to print out printing through the menu.
Simultaneously on the screen it is possible to output diagrams only
46
for one reception. By operation with the diagram other functions of the
program become unavailable.
47
7.6. CREATION AND PRINTING OF THE REPORT
Given diagnostics can be displayed or printed. For this purpose:
1. Enter into a card of the patient and guide the cursor on
reception, for which it is required to print out the report.
2. Press the button
open.
the Report, the menu of the report will
You can select various forms of the report, such as the anamnesis,
Recommendations and the conclusion. The information on the
accepting doctor and the name of the organization should be
entered in customizations of the report, the menu File>
Customizations of the report.
48
7.7. DELETING OF RECEPTION
In a bookmark Diagnostics VOLL/BIOVOLL is button
Delete reception. With its help it is possible to delete receptions
without deleting a card of the patient. Receptions are deleted one by
one. At deleting reception are deleted: record about reception in the
table of receptions, all results of diagnostics made in this reception.
For deleting reception from a card of the patient it is necessary to
enter into a card. After that from the table with receptions to select
what is necessary for deleting and to press button
Delete.
ATTENTION! Remote data are not a subject to restoring.
49
PART 8.
SHORTCUTS
By operation with a file:
F3 - search on a Last name
F4 - to edit a card
F5 - to create a new card
F6 - sorting by name (Last name)
F7 - sorting by number
F8 - sorting by date
Del - to delete a card
By operation in a bookmark Diagnostics:
F2 - to save data
F5 - new diagnostics VOLL and the BIOREPER
F6 - new diagnostics BIOVOLL
Del - to delete data
Esc - to cancel data entry
50
PART 9.
OPERATION WITH FILES OF THE DATABASE
All the data entered into the program (data of the patient, results of
diagnostics), are stored in a file of a database. The file of base has
*.den extension. By default the base is stored in the directory where
the program is placed. In the menu the File is available a set of
standard options: New, Open, Save as.
By means of an option New it is possible to create a new database.
For example, it is required to create separate base of group of
inspected people. Thus the old base will be saved under the current
name.
The option Open allows to open and work with earlier created
bases.
If necessary to save base under other name it is possible to use an
option Save as.
In the menu Service is an option Compress a database. At a
plenty of records in a file (more than 500), or yearly it is necessary to
start optimization of a database for accelerate its operation. Before
start of optimization it is recommended to make a backup copy of
base. For this purpose it is possible to take advantage of an option
Save as.
51
PART 10.
POSSIBLE PROBLEMS AND THEIR SOLUTIONS
1.
The device does not switch on.
The battery is absent or the battery is discharged - change the
battery.
2. The Program does not find accessible COM-port.
Call the expert (system administrator).
3. At attempt to start the program informs new reception:
« The device is not switched on or not selected COM-port »
To check up:
• Switch On of the device;
• Connection of a cable from the device to a computer;
• Whether it is correctly specified COM-port in customizations of the
program;
• Cable and the plug on absence of mechanical damages.
SPE ”Exclusive-store”
Ukraine 51400, Pavlograd,
Petrovskogo str.
tel\fax:+38 050 1548882
+38 056 3261449
e-mail:
[email protected]
www.exclusiv-store.com
52


![HiSoft Devpac 3 (text version) [1992] [Manual: PDF]](http://vs1.manualzilla.com/store/data/005668901_1-67cf8256fc448cd2edf58a11a6ec729e-150x150.png)