1
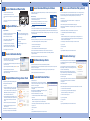
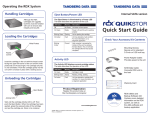
TECHNICAL SUPPORT
WHAT’S IN THE BOX?
1. AccuVault RDX
3
2. RDX 1-Terabyte Cartridge
3. AccuGuard Enterprise
License Activation Card
2
640GB
4
1
6
• Driver, firmware, and software updates
• Knowledge base articles
• Troubleshooting information
4. Bumper Guards
(to mount on bottom if unit
is placed horizontally)
• Product documentation
5. Ethernet Cable
• Email and phone technical support
6. U.S. Region Power Cord
AccuVault RDX DT 1TB
• Product warranty and registration
7
8. Hardware Stands
(to place unit vertically)
640GB
9. Quick Start Guide
9
AccuVault™RDX DT 1TB
with AccuGuard™
Make a note of your Product Model number and Product Serial number here
7. U.K. Region Power Cord
8
5
Visit the Support section of the Tandberg Data web site (http://www.tandbergdata.com)
for the following:
Model No.
DPS3005
Serial No.
Power Ratings
Before you Begin
Follow these guidelines before you setup the AccuVault RDX:
• Verify all items are included in the accessory kit.
AC Input Voltage
100-240 VAC
Rated Input Current
1,0 A
Rated Input Frequency
50/60 Hz
Safety Precautions
• Keep the packing materials and box in case you need to ship the unit later.
• Orient the unit horizontally or vertically:
1. For horizontal orientation, place the unit on a flat, stable work surface. Apply the bumper guards included in the
accessory kit to the bottom, if desired.
Be aware of the locations of the power on/off switch on the AccuVault RDX chassis as well as the room’s emergency
power-off switch, disconnection switch, or electrical outlet. If an electrical accident occurs, you can then quickly
remove power from the system.
2. For vertical orientation, use the supplied hardware stands.
Keep the area around the AccuVault RDX clean and free of clutter.
• Keep the area around the AccuVault RDX clean and free of clutter. Ensure that the system has adequate clearance for ventilation.
Remove any jewelry or metal objects from your body, which are excellent metal conductors that can create short
circuits and harm you if they come into contact with printed circuit boards or areas where power is present.
Electrostatic discharge is generated by two objects with different electrical charges coming into contact with each
other. An electrical discharge is created to neutralize this difference, which can damage electrical components and
printed circuit boards. The following measures are generally sufficient to neutralize this difference before contact is
made to protect your equipment from ESD:
AccuVault RDX System Features
• Use a grounded wrist strap designed to prevent static discharge.
• Keep all components and printed circuit boards (PCBs) in their antistatic bags until ready for use.
• Touch a grounded metal object before removing any board from its antistatic bag.
The power supply cord must include a grounded plug and must be plugged into a grounded electrical outlet.
Related Documentation
For additional information about the AccuVault RDX, refer to the following publications available from the Support section of the
Tandberg Data web site (http://www.tandbergdata.com):
• AccuVault RDX User Manual, Part Number 1019661
1
2
3
4
5
6
7
1
RDX cartridge eject button
7
VGA connector
2
Power button
8
USB 2.0 ports (4 each)
3
LCD panel
9
Gigabit Ethernet port
4
Power connector
10
Microphone connector (pink)
5
Keyboard connector (purple)
11
Audio Line-Out connector (green)
6
Mouse connector (green)
12
Audio Line-In connector (blue)
8
9
640GB
10 11 12
©2010 Tandberg Data. All rights reserved. AccuVault and AccuGuard are trademarks of
Tandberg Data. RDX is a registered trademark of ProStor Systems, Inc. All other trademarks
are the property of their respective owners.
P/N 1019089 Rev. A August 2010
#1019089A#
Tandberg Data Gmbh
Feldstrasse 81
44141 Dortmund, Germany
Agency Model Number: RMA-A-03-10
Model Number: DPS3005
www.tandbergdata.com
1
5
Connect Network and Power Cables
Launch AccuGuard Enterprise Software
• Connect the AccuVault ethernet network port to
an ethernet network port on a switch, hub, or router.
Complete the steps in the following three sections (obtain license keys, launch software, and activate license keys) to launch the
AccuGuard Enterprise software.
• Connect the power cord that is appropriate for your region to the AccuVault
RDX.
Obtain license keys
• Follow the steps on your AccuGuard License Activation card to obtain your
software license activation keys via email.
• Turn the power on by pushing the power button that is located on the front of
the AccuVault unit.
2
Note: There are two keys you must activate before you can use the AccuGuard
software: the Enterprise key and the Enterprise Remote Computers key.
Power connector
Configure LCD Panel
Ethernet port
Thank you for selecting Tandberg Data AccuGuard Enterprise
data protection software.
Key Benefits:
• Powerful Data Deduplication
• Quick Point-in-Time Recovery
• Fast File-Level Searching
• Microsoft Exchange Protection
• Microsoft SQL Protection
• Simple User Interface
1
Visit
www.tandbergdata.com/login
Account Sign In
2 Sign in or create an account
Enter the Promo Code
3 XXXXXX
4
License Agreement
Click to agree
5
Authorization Code
Enter the code LA C# ## ## ##
6 License Keys
Receive your keys via email
Launch software
• Click the “Start AccuGuard Data Protection Software” link located in the bottom-left corner of the AccuVault initial tasks window.
Configure IP Address
Set Language
If the network where you are installing the AccuVault RDX does
not use DHCP, you must manually enter an IP
address for the hardware via the LCD panel.
You can also change the language that the LCD panel
displays, if necessary. The default language is English.
To manually configure an IP address via the LCD panel:
• Press Menu on the LCD Panel window.
• Press Details on the LCD panel window.
• Press Language.
• Press Modify. At the next screen, press Modify again.
• Select the desired language from the menu.
• Using the touch keypad, enter the IP address,Gateway
Address, Subnet, and DNS. Press Accept after each entry.
• Press Accept.
To change the language:
• Press Accept again to return to the Home screen.
3
101XXXX Rev A
Tandberg Data AccuGuard™ License Activation
Connect via Remote Desktop
• From a Windows computer that is on the same network as the AccuVault RDX, open
Remote Desktop Connection. (For more information about Remote Desktop
Connection, see the AccuVault RDX User Manual.)
• If software updates are available, the Enterprise Upgrade wizard opens to update the software. Click Download to start the process.
Note: You can also verify you have the most current version of the software by clicking the “Check for Updates...” link in the right pane
of the AccuGuard interface.
Configure the following Windows Storage Server settings from the
Tandberg Data AccuVault initial task window:
1. Set time zone.
2. Change the AccuVault RDX computer name. You must change
the computer name before creating any data protection plans.
The plans use the computer name as a link when archiving data.
Note: Restart the computer after you change the computer
name. Do not add the domain at the same time.
Note: The options to select SQL Databases or Exchange Data only apply if the remote computer has SQL
or Exchange installed.
• Follow the Plan wizard to create a plan. Click Next after each task. There are six tasks:
1. Choose the data to protect (files and folders, databases, storage groups).
2. Select a store.
Note: AccuGuard Enterprise ships with a pre-configured store that you can select to get started. For more
information on creating stores or advanced store management, see the AccuVault RDX User Manual that is
available online from www.tandbergdata.com.
2. Click Add from the License Keys dialog box.
4. Type a plan name.
3. Type the Enterprise license key. Click OK.
5. Set a backup schedule.
4. Click Yes to activate the software The software activation dialog box opens.
6. Finish.
• Select the Internet radio button to activate the software via the Internet. Click Activate. Click OK to confirm.
Note: If you do not have Internet access, select the Telephone radio button and contact Tandberg Data technical
support for an activation PIN.
• Repeat steps 1 and 2 to activate the Enterprise Remote Computers license key.
6
Add Remote Backup Clients
• Select one of the methods listed (browse network, search active directory, or type computer name) to add a computer.
• Click OK. Repeat the process to add more remote computer clients.
7
Create Data Protection Plans
To create a protection plan:
• Expand “Remote Computers” in the left pane of the AccuGuard Enterprise
interface. Click on a remote computer name from the left pane. Click “Create a
Protection Plan...” from the right pane.
• Select one of the following: Files and Folders, SQL Databases,
or Exchange Data.
Note: The options to select SQL Databases or Exchange Data only apply if the
remote computer has SQL or Exchange installed.
• Follow the Plan wizard to create a plan. There are six tasks:
1. Choose the data to protect (files and folders, databases, storage groups).
3. Add the AccuVault RDX to the same network domain where the
remote computer clients reside. (Remote computer clients refers
to the systems that you intend to back up with the AccuGuard
software.)
2. Select a store.
4. Download and install any available critical Windows updates.
3. Select a temporary file location other than the default system C:\ drive location, if desired.
5. If necessary, set Regional and Language options from the
Windows Control panel.
4. Type a plan name.
Note: All other links in the initial tasks screen are provided for your
convenience. They are not required to run the AccuGuard software.
• Select one of the following: Files and Folders, SQL Databases, or Exchange Data.
3. Select a temporary file location other than the default system C:\ drive location, if desired.
• Expand “Remote Computers” in the left pane of the AccuGuard Enterprise interface. Click “All Computers” from the left pane. Click
“Add Computer...” from the right pane.
Complete Windows Storage Server Tasks
• Click “Local Plans” from the left pane. Click “Create a Protection Plan...” from the right pane of the
AccuGuard Enterprise interface.
1. Click Yes at the first dialog box that states, “Your license requires activation...”
• Type the following default Windows administrator password: Admin!. Click OK.
4
To create a local plan:
• Add the Enterprise activation key that you received via email. There are four steps to complete this process:
To add a remote computer that you intend to back up with the AccuGuard Enterprise software:
The Tandberg Data AccuVault initial tasks window and the AccuGuard
Navigator console are displayed.
Create a Local Protection Plan (optional)
You can create a local data protection plan for the AccuVault RDX server’s system C:\ drive. Creating a local plan for your
system C:\ drive allows you to restore all of your system and AccuGuard Enterprise configuration settings if necessary.
The process for creating a local plan is similar to creating a data protection plan for a remote computer.
Activate license keys
• In the Computer field, type the IP address that is displayed on the AccuVault RDX
LCD panel. Click Connect.
Note: The administrator password is case sensitive.
8
Note: AccuGuard Enterprise ships with a pre-configured store. For more
information on creating stores, see the AccuVault RDX User Manual.
5. Set a backup schedule.
6. Finish.
• Type the requested administrator password for the remote computer. Click OK.
• Type the requested administrator password for the AccuVault RDX. Click OK.
9
Schedule a Store Copy
A store is a virtual storage location that contains archived, de-duplicated data
and its associated cataloging information. A single store can be targeted by one
or more protection plans.
A store copy task creates a mirror of the store’s archived data to another store
that you designate. In most cases, you would use the store copy task to create a
mirror store on a removable RDX cartridge.
Note: Make sure you have an RDX cartridge inserted in the AccuVault unit
before you create a store copy task. The AccuGuard software automatically creates a removable disk store when the cartridge is inserted.
To create a store copy task:
• Select the store that you want to mirror from the “Stores” tree structure in the
left pane of the AccuGuard Enterprise interface. Click “Create Store Task...”
from the right pane.
• Select “Create Store Copy Task.”
• Follow the Store Copy wizard to create a store copy schedule. Click Next after each task. There are six tasks:
1. Select the source store and the destination store.
2. Select the archives to copy (files and folders, databases, storage groups).
Note: It is recommended that you choose to copy all archives.
3. Select all or most recent recovery points.
4. Type a store copy task name.
5. Set a copy schedule.
6. Finish.
• Type the requested administrator password for the AccuVault RDX. Click OK.