1
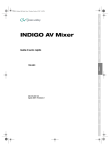
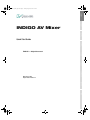
deutsch
INDIGO AV Mixer
español
english
INDIGO_Update_QSG.book Page 1 Tuesday, August 21, 2007 3:31 PM
français
Quick Start Guide
русский
中文
000 219 419 100
August 2007 / Revision 2
português
polski
italiano
ENGLISH — Original document
INDIGO_Update_QSG.book Page 2 Tuesday, August 21, 2007 3:31 PM
Contacting Grass Valley
On the www.thomsongrassvalley.com web site you get further information
on Thomson/Grass Valley and our products.
For Sales and Service, please contact your local dealer.
To find the account representative, dealer, or distributor nearest you, go to
www.thomsongrassvalley.com/indigo.
END-OF-LIFE PRODUCT RECYCLING NOTICE
Grass Valley’s innovation and excellence in product design also extends to the programs we’ve established to
manage the recycling of our products. Grass Valley has developed a comprehensive end-of-life product take
back program for recycle or disposal of end-of-life products. Our program meets the requirements of the European Union’s WEEE Directive and in the United States from the Environmental Protection Agency, individual state
or local agencies.
Grass Valley’s end-of-life product take back program assures proper disposal by use of Best Available Technology. This program accepts any Grass Valley branded equipment. Upon request, a Certificate of Recycling or a
Certificate of Destruction, depending on the ultimate disposition of the product, can be sent to the requester.
Grass Valley will be responsible for all costs associated with recycling and disposal, including freight, however
you are responsible for the removal of the equipment from your facility and packing the equipment
ready for pickup.
For further information on the Grass Valley product take back system please contact Grass
Valley at + 800 80 80 20 20 or +33 1 48 25 20 20 from most other countries. In the US
and Canada please call 800-547-8949 or 530-478-4148. Ask to be connected to the
EH&S Department. In addition, information concerning the program can be found at:
www.thomsongrassvalley.com/environment
CE Conformity
This product is in conformity with the following standards, corresponding
to the provisions of 89/336/EEC and 73/23/EEC:
Standard
EN 55103-1; -2 / Class A
EN 55022 / Class A
EN 61000-4-2
EN 61000-4-3
Version
1997-06
2000-05
2001-12
2001-12
Standard
EN 61000-4-4
EN 61000-4-5
EN 61000-4-6
EN 61000-4-11
Version
2002-07
2001-12
2001-12
2001-4-11
Find the detailed Declaration of Conformity on the CD shipped with your
INDIGO AV Mixer.
2
INDIGO AV Mixer Quick Start Guide
english
INDIGO_Update_QSG.book Page 3 Tuesday, August 21, 2007 3:31 PM
Section 1 — Safety Summary . . . . . . . . . . . . . . . . . . . . . . . . . . . . . . . . . . . . . . . . . . . .
9
Section 4 — Initial Settings . . . . . . . . . . . . . . . . . . . . . . . . . . . . . . . . . . . . . . . . . . . . .
13
Power-On . . . . . . . . . . . . . . . . . . . . . . . . . . . . . . . . . . . . . . . . . . . . . . . . . . . . . .
Video Settings . . . . . . . . . . . . . . . . . . . . . . . . . . . . . . . . . . . . . . . . . . . . . . . . . .
Audio Settings. . . . . . . . . . . . . . . . . . . . . . . . . . . . . . . . . . . . . . . . . . . . . . . . . .
Example Setup. . . . . . . . . . . . . . . . . . . . . . . . . . . . . . . . . . . . . . . . . . . . . . . . . .
13
13
14
14
Section 5 — Basic Operation . . . . . . . . . . . . . . . . . . . . . . . . . . . . . . . . . . . . . . . . . . .
15
Overview of Control Features . . . . . . . . . . . . . . . . . . . . . . . . . . . . . . . . . . . .
Selecting Sources . . . . . . . . . . . . . . . . . . . . . . . . . . . . . . . . . . . . . . . . . . . . . . .
Video Processing . . . . . . . . . . . . . . . . . . . . . . . . . . . . . . . . . . . . . . . . . . . . . . .
Audio Processing . . . . . . . . . . . . . . . . . . . . . . . . . . . . . . . . . . . . . . . . . . . . . . .
15
22
24
29
中文
русский
5.1
5.2
5.3
5.4
polski
11
11
12
12
12
italiano
. . . . . . . . . . . . . . . . . . . . . . . . . . . . . . . . . . . . . . . . . . . . . . . 11
Rear Panel Overview . . . . . . . . . . . . . . . . . . . . . . . . . . . . . . . . . . . . . . . . . . . .
Electric Power Supply . . . . . . . . . . . . . . . . . . . . . . . . . . . . . . . . . . . . . . . . . . .
Video Connections . . . . . . . . . . . . . . . . . . . . . . . . . . . . . . . . . . . . . . . . . . . . . .
Audio Connections. . . . . . . . . . . . . . . . . . . . . . . . . . . . . . . . . . . . . . . . . . . . . .
Monitors . . . . . . . . . . . . . . . . . . . . . . . . . . . . . . . . . . . . . . . . . . . . . . . . . . . . . . .
4.1
4.2
4.3
4.4
français
About this Manual . . . . . . . . . . . . . . . . . . . . . . . . . . . . . . . . . . . . . . . . . . . . . . . 9
Related Documents . . . . . . . . . . . . . . . . . . . . . . . . . . . . . . . . . . . . . . . . . . . . . 10
Before You Begin . . . . . . . . . . . . . . . . . . . . . . . . . . . . . . . . . . . . . . . . . . . . . . . 10
Section 3 — Connections
3.1
3.2
3.3
3.4
3.5
deutsch
Section 2 — Welcome . . . . . . . . . . . . . . . . . . . . . . . . . . . . . . . . . . . . . . . . . . . . . . . . . . . .
2.1
2.2
2.3
5
Safety Terms and Symbols . . . . . . . . . . . . . . . . . . . . . . . . . . . . . . . . . . . . . . . . 5
Warnings . . . . . . . . . . . . . . . . . . . . . . . . . . . . . . . . . . . . . . . . . . . . . . . . . . . . . . . 7
Cautions . . . . . . . . . . . . . . . . . . . . . . . . . . . . . . . . . . . . . . . . . . . . . . . . . . . . . . . . 8
português
1.1
1.2
1.3
español
Table of Contents
INDIGO AV Mixer Quick Start Guide
3
INDIGO_Update_QSG.book Page 4 Tuesday, August 21, 2007 3:31 PM
4
INDIGO AV Mixer Quick Start Guide
1
Safety Summary
français
Read and follow the important safety information below, noting especially
those instructions related to risk of fire, electric shock or injury to persons.
Additional specific warnings not listed here may be found throughout the
manual.
deutsch
Section
español
english
INDIGO_Update_QSG.book Page 5 Tuesday, August 21, 2007 3:31 PM
italiano
WARNING Any instructions in this manual that require opening the equipment cover
or enclosure are for use by qualified service personnel only. To reduce the
risk of electric shock, do not perform any servicing other than that contained in the operating instructions unless you are qualified to do so.
1.1 Safety Terms and Symbols
polski
1.1.1 Terms in this Manual
Safety-related statements may appear in this manual in the following
form:
português
WARNING Warning statements identify conditions or practices that may result in
personal injury or loss of life.
русский
CAUTION Caution statements identify conditions or practices that may result in
damage to equipment or other property, or which may cause equipment
crucial to your business environment to become temporarily non-operational.
1.1.2 Terms on the Product
The following terms may appear on the product:
WARNING — A personal injury hazard exists but is not immediately accessible as you read the marking.
CAUTION — A hazard to property, product, and other equipment is present.
INDIGO AV Mixer Quick Start Guide
5
中文
DANGER — A personal injury hazard is immediately accessible as you read
the marking.
INDIGO_Update_QSG.book Page 6 Tuesday, August 21, 2007 3:31 PM
Section 1 — Safety Summary
1.1.3 Symbols on the Product
The following symbols may appear on the product:
Indicates that dangerous high voltage is present within the
equipment enclosure that may be of sufficient magnitude to
constitute a risk of electric shock.
Indicates that user, operator or service technician should refer
to product manual(s) for important operating, maintenance,
or service instructions.
This is a prompt to note fuse rating when replacing fuse(s).
The fuse referenced in the text must be replaced with one
having the ratings indicated.
Identifies a protective grounding terminal which must be connected to earth ground prior to making any other equipment
connections.
Identifies an external protective grounding terminal which
may be connected to earth ground as a supplement to an
internal grounding terminal.
Indicates that static sensitive components are present which
may be damaged by electrostatic discharge. Use anti-static
procedures, equipment and surfaces during servicing.
6
INDIGO AV Mixer Quick Start Guide
Warnings
english
INDIGO_Update_QSG.book Page 7 Tuesday, August 21, 2007 3:31 PM
The following warning statements identify conditions or practices that can
result in personal injury or loss of life.
Dangerous voltage or current may be present — Disconnect power and remove
español
1.2 Warnings
Do not service alone — Do not internally service this product unless another
person capable of rendering first aid and resuscitation is present.
deutsch
battery (if applicable) before removing protective panels, soldering, or
replacing components.
Remove jewelry — Prior to servicing, remove jewelry such as rings, watches,
Avoid exposed circuitry — Do not touch exposed connections, components or
circuitry when power is present.
Use proper power cord — Use only the power cord supplied or specified for
français
and other metallic objects.
this product.
Ground product — Connect the grounding conductor of the power cord to
italiano
earth ground.
Operate only with covers and enclosure panels in place — Do not operate this
product when covers or enclosure panels are removed.
Use correct fuse — Use only the fuse type and rating specified for this
polski
product.
Use only in dry environment — Do not operate in wet or damp conditions.
Use only in non-explosive environment — Do not operate this product in an
High leakage current may be present — Earth connection of product is essential
before connecting power.
Double pole neutral fusing — Disconnect mains power prior to servicing.
português
explosive atmosphere.
中文
русский
Avoid mechanical hazards — Allow the fan to come to a stop before servicing.
INDIGO AV Mixer Quick Start Guide
7
INDIGO_Update_QSG.book Page 8 Tuesday, August 21, 2007 3:31 PM
Section 1 — Safety Summary
1.3 Cautions
The following caution statements identify conditions or practices that can
result in damage to equipment or other property.
Do not open the device — Unauthorized opening will void warranty.
Use correct power source — Do not operate this product from a power source
that applies more than the voltage specified for the product.
Provide proper ventilation — To prevent product overheating, provide equip-
ment ventilation in accordance with installation instructions. Do not
deposit any papers beneath the device — they could affect ventilation.
Place device only on a flat surface.
Use anti-static procedures — Static sensitive components are present which
may be damaged by electrostatic discharge. Use anti-static procedures,
equipment, and surfaces during servicing.
Do not use CF card with a PC — The CF card is specially formatted. The software stored on the CF card could be deleted.
Do not operate with suspected equipment failure — If you suspect product
damage or equipment failure, have the equipment inspected by qualified
service personnel.
Route cable properly — Route power cords and other cables so that they are
not likely to be damaged. Properly support heavy cable bundles to avoid
connector damage.
Use correct power supply cords — Power cords for this equipment, if provided,
meet all regional electrical codes. Operation of this equipment at voltages
exceeding 130 VAC requires power supply cords which comply with
NEMA configurations. International power cords, if provided, have the
approval of the country of use.
Use correct replacement battery — This product contains a battery. To reduce
the risk of explosion, check polarity and replace only with the same or
equivalent type recommended by manufacturer. Dispose of used batteries
according to the battery manufacturer’s instructions.
The unit does not contain any user serviceable parts. If problems arise,
please contact your local dealer.
8
INDIGO AV Mixer Quick Start Guide
Section
2
deutsch
Welcome
español
english
INDIGO_Update_QSG.book Page 9 Tuesday, August 21, 2007 3:31 PM
português
polski
italiano
français
Welcome to the INDIGO AV Mixer. The INDIGO AV Mixer uniquely
combines advanced features of an SD/HR video production switcher, a
seamless switcher, and an audio mixer.
2.1 About this Manual
This Quick Start Guide is designed to help users who have a general understanding of how a video/audio mixer works and who want to start immediately.
The Quick Start Guide provides an overview of the connections, tells you
how to setup the INDIGO AV Mixer after power-on, and explains the basic
operation.
INDIGO AV Mixer Quick Start Guide
9
中文
русский
Figure 1. The INDIGO AV Mixer
INDIGO_Update_QSG.book Page 10 Tuesday, August 21, 2007 3:31 PM
Section 2 — Welcome
2.2 Related Documents
You will find the complete User Manual on the CD-ROM contained in the
INDIGO AV Mixer package. It provides you with comprehensive information about your INDIGO AV Mixer.
Additionally, you will find the following information at
www.thomsongrassvalley.com:
•
Online versions of Documentation — Current versions of product catalogs, brochures, data sheets, ordering guides, planning guides, manuals, and release notes in .pdf format are available for download.
•
FAQ Database — Search our Frequently Asked Questions (FAQ) database to find quick answers to common questions and troubleshoot
problems.
•
Software Downloads — Software updates, drivers, and patches are
available for download.
2.3 Before You Begin
Check if your INDIGO AV Mixer package is complete. The following
items are included:
10
•
INDIGO AV Mixer device
•
Two power supply cables (US and Continental Europe)
•
Tally/GPI/GPO breakout box + cable (if ordered)
•
Digital Audio breakout cable (if ordered)
•
HiRes Board (if ordered)
•
CD-ROM with the User Manual in different languages
•
This multilingual Quick Start Guide
INDIGO AV Mixer Quick Start Guide
Section
3
deutsch
Connections
español
english
INDIGO_Update_QSG.book Page 11 Tuesday, August 21, 2007 3:31 PM
italiano
The following figure shows the rear panel of the INDIGO AV Mixer with
its various connectors:
français
3.1 Rear Panel Overview
polski
35"/54
3.2 Electric Power Supply
3.2.1 AC Power Cable
Use the power cable to connect the power inlet of the INDIGO AV Mixer
to the wall outlet.
If required, ask your dealer for an appropriate power cable.
中文
Note
русский
português
Figure 2. Rear panel of the INDIGO AV Mixer
3.2.2 Ground Screw
Use the ground screw to connect the unit to the ground terminal.
INDIGO AV Mixer Quick Start Guide
11
INDIGO_Update_QSG.book Page 12 Tuesday, August 21, 2007 3:31 PM
Section 3 — Connections
3.3 Video Connections
The provides various analog and digital video inputs and outputs. Via the
optional HiRes board you can also make use of HD inputs and outputs as
well as internal upscaled and downscaled signals.
Figure 3. Video input and output connections
3.4 Audio Connections
The INDIGO AV Mixer provides various analog and digital audio inputs
and outputs.
35"/54
Figure 4. Audio input and output connections
3.5 Monitors
The INDIGO AV Mixer provides program, preview, and auxiliary
monitor outputs.
Figure 5. Monitor outputs
12
INDIGO AV Mixer Quick Start Guide
4
Initial Settings
français
If you switch on your INDIGO AV Mixer for the first time or use a new
setup (i.e. you connected different or additional devices) you have to
adjust the video and audio settings after first power-on.
deutsch
Section
español
english
INDIGO_Update_QSG.book Page 13 Tuesday, August 21, 2007 3:31 PM
4.1 Power-On
polski
italiano
Use the power switch on the rear side to switch on your INDIGO AV
Mixer.
Figure 6. The power switch
4.2 Video Settings
português
Configure the video settings as needed, according to the connected
devices:
1. Select the SETUP main menu to make your settings.
3. Press the Output button and select the desired Graphic Standard
(resolution) and Type (PAL or NTSC).
4. If desired, in the CONTROL PANEL submenuControl Panel Submenu on
page 135, press Button Assign and set the video signal routing, i.e. which
video Sources are routed to which Buttons on the Background
crossbar.
By default, the buttons are assigned corresponding to the number of
the video signal input channel, SD stills are assigned to buttons.
INDIGO AV Mixer Quick Start Guide
13
中文
русский
2. In the VIDEO submenu, press the Input button to list all video inputs and
set the signal Type for each (used) video input.
INDIGO_Update_QSG.book Page 14 Tuesday, August 21, 2007 3:31 PM
Section 4 — Initial Settings
4.3 Audio Settings
To adjust the audio settings:
1. Select the SETUP main menu.
2. In the AUDIO submenu, press the Operation Mode button to select one of
the following modes:
•
8 Stereo: You can use the audio signals of eight stereo sources,
deriving from RCA, TRS 1/4’’, XLR, AES/EBU signals or even deembedded audio from video streams.
•
7 Stereo, 2 Mic: You can use seven stereo audio signals and two
microphones that are connected to LINE/MIC IN inputs.
•
6 Stereo, 4 Mic: You can use six stereo audio signals and up to four
microphones that are connected to LINE/MIC IN inputs.
3. If desired, in the CONTROL PANEL submenuControl Panel Submenu on
page 135, press Fader Assign and set the audio signal routing (i.e. which
audio source is routed to which fader in the Audio Control Subpanel.
By default, the faders are assigned according to the number of the
audio signal input channel, for example, the signal from audio input 3
is routed to fader 3.
4.4 Example Setup
The following figure shows a possible setup:
Figure 7. Connections for a big event setup
14
INDIGO AV Mixer Quick Start Guide
Section
5
deutsch
Basic Operation
español
english
INDIGO_Update_QSG.book Page 15 Tuesday, August 21, 2007 3:31 PM
français
5.1 Overview of Control Features
5.1.1 Control Panel
(1) Touch Screen with Digipots (see page 16)
•
(2) Delegation Subpanel (see page 17)
•
(3) Crossbars for Bus and Source Selection (see page 17)
•
(4) Main Transitions Subpanel with Transition Lever Arm (see page 18)
•
(5) Numeric Input Subpanel (see page 20)
•
(6) Audio Control Subpanel (see page 20)
•
(7) Joystick (see page 21)
中文
русский
•
português
The control features of the INDIGO AV Mixer are grouped by functionality into the following main sections:
polski
The buttons on the Control Panel are used during live operation for fast
and real time control. The menus, accessed via the Touch Screen, allow full
control and edit facilities and are mainly used to set up effects and for
system configuration.
italiano
The INDIGO AV Mixer is operated by using the buttons, Digipots, lever
controls, and the graphical menu on the Touch Screen.
INDIGO AV Mixer Quick Start Guide
15
INDIGO_Update_QSG.book Page 16 Tuesday, August 21, 2007 3:31 PM
Section 5 — Basic Operation
The following figure shows the Control Panel of the INDIGO AV Mixer
with its various control features:
INDIGO
AV MIXER
7
1
ON
2
4
5
1
Learn
+/-
2
7
8
9
4
5
6
1
2
3
FX
BGD
Key 1
Key 2
PFL
NEXT TRANSITION
USER
MASTER VOLUME
SD
Shift
Hi-Res
DELEGATE
Key 1
Cut
Key 2
Aux 1
Aux 2
FS
Aux 3
Del
0
Auto
Cut
KEY 1
CUT
Enter
Auto
KEY 2
AUTO
FTB
Shift
1
2
6
dB
+10
BUS DELEGATION
BUS
3
4
5
6
7
8
9
10
+10
+5
+5
+0
+0
-5
-5
BACKGROUND
3
-10
Shift
1
2
3
4
5
6
7
8
9
10
BACKGROUND PRESET
Shift
1
2
3
4
5
6
7
8
9
-10
-15
-15
-20
-20
-30
-40
-50
-00
-30
-40
-50
-00
10
1
2
3
4
5
6
Figure 8. Control Panel
5.1.2 Touch Screen with Digipots
Touch Screen
The Touch Screen allows direct interaction with menu controls displayed
on the screen. The screen is designed to work with a finger or other soft
objects. The Touch Screen is sensitive to a single pressure location only, so
only one touch surface control can be adjusted at a time.
Digipots
The Digipots below the graphical display can be used to dial in parameter
values for functions displayed on the Touch Screen. Pressing a Digipot sets
the parameter value to default.
16
INDIGO AV Mixer Quick Start Guide
Overview of Control Features
english
INDIGO_Update_QSG.book Page 17 Tuesday, August 21, 2007 3:31 PM
español
5.1.3 Delegation Subpanel
53 % 2
3$
(I2ES
+EY
+EY &3
!UX
!UX !UX
deutsch
$% ,% ' !4%
" 5 3 $ % , % ' ! 4 )/ .
français
Figure 9. Delegation Subpanel
User
italiano
Use buttons 1 or 2 to quickly and directly access a specific point in the
menu hierarchy, for example, to call up Calibration in the SETUP main
menu.
Delegate
Use the DELEGATE section to determine which M/E is active: SD or HiRes.
polski
Bus Delegation
português
To simplify use, the INDIGO AV Mixer panels provide alternate buses
accessed by BUS DELEGATION buttons. Press a BUS DELEGATION button to
change which bus is affected by pressing a source select button on the
Bus Crossbar.
5.1.4 Crossbars for Bus and Source Selection
The INDIGO AV Mixer includes several inputs which can be used universally for video or key signals.
русский
" 53
3HIFT
"!#+'2/5.$
3HIFT
3HIFT
中文
"! # + '2/5.$ 0 2 % 3 % 4
Figure 10. Crossbars for Bus and Source Selection
INDIGO AV Mixer Quick Start Guide
17
INDIGO_Update_QSG.book Page 18 Tuesday, August 21, 2007 3:31 PM
Section 5 — Basic Operation
Bus
The Bus Crossbar is used to select key and fill signals as well as sources for
AUX 1 to 3.
Background
The Background Crossbar indicates which signal is selected as the current
background picture. Pressing another key in this row performs a hard cut
to another background picture. The selected background picture can be
viewed on the corresponding program monitor.
Background Preset
The Background Preset Crossbar is used to pre-select and indicate the
background involved in a signal transition. The preset background picture
and the selected modifications (for example, keys) can be viewed on the
corresponding preview monitor.
The background and preset buses operate in “Flip-Flop” mode. After the
background transition is complete, the preset source is automatically
selected on the background bus and the original background source is
automatically “flipped” to the preset bus.
5.1.5 Main Transitions Subpanel with Transition Lever Arm
The transition controls are used to select the signal elements that will be
involved in the transition (background and/or keys), define the type of
transition and perform the transition.
The control is performed in two sections:
•
Main Transition Section with all main controls for transitions
•
Transition Lever Arm for manual transition control
Main Transition Elements
Use the Key 1, Key 2, and BGD buttons in the NEXT TRANSITION section to select
the elements that will change during the next transition.
Use the CUT and AUTO buttons and the Transition Lever Arm to perform main
transitions. After a transition is complete, the background source selections flip-flop, readying the Background Preset bus for the next source
selection.
18
INDIGO AV Mixer Quick Start Guide
Overview of Control Features
'9
#(%
,FZ ,FZ .JY
$VU
$65
.JY
,&:
'5#
"650
deutsch
,&:
español
/&9553"/4*5*0/
$VU
english
INDIGO_Update_QSG.book Page 19 Tuesday, August 21, 2007 3:31 PM
Figure 11. Main Transition Section
français
FX
Activates the selected effects for each layer and makes them usable for
transitions. The effects are selected and adjusted in the TRANSITION main
menu.
italiano
If the FX button is deactivated, the selected effects are ignored and Mix is
used for transitions.
中文
The Transition Lever Arm is used to manually perform a transition. You can
move the lever in either direction to run a transition due to the flip-flop
architecture of the buses. Moving the lever from one limit to the other performs a complete transition.
русский
Figure 12. Transition Lever Arm
português
polski
Transition Lever Arm
INDIGO AV Mixer Quick Start Guide
19
INDIGO_Update_QSG.book Page 20 Tuesday, August 21, 2007 3:31 PM
Section 5 — Basic Operation
5.1.6 Numeric Input Subpanel
You can also adjust parameter values via the Numeric Input Subpanel. In
this case, the Shift button outputs the decimal point (“.”) and the Learn
button outputs the minus sign (“-”).
,EARN
3HIFT
$EL
%NTER
Figure 13. Numeric Input Subpanel
You can use the Numeric Input Subpanel to store and call up E-MEMs.
These are mixer state presets. Use the numeric keys to have quick access to
the first 20 presets. Access numbers 11 to 20 with the Shift button. In the
E-MEM main menu, you can access stored presets with a number higher
than 20.
5.1.7 Audio Control Subpanel
/.
0&,
- !3 4% 2 6/,5- %
D"
Figure 14. Audio Control Subpanel
20
INDIGO AV Mixer Quick Start Guide
Overview of Control Features
english
INDIGO_Update_QSG.book Page 21 Tuesday, August 21, 2007 3:31 PM
Mute/PFL Buttons
español
PFL (Pre-Fader-Listening)
Changes to PFL mode. This allows you to hear the audio signal on the
headphones as it sounds before the fader.
On
deutsch
Turns the related audio channel on/off.
LED Peak-Meters
Green: from - ∞ to -6 dB
•
Yellow: -6 dB to -2 dB
•
Red: -2 dB to +10 dB
Faders
The faders adjust the input levels of the audio assigned to the INDIGO AV
Mixer channels within the range of - ∞ to +10 dB.
italiano
•
français
The meters read the inputs assigned to the faders and display the channel
levels with three different colors:
polski
Use them to level the volumes of different audio sources.
Master Volume Button
The Master Volume Button lets you adjust the overall volume.
There are 2 phones connectors: one on the Control Panel and one on the
rear panel. They have the same source, but separate amplifiers.
5.1.8 Joystick
中文
The Joystick in the upper right section of the INDIGO AV Mixer provides
easy positioning and sizing of keys (for example, positioning PIPs). On
Chromakey, the Joystick can be used to position the cursor for selecting the
color area to perform the key processing.
русский
The phones connectors output the Main out, Sub-Out or channel PFL
signal.
português
Headphones
INDIGO AV Mixer Quick Start Guide
21
INDIGO_Update_QSG.book Page 22 Tuesday, August 21, 2007 3:31 PM
Section 5 — Basic Operation
5.2 Selecting Sources
This section provides information on selecting sources as video and audio
signals, keys sources, and Stills.
5.2.1 Video
Select video signals with the crossbar buttons (see Crossbars for Bus and
Source Selection on page 17). Use the SETUP main menu to assign video
sources to the buttons.
" 53
3HIFT
"!#+'2/5.$
3HIFT
"! # + '2/5.$ 0 2 % 3 % 4
3HIFT
See also Video Settings on page 13 for information on configuring video settings.
Video Sources
The video signals for the program monitors are selected in the middle
crossbar row, labeled as BACKGROUND. Pressing another key in this row performs a hard cut to another signal.
Keys Sources, Auxes and Stills
Key and fill signals, and auxiliary outputs are selected in the top crossbar
row, labeled as BUS.
Preview of Signal Transitions
The preset background involved in a signal transition together with the
selected modifications (for example, keys) is selected in the bottom
crossbar row, labeled BACKGROUND PRESET. Pressing a key in this row shows
the selected preset background on the corresponding preview monitor
(LAH preview).
Onscreen Preview
Use the Onscreen Preview button in the upper left corner of the Touch Screen
to open/close the Onscreen Preview video overlay window.
22
INDIGO AV Mixer Quick Start Guide
português
polski
italiano
français
deutsch
The Onscreen Preview window lets you display program, preview, and
Aux1/2 signals of SD outputs directly on the Touch Screen. Thus, you can
check the signal output or adjust a chroma key without having to use an
external monitor.
español
Selecting Sources
english
INDIGO_Update_QSG.book Page 23 Tuesday, August 21, 2007 3:31 PM
Figure 15. Onscreen Preview window
Use the faders and the AUDIO MIXER main menu to control the audio signals.
Use the CONTROL PANEL submenu.
русский
5.2.2 Audio
You can assign an audio stream to a video source.
中文
See also Audio Settings on page 14 for information on configuring the audio
settings.
INDIGO AV Mixer Quick Start Guide
23
INDIGO_Update_QSG.book Page 24 Tuesday, August 21, 2007 3:31 PM
Section 5 — Basic Operation
5.3 Video Processing
This section shows you how to make transitions, effect transitions, titles,
and chroma keys.
5.3.1 Making a Background Transition
To make a background transition:
1. Select SD or HiRes [DELEGATE].
3$
(I2ES
$% ,% ' !4%
2. Select the desired source on the Preset bus.
"! # + '2/5.$ 0 2 % 3 % 4
3HIFT
3. Make sure background transition is selected, i.e. the BGD [Next Transition]
button is ON.
"'$
+E Y +EY . %8442!.3)4)/.
4. If necessary, select the TRANSITION main menu, select the SD EFFECTS or
HR EFFECTS submenu (depending on delegation), and press SD BGND or
HR BGND.
5. Select the desired category and the pattern, for example, 3D and Ripple.
Note
If the FX button is OFF, only Mix is used for transitions. If FX is ON, the
selected effects are used for transitions.
Note
For HiRes, only Wipes and Mix are available.
6. Press the AUTO button.
#54
&4"
!54/
– or –
Move the Transition Lever Arm to the opposite position.
24
INDIGO AV Mixer Quick Start Guide
Video Processing
english
INDIGO_Update_QSG.book Page 25 Tuesday, August 21, 2007 3:31 PM
This type of transition inserts a text into the background scene. The background remains unaffected.
Note
The following example uses Key 1 in SD mode, but you can also use Key 2
and/or HiRes mode.
español
5.3.2 Making a Title
deutsch
To make a title:
1. Select Key 1 [NEXT TRANSITION].
Key 1 [BUS DELEGATION] is selected automatically.
3$
français
53 % 2
(I2ES
$% ,% ' !4%
+EY
+EY &3
!UX
!UX !UX
italiano
" 5 3 $ % , % ' ! 4 )/ .
2. Make sure Key 1 [BUS DELEGATION] is selected.
3. Make sure KEYER main menu is selected.
4. Select the SD KEY 1 submenu and press Type.
polski
5. Select Luma as key type.
6. Press the Source button to select key sources.
Fill: Characters from title generator
português
Key: “Alpha channel” from title generator
7. Press the Adjust button.
8. Press the Auto button.
9. Select the mode (Clip Gain or Cleanup Density)
русский
If necessary, adjust the settings.
10. Press the Cut [KEY 1] or Mix [KEY 1] button.
#UT
-IX
+% 9 #UT
-IX
+%9 中文
– or –
Press the CUT or AUTO button.
– or –
Move the Transition Lever Arm to the opposite position.
INDIGO AV Mixer Quick Start Guide
25
INDIGO_Update_QSG.book Page 26 Tuesday, August 21, 2007 3:31 PM
Section 5 — Basic Operation
5.3.3 Making a Chroma Key
This type of transition inserts one video signal in place of areas of a particular color of another video signal. The background remains unaffected.
Note
The following example uses Key 1 in SD mode, but you can also use Key 2
and/or HiRes mode.
To make a chroma key:
1. Select Key 1 [NEXT TRANSITION].
Key 1 [BUS DELEGATION] is selected automatically.
2. Make sure Key 1 [BUS DELEGATION] is selected.
3. Make sure KEYER main menu is selected.
4. Select the SD KEY 1 submenu and press Type.
5. Select Chroma as key type.
6. Press the Source button to select key and fill sources.
7. Press the Adjust button.
8. Press the Auto button.
This adjusts the Chroma and Selectivity values automatically.
– or –
Press the Cursor button.
Adjust the Cursors position and size with the Joystick to set the color
values used for the chroma key.
Note
Auto and Cursor buttons are not available in HiRes mode.
9. If required, adjust the Chroma and Selectivity values manually.
10. Press the Cut [KEY 1] or Mix [KEY 1] button.
– or –
Press the CUT or AUTO button.
– or –
Move the Transition Lever Arm to the opposite position.
26
INDIGO AV Mixer Quick Start Guide
Video Processing
english
INDIGO_Update_QSG.book Page 27 Tuesday, August 21, 2007 3:31 PM
5.3.4 Making an Effect Transition
Note
español
With this type of transition, the background remains unaffected.
The following example uses Key 1 in SD mode, but you can also use Key 2
and/or HiRes mode.
To make an effect transition:
deutsch
1. Select Key 1 [NEXT TRANSITION].
Key 1 [BUS DELEGATION] is selected automatically.
2. Make sure Key 1 [BUS DELEGATION] is selected.
français
3. Make sure KEYER main menu is selected.
4. Select the SD KEY 1 submenu and press Type.
5. Select Type.
6. Select Source.
italiano
7. Go to the TRANSITION main menu.
8. Select SD Key 1 In.
9. Select the desired category and pattern, for example, Slide and Left.
polski
10. If necessary, go to the DURATION submenu to adjust the timing settings.
11. Select SD Key 1 Out.
12. Select the desired category and pattern, for example, Wipe and Circle.
português
13. If necessary, go to the DURATION submenu to adjust the timing settings.
14. Make sure FX is selected.
15. Press the Mix [KEY 1] button.
– or –
русский
Press the AUTO button.
– or –
中文
Move the Transition Lever Arm to the opposite position.
INDIGO AV Mixer Quick Start Guide
27
INDIGO_Update_QSG.book Page 28 Tuesday, August 21, 2007 3:31 PM
Section 5 — Basic Operation
5.3.5 Making a PiP (Picture in Picture) in SD Mode
This type of transition inserts a picture into the background scene. The
background remains unaffected.
Note
The following example uses Key 1 in SD mode, but you can also use Key 2.
To make a PiP:
1. Select Key 1 [NEXT TRANSITION].
Key 1 [BUS DELEGATION] is selected automatically.
2. Make sure Key 1 [BUS DELEGATION] is selected.
3. Make sure KEYER main menu is selected.
4. Select the SD KEY 1 submenu and press Type.
5. Select PiP as Type.
6. Press the Source button and select the Fill source from the list.
7. Press Transform.
8. Make sure the Enable button is activated.
9. Adjust Top Corner, Bottom Corner, and 2D Size as desired to position
and resize the picture.
10. Press the Cut [KEY 1] or Mix [KEY 1] button.
– or –
Press the CUT or AUTO button.
– or –
Move the Transition Lever Arm to the opposite position.
5.3.6 Making a PiP (Picture in Picture) in HR Mode
Making a PiP in HR mode is basically the same as in SD mode.
Note
In HR mode, the Fill source must not be the same as the background source.
5.3.7 PiP within a PiP in HR Mode
In HR mode, there is also the possibility to have a PiP within a PiP.
Find the detailed description in the User Manual.
28
INDIGO AV Mixer Quick Start Guide
Audio Processing
english
INDIGO_Update_QSG.book Page 29 Tuesday, August 21, 2007 3:31 PM
5.4 Audio Processing
español
This section shows you how to process and mix audio signals with the
INDIGO AV Mixer.
Audio Follow Video
Thus, when this video channel is selected, the assigned audio channels are
selected automatically. The audio channels’ volume levels can be adjusted
for On Air and Off Air.
deutsch
You can assign one or more audio channels to a video channel.
To assign an audio channel to a video channel:
français
1. Select the SETUP main menu.
2. Select the AUDIO submenu.
3. Press Follow Video.
italiano
4. If required, press AVF Enable to display the Video Sources.
5. Select the desired video channel from the Video Sources list.
6. Press the Audio Source button to display the Audio Sources list.
9. Use the two faders of the small area next to the Audio Sources list to
adjust the audio levels for On Air and Off Air.
You may also use the Digipots to adjust these values for the selected
audio source.
10. If required, repeat steps 7 to 9 to assign further audio sources.
Activated (enabled) video and audio sources are displayed as green entries
within the lists.
русский
Note
português
8. Press the Level-Set button.
polski
7. Select the desired audio channel from the Audio Sources list.
5.4.1 Mic Inputs
If required, switch on phantom power (+48 V DC) for microphones.
INDIGO AV Mixer Quick Start Guide
中文
You may, for example, pan the signals, route them to buses and set the
desired volumes.
29
INDIGO_Update_QSG.book Page 30 Tuesday, August 21, 2007 3:31 PM
Section 5 — Basic Operation
30
INDIGO AV Mixer Quick Start Guide