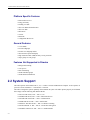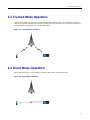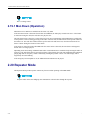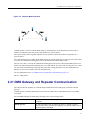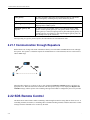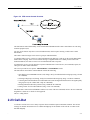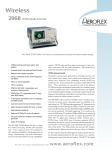
1
Mobile Release 10.7
MTP6550/MTP6750
PRODUCT INFORMATION MANUAL
November 2013
EN
© 2013 Motorola Solutions, Inc. All rights reserved.
*68015000664
68015000664-A
Contents
1
2
Product Overview ...................................................................................................................................... 1-1
1.1 MTP6000 Series Overview ................................................................................................................. 1-1
1.1.1 Specification – MTP6000 Series ................................................................................................. 1-3
1.2 Radio and Features Ordering Options ................................................................................................... 1-4
1.3 Dongle Enablement – Software Enablement Kits .................................................................................... 1-5
1.4 Ordering Software Enablement Kit....................................................................................................... 1-6
1.5 Radio Ordering................................................................................................................................. 1-6
1.6 Golden Codeplug.............................................................................................................................. 1-6
Services and Features ................................................................................................................................. 2-1
2.1 Features Overview ............................................................................................................................ 2-1
2.2 System Support ................................................................................................................................ 2-2
2.3 Trunked Mode Operation ................................................................................................................... 2-3
2.4 Direct Mode Operation ...................................................................................................................... 2-3
2.5 Numbering and Addressing ................................................................................................................ 2-4
2.6 Dialing Methods............................................................................................................................... 2-4
2.6.1 Talkgroup Dialing.................................................................................................................... 2-4
2.6.2 Individual Dialing.................................................................................................................... 2-5
2.7 Unified Address Book........................................................................................................................ 2-5
2.8 Call History ..................................................................................................................................... 2-6
2.9 Group Call ...................................................................................................................................... 2-6
2.9.1 Programmable Talkgroups......................................................................................................... 2-6
2.9.2 Talkgroup Selection ................................................................................................................. 2-7
2.9.3 Favorite Folders ...................................................................................................................... 2-7
2.9.4 Talkgroup Blind Operation ........................................................................................................ 2-7
2.9.5 Receive-only Talkgroups........................................................................................................... 2-7
2.9.6 Non-Selectable Talkgroups........................................................................................................ 2-7
2.9.7 Talk Time Limit ...................................................................................................................... 2-8
2.9.8 Receiving a Group Call............................................................................................................. 2-8
2.9.9 Talkgroup Scanning ................................................................................................................. 2-8
2.9.10 Priority Monitor..................................................................................................................... 2-9
2.9.11 Announcement Talkgroup........................................................................................................ 2-9
2.9.12 Broadcast Call Initiated by User................................................................................................ 2-9
2.9.13 Broadcast Call..................................................................................................................... 2-10
2.9.14 Announcement Call.............................................................................................................. 2-10
2.9.15 PTT Double Push................................................................................................................. 2-10
2.9.16 PTT Queue ......................................................................................................................... 2-11
2.9.17 Talking Party Identification .................................................................................................... 2-11
2.9.18 Call Ownership ................................................................................................................... 2-11
2.9.19 Transmission During Group Call............................................................................................. 2-11
2.9.20 Call Restoration................................................................................................................... 2-11
2.9.21 Temporary Group Address..................................................................................................... 2-12
2.9.22 Late Entry .......................................................................................................................... 2-12
2.9.23 User Initiated Group Attachment............................................................................................. 2-12
2.9.24 SwMI Initiated Group Attach/Detach....................................................................................... 2-12
2.10 Private Call.................................................................................................................................. 2-13
2.10.1 Simplex Private Call............................................................................................................. 2-13
2.10.2 Duplex Private Call .............................................................................................................. 2-13
2.10.3 Talk Time Limit................................................................................................................... 2-14
2.10.4 Call Restoration in Private Call............................................................................................... 2-14
2.10.5 Call Modification ................................................................................................................. 2-14
2.10.6 Assistance Call .................................................................................................................... 2-15
2.10.7 DMO Individual Call Presence Check...................................................................................... 2-15
i
TETRA Radio Product Information Manual
2.10.8 DMO Individual Only Talkgroups ........................................................................................... 2-15
Phone Call ................................................................................................................................... 2-15
2.11.1 Initiating a Phone Call........................................................................................................... 2-16
2.11.2 Receiving a Phone Call ......................................................................................................... 2-16
2.11.3 Call Restoration in Phone Call ................................................................................................ 2-16
2.12 Emergency Operations ................................................................................................................... 2-16
2.12.1 Emergency Group Call.......................................................................................................... 2-17
2.12.2 Non-Tactical Emergency ....................................................................................................... 2-17
2.12.3 Emergency Individual Calls (Private or MS-ISDN)..................................................................... 2-17
2.12.4 Emergency Alarm ................................................................................................................ 2-18
2.12.5 Emergency SDS Status ......................................................................................................... 2-18
2.12.6 Emergency Hot Microphone .................................................................................................. 2-18
2.12.7 Alternating Hot Microphone .................................................................................................. 2-18
2.12.8 Silent Emergency Mode ........................................................................................................ 2-19
2.12.9 Invisible Emergency ............................................................................................................. 2-20
2.12.10 Disaster Alert .................................................................................................................... 2-20
2.13 Short Data Services ....................................................................................................................... 2-20
2.13.1 Status Messages................................................................................................................... 2-21
2.13.2 Text Messages..................................................................................................................... 2-22
2.13.2.1 SDS Messages Concatenation .......................................................................................... 2-23
2.13.3 Immediate Text Messages...................................................................................................... 2-23
2.13.4 Home Display Text Message .................................................................................................. 2-24
2.13.5 Predefined Templates (ATS Entry Prompt) ................................................................................ 2-24
2.13.6 SDS Air Interface Aspects ..................................................................................................... 2-24
2.13.7 SDS Encryption................................................................................................................... 2-24
2.13.7.1 SDS End-to-End Encryption............................................................................................ 2-25
2.13.8 Store and Forward................................................................................................................ 2-27
2.13.9 SDS Receive Failure Notification............................................................................................ 2-27
2.14 Security Services .......................................................................................................................... 2-27
2.14.1 Terminal Equipment Identity .................................................................................................. 2-27
2.14.2 PIN/PUK User Authentication................................................................................................ 2-27
2.14.3 Authentication..................................................................................................................... 2-27
2.14.4 Air Interface Encryption........................................................................................................ 2-28
2.14.4.1 Clear Radios (Class 1).................................................................................................... 2-29
2.14.4.2 Static Cipher Key Encryption (Class 2).............................................................................. 2-29
2.14.4.3 Derived Cipher Key and Common Cipher Keys Encryption (Class 3) ...................................... 2-29
2.14.4.4 Group Cipher Keys Encryption (Class 3G) ......................................................................... 2-29
2.14.4.5 Over-the-Air-Rekeying................................................................................................... 2-30
2.14.4.6 Encryption Mobility....................................................................................................... 2-31
2.14.4.7 Encryption MMI ........................................................................................................... 2-31
2.14.4.8 AIE Key Storage ........................................................................................................... 2-31
2.14.4.9 Deleting User Keys........................................................................................................ 2-31
2.14.5 Secure DMO....................................................................................................................... 2-32
2.14.6 End-to-End Encryption ......................................................................................................... 2-32
2.14.7 Radio Disable/Enable ........................................................................................................... 2-33
2.14.8 Radio Permanent Disable ...................................................................................................... 2-34
2.14.9 Radio Permanent Disable v2 .................................................................................................. 2-34
2.14.10 High Assurance Boot .......................................................................................................... 2-35
2.15 Packet Data.................................................................................................................................. 2-35
2.15.1 Voice and Data Support ........................................................................................................ 2-36
2.15.2 Packet Data IP Addressing..................................................................................................... 2-38
2.15.3 PD User Authentication ........................................................................................................ 2-38
2.16 TETRA Network Protocol 1............................................................................................................ 2-38
2.16.1 TNP1 IP Addressing............................................................................................................. 2-39
2.17 Mobility Services .......................................................................................................................... 2-39
2.11
ii
2.17.1 Main Control Channel Frequencies.......................................................................................... 2-40
2.17.2 Control Channel Selection ..................................................................................................... 2-40
2.17.3 Multi-System Operation ........................................................................................................ 2-40
2.17.4 Registration ........................................................................................................................ 2-41
2.17.5 Roaming ............................................................................................................................ 2-42
2.17.6 Seamless Handover .............................................................................................................. 2-43
2.17.7 Air Interface Migration ......................................................................................................... 2-43
2.17.8 Dynamic Air Interface Migration ............................................................................................ 2-43
2.17.9 Any Networks ..................................................................................................................... 2-44
2.17.10 Congested Cell Handling ..................................................................................................... 2-44
2.17.11 Subscriber Class................................................................................................................. 2-45
2.17.12 Subscriber Class by Talkgroup .............................................................................................. 2-45
2.17.13 RF Power Toggle ............................................................................................................... 2-45
2.17.14 Cell Surveillance and Monitoring Threshold (Negative C).......................................................... 2-46
2.18 Supplementary Services ................................................................................................................. 2-46
2.18.1 Ambience Listening ............................................................................................................. 2-46
2.18.2 Pseudo Power-Off ................................................................................................................ 2-46
2.18.3 Auto Power-On ................................................................................................................... 2-47
2.18.4 Preemptive Priority Call ........................................................................................................ 2-47
2.18.5 Transmit Inhibit Mode .......................................................................................................... 2-47
2.18.6 Calling Line Identification Presentation.................................................................................... 2-48
2.18.7 Talking Party Identification .................................................................................................... 2-48
2.18.8 DTMF Overdial................................................................................................................... 2-49
2.18.9 Universal Time Display......................................................................................................... 2-49
2.19 Man Down................................................................................................................................... 2-49
2.19.1 Man Down (Operation) ......................................................................................................... 2-50
2.20 Repeater Mode ............................................................................................................................. 2-50
2.21 DMO Gateway and Repeater Communication..................................................................................... 2-51
2.21.1 Communication through Repeaters .......................................................................................... 2-52
2.22 SDS Remote Control ..................................................................................................................... 2-52
2.23 Call-Out ...................................................................................................................................... 2-53
2.23.1 Call-Out Interactions ............................................................................................................ 2-54
2.24 Radio Messaging System................................................................................................................ 2-55
2.25 GPS Location Service .................................................................................................................... 2-56
2.25.1 GPS over Packet Data........................................................................................................... 2-58
2.25.2 GPS Military Grid Reference System....................................................................................... 2-58
2.25.3 GPS Different Location Displays ............................................................................................ 2-59
2.26 Side Connector ............................................................................................................................. 2-60
2.27 WAP........................................................................................................................................... 2-60
2.27.1 WAP Browser ..................................................................................................................... 2-60
2.27.2 WAP Push .......................................................................................................................... 2-60
2.27.2.1 WAP Push Framework ................................................................................................... 2-61
2.27.2.2 WAP Push Service Indication .......................................................................................... 2-61
2.27.2.3 WAP Push Service Load ................................................................................................. 2-61
2.28 Radio User Assignment and Radio User Identity ................................................................................ 2-61
2.28.1 RUA/RUI Logging On ......................................................................................................... 2-62
2.28.2 RUA/RUI Radio Behavior ..................................................................................................... 2-62
2.28.3 RUA/RUI Interactions .......................................................................................................... 2-62
2.29 Camera ....................................................................................................................................... 2-63
2.29.1 Live View........................................................................................................................... 2-63
2.29.2 Pictures.............................................................................................................................. 2-64
2.29.3 Digital Fingerprint ............................................................................................................... 2-64
2.29.4 EXIF Data .......................................................................................................................... 2-64
2.29.5 Support Light ...................................................................................................................... 2-65
2.30 Radio Mass Storage....................................................................................................................... 2-65
iii
TETRA Radio Product Information Manual
2.31
Bluetooth..................................................................................................................................... 2-65
2.31.1 Bluetooth Interactions........................................................................................................... 2-66
2.31.2 Bluetooth Restrictions........................................................................................................... 2-66
3 Man-Machine Interface ............................................................................................................................... 3-1
3.1 Controls, Indicators and Related Features .............................................................................................. 3-1
3.1.1 LED Indications ...................................................................................................................... 3-1
3.1.2 Controls and Indicators ............................................................................................................. 3-3
3.1.3 Keypad Lock .......................................................................................................................... 3-6
3.1.4 Automatic Keypad Lock ........................................................................................................... 3-7
3.1.5 One-Touch Button Feature ........................................................................................................ 3-7
3.2 Display ........................................................................................................................................... 3-9
3.2.1 Status Icons .......................................................................................................................... 3-10
3.2.2 Idle Display.......................................................................................................................... 3-15
3.2.3 Configurable Idle Screen ......................................................................................................... 3-16
3.2.4 Display Features.................................................................................................................... 3-16
3.2.5 Languages Supported ............................................................................................................. 3-17
3.3 Audio ........................................................................................................................................... 3-18
3.3.1 Tones .................................................................................................................................. 3-18
3.3.2 Dual Microphones ................................................................................................................. 3-18
3.3.3 Speaker/Earpiece ................................................................................................................... 3-18
3.3.4 Volume Adjustment Mode ....................................................................................................... 3-18
3.3.5 Accessory Setup .................................................................................................................... 3-19
3.3.6 Audio Features...................................................................................................................... 3-19
3.3.6.1 Audio Profiles ................................................................................................................ 3-19
3.3.6.2 Transmit Automatic Gain Control ...................................................................................... 3-20
3.3.6.3 Howling Suppression....................................................................................................... 3-20
3.4 Testing.......................................................................................................................................... 3-20
3.4.1 Test Page ............................................................................................................................. 3-20
3.4.2 Radio Info............................................................................................................................ 3-22
3.4.3 Hardware Test....................................................................................................................... 3-22
Appendix A Tones ....................................................................................................................................... A-1
Appendix B Glossary ................................................................................................................................... B-1
iv
List of Figures
Figure 1-1
Figure 1-2
Figure 2-1
Figure 2-2
Figure 2-3
Figure 2-4
Figure 2-5
Figure 2-6
Figure 2-7
Figure 2-8
Figure 3-1
MTP6550 ................................................................................................................................ 1-1
MTP6750 ................................................................................................................................ 1-2
Trunked Mode Operation ............................................................................................................ 2-3
Direct Mode Operation............................................................................................................... 2-3
SDS End-to-End Encryption...................................................................................................... 2-26
Voice and Data End to End Encryption ........................................................................................ 2-33
Repeater Mode Operation ......................................................................................................... 2-51
SDS remote Control Overview................................................................................................... 2-53
Radio Messaging System Flow Model......................................................................................... 2-55
Push Framework ..................................................................................................................... 2-61
Default Home Screen with Icons .................................................................................................. 3-9
v
List of Tables
Table 1-1
Table 1-2
Table 1-3
Table 2-1
Table 2-2
Table 2-3
Table 2-4
Table 2-5
Table 2-6
Table 2-7
Table 3-1
Table 3-2
Table 3-3
Table 3-4
Table 3-5
Table 3-6
Table 3-7
Table A-1
Service Information — Telephone Numbers to EIA Integrated Call Center .............................................xi
Service Information — Telephone Numbers and Addresses of the Asia and Pacific Motorola
Centers.................................................................................................................................... xiii
Service Information — Telephone Numbers and Addresses of Latin America Radio Support
Centers................................................................................................................................... xvii
Service Information — Telephone Numbers and Addresses of Latin America Motorola Centers ............. xviii
General Technical Specification ................................................................................................... 1-3
RF Specification........................................................................................................................ 1-4
GPS Specification ..................................................................................................................... 1-4
Dialing Scheme ........................................................................................................................ 2-5
Security Features Required Per Security Class .............................................................................. 2-28
Voice-Data Interaction Modes.................................................................................................... 2-37
Packet Data IP Addressing ........................................................................................................ 2-38
TNP1 IP Addressing ................................................................................................................ 2-39
GPS Triggers.......................................................................................................................... 2-57
Different Location Displays ...................................................................................................... 2-59
LED Indications........................................................................................................................ 3-1
Controls and Indicators............................................................................................................... 3-4
One-Touch Button Features ........................................................................................................ 3-7
Display ................................................................................................................................... 3-9
Colors of the SOFT Keys............................................................................................................ 3-9
Status Icons............................................................................................................................ 3-10
Languages Supported ............................................................................................................... 3-17
Radio Tones ............................................................................................................................ A-1
vii
Copyright Information
The Motorola products described in this manual may include copyrighted Motorola computer programs stored in
semiconductor memories or other mediums. Laws in the United States and other countries preserve for Motorola
certain exclusive rights for copyrighted computer programs, but not limited to, including the exclusive right to copy
or reproduce in any form the copyrighted computer program. Accordingly, any copyrighted Motorola computer
programs contained in the Motorola products described in this manual may not be copied, reproduced, modified,
reverse engineered, or distributed in any manner without the express written permission of Motorola.
© 2013 Motorola Solutions Inc. All rights reserved.
No part of this manual may be reproduced, transmitted, stored in a retrieval system, or translated into any language
or computer language, in any form or by any means, without the prior written permission of Motorola Solutions, Inc.
Furthermore, the purchase of Motorola products shall not be deemed to grant either directly or by implication,
estoppel, or otherwise, any license under the copyrights, patents, or patent applications of Motorola, except for the
normal non-exclusive license to use that arises by operation of the law in the sale of a product.
ix
Service Information – EIA
This topic contains contact details to service centers in Europe, Middle East, and Africa.
European Radio Support Centre (ERSC)
ERSC provides a remote Technical Support Service to help customers resolve technical issues and quickly restore
their systems. This team of highly skilled professionals is available to the customers that have current ERSC service
agreements in place. For further information and to verify if your current service agreement entitles you to benefit
from this service, contact your local customer support.
To contact ERSC, use the following EIA Integrated Call Center details:
E-mail: [email protected] .
Telephone: +49 30 66 86 1555
Service Information — Telephone Numbers to EIA Integrated Call Center
Country
Telephone Number
Austria
01206091087
Denmark
043682114
France
0157323434
Germany
06950070204
Italy
0291483230
Lithuania
880030828
Netherlands
0202061404
Norway
24159815
Portugal
0800552277
Russia
810800228 41044 (Alternative 8108001201011)
Saudi Arabia
8008445345
South Africa
0800981900
Spain
0912754787
United Kingdom
02030277499
Other Countries
+42 0533336946
European Systems and Components Centre (ESCC)
ESCC provides a repair service for infrastructure equipment. Customers requiring a repair service should contact
the Customer Information Desk and obtain a Return Material Authorization number. Unless advised otherwise, the
equipment should then be shipped to the following address:
Motorola GmbH, European Systems Component Center, Am Borsigturm 130, 13507 Berlin, Germany
E-mail: [email protected].
Telephone: +49 30 66 86 1404
xi
TETRA Radio Product Information Manual
Mon – Fri, 08:00 am – 06:00 pm (CET)
Parts Identification and Ordering
To get help in identification of non-referenced spare parts, contact Customer Care Organization of Motorola
local area representation.
To request replacement parts, kits and assemblies, place orders directly on Motorola local distribution organization
or through http://emeaonline.motorolasolutions.com.
EIA Test Equipment Support
For information related to support and service of Motorola Test Equipment, contact Customer Care Organization of
Motorola local area representation or see http://emeaonline.motorolasolutions.com.
For customers in Germany, contact the Equipment Service Group in Germany:
Telephone: +49 (0) 6128 702179
Fax: +49 (0) 6128 951046
Latest Versions of Manuals
To download the latest versions of technical manuals, go to http://emeaonline.motorolasolutions.com.
Submit Your Comments
If you have any comments or would like to report a problem regarding Motorola publications, send an e-mail
to:[email protected].
xii
Service Information – AME
This topic contains contact details to service centers in Asia and Pacific region.
Technical Support
Technical support is available to assist the dealer/distributor in resolving any malfunction which may be
encountered. Initial contact should be by telephone wherever possible. When contacting Motorola Technical
Support, be prepared to provide the product model number and the serial number.
Further Assistance from Motorola
You can also contact the Customer Help Desk through the website: http://www.motorolasolutions.com/tetra. If a
unit requires further complete testing, knowledge and/or details of component level troubleshooting or service
than is customarily performed at the basic level, send the radio to a Motorola Service Center as listed in the
following table:
Service Information — Telephone Numbers and Addresses of the Asia and Pacific Motorola
Centers
Country
Telephone Number
Address
Singapore
+65-6352-6383
Motorola Solutions Singapore Pte. Ltd,
c/o Azure Engineering,
49 Jalan Pemimpin,
#03-11 APS Industrial Building,
Singapore 577203
Contact: Mareen Phua
E-mail: [email protected]
Enquiry: Tay Yong Hock
E-mail: [email protected]
Malaysia
+603-7809-0000
Motorola Solutions Sdn. Bhd.
Level 14, Persoft Tower,
No. 68, Pesiaran Tropicana,
47410 Petaling Jaya,
Selangor Darul Ehsan,
Malaysia
Contact: Koh Tiong Eng
E-mail: [email protected]
xiii
TETRA Radio Product Information Manual
Service Information — Telephone Numbers and Addresses of the Asia and Pacific Motorola
Centers (cont'd.)
Indonesia
+62-21-3043-5239
PT. Motorola Solutions Indonesia
30th Floor, Gedung BRI II, Suite 3001,
Jl. Jend. Sudirman Kav. 44-46,
Jakarta 10210,
Indonesia
Contact: Eko Haryanto
E-mail: [email protected]
Thailand
Tel: +662-653-220
Motorola Solutions (Thailand) Ltd.
Fax: +668-254-5922
142 Two Pacific Place Suite 2201,
3220 Sukhumvit Road,
Klongtoey,
Bangkok 10110
Contact: Nitas Vatanasupapon
E-mail: [email protected]
India
+91-9844218850
Motorola Solutions India Pvt. Ltd.
C/o Communication Test Design India Private Limited,
#4, 5 Maruthi Industrial Estate,
Rajapalya, Hoodi Village,
Bangalore - 560048,
India
Contact: K. Umamaheswari
E-mail: [email protected]
China
+86-10-8473-5128
Motorola Solutions (China) Co. Ltd.
No. 1 Wang Jing East Road,
Chao Yang District,
Beijing, 100102,
P.R. China
Contact: Sophy Wang
E-mail: [email protected]
xiv
Service Information – AME
Service Information — Telephone Numbers and Addresses of the Asia and Pacific Motorola
Centers (cont'd.)
(Hong Kong)
852-2966-4823
Motorola Solutions Asia Pacific Ltd.
Unit 1807-1812, 18/F, Two Harbourfront,
22 Tak Fung Street,
Hunghom, Kowloon,
Hong Kong
Contact: Judy Leung
E-mail: [email protected]
Philippines
Tel: +632 858-7500
Motorola Communications Philippines, Inc.
Fax: +632 841-0681
Unit 2102, One Global Place Building,
5th Ave., Bonifacio Global City,
Taguig, Philippines 1634.
Contact: Arthur Nieves
E-mail: [email protected]
Korea
+822-3497-3649
Motorola Solutions Korea, Inc.
9th Floor, Hibrand Building,
215, Yangjae-Dong, Seocho-Gu,
Seoul, 137-924,
Korea.
Contact: KS Kwak
E-mail: [email protected]
Taiwan
+886-2-8729 8000
Motorola Solutions Taiwan, Ltd.
8F, No. 9, Songgao Rd.,
Taipei 110,
Taiwan (R.O.C.)
Contact: Michael Chou
E-mail: [email protected]
Australia
+613-9847-7725
Motorola Solutions Australia Pty. Ltd.
10 Wesley Court,
Tally Ho Business Park,
East Burwood Victoria 3151,
Australia.
E-mail: [email protected]
xv
TETRA Radio Product Information Manual
Piece Parts
Some replacement parts, spare parts, and/or product information can be ordered directly. If a complete Motorola
part number is assigned to the part, it is available from Motorola Radio Aftermarket and Accessory Division
(AAD). If no part number is assigned, the part is not normally available from Motorola. If a list of parts is not
included, that means that no user-serviceable parts are available for that kit or assembly.
Customer Programming Software has no capability to tune the radio. Tuning the radio can only be
performed at the factory or at the appropriate Motorola Repair Center. Component replacement can affect
the radio tuning and must only be performed by the appropriate Motorola Repair Center.
All orders for parts/information should include the complete Motorola identification number. All part orders should
be directed to your local AAD office. See your latest price pages.
Parts Identification and Ordering
Request for help in identification of non-referenced spare parts should be directed to the Customer Care
Organization of Motorola local area representation. Orders for replacement parts, kits, and assemblies should be
placed directly on Motorola local distribution organization or via Motorola Online (Extranet).
xvi
Service Information – Americas
This topic contains contact details to service centers in Latin America and Caribbean region.
Technical Support
To request technical support, go to https://businessonline.motorolasolutions.com, Contact Us.
Some replacement parts, spare parts, and/or product information can be ordered directly. If a complete Motorola part
number is assigned to the part, it is available from Motorola. If no part number is assigned, the part is not normally
available from Motorola. If the part number is appended with an asterisk, the part is serviceable by Motorola Depot
only. If a list of parts is not included, that means that no user-serviceable parts are available for that kit or assembly.
Warranty and Repairs
Service Information — Telephone Numbers and Addresses of Latin America Radio Support Centers
Country
Telephone Number
Address
Colombia
571- 376-6990
MOTOROLA DE COLOMBIA SERVICE CENTRE
Torre Banco Ganadero
Carrera 7 No. 71-52
Torre B piso 13
Oficina 1301
Bogota
Mexico
5252576700
MOTOROLA DE MEXICO SERVICE CENTRE
Bosques de Alisos #125
Col. Bosques de las Lomas CP
05120 Mexico DF
Piece Parts
To order parts in Latin America and the Caribbean contact your local Motorola CGISS representative.
xvii
TETRA Radio Product Information Manual
Service Information — Telephone Numbers and Addresses of Latin America Motorola Centers
Country
Telephone Number
Address
Argentina
5411-4317-5300
MOTOROLA DE ARGENTINA
Ave. del Libertador 1855
B1638BGE, Vicente Lopez
Buenos Aires
Brasil
5511-3847-668
MOTOROLA DO BRASIL LTDA.
Av. Chedid Jafet
222 Bloco D Conjuntos 11,12,21,22 E 41
Condominio Millennium Office Park
04551-065- Vila Olimpia, Sao Paulo
Chile
562-338-9000
MOTOROLA CHILE Ave.
Nueva Tajamar 481
Edif. World Trade Center
Of. 1702, Torre Norte
Las Condes Santiago
Colombia
571-376-6990
MOTOROLA DE COLOMBIA, LTDA.
Carrera 7 #71-52
Torre A, Oficina 1301
Bogotá
Costa Rica
506-201-1480
MOTOROLA DE COSTA RICA
Parque Empresarial Plaza Roble
Edificio El Portico, 1er Piso
Centro de Negocios Internacional
Guachepelin, Escazu
San Jose
Ecuador
5932-264-1627
MOTOROLA DEL ECUADOR
Autopist Gral. Rumiñahui, Puente
2 Conjunto Puerta del Sol Este-Ciudad Jardin
Pasa E, Casa 65
Quito
Mexico
52-555-257-6700
MOTOROLA DE MEXICO, S.A.
Calle Bosques de Alisos #125
Col. Bosques de Las Lomas
05120 México D.F.
xviii
Service Information – Americas
Service Information — Telephone Numbers and Addresses of Latin America Motorola Centers
(cont'd.)
Country
Telephone Number
Address
Peru
511-211-0700
MOTOROLA DEL PERU, S.A.
Ave. República de Panama 3535
Piso 11, San Isidro
Lima 27
USA
954-723-8959
MOTOROLA SOLUTIONS, INC.
Latin American Countries Region
789 International Parkway
Sunrise, FL 33325
Venezuela
58212-901-4600
MOTOROLA DE LOS ANDES C.A.
Ave. Francisco de Miranda
Centro Lido, Torre A
Piso 15, El Rosal
Caracas, 1060
xix
Icon Conventions
The following graphic icons, which help identify situations or settings crucial to proper radio operation and user
safety, are used throughout this document:
The signal word DANGER with the associated safety icon indicates information that, if disregarded,
will result in death or serious injury.
The signal word WARNING with the associated safety icon indicates information that, if disregarded,
could result in death or serious injury, or serious product damage.
The signal word CAUTION with the associated safety icon indicates information that, if disregarded,
may result in minor or moderate injury, or serious product damage.
The signal word CAUTION may be used without the safety icon to state potential damage or injury
that is not related to the product.
IMPORTANT statements contain information that is crucial to the discussion at hand, but is not CAUTION
or WARNING. There is no warning level associated with the IMPORTANT statement.
NOTE contains information more important than the surrounding text, such as exceptions or preconditions.
They also refer the reader elsewhere for additional information, remind the reader how to complete an
action (when it is not part of the current procedure, for instance), or tell the reader where something is
located on the screen. There is no warning level associated with a note.
SUGGESTION
SUGGESTION indicates a recommendation from Motorola that does not require to be followed, but might
be helpful. There is no warning level associated with SUGGESTION.
xxi
1
Product Overview
1.1 MTP6000 Series Overview
The MTP6550 and MTP6750 are Motorola TETRA portable radios for mission critical communications.
Figure 1-1
-
MTP6550
1-1
TETRA Radio Product Information Manual
Figure 1-2
MTP6750
The best-in-class receiver sensitivity, in connection with 4W audio through the loudspeaker or IMPRES remote
speaker microphone guarantees clear and reliable communication.
The radios meet and exceed MIL-SPEC test standards as well as ETSI mechanical tests. The MTP6000 radios are
IP67 compliant, which means they can operate even after being submerged in water.
On top of the best audio quality and ruggedness standards, the MTP6000 radio guarantees the improved operational
effectiveness by:
• 5MP camera and Digital Fingerprint technology to capture and authenticate photographic evidence and
intelligence.
• Micro SD card for multimedia content storage (not available on Option board models used for hardware-based
End-to-End encryption).
• Bluetooth v2.1 wireless technology for instant data sharing.
• TEDS data connectivity for enhanced data transfer (hardware ready).
1-2
-
1.1.1 Specification – MTP6000 Series
1.1.1 Specification – MTP6000 Series
Table 1-1
General Technical Specification
Parameter
Value
Camera
5MP, Auto Focus, Built-in LED Flash
Additional Storage
Micro SD card (up to 32 GB additional capacity)
Micro SD card slot is not available on models that
support hardware-based End-to-End Encryption.
Battery Options
Standard battery: 1650 mAh
High capacity battery: 2150 mAh
Dimensions HxWxD mm
132x54x33.5 (with standard battery)
132x54x36.7 (with high capacity battery)
Weight g
286 +/-1% (SIM/Non-camera radio with standard battery and
short stubby 380 MHz antenna)
Battery Operating Life (Time Expected –
Tx/Rx/Stand-by)
Class 4 (1 W)
Class 3L (1.8 W)
05/05/90
> 16 hr
> 15 hr
05/35/60
> 12 hr
> 11 hr
Color Display
Large 2” QVGA with 262K vivid colors, Backlight, Flip screen,
large icons and scalable text font options. Screen saver gif image
& text (user defined). Universal time display.
Talkgroups - TMO
256 TMO Folders
4000 Entries (up to 2048 entries in one folder)
2048 Unique entries
Talkgroups - DMO
128 DMO Folders
1024 DMO Groups
Favorite Groups
384 (3 Favorite Groups folders containing up to 128 entries each)
Contact List
1000 Contacts
up to six entries (numbers) per contact
Maximum 2000 entries
Text Message List
100 Short and 20 Long Messages for Outbox
100 Short and 10 Long Messages for Inbox
-
Status List
400 Entries
Country Code/Network Code List
100 Entries
Scan List
40 Lists of 20 Groups
1-3
TETRA Radio Product Information Manual
Table 1-1
General Technical Specification (cont'd.)
Parameter
Value
Operating Temperature °C
-30 to +60
Storage Temperature °C
-40 to +85
Humidity
ETSI 300 019-1-7 class 7.3E
Dust and Water
IP67 and IP65 per IEC 60529
Shock (Mechanical), Drop & Vibration
ETSI 300 019-1-7 class 7M3
Table 1-2
RF Specification
Parameter
Value
Frequency Bands MHz
350-470 MHz
RF Channel Bandwidth kHz
25
Transmitter RF Output Power W
Power Class 3L (1.8W) & Class 4 (1W)
RF Power Control
3 Steps of 5 dB
RF Power Level Accuracy +/-dB
2
Adaptive Power Control
A and B
Receiver Class
A and B
Receiver Static Sensitivity dBm
-114 (min); -116 (typical)
Receiver Dynamic Sensitivity dBm
-105 (min); -107 (typical)
Table 1-3
GPS Specification
Parameter
Value
GPS Tracking Sensivity
–159dBm (guaranteed), –160dBm (typical)
GPS Horizontal Tracking Accuracy (tracking)
5m (50% probable at –130dBm)
10m (95% probable at –130dBm)
This specification may be subject to change without further notice. All product features are subject to
infrastructure support. Selected features are subject to optional software upgrade.
1.2 Radio and Features Ordering Options
TETRA terminals are only available to Accredited Channel Partners who are advised of the discount structure
applied to these products.
1-4
-
1.3 Dongle Enablement – Software Enablement Kits
For information about available Software Features and their ordering visit Order Management Electronic Catalog
(OM-eCAT) Volume Descriptions and choose your region. Navigate to Tetra/Subscribers/Software Features in
your respective page. E.g. for Western Europe go to http://om-ecat.am.mot.com/Volumes/ECEUR/index.htm,
and navigate to Tetra/Subscribers/Software Features.
Software options can be ordered and enabled in three ways:
• You can have them enabled at Distribution Centre (DC).
• If you have iTM, you can enable them with license.
• You can order by dongle.
1.3 Dongle Enablement – Software Enablement Kits
Each software enablement kit ordered provides one dongle for the customer with a specific number of counters set
according to the amount of software options ordered. This kit number is applicable to both new orders or existing
fielded terminals which require software enablement.
The features are enabled at the same time the customer programs the radio. The enablement for all the selected
features is performed in one operation.
-
1-5
TETRA Radio Product Information Manual
1.4 Ordering Software Enablement Kit
Procedure Steps
1
Order the standard software enablement kit (main kit) – GM0127.
2
Add software feature options.
You can select more than one feature for each main kit.
3
Order quantity equaling number of models requiring an option.
1.5 Radio Ordering
Procedure Steps
1
Order the main radio model.
2
Order options from each of the categories:
• Software Selling Features
• Customer Programming Software
• Integrated Terminal Management
• Accessories
Export controls apply when ordering encryption.
1.6 Golden Codeplug
The Golden Codeplug covers all standard codeplug fields and required optimal settings. In a Golden Codeplug, field
parameters are pre-configured and fine-tuned for high quality and to get better performance from your new radio.
1-6
-
2
Services and Features
2.1 Features Overview
Trunk Mode Operation (TMO)
• Air Interface Encryption - SCK, CCK, DCK, GCK
• Air Interface Migration
• Ambience Listening
• Announced Type 2 handover
• AT commands
• Broadcast Call
• Congested Cell Handling
• DGNA (Individually and group addressed)
• Dynamic Key Encryption
• Emergency group call
• Group call
• Hot Mic and Alternating Hot Mic
• Multi-Network Operation
• Mutual Authentication
• OTAR (Over The Air Re-keying)
• Preemptive Priority Call
• Secondary Control Channel
• SwMI Initiated Authentication
• Talkgroup and Priority monitor
• Temporary/Permanently Enable/Disable
• Transmit Inhibit (RF Sensitive Area Mode)
Direct Mode Operation (DMO)
• AT commands
• DMO Group Call
• DMO Group Emergency Call
• DMO Inter-MNI (including open group and open MNI)
• DMO Repeater Capability
• DMO Static Key Encryption (DMO SCK)
• DMO/TMO Emergency Switching
• Transmit Inhibit (RF Sensitive Area Mode)
-
2-1
TETRA Radio Product Information Manual
Platform Specific Features
• Built-in GPS receiver
• Energy Economy
• Flashing via USB
• GPS over Multi-Slot Packet Data
• GPS over SDS
• Man Down
• Camera
• Bluetooth
• Configurable Idle Screen
General Features
• Covert Mode
• Favorite talkgroups
• Flexible size talkgroup folders
• GPS location reports and display
• High Assurance Boot (HAB) memory access protection
• Super groups of scan groups
Features Not Supported in Dimetra
• Background scanning
• CCK per LA
• DCK Forwarding
• SwMI controlled groups
• SwMI initiated attachments
2.2 System Support
The radio operates on the Dimetra IP 5.x, 6.x, 7.x and 8.x releases and Dimetra IP Compact. It also operates on
previous versions of Dimetra — from Release 3.8 and on.
The radio is designed to operate optimally on the Dimetra IP system. The radio operates properly on all SwMIs
that comply with the following IOP TIP documents:
• TIP-Core TTR 001-01, TIP — Part 1: Core.
• TIP SDS TTR 001-02, TIP — Part 2: Short Data Service.
• TIP Auth TTR 001-04 TIP — Part 4: Authentication.
• TIP PD TTR 001-05 TIP — Part 5: Packet Data.
• TIP-SS-AL TTR 001-09 TIP — Part 9: Ambience Listening.
• TIP AIE TTR 001-11 TIP — Part 11: Air Interface Encryption.
• TIP Disable TTR 001-13 TIP — Part 13 - Enable/Disable.
2-2
-
2.3 Trunked Mode Operation
2.3 Trunked Mode Operation
Trunked Mode Operation requires the switching and management infrastructure. This operation mode enables
various voice and data communication types (for example, group calls, short data service messages) and access to
the infrastructure-related features (for example, packet data).
Figure 2-1
Trunked Mode Operation
2.4 Direct Mode Operation
Direct Mode Operation is a mode of simplex operation where radios communicate directly.
Figure 2-2
-
Direct Mode Operation
2-3
TETRA Radio Product Information Manual
2.5 Numbering and Addressing
Each radio has a TETRA ITSI used for addressing the radio over the air interface. However, it is undesirable to
require you to enter a long number to address another radio. To this end, a set of short number schemes can be used.
Alternatively, the radio can be provisioned to treat a short number as an SSI. This scheme can be refined to allow
short dialing within a fleet by combining the ID entered with the radio own SSI.
If the radio is provisioned to treat a short number as a TETRA Short Subscriber Identity (SSI), and the number
entered is less than seven digits, the radio own identity is combined with the number entered to produce the actual
ISSI. Using this scheme, an ISSI can be comprised of a fleet number part and a member part.
The radio own ISSI is used for determining the leading digits for the digits omitted as in the following scenario:
1.
The radio has the following ID: 1234567
2.
You enter: 890
3.
The SSI sent is: 1234890
The following services can use the short SSI for identification for both the called and the calling party:
• Duplex private call
• Simplex private call
• Group call
• Mobile status
• Short data bearer service
• Text message service
Regardless of the short addressing scheme used, if you are provisioned with the capability of entering a real TETRA
ISSI and you enter an ID of seven digits, the number is interpreted as a real TETRA ISSI.
2.6 Dialing Methods
The radio supports multiple methods for selecting a number for an outgoing call.
The direct dialing provides the radio user with a possibility to dial a number before entering the mode (modeless
operation for all types of calls). To start dialing from the idle display activate the private number dialing editor by
pressing and holding an assigned key. The default call type is suggested with the possibility to change the call type.
Scrolling keys are used to scroll back and forth through the contact list or talkgroup/folder names.
2.6.1 Talkgroup Dialing
The talkgroup dialing by index allows calling from a radio to a talkgroup by using the talkgroup speed dial number
(in other words the Talkgroup ID or Index). By default, you scroll through a list of talkgroups to find the one and
call. With the talkgroup dialing by index option enabled, you can use the keypad and enter the talkgroup speed
dial number followed by the * key. For example, to call a talkgroup which ID is 19, a radio user enters 1, 9, and
* from the keypad and then presses the PTT button.
2-4
-
2.6.2 Individual Dialing
2.6.2 Individual Dialing
If the One-Touch Button method is provisioned, you can call an individual by pressing and holding down one
of the programmable buttons.
The Phone/PABX feature allows you to dial Phone/PABX by a shortened number of up to three digits instead of the
full number. The Phone/PABX Speed # number is assigned when the dialed number is added in the contact list.
You can re-dial numbers from the call history stack.
The private ID number is a number with up to 16 digits. If you enter less than 16 digits, the Individual Short
Subscriber Identity (ISSI) part is padded to full Individual TETRA Subscriber Identity (ITSI) with leading zeros.
The private ID number consists of MCC (Mobile Country Code), MNC (Mobile Network Code) and ISSI.
Table 2-1
Dialing Scheme
MCC
MNC
ISSI
16–14
13–9
8–1
For the MNC of a private ID (digits 13-9) values from 00000 to 16383 are accepted.
Two options are given to the user:
• Fixed — provide up to 16 digits which include the MCC, MNC, and ISSI numbers. If you enter less than 16
digits, then the rest is filled with the digits that are set in the codeplug.
• Automatic — provide up to eight digits. If you provide more, it switches to fixed mode. If you enter less
than 16 digits, the radio fills the rest of the number with its own ITSI.
If you try to enter more than 16 digits, you receive a prompt informing about an incorrect input.
2.7 Unified Address Book
The radio offers an address book facility, where multiple numbers are associated with a single name tag. This
facility presents an interface to the address book and provides a natural way to call an individual who can be
contacted in different ways.
Each individual can have up to six associated numbers:
• Private (a TETRA ISSI)
• Home (phone number)
• Mobile (phone number)
• Work (phone number)
• PABX (local short number)
• Other (phone number)
The Contact List has a maximum capacity of 1000 Contacts, with up to 1000 associated Private and up to 1000
associated either Phone or PABX numbers distributed among the contacts.
The radio provides editing capabilities to the address book to allow adding or deleting entries.
-
2-5
TETRA Radio Product Information Manual
The radio provides with the possibility to view the number of used and free address book entries.
The address book is also accessible through PEI. Using the PEI enables you to read, write, and modify contact
list entries using AT commands.
2.8 Call History
A call history stack is provided which consists of the following:
• Last dialed numbers
• Missed call numbers
• Answered (Received) call numbers
Additionally for the recent calls the time when a call was established and the call duration is available.
The Call History stack holds private TETRA IDs as well as phone and PABX numbers.
Numbers from the stack may be viewed, selected, and called. However, outgoing duplex calls from Recent Calls
list display in DMO are not allowed. When you scroll through the lists, the entries appear in the opposite order (the
most recent shown first).
When a call is made to a number that exists in the last dialed list, this number is not duplicated in the list and is
moved to the beginning of the list. However, a missed call and received entries are duplicated in the corresponding
call list.
The call history lists are available after next power-up.
You can save a number from the call history stack to the address book.
2.9 Group Call
The group call service enables the radio to communicate with a group of other TETRA radios using point to
multi-point operation. This service is available in both TMO and DMO. You can initiate a new group call to the
selected talkgroup or talk back to the existing group call by pressing the PTT button.
2.9.1 Programmable Talkgroups
The radio offers a talkgroup list facility. Each talkgroup entry contains a TETRA group address and may be
associated with a name tag. The talkgroups can be defined in the codeplug as per the radio capabilities. Talkgroups
are configured separately for TMO and DMO modes. To program a talkgroup in TMO define its name and GSSI.
To program a talkgroup in DMO define its name, GTSI and frequency. The radio operator can select a talkgroup
which has an associated TMO or DMO frequency depending on the mode selected. When switching between the
TMO and DMO modes the last active talkgroup is selected. However the required talkgroup can be mapped in
CPS. In such a case a corresponding talkgroup is automatically selected during mode switching, irregardless of the
previously selected talkgroup.
Neither the group name nor the corresponding group address can be edited using the radio MMI.
2-6
-
2.9.2 Talkgroup Selection
2.9.2 Talkgroup Selection
Talkgroup selection from the stored talkgroups list in the idle mode can be performed by scrolling through the list
using the scroll keys, or the talkgroup rotary knob.
Talkgroup scrolling can be provisioned to scroll in a folder only, or continuously through the folders acting as
one continuous list of groups.
The radio does not allow directly dialing a group SSI.
2.9.3 Favorite Folders
You can add frequently used talkgroups and phone book contacts to the Favorite folder. You can add items from
Favorites or Talkgroups and Contacts menu levels respectively.
This feature allows a quick access to frequently used talkgroups by including the groups in up to three favorite
talkgroups ranges. These ranges are separately stored in the data storage.
The feature operates in both TMO and DMO modes. The favorite talkgroups ranges are shared for TMO and DMO
talkgroups. You can select, view, and edit My Groups ranges. Once a group from the My Groups range is selected,
you can select any of the favorite talkgroups in that range using normal procedure.
A favorite talkgroup range name replaces a talkgroup range name on the radio display whenever a favorite
talkgroup is selected, or is in use for appropriate operation. The ranges of favorite talkgroups with their talkgroup
assignments are kept through the radio power cycle.
2.9.4 Talkgroup Blind Operation
The radio can be provisioned with a virtual rotary end-stop option for use in blind operation. When you have
scrolled to the beginning or the end of the list, the first or the last talkgroup is displayed even if you continue to
scroll. To change this setting for the rotary knob you can select “Wrap around Rotary Knob Group Scrolling”
option in the CPS.
2.9.5 Receive-only Talkgroups
Talkgroups can be provisioned as receive-only talkgroups. This setting depends on the settings of the folder
the talkgroup is in. Any talkgroup from the receive-only folder can be selected. The radio allows to receive
calls, however, no call can be initiated to this talkgroup.
2.9.6 Non-Selectable Talkgroups
A talkgroup can be provisioned as a non-selectable talkgroup. Such talkgroups are not visible when scrolling
through the talkgroup list, and thus cannot be selected. The group name is displayed only upon receiving a call for
the group, for instance, if it is an announcement talkgroup associated with the selected group, or if it is a scanned one.
-
2-7
TETRA Radio Product Information Manual
2.9.7 Talk Time Limit
The radio limits the time you can continuously talk in a group call without interruption, according to a provisioned
value. You are warned a short time before the talk time expires. The timer is provisioned per talkgroup folder.
2.9.8 Receiving a Group Call
In most situations, the radio receives group calls without any intervention. When the radio receives an incoming
group call, you may be alerted with a short alert tone. Depending on the configuration the tone may be disabled.
Then the speech follows.
To clear a call ended by the call owner (normally the SwMI), you do not need to do anything. However, you
can leave a group call. Then the call continues for other radios, however, your radio does not participate in the
call anymore.
2.9.9 Talkgroup Scanning
Talkgroup scanning allows the radio to monitor signaling of a number of talkgroups at the same time. In addition to
monitoring signaling addressed to the selected talkgroup, the radio can monitor signaling addressed to multiple
talkgroups.
To use the multiple group monitoring, define a scan list — the user-activated scan list. This list holds up to 20
talkgroups, which you monitor in addition to the selected group.
You can choose only one user-activated scan list at a time. When this list is activated, the radio begins to monitor
traffic for these groups in addition to the traffic for the selected group. The radio can allow creating and editing the
scan list using MMI. Up to 40 scan lists can be defined.
If the SwMI instructs a radio to detach one of the scanned groups, the radio stops monitoring the group, but
the group remains in the scan list. Subsequent attachment of a group by the SwMI causes the radio to begin
monitoring the group again.
The SwMI may also instruct a radio to attach groups from out of the scan list. If the group attachment is accepted,
the radio monitors the group.
The radio may passively monitor the following talkgroups if they have been attached or are always attached:
• Selected talkgroup.
• ATG associated with the selected talkgroup (if this talkgroup is not set as Permanently detach).
• Talkgroups associated with the selected ATG (if this talkgroup is not set as Permanently detach).
• Talkgroups in the user-activated scan list (if scanning is enabled and the SwMI-initiated detachment has
not been performed on these groups).
• Talkgroups in the SwMI-controlled scan list (if scanning is enabled).
• Talkgroups with the class of usage set to Always Scanned (if supported).
• Supergroup of the selected talkgroup.
• Supergroups of the scanned talkgroup.
2-8
-
2.9.10 Priority Monitor
2.9.10 Priority Monitor
While the radio is active in a group call, it may receive a group call setup for a different group. The radio decides
whether to ignore the new call or accept it basing on the call priority. If the new call has the higher priority than the
current one, the new call may be joined and the current call is dropped.
The following priority types are applicable to calls:
• Call priority indicated in the call setup signaling.
• Priority of the group indicated by the Class of Usage (CoU) negotiated upon attachment.
If the old call and new call have different call priorities, the radio follows the call with the higher call priority. If the
calls have the same call priority, the CoU priority of the group decides.
If a radio is in a group call, but is not currently the talking party, and detects a call setup for a different group with
the same priority, it joins the call if a CoU priority is higher.
The radio can be set up not to immediately join the new higher priority call but to present the new call to the user
before joining it. If so provisioned, you are given a choice of following the new higher priority call or staying
with the present call.
The radio can be set up to treat a selected group call as a higher priority than a scan group call. This behavior occurs
regardless of the priority of the calls or the groups.
2.9.11 Announcement Talkgroup
The radio supports the concept of a group hierarchy. A special group, an announcement talkgroup (ATG), in
addition to being a group, logically contains up to 20 subgroups.
When you select an ATG as the selected group, the radio monitors traffic received for the announcement group as
well as the traffic received for any of the associated subgroups. However, the radio does not monitor the active scan
list groups when an announcement group is selected.
When you select one of the subgroups of the ATG, the traffic for the subgroup is monitored as well as the traffic for
its announcement group, not other subgroups though.
Each normal talkgroup may be associated with only one ATG. An ATG cannot be associated with another ATG.
Depending on the codeplug settings, you may be prohibited from initiating ATG calls. In such case, you are still
permitted to initiate an emergency call to an ATG group.
2.9.12 Broadcast Call Initiated by User
This feature allows you to make a Broadcast Call from the radio initiated on the predefined talkgroup. The alias
(message) displayed during Broadcast Call, as well as the call priority and destination address (talkgroup), can
be configured in codeplug. This feature can only be used in TMO mode.
During Broadcast Call, other features are impacted:
• No other services except emergency are allowed (same as in emergency mode)
• Hot Mic functionality cannot be used.
• When Broadcast Call begins, any other ongoing services are terminated.
-
2-9
TETRA Radio Product Information Manual
If the type of the encryption is defined by the BSI feature (radio with a SIM Card), the Broadcast Call is
always clear. Otherwise if the radio uses other encryption service the type of the encryption used for that
Call is up to the encryption settings of that service.
Not all infrastructures support this feature. Consult with your service provider before enabling this feature.
2.9.13 Broadcast Call
This kind of call enables dispatcher to transmit to all radios in the specific area.
The radio joins calls received with a communication type broadcast and displays a notification that this call is a
broadcast call.
Typically, this call type is addressed to the broadcast address (ISSI).
A broadcast call takes precedence over any other call that has the same or lower call priority.
The radio cannot initiate a broadcast call, however, the radio is able to initiate the "broadcast-type" call
restricted to the particular talkgroup using the Announcement Call feature.
2.9.14 Announcement Call
This feature allows you to make a Broadcast Call from the radio initiated on the predefined talkgroup. The alias
(message) displayed during Broadcast Call, as well as the call priority and destination address (talkgroup), can
be configured in codeplug. This feature can only be used in TMO mode.
During Announcement Call, other features are impacted:
• No other services except emergency are allowed (same as in emergency mode)
• Hot Mic functionality cannot be used.
• When Announcement Call begins, any other ongoing services are terminated.
If the type of the encryption is defined by the BSI feature (radio with a SIM Card), the Broadcast Call is always
clear. Otherwise if the radio uses other encryption service the type of the encryption used for that call is up to the
encryption settings of that service. Not all infrastructures support this feature. Consult your service provider
before enabling it.
2.9.15 PTT Double Push
PTT Double Push (D-PTT) lets the radio user send a tone to other users on the same talkgroup, as a way of
attracting attention before transmitting voice or as a signal instead of speech, for example as confirmation of
message received. The D-PTT tone can be configured as single, double or triple in the radio setup menu.
2-10
-
2.9.16 PTT Queue
The D-PTT tone is sent as voice, so it only needs to be configured on the sending radio. All radios attached
to the same talkgroup as the sender receive it regardless of having D-PTT enabled.
2.9.16 PTT Queue
This feature allows you to configure the response to releasing PTT of the call originating radio. This determines
how to cancel waiting for the call when the infrastructure is busy and your call is queued.
2.9.17 Talking Party Identification
The PDUs and facility elements for these TETRA Supplementary Services are not supported. However,
identification presentation functionality is supported in most cases using the information found in the call setup
messages.
2.9.18 Call Ownership
The radio can be given the call ownership of a talkgroup call. When the radio is the call owner, it sends an
appropriate TETRA signaling to end the call.
The SwMI decides about the ownership of a call.
2.9.19 Transmission During Group Call
While receiving a group call, and the PTT during received Group Call is enabled, you may request to transmit by
pressing and holding the PTT. The system registers this action and informs you that the request has been queued.
If you release the PTT, the radio sends a message to the system withdrawing the request.
2.9.20 Call Restoration
If the radio roams to a new cell during a call, it attempts to continue the call on the new cell. Cell reselection and
call restoration procedures are employed for this attempt.
If the radio roams while being the transmitting party in the call, an announced cell reselection, if possible, is
carried out in the new cell.
If the radio is not the transmitting party, an unannounced cell reselection is employed, followed by call restoration
procedures.
-
2-11
TETRA Radio Product Information Manual
2.9.21 Temporary Group Address
The radio supports the temporary group address assigned by the SwMI. The address is valid only for the lifetime
of the call.
The radio monitors signaling addressed to the temporary group, when the radio initiates a group call on the selected
group, and the SwMI assigns the call to a temporary group.
The radio supports assignment of an incoming group call to a temporary group address.
2.9.22 Late Entry
The user can join the group call even if not participating in it from the beginning. This is possible for example, if a
user turns on their TETRA terminal, in such a case the system diverts the user's terminal to a talkgroup call, if a call
is already in progress. Similarly, if the user's terminal has been outside of the radio coverage, for example in a tunnel,
the control channel will also divert the user's terminal to a talkgroup call assuming a call is already in progress.
For TMO this feature must be configured on SwMI. Acknowledged late entry, and late entry paging
are not supported.
2.9.23 User Initiated Group Attachment
To enable a radio to use a group, the radio should attach the group. The radio initiates a group attachment request to
the SwMI after the RCU initialization. The attachment occurs whenever you initiate a group change and when
the radio registers on a new site. When you change the selected talkgroup, the radio initiates an attachment to the
SwMI, detaching the old group and attaching the new one.
All group attachments sent by the radio are sent with attachment mode of Amendment or Detach all... depending
on which form causes sending less bits over the air interface.
When you turn on scanning and then select the scan list, the radio sends a group attachment request to attach the scan
groups in addition to the selected group. Similarly, when you select an ATG, the radio sends an attachment of the
ATG as the selected group along with the attachment of the associated groups as scan groups. If a group associated
with an ATG is selected, the radio sends an attachment of the ATG as the selected group and as a scan group.
The TETRA TIP provides a facility by which the radio can send a status message to the SwMI to turn scanning
off and on to save air interface signaling.
If the radio is provisioned with this option, when you turn scanning off, the radio sends an appropriate TETRA
signaling. In this state, the radio does not monitor any groups other than the selected group. If you then turn
scanning on, the radio sends an appropriate TETRA signaling and begins monitoring all scanned groups again.
If the radio is not provisioned with this option, you only have an option to deselect the active scan list. However,
you cannot turn off the scanning. Deselection of the user scan list causes a group detachment of the scan list groups
sent to the SwMI. However, the radio continues to scan all other groups (such as ATG associations).
2.9.24 SwMI Initiated Group Attach/Detach
The SwMI can send a talkgroup attachment to the radio. The radio will attach to it, even if this talkgroup had not
been programmed in the codeplug.
2-12
-
2.10 Private Call
If the radio receives a SwMI initiated attachment for the group already currently selected, the radio accepts the
attachment, and keeps the group selected.
If the radio receives a SwMI initiated attachment for a group in the currently active scan list, the attachment is
accepted. If it is for a group that is not in the current active scan list, the attachment is rejected.
If the detachment is for the selected group, the display indicates that no group is currently selected. If the
detachment is for a group that is in the scan list, the group remains in the list. However, it is not monitored. If the
detachment is for a group that is in the SwMI controlled list, it is removed from that list.
2.10 Private Call
The Private Call, also called point-to-point, or individual call, enables calling between two individuals. No other
radio can hear the conversation. This call type can be carried out in two ways:
• Duplex call (if the system allows), in TMO Mode. Both parties can speak at the same time.
• Simplex call, in TMO or DMO Mode. Only one party can speak at a time.
From your radio, a Private Call can be started using one of the following methods:
• Dialing ISSI number on the idle screen
• By selecting contact from the address book
• By selecting ISSI number from the recent call list
• Using Remote Control feature
• By pressing predefined One Touch Button
• Other
When a DMO Private Call takes place, radios not involved in this call receive the channel busy indication. The
radios are identified using their radio numbers.
2.10.1 Simplex Private Call
The radio is able to make and receive private calls to and from other TETRA radios with simplex speech capability.
This call type uses TETRA individual call signaling.
All private calls are initiated using the on-off hook method. For incoming calls, the radio accepts both direct
and on-off hook setup.
2.10.2 Duplex Private Call
The radio allows making and receiving private calls to and from other TETRA radios with duplex speech capability.
Depending on the configuration, the radio may prohibit you from initiating duplex private calls.
The radio always initiates duplex private calls using on-off hook signaling with the traffic channel allocated by
the SwMI only after the called party has answered the call. Therefore, the radio generates all progress tones
during the call setup. In addition, the radio allows the SwMI to modify the call setup to direct. This modification
enables the infrastructure to generate the progress tones.
-
2-13
TETRA Radio Product Information Manual
2.10.3 Talk Time Limit
In a simplex call, the radio limits the time you can continuously talk in a group call without interruption, according
to a provisioned value. You are warned a short time before the talk time expires. The timer is provisioned per
talkgroup folder.
In a simplex call, the radio limits the time you can continuously talk in a group call without interruption, according
to a provisioned value. You are warned a short time before the talk time expires.
2.10.4 Call Restoration in Private Call
If the radio roams while you are the transmitting party in a private call, the announced cell reselection is employed
(if possible). Call restoration procedures are performed in the new cell.
If you are not the transmitting party, the unannounced cell reselection is employed, followed by call restoration
procedures.
2.10.5 Call Modification
Call Modification is a feature that allows your service provider to modify the call in order to optimize it and
adjust to a current situation.
Modification can cover:
• Call priority — modified during call setup.
• Call type — modified during call setup.
• Call encryption — modified during an ongoing call (but not in the transmission phase).
When the call is modified, your radio displays Call Modified message.
When a recently modified call requires the PTT button to transmit, your radio displays Call ModifiedUse PTT.
All modifications are made by your service provider and the radio only follows them. You have no influence
on ongoing call modifications.
When call priority is changed to emergency:
• The display indicates that an Emergency Group Call has been received.
• The radio plays a special audio alert.
If a Group Call is modified into an Emergency Group Call, no emergency related features are triggered.
If call modification requested by your service provider cannot be followed by the radio (due to its settings), the
radio rejects it and displays Service Not Available message.
2-14
-
2.10.6 Assistance Call
2.10.6 Assistance Call
Assistance Call feature helps you to call for assistance during normal and non-critical situations. Starting an
Assistance Call means starting a private call on a configured ISSI number. Assistance Call destination address and
priority can be configured in the codeplug. This feature is only supported in TMO mode.
Assistance Call can be a simplex or duplex call depending upon your service provider settings. An Assistance Call
is full-duplex when you start the call using radio menu. When you type the number and press PTT, then your radio
starts a half-duplex call, but if you type the number and press SEND, then the call is duplex.
2.10.7 DMO Individual Call Presence Check
If the other party is listening, the Presence Check feature allows the user making a DMO private call to have a
confirmation. This is important in situations where it is crucial that the message gets through. A radio with Presence
Check enabled displays the “Party not available” message if the other party does not answer. To use this feature,
both radios need to support it.
In addition, radios can be configured to Accept DMO Individual Calls with Presence Check. If enabled, the
radio accepts incoming calls with or without the presence check. If disabled, the radio only accepts private calls
without the presence check.
2.10.8 DMO Individual Only Talkgroups
It is possible to configure some or all DMO talkgroups to allow only individual calls. This helps optimize frequency
allocation in Direct Mode Operation.
2.11 Phone Call
The phone call service enables a radio in TMO to communicate in a one-on-one simplex or duplex conversation
with a phone (for example, a phone calls-enabled TETRA radio or landline number) using a telephone switch. The
radio supports individual call service to an external identity.
Two phone call types are available:
• PSTN (a full phone number) is addressed to the defined PSTN gateway address.
• PABX phone number, for internal calls, numbers dialed are addressed to the defined PABX gateway address.
The PSTN phone call is supported when PSTN/PABX feature is enabled in the codeplug and the SwMI
supports this functionality. The PSTN/PABX gateway must be configured properly.
No more than one PSTN/PABX gateway ID and one PABX/PABX gateway ID are available in the radio.
-
2-15
TETRA Radio Product Information Manual
2.11.1 Initiating a Phone Call
The radio is able to initiate phone calls to a PSTN/PABX with duplex speech capability. This call type uses TETRA
individual call signaling using single stage dialing and hook setup for outgoing calls.
Using the hook signaling for phone calls, implies that until a traffic channel is allocated, the radio generates all
feedback tones internally. In addition, the radio accepts SwMI modification of the call setup to direct, enabling the
infrastructure to generate the progress tones.
Phone calls can also be made between TETRA radios using the MS-ISDN number as the called party number.
MS-ISDN calls share the same gateway as phone calls, that is, PSTN gateway configured in the codeplug. If an
MS-ISDN call is placed, two radios can have a simplex or duplex call based on assigned ISDN number.
The Dimetra Infrastructure does not support private calls and SDS through MS-ISDN.
2.11.2 Receiving a Phone Call
Incoming phone calls (land gateway to mobile) use on-off hook signaling. The radio extracts the gateway ID
from the call setup signaling, to determine whether to start phone or PABX call. That means you need to answer
the call e.g. by pressing the SEND button.
2.11.3 Call Restoration in Phone Call
If the radio roams while being in an active phone call, and the announced cell reselection is possible, then the
announced cell reselection is employed. Also the call restoration procedures are performed.
2.12 Emergency Operations
Emergency Operations are used in critical situations.
Pressing the EMERGENCY button or entering Emergency number and pressing SEND key, activates one or
more services (depends on the service provider setting):
• Sending Emergency Alarm
• Sending SDS Status
• Starting Silent Emergency
• Starting Hot Microphone operation
• Starting Emergency Individual Call (Private or MS-ISDN)
• Sending the GPS location information
It is possible to power up the radio by pressing the Emergency Button. Depending on the service provider
settings the radio can start Emergency Operations automatically. If the radio was PIN-protected (except
SIM PIN), Emergency Operations will bypass the PIN lock for the duration of the Emergency Operations.
2-16
-
2.12.1 Emergency Group Call
During Emergency Operations, the radio automatically rejects phone, PABX and private calls, and does not
monitor the talkgroups in the selected scan list. However, if an ATG is the selected group, the radio monitors
the sub-groups associated with the ATG.
When entering Emergency Operation, any ongoing voice call is aborted or cleared down. Any packet data transfer
in progress is aborted. However, the session is kept open.
2.12.1 Emergency Group Call
The Emergency Group Call has the highest communication priority that means it is the pre-emptive call. Emergency
Group Call is available in both TMO and DMO modes. During Emergency Operations, Emergency Group Call can
be started by pressing PTT. The MS may also support Hot Microphone operation, which allows the Emergency
Call to be conducted without pressing PTT.
If a radio receives an incoming group call with emergency priority, the display shows that an emergency call
has been received, and a special audio alert is played.
An emergency group call can be configured as non-tactical or tactical:
• A non-tactical call is initiated on a talkgroup designated by the codeplug setting. When in non-tactical
emergency mode, you cannot switch talkgroups.
• A tactical call is initiated on the currently selected talkgroup
In TMO, if the radio enters emergency operations while the emergency broadcast call is active the radio continues
on the call without initiating any calls and sends an emergency alarm.
2.12.2 Non-Tactical Emergency
In Non-Tactical Emergency the radio switches to a designated Emergency talkgroup when starting Emergency
Operations. This talkgroup is used for the complete duration of the Emergency Operations (you cannot change the
talkgroup).
In TMO, it is possible to configure the radio to make Emergency Non-Tactical Group Calls without sending
attachment. If this is set, the radio assumes implicit attachment after receiving a temporary address.
In DMO, the Non-Tactical Emergency proceeds on the same frequency as the previously selected talkgroup. The
service provider can designate any ITSI address to be used for Emergency Operations, (this can be an Open
Group – broadcast address).
After exiting from Non-Tactical Emergency, the radio goes back to the previously selected talkgroup.
2.12.3 Emergency Individual Calls (Private or MS-ISDN)
The Emergency Individual Calls are Simplex or Duplex Calls with emergency priority. On pressing the
EMERGENCY button, the radio initiates an Individual Call to the provisioned address (private or MS-ISDN).
During this kind of call all user indications are unavailable and all other services are rejected. Emergency Operation
ends as soon as the Emergency Individual Call is ended.
-
2-17
TETRA Radio Product Information Manual
2.12.4 Emergency Alarm
The emergency alarm is a special status message sent to the infrastructure while starting the Emergency Operations.
The radio may wait for infrastructure acknowledgment for this alarm and attempts retries.
Each time the radio enters the Emergency operation, it sends an emergency alarm. When an emergency alarm is
sent successfully, the respective audible tone sounds.
In addition, once the radio is in the Emergency Operation on pressing the EMERGENCY button, an additional
emergency alarm is sent. (Exception: during Hot Microphone transmission).
The message can be dispatched both in TMO and DMO.
2.12.5 Emergency SDS Status
Radio sends a status message with a preprogrammed value to the destination address set up in the codeplug.
Emergency SDS Status is available in TMO only. If no status acknowledgment or negative acknowledgment is
received, the radio retries sending the message. Status is not resend if Emergency Alarm or Hot Microphone is
configured.
2.12.6 Emergency Hot Microphone
The Hot Microphone allows you to talk without pressing the PTT button during Emergency Operations. The
transmission continues for a provisioned amount of time. Pressing the PTT button before the Hot Microphone
time expires ends the Hot Microphone operation. Then normal PTT operation in Emergency group call takes over
(that is, the transmission is ongoing for the time the PTT button is held).
Subsequent EMERGENCY button presses during the Emergency Operation restarts the Hot Microphone
transmission.
If a talk permit is granted to another member of the group, the Emergency Call received tone is played. If
configured, the radio automatically attempts to get talk permit again.
Pressing EndSOFT key or END key ends the Hot Microphone operation.
2.12.7 Alternating Hot Microphone
The Alternating Hot Microphone is an enhancement of the Hot Microphone feature. It allows you to have the Hot
Microphone switched on and off alternately.
If this feature is enabled, you can initiate the Alternating Hot Microphone by pressing the EMERGENCY button.
The Alternating Hot Microphone terminates when one of the following conditions is met:
• The radio exits the Emergency Mode.
• The Alternating Hot Microphone timer expires.
• The PTT button is pressed.
• The right SOFT key is pressed (only during the transmission timeslot).
To skip your transmission timeslot and jump to a receiving timeslot, press END key.
2-18
-
2.12.8 Silent Emergency Mode
When the radio goes out of the service, it enters the receiving mode and the Alternating Hot Microphone
is on hold. When the radio is back to the service, the Hot Microphone transmission and the Alternating
Hot Microphone resume.
When the user is in the Emergency Mode, pressing EMERGENCY button restarts the Alternating Hot
Microphone.
2.12.8 Silent Emergency Mode
The Silent Emergency Mode is a type of emergency services that provides no audible indications and no keypad
tones at the entrance. All the display indications are as in the idle mode. However, the radio cannot use any
services except for:
• Receiving Ambience Listening
• Sending Silent Emergency Alarms
• Sending GPS location reports
If you try to activate any other feature, it is blocked.
If the Silent Emergency feature is enabled, the radio enters Silent Emergency Mode on pressing the EMERGENCY
button. After entering this Mode the radio stays in TMO or switches to it, depending on the actual state. Once
in TMO, the radio sends Silent Emergency Alarm.
If the radio is in a private or group call, the radio waits until the call ends and then enters the Silent
Emergency Mode.
The radio keeps re-sending the alarm until successful sending is confirmed. After the alarm is successfully
delivered, the radio stays in Silent Emergency Mode and waits for the Ambience Listening.
Your radio exits the Silent Emergency Mode, under the following conditions:
• Press MENU and then # key within 3 seconds.
• Press MENU simultaneously with right NAVIGATION key.
• Press both SOFT keys simultaneously.
• No success in sending the Silent Emergency Alarm and the maximum number of retries has been reached.
• The control room terminates the Silent Ambience Listening.
• The Ambience Listening is disconnected due to another reason.
-
2-19
TETRA Radio Product Information Manual
If you turn off the radio in the Silent Emergency Mode, the radio switches to pseudo power off state. In this state, the
radio appears to be turned off. However, the radio is still on and in the Silent Emergency Mode. On turning the radio
on during the pseudo power off state, the radio acts as during turning on and still is in the Silent Emergency Mode.
2.12.9 Invisible Emergency
It is possible for the service provider to disable visual and audible indications of performing Emergency Operations
on the radio. The purpose of this feature is to hide the fact of using Emergency Operations in a critical situation
(e.g. direct attack on the user) and thus to provide additional layer of safety.
2.12.10 Disaster Alert
Disaster Alert call is a broadcast emergency call initiated by the radio, with emergency pre-emptive priority
that everyone in a broadcast area can hear. This feature is specifically designed for catastrophic situations, such
as earthquakes, and has the highest priority over other calls. All radios under Disaster Alert display emergency
notification on their screens. The alert message, its duration and destination talkgroup can be configured in the
codeplug.
In order to initiate Disaster Alert, switch the radio to Disaster Alert mode and press PTT button. When the call
ends, the radio will exit the Disaster Alert state.
During Disaster Alert, other functionality is impacted:
• When Disaster Alert begins, any other ongoing services are terminated.
• No other services can interrupt this type of call.
• Hot Mic functionality cannot be used.
• Speech can only be in Clear mode, even if any of the encryption services are enabled. The only exception is
E2E Encryption.
Not all infrastructures support this feature. Please consult with your service provider before enabling
this feature.
2.13 Short Data Services
The radio supports the following Short Data Service (SDS) message types:
• SDS Status.
• SDS User Defined Data Types 1, 2, 3.
• SDS User Defined Data Type 4 with or without SDS Transport Layer (SDS-TL).
The feature supports the following addressing modes:
• Radio to radio.
• Radio to talkgroup.
• Radio to external subscriber number (gateway address).
2-20
-
2.13.1 Status Messages
For SDS-TL, the message can be sent through the service center.
The radio provides a short data bearer service for both internal and external applications.
The radio supports SDS-TL services which provide end-to-end acknowledgments, delivery report requests, and
message numbering for SDS user-defined data type 4 messages. The TL also provides SDS access for applications
that do not request these transport layer services, however, use a Protocol Identifier (PI). The radio can send the
delivery report by using an appropriate TETRA signaling, even if the originator requested a short report. The radio
can support the old SDS-TL standard for operation on legacy systems, or for operation on other SwMIs.
An externally connected device may access the SDS services in the radio using AT commands and TNP1 protocol.
An external application may use this service to send and receive SDS statuses, SDS user-defined data types 1,
2, 3, and 4.
Downlink SDS messages type 4 are presumed to contain a PI for identifying the target application. If an external
application has registered with the radio for that PI, the radio delivers the message to the target application. The
radio may receive downlink SDS messages that are successive retransmissions of a message already received and
acknowledged by the radio. The radio does not display these messages, nor store in them in the inbox, nor send
them to an external application.
2.13.1 Status Messages
You can select from a list of up to 100 pre-programmed alphanumeric aliases each of which corresponds to a status
value. The valid range of uplink status values is a set of provisioned parameters. If the radio is not enabled
with targeted status, the status value is sent over the air interface to the address of the selected group. The radio
recognizes the general status acknowledgment sent from the SwMI, as well as the negative acknowledgment. In
TMO, if no status acknowledgment or negative acknowledgment is received, the radio retries sending the message.
The number of retries and time to wait before retrying are provisioned parameters. You are notified of the delivery
status. As there is no acknowledgment for DMO status messages, you are notified only of sending the status
message. The radio does not initiate sending of status messages on a traffic channel.
If the radio is provisioned with the targeted status, the status value is sent over the air interface by default to the last
sent target. You have also an option to specify a different individual or group to send the message to. In other
words, you can send an SDS status message to a directly entered ID (for example, ISSI, GSSI, MS-ISDN). If the
radio is not provisioned with the targeted status and you want to send an SDS status message, the following
possible actions apply:
• When the default address type of targeted SDS status is set to Private or Phone, the default address is
used as ISSI or ISDN, depending on configuration.
• When the default address type of targeted SDS status is set to group, the selected talkgroup address is used.
• When the targeted SDS status is set to `Dynamic`, the status message is sent to the address configured for
the Dynamic statuses, or defined by a dispatcher (by means of SDS Remote Control).
The radio accepts status messages from addresses it is monitoring. The radio can be preprogrammed with an
appropriate text associated with each status value. The radio notifies when a new status message has been received.
Upon receiving an incoming status message, the stored text corresponding to the status value is extracted and placed
in the text message buffer as a text message. Receiving a status causes the radio to display the message mail screen,
allowing the user quick access to read the message. A received status can be stored in the radio text message buffer.
The PEI provides access for external applications to send and receive status messages.
-
2-21
TETRA Radio Product Information Manual
2.13.2 Text Messages
The radio supports an internal text messaging application using the TETRA SDS Transport Layer. The radio can
send and receive up to 140 bytes of payload data (which can be up to 160 characters, if a 7-bit encoding is used).
Depending on radio settings, for each message in the Inbox , the following options are available:
• Store — used to save the message as a template.
• Delete — used to remove the message from the list.
• Delete All — used to remove all the messages from the list.
• Reply — used to send a reply to the message originator with the option to edit the text (where available).
• Forward — used to send the current message to another recipient with the option to edit the text.
• Refresh — used to reorder the messages list and see the newest at the top. When you are in the Inbox and
the new message comes, refresh the list to see the new message.
The radio provides an edit facility for composing and editing a text message. The message can be sent to a target
TETRA radio using SSI addressing, and is sent with a request for a received delivery report.
All the outgoing text messages (short or long) are stored in Outbox, when the store and forward mechanism is
not in place. When the store and forward feature is enabled and the messages go through the store and forward
server, the short messages are stored regardless the delivery status. Whereas, long messages are stored only if
delivered (even if only to the store and forward server). Depending on radio settings, for each Outbox message the
following options are available.
• Store — used to save the message as a template.
• Delete — used to remove the message from the list.
• Delete All — used to remove all the messages from the list.
• Resend — used to send the message again to the same recipients with the option to edit the text.
• Forward — used to send the message to the other recipient with the option to edit the text.
• Refresh — used to reorder the messages list and see the newest at the top.
• Delivery Status — used to check the time and the date when a message was sent, delivered, read, expired,
or not delivered. Every status change is communicated.
Delivery report is saved in the Inbox and in the associated message in Outbox. However, the report is deleted
from the Inbox after viewing it.
Outbox and Inbox share memory area, hence their capacity depends on the combination of stored short and long
messages in each of these folders. If Inbox is empty, Outbox may store up to 100 short messages or at least 20 full
size long messages. If Outbox is empty, Inbox may store up to 100 short messages or at least 10 full size long
messages. When you enter Messages submenu, the number on the right side of Inbox and Outbox is indicating the
number of the messages stored. If the Outbox is empty, then the radio displaysNo Messages notification.
Upon receiving a text message, the radio places the text into a circular buffer. You are notified when a new text
message is received and a quick access to read the message is provided. If a delivery report is requested, the radio
sends it upon receipt of the message by SDSTL. If a consumed report is requested, the radio sends it when you
read the message.
If you read the message when the radio is out of service, the report may not be sent.
You can save incoming or edited (outgoing) text messages. These messages can be edited and sent.
2-22
-
2.13.2.1 SDS Messages Concatenation
For each message, you can verify its timestamp. The timestamp displayed is extracted from the SDS TL PDU. The
timestamp is generated and inserted to the message by the SwMI.
2.13.2.1 SDS Messages Concatenation
This feature allows sending long text messages up to 1000 characters. All the messages that are longer than 140
characters are divided and sent separately one after another. When a recipient receives all the parts of the message,
it displays as one on the screen.
When the radio receives an SDS message and the Inbox/Outbox is full, the radio acts according to the Buffer Full,
Overwrite Policy codeplug field settings.
When the text or status message is received and accepted, the radio retrieves actual time information from
its internal clock.
The radio can reconstruct a long text message consisting of up to ten short messages. The maximum length of the
message is 141-1000, what can be defined in the codeplug. The radio recombines the text segments independently
of the order they have been received to the correct order of the original message. The message can be combined
only if all their message reference number are correct and the segmented receiver timer is still valid.
You can send long text messages to an individual destination. However, sending long text messages to groups is
not possible:
• Receiving the message during group/broadcast call — radio allows receipt of the text message during ongoing
group call and broadcast call. The group/broadcast call is displayed with the New mail arrived icon and tone for
mail reis played.
• Emergency Mode — you can receive SDS messages. To read the SDS messages the radio have to leave the
emergency mode. Sending the SDS messages in the emergency mode is prohibited.
When sending long, segmented text messages, a timer is activated. If not all segments of the message are received
before the timer expires, the whole sending process is considered as failed. The value of the timer is set by the
service provider.
2.13.3 Immediate Text Messages
Immediate Text Messaging is a selling feature which enables displaying the text message immediately on the radio
display. This feature is used for sending high important information from the console to radios.
When the radio has the feature enabled and receives an immediate text message, then:
• the immediate text message is stored in the Inbox.
• the content of the immediate text message is displayed.
• the relevant audio tone is played.
• additionally if the periodic alert feature is enabled, the periodic alerting is active until the immediate text
message is skipped or closed.
When the feature is disabled in the radio, then immediate text messages are processed as normal text
messages.
When you reply or forwards an immediate text message, the message is sent as a normal text message.
-
2-23
TETRA Radio Product Information Manual
When the radio receives more than one immediate text message, then just the latest received immediate message is
displayed. All the previous immediate messages in the Inbox are not prompted.
2.13.4 Home Display Text Message
Your radio is provided with a feature that allows your service provider to send special text messages to the display.
The message stays on the home screen until a new message is received. Power cycle your radio to replace the Home
Display message to the predefined one.
2.13.5 Predefined Templates (ATS Entry Prompt)
This feature assists the radio in sending formatted messages with a predefined destination address (MS-ISDN, SSI
or TSI) for computer applications.
You can select a predefined entry prompt which defines a message format to assist in the construction of an SDS
message. The prompt definition is set in the codeplug. The definition sets areas that are read-only, areas that can be
edited, and the type of characters that can be entered (numeric, alpha-numeric or phone digits). Along with the
message definition, the address to send the message is provided.
When you send the message, it is sent using SDS-TL with the PI that is provisioned in the codeplug. A receipt
report is requested.
2.13.6 SDS Air Interface Aspects
The radio can be provisioned to send a short-form SDS-TL receive report when the originator of the message allows
short-form report. The short form report uses specially designated SDS status values instead of SDS-REPORT.
The radio supports SwMIs that employ store and forward service as indicated in the cell broadcast information.
The radio supports use of a service center, which address is set in the radio. The store and forward operation is
supported. However, the radio notifies you only on successful sending of the message. The radio does not wait for
the report from the service center.
Downlink SDS messages types 1, 2, and 3 are always routed to the PEI when an AT application is registered. If no
external application is registered, the message is discarded.
The DMO SDS do not support type 1,2, and 3 user-defined short messages.
2.13.7 SDS Encryption
Short data messages stored in a radio are protected against any unauthorized access. The stored data includes
messages in the Inbox, Outbox, and stored call out messages.
The required protection against any unauthorized access through the MMI, PEI, or unintentional access by other
means is carried out through the special mechanisms. The encryption of stored messages preventing from accessing
the memory directly and the user authentication protect SDS messages. Protected messages cannot be read on the
radio MMI unless valid authentication occurs. For the user authentication, the existing radio PIN is used.
2-24
-
2.13.7.1 SDS End-to-End Encryption
SDS messages received by the radio are encrypted before being stored in the Inbox. Store and Forward messages
are encrypted before being saved in the Outbox.
Received call out messages are encrypted before being stored in the CO Box.
If the feature is enabled, then the radio prompts you to enter the PIN if any of the following menu items are
selected from the MMI.
• Messages → Inbox.
• Messages → Outbox.
• Messages → CO Box.
Following successful PIN entry and access to the required messages, the radio does not require further PIN entries
to access messages unless one of the following conditions has been met.
• Exiting from the radio menu.
• Turning off the radio.
• Changing the PIN from the MMI.
If you disable the PIN lock through the MMI or change the PIN, the protected messages are deleted. Before
deleting the messages, you are prompted to ensure that the operation should proceed. If the PIN lock is changed
through the PEI, all the protected messages stored in the Inbox, Outbox, and CO Box are deleted. On enabling
the radio permanent disable, the access to the protected messages is lost.
2.13.7.1 SDS End-to-End Encryption
The TETRA standard supports the air interface security that provides protection of the air interface. The
information flow inside the infrastructure is not secured. When you require data protection for your data going
through the infrastructure, you need your entire transport path to be encrypted.
This entire path encryption is called end-to-end encryption (E2EE). The source and the destinations are supplied
with the mechanism for encrypting and decrypting.
E2EE is a selling feature which provides customers with a higher degree of confidentiality than existing TETRA air
interface data encryption.
The 260–275 MHz radios do not support the SDS end-to-end encryption.
In air interface encryption, the receiving base station decrypts data which travels clear within the system domain.
For E2EE, the transmitting radio encrypts the data and the receiving radio or an E2E terminator located in the
infrastructure decrypts the data.
E2EE protects the SDS/SDS-TL data services both in TMO and DMO. The following TETRA data types are
protected.
• SDS type 4 with SDS-TL.
• SDS type 4 without TL.
For short data applications, the source data may come from an external application or from a task internal to the
radio, such as text messages or GPS. The radio passes only the internal text messages and GPS data for encryption
by its crypto engine.
-
2-25
TETRA Radio Product Information Manual
The encrypted short data service is established between two end points. One end point is terminated in the radio,
and the other end point is terminated in a Short Data Encryption Gateway (SDEG) or another radio. The destination
address specifies the encryption type, that is, whether the packets are transmitted as encrypted, clear or dropped.
Figure 2-3
SDS End-to-End Encryption
Data Services
TETR A System
Boundary
Message Display Service
and Other Embedded
Aplications
PEI
End-to-End SDS Encryption
End-to-End Key Management
Short Data Transport Layer
(with or without SDS-TL)
Short Data Service
Type 4
Standard TETR A Air Interface Encryption
and Key Management
Key Management Facility (KMF) can manage and support only one short data association and a key
at the same time.
The radio selects the E2EE mode for the outgoing text message in accordance to the address association and
requirements for the E2EE High Security Mode. Depending on codeplug settings you can override the address
association and select using the MMI menu whether an SDS is sent to clear or encrypted contact (Group or
Private Number).
The radios support the high security mode configurable using the CPS. In this mode the association that binds the
address to a given cryptogroup is always mandatory.
If no cryptogroup associations exist, this means that the keys are not loaded. In such situation, the radio discards
any outgoing or incoming message that is encrypted. You are alerted when this situation occurs.
This feature can only be disabled using the KVL.
2-26
-
2.13.8 Store and Forward
2.13.8 Store and Forward
This feature allows communicating with each other without being available at the same time. If the destination
is not reachable, the message is stored in the system (if supported) until it is available or the expiration time
is exceeded. The system is configured to delete the message after a preconfigured time and this time cannot
be configured using the radio.
You can send the store and forward messages to an individual address or a group. Depending on the codeplug
settings, if you choose to send it to the group, the message status is switched from Store and Forward to
Immediate.
2.13.9 SDS Receive Failure Notification
When a radio fails to decrypt a received SDS message, it displays a notification including the ISSI of sender and
reason for failure.
2.14 Security Services
The radio provides TETRA security features as described in the TETRA Security ETS 300 392-7 standard, TTR
001-11 TIP, and TTR 001-13 TIP.
2.14.1 Terminal Equipment Identity
The Terminal Equipment Identity (TEI) is unique identification number programmed in the radio at the factory and
cannot be later modified.
2.14.2 PIN/PUK User Authentication
In order to authenticate yourself, the radio supports a Personal Identification Number (PIN) and PIN Unblocking
Key (PUK) mechanisms. These mechanisms prevent from an unauthorized access to the radio. The PIN/PUK
operations are available from both MMI and PEI (using AT commands).
For the authentication purpose the radio prompts you to enter a valid 4-digit PIN, before the radio allows to access
all the available services. The PIN is defined in the codeplug.
If the maximum number of consecutive failed attempts is reached, the radio is blocked and remains in this state
until unblocking. The permissible number of consecutive failed attempts is defined in the codeplug. The blocked
status is sustained regardless of turning off or battery removal.
When the radio is PIN locked, you have no or limited access to the radio services. The PIN is defined in the
codeplug. The radio is unblocked either by entering the PUK or by using the CPS. The PUK can be entered through
the MMI or through the PEI. The PUK is defined in the codeplug.
2.14.3 Authentication
Authentication establishes a level of a trust between a radio and SwMI. It is a challenge-response result protocol
between two parties based on their common knowledge of a secret key (K) to verify each others identity.
-
2-27
TETRA Radio Product Information Manual
The SwMI authentication centre (AuC) provides a single K for authentication, which is shared only with the
radio. Authentication is always initiated by the SwMI, the radio can also authenticate the SwMI (if set by the
service provider).
2.14.4 Air Interface Encryption
The radio supports TETRA Air Interface Encryption (AIE) using the standard TETRA public encryption algorithms,
as defined in TETRA Security ETS 300 392-7, TEA1, TEA2 and TEA3. The focus of cryptography in TETRA is
the encryption key. TETRA AIE provides 12 000 000 000 000 000 000 000 000 key combinations.
TETRA TMO has three classes of encryption:
• Class 1 — clear (none).
• Class 2 — static key encryption (SCK).
• Class 3 — derived key encryption (DCK, sometimes called the dynamic key), the Common Cipher Key
(CCK), and the Group Cipher Key (GCK).
TETRA DMO has two classes of encryption: Class 1 and Class 2.
The security features supported in the radio depend on the security mode.
Table 2-2
Security Features Required Per Security Class
Mode
Security Feature
Security Class 1
Security Class 2
Security Class 3
Security Class
3G
Radio Initiated
Authentication
Not Allowed
Not Allowed
Not Allowed
Not Allowed
SwMI Initiated
Authentication
Optional
Optional
Mandatory
Mandatory
Mutual
Authentication
Optional
Optional
Optional
Optional
OTAR
N/A
Optional
Mandatory
Mandatory
SCK AIE
N/A
Mandatory
N/A
N/A
DCK AIE
N/A
N/A
Mandatory
Mandatory
GCK AIE
N/A
N/A
N/A
Mandatory
In the current release the radio does not support the following security features:
• Radio initiated authentication
• Support for TEA4
• Explicit authentication during DGNA
Enhanced Security, which consists of TMO Air Interface Encryption class 3G and DMO class 2, is a selling feature.
2-28
-
2.14.4.1 Clear Radios (Class 1)
2.14.4.1 Clear Radios (Class 1)
A radio can be configured as a clear radio. In such case the radio identifies itself in registration as a Security Class 1
radio and does not support encryption. A Security Class 1 radio does not contain any encryption algorithms in
its software.
2.14.4.2 Static Cipher Key Encryption (Class 2)
The radio supports static AIE using a set of up to 32 static cipher keys (SCK) shared by the SwMI and all authorized
radios. The radio then determines which static keys to use based on the SCK Number (SCKN) and SCK version
number (SCK-VN) broadcast by the SwMI.
A radio can be configured to support static key encryption. In such case it identifies itself in registration as a
Security Class 2 radio, and attempts to negotiate Security Class 2 encryption. Each radio then uses either the TEA1
or the TEA2 (TEA 3 — for Asia and Pacific) Key Stream Generator (KSG) algorithm. Each radio contains only
one of those algorithms in its software.
When Security Class 2 Encryption has been negotiated, encrypted PDUs are encrypted using SCK.
In DMO, the system manager may choose the SCK and the key may be distributed from the TMO SwMI using the
OTAR mechanism or provided manually using KVL.
2.14.4.3 Derived Cipher Key and Common Cipher Keys Encryption
(Class 3)
DCK/CCK are required to prevent over-exposure of key material. Existing encryption systems use Static Cipher
Keys (SCK), where one key is used for all radios and all calls. Key material is often exposed and SCK logistics of
changing keys consist in programming all radios and base stations.
DCK is used for individually addressed TM-SDU (Service Data Unit). DCK/CCK encryption provides Derived
Cipher Key (DCK) for uplink (from the radio to the BTS) communication and Common Cipher Key (CCK) for
downlink (from the BTS to the radios) group communication. The DCK is derived from either the one way or
mutual authentication process and the CCK is received during registry.
The radios supporting the dynamic key encryption identify themselves to the system as Class 3 radios during
registry and attempt to negotiate Class 3 encryption. A Class 3 radio supports group addressed signaling and group
call traffic encryption using CCKs as well as encryption of uplink and down link individually addressed signaling
messages and individual call traffic (private or phone) using its DCKs. The radios support Over-the-Air-Rekeying
(OTAR) of the CCK by the system.
A clear radio can set up calls to and receive calls from encrypted radios. The system informs the encrypted radios
that the call is with a clear radio and they switch to clear operation. Class 2 and 3 radios can only act as described if
they are allowed to operate in a lower class.
2.14.4.4 Group Cipher Keys Encryption (Class 3G)
For the Security Class 3G the system allows grouping addressed signaling and dedicated group call traffic
encryption using GCKs to cryptographically isolate talkgroups. The downlink signaling is encrypted using MGCK
that is cryptographically derived from the CCK associated with the serving cell and the GCK associated with a
given talkgroup. The SwMI does not change GCK and CCK simultaneously. Whenever a GCK change occurs,
CCK changes are frozen for this time period.
The DCK is derived from either the one way or mutual authentication process and the CCK is received during
registry, whereas the GCK is received through OTAR mechanism only.
-
2-29
TETRA Radio Product Information Manual
The radio supports over-the-air and manual provisioning of key associations that link a GCK to one or more TMO
talkgroups, and manual provisioning of KAG to one or more DMO talkgroups.
The system can provide the ability for the operator to group contiguous ranges of TMO SSI. This case occurs where
any talkgroup residing within the address range is assigned using the same GCK association. These ranges, referred
to as Key Association Ranges (KAR), are used to convey the TMO talkgroup and GCK relationships to the
relevant SwMI and radios responsible for GCK functions.
2.14.4.5 Over-the-Air-Rekeying
TETRA systems support GCK encryption for specific talkgroups:
• Group Over-the-Air-Rekeying (OTAR) of GCK.
• Group OTAR of fallback TM-SCK.
• Group OTAR of DM-SCK, including management of the cryptographic schedule of DM-SCKs.
The group OTAR mechanisms require a use of the group session key for OTAR (GSKO). The GSKO is delivered to
the radio only by using individual OTAR and the session key for OTAR (KSO).
For the systems utilizing group OTAR, the fundamental system operation (with respect to SCK/GCK OTAR) relies
on the sites regular transmission. In other words, the sites are regularly broadcasting information regarding which
security class and associated keys are in use. The sites transmit future versions of the respective keys to groups of
radios belonging to the same cryptographic management group (CMG). The radios acquire the keys before the
SwMI activates them. Then the air interface encryption service uses the keys. The sites also broadcast the current
key that is in use which can be sent using OTAR mechanism to the radio on request.
When a radio has not received a new key before activation by the SwMI, the radio requests the missing
keys.
Some systems adopt only individual OTAR methods for delivery of SCK and GCK to the radio. In such cases
GSKO is not used. Some systems employ a mix of individual and group OTAR methods. The radio supports the
complement to functionality required for supporting the superset of different SwMI behaviors, for example:
• Individual OTAR (using KSO) of SCK and GCK.
• Group OTAR (using GSKO) of SCK and GCK.
• Individual OTAR (using KSO) of GSKO.
• Secure DMO Key Management (via SwMI).
• Crypto Management Group.
• Storage of 10 KAG (equivalent to 30 DM-SCK).
• Storage of 16 GCK (includes current/future versions).
• Storage of 2 TM-SCK.
• Storage of Group Association attribute per Talkgroup.
• GCK Air Interface Encryption.
• Seamless key changes of GCK.
• Seamless security class changes to SC3G.
2-30
-
2.14.4.6 Encryption Mobility
The SwMI can support the group OTAR feature. Where supported, the SwMI groups radios that share the same set
of cryptographic key material into a specific crypto management group (CMG). Any radio belonging to the same
CMG is addressed using a CMG GTSI. The primary purpose of the addressing is to transmit group OTAR messages
conveying TM-SCK, DM-SCK and/or GCK. Any radio that supports TM-SCK group OTAR, DM-SCK group
OTAR or GCK group OTAR is assigned to a specific CMG.
Each CMG has a designated specific GSKO. The system deploys over the air a CMG GSKO (and CMG GTSI) to
each radio belonging to the CMG. The GSKO is used as the sealing key for TM-SCK, DM-SCK, and GCK, when
sent across the air interface. The SwMI can perform scheduled transmissions of the future TM-SCK addressed to
each CMG. The radio requesting a TM-SCK triggers the site to schedule additional transmissions of the requested
TM-SCKs. These transmissions are addressed to either the CMG GTSI that the radio belongs to or its ITSI.
The SwMI can perform scheduled background transmissions of the future GCKs addressed to each CMG. The
radio requesting for a given GCK triggers the site to schedule additional transmissions of the current and the
future versions associated of the requested GCK. These transmissions are addressed to either the CMG GTSI that
the radio belongs to or its ITSI.
The SwMI can perform scheduled background transmissions of the current and the future DM-SCK addressed
to each CMG. The radio requesting for a DM-SCK triggers the site to schedule additional transmissions of the
requested DM-SCK. These transmissions are addressed to either the CMG GTSI that the radio belongs to or its ITSI.
2.14.4.6 Encryption Mobility
A Class 2 or Class 3 radio can operate on a lower class SwMI (depending on configuration). A radio that is
provisioned not to allow operation on a lower class SwMI, does not register on such a cell.
A Class 2 or Class 3 radio moves to a cell that supports an SCK/CCK/GCK that the radio possesses, applies AIE to
the registration PDU. If no acknowledgment is received, the radio sends the registration in clear.
2.14.4.7 Encryption MMI
A Class 2 or Class 3 radio that is involved in a clear call provides a visual and an audible indication informing that
the call is not encrypted (if enabled by the service provider).
2.14.4.8 AIE Key Storage
The radio stores all the keys, SCK/CCK/DCK/GCK, in a sealed manner in non-volatile memory of the radio.
However, they are not stored in the codeplug.
The radio supports loading of the SCK keys manually using the Key Variable Loader (KVL).
By using a special key combination, you can delete the cipher keys in the radio. Depending on configuration, you
may erase either all keys or only the short-term keys.
2.14.4.9 Deleting User Keys
Prerequisites:
The user key deletion is enabled in the codeplug.
-
2-31
TETRA Radio Product Information Manual
Procedure Steps
1
Verify that the radio is turned on.
2
Press the following key sequence: *, *, 0, 0, #, #.
The key deletion takes up to 30 seconds. During the period, the battery must not be removed. Removing the
battery during that period may lead to radio malfunction.
Result:
Encryption and/or Authentication keys are deleted. The radio enters Temporary Disable state and must be manually
restored by the service provider.
2.14.5 Secure DMO
The Secure DMO feature guarantees key ciphered transmission in the DMO.
When DM-SCKs are provided by OTAR, you are informed in case the radio does not contain the complete set of
SDMO keys. Whenever the radio enters DMO and the radio does not possess past and present DM-SCKs for all
provisioned KAG and/or it has not yet successfully received SCK Subset Grouping Type, SCK Subset Number and
SCK-VN information from the SwMI, then the radio:
• plays a special reject tone.
• prompts a message indicating OTAR incomplete.
The radio provides SDMO status information to the user via the MMI DMOSCK Validity submenu inside the
Security menu (present only when configured in the codeplug):
• DMO SCK is Valid — DMO SCK OTAR is disabled and all DM-SCKs are provided using the KVL.
• DMO SCK is Valid — DMO SCK OTAR is enabled and the radio knows the current SCK information and
has all the corresponding past and present DM-SCKs.
• DMO SCK is Invalid in all other cases.
The radio supports system management of SDMO keys. The radio using system managed SDMO requires the
structure of DM-SCKs used for SDMO, the current active SCK Subset Number, and Version Number information
to coordinate key schedules. The radio considers the last received variant of this information PDU as the most
accurate indication of SDMO key configuration.
DMO SCK can only be used if Enhanced Security feature is purchased.
2.14.6 End-to-End Encryption
The TETRA standard supports air encryption. The radio creates the PDU (Protocol Data Unit) and the PDU is
encrypted before transmission. The base station receives this PDU and must decrypt it, to know what to do with it
and where to send it. Thus, if a PDU contains voice information, the voice part of the message has been decrypted
and is now unprotected, until it is transmitted out to the caller.
2-32
-
2.14.7 Radio Disable/Enable
Figure 2-4
Voice and Data End to End Encryption
Data Services
TETRA System
Boundary
Voice Code c
End-to-End Encryption
End-to-End Key Management
PEI
Standard TETRA Air Inte rfa ce Encryption
and Key Management
Short Data Service
Type 4
The End-to-End Encryption (E2EE) feature resolves this issue by encrypting the voice information before it is
packed into the PDU. This message is also encrypted according to the over-the-air encryption of the TETRA
standard. Thus, when the base station decrypts the PDU containing voice information, the voice part remains
protected by encryption until the called radio receives the voice and decrypts it.
The Motorola Advanced Crypto Engine (MACE), located in the radio, carries out voice encryption. The crypto
engine takes the voice stream and encrypts this stream using a set of keys. Likewise, the crypto engine takes
encrypted voice stream and using the same keys decrypts back into clear voice.
In the end-to-end encryption feature, the radio notifies and informs whether the call, being made or received, is
voice-encrypted. The radio also provides with means to select a different key, delete keys, request new keys and
change the encryption mode of nondefined private calls.
This feature is relevant for group calls and private calls in TMO and DMO.
2.14.7 Radio Disable/Enable
On reception of an appropriate TETRA signaling for subscription disable with the correct SSI and MNI of the
radio, the radio becomes disabled.
When disabled, the radio does not participate in any voice call, SDS, or packet data activity and ignores all
supplementary services sent on the downlink. All visible and audible indications are disabled, and the radio appears
to be turned off. All user inputs (key presses, knob operation) are ignored, and the PEI interface is closed.
The radio continues to perform mobility management functions, such as roaming, to facilitate subsequent enabling
(or further disabling).
The radio stores the disabled/enabled state in the codeplug, so the unit remains in that state after turning on.
If the radio is in the disabled state, and receives an appropriate TETRA signaling for subscription enablement with
the correct SSI and MNI, it restores to its normal operative state.
The TEI Query feature provides TEI information to the infrastructure during registration. This allows to disable
the radio by sending an appropriate TETRA signaling for equipment disable with the correct TEI for this radio.
Replacing the SIM card does not activate the radio.
-
2-33
TETRA Radio Product Information Manual
If the radio is in the equipment disabled state, and receives an appropriate TETRA signaling with the correct TEI,
the radio restores to its normal operative state (if the subscription is also in the enabled state).
2.14.8 Radio Permanent Disable
Permanent disabling is intended to protect a network from attack from a compromised or faulty radio. It can be
used when the radio has been compromised, or has been suspected of compromise for a long time. It is a one-way
function and no equivalent enable is available. Then the radio should be recovered and reprogrammed before
being used again by the service provider.
When the radio is permanently disabled, it becomes inoperable.
• All its MMI interfaces on the radio are disabled.
• All its security key material, that is GCK, GSKO, DMO SCKs, Ks, DCK, CCK, TMO SCKs are deleted.
• All its codeplug is deleted.
• All its software is deleted.
The permanent disable should be invoked when it has been determined that a radio is unrecoverable. When a radio
has been lost or stolen, the first step always is to stun the radio (using the temporary disable).
The permanent disable should be used with the deletion of the user radio record in the User Configuration Server
and the deletion of the K-REF association of the disabled radio in the Provisioning Centre and the Authentication
Centre. This deletion ensures that subscriber information is not downloaded into the Home Location Register if a
restore of the UCS is performed.
The system operator has to also ensure that the radio K-REF association is also removed from the other
Authentication Centres in the network, in cases where the K-REF pairs are duplicated across the network.
If this association is not removed, the radio could be assigned a new home zone that lies in a cluster where the
K-REF association has not been deleted.
Radio Permanent Disable and Radio Permanent Disable v2 are mutually exclusive selling features.
2.14.9 Radio Permanent Disable v2
Similarly to the permanent disable, once the radio is disabled using the permanent disable v2, it cannot be recovered
over the air. When the radio accepts the permanent disable command, and if the permanent disable v2 flag is
enabled in the codeplug, the radio appears to be inoperable.
• All its MMI interfaces on the radio appear to be disabled.
• All its security key material; GCK, GSKO, DMO SCKs, Ks, DCK, CCK, TMO SCKs, and End-to-End
key material are deleted.
• The radio automatically turns off on powering attempts without any audible/visible indications to the
end users.
• The permanent disable flag is set in the codeplug.
Unlike in the permanent disable, a permanent disabled v2 radio can be re-enabled using the software selling dongle.
If you have the software selling dongle, you can read the codeplug and clear the permanent disable flag.
2-34
-
2.14.10 High Assurance Boot
When a radio has been disabled using the permanent disable v2, entering programming mode procedure
is different. For the details, see TETRA Terminals CPS Start-up User Guide (Motorola Part Number:
6802974C10).
Radio Permanent Disable and Radio Permanent Disable v2 are mutually exclusive selling features.
2.14.10 High Assurance Boot
The radio has a facility that ensures that the code and data flashed in the radio is authentic and has not been
altered. The hardware forces the HAB module to run at boot time. The module checks if all software comes from
a trusted source. The radio is checking the signature of the code and data segments present in the radio using a
public/private key mechanism.
If the HAB authentication of the flashed software fails, it does not allow the radio software to run.
2.15 Packet Data
The radio provides, in the TMO, a TETRA bearer service for applications that use the IP protocol. This service is
available to external applications by connecting using the PEI.
The radio supports TETRA standard multi-slot packet data using the IP network layer protocol through
Point-to-Point Protocol (PPP), and TETRA SNDCP protocol. The IP connection is established between Terminal
Equipment and Mobile Terminal, allowing external applications to communicate with Terminal Equipment using
predefined IP addresses.
This IP connection is referred to as the local link. The link established between the radio and the SwMI
is referred to as the wide link. When a wide link has been established, the radio is considered to be in
the wide mode.
Packet data applications reside internally, over UDP, or in an externally connected device connected via USB cable
port in the radio. Communication to the external radio is initialized using AT commands. Once the connection is
established, the external application may request Point-to-Point Protocol (PPP) mode, and then operates in PPP
mode until the data connection is terminated. The radios can operate both on the single-slot packet data channel and
the multi-slot packet data channel.
The system provides point to point IP connectivity allowing the following datagram exchanges.
• Radio ←→ External Equipment (Terminal Equipment) (for example PC).
• External Equipment (Terminal Equipment) ←→ Network (through radio).
The radio supports only IP version 4 packets. The radio routes datagrams independently of the protocol sitting
on top of IP.
The radio supports an MTU of 1500 bytes.
The radio provides the best effort delivery service. However, if the delivery fails, the originating user application is
informed by sending back to Terminal Equipment an ICMP message, if possible.
-
2-35
TETRA Radio Product Information Manual
The radio generates ICMP messages addressed to the Terminal Equipment in case of failed delivery due to the radio
environment. The delivery may fail due to, for example:
• no radio coverage.
• failed transmission.
• service interaction.
The packet data service PDCH access signaling has the same priority as circuit mode setup-related signaling. The
radio uses advanced link for PD transmission and supports advanced link flow control. The advanced link roaming,
if the advanced link is not disconnected between cells, is supported, where the SwMI supports it.
The radio does not support data compression. If an application attempts to negotiate data compression during
context activation, it is rejected. If a data compressed IP packet is received from the SwMI, it is silently discarded.
The radio supports IP header compression negotiation received from Terminal Equipment during PDP context
activation, and transparently transfers IP packets with the header compression between Terminal Equipment and
the SwMI.
The packet data service employs the TETRA standard cell selection and re-selection. The packet data service is
suspended while the reselection is occurring, and resumes when the cell reselection procedure is complete.
The cell reselection is undeclared in a strict TETRA sense. However, the SNDCP protocol defines a
procedure for reconnecting the packet data service on the new cell. In this sense, the cell reselection
procedure resembles the unannounced cell re-selection procedure.
Multi-slot packet data is a selling feature.
2.15.1 Voice and Data Support
The radio can alternate voice and packet data service. However, voice and data running in parallel are not
supported. This behavior corresponds to Packet Data Type B - IP dual mode.
If the SwMI rejects the context activation due to PD MS type not supported, the radio reinitiates context activation
indicating that supports Type C. It is done to accommodate legacy SwMIs that uses an older definition of these types.
The radio supports transmitting and receiving SDS on the packet data channel. Thus, these services may be
conducted in parallel.
The radio can operate in one of the voice-data interaction modes.
2-36
-
2.15.1 Voice and Data Support
Table 2-3
Voice-Data Interaction Modes
Voice-Data Interaction Mode
Description
Voice Only Mode
You have the option to select Voice Only mode, in
which Packet Data service is disabled. If an external
application attempts to start up in this mode, packet
data registration for a wide link is rejected. If the packet
data service is active when this mode is selected, the
radio deactivates packet data. The PEI operates in the
local mode only (data transfer between TE and MT).
Data Only Mode
You have the option to select Data only mode, in
which normal voice calls are not permitted. Incoming
non-emergency voice calls are rejected, and you cannot
initiate non-emergency voice calls. Incoming and
outgoing emergency calls are allowed.
Voice and Data Mode
In Voice and Data mode any voice call activity that
occurs during a data session takes priority over the
packet data. Once a voice call has interrupted the data
session, the PD session is suspended, until the voice
activity has ended. Then the session is resumed. Voice
priority mode is the default mode.
You can choose one of the interaction modes. The choice of interaction mode is stored in non-volatile memory
and remembered at power up.
In Voice and Data mode, if the radio moves to the traffic channel due to the voice service, the radio terminates
any active packet data transmission or reception. The data service is suspended. The data service resumes when
the voice service ends.
The radio accepts any downlink SDS message received on the Packet Data Control Channel (PDCH). The radio can
send uplink SDS messages on the PDCH.
The radio allows PEI, GPS, and WAP PD applications to activate and use the PD context simultaneously. The first
application initiates PD context activation. The next PD context activation from another PD application results in
sending a reply indicating that the PD context is active. When WAP, GPS, and PEI PD applications are using the
active PD context, the radio can filter the downlink IP packets based on their TCP/UDP port.
• UDP packets addressed to the WAP port (configured in the codeplug) are routed to the WAP internal
application.
• UDP packets addressed to the GPS port (configured in the codeplug) are routed to the GPS internal
application.
• UDP packets not addressed to the WAP nor the GPS ports are routed to the PEI (using PPP).
When activating another PD context on the radio, use the same settings in both PD contexts.
-
2-37
TETRA Radio Product Information Manual
2.15.2 Packet Data IP Addressing
Table 2-4
Packet Data IP Addressing
Addressing Mode
Description
Wide IP Address
An IP address may be assigned to the terminal by
the SwMI during the Packet Data context activation.
When assigned, both Terminal Equipment and Mobile
Terminal applications use this address as the source
address in IP packets delivered to the infrastructure.
Local IP Address
By default both Terminal Equipment and the radio
have their own IP addresses. Terminal Equipment and
Mobile Terminal use these addresses for local datagram
transmissions between Terminal Equipment and Mobile
Terminal only and are not passed to the SwMI.
Static or Dynamic IP Address Assignment
The terminals support static and dynamic IP address
assignment. The dynamic support is requested in the
following situations:
• Request a Dynamic IP Address is set to
Dynamic and the PD Application Type is the
radio internal PD application.
• Request a Dynamic IP Address is set to
Dynamic and the PD Application Type is a PEI
PD application requesting dynamic IP address.
2.15.3 PD User Authentication
The PD user authentication is a method of authenticating the Terminal Equipment user before allowing the packet
data link activation. A PD Authentication server connected to the SwMI performs the actual authentication. The
terminal only sends the messages between the Terminal Equipment and the SwMI. In the wide mode, the terminal
offers PPP user authentication between Mobile Terminal and Terminal Equipment using Password Authentication
Protocol (PAP) or Challenge Handshake Authentication Protocol (CHAP), before the IP link is established. The
terminal always attempts to negotiate usage of the CHAP method. However, the radio agrees to use PAP, when
the Terminal Equipment application insists. If the terminal does not require PD user authentication, it operates
without any user authentication. However, if the terminal requires the PD user authentication, it rejects the Packet
Data Protocol (PDP) context activation.
If the SwMI does not agree for the authentication method (for example, PAP), the SwMI can reject it.
2.16 TETRA Network Protocol 1
TETRA Network Protocol type 1 (TNP1) is a bridge protocol based on the TETRA layer 3 over the air protocol.
The TNP1 supports all TETRA dispatch functionality.
2-38
-
2.16.1 TNP1 IP Addressing
In the TMO, the TNP1 specifies a protocol for use over the PEI, that allows terminal equipment (TE) to have control
over the TETRA services: mobility management, call control, short data service, and supplementary services: send
GPS reports, software information and battery state information. In addition, commands to access the radio
configuration and storage parameters are available.
The radio supports TETRA standard packet data using the IP network layer protocol.
The radio can operate both on the single slot packet data channel and the multi-slot packet data channel.
Packet data applications reside internally, for example: GPS reports, WAP, or in an external device connected to the
8–wire RS232 data port on the radio. Communication to the external device is initialized using AT commands.
The system provides point to point IP connectivity allowing the following datagram exchanges:
• Radio ←→ External Equipment (TE) (for example PC).
• External Equipment (TE) ←→ Network (through radio).
The radio supports IP version 4 packet.
TNP1 services can use one of two PPP methods to connect from the terminal equipment to the radio, local mode,
and wide mode. The TNP1 should be used in wide-mode wherever possible, to allow the parallel operation of
TNP1-SDS services and packet data services over a common PPP link.
If the transmit inhibit is entered, the radio drops the wide mode connection, thus the PEI goes back to AT mode.
Then the TNP1 client detects this change and reinitiates the PPP session in local mode.
The radio disables the TNP1 session while being in the DMO.
AT commands are used to initiate the PPP service for TNP1 to operate. Once the PPP session is running all AT
commands are blocked. When the PPP session is closed, AT commands are available.
2.16.1 TNP1 IP Addressing
Table 2-5
TNP1 IP Addressing
Addressing Mode
Description
Wide Mode
All TNP1 services are available including packet data
transfer towards the SwMI. The address used is the
dynamic address MS IP or configured statically.
Local Mode
All TNP1 services are available except packet data
transfer. The addresses used are the two static addresses
TE IP: 10.0.0.101 and MT IP: 10.0.0.100.
Port Addressing
The radio uses a fixed port address for reception and
transmission of TNP1 packets. The port number is
4024.
2.17 Mobility Services
Following is the description of the Mobility Services.
-
2-39
TETRA Radio Product Information Manual
2.17.1 Main Control Channel Frequencies
The radio can find a wide range of main control channels. The radio maintains stored lists of carrier frequencies
which are scanned in order.
1.
A dynamic list of up to 32 discrete entries maintained only by the radio software.
2.
A static list of up to 32 discrete frequencies specified by the operator that can be preprovisioned. The
system operator can modify this list using the programming tool.
3.
A frequency range specification, using a specific offset, that can be preprogrammed in the factory. The
system operator can modify this range using the programming tool. Then the radio scans all frequencies in
25 kHz intervals in the specified range.
4.
An additional frequency range specification. Having two separate range specifications allows for two
non-contiguous blocks of frequencies or two different offsets.
2.17.2 Control Channel Selection
Each TDMA frame on a given carrier is comprised of four time slots, of which any can be used as a physical
channel. The following types of physical channels are available:
• Traffic physical (TP) channel — used primarily for circuit call traffic.
• Control physical (CP) channel — dedicated only for signaling.
• Packed Data Control (PDCH) channel — dedicated for Packet Data traffic.
• Unallocated physical (UP) channel.
The following types of control channels are available:
• Main Control Channel (MCCH) — occupies the first slot of the main carrier.
• Secondary Control Channel (SCCH) — can be used to extend Control Channel capacity.
The following types of SCCH are available:
• Common SCCH
• Assigned SCCH
In addition to the MCCH, a cell can have up to three common SCCHs, which could occupy slots 2, 3 and 4 in the
main carrier. This solution provides the ability to distribute the radio population among up to four channels and so
to increase Control Channel capacity (at the expense of traffic channel capacity).
Until having received a specific parameter on a cell, the radio uses the MCCH. When the signal is received, each
radio maps itself to a particular common SCCH, and that SCCH operates as the MCCH for the radio.
SCCH is a selling feature.
2.17.3 Multi-System Operation
The radio holds a list of up to 100 allowed network identities – Mobile Country Code (MCC)/Mobile Network
Code (MNC) combinations, that are considered friendly networks. The first network in this list must be the radio
home network. Each network can have an associated name that can indicate to the user which network it is. The
radio can perform initial cell selection and registration on these networks and only these networks. Registration
2-40
-
2.17.4 Registration
on any of these networks is performed using the radio ISSI and without migration signaling. The same ISSI is
used on all networks. You can limit registration to the home network only, or to a selected network only, and to
ignore the other allowed networks.
In case the migration defined by ETSI standard is NOT supported by the BTS, multi-system operation is only
supported as follows:
You can change the network mode using the MMI. A top-level menu item called Networks Sel allows choosing
between Home Only, Select Net and Any Net. If the radio chooses a network different from the current one, the
radio forces initial cell selection to find a cell that belongs to the home or the selected network. In the selected
network option, a list of network names (where each network name corresponds to one of the MNIs in the list) is
displayed. The network names are provisioned in the radio as part of provisioning of the MNI list. The network
alias or MNI of the current network is displayed on the first line of the idle display.
Home Only
In this mode the radio recognizes only the first system in the allowed list. As a
result, the radio registers only on its home network, even if a foreign network
is in range and is found first.
Select Network (Select Net)
In this mode the radio recognizes only the system you selected in the list
of allowed systems. As the result, the radio registers only on this selected
network, even if another network is in range and is found first.
Any Network (Any Net)
In this mode radio selects the network automatically where the home network
is not available. The radio registers to any network that it finds that is already
programmed into its codeplug list of networks, i.e. no user manual selection
is required. Network selection to another network is only performed at initial
cell selection following a link fail and then only if the home network is not
available. The radio uses its own ISSI.
The radio operates in all networks as it does in its home network. All calls are placed using SSI addresses, and it is
the SwMI responsibility to reject calls for subscribers or groups that cannot be reached in the local system.
The telephony gateway interprets telephone numbers with the country code of the local country. For
example, if you dial the number 01256-48-4566 in the UK, it is treated as if you dialed +44-1256-48-4566.
For description of other migrating modes used when migration is supported by the BTS, refer to Air Interface
Migration and Dynamic Air Interface Migration sections.
2.17.4 Registration
On camping on a cell, the radio sends a registration request PDU to the SwMI, which includes a request to attach
to the selected talkgroup.
If the registration and attachment succeeded, the radio begins normal operation on the cell. If the registration
attempt times out, or the SwMI rejects the registration for a temporary reason, another registration attempt is made.
If both attempts fail, the radio attempts to camp on a different cell.
If the SwMI denies the registration request due to the location area rejection, the radio does not attempt to register
again at this cell until the next power-on. The radio supports the modification of its subscriber class on receipt of a
new subscriber class from the SwMI in the registration acknowledgment PDU. This subscriber class is used until
turning off the radio or next ITSI attach.
-
2-41
TETRA Radio Product Information Manual
The radio does not send registration signaling when one of the following occurs:
• Roaming and registration fail before the radio receives the random access acknowledgment and the radio
goes back to the last serving cell.
• The radio discovers a link failure on the serving cell, the link failure is shorter than the predefined timer
and the radio is not in the transmit inhibit mode.
• The radio discovers a link failure on the serving cell and is in the transmit inhibit mode. In this case the
radio always goes back to the serving cell without registration and stays in the transmit inhibit mode
until the mode is turned off.
When two or more scenarios occur at the same time, the radio registers with signaling.
If the radio discovers a link failure on the serving cell, a specific timer starts counting. If the link failure remains
after the timer expires, then the radio acts as during a normal link failure. If the link failure ends before timer
expires, then the radio goes back to the serving cell without registration. This mechanism ensures that unnecessary
registration is avoided.
When a radio is out of the serving cell range for a period shorter than configured in the codeplug, then the radio
does not perform the registration on going back in the range.
2.17.5 Roaming
The radio continually monitors neighbor cells and scans the highest ranked neighbor cell. When the state of the
highest ranked neighbor cell is sufficiently better than the serving cell, or when the radio has lost the serving cell,
the radio employs cell reselection procedures using the following methods:
• If not in a call — undeclared cell reselection.
• If in a call and not transmitting or link failure occurs — unannounced cell reselection.
• If transmitting in a call, and a neighbor has been scanned, and the cells are synchronized — announced
type-1 or type-2 cell reselection.
• If transmitting in a call and no neighbor has been scanned or the cells are not synchronized — announced
type-3 cell reselection.
For compatibility with systems that do not support type-1 or type-2 cell reselection, the radio can be provisioned to
never perform these types of reselections.
The radio decides on the need for cell reselection, based on comparison of the signal strength and the service
level between the serving cell and neighbor cells. The service level criteria are based on the following criteria
listed in priority order:
2-42
1.
System Wide Services available (Local/Wide Trunking)
2.
Valid/Invalid Subscriber Class
3.
Relinquishing criteria
4.
Congestion level
5.
Security Class
6.
Subscriber Class
7.
Home Location Area (Home Location area)
8.
LA Boundary
-
2.17.6 Seamless Handover
9.
Cell Load
The radio prefers a cell that has a higher service level to one with a lower service level. If the radio is operating on a
serving cell that has a lower service level than a neighbor cell, the radio roams to the neighbor, even during a call.
During network reconfiguration, a significant number of radios registered on one cell may roam. This roaming can
cause major congestion on specific cells. In order to avoid the congestion on control channels for the specific cells,
the specified radios roaming should be distributed in time.
As the operation cannot be performed immediately for all the radios, some of the radios must wait longer to roam.
The time cannot be programmed not to cause any of the radios to have inferior roaming capabilities. Thus the
roaming time for the radios is randomized.
The randomization means that after roaming scenario starts, a radio is not sending registration parameters to other
cells at once but waits random time before sending registration PDUs to other cells. Link failures and other related
scenarios are not randomized not to cause any unwanted delays in restoring the link.
2.17.6 Seamless Handover
Seamless handover eliminates voice interruption during calls by enabling the radio to roam faster between cells
while transmitting. Faster roaming is possible because the radio asks its serving cell to perform the reselection and
the SwMI performs all of the roaming signaling. The radio then moves straight to the traffic channel on the new
cell and continues the call without call restoration.
2.17.7 Air Interface Migration
The Air Interface Migration (AIM) feature enables the radio to migrate to a foreign SwMI, that is, the radio
registration in a foreign SwMI is allowed. The AIM also enables the radio to attach the groups in a foreign SwMI
and to make and receive calls and SDS.
The AIM services cover individual call, group call and individually addressed SDS or Status. In order to receive
group calls or group addressed SDS and Status from a group of the current network, the radio has to attach the
nominated group. The radio cannot migrate to a foreign network while it is in an active call. The radio also cannot
attach a foreign group on the current network hence no group-addressed status/SDS messages can be sent to home
network of the migrated radio. After migrating the radio is in the Clear Mode.
When AIM feature is enabled the radio selects the network in the Foreign Net mode (selectable in the radio MMI).
Foreign Network (Foreign
Net)
In this mode radio selects the network automatically where the home network
is not available. The radio registers to any network that it finds that is already
programmed into its codeplug list of networks, i.e. no user manual selection is
required. Network selection to another network is only performed at initial
cell selection following a link fail and then only if the home network is not
available. The radio uses Visiting Short Subscriber Identity (VSSI).
AIM, DAIM and Any Networks features are mutually exclusive.
This is a selling feature.
2.17.8 Dynamic Air Interface Migration
The Dynamic Air Interface Migration feature offers users a quick and easy way to switch between networks.
Depending on that setting, every time a radio is powered up or a talkgroup is changed, it automatically roams to the
assigned network. If a talkgroup has no particular network assigned, the radio stays on the current network.
-
2-43
TETRA Radio Product Information Manual
This feature consist of these major functionalities:
• It allows your radio to dynamically select the appropriate network after your radio is powered up.
• If you change talkgroup to the one from a different network, radio automatically migrates to this network (in
this feature it is possible to assign network to particular talkgroup in the codeplug). It gives you an option to
automatically migrate to a network which is available in the region (network needs to be first pre-configured
in the codeplug). It is useful in case of loosing signal from dynamically selected network as the radio
attempts to establish communication with any available network.
This feature is useful where quick switching between networks is required, for example when entering a building
that uses its own infrastructure.
When DAIM feature is enabled the user has these selectable options:
Migrate to
In this mode the radio user selects the network manually. Once network is
selected terminal performs migration as to the foreign SwMI. If you change
talkgroup to the one from a different network, radio automatically migrates
to this network.
Auto
In this mode the radio selects the network automatically.
After migrating the radio is in the Clear Mode. AIM, DAIM and Any Networks features are mutually exclusive.
2.17.9 Any Networks
This feature allows to use the radio on any network that was pre-configured in that radio, like it was its Home
network. This is useful when the radio loses its Home network coverage, but is within coverage of another network
(for example, if a radio travels between different locations). Note that calls between networks are not possible.
Air Interface Encryption services are not available when roaming to a different (not Home) network.
Dynamic Air Interface Migration and Any Networks features are mutually exclusive.
This is a selling feature.
2.17.10 Congested Cell Handling
This feature is used only during initial registration and when roaming between sites. It is not used when camped on
a site that has become busy or congested due to no free traffic channel to make or receive calls.
When the cell that the terminal is trying to register is congested, a special level-based algorithm is in the place.
Depending on the level of congestion the terminal is waiting for the registration or is rejected on that cell.
The terminal recognizes whether the cell is congested (Control Channel Congestion). The terminal tries to roam to
not congested cells first, ranking congested ones as secondary. The cell congestion is one of the service level criteria.
The following cells are never marked as congested.
• Last suitable cell — if there are no other suitable cells (during roaming or initial cell selection).
• Serving cell.
The feature is configurable using the CPS.
2-44
-
2.17.11 Subscriber Class
2.17.11 Subscriber Class
When the radio powers up, or whenever it performs registration or roaming, it always uses its provisioned
Subscriber Class (SC).
When the radio registers on a cell that does not support any of its SCs, it is active only in services that have
the emergency priority.
Whenever the radio SC does not match the cell SC (the feature is configurable using the CPS):
• the radio uses normal ranking procedures (see section Roaming)
• does not roam to the cell at all
2.17.12 Subscriber Class by Talkgroup
The Subscriber Class by Talkgroup feature forces all the radios attached to the same talkgroup to have the same
Subscriber Class.
The Subscriber Class by Group feature helps to avoid issues as presented in the following scenarios:
• Preserving traffic channel capacity. For two cells having the same coverage and placed together to multiply
traffic capacity a number of radios is attached to Talkgroup 1 on the first cell and only one radio is attached
to Talkgroup 1 on the second cell. A group call uses two traffic channels (one on the first cell and one on the
second). In this scenario, multiplying traffic capacity would not work without the feature. However, as
radios on the same talkgroup are forced (by Subscriber Class mismatch) to roam to one cell, all the radios
should use only the first cell.
• Spreading radios population across cells and prohibit them from roaming. Many radios used on a small area
with multiple BTS coverage causes huge roaming traffic. A congestion occurs and as a result you would
not be able to communicate. However with the feature, radios do not roam to a cell with mismatched
Subscriber Class, what stops the roaming traffic.
A radio Subscriber Class changes when the user changes between talkgroups which are assigned to another
Subscriber Class.
Up to 16 Subscriber Classes can be configured (in the CPS) and talkgroups assigned to them. The assignment is
carried out by talkgroup GSSI or by folder (except Favorite) which the talkgroup was chosen from.
Talkgroup may be assigned to more than one Subscriber Class (either by folder or Talkgroup range). The first
assigned Subscriber Class is used. Upon receiving Subscriber Class from the SwMI radios change their Subscriber
Class to the received one. The Subscriber Class received from the SwMI over the air has always higher priority
than Subscriber Class by Group. If a radio already uses the same Subscriber Class as the one received from the
SwMI, the current Subscriber Class is not changed. On powering on, the radio is set to the default Subscriber Class
or Subscriber Class assigned to an attached talkgroup.
Favorite folders cannot be assigned to any Subscriber Class.
Super Groups are treated as scanned groups and Subscriber Class by Talkgroup feature does not apply to them.
Subscriber Class by Talkgroup is a selling feature.
2.17.13 RF Power Toggle
The RF power toggle is a radio-specific hardware feature enabling the radio to transmit with Class 3L (1.8 W)
power. Using the CPS the power class can be set for the radio to transmit with Class 3L (1.8 W) or Class 4.
-
2-45
TETRA Radio Product Information Manual
Depending on the codeplug settings, you can toggle through the interface, between high and normal RF power.
That respectively is Class 3L (1.8 W) and Class 4.
The radio can be configured to switch automatically to Class 3L (1.8 W) on entering DMO and to automatically
switch to Class 4 (1 W) on entering TMO.
Changing RF power class is performed immediately. The change can be done, for example, during a call.
Such action may result in dropping the call, as the selected power class setting can be insufficient to sustain
the transmission.
2.17.14 Cell Surveillance and Monitoring Threshold
(Negative C)
The radio constantly calculates a normalized value that represents the signal strength of a cell. This value is used
by the radios to determine if the cell is usable and when to leave the cell. In the default case, when the radio is
camped on a cell it will initiate link failure procedures, i.e. leave the cell, if this normalized signal strength value
falls below zero.
However via the CPS it is possible to configure the radio to allow this normalized value to be processed below
zero; value can be set in 1db steps up to -5db. Reducing this value below zero will allow the radio to maintain
service on a very weak cell where the radio is unable to roam to a better cell.
2.18 Supplementary Services
Following is the description of the TETRA Supplementary Services (SS) that the radio supports in the TMO.
2.18.1 Ambience Listening
The Ambience Listening (AL) allows a console operator or dispatcher to monitor audio activity in the vicinity of a
specific radio without giving any indication to the affected radio.
When the radio receives a call setup message with an AL call, the radio accepts the call. Then the radio opens the
microphone, and begins transmitting without showing any indication of the call. Call acceptance and rejection
while active in another call follows the PPC rules.
The radio imposes no time limit on the transmission. The radio continues to transmit until the SwMI ends the call
or the user performs an action that releases the call. If the user attempts to start a service while the AL call is in
progress, the radio disconnects the call and initiates the requested service. The radio allows performing actions
that can be performed without releasing the AL call. These actions include access of most menu items, activating,
deactivating scan lists, and changing talkgroups. When changing talkgroups, the radio appears as if it is performing
an attachment. The attachment appears to be successful, but the actual attachment signaling is performed only
after the AL call terminates. When performing the attachment after the call, no indication is shown to the user
unless the attachment fails. If you attempt to power down the radio in the active Ambience Listening call, the radio
enters Pseudo Power-Off state.
2.18.2 Pseudo Power-Off
If you attempt to power down the radio in the active Ambience Listening call, the radio appears to turn off. However,
it remains fully operational from Layer–3 and below. The radio has a blank screen, and all LEDs are turned off.
2-46
-
2.18.3 Auto Power-On
When the AL call ends in this pseudo power-off state, the radio automatically turns off.
If you attempt to power up the radio from the pseudo power-off state, the radio acts as if it is really powering up.
2.18.3 Auto Power-On
The radio can be configured to turn on automatically after inserting the battery. This functionality is configurable
using CPS.
If the emergency mode was active before removing the battery, the radio enters this mode when the power-off
period is shorter than approximately 3 seconds. This behavior applies to normal and silent emergency modes. The
three-second period is approximate and determined by the discharge rate of capacitors in the radio. The period
may last from 3 up to 6 seconds.
2.18.4 Preemptive Priority Call
If during a call, a call setup is received for a call with higher priority than the present call, and the new call priority
is Preemptive Priority 3 (value 14 in the codeplug) or Preemptive Priority 4 – Emergency (15), the radio disconnects
from the present call and joins the new high priority call.
If the call priority of the new call is Preemptive Priority 1 (12) or Preemptive Priority 2 (13), depending on
configuration the radio either accepts or rejects the new call.
When the new call is accepted, a special tone is played, and you are notified of the high priority call.
When you initiate a private call and you receive a rejection with the reason Called party busy, you have the option
to interrupt the existing call or initiate a new call. However, this time the call is initiated with the preemptive priority.
2.18.5 Transmit Inhibit Mode
The Transmit Inhibit Mode is a mode in which the radio sends no radio transmissions. It is recommended to
activate the mode in RF sensitive areas, for example hospitals, airplanes, where safety can be jeopardized due to
transmission radiation.
To activate, select MENU → Networks → TXI Mode → Activate.
In this mode, the radio does not transmit under any circumstances except for the Emergency Calls. All the functions
and keys which cause transmission, for example registration to the network, changing talkgroup or folder, sending
SDS messages, or pressing the PTT button are disabled. Any transmission trial causes the radio to display Not
Allowed In TXI Mode notification and to play a tone.
Your radio can still receive:
• Group calls.
• Messages — stored in the Inbox.
• Private call attempts — stored in the Missed Calls list, without the option to respond.
When no danger to safety exists anymore (for example, you leave the RF sensitive area), you can deactivate the
Transmit Inhibit Mode and the radio returns to standard operation.
You can deactivate the mode by selecting MENU → Networks → TXI Mode → Deactivate, pressing One-Touch
button, or implicitly when initiating an Emergency Call.
-
2-47
TETRA Radio Product Information Manual
RF Transmissions from the radio are prevented under the following conditions:
• TXI Mode is activated.
• Battery is removed.
• The radio is turned off.
On entering or exiting the transmit inhibit mode, when the radio is camped on a cell, it sends a specially designated
SDS status message. This SDS message indicates to the SwMI that the radio is entering or exiting transmit inhibit
mode.
Mobility procedures that do not require the radio to send an uplink transmission are performed except for cell
reselection.
In transmit inhibit mode the radio joins group calls for any group that the radio is monitoring, but the transmitting
on that call is still prohibited.
The radio also displays any incoming SDS messages to the user. The missed call feature is active in the transmit
inhibit mode and allows checking what calls were missed. However, the radio attempts to prevent call setup
retransmission from being recorded as separate calls.
If you initiate an emergency call, the radio immediately leaves transmit inhibit mode and attempts to start the
emergency call if the radio is in service.
If the radio is turned off in the transmit inhibit mode, on turning on the radio asks whether to exit the transmit
inhibit mode. If you choose No, the radio turns off.
2.18.6 Calling Line Identification Presentation
If the radio is provisioned with the calling line identification presentation (CLIP), the calling party number is
transported as part of the incoming call setup signaling. Also the calling party number is shown on the radio
display. If the calling party ID is programmed in the radio with a corresponding name, the name is displayed in
addition to the number.
The number sent by the SwMI is expected to be in a form that can be used to call back the calling party at
any other time. Thus, for instance, the number can be stored in the address book.
If the calling party number is not present in the incoming call setup signaling, a blank line is displayed in its place.
2.18.7 Talking Party Identification
The PDUs and facility elements for these TETRA Supplementary Services are not supported. However,
identification presentation functionality is supported in most cases using the information found in the call setup
messages.
2-48
-
2.18.8 DTMF Overdial
2.18.8 DTMF Overdial
This supplementary service allows the radio to send DTMF tones to both internal and the external network during
the call (conversation). It is only possible to send DTMFs when in full duplex call. This can be disabled in the
codeplug (enabled by default).
2.18.9 Universal Time Display
The radio can present time information to the user. The time is derived from an internal clock. The radio maintains
the clock both when the radio is powered on and powered off.
If the power is lost, for example due to the flat battery, the internal clock is not maintained.
In order to ensure the time displayed is accurate, the time is displayed only if within the last 48 hours either of the
following events have occurred:
• The radio has received a network time update from the system.
• You have manually updated the time.
Also, as the internal clock is not maintained after a power loss event, the time is not displayed until either these
events occur.
The feature is enabled or disabled and the default configuration can be set for the radio using the CPS or MMI.
The radio display supports the following:
• Twenty-four-hour and twelve-hour formats.
• DD/MM/YY, MM/DD/YY, DD-MON-YY and YY/MM/DD date formats.
You can change the time and configuration information through the MMI (depending on the codeplug settings).
Depending on configuration, system broadcast information can have higher priority than data entered manually.
Thus time, date, and offset information entered from the MMI is overwritten, when data is received from the SwMI.
The radio provides user indications upon crossing to another time zone, when a new MCC broadcast received.
2.19 Man Down
Man Down alerts when no movement occurs for a set time or the radio stays at an angle of tilt below a defined
value. The radio alerts you when:
• its tilt exceeds a predefined angle value.
• it remains static for a predefined time.
In case any of the above conditions are met, the radio alerts you with a Man Down pre-alert. If you do not remove
the pre-alert condition, the radio switches to the Emergency Operation.
To exit Man Down, exit the Emergency Mode by pressing and holding the Exit SOFT key, or press the PTT button.
-
2-49
TETRA Radio Product Information Manual
This is a selling feature.
2.19.1 Man Down (Operation)
Man Down can be disabled or enabled from the menu or by OTB.
If the man down feature is deactivated with a One-Touch Button, the radio plays an audio tone once. If the feature
is deactivated using the menu, the radio does not play the tone.
The man down feature is based on a sensor with low power current consumption. When Man Down is enabled the
sensor performs a self test during powering on the radio. If the test fails, the radio notifies with a specific audio tone
and status icon. The radio also notifies with the specific audio tone and status icon, when the man down device
detects a failure during the activation of the feature.
If the feature is deactivated using radio MMI after the sensor failure is detected, the man down icon disappears
and the tone is no longer played.
Depending on the CPS settings, additional audio and/or visual indications are available to help locating the radio. In
such case, if the man down alarm is activated (emergency alarm started), the radio starts additional audio indication
playing high and low frequency sounds continuously, with highest possible volume. The radio display and/or
keypad may also start blinking.
If the emergency hot microphone is on, the additional audio indication is not played.
2.20 Repeater Mode
The Repeater Mode provides repeater connectivity between radios operating in the DMO Mode.
Only the radios on the same talkgroup can communicate with each other through the repeater.
2-50
-
2.21 DMO Gateway and Repeater Communication
Figure 2-5
Repeater Mode Operation
DMO
DMO
A DMO repeater is used to extend the DMO range by retransmitting received information from one radio to
another. It retransmits group calls, private calls and data on a given frequency.
The repeater sends presence signal periodically on a free channel to allow other radios to synchronize on a
given frequency.
The communication between radios and the DMO repeater is logically divided in two links. The term “master link”
is used for all communication taking place between the Master radio and the DMO repeater.
The term “slave link” is used for all communication taking place between slave radio and the DMO repeater. The
master is the radio initiating and transmitting the voice or data and the slave is the radio receiving the voice or data.
You can enable Call Monitoring of ongoing call to hear what is being transmitted. You can enable Interactive
Repeater in order to hear and take part in the transmitted call.
For more information refer to 2.21 DMO Gateway and Repeater Communication, page 2-51.
This is a selling feature.
2.21 DMO Gateway and Repeater Communication
The radio provides the capability of communicating in DMO mode with a TMO group via the IOP certified
gateways.
A DMO repeater re-transmits information received from one DMO radio to other DMO radios over the DMO
air interface.
For each DMO talkgroup, the radio allows operating in one of the following modes:
-
Radio to radio only
The radio initiates calls only on a talkgroup directly and not through a gateway
or repeater.
Specific gateway
The radio can initiate calls on a talkgroup directly or through a specific
gateway address that is specified for a talkgroup. The gateway address can be
edited through the radio MMI.
2-51
TETRA Radio Product Information Manual
Auto gateway
The radio can initiate calls on the selected talkgroup directly with another
radio or through any available gateway that is detected as present.
Repeater
The talkgroup links to a DMO repeater.
Specific gateway and repeater
The radio uses only the gateway with the specified gateway address for the
talkgroup and/or a DMO repeater.
Automatic gateway and
repeater
The radio uses the first available gateway for a talkgroup and/or a DMO
repeater. If either specific gateway or auto gateway mode is chosen, and a
suitable gateway is found, all outgoing calls are placed through the gateway. If
a suitable gateway is not found, or a call setup through the gateway fails, the
radio attempts to set up the call directly.
When operating on a gateway and/or repeater, the radio indicates the communication mode.
2.21.1 Communication through Repeaters
Radios that are out of range and cannot communicate directly one with another in DMO Mode can do it through
the repeater. The repeater is a radio that repeats all communication on a chosen channel, and as a result increases
radios’ DMO range.
DMO
DMO
When the radio connects to a repeater, it plays a tone, displays the Repeater available message, and shows an
appropriate icon. When the radio looses connection with the repeater, it plays a tone, displays the Repeater not
available message, and the repeater icon is blinking. Messages and sounds are configured by the service provider.
2.22 SDS Remote Control
The SDS remote control feature enables controlling a radio through Air Interface using SDS-TL bearer service. A
controlling terminal (for instance, a controlling radio or SwMI controlling terminal) sends the SDS remote control
messages with AT commands to be executed by the radio.
2-52
-
2.23 Call-Out
Figure 2-6
SDS remote Control Overview
C o n tro lle d Ra dio
S wMI
C o n tro llin g T e rm in a l
TMO
T M O/DMO
Radi o
TE
C o n tro llin g Te rmina l
The SDS remote control functionality works in both TMO and DMO and the remote control PDUs are sent using
terminal equipment (TE).
You can use the feature only after a successful authorization, which requires entering a valid remote control
PIN number.
The remote control messages can be sent to a group or individual radios.
A controlled radio receives over the air control information using SDS type 4 with TL on the specific PID number
defined in the codeplug. If the received control message is originated from one of ISSIs present on the radio
authorized ISSI list, the radio executes received command and sends a response.
If configured by service provider upon the reception of SDS Remote Control Service (AT command) request, the
radio gives an audio-visual notification.
The service provider has two options: Limited SDS RC and Full SDS RC modes.
The SDS remote control in the Limited SDS RC enables the following:
• Switching between TMO/DMO modes (read, change, notify) for individual radio and group (using +CTOM
AT command).
• Selecting a talkgroup (read, change, notify) for individual radio and group (using +CTGS AT command).
• Collecting Network Information from individual radio (Network Registration Status and Cell Signal Quality
using respectively the +CREG and +CSQ AT commands).
• Reading individual radio GPS position (using +GPSPOS AT command).
• Setting volume level for individual MT (using +CLVL AT command).
The SDS remote control in the Full SDS RC enables to use most of the AT Commands. Refer to the AT Commands
Programmer`s Guide to see which are not supported.
This is a selling feature.
2.23 Call-Out
A call-out is an alert sent to one or many recipients when an incident requires immediate attention. The call-out
message can include an instruction to use a different talkgroup for the duration of the call-out or remain on the
attached talkgroup.
-
2-53
TETRA Radio Product Information Manual
There are four types of Call-Out alerts:
• Normal
• Storm Plan
• Fallback Mode
• Test Call-Out
Only the emergency mode has higher priority than the call-out. When you receive the alert, the following responses
are available.
• Accept — additional information from the dispatcher is displayed.
• Stand by — voice and message communication is the same as for Accept.
• Reject — display returns to the home display and the talkgroup is set to the one before the call-out.
Call-out alert can be addressed as follows:
• ISSI — an individual.
• GSSI — a group of recipients.
All incoming and outgoing call-out messages are stored in CO Box (Call-Out Box) and can be managed through
the MMI. There is a two-level structure for the alerts. First level is the main alert list, and the second one are all
the messages associated with the alerts. Both lists are displayed chronologically with the newest on top. The
capacity of the CO Box is ten call-out alerts and 100 messages (incoming/outgoing). It has also the overwrite
policy which deletes the oldest one upon receipt of a new call-out message. When a new call-out arrives, the new
call-out overrides the old call-out (even if it has not been responded). An ongoing call-out overrides the old one in
any phase of the call-out alert.
In normal mode, you can browse the CO Box and read all the call-out messages. In the call-out mode, you can
only read the ongoing call-out messages.
The call-out service function in two main phases:
1.
Alert Phase — you receive the alert with the associated messages that you can respond to. These messages
provide all the important information about an incident. A special tone is played when the alert is coming
in. The tone volume range is configured in the codeplug and cannot be adjusted through the MMI. The
conditions for stopping this tone are configured in the codeplug (for example, upon pressing any key).
Additionally, an ongoing alert tone is paused on incoming call-out group call. This alert is resumed once
the call ends (if not stopped before).
2.
Information Phase — you are in the call-out mode and you may receive more messages about the
incident with the text or voice. You can also query for more information using the voice group call or
the call-out text function which enables to send a text message to the dispatcher host application. The
voice message can be sent with the high priority as a group call. You can answer back to the group or
to the dispatcher using the voice group call. You may receive more info about the incident via either
via subsequent text or voice messages
This is a selling feature.
2.23.1 Call-Out Interactions
When you receive a call-out alert while being in the emergency mode, the message is ignored.
In the transmit inhibit mode, you can receive call-out messages. However, you cannot respond until the transmit
inhibit mode is deactivated. When you decide to leave the transmit inhibit mode after viewing the message, the
radio prompts to accept, standby, or reject the call-out.
The call-out feature is not supported in DMO.
2-54
-
2.24 Radio Messaging System
In the fallback mode (that is, when you are in the local site trunking) you can receive a call-out call. In such case
the receiving radio enters the call-out fallback mode, which only includes voice communication. You can only
clear the fallback mode manually.
The dispatcher can test the feature by using the call-out test. The radio displays then Call-Out Test and generates
the alert tone. A soft key is available in the MMI with the label Test OK. After responding to it, the display
returns to the previous mode.
Storm plan alert is a special case of call-out. This alert is sent out to the larger group of people. You can respond
to it with any key stroke. After responding, you proceed to the information phase. The storm plan alert is sent
several times to raise reliability.
2.24 Radio Messaging System
The Radio Messaging System (RMS) feature enables radios to receive and send RMS messages through the
TETRA network using the Short Data Service (SDS) Transport Layer (TL).
Figure 2-7
Radio Messaging System Flow Model
S wMI
C o n tro l Room
RMS P I (S DS -TL)
SDR
RMS P I (S DS -TL)
RMS P I (S DS -TL)
Radi o
RMS S ta tus
RMS Fre e Te xt
A Short Data Router (SDR) provides TETRA short data services between host applications connected to Dimetra
Mobile Stations or between a host application connected to a Dimetra Mobile Station and a host application
connected through the Dimetra Master Site. Furthermore the SDR provides TETRA short data services directly
between two Dimetra Mobile Stations or directly between a Dimetra Mobile Station and a host application
connected through the Dimetra Master Site.
To receive and send RMS messages, ensure that the RMS feature is enabled in the codeplug. The radio accepts
received RMS messages only from the calling party address defined in the codeplug. Any outgoing RMS status is
sent to the RMS status target address defined in the codeplug.
The RMS status is a bidirectional messaging (from the control room to a radio and conversely). Sending an RMS
status is possible, where the RMS mode is enabled in the radio. In such case, the radio user can send one of ten
predefined RMS statuses to an address predefined in the codeplug. You can select the particular RMS status using
assigned one-touch buttons. A received RMS status is displayed in blue color on the idle display. The latest
received or sent RMS status is kept on the idle display until the next power cycle.
The RMS free text is a unidirectional message (from the control room to a radio). Received RMS free texts are
displayed in blue color on the idle display. The latest RMS free text is kept on the display (idle display) until the
next power cycle.
Upon receiving the request, the radio sends the latest sent RMS status to the control room without any user
interaction or notification.
-
2-55
TETRA Radio Product Information Manual
Incoming and outgoing RMS statuses and RMS free text messages (with the exception for RMS status sent)
are stored in the RMS Box. The RMS Box capacity is maximum ten entries for incoming and outgoing RMS
messages. If the RMS Box is full, storing any new incoming or outgoing RMS message overwrites the oldest
message (received or sent) in the RMS Box.
This is a selling feature.
2.25 GPS Location Service
The GPS Location Service feature uses information from Global Positioning System (GPS) satellites orbiting the
Earth to determine the approximate geographical location of your radio.
The GPS Location Service availability, accuracy, and the position calculation time vary depending on the
environment in which you use the radio. The GPS Location Service can assist your dispatcher or colleagues in
many ways such as more efficient deployment of resources or locating your radio when you trigger your emergency
service.
The radio can display the location information directly on the screen or send it over the air to your Dispatcher to
display it in the control center. Check your radio configuration details with your service provider.
Where the signals from satellites are not available, the GPS Location Service does not work. This situation
usually happens when your radio cannot establish a view of a wide area of open sky, for example, when
your GPS antenna is covered or facing the ground. Such situations include being:
• In underground locations
• Inside buildings, trains, or other covered vehicles
• Under any other metal or concrete roof or structure
• Near a powerful radio or television tower
• In extreme temperature outside the operating limits of your radio
Even if your location information can be calculated in such situations, it may take longer to do so. Therefore, in
any emergency situation, always report your location to your dispatcher. Where adequate signals from multiple
satellites are available, your GPS Location Service feature provides a location, most probably near to your actual
location. For GPS feature performance, under ideal test conditions see Table “GPS Specification”
The radio can be triggered to send Location Reports in various circumstances, for example:
• Upon a request
• Entering Emergency Mode
• At specified time intervals
• At specified distance intervals
The Location Reports can be sent in two ways using:
• SDS
• Packet Data
If the Location Reports are sent over the Packet Data, a Packet Data icon is displayed when the message is being sent.
2-56
-
2.25 GPS Location Service
If the Location Reports are sent via SDS with User Defined Data Type-4 as a transport layer, either the ETSI
Location Information Protocol (LIP) or Motorola Location Request/Response Protocol (LRRP) GPS Location
Protocol is used. The LRRP GPS protocol either use SDS-TL (for added reliability) or Simple GPS with no
SDS-TL (for saving air interface resources). GPS Protocol Identifiers are:
• LRRP SDS TL = 131
• LRRP Simple GPS = 3
• LIP GPS = 10
Location reports are sent in TMO and can also be provisioned to be sent in DMO. If the radio is provisioned to
provide user indications, the feature operational status is indicated on the radio display. Also, if configured by
service provider, the radio gives an audio-visual notification upon reception of LIP command.
Depending on the radio configuration, viewing the radio position and the status of the visible satellites is available.
The position may consist of longitude and latitude, UK, or Irish grid coordinates. The GPS Location Service feature
can be enabled or disabled as a whole using the CPS. It is possible to configure the feature parameters using the
CPS, or over the air. The CPS configuration provides a default profile. The commands received over the air may
overwrite the default profile configuration. The profile assigned to the radio determines when to send location data,
what data to send with what accuracy and to what address. All data requests and configuration commands received
over the air are checked to confirm they have come from a trusted source. Location reports are accepted only from
authorized ISSIs or IPs, depending on the configured transport layer (SDS, Packet Data).
Ensure the application receiving location messages and the radio are configured in a corresponding way.
Otherwise the radio will reject all system GPS requests.
The radio supports GPS triggers functionalities (using LIP or LRRP) to report GPS positions when the radio meets
a set of criteria. The following triggers, together with their specific parameters, can be set up by service provider:
Table 2-6
-
GPS Triggers
Trigger Type
Trigger Event
Power-up
Radio powers up in TMO.
Power-down
Radio powers down in TMO.
Emergency
condition
Radio enters emergency operations.
Periodic
Given time interval after the last location report expires.
Moved
Radio position has changed by at least the distance defined (the radio checks the movement
from the last known position at an interval).
TMO ON
Successful registration on entering TMO from DMO.
DMO ON
Before TMO deregistration, and before entering DMO.
Transmit Inhibit
Mode ON
Radio is about to enter TXI.
Transmit Inhibit
Mode OFF
Radio has successfully registered after leaving TXI.
Low battery
Radio detects its battery level has reached or fallen below the level specified by service
provider.
2-57
TETRA Radio Product Information Manual
Table 2-6
GPS Triggers (cont'd.)
Trigger Type
Trigger Event
Loss of GPS
Radio detects a loss of GPS for a minimum duration defined by service provider.
Recovery of GPS
Radio detects a recovery of GPS signal for a minimum duration defined by service provider.
Status entered
Radio sends a status defined in the CP for location reporting by pre-programming.
DCK Connected
Radio detects that a Car Kit has been connected.
DCK Disconnected
Radio detects that a connected Car Kit has now been disconnected.
GPS ON
Positioning device has been switched ON.
GPS OFF
Positioning device in the radio is about to be switched OFF.
Emergency
Periodic Profile
(LRRP only)
Radio is in emergency operation and given time interval after the last location report
expires.
This is a selling feature.
2.25.1 GPS over Packet Data
This feature enables a radio to use the GPS Location Service over Packet Data instead of standard Short Data
Services.
When the GPS Location Service feature is enabled and the GPS services have been turned on using the radio
interface, the radio requests for Packet Data context activation.
With turning off the GPS using the radio interface, Packet Data service deactivates. The ongoing Packet Data
session deregisters. For the GPS over Packet Data, triggers and location information are sent or received while
Packet Data is activated. It is carried out similarly to the standard GPS over SDS.
When the GPS over Packet Data is enabled, sending or receiving triggers and location information during DMO or
Emergency Mode is not possible.
If a Packet Data connection cannot be established, the radio is not able to send or receive GPS data.
2.25.2 GPS Military Grid Reference System
The Military Grid Reference System (MGRS) is the geocoordinate standard used by the military for locating
points on Earth. The MGRS attempts to represent the entire surface of Earth on a worldwide grid. The grid
is based on the UTM (Universe Transverse Mercator) between 80°S and 84°N latitudes and UPS (Universal
Polar Stereographic) systems.
The UTM area is divided into 60 longitudinal strips, each 6° wide. The strips are numbered 1-60 beginning
at the 180°-174° W (Zone 1) and increase to the East. Each strip (or Zone) is then divided (horizontally) into
8° latitude bands.
2-58
-
2.25.3 GPS Different Location Displays
An example of an MGRS coordinate would be 19TDJ3858897366, which consists of:
• 19 is the UTM Zone Number
• T is the corresponding UTM latitude band letter
• DJ is the MGRS Grid Reference used to define the 100 km square within the UTM/UPS block.
The columns A-Z (excluding "I" and "O"), like UTM, start at 180° and increase towards the East.
Every three columns, the pattern repeats. Letters designating rows, increase towards the North.
The letters cycle backwards through the alphabet in the southern hemisphere (towards the South):
– D is the MGRS column letter
– J is the MGRS row letter
• 38588 is the 5–digit MGRS Easting value. It represents the number of meters East of the origin
(that is, southwest corner) of the 100 km square in which it is contained.
• 97366 is the 5–digit MGRS Northing value. It represents the number of meters North of the origin
(that is, southwest corner) of the 100 km square in which it is contained.
MGRS Support feature can be programmed in CPS. The user can choose to display the GPS coordinates in MGRS
format.
This is a selling feature.
2.25.3 GPS Different Location Displays
Table 2-7
Different Location Displays
Latitude /
Longitude
UK Coordinates
Irish Coordinates
UTM Coordinates
MGRS
Coordinates
Time
Time
Time
Time
Time
Latitude
2–Letter Code
1–Letter Code
3–Letter Code
3–Letter Code and
2–Letter Code
Longitude
Easting and
Northing Coordinate
Easting and
Northing Coordinate
Easting and
Northing Coordinate
Easting and
Northing Coordinate
Altitude
Altitude
Altitude
Altitude
Altitude
Satellites
Satellites
Satellites
Satellites
Satellites
• Time — indicates when the last time the location was calculated. The time is provided in Universal Time
Coordinated.
• Letter Code — grid zone or square on the map for different coordinate standard
• Latitude — expressed in degrees, minutes, and seconds.
• Longitude — expressed in degrees, minutes, and seconds.
• Number of satellites — used to calculate the location. In general, more satellites make for better accuracy.
The maximum is 12 satellites.
• Easting — refers to the eastward-measured distance expressed in meters.
• Northing — refers to the northward-measured distance expressed in meters.
-
2-59
TETRA Radio Product Information Manual
Skipping each digit of easting and northing coordinates decreases the accuracy by the factor of 10.
2.26 Side Connector
The radio is equipped with a side connector allowing to attach accessories like RSM (Remote Speaker Microphone),
head sets, earpieces.
2.27 WAP
Wireless Application Protocol (WAP) is a standard for application layer network communications in a wireless
communication environment such as TETRA network. The protocol is used to access the mobile web from a
radio through a WAP browser.
This is a selling feature.
2.27.1 WAP Browser
The Openwave Mobile Browser is a WAP-compliant user agent. The WAP browser provides all of the basic
services of a computer-based web browser. Whenever any preemptive display interrupts the browser session, the
browser needs manual reactivating to return. The WAP browser does not support right-to-left languages (as Arabic
and Hebrew); English is used instead. For the content in these languages, the characters are not displayed.
Depending on the radio configuration and the network conditions, the WAP browser may not display
images properly (or may display them with a delay).
2.27.2 WAP Push
WAP push allows WAP content to be pushed to a radio. This push is carried out by sending a specially formatted
(Push Access Protocol) XML document to the Push Proxy Gateway, that in turn forwards the document to the radio.
A WAP push message is an encoded message including a link to a WAP address. On receiving a WAP push, a
WAP enabled radio automatically gives the option to access the WAP content. The implemented WAP push is
compliant to WAP 2.0 standard.
The radio supports WAP 2.0 through a proxy only. Proxy-less connections are not supported.
This is a selling feature.
2-60
-
2.27.2.1 WAP Push Framework
2.27.2.1 WAP Push Framework
A push operation in WAP is carried out by allowing a Push Initiator (PI) to transmit push content and delivery
instructions to a Push Proxy Gateway (PPG). The PPG delivers the push content to the radio as per to the delivery
instructions.
The PI is an application running on a web server and communicating with the PPG using the Push Access Protocol
(PAP). The PPG uses the Push Over-The-Air (OTA) Protocol to deliver the push content to the radio.
Figure 2-8
Push Framework
P us h Ove r-the -Air P rotocol
WAP Clie nt
00
00
00
00
P us h P roxy Ga te wa y
P us h Acce s s P rotocol
00
00
00
00
P us h Initia tor
2.27.2.2 WAP Push Service Indication
The service indication (SI) presents a notification and an associated URL with a prompt to enter the URL on the
radio display. The notification is then stored in the WAP box for subsequent presentation.
The SI can be valid only for a certain amount of time. After the specified time elapses the SI indicates void content.
The author of an SI can set the expiration date and time, that is, when the SI is automatically deleted from a radio.
The service provider can remotely delete SIs that became invalid. The removal is carried out through sending a
special SI to delete the invalid entity.
A new SI is indicated with a respective status icon, tone, and a pop-up. The pop-up occurrence depends on the
SI priority (high and medium) and the radio conditions (for instance, if the radio is in a call the pop-up does not
appear). Depending on the periodic alert feature availability, a notification of an unread SI can be indicated with
periodic notification, similarly to an SDS message.
2.27.2.3 WAP Push Service Load
Service Loads (SL) differ from the Service Indications (SI) by the fact they do not prompt to enter the URL. Instead,
the browser is automatically activated. The SL contains an URL indicating what service to load.
A new SL is indicated with a respective status icon, tone, and browser activation. The browser activation depends
on the SL priority (high) and the radio conditions (for instance, if the radio is in a call, the browser does not display).
SL messages sent with urgency cache can be not indicated directly to the user. Such SL messages load content and
store it in the cache (the process works in the background, only the PD icon is visible to the user).
2.28 Radio User Assignment and Radio User Identity
Radio User Assignment (RUA) and Radio User Identity (RUI) enables authentication for providing full access to
the infrastructure and the physical radio.
Where the RUI feature is enabled, on logging on to the radio you enter your User ID with the PIN to check your
identity. Only the successful logon provides the full access. A logon failure results in limited service.
-
2-61
TETRA Radio Product Information Manual
Where also the RUA feature is enabled, after successful RUA/RUI authentication you are logged on to the physical
radio. Thus, you can still be reached at your radio number.
You can differentiate the RUA/RUI state by the interface color. Blue for logged on and gray for logged off. No
additional icon indicates whether you are logged on.
Besides the logged on off states, the radio can also be in the pseudo log on state indicated by the relevant icon.
The User ID is stored in the RUI List. To verify who is logged on to the radio, see the second line in the RUI list
(the first line is New User ID).
RUA/RUI is a selling feature.
2.28.1 RUA/RUI Logging On
You can log on yourself or the dispatcher can log you on. The feature must be enabled in the codeplug, by your
service provider.
After turning on the radio, the infrastructure verifies a request from the radio and checks if it supports the
RUA/RUI. When the infrastructure accepts RUA request, you are asked for RUI and RU-PIN. After providing
correct information, a successful logon occurs and full access is granted for specified time.
When a RUI and/or RU-PIN are incorrect, a logon failure occurs. The infrastructure sends the RUA reject signal to
the radio. If enabled in the codeplug, limited service access is granted.
When the dispatcher is sending the RUA accept signal to the radio with the time period that the full service is
granted, then the successful book on occurs.
2.28.2 RUA/RUI Radio Behavior
When the radio is logged off and receives RUA accept from the infrastructure without sending logon information, it
indicates book on with assigned logon period timer. The radio sends automatically book on response according
to the terminal settings: Book on Reject — the radio rejects all the book on, Book on Accept — the radio
accepts all the book on.
To log off, use the radio menu. The dispatcher has also the option to log you off using Force Off setting.
The pseudo log on is a state which occurs when the RUA/RUI authenticated radio goes to LST, or infrastructure
accepts the logon with the empty granted assignment period. In this state, the radio has the full functionality
available except some services as forwarding calls. This state is signalized with a specific icon.
The RUA/RUI feature is specified with the following timers:
• Logon Process Timer — defines the amount of time during which the radio awaits log on response from
infrastructure.
• Time Out Warning Timer — defines the amount of time after which the radio displays the warning.
• Logon Period Timer — defines the amount of time during which the radio is logged on.
2.28.3 RUA/RUI Interactions
When you switch from TMO to DMO, the terminal logs off (depending on the codeplug settings). When you switch
from DMO to TMO, the radio initiates the log on process.
2-62
-
2.29 Camera
You may be RUI-authenticated when out of coverage. In this situation, the radio is in pseudo logged on status.
All the timers are the same as for the logged on user with the coverage. You may also be logged off when out of
coverage. In this situation, the radio is provided with the limited service access. In both cases, if the radio is back in
the coverage area and receives RUA request from SwMI, it prompts you to log on.
If during the emergency operations you receive the force-off, it logs you off without exiting the emergency
operations. As long as the radio is in the emergency operations, the radio display does not indicate any change.
When the radio turns on in the LST, it prompts for the PIN. If the correct PIN is entered, the radio switches to
the pseudo logged on state. When you move to the LST, the radio switches to pseudo logged on state. However,
no prompt for the PIN occurs.
When you change to a different physical terminal, the store and forward report is routed to the radio where you are
currently logged on. When the radio receives store and forward report, it does not display the report, as the reports
have to match the sent SDS. If an SDS consumer report is requested, it is recommended that the receiver sends an
explicit separate SDS message to confirm the message has been received and read. The report is stored together
with the sent SDS in the Outbox, because of that when you log off, delete the messages from the Outbox. When
you change to different physical radio, the previous permanent radio does not receive the report. The status of store
and forward message in the Outbox cannot be updated.
2.29 Camera
The radio is equipped with a built-in 5 MP camera. Pictures resolution can be configured to 5, 2 or 1 MP. You
can store pictures in the internal flash memory or on microSD cards. It is possible to share the pictures by
Bluetooth, they are also accessible via USB. In Emergency Operations it is only possible to initialize the camera by
One-Touch Button.
To authenticate the photos Digital Fingerprint and EXIF tags are added. The camera application adds the following
information the picture's EXIF data:
• GPS position (when there is GPS coverage)
• network information:
– SwMI time stamp
– the radio ISSI
– selected GTSI
– serving site at the time the picture was taken
Digital Fingerprint is stored separately.
The feature, as well as specific settings connected with it, requires to be set up by the service provider.
2.29.1 Live View
The camera starts in Live view – in this mode live preview from camera is displayed on the screen and blended
with terminal GUI allowing user to capture a picture. To take a picture press Capture. The pictures are stored on
the SD card or extended flash memory.
-
2-63
TETRA Radio Product Information Manual
While in the live view mode, notices requiring your action are displayed and actions selected by you are taken.
Group calls operate in the background – incoming group calls are heard, and you can start a group call or answer
the existing one by pressing PTT. Private calls terminate the live view mode.
2.29.2 Pictures
The Picture Browser is an application that allows you to browse through pictures taken by the camera. Unless the
Digital Fingerprint feature is enabled, you can also add comments or edit exiting ones.
The Picture Browser has two views:
• The multi-picture view – displays thumbnails of pictures and folders.
• The full screen view – displays one picture that is scaled to fit the display. This view also allows zooming
in and out of pictures.
Picture Browser displays pictures only in the JPEG format, that is files with .jpg and .jpeg extensions. Also, the
browser does not open pictures which size exceeds 10 MB – File too large message is displayed.
2.29.3 Digital Fingerprint
A Digital Fingerprint is a unique signature generated and assigned to each picture after it is taken. It allows
authenticating pictures taken by Motorola radios so that they can be used as supporting evidence, for example, in a
court of law. The existing Digital Fingerprint cannot be modified or overwritten by another one.
The Digital Fingerprints are stored in the internal radio memory and cannot be accessed by end users. Extracting and
administering the pictures together with their signatures is later done by using of a Motorola application – iTM PICS.
The radio can contain up to 1000 items. If no space for the signatures is left, the pictures are still captured and
stored, but without generating Digital Fingerprints.
Upon Terminal Permanent Disable all picture signatures are optionally deleted.
This is a selling feature.
2.29.4 EXIF Data
EXIF data (EXchangeable Image File Format) contain technical information about the pictures, stored as metadata.
Motorola radios also store information about the state of the radio at the time the picture was taken, such as:
• Full time and date of taking the picture
• GPS position (when there is GPS coverage)
• Radio ISSI
• Selected Talkgroup
• Servicing Site ID
EXIF data cannot be viewed on the radio. An EXIF viewer is needed to access the TETRA specific information.
2-64
-
2.29.5 Support Light
2.29.5 Support Light
The built-in LED can be used as a flashlight. This functionality must be assigned to a one touch button. It is
not possible to activate the flashlight from the menu.
2.30 Radio Mass Storage
Radio Mass Storage enables support of Micro SD/SDHC Card or flash memory in the MS as a medium for storage
for applications. The radio can support one of the microSD cards:
• Micro Secure Digital Card (a standard microSD card) with capacity up to 2 GB
• Micro Secure Digital High Capacity Card (MicroSDHC card) with capacity from 2 GB to 32 GB
The SD Card/radio internal flash memory is accessible by the USB interface on the bottom connector. The
following operations are available to applications:
• Read file
• Write file
• Create file
• Delete file
• Create directory
• Delete directory
If the MS supports an SD card, then the SD card is used as message storage device, radio internal flash memory
is not accessible.
If the radio supports SD card, as part of Permanent Disable the MS formats the SD card. This applies to both
Permanent Disable and Permanent Disable v2.
2.31 Bluetooth
You can use Bluetooth to:
• Connect the radio with wireless accessories, for example headsets, which gives you a greater freedom
of movement and increases your work comfort.
• Send and receive files via the Object Push Profile (OPP).
The radio supports Bluetooth 2.1 + EDR standard. Secure Simple Pairing, one of its features, ensures high level of
security while pairing devices and thus protects you against recording and passive eavesdropping.
Bluetooth operating range is approximately 10 meters. The usable range may be reduced if you connect the radio
with devices that support more limited ranges or if physical obstacles such as walls appear between devices.
One radio can be connected with up to three devices at the same time. You can connect: one Motorola PTT pod,
one headset, and one device supporting file transfer.
Bluetooth and the Object Push Profile are selling features.
-
2-65
TETRA Radio Product Information Manual
2.31.1 Bluetooth Interactions
The features and situations provided in the table below limit the use of Bluetooth.
Feature
Interaction
Transmit Inhibit Mode (TXI),
Repeater Mode
Bluetooth does not work in the Transmit Inhibit Mode nor in the Repeater
Mode. When the radio enters one of those modes while Bluetooth is enabled,
all remote devices are disconnected and Bluetooth is disabled. After leaving
the TXI or the Repeater Mode, Bluetooth is enabled again (provided that it
was previously turned on).
Covert Mode
The radio cannot enter Discoverable Mode while in the Covert Mode (the
Covert Mode has a higher priority).
Wired Audio Accessories
Wired audio accessories have a higher priority than Bluetooth audio
accessories. If both types of devices are connected to the radio, it disconnects
the Bluetooth audio device. When a wired audio device is already connected
to the radio, scanning for Bluetooth audio devices is disabled.
2.31.2 Bluetooth Restrictions
Tetra Radios support simultaneous connection with up to 3 remote devices of different types.
The Tetra radios do have the following restrictions on the combinations of connected remote devices at any
given time:
• It is only possible to connect one Motorola PTT device connected at a time.
• It is only possible to connect one Bluetooth (BT) audio device at a time.
• It is only possible to have one Object Push Profile (OPP) enabled device connected at a time. The size limit
of the file to be sent is 2 GB.
• It is possible to have one Motorola PTT device, one BT audio device, and one OPP device connected
and active at the same time.
2-66
-
3
Man-Machine Interface
3.1 Controls, Indicators and Related Features
3.1.1 LED Indications
Table 3-1
LED Indications
Indication
Status
Solid green
In use
Repeating call
Battery fully charged
See the following
section “Charging
Battery”.
Blinking green
In service
Battery charged at 90%
See the following
section “Charging
Battery”.
Solid red
Out of service
Rapid charge
Trickle charge
Blinking red
Connecting to the network
Entering DMO
Faulty or invalid battery
Solid orange
Transmit inhibit in service
Channel busy in DMO
Blinking orange
Incoming call
Battery is waiting to charge
No indication
Idle
Radio powered down
-
3-1
TETRA Radio Product Information Manual
Charging Battery
When you charge your radio in a multi-unit charger and the battery is at the 90–100% charge level, the LED indicators on
the radio and on the multi-unit charger differ:
• LED on the radio – blinking green
• LED on the multi-unit charger – solid green
It is possible to charge the battery by means of the USB cable only after installing the special driver
available on the CPS CD. Make sure that Motorola Customer Programming Software (CPS) or the USB
Charging Driver Tool (available on the CPS installation CD) is installed on your computer.
3-2
-
3.1.2 Controls and Indicators
3.1.2 Controls and Indicators
1
2
3
4
5
13
14
15
16
17
6
18
5
19
7
7
8
20
9
21
10
11
22
12
15
-
13
3-3
TETRA Radio Product Information Manual
Table 3-2
Controls and Indicators
Annotation
Description
1
EMERGENCY button
Press and hold the EMERGENCY button to start Emergency Operations. By default, when
your radio is off, press and hold to power on in Emergency Operations.
2
ROTARY KNOB
• Rotate to set the volume.
• Press and rotate to select a different talkgroup.
• Press and hold the ROTARY KNOB to lock/unlock it. Powering the radio off and
on also unlocks a locked ROTARY KNOB.
3
LED Status Indicator
4
EARPIECE
5
Programmable SIDE buttons
The SIDE buttons support the One Touch Button feature. By default the following features
are assigned to them:
• MTP6550 – the upper SIDE button is set to Flip Display and the lower SIDE
button is set to High/Low Audio
• MTP6750 – the upper SIDE button is set to Start Camera / Take Picture and the
lower SIDE button is set to High/Low Audio
The required time to press and hold a button to activate a One-Touch
Button feature is by default set to 0.1 second.
6
PTT (Push-To-Talk)
• Press and hold to talk in simplex calls, release it to listen.
7
SOFT key
Press left or right SOFT key, to select the option that appears above.
8
SEND key
• Press to initiate or answer duplex calls, or send messages.
• Press in home screen to enter Recent Dialed Calls.
9
3-4
SPEAKER
-
3.1.2 Controls and Indicators
Table 3-2
Controls and Indicators (cont'd.)
Annotation
Description
10
KEYPAD
Use the keypad to enter alphanumeric characters for dialing, contact entries, and text
messages.
The keys (0-9, * and #) support the One-Touch Button feature. Press and hold a key to
activate a one-touch function assigned to it.
The required time to press and hold a button to activate a One-Touch Button
feature is by default set to 1 second.
11
BOTTOM MICROPHONE
Activated during Duplex low audio calls such as Private Calls.
12
BOTTOM CONNECTOR
Used for charging and programming the radio, and connecting data transfer cables.
13
5.0 megapixel CAMERA with auto focus and LED flash. Available only on MTP6750.
14
ANTENNA
15
EXTERNAL ANTENNA CONNECTOR
Used to connect an external antenna, such as the one in a Digital Car Kit.
16
TOP MICROPHONE
Activated during Simplex, high audio calls such as Group Calls.
17
SIDE CONNECTOR
Provides connection for accessories.
It is recommended to turn off the radio before connecting accessories.
18
DISPLAY
Features a high resolution of 240 x 320 pixels and 65,536 colors. Supports scalable fonts
and high color images.
19
MENU key
• From the home screen, press to enter the main menu.
• Used to enter context-sensitive menus.
-
3-5
TETRA Radio Product Information Manual
Table 3-2
Controls and Indicators (cont'd.)
Annotation
Description
20
ON/OFF/END/HOME key
• Press and hold to turn on/off your radio.
• Press to end calls.
• Press to return to the home screen.
21
NAVIGATION key
Press up, down, left or right NAVIGATION key for list scrolling, while moving around the
menu hierarchy, or for alphanumeric text editing.
From the home screen, press to activate one of the following:
• Down NAVIGATION key – enters Recent Calls menu item.
• Up NAVIGATION key – changes My Groups talkgroup folder.
• Left and right NAVIGATION key – toggles through the talkgroups.
22
BACKLIGHT SENSOR
The backlight sensor measures ambient light intensity. When the display backlight is
active and a low light condition is detected, the keypad is illuminated.
A detailed list of compatible accessories is included in Accessory Leaflet, part number: 68015000668. To
obtain the document, contact your service provider.
3.1.3 Keypad Lock
You can lock the keypad to prevent accidental pressing of keys. The keypad lock can be invoked using the menu
or predefined menu shortcut (by default Menu, *).
By default, while the keypad is locked, all front and side keys (including PTT) are inoperative except for the
ON-OFF and EMERGENCY buttons. The PTT button behavior can be set in the codeplug.
When an incoming emergency call is received, the PTT button automatically unlocks for the call duration.
When the keypad is locked one of the following is displayed:
• Nothing — no notification is displayed.
• Notification Only — Keys Locked is displayed.
• Notification and Instruction — Press Menu and * to unlock is displayed.
The displayed option can be set in the codeplug. By default it is set to Notification and Instruction.
3-6
-
3.1.4 Automatic Keypad Lock
3.1.4 Automatic Keypad Lock
The automatic keypad lock is a feature enabling the radio to lock its keypad automatically after a defined period.
The radio allows activating or deactivating the feature using the MMI. If the feature is enabled, after a defined time
of inactivity the keypad locks automatically. Any user activity restarts the Automatic Keypad Lock timer. When
the keypad locks automatically, the following notification is displayed Keypad auto locked. You can change the
time value required for the automatic lock through the MMI.
3.1.5 One-Touch Button Feature
The One-Touch Button feature allows for quick activation of functions by pressing and holding keys or buttons
assigned to those functions.
Table 3-3
-
One-Touch Button Features
Feature
Description
Backlight Toggle
Toggles the backlight settings.
Bluetooth Discoverable Mode
Turns on/off the Discoverable Mode.
Change Audio Profile
Change to the specific audio profile.
Change Talkgroup
Changes the talkgroup to the programmed one by your service
provider.
Connect/Disconnect RSM Earpiece
Toggles between operation of RSM with and RSM without earpiece
connected.
Covert Mode
Turns on/off the Covert Mode.
Disconnect All Connected Bluetooth
Devices
Disconnects all Bluetooth devices connected to the radio.
Display Time
Displays universal time on the home screen.
Enable/Disable Howling Suppression
Turns on/off Howling Suppression.
Extra Zoom On/Off
Turns on/off Extra Zoom.
Flashlight On/Off
Turns on/off the camera flashlight, which allows you to use the
radio as a torch. The flashlight turns off automatically after a period
of time determined by your service provider.
Flip Display
Rotates the display by 180 degrees.Disabled if the camera is
running.This is the default function for the upper SIDE button.
GPS Report
Sends a message with the radio’s GPS location to a dedicated
address.
Hi/Low Audio
Toggles high/low audio. This is the default function for the lower
SIDE button.
Initiate Call-Out Fallback Alert
Sends Call-Out Fallback Alert.
PABX Call
Initiates a PABX call to a predefined entry in the contact list.
Phone Call
Initiates a phone call to a predefined entry in the contact list.
Previous Talkgroup
Changes the selected talkgroup of the radio to the talkgroup (DMO
or TMO) that was selected previously.
3-7
TETRA Radio Product Information Manual
Table 3-3
One-Touch Button Features (cont'd.)
Feature
Description
Private Call
Initiates a private call (simplex or duplex) to a predefined entry in
the contact list or to the last group call originator.
Quick Photo
Takes a quick picture (no auto focus) without starting the camera
application. The picture is automatically saved to a selected folder.
RMS Mode (applicable only for * and #)
Toggles on/off RMS feature.
Rotary Switches Lock/Unlock
Locks/unlocks the Rotary Switches.
RUA/RUI Log On/Off
Asks for the credential or logs off the radio.
Scan for Bluetooth Devices
Activates scanning for Bluetooth devices.
Screen Saver Activation
Turns on/off the Screen Saver feature.
Scroll Audio Profiles
Scrolls through all available audio profiles.
Sending Predefined Message
Sends a predefined message to a dedicated address.
Sending Status
Sends a dedicated status message to a dedicated address.
Sending User Defined Message
Sends a user defined message to a dedicated address.
Speaker Enable/Disable Per Call
Enables the loudspeaker for a duration of the ongoing call..
Start Camera
Turns on the camera or takes a picture (with auto focus) if the
camera application is already started. This is the default function
for the upper SIDE button.
Timed Talkgroup Change
Makes a predefined talkgroup the selected talk group for a specified
amount of time. While using the predefined talkgroup, the second
press of the One-Touch Button results in: returning to the previously
selected talkgroup, restarting the predefined time, or no action
(depending on configuration). After the timer expires, the radio
returns to the previously selected talkgroup.
TMO / DMO Switch
Toggles between TMO and DMO modes.
TMO Talkgroup Scan
Turns on/off the Talkgroup Scan feature in TMO Mode.
Toggle Backlight Intensity
Regulates the backlight intensity.
Toggle RF Power Class
Toggles the RF Power Class between High and Normal.
Transmit Inhibit Mode (TXI)
Turns on/off the Transmit Inhibit Mode.
Turn On/Off Bluetooth
Turns on/off Bluetooth.
Turn On/Off Repeater Mode
Turns on/off the Repeater Mode.
Your service provider can assign one-touch functions only to the side buttons and keypad keys.
All the features can be assigned on the option buttons for RSM accessories.
If the One-Touch Button feature is enabled, the One-Touch Dial is disabled. If no feature is assigned to a
button, your radio displays an Unassigned Button message.
3-8
-
3.2 Display
3.2 Display
This section presents the radio's default home screen elements.
Figure 3-1
Default Home Screen with Icons
1
2
3
4
Table 3-4
Display
Annotation
Description
1
Status icon area
2
Text display area
3
SOFT key area
4
MENU/Context sensitive icon
The color of the SOFT keys informs you about the mode or state that your radio is in.
Table 3-5
-
Colors of the SOFT Keys
Color
Mode or State
Light blue
Normal TMO and DMO Modes
Light red
Emergency Mode or Disaster Alert Call
Olive
Local Site Trunking Mode
Yellow
Call Out — Standby
Red
Call Out — Alert
Green
Call Out — Accepted
Blue
Radio Messaging Service (RMS)
Grey
Radio User Assignment (RUA) — Limited service
3-9
TETRA Radio Product Information Manual
3.2.1 Status Icons
Status icons appear when your radio is engaged in certain activities or when you have activated certain features.
Depending on your service provider settings, status icons can appear in normal or large size. By default, they are
large on the home screen and normal when browsing though the radio menu.
Table 3-6
Icon
Status Icons
Description
Trunked Mode Operation
In Service
or
No Service
or
Signal Strength – The more bars, the stronger the signal.
or
or
RF Power — Indicates the High RF Power is enabled. Shows the signal strength. More
bars indicate a stronger signal.
Migration — Displayed when your radio is registered to the foreign network.
Broadcast Call — Displayed when the radio is in the Broadcast Call.
Scan — Indicates talkgroup scanning is activated in the radio.
Priority Scan — Indicates that priority scanning is activated in the radio.
Data Connected — Displayed when the Packet Data feature is activated and the external
device sets up data connection with the radio.
Data Transmit/Receive — Displayed when the Packet Data feature is activated and the
external device sets up data connection with the radio.
• No number — standby data session.
• Number 1, 2, 3, or 4 — indicates active data session with 25%, 50%, 75%, or
100% bandwidth.
Direct Mode Operation
Direct Mode Call – Displayed during a Direct Mode call; more bars indicate a stronger
signal.
Direct Mode — Displayed when the radio is in Direct Mode (radio-to-radio
communication).
3-10
-
3.2.1 Status Icons
Table 3-6
Status Icons (cont'd.)
Icon
Description
Repeater Mode — Displayed when the radio is switched to work as a repeater in Repeater
Mode.
DMO Gateway Communication Mode — Indicates that gateway is selected. The icon
has the following states:
• Solid — while the radio is synchronized with the gateway.
• Blinking — while the radio is not synchronized or during attachment.
• No icon — during a radio to radio and repeater call.
DMO Repeater Communication Mode — Displayed when the Repeater or GW + Rep
option in DMO Mode is selected. This icon has the following states:
• Solid — while the radio has detected the repeater (for example when the radio
receives a presence signal).
• Blinking — while the radio has not detected the repeater or during attachment.
• No icon — during a radio to radio and gateway call.
General Icons
All Tones Off and Duplex and Simplex Ring Muted — Indicates that all alert tones are off
and both duplex an simplex ring volume is set to 0.
All Tones Off — Indicates that:
• Volume is set to 0 (when Volume Adj. Mode is set to Common).
• Both simplex and duplex ring volume is set to 0 (when Volume Adj. Mode is
set to Individual).
Simplex Ring Muted — Indicates that simplex ring volume is set to 0 and duplex ring
volume is set to more than 0.
Duplex Ring Muted — Indicates that duplex ring volume is set to 0 and simplex ring
volume is set to more than 0.
Vibrate On — Indicates that the radio vibrates to alert you of an incoming call.
Vibrate then Ring — Indicates that the radio vibrates and rings to alert you of an incoming
call.
Low Audio — Indicates that the audio mode is changed to low.
High Audio — Indicates that the audio mode is changed to high.
Earpiece Connected — Indicates that the earpiece is connected.
-
3-11
TETRA Radio Product Information Manual
Table 3-6
Status Icons (cont'd.)
Icon
Description
GPS — Indicates that a valid location coordinates are received.
RUI Logged on — Indicates that you are logged on into the radio.
RUI Pseudo Log On — Indicates that you are in pseudo logged on state.
RUI Packet Data — Indicates Pseudo Log On state when the Packet Data feature is
activated and active data session is in progress.
RUI Packet Data — Indicates Pseudo Log On state when the Packet Data feature is
activated and the external device sets up data connection with the radio.
Battery Strength — Shows the charge of your battery.
Battery Charging — Indicates that the battery is charging.
Emergency — Appears while the radio is in Emergency Operation.
Disaster Alert Call — Appears while the radio is in the Disaster Alert Call.
List Scrolling — Displayed to indicate that the ROTARY KNOB is in list scrolling mode.
New Message Has Arrived — Indicates a new message just arrived.
New Message(s) in Inbox — Indicates that you have unread messages in your Inbox.
Unread (New) WAP Message — Indicates that new page was loaded to the browser.
Man Down Active — Indicates that the Man Down feature is active.
Man Down Alert — Displayed when the Man Down feature is active. This icon has
two states:
• Blinking — pre-Alert; the radio signalizes Man Down conditions. To exit the
pre-Alert state, change the conditions or press the PTT.
• Solid — the radio entered the Alert mode.
3-12
-
3.2.1 Status Icons
Table 3-6
Status Icons (cont'd.)
Icon
Description
Man Down Failure — Indicates the Man Down device failed.
Call-Out — Indicates Call-Out alert.
Call-Out Alert Arrived — Indicates a receipt of a new Call-Out message.
Call-Out Alert Unread — Indicates unread alert in the CO Box.
End-to-End Encryption (E2EE)
Solid, when the E2EE is enabled
• for the selected talkgroup,
• for the highlighted private number,
• for the manually entered private number,
• when transmitting voice in Group Calls,
• when transmitting voice in Simplex Private Calls.
Blinking, when the End-to-End Encryption is enabled
• when receiving voice in Group Calls,
• when receiving voice in Simplex Private Calls,
• during encrypted Duplex Private Calls.
SDS End-to-End Encryption
Solid, when the E2E status of an SDS message, or the E2E status of a message recipient
address.
In High Security mode, when your radio processes only the encrypted information, this
icon is always visible in when you are in the messages menu (for example, Inbox).
Unread (New) WAP Message — Indicates that you have not entered WAP Box since last
WAP message was received (Blinks when the priority is high).
WAP Message Icon — Displayed next to the priority in the message list view.
WAP Message Time — Displayed next to the create date in the message list view.
WAP Message Expiration — Displayed next to the expiry date in the message list view.
-
3-13
TETRA Radio Product Information Manual
Table 3-6
Status Icons (cont'd.)
Icon
Description
WAP Message Title Icon — Displayed next to the title along with the text in the message
list view.
Keys Locked — Indicates that keys are locked.
Non Secured Call — Air Encryption Unavailable
Blinking, indicates that Air Encryption is not available when the radio:
• Is in the Local Site Trunking Mode.
• Attempts to connect to a gateway.
Not Secured Call — Air Encryption Unavailable
Alternately blinking, indicates that Air Encryption is not available when the radio:
• Is in TMO Mode.
• Communicates through a gateway.
Not Secured Call — Air Encryption Unavailable
Blinking, indicates that Air Encryption is not available in DMO Mode. The icon appears
after the PTT button is pressed.
Non-formatted SD Card
• Solid – The microSD card is:
– Not formatted at all,
– Formatted incorrectly, or
– Damaged.
• Blinking – The microSD card is being formatted.
USB Connected – Indicates that the radio is connected to the computer via the USB cable.
Visible only in the Mass Storage mode.
Bluetooth Connected
Indicates one of the following:
• Bluetooth is enabled and at least one device is connected.
• The file transfer is in progress and the radio is either receiving or sending a file.
3-14
-
3.2.2 Idle Display
Table 3-6
Status Icons (cont'd.)
Icon
Description
Bluetooth Disconnected
Solid indicates that Bluetooth is enabled, but no device is connected.
Blinking indicates one of the following:
• Bluetooth is enabled and the radio is in the Discoverable Mode.
• Bluetooth is enabled and a connection with a remote device is being established.
Remote Control
Indicates that the radio is being remotely controlled and some commands are being
executed in the background. For example, when the radio is controlled via special SDS
messages or triggered to send a GPS location report.
The icon is not visible in the Extra Zoom Mode.
3.2.2 Idle Display
The terminals provide access to all services from the main idle display.
The idle display shows the following content.
• Icons on the status area (top line):
– Status icons.
– Battery level displayed at all times
The terminal periodically repeats the audible and visible indication of low battery.
– Signal level icon.
♦ Displayed in TMO at all times.
♦ Displayed in DMO only when receiving a voice in a group call.
– Up to five lines of text.Displays 3 to 4 lines depending upon the font size, and the icon bar.
♦ Line 1: Network status or network identification (No Service or MCC/MNC or MCC/ MNC alias).
♦ Line 2: Selected Group Folder.
♦ Line 3: Selected Group.
♦ Lines 4, 5: Home Mode Display (if available).
♦ Line 5: Time and Date (if available).
-
3-15
TETRA Radio Product Information Manual
In case the time and date information for a specific language cannot be displayed in one
line in the zoom or standard mode, the information is displayed in two lines. The time and
date overwrite the second line of Home Mode Display if any.
• Softkey labels and optional menu icon.
• An optional wallpaper background.
From the idle display, you have an easy access to stored target lists.
• Pressing the UP key accesses the favorite talkgroups list.
• Pressing the DOWN key accesses the recent calls lists.
• Pressing the SEND key accesses the last dialed numbers list.
• Pressing the Contacts softkey accesses the address book.
3.2.3 Configurable Idle Screen
Configurable Idle Screen is a feature that allows your service provider to determine what additional information
is displayed below the status icon area on the idle screen (five items maximum). The following information can
be selected:
• Network
• Range
• Talkgroup name
• Time and date
• Home mode display
• RMS/FMS
• ISSI
3.2.4 Display Features
The radio utilizes colors to highlight certain special situations:
• When the radio is in an emergency mode/call.
• When in the call-out mode (alert received state, standby state, accept the state).
• In the RUA/RUI, when you are logged on or pseudo logged on.
If the display flip is provisioned, the radio provides the ability to reverse the direction of the display. Hence, the
display can be read when holding the radio upside down.
The radio has four font size levels that you can choose using the menu.
The backlight can be provisioned to operate in one of the following modes:
• Disabled — The backlight does not operate at all.
• Semi-Auto — Pressing a provisioned one-touch button toggles the on/off state of the backlight. The
backlight is also turned off automatically when the backlight timer runs out.
3-16
-
3.2.5 Languages Supported
• Auto — Pressing any key automatically turns on the backlight.
The backlight remains on until the backlight timer runs out, or if a provisioned one-touch button is pressed to turn it
off. You can also toggle between the modes using the menu.
The radio supports an option to display a screen saver when the radio has been idle for a set time, or when you
explicitly activate it. The screen saver consists of an image, which can be provisioned from any GIF image, and a
text string which can also be provisioned. When the screen saver is being displayed, any key input or incoming
service causes the screen saver to deactivate.
3.2.5 Languages Supported
Table 3-7
Languages Supported
Language
-
English
Yes
Arabic
Yes
Chinese (simplified)
Yes
Chinese (traditional)
Yes
Croatian
Yes
Danish
Yes
Dutch
Yes
French
Yes
German
Yes
Greek
Yes
Hebrew
Yes
Hungarian
Yes
Italian
Yes
Korean
Yes
Lithuanian
Yes
Macedonian
Yes
Mongolian
Yes
Norwegian
Yes
Portuguese
Yes
Polish
Yes
Russian
Yes
Spanish
Yes
Swedish
Yes
User defined
Yes
3-17
TETRA Radio Product Information Manual
3.3 Audio
3.3.1 Tones
Motorola TETRA terminal supports audible user notification, tones. Tones for events are divided into five
categories:
• Keypad: for events triggered by key-press
• Alert: for events triggered by an application
• Ring: for events triggered by incoming/outgoing call
• Callout: for events triggered by Call-Out alert
• Voice: for the event triggered by voice volume set
A category may have many or few associated events.
The number of tones is limited; a specific tone may be used for indicating several different events. The generated
tone may be mixed with the received speech signal, replace it, or be played while the radio is in idle (i.e. no
received or transmitted speech) dependent on its category and the features interaction.
The ‘right’ tone/event loudness is an objective matter. Motorola TETRA terminal tones architecture is highly
flexible and allows you to adjust the level of every tone-event (e.g. valid key-press) individually and at the same
time to adjust the level of all events associated with a tone-category.
Using the Customer Programming Software (CPS) tool, it is possible to set the level of each event compare with
the nominal speech level (-20dBm0); that means, for a given volume setting, a tone may be louder, softer, or at
speech level. This option is available both for in idle (i.e. no received or transmitted speech) and in-call (i.e.
during received or transmitted speech).
For a complete list of tones and audio files refer to the Appendix.
3.3.2 Dual Microphones
Each radio has two microphones. One located at the top of the unit for dispatch (simplex) operation, and the
second located on the bottom of the unit for duplex calls.
3.3.3 Speaker/Earpiece
Each radio has an internal speaker for high audio (located at the middle of the unit) and an internal earpiece for
low audio (located at the top of the unit). The audio can be routed either to the speaker or the earpiece using the
Audio Toggle menu and the assigned One-Touch Button.
3.3.4 Volume Adjustment Mode
You can set the volume to Individual or Common. When it is set to Individual, the volume level for Voice,
Duplex, Simplex, Keypad, Tones, and Call-Out can be set per user preferences. When set to Common, the
audio has one setting for all items.
3-18
-
3.3.5 Accessory Setup
When volume control capable Bluetooth device is connected, the radio always uses the Common setting.
The max volume offset (dB) and the volume range (dB) are configurable via CPS (Audio Settings -> User Profile).
The volume control in the radio is divided into 13 steps (0 to 14); if e.g. the vol. range is set to 39, each step on
the volume indication bar is 3dB
3.3.5 Accessory Setup
When connecting an accessory to the radio’s side connector, if it is an IMPRES accessory, the radio detects and
recognizes the accessory automatically. Else, if the accessory is CORE, Other (i.e. 3rd party accessory, detected by
specific resistance values), or Secondary Accessory (i.e. an earpiece connected to RSM), the radio may detect the
connection, however, the accessory has to be set manually via the Accry Setup menu (or CPS: Audio Settings).
This menu contains the supported accessories, represented by their Model Number as defined by the related ADD.
Audio Device Descriptor (ADD) is a set of parameters in the radio, which defines the audio setting (e.g. gains and
filters settings) for each accessory. For Motorola accessories, the ADDs are predefined and cannot be changed by
the user. For 3rd party accessories, the ADD parameters are configurable via CPS (Audio Settings -> 3rd Party
Accessory Device Parameter) – please refer to the licensable “Motorola 3rd Audio Device Descriptor (ADD)
parameter creation for 3rd party audio accessories” document. Motorola ADDs can be imported and removed via
CPS (Buttons, Keys and Accessories -> ADD Import / Remove).
3.3.6 Audio Features
There are many situations where the demand of audio quality changes according to the working environment. For
example, an airport worker, who works partly in the field where there is lots of noise coming from the surrounding
environment and partly inside the airport where there is relatively less noise, may experience different audio
quality. In the working environments like these ones, there is a need for different audio quality and adaptive audio
parameters which can be configured according to the working environment.
3.3.6.1 Audio Profiles
Audio profiles can be used to adjust the audio settings of the radio to fit to different operating environments. The
user can select the corresponding audio profiles which are mapped to “User Profiles” generated in CPS. It is
possible to enable and customize up to 3 audio profiles using CPS (Audio Settings -> User Profile). The following
parameters can be changed in a User Profile:
• Mic Gain offsets
• Howling Gains
• AGC, Echo Canceller and RX/TX Noise suppressor
• Voice offsets and ranges for different audio devices
• Tone offset and ranges
Audio Profile names in the Radio MMI correspond to the Profile Alias/Name parameter value for the
corresponding User Profile in CPS.
-
3-19
TETRA Radio Product Information Manual
Using the CPS you can create an audio profile using the 3 User Profiles.
Using the CPS you can enable/disable an audio profile in the codeplug.
Using the CPS you can give an alias/name to a particular profile configured in the codeplug.
The audio profiles are created and maintained independent of each other. Creating or modifying one audio profile
does not have any impact on the others.
The radio enables toggling audio profiles using the menu or using the One-Touch Button.
You can change the audio profile during an active call.
3.3.6.2 Transmit Automatic Gain Control
The Transmit Automatic Gain Control (TX-AGC) provides flexibility in terms of operating environment. The
TX-AGC allows to transmit from a radio both indoor and outdoor without having to change a profile. The TX-AGC
provides normalized sound levels to the receiving party.
3.3.6.3 Howling Suppression
The howling suppression is a mode increasing the stability of the acoustic feedback loop. To enable this
anti-howling function use the menu or the corresponding One-Touch Button. The radio eliminates howling caused
by the feedback loop from the receiving radios to the sending radio in simplex calls.
When the howling suppression is enabled, Microphone and Speaker gain reduction values corresponding to the
active audio profile are taken into use.
You can toggle the howling suppression during an active call.
3.4 Testing
3.4.1 Test Page
The Test Page option must be enabled in the codeplug. The test page is only for use by authorized
persons. When using KVL 3000 (a portable device used to load encryption keys to a secure entity), set the
baud rate on it to 19200 bits/second.
Use the following key sequence to access the test page: *, #, MENU, RIGHT.
If the test page option is not enabled in the codeplug, you have only access to the KVL mode options
KVL On or KVL Off.
3-20
-
3.4.1 Test Page
The following information is available in the test page.
• Ver Info – Version Information – displays software/hardware version information.
– Build Date – software build (a compiled version of software)
– CP Ver – CodePlug version
– DSP Ver – Signalling Processor Software version
– Host Ver – Application Software version
– HardwareID – hardware identification number
– EquipID – TEI (Tetra Equipment Identity)
– LLS version– Local Language Package version
• Addresses;
– Home MNI – country identification code, network code
– Group ID – number of the currently selected talkgroup
– Own ISSI – Own Individual Short Subscriber Identity
– ASSI – Alias Short Subscriber Identity
• Err Logs – Error Logs – displays information about software errors.
• Cells Info – Cell Information – displays information about the foreground and background cells (BTS sites).
This menu displays the RSSI levels of the cells.
• Cell Lists – Displays frequency lists.
– Frequency List1 (32 variable frequencies)
– Frequency List2 (32 fixed frequencies)
– Frequency List3 (comprehensive hunt)
– Frequency List4 (comprehensive hunt)
• Data Svc – Data Services – allows access to the air tracer enable, the conformance tests, and the KVL mode.
– Air Tracer
– Conf Test – Conform test
– KVL Mode
To leave the KVL Mode power off and on.
– E2E KVL Mode
– MS Logging
• CE Monitor – Crypto Engine Monitor
• Key Info – Key Information — allows displaying the security information for the following conditions:
– For the serving cell:
♦ Curr Cell SC – Security class of the serving cell, that is Security Class 1, Security Class 2, Security
Class 3, Security Class 3 with GCK.
– For the group OTAR:
♦ CMG GSSI – Crypto Management Group (CMG) group of MSs with common key material
-
3-21
TETRA Radio Product Information Manual
– For SDMO and TM-SCK OTAR:
♦ SCK SubsGrType – SDMO SCK Subset Grouping Type.
♦ Curr Subs Info – current SDMO SCK Subset Number and SCK-VN.
♦ Fallback TMSCK – current Fallback TMO SCK, that is SCKN and SCK-VN attributes.
♦ SCK List – list all SCKs stored in the MS, that is SCKN and SCK-VN attributes (SCK version
number).
When checking that the SDMO key information in the radio, be advised that the SDMO
KAG (SDMO Key Association Group) range in the AuC (Authentication Centre) is from 0
to 9 and the range in the radio is from 1 to 10.
– For the GCK (Group Cipher Key):
♦ Full GCK-VN – current Full GCK-VN. (GCK version number).
♦ GCK List – list all GCKs stored in the MS, that is GCKN and GCK-VN attributes.
• DMO info – Direct Mode Operation information (RSSI and Frequency)
3.4.2 Radio Info
Depending on the codeplug configuration the manufacturer, type, and serial number information is available. The
information is available through the service page accessible from the MMI.
The Radio Info provides the following data:
• Manufacturer
• Product Type
The manufacturer and product type information is displayed only on radios distributed under
Motorola trademark.
• ISSI — the ISSI which is currently in use. If a SIM Card is present the ISSI is read from the card, otherwise
it is taken from the codeplug.
• TEI — the TEI is displayed as a hexadecimal number.
• Serial number — Motorola serial number is displayed only on radios distributed under Motorola trademark.
• OPTA — if the BSI SIM support is disabled no OPTA information is displayed.
3.4.3 Hardware Test
This mode allows performing basic hardware tests and share the results immediately on the display.
3-22
-
3.4.3 Hardware Test
The hardware test mode is only for use by authorized persons.
Use the following key combinations to access the hardware test: 1, 2, 3 (hold all simultaneously) and then press
ON/OFF key.
-
3-23
Appendix A: Tones
To listen to the audio signal tones samples, refer to the PDF file with the embedded sound files.
Table A-1
New Tone
Radio Tones
Classic Tone
Tone Description
Default Beep — Played when pressing a key.
Duplex Volume Set — Played when adjusting duplex volume.
Invalid Action
Examples:
• Pressing an invalid key.
• Dialing an invalid number.
• Talk prohibit.
System Notification
Examples:
• The radio changed its status from out-of-range to in service.
• The radio returned to the home network.
• Toggling between the TMO and DMO modes.
System Error
Examples:
• The radio changed its status from in service to out-of-range.
• Call disconnected.
General Notification
Examples:
• Entering Local Site Trunking.
• Entering the Transmit Inhibit Mode.
Positive Notification — Message sending succeeded.
Negative Notification — Message sending failed.
Item Received — A new message received.
-
A-1
Feature User Guide
Table A-1
Radio Tones (cont'd.)
New Tone
Classic Tone
Tone Description
Talk Permit — The radio user is allowed to transmit their message (after
pressing the PTT button).
Clear-to-send — Data transmission ready to begin.
Emergency — The Emergency Call received.
Low Battery — The battery charge level is low.
Over the Air 1 — Single D-PTT tone.
Over the Air 2— Double D-PTT tone.
Over the Air 3— Triple D-PTT tone.
Phone Busy — The called radio is busy.
Phone Ring Back — Played on the initiating phone when the Phone Call
is being setup.
Private Ring Back — Played on the initiating phone when the Private
Call is being setup.
Ringtone 1.
Ringtone 2.
Ringtone 3.
Ringtone 4.
Ringtone 5.
Simplex Volume Set — Played when adjusting simplex volume.
A-2
-
Appendix B: Glossary
ADD
Audio Device Descriptors
AIE
Air Interface Encryption
Air Interface Encryption (AIE)
Provides confidentiality on the radio link over the air.
Encryption
Announced Cell Reselection
Cell reselection where radio Mobile Link Entity (MLE) informs the Switching and Management Infrastructure (SwMI) both
in the serving cell and in the new cell that cell change is performed.
APAC
Asia Pacific region
ASSI
Alias Short Subscriber Identity
Short Subscriber Identity
Audio Device Descriptors (ADD)
A structure which provides hardware information about a particular audio accessory (for both IMPRESS and core
accessories). Files with ADD have an extension .add.
Base Station
Term used to identify the installation including the BTS, antenna and ancillary equipment.
BTS
Base Transceiver Station
Calibration values
A set of important and unique, factory-defined values (such as frequency tuning) assigned to radios. Also known as
Sensitive data.
CCK
Common Cipher Key
-
B-1
TETRA Radio Product Information Manual
Central Network Equipment
The equipment located at the Master Site or Mobile Switching Office.
Class 3
DCK encryption, ESI with CCK, authentication.
Clear
Not encrypted.
Common Cipher Key (CCK)
Used to encrypt group and broadcast addressed downlink signaling (from infrastructure to a radio). Also used to protect
ISSI identities.
Encryption
Individual Short Subscriber Identity
Control Channel
The always active control channels transmit and receive the signaling to monitor and control the operation of radios.
CPS
Customer Programming Software
Customer Programming Software (CPS)
The software application used for programming radios.
DCK
Digital Car Kit
DCK
Derived Cipher Key
Derived Cipher Key (DCK)
Used to encrypt all uplink signaling (from radios to infrastructure) and individually addressed downlink signaling (from
infrastructure to a radio).
Encryption
DGNA
Dynamic Group Number Assignment
Direct Mode Operation (DMO)
Direct communications between two or more radios without the use of any infrastructure.
DMO
Direct Mode Operation
B-2
-
Appendix B Glossary
DTE
Data Radio Equipment
DTMF
Dual Tone Multi-Frequency
Dual Tone Multi-Frequency (DTMF)
Tone-based signaling scheme which combines two of a set of standard frequencies. The result is a third or beat frequency
(signal) which is the desired or usable signal. DTMF signaling is used as tone-dialing in the common telephone.
Dynamic Group Number Assignment (DGNA)
DGNA is a possibility to provision talkgroups into the radio over the Air Interface.
Talkgroup
Encryption
Secure communications systems are designed to provide coded (?encrypted?) signals between some or all links in the system.
In order to do this, each device involved in secure communications is loaded with a multi-digit encryption variable (called a
key). This key is used by an encryption algorithm built into the device to encrypt voice or data as needed. Only devices in the
system with the same algorithm and encryption key can decode the encrypted signals.
Encryption
The manipulation of a packet's data in order to prevent anyone but the intended recipient from reading that data. There are
many types of data encryption, and they are the basis of network security.
ESI
Encrypted Short Identity
ESSC
EMEA System Support Center
ETSI
European Telecommunications Standards Institute
European Telecommunications Standards Institute (ETSI)
The European standards organization responsible for the TETRA standard.
Firmware
Computer instructions that reside as read-only software on a radio's flash memory.
Fixed Network Equipment
Switching and Management Infrastructure
Flash
A storage chip integrated in to radio hardware, that can be erased and reprogrammed.
-
B-3
TETRA Radio Product Information Manual
Flashing
Writing a software image file to a radio.
GCK
Group Cipher Key
GCK KAR
Group Cipher Key Key Association Range
GPIO
General Programmable Input Output
Group Call
An instant communication between users that belong to the same talkgroup.
Talkgroup
Group Cipher Key (GCK)
Predetermined cipher key used to provide confidentiality in Class 3 system with corresponding algorithm. Used to generate
MGCK.
Modified Group Cipher Key
Class 3
Group Short Subscriber Identity (GSSI)
TETRA term, in Dimetra called Group ID or Talkgroup ID.
Short Subscriber Identity
GSSI
Group Short Subscriber Identity
Home Location Address
Area within radio coverage of a base station or group of base stations within which a radio is allowed to operate.
Base Station
B-4
-
Appendix B Glossary
Individual Short Subscriber Identity (ISSI)
TETRA term for a unique, individual ID assigned for each radio.
Short Subscriber Identity
Individual TETRA Subscriber Identity (ITSI)
Consists of ISSI plus MCC and MNC codes.
Individual Short Subscriber Identity
Mobile Country Code
Mobile Network Code
ISSI
Individual Short Subscriber Identity
ITSI
Individual TETRA Subscriber Identity
Key
Each device involved in secure communications is loaded with a multi-digit encryption variable ? an encryption key. An
encryption algorithm built into the device uses this key to encrypt voice or data as needed. Only devices in the system with
the same algorithm and encryption key can decode the encrypted signals.
Encryption
LIP
Location Information Protocol
Local Site Trunking (LST)
Allows radio subscribers of the same cell site to communicate when the link between the site and network central controller
fails. Entering and exiting Local Site Trunking (that is, returning to Site Wide Trunking) is done automatically ? the
display shows the ?Local Area Service? message Any call in progress is dropped upon entering Local Site Trunking mode.
Registration, Group Call, and Emergency Call are available in Local Site Trunking.
Central Network Equipment
Location Request/Response Protocol (LRPP)
This protocol allows for a single and efficient format of passing location information (requests and responses).
-
B-5
TETRA Radio Product Information Manual
LRPP
Location Request/Response Protocol
LST
Local Site Trunking
MACE
Motorola Advanced Crypto Engine
Main Control Channel (MCCH)
The main control channel at a site. The channel is used by radios to register on the system and to request and setup speech
calls with other radios.
Control Channel
Man Machine Interface (MMI)
Relates to the CPS Plus and radios user interface.
MCCH
Main Control Channel
MLE
Mobile Link Entity
Announced Cell Reselection
MMI
Man Machine Interface
Mobile Country Code
The MCC and MNC together form a unique TETRA system identifier that is broadcast by a Dimetra system over the
air interface.
Mobile Network Code
The Mobile Network Code should be allocated by the national authority that allocates frequency assignments in a country
and should be requested from that authority at the same time as frequency allocations are requested. The MCC and MNC
together form a unique TETRA system identifier that is broadcast by a Dimetra system over the air interface.
Modified Group Cipher Key
Used to encrypt group addressed downlink signaling.
NGCH
Next Generation Control Head
OTAR
Over-The-Air-Rekeying protocol
B-6
-
Appendix B Glossary
Over-The-Air-Rekeying protocol (OTAR)
Used in connection with Air Interface Encryption.
Air Interface Encryption
PABX
Private Automatic Branch Exchange
PABX Gateway
A device that provides connectivity from a TETRA user to a PABX subscriber and the other way around.
Private Automatic Branch Exchange
PDV2
Permanent Disable Version 2
PEI
Peripheral Equipment Interface
Permanent Disable Version 2 (PDV2)
You can restore a disabled radio using CPS Plus.
Personal Hands-Free kit (PHF)
In other words an earpiece or a handset.
PHF
Personal Hands-Free kit
Private Automatic Branch Exchange (PABX)
Allows to call local (office) extension numbers.
Private Call
An individual call between two radios or between a radio and a console operator. Apart from the two interlocutors, no
one else can participate or listen to the call.
Private Duplex Call
A private call between two radios that resembles a telephone conversation. The two individuals can talk and listen at the
same time without pressing PTT.
Private Call
Push-to-Talk
-
B-7
TETRA Radio Product Information Manual
Private Number
Also called Private ID.
PSTN
Public Switched Telephone Network
PSTN Gateway
A device that provides connectivity from a TETRA user to a PSTN subscriber and the other way around. Additionally,
for the duration of the call, the PSTN gateway allows TETRA signaling information to be passed from TETRA Switching
and Management Infrastructure to the external network user and from the external network user to the TETRA SwMI in
accordance with the TETRA Call Control (CC) procedures.
Public Switched Telephone Network
Switching and Management Infrastructure
PTPC
Point-to-Point Call
Private Call
PTT Button
Push-to-Talk button
Public Switched Telephone Network (PSTN)
Traditional telephone network.
Push-to-Talk
Pressing this button on a radio allows the subscriber to transmit.
Radio
A two-way communication device used for voice and data.
Radio User Assignment/Radio User Identity (RUA/RUI)
This feature allows to assign alphanumeric user names to radio users, and to authenticate the radio users in a logon process.
Radio User Assignment (RUA)
Part of RUA/RUI feature.
Radio User Assignment/Radio User Identity
B-8
-
Appendix B Glossary
Radio User Identity (RUI)
Part of RUA/RUI feature
Radio User Assignment/Radio User Identity
RCU
Remote Control Unit
Remote Control Unit (RCU)
A small device attached to a covert radio over a thin wire, used for operating the radio.
Remote flashing
Programming the transceiver via the control head.
RSM
Remote Speaker Microphone
RSSI
Radio Signal Strength Indicator
RUA
Radio User Assignment
RUA/RUI
Radio User Assignment/Radio User Identity
RUI
Radio User Identity
SCK
Static Cipher Key
SDMO KAG
Secure Direct Mode Operation Key Association Group
SDS
Short Data Service
Selling Feature
Requires a USB dongle with purchased licenses.
-
B-9
TETRA Radio Product Information Manual
Semi-Duplex Private Call
Also called Private Call or Express Connect Call. In this type of one-way call, the user presses and holds the PTT while
talking, and releases the PTT while listening.
Private Call
Push-to-Talk
Sensitive Data
A set of important and unique, factory-defined values (such as frequency tuning) assigned to radios.
Short Data Service (SDS)
A flexible bearer service that transfers information from one interface to another.
Short Subscriber Identity (SSI)
The network specific portion of a TETRA Subscriber Identity. An SSI is only unique within one TETRA subdomain (one
TETRA network).
SIM
Subscriber Identity Module
Software Image
A collection of files distinguished by individual releases. It contains firmware, codeplug, and audio template files dedicated
to specific radio models.
SSI
Short Subscriber Identity
Static Cipher Key (SCK)
Key used for encryption between radios and BTS in Class 2 systems with corresponding algorithm.
Encryption
Status ID
A feature that makes it possible for a subscriber to send status messages to other subscribers. The user can enter a status
message for each ID in a Status ID list. When a subscriber sends a status message, the ID of the subscriber?s unit is
sent along with the status message.
Subscriber Identity Module (SIM)
A smart card that holds subscriber information (including the authentication key) and is inserted into the radio to grant its
personality.
B-10
-
Appendix B Glossary
Switching and Management Infrastructure (SwMI)
All the system components excluding the mobile equipment that is the CNE and all the remote site equipment.
Central Network Equipment
SwMI
Switching and Management Infrastructure
Talkgroup
A group of radio users that can share calls and messages as a group. Normally a talkgroup is comprised of users who have a
need to communicate with each other on a day-to-day basis.
TEI
TETRA Equipment Identity
Telephone Interconnect (TI)
A call feature that provides subscriber access to the Public Switched Telephone Network (PSTN). Telephone interconnect
can be used for both land-to-mobile calls and mobile-to-land calls.
Public Switched Telephone Network
TETRA
Acronym for TErrestrial Trunked RAdio. The digital trunked radio standard produced by ETSI providing detailed
telecommunications specifications to which Base Stations and radios should adhere.
Base Station
European Telecommunications Standards Institute
Radio
TETRA Equipment Identity (TEI)
An electronic serial number that is permanently embedded in the TETRA equipment, like radios.
TI
Telephone Interconnect
TMO
Trunked Mode Operation
Trunked
Trunked Radio Communications
-
B-11
TETRA Radio Product Information Manual
Trunked Radio Communications (Trunked)
A computer controlled communications system that allocates speech channels on demand selecting on a random basis from
the group of channels available.
Upgrade
To replace radio firmware with a newer version and preserve User and Sensitive Data.
User Data
A set of codeplug nodes and values, that can be edited and replicated to other codeplugs or radios.
VASSI
Visitor Alias Short Subscriber Identity
B-1
-