1
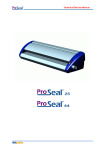
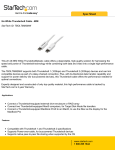
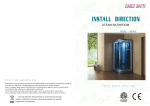
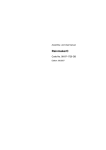
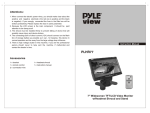
Specifications
Screen Size:
System:
Display Method:
Power source/Consumption:
Storage Temperature:
Display Method :
Monitor dimension:
Pixs:
Weight:
13 inch 4:3TFT
PAL/NTSC
TFT Active matrix system
DC12V+/-20%, 15W
-10 ~ +85
Color LCD
325x275x30mm
800x600
900g
13 TFT LCD COLOR MONITOR
Instruction Manual
Cautions
Never connect the car adaptor to cigarette lighters for such as trucks
or buses which use 12V DC power.
Do not expose the monitor to high humidity, dust, steam,oily smoke,
direct sunlight etc.
For your safety, turn power OFF when not in use and unplug the adaptor.
Never attempt your own maintenance. Consult your TV dealer or the
company.
Avoid dropping and strong impact.
For your safety, the driver should not watch the Monitor or operate the
controls while driving.
Accessories
1xRemote control
1xinstruction manual
WARNING:
DO NOT WATCH MONITOR WHILE VEHICLE IN MOTION.
IT CAN BE HAZARDOUS.
WARNING:
HAZARD DO NOT OPERATE THIS
UNIT UNLESS VEHICLE IS PARKED
IN SAFE AND LEGAL AREA
PLVW1342
Thank you for the purchase of this roof mounting 13inch TFT-LCD
monitor .Before operating the unit ,please read this manual
thoroughly and keep it for future reference.
REMOTE CONTROL BATTERY
Back of the remote
PREAUTIONS
Battery tank
Battery
Transparent slice
1.Always use new batteries when replacing the old set .
2. Do not attempt to charge ,short-circuit ,disassemble ,heat or burn
used batteries.
3.Battery replacement is necessary when remote control acts
sporadically or stops operating this device.
4.Do not place objects between the remote control and remote receiver.
5.If the monitor does not operate even when operating the remote
control from a colse rangre ,it is time to replace the batteries
Product number :(cr2025)
INSTALLATION
The device is an overhead ,fold-down 13 inch monitor with an infrared
ir eye .It will accept a video signal from any video source with composite
videout .
1.Look over the vehicle for a location for the monitor .Each vehicle
is different and locations will vary .Make sure the monitor will not
interfere with the driver.
2.Once a location has been determined ,connect the IR ,A/V RCAs
and Powercables to the designated sources.
3.Feed the cables through the hole in the mounting bracket and
screw the bracket to the head liner ,Use short screws so as not to
damage the roof.
4.Plug the cable into the monitors 6 pin din connector .Mount the
monitor with the provided hardware.
The set is for use in DC12V ,negaive ground vehicles.
Do not operate the set in ways other than described in this guide .Doing
so may damage it and may void your warranty.
SAFETY FIRST FOR REAR SEAT USE ONLY .Do not install on dashboard
or any where else that would permit monitor to be viewed by the driver .
Monitor must never be used in any manner that will distract driver or
interfere with the drivers
safe operation of the monitor vehivle.
Be careful not to run down the car battery while using the set with the
car stopped.Do not disassemble or modify the set .Doing so may damage
it and voids your warranty.
Keep drinks and drops from numberllas away from the set .Water may
damage the internal circuitry.
Do not let the set become hot .If temperature in the car is high or the
set has been exposed to direct sunlight and is hot ,lower the temperature
before using it .In extremely cold temperature ,the movement of the
picture may be slow and the picture may be dark ,but this is not a
malfunction .The set will work normally once the temperature increases.
Pannel
WIRING DIAGRAM
10
11
12
Read all wiring precautions .If you are not sure of the connections ,contact your
authorized dealer.
1.Disconnect the negative(-) lead of the battery before making any power
connections.
2.When creating passage holes for the power wires ,use grommets to eliminate
any sharp edges created during drilling .This will protect the wire from being
nicked and causing a short circuit .
3.When connecting the ground lead ,fasten the ground lead(black) securely to a
clean metal plate on the vehicle .
1
2
3
4
5
6
7
8
9
1.LED
3.AV1
5.+
7.9.IR
11.Monitor release button
2.Power
4.AV2
6.MENU
8.RSI
10.Dome light
12.Dome light switch
4
REMOTE CONTROL
PYLE CAR VIDEO
8
AV
TFT-LCD
MONITOR REMOTE
3
PLAYER
Red
2
7
Video input2 (white RCA)
6
Black
FUSE 2A
5
Video1 input (yellow RCA)
1.Power ON/OFF the monitor
2.Contrast positive adjustment
3.Switch between V1 and V2
4.Brightness positive adjustment
5.Brightness negative adjustment
6.Contrast negative adjustment
7.Saturation negative adjustment
8.Saturation positive adjustment
1
12V
BATTERY
AUTO VIDEO ACCESSORIES