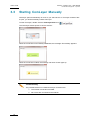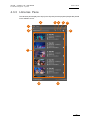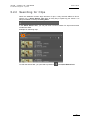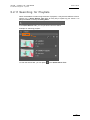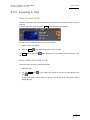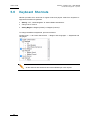
1
XNC – Version 1.0 – User Manual Network Broadcast Systems – August 2012 Issue 1.0.A nanoAir – Version 1.00 – User Manual Issue 1.00.B EVS Broadcast Equipment – April 2013 Copyright EVS Broadcast Equipment – Copyright © 2013. All rights reserved. Disclaimer The information in this manual is furnished for informational use only and subject to change without notice. While every effort has been made to ensure that the information contained in this user manual is accurate, up-to-date and reliable, EVS Broadcast Equipment cannot be held responsible for inaccuracies or errors that may appear in this publication. Improvement Requests Your comments will help us improve the quality of the user documentation. Do not hesitate to send improvement requests, or report any error or inaccuracy on this user manual by e-mail to [email protected]. Regional Contacts The address and phone number of the EVS headquarters are usually mentioned in the Help > About menu in the user interface. You will find the full list of addresses and phone numbers of local offices either at the end of this user manual (for manuals on hardware products) or on the EVS website on the following page: http://www.evs.tv/contacts User Manuals on EVS Website The latest version of the user manual, if any, and other user manuals on EVS products can be found on the EVS download center, on the following webpage: http://www.evs.tv/downloadcenter I nanoAir – Version 1.00 – User Manual Issue 1.00.B EVS Broadcast Equipment – April 2013 Table of Contents 1. INTRODUCTION ...................................................................................................... 1 1.1 1.2 1.3 2. Overview ..................................................................................................................... 1 General Principles ....................................................................................................... 1 Hardware Requirements ............................................................................................. 2 SOFTWARE INSTALLATION...................................................................................... 3 2.1 2.2 2.3 3. Prerequisites ............................................................................................................... 3 ComLayer and Server Management ........................................................................... 3 Installing nanoAir ........................................................................................................ 5 STARTUP AND CONFIGURATION............................................................................ 12 3.1 Selecting Server........................................................................................................ 12 3.1.1 3.1.2 3.1.3 3.2 3.3 4. Starting the NanoAir Application ..........................................................................................12 The Server List .....................................................................................................................13 Selecting the Channels’ configuration ..................................................................................15 Selecting the Server .................................................................................................. 17 Starting ComLayer Manually ..................................................................................... 18 OPERATION ......................................................................................................... 19 4.1 4.2 4.3 Introduction ............................................................................................................... 19 Overview of NanoAir Main Window ........................................................................... 19 Pane Description....................................................................................................... 21 4.3.1 4.3.2 4.3.3 4.3.4 4.3.5 4.4 4.5 Switching Panes ....................................................................................................... 34 Setting Menu ............................................................................................................. 35 4.5.1 4.5.2 4.6 4.7 5. Menu Bar ..............................................................................................................................21 Ingest Pane...........................................................................................................................23 Libraries Pane.......................................................................................................................25 Playlist Edit Pane ..................................................................................................................29 Playout Pane ........................................................................................................................31 Servers Configuration ...........................................................................................................35 General Settings ...................................................................................................................36 Locking Keyboard and Shuttle Pro ............................................................................ 37 About window ........................................................................................................... 38 OPERATIONS ....................................................................................................... 39 5.1 Ingesting Content ...................................................................................................... 39 5.1.1 5.1.2 5.1.3 5.1.4 5.1.5 5.1.6 5.1.7 5.2 Managing Clips and Playlists .................................................................................... 44 5.2.1 5.2.2 5.2.3 5.2.4 5.2.5 5.2.6 5.2.7 5.2.8 5.2.9 II Loading A/V Content ............................................................................................................39 OSD monitoring ....................................................................................................................40 Creating a New Clip ..............................................................................................................41 Updating clip .........................................................................................................................42 Browse the Content ..............................................................................................................42 Changing Playing Mode .......................................................................................................43 Changing Playing Speed ......................................................................................................43 Sorting Clips .........................................................................................................................44 Searching for Clips ...............................................................................................................45 Selecting Clip(s) ...................................................................................................................46 Deleting Clips........................................................................................................................48 Defining Clip Number per Page ............................................................................................50 Editing Clip Name .................................................................................................................50 Playlist(s) ..............................................................................................................................51 Creating a Playlist .................................................................................................................53 Copying Playlist ....................................................................................................................53 nanoAir – Version 1.00 – User Manual Issue 1.00.B EVS Broadcast Equipment – April 2013 5.2.10 5.2.11 5.2.12 5.2.13 5.2.14 5.3 Editing Playlists ......................................................................................................... 60 5.3.1 5.3.2 5.3.3 5.3.4 5.3.5 5.3.6 5.3.7 5.3.8 5.3.9 5.3.10 5.3.11 5.3.12 5.4 Focus ....................................................................................................................................70 OSD monitoring in playout mode..........................................................................................70 Selecting Clips ......................................................................................................................73 Loading a Playlist .................................................................................................................73 Element speed ......................................................................................................................74 Ejecting a Playlist .................................................................................................................74 Goto IN/OUT of the Current Clip ..........................................................................................74 Recuing a Playlist .................................................................................................................74 Gang Mode ...........................................................................................................................75 Looping a Clip .......................................................................................................................76 Entire Loop ...........................................................................................................................76 Replacing Playlist by another Playlist ...................................................................................77 Locking a Playlist ..................................................................................................................77 Transport Commands ...........................................................................................................78 Shuttle Pro Management .......................................................................................... 80 5.5.1 5.5.2 5.6 Selecting Clips ......................................................................................................................60 Modifying Still Mode .............................................................................................................60 Looping a Clip .......................................................................................................................61 Element Speed .....................................................................................................................62 Inserting Contents into a Playlist ..........................................................................................63 Removing Clip(s) ..................................................................................................................64 Replacing Playlist by another Playlist ...................................................................................66 Replacing a Clip by another Clip ..........................................................................................67 Appending Clip(s) .................................................................................................................68 Appending a Playlist .............................................................................................................68 Moving Clips .........................................................................................................................69 Copying Clip(s) from one Playlist to another ........................................................................69 Playout mode ............................................................................................................ 70 5.4.1 5.4.2 5.4.3 5.4.4 5.4.5 5.4.6 5.4.7 5.4.8 5.4.9 5.4.10 5.4.11 5.4.12 5.4.13 5.4.14 5.5 Deleting Playlists ..................................................................................................................54 Searching for Playlists ..........................................................................................................55 Editing Playlist Name............................................................................................................56 Importing Clip(s) ...................................................................................................................57 Exporting Clip(s) ...................................................................................................................58 Operations in Ingest Mode ...................................................................................................80 Operations in Playout Mode .................................................................................................85 Keyboard Shortcuts .................................................................................................. 88 5.6.1 5.6.2 Ingest Mode ..........................................................................................................................89 Playout Mode ........................................................................................................................91 III nanoAir – Version 1.00 – User Manual Issue 1.00.A EVS Broadcast Equipment – April 2013 1. Introduction 1.1 Overview The main purpose of this document is to explain the nanoAir functionality and to define the GUI elements for operations, as well as constraints and limitations. 1.2 General Principles NanoAir is the interface software dedicated to the clip creation, the playlist creation and the playback of playlists. The user interface has a limited number of windows, which allows users to easily perform simple actions, including loading a playlist on a player channel, modifying some clip or playlist metadata, modifying the playlist content. 1 nanoAir – Version 1.00 – User Manual Issue 1.00.B EVS Broadcast Equipment – April 2013 1.3 Hardware Requirements NanoAir application is installed on: 2 o EVS AppServer (NanoAir) 1U o EVS XFLY o Other EVS workstation upon specific demands nanoAir – Version 1.00 – User Manual Issue 1.00.A EVS Broadcast Equipment – April 2013 2. Software Installation 2.1 Prerequisites A nanoAir application can only control a single EVS server at a time. You can shift to another server in the start menu. The computer which will host nanoAir is connected to the server by EVS LINX protocol 2.2 ComLayer and Server Management When starting nanoAir application, ComLayer is started in an open status within the same network as the computer equipped with nanoAir. Some principles that are applied to the ComLayer Management: One ComLayer can control only one server at a time. An additional ComLayer is needed to control a second server, and so on. The one-to-one relationship between server and ComLayer: Server A ComLayer Server B ComLayer ... ... Server N ComLayer 3 nanoAir – Version 1.00 – User Manual Issue 1.00.B EVS Broadcast Equipment – April 2013 If the user connects to another server, the ComLayer will automatically disconnect from the previous server and connect to the new server. Server A ComLayer Server B One computer can open only one ComLayer which should be installed in the same computer, i.e. the ComLayer can only control nanoAir on a single computer. nanoAir 4 ComLayer nanoAir – Version 1.00 – User Manual Issue 1.00.A EVS Broadcast Equipment – April 2013 2.3 Installing nanoAir Before installing nanoAir, you need to configure EVS serial number on your PC, if your PC has been licensed, you can skip configure EVS serial number part. After configuration, you can preceed installing .NET framework and then installing nanoAir application. To configure EVS serial number, proceed as follows: 1. Run nanoAir installation package and then follow the steps of the Setup wizard. 2. If the computer you are operating is an EVS computer, click Yes and go to the next step. Enter the EVS serial number which is at the back of the computer. And then click Finish. 5 nanoAir – Version 1.00 – User Manual Issue 1.00.B EVS Broadcast Equipment – April 2013 3. If the computer you are operating now is not an EVS computer, click No and go to the next step. Enter the EVS serial number which is at the back of the computer 4. A progress bar shows the installation progress: 5. The .NET Framework, if not yet installed, will be installed on your computer. 6. You must manually restart your computer. 6 nanoAir – Version 1.00 – User Manual Issue 1.00.A EVS Broadcast Equipment – April 2013 To install nanoAir, proceed as follows: 1. Run nanoAir installation package again and then follow the steps of the Setup wizard and click Next. 2. Select “I accept the agreement” and then click Next. 7 Issue 1.00.B nanoAir – Version 1.00 – User Manual EVS Broadcast Equipment – April 2013 3. Select the destination directory to install the new software application and then click Next. The installer proposes a default path for the installation. i.e.: C:\Progam Files\EVSBroadcast Equipment\NanoAir. 4. The following step gives the choice between a full installation in silent mode or an advanced installation with manual selection. 8 nanoAir – Version 1.00 – User Manual Issue 1.00.A EVS Broadcast Equipment – April 2013 5. Select the components to install, and then click Next. Note XSquare is installed by default as it is required to run nanoAir. If you need to update nanoAir only, you can unselect XSquare and click Next. 6. Click Browse and select a folder in which nanoAir shortcuts are saved, and then click Next. The installer proposes a default shortcut for the installation. i.e.: \EVSBroadcast Equipment\NanoAir. 9 nanoAir – Version 1.00 – User Manual Issue 1.00.B EVS Broadcast Equipment – April 2013 7. Select Create a desktop icon to create a shortcut on the desktop. If it is not selected, the shortcut won’t display on the desktop. Click Next. 8. Click Install and wait until the installation is completed. This can last a couple of minutes. 10 nanoAir – Version 1.00 – User Manual Issue 1.00.A EVS Broadcast Equipment – April 2013 9. Select the first option to restart you computer now or select the second option to restart your computer later. The first option is highly recommended. And then click Finish to finish installation. Six applications are installed successfully with the following icons: Main applications: XSquare suite for Import/Export Facilities and Thumbnails’ creation: And Xsecure manager for Key/Code management: 11 nanoAir – Version 1.00 – User Manual Issue 1.00.B EVS Broadcast Equipment – April 2013 3. StartUp and Configuration The purpose of this chapter is to describe how to start up the server, and configure it. 3.1 Selecting Server 3.1.1 Starting the NanoAir Application You perform the server selection and channel configuration selection after opening the nanoAIR application. Double click the nanoAir icon on the desktop to open the application. This opens an initialization window, followed by the Server Configuration window. Note ComLayer is the link between the computer and the server. This application is automatically launched at NanoAir Startup. 12 nanoAir – Version 1.00 – User Manual Issue 1.00.A EVS Broadcast Equipment – April 2013 3.1.2 The Server List The EVS server channels are configured in the Server Configuration window. You will access the configuration window from the server list, where all servers are listed in alphabetical order and named with the following pattern: <SERVERNAME_SERIALNUMBER_ VERSION NUMBER>. The current configuration is represented by color icons for the recorder and player channels. Area Description 1 2 3 7 4 6 5 13 nanoAir – Version 1.00 – User Manual Issue 1.00.B EVS Broadcast Equipment – April 2013 The server list lists all servers detected via LINX protocol: Area Name Description Title bar Title bar that displays the current nanoAir version and the window name. Server Information Area that shows the server name, server Serial Number and the Multicam version installed. Server Configuration panel Area that includes the configuration information: the server type, the recorder and player channel configuration. Number of Server found Area that shows the number of servers detected by the ComLayer. Refresh button Button to refresh the server list. Select button Click on the Select button to select a server or double-click on the server area 1 2 3 4 5 6 7 14 Channel Configuration Area that allows the channels configuration selection. nanoAir – Version 1.00 – User Manual Issue 1.00.A EVS Broadcast Equipment – April 2013 3.1.3 Selecting the Channels’ configuration To configure channels, proceed as follows: 1. Double-click the nanoAir.exe icon . The server list turns up. 2. Select one server in the list: the server area lights blue and the Configuration button appears. 3. Click on the configuration button to open the Server Configuration window related to the server: 15 nanoAir – Version 1.00 – User Manual Issue 1.00.B EVS Broadcast Equipment – April 2013 4. Click the arrow next to the channel configuration field and select the requested channel configuration in the drop-down list. Note Only the config lines defined on the XSNano server appear in the drop-down list. 5. Click OK to validate your selection. The application pops up a window asking you to confirm you want to restart the server. Click OK button to restart the server and validate this configuration, or click Cancel to abort the operation. 16 nanoAir – Version 1.00 – User Manual Issue 1.00.A EVS Broadcast Equipment – April 2013 3.2 Selecting the Server To select the server you want to work with, proceed as follows: 1. Double-click the nanoAir.exe icon . The server list turns up. 2. Click the requested server in the server list. The selected server turns blue. 3. To select a requested server and go to the next step, do one of the following actions: o Click Select at the bottom of the window o Press ENTER. o Double-click the requested server. When server is selected, the main window application opens. Note The Server Configuration panels with a red background cannot be selected, because the given server is controlled by another ComLayer /nanoAir: 17 nanoAir – Version 1.00 – User Manual Issue 1.00.B EVS Broadcast Equipment – April 2013 3.3 Starting ComLayer Manually ComLayer opens automatically as soon as you start nanoAir. If ComLayer however fails to open, you should manually re-start ComLayer. To start ComLayer, double–click the ComLayerUI.exe icon . The ComLayer window opens to connect servers: When the connection is successfully established, the message ‘Successfully’ appears. When the connection is failed, the message ‘No server found!’ pops up. Troubleshooting The possible reasons for a failed ComLayer connection are: 1. The network connection has failed. 2. No servers are connected to the network. 18 nanoAir – Version 1.00 – User Manual Issue 1.00.A EVS Broadcast Equipment – April 2013 4. Operation 4.1 Introduction This chapter explains how to use nanoAir, in ingest or playout mode. Both modes are not available at the same time. The nanoAir window opens as soon as you have clicked the Select button at the end of the Server Configuration process. 4.2 Overview of NanoAir Main Window The nanoAir user interface consists of five main areas, including the Menu bar. The areas are highlighted on the following screenshots and shortly described in the table below. The following screenshot show the Ingest pane with the clip library and the Playlist edition pane. 1 2 3 4 19 nanoAir – Version 1.00 – User Manual Issue 1.00.B EVS Broadcast Equipment – April 2013 In the screenshot below, the Playout mode is active, and the playlists are loaded on the playout channel: 5 Area Name Description 1 Menu Bar Area that gives access to mode selection, i.e.: Ingest mode, Libraries, Playlist edition mode, Playout mode. 2 Ingest Pane Dedicated area for clip creation and clip modification. 3 Library Pane Area that displays the database content for the selected server, clips and playlists are listed. A Search bar is available to easily find specific content. User can also import/export clips for the clip library. 4 Playlist Edition Pane Dedicated area for playlist edition. Each playlist is displayed with its elements and the associated metadata. 5 Playout Pane Dedicated area for playing out the playlists. All modes are accessible by selecting one of the buttons in the Menu Bar. 20 nanoAir – Version 1.00 – User Manual Issue 1.00.A EVS Broadcast Equipment – April 2013 4.3 Pane Description 4.3.1 Menu Bar The Menu bar elements are described from left to right: Area Name Description 1 Ingest Button to make the Ingest mode available or not. Click Ingest to toggle between both modes: Blue button: The Ingest mode is available, and the Ingest pane is displayed. Grey button: The Ingest mode is not available and the Ingest pane unavailable. 2 Library is hidden: The ingest functions are Button to make the Library mode available or not. Click Library to toggle between both modes: Blue button: The Library mode is available, and the Library Pane is open and shows the database content. Grey button: The Library mode is unavailable, and the Library Pane is hidden. The function for reviewing content is unavailable. 3 Playout Buttons to open the Playout Pane and load the playlists on one or more playout channels. Click the button corresponding to the number of playout channels you want to use: 1 player: 1 player mode 2 players: 2 players mode 3 players: 3 players mode 4 players: 4 players mode The buttons can have three status: Color codes: o Blue: The player is active. o Grey (white font): The player is not used. o Dimmed: The given players are not available in the current server configuration. 4 nanoAir Info Area that displays software name-software version-server name- server version-IP address 5 Lock Keyboard Button to lock keyboard. All commands coming from keyboard are ignored. 21 nanoAir – Version 1.00 – User Manual Issue 1.00.B EVS Broadcast Equipment – April 2013 6 22 Lock Shuttle Pro Command to lock Shuttle Pro. All commands coming from the Shuttle Pro are ignored. 7 Setting Command to access the Setting menu. 8 About Command to access the product information, the current version and the user manual. 9 Min/Max Command to minimize or maximize the nanoAir main window 10 Exit Command to exit the nanoAir application. A confirmation is requested. nanoAir – Version 1.00 – User Manual Issue 1.00.A EVS Broadcast Equipment – April 2013 4.3.2 Ingest Pane 1 2 3 5 6 8 7 Area Name Description 1 Eject Button to unload the trains and clips. 2 Timecode Selection Area that shows the timecode type used. 3 Remaining Capacity Area that shows the total remaining capacity on the current server with the format: hour: minute. If the capacity is modified, it will refresh every 3s. Otherwise it will refresh every 30s. 4 Recorder Channels Area that allows selecting the recorder channel for trains. 5 Shuttle Bar Area that allows changing the position in loaded clip or recorded trains. 6 Transport commands The transport commands are described from left to right: Go to previous frame : Goes back to the previous frame(s) of the clip. Fast rewind Play : Fast backward the clip. : Plays the media at normal speed. Pause : Playing media will pause, and player displays the picture at the pause point. Fast forward : Fast forward the clip. Go to last frame : Goes back to the next one frame or ten frames of the clip. 23 nanoAir – Version 1.00 – User Manual Issue 1.00.B EVS Broadcast Equipment – April 2013 E/E : return to live mode (record train). The E/E function is disabled when a clip is loaded to the ingest pane. 7 Clip Creation The clip creation commands are described from left to right: Name: The name of the created clip. In: The first frame of the created clip is at the IN position with the IN timecode. Duration: Refers to the period from IN to OUT. Out: The last frame of the created clip is at the OUT position with the OUT timecode. Go To Mark IN: Go to the current IN point. Go To Mark OUT: Go to the current OUT point Clear: Clear the current IN/OUT value. When you load a unavailable. clip, the Clear function is New Clip: Creates clip. Update Clip: Updates the existing clip. It can only modify the clip name in the latest version. 8 24 Jog Bar Area that allows changing the playing speed of the loaded trains or clip from-400f/s to +400f/s accordingly. nanoAir – Version 1.00 – User Manual Issue 1.00.A EVS Broadcast Equipment – April 2013 4.3.3 Libraries Pane The Libraries pane displays the clips (in the Clip tab) and the playlists (Playlist tab) stored on the XSNano server. 8 4 5 6 7 1 2 9 10 3 10 11 25 nanoAir – Version 1.00 – User Manual Issue 1.00.B EVS Broadcast Equipment – April 2013 The Clip pane consists of the main following areas: Area 1 Name Description Icon to show that the window status is in clip mode. Clip 2 Quick Search Tool Area that allows filtering on the clip list. 3 Clip element Area that shows all the clips in database in this server. Name: The name of this clip IN&OUT: The timecode of IN&OUT Duration: The length between IN and OUT. Date&Time: The date and time when the clip is created Delete: Remove the current selected clip from Library Pane and from the XSNano database. Select: Select the clip Edit: Edit the clipname 4 Command to select all clips in the library Select All 5 6 7 8 9 Delete Command to delete the selected clip(s) in Library database. Export Command to export the requested clips to the local computer. Import Command to import the requested clips from the local computer. Sorting Bar Edit 10 Items per Page 11 26 Go to Page Area that allows sorting the clips in the database by ClipName and CreationTime within ascending or descending order. Command to edit the selected clip This area allows specifying the number of items displayed per page (25, 50 or 100 items). This area allows to navigate through the different pages, the number of pages is based on the items per page selection. nanoAir – Version 1.00 – User Manual Issue 1.00.A EVS Broadcast Equipment – April 2013 1. The Playlist pane consists of the following areas: 1 4 5 6 3 7 2 8 9 27 nanoAir – Version 1.00 – User Manual Issue 1.00.B EVS Broadcast Equipment – April 2013 Area 1 2 Name Playlist Playlist Element Description Selection tab to display the Playlist library Area shows all playlists in database in the XSNano server. Name: The name of the playlist. Duration: The length of the playlist. Number of Clips: the total number of clips in this playlist Name Edit: Edit the name of the playlist Select: Select the current playlist 3 Area that allows filtering on the playlist. Quick Search Tool 4 Select All 5 Delete 6 Command to select all playlists by clicking once. Command to delete the selected playlist(s) in database. Command to create a new playlist. Create 7 Copy 8 Items per Page 9 Go to Page 28 Command to copy the selected playlist. Area allows specifying the number of items displayed per page (25, 50 or 100 items). Area allows going to the specific page, the pages is based on the items per page. nanoAir – Version 1.00 – User Manual Issue 1.00.A EVS Broadcast Equipment – April 2013 4.3.4 Playlist Edit Pane 1 7 2 5 6 3 4 29 nanoAir – Version 1.00 – User Manual Issue 1.00.B EVS Broadcast Equipment – April 2013 Area Name Description 1 Playlist Information Area that show the different information about the current loaded playlist Playlist name Current physical channel name Number of clips 2 Duration information Area that shows the total duration of the current playlist. 3 Clip element Area that edits each clip elements Name Duration Speed Loop Delete : Clip’s name. : The length of clip. : The playing speed of clip. : Loops the clip. : Removes the single clip. Stops on first frame of the current element . Continuous play : it is the default start mode and play from element to element Stops on the last frame of previous element . Playing interval between two elements is 2s . Replace 30 : Replace the current clip. 4 Append Zone Appends clip(s) at the last position in the selected playlist 5 Select all Command to select all the clips in a selected playlist. 6 Delete Command to remove the selected clip(s). 7 Eject Command to unload the selected playlist. nanoAir – Version 1.00 – User Manual Issue 1.00.A EVS Broadcast Equipment – April 2013 4.3.5 Playout Pane 1 7 2 3 5 4 6 31 nanoAir – Version 1.00 – User Manual Issue 1.00.B EVS Broadcast Equipment – April 2013 Area Name Description 1 Playlist Information Area that show the different information about the current loaded playlist Playlist name Current physical channel name Number of clips 2 Time Bar Area that shows the different time parameters of the playing playlist from left to right. Remaining duration of the current clip Remaining duration till the next break Remaining duration of the current playlist & the total duration of the current playlist 3 Transport Commands Area that shows all the operations at playout. Gang : all ganged PGM group deploys all command synchronously, all the status and positions of the elements are totally the same. Recue Play : Reloads this playlist from server. : the playlist is being played. Pause : the current playlist is paused. Go to the first frame of the current clip . Go to the last frame of the current clip . Next : Goes to the first frame of the next element. Skip : Skips the next element during the playout of the playlist so it won’t play. Global Loop : Loops the playlist from beginning to end repeatedly. 4 Clip element Area that shows all the operations on frame while playout as well as the metadata of clips. Name : The name of clip. Duration Speed Loop Delete : The length of clip. : The playing speed of clip. : Loops the single clip. : Removes the single clip. Stops on first frame of the current element . Continuous play: it is the default start mode 32 nanoAir – Version 1.00 – User Manual Issue 1.00.A EVS Broadcast Equipment – April 2013 and play from element to element . Stops on the last frame of previous element . Playing interval between two elements is 2s . Replace : Replace the current clip, This function is only available for single clip selection. 5 Additional Function Area that shows the additional functions in append zone. Select all : Selects all the clips in a selected Playlist. Delete Lock : Removes the selected clip(s). : Locks the playing zone. 6 Append Zone Area that appends clip(s) at the last position in a selected playlist . 7 Eject Command to unload the selected playlist. Note The green background of Playlist Information Pane indicates that the current loaded playlist is on playing. 33 nanoAir – Version 1.00 – User Manual Issue 1.00.B EVS Broadcast Equipment – April 2013 4.4 Switching Panes Ingest pane opens by default when the nanoAir application starts. When you press one of the Playout Panes, such as 2Play, the application behavior is as follows: The Ingest pane is hidden The Ingest button turns grey The 2 Playout Panes are displayed All the Playlist Edit Panes are hidden When you press Ingest again and confirm the action by clicking OK in the Warning window, the application behavior is as follows: All the Playlist Edit Panes are displayed The Playout Pane is hidden Ingest button turns blue Library When you press Library Pane, the application behavior is as follows: Both Ingest pane and Library Pane are hidden Library button turns grey When click Library button again, the application behavior is as follows: Library Pane shows up Library button turns blue . Different Players 4 players can be available in nanoAir Playout Pane and can switch with each other by a single press the grey player button, such as , the blue one represents the current play mode. The number of players is defined in channel configuration. 34 nanoAir – Version 1.00 – User Manual Issue 1.00.A EVS Broadcast Equipment – April 2013 4.5 Setting Menu 4.5.1 Servers Configuration During the operations the server configuration is accessible for information only. Do the same operation as the second step of 3.2 to select the requested server. Note Channel configuration function Window. is disabled in Server Configuration 35 nanoAir – Version 1.00 – User Manual Issue 1.00.B EVS Broadcast Equipment – April 2013 4.5.2 General Settings In this version only one setting is available from the General settings tab. The wait value from the Stop-Wait still modes is 2 seconds by default. 36 nanoAir – Version 1.00 – User Manual Issue 1.00.A EVS Broadcast Equipment – April 2013 4.6 Locking Keyboard and Shuttle Pro Lock Keyboard / Shuttle Pro To lock keyboard/Shuttle Pro, click To release the lock, click , the icon lights orange , the icon turns to gray . . . 37 nanoAir – Version 1.00 – User Manual Issue 1.00.B EVS Broadcast Equipment – April 2013 4.7 About window To view product information of the current software version, you just need to click then a message box pops up: Click on User’s manual link to open the PDF version of the current software version. 38 , and nanoAir – Version 1.00 – User Manual Issue 1.00.A EVS Broadcast Equipment – April 2013 5. Operations 5.1 Ingesting Content This section aims at describing all functions available among trains and clips in the Ingest pane. 5.1.1 Loading A/V Content How to Load a RecTrain To load the record train of a record channel, select the corresponding recorder channel. The Rectrain is loaded into the PGM channel. How to Load a Clip 3 methods are available to load clip(s): Drag and drop the selected clip into the Ingest pane. Select the clip to load, and click Edit clip. Double click the clip in the Library Pane to load clip. To clear current loading, click Eject beside the Quick Search Tool to load the . 39 nanoAir – Version 1.00 – User Manual Issue 1.00.B EVS Broadcast Equipment – April 2013 5.1.2 OSD monitoring Player Channel Name Error/Warning Audio Level Current Timecode/ Primary Timecode Clip Name/Recorder Name Player Channel Name This area is used to display the name (or the default name, such as PGM1) of the controlled player channel. Error/Warning 40 Problem OSD Value Power supply error !PSU1 and !PSU2 (1 or 2: number of power supply) Genlock error !Glk LTC in error !TC Disk error !DSK nanoAir – Version 1.00 – User Manual Issue 1.00.A EVS Broadcast Equipment – April 2013 Audio Level This area displays the audio level in a graphical format. For example: 2 audios 4 audios 8audios 16audios Current Timecode This area displays the current timecode according to the current Primary TC of clip or train. The format is hh:mm:ss:ff(.) Clip Name/Recorder Name If clip is loaded, this area displays the clip name. If recorder train is loaded, this area displays the recorder name. 5.1.3 Creating a New Clip To create a new clip, proceed as follows: 1. Load a train. 4 recorder channels are available for trains loading by default. You can select one channel by clicking on it corresponding trains. 2. Input name, IN, OUT, or click to load the to clear the corresponding values. 3. Click New Clip to create a new clip named test : the new clip appears in the Clip Library. 41 nanoAir – Version 1.00 – User Manual Issue 1.00.B EVS Broadcast Equipment – April 2013 5.1.4 Updating clip Modifying clip means that MarkIn/ MarkOut point and Clipname can be modified To modify clip data, proceed as follows: 1. Load an existing clip from Library Pane. 2. Modify clip name and /or IN or Out point. Note The clip can only be shorten because the current version does not handle Cli guardbands 3. Click Update Clip to modify the existing clip. 5.1.5 Browse the Content Using the Shuttle Bar After loading A/V content, drag the shuttle bar to move the bullet of the Shuttle Bar for the existing clip or recorded trains, after that, A/V content stays at PAUSE mode. Typing value into Server TC field To change the position in the existing clip or recorded trains, you can type a TC value into the Server TC field and then press ENTER from the keyboard, and then the bullet of the Shuttle Bar can be changed correspondingly. 42 nanoAir – Version 1.00 – User Manual Issue 1.00.A EVS Broadcast Equipment – April 2013 5.1.6 Changing Playing Mode While playing a clip or a record train, the normal playing mode is playout by one frame. To change the playing mode by 10 frames, press SHIFT, and simultaneously click , or left and right arrow. The bullet moves 10 frames in Pause mode. 5.1.7 Changing Playing Speed The jog bar allows playing the content at different speed must represent the current value of the actual speed. , and it Audio will not be available at the speed higher than 300% or lower than -300%. The shuttle ranges are: -300 -200 -100 -75 -50 -25 0 +25 +50 +75 +100 +200 +300 Three methods are available to change the playing speed: Using Shuttle bar Changing speed by moving ball, playing speed will be changed according to the corresponding shuttle range. When the user moves the bullet left or right without release the mouse, the player plays according to the speed relative to the bullet’s position. When the user releases the mouse, the bullet goes back in the center and playback stops. With Shuttle Pro Rotate the Shuttle clockwise or anti-clockwise to change speed by each multiple value of 50. Rotate the Jog clockwise or anti-clockwise to change speed by one frame. See section 5.5.1 for more information about Shuttle function to changing speed. Using Fast Rewind/Fast Forward commands To change playing speed, you can click Fast Rewind shuttle bar. or Fast Forward in the 43 nanoAir – Version 1.00 – User Manual Issue 1.00.B EVS Broadcast Equipment – April 2013 5.2 Managing Clips and Playlists The main functionality of this section is to list all operations in managing clips and playlists, including the methods and steps. Some principles are applied to clips and playlist management: The maximum clip number in Clip Library is up to 5400. The maximum playlist number in Playlist Library is up to 90 The maximum elements number in a playlist is up to 999 5.2.1 Sorting Clips You can change the sort order of clips in the Library Pane. You can change the sort order from ascending to descending or vice versa: 44 Ascend by ClipName Descend by ClipName Ascend by Creation Time Descend by Creation Time nanoAir – Version 1.00 – User Manual Issue 1.00.A EVS Broadcast Equipment – April 2013 5.2.2 Searching for Clips When the database contains large amounts of clips, it may become difficult to find a specific one. A Quick Search Tool offers an easy way to speed up your search. It is always available on the top of Library Pane. In the Quick Search Tool, you can just enter a word to search for clips whose name includes this word. Example for searching clips: To clear the search filter, you just need to press the in the Quick Search Tool. 45 nanoAir – Version 1.00 – User Manual Issue 1.00.B EVS Broadcast Equipment – April 2013 5.2.3 Selecting Clip(s) How to Select a Clip Select: Click in the clip area. Or click on the left of a single clip. Unselect: 46 If the clip lights blue, click in the clip area Click to release the selected clip. nanoAir – Version 1.00 – User Manual Issue 1.00.A EVS Broadcast Equipment – April 2013 How to Select Multiple Clips Select: Different methods are available to select multiple clips: Click one clip, then press CTRL from keyboard, and simultaneously click other clips one by one to add selection, with this method, all the clicked clips will be selected. Click one clip, then press SHIFT from keyboard, and click any other clip in Library Pane, then all the clips between those two selected clips will be selected. Click on the left of a single clip to select multiple clips. Click on the upper right corner of Library Pane to select all the clips. Press CTRL+A to select all the clips. Unselect: Different methods are available to unselect multiple clips: Press CTRL from keyboard, and simultaneously click the selected clips one by one to release selection, with this method, all the clicked clips will be released. Press SHIFT from keyboard, and simultaneously click the selected clips one by one to release selection, with this method, all the clicked clips will be released. Click on the left of the selected clips to release multiple clips. Click on the upper right corner of Library Pane to release all the clips. 47 nanoAir – Version 1.00 – User Manual Issue 1.00.B EVS Broadcast Equipment – April 2013 5.2.4 Deleting Clips How to Delete a Single Clip To delete a single clip, proceed as follows: 48 Select a clip. Click either Delete on the lower right corner of the selected clip or on the upper right corner of Library Pane. A message popup, you need to confirm/abort the operation. Click OK or Enter to delete clip(s), or click Cancel to abort this action. nanoAir – Version 1.00 – User Manual Issue 1.00.A EVS Broadcast Equipment – April 2013 How to Delete Multiple Clips To delete multiple clips, proceed as follows: 1. Select multiple clips with CTRL or SHIFT keys 2. Click Delete on the upper right corner of Library Pane. Or press Delete from the keyboard. 3. A message popup appears to confirm/abort the operation 4. Click OK or Enter to delete clip(s), or click Cancel to abort this action Note You can’t delete clip(s) successfully in the following situations: The clip to delete is loaded in PGM channel The clip inserted in a playlist 49 nanoAir – Version 1.00 – User Manual Issue 1.00.B EVS Broadcast Equipment – April 2013 5.2.5 Defining Clip Number per Page You can set the clip number per page to adapt to your own browsing habits. Click on each to toggle to another display mode, it is modified by the following three different possibilities: 25 items per page 50 items per page 100 items per page After select the specific display mode, you can input the valid number in the blank box, and then press ENTER from keyboard to come to the exact page. The number of pages varies from different display mode. 5.2.6 Editing Clip Name Two methods are available to editing clip name: As to the first way, you can refer to 5.1.4 for more details. As to the second way, proceed as follows: 1. Click Edit activated. beside the clip to edit, the clip is highlighted blue and the name area is 2. Input the new name in the name area. 3. Press Enter from keyboard to validate this change, a message box pops up to indicate that the operation to edit clip name is successful or you can just select another clip to validate this change. 4. Or press ESC to returns to previous name and quit the edition mode. Note The maximum number of clip name is 24 characters. 50 nanoAir – Version 1.00 – User Manual Issue 1.00.A EVS Broadcast Equipment – April 2013 5.2.7 Playlist(s) How to Select Single Playlist Select: Two ways are available to select a single playlist: Single clicking a playlist means selecting this playlist. Or click on the left of a single playlist to select it. Unselect: Click to release the selected playlist. 51 nanoAir – Version 1.00 – User Manual Issue 1.00.B EVS Broadcast Equipment – April 2013 How to Select Multiple Playlists Select: Six methods are available to select multiple playlists: Click one playlist, then press CTRL from keyboard, and simultaneously click other playlists one by one to add selection, with this method, all the clicked Playlist s will be selected. Click one Playlist, then press SHIFT from keyboard, and click any other playlist in Library Pane, then all the playlists between those two selected playlists will be selected. Click on the left of a single playlist to select multiple playlists. Click on the upper right corner of Library Pane to select all the playlists. Press CTRL+A to select all the playlists. Unselect: Four methods are available to unselect multiple playlists: 52 Press CTRL from keyboard, and simultaneously click the selected playlist s one by one to release selection, with this method, all the clicked playlists will be released. Press SHIFT from keyboard, and simultaneously click the selected playlists one by one to release selection, with this method, all the clicked playlists will be released. Click on the left of the selected playlists to release multiple playlists. Click on the upper right corner of Library Pane to release all the playlists. nanoAir – Version 1.00 – User Manual Issue 1.00.A EVS Broadcast Equipment – April 2013 5.2.8 Creating a Playlist 1. Select Playlist in the Library Pane. 2. Click Create Playlist button next to Quick Search Tool. A new playlist is created in the Library, but the playlist is empty. Fill in a playlist name into the playlist name field, a default name with increment is automatically given to all the new playlists. You can modify the playlist name by entering a word, and then press ENTER key to validate the modification. Tip You can use the CTRL+N to create a new playlist 5.2.9 Copying Playlist 1. Select the playlist to copy. 2. Click the Copy Playlist button next to Quick Search Tool. 3. A copied playlist appears in the Library with a new playlist name, a default playlist name is automatically given to the copy: OldPlaylistName-copy&serial number, this auto playlist name can be modified afterwards. 53 nanoAir – Version 1.00 – User Manual Issue 1.00.B EVS Broadcast Equipment – April 2013 5.2.10 Deleting Playlists How to Delete a Playlist To delete a single playlist, proceed as follows: 1. Select a playlist. 2. Click either Delete on the lower right corner of the selected playlist or on the upper right corner of Library Pane or the Delete from the keyboard. 3. A popup window is displayed to confirm/abort the operation. 4. Click OK or Enter to delete playlist(s), or click Cancel to abort this action. How to Delete Multiple Playlists To delete multiple playlists, proceed as follows: 1. Select multiple playlists. 2. Click Delete on the lower left corner of Library Pane. 3. A popup window is displayed to confirm/abort the operation. 4. Click OK or Enter to delete playlists, or click Cancel to abort this action. Note Playlists loaded in Playout channel cannot be deleted 54 nanoAir – Version 1.00 – User Manual Issue 1.00.A EVS Broadcast Equipment – April 2013 5.2.11 Searching for Playlists When the database contains large amounts of playlists, it may become difficult to find a specific one. A Quick Search Tool offers an easy way to speed up your search. It is always available on the top of Library Pane. In the Quick Search Tool, you can just enter a word to search. Example for searching playlists: To clear the search filter, you can press in the Quick Search Tool. 55 nanoAir – Version 1.00 – User Manual Issue 1.00.B EVS Broadcast Equipment – April 2013 5.2.12 Editing Playlist Name 1. Click the name field of playlist to change to make this area editable. 2. Input the new playlist name. 3. Click any other area except the name field to finish changing or press ENTER from keyboard. To edit playlist name, proceed as follows: 1. Click Edit beside the playlist to edit, the clip is highlighted blue and the name area is activated. 2. Input a new name in the name area. 3. Press Enter from keyboard to validate this change, a message box pops up to indicate that the operation to edit clip name is successful or you can just select another playlist to validate this change. 4. Or press ESC to returns to previous name and quit the edition mode. Note The maximum number of playlist name is 24 characters. 56 nanoAir – Version 1.00 – User Manual Issue 1.00.A EVS Broadcast Equipment – April 2013 5.2.13 Importing Clip(s) 1. Click Import button window appears: on the upper right corner of the Library Pane, the import 2. Click Browse to select the clip(s) to import from your local computer. The format of the selected clip(s) must be supported by EVS servers. 3. If you want to delete the selected clip(s), select the clip(s) to delete, and then click Remove button. 4. Click Import button to import the selected clip(s) or click Cancel to abandon this operation. The progress bar appears to indicate the progress of importing clip(s). 5. When Importing operation finishes, the imported clip(s) will exist in the Library Pane. 57 nanoAir – Version 1.00 – User Manual Issue 1.00.B EVS Broadcast Equipment – April 2013 5.2.14 Exporting Clip(s) To export clip(s), proceed as follows: 1. Select the clip(s) in the Library Pane to export, and then click corner of the Library Pane. on upper right 2. Click the drop-down list in Wrappers selection to select the requested format and click Browse to select a requested path in the local computer to store the clip(s) to store. 58 nanoAir – Version 1.00 – User Manual Issue 1.00.A EVS Broadcast Equipment – April 2013 3. Click Export, a progress bar appear to show the progress of exporting clips, or you can click to abort this operation. 4. After exporting action successes, you can see the exported clip(s) at the specific path in your local computer. 59 nanoAir – Version 1.00 – User Manual Issue 1.00.B EVS Broadcast Equipment – April 2013 5.3 Editing Playlists The main functionality of this section is to list all operations in editing playlist. 5.3.1 Selecting Clips Several methods are available to select clips among the loaded playlist in Playlist Editing Pane: Click on the upper left corner of each clip in the Playlist Edit Pane to select a single clip. Click Select one clip in the playlist, then use Up, Down, Left, Right for the keyboard to select the different clip in the different playlists loaded in the Playlist Edit Pane. For other selection methods, please see section 5.2.3 for more details. on the upper right corner of the Playlist Edit Pane to select all the clips. 5.3.2 Modifying Still Mode The still mode setting determines whether the playout should stop within the playlist. They are associated with a batch of icons presented between each clip in the playlist: 60 : Stop on first frame of current clip. : The default start mode is set to Continuous and the playlist will play from clip to clip till the end of the playlist. : Stop on last frame of previous clip. : Stop on the last frame of the previous clip, wait a period of time, and jump to the first frame of the next clip. The playlist will stop on the last frame of the previous clip, and then wait for a while, the time can be configured in the Setting Menu mention in 4.5.2 , and jump to the first frame of the next clip. nanoAir – Version 1.00 – User Manual Issue 1.00.A EVS Broadcast Equipment – April 2013 5.3.3 Looping a Clip How to Loop a Clip The loop clip function will loop the selected clip until the command (stop, pause or next) is received. The loop clip mode is active with the LOOP button placed in the clip area: To loop a clip in a selected playlist, proceed as follows: 1. Select a clip in the playlist. 2. Click the Loop in the upper right corner of the clip area. The Loop button turns blue playlist. . When pressing play command, the clip will loop in the How to Remove Clip Loop To remove clip loop mode, proceed as follows: 1. Select the clip. 2. Clip the Loop button grey in the upper right corner of the clip, the Loop button turns . Or press the button (stop, pause or next) to end the clip loop mode and continue playlist playout. 61 nanoAir – Version 1.00 – User Manual Issue 1.00.B EVS Broadcast Equipment – April 2013 5.3.4 Element Speed The speed of clip in the playlist can be changed with the range during 0%~300%, and then the clip of the playlist will be played out with the desirable speed. To change the clip’s speed, proceed as follows: 1. Click the speed area of the clip in the loaded playlist. 2. Input the exact number which is from 0% to 300%, and then click other areas or just press ENTER to validate this change. To set normal speed by 100%, proceed as follows: 1. Select the speed area of the clip you want to change. 2. Two methods are available to set the normal speed: a) Input 100% into the speed area. b) Click the Speed Button on the left side of the speed area 3. The clip’s speed goes back to normal (100%) Note The default speed of a clip is always 100%. 62 nanoAir – Version 1.00 – User Manual Issue 1.00.A EVS Broadcast Equipment – April 2013 5.3.5 Inserting Contents into a Playlist The insert function consists in adding a clip (multiple clips) or a playlist into a selected playlist. The clip number in a playlist is up to 250. How to Insert Clip(s) To insert clip(s) into a playlist in Playlist Editing Pane, proceed as follows: 1. Select a clip from the clip Library. If need to select multiple clips, use CTRL or SHIFT for a multiselection, all the selected clips turn blue. 2. Drag and drop the clip(s) into playlist at the requested position. The background of the dragged clip(s) is highlighted transparent blue, the number of the dragged clip(s) is marked under it, for example, when drag two clips, the number is 2. How to Insert a Playlist To insert a playlist into a playlist in Playlist Editing Pane, proceed as follows: 1. Select a playlist from the playlist Library, you can only insert one playlist at one time, the selected playlist turns blue. 2. Drag and drop at the requested position in the Playlist Edit Pane. The background of the dragged playlist is highlighted transparent blue. When release mouse, all the clip(s) in the dragged playlist will be inserted in the requested position. 63 nanoAir – Version 1.00 – User Manual Issue 1.00.B EVS Broadcast Equipment – April 2013 5.3.6 Removing Clip(s) How to Remove a Clip The remove function consists in removing the undesirable clip from a selected playlist. To remove a clip from the requested playlist in Playlist Editing Pane, proceed as follows: 1. Select a clip to remove. 2. Click Remove at the lower right side of the clip to remove. 3. Click OK to confirm the clip deletion, then the selected clip will be removed. 64 nanoAir – Version 1.00 – User Manual Issue 1.00.A EVS Broadcast Equipment – April 2013 How to Remove Multiple Clips To remove multiple clips from the requested playlist in Playlist Editing Pane, proceed as follows: 1. Select the clips you want to remove, and all the selected clips are marked with blue frame. 2. Click Remove located in the upper right corner of Playlist Editing Pane. 3. Click OK to confirm the deletion, then the selected clips will be removed. 65 nanoAir – Version 1.00 – User Manual Issue 1.00.B EVS Broadcast Equipment – April 2013 5.3.7 Replacing Playlist by another Playlist The playlist replace function is applied to replace the playlist by another playlist from the Playlist Library Pane in playlist edit mode. To replace a playlist by another playlist, proceed as follows: 1. Select a playlist from the Playlist Library Pane. 2. Drag and drop it to the head of the Playlist Edit Pane. 3. The destination playlist is replaced by the selected playlist. 66 nanoAir – Version 1.00 – User Manual Issue 1.00.A EVS Broadcast Equipment – April 2013 5.3.8 Replacing a Clip by another Clip Two methods are available to replace a clip by another clip, proceed as follows: Method 1: 1. Select a clip in the Clip Library. 2. Find the clip in the playlist to replace, and click , a message box pops up: 3. Click OK to confirm this replacement, the clip to replace will be replaced by the new clip. And the new clip will be in selected mode. Method 2: 1. Select a clip in the Clip Library. 2. Press SHIFT and D&D to the clip in Playlist Edit Pane. 3. Click OK to confirm this operation. Note The REPLACE command is not available when the clip is on air (lights green) 67 nanoAir – Version 1.00 – User Manual Issue 1.00.B EVS Broadcast Equipment – April 2013 5.3.9 Appending Clip(s) How to Append a Clip The append function consists in adding a clip at the last position in a selected playlist. To append a clip, proceed as follows: 1. Select a clip from the clip Library. 2. Drag and drop the clip into the Append zone located at the bottom of the playlist area. The clip is inserted at the end of the selected playlist. The inserted clip is in selected mode in the playlist. How to Append Multiple Clips To append multiple clips, proceed as follows: 1. Select the multiple clips from the clip Library. 2. Drag and drop the clips into the Append zone located at the bottom of the playlist area. These clips are inserted at the end of the selected playlist, all the inserted clips is in selected mode in the playlist. 5.3.10 Appending a Playlist To append a playlist, proceed as follows: 1. Select a playlist in the Playlist Library. 2. Drag and drop playlist into the Append zone located at the bottom of the playlist area. The clips of the selected playlist are inserted at the end of the selected playlist. All the clips in the inserted playlist is in selected mode. 68 nanoAir – Version 1.00 – User Manual Issue 1.00.A EVS Broadcast Equipment – April 2013 5.3.11 Moving Clips How to Move Clip(s) in one Playlist The move function consists in moving clips’ position in a selected playlist. To move multiple clips, use CTRL or SHIFT for a multiselection. To move clips, proceed as follows: 1. Select a clip in the playlist, the outline of the clip is highlighted blue. 2. Drag and drop the clip in the playlist at the requested position. How to Move Clip(s) from one Playlist to another Moving clip(s) means cutting the clip(s) from the original playlist, and then past them to the destination playlist, the clip(s) from the original playlist will be deleted. To move clip(s) from one playlist to another, proceed as follows: 1. Select one clip or multiple clips from the playlist in Playlist Edit Pane. 2. Drag them to the requested position in another playlist of the Playlist Edit Pane. 3. After drop them, all the dragged clips can be moved to the destination playlist, all the moved clips are in selected mode. Note You can’t move clip(s) into the playlist they have already existed in, even though the playlist is loaded into another Playlist Edit Pane. 5.3.12 Copying Clip(s) from one Playlist to another Copying clip(s) means copying the clip(s) from the original playlist, and then past them to the destination playlist, the clip(s) from the original playlist will be reserved. To copy clip(s) from one playlist to another, the operation is similar to the moving clip operation. When dragging, you should simultaneously press CTRL from the keyboard, and drop the clip(s) into the playlist. 69 nanoAir – Version 1.00 – User Manual Issue 1.00.B EVS Broadcast Equipment – April 2013 5.4 Playout mode The purpose of the section is to list out all the functionalities about playlist playout, including loading playlist, recuing playlist and ganging playlist. 5.4.1 Focus A blue frame appears around the header of the pane when the focus is set 5.4.2 OSD monitoring in playout mode Player channel name Time until next Break Playlist Name Rem. Current Element Error/Warning Audio Level Remaining Time Current Timecode (Primary TC) Speed Current Clip Name 70 Position in the playlist nanoAir – Version 1.00 – User Manual Issue 1.00.A EVS Broadcast Equipment – April 2013 PGM Name This area is used to display the name (or the default name, such as PGM1) of the controlled player channel. Error/Warning Problem OSD Value Power supply error !PSU1 and !PSU2 (1 or 2: number of power supply) Genlock error !Glk LTC in error !TC Disk error !DSK Audio Level This area displays the audio level in a graphical format. For example: 2 audios 4 audios 8audios 16audios Playlist Name This area displays the name of the loaded playlist Time until next Break The remaining time before the next action that pauses the playout (freeze). The format is mm:ss:ff(.) if the remaining time < 1h The format is hh:mm:ss if the remaining time is > 1h Rem. Current element The remaining time of the current element The format is mm:ss:ff(.) if the remaining time < 1h 71 nanoAir – Version 1.00 – User Manual Issue 1.00.B EVS Broadcast Equipment – April 2013 The format is hh:mm:ss if the remaining time is > 1h Current Timecode (PrimaryTC) Display the current timecode according the current PrimaryTC of the current element. The format is hh:mm:ss:ff(.) Remaining Time The remaining time of the total playlist. The format is mm:ss:ff(.) if the remaining time < 1h The format is hh:mm:ss if the remaining time is > 1h Speed Display the current element speed. The format corresponds to a percentage. Position in Playlist Display the position of the current element in the playlist and total number of elements in the playlist. Ex: 010/050 Current Timecde(Primary TC) This area displays the current timecode according to the current Primary TC of clip or train The format is hh:mm:ss:ff(.) Clip Name/Recorder Name If clip is loaded, this area displays the clip name. If recorder train is loaded, this area displays the recorder name. 72 nanoAir – Version 1.00 – User Manual Issue 1.00.A EVS Broadcast Equipment – April 2013 5.4.3 Selecting Clips This function is similar with that in Playlist Edit Pane. Note See section 5.6.2 for the shortcuts to select different clips and scroll up and down the current playlist. 5.4.4 Loading a Playlist To load a playlist, proceed as follows: 1. Select the playlist to load in the Library Pane. 2. Drag and drop it into the blank area of the Playout Pane. All the clips of the loaded playlist present in the selected playout channel. 73 nanoAir – Version 1.00 – User Manual Issue 1.00.B EVS Broadcast Equipment – April 2013 5.4.5 Element speed This function is similar with that in Playlist Edit Pane, see section 5.3.4 for more details. 5.4.6 Ejecting a Playlist The function of eject command is to clear the playlist from the Playout Pane, and then the playout channel is idle. To eject a playlist, two methods are available: Press the Eject button Use the keyboard shortcut: E from the Transport Function Bar. Warning The EJECT command is not active when the playlist is on air. To eject the playing playlist, user has to stop it and try again. 5.4.7 Goto IN/OUT of the Current Clip The Goto function re-loads the clip on its first frame of the selected clip. Three methods are available to go to the IN/OUT point of the current clip: Double-click the element (for GOTO IN point only). Select the clip in playout list, click point. Select the clip in the playout list and use the keyboard shortcut: I or O to go to IN point, or click to go to OUT If the playlist is in PLAY or PAUSE mode, the playlist jumps to the IN/OUT point of the selected element but remains paused. 5.4.8 Recuing a Playlist The Recue function re-loads the playlist on the first frame of the first clip. Two methods are available to recue a playlist: Double-click the first element of the playlist in the Playlist pane Use the Recue button from the Transport Function Bar Note See section 5.6.2 for the shortcuts to recue the playlist loaded on PGM. 74 nanoAir – Version 1.00 – User Manual Issue 1.00.A EVS Broadcast Equipment – April 2013 5.4.9 Gang Mode Gang mode is able to support one or more combinations of groups of ganged PGM channels on EVS server. Any ganged PGM group need to handle all commands frame accurately and synchronously on all the PGM channels of the group. How to Create a Group of Gang Channel NanoAir is able to support one or more combination of gang playlist. With 4-channel EVS server, only 2 combinations are available. Note Gang mode is available to 2 playlists or above, the playlist to set should have the same duration, IN and OUT point, the different contents are OK. If these playlists don’t meet the gang mode requirement, a message pop up to remind users, if you still insist and click Yes, the gang mode on these playlists will be incorrect. To create gang mode, proceed as follows: 1. Drag and drop the playlist into the different Playout Panes. 2. Click Gang which is at the upper right of each Playout Pane, Gang button turns blue , and stays in state1 mode (the left small rectangle is highlighted blue).when click the Gang button once more, gang mode stays in state2 mode (the right small rectangle is highlighted blue) . 3. After setting gang mode successfully, when you play/stop/pause or deploy with any other playing command, all the ganged playlists will act as the same synchronously. Only the playlists with the same state mode can be ganged with each other, such as the playlists with state1 mode (or state2 mode) can be ganged, but one playlist with state1 mode and the other with state2 mode can’t be ganged with each other. As to the state mode, because nanoAir is only deployed with 4 Players, gang mode needs 2 Players or above, and thus at most 2 groups of gang mode are available (2 players for each). How to Deactivate Gang Mode To deactivate gang mode, click the gang button which has already been highlighted blue, then gang mode is removed and the button turns grey. And thus all the actions apply to them can’t affect with each other any more. 75 nanoAir – Version 1.00 – User Manual Issue 1.00.B EVS Broadcast Equipment – April 2013 5.4.10 Looping a Clip Because this section is similar with that in Editing Playlist, please see section 5.3.3 for more information. 5.4.11 Entire Loop How to Loop the Entire Playlist Looping the entire playlist can be also called Global Loop mode, which will loop the entire playlist indefinitely until the stop/pause command is received. Looping entire playlist is activated with the Loop button placed in the commands area. The entire playlist will be played in loop mode, which is applied to all the clips in the playlist. To loop the entire playlist, proceed as follows: 1. Select a playlist. 2. Click the Loop button in the Transport Function Bar Or press the L key on the keyboard. How to Remove Entire Loop To remove the entire loop mode, proceed as follows: 1. Select a playlist set with entire loop mode. 2. Click the Loop button in the command area Or press the L key on the keyboard. 76 nanoAir – Version 1.00 – User Manual Issue 1.00.A EVS Broadcast Equipment – April 2013 5.4.12 Replacing Playlist by another Playlist The playlist replace function is applied to replace the playlist by another playlist from the Playlist Library Pane in playlist playout mode. To replace playlist by another playlist, proceed as follows: 1. Select a playlist from the Playlist Library Pane. 2. Drag and drop it to the head of the Playlist Playout Pane. 3. Click OK to confirm the action. Note When the playlist in the Playlist Playout Pane is playing, when drop down the playlist, a message will pop up to remind you that the operation is invalid. 5.4.13 Locking a Playlist When set locking a playlist, the position of the playing clip and the next one to play will be fixed, the playing list will move automatically until the last clip. To lock a playlist, you just need to click Lock at the button of the Playout Pane. To unlock a Playlist, you just need to click Unlock locking. or just drag the scroll to release 77 nanoAir – Version 1.00 – User Manual Issue 1.00.B EVS Broadcast Equipment – April 2013 5.4.14 Transport Commands How to Recue a Playlist To know detailed information about recue, please refer to 5.4.8. How to Play a Playlist The Play command plays the loaded playlist. To play a playlist, two methods are available to play a playlist: Press the Play button green on the Transport Function Bar. The Play button lights when the playlist is on air. How to Pause a Playing Playlist The pause command stops the playout of an element in the loaded playlist at the current position. To pause a playing playlist, two methods are available: Press the Pause button from the Transport Function Bar. The button turns orange and remains orange until user re-initiates the Playout. Use the keyboard shortcut: H. How to Go to the First Frame See section 5.4.7 for the GOTO IN/OUT function in Playlist Edit Pane. How to Go to the Last Frame See section 5.4.7 for the GOTO IN/OUT function in Playlist Edit Pane. How to Go to the Next Clip When a playlist is applied with Next command, if the playlist is in Play mode, the next element is loaded immediately and played accordingly to its still mode. If the playlist is in Pause mode, the playlist jumps to the IN point of the next element of the playlist but remain paused. To go to the next clip, press 78 from the Transport Function Bar. nanoAir – Version 1.00 – User Manual Issue 1.00.A EVS Broadcast Equipment – April 2013 How to Skip a Clip The Skip function skips the next element during the playout of the playlist so it will not play. If the button is clicked twice, the next 2 elements will be skipped, and so on… The current element and the next element are highlighted (green and blue) on the playing list. The skip command is only active in Playout mode. To skip a clip, press when selected. from the Transport Function Bar, the button lights blue 79 nanoAir – Version 1.00 – User Manual Issue 1.00.B EVS Broadcast Equipment – April 2013 5.5 Shuttle Pro Management This section aims to describe the shuttle pro management in nanoAir. The shuttle pro is a remote control device connected by USB to the computer workstation that runs nanoAir. The Shuttle Pro driver is installed during nanoAir installation. 5.5.1 Operations in Ingest Mode When nanoAir is in Ingest mode, the shuttle pro is automatically attached to the Player channel used for clipping. Layout Notes The undefined buttons are unavailable in Ingest Mode. 80 nanoAir – Version 1.00 – User Manual Issue 1.00.A EVS Broadcast Equipment – April 2013 Operations Upper buttons are used to load a recorder on the player: Area Description 1 Button to load recorder1 to the player at the current timecode 2 Button to load recorder2 to the player at the current timecode 3 Button to load recorder3 to the player at the current timecode 4 Button to load recorder4 to the player at the current timecode Note If a recorder channel is not configured (for ex.: XS Nano is in 2 recorders / 2 players) and the user press on a button that doesn’t have a recorder, nothing happens, the player stays on the current recorder or clip. 81 nanoAir – Version 1.00 – User Manual Issue 1.00.B EVS Broadcast Equipment – April 2013 These buttons are used to control the play back of a clip/Rectrain in Ingest Mode: Area Description Play Button to start playing on the player at 100% speed. Pause Fast Rewind Button to pause the player Button to start playing backward at specific speed for the current player. Each time the button is pressed, it toggles between these values: -200%, -300%, -400% and then -200% again. Fast Forward Button to start playing forward at specific speed for the current player. Each time the button is pressed, it toggles between these values: +200%, +300%, +400% and then +200% again E/E 82 Button to go to live mode for the current player. nanoAir – Version 1.00 – User Manual Issue 1.00.A EVS Broadcast Equipment – April 2013 CTRL from keyboard Mark In Mark Out SHIFT from keyboard equivalent to the Mark In button in the ingest panel equivalent to the Go to (Mark) IN button in the ingest panel equivalent to the Clear (Mark) IN button in the ingest panel equivalent to the Mark Out button in the ingest panel equivalent to the Go to (Mark) OUT button in the ingest panel equivalent to the Clear (Mark) OUT button in the ingest panel If you press Save Clip button: It corresponds to the New clip button in the ingest panel. If you press CTRL+ Save Clip button: It corresponds to the Update clip button in the ingest panel. 83 nanoAir – Version 1.00 – User Manual Issue 1.00.B EVS Broadcast Equipment – April 2013 Each Jog Wheel step corresponds to movement of one frame backward (anti-clockwise) or forward (clockwise). It the player is not in pause, it is set in pause. The Shuttle wheel contains 7 steps anti-clockwise, 7 steps clockwise and an automatic centered step. Each position must do a play at variable speed according to the following chart: Anti-clockwise -7 = -35x -6 = -10x -5 = -5x -4 = -2x -3 = -100% (play backward) -2 = -50% -1 = -33% Centered 0 (Centered) = pause, 0% Clockwise +1 = +33% +2 = +50% +3 = +100% (play forward) +4 = +2x +5 = +5x +6 = +10x +7 = +35x 84 nanoAir – Version 1.00 – User Manual Issue 1.00.A EVS Broadcast Equipment – April 2013 5.5.2 Operations in Playout Mode Layout When nanoAir is in playout mode (1, 2, 3 or 4 playlists), the shuttle pro is automatically attached to the Playlist panel that has the focus. Fast Rewind 2 / Previous 3 / Next 1 / Recue 4 / Skip Pause Fast Forward Play Goto Mark In (CTRL +) Gang mode -------------- Shuttle Jog Goto Mark Out (CTRL +) -------------------------- 85 nanoAir – Version 1.00 – User Manual Issue 1.00.B EVS Broadcast Equipment – April 2013 Operations Upper buttons are used to set the focus to a specific Playlist panel: CTRL from keyboard 1 Button to recue the playlist (PGM) on the playlist that has focus Buttons that set focus to Playlist panel 1 (PGM1) 2 Button to go to the previous clip in the playlist that has focus Buttons that set focus to Playlist panel 2 (PGM2) 3 Button to go to the next clip in the playlist that has focus Buttons that set focus to Playlist panel 3 (PGM3) 4 Button to skip the next clip in the playlist that has focus Buttons that set focus to Playlist panel 4 (PGM4) Area Description Play Button to start playing on the player at 100% speed. Pause Fast Rewind Button to pause the player Button to start playing backward at specific speed for the current player. Each time the button is pressed, it toggles between these values: -200%, -300%, -400% and then -200% again. Fast Forward Button to start playing forward at specific speed for the current player. Each time the button is pressed, it toggles between these values: +200%, +300%, +400% and then +200% again 86 nanoAir – Version 1.00 – User Manual Issue 1.00.A EVS Broadcast Equipment – April 2013 If you press CTRL+ In button: It corresponds to the Go to Mark In button in the Playlist panel. If you press CTRL+ Out button: It corresponds to the Go to Mark Out button in the Playlist panel. If you press Gang Mode button: The gang mode on the current Playlist panel toggles between the different values: Ganged Group 1 > Ganged group 2 > No gang Each Jog Wheel step corresponds to movement of one frame backward (anti-clockwise) or forward (clockwise). It the player is not in pause, it is set in pause. The Shuttle wheel contains 7 steps anti-clockwise, 7 steps clockwise and an automatic centered step. See Variable speed chart in Ingest mode 87 nanoAir – Version 1.00 – User Manual Issue 1.00.B EVS Broadcast Equipment – April 2013 5.6 Keyboard Shortcuts NanoAir provides some shortcuts for Ingest mode and playout mode from keyboard. It supports three kinds of keyboards: Qwerty :“US”, “United Kingdom” & “United States-International” Azerty French: French Azerty Belgian: “Belgian (Period)” & “Belgian (Comma)” To change the different keyboards, proceed as follows: Control Panel --> All Control Panel Items --> Region and Languages --> Keyboards and Languages: Note All the shortcuts are fixed and cannot be modified upon user request. 88 nanoAir – Version 1.00 – User Manual Issue 1.00.A EVS Broadcast Equipment – April 2013 5.6.1 Ingest Mode All the shortcuts below are only active when nanoAir is in Ingest Mode. Key Modifier (SHIFT, CTRL) Behavior / Feature F1 Load Recorder 1 (if available) on PGM1 F2 Load Recorder 2 (if available) on PGM1 F3 Load Recorder 3 (if available) on PGM1 F4 Load Recorder 4 (if available) on PGM1 E Mark In R Mark Out E CTRL Go To Mark In R CTRL Go To Mark Out E SHIFT Clear Mark In R SHIFT Clear Mark Out I Mark In O Mark Out I CTRL Go To Mark In O CTRL Go To Mark Out I SHIFT Clear Mark In O SHIFT Clear Mark Out S Create Clip D Update Clip J Fast Rewind (multi-speed) on PGM1 K Pause on PGM1 L Fast Forward (multi-speed) on PGM1 Left (Arrow) Go to Previous frame on PGM1 Right (Arrow) Go to Next frame on PGM1 Left SHIFT Go to Previous 10 frames on PGM1 89 nanoAir – Version 1.00 – User Manual Issue 1.00.B EVS Broadcast Equipment – April 2013 (Arrow) Right (Arrow) 90 SHIFT Go to Next 10 frames on PGM1 DEL Delete current selected clip(s) or playlist(s). A confirmation is requested ENTER Load current selected clip on PGM (first if multiple selection) nanoAir – Version 1.00 – User Manual Issue 1.00.A EVS Broadcast Equipment – April 2013 5.6.2 Playout Mode All the shortcuts below are only active when nanoAir is in Playout Mode. Key Modifier (SHIFT, CTRL) Behavior / Feature F1 Set the focus and activate PGM1 F2 Set the focus and activate PGM2 F3 Set the focus and activate PGM3 F4 Set the focus and activate PGM4 F1 CTRL Recue the playlist loaded on PGM1 F2 CTRL Recue the playlist loaded on PGM2 F3 CTRL Recue the playlist loaded on PGM3 F4 CTRL Recue the playlist loaded on PGM4 Left (Arrow) Select element at left Right (Arrow) Select element at right Up (Arrow) Select element above Down (Arrow) Select element below Home Select first element of playlist End Select last element of playlist Page Up Scroll up current playlist (if not lock) Page Down Scroll down current playlist (if not lock) DEL Remove selected element(s) from playlist (needs confirmation) ENTER Cue current selected element (needs confirmation) 1 ! Play command on PGM3 (if available) 3 # Next command on PGM3 (if available) 4 $ Skip command on PGM3 (if available) 8 * Play command on PGM4 (if available) 91 nanoAir – Version 1.00 – User Manual Issue 1.00.B EVS Broadcast Equipment – April 2013 92 0 ) Next command on PGM4 (if available) - _ Skip command on PGM4 (if available) Z Play command on PGM1 (if available) C Next command on PGM1 (if available) V Skip command on PGM1 (if available) M Play command on PGM2 (if available) >, Next command on PGM2 (if available) /? Play command on PGM2 (if available) &1 Play command on PGM3 (if available) “3 Next command on PGM3 (if available) ‘4 Skip command on PGM3 (if available) à0 Next command on PGM4 (if available) )° Skip command on PGM4 (if available) W Play command on PGM1 (if available) C Cue current selected element (needs confirmation) V Skip command on PGM1 (if available) ,? Play command on PGM2 (if available) :/ Next command on PGM2 (if available) _8 Play command on PGM4 (if available) !$ Play command on PGM2 (if available) !8 Play command on PGM4 (if available) =+ Play command on PGM2 (if available)