1
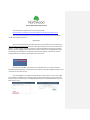
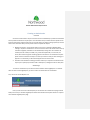
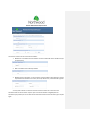
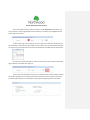
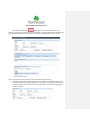
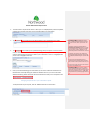
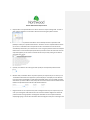
Provider Authorization Request Portal
Contents
Logging In ...................................................................................................................................................... 1
Creating an Authorization ............................................................................................................................. 3
Managing the procedures on your authorization request ....................................................................... 8
Managing your Authorizations ................................................................................................................... 11
Welcome to the provider authorization request portal. This portal was designed to give
providers the ability to submit requests for authorizations electronically and to manage those
authorizations. This help file was written to give you an overview of each component of the portal and
walk you through the various features that you will use to electronically create your authorization
requests. Once you have gained entry to the portal you will notice question mark icons
on most of
the components. When clicked, these icons will display information for that component. So if you have
any questions about what a component is, just click the
icon for help.
How to read this manual
This manual will cover each section of the portal. When beginning a new section, there will be a
general overview of the features followed by a walkthrough of how to use the features. The overview
contains general information about the features, the purpose of those features and what they are used
for. The walkthrough portion of the section will guide you through step-by-step on how to use each
feature.
Logging In
Overview
The provider authorization request portal has various security features that guard against
unauthorized guests. If you have a valid login to the portal, make sure to safeguard your login
information. Your password is stored in our system using robust encryption algorithms so that no one
can see or know your password but you. If you forget your password, or feel that your password may
have been compromised, feel free to change it within the portal.
Provider Authorization Request Portal
If you would like to request access to the portal please visit:
https://provider.northwoodinc.com/FormsAndDocumentation/Documentation.aspx
Once you have finished filling out the form, please fax or mail the form to the address/fax
number at the bottom of the form.
Walkthrough
Once you have received the email notifying you that you now have access to the portal, go to
https://provider.northwoodinc.com and enter in your login information. If this is the first time you’ve
logged in, or have recently changed your password, you will be prompted to change your password
before continuing. If logging in for the first time, you will be directed to the ‘Change Password’ page
automatically. If you would like to change your password under different circumstances, click the
‘Change Password’ link located in the top right corner of the screen.
As stated in the overview, your password is unrecoverable due to our level of encryption.
Although Northwood generates a new password on your behalf, it must be changed by the user so that
no one but the user has access to it.
If you have forgotten your password and would like to receive a new one, click on the ‘Forgot
your password’ link located on the initial login page. The system will prompt you for your username.
Once you click the ‘Submit’ Button, an email (from EDIServer) with a new password will be sent to the
email account on file.
Provider Authorization Request Portal
Creating an Authorization
Overview
An electronic authorization request is an electronic form submitted by a provider to Northwood
via the provider authorization request portal. The information that you submit with the request should
be all the information needed to authorize your request. Before you begin creating requests you should
have certain information with you that you will need to complete the request.
1. Member information: The portal will allow you to look up a member’s eligibility before
creating a request for authorization. There are 3 search criterion that can be used to look up
a member’s eligibility: A member can be identified by entering either the member’s ID
number (contract number, B-number, etc.), Social Security Number, or first name, last
name, date of birth and gender. Ordering physician information: The authorization request
portal contains convenient and easy to use look up controls to assist you when looking up a
physician. At a minimum, you will need the physicians first and last name.
2. Procedure code information: Adding procedure codes to your request for authorization will
require you to specify the procedure code or description, and diagnosis code or description.
Walkthrough
To create an authorization you must first find the member’s active eligibility file. If a member
does not have an active eligibility file, you cannot create an authorization for that member.
First, click on the ‘Create Request’ tab.
Once you click on the tab ‘Create Request’ you will be taken to a member search page that will
allow you to look up a member’s eligibility that will be associated with the request. Below is a snapshot
of the member eligibility search page.
Provider Authorization Request Portal
Three search criterions can be used to find a member:
1. Member ID. The member ID is the member’s contract or B-Number of the member that you
are searching for.
2. SSN. The member’s Social Security Number.
3. Member general information. To use this search option all fields must be filled out. The four
required fields are member’s first name, last name, date of birth, and the member’s gender.
You only have to fill out one of the three search areas but make sure to enter all of the
information that the search criteria requires. If you cannot find a member’s eligibility with the
information you provided, be sure to make sure all information entered is accurate and try your request
again.
Provider Authorization Request Portal
Once you have filled out all the required information in one of the three search options, you
must now select a service range date (date from and date to). The member’s active eligibility file and
service range must coincide.
To select a date range, click the calendar icon to the right of each textbox. A calendar will open
that will allow you to visually search for the date you wish to select. Once you have found the date that
you want to use, click the date with the mouse and the textbox will be updated with the date selected.
Once all of the required information is entered, click the ‘Search’ button located at the bottom
right of within the mandatory date range area.
The next screen that will appear is where you can view the attributes of the member and select
the member’s eligibility record. This page also allows the provider to enter the physician information,
provider contact information, and authorization request type and dispensing location information.
Provider Authorization Request Portal
Review the information about the member and select the active eligibility file located in the
‘Member Eligibility’ grid. Next, select an ordering physician. The ordering physician textbox is an autocomplete textbox that allows you to enter in information about a physician and returns a list as you type
that you can select from. Begin by typing the letters of the first or last name of the physician and select
one from the list that will appear by clicking the desired name with your mouse.
Enter the contact person from your organization. The contact person is the person that
Northwood can contact for information about the request. If this person is not you, enter in the name of
the person whom a Northwood benefit coordinator can contact.
After you have filled out the physician and contact person information, please use the check
boxes provided to indicate whether or not this request is ‘Urgent’ or ‘Emergent’ and whether or not this
request was ‘Dispensed from a loan closet’. If the boxes are left unchecked the request is assumed to
not be not urgent or emergent and not dispensed from a loan closet.
Comment [LRW1]: ONLY if unable to find the
ordering physician in the drop down – type in
000000 and the drop down will display –
UNKNOWN. Pick UNKNOWN to continue with the
authorization. NOTE: If UNKNOWN is picked – you
must provide the Ordering Physician information
(name, phone number, address, NPI) in the
COMMENTS section.
Comment [LRW2]: Please enter your name and
phone number (i.e. Lisa W. 5867553830) so
Northwood may contact you directly with questions.
Provider Authorization Request Portal
Clicking on the submit button
will generate a new authorization request for the
member you have selected. The next screen that will appear is the authorization request form page. This
page contains the features that will allow you to attach files and add procedures to your request.
Here is an overview of the four sections on the authorization request form page:
1. The general authorization request information section shows you the member, physician, and
provider information that will be included in your authorization. These fields are read-only and
cannot be modified. If there is a mistake in one of the fields you will have to start over again to
correct the mistake.
Provider Authorization Request Portal
2. The authorization request details section is where you can add/edit/delete procedures (HCPCS,
quantity limits and date of service) that are associated with your authorization.
3. The comments section is where you can add comments to your authorization as a whole.
4. The File Upload section allows you to upload files along with your request. To use this section
click the ‘Select’ button and select a file from your computer. Once you have selected your files,
click the ‘Upload’ button to attach your files to your authorization. There is a 1 megabyte limit
per file and a 5 megabyte limit total.
Comment [LRW3]: If UNKNOWN provider is
used – indicate Physician Information in this field
(first and last name, address, phone number and
NPI).
This field also needs to be populated with the
medical necessity information necessary to review
this authorization request. Generally, the medical
necessity criteria is similar to Medicare as is the
information/questions Northwood needs answered.
For example, if the request is for a CPAP please
document the following information: date of sleep
study, RDI/AHI (additional diagnosis required if RDI
<5).
If request is for a Hospital Bed: document in
comment section the elevation degree of head of
bed, if member is able to position on their own, etc.
If request is for oxygen: document in this comment
section the low saturation level.
5. Once you are finished editing your authorization you can either submit the authorization to
Northwood for review by clicking the ‘Submit for Review’ button or you can click the ‘Save
Without Submitting’ button which will save the authorization so that you can complete it later.
Managing the procedures on your authorization request
To add procedures to your request, click the ‘Add New Procedure’ menu button.
Comment [LRW4]: At a minimum, providers
need to upload the prescription(s) to support the
authorization request. Providers should also upload
other pertinent documents such as – LOMN, Sleep
Study, Growth Charts, Speech/Language Evaluation,
etc.
Provider Authorization Request Portal
After clicking the ‘Add New Procedure’ button, a form will open that will contain all the fields
that need to be filled out to add a procedure to the request.
There are 7 types of fields on the add procedure form. Here is a description of each:
1. Request type: The request type refers to whether the request is normal or urgent. There are
four choices for request type – 1) Urgent – Non Discharge, 2) Urgent – Discharge, 3) Normal –
Non Discharge, 4) Normal – Discharge. NOTE: Most authorization requests should be marked as
Normal. An Urgent request type means that a member’s physical condition is such that
imminent or serious consequences could result to the member’s health or, if in the opinion of
the physician, the member would be subjected to severe pain if a DMEPOS request is processed
within the routine decision-making time frame.
2. Comments: The comments field allows you to enter in information about this procedure that
may not be definable elsewhere on the form.
Comment [LRW5]: Please do not use this
comment field that is attached to the specific HCPCS
code only – utilize the general comment field above
that is associated with the whole authorization
request.
Provider Authorization Request Portal
3. Request Date: The requested date is the date on which this request is being made. To select a
date, click the calendar icon and select a date from the resulting drop down calendar.
4. Procedure Code: The procedure code field is used to identify and select a procedure code
(HCPCS) to add to your requested authorization. This field is an auto-complete field that allows
you to enter in information about the procedure code in the left text box and a list will be
automatically retrieved for you to select from. To start using the procedure code auto-complete
textbox enter in either the description/name of the procedure code or the code itself. Once the
drop down appears you can select a code from the list at any time by clicking on the desired
result with your mouse.
5. Quantity: This textbox is for entering the item quantity for the requested procedure code.
6. Modifier: Only one modifier field is required to process your request but you can send up to 4.
The modifier tells whether the equipment is purchased (NU) or rented (RR) or it tells whether
the oral enteral is tube fed (BA) or orally administered (BO). NOTE: The first modifier should be
either NU for purchase or RR for rental; except for oral nutrition where the first modifier should
be BO for orally administered or BA for tube fed administration.
7. Diagnosis Code: You are required to only have one diagnosis code on your request but you can
enter up to 4. Diagnosis code fields are there to record the member’s diagnosis for which the
procedure code is being requested. The diagnosis code fields are auto-complete textboxes.
Simply begin typing in the left box information about the diagnosis code you are looking for and
Provider Authorization Request Portal
a list will be displayed as you type. To select on a desired diagnosis code, click on the code with
your mouse
To add a procedure to your authorization request, fill in all of the required information and click the
‘Insert’ button. If you wish to cancel and abandon the information you have entered, click the ‘Cancel’
button.
To edit a procedure after it has been added, highlight the procedure you would like to edit by
clicking on the row with the mouse and click the ‘Edit Selected Detail’ button. The same form that was
used to enter the information the first time will be displayed and you can edit any of the information
contained within.
Managing your Authorizations
Overview
The authorization dashboard gives you the ability to review, maintain, and edit all of your
authorization requests. There are two main sections that make up the authorization dashboard. The first
section is the unsubmitted authorization section. This section contains all the authorizations that have
been created by the provider but have not yet been submitted to Northwood. This section allows you to
manage your unsubmitted authorizations by giving you the option to edit the authorization so that you
can submit it or by letting you delete the authorization request from your records.
The second section is the submitted authorization request section. This section allows you to
see any and all authorizations that were created by the provider and features date range selectors to
filter the results that you are looking for. Not only can you view past requests for authorization within
this section but you can also view Northwood’s response to your request as soon as Northwood releases
it.
Provider Authorization Request Portal
To begin managing your authorization requests click on the ‘Authorization Dashboard’ menu
tab.
There are two sections that you can use to manage your authorization requests.
1. Unsubmitted Authorization requests.
The Unsubmitted authorization request grid is located on the left hand side of the screen and
contains all of the authorizations that have been previously saved but have not yet
been submitted to Northwood for review. To review and submit the authorization
request click on the ‘Edit’ link in the far right column of the item you would like to
review and submit. If you would like to remove the authorization request from the grid, click on
the ‘Delete’ button.
2. The section to the right of the unsubmitted authorization section is the ‘View Submitted
Authorization’ section.
In this section you can view all of the requests that you have submitted to Northwood.
To filter the authorizations that will appear in the list, you can use the date range criteria option.
There are two sets of criteria that you can use to filter your results. The first is the custom date
range feature that allows you to define your own search dates. To find an authorization that was
submitted to Northwood on 09/24/2012, you would select a date on or prior to that date in the
first date field and a date that is on or after the desired date in the second date field.
Provider Authorization Request Portal
Once you have set your desired date range, click the ‘View Requests’ button. If there are
any results they will appear in the grid below the date ranges selection section.
The second search area gives you a drop down list of predefined date ranges that you
can select from instead of defining your own. To use this feature, click on the drop down and
select from the list of options via a mouse click.
Once you have selected your desired date filters and clicked ‘View Requests’, any
submitted authorization requests that you have submitted within the date range will appear in
the grid below the filter criteria section.
To view the authorization request, click on the ‘View’ link. If Northwood has reviewed
your authorization request and has granted an authorization, a link will be provided in the ‘View
Authorization’ column.