1
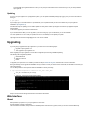
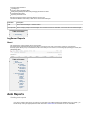
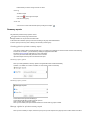
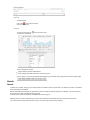
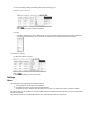
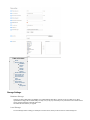
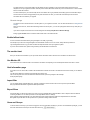
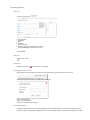
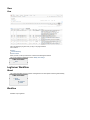
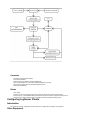
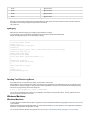
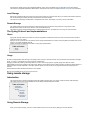
1. op5 Logserver Extension 3.7.1 . . . . . . . . . . . . . . . . . . . . . . . . . . . . . . . . . . . . . . . . . . . . . . . . . . . . . . . . . . . . . . . . . . . . . . . . . . . . . . . . .
1.1 LogServer Installation . . . . . . . . . . . . . . . . . . . . . . . . . . . . . . . . . . . . . . . . . . . . . . . . . . . . . . . . . . . . . . . . . . . . . . . . . . . . . . . . . . . .
1.1.1 Basic installation . . . . . . . . . . . . . . . . . . . . . . . . . . . . . . . . . . . . . . . . . . . . . . . . . . . . . . . . . . . . . . . . . . . . . . . . . . . . . . . . . . .
1.2 Web Interface . . . . . . . . . . . . . . . . . . . . . . . . . . . . . . . . . . . . . . . . . . . . . . . . . . . . . . . . . . . . . . . . . . . . . . . . . . . . . . . . . . . . . . . . . .
1.2.1 Audit tracking . . . . . . . . . . . . . . . . . . . . . . . . . . . . . . . . . . . . . . . . . . . . . . . . . . . . . . . . . . . . . . . . . . . . . . . . . . . . . . . . . . . . . .
1.2.2 LogServer Reports . . . . . . . . . . . . . . . . . . . . . . . . . . . . . . . . . . . . . . . . . . . . . . . . . . . . . . . . . . . . . . . . . . . . . . . . . . . . . . . . .
1.2.3 Search . . . . . . . . . . . . . . . . . . . . . . . . . . . . . . . . . . . . . . . . . . . . . . . . . . . . . . . . . . . . . . . . . . . . . . . . . . . . . . . . . . . . . . . . . . .
1.2.4 Settings . . . . . . . . . . . . . . . . . . . . . . . . . . . . . . . . . . . . . . . . . . . . . . . . . . . . . . . . . . . . . . . . . . . . . . . . . . . . . . . . . . . . . . . . . .
1.2.5 View . . . . . . . . . . . . . . . . . . . . . . . . . . . . . . . . . . . . . . . . . . . . . . . . . . . . . . . . . . . . . . . . . . . . . . . . . . . . . . . . . . . . . . . . . . . . .
1.3 LogServer Workflow . . . . . . . . . . . . . . . . . . . . . . . . . . . . . . . . . . . . . . . . . . . . . . . . . . . . . . . . . . . . . . . . . . . . . . . . . . . . . . . . . . . . .
1.4 Configuring LogServer Clients . . . . . . . . . . . . . . . . . . . . . . . . . . . . . . . . . . . . . . . . . . . . . . . . . . . . . . . . . . . . . . . . . . . . . . . . . . . . .
1.4.1 Other Equipment . . . . . . . . . . . . . . . . . . . . . . . . . . . . . . . . . . . . . . . . . . . . . . . . . . . . . . . . . . . . . . . . . . . . . . . . . . . . . . . . . . .
1.4.2 UNIX Machines . . . . . . . . . . . . . . . . . . . . . . . . . . . . . . . . . . . . . . . . . . . . . . . . . . . . . . . . . . . . . . . . . . . . . . . . . . . . . . . . . . . .
1.4.3 Windows Machines . . . . . . . . . . . . . . . . . . . . . . . . . . . . . . . . . . . . . . . . . . . . . . . . . . . . . . . . . . . . . . . . . . . . . . . . . . . . . . . . .
1.5 op5 LogServer Technology . . . . . . . . . . . . . . . . . . . . . . . . . . . . . . . . . . . . . . . . . . . . . . . . . . . . . . . . . . . . . . . . . . . . . . . . . . . . . . . .
1.5.1 op5 Logserver Components . . . . . . . . . . . . . . . . . . . . . . . . . . . . . . . . . . . . . . . . . . . . . . . . . . . . . . . . . . . . . . . . . . . . . . . . . .
1.5.2 op5 LogServer Storage . . . . . . . . . . . . . . . . . . . . . . . . . . . . . . . . . . . . . . . . . . . . . . . . . . . . . . . . . . . . . . . . . . . . . . . . . . . . . .
1.5.3 The Syslog Protocol and implementations . . . . . . . . . . . . . . . . . . . . . . . . . . . . . . . . . . . . . . . . . . . . . . . . . . . . . . . . . . . . . . .
1.6 Using remote storage . . . . . . . . . . . . . . . . . . . . . . . . . . . . . . . . . . . . . . . . . . . . . . . . . . . . . . . . . . . . . . . . . . . . . . . . . . . . . . . . . . . .
1.7 Advanced DataBase Management . . . . . . . . . . . . . . . . . . . . . . . . . . . . . . . . . . . . . . . . . . . . . . . . . . . . . . . . . . . . . . . . . . . . . . . . . .
2
2
2
3
4
5
8
15
19
20
21
21
22
23
24
24
24
25
25
26
op5 Logserver Extension 3.7.1
Preface
Since version 7.0 of op5 Monitor, the log server functionality has been integrated into the main product. Documentation for the built in
syslog functionality can be found in the User manual and in the Administrator manual.
Preface
Modern organisations have higher demands to secure their IT environment than just a few years ago – for many reasons:
They store credit card information
Because of legislation
Because of demands on public service organizations
Securing high quality towards your customers
This makes op5 LogServer Extension an increasingly important part of many organisations’ IT systems.
Virtually every modern computer application logs what happens, and you can not know in advance which information will be important or not.
The syslog protocol, an important part of the op5 LogServer architecture, provides a business standard for how to transfer data.
op5 LogServer is unique in it’s design and flexibility for storing large volumes of data, and accessing archived data is very easy.
It is our hope that your organisation will benefit from using op5 LogServer on many levels, and that this manual will answer your questionsquickly
and to the point. If you have any queries about this manual, please send these to [email protected] or call +46-31-774 09 24.
LogServer Installation
Basic installation
About
If you have bought an op5 hardware appliance, you should install op5 Appliance System on it.
Installation of op5 Appliance System, any op5 Hardware and basic configuration of the system, such as IP address and SMTP relay server
is covered in op5 Installation and Configuration Customer Guide where you also find a list of recommended helper utilities for your
administrators desktop.
If you have not received op5 Installation and Configuration Customer Guide, please notify op5 Support or download it here: http://www.op5.
com/manuals/extras/op5_quick_install_guide.pdf
Table of Content
About
Installing op5
LogServer Extension
Obtaining
tar.gz files
Updating
Upgrading
Installing op5 LogServer Extension
op5 LogServer is delivered as tar.gz files to be installed onto op5 Appliance System, CentOS 5 or Red Hat Enterprise Linux 5. See http://w
ww.op5.com/support/ for hardware requirements.
If you install it on op5 Appliance System and have a support agreement, the support includes not only op5 LogServer but also op5
Appliance System and hardware support. If you use another vendor for your operating system or hardware, please contact their support.
Obtaining tar.gz files
Download from our download area at op5.com: http://www.op5.com/get-op5-monitor/download/ using your user name and password.
If you have not received a user name and password, please notify op5 Support.
When you have downloaded the files; copy them onto your op5 server root directory (/root), and then run the following commands.
#
#
#
#
cd /root
tar xvzf op5-logserver*.tar.gz
cd logserver*
./install.sh
This will install op5 LogServer Extension. Then you can point your web browser to the machine and log on to your newly installed
op5 LogServer.
Updating
If you run your op5 LogServer on op5 Appliance System, you can update all installed packages by logging on to your server via SSH and
then type:
# yum update
Or just simply log in to the web interface in op5 Portal with your root password that you find on the address of your op5 LogServer
installation: http://logserver-ip/
For alternative ways of updating, such as offline updates or other, please contact op5 Support or look at the op5 Appliance System
documentation.
To be able to upgrade you must have a valid license.
If you use Mac OSX or UNIX, you can copy files to your server using scp. If you use Windows, you can use WinSCP.
You can't update from 2.x to 3.x with yum update, but once 3.x is installed you can update your system.
op5 Support can be reached at [email protected] or at +46-31-7740924
Upgrading
If you are going to upgrade from op5 LogServer 2.x you have to do it in the following steps:
Upgrade to op5 LogServer 3.0
Then upgrade to op5 LogServer 3.6
When migrating from op5 LogServer 2.x there will be a migration process during installation/updating.
The following will be migrated by default:
Users/Passwords
Settings for Archive
Filters
To Upgrade your system from a 2.x release you follow the steps in obtain the tar.gz file, and follow the on-screen instructions.
During the last step on the upgrade the installation ask if you want to convert your archive to the new format, this will take a lot of time if you
have a large archive.
You can always start the convert process after the installation is done by executing:
# /opt/logserver/migrate2to3/convert.sh <src_dir> <dest_dir>
<src_dir> - the location of your 2.x logs.
<dest_dir> - the local or remote archive location.
Keep in mind that remote storage Forever will be converted to 999 months.
Web Interface
About
Most operations you perform on your op5 LogServer is done from
the web interface, including configuration.
The web interface is intuitive, and you will find a clickable question mark near many options, where you can find context–related help.
If you need information about a specific option, you should look at context–related help–popups. If you need information about how to solve
a specific task, this manual is the right place to look.
Table of Content
About
Logging In
Logging In
Point your web browser to the server you installed op5 LogServer Extension on and click the icon for op5 LogServer. That will take you to
the login window.
To log in, fill out your user name and password and click the login
button.
Default user name is "admin", and password is "admin".
Audit tracking
Audit tracking
Since version 3.5 of op5 LogServer we have included audit tracking to make sure an administrator can se what the users have been doing.
The following actions is logged:
Password and settings changes
Logging in and out
Creating, editing, deleting and viewing of auto reports
Adding, editing, deleting and viewing users and groups
Creating, editing, deleting and viewing of summary reports
Changing filter permissions
Importing logs
Creating, editing and deleting filters
Making filters global/private and viewing/changing permissions on filters
Importing/exporting filters
Exporting result sets to CSV
Everything is logged via syslog so the logs will show up in the GUI.
Two filters are added to make it easy ti either see or hide the audit messages:
Filtername
Description
audit
Shows all audit messages - useful for admins.
all except audit
Shows everyting except for audit messages. This is useful as a base for other filters, so that users don't see audit messages.
Table of Content
Audit tracking
LogServer Reports
About
The reports section of op5 LogServer has to main functions:
Auto reports: Does scheduled searches and sends them to a list of user via e-mail, or save them in a folder on your file server.
Summary reports: Gives you top 10 hosts based on hits for each filter you have access to, and create graphs (message per minute) from
global/private filters.
Table of Content
About
Auto Reports
Creating
auto reports
Auto report
Parameters
Manage an
Auto Report
Summary reports
Creating
global or
private
summary
report
Manage a
global or
private
summary
report
Auto Reports
Creating auto reports
If you wish to create an Auto report - for instance you might want a log of failed password login attempts sent to you weekly - you
should start by creating the appropriate search filter. See section Search Filters for information on how to create filters.
If you have your search filter ready and wish to us it to create a report, click Reports in the top menu, and click Add new report.
Create the appropriate search filter
Click Reports in the top menu
Fill out the parameters - see section Auto report Parameters.
Auto report Parameters
Report name
This is the name of the report you are creating. Choose a name that is descriptive - not only for your own sake, but also for
your colleagues.
Sometimes it is a good idea to use your own name as part of the report, for future reference.
Description
Brief decription of your report.
Search filter
Choose your search filter from the menu.
Recipient Type
Choose Email if you want the report to be sent via e-mail.
Choose path if you want the report tot be created on a file server. You need to mount the file share on your op5 LogServer
server in order to have a local path. See Using Remote Storage.
Email Recipients or File Path
Enter the email addresses that should receive the report (separated with comma ','), or the path in which it should be saved.
Generating Interval
Choose - Every hour, Every 6 hours, Every 12 hours, Daily, Weekly or Monthly - How often the report should be genreated.
Click "Save" when you are done filling out the fields and then your report will be created.
Manage an Auto Report
When you have created your report, it will show up every time you click Reports in the page top menu.
Edit
To edit a report
Click on the
to the right of the auto report, or double click on the row in the list.
Edit the fields you want to change and click on "Save".
Deleting
To delete a report
Click on the
to the right of the report
Click OK on the popup
Send now
You can force a send of the selected report by clicking the envelope
.
Summary reports
The global and private summary reports is used to:
Print graphs over how many logs matches a filter
Display statistics over top 10 hosts found with a filter
To be able to add or delete a report your user have to belong to the group 'Filter administrators'.
To veiw a report your user only have to belong to the 'Summary viewers' group.
Creating global or private summary report
If you wish to create a global or private summary report – for instance you might want to view the number of hits for a filter matching
incorrect ssh connections – you should start by creating the appropriate search filter.
See section Search Filtersfor information on how to create filters.
If you have your search filter ready and wish to use it to create a
report click Reports in the top menu and click Add new report.
Summary report - global
When you create global filers, summary reports for the global filter will be created automaticaly.
However, if you delete your contact or upgrade, you might have to create one manually.
Summary report - private
Choose user that the report should belong to.
Choose what private filter you like to base the report on.
Click on "Save" and your report is created.
When you have added your report it will take maximum 5 minutes until any graps is created.
Manage a global or private summary report
When you have created your report, it will show up every time you click Reports in the page top menu and then Global or Private su
mmary reports flap.
Deleting
To delete a report
Click on the
to the right of the report
Click OK on the popup
Viewing
To view a report click on the
You will see a view like this:
to the right of the report.
The view is divided in two parts:
A graph displaying number of filter matches
A top 10 logging hosts table with number of matches per host.
You can "zoom" in on the grap by selecting what timeframe you want to look at by pressing the links under the graph image.
Search
Search
To search for a message, simply type your search phrase in the search form box and press enter. You will then do a search in the full-text
search index table in the database.
Both the result table and the timebar are updated when each hour of data are searched through in the database. If you want to stop the
search just click on "Stop" just below the search text field.
A Full-text search searches in all fields of the database for words you type in.
Example: search of "connect" instead of msg="connect" will be searched in all text fields, taking more resources from the server.
If you want to define a more advanced search query you can use the op5 LogServer query language.
Table of Content
Search
Query Language
Examples:
Query Builder
Search Filters
Search
Criteria
Save your
search
query
Search
using a
saved filter
Manage Filters
Delete filter
Edit filter
Global/Priva
te filters
Auto Refresh
CSV export
Timeline Browsing
Select date
Move in time
Import
archived
data
Search Result
Modify view
settings
Columns to
display
Query Language
In op5 LogServer we have created a own Query Language to be able to do more complex searches. The usage is described below.
Column
Query
Severity
sev|severity
(=)
Facility
fac|facility
(=)
Event ID
event|event_id|eventid
(=)
Src IP
ip|src_ip|source_ip|sourceip
(=) (:) (~)
Ident
ident
(=) (:) (~)
Host
host
(=) (:) (~)
PID
pid
(=)
Message
msg|message
(=) (:) (~)
Information about descriptors:
= means 'contains'
: means 'starts with'
~ means 'matches regular expression'
For more info about PostgreSQL Regular Expression see the PostgreSQL Manual
Descriptor
Examples:
msg="connection"
will search for any message including the string "connection"
sev=(warn info) -(statistics daemon) -msg:Log -ident=sshd
Logs that have severity "warn" or "info", and do not contain words "statistics" or "daemon" in any field, and where field "msg" does not
begin with "Log", and that were not generated by "sshd"
host "192.168.1.(97|158)" -msg "^(root) CMD"
Match host 192.168.1.97 or 158 and messages not starting with '(root) CMD'
msg~"UserName:\x09([[:alnum:]$_-])*[ˆ$] "
Match msg that contains "UserName:<tab>username"and user name does not end with $
Available fields: sev, fac, event, ip, ident, host, pid, msg
Severities: emerg(ency), alert, crit(ical), err(or), warn(ing), notice, info, debug
and user-name does not end with $
Facilities: kernel, user, mail, daemon, auth, syslog, lpr, news, uucp, cron, authpriv, ftp, ntp, logaudit, logalert, clock2, local0 to local7,
mark
Query Builder
We have also created a Query builder function to make it easy for users to build their custom filters.
The Query Builder is bidirectional since op5 LogServer 3.3, meaning that it will expand your filter's criteria to the correct boxes when
selecting a filter. You can only get "OR" function in Query Builder
Enclose your text with "quotes"
Example: "User Name" "monitoruser"
Press the
located under the Search area to get a drop-down with options.
To select more than one Severity or Facility, press and hold the Ctrl-key and click to select additional items.
Enter the criteria you want to include in the search:
Enter the criteria you want to exclude from the search.
Regular expressions are not allowed in Query Builder
Search Filters
Search Criteria
When you create a search filter, you have several criteria to choose
from. Some of these apply only to Windows and some only to UNIX.
Severity
Most UNIX daemons log their messages with more than one severity – depending on the message your database server might
send a notice message or a critical message – or any of the other available messages.
Facility
This is the category of data. For instance: Your mail server daemons may log only using the mail facility and you will find most
log on failures in the auth facility. This field is part of the syslog specification.
Host
The name of the logging host.
Source IP
Displays' the IP-address of the logging host.
Ident
This is normally the name of the logging application.
PID
This is a unique Process ID for the application sending the logs.
Event ID
This is only used by Windows hosts - it is the Event ID field from Windows Event Log
Message
This is the actual log message. This is the field that is the least well defined. You may want to use this to exclude any
messages that clutter your search results.
Full text
Use these fields to specify search criteria that should be applied to all fields.
Save your search query
The basic concept for using op5 LogServer is a search filter. Similar to any database search
Fill out a number of criteria in the Search area or use the Query Builder.
Decide if you want to make the filter Global (for everyone) or Local (for yourself).
Type a name for the filter in the Save this search area.
Click Save.
The saved filter will be based on the one selected in "Search among".
Search using a saved filter
To be able to extend your search you can us an existing filter (saved search query):
Select the filter you want to search within.
Enter your search criteria. You can use a simple full text search, the query language, or the query builder.
Press Search now.
The search will now use the criteria in the Filter and the criteria you typed in the Search field.
Since the filters are organized in a hierarchical data model (a tree-like structure) you can create multiple filters in multiple levels
based on the same parent filter. Filters created from filters will become dependent on the filter out of which they were created.
Manage Filters
The user management in op5 LogServer supports making filters Global or Private (My filters) and assigning special permissions to the
filters.
Delete filter
To delete a filter, select it from the dropdown menu and press the
button.
If you want to remove a filter that has other filters based on it you must first delete the "sub filters". Otherwise the "sub filters" are left
unusable.
Edit filter
To view/edit the search criteria of an existing filter, select it from the filter dropdown menu and press the edit icon
.
You can now edit the search criteria directly in the search box or by using the Query builder.
A user can't edit Global filters unless they are member of the 'Filter administrators' group.
Global/Private filters
If you are member of 'Filter administrators' group you can view how your filter looks like and also change/assign permission to filters.
Global filter
To make a filter Global you mark it under My filters and press the
button.
Available Users/Groups: Users/Groups you can grant permission to use the selected filter.
Current Users/Groups: Users/Groups that have permission to use the selected filter
Making a filter global will also make all its parent filters global too.
When you create/manage a filter, you need to decide which users should be able to use it. Default is none.
If you want the filter to be visible for all users, us the 'All' group.
My filters
To make a filter My filters (private) you mark it under Global and press the
.
Since it's a private filter no permissions can be applied.
Making a filter private will make all its child filters private as well.
Private filters are private, filter administrators can't view your private filters.
Auto Refresh
By clicking on the Down arrow on the Search now button will allow you to set a refresh period of the page. You can set it between 30 and
300 seconds.
The Auto refresh works like the UNIX program tail, showing the last x messages,
To cancel a refresh setting, click on cancel.
CSV export
You can export the retrived data in CSV format by clicking on
The format is a | (pipe) separated list.
Depending of the user setting, see modify view settings
.
Timeline Browsing
You can move back and forth in time by using the timeline. If you go back in time and lack the data in the database you can easily import it,
see Import archived data
Select date
To be able to browse/search on a specific day/hour you have to select it on the timeline.
Select the month
Select the date
Select the hour you wish to display from
The GUI will now display the X messages, matching the search criteria within the given time. To change the number or messages
displayed, see modify view settings
Messages are by default searched from the time you selected until the last message in database.
If you select 2012-01-09 hour 17, you will be able to search on all messages between 17:00 and the last message imported into the
database.
No-day-limit or unlimited search mod is deprecated, this is now the normal behavior.
Move in time
To move in time you click the small arrows, they will move in time and display the X previoius/following messages matching the time
in the timeline.
Import archived data
Data is kept in the database only for a limited amount of time, so that archived data does not occupy uncompressed disk space and
slow down your searches.
However, the archived data is not discarded until after a much longer time. It is merely compressed and archived for possible future
access.
When you have started an import it will continue in the background so you can continue to browse your messages.
To change the time data is stored in database, see: Database Storage.
To look into very old data:
Select the date you want to import
Choose hour/day/month to import
The import process will start to import the logs that correspond to your selection. A status message in the upper left corner of the GUI
will display the status of the import:
.
A red hour number in the timeline indicates that the data is being imported
A black hour number in the timeline indicate that the import is done. The date will become gray indicating that you have logs on that
date.
The import can take alot of time depending of the amount of logs in your archive
Search Result
Modify view settings
You can change display settings, these settings will be reseted when logging out.
Number of rows returned
Click on
Select the number of rows you want to be displayed
EventID
In the search result there is a column called EventID. If the log row contains a MS Windows Event, the eventid is displayed as
a link directly to www.eventids.net. If you click on the link you will be sent to the page for the eventid in the log row.
Columns to display
To hide/unhide columns on the page.
Click on
Check/Uncheck the field(s) you want to hide/unhide
Settings
About
op5 LogServer stores the logged data in three different locations:
A local database for normal web access of latest data
Compressed archive for longer term storage on local filesystem
Compressed archive on remote file server for storage up to many years, only limited by the amount of disk space available
We recommend that you use op5 Monitor to check the available disk space on all disks used to store log data, so that you receive an alert if
disk space is insufficient.
The picture below shows how the settings page looks like. Each option will be described in the next sections.
Table of Content
About
Storage Settings
Database
Storage
Local
Storage
Remote
storage
Enable fulltext index
The monitor host
Use Monitor 5/6
Host information
page
Import filter
Export filters
Users and Groups
User
Managemen
t
Storage Settings
Database Storage
How long you wish to keep data in the database - the Rotate database After setting - depends on how much data you log. Most
organisations are happy with the default setting of 5 days, but if you log very much data you may need to store it for a shorter amount
of time, regarding performance and disk space used.
Old values will be converted if you upgrade.
Local Storage
The Local Storage Path is a setting you normally do not need to touch, unless you wish to save it on another storage unit.
The Keep archave in local storage setting with its default of 5 days regulates for how long the data will be stored in the local
filesystem on the op5 LogServer machine. After this period of time, data will be stored only on the remote file server - still accessible
but the access will be slower.
The issue is disk space; you would normally want to save data for as long as possible, without filling up the local hard disk. Keep in
mind that since the amount of logged data per day often increases over time, you need a lot of free disk space for the future.
Old values will be converted if you upgrade.
Remote storage
You should mount a remote file server in the file system on your LogServer machine. You can read more about this in Using Remote
Storage.
When you have done so, set the Remote Storage Path to the mount point - you can use /opt/logserver/remote or any other path you
choose.
If you wish to impose a time limit on the remote storage with the setting Keep Archive in Remote Storage.
During upgrade Forever will be converted to 999 months which is the maximum limit.
Enable fulltext index
In some environments full text indexing of log messages is not really a good thing.
For example if you have a lot of log messages from a firewall that contains a lot of "non-words", binary data dumps and such.
Log messages like that can hog your CPU and affect the responsiveness of the op5 LogServer system.
If you turn off the full text index, queries using full text syntax will still work but a bit slower.
The monitor host
Here you can define the hostname of your op5 monitor server that will be used in the links in the host field in the search result.
Use Monitor 5/6
Check this check box to have the links in the host field in the search result pointing to the new Ninja Gui instead of the old 4.x version.
Host information page
If you like to have an custom URL, instead of the standard URL to Monitor for the link in the host field in the search result, you can define it
here.
You still need to define the hostname in the text field The monitor host.
This can be any URL and to have the hostname added to the URL just use a [host] like in this example:
/index.php?host=[host]
Import filter
You can import already exported filters here. Just click on Browse to choose the file. Then click on Import to import the filters.
Every imported filter will be set as global with default permissions.
Export filters
Choose the filters you like to export and "move" them over from Available filters to Selected filters. Click on Export to save the XML file
containing the filters. You can then import them via the Importfilters section in Settings.
When exporting a filter that depends on an other filter both of them will be exported to make sure dependencies are untouched.
Both global and private filters can be exported and no permission settings will be included
Users and Groups
To access Users and Groups, you have to be logged on as a user with admin privileges. If you have user administrator privileges, you will
see a link called Users and Groups in the main menu at the top.
User Management
Add user
To add a new user click on
Fill in Username
Real Name
Email
Password
Repeat Password
Select the group(s) you want the user to belong to
Select the default filter to be used for the user
And press Save
Edit User
To edit a user, click on
Delete User
To delete a user, click on
and answer "OK" on the popup.
Changing password as user
When logged in to the op5 LogServer you will see your username and a logout button in the top right corner.
Pressing the username will popup a "Update password" dialogue.
Enter your old password
Type in your new password
Verify your new password by re-typing it
Group Management
As default all new created user can see all log messages. To have it the opposite way you should remove the group all from
the filter all. The you create groups for different level of users and set the permissions on the filters for the groups you created.
Default Groups
op5 LogServer comes with a couple of default groups that can't be deleted:
Group
Description
Filter Administrators
Create/Manage Global filters, Create/Manage Summary reports
Import Administrators
Import old logs from archive into DB
Report Administrators
Create/Manage Auto reports, No access to Summary reports
Settings Administrators
Access/Change Settings
User Administrators
Create/Manage Users/Groups
Summary Viewers
View Summary reports
Add Group
To add a new group click on
in the top menu
Then on the tab
And press
Fill in name
Description
Select and move the users you will assign/remove to this group
And press Save
Edit group
To edit a group, click on
To delete a group, click on
or double click on the row for the group.
and answer "OK" on the popup.
View
View
This is the first page you get to when you log in. The page is divided
into 3 sections.
Search
Timeline Browsing
Search Result
When you click on View you will see the 75 last received messages as default.
This can be changed as displayed in section: Modify view settings.
Table of Content
View
LogServer Workflow
About
This chapter describes how op5 LogServer is designed and how it transports received log data internally
Table of Content
About
Workflow
Connector
Rotate
Workflow
Workflow of op5 LogServer:
Connector
It's a Daemon (op5-logserver-loader)
Runs two times/minute
Read logs from spool directory (/var/log/oslogd/spool)
If they contain illegal char, move to Error (/var/log/oslogd/error) and stop.
Move logs to temporary archive (/var/log/oslogd/archive) and
Insert logs into database
Rotate
It's a cronjob
Runs every hour at xx.30 and put logs from the temporary archive to local and remote archives
Runs every hour, checks database and local archive for old logs and rotate (configured in settings menu)
Runs every day, checks remote archive for old logs and rotate (configured in settings menu)
Configuring LogServer Clients
Introduction
This chapter covers basic configuration of clients that can be configured to send logs to op5 LogServer.
Other Equipment
Other Equipment
Many devices - from broadband firewalls for the home to office printers - can send their logs to a syslog server.
Look at the manual for your respective devices for information on how to configure it to send logs to op5 LogServer.
Table of Content
Other Equipment
UNIX Machines
About
A UNIX machine has built-in support for syslog and hence you do not need to install any extra software.
Table of Content
About
syslogd
syslog-ng
Sending Text Files to
LogServer
syslogd
On most systems, you will find a config file callet /etc/syslog.conf - this is where you enter the host name or IP address of your op5
LogServer host.
If your op5 LogServer host is on IP address 172.16.32.64, and you want to forward all facilities to it, append the following to /etc/syslog.conf
and restart your syslog daemon:
. @172.16.32.64
Some systems do not understand . - if this is the case you have to enter all facilities separatly.
auth.*
@172.16.32.64
authpriv.*
@172.16.32.64
cron.*
@172.16.32.64
daemon.*
@172.16.32.64
ftp.*
@172.16.32.64
kern.*
@172.16.32.64
lpr.*
@172.16.32.64
mail.*
@172.16.32.64
mark.*
@172.16.32.64
news.*
@172.16.32.64
security.*
@172.16.32.64
syslog.*
@172.16.32.64
user.*
@172.16.32.64
uucp.*
@172.16.32.64
local0.*
@172.16.32.64
local1.*
@172.16.32.64
local2.*
@172.16.32.64
local3.*
@172.16.32.64
local4.*
@172.16.32.64
local5.*
@172.16.32.64
local6.*
@172.16.32.64
local7.*
@172.16.32.64
Note that on some systems, notably Solaris, the blank between the facility and the reciving host has to be made up of tabs, not spaces.
For details on how to configure syslog.conf, please refer to the manual:
man syslog.conf
syslog-ng
More and more clients uses syslog-ng for sending syslog messages to a loghost.
If you use syslog-ng you can benefit from the stability to use tcp connection instead of the standard udp.
Sample /etc/syslog-ng/syslog-ng.conf to setup logging to loghost:
all known message sources
source s_all {
message generated by Syslog-NG
internal();
standard Linux log source (this is the default place for the syslog()
function to send logs to)
unix-stream("/dev/log");
messages from the kernel
file("/proc/kmsg" log_prefix("kernel: "));
};
destination d_loghost {
tcp("172.16.32.64" port(514));
};
send everything to loghost
log {
source(s_all);
destination(d_loghost);
};
Sending Text Files to LogServer
Some applications do not send their logs to syslog, but store them in a file on disk.
Most applications can be configured to use syslog, and changing the configuration of those applications should be your first hand choice.
Another option is using tail and logger to read the log file, and sen appended lines to syslog. This command will read /var/log/myapp.log
and send it to syslog as facility daemon and severity info.
# tail -f /var/log/myapp.log | logger -p daemon.info
You can use a command like the one above for your application, and make sure it is executed in reboot - on many systems this can be
done by placing the command in /etc/rc.local.
Windows Machines
Windows Machines
To make a Windows computer send their logs to LogServer you have to download the Windows Syslog Agent from http://www.op5.com/sup
port and install it.
Windows Syslog Agent sends the Windows Event Log content to the IP address of your op5 LogServer, and can optionally send plain text
log files too – for applications that keep their own logs.
You can find the manual for Windows Syslog Agent here: http://www.op5.com/manuals/extras/op5_SyslogAgent_3.3.5_manual.pdf
Table of Content
Windows Machines
op5 LogServer Technology
About
This chapter covers the underlying technology that op5 LogServer uses to save data, and brief information of the syslog protocol.
Table of Content
About
op5 Logserver Components
Syslog-ng
Syslog-ng is the component that receives and stores syslog data.
If you want to know more about syslog-ng, havve a look at: http://www.balabit.com/network-security/syslog-ng/
Table of Content
Syslog-ng
PostgreSQL
Apache Web Server
with PHP
PostgreSQL
In op5 LogServer all data is stored in a PostgreSQL database for a limited amount of time, for easy access from the web interface and
rotated to disk after a configurable amount of time.
Apache Web Server with PHP
The web interface is written in PHP and served by an Apache web server.
op5 LogServer Storage
About
op5 LogServer has three storage facilities. Data is written to all three of these upon being received - however it is deleted according to
separate settings.
Table of Content
About
The PostgreSQL
database
Local Storage
Remote Storage
The PostgreSQL database
All messages ar initially stored in the PostgreSQL database. This is used as the default source of information for the web interface.
The data in the PostgreSQL database is deleted after a configured amount of time. See chapter Database Storage for more information.
Local Storage
Data is also compressed with bzip and saved to disk, for future reference as archived data. When you restore archived data it is fetched
from the local storage if possible, otherwise it is fetched from the remote storage.
The data in the local storage is deleted after a configured amount of time. See chapter Local Storage for more information.
Remote Storage
The remote storage has the same information as the local storage, but it is meant for saving data over a longer period of time.
Normally this is located on a file server, where it is also should be backed up.
The data on the remote storage is deleted after a configured amount of time - see chapter Remote storage for more information.
The Syslog Protocol and implementations
About
Syslog was originally written by Eric Allman as a part of his application sendmail but turned out to be so useful that it was turned into a
project of it's own in the 1980:s.
Syslog is not only a protocol, but it also refers to various syslog implementations such as the local syslog daemon that takes care of local
logging on any UNIX compatible computer.
In 2001, RFC 3164 was published as an effort to unify syslog implementations.
Table of Content
About
Usage
Usage
On UNIX, most applications send their logs to the syslog process running on the same machine. This process then either stores the messages
locally - in /var/log - or sends them to a syslog server for central storage.
All logging machines send their log data using TCP/IP to port 514 n the reciving logserver. Typically syslog uses UDP, but modern
implementations such as op5 LogServer also support TCP. Most log servers simply store this data in text files, and retrieving historical data is a
manual procedure and often impossible - unlike op5 LogServer where you have an easy-to-use grapichal interface with easy import from
archives.
sendmail was the de-facto standard email server for two decades.
RFC for syslog available at http://tools.ietf.org/html/rfc3164
Using remote storage
Introduction
op5 LogServer and it's underlying operating system op5 Appliance System gives you a variety of options to attach external storage.
This chapter will cover two of the possibilities for remote storage: Windows fileserver and NFS.
Table of Content
Introduction
Using Remote
Storage
Mounting a
Windows
Fileserver
Mounting an
NFS share
Using Remote Storage
When you use remote storage, you have to create a folder and use it as a mount point by defining it in the file /etc/fstab:
LABEL=/ / ext3 data=writeback,noatime 1 1
LABEL=/boot /boot ext3 data=writeback,noatime 1 2
devpts /dev/pts devpts gid=5,mode=620 0 0
tmpfs /dev/shm tmpfs defaults 0 0
proc /proc proc defaults 0 0
sysfs /sys sysfs defaults 0 0
tmpfs /tmp tmpfs nodev,nosuid,noatime 0 0
LABEL=SWAP-sda5 swap swap defaults 0 0
Normally, everthing in /etc/fstab is mounted on system startup. If you want to mount everything after editing, you can issue the command:
# mount -a
and if you want to check what is currently mounted you can issue the command:
# df
and mount using the commands mount and umount.
Mounting a Windows Fileserver
Add a line to /etc/fstab where the first column, the device, is the Windows path for the share you want to mount, using forward
slashes instead of backslashes.
The second column should be a path that exists where you want to mount it. If you would like to mount it on /var/remotearchive you
can create the folder by issuing the command:
mkdir -p /var/remotearchive
The third column should say cifs and the fourth, fifth and sixth should be defaults, 0 and 0 respectively.
//192.168.0.3/logs /opt/logserver/remote cifs defaults 0 0
Mounting an NFS share
If you have a UNIX environment, it is quite common to have NFS shares published from the file server using /etc/exports and then
mounted on one or several client systems.
This chapter only describes NFS since it is the most common file server system, but if you are using a more advanced file server
system – such as AFS or Coda – you can mount these just as on any other Linux system.
Add a line to /etc/fstab where the first column is the NFS server followed by a : and the path on the file server.
Let the second column be an existing path where you want the NFS share to be mounted – for this example /var/remotearchive
Let the third column be nodev,nosuid and the forth and fifth columns both be 0.
//192.168.0.3/exports/logs /opt/logserver/remote nfs nodev,nosuid 0 0
Advanced DataBase Management
Advanced DataBase Management
The original postgresql.conf file is tuned to run on low RAM machines (<3Gb RAM)
If you have a server with more than 3GB of RAM you should change the postgresql configuration to a file with larger memory settings.
Stop PostgreSQL Service
replace /var/lib/pgsql/data/postgresql.conf
with /opt/logserver/db/config/postgresql.conf
Start PostgreSQL Service
For further information, please refer to the PostgreSQL manual: http://www.postgresql.org/docs/8.3/static/index.html
Table of Content
Advanced DataBase
Management