1
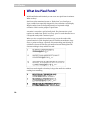
FontFlasher 1.0
for Windows/Macintosh
User Manual
FontFlasher
Copyright ©1992-2003 by FontLab, Ltd. All rights reserved.
No part of this publication may be reproduced, stored in a retrieval system, or transmitted, in
any form or by any means, electronic, mechanical, photocopying, recording, or otherwise,
without the prior written consent of the publisher. Any software referred to herein is furnished
under license and may only be used or copied in accordance with the terms of such license.
FontLab, FontLab logo, ScanFont, TypeTool, SigMaker, AsiaFont Studio, FontAudit and VectorPaint
are either registered trademarks or trademarks of FontLab, Ltd. in the United States and/or
other countries.
Apple, the Apple Logo, Mac, Mac OS, Macintosh and TrueType are trademarks of Apple
Computer, Inc., registered in the United States and other countries.
Adobe, PostScript, Type Manager and Illustrator are trademarks of Adobe Systems Incorporated,
which may be registered in certain jurisdictions.
Windows, Windows 95, Windows 98, Windows XP and Windows NT are either registered
trademarks or trademarks of Microsoft Corporation in the United States and/or other
countries.
IBM is a registered trademark of International Business Machines Corporation.
Macromedia, Fontographer, Flash and Freehand are registered trademarks of Macromedia, Inc.
Other brand or product names are the trademarks or registered trademarks of their respective
holders.
THIS PUBLICATION AND THE INFORMATION HEREIN IS FURNISHED AS IS, IS SUBJECT TO
CHANGE WITHOUT NOTICE, AND SHOULD NOT BE CONSTRUED AS A COMMITMENT BY
FONTLAB, LTD.
FONTLAB, LTD. ASSUMES NO RESPONSIBILITY OR LIABILITY FOR ANY ERRORS OR
INACCURACIES, MAKES NO WARRANTY OF ANY KIND (EXPRESS, IMPLIED OR STATUTORY) WITH
RESPECT TO THIS PUBLICATION, AND EXPRESSLY DISCLAIMS ANY AND ALL WARRANTIES OF
MERCHANTABILITY, FITNESS FOR PARTICULAR PURPOSES AND NONINFRINGEMENT OF THIRD
PARTY RIGHTS.
User manual release 1.0 [11/2003]
2
Contents
CONTENTS
3
INTRODUCTION
5
About this Manual
6
System Requirements
7
Installing FontFlasher
8
GETTING STARTED
9
What Are Pixel Fonts?
10
Using FontFlasher
12
Selecting The Source Font
Selecting The Source Font Size
Selecting The Pixel Font Size
Generating a Font
13
14
15
16
FontFlasher Preferences
18
EDITING PIXEL FONTS
19
Editing Glyphs
20
Installing Python
21
The Pixel Tool
22
Activating The Pixel Tool
Using The Pixel Tool
Editing a Glyph’s Sidebearings
Finalizing Editing Glyphs
Editing Font Info
23
24
25
26
27
Introduction
Thank you for purchasing FontFlasher 1.0 – a small professional utility
adding new features to FontLab and AsiaFont Studio.
The key features of FontFlasher 1.0 are:
• Import any installed OpenType, TrueType and PostScript Type 1 font
• “Trace” the selected font on a pixel basis and export the glyphs directly
into FontLab or AsiaFont Studio for further editing
• Pixel preview without font smoothing
• Python tool to edit pixel fonts in FontLab quickly.
FontFlasher
About this Manual
This manual covers both the Macintosh and Windows versions of
FontFlasher 1.0. We will describe the Macintosh version here in the
Manual making special note of anything specific for the Windows version.
The following chapters describe all of FontFlasher’s features in full detail.
They are organized to cover the whole process of creating pixel fonts.
Getting Started
This chapter introduces pixel fonts and covers the user interface and
functionality of FontFlasher.
Editing Pixel Fonts
This chapter explains how to modify fonts in FontLab before final output.
It provides information about Python interpreter installation and special
Python tool usage.
6
Introduction
System Requirements
The Windows version of FontFlasher requires one of the following
hardware and software configurations:
A PC computer running one of the following versions of Windows:
Windows 98, Windows ME, Windows NT 4.0, Windows 2000 or
Windows XP.
The Macintosh version of FontFlasher requires the following hardware
and software configurations:
• a Power PC based computer capable of running Mac OS 9.1 or Mac OS X
• one of the following versions of Mac OS:
Mac OS 9.1 or later classic operating system (v 9.2.2 is recommended)
with CarbonLib 1.6 or later or
Mac OS X 10.1 or later.
Since FontFlasher is a small plug-in it doesn’t need much RAM or hard
disk space.
7
FontFlasher
Installing FontFlasher
To install FontFlasher on Windows:
1.
Quit all open applications and disable any antivirus utilities that may
prevent proper installation.
2.
Run the FontFlasher Installer.
3.
Follow the on-screen instructions.
The installer will put all the necessary files into the /Program
Files/FontLab/FontFlasher directory. If you have FontLab 4.x or AsiaFont
Studio 4.x installed on your hard disk, the installer will put the special file
“Pixel.py” with Python macro tool into the /FontLab/Macros/System/Tool
directory.
To install FontFlasher on Macintosh:
1.
Quit all open applications and disable any antivirus utilities that may
prevent proper installation.
2.
Run the FontFlasher Installer.
3.
Follow the on-screen instructions.
The installer will put all the necessary files into the
/Applications/FontFlasher ƒ folder. If you have FontLab 4.x or AsiaFont
Studio 4.x installed on your hard disk, the installer will put the special file
“Pixel.py” with Python macro tool into the /FontLab/Macros/System/Tool
folder. If you have both applications installed you will be prompted with a
dialog about the place for the tool installation.
Note that you need to have enough user privileges to install software on
Mac OS X or Win 2k/XP systems.
8
Getting Started
This chapter introduces pixel fonts and discusses the usage of FontFlasher
for creating pixel fonts.
1
FontFlasher
What Are Pixel Fonts?
With FontFlasher and FontLab you can create new pixel fonts in minutes.
What are they?
Pixel fonts (also sometimes known as “Flash fonts”) are TrueType or
Type 1 outline fonts especially designed for low resolution screen display.
Regular outline fonts are designed primarily to be printed at high
resolution. This is not the purpose of pixel fonts.
A monitor’s screen has a grid of small pixels. The characters in a pixel
typeface are made from “pixels” too. Every “pixel” in each character has to
correspond exactly with a monitor’s pixel.
When you view a regular font on the screen, you see the result of the
system rasterizer’s work. Regular fonts will look fine at medium to large
sizes, 12 points and larger, especially if font smoothing (anti-aliasing) is
switched on, but as the font size gets smaller the anti-aliasing blurs the
character making it fuzzy and hard to read:
Pixel fonts are designed so that they look good at small sizes without
needing font smoothing:
10
Using FontFlasher
Pixel fonts are widely used for web page design, especially in Macromedia
Flash. In all other respects they are typical outline fonts that can be
installed on a Windows or Mac OS system without any additional software.
Generally pixel fonts can be created in any font format – TrueType, Type 1,
OpenType – but the TrueType font format is more common.
Pixel fonts are always created at some specified size (e.g. 8 pixels). This is
merely a setting of the font and not its actual size. When using a pixel font
you should always keep in mind its size. Multiplications of the specified
size will also work (e.g. 16, 24, 32 etc.) but will look pixelated at larger
sizes:
11
FontFlasher
Using FontFlasher
With FontFlasher you can create new fonts by using existing fonts installed
in the system.
The general workflow is as follows:
1.
Install the source font on the system.
2.
Run FontFlasher to generate a font in FontLab format (.vfb extension).
3.
Open the generated font in FontLab, edit it as needed and export in the
TrueType or Type 1 format.
When you start FontFlasher you will see its window:
The window contains a list of the fonts installed on the system, a set of
options and three buttons.
12
Using FontFlasher
Selecting The Source Font
To select the font that will be used for creating a new font, click on the
name in the list of the installed fonts:
Select the font style in the Style pop-up menu:
In Windows click on the style name in the font list:
13
FontFlasher
Selecting The Source Font Size
Before you create a new font, you need to set the point size for the source
font. Use the Size combobox to set the source font size:
The font will be rasterized at the selected size without anti-aliasing. When
you select different sizes in the Size field you can see the actual result in
the Preview area.
You can edit the Preview string to preview other characters:
The default preview string is set to “ABCabc123”. You can change the
default string just by typing in the field. The last typed string is saved in the
FontFlasher preferences on exit and will be used the next time you launch
FontFlasher.
The Preview area contains three strings of characters. They are not
different point sizes as you might think. The first string is actually the text
drawn at the selected point size (e.g. 12 points), while the other two strings
are just multiplications of the first one:
original string
original x 2
original x 3
14
Using FontFlasher
Selecting The Pixel Font Size
Before you begin to generate a pixel font you need to define its size. What is
the pixel font size?
The UPM (Units per eM) font size of the output pixel font is always equal
to 1000 units. Since it is an outline font the glyphs consist of contours. The
contours in a pixel font imitate screen pixels:
Unfilled contours
Filled contours
Therefore the number of such pixels that fit the font’s UPM size is actually
the pixel font’s point size.
To define the pixel font point size, use the control below the preview area:
We recommend you set the pixel font point size equal to the selected
source font point size for best results.
15
FontFlasher
Generating a Font
There are some more options in the FontFlasher window.
Open font in FontLab
Check this option if you want the font to be opened in FontLab
automatically right after it is generated. By “FontLab” we mean any
FontLab-based application capable of opening .vfb files.
Make pixels editable in FontLab (or Overlap pixels)
If you select “editable pixels” the output glyph image will consist of several
separate square contours each representing a pixel:
Unfilled contours
Filled contours
If you have the Python system installed you will be able to edit such glyphs
with the special Python tool. See the next chapter for details.
Do not set this option if you are not going to edit your font with the Python
tool.
16
Using FontFlasher
Otherwise if you check the Overlap pixels (not editable) radio button
FontFlasher will generate contours that can be edited in FontLab as usual
but will not be editable by the Python tool:
Unfilled contours
Filled contours
In Windows you have the option to select a codepage for your new font.
If you are working on Windows 2000 or Windows XP you do not need to
change the default setting:
If you are on Windows 95 or 98 you may want to choose the appropriate
codepage in the Font codepage popup list:
After you set all the necessary options, click on the Start button to generate
a font. You will be prompted with the standard system Save File dialog.
Select the destination for the font and click Save. After FontFlasher
finishes, the font is ready to open with a FontLab font editor.
17
FontFlasher
FontFlasher Preferences
On Macintosh you can customize some of the default FontFlasher settings.
This option is not available in the Windows version. Select the
Preferences command in the FontFlasher menu in Mac OS X or in the
File menu in the Classic environment. The Preferences dialog will
appear:
By default, FontFlasher searches for the server application (FontLab or
AsiaFont Studio) on local hard disks and launches it if the Open in
FontLab option is switched on. You can choose and set the server
application manually. Click on the Use selected server radio button, click
on the Select server button and choose the application in the standard
File Open dialog.
Since FontFlasher is a plugin it can be added to the FontLab’s Tools–
>External Tools menu as well.
18
Editing Pixel Fonts
FontFlasher saves the generated pixel font in a file in FontLab format (.vfb
extension). But you cannot use it yet as a font. You must open it with one of
the font editors: FontLab 4.x, AsiaFont Studio 4.x or TypeTool 2.x, and
export it in TrueType or Type 1 format. You have the option to convert this
file with TransType Pro as well.
2
FontFlasher
Editing Glyphs
Before you export the generated pixel font in TrueType or Type 1 format
you may want to check and edit the glyph contours. You can do this in
FontLab, AsiaFont Studio or TypeTool.
There are two types of glyph shapes that FontFlasher can generate:
Both can be edited in the above applications but the most convenient way
to edit the first type of glyphs is to use a special Python macro in FontLab
or AsiaFont Studio. To use this tool you must first install the Python
interpreter.
20
Index
Installing Python
Macintosh
FontLab (and AFS) for Macintosh can work only with the Carbon version
of the Python interpreter: version 2.x. First, download it from the FontLab
site (http://www.fontlab.com/html/fontlab.html provides a download link) or
from the Python site:
http://python.org/ftp/python/2.2.1/MacPython221full.hqx
or
http://www.cwi.nl/ftp/jack/python/mac/MacPython23full.hqx
After you download this file, run it and follow the instructions to install
Python. By default the installer places the “Python 2.x.x” folder in the
Applications folder under Mac OS X. Make sure you have Admin rights to
install there.
You can look for the most recent version of Python at:
http://www.cwi.nl/~jack/macpython.html
Windows
FontLab (and AFS) for Windows can work with the Python interpreter
starting from version 2.2.1. Version 2.2.3 is recommended.
First, download it from the FontLab site:
http://www.fontlab.com/html/fontlab.html
or from the Python site:
http://python.org/ftp/python/2.2.3/Python-2.2.3.exe
After you download this file, run it and follow the instructions to install
Python.
As an alternative you can use ActivePython (which is also based on Python
2.2.x but provides additional services specific for Windows):
http://www.activestate.com/Products/ActivePython/
21
FontFlasher
The Pixel Tool
Once you install the Python interpreter you can use it in FontLab.
FontFlasher has an additional component installed in the
/Macros/System/Tool folder in your FontLab folder. This component is a
file containing a special macro tool for editing glyphs in pixel fonts:
Pixel.py. How is it used?
22
Index
Activating The Pixel Tool
1.
Launch a FontLab editor and open the font file generated by
FontFlasher. If the Open font in FontLab option was switched on in
FontFlasher, then FontLab launches and opens the font automatically.
2.
Double-click one of the cells in the Font window to open a glyph for
editing.
3.
Choose the Macro command in the View->Toolbars menu to open the
Macro toolbar:
4.
Click on the Python tool selection popup button and select the Pixel
editing tool if not yet selected:
5.
Now click on the
button and you are ready to edit glyph “pixels”.
To finish using the Python Pixel tool, just select another editing tool in the
Tools toolbar.
23
FontFlasher
Using The Pixel Tool
To edit a glyph just click with the mouse cursor in the glyph editing area to
add or remove square contours representing “pixels”:
You can also press the mouse button and drag the mouse to add or remove
contours continuously.
24
Index
Editing a Glyph’s Sidebearings
To edit a glyph’s sidebearings (its left and right margins), press on one
of the red marks at the glyph’s baseline and drag it:
The sidebearings will snap to the pixel grid.
You can make the Grid layer visible by choosing the Grid command in the
View->Show Layers menu. To set the step size for the grid CTRL-click the
mouse button while the Pixel tool is active. You will see the FontFlasher
Actions dialog:
Click on the Set FontLab Grid button to set the grid step to the size of the
pixel font “pixels”. This is the same as setting the Grid step in FontLab’s
Preferences dialog.
25
FontFlasher
Finalizing Editing Glyphs
Separate square contours representing “pixels” in a glyph are good for
editing with the Pixel tool but are not what should be exported in a pixel
font. All “pixels” in each glyph should be combined and enlarged in order
for a proper font to be generated. Contours having common dots should
overlap:
To finish editing a glyph CTRL-click with the Pixel tool somewhere in
the editing field. You will see the FontFlasher Actions dialog:
Click on the Finalize Glyph button to combine and overlap the “pixels” of
the current glyph.
If you click on the Finalize Font button you will apply this operation to all
glyphs of the font and therefore prepare the whole font for export.
26
Index
Editing Font Info
Before you export your new pixel font in a system readable format you
need to set or change some font information. In FontLab (or AFS, or
TypeTool) open the Font Info dialog and set all the basic names for your
new font. Set Unicode Ranges for TrueType export and Supported
Codepages for Type 1 export. Go to the TrueType-specific settings page
and switch off the Use default export options checkbox if needed.
Close the Font Info dialog and export the font as described in the Manual
for the program you use.
27