1
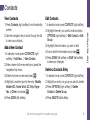
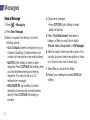
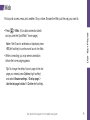
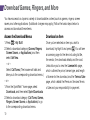
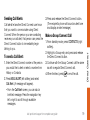
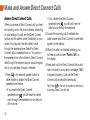
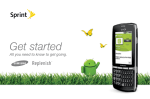
Get
Started
All you need to know to get going.
Welcome!
Sprint is committed to developing technologies that give you the ability
to get what you want when you want it, faster than ever before. This booklet
introduces you to the basics of getting started with Sprint and your
KYOCERA DuraMax.
Visit sprint.com/support for the complete User Guide, along with videos,
tutorials, and community forums for your phone.
This Get Started guide is designed to help you set up and use your new
KYOCERA DuraMax. It’s divided into four sections to help you find the
information you need quickly and easily.
Get Ready − page 1 − Find out what
you need to do before you use your
phone the first time, including inserting
a battery and activating Sprint service
on your phone.
Get the Most Out of Sprint Direct
Connect − page 16 − Learn the basics
of using Sprint Direct Connect, which
lets you connect to other Sprint Direct
Connect users with the push of a button.
Use Your Phone − page 3 − Take
advantage of your phone’s features
and Sprint services, from the basics
(making calls) to the more advanced
(taking pictures, pairing with Bluetooth
devices, and more).
Tools & Resources − page 21 − Find
useful tips for your phone and discover
resources and other helpful Sprint
information. For additional information
including the full User Guide, videos,
tutorials, and community forums, visit
sprint.com/support.
Using This Guide
Using This Guide
Your KYOCERA DuraMax
Earpiece
External
Speaker
Button
Main
Screen
Volume
Button
Softkeys
Navigation
Key
MENU/OK
Key
BACK
Key
Camera
Key
TALK Key
END/
POWER
Key
SPEAKER
Key
Microphone
Keypad
Internal
Antenna
Call List Button
Camera Lens
Flash
Headset
Jack
Speaker
Outer
Screen
micro SD
Card
(Internal)
Charger/
Accessory
Jack
LED
Indicator
Direct
Connect
Button
Internal Antenna
Battery Cover Release Latch
Install the Battery
Turn the Phone On
1.Insert the battery, contacts end first, and gently
press into place.
2.Replace the cover, making sure all tabs on the
cover align with the battery compartment slots
and press down until the cover snaps into
place.
3.Slide the battery cover release latch into the
locked position.
►►Press
Get Ready
Get Your Phone Ready
to turn your phone on.
Charge the Battery
1.Plug the USB connector into the charger/
accessory jack on the left side of your phone.
2.Plug the AC adapter into an electrical outlet.
visit sprint.com/support for complete user guide
1
Activate Your Phone
Activate Your Phone
•If you purchased your phone at a Sprint Store, it
is probably activated and ready to use.
•If you received your phone in the mail, and it is a
new Sprint account or a new phone number,
your phone is designed to activate automatically
when you first turn it on. You will see a Hands
Free Activation screen at startup. When it’s
finished, touch OK to continue. To confirm your
activation, make a phone call.
•If you received your phone in the mail and
it is going to be activated on an existing
number (you’re swapping phones), go to
sprint.com/activate and follow the instructions.
2
When you have finished, if your phone is still not
activated or you do not have access to the
Internet, contact Sprint Customer Service at
1-888-211-4727 for assistance.
Turn the Phone Off
•Press and hold
to turn the phone off.
Use Your Phone: Voicemail
Set Up Your Voicemail
Retrieve Your Voicemail
All unanswered calls are automatically transferred
to your voicemail, even if your phone is in use or
turned off. You should set up your voicemail and
personal greeting as soon as your phone is
activated:
►►Press and hold
1.Press and hold
.
2.Follow the voice prompts to create your
password and record your name and greeting.
Use Your Phone
.
From any other phone:
1.Dial your wireless phone number.
2.When your voicemail answers, press
*.
Sprint strongly recommends setting a voicemail
password. Without a password, anyone who has
access to your phone can access your
messages.
visit sprint.com/support for complete user guide
3
Phone Calls
Make a Phone Call
1.Enter a number from standby mode.
2.Press
to delete one or more digits.
3.Press
,
, or the external speaker button.
4.Press
when you are finished.
Answer an Incoming Call
•Press
to answer an incoming call.
In-Call Options
Pressing OPTIONS (right softkey) during a call
displays a list of available in-call features. To select
an option, highlight the option and press
.
•Transfer Audio to switch the call to a
Bluetooth device (if applicable).
4
•Save to save the current call’s phone number
in your Contacts.
•Contact Details to display information about
the caller stored in your Contacts.
•Main Menu to display the phone’s main
menu.
•3-Way Call to open a call with two other
parties.
•Contacts to display your Contacts list.
View Contacts
Edit Contacts
1.Press Contacts (right softkey) from the standby
screen.
2.Use the navigation key to scroll through the list
to view your contacts.
1. In standby mode, press CONTACTS (right softkey).
2.Highlight the entry you want to edit and press
OPTIONS (right softkey) > Edit Contact or Edit
Group.
3.Highlight the information you wish to edit.
4.Add or edit the information and press
.
5.Press DONE (left softkey) or SAVE (left softkey)
to save your changes.
Add a New Contact
1.In standby mode, press CONTACTS (right
softkey) > Add New... > New Contact.
2.Enter a name for the new entry and press the
navigation key down.
3.Enter the phone number and press
.
4.Highlight a number type for the entry (Mobile,
Mobile+DC, Home, Work, DC Only, Pager,
Fax, or Other) and press
.
5.Press DONE (left softkey).
Delete a Contacts Entry
1. In standby mode, press CONTACTS (right softkey).
2.Highlight an entry or a group you want to delete.
3.Press OPTIONS (right softkey) > Delete
Contact or Delete Group.
4.Press DELETE (left softkey).
visit sprint.com/support for complete user guide
5
Use Your Phone
Contacts
Messages
Send a Message
4.Compose a message.
1.Press
•Press OPTIONS (right softkey) to select
additional options.
5.Select <Add Attachment> and select a
category of files you would like to attach
(Picture, Video, Voice, Audio, or File Manager).
6.Select a location where your file is stored. (You
can also choose to take a new picture or video,
or to record a new voice or audio clip.)
7.Select files you would like to attach.
8.Review your message and press SEND (left
softkey).
> Messaging.
2.Press Send Message.
3.Select a recipient from the list or from the
following options:
•Go to Contacts to select a recipient from your
Contacts. (Qualifying Contacts entries must
contain a phone number or an email address.)
•MULTIPLE (left softkey) to select multiple
recipients. Press CONTINUE (left softkey) when
you have finished selecting and entering
recipients. (You may include up to 40
recipients per message.)
•NEW ADDRESS (right softkey) to enter a
recipient’s phone number or email address
directly. Press CONTINUE (left softkey) to
proceed.
6
To read a message
Be a hero. Don’t drive distracted.
►►When you receive a message, your phone will
Use Your Phone
display a notification message. Use your
navigation key or select View.
To reply to a message:
1.While the message is displayed, press REPLY
(left softkey).
•Select Reply to Sender, or select Reply All if
you are replying to a message with multiple
recipients.
2.Compose a reply and press SEND (left softkey).
sprint.com/focusondriving
visit sprint.com/support for complete user guide
7
Email Setup
Email allows you to stay connected 24 hours a day anywhere on the Nationwide Sprint Network. You
can set up email accounts through the email application.
Set Up an Email Account
1.Press
> Web.
2.From the SprintWeb home page, select
Messaging > Email.
3.Select Yahoo! Mail, AOL & AIM Mail, or MSN
Hotmail.
4.Use your keypad to enter the required sign-in
information for the selected provider, such as
user name, email address, or password, and
select Sign In. (Your mailbox for the selected
provider will be displayed.)
5.Follow the onscreen instructions to read, reply to,
compose, and send messages and manage
your email account.
SM
8
Web
Find sports scores, news, and weather. Shop online. Browse the Web just the way you want to.
Use Your Phone
•Press
> Web. (Your data connection starts
and you see the SprintWeb home page.)
SM
Note: If Net Guard is enabled and displayed, press
YES (left softkey) to continue and launch the Web.
•While connecting, you may see an animation
before the home page appears.
Tip: To change the default launch page to the last
page you viewed, press Options (right softkey)
and select Browser settings > Startup page >
Use the last page I visited > Confirm (left softkey).
visit sprint.com/support for complete user guide
9
Download Games, Ringers, and More
You have access to a dynamic variety of downloadable content, such as games, ringers, screen
savers, and other applications. (Additional charges may apply.) Follow the basic steps below to
access and download these items.
Access the Download Menus
Download an Item
1.Press
> My Stuff.
2.Select a download category (Games, Ringers,
Screen Savers, or Applications), and then
select Get New.
Once you’ve selected an item you wish to
download, highlight it and press
. You will see
a summary page for the item including its title,
the vendor, the download details, and the cost.
Links allow you to view the License Info page,
which outlines the price, license type, and length
of license for the download, and the Terms of Use
page, which details the Premium Services Terms
of Use and your responsibility for payment.
– or –
Select Call Tones. (The browser will start and
take you to the corresponding download menu.)
– or –
1.From the SprintWeb home page, select
Downloads, and then select Sprint Downloads.
2.Select a download category (Call Tones, Games,
Ringers, Screen Savers, or Applications) to go
to the corresponding download menu.
SM
10
1.From the information page, use your navigation
key to move the cursor over Buy. When the
cursor changes from an arrow into a hand,
press
. The item will download automatically.
When you see the NEW DOWNLOAD screen,
you have successfully downloaded the item to
your phone. (When you download a call tone,
you will not see the NEW DOWNLOAD screen.
Instead, you will see a screen giving you the
option to set the downloaded call tone as your
default.)
Note: If you have not previously purchased an
item, you will be prompted to create your
purchasing profile.
Your data session will end, and your phone
will redirect you to the appropriate phone menu
screen.
Use Your Phone
To download a selected item:
•Select Assign to assign a ringer or screen
saver to a phone function.
•Select Settings to configure downloaded
games or applications.
•Select Shop to browse for other items to
download.
•Press
to quit the browser and return to
standby mode.
2.Select an option to continue:
•Select a menu such as Run/Open/Listen/
View/Play to start the downloaded item.
visit sprint.com/support for complete user guide
11
Camera & Camcorder
Take a Picture
1.Press
> Photos & Videos > Camera to
activate camera mode.
Shortcut: To activate camera mode, you can also
.
press and hold
2.Using the phone’s main screen as a viewfinder,
aim the camera lens at your subject.
3.Press
,
, or CAPTURE (left softkey) until
the shutter sounds. The picture will automatically
be saved in the selected storage area.
•To return to camera mode to take another
picture, press CAMERA (left softkey) or
.
Record a Video
1.Press
> Photos & Videos.
Shortcut: Press
to access the Photos & Videos
menus.
12
2.Press Camcorder > Video Mail or Long Video
to activate camcorder mode.
Note: Video Mail is limited to 50 seconds if Quality is
set to Fine and 70 seconds if set to Normal.
Note: The length of a Long Video will vary
depending on the quality settings and storage
type used (phone or memory card).
3.Using the phone’s main screen as a viewfinder,
aim the camera lens at your subject.
4.Press
,
, or RECORD (left softkey) to
begin recording.
5.Press
or STOP (right softkey) to stop
recording. The video will automatically be saved
in your designated storage area.
•To return to camcorder mode to take another
video, press CAMCORDER (left softkey) or
.
1.From camcorder mode, press OPTIONS (right
softkey) > Video Settings.
2.Select an option and press
.
•Resolution to select video resolution from
QCIF (176x144) or Sub-QCIF (128x96).
•Quality to select video quality from Fine or Normal.
•Silent Movie to select On to record without
sound. Select Off to deactivate this feature.
•Cue Sound to select a cue sound (Default,
“Action & Cut,” or “Ready & Stop”).
• Auto Save to to select the storage area for the videos.
•Auto Review to select whether or not the video
is displayed for review after you finish recording.
Share Pictures and Videos Using Messaging
1.Press
> Photos & Videos > My Photos &
Videos > In Phone or On Memory Card.
2.Select your pictures or videos to send.
•Press OPTIONS (right softkey) > Select
Multiple to select multiple pictures or videos.
3.Press SEND (left softkey) > Contact.
4.Select the recipient from the list or from the
following options:
•Go to Contacts to select a recipient from your
Contacts. (Qualifying Contacts entries must contain
a wireless phone number or an email address.)
•MULTIPLE (left softkey) to select multiple
recipients. Press CONTINUE (left softkey)
when you have finished selecting and
entering recipients. (You may include up to 40
recipients per message.)
•NEW ADDRESS (right softkey) to enter a
recipient’s wireless phone number or email
address directly. Press CONTINUE (left
softkey) to proceed.
5.Compose a message.
6.Confirm the recipients, message, and pictures
or videos. (You may also select additional
options by pressing the right softkey. Follow the
onscreen instructions to add available options.)
7.Press SEND (left softkey) to send the pictures
and videos.
visit sprint.com/support for complete user guide
13
Use Your Phone
Camcorder Settings
Bluetooth
Turn Bluetooth On and Off
1.Press
> Tools > Bluetooth > On/Off.
2.Press ON (left softkey) to enable Bluetooth. Press
OFF (left softkey) to disable Bluetooth.
Pair Bluetooth Devices
1.Press
> Tools > Bluetooth > Add New.
2.Select the device you wish to pair with and
press
.
3.Enter the passkey and press
.
4.(Optional) Edit the device name and press SAVE
(left softkey).
Note: Due to different specifications and features
of other Bluetooth compatible devices, display
and operations may be different, and functions
such as transfer or exchange may not be possible
with all Bluetooth compatible devices.
14
Share Contacts, Files, or Pictures Using
Bluetooth
1.Press
> Tools > Bluetooth > Trusted
Devices.
2.Select the device from the Trusted Devices list
and press TRANSFER... (left softkey).
3.Select an item (Contacts, Photos / Videos,
Music, Files, or Calendar Events) and press
.
4.Follow the onscreen instructions to select items
to send.
5.Read the message and press SEND (left
softkey).
GPS Navigation
Note: Before using any navigation programs,
make sure your phone is set to allow location
detection.
Turn Location On/Off
1. Press
> Settings > Others > Location >
On/Off. (You will see the Location disclaimer.)
2.Read the disclaimer and press
.
3.Select On.
GPS Navigation
1.Press
> Maps > Sprint Navigation.
2.If this is your first time, follow the onscreen
instructions to enter and submit the required
registration information.
3.Select an option and follow the onscreen
instructions to get directions or view maps.
•Drive To lets you enter an address (vocally or
using the keypad) or select from categories
such as My Favorites, Recent Places, or
Businesses to search for turn-by-turn
directions.
•Search provides a categorized list of locations
such as Gas Stations, Grocery Stores, and
Hospitals to help find local businesses and
services.
•Maps & Traffic lets you view maps and get
traffic information for your current location or for
any other location (same categories as Drive To).
•Share & More provides access to additional
services such as Share Address, Record
Location, and Preferences.
visit sprint.com/support for complete user guide
15
Use Your Phone
Your phone’s built-in GPS capability gives you access to a number of location-based services.
Get the Most out of Sprint Direct Connect
Sprint Direct Connect on your Sprint phone offers instant, two-way “walkie-talkie-style”
communication between you and your family, friends, and co-workers, all at the click of a button.
®
®
Your Direct Connect Number
Your Sprint phone allows you two different
options for your Direct Connect number:
•Separate numbers (DC Only) – Your Direct
Connect number is a unique number (not your
wireless number). It is made up of three sets of
digits separated by asterisks (for example,
444*5555*111).
•A single number (Mobile+DC) – Your Direct
Connect number is the same as your wireless
number (for example, 555-555-1234).
16
Important: When the Direct Connect feature is
active, your phone’s data services are enabled
and the Net Guard feature is disabled (Settings >
Others > Data Settings > Data and Net Guard).
Display Your Direct Connect Number
►► Press
> Settings > Phone Info >
Phone#/User ID.
•If the person you are calling has a separate
number for Direct Connect, make sure you dial
any asterisks (*) in the number. If you are saving
the number in your Contacts, choose DC Only
for the phone type.
•If the person you are calling has a single
number for both voice calls and for Direct
Connect, use that ten-digit phone number to
make Direct Connect calls. You do not need to
add any asterisks (*) to the number. If you are
saving this number in your contacts, choose
Mobile+DC for the phone type.
Tip: Users with a Nextel phone must always add
asterisks (*) between sets of numbers to dial
Direct Connect numbers. If you use a single
number, make sure to tell your contacts with
Nextel phones to dial the ten-digit number using
asterisks (*) in place of hyphens (for example,
555*555*1234).
visit sprint.com/support for complete user guide
Direct Connect
Dial Direct Connect Numbers
17
Make and Answer Direct Connect Calls
Make a Direct Connect Call
Creating a Group Entry
1.Use your keypad to enter a Direct Connect
number.
•The Direct Connect number may be the
ten-digit wireless phone number of the person
you are calling (Mobile+DC).
– or –
If calling a Nextel customer, the Direct Connect
number may have three parts with an asterisk
between each part (for example: 444*5555*111).
When dialing or saving this type of number,
always include the asterisks (
).
2.Press and release the Direct Connect button on
the side of your phone.
•Pressing and releasing the Direct Connect
button “pings” the recipient. The recipient’s
phone emits an incoming tone and displays
your name or number. If available, he or she can
choose to respond and begin the conversation.
You can create a group by assigning personal
Contacts entries as members and then naming
the new group. Each group entry can contain up
to 40 members for sending messages, or up to 20
members for making Direct Connect group calls.
18
1.In standby mode, press CONTACTS (right
softkey) > Add New... > New Group.
2.Read the message and press START (left softkey).
3.Scroll through the list and press
for each
selection. A check mark will appear in the box
next to the selected entry.
4.When you have selected all the entries you
want to add, press CONTINUE (left softkey).
5.Enter a group name and press
(left softkey).
> SAVE
Call alerts let another Direct Connect user know
that you want to communicate using Direct
Connect. When the person your are contacting
receives your call alert, that person can press the
Direct Connect button to immediately begin
talking to you.
To send a Call Alert:
1.Enter the Direct Connect number of the person
you would like to alert or select a number from
History or Contacts.
3.Press and release the Direct Connect button.
(The recipient’s phone will sound an alert tone
and display an alert message.)
Make a Group Connect Call
1.From standby mode, press CONTACTS (right
softkey).
2.Highlight a Group entry and press and release
the Direct Connect button.
3.Continue with the Group Connect call the same
as with a regular Direct Connect call.
4.When finished, press
to end the call.
2.Press MSG/ALERT (left softkey) and select
Call Alert. (A message will appear).
•From the Call Alert screen, you can add a
brief text message. Press the navigation key
left or right to scroll through available
messages.
visit sprint.com/support for complete user guide
19
Direct Connect
Sending Call Alerts
Make and Answer Direct Connect Calls
Answer Direct Connect Calls
When you receive a Direct Connect call, you hear
an incoming tone or the phone vibrates, depending
on your settings. You will see the Direct Connect
number and the caller’s name (if available) on your
screen. You may also hear the caller’s voice
through the speakerphone. Default for Direct
Connect calls is speakerphone on. You can turn
the speakerphone off and listen to Direct Connect
calls through the earpiece as you would a regular
call, or you can listen through a headset.
1.Press
or the external speaker button to
either enable or disable the Direct Connect
speakerphone feature.
•If you enable the Direct Connect
speakerphone ( ), you will hear the caller’s
voice through the speakerphone on the front
of the phone.
20
•If you disable the Direct Connect
speakerphone ( ), you will only hear the
caller’s voice through the earpiece.
2.Accept the incoming call. If available, the
caller’s name and Direct Connect number also
appear on the display.
3.When the caller has finished speaking, you
will hear a tone and see “Push to Talk” on
the display.
4.Press and hold the Direct Connect button and
wait for a tone to sound and a message (“Me”)
to appear onscreen. Continue the Direct
Connect call as described previously.
Tip: Press
or the call list button to dismiss an
incoming Direct Connect call.
Helpful Sprint Information
Total Equipment Protection
The protection you need so you can be
worry free.
Total Equipment Protection is a service provided by Asurion
Protection Services, LLC, Continental Casualty Company’s (a
CNA company) licensed agent for the customers of Sprint.
Should anything happen to your phone, you’ll have
a worry-free way to ensure that you get connected
again soon.
Tools & Resources
•Coverage includes:
Loss, theft, routine maintenance, physical or
liquid damage, mechanical or electrical
problems, failure from normal wear and tear.
•For more information:
See the Total Equipment Protection brochure
available at any participating retail location
or go to sprint.com/tep for more details. To
enroll within 30 days of activation, call
1-800-584-3666.
visit sprint.com/support for complete user guide
21
Manage Your Account
Online: sprint.com
From Any Other Phone
•Make a payment, see your bills, enroll in online
billing.
•Sprint Customer Service:
Dial 1-888-211-4727
•Check minute usage and account balance.
•Business Customer Service:
Dial 1-888-788-4727
•See or modify the details of your Sprint service
plan.
•Get detailed instructions and download content.
From Your Sprint Phone
•Press
account balance.
to check minute usage and
•Press
to make a payment.
to access a summary of your
•Press
Sprint service plan or get answers to other questions.
22
Resources
Resources For Your Phone
Responsibility
•This Get Started Guide to get you up and
running.
•Web – Visit sprint.com/support for the complete
User Guide, along with videos, tutorials, and
community forums for your KYOCERA DuraMax.
At Sprint, environmental responsibility is more
than talk. We’re continuously working to reduce
our carbon footprint and decrease our use of
natural resources. To find out more, visit
sprint.com/responsibility.
Sprint 411
visit sprint.com/support for complete user guide
Tools & Resources
Dial 411 for nationwide listings, movie show times,
restaurant reservations, driving directions and
more. Spanish-speaking operators are available.
See sprint.com for pricing and details.
23
Survey
Please tell us what you think about your
new phone.
We are interested in your initial impressions
of this new Sprint phone. Within two weeks of
your phone purchase, please go to the website
http://labs.sprint.com/sprintphonesurvey to
complete a brief survey. Your feedback will help
us provide the wireless features and services
you want most.
Thank you for choosing Sprint.
24
Index
3-Way Call 4
A
Activate 2
AOL & AIM Mail 8
B
Battery
Charge 1
Install 1
Bluetooth 14
Pair Devices 14
Sharing 14
Turn On and Off 14
C
Calls
see Phone Calls
Camcorder 12-13
Camera 12
Contacts 5
Add 5
Delete 5
Edit 5
Sharing 14
View 5
D
Direct Connect
see Sprint Direct Connect
Downloading 10-11
Applications 10
Call Tones 10
Games 10
Ringers 10
Screen Savers 10
Driving Directions 15
visit sprint.com/support for complete user guide
E
Email 8
Setup 8
G
GPS Navigation 15
Location 15
L
Location 15
Turn On and Off 15
M
Manage Your Account 22
Maps 15
Messages 6-7
Read 7
Reply To 7
Send 6
MSN Hotmail 8
Multimedia Messages 13
Index
Numerics
25
Index
N
Navigation 15
GPS 15
Net Guard 9, 16
P
Phone Calls 4
Answer 4
In-Call Options 4
Make 4
Picture Mail
see Multimedia Messages
Push-to-talk
see Sprint Direct Connect
R
Record a Video 12
Resources 23
S
Settings
Camcorder 13
26
Sharing 13, 14
Bluetooth 14
Contacts 14
Files 14
Pictures and Videos 13, 14
Sprint
411 23
Customer Service 2, 22
Helpful Information 21
Service Plan 22
Store 2
Sprint 411 23
Sprint Direct Connect 16-20
Answer Direct Connect
Call 20
Dial Direct Connect Number
17
Direct Connect Number 16
Display Number 16
Make a Direct Connect
Call 18
Survey 24
T
Take a Picture 12
Total Equipment Protection 21
Transfer Audio 4
Turn the Phone Off 2
Turn the Phone On 1
V
Voicemail 3
Retrieve 3
Set Up 3
W
Walkie-Talkie
see Sprint Direct Connect
Web 9
Y
Yahoo! Mail 8
The services described in this guide may require a subscription to a service plan and/or may incur
additional charges. Not all services will work on all phones. Sprint coverage is not available in all
markets. See sprint.com/coverage for more details.
Important Privacy Message. This phone is capable of determining its/your geographical location.
> Settings >
To set controls for access and use of your location information by others, press
Others > Location. You will then have the option to select On or Off. For some applications and
services you select, a phone must be turned on and set to allow collection of location information in
order to function.
visit sprint.com/support for complete user guide
Index
©2011 Sprint. Sprint and the logo are trademarks of Sprint. KYOCERA is a registered trademark of
Kyocera Corporation. Other marks are the property of their respective owners.
27
Printed in Malaysia
5KKTF35KFNRA-