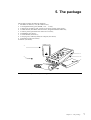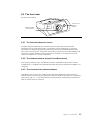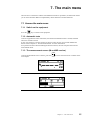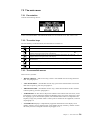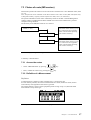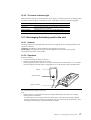
1
USER MANUAL DT SU 15 50 OR INT SENS , dBA A=60 + SDT 170 Copyright 1998 by SDT International n.v. s.a. First Edition, US English. All rights reserved: No one is permitted to reproduce or duplicate, in any form, the whole or part of this document without the written permission of SDT International n.v. s.a. The information herein is believed to be accurate to the best of our knowledge. Due to continued research and development, specifications of this product can change without prior notice. SDT International n.v. s.a. Bd. de l’Humanité 415, B – 1190 Brussels (BELGIUM) Tel: ++32.2.332.32.25 Fax: ++32.2.376.27.07 e-mail: [email protected] web page: http://www.sdt.be Contents 1. 2. Conformity statement ................................................................................. 1 The Users Manual ...................................................................................... 2 2.1 Versions ..............................................................................................................................2 2.1.1 SDT 170 M – Multifunction Version .........................................................................2 2.1.2 SDT 170 MD – Multifunction Datalogger Version....................................................2 2.2 Purpose ...............................................................................................................................3 2.3 Reading ...............................................................................................................................3 3. Warranty and responsibility limits .............................................................. 4 3.1 Warranty .............................................................................................................................4 3.2 Responsibility limits............................................................................................................4 4. Recommendations...................................................................................... 5 4.1 Usage recommendations .....................................................................................................5 4.1.1 The equipment............................................................................................................5 4.1.2 The battery pack.........................................................................................................5 4.1.3 The charger ................................................................................................................5 4.2 Operator safety....................................................................................................................6 4.3 End of life destruction of the equipment .............................................................................6 4.4 Usage limits ........................................................................................................................6 5. 6. The package............................................................................................... 7 Presentation ............................................................................................... 8 6.1 Front and back side .............................................................................................................8 6.1.1 The display.................................................................................................................9 6.1.2 The keyboard............................................................................................................11 6.1.3 The rear connectors ..................................................................................................12 6.2 The front view...................................................................................................................13 6.2.1 The internal ultrasonic sensor...................................................................................13 6.2.2 The infrared window (except S and M versions)......................................................13 6.2.3 The connector for external sensors...........................................................................13 6.3 The back view...................................................................................................................14 6.3.1 The battery pack.......................................................................................................14 6.3.2 The battery ...............................................................................................................14 7. The main menu ........................................................................................ 15 7.1 Access the main menu.......................................................................................................15 7.1.1 Switch on the equipment ..........................................................................................15 7.1.2 Automatic tests.........................................................................................................15 7.1.3 The measurement screen (M and MD version) ........................................................15 7.2 The main menu..................................................................................................................16 7.2.1 Presentation..............................................................................................................16 7.2.2 The active keys.........................................................................................................16 7.2.3 The accessible menus ...............................................................................................16 7.3 Choice of route (MD version) ...........................................................................................17 7.3.1 Access the routes......................................................................................................17 7.3.2 Definition of a Measurement....................................................................................17 Definition 17 7.3.3 Definition of a Memory Number..............................................................................18 7.3.4 Definition of a Route................................................................................................19 7.3.5 The active keys.........................................................................................................19 7.4 Visualization of the measurements (M and MD versions only) .......................................20 7.4.1 Access to the memory number .................................................................................20 7.4.2 General information .................................................................................................20 7.4.3 More detailed information........................................................................................21 7.5 Delete measurement (M and MD versions only)..............................................................21 7.5.1 Access to a memory number ....................................................................................21 7.5.2 General information .................................................................................................21 7.5.3 Visualize detailed information .................................................................................22 7.6 Parameters.........................................................................................................................22 7.6.1 Time / Date...............................................................................................................22 Table of contents 7.6.2 DISP CRTST (Adjust the displays contrast ratio)....................................................23 7.6.3 Backlighting .............................................................................................................24 7.6.4 Auto power off .........................................................................................................24 7.6.5 Language ..................................................................................................................25 7.6.6 Measurement system ISO / IMP...............................................................................25 7.6.7 Temperature unit ......................................................................................................26 7.6.8 Frequency band ........................................................................................................27 7.7 System information ...........................................................................................................28 8. Measurement display ............................................................................... 29 8.1 Type of sensor...................................................................................................................29 8.2 Time / Date / Autonomy ...................................................................................................29 8.3 The measurement ..............................................................................................................30 8.3.1 The measured value..................................................................................................30 8.3.2 The measurement units.............................................................................................30 8.3.3 The amplification level.............................................................................................30 8.4 The bargraph.....................................................................................................................31 9. Usage....................................................................................................... 32 9.1 Available Configurations ..................................................................................................32 9.1.1 SDT 170 S version ...................................................................................................32 9.1.2 SDT 170 M and MD versions: Usage without user programmed route. ..................32 9.1.3 SDT 170 MD version: : Usage with user defined routes..........................................32 9.2 Switching on the unit ........................................................................................................32 9.2.1 Self diagnostics ........................................................................................................32 9.2.2 Route selection (M and MD versions)......................................................................33 9.2.3 Amplification ...........................................................................................................33 9.2.4 Taking a Measurement ( M and MD versions only).................................................33 9.2.5 Storage (M and MD versions only) ..........................................................................34 9.2.6 Switch off the equipment..........................................................................................34 10. Recharging the battery pack ................................................................. 35 10.1 General recommendations ............................................................................................35 10.1.1 The charger ...........................................................................................................35 10.1.2 The battery pack ...................................................................................................35 10.2 The battery charger.......................................................................................................36 10.2.1 General .................................................................................................................36 10.2.2 The status indicator light.......................................................................................37 10.3 Recharging the battery pack in the unit ........................................................................37 10.3.1 General .................................................................................................................37 10.3.2 Operation ..............................................................................................................37 10.3.3 General .................................................................................................................38 10.3.4 Operation ..............................................................................................................38 11. 11.1 11.2 12. Functional Anomalies............................................................................ 40 Battery discharged ........................................................................................................40 Other indications ..........................................................................................................40 Technical specifications ........................................................................ 41 12.1 Measurement unit .........................................................................................................41 12.2 Battery pack..................................................................................................................41 12.3 Battery charger .............................................................................................................42 12.4 Internal ultrasonic sensor..............................................................................................42 12.5 Contact probe ...............................................................................................................42 12.6 External ultrasound sensors (optional) .........................................................................43 12.6.1 Open sensor 14 mm. .............................................................................................43 12.6.2 Open sensor 20 mm ..............................................................................................43 12.6.3 Closed sensor 13 mm............................................................................................43 12.6.4 Closed sensor 23 mm............................................................................................44 12.6.5 Flexible sensor – Length 550 mm - Closed sensor 13 mm ..................................44 12.6.6 Flexible sensor - Length 550 mm or 820 mm – Closed sensor 13 mm .................44 12.6.7 Magnetic sensor (BNC and SMB types)...............................................................45 12.6.8 Threaded sensor....................................................................................................45 12.7 Cables ...........................................................................................................................45 Table of contents 12.7.1 BNC to LEMO 7-pin cable - Length = 2.5 m / 8.2 ft............................................45 12.7.2 SMB to LEMO 7-pin cable – Length = 2.5 m / 8.2 ft...........................................46 12.8 Ultrasonic transmitters (optional) .................................................................................47 12.8.1 SDT 200mW transmitter.......................................................................................47 12.8.2 SDT 8 fixed power multi transmitter ....................................................................48 12.8.3 SDT 13 adjustable multi-transmitter.....................................................................49 12.9 External sensors (optional) ...........................................................................................50 12.9.1 Sound Level Meter ...............................................................................................50 12.9.2 Rotation speed measurement ................................................................................50 12.9.3 Air mass flow measurement..................................................................................50 12.9.4 Temperature measurement interface .....................................................................51 12.9.5 Light intensity meter .............................................................................................51 12.9.6 pH measurement ...................................................................................................51 13. Practical applications ............................................................................ 52 13.1 Ultrasonic waves...........................................................................................................52 13.1.1 General .................................................................................................................52 13.1.2 Operating principle of the SDT 170 .....................................................................52 13.1.3 Physical presentation of the ultrasonic sensors .....................................................53 13.2 Main application fields .................................................................................................53 13.2.1 Automotive and transportation .............................................................................53 13.2.2 Aviation and space................................................................................................53 13.2.3 Trucks and buses ..................................................................................................53 13.2.4 Rubber and tire .....................................................................................................53 13.2.5 Railroads...............................................................................................................53 13.2.6 Chemical and petrochemical.................................................................................53 13.2.7 Construction/Contracting vehicles & cranes.........................................................53 13.2.8 General manufacturing..........................................................................................53 13.2.9 Gas plants .............................................................................................................53 13.2.10 Facilities and buildings .........................................................................................54 13.2.11 Marine...................................................................................................................54 13.2.12 Materials and composites......................................................................................54 13.2.13 Pulp and paper ......................................................................................................54 13.2.14 Power plants (generation/distribution)..................................................................54 13.2.15 Textiles .................................................................................................................54 13.2.16 Food processing....................................................................................................54 13.2.17 Water waste treatment ..........................................................................................54 13.3 Main applications .........................................................................................................55 13.3.1 The bearings .........................................................................................................55 13.3.2 Coupling (alignment) ............................................................................................56 13.3.3 Barrels and bottles ................................................................................................57 13.3.4 Hydraulic circuits..................................................................................................57 13.3.5 Compressor...........................................................................................................57 13.3.6 Corona effect ........................................................................................................58 13.3.7 Gears.....................................................................................................................58 13.3.8 Tightness control (emission/reception) .................................................................58 13.3.9 Leaks (detection and localization) ........................................................................59 13.3.10 Complex reducers .................................................................................................59 13.3.11 Continuous welds..................................................................................................59 13.3.12 Valves ...................................................................................................................59 13.3.13. Vibrations .............................................................................................................59 Table of contents 1. Conformity statement Manufacturer SDT International n.v. s.a. Boulevard de l’Humanité 415 B - 1190 BRUSSELS BELGIUM Declares that SDT 170 Multifunction Detector making the object of this declaration, is conform to the fundamental description concerning security stipulated in de EMC 89/336/CEE directive. The equipment contains the logo of being compliant to the current CE regulations. To be able to operate by state of the art rules, as stipulated in the directive. It has been designed by the following rules: • The SDT 170 does not radiate electromagnetic waves (EMC); • The SDT 170 is immunized against external electromagnetic radiation (EMI); • The SDT 170 is protected against electrostatic discharges (ESD). Note: the owner is obliged to preserve the present users manual with the obligation to pass it on to future users, or been resold to an other user. Brussels, March 1998. Chapter 1 - Declaration of Conformity 1 2. The Users Manual 2.1 Versions The SDT170 is available in three versions. Depending on the needs of the customer, SDT configures the software to meet individual requirements and/or budget. The hardware configuration remains the same for all three versions. Each version can be upgraded to the version above by purchasing an upgrade license from your authorized SDT dealer This user manual describes the scope and functionality of the three versions, and indicates which functions are available with each version. To see which version is installed with your SDT 170, refer to chapter 7.1.2 for more details on how to show the implemented version on the LCD display. SDT 170 S – Standard Version The S version is designed to detect compressed air and vacuum leaks and listen to mechanical phenomena in the ultrasonic domain. The signal is displayed by means of an analog bar graph on the LCD display. This version is limited to the usage of the internal and external ultrasonic sensors. It contains no memory or storage possibilities, it has no multi-functional measurement capabilities found in the M and MD version (see chapter 12 specifications), and it cannot communicate to a PC. 2.1.1 SDT 170 M – Multifunction Version The M version contains all the functions described in the technical specifications (see Chapter 12). An internal memory is installed but its capacity is limited to 1000 points. It is possible to measure and store data in the M version, however, there is no possibility to define routes or load identification information for specific plant machinery. The M version cannot transfer its stored data to a PC. 2.1.2 SDT 170 MD – Multifunction Datalogger Version This equipment contains all the functions described in the technical specifications found in chapter 12. A dynamic datalogger is capable of memorizing approximately 15,000 measurement points. Using the software program provided, the user can create individual maintenance routes that clearly define the machines to be monitored. Each route can contain as many as 1000 points, each point clearly identified by a 10 character alphanumeric code. The SDT 170MD can transfer all measured data back to the software by means of either an RS 232 C or IRDA connection. The SDT Data Management Software will organize measured data in several formats, all definable by the user. Chapter 2 – The Users Manual 2 2.2 Purpose The Users Manual is designed as an educational guide and reference tool for anyone who wishes to use the SDT 170 equipment for its intended purposes. Inside you will find information pertaining to: • The description and functionality of the equipment; • Its many uses; • How to care for and maintain the equipment. Recommendations relative to the declaration of compliance to the European Community’s regulations, the warranty and the different area’s of applications are included into this Users Manual. SDT produces this manual with the sole purpose of supplying simple and accurate information to the user. SDT shall not be held responsible for any miss-interpretation of this manual. Despite our efforts to provide an accurate manual, it may contain technical errors beyond our control. If in doubt, contact your local SDT distributor for clarification. While every effort was made to present a true and accurate text, modifications and/or improvements to the product described herein can be made at any time without corresponding changes being made to the manual. This Users Manual and its contents remain the inalienable property of SDT. 2.3 Reading The SDT 170 can be used: - for direct measurements (versions 170 S/M/MD); for measurement and undefined data storage (170 M version) Note: No PC Communication for measurement and defined data storage (170 MD version) Note: In the MD version routes are defined by the user with a software program included with the MD system. Please refer to the Users Manual of the SDT 170 Data Management software for further details. Chapter 2 – The Users Manual 3 3. Warranty and responsibility limits 3.1 Warranty SDT International guarantees the SDT 170 unit against manufacturing faults for a period of 2 (two) years, with the exception of the battery and accessories (charger, headphones, sensors, etc.) these are guaranteed for a period of 6 (six) months. The warranty covers all material supplied and implies the free replacement of all parts that contain a manufacturing fault. The warranty does not include packing and transportation to and from the factory. These remain the responsibility of the customer. The warranty period begins on the day that the unit is delivered to the end-user, and is valid only if the warranty card is returned to SDT International directly, or via a local representative. In case of failure, the manufacturing shipment date will be used as a reference. The warranty is void if misused, or accident damages the product, if the product is altered in any way, if an unauthorized party attempts repair, or the unit is opened without written authorization of SDT International. In the event of a defect, contact your local SDT representative or SDT International. 3.2 Responsibility limits. Neither the company SDT International, nor any related company, will in any circumstances be liable for any damages, including, without limitation, damages for loss of business, business interruption, loss of information, defect of the SDT 170 unit or its accessories, bodily harm, loss of time, financial or material loss or any other indirect or consequential loss arising out of the use, or inability to use this product, even when it has been warned of possible damages. Chapter 3 – Warranty and responsibility limits 4 4. Recommendations 4.1 Usage recommendations This Users Manual must be read carefully and completely prior to anyone using the equipment. 4.1.1 The equipment • • • • Can be used alone, or in combination with an external sensor or an adapted ultrasonic transmitter (SDT 8 for example); Must be used outside of any classified zone, by the fact of the absence of intrinsic security certificate or not being explosion proof; Must not be submerged in liquids of any kind. Caution should be used to ensure that airborne ultrasonic sensors are kept dry and clean. In situations where high levels of dust and moisture are present use environmentally sealed sensors which are designed for harsh applications. All sensors must be used within the temperature range and humidity limits outlined in the technical specifications; Can be used with the battery charger connected. When operating the equipment in this way the user must respect normal precautions for equipment under main’s power supply (proper power source, voltage, amperage, condition of the cables, etc…). 4.1.2 The battery pack • • • • Contains MiMH type batteries (Nickel Metal Hydrate, operating voltage 7.2 V). Short circuit of the battery pack’s connections can be dangerous; Must not be thrown into a flame or fire; Must be protected from any mechanical shock that can lead to a rupture of the battery pack’s outer casing, that can compromise the life of the batteries; Must be recharged at least every 3 (three) months when not used for long periods of time. 4.1.3 The charger • • Contains no user serviceable parts, and must not be opened by the user for any reason. Must not be subjected to water or used in humid environments. Chapter 4 - Recommendations 5 4.2 Operator safety The operator must take all necessary precautions when using the equipment in high risk area’s (sound levels, high light and radiation levels, extreme temperature conditions, chemical corrosive elements, etc…). The user must be particularly vigilant when entering enclosed zones (holds, silos) where a risk of asphyxiation or lack of oxygen is possible. 4.3 End of life destruction of the equipment When the equipment becomes obsolete, the internal battery pack must be removed from the equipment, and must be disposed of in a such a way that conforms to the environmental laws of the country. The outer casing and other internal components may be destroyed by the appropriate specialized organizations. Local laws take precedence over this text, and must be scrupulously respected. 4.4 Usage limits This multifunctional equipment is designed on one hand, as a detector of ultrasonic sound waves, and on the other hand as a measuring device when connected to specific sensors. In the domain of: • In the detection of transmitted ultrasonic waves, the equipment will function with its internal ultrasonic sensor, or with an external ultrasonic sensor. In the context of being used in a transmitter/receiver application as described in the chapter ‘Applications’, the equipment functions in combination with an ultrasonic transmitter (200 mW, SDT 8 or SDT 13). • In the measurement of different physical magnitudes, the equipment functions in combination with a specific sensor (temperature, air mass flow, RPM, Light intensity, pH, etc…). Please read this users manual carefully, and file it in a safe place for future reference. All suggestions and warnings must be followed in order to maximize the value of your investment. Chapter 4 – Recommendations 6 5. The package The package contains the following elements: 1. The SDT 170 detector, in S, M or MD version; 2. A rechargeable battery pack (NiMH, 7.2 V – 1.3 Ah); 3. A charger for the battery pack, specific to the power supply of the country; 4. A rubber holster (blue Fluor-silicone holster, wrapped around the SDT 170); 5. A contact probe (optional for the SDT 170 S version) ; 6. A headphone (not shown) ; 7. A Users Manual (not shown) ; 8. A carrying case, with inlay foam, for transport (not shown). 9. Localization probe (not shown) 10. Punch (not shown) 3 SDT M 1 M 5 4 2 The SDT 170, contact probe, battery, and charger. Chapter 5 – The package 7 6. Presentation The SDT 170 is a measurement instrument designed for predictive maintenance and quality control. It combines technology with simplicity and versatility. A diverse selection of sensor options makes it a multifunctional solution answering all the needs of industry. The SDT 170 not only detects pressure and vacuum leaks, it is also capable of quantifying the leak by means of a mass air flow sensor. Mechanical wear and lubrication failure, contact and non-contact temperature measurement, rotation speed (RPM), noise level (dBA), water tightness testing, light intensity (LUX), and pH (acidity) are examples of the systems multi-functionality. 6.1 Front and back side Presents itself as follows: S U DT Display Keyboard M M+ Strap carrying rings Holster Battery charger connector Communication connector Headphones connector The visible elements on the front and bottom of the SDT 170. Chapter 6 - Presentation 8 6.1.1 The display The LCD display contains different icons that indicate the functional mode of the equipment, the context and/or the type of sensor connected. The locations are as follows: SDT 170 M AND SDT 170 MD VERSION 7 8 9 1 2 3 4 5 6 Primary icon locations on the display of the SDT 170 M and SDT 170 MD versions. The display is composed of the following icons: Location 1 2&3 Associated function Sensor Amplification adjustment indicators. 4 5 Bar graph. Peak and hold maximum signal indicator. 6 Measurement value. Remarks Type of sensor used / connected. Only for ultrasound (dBµV) and sound level (dBA) measurements. Visual indications of the measured value. This indicator shows the maximum signal detected and resets itself after approximately 2 seconds. The lines are replaced with a measured value + 7 Battery level indicator. 7 Time (Hour) 7 Date 8 9 Unit of measurement. Complementary information. when the key has been pressed. This key is only used when measuring dBµV and dBA. 100% corresponds to a fully charged battery. Display alternates between time, date, and load. Current time. Display alternates between time, date, and load. Current date. Display alternates between time, date, and load. Depends on the connected sensor. See further. A = amplification value in dB (ultrasound). Chapter 6 - Presentation 9 SDT 170 S VERSIONS 5 1 2 3 4 The orientation of the main icons on the SDT 170 S version. The display is composed of the following icons: Location 1 2 3 4 5 Associated Function Sensor. Bar graph. Indication of the maximum measured signal. (peak value) Complimentary information. Date Remarks Type of sensor connected. Visual indication of the measured vales. The scale (-10 → 70) gives a visual idea about the amplitude strength of the measured signal. This indicator resets itself after approximately two seconds. A = amplification level used in dB (ultrasound). Display alternates between time, date, and battery load Chapter 6 – Presentation 10 6.1.2 The keyboard The keys correspond to the following functions Key Associated Function Access to the menus (first press) or return to the measurement (second press). Upward movement of the selector. Increment of the displayed information. Downward movement of the selector Decrement of the shown information. Storage of the shown (measured) value (except for the S version). Measurement peak and hold key. (except S version) Acceptance of the choice (except S version). Activate backlighting. On – Off switch. Remarks See § 7.2. Use to toggle through the menu options. Use to select a number in a route, the memory point, the time, the date, the level of amplification (dBµV and dBA only), etc. Same as above. Same as above. - Is only available when a valid measurement has been take, by pressing the + key. - The measured value is stored on the position selected on the datalogger, - Only used when measuring ultrasound and noise levels (dBµV and dBA) - Used to accept a shown selection. - Press the key to switch on the backlight The backlighting switches off automatically if the no buttons are used within a predefined period of time. - Pressing the key again switches off the backlight. - First key press: switch on the unit. - The unit switches off automatically if no buttons are touched on the keypad within a pre-defined period of time. - Second key press: switch off the unit. Chapter 6 - Presentation 11 S U DT 6.1.3 The rear connectors This figure represents the location of the connectors. Charger connector Communication/expansion connector Headphone connector Connectors on the bottom of the equipment. The battery charger connector This 3-pin connector is used to make the connection with the battery charger provided with the SDT 170. Due to the active interaction between the charger and the battery/equipment, only this charger can be used to charge the batteries. Connecting another charger will do serious damage to the equipment and void the warranty. The communication/expansion connector This 8 pin connector permits a connection to a PC by means of a RS 232 C type connection. This is used to download measurements to a PC. This port is also used to upload new software to the SDT 170. These functions are described in the SDT 170 Data Management software manual. The headphone connector The supplied headphones are connected to the SDT 170 in order to listen to the converted ultrasounds. Chapter 6 – Presentation 12 6.2 The front view Presents itself as follows: Connector for external sensors Infrared window Internal sensor The visible elements on the front side of the equipment. 6.2.1 The internal ultrasonic sensor The SDT 170S, M, and MD all have an internal sensor for detecting airborne ultrasonic phenomena such as compressed air leaks, vacuum leaks, and corona discharge. It is directly connected to the internal components and protected by the sturdy extruded aluminum housing. This sensor is not waterproof. Precautions must be taken to protect the sensor from humidity and projections of liquids. Different waterproof sensors are available to be connected as external sensors. See Chapter 6.2.3 for more information. 6.2.2 The infrared window (except S and M versions) This window permits the unit to communicate by means of the IRDA mode (wireless infrared communication, 115 kBaud) with equipment that permits this kind of communication (IRDA V1.0 compliant). 6.2.3 The connector for external sensors Depending on the version (S, M, or MD) you have purchased, additional external sensors are available which can measure several phenomena (ultrasonic, RPM, air mass flow rate, temperature, light intensity, pH, etc…). The internal airborne ultrasound sensor is automatically disconnected when an external sensor is connected. Chapter 6 - Presentation 13 6.3 The back view Permits access the battery pack: Battery pack Battery pack locking catch. Visible elements of the backside of the equipment. 6.3.1 The battery pack The battery pack can be removed after unlocking the locking catch. This is done by shifting the locking catch towards the front of the equipment (in the direction of the internal airborne ultrasound sensor). 6.3.2 The battery The batter is a NiMH type (Nickel Metal Hydrate; operating voltage 7.2 V). It is specific to the equipment. Chapter 12.1 presents the general characteristics of the battery pack. Chapter 10 explains how to recharge the battery pack. Chapter 6 – Presentation 14 7. The main menu After the unit is switched on and has concluded the internal test procedure, the main menu allows you to choose between different complimentary menus and their associated functions. 7.1 Access the main menu 7.1.1 Switch on the equipment Press the key to switch on the equipment. 7.1.2 Automatic tests Once the equipment has been switched on, the build in automated self-test is started, and takes about two seconds to finish. In case of a problem, a specific message is shown to warn the user of a possible malfunction. Please refer to Chapter 11 ‘Functional Anomalies’ for more information. If no problem or fault is detected during the build in self-test, the unit will place itself into the measurement mode. 7.1.3 The measurement screen (M and MD version) Once the measurement screen is shown, press the next Chapter. to access the main menu. Continue on the Measurement screen (SDT 170 M and MD versions) Measurement screen (SDT 170 S version) Chapter 7 – The main menu 15 7.2 The main menu 7.2.1 Presentation Contains the following choices: Main menu. The menu ROUTE CHOISE is only in the SDT 170 MD version accessible. The menus VISUALISE MEAS. and ERASE MEAURE. are not available in the SDT 170S version 7.2.2 The active keys The activated keys in the main menu, and sub menu are contexts are: Key Function Return to the measurement function Select one of the menu lines by moving the inverted line upwards, only when the sign is displayed in the upper right corner of the display. Select one of the menu lines by moving the inverted line downwards, only when the is displayed in the lower right corner of the display. Enter, validates the choice (the inverted line). Continue on the paragraph relative to the selected choice. Activates the backlight. This key is available at any time. See paragraph 7.6.3. Switch of the equipment. This function is always available. 7.2.3 The accessible menus There are five (5) menus: • ‘ROUTE CHOICE’ : (MD version only) Select a user-defined route for storing measured data. See paragraph 7.3. • ‘VISUALIZE MEAS’ : (M and MD versions only) preview the measurements stored in the data collector point by point. See paragraph 7.4. • ‘ERASE MEASURE’ : (M and MD versions only) delete measurements stored in the data collector point by point. See paragraph 7.5. • ‘PARAMETER’ use this menu to adjust time and date of the internal real time clock, set the LCD display’s contrast, define the displays backlighting timer, auto power down timer, select the language, type of measurement system, unit of measurement relative to temperature and frequency range (only available when a contact probe is attached to the equipment). Continue on paragraph 7.6. • ‘SYSTEM INFO display’s complementary equipment information on the display: serial number, software version, language used, serial number and type of battery, number of times the battery has been recharged. Continue on paragraph 7.6.8. Chapter 7 – The main menu 16 7.3 Choice of route (MD version) This function permits the selection of one route from a maximum of 15 user definable routes (from 1 to 15). Note: this function is not available on the SDT 170 M version. This version (SDT 170 M) has only 1,000 points memory capacity, numbered from 0 to 999 (route 0, or bulk route). The specific information of the routes is defined by means of the SDT 170 Data Management software which is included with the SDT 170MD version and can be installed on a personal computer running Windows . The hierarchy of the MD Data Collector is as follows: Measurements (the last four measurements taken with any type of sensor connected to the equipment – number of measurement depending on the amount of memory). Route (1 →15) Memory n° 0 Measurements (the last four measurements taken with any type of sensor connected to the equipment – number of measurement depending on the amount of memory). Memory n° 999 max The hierarchy of the different storage levels. A summary is defined below. 7.3.1 Access the routes • Select ‘CHOIX ROUTE’ by pressing • Enter, validate the selection by pressing the or key. key. 7.3.2 Definition of a Measurement Definition A measurement is a numerical value (example 250 °C) stored in the unit. For each memory number, the last four measurements are stored (numerical values) and are retrievable any time regardless of the sensor type used. The internal memory capacity of the equipment permits storage of up to 15,000 time dated measurements of any sensor type. The last four measurements are stored in the equipment. Chapter 7 – The main menu 17 7.3.3 Definition of a Memory Number Definition A memory number is an electronic page where data from any of the sensors is stored. For each route, a maximum of one thousand independent storage locations, numbered from zero to 999, are available. For each storage location the 170 stores the data (measured value, unit, type of sensor used, time and date) of the last four measurements made. The memory works on the theory of first in first out, so the fifth oldest measurement is automatically deleted. Usage A memory number is generally attached to a physical location. For example, ‘workshop 3 – waste water return pump’ could define memory location one. For each memory location (the physical location in reality), the user defines the type of sensor to be used. In this example the ultrasonic sound level on the front pump bearing and the pumps rotation speed and temperature is to be measured. For each memory location (measurement point) a label can be defined and uploaded from a personal computer in the SDT 170’s memory (MD version only). See the corresponding user manual of the SDT Data Management software for more information. .1.1.1.1.1 Memory location No. 2 Measure T° (n) Measure dBµV (n-1) Measure RPM (n-2) Measure dBA (n-3) In this example, on memory location number 2, four measurement type have been done (T°, dBµV, RPM and dBA). Chapter 7 – The main menu 18 7.3.4 Definition of a Route Definition A route consists of several different physical locations that are to be monitored with the various sensors available to the SDT 170M equipment. The order and sequence of these locations are defined by the user, and mapped out within his SDT Data Software package. Once a route is defined on the PC, it can be uploaded to the SDT 170 device by means of the IRDA link or the RS232 interface. Up to fifteen independent routes can be stored in the unit at once. The tasks of the user is thus perfectly defined and simplified. No measurement is forgotten, or stored in the wrong memory location. Usage The routes are defined and transferred in the equipment by the means of a specific SDT 170 Data Management software installed on a personal computer. The conventions are: - Route 0: Is a non predefined route, and gives the possibility to the user to store an optional, or non planned measurement or control point as needed. This route is also called a bulk route. • Routes 1 to 15 (MD versions only): Predefined and uploaded routes from a personal computer. Example of the utilization of routes and memory numbers Route NR 1 2 Memory NR 1 Measurement to be taken - Ultrasonic level, front bearing of pump - RPM speed of pumps bearing - Temperature of pumps bearing 2 - Ambient noise level of workshop 3 - Oven temperature (without contact) - Lighting level. 4 - Tightness of valve - Temperature - RPM speed 1 - Mechanical wear of pulley 4 - Noise level of ventilator - RMP speed of ventilators motor 5 - Tightens incoming gas valve 8 - RPM speed of centrifugal pump 7.3.5 The active keys Key Function Return to main menu without validating the changes (escape). Increases the route number. Decreases the route number. Enter, validate the selected route number and return to the main menu. Chapter 7 – The main menu 19 7.4 Visualization of the measurements (M and MD versions only) Note: it is advised to have knowledge of the information shown in chapter 8. This function permits the user to display, for a given memory number, the stored memory contents (four last values only). 7.4.1 Access to the memory number • Enter ‘VISU MESURE’ by pushing the key. • When a new screen is shown, select the memory number by pressing the Keep pressing the key to auto increment/decrement the memory number. • Enter, validate the selected memory number by pressing the • Return to the other menu (escape) by pressing the or key. key. key. 7.4.2 General information When no data is stored on the selected memory location, the display responds with ‘No measurements available”. Press the key to return to the previous screen. When at least one measurement has been stored on this memory location, the following similar display will be shown: Memory number Measurement number Date Measured value Measurement unit Date of measurement Example of the “SHOW MEASUREMENT” display. Active key’s Key Function Return to main menu (by successive key-presses). Move the inverted selection line upwards. The first number is the last measurement made. Move the inverted selection line downwards. The last number is the first measurement made. Enter, validate the selected memory number. This allows you to see more details about the measurement (see next paragraph). Chapter 7 – The main menu 20 7.4.3 More detailed information When a particular measurement has been selected, press the following information: key. The display will show the Memory number and measurement number selected Current time and date, charge left in the battery. Sensor type Time when measurement was taken Measurement unit Date measurement was taken Measured value Example of a display shown when detailed information of the measurement is recalled. Active key’s Key Function Return to the main menu (with successive key-presses). Return to the general information menu. 7.5 Delete measurement (M and MD versions only) For the usage of the keyboard, please see paragraph 7.2.2. Permits the user to delete one of the four measurements previously stored on the selected memory number. Only one measurement can be deleted at a time, simultaneous deletion of multiple measurement is not allowed. 7.5.1 Access to a memory number • Select ‘EFFAC MESURE’ and press the to enter the function. • When the new screen appears, select the memory number by pressing the Hold the key to rapidly increment/decrement the memory number. • Enter, validate the selected memory number by pressing the and keys. . 7.5.2 General information When the selected memory number is empty, the message “No measurements available” is shown. When the selected memory number contains at least one measurement, the following similar screen is shown. Time, date and battery condition (alternating) Memory number Measurement number Measurement unit Date of measurement Measured value Display example relative to ‘ERASE MEASUREMENT’. Chapter 7 – The main menu 21 Active keys Key Function Return to the previous menu / main menu (by successive key-presses). Move the inverted selection line upwards. The first number is the last measurement made. Move the inverted selection line downwards. The last number is the first measurement made. Enter, validate the selected memory number. This allows you to see more details about the measurement to be deleted (see next paragraph). 7.5.3 Visualize detailed information When a particular measurement has been selected, press the following information: Memory number shown key. The display will show the Measurement number Time, date and battery condition (alternating) Type of sensor used for measurement Date of measurement Measured value and measurement unit. Command to erase Command not to erase Time of measurement Relative example of detailed information to erase a measurement. Active keys Key Function Return to previous menu / main menu (by successive key-presses). Erase the selected measurement. 7.6 Parameters For the operation of the keys, refer to paragraph 7.2.2. 7.6.1 Time / Date This function allows the adjustment of time and date. The display will show a screen similar to the one below: Display example that permits to change the time and date of the units internal real time clock. Chapter 7 – The main menu 22 Active keys Key Function Return to the parameter menu, without taking into account eventual changes. Increment the inverted field. Hold key for auto increment. Decrement the inverted field. Hold key for auto decrement. + Go to the next field to be modified. Enter, validate values, and return to the options menu. 7.6.2 DISP CRTST (Adjust the displays contrast ratio) This function permits to change the displays contrast ratio. The display will show a screen similar to the one below: Screen example when changing the displays contrast ratio. A contrast ratio of 75 % is ideal at room temperature. Increasing the value darkens the display, decreasing the value brightens up the display. Active keys Key Function Return to the parameter menu, without taking in to account eventual changes. Increases the contrast ratio. Hold key for auto increment. Decreases the contrast ratio. Hold key for auto decrement. Enter, validate the adjusted contrast ratio, and return to the options menu. Chapter 7 – The main menu 23 7.6.3 Backlighting This function adjusts the amount of time before the backlight automatically switches off to save the battery pack’s power. The backlighting accounts for about 40 % of the power consumption of the unit. The backlighting timer restarts each time a key is pressed. When no key is pressed for the preprogrammed time, the backlighting will switch off automatically. The display will show a screen similar to the one below: An example of the screen that permits the adjustment of the backlighting timer. The auto power off timer is adjustable between 1 and 100 seconds. Active keys Key Function Return to the parameter menu, without taking in to account eventual changes. Increases the backlighting timer. Hold key for auto increment. Decreases the backlighting timer. Hold key for auto decrement. Enter, validate the adjusted backlighting timer’s value, and return to the options menu. 7.6.4 Auto power off This function adjusts the time before the unit switches off power automatically to save the battery pack’s power. The auto power off restarts each time a key is pressed. When no key is pressed for the pre-programmed time, the unit will switch off power automatically. The display will show a screen similar to the one below: An example of the screen that permits the adjustment of the auto power off timer. The auto power off timer is adjustable between 1 and 100 minutes. Chapter 7 – The main menu 24 Active keys Key Function Return to the parameter menu, without taking in to account eventual changes. Increases the auto power off timer. Hold key for auto increment. Decreases the auto power off timer. Hold key for auto decrement. Enter, validate the adjusted auto power off timer’s value, and return to the options menu. 7.6.5 Language This function permits the user to change the language of the messages on the display. The display will show a screen similar to the one below: Screen example when changing the language. Active keys Key Function Return to the parameter menu, without taking in to account eventual changes. Move up the inverted language selector. Move down the inverted language selector. Enter, validate the selected language, and return to the options menu. 7.6.6 Measurement system ISO / IMP This function defines the unit system that is used for the measurements: • ISO: The measurements will be done in the ISO (METRIC) system. The mass flow sensor will read in SCCM (Standard Cubic Centimeter per Minute). Pressure will read out in Bar. Light intensity will read in Lux. Temperatures will read in degrees Celsius, or in degrees Kelvin depending on the setting, see paragraph 7.6.7. • IMPERIAL : The measurements will display the English imperial measurement system. The mass flow sensor will read in SCFM (Standard Cubic Foot Minute). Pressure will read in PSI. Light intensity will read in Foot Candle. Temperature will read in degrees Fahrenheit or in degrees Rankine depending upon the setting, see paragraph 7.6.7. The display will show a screen similar to the one below: Example of screen that permits to change the measurement system. Chapter 7 – The main menu 25 Active keys Key Function Return to the parameter menu, without taking in to account eventual changes. Move up the inverted measurement system selector. Move down the inverted measurement system selector. Enter, validate the measurement system, and return to the options menu. 7.6.7 Temperature unit This function defines the measurement system used for temperature measurement. You can either use the normal temperature scale, or a temperature relative to absolute zero. This selection is done in combination with the ISO/Imperial selection, see paragraph 7.6.6: • CELCIUS / KELVIN: in the ISO/METRIC system, one of both scales can be used. See paragraph 7.6.6. • FAHRENHEIT / RANKINE: in the English Imperial system, one of both scales can be used. See paragraph 7.6.6. The display presents itself as follows (when the ISO/METRIC system is used): Example of the shown screen when selecting the temperature scale to be used. Active keys Key Function Return to the parameter menu, without taking in to account eventual changes. Move up the inverted measurement scale type selector. Move down the inverted measurement scale type selector. Enter, validate the adjusted contrast ratio, and return to the options menu. Chapter 7 – The main menu 26 7.6.8 Frequency band This function is only accessible when a contact probe is plugged into the unit (by means of the external sensor connector). The user can select one of three operating modes, depending on the application (See chapter “Applications” for more information on when and how to use these frequency bands). SLOW MEC = Slow mechanical movements (most sensitive). MEC = Normal mechanical movements. US = For the detection of internal leaks. Example of the shown screen when selecting the measuring frequency band for the contact probe. Active keys Key Function Return to the parameter menu, without taking in to account eventual changes. Move up the inverted contact probe frequency band selector. Move down the inverted contact probe frequency band selector. Enter, validate the selected contact probe frequency band, and return to the options menu. Chapter 7 – The main menu 27 7.7 System information For the operation of the keys, refer to paragraph 7.2.2. This function permits the visualization of the system information and is a sequence of three consecutive screens: • Information Numbers: It consists of information relative to the type of equipment, serial number of the unit, and contains information relative to the equipment version, and software version and copyright message. Explanation of displayed system information. Complimentary information screen 1: starting from the previous display, press the key. The display will show information relative to the internal electronics and system software. This information is only useful to a service engineer in case of a problem. Example of the complementary information screen 1. key. Complimentary information screen 2: starting from the previous display, press the The display will show information relative to the selected language, serial number and type of battery, and the amount of capacity left in the battery pack as well as the number of battery recharge cycles done. Serial number of the battery pack Nominal capacity of the battery pack Number of recharge cycles done with the battery pack Remaining battery capacity in % Example of the complementary information screen 2. Active key Key Function - First key press: show the equipment’s serial number, version, and software revision. - Second key press: battery pack information. - Third key press: return to the main menu. Chapter 7 – The main menu 28 8. Measurement display Once the unit is powered up, the display shows the following information specific to the connected sensor (type of sensor, unit of measurement), as well as common information (time, date, and battery power). 8.1 Type of sensor The type of sensor is displayed at the upper left corner of the display. The system auto recognises externally connected sensors and switches to the corresponding function. Display example of sensor type connected. 8.2 Time / Date / Autonomy This information is cycling on the upper right corner of the screen. The format of the displayed time and date depends on the type of language used. The remaining capacity in the battery is expressed in % at the upper right corner of the display right of the battery icon. The amount of blackening corresponds to the remaining capacity of the battery. Example of battery capacity remaining. Chapter 8 – The measurement screen 29 8.3 The measurement Using the internal sensor for airborne ultrasonic detection is described in chapter 9. 8.3.1 The measured value The measured value is shown in the middle of the screen. It should be remembered that for each key memory number the last four measurements can be recalled at any time, by pressing the and selecting the ‘VISU MESURE’ menu. Refer to paragraph 7.4 for more details on this operation. Example of the display (M and MD versions). 8.3.2 The measurement units The measurement units are shown on the right side of the display. 8.3.3 The amplification level This is displayed when using ultrasound sensors only. The amplification level (‘A’ symbol) can be increased by pressing the key or decreased by pressing the key. The optimum adjustment of the amplification level is assisted by means of the arrows located on the left side of the screen. • The symbol indicates that the amplification level is to low, and that a higher amplification level should be selected. • The symbol indicated that the amplification level is to high, and that a lower amplification level should be selected. The displayed arrows can be used to guide the operator when adjusting the amplification. Optimum amplification is reached when no arrows are shown on the display. The table shown below indicates the correlation between the amplification level in dB and the absolute amplification value. A in dB Gain (x) 10 3 20 10 30 30 40 100 50 300 60 1 000 70 3 000 80 10 000 Chapter 8 – The measurement screen 30 8.4 The bargraph Situated on the lower side of the display, it graphically illustrates the amplitude of the measured signal. While measuring, an indicator line shows the peak value measured. Every two seconds, the peak and hold indicator is reset. Instant value Peak value Maximum allowed value The bargraph and its peak and hold indicator. Chapter 7 – The main menu 31 9. Usage This chapter discusses using the unit with the internal sensor or any external sensor. Measurements can be taken with or without using pre-defined routes. (see paragraph 7.3 for more information). 9.1 Available Configurations 9.1.1 SDT 170 S version This version is limited to the usage of either internal or external ultrasonic sensors. The S version has no ability to memorize values. 9.1.2 SDT 170 M and MD versions: Usage without user programmed route. Data can be stored into a so-called bulk route (route 0). This route cannot be pre-defined by the user. (See paragraph 7.3.3. and 7.3.4 for more information on route defining). The M and MD versions have the full range of multi-functional sensors available. 9.1.3 SDT 170 MD version: : Usage with user defined routes Data can be measured and then stored onto a predefined route. A route must first be mapped out with the SDT 170 Data Management software, and then uploaded to the SDT 170MD. Refer to the software manual for more information on building a route. The measurement will be stored onto the route selected by the user (see paragraph 7.3.4). All information can be transferred onto a personal computer. 9.2 Switching on the unit Press the key to switch on the unit. 9.2.1 Self diagnostics Once the unit is switched on, the unit performs an internal diagnostics. This takes about two seconds to complete. If the self test fails the unit will show a specific message to the user (see chapter 11 for more information). Chapter 9 - Usage 32 9.2.2 Route selection (M and MD versions) No user defined route The measurements must be stored in the so-called bulk route (route 0). When another route is to be used please refer to the next paragraph. Pre-programmed route (MD version only) • From the measurement screen, press the key to select the main menu, followed by the key to validate the route menu selection. and keys. Enter, validate by pressing the • Select the route by pressing the key. • Return to the measurement screen by pressing the key. 9.2.3 Amplification This function is only available when measuring one of the ultrasonic sensors. • When the bar graph is active; it shows the current ultrasonic signal strength. When necessary, modify the amplification by means of pressing the or key until the amplification adjustment indicators (up or down pointing arrow, at the left of the screen) are not shown anymore. Amplification adjustment indicator. Amplification level in ultrasound mode. Example of measurement screen, with amplification indication, and amplifier adjustment indicator. 9.2.4 Taking a Measurement ( M and MD versions only) - Press the + When the + key. The maximum or peak value is displayed for as long as the key is pressed. key is released, the 170 stops measuring. The display shows the highest measured value recorded while the • + key was pressed. To make a new measurement and erase the previous maximum value, just press the + Chapter 9 - Usage again. 33 9.2.5 Storage (M and MD versions only) To store the measured value in the data logger memory, proceed as following: • Once the measured value is displayed on the screen (see previous paragraph), press the key to begin the storage operation. - Select the location in the data collector where you want to store the measurement by using the • or key. Hold the keys down to make the selector move faster. Store the value by pressing the Key. The screen will show the type of sensor that was used, time, date, measured value and the measurement unit used. keys. • Return to the measuring screen by pressing the or Note: The measured and stored values are automatically stored in the previously selected route. 9.2.6 Switch off the equipment The unit can be switched off by briefly pressing the key. The unit will switch off automatically after a pre-programmed period of. This auto power down timer can be adjusted in the ‘Auto power off’ menu. (See paragraph 7.6.1 for more information). Chapter 9 – Usage 34 10. Recharging the battery pack 10.1 General recommendations 10.1.1 The charger • • • • Always keep and use the battery charger in a dry indoor place. Never short-circuit the pins of the charger connector. Never use a battery charger to charge the battery pack, other than the one supplied with your kit. The charging of the battery pack must always be done in a cool place, ie. Room temperature (out of the sun or away from any heating system). SDT The battery charger and its battery pack. 10.1.2 The battery pack • • • • • - Never short-circuit the contact pads on the battery pack. Never use the battery pack with inverted polarity. Always drain the battery before recharging to maximize the number of cycles Always charge the battery pack completely. Always store the battery pack charged, and in a cool dry place. After a long period without use, it is advised to charge/discharge the battery 3 times before the full battery capacity can be used again. Never incinerate or disassemble the battery pack, or the battery cells. The components used in the battery are corrosive and may be dangerous for skin and eyes. In case of any harm, contact a doctor as soon as possible. When the battery pack reaches its end of life, it must be disposed of in the proper way. These batteries contain no heavy metals, and can be recycled. Please send them to the nearest battery-recycling center. Chapter 10 – Recharging the battery pack 35 Battery contact pads. Do not short-circuit Battery charger connector The elements of the battery pack. 10.2 The battery charger 10.2.1 General The charger, mono block type, is represented as follows. Battery charger status indicator SDT View of the battery charger and its status indicator. The mains supply voltage depends on the model used (110 or 220 VAC). The output voltage of the battery charger can be either 7.2V or 9V depending on it’s operating mode (charger connected directly to the battery pack, or charger connected to the SDT 170, the unit being switched on or off). The maximum output current is about 500 mA. While charging the battery pack the following criteria are permanently monitored: • End of battery charging cycle detection by means of the ∆ U method. • End of the battery charging cycle detection by means of excessive change in the battery pack’s temperature. - Detection of temperature overload. - End of charging cycle by means of timeout timer. Chapter 10 – Recharging the battery pack 36 10.2.2 The status indicator light When the battery charger is connected to the power supply, it informs the user of its charging status by means of the status light. The definitions of the status light are shown in the following table: Status of the light No light Green / Fix Green / Flashing Red / Fix Meaning Battery charged. Power supply to the SDT 170 unit, the battery pack is in a slow charging mode (12 to 14 hours). Fast charging (5 to 6 hours), only on the battery pack. Problem with charging 10.3 Recharging the battery pack in the unit 10.3.1 General The battery pack can be charged while still in the unit. Charging will be done transparently to the operation of the unit. Advantage: Possibility to charge the battery pack while the unit is in use. Disadvantage: Charging time is longer when the equipment is switched on (due to power consumption restrictions of the charger). 10.3.2 Operation Proceed as follows: • Connect the charger connector to the unit. • Plug the charger into the mains power socket. • The charging will be done in about 5 to 6 hours when the unit is switched off, or 12 to 14 hours when the equipment is used. Refer to paragraph 10.2.2 for the charger status light indications. Charger Status indicator SDT M M Charger connector The connecton of the charger to the unit. Note: • When a charger is connected to the unit, the charger automatically switches to slow charge when the unit is switched on. - To switch back into fast charge mode, turn off the unit. It is not advised to change charging speeds of the battery by switching on and off the unit, this reduces the life of the battery. Once a charging cycle has begun, it should be allowed to finish. Chapter 10 – Recharging the battery pack 37 - 10.3.3 General Recharging the battery pack while outside the 170 is best. Advantages: The battery pack is always charged in fast mode. The unit can be used with another battery while charging the empty one. Disadvantages: none. 10.3.4 Operation Proceed as follows: • Shift the battery lock towards the front of the unit (towards the build in sensor). - Remove the battery pack by turning the equipment while maintaining the battery lock towards the front of the equipment (towards the build in ultrasonic sensor). Place your hand under the battery pack, and gently tap the unit against your hand. The battery pack will fall release easily using this method. Battery pack Battery lock To remove the battery pack, unlock the battery lock. • • • Plug the connector on the end of the battery charger into the connector on the battery pack. Plug the battery charger in the 110 or 220V socket (depending on the type of charger supplied with your device. The charging cycle will take about 5 to 6 hours to be completed. Please refer to paragraph 10.2.2 for more information on the status light on the battery charger. Battery charger Status light SDT Battery charger/ battery pack connector Connection of the battery charger to the battery pack. Chapter 10 – Recharging the battery pack 38 • Place the charged battery pack in the SDT 170 unit, like indicated. Slot upside. Rounded part downwards. Replace the battery pack by taking care of the position of contact pads, the rounded edge, and the slot like indicated. Chapter 10 – Recharging the battery pack 39 11. Functional Anomalies 11.1 Battery discharged The following message appears flashing on the display: The warning message when the battery pack’s charge is to low. Change the battery pack and recharge the empty pack as indicated in chapter 10. 11.2 Other indications These appear when a serious internal error occurs. In most cases this is due by an electronic failure of the unit. The user must return the equipment to the distributor for repair. There are no internal parts on the SDT 170 which are serviceable by the end user. Only qualified technicians should attempt repairs. Chapitre 11 - Functional Anomalies 40 12. Technical specifications 12.1 Measurement unit Function Display Keyboard Ultrasonic sensor External sensors Data Logger Communication Battery pack Auto power down Operating temperature Housing Weight Dimensions Holster Multifunction detector. Graphic LCD with backlighting. 8 function key’s. - Integral (See Chapter 12.2). - External (See appendix). - Sound level (noise level), RPM, air mass flow, temperature, light intensity, pH (acidity). - Capacity of approx. 15 000 points (includes time, date unit and type of sensor used). - Identification of the measuring points: up to 1 000 points per route (10 characters alphanumeric code/point). - Data transfer: See ‘communications’. - RS 232 C communication interface (19,2 kBaud). - IRDA communication interface (115 kBaud). - Rechargeable NiMH (Nickel Metal Hydrate). - Autonomy of 8 to 10 hours without backlighting. - Recharge time: 5 to 6 hours. - Nominal Capacity: 1,3 Ah. - Life span: 500 to 1000 charge/discharge cycles. - Recharge only with appropriate charger. Auto power down after pre set time. -10 °C to +60°C / 14 °F to 140 °F. Extruded aluminum. Approx. 700 g / 24.69 oz. (with battery and holster included). 203 x 38 x 88 mm / 8 x 1.5 x 3.4 inches (L x H x W). Rubber resistant to hydrocarbons (Fluor silicone). 12.2 Battery pack For optimum performance, this battery pack is equipped with an electronic management system (includes digital serial number, capacity, temperature management). Battery type Dimensions Protections Weight Housing 6 cell, 7.2 V, 1300mAh, NiMH battery pack. 106 x 52 x 12 mm / 4.17 x 2 x 0.5 inches. (L x W x H). Short-circuit, reverse polarity and temperature protected. 190 g. / 6.7 oz. Polyamide 6 / Epoxy (contact area). CSection 12 –Technical specifications 41 12.3 Battery charger For optimum performance, this charger is microprocessor controlled. Specific for SDT 170 NiMH battery pack. 230 or 110 VAC +15% / -10% - 50/60 Hz. 7.2 or 9.0 V DC (depending on the operating mode). 500 mA max. 5 to 6 hours typical in fast mode. 12 to 14 hours typical in slow mode. Temperature limitation at 60 °C / 140 °F. Two color LED type. Double isolation. 425 g. / 15 oz. PPE. Charger type Power supply Output voltage Current Recharge time Protections Status indicator Isolation Weight Housing 12.4 Internal ultrasonic sensor Function & type Measurement range Precision Resolution Signal to Noise ratio Bandwidth Frequency Open type ultrasonic sensor. -10 to +100 dBµV. ± 3 dBµV (over the whole scale). 0.1 dBµV (over the whole scale). -5 dBµV typical. +/-2 kHz (at -3 dB). 38.4 kHz 12.5 Contact probe ø2.5 PROBE 90 CONTACT ø7 ø35.3 The contact probe is supplied with a 1.20 m / 8.2 ft cable, equipped with a 7-pin LEMO connector (probe is standard on SDT 170 M and MD versions, option for SDT 170 S version). 144 260 Chapter 12 – Technical specifications 42 12.6 External ultrasound sensors (optional) 12.6.1 Open sensor 14 mm. The sensor is supplied with a 2.5 m / 8.2 ft cable, equipped with a 7-pin LEMO connector. ø2.5 24 ø14 49 12.6.2 Open sensor 20 mm The sensor is supplied with a 2.5 m / 8.2 ft cable, equipped with a 7-pin LEMO connector. ø2.5 14 ø20 53 12.6.3 Closed sensor 13 mm The sensor is supplied with a 2.5 m / 8.2 ft cable, equipped with a 7-pin LEMO connector. ø8 ø2.5 26 ø13 61 Chapter 12 – Technical specifications 43 12.6.4 Closed sensor 23 mm The sensor is supplied with a 2.5 m / 8.2 ft cable, equipped with a 7-pin LEMO connector. ø2.5 15 ø23 35 12.6.5 Flexible sensor – Length 550 mm - Open sensor 13 mm The sensor is supplied with BNC type connector and a coiled cable equipped with BNC and 7-pin LEMO connector. The coiled cable can be stretched to approx. 2 m / 6.6 ft. ø35 24 ø14 65 325 550 12.6.6 Flexible sensor - Length 550 mm or 820 mm – Open sensor 13 mm The sensor is supplied with BNC type connector and a coiled cable equipped with BNC and 7-pin LEMO connector. The coiled cable can be stretched to approx. 2 m / 6.6 ft. flexible rigid ø35 24 ø14 65 325 325 820 Chapter 12 – Technical specifications 44 12.6.7 Magnetic sensor (BNC and SMB types) The sensor is supplied with BNC type connector and a 2.5m / 8.2ft cable equipped with BNC and 7-pin LEMO connector. 15 ø22.5 15 BNC SMB 39 27.5 12.6.8 Threaded sensor The sensor is supplied with BNC type connector and a 2.5m / 8.2ft cable equipped with BNC and 7-pin LEMO connector. BNC M8 ø28 ø12 10 32 72.6 12.7 Cables ø14.5 ø2.5 ø9.5 12.7.1 BNC to LEMO 7-pin cable - Length = 2.5 m / 8.2 ft 53 58 Chapter 12 – Technical specifications 45 ø9.5 ø2.5 ø6.3 12.7.2 SMB to LEMO 7-pin cable – Length = 2.5 m / 8.2 ft 58 Chapter 12 – Technical specifications 46 12.8 Ultrasonic transmitters (optional) 12.8.1 SDT 200mW transmitter This unit is a small portable ultrasonic transmitter, equipped with one transducer. The transmitter is available in directional and bi-sonic modes. It is equipped with an internal rechargeable NiCd battery. The user can select between two power positions. SD T BA T.TE ST LO W Ma de Internal Battery Transmitter frequency Transmitter power Transmitter angle Autonomy Dimensions Weight HIG H in B elg iu PO W ER OF F ON m 9,6V 100mAh NiCd 39,5 kHz ± 100 Hz 200 mW 150° 4 hours 108 x 35 x 40 mm / 4.25 x 1.37 x 1.57 inches (L x W x H) 230 gr. / 8.11 oz. Chapter 12 – Technical specifications 47 12.8.2 SDT 8 fixed power multi transmitter This unit is a small portable fixed power multi-head (8 pieces) ultrasonic transmitter. The SDT 08 uses the bi-sonic mode only. It is equipped with a removable rechargeable Lead-Gel battery pack. ON OF F Battery pack Frequency Power Autonomy Dimensions Weight Operating temperature T8 U SD 12 V / 1.2 Ah Sealed Lead-Gel type bi-sonic: 39.5 kHz, fbs 0Hz 125 mW (per transducer) 2.5 hours 160 x 100 x 95 mm / 6.29 x 4 x 3.75 inches (L x H x W). 1.5 Kg. / 3.3 lb. -10 °C to +50°C / 14 °F to 122 °F. Chapter 12 – Technical specifications 48 12.8.3 SDT 13 adjustable multi-transmitter This unit is a microprocessor controlled, portable, adjustable power multi-head (13 pieces) ultrasonic transmitter. The power of each transducer can be adjusted (separately) between 25mW and 250mW in 6 fixed steps. A display show’s the current power setting used on each transducer group. The SDT 13 transmitter can be used in directional, bi-sonic or mixed (directional and bisonic) mode. The unit has an RS 232 C type connection to be connected to a personal computer for accurate power adjustments (0 to 250mW in 256 steps) / pre-programmable power sets. It is equipped with a removable rechargeable Lead-Gel battery pack. Battery pack Frequency Power Autonomy Dimensions Weight Operating temperature 12 V / 6.5 Ah Sealed Lead-Gel type Directional: 39,50 kHz / bi-sonic: 39.5 kHz, fbs 0Hz 0 to 250 mW (per transducer) 12 to 38 hours (depending on selected power) 350 x 230 x 200 mm / 13.7 x 9 x 7.9 inches (L x H x W). 6 Kg. / 13.2 lb. -10 °C to +50°C / 14 °F to 122 °F. Chapter 12 – Technical specifications 49 12.9 External sensors (optional) 12.9.1 Sound Level Meter Function Measurement ranges Precision Resolution Type of filter Measurement unit Sound (Pressure) Level Meter. 30 to +140 dBA. ± 2 dB (at full scale). 0,1 dB (over the whole range). « A » weighted, compliant with CEI 651A. dBA. 12.9.2 Rotation speed measurement Function Measuring range Precision Resolution Measurement unit Tachometer. 60 to 30 000 RPM 1 RPM. 1 RPM. RPM (revolutions per minute). 12.9.3 Air mass flow measurement Function Measuring ranges Precision Repeatability Measurement unit Measure leak flow rate. 0,1 SCCM à 1000 SCCM (depending on the sensor). ± 5 % (depending on the sensor type). ± 1 % (depending on the sensor type). - SCCM: Standard Cubic Centimeter Minute. - SCFM: Standard Cubic Foot Minute. Chapter 12 – Technical specifications 50 12.9.4 Temperature measurement interface Function Measurement range Precision Measurement units J type thermocouple interface: temperature measurement -25 to + 150 °C et -50 to +450 °C - ±1% between -25 to + 150 °C. - ±2% between -25 to + 150 °C and -50 to +450 °C. Celsius (°C), Fahrenheit (°F), Kelvin (°K), Rankine (°R). 12.9.5 Light intensity meter Function Measurement ranges Resolution Precision Measurement unit Light intensity/level metre. 0 à 200 lux / 0 to 499 ftcd 200 to 2000 lux / 5000 to 19.990 ftcd 2000 à 50 000 lux / 20.000 to 30.000 ftcd 1 lux / 1 ftcd. 10 lux / 10 ftcd. 100 lux / 100 ftcd. - 0,5 lux (0-200 lux range). - >5 lux (200 - 20 000 range). Lux (lumens/m²), footcandels (candels/ft²). 12.9.6 pH measurement Function Measurement range Precision Resolution PH meter. 0 à 14 pH. 0,05 pH (over the whole scale). 0,01 pH. Chapter 12 – Technical specifications 51 13. Practical applications 13.1 Ultrasonic waves 13.1.1 General Ultrasonic waves are sound waves beyond the range of human hearing (+20 kHz). To be detected, we need to use equipment like the SDT 170, with the capability to receive ultrasonic frequencies and convert them to corresponding audible sounds. Ultrasonic frequencies travel through gases (air) and solids (bearing housings) in a very directional nature; unlike audible sounds which disperse in all directions. Ultrasounds are low energy sound waves, therefore they are quickly absorbed by the medium through which they travel. Ultrasonic waves are generated by: • Naturally occurring mechanical phenomena (friction of rotating equipment), pressure or vacuum (pneumatic or hydraulic problems) or arcing and corona (electrical problems). • Artificially by means of a transmitter (like the SDT 8 or the SDT 13) for tightness testing. 13.1.2 Operating principle of the SDT 170 The SDT 170 detects ultrasonic signals, converts them to audible frequencies, and amplifies them. The challenge is to transpose the received signal, using the heterodyne technology, into an interpretable audible signal. This solution extends the ability of the human ear beyond the simple audible range and into the ultrasonic one. U (V) M 2 M 38,4 –2 F (kHz) A principle functions of the SDT 170 is converting high frequency signals into audible frequencies. Chapter 13 – Practical applications 52 13.1.3 Physical presentation of the ultrasonic sensors We have built several types of sensors to accommodate the diverse range of applications in the industrial environment. The primary ultrasound sensor is wired directly inside the detector. It is designed to detect sources of airborne ultrasound like compressed air leaks, vacuum leaks, corona discharge, etc… The extruded aluminum case serves to protect the sensor from the hazards inherent in most plants. However, the sensor is not waterproof and every precaution must be taken to prevent water and dust out of the sensor. With the same concept as the built-in airborne sensor, other ultrasonic sensors are available that are waterproof. Contact sensors like the contact probe, the magnetic sensor, the threaded sensor, and others, are designed to augment the functionality of the overall detector. 13.2 Main application fields An entire book could be devoted to the list of applications for ultrasonic detection in industry for preventative, predictive maintenance and quality control. The following is an outline of some of the most commonly used applications. 13.2.1 Automotive and transportation Wind noise, water leaks (windshield, tightness), bearings (including bearings on robots). Leaks on air brake systems. 13.2.2 Aviation and space Cabin pressure leaks, cockpit windows, oxygen system leaks, fuel cells, actuators, tire retention, hydraulic valves, hot air duct leaks, slides and rafts, nitrogen system and pneumatic system leaks, bearings. 13.2.3 Trucks and buses Wind noise, water leaks, air brakes, injector sequence, wheel bearings (slow speed). 13.2.4 Rubber and tire Leak detection; steam traps, valves, bearing monitoring, electrical gear (tracking), pumps, motors. 13.2.5 Railroads Air brakes, bearings, water leaks, electrical gear, and diesel injector’s sequence. 13.2.6 Chemical and petrochemical Pressure/vacuum leaks, bearing monitoring, steam traps, valves, compressors, heat exchangers, gear/gear boxes, pumps (including cavitation), motors, electrical gear (arcing). 13.2.7 Construction/Contracting vehicles & cranes Pump cavitation; valve leaks, air in-leakage around fittings, tire retention, bearings, gears. 13.2.8 General manufacturing Bearings, valves, steam traps, compressors, heat exchangers, pneumatic systems, pressure/vacuum leaks, gear/gear boxes, electric arc/corona/tracking in electrical gear. 13.2.9 Gas plants Compressor valve analysis, leak detection, valves, bearing monitoring. Chapter 13 – Practical applications 53 13.2.10 Facilities and buildings Bearings, air handlers, pumps, motors, compressors, pressure leaks, steam traps, valve, chillers, transformers, circuit breakers, relays, leaks in building envelope i.e. air infiltration, water leaks. 13.2.11 Marine Water tightness integrity tests, hatches, bulkheads, pneumatic system leaks, valves, heat exchangers, steam traps, diesel injector timing, condensers, bearing monitoring, refrigeration leaks, pumps, compressors, electrical gear (arcing), air distribution boxes (Manifold). 13.2.12 Materials and composites Vacuum, autoclaves, bearings on pumps. 13.2.13 Pulp and paper Steam traps, valves, bearing monitoring (including slow speed), heat exchangers, pressure/vacuum leaks, and electrical gear. 13.2.14 Power plants (generation/distribution) Condenser in-leakage, heat exchangers, steam traps, valves, boilers, bearing monitoring, pumps, turbines, arcing and corona in electrical gear. 13.2.15 Textiles Bearings, valves, pressure/vacuum leaks, steam traps. 13.2.16 Food processing Steam traps, valves, heat exchangers, bearings, pumps, motors, pressure/vacuum leaks, electrical gear, air distribution boxes (Manifold). 13.2.17 Water waste treatment Bearings, valves, pressure leaks, gearbox. Chapter 13 – Practical applications 54 13.3 Main applications Foreword Our local representative will give you the necessary information about the use of the appropriate sensor for the applications of the SDT 170 that are interesting you. The application list here under is not exhaustive. Therefore do not hesitate to contact us for any further information about the use of the equipment or its accessories. 13.3.1 The bearings Generalities The friction of the balls themselves and on the bearing track produces an ultrasonic emission. When the bearing is new and well lubricated, the grease film absorbs the emission generated by the balls. When the viscosity of the grease deteriorates the acoustic emission increases. This increase corresponds with an elevated reading (dBµV) from the SDT 170. Trending acoustic energy with the Data Logger software allows the user to accurately predict when lubrication should be applied to a bearing, and also when the bearing itself is entering early failure stages. Each bearing “emits” its own sound or ultrasound and its value is expressed in dBµV by the unit SDT170. This emission is directly influenced by the following factors: • The type of bearing : with needles, conical, with balls or rolls (single or double) ; • The diameter ; • The rotation speed ; • The load ; • The lubrication ; • The mounting ; • The envelope features ; • The environment (heat, dust, humidity). In other words, there is no absolute rule. Two identical bearings evolving in different environments may produce different acoustical emissions. The unit SDT 170 connected to a contact probe, trends bearing wear to determine the life cycle of a bearing. Users are forewarned of impending failure. The measurements taken and memorized have to be considered as relative values and not absolute. In general, the critical operating threshold is fixed at a value of ± 15 dBµV above the value of the signal produced when the bearing is in perfect status (normal operating baseline). An increase of +10 dBµV is reason to suspect a dramatic change in the lubrication condition. To optimize the use of the SDT 170 unit, it is essential to listen to the bearings. Listening to the noise of a bearing provides significant information on the measured values. A regular noise associated to stable values indicates a normal functioning. A strident noise indicates a lack of lubrication, an overload or a rotation speed not adapted to the features of the bearing. A crackling noise associated to unstable or high dBµV values indicates faults, wear or breaking. Use the headphones in conjunction with the digital readout to perform a total diagnostic predictive maintenance. Chapter 13 – Practical applications 55 Use of the contact probe Rules to respect In most circumstances, the contact probe is the best sensor to monitor a bearing. The contact probe is a standard accessory in the SDT 170M and MD versions and an option in the SDT 170S version. To ensure the repeatability of the measurements taken with the contact probe, it is imperative to follow the next rules: • Attach the needle correctly ; • Always take a measurement by applying the top of the needle on the same spot (possible marking with the awl to dimple the housing); • Maintain the contact on the vertical plane (perpendicular) of the measurement point. Any oblique position should be avoided; • Apply the same holding pressure on the probe ; • Hold the M+ button down for 3 to 4 seconds until stabilization of the measurement is achieved. • Make sure that the appropriate functioning mode has been selected (see next pages). Operating method To determine the status of the bearing, two operating methods are possible: 1. Trending the evolution: periodical measurements are recorded for further analysis with PC software or by consultation of the internal memory of the unit (version M & MD). Any signal increase higher than 10 dBµV needs to be watched. 2. By comparison: any significant difference (several dBµV) between the measurements take on the bearings evolving under similar operating conditions is to be watched. Operating mode When the probe is connected to the SDT 170, the sub-menu “Frequency band” of the menu “Parameters” allows the user to choose from three operating modes. These modes are preprogrammed frequency bands that are common to the application being tested. There are three different designations: • MEC to listen and to measure bearings with a rotation speed higher than 300 RPM ; • SLOW MEC to listen and to measure the bearings with a rotation speed lower than 300 RPM ; • US to listen and to measure the bearings of turbines and bearings with a speed higher than 10.000 RPM. This mode is also most convenient for finding internal leaks (hydraulic systems, fluids,). 13.3.2 Coupling (alignment) A coupling aligned to its tolerances produces a smooth characteristic whistling sound. A missaligned coupling produces an irregular noise staccato in nature. The SDT 170 can provide useful periodic inspection of pumps which may be out of alignment. Operate as follows: • Place the probe (MEC mode) in front of the coupling or under the casing, if there is one, in order to isolate the coupling noise. Avoid positioning the probe in the direction of the engine. • Listen to the signal. Generally, a signal above 55 dB indicates a fast wear of the bearings due to a misalignment of the coupling. Chapter 13 – Practical applications 56 13.3.3 Barrels and bottles Leaks on the weld seams of bottles (of gas for example) under pressure, are too small to be directly detected using the ultrasonic method. The leak can be amplified however, by spraying liquid (Water, oil or more lubricated oil) over the seams. Small bubbles are created where there is a leak. The bubble burst provokes ultrasonic emissions of high intensity which are easily detectable in the airborne sensor of the SDT 170, or with the flexible sensor. 13.3.4 Hydraulic circuits Operate as follows: • Place the probe (US mode) on the circuit. • Close the valve and measure the signal value (in dBµV). The value corresponds to the turbulence created by the turbulence before the closed valve. • Open valve, measure the signal value (in dBµV) produced by the passage of the fluid. • Any difference signifies a leak. On systems like shock absorbers, press circuits or bulldozers, etc., the presence of a leak is revealed by the formation of air bubbles. The burst, when put under pressure, is easily detected by the ultrasounds produced. 13.3.5 Compressor Piston compressors The functioning of piston compressors depends on the quality of the suction and repulsing valves. To detect the presence of deposits of contaminating materials (carbon or others) on the valve seats, operate as follows: • Mark each valve by means of the awl to maintain the same point each time. • Using the contact probe (MEC mode), take ultrasonic measurements once a month. • Any increase of the values indicates an increase of deposits on the valves and seats. Screw compressors Measuring and listening to the ball bearings of screw compressors is different from the sonic thresholds of the standard ball bearings. Therefore a measurement of 50 dB on the bearings of a screw compressor does not mean a problem. The high amplification level is due to the airflow in the screw. Once again, using the trending methods described earlier, an increase of 10 to 15 dBµV over normal baseline shows that a failure is approaching. Chapter 13 – Practical applications 57 13.3.6 Corona effect Micro-electrical discharges caused by corona effect, electrical arcs in cables, line bushings, transformers, engines, engine brushes, etc… generate ultrasonic phenomena that sound like frying eggs. These problems can cause serious problems such as fires and explosions. Using the SDT 170 in the airborne mode, corona effect can be discovered at an early stage, and from a safe distance from the problem. 13.3.7 Gears Meshing of gears produces a friction that creates an acoustic emission. It is possible using the SDT 170 to • Estimate the wear on gears by control in time. • Diagnose the defective gearwheel, either by an irregular ultrasonic noise or by a dBµV value that has increased over time. Operate as follows: • Listen to the signal by sweeping from one side of the box to the other using the airborne sensor. A good gear mesh produces constant and regular ultrasounds. A defective gear can be recognized by a high pitched irregular production of ultrasounds. • Take measurements on each gear. • Considering the diversity of the materials since it is impossible to give precise reference values for every size and type of gear in the marketplace. Use the comparison method when diagnosing gear problems, especially if a baseline has not been established. 13.3.8 Tightness control (emission/reception) An ultrasonic transmitter (such as SDT 8 or SDT 13 for bigger volumes) must be used. Operate as follows: • Place the transmitter inside the volume. From the outside, localize the passage of ultrasounds first with the detector only and afterwards with the detector equipped with the localization probe. • If the volume dimensions allow it, try reversing the procedure by placing the transmitter outside and the SDT 170 inside. • • • • • Certain volumes, due to their shape and wall thickness, can not be controlled by ultrasounds as they remain inside. Therefore an alternative solution has to be found: Air + ultrasounds: put the volume under pressure and localize the leaks by means of the detector. The detection limit is 4 cc per minute. Air + liquid developer + ultrasounds: this method is used when the pressure is under 1 bar (15 PSI) and when the leaks are smaller than 4 cc per minute. Air + water + ultrasounds: put the volume under pressure and submerse into water. Any leak provokes a bubble and its burst produces ultrasounds even when the bubbles are scarcely visible. This method allows controlling the tightness of a volume but the origin of the leaks can not be localized with precision. Vacuum + ultrasounds: if the volume permits, place it under vacuum after having previously introduced an ultrasonic sensor in it. The air penetration from a leak can be detected more easily as the volume constitutes a resonance chamber. Depression + liquid + sonic signal: by filling the volume with liquid prior to putting it under vacuum, any leak will provoke air bubbles that can be detected by means of a sensor placed in the liquid. This method combined with the previous one can be used when the liquid is not filling the entire volume. Example: Underground Storage Tanks Chapter 13 – Practical applications 58 13.3.9 Leaks (detection and localization) Any air leak with a size of about 1 mm² (pipe openings, badly tightened join, porous flexible) on a compressed air network at 7 bar pressure, represents a loss of about 5 m3/h . This represents about 43 800 m3 of lost air per year for one single leak. Detecting compressed air leaks is an important source of financial savings. Sweep the detector back and forth using the airborne sensor and listening for leaks in the headphones. A characteristic hissing sound associated with a leak will be obvious if a leak exists. Due to the directional nature of ultrasound, once the hissing is detected, it is easy to zero in on the exact source of the leak. Often it requires a simple action to make the repair. The same strategy can be employed for vacuum leaks, however, in the case of vacuum, much of the ultrasound occurs inside the body of the vessel or pipe. Therefore detection can require more skill and experience. 13.3.10 Complex reducers Measurements are taken on different places so as to localize the defective bearing and to minimize the dismantling work. Following indications can be taken into account: • Well-lubricated reducer: smooth and regular noise, value inferior to 40 dB. • Badly lubricated reducer: uniform but sharp noise, value near the 50 dB. • Problems of gears: clicking noise and values above the 60 dB. • Problems of bearings: localize the highest value by an axial search instead of a radial one. The measured value exceeds 60 dB. 13.3.11 Continuous welds A magnetic sensor placed at the basis of the cathode of the continuous welding system detects a relatively continuous signal when the welding is good. Any default produces either a signal loss or an increase of the dB values. 13.3.12 Valves The contact probe (US mode) permits detection of gas or liquid flowing through an open valve. A closed and tight valve will not produce ultrasounds. Therefore any signal implies a leak. Operate as follows: • Position the contact probe and listen to the movement of the valves and to the gas or liquid flow in the valve. • If the signal is continuous: . the valve is normally open: normal valve. . the valve is blocked in open position: defective valve. • If there is no signal: . the valve is normally closed: normal valve. . the valve is blocked in closed position: defective valve. The thickness of some large manual valves does not allow the detection of a sufficient signal by means of the contact probe. Using a magnetic sensor can solve this problem. Confusion can arise between the ultrasounds of a leak and those due to turbulence under high pressure before a closed valve or a condenser. A leak always produces a signal that is higher to the one produced by turbulence. A leak will produce a signal in one specific spot, while turbulence will come from a more generalized area. Experience and familiarity with your own plant is a great help in differentiating between a leak and turbulence. 13.3.13. Vibrations There is no defined method. The best way is to listen to the generated acoustic signal and to localize the signal. Chapter 13 – Practical applications 59