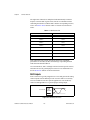
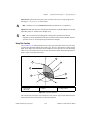
1
Motion Control
FlexMotion™
Software Reference Manual
FlexMotion Software Reference Manual
August 1999 Edition
Part Number 321943B-01
Worldwide Technical Support and Product Information
www.natinst.com
National Instruments Corporate Headquarters
11500 North Mopac Expressway
Austin, Texas 78759-3504 USA Tel: 512 794 0100
Worldwide Offices
Australia 03 9879 5166, Austria 0662 45 79 90 0, Belgium 02 757 00 20, Brazil 011 284 5011,
Canada (Calgary) 403 274 9391, Canada (Ontario) 905 785 0085, Canada (Québec) 514 694 8521,
China 0755 3904939, Denmark 45 76 26 00, Finland 09 725 725 11, France 01 48 14 24 24,
Germany 089 741 31 30, Greece 30 1 42 96 427, Hong Kong 2645 3186, India 91805275406,
Israel 03 6120092, Italy 02 413091, Japan 03 5472 2970, Korea 02 596 7456, Mexico (D.F.) 5 280 7625,
Mexico (Monterrey) 8 357 7695, Netherlands 0348 433466, Norway 32 27 73 00, Singapore 2265886,
Spain (Barcelona) 93 582 0251, Spain (Madrid) 91 640 0085, Sweden 08 587 895 00,
Switzerland 056 200 51 51, Taiwan 02 2377 1200, United Kingdom 01635 523545
For further support information, see the Technical Support Resources appendix. To comment on the
documentation, send e-mail to [email protected].
© Copyright 1998, 1999 National Instruments Corporation. All rights reserved.
Important Information
Warranty
The media on which you receive National Instruments software are warranted not to fail to execute programming
instructions, due to defects in materials and workmanship, for a period of 90 days from date of shipment, as evidenced
by receipts or other documentation. National Instruments will, at its option, repair or replace software media that do not
execute programming instructions if National Instruments receives notice of such defects during the warranty period.
National Instruments does not warrant that the operation of the software shall be uninterrupted or error free.
A Return Material Authorization (RMA) number must be obtained from the factory and clearly marked on the outside
of the package before any equipment will be accepted for warranty work. National Instruments will pay the shipping costs
of returning to the owner parts which are covered by warranty.
National Instruments believes that the information in this document is accurate. The document has been carefully
reviewed for technical accuracy. In the event that technical or typographical errors exist, National Instruments reserves
the right to make changes to subsequent editions of this document without prior notice to holders of this edition. The
reader should consult National Instruments if errors are suspected. In no event shall National Instruments be liable for
any damages arising out of or related to this document or the information contained in it.
EXCEPT AS SPECIFIED HEREIN, NATIONAL INSTRUMENTS MAKES NO WARRANTIES, EXPRESS OR IMPLIED, AND SPECIFICALLY DISCLAIMS
ANY WARRANTY OF MERCHANTABILITY OR FITNESS FOR A PARTICULAR PURPOSE . C USTOMER’S RIGHT TO RECOVER DAMAGES CAUSED
BY FAULT OR NEGLIGENCE ON THE PART OF NATIONAL INSTRUMENTS SHALL BE LIMITED TO THE AMOUNT THERETOFORE PAID BY THE
CUSTOMER . NATIONAL INSTRUMENTS WILL NOT BE LIABLE FOR DAMAGES RESULTING FROM LOSS OF DATA, PROFITS, USE OF PRODUCTS ,
OR INCIDENTAL OR CONSEQUENTIAL DAMAGES , EVEN IF ADVISED OF THE POSSIBILITY THEREOF. This limitation of the liability of
National Instruments will apply regardless of the form of action, whether in contract or tort, including negligence.
Any action against National Instruments must be brought within one year after the cause of action accrues. National
Instruments shall not be liable for any delay in performance due to causes beyond its reasonable control. The warranty
provided herein does not cover damages, defects, malfunctions, or service failures caused by owner’s failure to follow
the National Instruments installation, operation, or maintenance instructions; owner’s modification of the product;
owner’s abuse, misuse, or negligent acts; and power failure or surges, fire, flood, accident, actions of third parties,
or other events outside reasonable control.
Copyright
Under the copyright laws, this publication may not be reproduced or transmitted in any form, electronic or mechanical,
including photocopying, recording, storing in an information retrieval system, or translating, in whole or in part, without
the prior written consent of National Instruments Corporation.
Trademarks
BridgeVIEW™ , CVI™ , FlexMotion™ , LabVIEW™ , natinst.com™ , National Instruments™ , and RTSI™ are trademarks
of National Instruments Corporation.
Product and company names mentioned herein are trademarks or trade names of their respective companies.
WARNING REGARDING MEDICAL AND CLINICAL USE OF NATIONAL INSTRUMENTS PRODUCTS
National Instruments products are not designed with components and testing for a level of reliability suitable for use in
or in connection with surgical implants or as critical components in any life support systems whose failure to perform
can reasonably be expected to cause significant injury to a human. Applications of National Instruments products
involving medical or clinical treatment can create a potential for death or bodily injury caused by product failure, or by
errors on the part of the user or application designer. Because each end-user system is customized and differs from
National Instruments testing platforms and because a user or application designer may use National Instruments products
in combination with other products in a manner not evaluated or contemplated by National Instruments, the user or
application designer is ultimately responsible for verifying and validating the suitability of National Instruments products
whenever National Instruments products are incorporated in a system or application, including, without limitation,
the appropriate design, process and safety level of such system or application.
Contents
About This Manual
Conventions Used in This Manual.................................................................................xv
Related Documentation..................................................................................................xvi
Chapter 1
Introduction
About the FlexMotion Software ....................................................................................1-1
What You Need to Get Started ......................................................................................1-2
Installing a FlexMotion Controller ................................................................................1-2
Software Programming Choices ....................................................................................1-2
National Instruments Application Software ....................................................1-2
FlexMotion Language Support ......................................................................................1-3
Chapter 2
Building Applications with the FlexMotion Software Library
The FlexMotion Windows Libraries..............................................................................2-1
Creating a 32-Bit Windows Application .......................................................................2-2
Creating a 32-Bit LabWindows/CVI Application...........................................2-2
Creating a 32-Bit Microsoft or Borland C/C++ Application ..........................2-2
Creating a 32-Bit Visual Basic Application ....................................................2-3
Chapter 3
Programming Language Considerations
Variable Data Types ......................................................................................................3-1
Primary Types .................................................................................................3-2
Arrays ..............................................................................................................3-2
Structures and Other User-Defined Data Types ..............................................3-3
Function Return Status...................................................................................................3-3
Board Identification Parameter ......................................................................................3-4
Language-Specific Considerations ................................................................................3-4
C/C++ for Windows ........................................................................................3-4
Data Returned by Reference .............................................................3-4
Data Returned in Arrays ...................................................................3-5
FlexMotion Data Structures ..............................................................3-5
Visual Basic for Windows...............................................................................3-6
u8 Data Type Not Supported ............................................................3-6
Data Returned by Reference .............................................................3-7
© National Instruments Corporation
v
FlexMotion Software Reference Manual
Contents
Data Returned in Arrays ................................................................... 3-7
User-Defined Data Types ................................................................. 3-8
Considerations when Using Read Functions................................................................. 3-9
Example .......................................................................................................... 3-9
Considerations when Using Functions with Input Vectors ........................................... 3-10
Chapter 4
Software Overview
API Functional Organization......................................................................................... 4-1
Axes, Vector Spaces, and Motion Resources................................................................ 4-2
Resource IDs ................................................................................................... 4-2
Axes ................................................................................................................ 4-2
Motion Resources ........................................................................................... 4-4
Encoders ........................................................................................... 4-4
ADC Channels .................................................................................. 4-5
DAC Outputs .................................................................................... 4-6
Stepper Outputs ................................................................................ 4-7
General-Purpose I/O Ports .............................................................................. 4-8
Vector Spaces.................................................................................................. 4-8
Function Types and Parameters..................................................................................... 4-10
Bitmapped versus Per-Resource Functions..................................................... 4-10
Single and Double-Buffered Parameters......................................................... 4-10
Input and Return Vectors ................................................................................ 4-11
Onboard Variables .......................................................................................... 4-12
Initialization Overview.................................................................................................. 4-12
Recommended Initialization Procedure .......................................................... 4-13
System Configuration ....................................................................... 4-13
Motion I/O Configuration................................................................. 4-13
Per-Axis Configuration..................................................................... 4-13
Initialize Trajectory Parameters (Per-Axis)...................................... 4-13
Establish a Position Reference (Per-Axis)........................................ 4-13
Motion Trajectories ....................................................................................................... 4-14
Trajectory Types and Modes........................................................................... 4-14
Trapezoidal Point-to-Point Position Control .................................... 4-14
Velocity Control ............................................................................... 4-15
Move Blending ................................................................................. 4-15
Electronic Gearing ............................................................................ 4-16
Linear and Circular Interpolation ..................................................... 4-16
Pull-in Moves ................................................................................... 4-17
Trajectory Parameters ..................................................................................... 4-17
Velocity in RPM ............................................................................... 4-18
Velocity in Counts/s or Steps/s......................................................... 4-18
Acceleration in RPS/s ....................................................................... 4-19
FlexMotion Software Reference Manual
vi
www.natinst.com
Contents
Velocity Override in Percent.............................................................4-19
Arc Angles in Degrees ......................................................................4-19
Communication between the Host Computer and the FlexMotion Controller ..............4-20
Board ID ..........................................................................................................4-20
Packets, Handshaking, and FIFO Buffers .......................................................4-21
Return Data Buffer ..........................................................................................4-21
Errors and Error Handling .............................................................................................4-22
Modal and Non-Modal Errors .........................................................................4-22
Error Message Stack .........................................................................4-23
Communicate versus Individual Function Entry Points ...................4-23
Onboard Programs ............................................................................4-24
Fatal Hardware and Communication Errors....................................................4-24
Error Handling Techniques .............................................................................4-24
Chapter 5
Axis & Resource Configuration Functions
flex_config_axis.............................................................................................................5-2
flex_config_mc_criteria.................................................................................................5-6
flex_config_step_mode_pol...........................................................................................5-9
flex_config_vect_spc .....................................................................................................5-11
flex_enable_axes............................................................................................................5-13
flex_load_counts_steps_rev...........................................................................................5-17
flex_load_pid_parameters..............................................................................................5-19
flex_load_single_pid_parameter....................................................................................5-21
flex_load_vel_tc_rs........................................................................................................5-28
flex_set_stepper_loop_mode .........................................................................................5-30
Chapter 6
Trajectory Control Functions
flex_check_blend_complete_status ...............................................................................6-2
flex_check_move_complete_status ...............................................................................6-4
flex_load_acceleration ...................................................................................................6-6
flex_load_follow_err .....................................................................................................6-8
flex_load_rpm ................................................................................................................6-10
flex_load_rpsps ..............................................................................................................6-12
flex_load_target_pos......................................................................................................6-14
flex_load_velocity .........................................................................................................6-16
flex_load_vs_pos ...........................................................................................................6-18
flex_read_axis_status and
flex_read_axis_status_rtn ...........................................................................................6-20
flex_read_blend_status and
flex_read_blend_status_rtn .........................................................................................6-24
© National Instruments Corporation
vii
FlexMotion Software Reference Manual
Contents
flex_read_follow_err and
flex_read_follow_err_rtn............................................................................................ 6-27
flex_read_mcs_rtn ......................................................................................................... 6-29
flex_read_pos and
flex_read_pos_rtn ....................................................................................................... 6-31
flex_read_rpm and
flex_read_rpm_rtn ...................................................................................................... 6-33
flex_read_trajectory_status and
flex_read_trajectory_status_rtn .................................................................................. 6-35
flex_read_velocity and
flex_read_velocity_rtn................................................................................................ 6-39
flex_read_vs_pos and
flex_read_vs_pos_rtn.................................................................................................. 6-41
flex_reset_pos................................................................................................................ 6-43
flex_set_op_mode.......................................................................................................... 6-45
flex_wait_for_blend_complete...................................................................................... 6-49
flex_wait_for_move_complete...................................................................................... 6-52
Arcs Functions............................................................................................................... 6-55
flex_load_circular_arc .................................................................................... 6-56
flex_load_helical_arc ...................................................................................... 6-58
flex_load_spherical_arc .................................................................................. 6-60
Gearing Functions ......................................................................................................... 6-63
flex_config_gear_master................................................................................. 6-64
flex_enable_gearing ........................................................................................ 6-66
flex_enable_gearing_single_axis .................................................................... 6-68
flex_load_gear_ratio ....................................................................................... 6-70
Advanced Trajectory Functions .................................................................................... 6-72
flex_acquire_trajectory_data........................................................................... 6-73
flex_load_base_vel.......................................................................................... 6-75
flex_load_blend_fact....................................................................................... 6-76
flex_load_pos_modulus .................................................................................. 6-79
flex_load_rpm_thresh ..................................................................................... 6-80
flex_load_scurve_time .................................................................................... 6-82
flex_load_torque_lim ...................................................................................... 6-84
flex_load_torque_offset .................................................................................. 6-87
flex_load_vel_threshold.................................................................................. 6-89
flex_load_velocity_override ........................................................................... 6-91
flex_read_dac and
flex_read_dac_rtn......................................................................................... 6-93
flex_read_dac_limit_status and
flex_read_dac_limit_status_rtn .................................................................... 6-95
flex_read_steps_gen and
flex_read_steps_gen_rtn .............................................................................. 6-97
FlexMotion Software Reference Manual
viii
www.natinst.com
Contents
flex_read_target_pos and
flex_read_target_pos_rtn ..............................................................................6-99
flex_read_trajectory_data and
flex_read_trajectory_data_rtn.......................................................................6-101
Chapter 7
Start & Stop Motion Functions
flex_blend ......................................................................................................................7-2
flex_start ........................................................................................................................7-5
flex_stop_motion ...........................................................................................................7-8
Chapter 8
Motion I/O Functions
flex_configure_inhibits ..................................................................................................8-2
flex_enable_home_inputs ..............................................................................................8-4
flex_enable_limits..........................................................................................................8-6
flex_load_sw_lim_pos ...................................................................................................8-9
flex_read_home_input_status and
flex_read_home_input_status_rtn...............................................................................8-11
flex_read_limit_status and
flex_read_limit_status_rtn ..........................................................................................8-13
flex_set_home_polarity .................................................................................................8-15
flex_set_inhibit_momo ..................................................................................................8-17
flex_set_limit_polarity...................................................................................................8-19
Breakpoint Functions .....................................................................................................8-21
flex_enable_bp ................................................................................................8-22
flex_load_bp_modulus ....................................................................................8-25
flex_load_pos_bp ............................................................................................8-27
flex_read_breakpoint_status and
flex_read_breakpoint_status_rtn ..................................................................8-29
flex_set_bp_momo ..........................................................................................8-31
High-Speed Capture Functions ......................................................................................8-33
flex_enable_hs_caps........................................................................................8-34
flex_read_cap_pos and
flex_read_cap_pos_rtn..................................................................................8-36
flex_read_hs_cap_status and
flex_read_hs_cap_status_rtn ........................................................................8-38
flex_set_hs_cap_pol ........................................................................................8-41
© National Instruments Corporation
ix
FlexMotion Software Reference Manual
Contents
Chapter 9
Find Home & Index Functions
flex_find_home.............................................................................................................. 9-2
flex_find_index.............................................................................................................. 9-7
Chapter 10
Analog & Digital I/O Functions
flex_configure_encoder_filter ....................................................................................... 10-2
flex_configure_pwm_output ......................................................................................... 10-4
flex_enable_adcs ........................................................................................................... 10-7
flex_enable_encoders .................................................................................................... 10-9
flex_load_dac ................................................................................................................ 10-11
flex_load_pwm_duty..................................................................................................... 10-12
flex_read_adc and
flex_read_adc_rtn ....................................................................................................... 10-13
flex_read_encoder and
flex_read_encoder_rtn ................................................................................................ 10-15
flex_read_port and
flex_read_port_rtn ...................................................................................................... 10-17
flex_reset_encoder......................................................................................................... 10-19
flex_select_signal .......................................................................................................... 10-20
flex_set_adc_range ........................................................................................................ 10-23
flex_set_port_direction.................................................................................................. 10-25
flex_set_port_momo...................................................................................................... 10-27
flex_set_port_pol........................................................................................................... 10-30
Chapter 11
Error & Utility Functions
flex_get_error_description ............................................................................................ 11-2
flex_get_motion_board_info ......................................................................................... 11-6
flex_get_motion_board_name....................................................................................... 11-9
flex_read_err_msg_rtn .................................................................................................. 11-11
Chapter 12
Onboard Programming Functions
flex_begin_store ............................................................................................................ 12-2
flex_end_store ............................................................................................................... 12-4
flex_insert_program_label............................................................................................. 12-5
flex_jump_label_on_condition...................................................................................... 12-6
flex_load_delay ............................................................................................................. 12-11
FlexMotion Software Reference Manual
x
www.natinst.com
Contents
flex_pause_prog.............................................................................................................12-12
flex_read_program_status..............................................................................................12-13
flex_run_prog.................................................................................................................12-15
flex_set_status_momo ...................................................................................................12-16
flex_stop_prog ...............................................................................................................12-18
flex_wait_on_condition .................................................................................................12-19
Object Management Functions ......................................................................................12-24
flex_load_description ......................................................................................12-25
flex_object_mem_manage...............................................................................12-26
flex_read_description_rtn................................................................................12-28
flex_read_registry_rtn .....................................................................................12-29
Data Operations Functions.............................................................................................12-31
flex_add_vars ..................................................................................................12-32
flex_and_vars ..................................................................................................12-33
flex_div_vars ...................................................................................................12-34
flex_load_var...................................................................................................12-35
flex_lshift_var..................................................................................................12-36
flex_mult_vars.................................................................................................12-38
flex_not_var.....................................................................................................12-39
flex_or_vars.....................................................................................................12-40
flex_read_var and
flex_read_var_rtn..........................................................................................12-41
flex_sub_vars...................................................................................................12-43
flex_xor_vars...................................................................................................12-44
Chapter 13
Advanced Functions
flex_clear_pu_status ......................................................................................................13-2
flex_communicate..........................................................................................................13-4
flex_enable_1394_watchdog .........................................................................................13-7
flex_enable_auto_start ...................................................................................................13-8
flex_enable_shutdown ...................................................................................................13-9
flex_flush_rdb ................................................................................................................13-11
flex_read_csr_rtn ...........................................................................................................13-12
flex_reset_defaults .........................................................................................................13-14
flex_save_defaults .........................................................................................................13-15
flex_set_irq_mask ..........................................................................................................13-16
Appendix A
Error Codes
© National Instruments Corporation
xi
FlexMotion Software Reference Manual
Contents
Appendix B
FlexMotion Functions
Appendix C
Default Parameters
Appendix D
Onboard Variables, Input, and Return Vectors
Appendix E
Technical Support Resources
Glossary
Index
Figures
Figure 4-1.
Figure 4-2.
Figure 4-3.
Figure 4-4.
Figure 4-5.
Figure 4-6.
Servo Axis Resources ........................................................................... 4-3
Stepper Axis Resources ........................................................................ 4-3
ADC Input Resources ........................................................................... 4-5
DAC Output Resources......................................................................... 4-6
3D Vector Space Resources.................................................................. 4-9
Trapezoidal Trajectory with S-Curve Acceleration .............................. 4-15
Figure 5-1.
3-D Vector Space Example................................................................... 5-12
Figure 6-1.
Figure 6-2.
Figure 6-3.
Figure 6-4.
Figure 6-5.
Figure 6-6.
Figure 6-7.
Figure 6-8.
Figure 6-9.
CircularArc Definitions ........................................................................ 6-57
Helical Arc Definitions ......................................................................... 6-59
Spherical Arc Pitch and Yaw Definitions ............................................. 6-62
Blending with Blend Factor of –1......................................................... 6-77
Blending with Blend Factor of 0........................................................... 6-77
Blending with Blend Factor of 50 ms ................................................... 6-78
Effects of S-Curve Acceleration on a Trapezoidal Trajectory.............. 6-83
Primary and Secondary Torque Limits Example.................................. 6-86
Torque Offset Example......................................................................... 6-88
Figure 9-1.
Figure 9-2.
Find Home Definitions ......................................................................... 9-4
Find Home Sequence Example ............................................................. 9-6
FlexMotion Software Reference Manual
xii
www.natinst.com
Contents
Tables
Table 3-1.
Primary Type Names.............................................................................3-2
Table 4-1.
Table 4-2.
Table 4-3.
Table 4-4.
Table 4-5.
Table 4-6.
Table 4-7.
Axis Resource IDs.................................................................................4-4
Encoder Resource IDs ...........................................................................4-5
ADC Resource IDs ................................................................................4-6
DAC Resource IDs ................................................................................4-7
Stepper Output Resource IDs ................................................................4-7
I/O Port Resource IDs ...........................................................................4-8
Vector Space Control Resource IDs......................................................4-9
Table 10-1.
PWM Clock Frequency Settings ...........................................................10-5
Table A-1.
Error Codes Summary ...........................................................................A-2
Table B-1.
Table B-2.
FlexMotion Function Summary ............................................................B-1
ValueMotion to FlexMotion Cross Reference ......................................B-7
Table C-1.
Default Parameters ................................................................................C-1
Table D-1.
Functions with More than One Data Parameter ....................................D-1
© National Instruments Corporation
xiii
FlexMotion Software Reference Manual
About This Manual
The FlexMotion Software Reference Manual describes the FlexMotion
software. The FlexMotion software is a powerful application programming
interface (API) between your motion control application and the National
Instruments FlexMotion controllers for ISA and PCI bus computers.
Conventions Used in This Manual
The following conventions are used in this manual:
This icon denotes a note, which alerts you to important information.
This icon denotes a caution, which advises you of precautions to take to
avoid injury, data loss, or a system crash.
This icon denotes a warning, which advises you of precautions to take to
avoid being electrically shocked.
7344 controllers
Refers to the PCI-7344, PXI-7344, and FW-7344. These controllers have
four axes.
bold
Bold text denotes parameter names.
italic
Italic text denotes variables, emphasis, a cross reference, or an introduction
to a key concept. This font also denotes text that is a placeholder for a word
or value that you must supply.
monospace
Text in this font denotes text or characters that you should enter from the
keyboard, sections of code, programming examples, and syntax examples.
This font is also used for the proper names of directories, functions,
variables, filenames and extensions, and code excerpts.
FlexMotion-6C
controllers
Refers to the PC-FlexMotion-6C and the PCI-FlexMotion-6C. These
controllers have six axes.
FlexMotion software
reference
Unless otherwise noted, this phrase refers to both the FlexMotion Software
Reference Manual and the FlexMotion Software Reference Online Help.
© National Instruments Corporation
xv
FlexMotion Software Reference Manual
About This Manual
Related Documentation
The following documents contain information that you might find helpful
as you read this manual:
•
Your motion controller user manual
•
FlexMotion Software Reference Online Help
FlexMotion Software Reference Manual
xvi
www.natinst.com
1
Introduction
This chapter gives an overview of the FlexMotion software, lists what you
need to get started, and where to find information on installing your
hardware.
About the FlexMotion Software
FlexMotion software provides a comprehensive API you use to control
the FlexMotion controllers. FlexMotion software combined with the
FlexMotion controllers provide functionality and power for integrated
motion systems for use in laboratory, test, and production environments.
For programming ease, FlexMotion software is enhanced by a toolbox of
drivers, C Function Libraries, and Windows dynamic link libraries (DLLs)
that implement the entire FlexMotion API.
The FlexMotion software package includes Measurement & Automation
Explorer, which associates physical bus addresses with board IDs, which
are used in programs to distinguish between controllers. Measurement &
Automation Explorer also verifies that the FlexMotion controller is
installed correctly and is communicating with the host computer.
FlexMotion software also includes a Windows-compatible motion
application, FlexCommander, which provides access to the FlexMotion
application programming interface (API) in an easy-to-use, scriptable
environment. Simply pointing to and clicking on the desired function
allows you to interactively set up and control system parameters and all
multi-axis motion commands.
For application development, the FlexMotion software package includes
example programs to help get you up and running quickly.
A separate FlexMotion virtual instrument (VI) package includes a
complete motion VI library, with examples, for use with LabVIEW.
© National Instruments Corporation
1-1
FlexMotion Software Reference Manual
Chapter 1
Introduction
What You Need to Get Started
To set up and use your FlexMotion software, you need the following:
❑ FlexMotion software
❑ FlexMotion hardware
❑ FlexMotion Software Reference Manual
Installing a FlexMotion Controller
Use Measurement & Automation Explorer to configure and verify your
FlexMotion controllers. Refer to the FlexMotion release notes and the
Explore Motion Control online help for detailed information regarding
FlexMotion controller installation and configuration. In addition, refer to
your motion controller user manual for information about I/O jumper
settings and bus address DIP switches (for ISA boards).
Software Programming Choices
You have several options to choose from when programming with
your National Instruments FlexMotion software. You can use
National Instruments application software such as LabVIEW,
BridgeVIEW—LabVIEW for Industrial Automation, or
LabWindows/CVI, or third-party application development environments
(ADEs) such as Borland C/C++, Microsoft Visual C/C++, Microsoft
Visual Basic, or any other Windows-based compiler that can call into
Windows DLLs for use with the FlexMotion software.
National Instruments Application Software
LabVIEW and BridgeVIEW feature interactive graphics, a state-of-the-art
user interface, and a powerful graphical programming language. The
FlexMotion VI Library, a set of VIs for using LabVIEW with National
Instruments FlexMotion hardware, is available separately.
LabWindows/CVI features interactive graphics, a state-of-the-art user
interface, and uses the ANSI standard C programming language. The
functions that comprise the FlexMotion software library can be called from
LabWindows/CVI.
Using LabVIEW, BridgeVIEW, or LabWindows/CVI software will greatly
reduce the development time for your motion control application.
FlexMotion Software Reference Manual
1-2
www.natinst.com
Chapter 1
Introduction
FlexMotion Language Support
The FlexMotion software library is a DLL in Windows 2000/NT/98/95.
You can use the Windows DLL with any Windows development
environment that can call Windows DLLs. Chapter 2, Building
Applications with the FlexMotion Software Library, provides more specific
information on building Windows applications with Microsoft Visual
C/C++, Microsoft Visual Basic, and Borland C/C++.
© National Instruments Corporation
1-3
FlexMotion Software Reference Manual
Building Applications with the
FlexMotion Software Library
2
This chapter describes the fundamentals of creating FlexMotion
applications under Windows 2000/NT/98/95.
The FlexMotion Windows Libraries
This section contains general information about building FlexMotion
applications, describes the nature of the FlexMotion files used in building
FlexMotion applications, and explains the basics of building applications
using the following tools:
•
LabWindows/CVI
•
Borland C/C++
•
Microsoft Visual C/C++
•
Microsoft Visual Basic
If you are not using one of the tools listed, consult your development tool
reference manual for details on creating applications that call DLLs.
The FlexMotion DLL, FlexMotion32.dll, is used by FlexMotion
applications under all versions of Windows.
If you are programming in C or C++, you must link in the appropriate
import library so that you can call the FlexMotion DLL. In
Windows 2000/NT/98/95, the import libraries are different for Microsoft
and Borland C/C++. The import libraries contain information about the
FlexMotion DLL-exported functions.
FlexMotion is packaged with function prototype files for different
Windows development tools. For C/C++ development, the FlexMotion
header file, flexmotn.h, is provided. For Visual Basic development, a
BAS module, flexmotn.bas, is provided. If you are not using any of
these development tools, you may need to create your own function
prototype file based on the files provided with the FlexMotion software.
© National Instruments Corporation
2-1
FlexMotion Software Reference Manual
Chapter 2
Building Applications with the FlexMotion Software Library
Creating a 32-Bit Windows Application
Under Windows 2000/NT/98/95, FlexMotion applications should call
the FlexMotion32.dll. The FlexMotion DLL is installed in the
Windows\System directory in Windows 98/95 and in the
Winnt\System32 directory in Windows 2000/NT.
Creating a 32-Bit LabWindows/CVI Application
The FlexMotion header file for LabWindows/CVI programmers is
FlexMotn.h. FlexMotn.h automatically includes other required files
such as motnerr.h (the FlexMotion error file, for errors returned by the
FlexMotion functions), and motncnst.h (the FlexMotion constants file,
for the constants used while making calls to the FlexMotion functions).
All header files are installed in the FlexMotion\Include directory.
To create an application using LabWindows/CVI, link to the appropriate
FlexMotion import library. If you set the default compiler compatibility
mode to Microsoft Visual C++, link to FlexMS32.lib (installed in the
FlexMotion\lib\Microsoft directory). If you set the default compiler
compatibility mode to Borland C++, link to FlexBC32.lib library
(installed in the FlexMotion\lib\Borland directory).
Example programs using these import libraries and the
Flexmotion32.dll are in installed in the FlexMotion\Examples
directory.
Creating a 32-Bit Microsoft or Borland C/C++ Application
The FlexMotion header file for C/C++ programmers is FlexMotn.h.
FlexMotn.h automatically includes other required files such as
motnerr.h (the FlexMotion error file, for errors returned by the
FlexMotion functions), and motncnst.h (the FlexMotion constants file,
for the constants used while making calls to the FlexMotion functions).
All header files are installed in the FlexMotion\Include directory.
Microsoft C/C++ programmers should link to the FlexMS32.lib import
library (installed in the FlexMotion\lib\Microsoft directory).
Borland C/C++ programmers should link to the FlexBC32.lib import
library (installed in the FlexMotion\lib\Borland directory). The
Borland import library is created in version 5.0.
FlexMotion Software Reference Manual
2-2
www.natinst.com
Chapter 2
Building Applications with the FlexMotion Software Library
C\C++ example programs using these import libraries and the
Flexmotion32.dll are installed in the FlexMotion\Examples
directory.
Creating a 32-Bit Visual Basic Application
The FlexMotion function prototype file for Visual Basic programmers is
the FlexMotn.bas module. In addition, Motnerr.bas (the FlexMotion
error file, for errors returned by the FlexMotion functions) and
Motncnst.bas (the FlexMotion constants file, for the constants used
while making calls to the FlexMotion functions) should also be included in
Visual Basic projects when making FlexMotion applications. All the
Visual Basic modules are installed into the FlexMotion\Include
directory.
Visual Basic example programs are installed in the
FlexMotion\Examples directory.
© National Instruments Corporation
2-3
FlexMotion Software Reference Manual
3
Programming Language
Considerations
This chapter contains detailed information on programming language
syntax and special considerations that you need to know before you
develop your FlexMotion application.
In addition to LabVIEW, BridgeVIEW, and LabWindows/CVI,
the FlexMotion software supports the following industry-standard
programming environments:
•
Microsoft Visual C/C++
•
Borland C/C++
•
Microsoft Visual Basic
•
Any programming environment that can call into DLLs
This chapter includes information specific to each language environment
as well as general syntax information that applies to all languages.
Variable Data Types
Every function description has a parameter table that lists the data types for
each parameter. The following sections describe the notation used in those
parameter tables and throughout the manual for variable data types.
© National Instruments Corporation
3-1
FlexMotion Software Reference Manual
Chapter 3
Programming Language Considerations
Primary Types
Table 3-1 shows the primary type names and their ranges.
Table 3-1. Primary Type Names
Type
Type
Name
Description
Range
C/C++
Visual BASIC
Pascal (Borland
Delphi)
u8
8-bit ASCII
character
0 to 255
Char
Not supported by
BASIC. For functions
that require character
arrays, use string
types instead.
Byte
i16
16-bit signed
integer
–32,768 to 32,767
Short
Integer
(for example,
deviceNum%)
SmallInt
u16
16-bit unsigned
integer
0 to 65,535
Unsigned
short for
32-bit
compilers
Not supported by
BASIC. For functions
that require unsigned
integers, use the
signed integer type
instead. See the i16
description.
Word
i32
32-bit signed
integer
–2,147,483,648 to
2,147,483,647
Long
Long (for example,
count&)
LongInt
u32
32-bit unsigned
integer
0 to 4,294,967,295
Unsigned
long
Not supported by
BASIC. For functions
that require unsigned
long integers, use the
signed long integer
type instead. See the
i32 description.
Cardinal (in
32-bit operating
systems). Refer to
the i32
description.
f32
32-bit
single-precision
floating point
–3.402823 × 1038 to
3.402823 × 1038
Float
Single (for
example, num!)
Single
f64
64-bit
double-precision
floating point
–1.797683134862315 × 10308
to 1.797683134862315 × 10308
Double
Double (for
example, voltage
Number)
Double
Arrays
When a primary type is inside square brackets, such as, [i16], an array of
the type named is required for that parameter. Typically arrays are passed
by reference, not value. For information about passing and returning arrays
of data, refer to the Language-Specific Considerations section of this
chapter.
FlexMotion Software Reference Manual
3-2
www.natinst.com
Chapter 3
Programming Language Considerations
Structures and Other User-Defined Data Types
FlexMotion software uses data structures to send and receive groups of
parameters to and from the controller. Typically data structures are passed
by reference not value. For information about passing and returning
structures of data, refer to the Language-Specific Considerations section of
this chapter.
Function Return Status
Every FlexMotion function is of the following form:
status = function_name (parameter 1, parameter 2, …
parameter n)
Each function returns a value in the status variable that indicates the success
or failure of the function. A returned status of NIMC_noError (0) indicates
that the function was sent to the FlexMotion controller successfully. A
non-zero status indicates that the function was not executed because of an
error. Refer to Appendix A, Error Codes, for a complete description of
errors and possible causes.
In addition to errors returned in the status variable, modal errors can occur
when the controller executes the function. These modal errors have to be
explicitly read from the Error Stack on the FlexMotion controller. Refer to
the Errors and Error Handling section of Chapter 4, Software Overview,
for more information on modal errors and the Error Stack.
For C/C++ users, the header file, flexmotn.h provides the FlexMotion
function prototypes. All the functions in flexmotn.h have FLEXFUNC
as the return status. FLEXFUNC defines the return data type status. Under
Windows, FLEXFUNC also defines the calling convention of the
FlexMotion dynamic link library.
FLEXFUNC defines the return status of the FlexMotion functions to be
i32. In addition, FLEXFUNC defines the calling convention as standard
(__stdcall), which is the same as that used to call Win32 API functions.
For Visual Basic users, flexmotn.bas provides the FlexMotion function
prototypes. All FlexMotion functions in Visual Basic return an i32.
© National Instruments Corporation
3-3
FlexMotion Software Reference Manual
Chapter 3
Programming Language Considerations
Board Identification Parameter
The first parameter to every FlexMotion function is the board identification
parameter.
For C/C++ users, all functions in flexmotn.h have BOARD as the first
parameter. BOARD is defined as boardID (u8)—the board identification
number assigned by Measurement & Automation Explorer.
For Visual Basic users, all functions in flexmotn.bas have boardID
(Integer) as the first parameter, which is the board identification number
assigned by Measurement & Automation Explorer.
Ensure that you pass the correct board identification parameter depending
upon the programming language you are using. To use multiple FlexMotion
devices in one application, simply pass the appropriate board identification
parameter to each function.
Language-Specific Considerations
Apart from the data type differences, there are a few language-dependent
considerations you need to be aware of when you use the FlexMotion API.
Refer to the following sections that apply to your programming language.
Note Be sure to include the FlexMotion function prototypes by including the appropriate
FlexMotion header file in your source code. Refer to Chapter 2, Building Applications with
the FlexMotion Software Library, for the header file appropriate to your operating system
and programming environment.
C/C++ for Windows
Data Returned by Reference
The FlexMotion functions that return data do so in variables whose address
is passed into the function.
Example
To read position on an axis, you have to pass the address of the variable
position.
i32 status;
i32 position;
u8 boardID = 1;
u8 axis = 1;
status = flex_read_pos_rtn (boardID, axis, &position);
FlexMotion Software Reference Manual
3-4
www.natinst.com
Chapter 3
Programming Language Considerations
The data position for axis one is returned in the position variable.
Data Returned in Arrays
While passing an array to a FlexMotion function, you need to pass the
address of the beginning of the array.
Example
You would pass returnData as your parameter where returnData is an
array of size MAX i32s.
#define MAX 12
i32 status;
u8 boardID;
i32 returnData [MAX];
boardID = 1;
status = flex_read_trajectory_data_rtn(boardID,
returnData);
Trajectory data is returned in the returnData array and can be accessed
by incrementing through the array.
FlexMotion Data Structures
Two data structures are used by the FlexMotion functions—The registry
information data structure REGISTRY, and the PID parameters data
structure PID.
The registry information data structure REGISTRY is used by the Read
Object Registry function to get the information about the object registry on
the FlexMotion controller. For more information on the object registry,
refer to Chapter 12, Onboard Programming Functions.
typedef struct {
u16 device; // The object number
u16 type; // The type of object
u32 pstart; // The address where the object is stored
u32 size; // Size of the object
} REGISTRY;
© National Instruments Corporation
3-5
FlexMotion Software Reference Manual
Chapter 3
Programming Language Considerations
The PID parameters data structure PID is used by the Load All PID
Parameters function to load the PID and PIVFF parameter for an axis.
For more information on PID and PIVFF parameters, refer to Chapter 5,
Axis & Resource Configuration Functions.
typedef struct{
u16 kp; //Proportional Gain
u16 ki;//Integral Gain
u16 ilim;//Integration Limit
u16 kd;//Derivative Gain
u16 td;//Derivative Sample Period
u16 kv;//Velocity Gain
u16 aff;//Acceleration Feedforward
u16 vff;//Velocity Feedforward
} PID;
Example
While using the data structures, pass the address of the structure in the
function.
i32 status;
u8 boardID=1;
u8 axis=1;
u8 inputVector=0xFF;
PID PIDValues;
PIDValues.kp = 100;
PIDValues.ki = 0;
PIDValues.ilim = 1000;
PIDValues.kd = 1000;
PIDValues.td = 2;
PIDValues.kv = 0;
PIDValues.aff = 0;
PIDValues.vff = 0;
status = flex_load_pid_parameters(boardID, axis,
&PIDValues, inputVector);
Visual Basic for Windows
u8 Data Type Not Supported
Because Visual Basic does not support the u8 data type, all the FlexMotion
functions that take parameters that are of type u8 can be passed
integers (%). The FlexMotion DLL ignores the upper byte of the integer
passed.
FlexMotion Software Reference Manual
3-6
www.natinst.com
Chapter 3
Programming Language Considerations
For example, the Enable Axes function, which has the data type for
boardID and PIDrate as u8, can be called as shown in the following
example.
Example
Dim status as long
Dim boardID as integer
Dim PIDrate as integer
Dim axisMap as integer
boardID = 1 ‘The board identification number
PIDrate = NIMC_PID_RATE_250 ‘250 microsecond update rate
axisMap = &H1E ‘Enable axes 1 through 4
status = flex_enable_axes (boardID, 0, PIDrate, axisMap)
Data Returned by Reference
The FlexMotion functions that return data do so in variables passed into the
function by reference.
Example
Dim status as long
Dim boardID as integer
Dim position as long
Dim axis as integer
boardID = 1
axis = 1
status = flex_read_pos_rtn (boardID, axis, position)
The position for axis one is returned in the position variable.
Data Returned in Arrays
While passing an array to a FlexMotion function in Visual Basic, you need
to pass the first element of the array by reference.
Example
You would pass in returnData& (0) as your parameter, where
returnData (0 to MAX) is an array of MAX longs.
Dim status as long
Dim boardID as integer
Const MAX = 12
Dim returnData (0 to MAX) as long
© National Instruments Corporation
3-7
FlexMotion Software Reference Manual
Chapter 3
Programming Language Considerations
boardID = 1
status = flex_read_trajectory_data_rtn(boardID,
returnData&(0))
Trajectory data is returned in the returnData array and can be accessed
by incrementing through the array.
User-Defined Data Types
Two user-defined data types are used by the FlexMotion functions under
Visual Basic—the registry information data type registryRecord, and the
PID parameters data type PIDVals.
The registry information data type registryRecord is used by the Read
Object Registry function to get the information about the object registry on
the FlexMotion controller. For more information on the object registry,
refer to Chapter 12, Onboard Programming Functions.
Type registryRecord
device As Integer‘The object number
type As Integer‘The type of object
pStart As Long‘The address where the object is stored
size As Long‘Size of the object
End Type
The PID parameters data type PIDVals is used by the Load All PID
Parameters function to load the PID and PIVFF parameters for an axis.
For more information on PID and PIVFF parameters, refer to Chapter 5,
Axis & Resource Configuration Functions.
Type PIDVals
kp As Integer‘Proportional Gain
ki As Integer‘Integral Gain
ilim As Integer‘Integration Limit
kd As Integer‘Derivative Gain
td As Integer‘Derivative Sample Period
kv As Integer‘Velocity Gain
aff As Integer‘Acceleration Feedforward
vff As Integer‘Velocity Feedforward
End Type
FlexMotion Software Reference Manual
3-8
www.natinst.com
Chapter 3
Programming Language Considerations
Example
While using user-defined data types, pass the data types by reference to the
function.
Dim
Dim
Dim
Dim
boardID as integer
axis as integer
pidvalues As PIDVals
inputVector as integer
pidvalues.kp = 100
pidvalues.ki = 0
pidvalues.ilim = 1000
pidvalues.kd = 1000
pidvalues.td = 2
pidvalues.kv = 0
pidvalues.aff = 0
pidvalues.vff = 0
boardID =1
axis = 1
inputVector = &HFF
status = flex_load_loop_params(boardID, axis, pidvalues,
inputVector)
Considerations when Using Read Functions
Read functions return data from the FlexMotion controller. There are two
types of Read functions. The first takes a return vector and returns the data
to a general-purpose variable in onboard memory, or the Return Data
Buffer (RDB). This type of function is typically used in conjunction with
onboard programming. The second type returns the data by reference into
a variable in your application. The functions that return data by reference
have a suffix _rtn. This is the more commonly used type of function. For
more information on return vectors, refer to the Input and Return Vectors
section of Chapter 4, Software Overview.
Example
The return vector version of the Read Position function has the following
function prototype:
status = flex_read_pos (boardID, axis, returnVector)
When you use this function, the data retrieved by the controller is placed
into the general-purpose variable indicated by the returnVector parameter.
© National Instruments Corporation
3-9
FlexMotion Software Reference Manual
Chapter 3
Programming Language Considerations
If the returnVector is 0xFF (for Visual Basic users–&HFF), the return data
is placed in the Return Data Buffer (RDB) for later retrieval.
The _rtn version of Read Position function has the following function
prototype:
status = flex_read_pos_rtn (boardID, axis, position)
where boardID and axis are inputs and position is an output. When you
use this function, the FlexMotion software places the data retrieved from
the controller into the position variable that you referenced when calling
the function. For C/C++ users, position is a pointer to an i32. For Visual
Basic users, position is of type long and the pass-by-reference behavior
is made clear to the compiler by the function prototype in the
Flexmotn.bas header file.
Considerations when Using Functions with Input Vectors
FlexMotion functions that take an input vector allow the data for the
function to be loaded from different sources. The inputVector argument in
a function tells the FlexMotion controller whether to take the function data
from the host computer or from an onboard general-purpose variable.
An input vector of 0xFF (for Visual Basic users, &HFF) will tell the
FlexMotion controller to get the data form the host computer, in other
words, from the data parameters in the function call. For more information
on input vectors, refer to the Input and Return Vectors section of Chapter 4,
Software Overview.
FlexMotion Software Reference Manual
3-10
www.natinst.com
4
Software Overview
This chapter provides an overview of the FlexMotion API and describes the
types of functions you use to configure, initialize, control, and read back
data and status from the FlexMotion controller.
This chapter also includes discussions on advanced features and
programming techniques that describe the power and flexibility of the
FlexMotion architecture.
API Functional Organization
The FlexMotion API consists of over 120 functions organized into nine
functional groups:
•
Axis & Resource Configuration
•
Trajectory Control (includes Arc, Gearing, and Advanced Trajectory
functions)
•
Start & Stop Motion
•
Motion I/O (includes Breakpoint and High-Speed Capture functions)
•
Find Home & Index
•
Analog & Digital I/O
•
Error & Utility
•
Onboard Programming (includes Object Management and Data
Operations functions)
•
Advanced
Each group contains functions that are closely related to each other and
some groups are further organized into advanced function subgroups. This
hierarchical organization makes the extensive FlexMotion API easy to
understand and use.
Detailed descriptions for the functions in each group are in chapters 5
through 13, respectively. Within each chapter and subsection, the functions
are arranged alphabetically by function name. Each chapter and subsection
begins with an overview that describes features and issues relating to all the
functions in the section.
© National Instruments Corporation
4-1
FlexMotion Software Reference Manual
Chapter 4
Software Overview
As a quick reference, a summary of the entire FlexMotion API is in
Appendix B, FlexMotion Functions.
Axes, Vector Spaces, and Motion Resources
FlexMotion can control up to six axes of motion. The axes can be
completely independent, simultaneously coordinated, or mapped in
multidimensional groups called vector spaces. Axes themselves consist of
software and hardware blocks, generically referred to as motion resources.
FlexMotion allows hardware resources that are not mapped to axes to be
used independently as general-purpose I/O.
Resource IDs
Many FlexMotion functions require an axis number or other resource ID to
specify the target of the function. You can send these functions to axes,
vector spaces, or to the motion resources directly. Other functions are
dedicated or controller level and do not require a resource ID. Valid
resource choices are listed in each function description in chapters 5
through 13.
Note By convention, resource IDs are given as hex values with the 0x prefix.
Axes
An axis consists of a trajectory generator, PID or stepper control block, and
some sort of output resource, either a digital-to-analog converter (DAC)
output or a stepper pulse generator output. Servo axes must also have some
sort of feedback resource, either an encoder or ADC channel; refer to
Figures 4-1 and 4-2. Closed-loop stepper axes also require a feedback
resource, and can use either encoder or ADC inputs; open-loop stepper axes
do not require feedback for correct operation.
With FlexMotion, you configure an axis with the Configure Axis Resources
function by mapping feedback resources and output resources to the axis.
An axis with its primary output resource a DAC, is by definition, a servo
axis. An axis with its primary output resource a stepper output, is by
definition, a stepper axis.
FlexMotion Software Reference Manual
4-2
www.natinst.com
Chapter 4
Software Overview
101100111
øA
øB
32-Bit
Encoder 0101011101101
Interface
PID
Servo
Loop
11101101100
16-Bit
D/A
Converter
±10 V
101100111
Index
Figure 4-1. Servo Axis Resources
101100111
øA
øB
32-Bit
Encoder
Interface
Index
01011010
Stepper
Control
Loop
010010110
Stepper
Pulse
Generator
101100111
Figure 4-2. Stepper Axis Resources
In its default configuration, FlexMotion-6C controllers come preconfigured
as six servo axes with Encoder 1 and DAC 1 mapped to Axis 1, Encoder 2
and DAC 2 mapped to Axis 2, and so on through Axis 6. The 7344
controllers are preconfigured as four servo axes with similar feedback and
output resource mappings. However, you can map any feedback and output
resource to any axis. This flexibility allows you to tailor each axis to
accommodate your specific motion system requirements.
Note For many servo applications, the factory-default mapping of encoders and DACs to
axes will meet your typical system requirement.
In addition to the primary feedback and output resources, axes can have
secondary feedback and output resources mapped to them. You can use this
capability to implement dual-loop feedback and other advanced control
algorithms. Refer to the Configure Axis Resources function for more
information.
Axes also have dedicated motion I/O assigned to them. A forward and
reverse limit input, a home input, and an inhibit output are dedicated to each
axis. Depending on whether you are using a FlexMotion-6C or 7344
controller, there are either six or four identical sets of these signals,
© National Instruments Corporation
4-3
FlexMotion Software Reference Manual
Chapter 4
Software Overview
so mapping is not required. If not needed by the axis, you can also use the
signals as general-purpose I/O. Table 4-1 lists the resource IDs for axes.
Table 4-1. Axis Resource IDs
Resource Name
Resource ID
Axis Control
0 (0x00)
Axis 1
1 (0x01)
Axis 2
2 (0x02)
Axis 3
3 (0x03)
Axis 4
4 (0x04)
Axis 5 (FlexMotion-6C only)
5 (0x05)
Axis 6 (FlexMotion-6C only)
6 (0x06)
Functions that can operate on multiple axes simultaneously (for example,
Read Blend Status and Start Motion) can take the axis control (0) as their
resource parameter.
Motion Resources
There are four types of motion resources on the FlexMotion controller:
encoders, ADC channels, DAC outputs, and stepper outputs. In general,
functions relating to motion resources (for example, Read DAC and Read
Steps Generated) can be sent to the resource itself or the axis the resource
is mapped to.
Note Once mapped to an axis, all features and functions of a motion resource are available
as part of the axis. It is not necessary to remember or use the resource number directly when
accessing these features as part of the axis. Resources are referenced by axis number once
assigned to that axis.
Encoders
Encoder resources are primarily used for position feedback on servo and
closed-loop stepper axes. When encoder resources are not mapped to an
axis for use as axis feedback, you can use them for any number of other
functions including position or velocity monitoring, as digital
FlexMotion Software Reference Manual
4-4
www.natinst.com
Chapter 4
Software Overview
potentiometer encoder inputs, or as master encoders for master/slave and
gearing applications. Table 4-2 lists the resource IDs for encoders.
Table 4-2. Encoder Resource IDs
Resource Name
Resource ID
Encoder Control
0x20
Encoder 1
0x21
Encoder 2
0x22
Encoder 3
0x23
Encoder 4
0x24
Encoder 5 (FlexMotion-6C only)
0x25
Encoder 6 (FlexMotion-6C only)
0x26
Functions that can operate on multiple encoders simultaneously
(for example, Read High-Speed Capture Status) can take the encoder
control (0x20) as their resource parameter.
Encoders 1 through 4 (0x21 through 0x24) feature high-speed capture
inputs and breakpoint outputs. These features are implemented in the
encoder processor FPGA and are fully functional when an encoder is used
as an independent resource or as feedback for an axis.
On FlexMotion-6C controllers, encoders 5 and 6 do not have these
advanced features. Also, there are other performance differences between
encoder input channels. Refer to Appendix A, Specifications, of your
motion controller user manual for detailed encoder specifications.
ADC Channels
You can use ADC channels as analog feedback for axes or as
general-purpose analog inputs to measure sensors or potentiometers.
12 Bit
A to D
Converter
± 10 Volts
010101110110
Figure 4-3. ADC Input Resources
© National Instruments Corporation
4-5
FlexMotion Software Reference Manual
Chapter 4
Software Overview
The eight ADC channels are multiplexed and automatically scanned to
keep the converted ADC register values current. For information about
controlling the number of enabled ADCs and the corresponding scan rate,
refer to the Enable ADCs function. Table 4-3 lists the resource IDs for
ADCs.
Table 4-3. ADC Resource IDs
Resource Name
Resource ID
ADC 1
0x51
ADC 2
0x52
ADC 3
0x53
ADC 4
0x54
ADC 5
0x55
ADC 6
0x56
ADC 7
0x57
ADC 8
0x58
ADC channels do not typically provide the same level of feedback
performance as encoders, but have the advantage of providing absolute
rather than incremental feedback.
On 7344 controllers, ADCs 5 through 8 are hard-wired to specific sources,
and cannot be used as general-purpose resources or as feedback devices.
See the Read ADC function for more information.
DAC Outputs
DAC resources are typically mapped to servo axes and generate the analog
control outputs from the PID loops. DAC resources that are not used by
axes are available for non-axis specific applications. You can directly
control an unmapped DAC as a general-purpose analog output.
11101101100
16 Bit
D/A
Converter
±10 V
Figure 4-4. DAC Output Resources
FlexMotion Software Reference Manual
4-6
www.natinst.com
Chapter 4
Software Overview
The DAC outputs offer 16-bit resolution and the industry-standard ±10 V
range. Refer to Appendix A, Specifications, of your motion controller user
manual for complete DAC output specifications. Table 4-4 lists the
resource IDs for DACs.
Table 4-4. DAC Resource IDs
Resource Name
Resource ID
DAC 1
0x31
DAC 2
0x32
DAC 3
0x33
DAC 4
0x34
DAC 5 (FlexMotion-6C only)
0x35
DAC 6 (FlexMotion-6C only)
0x36
Stepper Outputs
Stepper output resources generate the step pulses required for stepper axis
control. They operate like the DAC output in a servo axis.
FlexMotion supports the two industry-standard stepper output
configurations: Step and Direction, or CW/CCW pulses. Refer to the
Configure Step Mode & Polarity function for more information on these
output configurations. Table 4-5 lists the resource IDs for stepper outputs.
Table 4-5. Stepper Output Resource IDs
© National Instruments Corporation
Resource Name
Resource ID
Stepper Output 1
0x41 (7344 only)
Stepper Output 2
0x42 (7344 only)
Stepper Output 3
0x43 (7344 only)
Stepper Output 4
0x44 (7344 only)
Stepper Output 5
0x45 (FlexMotion-6C only)
Stepper Output 6
0x46 (FlexMotion-6C only)
4-7
FlexMotion Software Reference Manual
Chapter 4
Software Overview
General-Purpose I/O Ports
FlexMotion-6C controllers provide 24 bits of general-purpose digital I/O
organized into three 8-bit ports. The 7344 controllers have 32 bits of
general-purpose digital I/O organized into four 8-bit ports. A fifth RTSI
software port is provided as a way to read from and write to the RTSI bus
on 7344 controllers. These I/O ports are also hardware resources, but
because they are never mapped to axes, they are not considered motion
resources.
You can use the general-purpose I/O port structure for programmable logic
controller (PLC) functions or for simple point I/O. For information about
how to configure the direction and polarity of the I/O ports and bits, set and
reset individual bits, and read the logical port status, refer to Chapter 10,
Analog & Digital I/O Functions. Table 4-6 lists the resource IDs for I/O
ports.
Table 4-6. I/O Port Resource IDs
Resource Name
Resource ID
I/O Port 1
1 (0x01)
I/O Port 2
2 (0x02)
I/O Port 3
3 (0x03)
I/O Port 4
4 (0x04) (7344 only)
I/O Port 5
5 (0x05) (7344 only)
Vector Spaces
Vector spaces are logical, multidimensional groups of axes. They can
be either one-dimensional, two-dimensional with x and y axes, or
three-dimensional with x, y, and z axes. FlexMotion supports up to three
vector spaces being defined at the same time.
FlexMotion Software Reference Manual
4-8
www.natinst.com
Chapter 4
Software Overview
Axis Resource
101100111
øA
øB
Z
X,Y, Z
32-Bit
Encoder 0101011101101
Interface
PID
Servo
Loop
11101101100
16-Bit
D/A
Converter
±10 V
Axis X
±10 V
Axis Y
±10 V
Axis Z
101100111
Index
Y
Axis Resource
101100111
øA
X
øB
32-Bit
Encoder 0101011101101
Interface
11101101100
16-Bit
D/A
Converter
101100111
Index
3D
Vector Space
PID
Servo
Loop
Axis Resource
101100111
øA
øB
32-Bit
Encoder 0101011101101
Interface
PID
Servo
Loop
11101101100
16-Bit
D/A
Converter
101100111
Index
Figure 4-5. 3D Vector Space Resources
Vector spaces facilitate 2D and 3D interpolated moves: linear, circular,
helical, and spherical. You can send a vector space to many FlexMotion
functions to define vector position, vector velocity, vector acceleration,
and so on.
Vector spaces are started, stopped, and controlled as if they were a single
axis, greatly simplifying the control of coordinated vector axes. All axes in
a vector space will start and stop at the same time, completing the vector
motion profiles programmed. Table 4-7 lists the resource IDs for vector
space control.
Table 4-7. Vector Space Control Resource IDs
Resource Name
Resource ID
Vector Space Control
0x10
Vector Space 1
0x11
Vector Space 2
0x12
Vector Space 3
0x13
Functions that can operate on multiple vector spaces simultaneously
(for example, Start Motion) can take the vector space control (0x10) as
their resource parameter.
© National Instruments Corporation
4-9
FlexMotion Software Reference Manual
Chapter 4
Software Overview
Vector spaces are configured by mapping axes to the vector space with the
Configure Vector Space function. Vector spaces are logical, not physical,
and do not require motion resources other than those used by the axes
themselves.
Function Types and Parameters
In addition to the API functional organization described previously,
FlexMotion functions can be categorized by common format, execution,
and parameter characteristics.
Bitmapped versus Per-Resource Functions
There are two basic types of FlexMotion functions—those that operate on
one resource (axis, vector space, and so on) at a time, and those that operate
on multiple axes, vector spaces, I/O bits, and so on simultaneously.
Per-resource functions typically send numeric values to, or read numeric
values from, the selected axis or resource. They operate identically on each
axis or member in the resource family.
In contrast, functions that operate on multiple items send and return
bitmaps, where each item (axis, vector space, I/O bit, and so on) is
represented by one bit in the bitmap. Bitmapped values are always shown
in hex (0x prefix) with two characters for a byte value and four characters
for a 16-bit word value.
Some functions set and reset bits using the MustOn/MustOff (MOMO)
protocol. This tri-state protocol allows you to set/reset one or more bits
without affecting the other bits in the bitmap. Refer to Table B-1,
FlexMotion Function Summary, in Appendix B, FlexMotion Functions,
to help you locate the MOMO functions on this protocol.
Bitmapped functions act on all items simultaneously. You should not use
these functions incrementally, because each execution completely
reconfigures all items in the bitmap.
Single and Double-Buffered Parameters
Almost all FlexMotion parameters are either single-buffered or
double-buffered on the controller. Single-buffered parameters take effect
immediately upon function execution and remain in effect until they are
overwritten with another call to the function that loaded or set them. It is
not necessary to constantly reload single-buffered parameters each time
you deal with an axis, vector space, or resource. The obvious exception to
this is action commands like Start Motion, Stop Motion, Find Home, and so
on, which must be called each time.
FlexMotion Software Reference Manual
4-10
www.natinst.com
Chapter 4
Software Overview
Most trajectory control parameters are double-buffered. You can load these
parameters on the fly without affecting the move in process. They do not
take effect until the next Start Motion or Blend Motion function is executed.
Like single-buffered parameters, the controller retains the values so they do
not have to be loaded before each move unless you want to change their
values.
Breakpoint position and breakpoint modulus are the only non-trajectory
parameters that are also double-buffered. They have no effect until you
execute a subsequent Enable Breakpoint function.
Input and Return Vectors
Many functions that load values and virtually all readback functions
support vectoring. Load functions (for example, Load Target Position) take
an input vector that specifies the source of the data, either immediate
(within the function call itself) or from an onboard general-purpose
variable. Read functions (for example, Read Position) take a return vector
that specifies the destination for the returned data, either the host computer
or an onboard variable.
The ability to use variables in motion control functions is one of the
powerful features of the FlexMotion onboard programming environment.
You can read data from a resource into a variable, scale or perform some
other calculation on the value, and then load the new value as a trajectory
or other motion parameter. All data operations functions take data from
variables and return the result through a return vector (typically to another
variable).
Note Data returned to the host by a return vector of 0xFF is actually left in the Return
Data Buffer (RDB). You must then use the Communicate function to retrieve the value
from the RDB.
Input and return vectors are very useful when writing onboard programs but
have little or no use in programs running on the host computer. For this
reason, the default value for input vector is immediate (0xFF) and the API
includes a second _rtn version for all Read functions. This version
automatically retrieves the data from the RDB after requesting it and
returns it by reference to the output parameter.
Note The suffix _rtn on the function indicates that the data should be returned to the host.
When this calling convention is used, no returnVector is required.
For information about the RDB, refer to the Communication between the
Host Computer and the FlexMotion Controller section of this chapter.
© National Instruments Corporation
4-11
FlexMotion Software Reference Manual
Chapter 4
Software Overview
Onboard Variables
FlexMotion supports 120 general-purpose variables (0x01 through 0x78)
for use in onboard programs. Variables are 32 bits wide and can hold either
signed (i32) or unsigned (u32) values. Variables can be referenced in input
and return vector parameters. Data Operations functions use variables
exclusively for input operands and the output result.
In general, most functions have a single data parameter that fits into a single
32-bit variable. If the function uses only a 16-bit data value, it is right
shifted within the 32-bit variable. Some functions with input or return
vectors have more than one data parameter, however. As a general rule,
each parameter, regardless of size, requires it own variable. For these
functions, the vector points to the first variable in a sequential group of
variables. Parameters are then associated with variables in sequential order.
A few advanced functions handle variables differently from the previous
description. Refer to Appendix D, Onboard Variables, Input, and Return
Vectors, for more information on variables and vectors.
Note You can save the entire set of onboard general-purpose variables to Flash ROM with
the Save Default Parameters function.
Initialization Overview
The FlexMotion controller has a factory-default configuration that applies
to a number of typical motion control applications. However, because the
range of possible applications for FlexMotion is endless, you will probably
have to initialize your controller with settings appropriate to your
application before executing axis motion. Appendix C, Default
Parameters, gives a complete list of the factory-default values.
A large number of motion parameters need to be set only once during
initialization. These parameters deal with the physical setup of the
application and are unlikely to change during the application. However, you
can change all FlexMotion parameters on the fly as necessary to tailor the
motion control.
Once these setup and initialization parameters are chosen, you can save
them as customized power-up defaults with the Save Default Parameters
function.
FlexMotion Software Reference Manual
4-12
www.natinst.com
Chapter 4
Software Overview
Recommended Initialization Procedure
This section presents a recommended list of functions you should execute
for system-level and per-axis initialization in the order you should call
them. This recommended list covers the minimum areas of initialization
for basic motion control. You can add additional functions to this list for
enhanced system configuration requirements.
System Configuration
1.
Clear Power Up Status (always required)
2.
Configure Axis Resources
3.
Enable Axes
Motion I/O Configuration
4.
Configure Inhibit Outputs
5.
Set Limit Input Polarity
6.
Set Home Input Polarity
7.
Enable Limits
8.
Enable Home Inputs
Per-Axis Configuration
9.
Configure Step Mode & Polarity (stepper axes only)
10. Load Counts/Steps per Revolution (closed-loop axes only)
11. Load All PID Parameters (servo axes only)
12. Set Stepper Loop Mode (stepper axes only)
Initialize Trajectory Parameters (Per-Axis)
13. Set Operation Mode
14. Load Following Error (closed-loop axes only)
15. Load Velocity
16. Load Acceleration/Deceleration
Establish a Position Reference (Per-Axis)
17. Find Home (requires configured and enabled limit and home inputs)
18. Find Index (closed-loop axes only)
19. Reset Position
© National Instruments Corporation
4-13
FlexMotion Software Reference Manual
Chapter 4
Software Overview
At power-up, all axes are automatically stopped, or killed when the axis
circuits are disabled (when the motor is off). You must always execute a
Clear Power Up Status function before attempting to initialize or control
the FlexMotion controller. This power-up state is for safety and cannot be
bypassed by saving custom defaults. A power cycle also resets velocity
override back to 100%.
An axis automatically starts to servo (servo axes) or the motor is energized
(stepper axes) when you execute a Start Motion, Blend Motion, Stop
Motion (halt type), Find Home, or Find Index function.
Depending upon your application requirements, you may need to configure
the general-purpose I/O ports, enable the ADCs, and so on. Refer to the API
function description in chapters 5 through 13 for more information on each
setup and configuration function.
Motion Trajectories
This section covers features related to motion trajectories, starting and
stopping motion, and the circumstances under which an axis is
automatically stopped or killed. It also discusses how the internal
representation for some trajectory parameters differs from their API and
how this affects their range and resolution.
Trajectory generators are responsible for calculating the instantaneous
position command that controls acceleration and velocity while it moves
the axis to its target position. This command is then sent to the PID servo
loop or stepper pulse generator, depending on axis configuration.
Trajectory Types and Modes
To program a motion trajectory, set the operation mode, load the
double-buffered trajectory parameters, then execute the Start Motion or
Blend Motion function.
Trapezoidal Point-to-Point Position Control
FlexMotion implements an industry-standard trapezoidal profile control
for point-to-point moves. FlexMotion has enhanced the trapezoidal profile
to offer independent acceleration and deceleration value programming and
s-curve smoothing (jerk control) of the (acceleration/deceleration)
inflection points.
FlexMotion Software Reference Manual
4-14
www.natinst.com
Chapter 4
Software Overview
Motion occurs first with a programmable acceleration (smoothed by the
s-curve value), then for a period at a constant velocity (if required) and then
with a programmed deceleration, stopping at the desired target position.
You can interrupt motion by executing a Stop Motion function. Motion is
automatically halt-stopped if an enabled limit or home input signal
becomes active during a motion trajectory controlled move. On closed-loop
axes, if the following error trip point is exceeded, the axis is killed.
Programmed Velocity
Acceleration
Deceleration
Figure 4-6. Trapezoidal Trajectory with S-Curve Acceleration
You can specify trapezoidal moves as absolute, relative, relative to captured
position, or modulo with the Set Operation Mode function.
Velocity Control
Velocity control is a simple variation of trapezoidal position-based control.
The same trajectory generator implements a continuous velocity control
mode. If you select this mode, the target position is effectively infinity and
the axis moves at the programmed constant velocity. You can change
velocity on the fly and all existing acceleration, deceleration, and s-curve
limits are applied to the new velocity in a trapezoidal velocity adjustment.
You can interrupt motion by executing a Stop Motion function. Motion is
automatically halt-stopped if an enabled limit or home input signal
becomes active. This mode is useful for jogging, simple speed control and
velocity profiling (regular updating of velocity) for continuous path
contouring applications.
Move Blending
FlexMotion can blend moves together with a programmable blend factor.
The FlexMotion Infinite Trajectory Control Processing allows you to
automatically and smoothly blend any move type into any other move
without stopping the axis or axes involved.
For more information, refer to the Blend Motion function in Chapter 7,
Start & Stop Motion Functions.
© National Instruments Corporation
4-15
FlexMotion Software Reference Manual
Chapter 4
Software Overview
Electronic Gearing
With electronic gearing, you can slave both position and velocity on one or
more axes to a master position/velocity source for synchronous ratio-based
motion. The master can be the feedback of an axis, an independent encoder
input, ADC channel, or even the trajectory generator output of another axis.
A slave axis operates in a special mode that calculates an instantaneous
position command value that is a ratio of the master axis position.
Because this calculation is completed every PID cycle, the axis accurately
tracks the ratio of the master velocity. For example, setting a gear ratio of
3:2 results in the slave axis rotating three revolutions for every two
revolutions of the master. Each slave axis can have its own gear ratio
independent and relative to the master axis.
You can also superimpose any move type on top of the geared slave because
its trajectory generators are not used for gearing. Again, the target position
command values are combined digitally using superposition. This very
powerful feature allows registration moves in an electronically geared,
master/slave system.
For more information, refer to the Gearing Functions section in Chapter 6,
Trajectory Control Functions.
Linear and Circular Interpolation
You can group multiple axes into vector spaces and perform 2D and 3D
linear interpolation, 2D circular interpolation, and 3D helical and spherical
interpolation.
The FlexMotion Infinite Trajectory Control Processing allows you to blend
any interpolated move segment into another without stopping the axes
involved.
You can interrupt interpolated moves by executing a Stop Motion function.
Motion is automatically halt-stopped on an axis if an enabled limit or home
input becomes active. The other axes in the vector space decelerate to a
stop. Similarly, if any closed-loop axis exceeds its following error trip
point, the axis is killed and the other axes in the vector space decelerate to
a stop.
For more information, refer to the Arcs Functions section in Chapter 6,
Trajectory Control Functions.
FlexMotion Software Reference Manual
4-16
www.natinst.com
Chapter 4
Software Overview
Pull-in Moves
In closed-loop stepper systems, any lost steps (that are not enough to cause
a following error trip) are made up with a final pull-in move. This move is
automatic and does not require a Start Motion or Blend Motion function
execution.
Trajectory Parameters
All trajectory parameters for servo and closed-loop stepper axes are
expressed in terms of quadrature encoder counts. Parameters for open-loop
stepper axes are expressed in steps. For servo axes, the encoder resolution
in counts per revolution determines the ultimate positional resolution of the
axis.
For stepper axes, the number of steps per revolution depends upon the type
of stepper driver and motor being used. For example, a stepper motor with
1.8°/step (200 steps/revolution) used in conjunction with a 10x microstep
driver would have an effective resolution of 2,000 steps per revolution.
Resolution on closed-loop stepper axes is limited to the steps per revolution
or encoder counts per revolution, whichever is more coarse.
There are two other factors that affect the way trajectory parameters are
loaded to the FlexMotion controller versus how they are used by the
trajectory generators: floating-point versus fixed-point parameter
representation, and time base.
You can load some trajectory parameters as either floating-point or
fixed-point values. The internal representation on the FlexMotion
controller is always fixed point, however. This fact is important when
working with onboard variables, input, and return vectors. It also has a
small effect on parameter range and resolution, as shown in the following
examples.
The second factor is the time base. Velocity and acceleration values are
loaded in counts/s, RPM, RPS/s, steps/s, and so on—all functions of
seconds or minutes. But the trajectory generators update target position at
the Trajectory Update Rate, which is programmable with the Enable Axes
function. This means that the range for these parameters depends on the
update rate selected, as shown in the following examples.
© National Instruments Corporation
4-17
FlexMotion Software Reference Manual
Chapter 4
Software Overview
Velocity in RPM
Velocity values in RPM are converted to an internal 16.16 fixed-point
format in units of counts (steps) per sample period (update period) before
being used by the trajectory generator. FlexMotion can control velocity to
1/65,536 of a count or step per sample. You can calculate this minimum
velocity increment in RPM with the following formula:
RPM = Vmin × (1/Ts) × 60 × (1/R)
where
Vmin = 1/65,536 count/sample or step/sample,
Ts = sample period in seconds per sample,
60 = number of seconds in a minute, and
R = counts or steps per revolution.
For a typical servo axis with 2,000 counts per revolution operating at the
250 µs update rate, the minimum RPM increment is:
(1/65,536) × 4,000 × 60/2,000 = 0.00183105 RPM
RPM values stored in onboard variables are in double-precision IEEE
format (f64). For information about the number of variables required to
hold an RPM value, refer to Appendix D, Onboard Variables, Input, and
Return Vectors.
Velocity in Counts/s or Steps/s
Velocity values in counts/s or steps/s are also converted to the internal
16.16 fixed-point format in units of counts or steps per sample (update)
period before being used by the trajectory generator. Although FlexMotion
can control velocity to 1/65,536 of a count or step per sample, you can see
from the following formula that it is impossible to load a value that small
with the Load Velocity function:
Velocity in counts or steps/s = Vmin × (1/Ts)
where
Vmin = 1/65,536 counts/sample or steps/sample and
Ts = sample period in seconds per sample.
Even at the fastest update rate, Ts = 62.5 × 10⁻⁶:
(1/65,536) × 16,000 = 0.244 counts or steps/s
The Load Velocity function takes an integer input with a minimum value of
1 count/s or step/s. You cannot load fractional values. If you need to load a
velocity slower than one count or step per second, use the Load Velocity in
RPM function.
FlexMotion Software Reference Manual
4-18
www.natinst.com
Chapter 4
Software Overview
Acceleration in RPS/s
Acceleration and deceleration values in RPS/s are converted to an internal
16.16 fixed-point format in units of counts/sample2 or steps/sample2 before
being used by the trajectory generator. You can calculate the minimum
acceleration increment in RPS/s with the following formula:
RPS/s = Amin × (1/Ts)2 × (1/R)
where
Amin = 1/65,536 counts/sample2 or steps/sample2,
Ts = sample period in seconds per sample, and
R = counts or steps per revolution.
For a typical servo axis with 2,000 counts per revolution operating at the
250 ms update rate, the minimum RPS/s increment is calculated as follows:
(1/65,536) × (4,000)2/2,000 = 0.122070 RPS/s
RPS/s values stored in onboard variables are in double-precision IEEE
format (f64). For information about the number of variables required to
hold an RPS/s value, refer to Appendix D, Onboard Variables, Input, and
Return Vectors.
Velocity Override in Percent
While the Load Velocity Override function takes a single-precision
floating-point (f32) data value from 0 to 150%, velocity override is
internally implemented as a velocity scale factor of 0 to 384 with an
implicit fixed denominator of 256. This is done for the sake of calculation
speed—the denominator is a simple shift right by eight bits.
The resolution for velocity override is therefore limited to 1/256 or about
0.39%.
Note The conversion from floating-point to fixed-point is performed on the host
computer, not on the FlexMotion controller. To load velocity override from an onboard
variable, you must use the integer representation of 0 to 384.
Arc Angles in Degrees
The Load Circular Arc, Load Helical Arc, and Load Spherical Arc
functions take their angle parameters in degrees as double-precision
floating-point values. These values are converted to an internal 16.16
fixed-point representation where the integer part corresponds to multiples
of 45° (for example, 360° is represented as 0x0008 0000).
© National Instruments Corporation
4-19
FlexMotion Software Reference Manual
Chapter 4
Software Overview
The conversion from floating-point to fixed point is performed as follows:
Angle (in degrees)/45° = Q + R
where
Q = quotient, the integer multiple of 45° and
R = remainder.
Angle (in 16.16 format) = Q.(R/45° × 65,536)
For example, 94.7° is represented in 16.16 format as follows:
Angle (in 16.16 format) = 2.(4.7°/45° × 65,536) = 0x0002.1ABD
The minimum angular increment is therefore (1/65,536) × 45° =
0.000687°.
Note The conversion from floating-point to fixed-point is performed on the host
computer, not on the FlexMotion controller. To load arc functions from onboard variables,
you must use the 16.16 fixed-point representation for all angles.
Communication between the Host Computer and the
FlexMotion Controller
The host computer communicates with a FlexMotion controller through a
number of I/O port addresses on the ISA or PCI bus.
At the controller’s base address is the primary bidirectional data transfer
port. This port supports FIFO data passing in both send and readback
directions. The FlexMotion controller has both a command buffer for
incoming commands and a Return Data Buffer (RDB) for return data.
At offsets from the controller’s base address are two read-only status
registers. The flow of communication between the host and the FlexMotion
controller is controlled by handshaking bits in the Communication Status
Register (CSR). The Move Complete Status (MCS) register provides
instantaneous motion status of all axes.
Board ID
Measurement & Automation Explorer assigns a unique boardID to each
motion controller in your system. Once this assignment is made, all
FlexMotion API functions use this boardID to send and receive commands
and data to/from a specific FlexMotion controller.
FlexMotion Software Reference Manual
4-20
www.natinst.com
Chapter 4
Software Overview
Packets, Handshaking, and FIFO Buffers
This section briefly describes how commands and data are passed between
the host computer and the FlexMotion controller. This information is
provided for reference purposes. The FlexMotion software provides
drivers, DLLs, and C function libraries that handle the host-to-controller
communication for you.
Data passed to or from the FlexMotion controller is handled in a packet
format. A packet consists of a packet identifier word, command and data
content, and a packet terminator word. This approach to communication
enhances the integrity of data communication, speeds the processing of the
transferred command and data, and organizes operation into powerful,
high-level functions.
Each word in a packet is sent over the bus after checking the
Ready-to-Receive (RTR) handshaking bit in the CSR. See the Read
Communication Status function for the status bitmap and more information
on the status reported in the CSR.
Command and data packets are checked for packet format errors as they are
received by the controller. If a packet error is detected, it is immediately
reported by setting an error bit in the CSR. Once the packet is received
without error, the command and data is stored in a FIFO buffer.
This FIFO can hold up to 16 commands. The FlexMotion RTOS will
process commands whenever it is not busy with higher priority tasks. In the
unlikely event that the FIFO fills up before any commands can be
processed, the host will be held off with a Not-Ready-to-Receive condition.
Each command is processed and a determination is made whether to
execute the command immediately, or store it away in a program to be
executed later. Commands are also checked for data and modal (sequence)
errors at this time. Modal errors are flagged by setting the Error Message
bit in the CSR. This modal error is functionally different from the packet
communication error previously described. See the Errors and Error
Handling section of this chapter for more information.
Return Data Buffer
Data or status requested by the host is buffered in the Return Data FIFO
Buffer (RDB). The RDB is 26 words deep and is large enough to hold the
biggest return data packet or many smaller return data packets.
© National Instruments Corporation
4-21
FlexMotion Software Reference Manual
Chapter 4
Software Overview
When data exists in the RDB, the Ready-to-Send bit in the CSR is set. You
can then use the Communicate function in mode 2 to retrieve the data from
the RDB.
You can use the RDB in two ways—as a temporary buffer holding a single
return data packet, or as a small FIFO buffer. Typically, once the requested
data is available in the RDB, it is read back by the host. The _rtn version
of each Read function (for example, flex_read_pos_rtn) performs this
type of synchronous communication for you. The function will not
complete until the requested data is placed in the RDB by the FlexMotion
controller and is then read from the RDB by the function.
It is possible however, to request a number of pieces of data and leave them
in the buffer for retrieval at a later time. The FlexMotion Software supports
both ways of using the RDB.
If the RDB fills up and there is no place to put requested return data,
FlexMotion generates an error and sets the Error Message bit in the CSR.
Errors and Error Handling
To minimize the possibility of erroneous system operation, functions,
packets, and data are checked for errors at multiple levels within the
FlexMotion software and within the firmware that resides on the
FlexMotion controller itself.
In a perfect system, errors should not be generated. However, during
application development and debugging, errors are unfortunately quite
common. FlexMotion offers an extensive error handling structure and
utility functions to allow you to quickly get to the bottom of any
error-generating situation. Refer to Chapter 11, Error & Utility Functions,
and Appendix A, Error Codes, for additional error handling information.
Modal and Non-Modal Errors
FlexMotion can detect two types of errors—modal and non-modal.
Non-modal errors are errors detected at the time of function execution. This
includes packet errors, communication failures, bad Board ID error, data
and resource range errors, and so on.
Each FlexMotion function returns a status that indicates whether the
function executed successfully. A non-zero return status indicates that the
function failed to execute and the status value returned is the non-modal
error code.
FlexMotion Software Reference Manual
4-22
www.natinst.com
Chapter 4
Software Overview
Modal errors, on the other hand, are errors that are not detected at the time
of function execution. Because functions can be buffered in the onboard
FIFO, it is not possible to detect all potential errors at the time of function
execution. Furthermore, some functions can be legal at one time and illegal
at another, depending on the state or mode of the FlexMotion controller. All
errors of these types are classified as modal errors. This modal error
structure also correctly detects errors generated by incorrectly sequenced
functions in onboard programs.
Error Message Stack
Modal errors cannot be enunciated in a function return status. Instead, they
generate an error message containing the command ID, resource ID, and
error code that is pushed on the Error Message Stack on the FlexMotion
controller and flagged in the Error Message (Err Msg) bit of the
Communication Status Register (CSR). You can return a modal error
message to the host by executing the Read Error Message function.
The Error Message Stack is organized as a last-in-first-out (LIFO) buffer so
that the most recent error is available immediately. Older errors can be read
with additional calls to the Read Error Message function and are returned
in the inverse order to which they were generated. When the stack is empty,
the Error Message (Err Msg) bit in the CSR is reset.
The Error Stack can hold up to 30 errors. When the stack is full (an unlikely
event), additional error messages are thrown away.
Communicate versus Individual Function
Entry Points
The FlexMotion software offers individual entry points for each API
function plus a single entry point function, Communicate, which can send
any function packet. The individual entry points perform more extensive
error checking than Communicate because they are aware of the function
context. Therefore, more errors can be caught as non-modal errors.
When you use the Communicate entry point, all errors except packet errors,
bad Board ID error, and communication failure are reported as modal
errors.
© National Instruments Corporation
4-23
FlexMotion Software Reference Manual
Chapter 4
Software Overview
Onboard Programs
Functions stored in onboard programs are checked twice for errors. The
first time is when you are storing the function in the program. You can
detect both non-modal and modal errors during program storage,
depending on the level of command FIFO usage and whether you are
calling the individual API entry points or calling the Communicate
function.
When the program is run, the stored functions are again checked for errors.
Only modal errors are generated during program execution.
Note If the host or onboard program is correctly written, you should not see any packet or
modal errors. These error handling structures are used mostly during application
development and debugging.
Fatal Hardware and Communication Errors
There are a few errors that, if detected, indicate a severe or fatal error
condition. These include but are not limited to NIMC_boardFailureError,
NIMC_watchdogTimeoutError, NIMC_FPGAProgramError,
NIMC_DSPInitializationError, NIMC_IOInitializationError, and
NIMC_readyToReceiveTimeoutError. Refer to Appendix A, Error Codes,
for a complete list of error codes and possible causes.
Fatal errors are unlikely, but if they occur, try to clear them by resetting or
power cycling. If this procedure does not clear the problem, refer to
Appendix E, Technical Support Resources.
Error Handling Techniques
Be sure to constantly watch for error conditions. You should always check
the function return status for a non-zero error code and react to the error as
appropriate. These non-modal errors are easily handled like any other
function error in C/C++ or other programming languages. The FlexMotion
software includes a utility function, Get Error Description, which you can
use to create error description strings for display.
Modal error handling is a bit more involved. Because these errors are rare
but can occur at any time, your application should check for modal errors
at various intervals. This is done by calling the Read Communication Status
function and checking the Error Message bit. How often to check for modal
FlexMotion Software Reference Manual
4-24
www.natinst.com
Chapter 4
Software Overview
errors depends upon your application, but you can use the following list as
a guideline:
1.
Check for modal errors at the end of each major subroutine or
functional block.
2.
Check for modal errors at the end of an initialization procedure. Even
better is to also check after each axis initialization. You should always
check after executing a Find Home or Find Index function to make sure
the sequence completed successfully.
3.
Include a modal error check in every status polling loop. Most
applications include a polling loop to display motion status, position,
velocity, and so on. This way you are assured of never missing a modal
error.
4.
You can always add a modal error check after each FlexMotion API
call, but that is inefficient and unnecessary. Remember that a correctly
written program will not generate errors.
5.
During debugging, you can run an independent application to check
for modal errors. The FlexCommander application always checks
modal errors for you when it is running.
Refer to the example programs, included with the FlexMotion software,
to see how error handling is implemented in practice.
© National Instruments Corporation
4-25
FlexMotion Software Reference Manual
Axis & Resource Configuration
Functions
5
This chapter contains detailed function descriptions of the functions used
to configure the axes and resources on your FlexMotion controller. The
functions are arranged alphabetically by function name.
These functions give you access to some of the most powerful features of
FlexMotion. They allow you to map encoder, ADC, and DAC resources to
various axes, configure axes for servo or stepper control, and combine axes
into 2D and 3D vector spaces for advanced motion control applications.
These axis and resource configuration functions are typically executed
once during system initialization. You can call most of them at any time to
reconfigure your motion control system on-the-fly. All of the functions in
this chapter have default values that provide good starting points for many
motion control applications.
As a quick reference, a summary of the entire FlexMotion function API is
in Appendix B, FlexMotion Functions.
© National Instruments Corporation
5-1
FlexMotion Software Reference Manual
Chapter 5
Axis & Resource Configuration Functions — flex_config_axis
flex_config_axis
Configure Axis Resources
Format
status = flex_config_axis (boardID, axis, primaryFeedback, secondaryFeedback,
primaryOutput, secondaryOutput)
Purpose
Configures an axis by defining its feedback and output resources.
Parameters
Input
Name
Type
Description
boardID
u8
assigned by Measurement & Automation Explorer
axis
u8
axis to be configured
primaryFeedback
u8
primary encoder or ADC feedback resource
secondaryFeedback
u8
secondary encoder or ADC feedback resource
primaryOutput
u8
primary DAC or step output resource
secondaryOutput
u8
secondary DAC or step output resource
Parameter Discussion
axis is the axis to be configured. Valid axis numbers are 1 through 6 for all FlexMotion
controllers. On reduced axis count controllers, configuring non-existent axes will have no
effect.
primaryFeedback is the number for the primary feedback resource being mapped to the axis.
The primary feedback resource is used for position feedback and derivative (Kd) damping.
Valid feedback resources include encoders (0x21 through 0x26 on FlexMotion-6C controllers
and 0x21 through 0x24 on 7344 controllers) and ADC channels (0x51 through 0x58 on
FlexMotion-6C controllers and 0x51 through 0x54 on 7344 controllers). Enter 0 (zero) to
configure no primary feedback resource.
secondaryFeedback is the number for an optional secondary feedback resource being
mapped to the axis. If a secondary feedback resource is mapped, it is used for velocity
feedback (Kv). Valid feedback resources include encoders (0x21 through 0x26 on
FlexMotion-6C controllers and 0x21 through 0x24 on 7344 controllers) and ADC channels
FlexMotion Software Reference Manual
5-2
www.natinst.com
Chapter 5
Axis & Resource Configuration Functions — flex_config_axis
(0x51 through 0x58on FlexMotion-6C controllers and 0x51 through 0x54 on 7344
controllers). Enter 0 (zero) to configure no secondary feedback resource.
primaryOutput is the number for the primary output resource being mapped to the axis. This
is the main command output. Valid output resources include DACs (0x31 through 0x36 on
FlexMotion-6C controllers and 0x31 through 0x34 on 7344 controllers) and Step Outputs
(0x45 through 0x46 on FlexMotion-6C controllers and 0x41 through 0x44 on 7344
controllers). Enter 0 (zero) to configure no primary output resource.
secondaryOutput is the number for an optional secondary output resource being mapped to
the axis. This is an optional command output. Valid output resources include DACs (0x31
through 0x36 on FlexMotion-6C controllers and 0x31 through 0x34 on 7344 controllers) and
Step Outputs (0x45 through 0x46 on FlexMotion-6C controllers and 0x41 through 0x44 on
7344 controllers). Enter 0 (zero) to configure no secondary output resource.
Using This Function
The Configure Axis Resources function defines the feedback and output devices for an axis.
You can configure up to two feedback resources and two output resources for each axis. This
flexible mapping of resources to axes allows for advanced servo and stepper configurations
such as: independent velocity and position feedback devices (dual-loop control), dual DAC
outputs with different offsets, and so on.
The various feedback and output resources on the FlexMotion controller have different
interface, performance, and functionality characteristics. This function allows you to define
the axis and tailor its performance.
The Configure Axis Resources function must be called for each axis that will be used by an
application prior to enabling the axis. The factory default mapping of resources to axes is as
follows.
Axis
Primary
Feedback
Secondary
Feedback
Primary Output
Secondary
Output
1
0x21 (Enc 1)
0
0x31 (DAC 1)
0
2
0x22 (Enc 2)
0
0x32 (DAC 2)
0
3
0x23 (Enc 3)
0
0x33 (DAC 3)
0
4
0x24 (Enc 4)
0
0x34 (DAC 4)
0
5
0x25 (Enc 5)
0
0x35 (DAC 5)
0
6
0x26 (Enc 6)
0
0x36 (DAC 6)
0
© National Instruments Corporation
5-3
FlexMotion Software Reference Manual
Chapter 5
Axis & Resource Configuration Functions — flex_config_axis
Note You cannot configure an axis when any axes are enabled. You must first disable all
axes using the Enable Axes function.
Example 1
To change axis 5 to use the fourth encoder channel and the sixth DAC output, call the
Configure Axis Resources function with the following parameters.
Axis
Primary
Feedback
Secondary
Feedback
Primary Output
Secondary
Output
5
0x24 (Enc 4)
0
0x36 (DAC 6)
0
To avoid potential contention for output resources, this VI will always honor the configuration
of the last time it is called. In this example, both axis 6 (by default) and axis 5 want to use
DAC 6. Similarly, both axis 4 (by default) and axis 5 want to use encoder 4. To avoid
contention, DAC 6 is assigned to axis 5 and removed from axis 6, and encoder 4 is assigned
to axis 5 and removed from axis 4, resulting in the following parameters.
Axis
Primary
Feedback
Secondary
Feedback
Primary Output
Secondary
Output
4
0
0
0x34 (DAC 4)
0
6
0x26 (Enc 6)
0
0
0
You must now call this VI again to configure axis 4 with a different feedback resource and
axis 6 with a different output resource.
Example 2
To configure axis 2 for dual-loop feedback you can use the following parameters.
Axis
Primary
Feedback
Secondary
Feedback
Primary Output
Secondary
Output
2
0x51 (ADC 1)
0x22 (Enc 2)
0x32 (DAC 2)
0
In this example, an ADC channel is used for the primary position feedback (kp, ki, kd) while
an encoder is used for the secondary velocity feedback. This application will typically use
velocity feedback (Kv) from the encoder for stability. For information about setting Kv, refer
the Load Single PID Parameter function.
FlexMotion Software Reference Manual
5-4
www.natinst.com
Chapter 5
Axis & Resource Configuration Functions — flex_config_axis
Note Stepper axes do not support dual-loop feedback and cannot have a secondary
feedback resource configured.
© National Instruments Corporation
5-5
FlexMotion Software Reference Manual
Chapter 5
Axis & Resource Configuration Functions — flex_config_mc_criteria
flex_config_mc_criteria
Configure Move Complete Criteria
Format
status = flex_config_mc_criteria (boardID, axis, criteria, deadband, delay, minPulse)
Purpose
Configures the criteria for the Move Complete status to be True.
Parameters
Input
Name
Type
Description
boardID
u8
assigned by Measurement & Automation Explorer
axis
u8
axis to be configured
criteria
u16
conditions that must be met for the MC status to
be True
deadBand
u16
tolerance area around target position
delay
u8
settling time delay in ms
minPulse
u8
minimum time the MC status must stay true in ms
Parameter Discussion
axis is the axis to be configured.
criteria is the bitmap that defines the criteria for the move complete status to be True.
D15
D14
D13
D12
D11
D10
D9
D8
D7
D6
D5
D4
D3
D2
D1
D0
0
0
0
0
0
0
0
0
0
0
0
In
Pos
Delay
Stop
MOff
PC
D0 Profile Complete (PC):
1 = Profile must be complete (default)
0 = N/A (cannot reset)
D1 Motor Off (MOff):
1 = Motor must be off
0 = Motor off status not considered (default)
FlexMotion Software Reference Manual
5-6
www.natinst.com
Chapter 5
Axis & Resource Configuration Functions — flex_config_mc_criteria
D2 Stop:
1 = Run/Stop must be stopped
0 = Run/Stop not considered (default)
D3 Delay:
1 = Move complete only after delay
0= Move complete not delayed (default)
D4 In Position (In Pos):
1 = Must be within deadband of target position
0 = Ignore in position status (default)
The effect of the criteria parameter can be summarized with the following equation:
Move Complete = (Profile Complete [OR Motor Off])
[AND (Run/ Stop == Stop)]
[AND (Delay == Done)]
[AND (| position – target position | < deadband)]
where
[...] = optional criteria.
deadband is the tolerance around the target position. If selected, the move is only considered
complete when | position – target position | < deadband. Deadband has a range of 0 (default)
to 32,767.
delay is a programmable settling time delay in ms. You can program it from 0 (default) to
255 ms.
minPulse is the minimum time in ms that the move complete status must stay true. This
parameter allows you to enforce a minimum pulse width on the move complete status even if
the axis is started again. The range is 0 (default) to 255 ms.
Using This Function
The Configure Move Complete Criteria function defines the conditions for reporting a move
complete. When a move is complete on an axis, the corresponding bit in the Move Complete
Status (MCS) register is set. For information about reading the MCS register, refer to the Read
Move Complete Status function.
This function allows a great deal of control over when and how a move is considered
complete. The Criteria bitmap contains five bits to set the conditions used to determine the
Move Complete status. The first two, Profile Complete and Motor Off, are logically OR’d to
provide the basis for Move Complete. The Profile Complete bit is always set and cannot be
disabled. When the axis trajectory generator completes its profile, this condition is satisfied.
© National Instruments Corporation
5-7
FlexMotion Software Reference Manual
Chapter 5
Axis & Resource Configuration Functions — flex_config_mc_criteria
If the Motor Off bit is set, any condition that causes the axis to turn its motor off (a kill or
following error trip) will satisfy this basic requirement for Move Complete. In other words,
either Profile Complete OR Motor Off must be True for Move Complete to be True.
The next three criteria, Run/Stop, Delay, and In Position, are optional conditions that are
logically AND’d to further qualify the Move Complete status. If the Run/Stop bit is set, the
axis must also be logically stopped for the move to be considered complete. For information
about the Run/Stop status, refer to the Configure Velocity Filter function.
If the Delay bit is set, the axis must wait a user-defined delay after the other criteria are met
before the move is considered complete. The user-defined delay parameter is typically used
to wait the mechanical settling time so that a move is not considered complete until vibrations
in the mechanical system have damped out. It can also be used to compensate for PID pull-in
time due to the integral term. This pull-in is typically at velocities below the Run/Stop
threshold.
Finally, if the In Position bit is set, the axis checks its final stopping position versus its target
position and only sets the Move Complete status if the absolute value of the difference is less
than the in position deadband.
The final parameter, minPulse sets the minimum time that the Move Complete status must
stay True. A non-zero value for minPulse guarantees that the status stays in the True state for
at least this minimum time even if another move starts immediately. You can use this feature
to make sure that the host does not miss a Move Complete status when it polls the Move
Complete Status register.
Note You can use the Delay parameter to guarantee a minimum time for the False state.
The status will transition from Complete to Not Complete at the start of a move and stay
in the Not Complete state for at least this delay time even in the case of a zero distance
move.
The Configure Move Complete Criteria function is typically called for each axis prior to using
the axis for position control. Once the criteria are set, they remain in effect until changed. You
can execute this function at any time.
When an axis starts, its corresponding bit in the Move Complete Status register is reset to
zero. When the move completes, the bit is set to one. You can check the status of an axis or
axes at any time by polling the MCS register. Onboard programs can use this status to
automatically sequence moves with the Wait on Condition function.
FlexMotion Software Reference Manual
5-8
www.natinst.com
Chapter 5
Axis & Resource Configuration Functions — flex_config_step_mode_pol
flex_config_step_mode_pol
Configure Step Mode & Polarity
Format
status = flex_config_step_mode_pol (boardID, axisOrStepperOutput, modeAndPolarityMap)
Purpose
Configures the mode and polarity of a stepper output.
Parameters
Input
Name
Type
Description
boardID
u8
assigned by Measurement & Automation Explorer
axisOrStepperOutput
u8
axis or stepper output to be configured
modeAndPolarityMap
u16
bitmap of output mode and polarity
Parameter Discussion
axisOrStepperOutput is the axis or stepper output to be configured. When sent to a stepper
axis, this function configures the mapped stepper output. Alternatively, you can execute this
function directly on the stepper output resource.
modeAndPolarityMap is the output mode and polarity bitmap.
D15
D14
D13
D12
D11
D10
D9
D8
D7
D6
D5
D4
D3
D2
D1
D0
0
0
0
0
0
0
0
0
0
0
0
0
0
Pol
0
Mode
D0 Mode:
1 = Step & Direction (default)
0 = CW & CCW
D1 Reserved
D2 Polarity (Pol):
1 = Inverting (default)
0 = Noninverting
© National Instruments Corporation
5-9
FlexMotion Software Reference Manual
Chapter 5
Axis & Resource Configuration Functions — flex_config_step_mode_pol
Using This Function
You use this function to configure a stepper output to correctly interface with a stepper driver.
FlexMotion supports the two industry standards for stepper control outputs. The most popular
mode is Step and Direction where one output produces the step pulses and the other output
produces a direction signal.
In clockwise (CW) and counter-clockwise (CCW) mode, the first output produces pulses
when moving forward or CW while the second output produces pulses when moving reverse
or CCW.
In either mode, you can set the active polarity with the polarity bit to be active low (inverting)
or active high (noninverting). For example, in Step and Direction mode, the polarity bit
determines whether a high direction output is forward or reverse. It also determines the resting
states of outputs when they are not pulsing.
The Configure Step Mode & Polarity function is typically called for each stepper axis prior
to using the axis for position control. Once the mode and polarity are set, they remain in effect
until changed. You can execute this function at any time.
FlexMotion Software Reference Manual
5-10
www.natinst.com
Chapter 5
Axis & Resource Configuration Functions — flex_config_vect_spc
flex_config_vect_spc
Configure Vector Space
Format
status = flex_config_vect_spc (boardID, vectorSpace, xaxis, yaxis, zaxis)
Purpose
Defines the axes that are associated with a vector space.
Parameters
Input
Name
Type
Description
boardID
u8
assigned by Measurement & Automation Explorer
vectorSpace
u8
vector space to be configured
xaxis
u8
physical axis to act as the logical x axis
yaxis
u8
physical axis to act as the logical y axis
zaxis
u8
physical axis to act as the logical z axis
Parameter Discussion
vectorSpace is the vector space to be configured. Valid vector space numbers are 0x11
(default), 0x12 and 0x13.
xaxis is the physical axis (1 through 6) to act as the logical x axis. The default is 0 (none).
yaxis is the physical axis (1 through 6) to act as the logical y axis. The default is 0 (none).
zaxis is the physical axis (1 through 6) to act as the logical z axis. The default is 0 (none).
Using This Function
The Configure Vector Space function is used to group axes into a vector space. A vector space
defines an x and y (2D) or x, y, and z (3D) coordinate space. You can map any physical axis
can be mapped to the logical x, y, and z axes to control motion in the vector space.
Once configured, you can use the vector space number in all functions that support vector
spaces. Vector spaces are used in 2D and 3D linear interpolation with vector position, vector
velocity, vector acceleration and deceleration, and vector operation mode. They are also used
in circular, helical and spherical arc moves. You can start, blend, and stop vector spaces just
© National Instruments Corporation
5-11
FlexMotion Software Reference Manual
Chapter 5
Axis & Resource Configuration Functions — flex_config_vect_spc
like axes. You can even synchronously start multiple vector spaces for multi-vector space
coordination.
Many status and data readback functions also operate on vector spaces. You can read vector
position, vector velocity, vector blend status, and so on, or you can read per-axis values and
status for the axes within the vector space.
While vector spaces can be comprised of three axes, it is possible to define two-axis or even
one-axis vector spaces. These vector spaces will function properly for all functions that do not
require a greater axis count.
You can use other complex motion control functions with vector spaces, including
electronically gearing an independent axis to a master axis contained within a vector space
definition.
Note Axes cannot belong to two vector spaces at the same time. To move an axis from one
vector space to another, you must de-map the axis from the first vector space and then map
it to the second vector space.
Example
Vector space 2 (0x12) is configured with axis 3 as the x axis, axis 1 as the y axis, and axis 2
as the z axis. The resulting 3D vector space is shown in Figure 5-1.
Z axis = axis 2
Y axis = axis 1
X axis = axis 3
Figure 5-1. 3-D Vector Space Example
FlexMotion Software Reference Manual
5-12
www.natinst.com
Chapter 5
Axis & Resource Configuration Functions — flex_enable_axes
flex_enable_axes
Enable Axes
Format
status = flex_enable_axes (boardID, reserved, PIDrate, axisMap)
Purpose
Enables the operating axes and defines the PID and trajectory update rate.
Parameters
Input
Name
Type
Description
boardID
u8
assigned by Measurement & Automation Explorer
reserved
u8
unused input
PIDrate
u8
PID update rate
axisMap
u8
bitmap of axes to enable
Parameter Discussion
reserved is an unused input. The input value is ignored.
PIDrate is the PID control loop and trajectory generator update rate. For stepper axes, this
parameter also determines how often the step generator is updated. The range for this
parameter is 0 to 7, with a default of 3.
Update Rate = (PIDrate + 1) × 62.5 µs
PIDrate
Update Rate
0
62.5 µs
1
125 µs
2
188 µs
3
250 µs
4
312 µs
5
375 µs (default)
© National Instruments Corporation
5-13
FlexMotion Software Reference Manual
Chapter 5
Axis & Resource Configuration Functions — flex_enable_axes
PIDrate
Update Rate
6
438 µs
7
500 µs
axisMap is the bitmap of enabled axes.
D7
D6
D5
D4
D3
D2
D1
D0
0
AXIS 6
AXIS 5
AXIS 4
AXIS 3
AXIS 2
AXIS 1
0
D1 through D6:
1 = Axis enabled
0 = Axis disabled (default)
Using This Function
The Enable Axes function is used to enable the specific axes required for the application and
set the servo (and stepper) update or sample rate. For highest performance, the FlexMotion
trajectory generators calculate a new instantaneous target position each update. Similarly, the
stepper pulse generators are adjusted each update to accurately control the step frequency.
Only enabled axes are updated and there is a direct correspondence between the number of
enabled axes and the fastest update rate allowed.
Number of Servo
Axes Enabled
Fastest Sample Rate
PIDrate (min)
1
62.5 µs
0
2
125 µs
1
3
188 µs
2
4
250 µs
3
5
312 µs
4
6
375 µs
5
The fastest update rate is only achievable when all axes are single-feedback servo axes and no
extra encoders are enabled.
Servicing the stepper pulse generators takes extra time that subtracts from the time available
for trajectory generation. If one or more axes are configured as stepper, you must increase the
PIDrate value by one (+1) and operate at the correspondingly slower update rate.
FlexMotion Software Reference Manual
5-14
www.natinst.com
Chapter 5
Axis & Resource Configuration Functions — flex_enable_axes
There is also a limit on the total number of enabled encoders that you can service when
PIDrate is below 3.
PIDrate
Update Rate
Max Number of Encoders
0
62.5 µs
1
1
125 µs
3
2
188 µs
5
3
250 µs
6
If your application requires more encoders than can be serviced at a specific update rate, you
must increase PIDrate appropriately.
Update rates that are too fast for the number of axes, stepper outputs and/or
encoders enabled will generate an error and the previous setting will remain in effect.
For information about errors and error handling, refer to Chapter 4, Software Overview.
Caution
The Enable Axes function will automatically enable the feedback devices mapped to the
enabled axes. It is not necessary to explicitly enable the encoders or ADC channels before
enabling the axes. Refer to the Enable Encoders and Enable ADCs functions for more
information on enabling and disabling these resources when you are using them not mapped
to an axis.
Note ADC channel scan rate is affected by the number of changes enabled. This could
limit the effective update rate (for axes with analog feedback). Refer to the Enable ADCs
function for more information.
Illegally configured axes cannot be enabled and attempting to do so will generate
an error. For example, an attempt to enable a servo axis that does not at least have its
Primary Feedback device mapped will generate an error.
Caution
You can also set the update rate slower than the maximum. This is useful in many applications
to scale the effective range of the PID control loop parameters and/or to improve stability.
Refer to the Load Single PID Parameter function for more information on the PID parameters
affected by the update rate.
Note Enabled axes must be killed (motor off) when changing the PID update rate or an
error will be generated.
© National Instruments Corporation
5-15
FlexMotion Software Reference Manual
Chapter 5
Axis & Resource Configuration Functions — flex_enable_axes
Example
Your application has the following axis requirements: Axis 1 is a servo axis with dual-loop
encoder feedback. Axis 2 is a closed-loop stepper axis. You also want to use the remaining
3 encoder channels as digital potentiometer inputs.
You have 2 axes, one of which is stepper. The fastest update rate you can set is as follows:
PIDrate = 1 + 1 (stepper) = 2
But at a PIDrate of 2, the maximum number of encoders is 5 and you need 6. So you must
increase PIDrate to the following:
PIDrate = 2 + 1 (too many encoders) = 3
Update Rate = (PIDrate + 1) × 62.5 µs = (3 + 1) × 62.5 µs = 250 µs
To enable axes 1and 2 with an update rate of 250 µs, call the Enable Axes function with
PIDrate = 3 and axisMap = 0x06. The value 0x06 corresponds to the following bitmap.
D7
D6
D5
D4
D3
D2
D1
D0
0
AXIS 6
AXIS 5
AXIS 4
AXIS 3
AXIS 2
AXIS 1
0
0
0
0
0
0
1
1
0
You must also enable the extra digital potentiometer encoders with the Enable Encoders
function.
FlexMotion Software Reference Manual
5-16
www.natinst.com
Chapter 5
Axis & Resource Configuration Functions — flex_load_counts_steps_rev
flex_load_counts_steps_rev
Load Counts/Steps per Revolution
Format
status = flex_load_counts_steps_rev (boardID, axis, unitType, countsOrSteps)
Purpose
Loads the quadrature counts or steps per revolution for an axis.
Parameters
Input
Name
Type
Description
boardID
u8
assigned by Measurement & Automation Explorer
axis
u8
axis to be controlled
unitType
u16
type of information, counts or steps, that is being loaded
countsOrSteps
u32
quadrature counts or steps per revolution
Parameter Discussion
axis is the axis to be controlled.
unitType is the type of information, counts or steps, that is being loaded. The legal values are
as follows.
unitType Constant
unitType Value
Action
NIMC_COUNTS
0
load counts per revolution
NIMC_STEPS
1
load steps per revolution
countsOrSteps is typically the quadrature counts or steps per revolution for the encoder
mapped to the axis. The range for this parameter is 2 to 228–1 with a default value of 2,000.
Using This Function
You use the Load Counts/Steps per Revolution function to load any feedback value per unit
of measure. For encoders, this is typically in units of quadrature counts per motor revolution,
but can be counts per inch, per cm, or per any unit of measure. For analog feedback, it can be
in units of scaled voltage. Steps can be full steps, half steps, or microsteps depending upon
how you have the external stepper driver and motor configured.
© National Instruments Corporation
5-17
FlexMotion Software Reference Manual
Chapter 5
Axis & Resource Configuration Functions — flex_load_counts_steps_rev
This parameter must be correctly loaded before you call the Load Velocity in RPM, Load
Accel/Decel in RPS/sec, Load Velocity Threshold in RPM, Read Velocity in RPM, or Find
Index functions.
The Find Index function will search for the encoder index for one revolution as defined by
this function. Therefore, another useful unit of measure is counts per index period. Linear
encoders often have indexes every inch or every centimeter.
Closed-loop stepper functionality relies on the ratio of counts to steps and not on the absolute
values of counts per revolution or steps per revolution. For closed-loop operation, any unit of
measure (UOM) that allows you to enter both counts per UOM and steps per UOM that are
within their valid ranges will work.
For closed-loop stepper controllers, steps/counts must be in the range of
1/32,767 < steps/counts < 32,767.
Warning
Other than these special issues with Find Index and closed-loop stepper functionality, the
Load Counts/Steps per Revolution function loads a scale factor that affects subsequently
loaded and readback values of velocity and acceleration.
FlexMotion Software Reference Manual
5-18
www.natinst.com
Chapter 5
Axis & Resource Configuration Functions — flex_load_pid_parameters
flex_load_pid_parameters
Load All PID Parameters
Format
status = flex_load_pid_parameters (boardID, axis, PIDValues, inputVector)
Purpose
Loads all 8 PID control loop parameters for an axis.
Parameters
Input
Name
Type
Description
boardID
u8
assigned by Measurement & Automation Explorer
axis
u8
axis to configure
PIDValues
PID FAR *
inputVector
u8
data structure containing all 8 PID parameters
source of the data for this function
Parameter Discussion
axis is the axis to configure.
PIDValues data structure contains all eight PID parameters in the following structure:
struct
u16
u16
u16
u16
u16
u16
u16
u16
} PID;
{
kp;// Proportional Gain
ki;// Integral Gain
il;// Integration Limit
kd;// Derivative Gain
td;// Derivative Sample Period
kv;// Velocity Feedback Gain
aff;// Acceleration Feedforward Gain
vff;// Velocity Feedforward Gain
inputVector indicates the source of the data for this function. Available inputVectors include
immediate (0xFF) or variable (0x01 through 0x78).
© National Instruments Corporation
5-19
FlexMotion Software Reference Manual
Chapter 5
Axis & Resource Configuration Functions — flex_load_pid_parameters
Using This Function
The Load All PID Parameters function allows you to set all eight PID parameters at the same
time for a given axis. You can call this function at any time. However, it is typically used
during initialization to configure and tune an axis. FlexMotion also offers a Load Single PID
Parameter function, which you can use to change an individual value on-the-fly without
having to worry about the other unchanged values.
Refer to Chapter 4, Functional Overview, of your motion controller user manual for an
overview of the PID control loop on the FlexMotion controller and to the Load Single PID
Parameter function for descriptions on the individual PID parameters and their ranges.
FlexMotion Software Reference Manual
5-20
www.natinst.com
Chapter 5
Axis & Resource Configuration Functions — flex_load_single_pid_parameter
flex_load_single_pid_parameter
Load Single PID Parameter
Format
status = flex_load_single_pid_parameter (boardID, axis, parameterType, PIDValue,
inputVector)
Purpose
Loads a single PID control loop parameter for an axis.
Parameters
Input
Name
Type
Description
boardID
u8
assigned by Measurement & Automation Explorer
axis
u8
axis to configure
parameterType
u16
selects PID parameter to load
PIDValue
u16
PID value to load
inputVector
u8
source of the data for this function
Parameter Discussion
axis is the axis to configure.
parameterType is the selector for the PID parameter to load.
parameterType Constant
parameterType Value
NIMC_KP
0
NIMC_KI
1
NIMC_IL
2
NIMC_KD
3
NIMC_TD
4
NIMC_KV
5
NIMC_AFF
6
NIMC_VFF
7
© National Instruments Corporation
5-21
FlexMotion Software Reference Manual
Chapter 5
Axis & Resource Configuration Functions — flex_load_single_pid_parameter
PIDValue is the value to load for the selected PID parameter.
PID Parameter
Abbreviation
Data Ranges
Default
Proportional Gain
Kp
0 to 32,767
100
Integral Gain
Ki
0 to 32,767
0
Integration Limit
Ilim
0 to 32,767
1,000
Derivative Gain
Kd
0 to 32,767
1,000
Derivative Sample Period
Td
0 to 63
2
Velocity Feedback Gain
Kv
0 to 32,767
0
Acceleration Feedforward Gain
Aff
0 to 32,767
0
Velocity Feedforward Gain
Vff
0 to 32,767
0
inputVector indicates the source of the data for this function. Available inputVectors include
immediate (0xFF) or variable (0x01 through 0x78).
Using This Function
Refer to Chapter 4, Functional Overview, of your motion controller user manual for an
overview of the enhanced PID control loop on the FlexMotion controller. The Load Single
PID Parameter function allows you to change an individual PID value on-the-fly without
having to worry about the other unchanged PID values.
Proportional Gain
The proportional gain (Kp) determines the contribution of restoring force that is directly
proportional to the position error. This restoring force functions in much the same way as a
spring in a mechanical system.
Each sample period, the PID loop calculates the position error (the difference between the
instantaneous trajectory position and the primary feedback position) and multiplies it by Kp
to produce the proportional component of the 16-bit DAC command output.
The formula for calculating this proportional contribution is as follows:
Vout(proportional) = (20 V / 216) × Kp × Position Error
An axis with zero or too small a value of Kp will not be able to hold the axis in position and
will be very soft. Increasing Kp stiffens the axis and improves its disturbance torque rejection.
However, too large a value of Kp will often result in instability.
FlexMotion Software Reference Manual
5-22
www.natinst.com
Chapter 5
Axis & Resource Configuration Functions — flex_load_single_pid_parameter
Integral Gain
The integral gain (Ki) determines the contribution of restoring force that increases with time
and thus ensures that the static position error in the servo loop is forced to zero. This restoring
force works against constant torque loads to help achieve zero position error when the axis is
stopped.
Each sample period, the position error is added to the accumulation of previous position errors
to form an integration sum. This integration sum is scaled by dividing by 256 prior to being
multiplied by Ki. Therefore, the formula for calculating the integral contribution in the 16-bit
DAC command output is as follows:
Vout(integral) = (20 V / 216) × Ki × LIMIT(Integration Sum/256)
where
LIMIT = shorthand for the effects of the integration limit described in the following
sections.
Note The scaling by 1/256 allows the use of integer values for the integral gain even when
only a small amount of integral contribution is required.
In applications with small static torque loads, this value can be left at its default value of
zero (0). For systems having high static torque loads, this value should be tuned to minimize
position error when the axis is stopped.
Non-zero values of Ki, while reducing static position error, tend to increase position error
while accelerating and decelerating. This effect can be mitigated through the use of the
Integration Limit parameter. Too high a value of Ki will often result in servo loop instability.
For these reasons, it is recommended that Ki be left at its default value of zero until the servo
system operation is stable and then you can add a small amount of Ki to minimize static
position errors.
Note Ki has no effect when Ilim is equal to zero.
Integration Limit
The integration limit (Ilim) is used to clamp the contribution of the integral term in the PID
loop. The scaled integration sum is compared to the integration limit and the lesser of the two
values is multiplied by Ki to produce the integral term of the control output. This limiting
function is indicated with LIMIT() in the following integral term output equation:
Vout(integral) = (20 V / 216) × Ki × LIMIT((Integration Sum/256), Ilim)
You can use Ilim to limit excessive restoring forces and to minimize the adverse effects that
integral compensation has during acceleration and deceleration.
© National Instruments Corporation
5-23
FlexMotion Software Reference Manual
Chapter 5
Axis & Resource Configuration Functions — flex_load_single_pid_parameter
Note Ilim has no effect when Ki is equal to zero.
Derivative Gain
The derivative gain (Kd) determines the contribution of restoring force proportional to the rate
of change (derivative) of position error. This force acts much like viscous damping in a
damped spring and mass mechanical system (for example, shock absorber).
The PID loop computes the derivative of position error every derivative sample period
(a multiple of PID sample period; see the following section, Derivative Sample Period). This
derivative term is multiplied by Kd every PID sample period to produce the derivative
component of 16-bit DAC command output.
The formula for calculating the derivative contribution is as follows:
Vout(derivative) = (20 V / 216) × Kd × (pos_err(t1) – pos_err(t0))
where the time between t1 and t0 is the derivative sample period.
A non-zero value of Kd is required for all systems that use torque block amplifiers (where the
command output is proportional to motor torque) for the servo loop operation to be stable.
Too small a Kd value will result in servo loop instability.
With velocity block amplifiers (where the command output is proportional to motor velocity)
you typically set Kd to zero or to a very small value.
Derivative Sample Period
The derivative sample period parameter (Td) is used as a multiplier of the PID sample period
(PID update rate). For information about setting the PID update rate, refer to the Enable Axes
function. Td determines how often (in update samples) the derivative of position error is
calculated.
The formula for calculating the derivative sample period from Td is as follows:
Derivative Sample Period = (Td + 1) × PID Sample Period
Because the range for Td is 0 to 63, the shortest derivative sample period is as follows:
Derivative Sample Period = 1 × 62.5 µs = 62.5 µs
The longest derivative sample period is as follows:
Derivative Sample Period = 64 × 500 µs = 32 ms
Adjusting Td provides greater flexibility in tuning the PID loop derivative term. As Td is
increased, you can use a proportionally lower value of Kd for similar results. You should start
FlexMotion Software Reference Manual
5-24
www.natinst.com
Chapter 5
Axis & Resource Configuration Functions — flex_load_single_pid_parameter
the Td parameter at its default value of 2 and make small adjustments as required by your
motion system configuration.
For low inertia systems, Td should be set to a small value (0 or 1) so that the derivative is
calculated often enough to provide adequate damping for servo loop stability.
Systems with higher inertia can benefit from larger values of Td. Because the higher inertia
means that the position error can not change quickly, it is acceptable to calculate the derivative
less often. This means you can use a lower value of Kd, have the same effective amount of
damping and the system will be smoother with less torque noise from the derivative term.
In higher inertia systems, using a Td of zero and therefore a larger value for Kd results in
increased torque noise and motor heating without any improvement in system stability.
Velocity Feedback Gain
When an axis is configured with a secondary feedback encoder, you can use that encoder for
velocity feedback. The velocity feedback gain (Kv) is used to scale this velocity feedback
before it is added to the other components in the 16-bit DAC command output.
Note Velocity feedback is only available from encoders. It is not available from ADC
channels.
It is possible to use Kv with only one feedback encoder. Map the encoder resource as both
the primary and secondary resource for the axis.
Velocity feedback gain (Kv) is similar to derivative gain (Kd) except that it scales the velocity
estimated from the secondary feedback resource only. The derivative gain scales the
derivative of the position error, which is the difference between the instantaneous trajectory
position and the primary feedback position. Like the Kd term, the velocity feedback derivative
is calculated every derivative sample period and the contribution is updated every PID Sample
Period.
The formula for calculating the velocity feedback contribution is as follows:
Vout = (20 V / 216) Kv (position(t1) – position(t0))
where the time between t1 and t0 is the derivative sample period.
Velocity feedback is estimated through a combination of speed dependent algorithms. At high
speeds, velocity is simply the change in position per sample. At low speeds, the estimator
seamlessly transitions to a 1/T method that measures the time between encoder counts and
then calculates the inverse. This method is used for smoother performance when estimating
velocities less than one encoder count per sample derivative sample period.
© National Instruments Corporation
5-25
FlexMotion Software Reference Manual
Chapter 5
Axis & Resource Configuration Functions — flex_load_single_pid_parameter
Using Kv and a secondary feedback encoder creates a minor velocity feedback loop. This is
very similar to the traditional analog servo control method using a tachometer and a velocity
block amplifier and is commonly referred to as dual-loop feedback. Dual-loop feedback is
most useful when the primary position sensor (encoder or analog transducer) is located on the
end-effector for improved accuracy, and is separated from the motor by gears, ballscrews, belt
drives, and/or other mechanical apparatus with potentially poor dynamics. In this case, it can
be difficult to achieve a high performance, stable control system without using the minor loop
velocity feedback from an encoder mounted directly on the back of the motor.
Typically, Kd is set to zero when Kv is used. However, FlexMotion allows you to use both Kv
and Kd terms simultaneously for improved performance.
Note Operating with zero derivative gain (Kd) and either velocity feedback or a velocity
block amplifier is often referred to as PIVff mode.
You can operate FlexMotion in PID mode, PIVff mode, or in a combination of both modes,
by using Kd, Kv, or both.
Acceleration Feedforward
The acceleration feedforward gain (Aff) determines the contribution in the 16-bit DAC
command output that is directly proportional to the instantaneous trajectory acceleration. Aff
is used to minimize following error (position error) during acceleration and deceleration and
can be changed at any time to tune the PID loop.
Using acceleration feedforward is an open-loop compensation technique and cannot affect the
stability of the system. However, if you use too large a value of Aff, following error during
acceleration and deceleration can reverse, thus degrading rather than improving performance.
Velocity Feedforward
The velocity feedforward gain (Vff) determines the contribution in the 16-bit DAC command
output that is directly proportional to the instantaneous trajectory velocity. This value is used
to minimize following error during the constant velocity portion of a move and can be
changed at any time to tune the PID loop.
Using velocity feedforward is an open-loop compensation technique and cannot affect the
stability of the system. However, if you use too large a value of Vff, following error during
the constant velocity portion can reverse, thus degrading rather than improving performance.
Velocity feedforward is typically used when operating in PIVff mode with either a velocity
block amplifier or substantial amount of velocity feedback (Kv). In these cases, the
uncompensated following error is directly proportional to the desired velocity. You can reduce
this following error by applying velocity feedforward. Increasing the integral gain (Ki) will
also reduce the following error during constant velocity but only at the expense of increased
FlexMotion Software Reference Manual
5-26
www.natinst.com
Chapter 5
Axis & Resource Configuration Functions — flex_load_single_pid_parameter
following error during acceleration and deceleration and reduced system stability. For these
reasons, increased Ki is not the recommended solution.
Velocity feedforward is rarely used when operating in PID mode with torque block amplifiers.
In this case, because the following error is proportional to the torque required (not to the
velocity), it is typically much smaller and velocity feedforward is not required.
Example
To load a Kp of 1,000 to an axis 5, call the Load Single PID Parameter function with the
following parameters:
axis = 5
parameterType = NIMC_KP
PIDValue = 1,000
inputVector = 0xFF (Immediate)
© National Instruments Corporation
5-27
FlexMotion Software Reference Manual
Chapter 5
Axis & Resource Configuration Functions — flex_load_vel_tc_rs
flex_load_vel_tc_rs
Configure Velocity Filter
Format
status = flex_load_vel_tc_rs (boardID, axis, filterTime, runStopThreshold, inputVector)
Purpose
Loads the time constant for the velocity filter and sets the velocity threshold above which an
axis will be considered running.
Parameters
Input
Name
Type
Description
boardID
u8
assigned by Measurement & Automation Explorer
axis
u8
axis to be controlled
filterTime
u16
filter time constant in Sample Periods
runStopThreshold
u16
Run/Stop threshold velocity in counts or
steps/sample period
inputVector
u8
source of the data for this function
Parameter Discussion
axis is the axis to be controlled.
filterTime is the velocity filter time constant in update sample periods. The range for this
parameter is 0 to 255 with a default value of 10 sample periods.
runStopThreshold is the Run/Stop threshold velocity in counts/sample period (servo and
closed-loop stepper axes) or steps/sample period (open-loop stepper axes). The range for this
parameter is 1(default) to 32,767 sample periods.
inputVector indicates the source of the data for this function. Available inputVectors include
immediate (0xFF) or variable (0x01 through 0x78).
FlexMotion Software Reference Manual
5-28
www.natinst.com
Chapter 5
Axis & Resource Configuration Functions — flex_load_vel_tc_rs
Using This Function
The Configure Velocity Filter function loads the time constant of the digital single-pole
lowpass filter used to average the instantaneous axis velocity. It also sets the velocity
threshold above which an axis will be considered running. Both parameters have time units
of update sample periods and are affected by the update rate set in the Enable Axes function.
The velocity filter improves the resolution of the velocity reported in the Read Velocity and
Read Velocity in RPM functions by averaging the measured counts or steps per sample over
a programmable number of update sample periods. This filtering minimizes the quantization
noise inherent in any discrete time velocity measurement of low speeds. Due to the aliasing
effects of polling from the host computer, it is often not possible to remove quantization noise
after velocity data has been gathered.
Note Velocity quantization noise is a measurement only phenomenon and does not affect
the FlexMotion ability to accurately control velocity and position at low speeds.
This function also configures the Run/Stop status, which is used for move complete
determination. This Run/Stop status uses the filtered velocity to minimize noise in this status.
The Run/Stop threshold is programmable to account for a wide range of feedback device
resolution and update sample periods and to allow the application to determine when an axis
is going slow enough to be considered stopped. Refer to the Read Trajectory Status and
Configure Move Complete Criteria functions for more information on the Run/Stop status.
The Configure Velocity Filter function is a status configuration function that is typically
called for each axis prior to using the axis for motion control. Once the parameters are set,
they remain in effect until changed. You can call this function at any time to tailor the status
reporting functions as the application requires.
© National Instruments Corporation
5-29
FlexMotion Software Reference Manual
Chapter 5
Axis & Resource Configuration Functions — flex_set_stepper_loop_mode
flex_set_stepper_loop_mode
Set Stepper Loop Mode
Format
status = flex_set_stepper_loop_mode (boardID, axis, loopMode)
Purpose
Sets a stepper axis to operate in either open or closed-loop mode.
Parameters
Input
Name
Type
Description
boardID
u8
assigned by Measurement & Automation Explorer
axis
u8
axis to be controlled
loopMode
u16
open or closed-loop mode of the stepper axis
Parameter Discussion
axis is the axis to be controlled.
loopMode sets the open or closed-loop mode for the stepper axis.
0 = open-loop (default)
1 = closed-loop
Using This Function
You can operate stepper axes in both open and closed-loop modes. In open-loop mode, the
stepper axis controls the trajectory profile and generates steps but has no feedback from the
motor or actuator to determine if the profile is followed correctly.
In closed-loop mode, the feedback position is constantly compared to the number of steps
generated to see if the stepper motor is moving correctly. When the trajectory profile is
complete, missing steps (if any) are made up with a pull-in move. If, at any time during the
move, the difference between the instantaneous commanded position and the feedback
position exceeds the programmed following error threshold, the axis is killed and motion
stops.
FlexMotion Software Reference Manual
5-30
www.natinst.com
Chapter 5
Axis & Resource Configuration Functions — flex_set_stepper_loop_mode
For proper closed-loop operation, the correct values for steps/rev and counts/rev
must be loaded with the Load Counts/Steps per Revolution function. Incorrect counts to
steps ratio can result in failure to reach the desired target position and erroneous
closed-loop stepper operation.
Warning
To operate in closed-loop mode, a stepper axis must have a primary feedback resource
(encoder or ADC channel) mapped to it prior to enabling the axis. Refer to the Configure Axis
Resources functions for more information on feedback resources. You can operate an axis
with a primary feedback resource in either open or closed-loop mode and you can switch the
mode at any time. You can still read the position of the mapped feedback resource even when
the axis is in open-loop mode.
© National Instruments Corporation
5-31
FlexMotion Software Reference Manual
Trajectory Control Functions
6
This chapter contains detailed descriptions of functions used to set up and
control motion trajectories on the FlexMotion controller. It includes
functions to load double-buffered trajectory parameters, read back
instantaneous velocity, position and trajectory status, as well as functions
to configure blending, gearing, and other advanced trajectory features. The
functions are arranged alphabetically by function name.
Double-buffered parameters for axes and vector spaces include
acceleration, deceleration, velocity, s-curve, operation mode, target
position, and circular, helical, and spherical arc parameters. You can send
these parameters to the controller at any time but do not take effect until you
execute the next Start Motion or Blend Motion function. This double
buffering allows you to set up moves ahead of time, synchronizing them
with a single Start Motion or Blend Motion call.
Other trajectory functions allow you to configure the operation of trajectory
generators and set status thresholds. These parameters include following
error, blend factor, gear master, ratio and enable, position modulus, velocity
threshold, torque limit, torque offset, and software limit positions. Unlike
double-buffered parameters, if you change these parameters on the fly, they
take effect immediately. Also in this category are functions to reset position
to zero or another desired value and to force a velocity override.
During a move, you can read the instantaneous values of position, velocity,
following error, and DAC output (torque). There are also functions to read
the following trajectory status: move complete, profile complete, blend
complete, motor off, following error trip, velocity threshold, and DAC limit
status. These trajectory values and status are used for move sequencing,
system coordination, and overall monitoring purposes.
Finally, FlexMotion offers a set of functions to acquire time-sampled
position and velocity data into a large onboard buffer and then later read
it out for analysis and display. These functions implement a digital
oscilloscope that is useful during system setup, PID tuning, and general
motion with data acquisition synchronization.
As a quick reference, a summary of the entire FlexMotion function API is
in Appendix B, FlexMotion Functions.
© National Instruments Corporation
6-1
FlexMotion Software Reference Manual
Chapter 6
Trajectory Control Functions — flex_check_blend_complete_status
flex_check_blend_complete_status
Check Blend Complete Status
Format
status = flex_check_blend_complete_status (boardID, axisOrVectorSpace, axisOrVSMap,
blendComplete)
Purpose
Checks the blend complete status for an axis, vector space, group of axes, or group of vector
spaces.
Parameters
Input
Name
Type
Description
boardID
u8
assigned by Measurement & Automation Explorer
axisOrVectorSpace
u8
axis or vector space selector
axisOrVSMap
u16
bitmap of axes or vector spaces to check
Output
Name
Type
blendComplete
Description
u16
the blend complete status
Parameter Discussion
axisOrVectorSpace can select an axis (1 through 6), vector space (0x11 through 0x13),
multiple axes (0), or multiple vector spaces (0x10). When simultaneously checking multiple
axes (0) or vector spaces (0x10), the axisOrVSMap parameter indicates which axes or vector
spaces to check.
axisOrVSMap is the bitmap of axes or vector spaces to check. It is only required when
multiple axes or vector spaces are selected with the axisOrVectorSpace parameter.
Otherwise, this parameter is ignored.
When checking multiple axes (axisOrVectorSpace = 0):
D15
D14
D13
D12
D11
D10
D9
D8
D7
D6
D5
D4
D3
D2
D1
D0
0
0
0
0
0
0
0
0
0
Axis
6
Axis
5
Axis
4
Axis
3
Axis
2
Axis
1
0
FlexMotion Software Reference Manual
6-2
www.natinst.com
Chapter 6
Trajectory Control Functions — flex_check_blend_complete_status
For D1 through D6:
1 = Blend must be complete on specified axis
0 = Blend can be either complete or not complete on specified axis (don’t care)
When checking multiple vector spaces (axisOrVectorSpace = 0x10):
D15
D14
D13
D12
D11
D10
D9
D8
D7
D6
D5
D4
D3
D2
D1
D0
0
0
0
0
0
0
0
0
0
0
0
0
VS 3
VS 2
VS 1
0
For D1 through D3:
1 = Blend must be complete on specified vector space
0 = Blend can be either complete or not complete on specified vector space (don’t care)
To check for blend complete on a single axis or vector space, set the axisOrVectorSpace
selector to the desired axis or vector space. The axisOrVSMap bitmap is ignored.
To check for blend complete on multiple axes, the axisOrVectorSpace selector is set to 0
(zero) and the axisOrVSMap bitmap defines the axes to be checked. They must all be blend
complete for the blendComplete output to be true. Similarly, to check for blend complete on
multiple vector spaces, the axisOrVectorSpace selector is set to 0x10 and the
axisOrVSMap bitmap defines the vector spaces to be checked.
blendComplete indicates whether or not the blend is complete on the axes or vector spaces
specified.
1 = Blend complete
0 = Blend not complete
Using This Function
This utility function is built on top of the Read Blend Status function, and is provided for your
programming convenience. Instead of decoding the output of the Read Blend Status function
yourself, this function does that for you by comparing the axes or vector spaces specified in
the axisOrVectorSpace and axisOrVSMap input parameters with the blend complete status
for the appropriate axes or vector spaces. The output is a single true/false value indicating
whether or not the specified blend or blends are complete.
© National Instruments Corporation
6-3
FlexMotion Software Reference Manual
Chapter 6
Trajectory Control Functions — flex_check_move_complete_status
flex_check_move_complete_status
Check Move Complete Status
Format
status = flex_check_move_complete_status (boardID, axisOrVectorSpace, axisOrVSMap,
moveComplete)
Purpose
Checks the move complete status for an axis, vector space, group of axes, or group of vector
spaces.
Parameters
Input
Name
Type
Description
boardID
u8
assigned by Measurement & Automation Explorer
axisOrVectorSpace
u8
axis or vector space selector
axisOrVSMap
u16
bitmap of axes or vector spaces to check
Output
Name
Type
moveComplete
Description
u16
the move complete status
Parameter Discussion
axisOrVectorSpace can select an axis (1 through 6), vector space (0x11 through 0x13),
multiple axes (0), or multiple vector spaces (0x10). When simultaneously checking multiple
axes (0) or vector spaces (0x10), the axisOrVSMap parameter indicates which axes or vector
spaces to check.
axisOrVSMap is the bitmap of axes or vector spaces to check. It is only required when
multiple axes or vector spaces are selected with the axisOrVectorSpace parameter.
Otherwise, this parameter is ignored.
When checking multiple axes (axisOrVectorSpace = 0):
D15
D14
D13
D12
D11
D10
D9
D8
D7
D6
D5
D4
D3
D2
D1
D0
0
0
0
0
0
0
0
0
0
Axis
6
Axis
5
Axis
4
Axis
3
Axis
2
Axis
1
0
FlexMotion Software Reference Manual
6-4
www.natinst.com
Chapter 6
Trajectory Control Functions — flex_check_move_complete_status
For D1 through D6:
1 = Move must be complete on specified axis
0 = Move can be either complete or not complete on specified axis (don’t care)
When checking multiple vector spaces (axisOrVectorSpace = 0x10):
D15
D14
D13
D12
D11
D10
D9
D8
D7
D6
D5
D4
D3
D2
D1
D0
0
0
0
0
0
0
0
0
0
0
0
0
VS 3
VS 2
VS 1
0
For D1 through D3:
1 = Move must be complete on specified vector space
0 = Move can be either complete or not complete on specified vector space (don’t care)
To check for move complete on a single axis or vector space, set the axisOrVectorSpace
selector to the desired axis or vector space. The axisOrVSMap bitmap is ignored.
To check for move complete on multiple axes, the axisOrVectorSpace selector is set to
0 (zero) and the axisOrVSMap bitmap defines the axes to be checked. They must all be move
complete for the moveComplete output to be true. Similarly, to check for move complete on
multiple vector spaces, the axisOrVectorSpace selector is set to 0x10 and the
axisOrVSMap bitmap defines the vector spaces to be checked.
moveComplete indicates whether or not the move is complete on the axes or vector spaces
specified.
1 = Move complete
0 = Move not complete
Using This Function
This utility function is built on top of the Read Trajectory Status function, and is provided for
your programming convenience. Instead of decoding the output of the Read Trajectory Status
function yourself, this function does that for you by comparing the axes or vector spaces
specified in the axisOrVectorSpace and axisOrVSMap input parameters with the move
complete status for the appropriate axes or vector spaces. The output is a single true/false
value indicating whether or not the specified move or moves are complete.
For more information on move complete status, refer to the Read Trajectory Status and
Configure Move Complete Criteria functions.
© National Instruments Corporation
6-5
FlexMotion Software Reference Manual
Chapter 6
Trajectory Control Functions — flex_load_acceleration
flex_load_acceleration
Load Acceleration/Deceleration
Format
status = flex_load_acceleration (boardID, axisOrVectorSpace, accelerationType, acceleration,
inputVector)
Purpose
Loads the maximum acceleration and/or deceleration value for an axis or vector space.
Parameters
Input
Name
Type
Description
boardID
u8
assigned by Measurement & Automation Explorer
axisOrVectorSpace
u8
axis or vector space to be controlled
accelerationType
u16
selector for acceleration, deceleration or both
acceleration
u32
acceleration value in counts/s2 or steps/s2
inputVector
u8
source of the data for this function
Parameter Discussion
axisOrVectorSpace is the axis or vector space to be controlled.
accelerationType is the selector for loading acceleration, deceleration or both acceleration
and deceleration (default).
accelerationType Constant
accelerationType Value
NIMC_BOTH
0 (default)
NIMC_ACCELERATION
1
NIMC_DECELERATION
2
acceleration is the acceleration (and/or deceleration) value in counts/s2 (servo axes) or
steps/s2 (stepper axes). The range for acceleration is 4,000 to 128,000,000 counts or steps/s2.
inputVector indicates the source of the data for this function. Available inputVectors include
immediate (0xFF) or variable (0x01 through 0x78).
FlexMotion Software Reference Manual
6-6
www.natinst.com
Chapter 6
Trajectory Control Functions — flex_load_acceleration
Using This Function
The Load Acceleration/Deceleration function specifies the maximum rate of acceleration
and/or deceleration for individual axes or vector spaces. When executed on a vector space,
the value controls the vector acceleration (deceleration) along the vector move path.
You can use this function to load separate limits for acceleration and deceleration or to set
them both to the same value with one call. These parameters are double-buffered so you can
load them on the fly without affecting the move in process, and they will take effect on the
next Start Motion or Blend Motion function. Once loaded, these parameters remain in effect
for all subsequent motion profiles until re-loaded by this function. You do not need to load
acceleration before each move unless you want to change it.
Acceleration defines how quickly the axis or axes come up to speed and is typically limited
to avoid excessive stress on the motor, mechanical system and/or load. A separate, slower
deceleration is useful in applications where gently coming to a stop is paramount.
Note You can also load acceleration and deceleration in motor rotations/s2 by calling the
Load Accel/Decel in RPS/sec function.
© National Instruments Corporation
6-7
FlexMotion Software Reference Manual
Chapter 6
Trajectory Control Functions — flex_load_follow_err
flex_load_follow_err
Load Following Error
Format
status = flex_load_follow_err (boardID, axis, followingError, inputVector)
Purpose
Loads the following error trip point.
Parameters
Input
Name
Type
Description
boardID
u8
assigned by Measurement & Automation Explorer
axis
u8
axis to be controlled
followingError
u16
following error trip point in counts
inputVector
u8
source of the data for this function
Parameter Discussion
axis is the axis to be controlled.
followingError is the following error trip point in encoder counts. If the following error
exceeds this value, the axis will be automatically killed. The range is 0 to 32,767 with a
default of 32,767 counts. Loading zero (0) is a special case that disables the following error
trip functionality.
inputVector indicates the source of the data for this function. Available inputVectors include
immediate (0xFF) or variable (0x01 through 0x78).
Using This Function
The Load Following Error function sets the maximum allowable following error. Following
error is the difference between the instantaneous commanded trajectory position and the
feedback position. If the absolute value of this difference exceeds the trip point, an internal
kill stop is issued and the axis is disabled.
This function is a safety feature used to protect the motion hardware and associated system
components from damage when the position error gets excessive due to friction, binding, or
a completely stalled motor. It will also protect you in case you load unobtainable values for
velocity and/or acceleration.
FlexMotion Software Reference Manual
6-8
www.natinst.com
Chapter 6
Trajectory Control Functions — flex_load_follow_err
This feature is available on all servo and closed-loop stepper axes. It has no effect on stepper
axes running in open-loop mode. You can completely disable the following error feature by
loading a zero (0) value.
Following error should not be disabled unless your application absolutely
requires operating with greater than 32,787 counts of error.
Caution
You can monitor following error status with the Read Trajectory Status or Read per Axis
Status functions. A following error trip always sets the Motor Off status. You can further
diagnose the cause of the trip by checking the torque limit status with the Read DAC Limit
Status function.
In general, a following error trip is considered normal operation and does not generate an
error. There are a few cases where an unexpected following error trip will generate a modal
error: during Find Home or Find Index and while executing a stored program. For information
about errors and error handling, refer to the Errors and Error Handling section in Chapter 4,
Software Overview.
© National Instruments Corporation
6-9
FlexMotion Software Reference Manual
Chapter 6
Trajectory Control Functions — flex_load_rpm
flex_load_rpm
Load Velocity in RPM
Format
status = flex_load_rpm (boardID, axisOrVectorSpace, RPM, inputVector)
Purpose
Loads velocity for an axis or vector space in RPM.
Parameters
Input
Name
Type
Description
boardID
u8
assigned by Measurement & Automation Explorer
axisOrVectorSpace
u8
axis or vector space to be controlled
RPM
f64
velocity in RPM
inputVector
u8
source of the data for this function
Parameter Discussion
axisOrVectorSpace is the axis or vector space to be controlled.
RPM is the double precision floating point velocity value in RPM. The RPM range depends
upon the motor counts or steps per revolution and the trajectory update rate. Refer to the
Trajectory Parameters section in Chapter 4, Software Overview, for more information on
velocity and acceleration units and their dependency on trajectory update rate.
inputVector indicates the source of the data for this function. Available inputVectors include
immediate (0xFF) or variable (0x01 through 0x78).
Using This Function
The Load Velocity in RPM function specifies the maximum trajectory velocity for individual
axes or vector spaces. When executed on a vector space, the value controls the vector velocity
along the vector move path. For velocity control applications, the sign of the loaded velocity
specifies the move direction. This function requires previously loaded values of either counts
per revolution (for servo axes) or steps per revolution (for stepper axes) to operate correctly.
FlexMotion Software Reference Manual
6-10
www.natinst.com
Chapter 6
Trajectory Control Functions — flex_load_rpm
RPM is double-buffered so you can load it on the fly without affecting the move in process,
and it will take effect on the next Start Motion or Blend Motion function. Once loaded, this
parameter remains in effect for all subsequent motion profiles until re-loaded by this function.
You do not need to load velocity before each move unless you want to change it.
Note The velocity loaded with this function is the maximum move velocity.
Actual velocity attainable is determined by many factors including PID tuning,
length of move, acceleration and deceleration values, and physical constraints of
the amplifier/motor/mechanical system.
You can also load velocity in counts/s or steps/s by calling the Load Velocity function.
© National Instruments Corporation
6-11
FlexMotion Software Reference Manual
Chapter 6
Trajectory Control Functions — flex_load_rpsps
flex_load_rpsps
Load Accel/Decel in RPS/sec
Format
status = flex_load_rpsps (boardID, axisOrVectorSpace, accelerationType, RPSPS, inputVector)
Purpose
Loads the maximum acceleration and/or deceleration value for an axis or vector space in
RPS/sec.
Parameters
Input
Name
Type
Description
boardID
u8
assigned by Measurement & Automation Explorer
axisOrVectorSpace
u8
axis or vector space to be controlled
accelerationType
u16
selector for acceleration, deceleration or both
RPSPS
f64
acceleration value in revolutions/s/s
inputVector
u8
source of the data for this function
Parameter Discussion
axisOrVectorSpace is the axis or vector space to be controlled.
accelerationType is the selector for loading acceleration, deceleration, or both acceleration
and deceleration (default).
accelerationType Constant
accelerationType Value
NIMC_BOTH
0 (default)
NIMC_ACCELERATION
1
NIMC_DECELERATION
2
acceleration is the double precision floating point acceleration (and/or deceleration) value in
motor revolutions/s/s (RPS/s). The range for acceleration in RPS/s depends upon the motor
counts or steps per revolution and the trajectory update rate. Refer to the Trajectory
Parameters section in Chapter 4, Software Overview, for more information on velocity and
acceleration units and their dependency on trajectory update rate.
inputVector indicates the source of the data for this function. Available inputVectors include
immediate (0xFF) or variable (0x01 through 0x78).
FlexMotion Software Reference Manual
6-12
www.natinst.com
Chapter 6
Trajectory Control Functions — flex_load_rpsps
Using This Function
The Load Accel/Decel in RPS/sec function specifies the maximum rate of acceleration and/or
deceleration for individual axes or vector spaces in revolutions/s/s. When executed on a vector
space, the value controls the vector acceleration (deceleration) along the vector move path.
This function requires previously loaded values of either counts per revolution (for servo
axes) or steps per revolution (for stepper axes) to operate correctly.
You can use this function to load separate limits for acceleration and deceleration or to set
them both to the same value with one call. These parameters are double-buffered so you can
load them on the fly without affecting the move in process, and they will take effect on the
next Start Motion or Blend Motion function. Once loaded, these parameters remain in effect
for all subsequent motion profiles until re-loaded by this function. You do not need to load
acceleration before each move unless you want to change it.
Acceleration defines how quickly the axis or axes come up to speed and is typically limited
to avoid excessive stress on the motor, mechanical system, and/or load. A separate, slower
deceleration is useful in applications where gently coming to a stop is paramount.
Note You can also load acceleration and deceleration in counts/s2 or steps/s2 by calling the
Load Acceleration/Deceleration function.
© National Instruments Corporation
6-13
FlexMotion Software Reference Manual
Chapter 6
Trajectory Control Functions — flex_load_target_pos
flex_load_target_pos
Load Target Position
Format
status = flex_load_target_pos (boardID, axis, targetPosition, inputVector)
Purpose
Loads the target position for the next axis move.
Parameters
Input
Name
Type
Description
boardID
u8
assigned by Measurement & Automation Explorer
axis
u8
axis to be controlled
targetPosition
i32
target position in counts or steps
inputVector
u8
source of the data for this function
Parameter Discussion
axis is the axis to be controlled.
targetPosition is the desired target position for the next axis move in counts (servo axes) or
steps (stepper axes). Target positions can be anywhere within the 32-bit position range,
–(231) to +(231–1). The default value for target position is zero (0).
Any single move is limited to ±(231–1) counts or steps. An error will be generated
if you exceed this limit by loading a target position too far from the current axis position.
Caution
inputVector indicates the source of the data for this function. Available inputVectors include
immediate (0xFF) or variable (0x01 through 0x78).
Using This Function
The Load Target Position function loads a target position to the axis specified. Target
positions can be for single axis moves, multi-axis coordinated moves, or vector space moves.
Position values indicate the desired end location and direction of motion (target position).
Note See the Load Vector Space Position function for an easy way to load up to three
target positions for a vector space in one call.
FlexMotion Software Reference Manual
6-14
www.natinst.com
Chapter 6
Trajectory Control Functions — flex_load_target_pos
Target position is double-buffered so you can load it on the fly without affecting the move in
process, and it will take effect on the next Start Motion or Blend Motion function. When the
target position is loaded, it is interpreted as either an absolute target position, a relative target
position, a target position relative to the last captured position or with the effect of a position
modulus, depending on the mode set with the Set Operation Mode function.
Once you execute the start or blend, the axis or axes will follow the programmed trajectory
and end up at the absolute, relative, or modulo target position.
© National Instruments Corporation
6-15
FlexMotion Software Reference Manual
Chapter 6
Trajectory Control Functions — flex_load_velocity
flex_load_velocity
Load Velocity
Format
status = flex_load_velocity (boardID, axisOrVectorSpace, velocity, inputVector)
Purpose
Loads the maximum velocity for an axis or vector space.
Parameters
Input
Name
Type
Description
boardID
u8
assigned by Measurement & Automation Explorer
axisOrVectorSpace
u8
axis or vector space to be controlled
velocity
i32
velocity in counts/s or steps/s
inputVector
u8
source of the data for this function
Parameter Discussion
axisOrVectorSpace is the axis or vector space to be controlled.
velocity is the target or maximum slewing velocity in counts/s (servo axes) or steps/s (stepper
axes). For servo axes, the velocity range is from ±1 to ±16,000,000 counts/s. For stepper axes
it is ±1 to ±1,500,000 steps/s. The upper range limits are the physical limitations of the
encoder inputs and stepper generator outputs.
Note It is possible to load a velocity slower than 1 count or step per second by using the
Load Velocity in RPM function.
Refer to the Trajectory Parameters section in Chapter 4, Software Overview, for more
information on velocity and acceleration units and their dependency on trajectory update rate.
inputVector indicates the source of the data for this function. Available inputVectors include
immediate (0xFF) or variable (0x01 through 0x78).
FlexMotion Software Reference Manual
6-16
www.natinst.com
Chapter 6
Trajectory Control Functions — flex_load_velocity
Using This Function
The Load Velocity function specifies the maximum trajectory velocity for individual axes or
vector spaces. When executed on a vector space, the value controls the vector velocity along
the vector move path. For velocity control applications, the sign of the loaded velocity
specifies the move direction.
Velocity is a double-buffered parameter so you can load it on the fly without affecting the
move in process, and it will take effect on the next Start Motion or Blend Motion function.
Once loaded, this parameters remains in effect for all subsequent motion profiles until
re-loaded by this function. You do not need to load velocity before each move unless you want
to change it.
Note The velocity loaded with this function is the maximum move velocity.
Actual velocity attainable is determined by many factors including PID tuning,
length of move, acceleration and deceleration values, and physical constraints of
the amplifier/motor/mechanical system.
© National Instruments Corporation
6-17
FlexMotion Software Reference Manual
Chapter 6
Trajectory Control Functions — flex_load_vs_pos
flex_load_vs_pos
Load Vector Space Position
Format
status = flex_load_vs_pos (boardID, vectorSpace, xPosition, yPosition, zPosition, inputVector)
Purpose
Loads the axis target positions for the next vector space move.
Parameters
Input
Name
Type
Description
boardID
u8
assigned by Measurement & Automation Explorer
vectorSpace
u8
vector space to be controlled
xPosition
i32
x axis target position in counts or steps
yPosition
i32
y axis target position in counts or steps
zPosition
i32
z axis target position in counts or steps
inputVector
u8
source of the data for this function
Parameter Discussion
vectorSpace is the vector space to be controlled.
xPosition, yPosition, and zPosition are the desired axis target positions for the next vector
space move in counts (servo axes) or steps (stepper axes). Target positions can be anywhere
within the 32-bit position range, –(231) to +(231–1). The default value for position is zero (0).
Any single move is limited to ±(231–1) counts or steps on an axis. An error will
be generated if you exceed this limit by loading target position too far from the current axis
positions.
Caution
inputVector indicates the source of the data for this function. Available inputVectors include
immediate (0xFF) or variable (0x01 through 0x78).
FlexMotion Software Reference Manual
6-18
www.natinst.com
Chapter 6
Trajectory Control Functions — flex_load_vs_pos
Using This Function
The Load Vector Space Position function loads up to three axis target positions for the vector
space specified. This function is identical to calling the Load Target Position function up to
three times, once per each axis in the vector space. Position values indicate the desired end
location and direction of motion (target position).
Target positions are double-buffered so you can load them on the fly without affecting the
move in process, and they will take effect on the next Start Motion or Blend Motion function.
When the target positions are loaded, they are interpreted as either absolute target positions,
relative target positions, target positions relative to the last captured positions or with the
effect of a position modulus, depending on the mode set with the Set Operation Mode
function.
Once you execute the start or blend, the axes in the vector space will follow the programmed
trajectory and end up at the absolute, relative, or modulo target positions.
Note If the vector space contains less than three axes, the extra target position values are
ignored.
© National Instruments Corporation
6-19
FlexMotion Software Reference Manual
Chapter 6
Trajectory Control Functions — flex_read_axis_status and flex_read_axis_status_rtn
flex_read_axis_status and
flex_read_axis_status_rtn
Read per Axis Status
Format
status = flex_read_axis_status (boardID, axis, returnVector)
status = flex_read_axis_status_rtn (boardID, axis, axisStatus)
Purpose
Reads the motion status on a per-axis basis.
Parameters
Input
Name
Type
Description
boardID
u8
assigned by Measurement & Automation Explorer
axis
u8
axis to read
returnVector
u8
destination for the return data
Output
Name
axisStatus
Type
u16
Description
bitmap of per-axis status
Parameter Discussion
axis is the axis to read.
returnVector indicates the desired destination for the return data generated by this function.
Available returnVectors include return data to the host (0xFF), return data to a variable (0x01
through 0x78), and don’t return data (0).
Note The suffix _rtn on the function indicates that the data should be returned to the host.
When this calling convention is used, no returnVector is required.
FlexMotion Software Reference Manual
6-20
www.natinst.com
Chapter 6
Trajectory Control Functions — flex_read_axis_status and flex_read_axis_status_rtn
axisStatus is a bitmap of motion status for the axis.
D15
D14
D13
D12
D11
D10
D9
D8
D7
D6
D5
D4
D3
D2
D1
D0
MC
BC
Dir
HSC
IF
HF
BP
VT
XXX
S/W
Limit
Home
Limit
FE
MOff
PC
R/S
D0 Run/Stop Status (R/S):
1 = Axis running
0 = Axis stopped
D1 Profile Complete (PC):
1= Profile complete
0 = Profile generation in process
D2 Motor Off (Moff):
1 = Motor off (killed)
0 = Motor on
D3 Following Error (FE):
1 = Axis tripped on following error
0 = Ok
D4 Limit Input (Limit):
1 = Forward or reverse limit input active
0 = Neither limit active
D5 Home Input (Home):
1 = Home input active
0 = Home input not active
D6 Software Limit (S/W Limit):
1 = Forward or reverse software limit reached
0 = Neither software limit reached
D7 Reserved
D8 Velocity Threshold (VT):
1 = Velocity above threshold
0 = Velocity below threshold
© National Instruments Corporation
6-21
FlexMotion Software Reference Manual
Chapter 6
Trajectory Control Functions — flex_read_axis_status and flex_read_axis_status_rtn
D9 Breakpoint (BP):
1 = Breakpoint occurred
0 = Breakpoint pending or disabled
D10 Home Found (HF):
1 = Home found during last Find Home
0 = Find Home sequence in process or home not found
D11 Index Found (IF):
1 = Encoder Index found during last Find Index
0 = Find Index sequence in process or index not found
D12 High Speed Capture (HSC):
1 = High speed capture occurred
0 = High speed capture pending
D13 Direction (Dir):
1 = Reverse
0 = Forward
D14 Blend Complete (BC):
1 = Blend complete
0 = Blend pending
D15 Move Complete (MC):
1 = Move complete
0 = Move not complete
Using This Function
The Read per Axis Status function returns the trajectory and motion I/O status for the
specified axis. It also returns the success or failure status of the most recent Find Home and
Find Index sequences.
Note You can also read individual item status in a multi-axis format with FlexMotion
functions like Read Limit Status, Read Trajectory Status, and so on.
FlexMotion Software Reference Manual
6-22
www.natinst.com
Chapter 6
Trajectory Control Functions — flex_read_axis_status and flex_read_axis_status_rtn
Example
Read per Axis Status is called on axis 4 and the function returns axisStatus = 0xBE02.
The returned value 0xBE02 corresponds to the following bitmap.
D15
D14
D13
D12
D11
D10
D9
D8
D7
D6
D5
D4
D3
D2
D1
D0
MC
BC
Dir
HSC
IF
HF
BP
VT
XXX
S/W
Limit
Home
Limit
FE
MOff
PC
R/S
1
0
1
1
1
1
1
0
0
0
0
0
0
0
1
0
The trajectory profile is complete, the move is complete, the motor is not running but it is
enabled, there was no following error trip, no active limits, home or software limits, a blended
move is pending, there was a position breakpoint, velocity is below the threshold, the last find
home and find index completed successfully, there was a high-speed position capture, and the
last move was in the reverse direction.
© National Instruments Corporation
6-23
FlexMotion Software Reference Manual
Chapter 6
Trajectory Control Functions — flex_read_blend_status and flex_read_blend_status_rtn
flex_read_blend_status and
flex_read_blend_status_rtn
Read Blend Status
Format
status = flex_read_blend_status (boardID, axisOrVectorSpace, returnVector)
status = flex_read_blend_status_rtn (boardID, axisOrVectorSpace, blendStatus)
Purpose
Reads the Blend Complete status for all axes or vector spaces.
Parameters
Input
Name
Type
Description
boardID
u8
assigned by Measurement & Automation Explorer
axisOrVectorSpace
u8
axis or vector space selector
returnVector
u8
destination for the return data
Output
Name
blendStatus
Type
u16
Description
bitmap of blend complete status for all axes or
vector spaces
Parameter Discussion
axisOrVectorSpace is the axis or vector space selector. For multi-axis status, use 0 (zero).
For multi-vector space status, use 0x10.
returnVector indicates the desired destination for the return data generated by this function.
Available returnVectors include return data to the host (0xFF), return data to a variable
(0x01 through 0x78), and don’t return data (0).
Note The suffix _rtn on the function indicates that the data should be returned to the host.
When this calling convention is used, no returnVector is required.
FlexMotion Software Reference Manual
6-24
www.natinst.com
Chapter 6
Trajectory Control Functions — flex_read_blend_status and flex_read_blend_status_rtn
blendStatus is a bitmap of blend complete status for all axes or all vector spaces.
When reading blend status for axes (axisOrVectorSpace = 0):
D15
D14
D13
D12
D11
D10
D9
D8
D7
D6
D5
D4
D3
D2
D1
D0
XXX
XXX
XXX
XXX
XXX
XXX
XXX
XXX
XXX
Axis
6
Axis
5
Axis
4
Axis
3
Axis
2
Axis
1
XXX
D1 through D6:
1 = Blend complete on axis
0 = Blend pending
When reading blend status for vector spaces (axisOrVectorSpace = 0x10):
D15
D14
D13
D12
D11
D10
D9
D8
D7
D6
D5
D4
D3
D2
D1
D0
XXX
XXX
XXX
XXX
XXX
XXX
XXX
XXX
XXX
XXX
XXX
XXX
VS3
VS2
VS1
XXX
D1 through D3:
1 = Blend complete on vector space
0 = Blend pending
Using This Function
Blending smoothly combines two move segments on an axis, axes, or vector space(s). When
continuously blending move segments into each other, it is necessary to wait until the blend
is complete between the previous two moves before you load the trajectory parameters for the
next move to be blended. The status information returned by the Read Blend Status function
indicates that the previous blend is complete and the axis, axes, or vector space(s) are ready
to receive the next blend move trajectory data.
Note Attempting to execute a Blend Motion function before the previous blend is
complete on the axes involved will generate a modal error. For information about errors and
error handling, refer to Chapter 4, Software Overview.
© National Instruments Corporation
6-25
FlexMotion Software Reference Manual
Chapter 6
Trajectory Control Functions — flex_read_blend_status and flex_read_blend_status_rtn
Example
While blending linearly interpolated moves in a 2D vector space, you call the Read Blend
Status function with axisOrVectorSpace = 0x10 to select vector space status. If the blend on
vector space 1 is still pending, this function will return blendStatus = 0x000C, which
corresponds to the following bitmap.
D15
D14
D13
D12
D11
D10
D9
D8
D7
D6
D5
D4
D3
D2
D1
D0
XXX
XXX
XXX
XXX
XXX
XXX
XXX
XXX
XXX
XXX
XXX
XXX
VS3
VS2
VS1
XXX
0
0
0
0
0
0
0
0
0
0
0
0
1
1
0
0
The blend is complete (1) on vector spaces 2 and 3 (or they do not exist), but the blend is still
pending (0) on vector space 1.
For your programming convenience, two utility functions—Check Blend Complete Status and
Wait for Blend Complete—are provided, which allow you to specify an axis, vector space,
group of axes, or group of vector spaces, and find out if a blend is complete, or wait until a
blend is complete. These functions return a simple true/false value indicating whether or not
a blend is complete.
FlexMotion Software Reference Manual
6-26
www.natinst.com
Chapter 6
Trajectory Control Functions — flex_read_follow_err and flex_read_follow_err_rtn
flex_read_follow_err and
flex_read_follow_err_rtn
Read Following Error
Format
status = flex_read_follow_err (boardID, axisOrVectorSpace, returnVector)
status = flex_read_follow_err_rtn (boardID, axisOrVectorSpace, followingError)
Purpose
Reads the instantaneous following error for an axis or vector space.
Parameters
Input
Name
Type
Description
boardID
u8
assigned by Measurement & Automation Explorer
axisOrVectorSpace
u8
axis or vector space to be read
returnVector
u8
destination for the return data
Output
Name
followingError
Type
Description
i16
instantaneous following error for an axis or vector
space in counts
Parameter Discussion
axisOrVectorSpace is the axis or vector space to be read.
returnVector indicates the desired destination for the return data generated by this function.
Available returnVectors include return data to the host (0xFF), return data to a variable
(0x01 through 0x78), and don’t return data (0).
Note The suffix _rtn on the function indicates that the data should be returned to the host.
When this calling convention is used, no returnVector is required.
followingError is the instantaneous difference between the commanded trajectory position
and the actual feedback position in counts.
© National Instruments Corporation
6-27
FlexMotion Software Reference Manual
Chapter 6
Trajectory Control Functions — flex_read_follow_err and flex_read_follow_err_rtn
Using This Function
The Read Following Error function returns the instantaneous following error for the axis or
vector space specified. For vector spaces, following error is the root-mean-square of the
following errors for the individual axes that make up the vector space.
Note Following error limit cannot be set for a vector space, you must set a following error
limit for each axis individually.
FlexMotion Software Reference Manual
6-28
www.natinst.com
Chapter 6
Trajectory Control Functions — flex_read_mcs_rtn
flex_read_mcs_rtn
Read Move Complete Status
Format
status = flex_read_mcs_status_rtn (boardID, moveCompleteStatus)
Purpose
Reads the Move Complete Status register.
Parameters
Input
Name
boardID
Type
Description
u8
assigned by Measurement & Automation Explorer
Type
Description
Output
Name
moveCompleteStatus
u16
bitmap of Move Complete Status for all axes
Parameter Discussion
moveCompleteStatus is a bitmap of Move Complete Status for all six axes. The bitmap also
includes the state of the three User Status bits.
D15
D14
D13
D12
D11
D10
D9
D8
D7
D6
D5
D4
D3
D2
D1
D0
Sts15
Sts14
Sts13
XXX
XXX
XXX
XXX
XXX
XXX
MC 6
MC 5
MC 4
MC 3
MC 2
MC 1
XXX
D1 through D6 Move Complete (MC):
1 = Move is complete
0 = Axis is moving
D13 through D15 User Status (Sts):
1 = True
0 = False
© National Instruments Corporation
6-29
FlexMotion Software Reference Manual
Chapter 6
Trajectory Control Functions — flex_read_mcs_rtn
Using This Function
The Read Move Complete Status function performs a direct read of the Move Complete
Status (MCS) register on the FlexMotion controller. Because a register read is virtually
instantaneous and does not effect communication processing or other FlexMotion operations,
you can call this function repetitively to get the most up to date status for the axes.
Move Complete Status is configurable individually for each axis with the Configure Move
Complete Criteria function. The criteria for considering motion to be complete include
Profile Complete, Run/Stop, In Position, Settling time delay, and so on.
Note Reading the MCS register immediately after calling the Start Motion function might
not return the status you expected. The Start Motion can still be buffered in the
communications FIFO when the instantaneous read of the MCS occurs.
This function also returns the state of the User Status bits. You can set and reset these three
bits during onboard program execution as general-purpose flags to the host computer. Refer
to the Set User Status MOMO function for more information.
Note When the FlexMotion controller is in the Power-Up state, the MCS register contains
a power-up code that describes why the controller is in the Power-Up state. For a list of
these power-up codes, refer to the Clear Power Up Status function.
FlexMotion Software Reference Manual
6-30
www.natinst.com
Chapter 6
Trajectory Control Functions — flex_read_pos and flex_read_pos_rtn
flex_read_pos and
flex_read_pos_rtn
Read Position
Format
status = flex_read_pos (boardID, axis, returnVector)
status = flex_read_pos_rtn (boardID, axis, position)
Purpose
Reads the position of an axis.
Parameters
Input
Name
Type
Description
boardID
u8
assigned by Measurement & Automation Explorer
axis
u8
axis to be read
returnVector
u8
destination for the return data
Output
Name
position
Type
i32
Description
axis position in counts (servo) or steps (stepper)
Parameter Discussion
axis is the axis to be read.
returnVector indicates the desired destination for the return data generated by this function.
Available returnVectors include return data to the host (0xFF), return data to a variable
(0x01 through 0x78), and don’t return data (0).
Note The suffix _rtn on the function indicates that the data should be returned to the host.
When this calling convention is used, no returnVector is required.
position is the axis position in quadrature counts (for servo axes) or steps (for stepper axes).
© National Instruments Corporation
6-31
FlexMotion Software Reference Manual
Chapter 6
Trajectory Control Functions — flex_read_pos and flex_read_pos_rtn
Using This Function
The Read Position function returns the instantaneous position of the specified axis. For servo
axes, it returns the primary feedback position in counts. For open-loop stepper axes, it returns
the number of steps generated. For closed-loop stepper axes, it converts the primary feedback
position from counts to steps and then returns the value in steps. Closed-loop stepper axes
require you to correctly load values of steps per revolution and counts per revolution to
function correctly.
Note For closed-loop axes, this function always returns the position of the primary
feedback resource.
See the Read Vector Space Position function for an easy way to read up to three axis
positions for a vector space in one call.
FlexMotion Software Reference Manual
6-32
www.natinst.com
Chapter 6
Trajectory Control Functions — flex_read_rpm and flex_read_rpm_rtn
flex_read_rpm and
flex_read_rpm_rtn
Read Velocity in RPM
Format
status = flex_read_rpm (boardID, axisOrVectorSpace, returnVector)
status = flex_read_rpm_rtn (boardID, axisOrVectorSpace, RPM)
Purpose
Reads the filtered velocity of an axis or vector space in RPM.
Parameters
Input
Name
Type
Description
boardID
u8
assigned by Measurement & Automation Explorer
axisOrVectorSpace
u8
axis or vector space to be read
returnVector
u8
destination for the return data
Output
Name
RPM
Type
f64
Description
filtered velocity in RPM
Parameter Discussion
axisOrVectorSpace is the axis or vector space to be read.
returnVector indicates the desired destination for the return data generated by this function.
Available returnVectors include return data to the host (0xFF), return data to a variable
(0x01 through 0x78), and don’t return data (0).
Note The suffix _rtn on the function indicates that the data should be returned to the host.
When this calling convention is used, no returnVector is required.
RPM is the filtered velocity value in RPM expressed as a double-precision floating point
number. For vector spaces, RPM is the filtered vector velocity for the vector move. The sign
of RPM indicates direction of motion.
© National Instruments Corporation
6-33
FlexMotion Software Reference Manual
Chapter 6
Trajectory Control Functions — flex_read_rpm and flex_read_rpm_rtn
Using This Function
The Read Velocity in RPM function returns the axis or vector space filtered velocity in RPM.
To minimize the quantization effects of any sampled data system, the instantaneous measured
velocity is averaged by a single-pole low pass filter and converted to RPM before being
returned. The time constant for this filter is programmable with the Configure Velocity Filter
function.
For vector spaces, this function returns vector velocity, the root-mean-square of the filtered
velocities of the individual axes that make up the vector space.
Note This function requires previously loaded values of either counts per revolution
(for servo axes) or steps per revolution (for stepper axes) to operate correctly.
FlexMotion Software Reference Manual
6-34
www.natinst.com
Chapter 6
Trajectory Control Functions — flex_read_trajectory_status and flex_read_trajectory_status_rtn
flex_read_trajectory_status and
flex_read_trajectory_status_rtn
Read Trajectory Status
Format
status = flex_read_trajectory_status (boardID, axisOrVectorSpace, statusType, returnVector)
status = flex_read_trajectory_status_rtn (boardID, axisOrVectorSpace, statusType, status)
Purpose
Reads the selected motion trajectory status of all axes or vector spaces.
Parameters
Input
Name
Type
Description
boardID
u8
assigned by Measurement & Automation Explorer
axisOrVectorSpace
u8
axis or vector space selector
statusType
u16
status selector
returnVector
u8
destination for the return data
Output
Name
status
Type
u16
Description
bitmap of selected status for all axes
Parameter Discussion
axisOrVectorSpace is the axis or vector space selector. For multi-axis status, use 0 (zero).
For multi-vector space status, use 0x10.
statusType is the selector for the type of trajectory status to be read.
statusType Constant
statusType Value
axisOrVectorSpace Value
NIMC_RUN_STOP_STATUS
0
0 only
NIMC_MOTOR_OFF_STATUS
1
0 only
NIMC_VELOCITY_THRESHOLD_STATUS
2
0 only
NIMC_MOVE_COMPLETE_STATUS
3
0 or 0x10
© National Instruments Corporation
6-35
FlexMotion Software Reference Manual
Chapter 6
Trajectory Control Functions — flex_read_trajectory_status and flex_read_trajectory_status_rtn
status is the bitmap of multi-axis or vector space status.
D15
D14
D13
D12
D11
D10
D9
D8
D7
D6
D5
D4
D3
D2
D1
D0
XXX
XXX
XXX
XXX
XXX
XXX
XXX
XXX
XXX
Axis
6
Axis
5
Axis
4
Axis
3
Axis
2
Axis
1
XXX
D15
D14
D13
D12
D11
D10
D9
D8
D7
D6
D5
D4
D3
D2
D1
D0
XXX
XXX
XXX
XXX
XXX
XXX
XXX
XXX
XXX
XXX
XXX
XXX
VS 3
VS 2
VS 1
XXX
D1 through D6 (axes) or D1 through D3 (vector spaces):
For NIMC_RUN_STOP_STATUS:
1 = Axis running
0 = Axis stopped
For NIMC_MOTOR_OFF_STATUS:
1 = Axis off
0 = Axis on
For NIMC_VELOCITY_THRESHOLD_STATUS:
1 = Velocity above threshold
0 = Velocity below threshold
For NIMC_MOVE_COMPLETE_STATUS:
1 = Move complete
0 = Move not complete
returnVector indicates the desired destination for the return data generated by this function.
Available returnVectors include return data to the host (0xFF), return data to a variable
(0x01 through 0x78), and don’t return data (0).
Note The suffix _rtn on the function indicates that the data should be returned to the host.
When this calling convention is used, no returnVector is required.
FlexMotion Software Reference Manual
6-36
www.natinst.com
Chapter 6
Trajectory Control Functions — flex_read_trajectory_status and flex_read_trajectory_status_rtn
Using This Function
The Read Trajectory Status function returns a multi-axis status bitmap of the status type
selected. You can select one of the following three trajectory status types:
NIMC_RUN_STOP_STATUS
Run/Stop status is derived from a change in position per update sample period. The axis is
considered to be running when the change in position per sample period exceeds the Run/Stop
threshold set with the Configure Velocity Filter function.
NIMC_MOTOR_OFF_STATUS
A motor can be Off for two reasons. Either a kill stop was executed or the following error trip
point was exceeded. A Motor Off condition also means that a properly configured inhibit
output is active. See the Configure Inhibit Outputs function for more information.
NIMC_VELOCITY_THRESHOLD_STATUS
The Velocity Threshold status indicates whether the axis velocity is above (True) or below
(False) the programmed velocity threshold. For information about setting and using a velocity
threshold, see the Load Velocity Threshold function.
NIMC_MOVE_COMPLETE_STATUS
The Move Complete status indicates whether an axis or vector space is in the move complete
state, which is the default when an axis or vector space is idle. While a move is in progress,
the move complete status will be false. For a move to be complete on a vector space, the move
complete status must be true on all axes in the vector space.
During a vector space move, if one axis in a vector space trips out on a following error, that
axis is killed, and the move complete status remains false. The other axes in the vector space
decelerate to a stop, and the move complete status is true. For the vector space as a whole, the
move complete status is false, because the move did not complete properly.
Use the Configure Move Complete Criteria function to change the conditions that cause a
move to be evaluated as complete. For example, by changing the move complete criteria to be
profile complete (default) OR motor off, the previous situation would result in a true move
complete status when one of the axes in the vector space tripped out on a following error.
Note You can get all four trajectory statuses for a single axis by calling the Read per Axis
Status function.
© National Instruments Corporation
6-37
FlexMotion Software Reference Manual
Chapter 6
Trajectory Control Functions — flex_read_trajectory_status and flex_read_trajectory_status_rtn
Example
To get Motor Off status, call the Read Trajectory Status function with axisOrVectorSpace =
0 and statusType = NIMC_MOTOR_OFF_STATUS. Assume the returned status = 0x0062.
This corresponds to the following bitmap.
D15
D14
D13
D12
D11
D10
D9
D8
D7
D6
D5
D4
D3
D2
D1
D0
XXX
XXX
XXX
XXX
XXX
XXX
XXX
XXX
XXX
Axis
6
Axis
5
Axis
4
Axis
3
Axis
2
Axis
1
XXX
0
0
0
0
0
0
0
0
0
1
1
0
0
0
1
0
Axes 1, 5, 6 are Off.
For your programming convenience, two utility functions—Check Move Complete Status and
Wait for Move Complete—are provided, which allow you to specify an axis, vector space,
group of axes, or group of vector spaces, and find out if a move is complete, or wait until a
move is complete. These functions return a simple true/false value indicating whether or not
a move is complete.
FlexMotion Software Reference Manual
6-38
www.natinst.com
Chapter 6
Trajectory Control Functions — flex_read_velocity and flex_read_velocity_rtn
flex_read_velocity and
flex_read_velocity_rtn
Read Velocity
Format
status = flex_read_velocity (boardID, axisOrVectorSpace, returnVector)
status = flex_read_velocity_rtn (boardID, axisOrVectorSpace, velocity)
Purpose
Reads the filtered velocity of an axis or vector space.
Parameters
Input
Name
Type
Description
boardID
u8
assigned by Measurement & Automation Explorer
axisOrVectorSpace
u8
axis or vector space to be read
returnVector
u8
destination for the return data
Output
Name
velocity
Type
i32
Description
axis or vector space filtered velocity in counts/s
(servo) or steps/s (stepper)
Parameter Discussion
axisOrVectorSpace is the axis or vector space to be read.
returnVector indicates the desired destination for the return data generated by this function.
Available returnVectors include return data to the host (0xFF), return data to a variable
(0x01 through 0x78), and don’t return data (0).
Note The suffix _rtn on the function indicates that the data should be returned to the host.
When this calling convention is used, no returnVector is required.
velocity is filtered velocity in counts/s (for servo axes) or steps/s (for stepper axes). For vector
spaces, velocity is the filtered vector velocity for the vector move. The sign of velocity
indicates direction of motion.
© National Instruments Corporation
6-39
FlexMotion Software Reference Manual
Chapter 6
Trajectory Control Functions — flex_read_velocity and flex_read_velocity_rtn
Using This Function
The Read Velocity function returns the axis or vector space filtered velocity in counts/s or
steps/s. To minimize the quantization effects of any sampled data system, the instantaneous
measured velocity is averaged by a single-pole low pass filter before being returned. The time
constant for this filter is programmable with the Configure Velocity Filter function.
For vector spaces, this function returns vector velocity, the root-mean-square of the filtered
velocities of the individual axes that make up the vector space.
Note You can also read velocity in RPM by calling the Read Velocity in RPM function.
FlexMotion Software Reference Manual
6-40
www.natinst.com
Chapter 6
Trajectory Control Functions — flex_read_vs_pos and flex_read_vs_pos_rtn
flex_read_vs_pos and
flex_read_vs_pos_rtn
Read Vector Space Position
Format
status = flex_read_vs_pos (boardID, vectorSpace, returnVector)
status = flex_read_vs_pos_rtn (boardID, vectorSpace, xPosition, yPosition, zPosition)
Purpose
Reads the position of all axes in a vector space.
Parameters
Input
Name
Type
Description
boardID
u8
assigned by Measurement & Automation Explorer
vectorSpace
u8
vector space to be read
returnVector
u8
destination for the return data
Output
Name
Type
Description
xPosition
i32
x axis position in counts or steps
yPosition
i32
y axis position in counts or steps
zPosition
i32
z axis position in counts or steps
Parameter Discussion
vectorSpace is the vector space to be read.
returnVector indicates the desired destination for the return data generated by this function.
Available returnVectors include return data to the host (0xFF), return data to a variable
(0x01 through 0x78), and don’t return data (0).
Note The suffix _rtn on the function indicates that the data should be returned to the host.
When this calling convention is used, no returnVector is required.
© National Instruments Corporation
6-41
FlexMotion Software Reference Manual
Chapter 6
Trajectory Control Functions — flex_read_vs_pos and flex_read_vs_pos_rtn
xPosition, yPosition, and zPosition are the positions in quadrature counts (for servo axes) or
steps (for stepper axes) of the three axes in the vector space. For vector spaces with less than
three axes, zero (0) is returned on the unused axes.
Using This Function
The Read Vector Space Position function returns the instantaneous positions of the axes in
the specified vector space. For servo axes, it returns the primary feedback position in counts.
For open-loop stepper axes, it returns the number of steps generated. For closed-loop stepper
axes, it converts the primary feedback position from counts to steps and then returns the value
in steps. Closed-loop stepper axes require correctly loaded values of steps per revolution and
counts per revolution to function correctly.
Note For closed-loop axes, this function always returns the position of the primary
feedback resource.
FlexMotion Software Reference Manual
6-42
www.natinst.com
Chapter 6
Trajectory Control Functions — flex_reset_pos
flex_reset_pos
Reset Position
Format
status = flex_reset_pos (boardID, axis, position1, position2, inputVector)
Purpose
Resets an axis position to a desired value.
Parameters
Input
Name
Type
Description
boardID
u8
assigned by Measurement & Automation Explorer
axis
u8
axis to be controlled
position1
i32
reset value for axis and primary feedback resource
position2
i32
reset value for secondary feedback resource
inputVector
u8
source of the data for this function
Parameter Discussion
axis is the axis to be controlled.
position1 is the reset value for the axis and it associated primary feedback resource. You can
reset position to any value in the total position range of –(231) to +(231–1).
position2 is the reset value for the optional secondary feedback resource. You can reset
position to any value in the total position range of –(231) to +(231–1).
Note For stepper closed-loop configurations, where the encoder counts per revolution is
greater than the steps per revolution, the range of the position parameters is reduced to
–(231)/counts or steps to (231–1)/counts or steps.
inputVector indicates the source of the data for this function. Available inputVectors include
immediate (0xFF) or variable (0x01 through 0x78).
© National Instruments Corporation
6-43
FlexMotion Software Reference Manual
Chapter 6
Trajectory Control Functions — flex_reset_pos
Using This Function
The Reset Position function resets the axis position, the associated primary feedback position,
and the optional secondary feedback position. You can reset position to zero or any value in
the 32-bit position range. You can reset the secondary feedback to the same value as the axis
and primary feedback or you can reset it to a different value. If a secondary feedback resource
is not in use, the corresponding reset value is ignored.
Note Non-zero reset values are useful for defining a position reference offset.
Position can be reset at any time. However, it is recommended that you reset position only
while the axis is stopped. An axis reset while the axis is moving will not have a repeatable
reference position. Typically, the Reset Position function is executed once after the Find
Home and Find Index sequences have completed successfully and not called again until the
next power-up.
An ADC channel used as a primary or secondary feedback resources is reset by storing an
offset value when this function is executed. In this way, its zero reference is not lost and you
can still read the actual ADC value with the Read ADC function.
FlexMotion Software Reference Manual
6-44
www.natinst.com
Chapter 6
Trajectory Control Functions — flex_set_op_mode
flex_set_op_mode
Set Operation Mode
Format
status = flex_set_op_mode (boardID, axisOrVectorSpace, operationMode)
Purpose
Sets the operation mode for an axis or vector space.
Parameters
Input
Name
Type
Description
boardID
u8
assigned by Measurement & Automation Explorer
axisOrVectorSpace
u8
axis or vector space to be controlled
operationMode
u16
mode of operation
Parameter Discussion
axisOrVectorSpace is the axis or vector space to be controlled.
operationMode selects the type of position or velocity mode for an axis or vector space.
operationMode Constant
operationMode Value
NIMC_ABSOLUTE_POSITION
0
NIMC_RELATIVE_POSITION
1
NIMC_VELOCITY
2
NIMC_RELATIVE_TO_CAPTURE
3
NIMC_MODULUS_POSITION
4
These modes are described in the following section.
Using This Function
The Set Operation Mode function is used both during initialization and during normal motion
control operation to configure the mode of operation for all trajectory commands to the axis
or vector space specified.
© National Instruments Corporation
6-45
FlexMotion Software Reference Manual
Chapter 6
Trajectory Control Functions — flex_set_op_mode
When sent to a vector space, the operation mode is broadcast to all axes in the vector space to
change the per-axis modes. If you later want to operate an axis independently in a different
mode, you must execute the Set Operation Mode function again for that axis.
Note All axes in a vector space must have the same operation mode. If the operation
modes are different on each axis when a Start Motion or Blend Motion function is executed,
an error will be generated.
The operation mode must be set or changed before any other trajectory parameters are loaded
for the next move. The operation mode affects how the target position and velocity values are
interpreted. Trajectory parameters loaded after a mode change will be interpreted in the newly
selected mode.
Note Changing operation mode after the trajectory parameters are loaded can result in
improper operation.
There are four position modes and one velocity mode as described in the following sections.
NIMC_ABSOLUTE_POSITION
In absolute position mode, target positions are interpreted with respect to an origin, reference,
or zero position. The origin is typically set at a home switch, end of travel limit switch, or
encoder index position. An absolute position move will use the preprogrammed values of
acceleration, deceleration, s-curve, and velocity to complete a trajectory profile with an
ending position equal to the loaded absolute target position.
The length of an absolute move depends upon the loaded position and the current position
when the move is started. If the target position is the same as the current position, no move
will occur.
Caution Any single move is limited to ±(231–1) counts or steps. An error is generated if
you exceed this limit by loading a target position too far from the current position.
NIMC_RELATIVE_POSITION
In relative position mode while motion is not in progress, loaded target positions are
interpreted with respect to the current position at the time the value is loaded. A relative
position move uses the preprogrammed values of acceleration, deceleration, s-curve and
velocity to complete a trajectory profile with an ending position equal to the sum of the loaded
relative target position and the starting position.
If a relative move is started while motion is in progress, the new target position is calculated
with respect to the target position of the move already in progress (considered to be the new
starting position), as if that move had already completed successfully. Motion continues to the
FlexMotion Software Reference Manual
6-46
www.natinst.com
Chapter 6
Trajectory Control Functions — flex_set_op_mode
new relative position, independent of the actual position location when the new move is
started.
In relative mode, the new target position is calculated and double-buffered when you execute
either the Load Target Position or Load Vector Space Position function. You must reload the
relative target position each time before executing a Start Motion or Blend Motion function.
NIMC_VELOCITY
In velocity mode, the axis moves at the loaded velocity until you execute a Stop Motion
function, a limit is encountered, or a new velocity is loaded and you execute a Start Motion
function. Load target positions have no effect in velocity mode. The direction of motion is
determined by the sign of the loaded velocity.
You can update velocity at any time to accomplish velocity profiling. Changes in velocity
while motion is in progress uses the preprogrammed acceleration, deceleration, and s-curve
values to control the change in velocity. You can reverse direction by changing the sign of the
loaded velocity and executing a Start Motion function.
Note Executing a Blend Motion function in velocity mode has no effect because the move
in process never normally stops. You should always use the Start Motion function to update
velocity in velocity mode.
Velocity mode is not valid on vector spaces and will generate an error.
NIMC_RELATIVE_TO_CAPTURE
The relative-to-capture position mode is very similar to relative position mode, except that
the position reference is the last captured position for the axis or axes. A relative-to-capture
position move uses the preprogrammed values of acceleration, deceleration, s-curve and
velocity to complete a trajectory profile with an ending position equal to the sum of the loaded
target position and the last captured position.
In relative-to-capture mode, the new target position is calculated and double-buffered when
you execute either the Load Target Position or Load Vector Space Position function. These
functions use existing values in the position capture register(s). You must load the target
position after the capture event has occurred and before executing the Start Motion or Blend
Motion function.
This mode is typically used in registration applications. Refer to the High-Speed Capture
Functions section in Chapter 8, Motion I/O Functions, for more information on the
high-speed capture functionality of the encoder inputs.
© National Instruments Corporation
6-47
FlexMotion Software Reference Manual
Chapter 6
Trajectory Control Functions — flex_set_op_mode
NIMC_MODULUS_POSITION
In modulus position mode, the loaded target position is interpreted within the boundaries of
a modulus range and the direction of motion is automatically chosen to generate the shortest
trajectory to the target. To load the modulus range execute the Load Position Modulus
function.
Modulus position mode is typically used with rotary axes or for other similarly repetitive
motion applications.
Example
A rotary tool changer has a modulus of 360°, such that 0°, 360°, 720°, and so on, are the same
rotary position.
In modulus position mode, the present position and the desired target position are used to
calculate the shortest trajectory to the target position. If the present position is 30° and the
target position is 290°, there are two possible moves:
290–30 = 260° in the clockwise direction, or
290–360–30 = –100° in the counterclockwise direction.
Because 100° is the shortest trajectory, the tool changer moves counterclockwise to the target
position of 290°.
Note Multiple revolution moves cannot be accomplished by indicating target positions
greater than the modulus value. All moves are resolved to one modulus range.
FlexMotion Software Reference Manual
6-48
www.natinst.com
Chapter 6
Trajectory Control Functions — flex_wait_for_blend_complete
flex_wait_for_blend_complete
Wait for Blend Complete
Format
status = flex_wait_for_blend_complete_status (boardID, axisOrVectorSpace, axisOrVSMap,
u32 timeout, i32 pollInterval, blendComplete)
Purpose
Waits up to the specified period of time for a blend to be completed on an axis, vector space,
group of axes, or group of vector spaces.
Parameters
Input
Name
Type
Description
boardID
u8
assigned by Measurement & Automation Explorer
axisOrVectorSpace
u8
axis or vector space selector
axisOrVSMap
u16
bitmap of axes or vector spaces to check
timeout
u32
timeout in milliseconds
pollInterval
i32
polling interval in milliseconds
Output
Name
blendComplete
Type
u16
Description
the blend complete status
Parameter Discussion
axisOrVectorSpace can select an axis (1 through 6), vector space (0x11 through 0x13),
multiple axes (0), or multiple vector spaces (0x10). When simultaneously waiting for a blend
to complete on multiple axes or vector spaces, the axisOrVSMap parameter indicates which
axes or vector spaces to wait for.
axisOrVSMap is the bitmap of axes or vector spaces to wait for. It is only required when
multiple axes or vector spaces are selected with the axisOrVectorSpace parameter.
Otherwise, this parameter is ignored.
© National Instruments Corporation
6-49
FlexMotion Software Reference Manual
Chapter 6
Trajectory Control Functions — flex_wait_for_blend_complete
When waiting for multiple axes (axisOrVectorSpace = 0):
D15
D14
D13
D12
D11
D10
D9
D8
D7
D6
D5
D4
D3
D2
D1
D0
0
0
0
0
0
0
0
0
0
Axis
6
Axis
5
Axis
4
Axis
3
Axis
2
Axis
1
0
For D1 through D6:
1 = Blend must be complete on specified axis
0 = Blend can be either complete or not complete on specified axis (don’t care)
When waiting for multiple vector spaces (axisOrVectorSpace = 0x10):
D15
D14
D13
D12
D11
D10
D9
D8
D7
D6
D5
D4
D3
D2
D1
D0
0
0
0
0
0
0
0
0
0
0
0
0
VS 3
VS 2
VS 1
0
For D1 through D3:
1 = Blend must be complete on specified vector space
0 = Blend can be either complete or not complete on specified vector space (don’t care)
To wait for blend complete on a single axis or vector space, set the axisOrVectorSpace
selector to the desired axis or vector space. The axisOrVSMap parameter is ignored.
To wait for blend complete on multiple axes, the axisOrVectorSpace selector is set to 0
(zero) and the axisOrVSMap bitmap defines the axes to wait for. They must all be blend
complete, for the blendComplete output to be true. Similarly, to wait for blend complete on
multiple vector spaces, the axisOrVectorSpace selector is set to 0x10 and the
axisOrVSMap bitmap defines the vector spaces to wait for.
timeout is the amount of time, in milliseconds, to wait for the blend to become complete.
pollInterval is the amount of time, in milliseconds, to wait between successive queries to the
controller to determine if the blend is complete.
blendComplete indicates whether or not the blend is complete on the axes or vector spaces
specified.
1 = Blend complete
0 = Blend not complete
FlexMotion Software Reference Manual
6-50
www.natinst.com
Chapter 6
Trajectory Control Functions — flex_wait_for_blend_complete
Using This Function
This utility function is built on top of the Check Blend Complete Status and Read Blend Status
functions, and is provided for your programming convenience. This function compares the
axes or vector spaces specified in the axisOrVectorSpace and axisOrVSMap input
parameters with the blend complete status for the appropriate axes or vector spaces. It does
this repetitively, with the pollInterval time determining the frequency that the controller is
queried. As soon as the blend is complete, the function returns NIMC_noError and the
blendComplete parameter is set to true (1). This function will wait for the amount of time
specified by the timeout parameter, and if the blend is still not complete, the function returns
NIMC_eventTimeoutError, and blendComplete is set to false (0).
The output is a single true/false value indicating whether or not the specified blend or blends
are complete.
For more information on blend complete status, refer to the Read Blend Status function.
© National Instruments Corporation
6-51
FlexMotion Software Reference Manual
Chapter 6
Trajectory Control Functions — flex_wait_for_move_complete
flex_wait_for_move_complete
Wait for Move Complete
Format
status = flex_wait_for_move_complete_status (boardID, axisOrVectorSpace, axisOrVSMap,
u32 timeout, i32 pollInterval, moveComplete)
Purpose
Waits up to the specified period of time for a move to be completed on an axis, vector space,
group of axes, or group of vector spaces.
Parameters
Input
Name
Type
Description
boardID
u8
assigned by Measurement & Automation Explorer
axisOrVectorSpace
u8
axis or vector space selector
axisOrVSMap
u16
bitmap of axes or vector spaces to check
timeout
u32
timeout in milliseconds
pollInterval
i32
polling interval in milliseconds
Output
Name
moveComplete
Type
u16
Description
the move complete status
Parameter Discussion
axisOrVectorSpace can select an axis (1 through 6), vector space (0x11 through 0x13),
multiple axes (0), or multiple vector spaces (0x10). When simultaneously waiting for a move
to complete on multiple axes or vector spaces, the axisOrVSMap parameter indicates which
axes or vector spaces to wait for.
axisOrVSMap is the bitmap of axes or vector spaces to wait for. It is only required when
multiple axes or vector spaces are selected with the axisOrVectorSpace parameter.
Otherwise, this parameter is ignored.
FlexMotion Software Reference Manual
6-52
www.natinst.com
Chapter 6
Trajectory Control Functions — flex_wait_for_move_complete
When waiting for multiple axes (axisOrVectorSpace = 0):
D15
D14
D13
D12
D11
D10
D9
D8
D7
D6
D5
D4
D3
D2
D1
D0
0
0
0
0
0
0
0
0
0
Axis
6
Axis
5
Axis
4
Axis
3
Axis
2
Axis
1
0
For D1 through D6:
1 = Move must be complete on specified axis
0 = Move can be either complete or not complete on specified axis (don’t care)
When waiting for multiple vector spaces (axisOrVectorSpace = 0x10):
D15
D14
D13
D12
D11
D10
D9
D8
D7
D6
D5
D4
D3
D2
D1
D0
0
0
0
0
0
0
0
0
0
0
0
0
VS 3
VS 2
VS 1
0
For D1 through D3:
1 = Move must be complete on specified vector space
0 = Move can be either complete or not complete on specified vector space (don’t care)
To wait for move complete on a single axis or vector space, set the axisOrVectorSpace
selector to the desired axis or vector space. The axisOrVSMap parameter is ignored.
To wait for move complete on multiple axes, the axisOrVectorSpace selector is set to
0 (zero) and the axisOrVSMap bitmap defines the axes to wait for. They must all be move
complete, for the moveComplete output to be true. Similarly, to wait for move complete on
multiple vector spaces, the axisOrVectorSpace selector is set to 0x10 and the
axisOrVSMap bitmap defines the vector spaces to wait for.
timeout is the amount of time, in milliseconds, to wait for the move to become complete.
pollInterval is the amount of time, in milliseconds, to wait between successive queries to the
controller to determine if the move is complete.
moveComplete indicates whether or not the move is complete on the axes or vector spaces
specified.
1 = Move complete
0 = Move not complete
© National Instruments Corporation
6-53
FlexMotion Software Reference Manual
Chapter 6
Trajectory Control Functions — flex_wait_for_move_complete
Using This Function
This utility function is built on top of the Check Move Complete Status and Read Trajectory
Status functions, and is provided for your programming convenience. This function compares
the axes or vector spaces specified in the axisOrVectorSpace and axisOrVSMap input
parameters with the move complete status for the appropriate axes or vector spaces. It does
this repetitively, with the pollInterval time determining the frequency that the controller is
queried. As soon as the move is complete, the function returns NIMC_noError and the
moveComplete parameter is set to true (1). This function will wait for the amount of time
specified by the timeout parameter, and if the move is still not complete, the function returns
NIMC_eventTimeoutError, and moveComplete is set to false (0).
The output is a single true/false value indicating whether or not the specified move or moves
are complete.
For more information on move complete status, refer to the Read Trajectory Status and
Configure Move Complete Criteria functions.
FlexMotion Software Reference Manual
6-54
www.natinst.com
Chapter 6
Trajectory Control Functions — Arcs Functions
Arcs Functions
This subsection contains detailed descriptions of functions that load
parameters for circularly interpolated moves. It includes 2D circular arcs,
3D helical arcs, and even full 3D spherical arcs functions.
Circular interpolation is an advanced feature of FlexMotion and is
primarily used in continuous path applications such as machining, pattern
cutting, liquid dispensing, robotics, and so on. For maximum smoothness
and accuracy, the FlexMotion’s DSP implements arcs through a cubic
spline algorithm.
Arc functions are always sent to a vector space. Velocity and acceleration
parameters loaded by executing those functions on the vector space are
used as the vector velocity and vector acceleration for all subsequent arc
moves. All arc parameters are double-buffered and take effect upon the next
Start Motion or Blend Motion function execution.
Note Arc radius determines the practical range for vector acceleration and velocity.
Unrealizable vector values generate an error and the start or blend does not execute.
You can blend arc moves into linearly interpolated moves and vice versa.
You can also load all axes in the vector space with the same blend factor
using the Load Blend Factor function.
Arc moves are defined relative to their starting position and as such, are
inherently operated in relative position mode. This approach guarantees
that the axes are already on the circle in the x′y′ plane, and avoids any
impossible situations where the end point of the last move and the
beginning of the arc move are not coincident. The mode selected with the
Set Operation Mode function has no effect on the arc move. It can, however,
affect the linearly interpolated vector move you might be blending into or
from.
These functions are arranged alphabetically by function name. As a quick
reference, a summary of the entire FlexMotion function API is in
Appendix B, FlexMotion Functions.
© National Instruments Corporation
6-55
FlexMotion Software Reference Manual
Chapter 6
Trajectory Control Functions — flex_load_circular_arc
flex_load_circular_arc
Load Circular Arc
Format
status = flex_load_circular_arc (boardID, vectorSpace, radius, startAngle, travelAngle,
inputVector)
Purpose
Loads parameters for making a circular arc move in a 2D or 3D vector space.
Parameters
Input
Name
Type
Description
boardID
u8
assigned by Measurement & Automation Explorer
vectorSpace
u8
vector space to be controlled
radius
u32
arc radius in counts or steps
startAngle
f64
starting angle for the arc move in the xy plane in
degrees
travelAngle
f64
travel angle for the arc move in the xy plane in
degrees
inputVector
u8
source of the data for this function
Parameter Discussion
vectorSpace is the vector space to be controlled.
radius is the arc radius in counts (servo axes) or steps (stepper axes). The range is 2 to 231–1
counts (steps).
startAngle is the double precision floating point value in degrees of the starting angle of the
arc. The range is 0 to 359.999313° where angle 0 is along the positive x axis and values
increase counterclockwise from the positive x axis in the xy plane.
travelAngle is the double precision floating point value in degrees of the angle to be
traversed. The range is –1,474,560 to +1,474,200° (–4,096 to +4,095 revolutions). A positive
travelAngle defines counter-clockwise rotation in the xy plane.
Note Internally, the floating point values for startAngle and travelAngle are represented
as scaled, fixed point numbers. See the Arc Angles in Degrees section in Chapter 4,
FlexMotion Software Reference Manual
6-56
www.natinst.com
Chapter 6
Trajectory Control Functions — flex_load_circular_arc
Software Overview, for more information on angular units and their effect on arc
resolution.
inputVector indicates the source of the data for this function. Available inputVectors include
immediate (0xFF) or variable (0x01 through 0x78).
Note The conversion from floating-point to fixed-point is performed on the host
computer, not on the FlexMotion controller. To load arc functions from onboard variables,
you must use the 16.16 fixed-point representation for all angles.
Using This Function
The Load Circular Arc function defines an arc in the xy plane of a 2D or 3D vector space.
The arc is specified by a radius, starting angle and travel angle and like all vector space moves,
uses the loaded value of vector acceleration and vector velocity to define the motion along the
path of the arc. Figure 6-1 defines a circular arc.
Y
1
2
6
3
5
4
X
1
2
Circular Arc
Travel Angle
3
4
Starting Position
Start Angle
5
6
Radius
Ending Position
Figure 6-1. CircularArc Definitions
Circular arcs are not limited to ±360°. Moves of over 4,000 circular revolutions in either
direction can be started with one call to this function.
© National Instruments Corporation
6-57
FlexMotion Software Reference Manual
Chapter 6
Trajectory Control Functions — flex_load_helical_arc
flex_load_helical_arc
Load Helical Arc
Format
status = flex_load_helical_arc (boardID, vectorSpace, radius, startAngle, travelAngle,
linearTravel, inputVector)
Purpose
Loads parameters for making a helical arc move in a 3D vector space.
Parameters
Input
Name
Type
Description
boardID
u8
assigned by Measurement & Automation Explorer
vectorSpace
u8
vector space to be controlled
radius
u32
arc radius in counts or steps
startAngle
f64
starting angle for the arc move in the xy plane in
degrees
travelAngle
f64
travel angle for the arc move in the xy plane in
degrees
linearTravel
i32
linear travel of the z axis in counts or steps
inputVector
u8
source of the data for this function
Parameter Discussion
vectorSpace is the vector space to be controlled.
radius is the arc radius in counts (servo axes) or steps (stepper axes). The range is 2 to 231–1
counts (steps).
startAngle is the double precision floating point value in degrees of the starting angle of the
arc. The range is 0 to 359.999313° where angle 0 is along the positive x axis and values
increase counterclockwise from the positive x axis in the xy plane.
travelAngle is the double precision floating point value in degrees of the angle to be
traversed. The range is –1,474,560 to +1,474,200° (–4,096 to +4,095 revolutions). A positive
travelAngle defines counter-clockwise rotation in the xy plane.
Note Internally, the floating point values for startAngle and travelAngle are represented as
scaled, fixed point numbers. See the Arc Angles in Degrees section in Chapter 4, Software
Overview, for more information on angular units and their effect on arc resolution.
FlexMotion Software Reference Manual
6-58
www.natinst.com
Chapter 6
Trajectory Control Functions — flex_load_helical_arc
linearTravel is the linear travel of the z axis in counts (servo axes) or steps (stepper axes).
The range is –(231) to +(231–1) counts (steps).
Note Loading a zero (0) for linearTravel reduces the helical arc to a circular arc.
inputVector indicates the source of the data for this function. Available inputVectors include
immediate (0xFF) or variable (0x01 through 0x78).
Note The conversion from floating-point to fixed-point is performed on the host
computer, not on the FlexMotion controller. To load arc functions from onboard variables,
you must use the 16.16 fixed-point representation for all angles.
Using This Function
The Load Helical Arc function defines an arc in 3D vector space that consist of a circle in the
xy plane and synchronized linear travel in the z axis. The arc is specified by a radius, starting
angle, travel angle, and z axis linear travel, and like all vector space moves, uses the loaded
value of vector acceleration and vector velocity to define the motion along the helical path of
the arc. Figure 6-2 defines a helical arc.
Z
1
7
2
6
Y
3
5
4
X
1
2
3
Helical Arc
Travel Angle
Start Angle
4
5
Starting Position
Radius
6
7
Linear Travel
Ending Position
Figure 6-2. Helical Arc Definitions
Like circular arcs, helical arcs are not limited to ±360°. Moves of up to 4,096 helical twists in
either direction can be started with one call to this function.
© National Instruments Corporation
6-59
FlexMotion Software Reference Manual
Chapter 6
Trajectory Control Functions — flex_load_spherical_arc
flex_load_spherical_arc
Load Spherical Arc
Format
status = flex_load_spherical_arc (boardID, vectorSpace, radius, planePitch, planeYaw,
startAngle, travelAngle, inputVector)
Purpose
Loads parameters for making a spherical arc move in a 3D vector space.
Parameters
Input
Name
Type
Description
boardID
u8
assigned by Measurement & Automation Explorer
vectorSpace
u8
vector space to be controlled
radius
u32
arc radius in counts or steps
planePitch
f64
angle between the x′ and x axes when the entire
x′y′z′ vector space is rotated around the y axis
planeYaw
f64
angle between the x′ and x axes when the entire
x′y′z′ vector space is rotated around the z axis
startAngle
f64
starting angle for the arc move in the x′y′ plane
in degrees
travelAngle
f64
travel angle for the arc move in the x′y′ plane
in degrees
inputVector
u8
source of the data for this function
Parameter Discussion
vectorSpace is the vector space to be controlled.
radius is the arc radius in counts (servo axes) or steps (stepper axes). The range is 2 to 231–1
counts (steps).
planePitch is the double precision floating point value in degrees of the angle between the x′
and x axes when the entire x′y′z′ vector space is rotated around the y axis. The y′ axis remains
aligned with the y axis. The range is 0 to 90°. When planePitch equals 90°, the positive x′
axis is aligned with the negative z axis.
FlexMotion Software Reference Manual
6-60
www.natinst.com
Chapter 6
Trajectory Control Functions — flex_load_spherical_arc
planeYaw is the double precision floating point value in degrees of the angle between the x′
and x axes when the entire x′y′z′ vector space is rotated around the z axis. The z′ axis remains
aligned with the z axis. The range is 0 to 359.999313°. When planeYaw equals 90°, the
positive x′ axis is aligned with the positive y axis.
Note Loading zeros for planePitch and planeYaw reduces the spherical arc to a circular
arc.
startAngle is the double precision floating point value in degrees of the starting angle of the
arc. The range is 0 to 359.999313° where angle 0 is along the positive x′ axis and values
increase counterclockwise from the positive x′ axis in the x′y′ plane.
travelAngle is the double precision floating point value in degrees of the angle to be
traversed. The range is –1,474,560 to +1,474,200° (–4,096 to +4,095 revolutions). A positive
travelAngle defines counter-clockwise rotation in the x′y′ plane.
Note Internally, the floating point values for planePitch, planeYaw, startAngle, and
travelAngle are represented as scaled, fixed point numbers. See the Arc Angles in Degrees
section in Chapter 4, Software Overview, for more information on angular units and their
effect on arc resolution.
inputVector indicates the source of the data for this function. Available inputVectors
include immediate (0xFF) or variable (0x01 through 0x78).
Note The conversion from floating-point to fixed-point is performed on the host
computer, not on the FlexMotion controller. To load arc functions from onboard variables,
you must use the 16.16 fixed-point representation for all angles.
Using This Function
The Load Spherical Arc function defines an arc in the x′y′ plane of a coordinate system that
has to be transformed by rotation in pitch and yaw from the normal 3D vector space (xyz). In
the transformed x′y′z′ space, the spherical arc is reduced to a simpler circular arc. It is
specified by a radius, starting angle and travel angle, and like all vector space moves, uses the
loaded value of vector acceleration and vector velocity to define the motion along the path of
the arc in the x′y′ plane.
Figure 6-3 shows a graphic representation of the transformation between the x′y′z′ and xyz
coordinate spaces. The formal definitions of planePitch and planeYaw are listed in the
previous section.
© National Instruments Corporation
6-61
FlexMotion Software Reference Manual
Chapter 6
Trajectory Control Functions — flex_load_spherical_arc
Z
Z
Z'
Y'
Y
Y
Plane Yaw
X'
X
Plane Pitch
X
X'
Figure 6-3. Spherical Arc Pitch and Yaw Definitions
Pitch and yaw transformations are inherently confusing because they interact. To avoid
ambiguities, you can think about spherical arcs and coordinate transformations as follows:
•
The spherical arc is defined as a circular arc in the x′y′ plane of a transformed vector
space x′y′z′. The original vector space xyz is defined by the Configure Vector Space
function.
•
The transformed vector space x′y′z′ is defined in orientation only, with no absolute
position offset. Its orientation is with respect to the xyz vector space and is defined in
terms of pitch and yaw angles.
•
Pitch angle rotation comes before yaw angle rotation.
•
When rotating through the pitch angle, the y and y′ axes stay aligned with each other
while the x′z′ plane rotates around them.
•
When rotating through the yaw angle, the y′ axis never leaves the original xy plane as the
newly defined x′y′z′ vector space rotates around the original z axis.
•
At the beginning of the move, the axes are considered to be already on the arc in the
x′y′ plane. This avoids any impossible situations where the end point of the last move
and the beginning of the arc move are not coincident.
Spherical arcs are one of the most powerful, unique and unfortunately complex features of
FlexMotion. They allow full 3D curvilinear motion for robotic, solid modeling, and other
advanced applications.
FlexMotion Software Reference Manual
6-62
www.natinst.com
Chapter 6
Trajectory Control Functions — Gearing Functions
Gearing Functions
This subsection contains detailed descriptions of functions used to set up
and control master-slave gearing on the FlexMotion controller. It includes
functions to configure a gear master, load a gear ratio, and enable
master-slave gearing.
Gearing is an advanced feature of FlexMotion and is used in applications
where either the master axis is not under control of the FlexMotion
controller or whenever extremely tight synchronization between multiple
axes is required.
These functions are arranged alphabetically by function name. As a quick
reference, a summary of the entire FlexMotion function API is in
Appendix B, FlexMotion Functions.
© National Instruments Corporation
6-63
FlexMotion Software Reference Manual
Chapter 6
Trajectory Control Functions — flex_config_gear_master
flex_config_gear_master
Configure Gear Master
Format
status = flex_config_gear_master (boardID, axis, masterAxisOrEncoderOrADC)
Purpose
Assigns a master axis, encoder, or ADC channel for master-slave gearing.
Parameters
Input
Name
Type
Description
boardID
u8
assigned by Measurement & Automation
Explorer
axis
u8
slave axis to be controlled
masterAxisOrEncoderOrADC
u8
axis, encoder or ADC channel to be used
as the master
Parameter Discussion
axis is the slave axis to be controlled.
masterAxisOrEncoderOrADC is the axis (1 through 6) trajectory generator, encoder (0x21
through 0x26), or ADC channel (0x51 through 0x58) to be used as the master for this slave
axis. A zero (0) value means no master is assigned (default).
Using This Function
The Configure Gear Master function assigns a master axis, encoder, or ADC channel to the
slave axis selected. Any number of slave axes can have the same master, but each slave axis
can have only one master.
You must call the Configure Gear Master function prior to enabling master-slave gearing with
the Enable Gearing function. The usual source of master position is either an independent
encoder or ADC channel or the feedback resource of an enabled axis. In either case, you
assign the resource, not the axis, as the master. You must enable independent master resources
with the Enable Encoders or Enable ADCs functions.
FlexMotion Software Reference Manual
6-64
www.natinst.com
Chapter 6
Trajectory Control Functions — flex_config_gear_master
When an axis is assigned as the master, its trajectory generator output (not its feedback
position) is used as the master position command. This mode of operation can eliminate the
following error skew between the master and slave axes and is especially useful in gantry
applications. The master axis can be operating in any mode (including being a slave to another
master).
Master-slave functionality of slave axes is in addition to their normal mode of operation. This
allows a point-to-point move to be superimposed upon the slave while the slave axis is in
motion due to being geared to its master. This functionality is useful for registration and
reference offset moves.
Refer to the Load Gear Ratio and Enable Gearing functions for more information on
master-slave gearing.
© National Instruments Corporation
6-65
FlexMotion Software Reference Manual
Chapter 6
Trajectory Control Functions — flex_enable_gearing
flex_enable_gearing
Enable Gearing
Format
status = flex_enable_gearing (boardID, gearMap)
Purpose
Enables slave axes for master-slave gearing.
Parameters
Input
Name
Type
Description
boardID
u8
assigned by Measurement & Automation Explorer
gearMap
u16
bitmap of slave axes to enable for gearing
Parameter Discussion
gearMap is the bitmap of slave axes to enable for gearing.
D15
D14
D13
D12
D11
D10
D9
D8
D7
D6
D5
D4
D3
D2
D1
D0
0
0
0
0
0
0
0
0
0
Axis
6
Axis
5
Axis
4
Axis
3
Axis
2
Axis
1
0
D1 through D6:
1 = Gearing enabled
0 = Gearing disabled (default)
Using This Function
The Enable Gearing function enables and disables master-slave gearing functionality of slave
axes. When gearing is enabled, the positions of the slave axes and their corresponding masters
are recorded as their absolute gearing reference. From then on, as long as the gear ratio
remains absolute, every incremental change of a master position is multiplied by the
corresponding absolute gear ratio and applied to the slave axis. See the Load Gear Ratio
function for more information about absolute versus relative gear ratios.
You must call the Configure Gear Master and Load Gear Ratio functions prior to enabling
master-slave gearing. In addition, you must enable and activate the slave axes before enabling
gearing. An error is generated if a slave is killed when gearing is enabled. These checks ensure
that the slave axis enables in a controlled fashion.
FlexMotion Software Reference Manual
6-66
www.natinst.com
Chapter 6
Trajectory Control Functions — flex_enable_gearing
You can call the Enable Gearing function at any time to disable gearing or to re-enable
gearing with new absolute gearing reference positions. If gearing is disabled on a moving
axis, the axis immediately stops but remains active. If the slave axis was also implementing a
superimposed move, the superimposed move decelerates to a stop.
Executing the Stop Motion function on a slave axis stops the axis and automatically disables
gearing for that axis. Find Home and Find Index functions cannot be executed on slave axes
with gearing enabled. An error will be generated and the find sequence will not start.
© National Instruments Corporation
6-67
FlexMotion Software Reference Manual
Chapter 6
Trajectory Control Functions — flex_enable_gearing_single_axis
flex_enable_gearing_single_axis
Enable Gearing Single Axis
Format
status = flex_enable_gearing_single_axis (boardID, axis, enable)
Purpose
Enables a slave axis for master-slave gearing.
Parameters
Input
Name
Type
Description
boardID
u8
assigned by Measurement & Automation Explorer
axis
u8
axis to be enabled or disabled
enable
u16
enable/disable value
Parameter Discussion
axis is the axis to be enabled or disabled.
enable indicates whether to enable or disable the slave axis for gearing.
1 = Gearing enabled
0 = Gearing disabled
Using This Function
This function is similar to the Enable Gearing function, but allows you to enable or disable
gearing on a single axis without affecting the other axes.
The Enable Gearing Single Axis function enables and disables master-slave gearing
functionality of a slave axis. When gearing is enabled, the position of the slave axis and its
corresponding master is recorded as its absolute gearing reference. From then on, as long as
the gear ratio remains absolute, every incremental change of a master position is multiplied
by the corresponding absolute gear ratio and applied to the slave axis. See the Load Gear
Ratio function for more information about absolute versus relative gear ratios.
You must call the Configure Gear Master and Load Gear Ratio functions prior to enabling
master-slave gearing. In addition, you must enable and activate the slave axis before enabling
gearing. An error is generated if the slave is killed when gearing is enabled. These checks
ensure that the slave axis enables in a controlled fashion.
FlexMotion Software Reference Manual
6-68
www.natinst.com
Chapter 6
Trajectory Control Functions — flex_enable_gearing_single_axis
You can call the Enable Gearing Single Axis function at any time to disable gearing or to
re-enable gearing with new absolute gearing reference positions. If gearing is disabled on a
moving axis, the axis immediately stops but remains active. If the slave axis was also
implementing a superimposed move, the superimposed move decelerates to a stop.
Executing the Stop Motion function on a slave axis stops the axis and automatically disables
gearing for that axis. Find Home and Find Index functions cannot be executed on slave axes
with gearing enabled. An error will be generated and the find sequence will not start.
© National Instruments Corporation
6-69
FlexMotion Software Reference Manual
Chapter 6
Trajectory Control Functions — flex_load_gear_ratio
flex_load_gear_ratio
Load Gear Ratio
Format
status = flex_load_gear_ratio (boardID, axis, absoluteOrRelative, ratioNumerator,
ratioDenominator, inputVector)
Purpose
Loads the gear ratio for master-slave gearing.
Parameters
Input
Name
Type
Description
boardID
u8
assigned by configuration utility
axis
u8
slave axis to be controlled
absoluteOrRelative
u16
selects absolute or relative gearing between
master and slave
ratioNumerator
i16
gear ratio numerator of the slave relative to the
master
ratioDenominator
u16
gear ratio denominator of the slave relative to the
master
inputVector
u8
source of the data for this function
Parameter Discussion
axis is the slave axis to be controlled.
absoluteOrRelative selects absolute (0) or relative (1) gearing between the master and slave.
ratioNumerator is gear ratio numerator of the slave relative to the master. The numerator is
a signed value between –32,768 to +32,767 to allow for both positive and negative gearing.
ratioDenominator is the gear ratio denominator of the slave relative to the master. The
denominator must be between 1 to 32,767.
inputVector indicates the source of the data for this function. Available inputVectors include
immediate (0xFF) or variable (0x01 through 0x78).
FlexMotion Software Reference Manual
6-70
www.natinst.com
Chapter 6
Trajectory Control Functions — flex_load_gear_ratio
Using This Function
The Load Gear Ratio function loads the gear ratio of the slave axis relative to its master and
selects whether this ratio is absolute or relative. The ratio is loaded as a numerator and
denominator because it is a natural format for a ratio (numerator: denominator) and it allows
a broad range of ratios, from 1:32,767 to 32,767:1. The ratio is always specified as slave
relative to master (slave:master).
When you execute the Enable Gearing function, the positions of the slave and its master are
recorded as their absolute gearing reference. From then on, as long as the gear ratio remains
absolute, every incremental change of the master position is multiplied by the absolute gear
ratio and applied to the slave axis or axis.
If a relative gear ratio is selected and loaded after gearing is enabled, the position of the master
is recorded as its relative reference point and every incremental change from this reference
point is multiplied by the relative gear ratio and applied to the slave axis or axis.
Note While changing an absolute gear ratio on the fly is allowed, you should be careful
because the slave axis will jump with full torque to the position defined by the new ratio
even when the master position has not changed.
The Load Gear Ratio function must be called prior to enabling master-slave gearing with the
Enable Gearing function. Often the positions of the master and slave are reset to zero or some
known position prior to enabling gearing, though this is not always required. The execution
of the Enable Gearing function stores both positions as offsets and gears them from that point
onward.
Because relative gearing does not maintain an absolute relationship between master and slave
positions over time, you can use periodic calls to this function with the appropriate absolute
gear ratio to force the slave back into gearing alignment.
Master-slave functionality of slave axes is in addition to their normal mode of operation. This
allows a point-to-point move to be superimposed upon the slave while the slave axis is in
motion due to being geared to its master. This functionality is useful for registration and
reference offset moves.
Refer to the Configure Gear Master and Enable Gearing functions for more information on
master-slave gearing.
Example
To load a slave to master gear absolute gear ratio of 3:2, call the Load Gear Ratio function
with absoluteOrRelative = 0 (absolute), ratioNumerator = 3 and ratioDenominator = 2.
For for two axes with identical resolution, setting a gear ratio of 3:2 results in the slave axis
rotating three revolutions for every two revolutions of the master.
© National Instruments Corporation
6-71
FlexMotion Software Reference Manual
Chapter 6
Trajectory Control Functions — Advanced Trajectory Functions
Advanced Trajectory Functions
This subsection contains detailed descriptions of advanced trajectory
functions. These functions are useful in special applications and showcase
some of FlexMotion’s power and flexibility.
Included in this section are the functions to acquire time-sampled position
and velocity data into a large onboard buffer and then later read it out for
analysis and display. These functions implement a digital oscilloscope that
is useful during system setup, PID tuning, and general motion with data
acquisition synchronization.
These functions are arranged alphabetically by function name. As a quick
reference, a summary of the entire FlexMotion function API is in
Appendix B, FlexMotion Functions.
FlexMotion Software Reference Manual
6-72
www.natinst.com
Chapter 6
Trajectory Control Functions — flex_acquire_trajectory_data
flex_acquire_trajectory_data
Acquire Trajectory Data
Format
status = flex_acquire_trajectory_data (boardID, axisMap, numberOfSamples, timePeriod)
Purpose
Acquires time-sampled position and velocity data on multiple axes.
Parameters
Input
Name
Type
Description
boardID
u8
assigned by Measurement & Automation Explorer
axisMap
u16
bitmap of axes to acquire data for
numberOfSamples
u16
number of samples to acquire
timePeriod
u16
time period between samples in ms
Parameter Discussion
axisMap is the bitmap of axes to acquire data for.
D15
D14
D13
D12
D11
D10
D9
D8
D7
D6
D5
D4
D3
D2
D1
D0
0
0
0
0
0
0
0
0
0
Axis
6
Axis
5
Axis
4
Axis
3
Axis
2
Axis
1
0
D1 through D6:
1 = Acquire samples on this axis
0 = Do not acquire samples (default)
numberOfSamples is the number of samples to acquire. The maximum number of samples
depends upon the number of axes selected by axisMap:
numberOfSamples (max) = 4096/number of axes
With 1 axis selected, the maximum is 4,096 samples. With all six axes selected, the maximum
is 682 samples.
timePeriod is the time period between samples in ms. The range is from 3 (default) to
65,535 ms.
© National Instruments Corporation
6-73
FlexMotion Software Reference Manual
Chapter 6
Trajectory Control Functions — flex_acquire_trajectory_data
Using This Function
The Acquire Trajectory Data function initiates the automatic acquisition of position and
velocity data for the selected axes. The data is held in an onboard first-in-first-out (FIFO)
buffer until later read back with the Read Trajectory Data function. You can select which axes
to acquire data for and program the time period between samples.
The Acquire Trajectory Data and Read Trajectory Data functions are used to acquire and
read back time-sampled position and velocity data for analysis and display. These functions
implement a digital oscilloscope that is useful during system setup, PID tuning, and general
motion with data acquisition synchronization.
Once started, this data acquisition operates autonomously in the background as a separate
task. Motion control operates normally and you can execute other motion functions
simultaneously. Depending upon the programmed time period and the total number of
samples, this acquisition task can run anywhere from a few milliseconds to tens of hours.
Caution
Wait an appropriate amount of time before attempting to read back the trajectory
data.
Example
To acquire 100 samples of data on axes 1, 2, and 5 at 10 ms/sample, call the Acquire
Trajectory Data function with the following parameters:
axisMap = 0x0026, corresponding to the following bitmap
D15
D14
D13
D12
D11
D10
D9
D8
D7
D6
D5
D4
D3
D2
D1
D0
0
0
0
0
0
0
0
0
0
Axis
6
Axis
5
Axis
4
Axis
3
Axis
2
Axis
1
0
0
0
0
0
0
0
0
0
0
0
1
0
0
1
1
0
numberOfSamples = 100
timePeriod = 10
FlexMotion Software Reference Manual
6-74
www.natinst.com
Chapter 6
Trajectory Control Functions — flex_load_base_vel
flex_load_base_vel
Load Base Velocity
Format
status = flex_load_base_vel (boardID, axis, baseVelocity, inputVector)
Purpose
Sets the base velocity used by the trajectory control circuitry for the axis specified.
Parameters
Input
Name
Type
Description
boardID
u8
assigned by Measurement & Automation Explorer
axis
u8
axis to be controlled
baseVelocity
u16
base velocity for the stepper axis in steps/second
inputVector
u8
source of the data for this function
Parameter Discussion
baseVelocity is loaded in steps per second and is a 16-bit data word in the range of 0 through
65,535. The default value is 0.
Using This Function
Base velocity is the minimum step rate used by the trajectory generator during acceleration
and deceleration. Larger or smaller values can be used to optimize the low frequency
performance of certain stepper motors.
If the target velocity loaded with the Load Velocity function is lower than the base velocity,
the base velocity is reduced to equal the loaded target velocity.
Note This function is valid only on axes configured as steppers, so you must configure an
axis as a stepper using the Configure Axis Resources function before executing this
function.
© National Instruments Corporation
6-75
FlexMotion Software Reference Manual
Chapter 6
Trajectory Control Functions — flex_load_blend_fact
flex_load_blend_fact
Load Blend Factor
Format
status = flex_load_blend_fact (boardID, axisOrVectorSpace, blendFactor, inputVector)
Purpose
Loads the blend factor for an axis or vector space.
Parameters
Input
Name
Type
Description
boardID
u8
assigned by Measurement & Automation Explorer
axisOrVectorSpace
u8
axis or vector space to be controlled
blendFactor
i16
the mode and/or dwell used during blending
inputVector
u8
source of the data for this function
Parameter Discussion
axisOrVectorSpace is the axis or vector space to be controlled.
blendFactor is the blend factor mode and/or dwell time. –1 specifies normal blending
(default), 0 specifies a start after the previous move is fully stopped, and values > 0 specify
additional dwell time in milliseconds.
inputVector indicates the source of the data for this function. Available inputVectors include
immediate (0xFF) or variable (0x01 through 0x78).
Using This Function
The Load Blend Factor function controls how the Blend Motion function operates. Blending
automatically starts a pending move on an axis or vector space when the move in process
completes. Exactly when the pending move starts is determined by the loaded blend factor.
FlexMotion Software Reference Manual
6-76
www.natinst.com
Chapter 6
Trajectory Control Functions — flex_load_blend_fact
A blend factor of –1 causes the pending move to start when the existing move finishes its
constant velocity segment and starts to decelerate, as shown in Figure 6-4. This blends the
two moves together at the optimum blend point.
Velocity
Second Move
First Move
Time
Figure 6-4. Blending with Blend Factor of –1
If the two moves are at the same velocity, in the same direction, and have matching
acceleration and deceleration, they will superimpose perfectly without a dip or increase in
velocity.
For a vector move, if all of the axes are continuing in the same direction, the vector velocity
remains constant. But, if one of the axes changes direction, the vector velocity does not
remain constant during the transition phase.
A blend factor of zero (0) causes the pending move to start when the existing move fully
completes its profile, as shown in Figure 6-5.
Velocity
Time = 0
Second Move
First Move
Time
Figure 6-5. Blending with Blend Factor of 0
© National Instruments Corporation
6-77
FlexMotion Software Reference Manual
Chapter 6
Trajectory Control Functions — flex_load_blend_fact
Positive blend factors allow for a dwell at the end of the first move before the automatic start
of the pending move, as shown in Figure 6-6. The blend factor dwell is programmed in
milliseconds.
The maximum value of the positive blend factor depends upon the PIDrate that you set in the
Enable Axes function, because the DSP delays the trajectory generators based on PID sample
periods. The formula used to determine the maximum positive blend factor is as follows:
s = (time × 1000)/PIDrate
where s is the time in sample periods, time is the positive blend factor value in milliseconds,
and PIDrate is in microseconds (62.5, 125, 188, 250, 312, 375, 438, or 500).
If s > 32,767, it is coerced to 32,767 sample periods.
At a PIDrate of 500 µs, the maximum value of the positive blend factor is 16,383 ms and at
a PIDrate of 250 µs, the maximum value is 8,192 ms.
Velocity
Time = 0 Time = 50
Second Move
First Move
Time
Figure 6-6. Blending with Blend Factor of 50 ms
If the first move has already completed when the Blend Motion function is executed, the
second move will still wait the dwell time before starting.
You can load blend factors to individual axes or to a vector space for coordinated blending of
all axes in the vector space. When sent to a vector space, the blend factor is broadcast to all
axes in the vector space to change the per-axis blend factors. If you later want to operate an
axis independently with a different blend factor, you must execute the Load Blend Factor
function again for that axis.
Note All axes in a vector space must have the same blend factor. If the blend factors are
different on each axis when you execute a Blend Motion function, an error is generated.
FlexMotion Software Reference Manual
6-78
www.natinst.com
Chapter 6
Trajectory Control Functions — flex_load_pos_modulus
flex_load_pos_modulus
Load Position Modulus
Format
status = flex_load_pos_modulus (boardID, axis, positionModulus, inputVector)
Purpose
Loads the position modulus for an axis.
Parameters
Input
Name
Type
Description
boardID
u8
assigned by Measurement & Automation Explorer
axis
u8
axis to be controlled
positionModulus
u32
position modulus value in counts or steps
inputVector
u8
source of the data for this function
Parameter Discussion
axis is the axis to be controlled.
positionModulus is the position modulus value in counts (servo axes) or steps (stepper axes).
The modulus range is from 0 (default) to 231–1.
inputVector indicates the source of the data for this function. Available inputVectors include
immediate (0xFF) or variable (0x01 through 0x78).
Using This Function
The Load Position Modulus function sets the modulus used when the axis is operating in
Modulus Position mode. It has no effect when the axis is operating in other modes. When a
target position is loaded, it is interpreted within the boundaries of a modulus range.
See the Set Operation Mode function for a complete description of the Modulus Position
mode.
© National Instruments Corporation
6-79
FlexMotion Software Reference Manual
Chapter 6
Trajectory Control Functions — flex_load_rpm_thresh
flex_load_rpm_thresh
Load Velocity Threshold in RPM
Format
status = flex_load_rpm_thresh (boardID, axis, threshold, inputVector)
Purpose
Loads a velocity threshold for an axis in RPM.
Parameters
Input
Name
Type
Description
boardID
u8
assigned by Measurement & Automation Explorer
axis
u8
axis to be controlled
threshold
f64
velocity threshold in RPM
inputVector
u8
source of the data for this function
Parameter Discussion
axis is the axis to be controlled.
threshold is the velocity threshold value in RPM expressed as a double-precision floating
point number. The RPM range depends upon the motor counts or steps per revolution and the
trajectory update rate, and is always a positive number. Refer to the Trajectory Parameters
section in Chapter 4, Software Overview, for more information on velocity and acceleration
units and their dependency on trajectory update rate.
inputVector indicates the source of the data for this function. Available inputVectors include
immediate (0xFF) or variable (0x01 through 0x78).
Using This Function
The Load Velocity Threshold function establishes a velocity threshold in RPM for the
specified axis which can then be monitored with the Read Trajectory Status function. The
velocity threshold status is True when the absolute value of filtered axis velocity is above the
threshold and False when the velocity drops below the threshold.
Velocity threshold is a status and does not have to be enabled or disabled. Loading a maximum
value effectively disables the feature because the status will always be off. Increasing the
FlexMotion Software Reference Manual
6-80
www.natinst.com
Chapter 6
Trajectory Control Functions — flex_load_rpm_thresh
velocity filter time constant with the Configure Velocity Filter function reduces quantization
noise in the threshold status but at the expense of increasing threshold status latency.
Velocity threshold is typically used to monitor the acceleration and deceleration trajectory
periods to see when or if an axis is up to speed. You can then change PID tuning or other
parameters as a function of velocity.
© National Instruments Corporation
6-81
FlexMotion Software Reference Manual
Chapter 6
Trajectory Control Functions — flex_load_scurve_time
flex_load_scurve_time
Load S-Curve Time
Format
status = flex_load_scurve_time (boardID, axisOrVectorSpace, sCurveTime, inputVector)
Purpose
Loads the s-curve time for an axis or vector space.
Parameters
Input
Name
Type
Description
boardID
u8
assigned by Measurement & Automation Explorer
axisOrVectorSpace
u8
axis or vector space to be controlled
sCurveTime
u16
smoothing time in update sample periods
inputVector
u8
source of the data for this function
Parameter Discussion
axisOrVectorSpace is the axis or vector space to be controlled.
sCurveTime is the time in update sample periods over which the acceleration profile is
smoothed as it transitions from zero to the programmed value and back to zero. The s-curve
range is from 1 to 32,767 with a default of 1 sample period.
inputVector indicates the source of the data for this function. Available inputVectors include
immediate (0xFF) or variable (0x01 through 0x78).
Using This Function
The Load S-Curve Time function smooths the acceleration and deceleration portions of a
motion profile, resulting in less abrupt transitions from start motion to acceleration,
acceleration to constant velocity, constant velocity to deceleration, and deceleration to stop.
Using s-curve acceleration limits the jerk in a motion control system.
Officially, jerk is defined as the derivative of acceleration (change of acceleration per unit
time) and is measured in units of counts (steps)/s3. This function, however, allows you to load
s-curve time in update sample periods rather than have to deal with the obscure units of jerk.
FlexMotion Software Reference Manual
6-82
www.natinst.com
Chapter 6
Trajectory Control Functions — flex_load_scurve_time
With the default s-curve time of one (1) sample period, there is virtually no affect on the
motion profile, and the standard trapezoidal trajectory is executed. As s-curve time increases,
the smoothing affect on the acceleration and deceleration portions of the motion profile
increase, as shown in Figure 6-7. Large values of s-curve time can override the programmed
values of acceleration and deceleration by sufficiently smoothing the profile such that the
acceleration and deceleration slopes are never reached.
Velocity
S-curve Time = 0
Time
Velocity
S-curve Time Increasing
Time
Figure 6-7. Effects of S-Curve Acceleration on a Trapezoidal Trajectory
Note With increasing s-curve, the overall time to reach the target position increases given
the same velocity, acceleration, and deceleration parameters.
You can load s-curve time to individual axes or to a vector space for smoothing all axes in the
vector space. When sent to a vector space, the s-curve time is broadcast to all axes in the
vector space to change the per-axis s-curve times. If you later want to operate an axis
independently with a different s-curve time, you must execute the Load S-Curve Time
function again for that axis.
Note All axes in a vector space should have the same s-curve time for best vector
accuracy.
© National Instruments Corporation
6-83
FlexMotion Software Reference Manual
Chapter 6
Trajectory Control Functions — flex_load_torque_lim
flex_load_torque_lim
Load Torque Limit
Format
status = flex_load_torque_lim (boardID, axis, primaryPositiveLimit, primaryNegativeLimit,
secondaryPositiveLimit, secondaryNegativeLimit,
inputVector)
Purpose
Loads primary and secondary DAC torque limits for an axis.
Parameters
Input
Name
Type
Description
boardID
u8
assigned by Measurement & Automation
Explorer
axis
u8
axis to be controlled
primaryPositiveLimit
i16
positive limit for primary DAC
primaryNegativeLimit
i16
negative limit for primary DAC
secondaryPositiveLimit
i16
positive limit for optional secondary DAC
secondaryNegativeLimit
i16
negative limit for optional secondary DAC
inputVector
u8
source of the data for this function
Parameter Discussion
axis is the axis to be controlled.
primaryPositiveLimit is the primary DAC positive torque (or velocity) limit. The range is
–32,768 to + 32,767 (–10 V to +10 V) with a default value of 32,767 (+10 V).
primaryNegativeLimit is the primary DAC negative torque (or velocity) limit. The range
is –32,768 to + 32,767 (–10 V to +10 V) with a default value of –32,767 (–10 V).
Note The positive limit cannot be less than the negative limit.
secondaryPositiveLimit is the optional secondary DAC positive torque (or velocity) limit.
The range is –32,768 to + 32,767 (–10 V to +10 V) with a default value of 32,767 (+10 V).
FlexMotion Software Reference Manual
6-84
www.natinst.com
Chapter 6
Trajectory Control Functions — flex_load_torque_lim
secondaryNegativeLimit is the optional secondary DAC negative torque (or velocity) limit.
The range is –32,768 to + 32,767 (–10 V to +10 V) with a default value of –32,767 (–10 V).
Note The positive limit cannot be less than the negative limit.
inputVector indicates the source of the data for this function. Available inputVectors include
immediate (0xFF) or variable (0x01 through 0x78).
Using This Function
The Load Torque Limit function allows you to limit the output range of the DAC output(s) on
the selected servo axis. This function has no effect on stepper axes or independent DAC
outputs that are not mapped to an axis.
By limiting the output range of a DAC, it is possible to control the maximum torque (when
connected to a torque block servo amplifier) or velocity (when connected to a velocity block
servo amplifier). This function is also helpful when interfacing to amplifiers that do not
support the standard ±10 V command range.
Primary and secondary DACs can have different limits, and the positive and negative limits
can be both positive or both negative to limit the DAC output to a unipolar range. The only
restriction is that a positive DAC limit cannot be less than the negative DAC limit.
You can also set a torque offset on the primary and secondary DAC outputs. See the Load
Torque Offset function for more information.
Example
Calling the Load Torque Limit function with the following parameters limits the output ranges
of the primary and secondary DACs mapped to the axis, as shown in Figure 6-8.
primaryPositiveLimit = 16,383
primaryNegativeLimit = –16,384
secondaryPositiveLimit = 8,191
secondaryNegativeLimit = –32,768
© National Instruments Corporation
6-85
FlexMotion Software Reference Manual
Chapter 6
Trajectory Control Functions — flex_load_torque_lim
–10 V
–5 V
0
+5 V
+10 V
–32768
–16384
0
16383
32767
–10 V
0
+2.5 V
+10 V
–32768
0
8191
32767
Figure 6-8. Primary and Secondary Torque Limits Example
The result of this function call is to limit the primary DAC to only half its range in either
direction, or ±5 V. The secondary DAC can only travel over a quarter of its positive range
but has its full negative range.
FlexMotion Software Reference Manual
6-86
www.natinst.com
Chapter 6
Trajectory Control Functions — flex_load_torque_offset
flex_load_torque_offset
Load Torque Offset
Format
status = flex_load_torque_offset (boardID, axis, primaryOffset, secondaryOffset, inputVector)
Purpose
Loads primary and secondary DAC torque offsets for an axis.
Parameters
Input
Name
Type
Description
boardID
u8
assigned by Measurement & Automation Explorer
axis
u8
axis to be controlled
primaryOffset
i16
offset for primary DAC
secondaryOffset
i16
offset for secondary DAC
inputVector
u8
source of the data for this function
Parameter Discussion
axis is the axis to be controlled.
primaryOffset is the primary DAC torque (or velocity) offset. The offset range is –32,768 to
+32,767 (–10 V to +10 V) with a default value of 0 (0 V).
secondaryOffset is the secondary DAC torque (or velocity) offset. The offset range is
–32,768 to +32,767.
Note The offset value must be within the range limits set by the Load Torque Limit
function.
inputVector indicates the source of the data for this function. Available inputVectors include
immediate (0xFF) or variable (0x01 through 0x78).
© National Instruments Corporation
6-87
FlexMotion Software Reference Manual
Chapter 6
Trajectory Control Functions — flex_load_torque_offset
Using This Function
The Load Torque Offset function loads offset values for the DACs mapped to the selected
servo axis. This function has no effect on stepper axes or independent DAC outputs that are
not mapped to an axis. When a DAC is connected to a velocity block servo amplifier, the
torque offset functions as a velocity offset.
A torque (or velocity) offset shifts the DAC output(s) by the programmed offset value without
requiring any action from the PID loop. In a servo system, this can be used to overcome
amplifier input offsets, system imbalances, or the effects of outside forces such as gravity.
Different torque offsets can be loaded for the primary and secondary DAC.
Note When an axis is killed, its DAC outputs are zeroed regardless of the torque offset
loaded.
DAC offsets can be used in conjunction with DAC range limits to interface to servo amplifiers
with unipolar input ranges (for example, 0 to 5 V or 0 to 10 V)
Example
Calling the Load Torque Offset function with primaryOffset = 4,096 and secondaryOffset
= 0 shifts the output ranges of the primary DAC mapped to the axis as shown in Figure 6-9.
Offset
–10 V
–8.75 V
–32768 –28672
0 +1.25 V
+10 V
0 4096
32767
Figure 6-9. Torque Offset Example
The result of this function call is to limit the primary DAC to a range of –8.75 V to +10 V with
an offset or null value of +1.25 V. This is because even when the PID loop is commanding full
negative torque, the torque offset is added and the resulting output is –8.75 V. In the positive
direction, the DAC cannot go above +10 V no matter what the offset is.
The function call leaves the secondary DAC offset at its default value of zero (0). This
example assumes the full torque range is available and not limited by the Load Torque Limit
function.
Note The offset value must be within the range limits set by the Load Torque Limit
function.
FlexMotion Software Reference Manual
6-88
www.natinst.com
Chapter 6
Trajectory Control Functions — flex_load_vel_threshold
flex_load_vel_threshold
Load Velocity Threshold
Format
status = flex_load_vel_threshold (boardID, axis, threshold, inputVector)
Purpose
Loads a velocity threshold for an axis.
Parameters
Input
Name
Type
Description
boardID
u8
assigned by Measurement & Automation Explorer
axis
u8
axis to be controlled
threshold
u32
velocity threshold in counts/s or steps/s
inputVector
u8
source of the data for this function
Parameter Discussion
axis is the axis to be controlled.
threshold is the velocity threshold in counts/s (servo axes) or steps/s (stepper axes). For servo
axes, the threshold range is 1 to 16,000,000 counts/s. For stepper axes, it is 1 to 1,500,000
steps/s. The factory default value for threshold is the maximum, so the feature is effectively
disabled until a threshold is loaded.
inputVector indicates the source of the data for this function. Available inputVectors include
immediate (0xFF) or variable (0x01 through 0x78).
Using This Function
The Load Velocity Threshold function establishes a velocity threshold for the specified axis,
which can then be monitored with the Read Trajectory Status function. The velocity threshold
status is True when the absolute value of filtered axis velocity is above the threshold and False
when the velocity drops below the threshold.
Velocity threshold is a status and does not have to be enabled or disabled. Loading a
maximum value effectively disables the feature because the status will always be off.
Increasing the velocity filter time constant with the Configure Velocity Filter function will
© National Instruments Corporation
6-89
FlexMotion Software Reference Manual
Chapter 6
Trajectory Control Functions — flex_load_vel_threshold
reduce quantization noise in the threshold status but at the expense of increasing threshold
status latency.
Velocity threshold is typically used to monitor the acceleration and deceleration trajectory
periods to see when or if an axis is up to speed. You can then change PID tuning or other
parameters as a function of velocity.
FlexMotion Software Reference Manual
6-90
www.natinst.com
Chapter 6
Trajectory Control Functions — flex_load_velocity_override
flex_load_velocity_override
Load Velocity Override
Format
status = flex_load_velocity_override (boardID, axisOrVectorSpace, overridePercentage,
inputVector)
Purpose
Loads an instantaneous velocity override for an axis or vector space.
Parameters
Input
Name
Type
Description
boardID
u8
assigned by Measurement & Automation Explorer
axisOrVectorSpace
u8
axis or vector space to be controlled
overridePercentage
f32
velocity override scale factor
inputVector
u8
source of the data for this function
Parameter Discussion
axisOrVectorSpace is the axis or vector space to be controlled.
overridePercentage is a single precision floating point value from 0 to 150%. This value
directly scales the programmed velocity. The default value is 100% (no effect).
Note Internally, this value is converted to a integer multiplier with a range of 0 to 384,
where 256 (0x100) corresponds to 100%. Therefore, the resolution of this function is
approximately 0.4%.
inputVector indicates the source of the data for this function. Available inputVectors include
immediate (0xFF) or variable (0x01 through 0x78).
Note The conversion from floating-point to fixed-point is performed on the host
computer, not on the FlexMotion controller. To load velocity override from an onboard
variable, you must use the integer representation of 0 to 384.
© National Instruments Corporation
6-91
FlexMotion Software Reference Manual
Chapter 6
Trajectory Control Functions — flex_load_velocity_override
Using This Function
The Load Velocity Override function scales the operating velocity on an axis or vector space
from 0 to 150%. Velocity override is not double-buffered. The function takes effect
immediately and does not require a Start Motion or Blend Motion function execution to
change the operating velocity. All velocity changes use the loaded values of acceleration,
deceleration, and s-curve to smoothly transition the velocity to its new value.
Velocity override scales velocity in all operation modes on all single axis and vector space
moves including 2D and 3D linear interpolation and circular, helical, and spherical arcs.
You can load velocity override to individual axes or to a vector space for coordinated velocity
scaling. When sent to a vector space, the velocity override is broadcast to all axes in the vector
space to change the per-axis overrides. If you later want to operate an axis independently with
a different velocity override, you must execute the Load Velocity Override function again for
that axis.
Note Typically, all axes in a vector space should have the same velocity override. If axes
have different velocity overrides, the vector move cannot function as expected. This mode
is legal however, and will not generate an error.
Once loaded, velocity override remains in effect until changed by another call to this function.
All subsequent moves will be at velocities scaled by the most recent override percentage. At
power-up reset, velocity override is always reset to 100%.
Velocity override it commonly used in machine tool and other applications to reduce the speed
of a programmed motion sequence and can be used to implement a feed hold by setting the
value to zero (0). You can directly use a scaled value from an analog input as the velocity
override value.
FlexMotion Software Reference Manual
6-92
www.natinst.com
Chapter 6
Trajectory Control Functions — flex_read_dac and flex_read_dac_rtn
flex_read_dac and
flex_read_dac_rtn
Read DAC
Format
status = flex_read_dac (boardID, axisOrDAC, returnVector)
status = flex_read_dac_rtn (boardID, axisOrDAC, DACValue)
Purpose
Reads the commanded DAC output value for an axis.
Parameters
Input
Name
Type
Description
boardID
u8
assigned by Measurement & Automation Explorer
axisOrDAC
u8
axis or DAC to read
returnVector
u8
destination for the return data
Output
Name
DACValue
Type
Description
i16
commanded DAC output value
Parameter Discussion
axisOrDAC is the axis or DAC to read.
returnVector indicates the desired destination for the return data generated by this function.
Available returnVectors include return data to the host (0xFF), return data to a variable (0x01
through 0x78), and don’t return data (0).
Note The suffix _rtn on the function indicates that the data should be returned to the host.
When this calling convention is used, no returnVector is required.
DACValue is the 16-bit commanded DAC output value from the PID loop, where +32,767
corresponds to +10 V output and –32,768 corresponds to –10 V output.
© National Instruments Corporation
6-93
FlexMotion Software Reference Manual
Chapter 6
Trajectory Control Functions — flex_read_dac and flex_read_dac_rtn
Using This Function
The Read DAC function returns the value of the specified DAC output. When sent to an axis,
this function returns the value of the primary DAC mapped to that axis. The signed 16-bit
value returned corresponds to the ±10 V full scale range of the DAC.
This function is used to monitor the output command from the PID loop. When the DAC
output is connected to a torque block servo amplifier, you can use this value to calculate motor
torque or to monitor the acceleration and deceleration portions of a trajectory to see how close
the control loop is to saturating at its maximum torque limits.
When the DAC output is connected to a velocity block servo amplifier, the DAC value read is
a direct representation of the instantaneous commanded velocity.
FlexMotion Software Reference Manual
6-94
www.natinst.com
Chapter 6
Trajectory Control Functions — flex_read_dac_limit_status and flex_read_dac_limit_status_rtn
flex_read_dac_limit_status and
flex_read_dac_limit_status_rtn
Read DAC Limit Status
Format
status = flex_read_dac_limit_status (boardID, returnVector)
status = flex_read_dac_limit_status_rtn (boardID, positiveStatus, negativeStatus)
Purpose
Reads the status of the DAC limits.
Parameters
Input
Name
Type
Description
boardID
u8
assigned by Measurement & Automation Explorer
returnVector
u8
destination for the return data
Output
Name
Type
Description
positiveStatus
u8
bitmap of positive DAC limit status
negativeStatus
u8
bitmap of negative DAC limit status
Parameter Discussion
returnVector indicates the desired destination for the return data generated by this function.
Available returnVectors include return data to the host (0xFF), return data to a variable (0x01
through 0x78), and don’t return data (0).
Note The suffix _rtn on the function indicates that the data should be returned to the host.
When this calling convention is used, no returnVector is required.
positiveStatus is a bitmap of the positive DAC torque limit status.
D7
D6
D5
D4
D3
D2
D1
D0
XXX
DAC 6
DAC 5
DAC 4
DAC 3
DAC 2
DAC 1
XXX
© National Instruments Corporation
6-95
FlexMotion Software Reference Manual
Chapter 6
Trajectory Control Functions — flex_read_dac_limit_status and flex_read_dac_limit_status_rtn
For D1 through D6:
1 = DAC output at positive limit
0 = DAC output below positive limit
negativeStatus is a bitmap of the negative DAC torque limit status.
D7
D6
D5
D4
D3
D2
D1
D0
XXX
DAC 6
DAC 5
DAC 4
DAC 3
DAC 2
DAC 1
XXX
For D1 through D6:
1 = DAC output at negative limit
0 = DAC output above negative limit
Using This Function
The Read DAC Limit Status function returns the positive and negative DAC torque limits.
Independent DACs that are not mapped to axes do not have torque limits, so those DACs will
always return zeros.
A DAC torque limit status is True (1) when the DAC output is saturated at the corresponding
limit. This information tells you that the motor is operating at its maximum torque, probably
due to an excessively high value of acceleration or deceleration. It can also indicate excessive
friction on the axis, a completely stalled motor, or some other system fault.
When an axis is active (not in the killed, motor off state), this function returns the
instantaneous state of the torque limit circuits. If the axis trips out on following error (a typical
occurrence when operating at the torque limits), the DAC limit status is latched so you can
tell which limit, positive or negative, caused the following error trip. The status remains
latched until the axis is activated again by a Start Motion, Stop Motion, or Blend Motion
function.
FlexMotion Software Reference Manual
6-96
www.natinst.com
Chapter 6
Trajectory Control Functions — flex_read_steps_gen and flex_read_steps_gen_rtn
flex_read_steps_gen and
flex_read_steps_gen_rtn
Read Steps Generated
Format
status = flex_read_steps_gen (boardID, axisOrStepperOutput, returnVector)
status = flex_read_steps_gen_rtn (boardID, axisOrStepperOutput, steps)
Purpose
Reads the number of steps generated by a stepper output.
Parameters
Input
Name
Type
Description
boardID
u8
assigned by Measurement & Automation Explorer
axisOrStepperOutput
u8
axis or stepper output to read
returnVector
u8
destination for the return data
Output
Name
steps
Type
i32
Description
number of steps generated
Parameter Discussion
axisOrStepperOutput is the axis or stepper output to read.
returnVector indicates the desired destination for the return data generated by this function.
Available returnVectors include return data to the host (0xFF), return data to a variable
(0x01 through 0x78), and don’t return data (0).
Note The suffix _rtn on the function indicates that the data should be returned to the host.
When this calling convention is used, no returnVector is required.
steps is the number of steps generated since the stepper axis last had its position reset.
© National Instruments Corporation
6-97
FlexMotion Software Reference Manual
Chapter 6
Trajectory Control Functions — flex_read_steps_gen and flex_read_steps_gen_rtn
Using This Function
The Read Steps Generated function returns the number of steps generated by a stepper axis
or stepper output resource. For open-loop stepper axes, this function returns exactly the same
value as the Read Position function.
For closed-loop stepper axes, this function returns the actual number of steps generated while
the Read Position function returns the feedback position converted from counts to steps. The
number of steps generated will include extra steps added during any pull-in move required to
reach the target position.
In applications where the feedback resolution is less than the steps resolution, the steps
generated can also be more a more accurate measurement of position.
FlexMotion Software Reference Manual
6-98
www.natinst.com
Chapter 6
Trajectory Control Functions — flex_read_target_pos and flex_read_target_pos_rtn
flex_read_target_pos and
flex_read_target_pos_rtn
Read Target Position
Format
status = flex_read_target_pos (boardID, axis, returnVector)
status = flex_read_target_pos_rtn (boardID, axis, targetPosition)
Purpose
Reads the destination position of the current motion trajectory.
Parameters
Input
Name
Type
Description
boardID
u8
assigned by Measurement & Automation Explorer
axis
u8
axis to be read
returnVector
u8
destination for the return data
Output
Name
targetPosition
Type
i32
Description
destination position of the current motion
trajectory in counts or steps
Parameter Discussion
axis is the axis to be read.
returnVector indicates the desired destination for the return data generated by this function.
Available returnVectors include return data to the host (0xFF), return data to a variable
(0x01 through 0x78), and don’t return data (0).
Note The suffix _rtn on the function indicates that the data should be returned to the host.
When this calling convention is used, no returnVector is required.
targetPosition is the destination position of the current motion trajectory in counts
(servo axes) or steps (stepper axes).
© National Instruments Corporation
6-99
FlexMotion Software Reference Manual
Chapter 6
Trajectory Control Functions — flex_read_target_pos and flex_read_target_pos_rtn
Using This Function
The Read Target Position function returns the destination position of the motion trajectory
currently in process. If the axis is stopped, it returns the target position of last trajectory
completed.
This function differs from the Reset Position function in that it returns the commanded target
(destination) position rather than the actual feedback position. When blending moves, this
function will return a value that is different from the last loaded target position when the blend
has not occurred yet.
You can use this function to monitor the state of an onboard program as it sequences moves.
It returns the target position of the move segment in process.
FlexMotion Software Reference Manual
6-100
www.natinst.com
Chapter 6
Trajectory Control Functions — flex_read_trajectory_data and flex_read_trajectory_data_rtn
flex_read_trajectory_data and
flex_read_trajectory_data_rtn
Read Trajectory Data
Format
status = flex_read_trajectory_data (boardID, returnVector)
status = flex_read_trajectory_data_rtn (boardID, returnData)
Purpose
Reads a sample of acquired data from the samples buffer.
Parameters
Input
Name
Type
Description
boardID
u8
assigned by Measurement & Automation Explorer
returnVector
u8
destination for the return data
Output
Name
returnData
Type
[i32]
Description
Array of position and velocity data for selected
axes
Parameter Discussion
returnVector indicates the desired destination for the return data generated by this function.
Available returnVectors include return data to the host (0xFF), return data to a variable
(0x01 through 0x78), and don’t return data (0).
Note The suffix _rtn on the function indicates that the data should be returned to the host.
When this calling convention is used, no returnVector is required.
returnData is an array of position and velocity data for the selected axes. The size of the
returnData array depends upon the number of axes selected with the Acquire Trajectory
Data function. For each axis selected, this function returns two array elements, position in
counts (steps) and velocity in counts/s (steps/s). The maximum array size is 12, when all
6 axes are selected.
© National Instruments Corporation
6-101
FlexMotion Software Reference Manual
Chapter 6
Trajectory Control Functions — flex_read_trajectory_data and flex_read_trajectory_data_rtn
Using This Function
The Read Trajectory Data function is used to read back a single sample of acquired data from
the onboard sample buffer. The number of samples, the time between samples and the size of
each sample is set when you execute the Acquire Trajectory Data function. The sample buffer
operates first-in-first-out (FIFO), so multiple calls to this function return samples in their
correct time sequence.
While it is possible to read the sample buffer while samples are still being acquired, you must
wait enough time between calls to the Read Trajectory Data function to avoid emptying the
buffer.
Note Attempting to read an empty sample buffer will generate an error. For information
about errors and error handling, refer to Chapter 4, Software Overview.
The Acquire Trajectory Data and Read Trajectory Data functions are used to acquire and
read back time-sampled position and velocity data for analysis and display. These functions
implement a digital oscilloscope that is useful during system setup, PID tuning, and general
motion with data acquisition synchronization.
Example
The Acquire Trajectory Data function is executed with axes 1, 2, and 5 selected. Each call to
the Read Trajectory Data function returns one sample with an array size of six and the
following data in the array:
returnData[] = {Axis 1 position, Axis 1 velocity,
Axis 2 position, Axis 2 velocity
Axis 5 position, Axis 5 velocity}
FlexMotion Software Reference Manual
6-102
www.natinst.com
Start & Stop Motion Functions
7
This chapter contains detailed descriptions of the functions used to start,
blend, and stop motion. The functions are arranged alphabetically by
function name.
You can execute all of the FlexMotion start and stop functions on an
individual axis, simultaneously on multiple axes, on a vector space, or
simultaneously on multiple vector spaces. These functions give complete
control over the state of the motors in the system and with the addition of
the Find Home and Find Index programs, are the only FlexMotion
functions that can actually initiate motion.
As a quick reference, a summary of the entire FlexMotion function API is
in Appendix B, FlexMotion Functions.
© National Instruments Corporation
7-1
FlexMotion Software Reference Manual
Chapter 7
Start & Stop Motion Functions — flex_blend
flex_blend
Blend Motion
Format
status = flex_blend (boardID, axisOrVectorSpace, axisOrVSMap)
Purpose
Blends motion on a single axis, single vector space, multiple axes, or multiple vector spaces.
Parameters
Input
Name
Type
Description
boardID
u8
assigned by Measurement & Automation Explorer
axisOrVectorSpace
u8
axis or vector space selector
axisOrVSMap
u16
bitmap of axes or vector spaces to blend
Parameter Discussion
axisOrVectorSpace can select an axis (1 through 6), vector space (0x11 through 0x13),
multiple axes (0), or multiple vector spaces (0x10). When simultaneously blending multiple
axes or vector spaces, the axisOrVSMap parameter indicates which axes or vector spaces are
involved.
axisOrVSMap is the bitmap of axes or vector spaces to be blended. It is only required when
you select multiple axes or vector spaces with the axisOrVectorSpace parameter.
When blending axes (axisOrVectorSpace = 0):
D15
D14
D13
D12
D11
D10
D9
D8
D7
D6
D5
D4
D3
D2
D1
D0
0
0
0
0
0
0
0
0
0
Axis
6
Axis
5
Axis
4
Axis
3
Axis
2
Axis
1
0
For D1 through D6:
1 = Blend axis
0 = Do not blend axis
FlexMotion Software Reference Manual
7-2
www.natinst.com
Chapter 7
Start & Stop Motion Functions — flex_blend
When blending vector spaces (axisOrVectorSpace = 0x10):
D15
D14
D13
D12
D11
D10
D9
D8
D7
D6
D5
D4
D3
D2
D1
D0
0
0
0
0
0
0
0
0
0
0
0
0
VS 3
VS 2
VS 1
0
For D1 through D3:
1 = Blend vector space
0 = Do not blend vector space
To blend a single axis or vector space, set the axisOrVectorSpace selector to the desired axis
or vector space. The axisOrVSMap bitmap is ignored.
To blend multiple axes, the axisOrVectorSpace selector is set to 0 (zero) and the
axisOrVSMap bitmap defines the axes to be blended. Similarly, to blend multiple vector
spaces, the axisOrVectorSpace selector is set to 0x10 and the axisOrVSMap bitmap defines
the vector spaces to be blended.
Note It is not possible to combine the blend of an axis and the blend of a vector space in
a single use of this function. To accomplish this, create a single axis vector space and then
execute a multi-vector space blend.
Using This Function
The Blend Motion function is used to blend motion profiles on axes or vector spaces, either
simultaneously or individually. A blend is similar to a normal start and has the same
requirements for valid trajectory parameters as the Start Motion function. The blended move
uses the most recently loaded values of acceleration, velocity, target position, s-curve,
operation mode and so on to generate the motion profile.
Note If a stepper axis is in a killed state (not energized), halt the axis using the Stop
Motion function, with stopType set to NIMC_HALT_STOP, before you execute a Start
Motion or Blend Motion function. After you halt the axis, you might need to wait before
executing a Start Motion or Blend Motion function, so that the stepper drive comes out of
reset state. If the stepper drive does not come out of reset state before you execute the
function, the stepper axis might lose some steps during acceleration. To determine whether
you need to wait before executing the function, refer to your stepper drive documentation
or vendor.
The primary difference between a Start Motion function and a Blend Motion function is that
the Start Motion is immediate and preemptive, while Blend Motion waits and starts the next
move upon the completion of the previous move.
© National Instruments Corporation
7-3
FlexMotion Software Reference Manual
Chapter 7
Start & Stop Motion Functions — flex_blend
Blend starting smoothly blends two move segments on an axis, axes, or vector space(s). There
are three types of blends, controlled by the blend factor:
•
Blend moves by superimposing the deceleration profile of the previous move with the
acceleration profile of the next move (blend factor = –1).
•
Blend moves by starting the next move at the exact point when the previous move has
stopped (blend factor = 0).
•
Start the next move after a programmed delay time between the end of the previous move
and the start of the next move (blend factor > 0 ms).
Refer to the Load Blend Factor function for more information on how blend factor controls
the blending of motion profiles.
For sequencing multiple moves with blends, FlexMotion must complete one
blend before parameters for the next move are loaded. Refer to the Read Blend Status
function for more information on blend sequencing.
Caution
If motion on any axis involved in a blend is illegal due to a limit or other error condition, the
entire Blend Motion function will not be executed and a modal error is generated. None of the
axes are affected and the move(s) in process will complete normally and stop. For information
about errors and error handling, refer to Chapter 4, Software Overview.
Example 1
To blend motion on axis 4 only, call the Blend Motion function with the following parameters:
axisOrVectorSpace = 4
axisOrVSMap = Don’t care
Example 2
To blend motion on vector spaces 2 and 3, call the Blend Motion function with the following
parameters:
axisOrVectorSpace = 0x10
axisOrVSMap = 0xC
The axisOrVSMap value of 0x0C corresponds to the following bitmap.
D15
D14
D13
D12
D11
D10
D9
D8
D7
D6
D5
D4
D3
D2
D1
D0
0
0
0
0
0
0
0
0
0
0
0
0
VS 3
VS 2
VS 1
0
0
0
0
0
0
0
0
0
0
0
0
0
1
1
0
0
FlexMotion Software Reference Manual
7-4
www.natinst.com
Chapter 7
Start & Stop Motion Functions — flex_start
flex_start
Start Motion
Format
status = flex_start (boardID, axisOrVectorSpace, axisOrVSMap)
Purpose
Starts motion on a single axis, single vector space, multiple axes, or multiple vector spaces.
Parameters
Input
Name
Type
Description
boardID
u8
assigned by Measurement & Automation Explorer
axisOrVectorSpace
u8
axis or vector space selector
axisOrVSMap
u16
bitmap of axes or vector spaces to start
Parameter Discussion
axisOrVectorSpace can select an axis (1 through 6), vector space (0x11 through 0x13),
multiple axes (0), or multiple vector spaces (0x10). When simultaneously starting multiple
axes or vector spaces, the axisOrVSMap parameter indicates which axes or vector spaces are
involved.
axisOrVSMap is the bitmap of axes or vector spaces to be started. It is only required when
multiple axes or vector spaces are selected with the axisOrVectorSpace parameter.
When starting axes (axisOrVectorSpace = 0):
D15
D14
D13
D12
D11
D10
D9
D8
D7
D6
D5
D4
D3
D2
D1
D0
0
0
0
0
0
0
0
0
0
Axis
6
Axis
5
Axis
4
Axis
3
Axis
2
Axis
1
0
For D1 through D6:
1 = Start axis
0 = Do not start axis
© National Instruments Corporation
7-5
FlexMotion Software Reference Manual
Chapter 7
Start & Stop Motion Functions — flex_start
When starting vector spaces (axisOrVectorSpace = 0x10):
D15
D14
D13
D12
D11
D10
D9
D8
D7
D6
D5
D4
D3
D2
D1
D0
0
0
0
0
0
0
0
0
0
0
0
0
VS 3
VS 2
VS 1
0
For D1 through D3:
1 = Start vector space
0 = Do not start vector space
To start a single axis or vector space, set the axisOrVectorSpace selector to the desired axis
or vector space. The axisOrVSMap bitmap is ignored.
To start multiple axes, the axisOrVectorSpace selector is set to 0 (zero) and the
axisOrVSMap bitmap defines the axes to be started. Similarly, to start multiple vector
spaces, the axisOrVectorSpace selector is set to 0x10 and the axisOrVSMap bitmap defines
the vector spaces to be started.
Note It is not possible to combine the start of an axis and the start of a vector space in a
single use of this function. To accomplish this, create a single axis vector space and then
execute a multi-vector space start.
Using This Function
The Start Motion function is used to start a motion profile on axes or vector spaces, either
simultaneously or individually. A start is preemptive and uses the most recently loaded values
of acceleration, velocity, target position, s-curve, operation mode, and so on to generate the
motion profile.
Note If a stepper axis is in a killed state (not energized), halt the axis using the Stop
Motion function, with stopType set to NIMC_HALT_STOP, before you execute a Start
Motion or Blend Motion function. After you halt the axis, you might need to wait before
executing a Start Motion or Blend Motion function, so that the stepper drive comes out of
reset state. If the stepper drive does not come out of reset state before you execute the
function, the stepper axis might lose some steps during acceleration. To determine whether
you need to wait before executing the function, refer to your stepper drive documentation
or vendor.
You can also use the Start Motion function to update trajectory parameters to a move that is
already in process. Trajectory parameters loaded after the start take effect immediately upon
the next start without requiring the motion to come to a stop. You can use this feature for
velocity profiling and other continuous motion applications.
FlexMotion Software Reference Manual
7-6
www.natinst.com
Chapter 7
Start & Stop Motion Functions — flex_start
Motion will start on properly configured and enabled axes. If motion on any axis involved in
a start is illegal due to a limit or other error condition, the entire Start Motion function is not
executed and a modal error is generated. None of the axes are started or updated. For
information about errors and error handling, refer to Chapter 4, Software Overview.
Example 1
To execute a multi-axis start on axes 2 and 6, call the Start Motion function with the following
parameters:
axisOrVectorSpace = 0
axisOrVSMap = 0x44
The axisOrVSMap value of 0x44 corresponds to the following bitmap.
D15
D14
D13
D12
D11
D10
D9
D8
D7
D6
D5
D4
D3
D2
D1
D0
0
0
0
0
0
0
0
0
0
Axis
6
Axis
5
Axis
4
Axis
3
Axis
2
Axis
1
0
0
0
0
0
0
0
0
0
0
1
0
0
0
1
0
0
Example 2
To start motion on vector space 2, call the Start Motion function with the following
parameters:
axisOrVectorSpace = 0x12
axisOrVSMap = Don’t care
© National Instruments Corporation
7-7
FlexMotion Software Reference Manual
Chapter 7
Start & Stop Motion Functions — flex_stop_motion
flex_stop_motion
Stop Motion
Format
status = flex_stop_motion (boardID, axisOrVectorSpace, stopType, axisOrVSMap)
Purpose
Stops motion on a single axis, single vector space, multiple axes, or multiple vector spaces.
Three types of stops can be executed: decelerate to stop, halt stop, and kill stop.
Parameters
Input
Name
Type
Description
boardID
u8
assigned by Measurement & Automation Explorer
axisOrVectorSpace
u8
axis or vector space selector
stopType
u16
type of stop to execute
axisOrVSMap
u16
bitmap of axes or vector spaces to stop
Parameter Discussion
axisOrVectorSpace can select an axis (1 through 6), vector space (0x11 through 0x13),
multiple axes (0), or multiple vector spaces (0x10). When simultaneously stopping multiple
axes or vector spaces, the axisOrVSMap parameter indicates which axes or vector spaces are
involved.
stopType is the type of stop to execute.
stopType Constant
stopType Value
Action
NIMC_DECEL_STOP
0
decelerate smoothly to a stop
NIMC_HALT_STOP
1
immediate, full torque/stop
NIMC_KILL_STOP
2
zero the command and activate
the inhibit/output
FlexMotion Software Reference Manual
7-8
www.natinst.com
Chapter 7
Start & Stop Motion Functions — flex_stop_motion
axisOrVSMap is the bitmap of axes or vector spaces to be stopped. It is only required when
multiple axes or vector spaces are selected with the axisOrVectorSpace parameter.
When stopping axes (axisOrVectorSpace = 0):
D15
D14
D13
D12
D11
D10
D9
D8
D7
D6
D5
D4
D3
D2
D1
D0
0
0
0
0
0
0
0
0
0
Axis
6
Axis
5
Axis
4
Axis
3
Axis
2
Axis
1
0
For D1 through D6:
1 = Stop axis
0 = Do not stop axis
When stopping vector spaces (axisOrVectorSpace = 0x10):
D15
D14
D13
D12
D11
D10
D9
D8
D7
D6
D5
D4
D3
D2
D1
D0
0
0
0
0
0
0
0
0
0
0
0
0
VS 3
VS 2
VS 1
0
For D1 through D3:
1 = Stop vector space
0 = Do not stop vector space
To stop a single axis or vector space, set the axisOrVectorSpace selector to the desired axis
or vector space. The axisOrVSMap bitmap is ignored.
To stop multiple axes, the axisOrVectorSpace selector is set to 0 (zero) and the
axisOrVSMap bitmap defines the axes to be stopped. Similarly, to stop multiple vector
spaces, the axisOrVectorSpace selector is set to 0x10 and the axisOrVSMap bitmap defines
the vector spaces to be stopped.
Note It is not possible to combine the stop of an axis and the stop of a vector space in a
single use of this function. To accomplish this, create a single axis vector space and then
execute a multi-vector space stop.
Using This Function
The Stop Motion function is used to stop a motion profile on axes or vector spaces, either
simultaneously or individually.
You can execute three different types of stops with the Stop Motion function: decel stop, halt
stop, and kill stop. When a decel stop is executed (NIMC_DECEL_STOP), the axis, axes, or
vector space(s) will immediately begin to follow the deceleration portion of their trajectory
© National Instruments Corporation
7-9
FlexMotion Software Reference Manual
Chapter 7
Start & Stop Motion Functions — flex_stop_motion
profile as controlled by previously loaded deceleration and s-curve parameters. The actual
stopped position is therefore dependent upon this deceleration trajectory.
In contrast, a halt stop (NIMC_HALT_STOP) is immediate and abrupt. The target position is
set to the position of the axis at the moment the function is executed. On servo axes, full torque
is applied to stop the motor(s) as quickly as possible. On stepper axes, the step pulses are
immediately ceased. In both cases, FlexMotion attempts to stop the motor(s) with a near
infinite rate of deceleration. There is no trajectory profile and motion is not controlled by
previously loaded deceleration and s-curve parameters.
On servo axes, a kill stop (NIMC_KILL_STOP) disables the control loop and zeros the output
DAC, allowing frictional forces alone to stop the motion. On stepper axes, a kill stop
immediately ceases the stepper pulse generation. On both axis types, there is no trajectory
profile during a kill stop. If enabled, the inhibit output is activated to inhibit (disable) the servo
amplifier or stepper driver. You can enable the inhibit outputs and set their polarity as
active-high (noninverting) or active-low (inverting) with the Configure Inhibit Outputs
function.
When an axis is killed, the motor is allowed to freewheel, and could possibly
move if external forces are acting on it. If the axis moves into an enabled limit switch, the
axis will be energized and held in position. If you do not want the axis to become energized
under any circumstances, you should disable the axis after killing it.
Warning
The Stop Motion function may or may not affect the motion of other axes that are not
explicitly referenced in the function. If an axis that is part of a vector space is individually
killed, the other axes in the vector space are decel stopped. If a slave axis is killed,
master-slave gearing is automatically disabled. Finally, if a program attempts to start axes that
have been manually stopped by the host computer, it is overruled and put into the paused state.
Example 1
To execute a multi-axis kill stop on all axes, call the Stop Motion function with the following
parameters:
axisOrVectorSpace = 0
stopType = NIMC_KILL_STOP
axisOrVSMap = 0x7E
The axisOrVSMap value of 0x7E corresponds to the following bitmap.
D15
D14
D13
D12
D11
D10
D9
D8
D7
D6
D5
D4
D3
D2
D1
D0
0
0
0
0
0
0
0
0
0
Axis
6
Axis
5
Axis
4
Axis
3
Axis
2
Axis
1
0
0
0
0
0
0
0
0
0
0
1
1
1
1
1
1
0
FlexMotion Software Reference Manual
7-10
www.natinst.com
Chapter 7
Start & Stop Motion Functions — flex_stop_motion
Example 2
To decelerate stop motion on vector space 1, call the Stop Motion function with the following
parameters:
axisOrVectorSpace = 0x11
stopType = NIMC_DECEL_STOP
axisOrVSMap = Don’t care
© National Instruments Corporation
7-11
FlexMotion Software Reference Manual
Motion I/O Functions
8
This chapter contains detailed descriptions of functions used to setup and
control the motion I/O features of the FlexMotion controller. It includes
functions to set polarity and enable limit and home inputs, high-speed
capture inputs and inhibit outputs, functions to configure and control
breakpoint outputs, and functions to read the status of all the motion I/O
signals, high-speed captured position, and software limit status. The
functions are arranged alphabetically by function name.
All of the dedicated motion I/O can also function as general-purpose digital
I/O when it is not being used for its motion specific features. You can set
and reset outputs, you can read inputs at any time, and you can set and
change their polarity as required.
This chapter has a main section covering limits and other basic Motion I/O
functions, and two subsections, one on Breakpoint Functions and the other
on High-Speed Capture Functions.
As a quick reference, a summary of the entire FlexMotion function API is
in Appendix B, FlexMotion Functions.
© National Instruments Corporation
8-1
FlexMotion Software Reference Manual
Chapter 8
Motion I/O Functions — flex_configure_inhibits
flex_configure_inhibits
Configure Inhibit Outputs
Format
status = flex_configure_inhibits (boardID, axisMap, polarityMap)
Purpose
Sets polarity and enables the per-axis inhibit outputs.
Parameters
Input
Name
Type
Description
boardID
u8
assigned by Measurement & Automation Explorer
axisMap
u8
bitmap of inhibit outputs to enable
polarityMap
u8
bitmap of active polarities for the inhibit outputs
Parameter Discussion
axisMap is the bitmap of inhibit outputs to enable. An enabled inhibit follows the motor off
(killed) state of the axis.
D7
0
D6
Axis 6
D5
Axis 5
D4
D3
D2
Axis 4
Axis 3
Axis 2
D1
Axis 1
D0
0
For D1 through D6:
1 = Inhibit enabled (default)
0 = Inhibit disabled
polarityMap is the bitmap of active polarities for the inhibit outputs.
D7
0
D6
Inhibit 6
D5
Inhibit 5
D4
Inhibit 4
D3
Inhibit 3
D2
Inhibit 2
D1
Inhibit 1
D0
0
For D1 through D6:
1 = Inverting (default)
0 = Noninverting
FlexMotion Software Reference Manual
8-2
www.natinst.com
Chapter 8
Motion I/O Functions — flex_configure_inhibits
Using This Function
The Configure Inhibit Outputs function enables/disables and sets the polarity (inverting or
noninverting) of the axis inhibit outputs. When enabled, a per-axis inhibit output is linked to
the motor off state of the corresponding axis. A killed axis (motor off) forces the
corresponding inhibit output On. When the axis is active, the inhibit output is Off.
Inhibit outputs are typically used to disable the servo amplifier or stepper driver for power
savings, safety, or specific application reasons.
Note Killing a servo axis also zeros its DAC output. With torque block amplifiers this
means that the motor freewheels whether or not the amplifier is disabled. With velocity
block servo amplifiers or stepper drivers, the motor does not freewheel unless the
amplifier/driver is disabled with the inhibit output.
You can also use inhibit outputs as general-purpose outputs. Disabled inhibit outputs ignore
the state of their corresponding axis and can be directly controlled through the Set Inhibit
MOMO function.
You can configure the active polarity of each inhibit output as inverting or noninverting.
Inverting polarity means that a logical True or On state corresponds to an active-low output.
Conversely, noninverting polarity means that a logical True (On) corresponds to an
active-high output. The inhibit polarity is always in effect, whether the inhibit is linked to its
axis (enabled) or directly controlled thought the Set Inhibit MOMO function.
Example
To configure inhibit outputs 1 and 2 as axis inhibits with inverting polarity and the rest of the
inhibit outputs as general-purpose outputs with noninverting polarity, call the Configure
Inhibit Outputs function with the following parameters:
axisMap = 0x06, which corresponds to the following bitmap
D7
D6
D5
D4
D3
D2
D1
D0
0
Axis 6
Axis 5
Axis 4
Axis 3
Axis 2
Axis 1
0
0
0
0
0
0
1
1
0
polarityMap = 0x06, which corresponds to the following bitmap
D7
D6
D5
D4
D3
D2
D1
D0
0
Inhibit 6
Inhibit 5
Inhibit 4
Inhibit 3
Inhibit 2
Inhibit 1
0
0
0
0
0
0
1
1
0
© National Instruments Corporation
8-3
FlexMotion Software Reference Manual
Chapter 8
Motion I/O Functions — flex_enable_home_inputs
flex_enable_home_inputs
Enable Home Inputs
Format
status = flex_enable_home_inputs (boardID, homeMap)
Purpose
Enables/disables the home inputs.
Parameters
Input
Name
Type
Description
boardID
u8
assigned by Measurement & Automation Explorer
homeMap
u16
bitmap of home inputs to enable
Parameter Discussion
homeMap is the bitmap of home inputs to enable.
D15
D14
D13
D12
D11
D10
D9
D8
D7
0
0
0
0
0
0
0
0
0
D6
Home 6
D5
Home 5
D4
Home 4
D3
Home 3
D2
Home 2
D1
Home 1
D0
0
For D1 through D6:
1 = Home input enabled
0 = Home input disabled (default)
Using This Function
The Enable Home Inputs function enables/disables any combination of axis home inputs. An
enabled home input causes a halt stop on the axis when the input becomes active. You can
configure each home input to be active-low (inverting) or active-high (noninverting) with the
Set Home Input Polarity function. You can also use a home input as a general-purpose input
and read its status with the Read Home Input Status function.
Home inputs are an enhancement on the FlexMotion controller and are not required for basic
motion control. You can operate all motion control functions without enabling or using the
home inputs except the Find Home function, which requires enabled limit and home inputs
for operation.
FlexMotion Software Reference Manual
8-4
www.natinst.com
Chapter 8
Motion I/O Functions — flex_enable_home_inputs
Note An active (and enabled) home input transition on an axis that is part of a vector space
move causes that axis to halt stop and the other axes in the vector space to decelerate to a stop.
Example
To enable the home inputs for axes 2 and 4, call the Enable Home Inputs function with
homeMap = 0x0014, which corresponds to the following bitmap.
D15
D14
D13
D12
D11
D10
D9
D8
D7
0
0
0
0
0
0
0
0
0
Home 6
Home 5
Home 4
Home 3
Home 2
Home 1
0
0
0
0
0
0
0
0
0
0
0
0
1
0
1
0
0
© National Instruments Corporation
8-5
D6
D5
D4
D3
D2
D1
D0
FlexMotion Software Reference Manual
Chapter 8
Motion I/O Functions — flex_enable_limits
flex_enable_limits
Enable Limits
Format
status = flex_enable_limits (boardID, limitType, forwardLimitMap, reverseLimitMap)
Purpose
Enables/disables either the forward and reverse limit inputs or the forward and reverse
software position limits.
Parameters
Input
Name
Type
Description
boardID
u8
assigned by Measurement & Automation Explorer
limitType
u16
hardware/software limit selector
forwardLimitMap
u8
bitmap of forward limits to enable
reverseLimitMap
u8
bitmap of reverse limits to enable
Parameter Discussion
limitType selects the type of limit to enable, either the hardware limit switch inputs or the
software position limits.
limitType Constant
limitType Value
NIMC_LIMIT_SWITCHES
0
NIMC_SOFTWARE_LIMITS
1
forwardLimitMap is the bitmap of forward limits to enable (either inputs or software).
D7
0
D6
Forward 6
D5
Forward 5
D4
Forward 4
D3
Forward 3
D2
Forward 2
D1
Forward 1
D0
0
For D1 through D6:
1 = Forward limit enabled
0 = Forward limit disabled (default)
FlexMotion Software Reference Manual
8-6
www.natinst.com
Chapter 8
Motion I/O Functions — flex_enable_limits
reverseLimitMap is the bitmap of reverse limits to enable (either inputs or software).
D7
0
D6
Reverse 6
D5
Reverse 5
D4
Reverse 4
D3
Reverse 3
D2
Reverse 2
D1
Reverse 1
D0
0
For D1 through D6:
1 = Reverse limit enabled
0 = Reverse limit disabled (default)
Using This Function
The Enable Limits function enables/disables any combination of axis limits.You can enable
the physical limit inputs (hardware) or the logical position limits (software) depending upon
the limitType selected. You can enable or disable forward and reverse limits separately. You
can enable both software and hardware limits on an axis or axes by calling this function twice.
The limit inputs are typically connected to end-of-travel limit switches or sensors. An enabled
limit input causes a halt stop on the axis when the input becomes active. You can configure
each limit input to be active-low (inverting) or active-high (noninverting) with the Set Limit
Input Polarity function. Active limit inputs also prohibit attempts to start motion that would
cause additional travel in the direction of the limit. You can also use limit inputs as
general-purpose inputs and read their status with the Read Limit Status function.
Note For the end-of-travel limits to function correctly, the forward limit switch or sensor
must be located at the positive (count up) end of travel and the reverse limit at the negative
(count down) end of travel.
An active (and enabled) limit input transition on an axis that is part of a vector space move
causes that axis to halt stop and the other axes in the vector space to decelerate to a stop.
Similarly, software limits are often used to restrict the range of travel further and avoid ever
hitting the hardware limit switches. An enabled software limit causes the axis to smoothly
decelerate to a stop when the limit position is reached or exceeded. Even when disabled, you
can poll the software limits by the host computer or use an onboard program to warn of an out
of range position. For information about loading and reading the forward and reverse software
limits, see the Load Software Limit Positions and the Read Limit Status functions.
Hardware limit inputs and software position limits are enhancements on the FlexMotion
controller and are not required for basic motion control. You can operate all motion control
functions without enabling or using these limits except the Find Home function, which
requires enabled limit and home inputs for operation. Find Home does not require enabled
software limits.
Note If any axis in a vector space move exceeds an enabled software limit position, all
axes in the vector space decelerate to a stop.
© National Instruments Corporation
8-7
FlexMotion Software Reference Manual
Chapter 8
Motion I/O Functions — flex_enable_limits
Example
To enable the forward and reverse software limits on axes 5 and 6, call the Enable Limits
function with the following parameters:
limitType = NIMC_SOFTWARE_LIMITS
forwardLimitMap = 0x60, which corresponds to the following bitmap
D7
D6
D5
D4
D3
D2
D1
D0
0
Forward 6
Forward 5
Forward 4
Forward 3
Forward 2
Forward 1
0
0
1
1
0
0
0
0
0
reverseLimitMap = 0x60, which corresponds to the following bitmap
D7
D6
D5
D4
D3
D2
D1
D0
0
Reverse 6
Reverse 5
Reverse 4
Reverse 3
Reverse 2
Reverse 1
0
0
1
1
0
0
0
0
0
This function call also disables the forward and reverse software limits on axes 1 through 4.
It has no effect on the enable/disable state of the forward and reverse limit switch inputs.
You can enable these limit inputs with another call to this function.
FlexMotion Software Reference Manual
8-8
www.natinst.com
Chapter 8
Motion I/O Functions — flex_load_sw_lim_pos
flex_load_sw_lim_pos
Load Software Limit Positions
Format
status = flex_load_sw_lim_pos (boardID, axis, forwardLimit, reverseLimit, inputVector)
Purpose
Loads the forward and reverse software limit positions for an axis.
Parameters
Input
Name
Type
Description
boardID
u8
assigned by Measurement & Automation Explorer
axis
u8
axis to be controlled
forwardLimit
i32
forward software limit position in counts or steps
reverseLimit
i32
reverse software limit position in counts or steps
inputVector
u8
source of the data for this function
Parameter Discussion
axis is the axis to be controlled.
forwardLimit is the forward software limit position in counts (servo axes) or steps
(stepper axes). Software limit positions can be anywhere within the 32-bit position range,
–(231) to +(231–1). The default value for the forward software limit is +(230–1) counts (steps).
reverseLimit is the reverse software limit position in counts (servo axes) or steps
(stepper axes). Software limit positions can be anywhere within the 32-bit position range,
–(231) to +(231–1). The default value for the reverse software limit is –230 counts (steps).
Note The forwardLimit cannot be less than the reverseLimit.
inputVector indicates the source of the data for this function. Available inputVectors include
immediate (0xFF) or variable (0x01 through 0x78).
© National Instruments Corporation
8-9
FlexMotion Software Reference Manual
Chapter 8
Motion I/O Functions — flex_load_sw_lim_pos
Using This Function
The Load Software Limit Positions function sets the forward and reverse position limit values
for the selected axis. When enabled with the Enable Limits function, a software limit causes
the axis to smoothly decelerate to a stop when the limit position is reached or exceeded.
Even when disabled, you can poll the software limits by the host computer or use an onboard
program to warn of an out of range position. For information about reading the software limit
status, see the Read Limit Status function.
You can use software limits to implement a position-based simulated limit switch. Software
limits are often used to restrict the range of travel and avoid hitting the hardware end-of-travel
limit switches. For example, you can travel at a high velocity until hitting the software limit
switch, and then move more slowly until hitting the hardware limit switch.
After an axis has stopped due to encountering a software limit switch, you can
still move further in the same direction if you command the axis to do so. This behavior is
not possible with hardware limits, but is desirable for software limits.
Warning
FlexMotion Software Reference Manual
8-10
www.natinst.com
Chapter 8
Motion I/O Functions — flex_read_home_input_status and flex_read_home_input_status_rtn
flex_read_home_input_status and
flex_read_home_input_status_rtn
Read Home Input Status
Format
status = flex_read_home_input_status (boardID, returnVector)
status = flex_read_home_input_status_rtn (boardID, homeStatus)
Purpose
Reads the instantaneous status of the home inputs.
Parameters
Input
Name
Type
Description
boardID
u8
assigned by Measurement & Automation Explorer
returnVector
u8
destination for the return data
Output
Name
homeStatus
Type
u16
Description
bitmap of the logical state of the home inputs
Parameter Discussion
returnVector indicates the desired destination for the return data generated by this function.
Available returnVectors include return data to the host (0xFF), return data to a variable
(0x01 through 0x78), and don’t return data (0).
Note The suffix _rtn on the function indicates that the data should be returned to the host.
When this calling convention is used, no returnVector is required.
© National Instruments Corporation
8-11
FlexMotion Software Reference Manual
Chapter 8
Motion I/O Functions — flex_read_home_input_status and flex_read_home_input_status_rtn
homeStatus is the bitmap of the logical state of the home inputs.
D15
D14
D13
D12
D11
D10
D9
D8
D7
XXX
XXX
XXX
XXX
XXX
XXX
XXX
XXX
XXX
D6
Home 6
D5
Home 5
D4
Home 4
D3
Home 3
D2
Home 2
D1
Home 1
D0
XXX
For D1 through D6:
1 = Home input True (On)
0 = Home input False (Off)
Using This Function
The Read Home Input Status function returns the logical state of the home inputs. You can
execute this function at anytime to monitor the home inputs, whether they are enabled or not.
A home input enabled with the Enable Home Inputs function causes a halt stop on an axis
when its home input becomes active (True). You can also use a home input as a
general-purpose input and read its status with this function.
Note This function reads the logical state (On or Off, True or False) of the home inputs.
The polarity of the home inputs determines whether an On state is active-high or
active-low. Refer to the Set Home Input Polarity function for more information.
FlexMotion Software Reference Manual
8-12
www.natinst.com
Chapter 8
Motion I/O Functions — flex_read_limit_status and flex_read_limit_status_rtn
flex_read_limit_status and
flex_read_limit_status_rtn
Read Limit Status
Format
status = flex_read_limit_status (boardID, limitType, returnVector)
status = flex_read_limit_status_rtn (boardID, limitType, forwardLimitStatus,
reverseLimitStatus)
Purpose
Reads the instantaneous state of either the hardware limit inputs or the software limits.
Parameters
Input
Name
Type
Description
boardID
u8
assigned by Measurement & Automation Explorer
limitType
u16
hardware/software limit selector
returnVector
u8
destination for the return data
Output
Name
Type
Description
forwardLimitStatus
u8
bitmap of forward limit status
reverseLimitStatus
u8
bitmap of reverse limit status
Parameter Discussion
limitType selects the type of limit status to read, either the hardware limit switch status or the
software position limit status.
limitType Constant
limitType Value
NIMC_LIMIT_SWITCHES
0
NIMC_SOFTWARE_LIMITS
1
© National Instruments Corporation
8-13
FlexMotion Software Reference Manual
Chapter 8
Motion I/O Functions — flex_read_limit_status and flex_read_limit_status_rtn
returnVector indicates the desired destination for the return data generated by this function.
Available returnVectors include return data to the host (0xFF), return data to a variable
(0x01 through 0x78), and don’t return data (0).
Note The suffix _rtn on the function indicates that the data should be returned to the host.
When this calling convention is used, no returnVector is required.
forwardLimitStatus is the bitmap of forward limit status (either hardware or software).
D7
0
D6
Forward 6
D5
Forward 5
D4
Forward 4
D3
Forward 3
D2
Forward 2
D1
D0
Forward 1
0
For D1 through D6:
1 = Forward limit True (On)
0 = Forward limit False (Off)
reverseLimitStatus is the bitmap of reverse limit status (either hardware or software).
D7
0
D6
Reverse 6
D5
Reverse 5
D4
Reverse 4
D3
Reverse 3
D2
Reverse 2
D1
D0
Reverse 1
0
For D1 through D6:
1 = Reverse limit True (On)
0 = Reverse limit False (Off)
Using This Function
The Read Limit Status function returns either the hardware limit input status or the software
position limit status, depending on the limit type selected. When limitType =
NIMC_LIMIT_SWITCHES (0), this function returns the logical state of the forward and
reverse limit inputs.
Note The polarity of the limit inputs determines whether an On state is active-high or
active-low. Refer to the Set Limit Input Polarity function for more information.
Alternatively, when limitType = NIMC_SOFTWARE_LIMITS (1), this function returns the
state of the forward and reverse software limits. A True (On) indicates that the forward or
reverse limit position for the corresponding axis has been reached or exceeded.
You can read the status of the limit inputs and the software position limits at any time, whether
the limits are enabled or not. Enabled limits cause axes to stop when their state transitions
True. Refer to the Enable Limits function for more information.
FlexMotion Software Reference Manual
8-14
www.natinst.com
Chapter 8
Motion I/O Functions — flex_set_home_polarity
flex_set_home_polarity
Set Home Input Polarity
Format
status = flex_set_home_polarity (boardID, homePolarityMap)
Purpose
Sets the polarity of the home inputs as either inverting (active-low) or noninverting
(active-high).
Parameters
Input
Name
Type
Description
boardID
u8
assigned by Measurement & Automation Explorer
homePolarityMap
u16
bitmap of active polarities for the home inputs
Parameter Discussion
homePolarityMap is the bitmap of active polarities for the home inputs.
D15
D14
D13
D12
D11
D10
D9
D8
D7
D6
D5
D4
D3
D2
D1
D0
0
0
0
0
0
0
0
0
0
Home 6
Home 5
Home 4
Home 3
Home 2
Home 1
0
For D1 through D6:
1 = Inverting (default)
0 = Noninverting
Using This Function
The Set Home Input Polarity function defines the active polarity for each home input as either
inverting or noninverting. Inverting polarity means that an active-low input corresponds to a
logical True or On state. Conversely, noninverting polarity means that an active-high input
corresponds to a logical True (On) state.
You can enable home inputs to cause halt stops when the input becomes active with the
Enable Home Inputs function. You can also use a home input as a general-purpose input and
read its status with the Read Home Input Status function.
© National Instruments Corporation
8-15
FlexMotion Software Reference Manual
Chapter 8
Motion I/O Functions — flex_set_home_polarity
Example
To set the polarity of the home inputs on axes 1, 3, 4, and 5 as inverting and the home inputs
on axes 2 and 6 as noninverting, call the Set Home Input Polarity function with
homePolarityMap = 0x003A, which corresponds to the following bitmap.
D15
D14
D13
D12
D11
D10
D9
D8
D7
D6
D5
D4
D3
D2
D1
D0
0
0
0
0
0
0
0
0
0
Home 6
Home 5
Home 4
Home 3
Home 2
Home 1
0
0
0
0
0
0
0
0
0
0
0
1
1
1
0
1
0
FlexMotion Software Reference Manual
8-16
www.natinst.com
Chapter 8
Motion I/O Functions — flex_set_inhibit_momo
flex_set_inhibit_momo
Set Inhibit MOMO
Format
status = flex_set_inhib_momo (boardID, mustOn, mustOff)
Purpose
Sets the inhibit outputs using the MustOn/MustOff protocol.
Parameters
Input
Name
Type
Description
boardID
u8
assigned by Measurement & Automation Explorer
mustOn
u8
bitmap of inhibit outputs to be forced on
mustOff
u8
bitmap of inhibit outputs to be forced off
Parameter Discussion
mustOn is the bitmap of inhibit outputs to be forced on.
D7
0
D6
mustOn 6
D5
mustOn 5
D4
mustOn 4
D3
mustOn 3
D2
mustOn 2
D1
mustOn 1
D0
0
For D1 through D6:
1 = Inhibit output forced On
0 = Inhibit output unchanged (default)
mustOff is the bitmap of inhibit outputs to be forced off.
D7
0
D6
mustOff 6
D5
mustOff 5
D4
mustOff 4
D3
mustOff 3
D2
mustOff 2
D1
mustOff 1
D0
0
For D1 through D6:
1 = Inhibit output forced Off
0 = Inhibit output unchanged (default)
© National Instruments Corporation
8-17
FlexMotion Software Reference Manual
Chapter 8
Motion I/O Functions — flex_set_inhibit_momo
Using This Function
The Set Inhibit MOMO function controls disabled inhibit outputs being used as
general-purpose I/O. You can directly set the inhibit outputs to a logical On or Off state.
Note This function has no effect on enabled inhibit outputs. These outputs are directly
controlled by their corresponding axes.
Using the MustOn/MustOff protocol allows you to set or reset individual inhibit outputs
without affecting the other inhibit outputs. This gives you tri-state control over each output:
On, Off, or Unchanged. A one (1) in a bit location of the MustOn bitmap turns the inhibit On,
while a one (1) in the corresponding location of the MustOff bitmap turns the inhibit Off. A
zero (0) in either bitmap has no affect, so leaving both the MustOn and MustOff bits at zero
is effectively a hold, and the state of the inhibit output is unchanged. If you set both the
MustOn and MustOff bits to one (1), it is interpreted as a MustOn condition and the inhibit is
turned On.
Note This function sets the logical state of an inhibit output On or Off (True or False). The
polarity of the inhibit outputs determine whether an On state is active-high or active-low.
Refer to the Configure Inhibit Outputs function for more information.
The Set Inhibit MOMO function allows individual control of the inhibit outputs without
requiring a shadow value to remember the state of other outputs not being set or reset with the
function.
Example
To turn inhibit output 1 On, output 6 off, and leave inhibit outputs 2 through 5 unchanged,
call the Set Inhibit MOMO function with the following parameters:
mustOn = 0x02, which corresponds to the following bitmap
D7
D6
D5
D4
D3
D2
D1
D0
0
mustOn 6
mustOn 5
mustOn 4
mustOn 3
mustOn 2
mustOn 1
0
0
0
0
0
0
0
1
0
mustOff = 0x40, which corresponds to the following bitmap
D7
D6
D5
D4
D3
D2
D1
D0
0
mustOff 6
mustOff 5
mustOff 4
mustOff 3
mustOff 2
mustOff 1
0
0
1
0
0
0
0
0
0
FlexMotion Software Reference Manual
8-18
www.natinst.com
Chapter 8
Motion I/O Functions — flex_set_limit_polarity
flex_set_limit_polarity
Set Limit Input Polarity
Format
status = flex_set_limit_polarity (boardID, forwardPolarityMap, reversePolarityMap)
Purpose
Sets the polarity of the forward and reverse limit inputs as either inverting (active-low) or
noninverting (active-high).
Parameters
Input
Name
Type
Description
boardID
u8
assigned by Measurement & Automation Explorer
forwardPolarityMap
u8
bitmap of active polarities for the forward limits
reversePolarityMap
u8
bitmap of active polarities for the reverse limits
Parameter Discussion
forwardPolarityMap is the bitmap of active polarities for the forward limit inputs.
D7
0
D6
Forward 6
D5
Forward 5
D4
Forward 4
D3
Forward 3
D2
Forward 2
D1
Forward 1
D0
0
For D1 through D6:
1 = Inverting (default)
0 = Noninverting
reversePolarityMap is the bitmap of active polarities for the reverse limit inputs.
D7
0
D6
Reverse 6
D5
Reverse 5
D4
Reverse 4
D3
Reverse 3
D2
Reverse 2
D1
Reverse 1
D0
0
For D1 through D6:
1 = Inverting (default)
0 = Noninverting
© National Instruments Corporation
8-19
FlexMotion Software Reference Manual
Chapter 8
Motion I/O Functions — flex_set_limit_polarity
Using This Function
The Set Limit Input Polarity function defines the active polarity for each forward and reverse
limit input as either inverting or noninverting. Inverting polarity means that an active-low
input corresponds to a logical True or On state. Conversely, noninverting polarity means that
an active-high input corresponds to a logical True (On) state.
You can enable limit inputs to cause halt stops when the input becomes active with the Enable
Limits function. You can also use a limit input as a general-purpose input and read its status
with the Read Limit Status function.
Example
To set the polarity of the forward and reverse limit inputs on axes 1, 2, 3, and 4 as inverting
and the forward and reverse limit inputs on axes 5 and 6 as noninverting, call the Set Limit
Input Polarity function with the following parameters:
forwardPolarityMap = 0x1E, which corresponds to the following bitmap
D7
D6
D5
D4
D3
D2
D1
D0
0
Forward 6
Forward 5
Forward 4
Forward 3
Forward 2
Forward 1
0
0
0
0
1
1
1
1
0
reversePolarityMap = 0x1E, which corresponds to the following bitmap
D7
D6
D5
D4
D3
D2
D1
D0
0
Reverse 6
Reverse 5
Reverse 4
Reverse 3
Reverse 2
Reverse 1
0
0
0
0
1
1
1
1
0
FlexMotion Software Reference Manual
8-20
www.natinst.com
Chapter 8
Motion I/O Functions — Breakpoint Functions
Breakpoint Functions
This subsection contains detailed descriptions of breakpoint functions.
Position breakpoints are an enhancement to the encoder FPGA and are
available when the encoders are operating as axis feedback or as
independent encoder resources. Breakpoint functionality is available on
servo and closed-loop stepper axes that use encoder feedback resources
0x21 through 0x24.
Included in this section are the functions to load, enable, and read the status
of position breakpoints. You can also load a breakpoint position modulus.
Like all motion I/O, breakpoint outputs can also function as
general-purpose outputs with the Set Breakpoint Output MOMO function.
These functions are arranged alphabetically by function name. As a quick
reference, a summary of the entire FlexMotion function API is in
Appendix B, FlexMotion Functions.
© National Instruments Corporation
8-21
FlexMotion Software Reference Manual
Chapter 8
Motion I/O Functions — flex_enable_bp
flex_enable_bp
Enable Breakpoint
Format
status = flex_enable_bp (boardID, axisOrEncoder, enableMode, actionOnBreakpoint)
Purpose
Enables a position breakpoint on an axis or encoder.
Parameters
Input
Name
Type
Description
boardID
u8
assigned by Measurement & Automation Explorer
axisOrEncoder
u8
axis or encoder to be controlled
enableMode
u8
breakpoint mode
actionOnBreakpoint
u8
action to perform when breakpoint reached
Parameter Discussion
axisOrEncoder is the axis or encoder to be controlled. You can enable breakpoints on
encoders mapped to axes 1 through 6 or directly on encoders 0x21 through 0x24.
Note Breakpoints are only available on encoders 1 through 4 (resources 0x21 through
0x24).
enableMode is the breakpoint enable mode.
enableMode Constant
enableMode Value
NIMC_BREAKPOINT_OFF
0
NIMC_ABSOLUTE_BREAKPOINT
1
NIMC_RELATIVE_BREAKPOINT
2
NIMC_MODULO_BREAKPOINT
3
FlexMotion Software Reference Manual
8-22
www.natinst.com
Chapter 8
Motion I/O Functions — flex_enable_bp
actionOnBreakpoint is the action to perform when the breakpoint is reached.
actionOnBreakpoint Constant
actionOnBreakpoint Value
NIMC_NO_CHANGE
0
NIMC_RESET_BREAKPOINT
1
NIMC_SET_BREAKPOINT
2
NIMC_TOGGLE_BREAKPOINT
3
Using This Function
The Enable Breakpoint function enables the breakpoint and configures it as an absolute,
relative, or modulo position breakpoint. It also defines the action to perform when the
breakpoint is reached—leave the breakpoint output unchanged, reset the breakpoint output
low, set the breakpoint output high, or toggle the state of breakpoint output.
Note For modulo breakpoints, the magnitude of the breakpoint value must be less than the
breakpoint modulus. If this range is exceeded, a modal error is generated when you execute
the Enable Breakpoint function.
When a breakpoint is enabled, the enableMode parameter determines how the previously
loaded breakpoint position is interpreted. Absolute breakpoints can be anywhere in the 32-bit
position range. Relative breakpoints are relative to the instantaneous encoder position when
the breakpoint is enabled. Modulo breakpoints are interpreted within the range of the loaded
breakpoint modulus. Refer to the Load Breakpoint Modulus function for more information on
modulo breakpoints.
When an enabled breakpoint is reached, a breakpoint event occurs. You can use the Read
Breakpoint Status function to see if a breakpoint has occurred yet or not.
A breakpoint event can also cause the state of the corresponding breakpoint output to change.
The actionOnBreakpoint parameter selects whether the output goes low, goes high, toggles
state, or does not change when the breakpoint event occurs. If the breakpoint output is
presently in the state defined by actionOnBreakpoint, it is forced to the opposite state when
the breakpoint is enabled. This guarantees that the desired transition occurs when the
breakpoint is reached.
You can enable only one breakpoint per encoder or axis at a time. Enabled breakpoints act as
one-shots. When an enabled breakpoint is reached, the breakpoint is automatically disabled.
You must explicitly re-enable the breakpoint to use it again. If you need to disable a previously
enabled breakpoint, call this function with enableMode = NIMC_BREAKPOINT_OFF (0).
© National Instruments Corporation
8-23
FlexMotion Software Reference Manual
Chapter 8
Motion I/O Functions — flex_enable_bp
Note Enabled breakpoints are also automatically disabled whenever you execute a Reset
Position or Reset Encoder Position function on the corresponding axis.
Breakpoints are fully functional on independent encoders that are not mapped to axes. In this
case, you enable breakpoints directly on the encoder resource itself.
FlexMotion Software Reference Manual
8-24
www.natinst.com
Chapter 8
Motion I/O Functions — flex_load_bp_modulus
flex_load_bp_modulus
Load Breakpoint Modulus
Format
status = flex_load_bp_modulus (boardID, axisOrEncoder, breakpointModulus, inputVector)
Purpose
Load the breakpoint modulus for a position breakpoint.
Parameters
Input
Name
Type
Description
boardID
u8
assigned by Measurement & Automation Explorer
axisOrEncoder
u8
axis or encoder to be controlled
breakpointModulus
u32
breakpoint modulus in counts
inputVector
u8
source of the data for this function
Parameter Discussion
axisOrEncoder is the axis or encoder to be controlled. You can load breakpointModulus on
encoders mapped to axes 1 through 6 or directly on encoders 0x21 through 0x24.
Note Breakpoints are only available on encoders 1 through 4 (resources 0x21 through
0x24).
breakpointModulus is the breakpoint modulus value in quadrature counts. The range for
modulus is 0 to 231–1. A modulus of zero (0) effectively disables the modulo function
(default).
inputVector indicates the source of the data for this function. Available inputVectors include
immediate (0xFF) or variable (0x01 through 0x78).
Using This Function
The Load Breakpoint Modulus function loads a modulus value for the axis or encoder
specified. This value is used when you enable a breakpoint in modulo mode. Breakpoint
modulus is double-buffered and not actually used until you execute the Enable Breakpoint
function.
© National Instruments Corporation
8-25
FlexMotion Software Reference Manual
Chapter 8
Motion I/O Functions — flex_load_bp_modulus
Modulo breakpoints are used in applications that require repetitive breakpoints equally
spaced. When using a breakpoint modulus, it is no longer necessary to load ever increasing
(or decreasing) breakpoint positions. It is still necessary, however, to re-enable the breakpoint
after each use.
FlexMotion-6C Modulo Breakpoints
On FlexMotion-6C controllers, the breakpoint modulus defines repeat periods. When a
modulo breakpoint is enabled, the loaded breakpoint position is interpreted with respect to the
beginning of the active repeat period for the encoder.
Example
An application requires breakpoints every 2,000 counts starting at 500 counts. To accomplish
this, you load a breakpoint position of 500 with the Load Breakpoint Position function and a
breakpoint modulus of 2,000. The modulus defines repeat periods from 0 to 1,999, 2,000 to
3,999, and so on, and breakpoints at 500, 2,500, 4,500, and so on. (It also defines similar
repeat periods in the negative direction: –2,000 to –1, –4,000 to –2,001, and so on with
breakpoints at –1,500, –3,500, and so on.)
If the instantaneous encoder position is 2,210 counts when you execute the Enable Breakpoint
function (in modulo mode), the breakpoint at 2,500 counts is enabled. If you re-enable the
breakpoint when the instantaneous encoder position is 3,200, the breakpoint at 2,500 is again
enabled because the encoder was still in the 2,000 to 3,999 repeat period.
7344 Modulo Breakpoints
On 7344 controllers, the breakpoint hardware and firmware has been enhanced to support true
modulo breakpoints. When you enable a modulo breakpoint on a 7344 controller, two
breakpoint positions, one in front and one behind the present encoder position, are enabled.
You no longer need to keep track of which repeat period you are in to know which of the two
possible breakpoint positions has been enabled.
Example
An application requires breakpoints every 2,000 counts offset at –500 counts: …–4,500,
–2,500, –500, 1,500, 3,500, and so on. To accomplish this, you load a breakpoint position of
–500 with the Load Breakpoint Position function and a breakpoint modulus of 2,000. If the
instantaneous encoder position is 2,210 counts when you execute the Enable Breakpoint
function (in modulo mode), the breakpoints at 1,500 counts and 3,500 counts are both
enabled.
FlexMotion Software Reference Manual
8-26
www.natinst.com
Chapter 8
Motion I/O Functions — flex_load_pos_bp
flex_load_pos_bp
Load Breakpoint Position
Format
status = flex_load_pos_bp (boardID, axisOrEncoder, breakpointPosition, inputVector)
Purpose
Loads the breakpoint position for an axis or encoder in counts.
Parameters
Input
Name
Type
Description
boardID
u8
assigned by Measurement & Automation Explorer
axisOrEncoder
u8
axis or encoder to be controlled
breakpointPosition
i32
breakpoint position in counts
inputVector
u8
source of the data for this function
Parameter Discussion
axisOrEncoder is the axis or encoder to be controlled. You can load breakpointPosition on
encoders mapped to axes 1 through 6 or directly on encoders 0x21 through 0x24.
Note Breakpoints are only available on encoders 1 through 4 (resources 0x21 through
0x24).
breakpointPosition is the breakpoint position in quadrature counts. Breakpoint positions can
be anywhere within the 32-bit position range, –(231) to +(231–1). The default value is zero (0).
inputVector indicates the source of the data for this function. Available inputVectors include
immediate (0xFF) or variable (0x01 through 0x78).
Using This Function
The Load Breakpoint Position function loads the breakpoint position value for the axis or
encoder specified. You can specify position breakpoints as either absolute, relative, or with
respect to a modulus range when the breakpoint is enabled. Breakpoint position is
double-buffered and not actually used until you execute the Enable Breakpoint function.
© National Instruments Corporation
8-27
FlexMotion Software Reference Manual
Chapter 8
Motion I/O Functions — flex_load_pos_bp
Note For modulo breakpoints, the magnitude of the breakpoint value must be less than the
breakpoint modulus. If this range is exceeded, a modal error is generated when you execute
the Enable Breakpoint function.
When the breakpoint position is reached, a breakpoint event is generated and the associated
high-speed breakpoint output immediately transitions.
High-speed breakpoint functionality is performed by the encoder resources themselves. When
this function is sent to an axis, it is actually being sent to the mapped encoder resource.
Breakpoints are only available on the FPGA encoder resources (0x21 through 0x24) and are
always loaded in quadrature counts.
When the same breakpoint position is used on a repetitive basis, it is not necessary to reload
the position each time. It is necessary, however, to re-enable the breakpoint after each use.
FlexMotion Software Reference Manual
8-28
www.natinst.com
Chapter 8
Motion I/O Functions — flex_read_breakpoint_status and flex_read_breakpoint_status_rtn
flex_read_breakpoint_status and
flex_read_breakpoint_status_rtn
Read Breakpoint Status
Format
status = flex_read_breakpoint_status (boardID, axisOrEncoder, breakpointType, returnVector)
status = flex_read_breakpoint_status_rtn (boardID, axisOrEncoder, breakpointType,
breakpointStatus)
Purpose
Reads the breakpoint status for all axes or encoders.
Parameters
Input
Name
Type
Description
boardID
u8
assigned by Measurement & Automation Explorer
axisOrEncoder
u8
axis or encoder selector
breakpointType
u16
reserved (must be 0)
returnVector
u8
destination for the return data
Output
Name
breakpointStatus
Type
u16
Description
bitmap of breakpoint status
Parameter Discussion
axisOrEncoder is the axis or encoder selector. For multi-axis status, use 0 (zero). For
multi-encoder status, use 0x20.
breakpointType is a reserved input that must be set to NIMC_POSITION_BREAKPOINT (0).
returnVector indicates the desired destination for the return data generated by this function.
Available returnVectors include return data to the host (0xFF), return data to a variable
(0x01 through 0x78), and don’t return data (0).
Note The suffix _rtn on the function indicates that the data should be returned to the host.
When this calling convention is used, no returnVector is required.
© National Instruments Corporation
8-29
FlexMotion Software Reference Manual
Chapter 8
Motion I/O Functions — flex_read_breakpoint_status and flex_read_breakpoint_status_rtn
breakpointStatus is the bitmap of breakpoint status for all axes or all encoders.
When reading breakpoint status for axes (axisOrEncoder = 0):
D15
D14
D13
D12
D11
D10
D9
D8
D7
XXX
XXX
XXX
XXX
XXX
XXX
XXX
XXX
XXX
D6
Axis 6
D5
Axis 5
D4
Axis 4
D3
Axis 3
D2
D1
Axis 2
Axis 1
D0
XXX
For D1 through D6:
1 = Breakpoint occurred
0 = Breakpoint pending or never enabled
When reading breakpoint status for encoders (axisOrEncoder = 0x20):
D15
D14
D13
D12
D11
D10
D9
D8
D7
D6
D5
D4
D3
D2
D1
XXX
XXX
XXX
XXX
XXX
XXX
XXX
XXX
XXX
XXX
XXX
Enc 4
Enc 3
Enc 2
Enc 1
D0
XXX
For D1 through D4:
1 = Breakpoint occurred
0 = Breakpoint pending or never enabled
Note Breakpoints are only available on encoders 1 through 4 (resources 0x21 through
0x24).
Using This Function
The Read Breakpoint Status function allows you to see if a breakpoint has occurred or is
pending. When you enable a breakpoint, the corresponding status bit is reset to indicate that
the breakpoint is pending. When the breakpoint position is reached, its status bit is set to
True (1).
Example
Executing the Read Breakpoint Status function with axisOrEncoder = 0x20 and
breakpointType = 0 returns breakpointStatus = 0x0012, which corresponds to the
following bitmap.
D15
D14
D13
D12
D11
D10
D9
D8
D7
D6
D5
D4
D3
D2
D1
D0
XXX
XXX
XXX
XXX
XXX
XXX
XXX
XXX
XXX
XXX
XXX
Enc 4
Enc 3
Enc 2
Enc 1
XXX
0
0
0
0
0
0
0
0
0
0
0
1
0
0
1
0
On encoders 1 and 4, breakpoints have occurred, but on encoders 2 and 3, breakpoints are
pending or were never enabled.
FlexMotion Software Reference Manual
8-30
www.natinst.com
Chapter 8
Motion I/O Functions — flex_set_bp_momo
flex_set_bp_momo
Set Breakpoint Output MOMO
Format
status = flex_set_bp_momo (boardID, axisOrEncoder, mustOn, mustOff)
Purpose
Sets the breakpoint outputs using the MustOn/MustOff protocol.
Parameters
Input
Name
Type
Description
boardID
u8
assigned by Measurement & Automation Explorer
axisOrEncoder
u8
axis or encoder selector
mustOn
u8
bitmap of breakpoint outputs to be forced On
mustOff
u8
bitmap of breakpoint outputs to be forced Off
Parameter Discussion
axisOrEncoder is the axis or encoder selector. To set breakpoint outputs on multiple axes,
use 0 (zero). To set breakpoint outputs on multiple encoder resources, use 0x20.
mustOn is the bitmap of breakpoint outputs to be forced On.
D7
0
D6
mustOn 6
D5
mustOn 5
D4
mustOn 4
D3
mustOn 3
D2
mustOn 2
D1
mustOn 1
D0
0
For D1 through D6:
1 = Breakpoint output forced On
0 = Breakpoint output unchanged (default)
© National Instruments Corporation
8-31
FlexMotion Software Reference Manual
Chapter 8
Motion I/O Functions — flex_set_bp_momo
mustOff is the bitmap of breakpoint outputs to be forced Off.
D7
0
D6
mustOff 6
D5
mustOff 5
D4
mustOff 4
D3
mustOff 3
D2
mustOff 2
D1
mustOff 1
D0
0
For D1 through D6:
1 = Breakpoint output forced Off
0 = Breakpoint output unchanged (default)
Note Breakpoints are only available on encoders 1 through 4 (resources 0x21 through
0x24).
Using This Function
The Set Breakpoint Output MOMO function directly controls the breakpoint outputs and sets
them high or low. You can use this function to set breakpoint outputs to a known state or to
control them as general-purpose outputs in non-breakpoint applications.
Breakpoint functionality is performed by the encoder resources themselves. When this
function is sent to axes, the FlexMotion firmware consults the mapping of axes to encoders
and actually sends the command to the mapped encoder resources. Breakpoints are only
available on encoder resources 0x21 through 0x24, so you can only control breakpoint outputs
on axes 5 and 6 if these axes are using encoder resources 0x21 through 0x24.
Using the MustOn/MustOff protocol allows you to set or reset individual breakpoint outputs
without affecting the other breakpoint outputs. This gives you tri-state control over each
output: On, Off, or Unchanged. A one (1) in a bit location of the MustOn bitmap sets the
breakpoint high, while a one (1) in the corresponding location of the MustOff bitmap resets
the breakpoint low. A zero (0) in either bitmap has no effect, so leaving both the MustOn and
MustOff bits at zero is effectively a hold, and the state of the breakpoint output is unchanged.
If you set both the MustOn and MustOff bits to one (1), it is interpreted as a MustOn condition
and the breakpoint is set high.
FlexMotion Software Reference Manual
8-32
www.natinst.com
Chapter 8
Motion I/O Functions — High-Speed Capture Functions
High-Speed Capture Functions
This subsection contains detailed descriptions of high-speed capture
functions. High-speed capture inputs are an enhancement to the encoder
FPGA and are available when the encoders are operating as axis feedback
or as independent encoder resources. High-speed capture functionality is
available on servo and closed-loop stepper axes.
Included in this section are the functions to enable high-speed capture,
read the status and the captured position and set the polarity of the
high-speed inputs. The high-speed capture inputs can also function as
latching general-purpose inputs. Configure as you would for high-speed
capture operation, but ignore the captured position. You can then read the
state of the latched inputs.
These functions are arranged alphabetically by function name. As a quick
reference, a summary of the entire FlexMotion function API is in
Appendix B, FlexMotion Functions.
© National Instruments Corporation
8-33
FlexMotion Software Reference Manual
Chapter 8
Motion I/O Functions — flex_enable_hs_caps
flex_enable_hs_caps
Enable High-Speed Position Capture
Format
status = flex_enable_hs_caps (boardID, axisOrEncoder, captureMap)
Purpose
Enables the high-speed capture inputs.
Parameters
Input
Name
Type
Description
boardID
u8
assigned by Measurement & Automation Explorer
axisOrEncoder
u8
axis or encoder selector
captureMap
u16
bitmap of high-speed capture inputs to enable
Parameter Discussion
axisOrEncoder is the axis or encoder selector. To enable high-speed capture inputs on
multiple axes, use 0 (zero). To enable high-speed capture inputs on multiple encoder
resources, use 0x20.
Note High-speed capture inputs are only available on encoders 1 through 4 (resources
0x21 through 0x24).
captureMap is the bitmap of high-speed capture inputs to enable.
When enabling axes (axisOrEncoder = 0):
D15
D14
D13
D12
D11
D10
D9
D8
D7
0
0
0
0
0
0
0
0
0
D6
Axis 6
D5
Axis 5
D4
Axis 4
D3
Axis 3
D2
D1
Axis 2
Axis 1
D0
0
For D1 through D6:
1 = Capture enabled
0 = Capture disabled (default)
FlexMotion Software Reference Manual
8-34
www.natinst.com
Chapter 8
Motion I/O Functions — flex_enable_hs_caps
When enabling encoders (axisOrEncoder = 0x20):
D15
D14
D13
D12
D11
D10
D9
D8
D7
D6
D5
0
0
0
0
0
0
0
0
0
0
0
D4
D3
D2
D1
Enc 4
Enc 3
Enc 2
Enc 1
D0
0
For D1 through D4:
1 = Capture enable
0 = Capture disabled (default)
Using This Function
The Enable High-Speed Position Capture function enables high-speed capture inputs to
capture instantaneous encoder position when an input becomes active. The position capture
is implemented in the encoder FPGA to reduce capture latency to the sub-100 ns range.
High-speed capture functionality is performed by the encoder resources themselves. When
this function is sent to axes, it is actually being sent to the mapped encoder resources.
High-speed inputs are only available on the FPGA encoder resources (0x21 through 0x24).
The high-speed inputs have programmable polarity. You can set the active state of the input
as active-low (inverting) or active-high (noninverting) with the Set High-Speed Capture
Polarity function. You can determine the results of the high-speed capture from the Read
High-Speed Capture Status and Read Captured Position functions.
High-speed capture is useful in registration and synchronization applications. You can
calculate subsequent moves relative to the captured position. For information about
relative-to-capture mode, refer to the Set Operation Mode function.
Note Enabling a high-speed capture input when the input is already active captures the
position immediately and sets the status bit.
© National Instruments Corporation
8-35
FlexMotion Software Reference Manual
Chapter 8
Motion I/O Functions — flex_read_cap_pos and flex_read_cap_pos_rtn
flex_read_cap_pos and
flex_read_cap_pos_rtn
Read Captured Position
Format
status = flex_read_cap_pos (boardID, axisOrEncoder, returnVector)
status = flex_read_cap_pos_rtn (boardID, axisOrEncoder, capturedPosition)
Purpose
Reads a captured position value from an axis or encoder.
Parameters
Input
Name
Type
Description
boardID
u8
assigned by Measurement & Automation Explorer
axisOrEncoder
u8
axis or encoder to be read
returnVector
u8
destination for the return data
Output
Name
capturedPosition
Type
i32
Description
position value captured
Parameter Discussion
axisOrEncoder is the axis or encoder to be read.
Note High-speed capture inputs are only available on encoders 1 through 4 (resources
0x21 through 0x24).
returnVector indicates the desired destination for the return data generated by this function.
Available returnVectors include return data to the host (0xFF), return data to a variable
(0x01 through 0x78), and don’t return data (0).
Note The suffix _rtn on the function indicates that the data should be returned to the host.
When this calling convention is used, no returnVector is required.
FlexMotion Software Reference Manual
8-36
www.natinst.com
Chapter 8
Motion I/O Functions — flex_read_cap_pos and flex_read_cap_pos_rtn
capturedPosition is the position value captured when the corresponding high-speed capture
input went active.
Using This Function
The Read Captured Position function returns the value in the high-speed capture register of
the axis or encoder selected. This value was captured when an enabled high-speed capture
input went active.
High-speed capture functionality is performed by the encoder resources themselves. When
this function is sent to an axis, the value returned is actually from the mapped encoder
resource. High-speed inputs are only available on the FPGA encoder resources (0x21 through
0x24).
Refer to the Enable High-Speed Position Capture and Read High-Speed Capture Status
functions for more information on the high-speed capture inputs and typical applications.
© National Instruments Corporation
8-37
FlexMotion Software Reference Manual
Chapter 8
Motion I/O Functions — flex_read_hs_cap_status and flex_read_hs_cap_status_rtn
flex_read_hs_cap_status and
flex_read_hs_cap_status_rtn
Read High-Speed Capture Status
Format
status = flex_read_hs_cap_status (boardID, axisOrEncoder, returnVector)
status = flex_read_hs_cap_status_rtn (boardID, axisOrEncoder, highSpeedCaptureStatus)
Purpose
Reads the high-speed position capture status for all axes or encoders.
Parameters
Input
Name
Type
Description
boardID
u8
assigned by Measurement & Automation
Explorer
axisOrEncoder
u8
axis or encoder selector
returnVector
u8
destination for the return data
Output
Name
Type
highSpeedCaptureStatus
u16
Description
bitmap of high-speed capture status
Parameter Discussion
axisOrEncoder is the axis or encoder selector. For multi-axis status, use 0 (zero). For
multi-encoder status, use 0x20.
returnVector indicates the desired destination for the return data generated by this function.
Available returnVectors include return data to the host (0xFF), return data to a variable
(0x01 through 0x78), and don’t return data (0).
Note The suffix _rtn on the function indicates that the data should be returned to the host.
When this calling convention is used, no returnVector is required.
highSpeedCaptureStatus is the bitmap of capture status for all axes or all encoders.
FlexMotion Software Reference Manual
8-38
www.natinst.com
Chapter 8
Motion I/O Functions — flex_read_hs_cap_status and flex_read_hs_cap_status_rtn
When reading high-speed capture status for axes (axisOrEncoder = 0):
D15
D14
D13
D12
D11
D10
D9
D8
D7
XXX
XXX
XXX
XXX
XXX
XXX
XXX
XXX
XXX
D6
Axis 6
D5
Axis 5
D4
Axis 4
D3
Axis 3
D2
D1
Axis 2
Axis 1
D0
XXX
For D1 through D6:
1 = Capture occurred
0 = Capture pending or never enabled
When reading high-speed capture status for encoders (axisOrEncoder = 0x20):
D15
D14
D13
D12
D11
D10
D9
D8
D7
D6
D5
D4
D3
D2
D1
XXX
XXX
XXX
XXX
XXX
XXX
XXX
XXX
XXX
XXX
XXX
Enc 4
Enc 3
Enc 2
Enc 1
D0
XXX
For D1 through D4:
1 = Capture occurred
0 = Capture pending or never enabled
Note High-speed capture inputs are only available on encoders 1 through 4 (resources
0x21 through 0x24).
Using This Function
The Read High-Speed Capture Status function allows you to see if a position capture has
occurred or is pending. When you enable a high-speed capture input, the corresponding status
bit is reset to indicate that the capture is pending. When the position capture occurs, its status
bit is set to True (1). For information about retrieving the captured position value, see the Read
Captured Position function.
The high-speed capture circuitry is also used during Find Index execution. When an index is
found successfully, the capture status for the corresponding encoder and axis is set to True as
a side effect.
Executing the Find Index function automatically leaves the corresponding high-speed capture
input disabled after the index is found.
© National Instruments Corporation
8-39
FlexMotion Software Reference Manual
Chapter 8
Motion I/O Functions — flex_read_hs_cap_status and flex_read_hs_cap_status_rtn
Example
Executing the Read High-Speed Capture Status function with axisOrEncoder = 0 returns
highSpeedCaptureStatus = 0x0024, which corresponds to the following bitmap.
D15
D14
D13
D12
D11
D10
D9
D8
D7
D6
D5
D4
XXX
XXX
XXX
XXX
XXX
XXX
XXX
XXX
XXX
Axis 6
Axis 5
Axis 4
0
0
0
0
0
0
0
0
0
0
1
0
D3
D2
D1
D0
Axis 3
Axis 2
Axis 1
XXX
0
1
0
0
On encoders mapped to axes 2 and 5, high-speed captures have occurred, but all other
captures are pending or were never enabled.
FlexMotion Software Reference Manual
8-40
www.natinst.com
Chapter 8
Motion I/O Functions — flex_set_hs_cap_pol
flex_set_hs_cap_pol
Set High-Speed Capture Polarity
Format
status = flex_set_hs_cap_pol (boardID, axisOrEncoder, highSpeedCapturePolarity)
Purpose
Sets the polarity of the high-speed capture inputs as either inverting (active-low) or
noninverting (active-high).
Parameters
Input
Name
Type
Description
boardID
u8
assigned by Measurement & Automation
Explorer
axisOrEncoder
u8
axis or encoder selector
highSpeedCapturePolarity
u16
bitmap of active polarities for the high-speed
capture inputs
Parameter Discussion
axisOrEncoder is the axis or encoder selector. To set the high-speed capture input polarity
on multiple axes, use 0 (zero). To set the high-speed capture input polarity on multiple
encoder resources, use 0x20.
highSpeedCapturePolarity is the bitmap of active polarities for the high-speed capture
inputs.
When setting polarities on multiple axes (axisOrEncoder = 0):
D15
D14
D13
D12
D11
D10
D9
D8
D7
0
0
0
0
0
0
0
0
0
D6
Axis 6
D5
Axis 5
D4
Axis 4
D3
Axis 3
D2
D1
Axis 2
Axis 1
D0
0
For D1 through D6:
1 = Inverting (default)
0 = Noninverting
© National Instruments Corporation
8-41
FlexMotion Software Reference Manual
Chapter 8
Motion I/O Functions — flex_set_hs_cap_pol
When setting polarities directly on multiple encoder resources (axisOrEncoder = 0x20):
D15
D14
D13
D12
D11
D10
D9
D8
D7
D6
D5
0
0
0
0
0
0
0
0
0
0
0
D4
D3
D2
D1
Enc 4
Enc 3
Enc 2
Enc 1
D0
0
For D1 through D6:
1 = Inverting (default)
0 = Noninverting
Note High-speed capture inputs are only available on encoders 1 through 4 (resources
0x21 through 0x24).
Using This Function
The Set High-Speed Capture Polarity function defines the active polarity for each high-speed
capture input as either inverting or noninverting. Inverting polarity means that an active-low
input corresponds to a logical True or On state. Conversely, noninverting polarity means that
an active-high input corresponds to a logical True or On state.
High-speed capture inputs are an integral part of the encoder resources. You can execute this
function indirectly on axes or directly on encoder resources. When sent to multiple axes, this
function sets the polarity of the high-speed capture inputs of the encoders mapped to the
corresponding axes.
You can enable high-speed capture inputs to capture instantaneous encoder position when the
input becomes active with the Enable High-Speed Position Capture function. You can also
use a high-speed input as a general-purpose input and read its status with the Read
High-Speed Capture Status function.
FlexMotion Software Reference Manual
8-42
www.natinst.com
Find Home & Index Functions
9
This chapter contains detailed descriptions of the functions used to
initialize your motion system and establish a repeatable reference position.
The functions are arranged alphabetically by function name.
Typical closed-loop motion systems use incremental feedback to keep track
of position. At power-up, this position is meaningless until a zero reference
position is established. Open-loop stepper systems must also be initialized
at power-up.
FlexMotion provides two built-in programs, Find Home and Find Index, to
accomplish these tasks. These functions perform search sequences to find
and stop on a specific edge of the home input and then find the next instance
of the encoder index. In this way a repeatable reference position that is
accurate to one encoder count is established.
As a quick reference, a summary of the entire FlexMotion function API is
in Appendix B, FlexMotion Functions.
© National Instruments Corporation
9-1
FlexMotion Software Reference Manual
Chapter 9
Find Home & Index Functions — flex_find_home
flex_find_home
Find Home
Format
status = flex_find_home (boardID, axis, directionMap)
Purpose
Executes a search sequence to find a home switch, approaching and stopping on a specific
edge.
Parameters
Input
Name
Type
Description
boardID
u8
assigned by Measurement & Automation Explorer
axis
u8
axis to be controlled
directionMap
u16
bitmap setting the search direction, home edge and
final find direction
Parameter Discussion
axis is the axis to be controlled.
directionMap is the bit map of search direction, home edge and final find direction.
D15
D14
D13
D12
D11
D10
D9
D8
D7
D6
D5
D4
D3
0
0
0
0
0
0
0
0
0
0
0
0
0
D2
D1
Edge
Srch
D0
Final
For D0 Final approach direction (Final):
1 = Reverse approach
0 = Forward approach
For D1 Initial search direction (Srch):
1 = Search reverse
0 = Search forward
For D2 Home edge to stop on (Edge):
1 = Reverse edge
0 = Forward edge
FlexMotion Software Reference Manual
9-2
www.natinst.com
Chapter 9
Find Home & Index Functions — flex_find_home
Using This Function
The Find Home function configures and initiates a search sequence for a home switch or other
sensor. You can specify the initial search direction, the edge (rising or falling) of the home
signal to stop on, and the direction you want to be travelling when you approach the specified
home edge.
When the search direction is forward, the axis starts moving in the forward direction using the
previously loaded values for acceleration, velocity, and s-curve. If the desired home signal
transition is detected, the find home sequence continues based on the other control bits. If the
forward limit switch is encountered before the home switch, the axis automatically reverses
direction and continues searching for the home switch. If the reverse limit is encountered
before the home switch, the sequence stops and the Home Found status is False. If a home
switch exists, finding it is guaranteed. A similar search sequence is followed when the initial
search direction is reverse.
Forward is defined as the direction of increasing position. The Forward and
Reverse Limits must be located at the proper ends of travel for the Find Home sequence to
function properly.
Warning
You can configure the find home sequence to detect either the rising or falling edge of the
home signal, as shown in Figure 9-1. You can also set the polarity of the limit and home inputs
with the Set Limit Input Polarity and Set Home Input Polarity functions, respectively. Once
the home switch is found, motion proceeds to approach the home edge from the desired
direction. If necessary, the axis travels past the home edge and reverses direction to approach
it from the programmed direction. This portion of the sequence is executed at a fixed low
speed (approximately 1/4 RPS) to smoothly approach the edge. This approach direction
feature is used to minimize the effects of motion system windup, backlash, and/or home
sensor hysteresis.
© National Instruments Corporation
9-3
FlexMotion Software Reference Manual
Chapter 9
Find Home & Index Functions — flex_find_home
Edge
Forward
Reverse
Edge
Location
Reverse
Forward
Edge
Location
Approach
Direction
Home Switch Active Region
Forward
Initial Search Direction
Reverse
Figure 9-1. Find Home Definitions
When the home switch is found, the Home Found status is set to True. If the home sequence
fails to locate the desired edge of the home signal, the Home Found status is False. You can
monitor this status with the Read per Axis Status function.
You can execute the Find Home function on systems without a home switch. In this case, the
sequence always terminates at the limit switch opposite to the initial search direction. The
Home Found status is false and the edge and approach direction features are not applicable.
You must enable both Limits and Home inputs prior to executing the Find Home
function. If any of the axes limit or home inputs are disabled, the Find Home function does
not start and a modal error is generated.
Caution
Note After a Find Home sequence is complete, the home input should be disabled because
it is no longer required, assuming you do not want to stop on it the next time the system
moves past it.
An unexpected limit condition during the find home sequence stops the sequence and
generates a modal error. For information about errors and error handling, refer to Chapter 4,
Software Overview. You must set unused limit and home inputs to their inactive state with the
Set Limit Input Polarity and Set Home Input Polarity functions.
In open-loop systems, once the find home sequence is complete, you should reset the axis
position to any desired value with the Reset Position function. This procedure establishes a
repeatable reference position that is as accurate as the home edge location.
FlexMotion Software Reference Manual
9-4
www.natinst.com
Chapter 9
Find Home & Index Functions — flex_find_home
Note The Find Home function does not automatically zero position. If this action is
desired, you can call the Reset Position function after the Find Home is completed.
In closed-loop encoder based systems, you can use the Find Index function to eliminate errors
in the home edge location. In these systems, it is typically not necessary to define a specific
home edge and approach direction; finding the home switch is enough. Refer to the Find
Index function for more information.
Example
You want to find the reverse edge of the home switch on axis 2 and approach it in the forward
direction. To start the search in the forward direction, call the Find Home function with the
following parameters:
axis = 2
directionMap = 0x0004
The directionMap value of 0x0004 corresponds to the following bitmap.
D15
D14
D13
D12
D11
D10
D9
D8
D7
D6
D5
D4
D3
D2
D1
0
0
0
0
0
0
0
0
0
0
0
0
0
0
0
0
0
0
0
0
0
0
0
0
D0
0
Edge
Srch
Final
0
1
0
0
D0 Final approach direction = Forward (0), D1 Initial search direction = Forward (0), and D2
Home edge to stop on = Reverse (1).
© National Instruments Corporation
9-5
FlexMotion Software Reference Manual
Chapter 9
Find Home & Index Functions — flex_find_home
As shown in Figure 9-2, this Find Home sequence searches for the home switch in the forward
direction (1). When the home switch is found, the reverse edge (2) is located. When the
reverse edge is located, this edge is approached in the forward direction (3).
Edge
Forward
Reverse
Edge
Location
Final
Search
Direction
Home Switch Active Region
3
Forward
2
1
Figure 9-2. Find Home Sequence Example
FlexMotion Software Reference Manual
9-6
www.natinst.com
Chapter 9
Find Home & Index Functions — flex_find_index
flex_find_index
Find Index
Format
status = flex_find_index (boardID, axis, direction, offset)
Purpose
Executes a search sequence to find and stop on the encoder index mark, plus or minus an
optional programmable offset.
Parameters
Input
Name
Type
Description
boardID
u8
assigned by Measurement & Automation Explorer
axis
u8
axis to be controlled
direction
u16
search direction
offset
i16
offset position relative to the found index position
Parameter Discussion
axis is the axis to be controlled.
direction is the search direction for the find index sequence: 0 = Search forward, 1 = Search
reverse.
offset is the target position relative to the found index position. The range is –32,768 to
+32,767 counts with a default value of zero (0).
Using This Function
The Find Index function initiates a search sequence to find the index (marker) signal of the
feedback encoder. Once found, it then adds (or subtracts) the programmed offset value to the
captured index position and moves to the resulting target position.
The encoder index signal is accurate to one quadrature count and provides a much more
repeatable reference than using just a home switch edge. The Find Index function is typically
called after the find home sequence is complete and before the position is reset with the Reset
Position function. With this procedure, the home switch need only be accurate enough to
© National Instruments Corporation
9-7
FlexMotion Software Reference Manual
Chapter 9
Find Home & Index Functions — flex_find_index
repeatably locate the axis within the same encoder revolution or index period. Then you can
use the Find Index function to find a unique instance of the index.
Note The Find Index function is only available on axes with incremental encoder
feedback.
The search sequence is performed in the specified direction at a fixed low velocity of 1/4 RPS
unless an even lower velocity is loaded with either the Load Velocity or Load Velocity in RPM
functions. To guarantee finding the index (if one exists), the length of the move is
automatically set to slightly greater than one encoder revolution.
You must have previously load the correct counts per revolution value with the
Load Counts/Steps per Revolution function for the Find Index function to operate properly.
Caution
Upon finding the index, the motor either stops at the index position or starts a new trajectory
to the index position ± the loaded offset. This index offset move is always performed at the
previous loaded values of acceleration, deceleration, s-curve, and velocity.
A successful index search is indicated with the Index Found status. You can monitor this
status with the Read per Axis Status function. If the index is not found during the search
revolution, the axis comes to a stop and indicates the failure by resetting the Index Found
status. Missing the index is possible for a number of reasons including an incorrectly
connected encoder or an incorrect value for counts per revolution. Refer to Chapter 5, Signal
Connections, of your motion controller user manual for more information about encoder
connections and index phasing.
You can only execute the Find Index function on properly configured axes that are presently
stopped or killed. Attempting to execute the Find Index function while the axis is in motion
generates a modal error. For information about errors and error handling, refer to Chapter 4,
Software Overview, of this manual.
Note The Find Index function does not automatically zero the position. If this action is
desired, you can call the Reset Position function after the Find Index is completed.
FlexMotion Software Reference Manual
9-8
www.natinst.com
Analog & Digital I/O Functions
10
This chapter contains detailed descriptions of functions used to control the
general-purpose analog and digital I/O resources on the FlexMotion
controller. These resources include up to 32 bits of general-purpose digital
I/O, PWM outputs, RTSI lines, and any extra encoders, ADC channels, and
DAC outputs that are not mapped to an axis. The functions are arranged
alphabetically by function name.
The 32 bits of digital I/O are available on the Digital I/O Connector on 7344
motion controllers. On the PC- and PCI-FlexMotion controllers, the 24 bits
of digital I/O are available on the auxiliary 24-bit digital I/O connector.
These bits are organized into 8-bit ports that you can configure as inputs or
outputs on a port-wise basis or on a bitwise basis on the 7344 controllers.
Each bit has individually programmable polarity that you can configure as
inverting (active-low) or noninverting (active-high). You can use the
general-purpose digital I/O for system integration applications including
operator panel switch inputs and outputs, relay and solenoid activation,
trigger I/O between other controllers and/or instruments in the system, and
so on.
You can use encoders, ADC channels, and DAC outputs that are not
mapped to an axis for general-purpose I/O. Typical uses for encoder inputs
include velocity monitoring, masters for master-slave gearing, and digital
potentiometer applications.
You can use unused ADC inputs and DAC outputs can be used for any
analog I/O that is within their specifications. Typical analog input
applications include analog joysticks, potentiometers, force, pressure, level
and strain sensors, and so on. Analog output applications vary from heater
element control to laser intensity modulation.
As a quick reference, a summary of the entire FlexMotion function API is
in Appendix B, FlexMotion Functions.
© National Instruments Corporation
10-1
FlexMotion Software Reference Manual
Chapter 10
Analog & Digital I/O Functions — flex_configure_encoder_filter
flex_configure_encoder_filter
Configure Encoder Filter
Format
status = flex_configure_encoder_filter (boardID, axisOrEncoder, frequency)
Purpose
Selects the maximum count frequency for an encoder channel by configuring its digital filter.
This function is only supported by 7344 motion controllers.
Parameters
Input
Name
Type
Description
boardID
u8
assigned by Measurement & Automation Explorer
axisOrEncoder
u8
axis or encoder to configure
frequency
u16
maximum count frequency selector
Parameter Discussion
axisOrEncoder is the axis or encoder to be configured. Legal values are 1 through 4 (axes)
or 0x21 through 0x24 (encoders).
For configuring encoders mapped to axes, you can call this function on the axis or directly on
its mapped encoder.
FlexMotion Software Reference Manual
10-2
www.natinst.com
Chapter 10
Analog & Digital I/O Functions — flex_configure_encoder_filter
frequency selects the maximum count frequency for the specified encoder.
frequency Value
Maximum Count Frequency
0
25.6 MHz
1
12.8 MHz
2
6.4 MHz
3
3.2 MHz
4
1.6 MHz (default)
5
800 kHz
6
400 kHz
7
200 kHz
8
100 kHz
9
50 kHz
10
25 kHz
Using This Function
Setting the maximum allowable count frequency for an encoder is useful for reducing the
effect of noise on the encoder lines. Noise on the encoder lines can be interpreted as extra
encoder counts. By setting the frequency to the lowest possible setting required for your
motion application, you can ensure the highest degree of accuracy in positioning. In choosing
the appropriate value, you should take into account the counts per revolution of your encoder
and the maximum velocity for the axis in question.
For example, with a 20,000 counts per revolution encoder and a maximum velocity of
3,000 RPM (50 revolutions per second), the encoder signal could be as high as 1,000,000
counts per second. A frequency value of 4, which would correspond to a maximum count
frequency of 1.6 MHz would be appropriate in this case.
If you never call this function, a default value of 4 (1.6 MHz) is used by the 7344 controller.
© National Instruments Corporation
10-3
FlexMotion Software Reference Manual
Chapter 10
Analog & Digital I/O Functions — flex_configure_pwm_output
flex_configure_pwm_output
Configure PWM Output
Format
status = flex_configure_pwm_output (boardID, u8 PWMOutput, u16 enable, u16 clock)
Purpose
Enables and disables PWM outputs, and sets the PWM clock frequency.
Parameters
Input
Name
Type
Description
boardID
u8
assigned by Measurement & Automation Explorer
PWMOutput
u8
PWM Output
enable
u16
enable/disable for PWM Output
clock
u16
clock selector
Parameter Discussion
PWMOutput selects the PWM Output to configure (1 or 2).
enable enables or disables the specified PWM Output. When enabled, the clock parameter
determines the clock frequency used for the PWM output.
1 = enabled
0 = disabled
clock specifies the clock frequency for the PWM output.
The base clock frequency for the PWM outputs is 8.2575 MHz on the PC- and
PCI-FlexMotion controllers, and 10.240 MHz on the 7344 controllers. This base clock
frequency is divided down depending on the clock value selected. Table 10-1 lists the PWM
clock frequency settings.
FlexMotion Software Reference Manual
10-4
www.natinst.com
Chapter 10
Analog & Digital I/O Functions — flex_configure_pwm_output
Table 10-1. PWM Clock Frequency Settings
Clock Value
Divide Down Factor
FlexMotion-6C
Controllers
7344 Controllers
0
28 = 256
32.256 kHz
40 kHz
1
29 = 512
16.128 kHz
20 kHz
2
210 = 1,024
8.064 kHz
10 kHz
3
211 = 2,048
4.032 kHz
5 kHz
4
212 = 4,096
2.016 kHz
2.5 kHz
5
213 = 8,192
1.008 kHz
1.25 kHz
6
214 = 16,384
504 Hz
625 Hz
7
28 = 256
External
Clock/256
External
Clock/32768
8
215 = 32,768
252 Hz
312.50 Hz
9
216 = 65,536
126 Hz
156.25 Hz
10
217 = 131,072
63 Hz
78.13 Hz
11
218 = 262,144
31.5 Hz
39.06 Hz
12
219 = 524,288
15.75 Hz
19.53 Hz
13
220 = 1,048,576
7.87 Hz
9.77 Hz
14
220 = 2,097,152
3.94 Hz
4.88 Hz
15
215 = 32,768
External Clock/
32,768
External Clock/
32,768
Using This Function
The PWM outputs on your FlexMotion controller are digital pulse-train outputs that have a
frequency specified by the clock parameter of this function and a duty cycle specified by the
Load PWM Duty Cycle function. These outputs can be used to control devices that require a
PWM input, such as a laser whose intensity is controlled by a PWM signal, or can be used to
generate isolated analog outputs by passing the PWM output through an optocoupler, and then
filtering the digital pulse train to produce an analog output voltage.
When you configure a PWM output, the clock frequency applies to both PWM outputs. If you
configure one PWM output for a clock value of 3, and then the second PWM output for a
clock value of 4, the value of 4 will apply to both PWM outputs. The only exception is when
© National Instruments Corporation
10-5
FlexMotion Software Reference Manual
Chapter 10
Analog & Digital I/O Functions — flex_configure_pwm_output
the clock settings for the two PWM outputs are 0 and 8, 1 and 9, 2 and 10, and so on, in which
case each output will have a different frequency.
On the PC- and PCI-FlexMotion controllers, the PWM outputs PWM1 and PWM2 share bits
0 (pin 15) and 1 (pin 13) of port 3 on the 24-bit Digital I/O connector. When configured as
PWM outputs, the PWM1 and/or PWM2 outputs cannot be used as general-purpose outputs,
but the other bits in the port can be used simultaneously without affecting the PWM outputs.
On the 7344 controllers, the PWM outputs have dedicated pins on the Digital I/O connector.
To use an external clock (clock values of 7 or 15), connect your external clock signal to the
PCLK input on the Digital I/O connector.
FlexMotion Software Reference Manual
10-6
www.natinst.com
Chapter 10
Analog & Digital I/O Functions — flex_enable_adcs
flex_enable_adcs
Enable ADCs
Format
status = flex_enable_adcs (boardID, reserved, ADCMap)
Purpose
Enables one or more of the unmapped ADC channels.
Parameters
Input
Name
Type
Description
boardID
u8
assigned by Measurement & Automation Explorer
reserved
u8
unused input
ADCMap
u16
bitmap of ADCs to enable
Parameter Discussion
reserved is an unused input. The input value is ignored.
ADCMap is the bitmap of ADC channels to enable.
D15
D14
D13
D12
D11
D10
D9
D8
0
0
0
0
0
0
0
0
D7
ADC 8
D6
ADC 7
D5
ADC 6
D4
ADC 5
D3
ADC 4
D2
ADC 3
D1
ADC 2
D0
ADC 1
D0 through D7:
1 = ADC channel enabled (default)
0 = ADC channel disabled
Using This Function
The Enable ADCs function enables one or more independent ADC channels for use as
general-purpose analog inputs. This function has no effect on channels that are mapped to
axes and being used for axis feedback. These feedback channels are automatically
enabled/disabled when you enable or disable their corresponding axis with the Enable Axes
function. Bit locations corresponding to mapped ADC channels are ignored.
© National Instruments Corporation
10-7
FlexMotion Software Reference Manual
Chapter 10
Analog & Digital I/O Functions — flex_enable_adcs
The FlexMotion Analog-to-Digital Converter (ADC) multiplexes between channels with a
scan rate of approximately 50 µs per channel (40 µs for the 7344 controller). Therefore, the
time between samples for a specific ADC channel is as follows:
ADC sample time = 50 µs/channel × (number of enabled channels)
By default, all channels are enabled at power up. You should disable unused channels to
increase the scan rate and decrease the sample time.
Note The 50 µs/channel scan rate is fast enough to support analog feedback at the fastest
PID update rates as long as no additional ADC channels are enabled.
Example
To enable ADC channels 1, 3, 5, and 7 on the FlexMotion controller, call the Enable ADCs
function with ADCMap = 0x0055, which corresponds to the following bitmap.
D15
D14
D13
D12
D11
D10
D9
D8
D7
D6
D5
D4
D3
D2
D1
D0
0
0
0
0
0
0
0
0
ADC 8
ADC 7
ADC 6
ADC 5
ADC 4
ADC 3
ADC 2
ADC 1
0
0
0
0
0
0
0
0
0
1
0
1
0
1
0
1
Under normal conditions, because ADC channels 2, 4, 6, and 8 are set to zero (0) they are
disabled when you execute this function. However, if ADC channel 2 is already being used as
feedback for axis 2, the disable (0) for ADC 2 is ignored resulting in the following bitmap of
enabled ADCs.
D15
D14
D13
D12
D11
D10
D9
D8
D7
D6
D5
D4
D3
D2
D1
D0
0
0
0
0
0
0
0
0
ADC 8
ADC 7
ADC 6
ADC 5
ADC 4
ADC 3
ADC 2
ADC 1
0
0
0
0
0
0
0
0
0
1
0
1
0
1
1
1
In this example there are five ADCs enabled, so the sample time for each ADC channel is as
follows:
ADC sample time = 50 µs/channel × 5 = 250 µs
This puts a limit on the fastest PID update rate practically achievable. You can set a faster PID
update rate with the Enable Axes function, but the PID loop will not truly operate at that faster
rate because the ADC channels used as feedback are not being sampled fast enough.
FlexMotion Software Reference Manual
10-8
www.natinst.com
Chapter 10
Analog & Digital I/O Functions — flex_enable_encoders
flex_enable_encoders
Enable Encoders
Format
status = flex_enable_encoders (boardID, encoderMap)
Purpose
Enables one or more of the unmapped encoder resources.
Parameters
Input
Name
Type
Description
boardID
u8
assigned by Measurement & Automation Explorer
encoderMap
u16
bitmap of encoders to enable
Parameter Discussion
encoderMap is the bitmap of encoder resources to enable.
D15
D14
D13
D12
D11
D10
D9
D8
D7
0
0
0
0
0
0
0
0
0
D6
D5
D4
D3
D2
D1
Enc 6
Enc 5
Enc 4
Enc 3
Enc 2
Enc 1
D0
0
D1 through D6:
1 = Encoder enabled
0 = Encoder disabled (default)
Using This Function
The Enable Encoders function enables one or more independent encoder channels for use as
general-purpose encoder inputs. It has no effect on encoders that are mapped to axes and
being used for axis feedback. These feedback encoders are automatically enabled/disabled
when their corresponding axis is enabled or disabled with the Enable Axes function. Bit
locations corresponding to mapped encoders are ignored.
Typical uses for independent encoder inputs include velocity monitoring, masters for
master-slave gearing, and digital potentiometer applications.
© National Instruments Corporation
10-9
FlexMotion Software Reference Manual
Chapter 10
Analog & Digital I/O Functions — flex_enable_encoders
Example
To enable encoders 3 and 4 on the FlexMotion controller, call the Enable Encoders function
with encoderMap = 0x0018, which corresponds to the following bitmap.
D15
D14
D13
D12
D11
D10
D9
D8
D7
D6
D5
D4
D3
D2
D1
0
0
0
0
0
0
0
0
0
0
0
0
0
0
0
0
D0
0
Enc 6
Enc 5
Enc 4
Enc 3
Enc 2
Enc 1
0
0
0
0
1
1
0
0
0
Normally, because encoders 1, 2, 5, and 6 are set to zero (0), they will be disabled by this
function execution. However, if encoder 2 is already being used as feedback for axis 2, the
disable (0) for Enc 2 is ignored resulting in the following bitmap of enabled encoders.
D15
D14
D13
D12
D11
D10
D9
D8
D7
D6
D5
D4
D3
D2
D1
0
0
0
0
0
0
0
0
0
0
0
0
0
0
0
0
D0
0
Enc 6
Enc 5
Enc 4
Enc 3
Enc 2
Enc 1
0
0
0
0
1
1
1
0
0
There is a limit on the number of enabled encoders supportable at the faster update rates.
Attempting to enable too many encoders generates an error. See the Enable Axes function for
more information on update rate limitations.
FlexMotion Software Reference Manual
10-10
www.natinst.com
Chapter 10
Analog & Digital I/O Functions — flex_load_dac
flex_load_dac
Load DAC
Format
status = flex_load_dac (boardID, DAC, outputValue, inputVector)
Purpose
Loads an output value to an unmapped DAC resource.
Parameters
Input
Name
Type
Description
boardID
u8
assigned by Measurement & Automation Explorer
DAC
u8
DAC to be controlled
outputValue
i16
value sent to the DAC
inputVector
u8
source of the data for this function
Parameter Discussion
DAC is the DAC to be controlled.
outputValue is the value sent to the DAC. The parameter range is –32,768 to +32,767,
corresponding to the full ±10 V output range.
Note DAC torque limits and offsets do not apply when directly loading a DAC.
inputVector indicates the source of the data for this function. Available inputVectors
include immediate (0xFF) or variable (0x01 through 0x78).
Using This Function
The Load DAC function is used to send a value directly to an unmapped DAC resource. DACs
not mapped as servo axis outputs are available for general-purpose analog out applications.
You should not execute this function on a DAC mapped to an axis. Doing so will
cause the DAC output to glitch momentarily before returning to axis control.
Caution
© National Instruments Corporation
10-11
FlexMotion Software Reference Manual
Chapter 10
Analog & Digital I/O Functions — flex_load_pwm_duty
flex_load_pwm_duty
Load PWM Duty Cycle
Format
status = flex_load_pwm_duty (boardID, PWMOutput, dutyCycle, inputVector)
Purpose
Sets the duty cycle for a PWM output.
Parameters
Input
Name
Type
Description
boardID
u8
assigned by Measurement & Automation Explorer
PWMOutput
u8
PWM Output
dutyCycle
u16
duty cycle for PWM Output
inputVector
u8
source of the data for this function
Parameter Discussion
PWMOutput selects the PWM Output to control (1 or 2).
dutyCycle is a value between 0 and 255 that specifies the amount of time the PWM output is
high.
inputVector indicates the source of the data for this function. Available inputVectors include
immediate (0xFF) and variable (0x01 through 0x78).
Using This Function
The dutyCycle determines the amount of time the PWM output is high. A dutyCycle of 0
corresponds to a 0 V output, and a dutyCycle of 255 corresponds to a pulse train that is high
for 255/256 = 99.6% of the time. Use the Configure PWM Output function to set the
frequency of the PWM output signal.
You can set the duty cycle before or after configuring a PWM output. By default, the
dutyCycle is 0, so if you call the Configure PWM Output function to configure a PWM
output, the output will be low until you set the dutyCycle differently. If you set the dutyCycle
first, the PWM output will reflect this dutyCycle immediately after calling the Configure
PWM Output function.
FlexMotion Software Reference Manual
10-12
www.natinst.com
Chapter 10
Analog & Digital I/O Functions — flex_read_adc and flex_read_adc_rtn
flex_read_adc and
flex_read_adc_rtn
Read ADC
Format
status = flex_read_adc (boardID, ADC, returnVector)
status = flex_read_adc_rtn (boardID, ADC, ADCValue)
Purpose
Reads the converted value from an ADC input channel.
Parameters
Input
Name
Type
Description
boardID
u8
assigned by Measurement & Automation Explorer
ADC
u8
ADC channel to be read
returnVector
u8
destination for the return data
Output
Name
ADCValue
Type
i16
Description
the converted analog value
Parameter Discussion
ADC is the Analog-to-Digital Converter channel to be read. Valid ADC resources are 0x51
through 0x58.
returnVector indicates the desired destination for the return data generated by this function.
Available returnVectors include return data to the host (0xFF), return data to a variable
(0x01 through 0x78), and don’t return data (0).
Note The suffix _rtn on the function indicates that the data should be returned to the host.
When this calling convention is used, no returnVector is required.
ADCValue is the signed 12-bit value from the ADC channel. ADCValue is from –2,048 to
+2,047 for the ±5 V and ±10 V ranges, and 0 to 4,096 for the 0 to 5 V and 0 to 10 V ranges.
© National Instruments Corporation
10-13
FlexMotion Software Reference Manual
Chapter 10
Analog & Digital I/O Functions — flex_read_adc and flex_read_adc_rtn
The voltage range is set through the Set ADC Range function for 7344 controllers and is
always ±10 V for FlexMotion-6C controllers.
Using This Function
The Read ADC function returns the converted voltage from any of the analog input channels.
You can only read values from channels that have been either directly enabled by the Enable
ADCs function or automatically enabled by being mapped to an enabled axis.
For an ADC channel mapped to an axis, this function returns the actual ADC value. In
contrast, the Read Position function executed on the owner axis returns an ADC value that
has been offset by a reset value stored when the Reset Position function was executed. ADC
channels are never internally reset so their DC values are preserved.
On the FlexMotion-6C controllers, all 8 ADC inputs are on the 100-pin Motion I/O connector.
On the 7344 controllers, ADC inputs 1 through 4 are on the 68-pin Motion I/O connector, and
the remaining four inputs are wired as follows.
ADC Input
Description
5
Cleaned +5 V PC supply
6
Not connected
7
Analog reference
8
Analog ground
FlexMotion Software Reference Manual
10-14
www.natinst.com
Chapter 10
Analog & Digital I/O Functions — flex_read_encoder and flex_read_encoder_rtn
flex_read_encoder and
flex_read_encoder_rtn
Read Encoder Position
Format
status = flex_read_encoder (boardID, axisOrEncoder, returnVector)
status = flex_read_encoder_rtn (boardID, axisOrEncoder, encoderCounts)
Purpose
Reads the position of an encoder.
Parameters
Input
Name
Type
Description
boardID
u8
assigned by Measurement & Automation Explorer
axisOrEncoder
u8
axis or encoder to be read
returnVector
u8
destination for the return data
Output
Name
encoderCounts
Type
i32
Description
encoder position in quadrature counts
Parameter Discussion
axisOrEncoder is the axis or encoder to be read.
returnVector indicates the desired destination for the return data generated by this function.
Available returnVectors include return data to the host (0xFF), return data to a variable
(0x01 through 0x78), and don’t return data (0).
Note The suffix _rtn on the function indicates that the data should be returned to the host.
When this calling convention is used, no returnVector is required.
encoderCounts is the encoder position is quadrature counts.
© National Instruments Corporation
10-15
FlexMotion Software Reference Manual
Chapter 10
Analog & Digital I/O Functions — flex_read_encoder and flex_read_encoder_rtn
Using This Function
The Read Encoder Position function returns the quadrature count value of the encoder
selected. The encoder must be enabled, either directly through the Enable Encoders function
or automatically, by being mapped to an enabled axis.
The Read Encoder Position function is typically used to read the value of an encoder that is
not part of an axis. This encoder could be a master encoder used for master-slave gearing or
an independent position or velocity sensor.
For reading encoders mapped to axes, you can call this function on the axis or directly on its
mapped encoder. For servo axes, both approaches return the same value as the Read Position
function. On stepper axes however, this function can return additional useful information.
During axis setup, you can operate the closed-loop stepper axis in open-loop mode and use
this function to directly measure the counts per revolution and steps per revolution for the
axis. These values must be loaded before for subsequent closed-loop operation. Refer to the
Load Counts/Steps per Revolution function for more information.
You can also use this function to return a finer reading of position in cases where the encoder
resolution greatly exceeds the step resolution of the closed-loop stepper axis.
FlexMotion Software Reference Manual
10-16
www.natinst.com
Chapter 10
Analog & Digital I/O Functions — flex_read_port and flex_read_port_rtn
flex_read_port and
flex_read_port_rtn
Read I/O Port
Format
status = flex_read_port (boardID, port, returnVector)
status = flex_read_port_rtn (boardID, port, portData)
Purpose
Reads the logical state of the bits in an I/O port.
Parameters
Input
Name
Type
Description
boardID
u8
assigned by Measurement & Automation Explorer
port
u8
general-purpose I/O port to be read
returnVector
u8
destination for the return data
Output
Name
portData
Type
u16
Description
bitmap of the logical state of the I/O port
Parameter Discussion
port is the general-purpose I/O port (1, 2, 3, or 4) or RTSI software port (5) to be read.
returnVector indicates the desired destination for the return data generated by this function.
Available returnVectors include return data to the host (0xFF), return data to a variable
(0x01 through 0x78), and don’t return data (0).
Note The suffix _rtn on the function indicates that the data should be returned to the host.
When this calling convention is used, no returnVector is required.
© National Instruments Corporation
10-17
FlexMotion Software Reference Manual
Chapter 10
Analog & Digital I/O Functions — flex_read_port and flex_read_port_rtn
portData is the bitmap of the logical state of the I/O port.
D15
D14
D13
D12
D11
D10
D9
D8
D7
D6
D5
D4
D3
D2
D1
XXX
XXX
XXX
XXX
XXX
XXX
XXX
XXX
Bit 7
Bit 6
Bit 5
Bit 4
Bit 3
Bit 2
Bit 1
D0
Bit 0
For D0 through D7:
1 = I/O bit True (On)
0 = I/O bit False (Off)
Using This Function
The Read I/O Port function reads the logical state of the bits in the general-purpose I/O port
selected. You can execute this function at anytime to monitor the signals connected to an input
port. Reads of ports configured as outputs return the last value written to the port with the Set
I/O Port MOMO function.
Note This function reads the logical state (On or Off, True or False) of the bits in a port.
The polarity of the bits in the port determines whether an On state is active-high or
active-low. Refer to the Set I/O Port Polarity function for more information.
PC- and PCI-FlexMotion controllers have three ports: 1, 2, and 3.
When reading the RTSI port on 7344 controllers, the value read is the latched data, so you can
detect active pulses on the RTSI bus. After reading the latched data value, the function resets
the latch. Use the Set I/O Port Polarity function to specify the polarity, and therefore the
active state for latching.
FlexMotion Software Reference Manual
10-18
www.natinst.com
Chapter 10
Analog & Digital I/O Functions — flex_reset_encoder
flex_reset_encoder
Reset Encoder Position
Format
status = flex_reset_encoder (boardID, encoder, position, inputVector)
Purpose
Resets the position of an unmapped encoder to the specified value.
Parameters
Input
Name
Type
Description
boardID
u8
assigned by Measurement & Automation Explorer
encoder
u8
encoder to be reset
position
i32
reset value for encoder
inputVector
u8
source of the data for this function
Parameter Discussion
encoder is encoder to be reset.
position is the reset value for the encoder resource. You can reset position to any value in the
total position range of –(231) to +(231–1).
inputVector indicates the source of the data for this function. Available inputVectors include
immediate (0xFF) or variable (0x01 through 0x78).
Using This Function
The Reset Encoder Position function resets the position of the selected encoder. You can reset
position to zero or to any value in the 32-bit position range. You can only execute this function
on independent encoders that are not mapped to axes. For encoders mapped to axes, you
should use the Reset Position function instead.
Note Attempting to reset an encoder that is mapped to an axis generates an error.
Encoder position can be reset at any time. However, it is recommended that you reset position
only while the encoder is stopped. A encoder reset while it is moving will not have a
repeatable reference position.
Note Non-zero reset values are useful for defining a position reference offset.
© National Instruments Corporation
10-19
FlexMotion Software Reference Manual
Chapter 10
Analog & Digital I/O Functions — flex_select_signal
flex_select_signal
Select Signal
Format
status = flex_select_signal (boardID, destination, source)
Purpose
Specifies the source and destination for various motion signals, including trigger inputs,
high-speed capture circuits, breakpoint outputs, RTSI lines, and RTSI software ports. This
function is only supported by 7344 motion controllers.
Parameters
Input
Name
Type
Description
boardID
u8
assigned by Measurement & Automation Explorer
destination
u16
destination of signal
source
u16
source of signal
Parameter Discussion
destination is the destination of the signal coming from source.
source is the source of the signal to be routed to destination.
For a destination value of NIMC_HS_CAPTURE[1..4] (Value 8–11), the valid source values
are as follows.
source
NIMC_RTSI[0..6]
Value
0–6
Comments
RTSI lines 0 through 6
NIMC_PXI_STAR_TRIGGER
7
PXI star trigger line
NIMC_TRIGGER_INPUT
8
Trigger input for the corresponding axis
FlexMotion Software Reference Manual
10-20
www.natinst.com
Chapter 10
Analog & Digital I/O Functions — flex_select_signal
For a destination value of NIMC_RTSI[0..6] (Value 0–6) or NIMC_PXI_STAR_TRIGGER
(Value 7), the valid source values are as follows.
source
NIMC_BREAKPOINT[1..4]
Value
9–12
Comments
Breakpoint outputs
NIMC_RTSI_SOFTWARE_PORT
13
Corresponding bit in RTSI software port
NIMC_DONT_DRIVE
14
Sets RTSI pin back to input state
Using This Function
When the destination is NIMC_RTSI[0..6] or NIMC_PXI_STAR_TRIGGER, the motion
controller drives the RTSI line as an output. When the destination is
NIMC_HS_CAPTURE[1..4], the RTSI line serves as an input for the high-speed capture
circuitry. The RTSI lines can always be read using the Read I/O Port function, regardless of
the way they are currently configured.
Examples
Example 1
To use the signal coming in on RTSI pin 3 to trigger the high-speed capture on encoder/axis 1,
call Select Signal as follows:
flex_select_signal (boardID, NIMC_HS_CAPTURE1, NIMC_RTSI3)
The polarity of the high-speed capture input is specified by the Set High-Speed Capture
Polarity function.
Example 2
To output the breakpoint signal for axis 2 on RTSI pin 4, call Select Signal as follows:
flex_select_signal (boardID, NIMC_RTSI4, NIMC_BREAKPOINT2)
The signal seen on the RTSI 4 pin will be a high pulse of 120 to 150 ns duration. The action
specified in the Enable Breakpoint function only applies to the breakpoint output pin on the
motion I/O connector, not to RTSI pins.
Example 3
To drive RTSI pin 5 with the corresponding bit (bit 5) of the RTSI software port, call Select
Signal as follows:
flex_select_signal (boardID, NIMC_RTSI5, NIMC_SOFTWARE_PORT)
To set the state of the RTSI software port, use the Set I/O Port MOMO function.
© National Instruments Corporation
10-21
FlexMotion Software Reference Manual
Chapter 10
Analog & Digital I/O Functions — flex_select_signal
Example 4
When writing to the RTSI software port by using the Set I/O Port MOMO function, only those
RTSI lines that have been configured to be controlled by the RTSI software port will be
affected. To set the RTSI line back to an input, call Select Signal as follows:
flex_select_signal (boardID, NIMC_RTSI5, NIMC_DONT_DRIVE)
FlexMotion Software Reference Manual
10-22
www.natinst.com
Chapter 10
Analog & Digital I/O Functions — flex_set_adc_range
flex_set_adc_range
Set ADC Range
Format
status = flex_set_adc_range (boardID, ADC, range)
Purpose
Sets the voltage range for the analog to digital converters, on a per-channel basis.
Parameters
Input
Name
Type
Description
boardID
u8
assigned by Measurement & Automation Explorer
ADC
u8
ADC channel to configure
range
u16
the voltage range for the specified ADC
Parameter Discussion
ADC is the analog-to-digital converter channel to configure. Valid ADC resources are
0x51 through 0x58.
range specifies the input voltage range over which the ADC will convert input voltages to
digital values. Voltages outside of the range will clamp at the extremes, which are –2,048 or
+2,047 for the –5 to +5 V and –10 to +10 V ranges, and 0 or 4,096 for the 0 to +5 V and 0 to
+10 V ranges. You can choose from the following values for the range.
.
range Constant
range Value
Range (Volts)
Binary Values
NIMC_ADC_UNIPOLAR_5
0
0 to +5
0 to +4,096
NIMC_ADC_BIPOLAR_5
1
–5 to +5
–2,048 to +2,047
NIMC_ADC_UNIPOLAR_10
2
0 to +10
0 to +4,096
NIMC_ADC_BIPOLAR_10
3
–10 to +10
–2,048 to +2,047
The constants listed previously are defined in the FlexMotion header files motncnst.h
(for C/C++ users) and motncnst.bas (for Visual Basic users).
© National Instruments Corporation
10-23
FlexMotion Software Reference Manual
Chapter 10
Analog & Digital I/O Functions — flex_set_adc_range
Note The only valid choice for FlexMotion-6C controllers is 3, which corresponds to the
–10 to +10 V range. The 7344 controllers provide for all four ranges.
Using This Function
If you do not call this function, the range defaults to –10 to +10 V. If you know that your input
voltage falls within a more restrictive range, you can effectively increase the resolution of
your measurements by selecting an appropriate range from the previous list.
For example, if your input signal ranges from –3 to +3 V, and you select the –5 to +5 V range,
the 4,096 discreet values for the ADC will be 2.44 mV apart instead of the 4.88 mV apart
when using the –10 to +10 V range.
For more information, refer to the Read ADC and Enable ADCs functions.
FlexMotion Software Reference Manual
10-24
www.natinst.com
Chapter 10
Analog & Digital I/O Functions — flex_set_port_direction
flex_set_port_direction
Set I/O Port Direction
Format
status = flex_set_port_direction (boardID, port, directionMap)
Purpose
Sets the direction of a general-purpose I/O port as input or output.
Parameters
Input
Name
Type
Description
boardID
u8
assigned by Measurement & Automation Explorer
port
u8
general-purpose I/O port to be controlled
directionMap
u16
port direction control
Parameter Discussion
port is the general-purpose I/O port (1, 2, 3, or 4) to be controlled.
Note On FlexMotion-6C controllers, which have three ports (1, 2, and 3), I/O port 3 is an
output-only port and cannot be set to input.
directionMap is the bitmap of directions for the bits in the I/O port.
D15
D14
D13
D12
D11
D10
D9
D8
0
0
0
0
0
0
0
0
D7
D6
D5
D4
D3
D2
D1
Bit 7
Bit 6
Bit 5
Bit 4
Bit 3
Bit 2
Bit 1
D0
Bit 0
For D0 through D7:
1 = Input (default)
0 = Output
Note On FlexMotion-6C controllers, all bits in a port must be set to the same direction,
leading to a directionMap of 0xFF (all inputs) or 0 (all outputs).
© National Instruments Corporation
10-25
FlexMotion Software Reference Manual
Chapter 10
Analog & Digital I/O Functions — flex_set_port_direction
Using This Function
The Set I/O Port Direction function configures the bits in a general-purpose I/O port as input
or output. After setting the direction, use the Read I/O Port function to read the port, the Set
I/O Port MOMO function to write to the port, and the Set I/O Port Polarity function to set the
polarity of each bit in the port to active-high or active-low.
On PC-FlexMotion and PCI-FlexMotion controllers, bits 5 and 6 of I/O port 2 have
special capabilities and are input only. When I/O port 2 is set as output, you cannot use
bits 5 and 6.
Notes
The direction of bits in the RTSI software port (port 5) on 7344 controllers is controlled
with the Select Signal function.
FlexMotion Software Reference Manual
10-26
www.natinst.com
Chapter 10
Analog & Digital I/O Functions — flex_set_port_momo
flex_set_port_momo
Set I/O Port MOMO
Format
status = flex_set_port_momo (boardID, port, mustOn, mustOff)
Purpose
Sets an I/O port value using the MustOn/MustOff protocol.
Parameters
Input
Name
Type
Description
boardID
u8
assigned by Measurement & Automation Explorer
port
u8
general-purpose I/O port to be controlled
mustOn
u16
bitmap of I/O port bits to be forced on
mustOff
u16
bitmap of I/O port bits to be forced off
Parameter Discussion
port is the general-purpose I/O port (1, 2, 3, or 4) or RTSI software port (5) to be controlled.
mustOn is the bitmap of I/O port bits to be forced on.
D7
mustOn 7
D6
mustOn 6
D5
mustOn 5
D4
D3
mustOn 4
mustOn 3
D2
mustOn 2
D1
mustOn 1
D0
mustOn 0
For D0 through D7:
1 = I/O bit forced to logical On
0 = I/O bit left unchanged (default)
© National Instruments Corporation
10-27
FlexMotion Software Reference Manual
Chapter 10
Analog & Digital I/O Functions — flex_set_port_momo
mustOff is the bitmap of I/O port bits to be forced off.
D7
D6
mustOff 7
mustOff 6
D5
mustOff 5
D4
D3
mustOff 4
mustOff 3
D2
mustOff 2
D1
D0
mustOff 1
mustOff 0
For D0 through D7:
1 = I/O bit forced to logical Off
0 = I/O bit left unchanged (default)
Using This Function
The Set I/O Port MOMO function sets the logical state of bits in the general-purpose I/O port
selected.
Using the MustOn/MustOff protocol allows you to set or reset individual bits without
affecting other output bits in the port. This gives you tri-state control over each bit: On, Off
or Unchanged. A one (1) in a bit location of the MustOn bitmap turns the bit On, while a
one (1) in the corresponding location of the MustOff bitmap turns the bit Off. A zero (0) in
either bitmap has no effect, so leaving both the MustOn and MustOff bits at zero is effectively
a hold and the state of the bit is unchanged. If you set both the MustOn and MustOff bits to
one (1), it is interpreted as a MustOn condition and the bit is turned On.
Note This function sets the logical state of a bit On or Off (True or False). The polarity of
the bits in the port determines whether an On state is active-high or active-low. Refer to the
Set I/O Port Polarity function for more information.
The Set I/O Port MOMO function allows individual control of general-purpose output bits
without requiring a shadow value or a read of the port to remember the state of other bits not
being set or reset with the function.
Example
In I/O port 2, to set bits 1 and 3 On, bits 0 and 5 Off and to leave the other bits (2, 4, 6, and 7)
unchanged, call this function with the following parameters:
port = 2
mustOn = 0x0A, where the value 0x0A corresponds to the following bitmap
D7
D6
D5
D4
D3
D2
D1
D0
mustOn 7
mustOn 6
mustOn 5
mustOn 4
mustOn 3
mustOn 2
mustOn 1
mustOn 0
0
0
0
0
1
0
1
0
FlexMotion Software Reference Manual
10-28
www.natinst.com
Chapter 10
Analog & Digital I/O Functions — flex_set_port_momo
mustOff = 0x21, where the value 0x21 corresponds to the following bitmap
D7
D6
D5
D4
D3
D2
D1
D0
mustOff 7
mustOff 6
mustOff 5
mustOff 4
mustOff 3
mustOff 2
mustOff 1
mustOff 0
0
0
1
0
0
0
0
1
Note PC- and PCI-FlexMotion controllers have three ports: 1, 2, and 3.
On 7344 controllers, you can always write to the RTSI software port, but the actual RTSI lines
on the physical RTSI port are only affected if the RTSI line has been configured properly by
using the Select Signal function. By default, none of the RTSI lines are configured to output
their corresponding bits in the RTSI software port; you must configure each RTSI line
individually using the Select Signal function, rather than the Set I/O Port Direction function.
© National Instruments Corporation
10-29
FlexMotion Software Reference Manual
Chapter 10
Analog & Digital I/O Functions — flex_set_port_pol
flex_set_port_pol
Set I/O Port Polarity
Format
status = flex_set_port_pol (boardID, port, portPolarityMap)
Purpose
Sets the bit polarity in a general-purpose I/O port.
Parameters
Input
Name
Type
Description
boardID
u8
assigned by Measurement & Automation Explorer
port
u8
general-purpose I/O port to be controlled
portPolarityMap
u16
bitmap of active polarities
Parameter Discussion
port is the general-purpose I/O port (1, 2, 3, or 4) or RTSI software port (5) to be controlled.
portPolarityMap is the bitmap of active polarities for the I/O port.
D15
D14
D13
D12
D11
D10
D9
D8
0
0
0
0
0
0
0
0
D7
D6
D5
D4
D3
D2
D1
Bit 7
Bit 6
Bit 5
Bit 4
Bit 3
Bit 2
Bit 1
D0
Bit 0
For D0 through D7:
1 = Inverting (active-low) (default)
0 = Noninverting (active-high)
Using This Function
The Set I/O Port Polarity function sets the polarity of the general-purpose I/O port on an
individual bit basis. You can set each bit for either inverting or noninverting polarity. Inverting
polarity means that a logical True or On state corresponds to an active-low signal on the pin.
Conversely, noninverting polarity means that a logical True (On) corresponds to an
active-high signal on the pin.
FlexMotion Software Reference Manual
10-30
www.natinst.com
Chapter 10
Analog & Digital I/O Functions — flex_set_port_pol
Typically, ports and their pins are configured for direction and polarity at initialization. After
configuration, you can then read or write logical states (True or False, On or Off) to ports
without worrying about the physical states of signals on the port pins.
On 7344 controllers, the polarity also defines the latching behavior for the RTSI port. In order
to detect short pulses on RTSI lines, the hardware latches active-going signals and holds that
state until the port is read. For example, if you configure a bit for inverting polarity, a
transition from high to low will be latched until read, even if the signal goes high again. If
the signal starts low, it will also be latched until read, even if the signal is high when you read
the bit.
Note PC- and PCI-FlexMotion controllers have three ports: 1, 2, and 3.
© National Instruments Corporation
10-31
FlexMotion Software Reference Manual
Error & Utility Functions
11
This chapter contains detailed descriptions of error handling functions and
utility functions for getting information about your motion controller. Refer
to Chapter 4, Software Overview, for an overview of modal versus
non-modal errors and a discussion on error handling techniques. The
functions are arranged alphabetically by function name.
As a quick reference, a summary of the entire FlexMotion function API is
in Appendix B, FlexMotion Functions.
© National Instruments Corporation
11-1
FlexMotion Software Reference Manual
Chapter 11
Error & Utility Functions — flex_get_error_description
flex_get_error_description
Get Error Description
Format
status=flex_get_error_description (descriptionType, errorCode, commandID, resourceID,
charArray, sizeOfArray)
Purpose
Gets an error, command, and/or resource description string as an ASCII character array.
Parameters
Input
Name
Type
Description
descriptionType
u16
type of description selector
errorCode
i32
error code
commandID
u16
command ID number
resourceID
u16
resource ID number
Input/Output
Name
Type
sizeOfArray
u32
Description
size of character array
Output
Name
charArray
FlexMotion Software Reference Manual
Type
[i8]
Description
character array
11-2
www.natinst.com
Chapter 11
Error & Utility Functions — flex_get_error_description
Parameter Discussion
descriptionType is the selector for the type of description string to return.
descriptiveType Constant
descriptionType Value
NIMC_ERROR_ONLY
0
NIMC_FUNCTION_NAME_ONLY
1
NIMC_RESOURCE_NAME_ONLY
2
NIMC_COMBINED_DESCRIPTION
3
errorCode is an error code from a function return status or the error code returned from the
Read Error Message function.
commandID is the command ID of a function.
resourceID is the resource ID of an axis, vector space, encoder, ADC, DAC, or other
resource.
sizeOfArray is the number of characters in the description plus one for the NULL string
terminator. As an input, this I/O parameter specifies the size of the allocated array.
If sizeOfArray and/or charArray is NULL or zero (0), the required size of the array
(not including the NULL terminator) is returned in the sizeOfArray parameter as an output.
charArray is an array of ASCII characters containing the error, command, and/or resource
description string. This function places all or part of the selected string in charArray,
if sizeOfArray is greater than zero (> 0).
Using This Function
The Get Error Description function returns the selected description string as an ASCII
character array. You must allocate space for this array on the host computer before calling this
function. You can use this function to generate a string for displaying a function name, a
resource name, an error code description, or a complete error description string in response
to an error code returned as a function status or the result of calling the Read Error Message
function.
© National Instruments Corporation
11-3
FlexMotion Software Reference Manual
Chapter 11
Error & Utility Functions — flex_get_error_description
Not all input parameters are required for each description type. The following parameters are
required to return an accurate description string.
descriptionType
errorCode
commandID
resourceID
required
not required
not required
NIMC_FUNCTION_NAME_ONLY
not required
required
not required
NIMC_RESOURCE_NAME_ONLY
not required
required
required
NIMC_COMBINED_DESCRIPTION
required
required
required
NIMC_ERROR_ONLY
Because resource IDs are not unique (for example, axis 1 and program 1 both are resource 1),
the command ID is required to set the context and allow this function to generate the proper
resource name string.
If NULL (or 0) is passed in either the charArray or sizeOfArray parameters, the required
size of the array (not including the NULL terminator) is returned in the sizeOfArray
parameter. You can use this feature when you want to allocate only the memory necessary to
hold the description string. This function is then called twice: once to get the required array
size, and once again to actually retrieve the description.
The number of characters required for the character array is always one more than the actual
number of characters in the controller name due to the NULL terminator at the end of the
string.
Note If sizeOfArray is smaller than the actual description string, this function returns a
partial string with the last three characters replaced by ... to indicate that the string is not
complete.
Example
After executing a Find Index sequence on axis 1, a modal error is detected. A call to the Read
Error Message function returns the following set of parameters:
commandID = 334
resourceID = 0x01
errorCode = 124
To generate an error description string for display, call the Get Error Description function
with these parameters, plus a descriptionType, sizeOfArray = 0 and charArray = NULL.
When the function returns, sizeOfArray will have the size of the description in it. Allocate
memory for a character array of size sizeOfArray + 1. Call the Get Error Description
function a second time passing in the same parameters as before except sizeOfArray is the
value of sizeOfArray + 1 returned by the first function call, and charArray points to the
FlexMotion Software Reference Manual
11-4
www.natinst.com
Chapter 11
Error & Utility Functions — flex_get_error_description
character array just allocated. This function returns the following strings, depending upon the
descritpionType selected.
descriptionType Constant
String
NIMC_ERROR_ONLY
Error 124 (NIMC_findIndexError);
Find Index sequence did not find the
index successfully
NIMC_FUNCTION_NAME_ONLY
Find Index (flex_find_index)
NIMC_RESOURCE_NAME_ONLY
Axis 0x01
NIMC_COMBINED_DESCRIPTION
Error 124 (NIMC_findIndexError) occurred in
Find Index (flex_find_index) on Axis 0x01;
Find Index sequence did not find the
index successfully
© National Instruments Corporation
11-5
FlexMotion Software Reference Manual
Chapter 11
Error & Utility Functions — flex_get_motion_board_info
flex_get_motion_board_info
Get Motion Board Information
Format
status=flex_get_motion_board_info (boardID, informationType, informationValue)
Purpose
Gets information about the properties and features of your motion controller.
Parameters
Input
Name
Type
Description
boardID
u8
assigned by Measurement & Automation Explorer
informationType
u32
type of information you want to retrieve
Output
Name
Type
informationValue
u32
Description
retrieved information
Parameter Discussion
informationType is the selector for the type of controller information you want. Legal values
are defined as constants in the FlexMotion header files motncnst.h (for C/C++ users) and
motncnst.bas (for Visual Basic users) and are listed in the following section.
informationValue is the returned information of the type you selected. Possible return values
are listed in the following section in terms of constants defined in the FlexMotion header files.
FlexMotion Software Reference Manual
11-6
www.natinst.com
Chapter 11
informationType Constant
Error & Utility Functions — flex_get_motion_board_info
Possible informationValues
NIMC_BOARD_FAMILY (1100)
NIMC_FLEX_MOTION (0)
NIMC_VALUE_MOTION (1)
NIMC_BOARD_TYPE (1120)
PC_SERVO_2A (7)
PC_SERVO_4A (3)
PC_STEP_2OX (8)
PC_STEP_4OX (4)
PC_STEP_2CX (9)
PC_STEP_4CX (5)
PC_FLEXMOTION_6C (16)
PCI_7314 (30)
PCI_7324 (29)
PCI_7344 (28)
PCI_SERVO_2A (17)
PCI_SERVO_4A (11)
PCI_STEP_2OX (18)
PCI_STEP_4OX (12)
PCI_STEP_2CX (19)
PCI_STEP_4CX (13)
PCI_FLEXMOTION_6C (24)
PXI_7312 (22)
PXI_7314 (20)
PXI_7322 (23)
PXI_7324 (21)
PXI_7344 (27)
NIMC_BUS_TYPE (1130)
NIMC_ISA_BUS (0)
NIMC_PCI_BUS (1)
NIMC_PXI_BUS (2)
NIMC_CLOSED_LOOP_CAPABLE (1150)
NIMC_TRUE (1)
NIMC_FALSE (0)
NIMC_NUM_AXES (1510)
NIMC_BOOT_VERSION
Number of axes on the controller
(3010)1
Version-build code (MMmmbbbb)
NIMC_FIRMWARE_VERSION (3020)
Version-build code (MMmmbbbb)
NIMC_DSP_VERSION (3030)
Version-build code (MMmmbbbb)
NIMC_FPGA_VERSION (3040)
Version-build code (MMmmbbbb)
NIMC_FPGA2_VERSION (3050)
Version-build code (MMmmbbbb)
NIMC_FLEXMOTION_BOARD_CLASS (2030)
1 This
NIMC_FLEX_6C (0)
NIMC_FLEX_7344 (1)
input value was used in FlexMotion software 4.0. It is not a valid value in the current version of FlexMotion.
© National Instruments Corporation
11-7
FlexMotion Software Reference Manual
Chapter 11
Error & Utility Functions — flex_get_motion_board_info
Using This Function
The Get Motion Board Information function returns selected information about ValueMotion
and FlexMotion controllers including controller type and family, bus type, number of axes,
and so on.
FlexMotion also has four information types for retrieving the version numbers and release
dates of the firmware segments loaded in the onboard Flash ROM. All firmware segments are
field upgradable using the Update Firmware option in Measurement & Automation
Explorer. Versions are returned in a version-build code format:
Version-build code = MMmmbbbb
where
MM = the major version number,
mm = the minor version number, and
bbbb = the build number.
You can use this information to verify that your FlexMotion controller has the latest firmware
downloaded on it.
FlexMotion Software Reference Manual
11-8
www.natinst.com
Chapter 11
Error & Utility Functions — flex_get_motion_board_name
flex_get_motion_board_name
Get Motion Board Name
Format
status=flex_get_motion_board_name (boardID, charArray, sizeOfArray)
Purpose
Gets the motion controller name as an ASCII character array.
Parameters
Input
Name
Type
Description
u8
assigned by Measurement & Automation Explorer
Name
Type
Description
sizeOfArray
u32
boardID
Input/Output
size of character array
Output
Name
charArray
Type
[i8]
Description
character array
Parameter Discussion
sizeOfArray is the number of characters in the controller name plus one for the NULL string
terminator. As an input, this I/O parameter specifies the size of the allocated array. If
sizeOfArray is insufficient, a NIMC_insufficientSizeError is returned as the status of the
function, and the required character array size (including space for the NULL terminator) is
returned in the sizeOfArray parameter. If sizeOfArray is sufficient, a NIMC_noError is
returned as the status of the function, the name is copied into the character array, and the
number of bytes copied (plus one for the NULL terminator) is returned in the sizeOfArray
parameter.
charArray is an array of ASCII characters containing the name of the controller. The
FlexMotion software places the name of the controller, referenced by boardID, in the
character array, if there is sufficient space. You must allocate space for this array before
calling this function.
© National Instruments Corporation
11-9
FlexMotion Software Reference Manual
Chapter 11
Error & Utility Functions — flex_get_motion_board_name
Using This Function
The Get Motion Board Name function returns the name of the controller as an ASCII
character array. You must allocate space for this array on the host computer before calling this
function.
If NULL (or 0) is passed in the charArray parameter, the size of a character array required to
hold the controller name is returned in the sizeOfArray parameter. You can use this feature
when you want to allocate only the memory necessary to hold the controller name. This
function is then called twice: once to get the required array size, and once again to actually
retrieve the name.
The number of characters required for the character array is always one more than the actual
number of characters in the controller name due to the NULL terminator at the end of the
string. For example, the controller name PXI-7324 is eight characters long, so you must
provide a 9-byte character array to hold this name. sizeOfArray must be nine or greater as
an input, and upon successful copy of the controller name, a value of nine is placed in
sizeOfArray.
FlexMotion Software Reference Manual
11-10
www.natinst.com
Chapter 11
Error & Utility Functions — flex_read_err_msg_rtn
flex_read_err_msg_rtn
Read Error Message
Format
status = flex_read_err_msg_rtn (boardID, commandID, resourceID, errorCode)
Purpose
Reads the most recent modal error from the Error Message Stack.
Parameters
Input
Name
Type
Description
u8
assigned by Measurement & Automation Explorer
Name
Type
Description
commandID
u16
command ID number
resourceID
u16
resource ID number
errorCode
u16
error code
boardID
Output
Parameter Discussion
commandID is the command ID of the function that caused the error.
resourceID is the resource ID involved in the error.
errorCode is the code for the error condition.
Using This Function
The Read Error Message function retrieves the most recent modal error from the Error
Message Stack and returns it through the Return Data Buffer to the host.
Note See Appendix A, Error Codes, for a description of error codes and possible causes.
When a modal error occurs, the command ID, resource ID, and error code are automatically
stored in the Error Message Stack and the Error Message (Err Msg) bit in the Communication
Status Register is set to indicate that one or more errors are present on the stack.
© National Instruments Corporation
11-11
FlexMotion Software Reference Manual
Chapter 11
Error & Utility Functions — flex_read_err_msg_rtn
Modal errors are defined as errors that are not detected at the time of function execution.
These errors can occur for a number of reasons including: bad command ID, bad axis, vector
space or resource ID, data out of range, function not valid in the present operating mode, and
so on. A common source of modal errors is improperly constructed function calls stored in an
onboard program. When the program is run, the errors generate modal error messages.
Note For a description of modal and non-modal errors, refer to Chapter 4, Software
Overview.
The Error Message Stack functions as a last-in-first-out (LIFO) buffer so that the most recent
error is available immediately. You can read older errors with additional calls to this function.
When the stack is empty, the Error Message (Err Msg) bit in the Communication Status
Register is reset.
Example
An application program running on the host computer monitors the Communication Status
Register to check for errors. If the Error Message bit is set, the program sends a Read Error
Message function to the controller and then reacts to the error information returned.
Depending upon the type of error and/or the function and resource involved, the appropriate
action is taken. You can check the Error Message bit again to see if any previous errors were
missed.
Normally, if the application program is functioning correctly, errors are not generated. The
Error Message Stack is most useful during initial application debug and for handling special
conditions.
FlexMotion Software Reference Manual
11-12
www.natinst.com
12
Onboard Programming Functions
This chapter contains detailed descriptions of functions used to load,
execute, and save onboard programs. The functions are arranged
alphabetically by function name.
FlexMotion offers a rich set of programming functions and features that
allow you to write and execute autonomous programs that are completely
independent from the host computer. FlexMotion has the capability of
executing up to 10 simultaneous motion programs in a preemptive,
real-time multitasking environment.
This extremely powerful feature is designed for real-time applications that
need tight synchronization and/or minimum latency from a motion or other
I/O event and fast command execution. You can execute the entire
FlexMotion function set from onboard programs. In addition, programs
support basic math and data operation functions on general-purpose
variables. Onboard programs also offer event-based functions such as Jump
to Label on Condition and Wait on Condition, which allow you to sequence
and make decisions in your programs. Programs can even start and stop
other programs.
Implementing part or all of your motion application as an onboard program
or programs offloads the host computer from handling these real-time
events. Onboard programs can also isolate your application from the host
computer non-real-time operating system. Only bus power is required to
correctly execute an onboard program once it is started.
Programs can be run from RAM or optionally saved to non-volatile Flash
ROM. Saved programs are therefore available for execution at any future
time, even after power cycles.
This chapter has a main section and two subsections, one on object
management and the other on data operations. The main section covers
functions to begin and end program storage and to control program
execution. The Object Management Functions section covers functions
to organize, annotate, and save program objects to ROM. The Data
Operations Functions section covers math functions on general-purpose
variables.
As a quick reference, a summary of the entire FlexMotion function API is
in Appendix B, FlexMotion Functions.
© National Instruments Corporation
12-1
FlexMotion Software Reference Manual
Chapter 12
Onboard Programming Functions — flex_begin_store
flex_begin_store
Begin Program Storage
Format
status = flex_begin_store (boardID, program)
Purpose
Begins a program storage session.
Parameters
Input
Name
Type
Description
boardID
u8
assigned by Measurement & Automation Explorer
program
u8
program number
Parameter Discussion
program is the program number. Valid program numbers are 0x01 through 0xFF
(1 through 255).
Using This Function
The Begin Program Storage function initiates program storage in RAM. Once begun, all
subsequent functions are stored in an object buffer and not executed until the program is run
with the Run Program function. This memory storage continues until you execute the End
Program Storage function. You can store only one program at a time.
The size and number of programs is completely flexible. It is ultimately limited by the 32 total
memory objects in the Object Registry or by total available memory, whichever is reached
first.
The FlexMotion-6C controller has 32 KB of RAM plus 32 KB of ROM for program and
object storage. You can run programs from either RAM or ROM, but you cannot split
programs between the two. With an average command size of 10 bytes, a single program can
be as large as 3,200 commands. Conversely, the FlexMotion-6C controller can simultaneously
execute 10 programs, five from RAM and five from ROM, each 640 functions long.
The 7344 controller has 64 KB of RAM plus 128 KB of ROM (divided into two 64 KB
sectors) for program and object storage. You can run programs from either RAM or ROM, but
you cannot split programs between the two, and you cannot split programs between the two
64 KB ROM sectors. With an average command size of 10 bytes, a single program can be as
FlexMotion Software Reference Manual
12-2
www.natinst.com
Chapter 12
Onboard Programming Functions — flex_begin_store
large as 6,400 commands. As another example, the 7344 controller can simultaneously
execute 10 programs, five from RAM and five from ROM, with each program up to 1,280
commands long.
Attempting to store more than 32 programs generates an error. Similarly, an error is generated
if you run out of memory during program storage. Both of these cases are extremely unlikely.
© National Instruments Corporation
12-3
FlexMotion Software Reference Manual
Chapter 12
Onboard Programming Functions — flex_end_store
flex_end_store
End Program Storage
Format
status = flex_end_store (boardID, program)
Purpose
Ends a program storage session.
Parameters
Input
Name
Type
Description
boardID
u8
assigned by Measurement & Automation Explorer
program
u8
program number
Parameter Discussion
program is the program number. Valid program numbers are 0x01 through 0xFF
(1 through 255).
Using This Function
The End Program Storage function ends memory storage of the program. All subsequent
functions are executed normally. You can save a program to non-volatile memory (ROM)
using the Object Memory Management function.
FlexMotion Software Reference Manual
12-4
www.natinst.com
Chapter 12
Onboard Programming Functions — flex_insert_program_label
flex_insert_program_label
Insert Program Label
Format
status = flex_insert_program_label (boardID, labelNumber)
Purpose
Inserts a label in a program.
Parameters
Input
Name
Type
Description
boardID
u8
assigned by Measurement & Automation Explorer
labelNumber
u16
arbitrary label number
Parameter Discussion
labelNumber is any arbitrary label number from 1 to 65,535.
Using This Function
The Insert Program Label function marks a location in the sequence of a program. The label
number identifies this location and uses it in the Jump to Label on Condition function. Label
numbers are arbitrary and do not have to follow a numerical sequence.
© National Instruments Corporation
12-5
FlexMotion Software Reference Manual
Chapter 12
Onboard Programming Functions — flex_jump_label_on_condition
flex_jump_label_on_condition
Jump to Label on Condition
Format
status = flex_jump_label_on_condition (boardID, resource, condition, mustOn, mustOff,
matchType, labelNumber)
Purpose
Inserts a conditional jump in a program.
Parameters
Input
Name
Type
Description
boardID
u8
assigned by Measurement & Automation Explorer
resource
u8
axis, vector space or other resource
condition
u16
qualifying condition for the jump
mustOn
u8
bitmap of bits that must be True
mustOff
u8
bitmap of bits that must be False
matchType
u16
selector for type of match required
labelNumber
u16
label number to jump to
Parameter Discussion
resource is the axis control, vector space control, or other resource involved in the condition.
condition is the qualifying condition for the jump.
condition Constant
condition Value
NIMC_CONDITION_LESS_THAN
0
NIMC_CONDITION_EQUAL
1
NIMC_CONDITION_LESS_THAN_OR_EQUAL
2
NIMC_CONDITION_GREATER_THAN
3
NIMC_CONDITION_NOT_EQUAL
4
NIMC_CONDITION_GREATER_
THAN_OR_EQUAL
5
NIMC_CONDITION_TRUE
6
FlexMotion Software Reference Manual
12-6
www.natinst.com
Chapter 12
Onboard Programming Functions — flex_jump_label_on_condition
condition Constant
condition Value
Valid resource
NIMC_CONDITION_HOME_FOUND
7
N/A
NIMC_CONDITION_INDEX_FOUND
8
N/A
NIMC_CONDITION_HIGH_SPEED_
CAPTURE
9
0 (axes) or
0x20 (encoders)
NIMC_CONDITION_POSITION_
BREAKPOINT
10
0 (axes) or
0x20 (encoders)
Reserved
11
N/A
NIMC_CONDITION_VELOCITY_
THRESHOLD
12
N/A
NIMC_CONDITION_MOVE_COMPLETE
13
N/A
NIMC_CONDITION_PROFILE_COMPLETE
14
N/A
NIMC_CONDITION_BLEND_COMPLETE
15
0 (axes) or
0x10 (vector
spaces)
NIMC_CONDITION_MOTOR_OFF
16
N/A
NIMC_CONDITION_HOME_INPUT_
ACTIVE
17
N/A
NIMC_CONDITION_LIMIT_INPUT_
ACTIVE
18
N/A
NIMC_CONDITION_SOFTWARE_LIMIT_
ACTIVE
19
N/A
NIMC_CONDITION_PROGRAM_
COMPLETE
20
program
NIMC_CONDITION_IO_PORT_MATCH
21
I/O port 1or 2
© National Instruments Corporation
12-7
FlexMotion Software Reference Manual
Chapter 12
Onboard Programming Functions — flex_jump_label_on_condition
mustOn is the bitmap of bits that must be True to satisfy the condition.
D7
mustOn 7
D6
mustOn 6
D5
mustOn 5
D4
mustOn 4
D3
mustOn 3
D2
D1
mustOn 2
mustOn 1
D0
mustOn 0
For D0 through D7:
1 = Bit must be True
0 = Don’t care (default)
mustOff is the bitmap of bits that must be False to satisfy the condition.
D7
mustOff 7
D6
mustOff 6
D5
mustOff 5
D4
mustOff 4
D3
mustOff 3
D2
D1
mustOff 2
mustOff 1
D0
mustOff 0
For D0 through D7:
1 = Bit must be False
0 = Don’t care (default)
matchType selects the type of match required for the bitmap.
matchType Constant
matchType Value
NIMC_MATCH_ALL
0
NIMC_MATCH_ANY
1
NIMC_MATCH_ANY means that a match of any bit (logical OR) is sufficient to satisfy the
condition while NIMC_MATCH_ALL requires a complete pattern match (logical AND) of
all bits.
labelNumber is the arbitrary label number to jump to. Valid label numbers are from 1 to
65,535.
Using This Function
The Jump to Label on Condition function controls the flow of execution in a stored program
by defining a conditional jump to any label within the program. In addition to condition codes
set as the result of a previous data operations function, you can test virtually any instantaneous
status of axes or resources to decide whether to jump or not.
There are two distinct groups of conditions. The first group, conditions 0 through 6, test the
result of the most recent logical, mathematical or data transfer operations function. For these
FlexMotion Software Reference Manual
12-8
www.natinst.com
Chapter 12
Onboard Programming Functions — flex_jump_label_on_condition
conditions, the resource, mustOn, mustOff, and matchType parameters are not required and
their values are ignored.
Note You can program unconditional jumps by setting the condition to
NIMC_CONDITION_TRUE (6).
The second group, conditions 7 and above, test a specific multi-axis, multi-vector space,
multi-encoder, program, motion I/O, or general-purpose I/O status. Where applicable, you
can select the desired resource with the resource parameter.
NIMC_CONDITION_PROGRAM_COMPLETE is similar to the first condition group in
that mustOn, mustOff, and matchType parameters are not required and their values are
ignored. You set resource equal to the desired program number to test. The balance of the
conditions in this group test status bitmaps and function similar to each other as described in
the remainder of this section.
The mustOn, mustOff, and matchType parameters work together to define a bitmap of True
and False bits that must be matched to satisfy the condition. The matchType parameter
allows you to select between an OR match, where any matching bit is sufficient, and an AND
match, where all status bits must match the True/False bitmap defined by mustOn and
mustOff.
Using the MustOn/MustOff protocol gives you tri-state control over each match bit: True,
False or Don’t care. A one (1) in a bit location of the MustOn bitmap sets the match bit to
True, while a one (1) in the corresponding location of the MustOff bitmap resets the match bit
to False. A zero (0) in either bitmap has no affect, so leaving both the MustOn and MustOff
bits at zero defines the bit as Don’t care. If you set both the MustOn and MustOff bits to
one (1), it is interpreted as a MustOn condition and the match bit is set to True.
The NIMC_CONDITION_LIMIT_INPUT_ACTIVE and
NIMC_CONDITION_SOFTWARE_LIMIT_ACTIVE conditions create a combined status
bitmap where if either the forward or reverse limit is active, the bit is True.
Example
To perform a conditional jump to label 99 if either axis 3 is move complete or axis 5 is still
moving (move not complete), call the Jump to Label on Condition function with the following
parameters:
condition = NIMC_CONDITION_MOVE_COMPLETE (13)
mustOn = 0x08, which corresponds to the following bitmap
D7
D6
D5
D4
D3
D2
D1
D0
mustOn 7
mustOn 6
mustOn 5
mustOn 4
mustOn 3
mustOn 2
mustOn 1
mustOn 0
0
0
0
0
1
0
0
0
© National Instruments Corporation
12-9
FlexMotion Software Reference Manual
Chapter 12
Onboard Programming Functions — flex_jump_label_on_condition
mustOff = 0x20, which corresponds to the following bitmap
D7
D6
D5
D4
D3
D2
D1
D0
mustOff 7
mustOff 6
mustOff 5
mustOff 4
mustOff 3
mustOff 2
mustOff 1
mustOff 0
0
0
1
0
0
0
0
0
matchType = NIMC_MATCH_ANY (1)
labelNumber = 99
In this example, the move complete status of axes 1, 2, 4, and 6 are don’t care and the
matchType is set to match either axis 3 move complete (On) or axis 5 move not complete
(Off).
FlexMotion Software Reference Manual
12-10
www.natinst.com
Chapter 12
Onboard Programming Functions — flex_load_delay
flex_load_delay
Load Program Delay
Format
status = flex_load_delay (boardID, delayTime)
Purpose
Loads a delay into a program sequence.
Parameters
Input
Name
Type
Description
boardID
u8
assigned by Measurement & Automation Explorer
delayTime
u32
delay time in milliseconds
Parameter Discussion
delayTime is the desired delay in milliseconds. The range is from 1 to 231–1 ms.
Using This Function
The Load Program Delay function suspends program execution for the number of
milliseconds loaded. Program execution resumes after the delay. Delays can be as short as one
or two milliseconds or as long as hundreds of hours.
© National Instruments Corporation
12-11
FlexMotion Software Reference Manual
Chapter 12
Onboard Programming Functions — flex_pause_prog
flex_pause_prog
Pause/Resume Program
Format
status = flex_pause_prog (boardID, program)
Purpose
Pauses a running program or resumes execution of a paused program.
Parameters
Input
Name
Type
Description
boardID
u8
assigned by Measurement & Automation Explorer
program
u8
program number
Parameter Discussion
program is the program number. Valid program numbers are 0x01 through 0xFF (1 through
255).
Using This Function
The Pause/Resume Program function suspends execution of a running program or resumes
execution of a paused program.
A program can pause or resume another program and can also pause (but not resume) itself.
Note Pausing a program does not affect a move already started and in progress. It does not
implement a Stop Motion function.
Any run-time (modal) error in a program automatically pauses the program in addition to
generating the error message. For information about errors and error handling, refer to the
Read Error Message function and Chapter 4, Software Overview.
A program can also automatically pause if you execute a Stop Motion function from the host
computer on an axis or axes under control of the onboard program. In these cases, the program
pauses when it attempts to execute a Start Motion or Blend Motion function on the stopped
axes. This automatic pause also applies when the stop is due to a limit, home, software limit,
or following error condition.
You can effectively single-step through an onboard program by having the program pause
itself after every function, and then resuming the program from the host computer.
FlexMotion Software Reference Manual
12-12
www.natinst.com
Chapter 12
Onboard Programming Functions — flex_read_program_status
flex_read_program_status
Read Program Status
Format
status = flex_read_program_status (boardID, program, returnVector)
status = flex_read_program_status_rtn (boardID, program, programStatus)
Purpose
Reads the status of an onboard program.
Parameters
Input
Name
Type
Description
boardID
u8
assigned by Measurement & Automation Explorer
program
u8
program number
returnVector
u8
destination for the return data
Output
Name
programStatus
Type
u16
Description
status of specified program
Parameter Discussion
program is the program number. Valid program numbers are 0x01 through 0xFF (0 through
255).
returnVector indicates the desired destination for the return data generated by this function.
Available returnVectors include return data to the host (0xFF) and return data to a variable
(0x01 through 0x78).
Note The suffix _rtn on the function indicates that the data should be returned to the host.
When this calling convention is used, no returnVector is required.
© National Instruments Corporation
12-13
FlexMotion Software Reference Manual
Chapter 12
Onboard Programming Functions — flex_read_program_status
programStatus is the status of the specified program. Possible values are as follows.
Value
Definition
0
NIMC_PROGRAM_DONE
1
NIMC_PROGRAM_PLAYING
2
NIMC_PROGRAM_PAUSED
3
NIMC_PROGRAM_STORING
Using This Function
This function can be used to determine the state of an onboard program.
FlexMotion Software Reference Manual
12-14
www.natinst.com
Chapter 12
Onboard Programming Functions — flex_run_prog
flex_run_prog
Run Program
Format
status = flex_run_prog (boardID, program)
Purpose
Runs a previously stored program.
Parameters
Input
Name
Type
Description
boardID
u8
assigned by Measurement & Automation Explorer
program
u8
program number
Parameter Discussion
program is the program number. Valid program numbers are 0x01 through 0xFF
(0 through 255).
Using This Function
The Run Program function initiates execution of the functions stored in the selected program.
You can run programs out of either RAM or ROM. You can simultaneously run up to ten (10)
programs in the preemptive, multitasking environment of the FlexMotion controller.
A program can run another program but you cannot have a program run itself. Attempting to
store a recursive Run Program function in a program generates an error and does not store the
function.
© National Instruments Corporation
12-15
FlexMotion Software Reference Manual
Chapter 12
Onboard Programming Functions — flex_set_status_momo
flex_set_status_momo
Set User Status MOMO
Format
status = flex_set_status_momo (boardID, mustOn, mustOff)
Purpose
Controls the user status bits in the Move Complete Status (MCS) register.
Parameters
Input
Name
Type
Description
boardID
u8
assigned by Measurement & Automation Explorer
mustOn
u8
bitmap of user status bits to be forced True
mustOff
u8
bitmap of user status bits to be forced False
Parameter Discussion
mustOn is the bitmap of user status bits to be forced True.
D7
mustOn Sts15
D6
mustOn Sts14
D5
mustOn Sts13
D4
D3
D2
D1
0
0
0
0
D0
0
D5 through D7:
1 = User status bit forced True
0 = User status bit unchanged (default)
mustOff is the bitmap of user status bits to be forced False.
D7
mustOff Sts15
D6
mustOff Sts14
D5
mustOff Sts13
D4
D3
D2
D1
0
0
0
0
D0
0
D5 through D7:
1 = User status bit forced False
0 = User status bit unchanged (default)
FlexMotion Software Reference Manual
12-16
www.natinst.com
Chapter 12
Onboard Programming Functions — flex_set_status_momo
Using This Function
The Set User Status MOMO function controls the upper three bits in the Move Complete
Status (MCS) register using the mustOn/MustOff protocol. You can use this function in
programs to report special conditions back to the host computer by setting and resetting one
or more of these bits. Refer to the Read Move Complete Status function for more information
on using the MCS register for high-speed polling.
Using the MustOn/MustOff protocol allows you to set or reset individual user status bits
without affecting the other user status bits. This gives you tri-state control over each bit: True,
False, or Unchanged. A one (1) in a bit location of the MustOn bitmap sets the user status bit
high, while a one (1) in the corresponding location of the MustOff bitmap resets the user
status bit low. A zero (0) in either bitmap has no affect, so leaving both the MustOn and
MustOff bits at zero is effectively a hold, and the state of the user status bit is unchanged. If
you set both the MustOn and MustOff bits to one (1), it is interpreted as a MustOn condition
and the user status bit is set high.
Example
After a conditional jump in a program, you want the program to flag the host with a success
code. This can be accomplished by storing the Set User Status MOMO with mustOn = 0xA0
and mustOff = 0x40. This forces user status bits 13 and 15 True and user status bit 14 low.
A subsequent poll of the MCS register returns motionCompleteStatus = 0xC07E, which
corresponds to the following bitmap.
D15
D14
D13
D12
D11
D10
D9
D8
D7
D6
D5
D4
D3
D2
D1
Sts 15
Sts 14
Sts 13
XXX
XXX
XXX
XXX
XXX
XXX
MC 6
MC 5
MC 4
MC 3
MC 2
MC 1
XXX
1
0
1
0
0
0
0
0
0
1
1
1
1
1
1
0
© National Instruments Corporation
12-17
D0
FlexMotion Software Reference Manual
Chapter 12
Onboard Programming Functions — flex_stop_prog
flex_stop_prog
Stop Program
Format
status = flex_stop_prog (boardID, program)
Purpose
Stops a running program.
Parameters
Input
Name
Type
Description
boardID
u8
assigned by Measurement & Automation Explorer
program
u8
program number
Parameter Discussion
program is the program number. Valid program numbers are 0x01 through 0xFF
(1 through 255).
Using This Function
The Stop Program function terminates execution of a running program. You cannot resume a
stopped program but you can re-run the program from the beginning.
A program can stop another program but you cannot have a program stop itself. Attempting
to store a recursive Stop Program function in a program generates an error and does not store
the function.
Note Stopping a program does not affect a move already started and in progress. It does
not implement a Stop Motion function.
FlexMotion Software Reference Manual
12-18
www.natinst.com
Chapter 12
Onboard Programming Functions — flex_wait_on_condition
flex_wait_on_condition
Wait on Condition
Format
status = flex_wait_on_condition (boardID, resource, waitType, condition, mustOn, mustOff,
matchType, timeOut, returnVector)
Purpose
Inserts a conditional wait in a program.
Parameters
Input
Name
Type
Description
boardID
u8
assigned by Measurement & Automation Explorer
resource
u8
axis, vector space or other resource
waitType
u16
selector for type of wait
condition
u16
qualifying condition to end the wait
mustOn
u8
bitmap of bits that must be True
mustOff
u8
bitmap of bits that must be False
matchType
u16
selector for type of match required
timeOut
u16
timeout value in 100 millisecond increments
returnVector
u8
destination for the return data
Parameter Discussion
resource is the axis, vector space, or other resource involved in the condition.
waitType is the selector for the type of wait to perform.
waitType Constant
waitType Value
NIMC_WAIT
0
NIMC_WAIT_OR
1
NIMC_WAIT_OR allows you to combine multiple, unrelated wait conditions into one wait
where the program is waiting for condition 1 OR condition 2 OR condition 3 and so on.
© National Instruments Corporation
12-19
FlexMotion Software Reference Manual
Chapter 12
Onboard Programming Functions — flex_wait_on_condition
condition is the qualifying condition to end the wait.
condition Constant
condition Value
Valid resource
NIMC_CONDITION_HOME_FOUND
7
N/A
NIMC_CONDITION_INDEX_FOUND
8
N/A
NIMC_CONDITION_HIGH_SPEED_
CAPTURE
9
0 (axes) or
0x20 (encoders)
NIMC_CONDITION_POSITION_
BREAKPOINT
10
0 (axes) or
0x20 (encoders)
Reserved
11
N/A
NIMC_CONDITION_VELOCITY_
THRESHOLD
12
N/A
NIMC_CONDITION_MOVE_COMPLETE
13
N/A
NIMC_CONDITION_PROFILE_
COMPLETE
14
N/A
NIMC_CONDITION_BLEND_COMPLETE
15
0 (axes) or
0x10 (vector
spaces)
NIMC_CONDITION_MOTOR_OFF
16
N/A
NIMC_CONDITION_HOME_INPUT_
ACTIVE
17
N/A
NIMC_CONDITION_LIMIT_INPUT_
ACTIVE
18
N/A
NIMC_CONDITION_SOFTWARE_LIMIT_
ACTIVE
19
N/A
NIMC_CONDITION_PROGRAM_
COMPLETE
20
program
NIMC_CONDITION_IO_PORT_MATCH
21
I/O port 1 or 2
Note Conditions 0 through 6 are not applicable to waits and generate an error.
FlexMotion Software Reference Manual
12-20
www.natinst.com
Chapter 12
Onboard Programming Functions — flex_wait_on_condition
mustOn is the bitmap of bits that must be True to satisfy the condition.
D7
mustOn 7
D6
mustOn 6
D5
mustOn 5
D4
mustOn 4
D3
mustOn 3
D2
D1
mustOn 2
mustOn 1
D0
mustOn 0
For D0 through D7:
1 = Bit must be True
0 = Don’t care (default)
mustOff is the bitmap of bits that must be False to satisfy the condition.
D7
mustOff 7
D6
mustOff 6
D5
mustOff 5
D4
mustOff 4
D3
mustOff 3
D2
D1
mustOff 2
mustOff 1
D0
mustOff 0
For D0 through D7:
1 = Bit must be False
0 = Don’t care (default)
matchType selects the type of match required for the bitmap.
matchType Constant
matchType Value
NIMC_MATCH_ALL
0
NIMC_MATCH_ANY
1
NIMC_MATCH_ANY means that a match of any bit (logical OR) is sufficient to satisfy the
condition while NIMC_MATCH_ALL requires a complete pattern match (logical AND) of
all bits.
timeOut is the wait timeout value in 100 millisecond increments. The range is 0 to 65,535 for
a maximum timeout of over 100 minutes.
returnVector indicates the desired destination for the return data generated by this function.
Available returnVectors include return data to the host (0xFF), return data to a variable
(0x01 through 0x78), and don’t return data (0).
Using This Function
The Wait on Condition function controls the flow of execution in a stored program. It
suspends program execution and waits until the specified condition is met or the timeout
expires. When the condition is met, program execution is resumed with the next function after
the Wait on Condition.
© National Instruments Corporation
12-21
FlexMotion Software Reference Manual
Chapter 12
Onboard Programming Functions — flex_wait_on_condition
If the timeout expires before the condition is met, an error is generated and the program goes
into the paused state. For information about resuming a paused program, see the
Pause/Resume Program function.
If you set a timeout of zero, the condition must already be true or an error is generated.
You can wait on virtually any instantaneous status of axes, vector spaces, encoders, programs,
motion I/O, or general-purpose I/O. Where applicable, you can select the desired resource
with the resource parameter.
When waiting on a program with the NIMC_CONDITION_PROGRAM_COMPLETE
condition, mustOn, mustOff, and matchType parameters are not required and their values
are ignored. You set resource equal to the desired program number to wait on. The balance of
the conditions test status bitmaps and function similar to each other as described in the
remainder of this section.
The mustOn, mustOff, and matchType parameters work together to define a bitmap of True
and False bits that must be matched to satisfy the condition. The matchType parameter allow
you to select between an OR match, where any matching bit is sufficient, and an AND match,
where all status bits must match the True/False bitmap defined by MustOn and MustOff.
Using the MustOn/MustOff protocol gives you tri-state control over each match bit: True,
False or Don’t care. A one (1) in a bit location of the MustOn bitmap sets the match bit to
True, while a one (1) in the corresponding location of the MustOff bitmap resets the match bit
to False. A zero (0) in either bitmap has no affect, so leaving both the MustOn and MustOff
bits at zero defines the bit as Don’t care. If you set both the MustOn and MustOff bits to
one (1), it is interpreted as a MustOn condition and the match bit is set to True.
The NIMC_CONDITION_LIMIT_INPUT_ACTIVE and
NIMC_CONDITION_SOFTWARE_LIMIT_ACTIVE conditions create a combined status
bitmap where if either the forward or reverse limit is active, the bit is True.
When the returnVector is set to anything other than zero (0), the condition code and status
bitmap that satisfied the condition are returned to the destination specified, either to a variable
or the host computer, as two 16-bit words (u16). In the host computer, they can then be read
from the RDB with the Communicate function. This feature is useful when debugging
programs.
Waits are one of the most powerful and useful features on the FlexMotion controller. While a
program is suspended waiting for a condition, FlexMotion is not wasting CPU cycles on it.
The preemptive multitasking real-time operating system (RTOS) on the FlexMotion
controller suspends the task until the condition is met or the timeout expires. This feature
allows up to 10 programs to be running simultaneously with little impact on function
execution performance.
FlexMotion Software Reference Manual
12-22
www.natinst.com
Chapter 12
Onboard Programming Functions — flex_wait_on_condition
To perform a conditional wait on two unrelated conditions, store the Wait on Condition
function twice—the first with waitType = NIMC_WAIT_OR and the second with
waitType = NIMC_WAIT.
Note Two sequential Wait on Condition functions both with waitType = NIMC_WAIT
effectively implement a Wait AND, because both wait conditions must evaluate
successfully before program execution is resumed.
Example
In program one, you want to wait until axes 1 through 4 have found home or until program
two is complete. To accomplish this, store a Wait on Condition function with the following
parameters:
waitType = NIMC_WAIT_OR
condition = NIMC_CONDITION_HOME_FOUND (7)
mustOn = 0x1E, which corresponds to the following bitmap
D7
D6
D5
mustOn 7
mustOn 6
mustOn 5
0
0
0
D4
mustOn 4
1
D3
mustOn 3
1
D2
mustOn 2
D1
mustOn 1
1
D0
mustOn 0
1
0
D1
D0
mustOff = 0x00, which corresponds to the following bitmap
D7
D6
mustOff 7
mustOff 6
0
0
D5
mustOff 5
D4
mustOff 4
0
0
D3
D2
mustOff 3
mustOff 2
mustOff 1
mustOff 0
0
0
0
0
matchType = NIMC_MATCH_ALL (0)
timeOut = 100 (timeout after 10 s)
returnVector = 0 (throw the status away)
Immediately follow this with a second Wait on Condition function with the following
parameters:
resource = 2 (for program two)
waitType = NIMC_WAIT
condition = NIMC_CONDITION_PROGRAM_COMPLETE (20)
timeOut = 100 (timeout after 10 s)
returnVector = 0 (throw the status away)
In this example, the home found status of axes 5 and 6 is don’t care.
© National Instruments Corporation
12-23
FlexMotion Software Reference Manual
Chapter 12
Onboard Programming Functions — Object Management Functions
Object Management Functions
This subsection contains detailed descriptions of functions to organize,
annotate, and save program objects to Flash ROM. These advanced
functions are primarily used for applications that require non-volatile
program storage. You can run programs out of RAM without using any of
these functions.
These functions are arranged alphabetically by function name. As a quick
reference, a summary of the entire FlexMotion function API is in
Appendix B, FlexMotion Functions.
FlexMotion Software Reference Manual
12-24
www.natinst.com
Chapter 12
Onboard Programming Functions — flex_load_description
flex_load_description
Load Memory Object Description
Format
status = flex_load_description (boardID, object, description)
Purpose
Loads a ASCII text description for a program or other memory object.
Parameters
Input
Name
Type
Description
boardID
u8
assigned by Measurement & Automation Explorer
object
u8
program or other memory object
description
[i8]
ASCII character array describing the object
Parameter Discussion
object is a program or other memory object stored in onboard RAM or ROM.
description is an ASCII character array of up to 32 characters that describes the object.
Using This Function
The Load Memory Object Description function loads a text description for a program or other
memory object. The ASCII text description is useful as a quick reminder of the contents or
purpose of a program or other memory object stored in memory.
Note This function must be executed while the object is still in RAM. Once the object is
saved to ROM, its description cannot be changed.
The description is limited to 32 characters; extra characters are ignored. You can retrieve the
stored description with the Read Memory Object Description function.
© National Instruments Corporation
12-25
FlexMotion Software Reference Manual
Chapter 12
Onboard Programming Functions — flex_object_mem_manage
flex_object_mem_manage
Object Memory Management
Format
status = flex_object_mem_manage (boardID, object, operation)
Purpose
Saves, deletes, or frees programs or other memory objects in RAM and ROM.
Parameters
Input
Name
Type
Description
boardID
u8
assigned by Measurement & Automation Explorer
object
u8
program or other memory object
operation
u16
operation to perform on the object
Parameter Discussion
object is a program or other memory object stored in onboard RAM or ROM.
operation is the operation to perform on the memory object.
operation Constant
operation Value
NIMC_OBJECT_SAVE
0
NIMC_OBJECT_DELETE
1
NIMC_OBJECT_FREE
2
Using This Function
The Object Memory Management function is used to save to ROM, delete from ROM, or free
from RAM, a program or other memory object. Objects saved to non-volatile Flash ROM are
available for use at any future time, even after power cycles.
To save an object to ROM, call this function with operation = NIMC_OBJECT_SAVE. The
object is copied to ROM and exists in both RAM and ROM until the next power cycle. When
that occurs, the RAM image is erased and the ROM version persists.
FlexMotion Software Reference Manual
12-26
www.natinst.com
Chapter 12
Onboard Programming Functions — flex_object_mem_manage
To remove an object from ROM, call this function with
operation = NIMC_OBJECT_DELETE. The object is deleted from both ROM and RAM
(if it still exists in RAM).
Once you have saved an object to ROM, you can free up its space in RAM by calling this
function with operation = NIMC_OBJECT_FREE. This has no effect on the copy in ROM
but deletes the image in RAM, making more memory available for storing additional
programs or other objects.
Note You cannot save or delete a program while any other program is running. Also, you
cannot free a program while it is running. In addition, you cannot save or delete a program
when any motor is moving. Attempting to execute this function in these cases generates an
error. Saving or deleting a program takes 2 to 4 seconds.
The FlexMotion-6C controller has 32 KB of RAM plus 32 KB of ROM for program and
object storage. You can run programs from either RAM or ROM, but you cannot split
programs between the two. With an average command size of 10 bytes, a single program can
be as large as 3,200 commands. Conversely, the FlexMotion-6C controller can simultaneously
execute 10 programs, five from RAM and five from ROM, each 640 functions long.
The 7344 controller has 64 KB of RAM plus 128 KB of ROM (divided into two 64 KB
sectors) for program and object storage. You can run programs from either RAM or ROM, but
you cannot split programs between the two, and you cannot split programs between the two
64 KB ROM sectors. With an average command size of 10 bytes, a single program can be as
large as 6,400 commands. As another example, the 7344 controller can simultaneously
execute 10 programs, five from RAM and five from ROM, with each program up to 1,280
commands long.
© National Instruments Corporation
12-27
FlexMotion Software Reference Manual
Chapter 12
Onboard Programming Functions — flex_read_description_rtn
flex_read_description_rtn
Read Memory Object Description
Format
status = flex_read_description_rtn (boardID, object, description)
Purpose
Reads the ASCII text description for a program or other memory object. This ASCII text
description was load with the Load Memory Object Description function and is useful for a
quick reference or reminder of the contents or function of an array or program stored in
memory.
Parameters
Input
Name
Type
Description
boardID
u8
assigned by Measurement & Automation Explorer
object
u8
program or other memory object
Output
Name
description
Type
[i8]
Description
ASCII character array describing the object
Parameter Discussion
object is a program or other memory object stored in onboard RAM or ROM.
description is an ASCII character array of up to 32 characters that describes the object.
Using This Function
The Read Memory Object Description function returns the ASCII text description for a
program or other memory object. The ASCII text description, previously loaded with the
Load Memory Object Description function, is useful as a quick reminder of the contents or
purpose of a program or other memory object stored in memory.
FlexMotion Software Reference Manual
12-28
www.natinst.com
Chapter 12
Onboard Programming Functions — flex_read_registry_rtn
flex_read_registry_rtn
Read Object Registry
Format
status = flex_read_registry_rtn (boardID, index, registryRecord)
Purpose
Reads a data record for a memory object from the Object Registry.
Parameters
Input
Name
Type
Description
boardID
u8
assigned by Measurement & Automation
Explorer
index
u8
registry record number
Output
Name
registryRecord
Type
Description
REGISTRY FAR *
data record containing information about the
memory object
Parameter Discussion
index is the registry record number. The range for index is 0 to 31.
registryRecord is the data record containing object information in the following structure:
struct {
u16 device;// Object number
u16 type;// Object type
u32 pstart;// Start address in RAM or ROM
u32 size;// Size of object in words
} REGISTRY;
Object type tells you the type of object stored. Presently only objects of program type are
supported. The start address and object size are returned in hex. Size is in number or 16-bit
words.
© National Instruments Corporation
12-29
FlexMotion Software Reference Manual
Chapter 12
Onboard Programming Functions — flex_read_registry_rtn
Using This Function
The Read Object Registry function returns a registry record for an object from the Object
Registry. The Object Registry contains information on all objects stored in memory. You can
store up to 32 objects in RAM and/or ROM. Each time an object is stored, a new record is
created to keep track of it.
Registry records are referenced by index and each call to this function returns information
on the referenced object. The index is not the same as the object number. You can use up to
255 unique object numbers (0x01 through 0xFF) but only 32 objects can be stored in memory
at one time.
FlexMotion Software Reference Manual
12-30
www.natinst.com
Chapter 12
Onboard Programming Functions — Data Operations Functions
Data Operations Functions
This subsection contains detailed descriptions of the available math
functions on general-purpose variables. Variables can be loaded, added,
multiplied, ANDed, and so on before being used as data in a motion control
function.
General-purpose variables are 32 bits long and can be used either signed
(i32) or unsigned (u32). All functions in this section operate on 32-bit
values and return 32-bit values. You must be careful to avoid overflow and
underflow conditions. For example, multiplying two 32-bit variables and
returning the result to a 32-bit variable might overflow and wrap around.
Smaller sized data is right aligned within a 32-bit variable. Bitwise logical
functions always assume this alignment and return similarly aligned
results.
Many FlexMotion functions can take input data from a general-purpose
variable by pointing to the variable with the input vector parameter.
Similarly, all read functions can return data to a general-purpose variable
by using the return vector parameter. See Chapter 4, Software Overview,
for a detailed description of input and return vectors.
All data operation functions set condition codes (less than, equal to or
greater than zero) depending on the result of the operation. Your program
can test these conditions with the Jump to Label on Condition function.
Executing a data operations function with a return vector of zero (0) tells
the program to set the condition code and then throw the resulting data
away. In this way, you can use all the data operations functions as tests for
conditional branching.
These functions are arranged alphabetically by function name. As a quick
reference, a summary of the entire FlexMotion function API is in
Appendix B, FlexMotion Functions.
© National Instruments Corporation
12-31
FlexMotion Software Reference Manual
Chapter 12
Onboard Programming Functions — flex_add_vars
flex_add_vars
Add Variables
Format
status = flex_add_vars (boardID, variable1, variable2, returnVector)
Purpose
Adds the values in the two variables and returns the result.
Parameters
Input
Name
Type
Description
boardID
u8
assigned by Measurement & Automation Explorer
variable1
u8
first operand
variable2
u8
second operand
returnVector
u8
destination for the result
Parameter Discussion
variable1 is the variable holding of the first operand. Valid variables are 0x01 through 0x78.
variable2 is the variable holding the second operand. Valid variables are 0x01 through 0x78.
returnVector indicates the desired destination for the result of this function. Available
returnVectors include return data to the host (0xFF), return data to a variable (0x01 through
0x78), and don’t return data (0).
Using This Function
The Add Variables function adds the values in the two variables and returns the result to the
destination specified by the returnVector.
returnVector → value = variable1 → value + variable2 → value
The result can be returned to a new variable or one of the two input variables, returned to the
host computer or thrown away. In all cases the condition codes are set according to the
resulting value, GREATER THAN, LESS THAN, or EQUAL to zero.
FlexMotion Software Reference Manual
12-32
www.natinst.com
Chapter 12
Onboard Programming Functions — flex_and_vars
flex_and_vars
AND Variables
Format
status = flex_and_vars (boardID, variable1, variable2, returnVector)
Purpose
Performs a bitwise AND of the values in the two variables and returns the result.
Parameters
Input
Name
Type
Description
boardID
u8
assigned by Measurement & Automation Explorer
variable1
u8
first operand
variable2
u8
second operand
returnVector
u8
destination for the result
Parameter Discussion
variable1 is the variable holding of the first operand. Valid variables are 0x01 through 0x78.
variable2 is the variable holding the second operand. Valid variables are 0x01 through 0x78.
returnVector indicates the desired destination for the result of this function. Available
returnVectors include return data to the host (0xFF), return data to a variable (0x01 through
0x78), and don’t return data (0).
Using This Function
The AND Variables function performs a bitwise logical AND of the values in the two
variables and returns the result to the destination specified by the returnVector.
returnVector → value = variable1 → value AND variable2 → value
The result can be returned to a new variable or one of the two input variables, returned to the
host computer, or thrown away. In all cases the EQUAL condition code is set True if the result
equals zero (all bits low) and False if any bit is set. The GREATER THAN and LESS THAN
codes are also set but can be confusing after logical bitwise operations.
Example
If the values in variable1 and variable2 are 0x0000 1234 and 0x0000 EEEE, respectively,
the result of the bitwise AND is 0x0000 0224 which is NOT EQUAL to zero.
© National Instruments Corporation
12-33
FlexMotion Software Reference Manual
Chapter 12
Onboard Programming Functions — flex_div_vars
flex_div_vars
Divide Variables
Format
status = flex_div_vars (boardID, variable1, variable2, returnVector)
Purpose
Divides the value in the first variable by the value in the second variable and returns the result.
Parameters
Input
Name
Type
Description
boardID
u8
assigned by Measurement & Automation Explorer
variable1
u8
dividend
variable2
u8
divisor
returnVector
u8
destination for the result
Parameter Discussion
variable1 is the variable holding of the dividend. Valid variables are 0x01 through 0x78.
variable2 is the variable holding the divisor. Valid variables are 0x01 through 0x78.
returnVector indicates the desired destination for the result of this function. Available
returnVectors include return data to the host (0xFF), return data to a variable (0x01 through
0x78), and don’t return data (0).
Using This Function
The Divide Variables function divides the value in the first variable by the value in the second
variable and returns the result to the destination specified by the returnVector.
returnVector → value = variable1 → value/variable2 → value
The result can be returned to a new variable or one of the two input variables, returned to the
host computer or thrown away. In all cases the condition codes are set according to the
resulting value, GREATER THAN, LESS THAN, or EQUAL to zero.
Note This function does an integer divide and the remainder is lost.
FlexMotion Software Reference Manual
12-34
www.natinst.com
Chapter 12
Onboard Programming Functions — flex_load_var
flex_load_var
Load Constant to Variable
Format
status = flex_load_var (boardID, value, variable1)
Purpose
Loads a constant value into a variable.
Parameters
Input
Name
Type
Description
boardID
u8
assigned by Measurement & Automation Explorer
value
i32
value to be loaded into the variable
variable1
u8
variable to be loaded
Parameter Discussion
value is the value to be loaded into the variable.
variable1 is the variable to be loaded. Valid variables are 0x01 through 0x78.
Using This Function
The Load Constant to Variable function loads a constant value into the selected variable.
variable1 → value = constant value
The condition codes are set according to the loaded value, GREATER THAN, LESS THAN,
or EQUAL to zero.
© National Instruments Corporation
12-35
FlexMotion Software Reference Manual
Chapter 12
Onboard Programming Functions — flex_lshift_var
flex_lshift_var
Logical Shift Variable
Format
status = flex_lshift_var (boardID, variable1, logicalShift, returnVector)
Purpose
Performs a logical shift on the value in a variable and returns the result.
Parameters
Input
Name
Type
Description
boardID
u8
assigned by Measurement & Automation Explorer
variable1
u8
variable holding the value to be shifted
logicalShift
i8
number of bits to shift
returnVector
u8
destination for the result
Parameter Discussion
variable1 is the variable holding the value to be shifted. Valid variables are 0x01 through
0x78.
logicalShift is the number of bits to shift. A positive logicalShift value shifts variable1 to the
left and a negative value shifts variable1 to the right. The shift range is –31 through +31 bits.
returnVector indicates the desired destination for the result of this function. Available
returnVectors include return data to the host (0xFF), return data to a variable (0x01 through
0x78), and don’t return data (0).
Using This Function
The Logical Shift Variable function performs a logical shift on the value in the selected
variable and returns the result to the destination specified by the returnVector.
For positive logicalShift values:
returnVector → value = variable1 → value << (logicalShift)
FlexMotion Software Reference Manual
12-36
www.natinst.com
Chapter 12
Onboard Programming Functions — flex_lshift_var
For negative logicalShift values:
returnVector → value = variable1 >> (–logicalShift)
The result can be returned to a new variable or to the input variable, returned to the host
computer or thrown away. In all cases the condition codes are set according to the resulting
value, GREATER THAN, LESS THAN, or EQUAL to zero.
This function actually performs an arithmetic rather than logical shift if the variable is a
signed 32-bit value (i32). Negative values are sign-extended when shifted to the right. You can
use this function to perform division or scaling of signed or unsigned numbers. In this case
the function effectively performs the following:
returnVector = variable1 × 2(logicalShift)
Example 1
If the value in variable1 is 0x0000 F002 and logicalShift = –1, this function returns
0x00007801.
Example 2
If the value in variable1 is 0xFFFF F002 and logicalShift = –1, this function returns
0xFFFFF801. The sign of the value is preserved by sign-extension.
© National Instruments Corporation
12-37
FlexMotion Software Reference Manual
Chapter 12
Onboard Programming Functions — flex_mult_vars
flex_mult_vars
Multiply Variables
Format
status = flex_mult_vars (boardID,variable1, variable2, returnVector)
Purpose
Multiplies the values in the two variables and returns the result.
Parameters
Input
Name
Type
Description
boardID
u8
assigned by Measurement & Automation Explorer
variable1
u8
first operand
variable2
u8
second operand
returnVector
u8
destination for the result
Parameter Discussion
variable1 is the variable holding of the first operand. Valid variables are 0x01 through 0x78.
variable2 is the variable holding the second operand. Valid variables are 0x01 through 0x78.
returnVector indicates the desired destination for the result of this function. Available
returnVectors include return data to the host (0xFF), return data to a variable (0x01 through
0x78), and don’t return data (0).
Using This Function
The Multiply Variables function multiplies the values in the two variables and returns the
result to the destination specified by the returnVector.
returnVector → value = variable1 → value × variable2 → value
The result can be returned to a new variable or one of the two input variables, returned to the
host computer or thrown away. In all cases the condition codes are set according to the
resulting value, GREATER THAN, LESS THAN, or EQUAL to zero.
Note Be careful when multiplying two large values. The result can overflow and wrap
around. An error is not generated when an overflow occurs.
FlexMotion Software Reference Manual
12-38
www.natinst.com
Chapter 12
Onboard Programming Functions — flex_not_var
flex_not_var
Invert Variable
Format
status = flex_not_var (boardID, variable1, returnVector)
Purpose
Performs a bitwise inversion (NOT) on the value in a variable and returns the result.
Parameters
Input
Name
Type
Description
boardID
u8
assigned by Measurement & Automation Explorer
variable1
u8
variable to be inverted
returnVector
u8
destination for the result
Parameter Discussion
variable1 is the location of the variable to be inverted. Valid variables are 0x01 through 0x78.
returnVector indicates the desired destination for the result of this function. Available
returnVectors include return data to the host (0xFF), return data to a variable (0x01 through
0x78), and don’t return data (0).
Using This Function
The Invert Variable function performs a bitwise logical NOT on the value in the selected
variable and returns the result to the destination specified by the returnVector.
returnVector → value = ~(variable1 → value)
The result can be returned to a new variable or to the input variable, returned to the host
computer or thrown away. In all cases the EQUAL condition code is set True if the result
equals zero (all bits low) and False if any bit is set. The GREATER THAN and LESS THAN
codes are also set but can be confusing after logical bitwise operations.
Example
If the value in variable1 is 0x0000 5A5A, the result of the bitwise NOT is 0xFFFF A5A5.
The EQUAL condition code is set to False.
© National Instruments Corporation
12-39
FlexMotion Software Reference Manual
Chapter 12
Onboard Programming Functions — flex_or_vars
flex_or_vars
OR Variables
Format
status = flex_or_var (boardID, variable1, variable2, returnVector)
Purpose
Performs a bitwise OR of the values in the two variables and returns the result.
Parameters
Input
Name
Type
Description
boardID
u8
assigned by Measurement & Automation Explorer
variable1
u8
first operand
variable2
u8
second operand
returnVector
u8
destination for the result
Parameter Discussion
variable1 is the variable holding of the first operand. Valid variables are 0x01 through 0x78.
variable2 is the variable holding the second operand. Valid variables are 0x01 through 0x78.
returnVector indicates the desired destination for the result of this function. Available
returnVectors include return data to the host (0xFF), return data to a variable (0x01 through
0x78), and don’t return data (0).
Using This Function
The OR Variables function performs a bitwise logical OR of the values in the two variables
and returns the result to the destination specified by the returnVector.
returnVector → value = variable1 → value OR variable2 → value
The result can be returned to a new variable or one of the two input variables, returned to the
host computer or thrown away. In all cases the EQUAL condition code is set True if the result
equals zero (all bits low) and False if any bit is set. The GREATER THAN and LESS THAN
codes are also set but can be confusing after logical bitwise operations.
Example
If the values in variable1 and variable2 are 0x5A5A 1234 and 0x8282 0000, respectively,
the result of the bitwise OR is 0xDADA 1234, which is NOT EQUAL to zero.
FlexMotion Software Reference Manual
12-40
www.natinst.com
Chapter 12
Onboard Programming Functions — flex_read_var and flex_read_var_rtn
flex_read_var and
flex_read_var_rtn
Read Variable
Format
status = flex_read_var (boardID, variable1, returnVector)
status = flex_read_var_rtn (boardID, variable1, value)
Purpose
Reads the value of a variable and returns the result.
Parameters
Input
Name
Type
Description
boardID
u8
assigned by Measurement & Automation Explorer
variable1
u8
variable to be read
returnVector
u8
destination for the return data
Output
Name
value
Type
i32
Description
value of the variable
Parameter Discussion
variable1 is the variable to be read. Valid variables are 0x01 through 0x78.
returnVector indicates the desired destination for the result of this function. Available
returnVectors include return data to the host (0xFF), return data to a variable (0x01 through
0x78), and don’t return data (0).
Note The suffix _rtn on the function indicates that the data should be returned to the host.
When this calling convention is used, no returnVector is required.
value is the value of the variable.
© National Instruments Corporation
12-41
FlexMotion Software Reference Manual
Chapter 12
Onboard Programming Functions — flex_read_var and flex_read_var_rtn
Using This Function
The Read Variable function reads the value of the selected variable and returns it to the
destination specified by the returnVector.
returnVector → value = variable1 → value
or
value = variable1 → value
The condition codes are set according to the value read: GREATER THAN, LESS THAN,
or EQUAL to zero.
FlexMotion Software Reference Manual
12-42
www.natinst.com
Chapter 12
Onboard Programming Functions — flex_sub_vars
flex_sub_vars
Subtract Variables
Format
status = flex_sub_vars (boardID, variable1, variable2, returnVector)
Purpose
Subtracts the value of second variable from the value of the first variable and returns the
result.
Parameters
Input
Name
Type
Description
boardID
u8
assigned by Measurement & Automation Explorer
variable1
u8
first operand
variable2
u8
second operand
returnVector
u8
destination for the result
Parameter Discussion
variable1 is the variable holding of the first operand. Valid variables are 0x01 through 0x78.
variable2 is the variable holding the second operand. Valid variables are 0x01 through 0x78.
returnVector indicates the desired destination for the result of this function. Available
returnVectors include return data to the host (0xFF), return data to a variable (0x01 through
0x78), and don’t return data (0).
Using This Function
The Subtract Variables function subtracts the value of second variable from the value of the
first variable and returns the result to the destination specified by the returnVector.
returnVector → value = variable1 → value – variable2 → value
The result can be returned to a new variable or one of the two input variables, returned to the
host computer or thrown away. In all cases the condition codes are set according to the
resulting value, GREATER THAN, LESS THAN, or EQUAL to zero.
This function is often used to compare two values prior to executing a conditional jump with
the Jump to Label on Condition function. In this case, the result is typically thrown away by
setting returnVector = 0.
© National Instruments Corporation
12-43
FlexMotion Software Reference Manual
Chapter 12
Onboard Programming Functions — flex_xor_vars
flex_xor_vars
Exclusive OR Variables
Format
status = flex_xor_vars (boardID, variable1, variable2, returnVector)
Purpose
Performs a bitwise Exclusive OR (XOR) of the values in the two variables and returns the
result.
Parameters
Input
Name
Type
Description
boardID
u8
assigned by Measurement & Automation Explorer
variable1
u8
first operand
variable2
u8
second operand
returnVector
u8
destination for the result
Parameter Discussion
variable1 is the variable holding of the first operand. Valid variables are 0x01 through 0x78.
variable2 is the variable holding the second operand. Valid variables are 0x01 through 0x78.
returnVector indicates the desired destination for the result of this function. Available
returnVectors include return data to the host (0xFF), return data to a variable (0x01 through
0x78), and don’t return data (0).
Using This Function
The Exclusive OR Variables function performs a bitwise logical XOR of the values in the two
variables and returns the result to the destination specified by the returnVector.
returnVector → value = variable1 → value XOR variable2 → value
The result can be returned to a new variable or one of the two input variables, returned to the
host computer or thrown away. In all cases the EQUAL condition code is set True if the result
equals zero (all bits low) and False if any bit is set. The GREATER THAN and LESS THAN
codes are also set but can be confusing after logical bitwise operations.
Example
If the values in variable1 and variable2 are 0x5A5A 1234 and 0xFFFF 4321, respectively,
the result of the bitwise XOR is 0xA5A5 5115, which is NOT EQUAL to zero.
FlexMotion Software Reference Manual
12-44
www.natinst.com
Advanced Functions
13
This chapter contains detailed descriptions of advanced functions used to
control the communications between the host computer and FlexMotion
controller. The functions are arranged alphabetically by function name.
These functions allow you to check the status of communications, control
host interrupts, clear the Return Data Buffer (RDB), and manage the
low-level communications to the controller. You will typically not have to
use any of these functions because the default configuration is correct for
almost all applications. These functions are available to handle special
applications.
This chapter also describes two utility functions that are regularly used but
are different from the rest of the FlexMotion API in that they are not
typically included in application code: Clear Power Up Status and Save
Default Parameters.
As a quick reference, a summary of the entire FlexMotion function API is
in Appendix B, FlexMotion Functions.
© National Instruments Corporation
13-1
FlexMotion Software Reference Manual
Chapter 13
Advanced Functions — flex_clear_pu_status
flex_clear_pu_status
Clear Power Up Status
Format
status = flex_clear_pu_status (boardID)
Purpose
Clears the Power-Up status bit and boots up the controller, making it ready to accept
functions.
Parameters
Input
Name
Type
Description
u8
assigned by Measurement & Automation Explorer
boardID
Using This Function
Whenever the FlexMotion controller is reset by a power cycle, watchdog timeout, or other
means, the controller is suspended in a Power-Up state and a Power-Up status bit in the
Communications Status Register (CSR) is set. The Clear Power Up Status function is used to
clear this bit and ready the controller for motion control communications.
You cannot execute other motion control functions until the Power-Up status bit has been
cleared by using this function. This lockout ensures that you are aware of the occurrence of
an unexpected reset, as in the case of a watchdog timeout.
You can include this function once at the beginning of an initialization routine, but should not
be included in other routines to avoid the possibility of restarting an application unexpectedly
after a power cycle or watchdog timeout.
When the FlexMotion controller is in the Power-Up state, the Move Complete Status (MCS)
register contains a power-up code that describes why the controller is in the Power-Up state.
To access this code, execute the Read Move Complete Status function. The following table
describes the power-up codes.
Code
Reset Type
Cause
0x80
Bus reset
Normal PC power cycle
0x40
Power-Up reset
Normal PC power cycle
0x20
Watchdog timeout
Fatal internal error
FlexMotion Software Reference Manual
13-2
www.natinst.com
Chapter 13
Code
Advanced Functions — flex_clear_pu_status
Reset Type
Cause
0x08
Shutdown
Shutdown input active; refer to the Enable
Shutdown function
0x02
Software reset
Firmware download
© National Instruments Corporation
13-3
FlexMotion Software Reference Manual
Chapter 13
Advanced Functions — flex_communicate
flex_communicate
Communicate
Format
status = flex_communicate (boardID, mode, wordCount, resource, command, data, vector)
Purpose
Sends and receives command packets to/from the FlexMotion controller.
Parameters
Input
Name
Type
Description
boardID
u8
assigned by Measurement & Automation Explorer
mode
u8
selects send command only, read RDB only or
both send command and read RDB
wordCount
u8
number of 16-bit words in the command packet
vector
u8
source of the data for this function or destination
for the return data
Type
Description
Input/Output
Name
resource
u8
axis, vector space, encoder, ADC channel,
program or other resource
command
u16
command ID for the function
data
FlexMotion Software Reference Manual
[u16]
array of data to/from the controller
13-4
www.natinst.com
Chapter 13
Advanced Functions — flex_communicate
Parameter Discussion
mode selects the communications mode for the function.
mode Constant
mode Value
Description
NIMC_SEND_COMMAND
0
send the command packet only
NIMC_SEND_AND_READ
1
send the command packet and then
read the RDB
NIMC_READ_RDB
2
read the RDB only
wordCount is the number of 16-bit words in the command packet. Appendix B, FlexMotion
Functions, lists the word counts for all the FlexMotion API functions.
resource is the axis, vector space, encoder, ADC channel, DAC, program, or other resource
on the FlexMotion controller.
command is the command ID for the function. Appendix B, FlexMotion Functions, lists the
command IDs for all the FlexMotion API functions.
data is an array of 16-bit data words. Depending upon mode, this data is either sent to the
controller, received from the RDB or both.
vector is either an inputVector or a returnVector.
inputVector indicates the source of the data for this function. Available inputVectors include
immediate (0xFF) or variable (0x01 through 0x78).
returnVector indicates the desired destination for the return data generated by this function.
Available returnVectors include return data to the host (0xFF), return data to a variable
(0x01 through 0x78), and don’t return data (0).
Using This Function
The Communicate function provides a single entry point API for all FlexMotion commands.
You can use Communicate to load parameters, read values, configure axes, start motion, and
so on. You can access all FlexMotion features with either the Communicate function or with
the individual API functions.
Communicate provides an alternate approach to motion control programming that is useful
in some programming environments. You can specify any FlexMotion function with
Communicate by suppling the appropriate command ID, resource and word count. Refer to
© National Instruments Corporation
13-5
FlexMotion Software Reference Manual
Chapter 13
Advanced Functions — flex_communicate
Appendix B, FlexMotion Functions, for a table of command IDs and word counts for each
function.
Note Communicate in NIMC_SEND_AND_READ mode is functionally equivalent to
the _rtn calling convention for individual read functions. The data is always returned to
the host and no inputVector is required.
All FlexMotion read functions have two calling conventions: with and without the _rtn
suffix. Without the _rtn suffix, the read function buffers the data in the Return Data Buffer.
You then use Communicate in NIMC_READ_RDB mode to read one or more packets from
this buffer.
Refer to your motion controller user manual for more information on low-level
communications protocols and return data packets.
FlexMotion Software Reference Manual
13-6
www.natinst.com
Chapter 13
Advanced Functions — flex_enable_1394_watchdog
flex_enable_1394_watchdog
Enable 1394 Watchdog
Format
status = flex_enable_1394_watchdog (boardID, enableOrDisable)
Purpose
Enables or disables the watchdog timer on the 1394 motherboard.
Parameters
Input
Name
Type
Description
boardID
u8
assigned by Measurement & Automation Explorer
enableOrDisable
u8
enable or disable the watchdog timer
Parameter Discussion
enableOrDisable enables or disables the watchdog timer on the 1394 motherboard. Set this
to NIMC_TRUE (1) to enable the watchdog timer and NIMC_FALSE (0) to disable the
watchdog timer.
Using This Function
The Enable 1394 Watchdog function enables the communications watchdog timer on the
FW-7344. If the FW-7344 is in an environment with severe electrostatic discharge (ESD)
conditions, these ESD events can disrupt the host-to-controller communication.
When the watchdog timer is enabled, the motion control driver must access the watchdog
timer every 10 seconds. If an event such as ESD disrupts this communication, the watchdog
automatically resets the controller. If you do not enable the watchdog timer, you have to power
cycle the FW-7344 to restore communication.
© National Instruments Corporation
13-7
FlexMotion Software Reference Manual
Chapter 13
Advanced Functions — flex_enable_auto_start
flex_enable_auto_start
Enable Auto Start
Format
status = flex_enable_auto_start (boardID, enableOrDisable, programToExecute)
Purpose
Allows you to automatically run a program when the controller powers up.
Parameters
Input
Name
Type
Description
boardID
u8
assigned by Measurement & Automation Explorer
enableOrDisable
u8
enable or disable auto start
programToExecute
u8
program number to execute
Parameter Discussion
enableOrDisable enables or disables the auto start feature. Set this to NIMC_TRUE (1) to
enable auto start and NIMC_FALSE (0) to disable auto start.
programToExecute is the onboard program the controller will execute if the auto start
feature is enabled. This should be a valid program number (1–255), that is stored to FLASH
using the Object Memory Management function.
Using This Function
The Enable Auto Start function configures the controller to automatically start an onboard
program on power up. Once auto start is enabled, the controller automatically executes the
onboard program specified on the subsequent power up. The onboard program to be executed
should be saved to FLASH using the Object Memory Management function before the
controller is powered down. If the controller does not find a valid program that it can load,
NIMC_autoStartFailedError is generated.
Note This function writes to onboard memory and hence it is not safe to execute when
motors are in motion. Doing so will generate a NIMC_wrongModeError.
FlexMotion Software Reference Manual
13-8
www.natinst.com
Chapter 13
Advanced Functions — flex_enable_shutdown
flex_enable_shutdown
Enable Shutdown
Format
status = flex_enable_shutdown (boardID)
Purpose
Enables the shutdown functionality of the controller.
Parameters
Input
Name
Type
Description
u8
assigned by Measurement & Automation Explorer
boardID
Using This Function
The Enable Shutdown function enables the controller to react to the shutdown input. When
the shutdown input transitions from low to high, the controller goes into a shutdown state. The
following actions take place in the shutdown state:
•
All the axes are killed. (On servo axes, the control loop is disabled and the output DACs
are zeroed, allowing frictional forces alone to stop the motion. On stepper axes, the
stepper pulse generation is stopped. On both axis types, there is no trajectory profile. If
enabled, the inhibit output is activated to inhibit (disable) the servo amplifier or stepper
driver. You can enable the inhibit outputs and set their polarity as active high
(noninverting) or active low (inverting) with the Configure Inhibit Outputs function.
•
All the axes, encoders and ADCs are disabled.
•
The DSP is disabled, which shuts down all control loop generation.
•
All the digital IO is re-initialized to defaults. If the user has saved defaults using the Save
Default Parameters function, the digital IO is re-initialized to the user defaults, else it is
re-initialized to the factory defaults.
•
All onboard programs that are executing are stopped.
•
The controller does not accept any functions, except for the following ones:
–
Get Motion Board Information
–
Read Error Message
–
Enable Auto Start
© National Instruments Corporation
13-9
FlexMotion Software Reference Manual
Chapter 13
Advanced Functions — flex_enable_shutdown
The shutdown functionality is disabled by default. This functionality has to be enabled every
time the controller is powered up. You should enable this feature only after the shutdown
circuit has been properly configured and connected to the controller. Once shutdown has been
enabled, it can be disabled only by resetting or power cycling the controller.
Note Once the controller has shut down, it has to be reset or power cycled before it can be
used again.
FlexMotion Software Reference Manual
13-10
www.natinst.com
Chapter 13
Advanced Functions — flex_flush_rdb
flex_flush_rdb
Flush Return Data Buffer
Format
status = flex_flush_rdb (boardID)
Purpose
Clears the Return Data Buffer by deleting all of the buffered data.
Parameters
Input
Name
boardID
Type
Description
u8
assigned by Measurement & Automation Explorer
Using This Function
The Flush Return Data Buffer function clears the Return Data Buffer by repetitively reading
the RDB until the buffer is empty. All return data packets in the RDB are deleted and nothing
is returned by this function.
You typically use the Flush Return Data Buffer function after an error condition when the data
in the Return Data Buffer is no longer valid or relevant. This function is also useful for
flushing the RDB after a programming error has caused the buffer to become skewed. Buffer
skew is when the data returned by a read function using the _rtn calling convention (such as
flex_read_pos_rtn) does not return the expected data but rather returns data requested by
a previous function.
Refer to your motion controller user manual for more information on low-level
communications protocols and return data packets.
© National Instruments Corporation
13-11
FlexMotion Software Reference Manual
Chapter 13
Advanced Functions — flex_read_csr_rtn
flex_read_csr_rtn
Read Communication Status
Format
status = flex_read_csr_rtn (boardID, csr)
Purpose
Reads the Communication Status Register (CSR).
Parameters
Input
Name
Type
Description
u8
assigned by Measurement & Automation Explorer
Type
Description
boardID
Output
Name
csr
u16
bitmap of communications status
Parameter Discussion
csr is the bitmap of communication status from the Communication Status Register.
D15
D14
D13
D12
D11
D10
D9
D8
D7
D6
D5
D4
D3
D2
D1
D0
XXX
XXX
XXX
XXX
XXX
XXX
XXX
XXX
HW
Fail
Err
Msg
PU
Reset
Pkt
Err
PIP
Int
RTS
RTR
For D0 Ready to Receive (RTR):
1 = Ready to receive a word from the host
0 = Not ready to receive (busy)
For D1 Ready to Send (RTS):
1 = Ready to send a word from the RDB to the host
0 = Not ready to send (RDB empty)
For D2 Interrupt (Int):
1 = Interrupt status
0 = Normal data
FlexMotion Software Reference Manual
13-12
www.natinst.com
Chapter 13
Advanced Functions — flex_read_csr_rtn
For D3 Packet In Process (PIP):
1 = Waiting for more words to finish the packet
0 = Idle
For D4 Packet Error (Pkt Err):
1 = Communication packet error
0 = No error
For D5 Power-Up Reset (PU Reset):
1 = Controller is in the Power-Up state
0 = Power-Up state has been cleared
For D6 Error Message (Err Msg):
1 = Modal error message pending
0 = No error
For D7 Hardware Failure (HW Fail):
1 = Fatal hardware error occurred
0 = No error
Using This Function
The Read Communication Status function performs a direct read of the Communication
Status Register (CSR) on the FlexMotion controller. The CSR is a hardware register
containing communication handshaking and error status bits. The FlexMotion software polls
this register continuously when sending and receiving packets for handshaking and error
checking purposes. Refer to your motion controller user manual for more information on
low-level communication protocols and return data packets.
You can also call this function at any time to check the communication and error status.
Because the CSR is always up to date and directly accessible over the computer bus, executing
this function does not affect the operation of the FlexMotion controller itself.
© National Instruments Corporation
13-13
FlexMotion Software Reference Manual
Chapter 13
Advanced Functions — flex_reset_defaults
flex_reset_defaults
Reset Default Parameters
Format
status = flex_reset_defaults (boardID)
Purpose
Resets the power-up defaults to the factory-default settings.
Parameters
Input
Name
boardID
Type
Description
u8
assigned by Measurement & Automation Explorer
Using This Function
The Reset Default Parameters function resets the power-up defaults to the factory-default
settings for all important configuration, initialization, and trajectory parameters for use after
subsequent power-up resets. When you execute this function, the default values for all
parameters listed in Appendix C, Default Parameters, are saved to nonvolatile flash memory
and become the power-up defaults.
Note The effect of this function is not realized until the next time the controller is powered
up from a power-down state.
You only need to use this function if you have previously modified the power-up defaults
using the Save Default Parameters function and want to revert back to the factory defaults.
FlexMotion Software Reference Manual
13-14
www.natinst.com
Chapter 13
Advanced Functions — flex_save_defaults
flex_save_defaults
Save Default Parameters
Format
status = flex_save_defaults (boardID)
Purpose
Saves the current operating parameters as defaults.
Parameters
Input
Name
boardID
Type
Description
u8
assigned by Measurement & Automation Explorer
Using This Function
The Save Default Parameters function saves all important configuration, initialization, and
trajectory parameters for use after subsequent power-up resets. When you execute this
function, all parameters listed in Appendix C, Default Parameters are saved to nonvolatile
flash memory and become the power-up defaults.
Note When the controller is powered up and the onboard processors boot, the defaults are
automatically applied. There will be some time, however, between the controller powering
up and the application of defaults.
If necessary, you can reinstate the factory-default parameters as the power-up defaults with
the Reset Default Parameters function.
This function does not perform a complete state save. For proper and safe operation after
power-up, certain parameters are always reset to their factory defaults to bring the controller
back to a known safe state. Refer to Table C-1, Default Parameters, of Appendix C, Default
Parameters, for a comprehensive list of all parameters stored by the Save Default Parameters
function. Parameters not stored are left out by design and are typically reset to zero at
power-up.
Note If you want to remember a parameter that is not included in this list, you can copy
that parameter to a general-purpose variable and it will be saved with this function. You can
then reset the parameter to your saved value with a program designed for this purpose.
© National Instruments Corporation
13-15
FlexMotion Software Reference Manual
Chapter 13
Advanced Functions — flex_set_irq_mask
flex_set_irq_mask
Set Interrupt Event Mask
Format
status = flex_set_irq_mask (boardID, mask)
Purpose
Selects the events that interrupt the host.
Parameters
Input
Name
Type
Description
boardID
u8
assigned by Measurement & Automation Explorer
mask
u16
bitmap of events to interrupt on
Parameter Discussion
mask is the interrupt event mask, the bitmap of events to interrupt on.
D15
D14
D13
D12
D11
D10
D9
D8
D7
D6
D5
D4
D3
D2
D1
D0
0
0
0
0
VT
BC
PC
0
0
0
HSC
BP
IO
MC
0
Err
For D0 Error Message Pending (Err):
1 = Interrupt when Error Message pending
0 = Do not interrupt
D1 is reserved
For D2 Move Complete (MC):
1 = Interrupt on Move Complete event
0 = Do not interrupt
For D3 GPIO Event (IO):
1 = Interrupt on general-purpose I/O event
0 = Do not interrupt
FlexMotion Software Reference Manual
13-16
www.natinst.com
Chapter 13
Advanced Functions — flex_set_irq_mask
For D4 Breakpoint (BP):
1 = Interrupt on breakpoint event
0 = Do not interrupt
For D5 High-Speed Capture (HSC):
1 = Interrupt on high-speed capture event
0 = Do not interrupt
D6 through D8 are reserved
For D9 Program Complete (PC):
1 = Interrupt on Program Complete event
0 = Do not interrupt
For D10 Blend Complete (BC):
1 = Interrupt on Blend Complete event
0 = Do not interrupt
For D11 Velocity Threshold (VT):
1 = Interrupt on velocity threshold event
0 = Do not interrupt
D12 through D15 are reserved
The factory default value for mask is zero (0)—all interrupt events disabled.
Using This Function
The Set Interrupt Event Mask function configures the event types that interrupt the host
computer when interrupts are enabled on the controller. Interrupts are an advanced method of
synchronizing and communicating with the host computer but require an interrupt handler on
the host to validate and process the interrupt.
Note Interrupts are supported under only Windows NT/98/95.
A typical FlexMotion application generates thousands of events. Rather than constantly
interrupting the host on every event, this function allows you to mask off event types that are
not relevant to your application. Doing this improves performance by reducing the number of
interrupts the handler has to process and reject as irrelevant.
© National Instruments Corporation
13-17
FlexMotion Software Reference Manual
Chapter 13
Advanced Functions — flex_set_irq_mask
This function controls interrupt event types, not individual per axis or vector space events.
Upon receiving an interrupt of a certain type, the interrupt handler must read the desired status
from the FlexMotion controller to further resolve the event to the particular axis, vector space,
program, and so on and then decide on the event reaction.
FlexMotion must have an interrupt line selected and enabled before any interrupts will be
generated. This is done during controller configuration when FlexMotion is first installed in
your system. Once an interrupt line is enabled, the Set Interrupt Event Mask function can be
used to further configure the interrupting events.
Note To disable all interrupts on the fly, mask them all off by setting mask = 0. This has
the same effect as reinstalling the controller with the interrupt line disabled.
FlexMotion Software Reference Manual
13-18
www.natinst.com
A
Error Codes
This appendix summarizes the error codes returned by the FlexMotion
software.
Each FlexMotion function returns a status that indicates whether the
function executed successfully. A non-zero return status indicates that the
function failed to execute. This non-zero value is an error code you can use
to diagnose the error condition.
FlexMotion can also generate modal errors during operation that are not
detected at the time of function execution. These model errors are returned
by the Read Error Message function as additional error codes.
Table A-1 lists all FlexMotion error codes and gives a brief description of
the associated error conditions. For reference, the table also lists a symbolic
constant corresponding to each numeric error code. These constants are
defined in the FlexMotion header files motnerr.h (for C/C++ users) and
motnerr.bas (for Visual Basic users).
Refer to Chapter 11, Error & Utility Functions, for detailed descriptions of
the functions for error handling. Chapter 4, Software Overview, gives
information on modal versus non-modal errors and on error handling
techniques.
© National Instruments Corporation
A-1
FlexMotion Software Reference Manual
Appendix A
Error Codes
Table A-1. Error Codes Summary
Error
Code
Symbolic Name
Description
0
NIMC_noError
No error.
1
NIMC_readyToReceiveTimeoutError
Ready to Receive Timeout. The
controller is still not ready to receive
commands after the specified timeout
period. This error may occur if the
controller is busy processing previous
commands. If this error persists, even
when the controller should not be
busy, contact National Instruments.
2
NIMC_currentPacketError
Either this function is not supported
by this type of controller, or the
controller received an incomplete
command packet and cannot execute
the function.
3
NIMC_noReturnDataBufferError
No data in the Return Data Buffer. The
kernel driver returns an error if it runs
out of time waiting for the controller
to return data to the Return Data
Buffer. For FlexMotion controllers,
this error can also be returned if the
power-up state of the controller has
not been cleared.
4
NIMC_halfReturnDataBufferError
Partial readback packet. The data
returned by the controller is
incomplete. The kernel driver timed
out after getting partial data.
5
NIMC_boardFailureError
Most likely, your controller is not
installed or configured properly. If this
error persists when you know your
controller is installed and configured
properly, it indicates an internal
hardware failure.
FlexMotion Software Reference Manual
A-2
www.natinst.com
Appendix A
Error Codes
Table A-1. Error Codes Summary (Continued)
Error
Code
Symbolic Name
Description
6
NIMC_badResourceIDOrAxisError
For ValueMotion, an invalid axis
number was used. For FlexMotion, an
invalid axis number or other resource
ID (Vector Space, Encoder, I/O Port,
and so on) was used.
7
NIMC_CIPBitError
A previous function is currently being
executed, so the controller cannot
accept this function until the previous
function has completed. If this
problem persists, try putting a delay
between the offending commands.
8
NIMC_previousPacketError
The function called previous to this
one is not supported by this type of
controller.
9
NIMC_packetErrBitNotClearedError
Packet error bit not cleared by
terminator (hardware error).
10
NIMC_badCommandError
Command ID not recognized. Invalid
command sent to the controller
(FlexMotion only).
11
NIMC_badReturnDataBufferPacketError
Corrupt readback data. The data
returned by the motion controller is
corrupt.
12
NIMC_badBoardIDError
Illegal board ID. You must use the
board ID assigned to your controller in
Measurement & Automation
Explorer.
13
NIMC_packetLengthError
Command packet length is incorrect.
14
NIMC_closedLoopOnlyError
This command is valid only on
closed-loop axes (closed-loop stepper
and servo).
15
NIMC_returnDataBufferFlushError
Unable to flush the Return Data
Buffer.
© National Instruments Corporation
A-3
FlexMotion Software Reference Manual
Appendix A
Error Codes
Table A-1. Error Codes Summary (Continued)
Error
Code
Symbolic Name
Description
16
NIMC_servoOnlyError
This command is valid only on servo
axes.
17
NIMC_stepperOnlyError
This command is valid only on stepper
axes.
18
NIMC_closedLoopStepperOnlyError
This command is valid only on
closed-loop stepper axes.
19
NIMC_noBoardConfigInfoError
Controller configuration information
is missing or corrupt.
20
NIMC_countsNotConfiguredError
Steps/rev and/or counts/rev (in
ValueMotion, lines/rev) not loaded for
this axis.
21
NIMC_systemResetError
System reset did not occur in
maximum time allowed.
22
NIMC_functionSupportError
This command is not supported by this
controller or operating system.
23
NIMC_parameterValueError
One of the parameters passed into the
function has an illegal value.
24
NIMC_motionOnlyError
Motion command sent to an Encoder
board.
25
NIMC_returnDataBufferNotEmptyError
The Return Data Buffer is not empty.
Commands that expect data returned
from the controller cannot be sent
until the Return Data Buffer is cleared.
26
NIMC_modalErrorsReadError
The Motion Error Hander.flx VI
discovered modal error(s) in the
modal error stack. These error(s) can
be viewed in the Modal Error(s) Out
Indicator/terminal of this VI.
27
NIMC_processTimeoutError
Under Windows NT, a function call
made to the motion controller timed
out waiting for driver access.
FlexMotion Software Reference Manual
A-4
www.natinst.com
Appendix A
Error Codes
Table A-1. Error Codes Summary (Continued)
Error
Code
Symbolic Name
Description
28
NIMC_insufficientSizeError
The resource is not large enough to
supported the specified operation.
33
NIMC_badPointerError
A NULL pointer has been passed into
a function inappropriately.
34
NIMC_wrongReturnDataError
Incorrect data has been returned by the
controller. This data does not
correspond to the expected data for the
command sent to the controller.
35
NIMC_watchdogTimeoutError
A fatal error has occurred on the
controller. You must reset the
controller by power cycling your
computer. Contact National
Instruments technical support if this
problem persists.
36
NIMC_invalidRatioError
A specified ratio is invalid.
37
NIMC_irrelevantAttributeError
The specified attribute is not relevant.
38
NIMC_internalSoftwareError
An unexpected error has occurred
internal to the driver. Please contact
National Instruments with the name of
the function or VI that returned this
error.
39
NIMC_1394WatchdogEnableError
The communication watchdog on the
1394 motherboard could not be
started.
49
NIMC_downloadChecksumError
There was an error during check sum
on a file being downloaded to the
FlexMotion controller.
51
NIMC_firmwareDownloadError
Firmware download failed. Reset the
controller and try downloading again.
© National Instruments Corporation
A-5
FlexMotion Software Reference Manual
Appendix A
Error Codes
Table A-1. Error Codes Summary (Continued)
Error
Code
Symbolic Name
Description
52
NIMC_FPGAProgramError
Internal Error. The FPGA failed to
program. Reset the controller and try
again. If the problem persists, contact
National Instruments technical
support.
53
NIMC_DSPInitializationError
Internal Error. The DSP failed to
initialize. Reset the controller and try
again. If the problem persists, contact
National Instruments technical
support.
54
NIMC_corrupt68331FirmwareError
Corrupt onboard microprocessor
firmware detected. Download new
firmware.
55
NIMC_corruptDSPFirmwareError
Corrupt DSP firmware detected.
Download new DSP firmware.
56
NIMC_corruptFPGAFirmwareError
Corrupt FPGA firmware detected.
Download new FPGA firmware.
57
NIMC_interruptConfigurationError
Internal Error. Host interrupt
configuration failed and interrupt
support is disabled.
58
NIMC_IOInitializationError
Internal Error. The I/O structure on the
controller failed to initialize. Reset the
controller and try again. If the problem
persists, contact National Instruments
technical support.
59
NIMC_flashromCopyError
Error copying to the FLASH ROM.
60
NIMC_corruptObjectSectorError
The objects stored in FLASH ROM
are corrupt.
73
NIMC_boardInShutDownStateError
The controller cannot accept this
function, as it has been shut down.
FlexMotion Software Reference Manual
A-6
www.natinst.com
Appendix A
Error Codes
Table A-1. Error Codes Summary (Continued)
Error
Code
Symbolic Name
Description
74
NIMC_shutDownFailedError
The controller failed to shut down.
This could be because it failed to
disable the DACs, the encoders, or the
ADCs, or because it could not reset
the I/O back to user defaults.
75
NIMC_hostFIFOBufferFullError
Communication FIFO buffer between
the host computer and the controller is
full.
76
NIMC_noHostDataError
Communications error. The controller
did not receive any data in the
command packet from the host
computer.
77
NIMC_corruptHostDataError
Communications error. The controller
received corrupt data in the packet
from the host computer.
78
NIMC_invalidFunctionDataError
Invalid data in the function.
79
NIMC_autoStartFailedError
The controller could not run the
onboard program on auto start. When
you enable auto start, make sure that
you specify a valid program number
and that the program is saved in
FLASH ROM.
80
NIMC_returnDataBufferFullError
The Return Data Buffer on the
controller is full.
83
NIMC_DSPXmitBufferFullError
Internal error. The transmit buffer of
the DSP is full. Messages from DSP to
the onboard microprocessor are being
delayed or lost.
84
NIMC_DSPInvalidCommandError
Internal error. The DSP received an
illegal command.
85
NIMC_DSPInvalidDeviceError
Internal error. The DSP received a
command with an invalid Device ID.
© National Instruments Corporation
A-7
FlexMotion Software Reference Manual
Appendix A
Error Codes
Table A-1. Error Codes Summary (Continued)
Error
Code
Symbolic Name
Description
92
NIMC_DSPXmitDataError
Internal error. The data returned by the
DSP is incomplete or corrupt.
93
NIMC_DSPCommunicationsError
Internal error. A command from the
onboard microprocessor to the DSP
was corrupt and ignored.
95
NIMC_DSPCommunicationsTimeoutError
Internal error. There was an internal
timeout while sending commands to
the DSP.
96
NIMC_passwordError
The password used for this function is
incorrect.
97
NIMC_mustOnMustOffConflictError
There is a conflict between the
mustOn and mustOff values set for
this function.
100
NIMC_IOEventCounterError
Problem with the I/O Event Counter.
102
NIMC_wrongIODirectionError
The I/O bit configuration does not
agree with its port's direction setting.
103
NIMC_wrongIOConfigurationError
I/O bit configuration is not possible
for that pin.
104
NIMC_outOfEventsError
Internal error. The number of events
pending have reached the maximum
allowed.
106
NIMC_outputDeviceNotAssignedError
No DAC or stepper output is assigned
to this axis.
108
NIMC_PIDUpdateRateError
PID rate specified is too fast for the
number of axes and/or encoders
enabled.
109
NIMC_feedbackDeviceNotAssignedError
No primary feedback device (encoder
or ADC) is assigned to a servo or
closed-loop stepper axis.
113
NIMC_noMoreRAMError
No RAM available for object storage.
FlexMotion Software Reference Manual
A-8
www.natinst.com
Appendix A
Error Codes
Table A-1. Error Codes Summary (Continued)
Error
Code
Symbolic Name
Description
115
NIMC_jumpToInvalidLabelError
A Jump to Label on Condition
function in a program had an invalid
label.
116
NIMC_invalidConditionCodeError
Condition selected is invalid.
117
NIMC_homeLimitNotEnabledError
Find Home function cannot execute
because the Home and/or Limit inputs
are not enabled.
118
NIMC_findHomeError
Find Home was not successful
because the motor stopped before the
find home switch was found.
119
NIMC_limitSwitchActiveError
The desired move cannot be
completed because the limit input is
active in the direction of travel.
121
NIMC_positionRangeError
Absolute target position loaded would
cause the move length to be out of the
±31 bit range allowed for a single
move segment.
122
NIMC_encoderDisabledError
The encoder is disabled. The encoder
must be enabled to read it.
123
NIMC_moduloBreakpointError
The breakpoint value loaded exceeds
the modulo range.
124
NIMC_findIndexError
Find Index sequence did not find the
index successfully.
125
NIMC_wrongModeError
The function was not executed
because it was attempted at an illegal
time.
126
NIMC_axisConfigurationError
An axis cannot be configured while
enabled. Disable the axis and then
configure it.
127
NIMC_pointsTableFullError
The points table for cubic splining is
full.
© National Instruments Corporation
A-9
FlexMotion Software Reference Manual
Appendix A
Error Codes
Table A-1. Error Codes Summary (Continued)
Error
Code
Symbolic Name
Description
129
NIMC_axisDisabledError
A disabled axis has been commanded
to move. Enable the axis before
executing a move on it.
130
NIMC_memoryRangeError
An invalid memory location is being
addressed on the controller.
131
NIMC_inPositionUpdateError
Internal error. The axis position could
not be read for in-position verification.
132
NIMC_targetPositionUpdateError
Internal error. The DSP was too busy
to update the target position.
133
NIMC_pointRequestMissingError
Internal error. The internal points
request buffer is missing a request.
134
NIMC_internalSamplesMissingError
Internal error. The internal samples
buffer is missing samples.
136
NIMC_eventTimeoutError
A wait operation timed out or a read
function timed out.
137
NIMC_objectReferenceError
An attempt was made to reference a
nonexistent program or other memory
object.
138
NIMC_outOfMemoryError
Not enough FLASH ROM space to
save this object.
139
NIMC_registryFullError
Object registry is full.
140
NIMC_noMoreProgramPlayerError
All program players (maximum 10)
are in use storing/playing programs.
141
NIMC_programOverruleError
A Start Motion, Blend Motion, Find
Home, or Find Index function being
executed from an onboard program
has been overruled by a Stop Motion
function from the host computer. The
program is left in the PAUSED state.
Execute the Pause/Resume Program
function to continue.
FlexMotion Software Reference Manual
A-10
www.natinst.com
Appendix A
Error Codes
Table A-1. Error Codes Summary (Continued)
Error
Code
Symbolic Name
Description
142
NIMC_followingErrorOverruleError
A Start Motion, Blend Motion, Find
Home, or Find Index function being
executed from an onboard program
has been overruled due to a following
error condition. The program is left in
the PAUSED state. Execute the
Pause/Resume Program function to
continue.
144
NIMC_illegalVariableError
An illegal general-purpose variable is
being used.
145
NIMC_illegalVectorSpaceError
The vector space being used does not
have enough axes assigned to it.
146
NIMC_noMoreSamplesError
There are no samples to read. Execute
Acquire Trajectory Data before trying
to read samples.
147
NIMC_slaveAxisKilledError
Gearing cannot be enabled because
the slave axis is in a killed state. Issue
a halt stop or decel stop with the Stop
Motion function on the slave axis to
energize it.
148
NIMC_ADCDisabledError
The ADC is disabled. The ADC
channel must be enabled to read it.
149
NIMC_operationModeError
Axes that are a part of a vector space
are either in velocity mode or have
different operation modes.
150
NIMC_followingErrorOnFindHomeError
Find Home sequence did not find
home successfully because the axis
tripped on following error.
151
NIMC_invalidVelocityError
The vector velocity is not valid. The
resulting angular velocity is out of
range. Change the vector velocity for
the arc move.
© National Instruments Corporation
A-11
FlexMotion Software Reference Manual
Appendix A
Error Codes
Table A-1. Error Codes Summary (Continued)
Error
Code
Symbolic Name
Description
152
NIMC_invalidAccelerationError
The vector acceleration is not valid.
The resulting angular acceleration is
out of range. Change the vector
acceleration for the arc move.
153
NIMC_samplesBufferFullError
Internal error. The internal samples
buffer is full.
154
NIMC_illegalVectorError
The input or return vector being used
is invalid.
155
NIMC_QSPIFailedError
Internal error. The internal QSPI serial
bus failed and ADC values cannot be
read.
157
NIMC_pointsBufferFullError
Internal error. The internal point
request buffer is full.
158
NIMC_axisInitializationError
Internal Error. The internal axis data
structures failed to initialize. Reset the
controller and try again. If the problem
persists, contact National Instruments
technical support.
159
NIMC_encoderInitializationError
Internal Error. The internal encoder
data structures failed to initialize.
Reset the controller and try again. If
the problem persists, contact National
Instruments technical support.
160
NIMC_stepChannelInitializationError
Internal Error. The internal stepper
output data structures failed to
initialize. Reset the controller and try
again. If the problem persists, contact
National Instruments technical
support.
161
NIMC_blendFactorConflictError
Axes, which are part of a vector space,
have different blend factors. Make
sure that all the axes in the vector
space have the same blend factor.
FlexMotion Software Reference Manual
A-12
www.natinst.com
Appendix A
Error Codes
Table A-1. Error Codes Summary (Continued)
Error
Code
Symbolic Name
Description
162
NIMC_torqueOffsetError
The torque offset is outside of the
torque limit range.
163
NIMC_invalidLimitRangeError
The negative (lower) limit is greater
than or equal to the positive (upper)
limit.
© National Instruments Corporation
A-13
FlexMotion Software Reference Manual
B
FlexMotion Functions
This appendix contains three tables that summarize the FlexMotion
function parameters, list changes to the FlexMotion API, and give a
ValueMotion to FlexMotion function cross reference.
Table B-1 summarizes the FlexMotion function parameters including the
number of words in the command packet sent to the controller, whether or
not the function takes a vector, and the Command ID. These parameters are
required when using the Communicate function.
Table B-1. FlexMotion Function Summary
Function Name
Description
Word Count
Uses Vectors
Command ID
flex_config_axis
Configure Axis Resources
5
No
281
flex_config_mc_criteria
Configure Move Complete
Criteria
6
No
285
flex_config_step_mode_pol
Configure Step Mode &
Polarity
4
No
65
flex_config_vect_spc
Configure Vector Space
6
No
280
flex_enable_axes
Enable Axes
4
No
3
flex_load_counts_steps_rev
Load Counts/Steps per
Revolution
4
No
406
flex_load_pid_parameters
Load All PID Parameters
11
Yes
32
flex_load_single_pid_parameter
Load Single PID Parameter
5
Yes
385
flex_load_vel_tc_rs
Configure Velocity Filter
5
Yes
45
flex_set_stepper_loop_mode
Set Stepper Loop Mode
5
No
381
flex_check_blend_complete_
status
Check Blend Complete
Status
N/A
—
—
flex_check_move_complete_
status
Check Move Complete
Status
N/A
—
—
Axis & Resource Configuration Functions
Trajectory Control Functions
© National Instruments Corporation
B-1
FlexMotion Software Reference Manual
Appendix B
FlexMotion Functions
Table B-1. FlexMotion Function Summary (Continued)
Function Name
Description
Word Count
Uses Vectors
Command ID
flex_load_acceleration
Load
Acceleration/Deceleration
6
Yes
379
flex_load_follow_err
Load Following Error
4
Yes
47
flex_load_rpm
Load Velocity in RPM
7
Yes
371
flex_load_rpsps
Load Accel/Decel in
RPS/sec
8
Yes
380
flex_load_target_pos
Load Target Position
5
Yes
39
flex_load_velocity
Load Velocity
5
Yes
391
flex_load_vs_pos
Load Vector Space Position
9
Yes
378
flex_read_axis_status/
flex_read_axis_status_rtn
Read per Axis Status
3
Yes
326
flex_read_blend_status/
flex_read_blend_status_rtn
Read Blend Status
3
Yes
291
flex_read_follow_err/
flex_read_follow_err_rtn
Read Following Error
3
Yes
48
flex_read_mcs_rtn
Read Move Complete
Status
N/A
—
—
flex_read_pos/
flex_read_pos_rtn
Read Position
3
Yes
41
flex_read_rpm/
flex_read_rpm_rtn
Read Velocity in RPM
3
Yes
374
flex_read_trajectory_status/
flex_read_trajectory_status_rtn
Read Trajectory Status
4
Yes
386
flex_read_velocity/
flex_read_velocity_rtn
Read Velocity
3
Yes
392
flex_read_vs_pos/
flex_read_vs_pos_rtn
Read Vector Space Position
3
Yes
377
flex_reset_pos
Reset Position
7
Yes
42
flex_set_op_mode
Set Operation Mode
4
No
35
flex_wait_for_blend_complete
Wait for Blend Complete
N/A
—
—
flex_wait_for_move_complete
Wait for Move Complete
N/A
—
—
FlexMotion Software Reference Manual
B-2
www.natinst.com
Appendix B
FlexMotion Functions
Table B-1. FlexMotion Function Summary (Continued)
Function Name
Description
Word Count
Uses Vectors
Command ID
Arc Functions
flex_load_circular_arc
Load Circular Arc
13
Yes
290
flex_load_helical_arc
Load Helical Arc
11
Yes
375
flex_load_spherical_arc
Load Spherical Arc
13
Yes
290
flex_config_gear_master
Configure Gear Master
4
No
30
flex_enable_gearing
Enable Gearing
4
No
4
flex_enable_gearing_single_axis
Enable Gearing Single Axis
4
No
396
flex_load_gear_ratio
Load Gear Ratio
6
Yes
31
flex_acquire_trajectory_data
Acquire Trajectory Data
6
No
292
flex_load_base_velocity
Load Base Velocity
4
Yes
28
flex_load_blend_fact
Load Blend Factor
4
Yes
36
flex_load_pos_modulus
Load Position Modulus
5
Yes
284
flex_load_rpm_thresh
Load Velocity Threshold in
RPM
7
Yes
376
flex_load_scurve_time
Load S-Curve Time
4
Yes
287
flex_load_torque_lim
Load Torque Limit
7
Yes
62
flex_load_torque_offset
Load Torque Offset
5
Yes
63
flex_load_vel_threshold
Load Velocity Threshold
5
Yes
393
flex_load_velocity_override
Load Velocity Override
4
Yes
74
flex_read_dac/
flex_read_dac_rtn
Read DAC
3
Yes
64
flex_read_dac_limit_status/
flex_read_dac_limit_status_rtn
Read DAC Limit Status
3
Yes
60
flex_read_steps_gen/
flex_read_steps_gen_rtn
Read Steps Generated
3
Yes
66
flex_read_target_pos/
flex_read_target_pos_rtn
Read Target Position
3
Yes
40
flex_read_trajectory_data/
flex_read_trajectory_data_rtn
Read Trajectory Data
3
Yes
18
Gearing Functions
Advanced Trajectory Functions
© National Instruments Corporation
B-3
FlexMotion Software Reference Manual
Appendix B
FlexMotion Functions
Table B-1. FlexMotion Function Summary (Continued)
Function Name
Description
Word Count
Uses Vectors
Command ID
Start & Stop Motion Functions
flex_blend
Blend Motion
4
No
22
flex_start
Start Motion
4
No
21
flex_stop_motion
Stop Motion
5
No
384
flex_configure_inhibits
Configure Inhibit Outputs
4
No
282
flex_enable_home_inputs
Enable Home Inputs
4
No
9
flex_enable_limits
Enable Limits
5
No
382
flex_load_sw_lim_pos
Load Software Limit
Positions
7
Yes
29
flex_read_home_input_status/
flex_read_home_input_status_rtn
Read Home Input Status
3
Yes
10
flex_read_limit_status/
flex_read_limit_status_rtn
Read Limit Status
4
Yes
383
flex_set_home_polarity
Set Home Input Polarity
4
No
8
flex_set_inhibit_momo
Set Inhibit MOMO
4
No
11
flex_set_limit_polarity
Set Limit Input Polarity
4
No
5
flex_enable_bp
Enable Breakpoint
4
No
322
flex_load_bp_modulus
Load Breakpoint Modulus
5
Yes
59
flex_load_pos_bp
Load Breakpoint Position
5
Yes
58
flex_read_breakpoint_status/
flex_read_breakpoint_status_rtn
Read Breakpoint Status
4
Yes
387
flex_set_bp_momo
Set Breakpoint Output
MOMO
4
No
323
flex_enable_hs_caps
Enable High-Speed
Position Capture
4
No
324
flex_read_cap_pos/
flex_read_cap_pos_rtn
Read Captured Position
3
Yes
57
flex_read_hs_cap_status/
flex_read_hs_cap_status_rtn
Read High-Speed Capture
Status
3
Yes
332
Motion I/O Functions
Breakpoint Functions
High-Speed Capture Functions
FlexMotion Software Reference Manual
B-4
www.natinst.com
Appendix B
FlexMotion Functions
Table B-1. FlexMotion Function Summary (Continued)
Function Name
Word Count
Uses Vectors
Command ID
Set High-Speed Capture
Polarity
4
No
325
flex_find_home
Find Home
4
No
333
flex_find_index
Find Index
4
No
334
flex_configure_pwm_output
Configure PWM Output
5
No
397
flex_enable_adcs
Enable ADCs
4
No
321
flex_enable_encoders
Enable Encoders
4
No
53
flex_load_dac
Load DAC
4
Yes
61
flex_load_pwm_duty
Load PWM Duty Cycle
4
Yes
316
flex_read_adc/
flex_read_adc_rtn
Read ADC
3
Yes
320
flex_read_encoder/
flex_read_encoder_rtn
Read Encoder Position
3
Yes
56
flex_read_port/
flex_read_port_rtn
Read I/O Port
3
Yes
319
flex_reset_encoder
Reset Encoder Position
5
Yes
68
flex_select_signal
Select Signal
5
No
402
flex_set_adc_range
Set ADC Range
4
No
401
flex_set_encoder_frequency
Configure Encoder Filter
4
No
77
flex_set_port_direction
Set I/O Port Direction
4
No
311
flex_set_port_momo
Set I/O Port MOMO
4
No
318
flex_set_port_pol
Set I/O Port Polarity
4
No
314
flex_get_error_description
Get Error Description
N/A
—
—
flex_get_motion_board_info
Get Motion Board
Information
N/A
—
—
flex_get_motion_board_name
Get Motion Board Name
N/A
—
—
flex_read_err_msg_rtn
Read Error Message
3
No
2
flex_set_hs_cap_pol
Description
Find Home & Index Functions
Analog & Digital I/O Functions
Error & Utility Functions
© National Instruments Corporation
B-5
FlexMotion Software Reference Manual
Appendix B
FlexMotion Functions
Table B-1. FlexMotion Function Summary (Continued)
Function Name
Description
Word Count
Uses Vectors
Command ID
Onboard Programming Functions
flex_begin_store
Begin Program Storage
3
No
339
flex_end_store
End Program Storage
3
No
340
flex_insert_program_label
Insert Program Label
4
No
344
flex_jump_label_on_condition
Jump to Label on Condition
7
No
390
flex_load_delay
Load Program Delay
5
No
359
flex_pause_prog
Pause/Resume Program
3
No
342
flex_read_program_status/
flex_read_program_status_rtn
Read Program Status
3
Yes
395
flex_run_prog
Run Program
3
No
341
flex_set_status_momo
Set User Status MOMO
4
No
356
flex_stop_prog
Stop Program
3
No
343
flex_wait_on_condition
Wait on Condition
8
Yes
388
flex_load_description
Load Memory Object
Description
19
No
366
flex_object_mem_manage
Object Memory
Management
4
No
389
flex_read_description_rtn
Read Memory Object
Description
3
No
367
flex_read_registry_rtn
Read Object Registry
3
No
361
flex_add_vars
Add Variables
4
Yes
346
flex_and_vars
AND Variables
4
Yes
352
flex_div_vars
Divide Variables
4
Yes
349
flex_load_var
Load Constant to Variable
5
Yes
351
flex_lshift_var
Logical Shift Variable
4
Yes
357
flex_mult_vars
Multiply Variables
4
Yes
347
flex_not_var
Invert Variable
4
Yes
355
flex_or_vars
OR Variables
4
Yes
353
Object Management Functions
Data Operations Functions
FlexMotion Software Reference Manual
B-6
www.natinst.com
Appendix B
FlexMotion Functions
Table B-1. FlexMotion Function Summary (Continued)
Function Name
Description
Word Count
Uses Vectors
Command ID
flex_read_var/
flex_read_var_rtn
Read Variable
4
Yes
358
flex_sub_vars
Subtract Variables
4
Yes
348
flex_xor_vars
Exclusive OR Variables
4
Yes
354
flex_clear_pu_status
Clear Power Up Status
3
No
258
flex_communicate
Communicate
variable
Yes
any
flex_enable_1394_watchdog
Enable 1394 Watchdog
N/A
No
255
flex_enable_auto_start
Enable Auto Start
4
No
404
flex_enable_shutdown
Enable Shutdown
3
No
405
flex_flush_rdb
Flush Return Data Buffer
N/A
—
—
flex_read_csr_rtn
Read Communication
Status
N/A
—
—
flex_reset_defaults
Reset Default Parameters
3
No
403
flex_save_defaults
Save Default Parameters
3
No
283
flex_set_irq_mask
Set Interrupt Event Mask
4
No
269
Advanced Functions
To aid in converting a ValueMotion application to FlexMotion, Table B-2
lists each function in the ValueMotion API and gives the nearest
FlexMotion function. Refer to the individual functions in both the
ValueMotion and FlexMotion function references for detailed information
on the functional and syntactic differences.
Table B-2. ValueMotion to FlexMotion Cross Reference
ValueMotion Function Name
FlexMotion Function Name
Descriptive Name
acquire_samples
flex_acquire_trajectory_data
Acquire Trajectory Data
begin_prestore
flex_begin_store
Begin Program Storage
communicate
flex_communicate
Communicate
enable_brk
flex_enable_bp
Enable Breakpoint
enable_io_trig
flex_wait_on_condition
Wait on Condition
enable_limits
flex_enable_limits
Enable Limits
flex_enable_home_inputs
Enable Home Inputs
© National Instruments Corporation
B-7
FlexMotion Software Reference Manual
Appendix B
FlexMotion Functions
Table B-2. ValueMotion to FlexMotion Cross Reference (Continued)
ValueMotion Function Name
FlexMotion Function Name
Descriptive Name
enable_pos_trig
flex_jump_label_on_condition
Jump to Label on Condition
end_prestore
flex_end_store
End Program Storage
find_home
flex_find_home
Find Home
find_index/
find_index_rdb
flex_find_index
Find Index
flush_rdb
flex_flush_rdb
Flush Return Data Buffer
get_board_type
flex_get_motion_board_info
Get Motion Board Information
get_motion_board_info
flex_get_motion_board_info
Get Motion Board Information
get_motion_board_name
flex_get_motion_board_name
Get Motion Board Name
in_pos
flex_config_mc_criteria
Configure Move Complete Criteria
kill_motion
flex_stop_motion
Stop Motion
load_accel
flex_load_acceleration
Load Acceleration/Deceleration
load_accel_fact
—
—
load_break_mod
flex_load_bp_modulus
Load Breakpoint Modulus
load_deriv_gain
flex_load_single_pid_parameter
Load Single PID Parameter
load_deriv_per
flex_load_single_pid_parameter
Load Single PID Parameter
load_fol_err
flex_load_follow_err
Load Following Error
load_intg_gain
flex_load_single_pid_parameter
Load Single PID Parameter
load_intg_lim
flex_load_single_pid_parameter
Load Single PID Parameter
load_pos_brk
flex_load_pos_bp
Load Breakpoint Position
load_pos_ref
—
—
load_pos_scale
—
—
load_prop_gain
flex_load_single_pid_parameter
Load Single PID Parameter
load_rot_counts
flex_load_pos_modulus
Load Position Modulus
load_rpm
flex_load_rpm
Load Velocity in RPM
load_rpsps
flex_load_rpsps
Load Accel/Decel in RPS/sec
load_steps_lines
flex_load_counts_steps_rev
Load Counts/Steps per Revolution
load_target_pos
flex_load_target_pos
Load Target Position
load_time_brk
—
—
FlexMotion Software Reference Manual
B-8
www.natinst.com
Appendix B
FlexMotion Functions
Table B-2. ValueMotion to FlexMotion Cross Reference (Continued)
ValueMotion Function Name
FlexMotion Function Name
Descriptive Name
load_vel
flex_load_velocity
Load Velocity
load_vel_change
flex_load_velocity_override
Load Velocity Override
master_slave_cfg
flex_config_gear_master
Configure Gear Master
multi_start
flex_start
Start Motion
read_adc
flex_read_adc/
flex_read_adc_rtn
Read ADC
read_axis_stat/
read_axis_stat_rdb
flex_read_axis_status/
flex_read_axis_status_rtn
Read per Axis Status
read_csr
flex_read_csr_rtn
Read Communication Status
read_encoder/
read_encoder_rdb
flex_read_encoder/
flex_read_encoder_rtn
Read Encoder Position
read_gpio/
read_gpio_rdb
flex_read_port/
flex_read_port_rtn
Read I/O Port
read_io_port/
read_io_port_rdb
flex_read_hs_cap_status/
flex_read_hs_cap_status_rtn
Read High-Speed Capture Status
read_lim_stat/
read_lim_stat_rdb
flex_read_limit_status/
flex_read_limit_status_rtn
Read Limit Status
flex_read_home_input_status/
flex_read_home_input_status_rtn
Read Home Input Status
read_pos/
read_pos_rdb
flex_read_pos/
flex_read_pos_rtn
Read Position
read_rdb
flex_communicate
Communicate
read_rpm
flex_read_rpm/
flex_read_rpm_rtn
Read Velocity in RPM
read_steps_vel
flex_read_velocity/
flex_read_velocity_rtn
Read Velocity
read_vel/
read_vel_rdb
flex_read_velocity/
flex_read_velocity_rtn
Read Velocity
reset_pos
flex_reset_pos
Reset Position
send_command
flex_communicate
Communicate
set_base_vel
—
—
set_direction
flex_load_velocity
Load Velocity
flex_load_rpm
Load Velocity in RPM
© National Instruments Corporation
B-9
FlexMotion Software Reference Manual
Appendix B
FlexMotion Functions
Table B-2. ValueMotion to FlexMotion Cross Reference (Continued)
ValueMotion Function Name
FlexMotion Function Name
Descriptive Name
set_gpio
flex_set_port_momo
Set I/O Port MOMO
set_io_output
flex_set_bp_momo
Set Breakpoint Output MOMO
set_io_pol
flex_set_hs_cap_pol
Set High-Speed Capture Polarity
set_lim_pol
flex_set_limit_polarity
Set Limit Input Polarity
flex_set_home_polarity
Set Home Input Polarity
set_loop_mode
flex_set_stepper_loop_mode
Set Stepper Loop Mode
set_portc_dir
flex_set_port_dir
Set I/O Port Direction
set_pos_mode
flex_set_op_mode
Set Operation Mode
set_rs_pulse
flex_config_mc_criteria
Configure Move Complete Criteria
set_scale_seq
—
—
set_step_mode_pol
flex_config_step_mode_pol
Configure Step Mode & Polarity
set_stop_mode
flex_stop_motion
Stop Motion
start_motion
flex_start
Start Motion
stop_motion
flex_stop_motion
Stop Motion
store_elc
flex_load_counts_steps_rev
Load Counts/Steps per Revolution
store_steps_rev
flex_load_counts_steps_rev
Load Counts/Steps per Revolution
trig_buff_delim
flex_wait_on_condition
Wait on Condition
trigger_io
flex_run_prog
Run Program
FlexMotion Software Reference Manual
B-10
www.natinst.com
C
Default Parameters
This appendix lists all parameters that have default values.
When you execute the Clear Power Up Status function after a power-up
reset, the FlexMotion controller is automatically reinitialized to a known
state and all important configuration, initialization, and trajectory
parameters are set to their default values.
FlexMotion ships with a set of factory defaults that are adequate for initial
motion control development. You can change and save new power-up
defaults with the Save Default Parameters function.
Table C-1 lists all of the parameters that have defaults. Parameters not listed
are typically reset to zero (0). Velocity override is always reset to 100%.
At power-up reset, all axes are blend complete, profile complete (and move
complete), all are motor off (killed) but are not tripped on the following
error. In addition, the user status bits in the Move Complete Status register
are all reset.
Table C-1. Default Parameters
Parameter
Factory Default
Axis & Resource Configuration Parameters
© National Instruments Corporation
Axis n primary feedback
Encoder n
Axis n secondary feedback
None (0)
Axis n primary output
DAC n
Axis n secondary output
None (0)
Move complete criteria
PC only (1)
Move complete deadband
1
Move complete delay
0
Move complete min pulse
0
Stepper mode and polarity
Inverting, Step, and Dir (5)
C-1
FlexMotion Software Reference Manual
Appendix C
Default Parameters
Table C-1. Default Parameters (Continued)
Parameter
Factory Default
Vector space n
No axes (0)
Enable axes
All disabled (0)
Counts per Revolution
2,000
Kp
100
Ki
0
Ilim
1,000
Kd
1,000
Td
2
Kv, Aff, Vff
0
Steps per Revolution
2,000
Velocity filter time constant
10 samples
Run/stop threshold
1 count/sample
Stepper loop mode
Open (0)
Trajectory Parameters
Axis Acceleration, Deceleration
6,210 counts/sample
Vector Acceleration, Deceleration
6,210 counts/sample
Following error
32,767
Target position
0
Axis Velocity
200 counts/sample
Vector Velocity
200 counts/sample
Operation mode
Absolute position (0)
Gear master
None (0)
Enable gearing
All disabled (0)
Gear ratio
0
Gear ratio type
Absolute (0)
Blend factor
Blend at decel (–1)
FlexMotion Software Reference Manual
C-2
www.natinst.com
Appendix C
Default Parameters
Table C-1. Default Parameters (Continued)
Parameter
Factory Default
Position modulus
None (0)
S-Curve time
1 sample
Torque limit positive
(primary and secondary)
32,767 (+10 V)
Torque limit negative
(primary and secondary)
–32,768 (–10 V)
Torque offset
(primary and secondary)
0
Velocity threshold
524,288,000 counts/sample
Motion I/O Parameters
© National Instruments Corporation
Enable inhibits
All enabled (0x7E)
Inhibit polarity
Inverting (0x7E)
Enable home inputs
All disabled (0)
Enable forward limit inputs
All disabled (0)
Enable reverse limit inputs
All disabled (0)
Enable S/W limits
All disabled (0)
Axis n forward S/W limit position
230–1 counts/steps
Axis n reverse S/W limit position
–230 counts/steps
Home polarity
Inverting (0x7E)
Inhibit mustOn
All on (0x7E)
Inhibit mustOff
0
Forward limit polarity
Inverting (0x7E)
Reverse limit polarity
Inverting (0x7E)
Breakpoint modulus
None (0)
Breakpoint position
0
Breakpoint mustOn
0
Breakpoint mustOff
All off (0x7E)
C-3
FlexMotion Software Reference Manual
Appendix C
Default Parameters
Table C-1. Default Parameters (Continued)
Parameter
Factory Default
Enable high-speed capture
All disabled (0)
High-speed capture polarity
Noninverting (0)
High-speed capture source
Trigger input on I/O connector
Analog & Digital I/O Parameters
ADC enable
None (0)
ADC range
–10 to +10 V
Encoder enable
None (0)
Maximum encoder frequency
(7344 only)
1.6 MHz
I/O port direction
1 and 2 input, 3 output
(FlexMotion-6C);
All input (7344)
I/O port mustOn
0
I/O port mustOff
All off (0xFF)
I/O port polarity
Inverting (0xFF)
RTSI port (7344 only)
All input, no RTSI lines driven
General purpose variables
All 0
Interrupt event mask
All events masked off (0)
FlexMotion Software Reference Manual
C-4
www.natinst.com
Onboard Variables, Input, and
Return Vectors
D
This appendix gives additional information on how to use input and return
vectors in conjunction with onboard variables.
Table D-1 list functions with more than one data parameter that require
multiple variables when using vectors. The Maximum Variable Number
column lists the highest variable number that a vector can point to and still
have room for all the data without exceeding the total variable space.
This appendix also highlights a few special cases where the number of
parameters does not equal the number of variables. These cases are
described in the notes that follow the table.
Table D-1. Functions with More than One Data Parameter
Vector Type
Number of
Parameters
Number of
Variables Required
Maximum
Variable Number
Load All PID Parameters
Input
8
8
0x71
Configure Velocity Filter
Input
2
2
0x77
Load Velocity in RPM
Input
1
4 (note 1)
0x75
Load Accel/Decel in RPS/sec
Input
1
4 (note 1)
0x75
Load Vector Space Position
Input
3
3
0x76
Read Velocity in RPM
Return
1
4 (note 1)
0x75
Read Vector Space Position
Return
3
3
0x76
Reset Position
Input
2
2
0x77
Load Circular Arc
Input
3
5 (notes 2 and 3)
0x74
Load Helical Arc
Input
4
4 (note 2)
0x75
Load Spherical Arc
Input
5
5 (note 2)
0x74
Load Gear Ratio
Input
3
3
0x76
Load Velocity Threshold in
RPM
Input
1
4 (note 1)
0x75
Function Name
© National Instruments Corporation
D-1
FlexMotion Software Reference Manual
Appendix D
Onboard Variables, Input, and Return Vectors
Table D-1. Functions with More than One Data Parameter (Continued)
Vector Type
Number of
Parameters
Number of
Variables Required
Maximum
Variable Number
Load Torque Limit
Input
4
4
0x75
Load Torque Offset
Input
2
2
0x77
Read DAC Limit Status
Return
2
1 (note 4)
0x78
Read Trajectory Data
Return
2 (per axis)
2 (note 5)
note 5
Input
2
2
0x77
Read Limit Status
Return
2
1 (note 4)
0x78
Wait on Condition
Return
2
2 (note 6)
0x77
Function Name
Load Software Limit Positions
Notes
1 RPM and RPSPS are double precision floating point values (f64). They are internally represented in IEEE floating point
format in four 16-bit words. This format is also used in the communications packet between the host computer and the
FlexMotion controller.
2 While the three Arc functions take double-precision floating-point values (f64) for their angle parameters, these values are
converted to 32 bit values (i32 and u32) in the FlexMotion DLL before being sent to the controller. Therefore, unlike other
FlexMotion functions taking floating-point values, the internal representation for each angle parameter requires only one
variable.
3
The Load Circular Arc and Load Spherical Arc functions are implemented identically on the FlexMotion controller. The
FlexMotion DLL simply substitutes zeros for plane pitch and yaw when you call the Load Circular Arc function. When using
variables and vectors, use the Load Spherical Arc function exclusively.
4 The Read Limit Status and Read DAC Limit Status functions return the forward and reverse status bytes (u8) packed
together as one 16-bit word (u16). Only one variable is required.
5 The Read Trajectory Data function returns two values (position and velocity) per axis. The total number of variable
required is therefore two times the number of axes selected with the Acquire Trajectory Data function. Also, the maximum
variable number is therefore 0x78 minus two times the number of axes selected with the Acquire Trajectory Data function.
6 The Wait on Condition function can return two values, condition code and bitmapped status, to the variables specified with
the return vector.
FlexMotion Software Reference Manual
D-2
www.natinst.com
Technical Support Resources
E
This appendix describes the comprehensive resources available to you in
the Technical Support section of the National Instruments Web site and
provides technical support telephone numbers for you to use if you have
trouble connecting to our Web site or if you do not have internet access.
NI Web Support
To provide you with immediate answers and solutions 24 hours a day,
365 days a year, National Instruments maintains extensive online technical
support resources. They are available to you at no cost, are updated daily,
and can be found in the Technical Support section of our Web site at
www.natinst.com/support.
Online Problem-Solving and Diagnostic Resources
•
KnowledgeBase—A searchable database containing thousands of
frequently asked questions (FAQs) and their corresponding answers or
solutions, including special sections devoted to our newest products.
The database is updated daily in response to new customer experiences
and feedback.
•
Troubleshooting Wizards—Step-by-step guides lead you through
common problems and answer questions about our entire product line.
Wizards include screen shots that illustrate the steps being described
and provide detailed information ranging from simple getting started
instructions to advanced topics.
•
Product Manuals—A comprehensive, searchable library of the latest
editions of National Instruments hardware and software product
manuals.
•
Hardware Reference Database—A searchable database containing
brief hardware descriptions, mechanical drawings, and helpful images
of jumper settings and connector pinouts.
•
Application Notes—A library with more than 100 short papers
addressing specific topics such as creating and calling DLLs,
developing your own instrument driver software, and porting
applications between platforms and operating systems.
© National Instruments Corporation
E-1
FlexMotion Software Reference Manual
Appendix E
Technical Support Resources
Software-Related Resources
•
Instrument Driver Network—A library with hundreds of instrument
drivers for control of standalone instruments via GPIB, VXI, or serial
interfaces. You also can submit a request for a particular instrument
driver if it does not already appear in the library.
•
Example Programs Database—A database with numerous,
non-shipping example programs for National Instruments
programming environments. You can use them to complement the
example programs that are already included with National Instruments
products.
•
Software Library—A library with updates and patches to application
software, links to the latest versions of driver software for National
Instruments hardware products, and utility routines.
Worldwide Support
National Instruments has offices located around the globe. Many branch
offices maintain a Web site to provide information on local services. You
can access these Web sites from www.natinst.com/worldwide.
If you have trouble connecting to our Web site, please contact your local
National Instruments office or the source from which you purchased your
National Instruments product(s) to obtain support.
For telephone support in the United States, dial 512 795 8248. For
telephone support outside the United States, contact your local branch
office:
Australia 03 9879 5166, Austria 0662 45 79 90 0, Belgium 02 757 00 20,
Brazil 011 284 5011, Canada (Calgary) 403 274 9391,
Canada (Ontario) 905 785 0085, Canada (Québec) 514 694 8521,
China 0755 3904939, Denmark 45 76 26 00, Finland 09 725 725 11,
France 01 48 14 24 24, Germany 089 741 31 30, Greece 30 1 42 96 427
Hong Kong 2645 3186, India 91805275406, Israel 03 6120092,
Italy 02 413091, Japan 03 5472 2970, Korea 02 596 7456,
Mexico (D.F.) 5 280 7625, Mexico (Monterrey) 8 357 7695,
Netherlands 0348 433466, Norway 32 27 73 00, Singapore 2265886,
Spain (Barcelona) 93 582 0251, Spain (Madrid) 91 640 0085,
Sweden 08 587 895 00, Switzerland 056 200 51 51,
Taiwan 02 2377 1200, United Kingdom 01635 523545
FlexMotion Software Reference Manual
E-2
www.natinst.com
Glossary
Prefix
Meanings
Value
n-
nano-
10 – 9
µ-
micro-
10 – 6
m-
milli-
10 –3
c-
centi-
10 –2
k-
kilo-
10 3
M-
mega-
10 6
Numbers/Symbols
%
percent
±
plus or minus
+
positive of, or plus
–
negative of, or minus
/
per
°
degree
Ω
ohm
%
percent
A
A
amperes
absolute mode
treat the target position loaded as position relative to zero (0) while
making a move
absolute position
position relative to zero
© National Instruments Corporation
G-1
FlexMotion Software Reference Manual
Glossary
acceleration
A measurement of the change in velocity as a function of time.
Acceleration describes the period when velocity is changing from one value
to another. From a stop (zero velocity) to a desired speed (target velocity)
or vice versa.
active-high
a signal is active when its value goes high (1)
active-low
a signal is active when its value goes low (0)
A/D
analog-to-digital
address
character code that identifies a specific location (or series of locations) in
memory
axis
the unit which is used to control a motor or any similar device
B
b
bit—one binary digit, either 0 or 1
base address
A memory address that serves as the starting address for programmable
registers. All other addresses are located by adding to the base address.
binary
a number system with a base of 2
buffer
temporary storage for acquired or generated data (software)
bus
The group of conductors that interconnect individual circuitry in a
computer. Typically, a bus is the expansion vehicle to which I/O or other
devices are connected. Examples of PC buses are the ISA and PCI bus.
byte
Eight related bits of data, an 8-bit binary number. Also used to denote the
amount of memory required to store one byte of data.
C
CCW
counter-clockwise—implies direction of rotation of the motor
closed-loop
A broadly applied term relating to any system where output is measured
and compared to input. The output is then adjusted to reach the desired
condition. In motion control this term applies to a system using an encoder
or any feedback device.
FlexMotion Software Reference Manual
G-2
www.natinst.com
Glossary
commutation
The sequential control of switched waveforms from the power driver
amplifier into the motor phase windings that will cause rotation or linear
motion depending on motor type. Brush type motors auto-commutate due
to the brush contact with the motor windings. Brushless type motors require
the advance information of position and direction in order to accurately
provide correct waveform switching sequences. Brushless motors typically
use hall-effect type sensors to generate the commutation control
waveforms.
control system
bandwidth
This is the measure of a closed-loop system’s response and is typically
represented as a frequency range or an update period for the PID loop in a
digital servo controller. For example, if a PID loop has an update rate of
250 µs, it would have a bandwidth of 4 kHz.
CPU
central processing unit
CW
clockwise—implies direction of rotation of the motor
D
DC
direct current
deceleration
A measurement of the change in velocity as a function of time.
Deceleration describes the period when velocity is changing from one value
to another. From a stop (zero velocity) to a desired speed (target velocity)
or vice versa. Deceleration is also considered negative acceleration.
dedicated
assigned totally for a particular function
DGND
digital ground
digital I/O port
a group of digital input/output signals
DIP
dual inline package
DLL
Dynamic Link Library for Windows. Provides the API (Application
programming interface) for the motion controllers.
drivers
software that controls a specific hardware device such as a DAQ board or
a motion controller
© National Instruments Corporation
G-3
FlexMotion Software Reference Manual
Glossary
E
encoder
a device that translates mechanical motion into electrical signals used for
monitoring position or velocity
encoder resolution
The number of encoder lines between consecutive encoder indexes (marker
or Z-bit). If the encoder does not have an index output, the encoder
resolution can be referred to as lines per revolution.
F
FIFO
First-in-first-out memory buffer—the first data stored is the first data sent
to the acceptor. FIFOs are often used on DAQ devices to temporarily store
incoming or outgoing data until that data can be retrieved or output. For
example, an analog input FIFO stores the results of A/D conversions until
the data can be retrieved into system memory, a process that requires the
servicing of interrupts and often the programming of the DMA controller.
This process can take several milliseconds in some cases. During this time,
data accumulates in the FIFO for future retrieval. With a larger FIFO,
longer latencies can be tolerated. In the case of analog output, a FIFO
permits faster update rates, because the waveform data can be stored on the
FIFO ahead of time. This again reduces the effect of latencies associated
with getting the data from system memory to the DAQ device.
filter parameters
indicates the control loop parameter gains (PID gains) for a given axis
filtering
a type of signal conditioning that allows you to filter unwanted signals from
the signal you are trying to measure
flash
non-volatile memory used for storing code, programs, and data
following error
trip point
Following error is the difference between the instantaneous commanded
trajectory position and the feedback position. If the following error
increases beyond the maximum allowable value entered (called the
following error trip point), the motors trip out on following error (that is,
are killed, thus preventing the axis from running away).
freewheel
the condition of a motor when power is de-energized and the motor shaft is
free to turn with only frictional forces to impede it
full-step
full-step mode of a stepper motor—for a two phase motor this is done by
energizing two windings or phases at a time
FlexMotion Software Reference Manual
G-4
www.natinst.com
Glossary
function declaration
a specification showing the return value and parameters for a function
function library
a collection of related functions packaged into a dynamic link library
(DLL) for Windows, or a library file for DOS
G
Gnd
ground
GND
ground
H
half-step
Half-step mode of a stepper motor—for a two phase motor this is done by
alternately energizing two windings and then only one. In half-step mode,
alternate steps are strong and weak but there is significant improvement in
low-speed smoothness over the full-step mode.
hex
hexadecimal
holding torque
The force that a motor can provide or withstand while still remaining in a
fixed stop location without any rotation, translation or movement.
home switch/home
position (input)
A reference position in a motion control system derived from a mechanical
datum or switch. Often designated as the zero position. The motion
controller halts the motor if it finds this switch active while doing a find
home sequence.
host computer
computer into which the motion controller is plugged
hybrid stepper motor
A motor type designed to move in discrete step increments, (typically
specified in degrees). Hybrid stepper motors have permanent magnet rotor
elements with a coil wound stator (outer shell) and no brushes contacting
between the two. The current through the coil phases is switched in a
predetermined sequence (commutated) to produce desired motion in a
given direction.
Hz
hertz—the number of scans read or updates written per second
© National Instruments Corporation
G-5
FlexMotion Software Reference Manual
Glossary
I
I/O
input/output—the transfer of data to/from a computer system involving
communications channels, operator interface devices, and/or data
acquisition and control interfaces
ID
identifier
import library
A Windows-specific file that contains information about the functions
contained in a companion dynamic link library (DLL). Windows
applications are typically linked to one or more import libraries.
in
inches
index
marker between consecutive encoder revolutions
inverting
Defines the polarity of a switch (limit switch, home switch, and so on)
when it is in its active state. If these inputs are active-low they are said to
have inverting polarity.
IRQ
interrupt request
ISA
industry-standard architecture
J
jerk
the derivative of acceleration (change of acceleration per unit time)
measured in units of counts (steps)/s3
K
k
kilo—the standard metric prefix for 1,000, or 103, used with units of
measure such as volts, hertz, and meters
K
kilo—the prefix for 1,024, or 210, used with byte in quantifying data or
computer memory
FlexMotion Software Reference Manual
G-6
www.natinst.com
Glossary
L
latching
a signal that maintains its value while in a given state, as opposed to a
signal that momentarily pulses when entering or exiting a state
LIFO
last-in-first-out
limit switch/
end-of-travel (input)
properly designed motion control systems have sensors called limit
switches that alert the control electronics that physical end of travel is
being approached and that the motion should stop
loop tuning
bode plot
A graphical display of the measured or calculated system gain and phase
margin versus frequency of a closed-loop system for a given range of input
frequency. The Tune PID bode plot VI function provides an interactive
display of the steady state performance of the closed-loop control system,
taking into account actual system characteristics.
M
m
meters
MCS
Move Complete Status
microstep
Microstepping mode of a stepper motor—subdividing the basic motor step
by proportioning the current in the windings. In this way the step size is
reduced and low speed smoothness is dramatically improved.
modulo position
treat the position as within the range of total quadrature counts per
revolution for an axis
MustOff
state or bit that is forced off (False) or must be off to satisfy a condition
MustOn
state or bit that is forced on (True) or must be on to satisfy a condition
N
noise
An undesirable electrical signal—Noise comes from external sources such
as the AC power line, motors, generators, transformers, fluorescent lights,
soldering irons, CRT displays, computers, electrical storms, welders, radio
transmitters, and internal sources such as semiconductors, resistors, and
capacitors. Noise corrupts signals you are trying to send or receive.
© National Instruments Corporation
G-7
FlexMotion Software Reference Manual
Glossary
noninverting
Defines the polarity of a switch (limit switch, home switch, and so on)
when it is in its active state. If these inputs are active-high low they are said
to have noninverting polarity.
O
OL
open-loop—refers to a motion control system where no external sensors
(feedback devices) are used to provide position or velocity correction
signals
P
packets
command and data sent as a group over a computer bus
phase angle/
phase margin
A value presented in PID Loop Tuning Bode Plot analysis that represents
the advance or lead of an input signal to the output signal in a closed-loop
servo controller. Used to determine closed-loop system stability at a given
crossover frequency.
PID
proportional integral derivative control loop
PID loop tuning/
servo compensation
Flexible adjustment of the Proportional, Integral, and Derivative Gain
Parameters along with loop update rate or frequency to assure stable
operation and desired dynamic response of a closed-loop servo system.
port
(1) a communications connection on a computer or a remote controller
(2) a digital port, consisting of four or eight lines of digital input and/or
output
position breakpoint
Position breakpoint for an encoder can be set in absolute or relative
quadrature counts. When the encoder reaches a position breakpoint, the
associated high-speed breakpoint output immediately transitions.
position resolution
Typically determined by the smallest increment of motion that can be
controlled. In Stepper Motor systems, it is determined by the number of
steps per revolution, typically as a limitation of the stepper driver
microstepping value or of the feedback device resolution. In Servo Motor
systems, it is entirely determined by the resolution of the feedback device
in counts per revolution of the motor.
power cycling
Implies turning the host computer off and then back on. This resets the
motion controller.
FlexMotion Software Reference Manual
G-8
www.natinst.com
Glossary
profile
instantaneous position versus time output of a trajectory generator
pull-in move
When stepper motors are run in closed-loop mode, the encoder feedback is
used to verify the position of an axis when the motion ends. The motion
controller then commands the axis to do a final move so that it is at the
desired target position.
PWM
Pulse Width Modulation—a method of controlling the average current in a
motors phase windings by varying the on-time (duty cycle) of transistor
switches
Q
quadrature counts
The encoder line resolution times four. The encoder resolution is the
number of encoder lines between consecutive encoder indexes (marker or
Z-bit). If the encoder does not have an index output the encoder resolution
can be referred to as lines per revolution, lines per inch, lines per millimeter,
and so on.
R
RAM
random-access memory
relative breakpoint
sets the position breakpoint for an encoder in relative quadrature counts
relative mode
treat the target position loaded as position relative to current position while
making a move
relative position
position relative to current position
ribbon cable
a flat cable in which the conductors are side by side
ROM
read-only memory—non-volatile memory used for storing code, programs,
and data
rotary axis
An axis for which rotary counts are loaded. The axis moves to the target
position by taking the shortest path, either forward or backwards, while
remaining within the one revolution defined by the loaded modulo value.
RPM
revolutions per minute. Units for velocity.
RPSPS or RPS/s
revolutions per second square. Units for acceleration and deceleration.
© National Instruments Corporation
G-9
FlexMotion Software Reference Manual
Glossary
RTSI
Real-Time System Integration bus—the National Instruments timing bus
that connects controllers directly, by means of connectors on top of the
controllers, for precise synchronization of functions.
S
s
seconds
sec
seconds
servo
(1) specifies an axis that controls a servo motor (2) specifies when a servo
motor becomes active
slot
a position where a module can be inserted into an ISA or PCI backplane
step output rate
The frequency of the step output control pulses generated by a
controller/indexer and provided to an amplifier driver. The combination of
step output rate (steps/s), steps per revolution (steps/rev), and time
(60 s/minute) provide a basic representation of motor velocity in RPM.
Linear speed may be further derived by additional mechanical data, lead
screw revolutions per inch, and so on.
stepper
specifies an axis that controls a stepper motor.
T
toggle
changing state from high to low, back to high and so on
torque
force tending to produce rotation
trapezoidal profile
A typical motion trajectory, where a motor accelerates up to the
programmed velocity using the programmed acceleration, traverses at the
programmed velocity and then decelerates at the programmed acceleration
to the target position.
trigger
any event that causes or starts some form of data capture
trigger buffer inputs
A digital signal that begins the execution of a sequence of motion
commands stored on the controller/indexer allowing the commands to
fully execute until the end of the sequence is reached.
TTL
transistor-transistor logic
© National Instruments Corporation
G-10
FlexMotion Software Reference Manual
Glossary
U
UOM
unit of measure
V
V
volts
velocity mode
move the axis continuously at the specified velocity
W
watchdog
a timer task that shuts down (resets) the motion controller if any serious
error occurs
word
The standard number of bits that a processor or memory manipulates at one
time. Microprocessors typically use 8-, 16-, or 32-bit words.
Z
Z-bit
marker or index between consecutive encoder revolutions
© National Instruments Corporation
G-11
FlexMotion Software Reference Manual
Index
A
flex_read_dac_limit_status_rtn,
6-95 to 6-96
flex_read_dac_rtn, 6-93 to 6-94
flex_read_steps_gen, 6-97 to 6-98
flex_read_steps_gen_rtn, 6-97 to 6-98
flex_read_target_pos, 6-99 to 6-100
flex_read_target_pos_rtn, 6-99 to 6-100
flex_read_trajectory_data, 6-101 to 6-102
flex_read_trajectory_data_rtn,
6-101 to 6-102
summary (table), B-3
analog & digital I/O functions, 10-1 to 10-31
default parameters (table), C-4
flex_configure_encoder_filter, 10-2 to 10-3
flex_configure_pwm_output, 10-4 to 10-6
flex_enable_adcs, 10-7 to 10-8
flex_enable_encoders, 10-9 to 10-10
flex_load_dac, 10-11
flex_load_pwm_duty, 10-12
flex_read_adc, 10-13 to 10-14
flex_read_adc_rtn, 10-13 to 10-14
flex_read_encoder, 10-15 to 10-16
flex_read_encoder_rtn, 10-15 to 10-16
flex_read_port, 10-17 to 10-18
flex_read_port_rtn, 10-17 to 10-18
flex_reset_encoder, 10-19
flex_select_signal, 10-20 to 10-22
flex_set_adc_range, 10-23 to 10-24
flex_set_port_direction, 10-25 to 10-26
flex_set_port_momo, 10-27 to 10-29
flex_set_port_pol, 10-30 to 10-31
summary (table), B-5
API functional organization, 4-1 to 4-2
application development. See FlexMotion
Windows libraries; programming language
considerations.
arc angles in degrees, 4-19 to 4-20
acceleration feedforward gain, changing, 5-26
acceleration in RPS/s, 4-19
ADC channels
purpose and use, 4-5 to 4-6
resource IDs (table), 4-6
ADC functions
flex_enable_adcs, 10-7 to 10-8
flex_read_adc function, 10-13 to 10-14
flex_read_adc_rtn function, 10-13 to 10-14
flex_set_adc_range, 10-23 to 10-24
advanced functions, 13-1 to 13-18
flex_clear_pu_status, 13-2 to 13-3
flex_communicate, 13-4 to 13-6
flex_enable_1394_watchdog, 13-7
flex_enable_auto_start, 13-8
flex_enable_shutdown, 13-9 to 13-10
flex_flush_rdb, 13-11
flex_read_csr_rtn, 13-12 to 13-13
flex_reset_defaults, 13-14
flex_save_defaults, 13-15
flex_set_irq_mask, 13-16 to 13-18
summary (table), B-7
advanced trajectory functions, 6-72 to 6-102
flex_acquire_trajectory_data, 6-73 to 6-74
flex_load_base_vel, 6-75
flex_load_blend_fact, 6-76 to 6-78
flex_load_pos_modulus, 6-79
flex_load_rpm_thresh, 6-80 to 6-81
flex_load_scurve_time, 6-82 to 6-83
flex_load_torque_lim, 6-84 to 6-86
flex_load_torque_offset, 6-87 to 6-88
flex_load_vel_override, 6-91 to 6-92
flex_load_vel_threshold, 6-89 to 6-90
flex_read_dac, 6-93 to 6-94
flex_read_dac_limit_status, 6-95 to 6-96
© National Instruments Corporation
I-1
FlexMotion Software Reference Manual
Index
arcs functions, 6-55 to 6-62
flex_load_circular_arc, 6-56 to 6-57
flex_load_helical_arc, 6-58 to 6-59
flex_load_spherical_arc, 6-60 to 6-62
summary (table), B-3
array data type, 3-2
automatic startup function
(flex_enable_auto_start), 13-8
axes, 4-2 to 4-4
configuring, 4-2
definition, 4-2
resource IDs (table), 4-4
stepper axis resources (figure), 4-3
axis & resource configuration functions,
5-1 to 5-31
default parameters (table), C-1 to C-2
flex_config_axis, 5-2 to 5-5
flex_config_mc_criteria, 5-6 to 5-8
flex_config_step_mode_pol, 5-9 to 5-10
flex_config_vect_spc, 5-11 to 5-12
flex_enable_axes, 5-13 to 5-16
flex_load_counts_steps_rev, 5-17 to 5-18
flex_load_pid_parameters, 5-19 to 5-20
flex_load_single_pid_parameter,
5-21 to 5-27
flex_load_vel_tc_rs, 5-28 to 5-29
flex_set_stepper_loop_mode,
5-30 to 5-31
summary (table), B-1
flex_wait_for_blend_complete,
6-49 to 6-51
board ID, in host-FlexMotion board
communication, 4-20
board identification parameter, 3-4
Borland C/C++ application, creating,
2-2 to 2-3. See also C/C++ applications.
breakpoint functions, 8-21 to 8-32
flex_enable_bp, 8-22 to 8-24
flex_load_bp_modulus, 8-25 to 8-26
flex_load_pos_bp, 8-27 to 8-28
flex_read_breakpoint_status,
8-29 to 8-30
flex_read_breakpoint_status_rtn,
8-29 to 8-30
flex_set_bp_momo, 8-31 to 8-32
summary (table), B-4
BridgeVIEW software, 1-2
building applications. See FlexMotion
windows libraries; programming language
considerations.
C
capture functions. See high-speed capture
functions.
C/C++ applications
creating 32-bit Windows applications,
2-2 to 2-3
programming considerations, 3-4 to 3-6
data returned by reference, 3-4 to 3-5
data returned in arrays, 3-5
FlexMotion data structures,
3-5 to 3-6
communication with host computer,
4-20 to 4-22
board ID, 4-20
packets, handshaking, and FIFO
buffers, 4-21
return data buffer, 4-21 to 4-22
B
bitmapped versus per-resource functions, 4-10
blend functions. See also move functions.
flex_blend, 7-2 to 7-4
flex_check_blend_complete_status,
6-2 to 6-3
flex_load_blend_fact, 6-76 to 6-78
flex_read_blend_status, 6-24 to 6-26
flex_read_blend_status_rtn, 6-24 to 6-26
FlexMotion Software Reference Manual
I-2
www.natinst.com
Index
D
configuration functions
advanced functions
flex_set_irq_mask, 13-16 to 13-18
analog & digital I/O functions
flex_configure_encoder_filter,
10-2 to 10-3
flex_configure_pwm_output,
10-4 to 10-6
flex_set_adc_range, 10-23 to 10-24
flex_set_port_direction,
10-25 to 10-26
flex_set_port_momo, 10-27 to 10-29
flex_set_port_pol, 10-30 to 10-31
axis & resource configuration functions
flex_config_axis, 5-2 to 5-5
flex_config_mc_criteria, 5-6 to 5-8
flex_config_step_mode_pol,
5-9 to 5-10
flex_config_vect_spc, 5-11 to 5-12
flex_set_stepper_loop_mode,
5-30 to 5-31
breakpoint functions
flex_set_bp_momo, 8-31 to 8-32
gearing functions
flex_config_gear_master,
6-64 to 6-65
high-speed capture functions
flex_set_hs_cap_pol, 8-41 to 8-42
motion I/O functions
flex_configure_inhibits, 8-2 to 8-3
flex_set_home_polarity,
8-15 to 8-16
flex_set_inhibit_momo, 8-17 to 8-18
flex_set_limit_polarity, 8-19 to 8-20
onboard programming functions
flex_set_status_momo,
12-16 to 12-17
trajectory control functions
flex_set_op_mode, 6-45 to 6-48
© National Instruments Corporation
DAC functions
flex_load_dac, 10-11
flex_read_dac, 6-93 to 6-94
flex_read_dac_limit_status, 6-95 to 6-96
flex_read_dac_limit_status_rtn,
6-95 to 6-96
flex_read_dac_rtn, 6-93 to 6-94
DAC outputs
purpose and use, 4-6 to 4-7
resource IDs (table), 4-7
resources (figure), 4-6
data operations functions, 12-31 to 12-44
flex_add_vars, 12-32
flex_and_vars, 12-33
flex_div_vars, 12-34
flex_load_var, 12-35
flex_lshift_var, 12-36 to 12-37
flex_mult_vars, 12-38
flex_not_var, 12-39
flex_or_vars, 12-40
flex_read_var, 12-41 to 12-42
flex_read_var_rtn, 12-41 to 12-42
flex_sub_vars, 12-43
flex_xor_vars, 12-44
summary (table), B-6 to B-7
data returned by reference
C/C++ for Windows, 3-4 to 3-5
Visual Basic for Windows, 3-7
data returned in arrays
C/C++ for Windows, 3-5
Visual Basic for Windows, 3-7 to 3-8
data structures, 3-3, 3-5 to 3-6
data types, 3-1 to 3-3
arrays, 3-2
primary types (table), 3-2
structures and other user-defined data
types, 3-3
I-3
FlexMotion Software Reference Manual
Index
flex_enable_hs_caps function,
8-34 to 8-35
flex_enable_limits function, 8-6 to 8-8
flex_enable_shutdown, 13-9 to 13-10
encoder functions
flex_configure_encoder_filter,
10-2 to 10-3
flex_enable_encoders, 10-9 to 10-10
flex_read_encoder, 10-15 to 10-16
flex_read_encoder_rtn, 10-15 to 10-16
flex_reset_encoder, 10-19
encoders
encoder resource IDs (table), 4-5
purpose and use, 4-4 to 4-5
error & utility functions, 11-1 to 11-12
flex_get_error_description, 11-2 to 11-5
flex_get_motion_board_info,
11-6 to 11-8
flex_get_motion_board_name,
11-9 to 11-10
flex_read_err_msg_rtn, 11-11 to 11-12
summary (table), B-5
errors and error handling, 4-22 to 4-25
error codes summary (table), A-1 to A-13
error handling techniques, 4-24 to 4-25
fatal hardware and communication
errors, 4-24
modal and non-modal errors, 4-22 to 4-24
communication versus individual
function entry points, 4-23
error message stack, 4-23
onboard programs, 4-24
default management functions
flex_reset_defaults, 13-14
flex_save_defaults, 13-15
default parameters (table), C-1 to C-4
analog & digital I/O parameters, C-4
axis & resource configuration parameters,
C-1 to C-2
motion I/O parameters, C-3 to C-4
trajectory parameters, C-2 to C-3
derivative gain, changing, 5-24
derivative sample period, changing,
5-24 to 5-25
developing applications. See FlexMotion
Windows libraries; programming language
considerations.
diagnostic resources, online, E-1
digital I/O functions. See analog & digital I/O
functions.
documentation
conventions used in manual, xv
related documentation, xvi
double-buffered parameters, 4-10 to 4-11
E
electronic gearing, 4-16. See also gearing
functions.
enabling functions
flex_enable_1394_watchdog, 13-7
flex_enable_adcs function, 10-7 to 10-8
flex_enable_auto_start, 13-8
flex_enable_axes function, 5-13 to 5-16
flex_enable_bp function, 8-22 to 8-24
flex_enable_encoders function,
10-9 to 10-10
flex_enable_gearing function,
6-66 to 6-67
flex_enable_gearing_single_axis,
6-68 to 6-69
flex_enable_home_inputs function,
8-4 to 8-5
FlexMotion Software Reference Manual
F
fatal hardware and communication
errors, 4-24
FIFO buffers, in host-FlexMotion board
communication, 4-21
I-4
www.natinst.com
Index
Find Home & Find Index functions, 9-1 to 9-8
flex_find_home, 9-2 to 9-6
flex_find_index, 9-7 to 9-8
summary (table), B-5
flex_acquire_trajectory_data function,
6-73 to 6-74
flex_add_vars function, 12-32
flex_and_vars function, 12-33
flex_begin_store function, 12-2 to 12-3
flex_blend function, 7-2 to 7-4
flex_check_blend_complete_status function,
6-2 to 6-3
flex_check_move_complete_status function,
6-4 to 6-5
flex_clear_pu_status function, 13-2 to 13-3
flex_communicate function, 13-4 to 13-6
flex_config_axis function, 5-2 to 5-5
flex_config_gear_master function,
6-64 to 6-65
flex_config_mc_criteria function, 5-6 to 5-8
flex_config_step_mode_pol function,
5-9 to 5-10
flex_config_vect_spc function, 5-11 to 5-12
flex_configure_inhibits function, 8-2 to 8-3
flex_configure_encoder_filter, 10-2 to 10-3
flex_configure_pwm_output function,
10-4 to 10-6
flex_div_vars function, 12-34
flex_enable_1394_watchdog function, 13-7
flex_enable_adcs function, 10-7 to 10-8
flex_enable_auto_start function, 13-8
flex_enable_axes function, 5-13 to 5-16
flex_enable_bp function, 8-22 to 8-24
flex_enable_encoders function, 10-9 to 10-10
flex_enable_gearing function, 6-66 to 6-67
flex_enable_gearing_single_axis,
6-68 to 6-69
flex_enable_home_inputs function, 8-4 to 8-5
flex_enable_hs_caps function, 8-34 to 8-35
flex_enable_limits function, 8-6 to 8-8
flex_enable_shutdown function, 13-9 to 13-10
© National Instruments Corporation
flex_end_store function, 12-4
flex_find_home function, 9-2 to 9-6
flex_find_index function, 9-7 to 9-8
flex_flush_rdb function, 13-11
flex_get_error_description function,
11-2 to 11-5
flex_get_motion_board_info function,
11-6 to 11-8
flex_get_motion_board_name function,
11-9 to 11-10
flex_insert_program_label function, 12-5
flex_jump_label_on_condition function,
12-6 to 12-10
flex_load_acceleration function, 6-6 to 6-7
flex_load_base_vel function, 6-75
flex_load_blend_fact function, 6-76 to 6-78
flex_load_bp_modulus function, 8-25 to 8-26
flex_load_circular_arc function, 6-56 to 6-57
flex_load_counts_steps_rev function,
5-17 to 5-18
flex_load_dac function, 10-11
flex_load_delay function, 12-11
flex_load_follow_err function, 6-8 to 6-9
flex_load_gear_ratio function, 6-70 to 6-71
flex_load_helical_arc function, 6-58 to 6-59
flex_load_pid_parameters function,
5-19 to 5-20
flex_load_pos_bp function, 8-27 to 8-28
flex_load_pos_modulus function, 6-79
flex_load_pwm_duty function, 10-12
flex_load_rpm function, 6-10 to 6-11
flex_load_rpm_thresh function, 6-80 to 6-81
flex_load_rpsps function, 6-12 to 6-13
flex_load_scurve_time function, 6-82 to 6-83
flex_load_single_pid_parameter function,
5-21 to 5-27
acceleration feedforward gain, 5-26
derivative gain, 5-24
derivative sample period, 5-24 to 5-25
example, 5-27
integral gain, 5-23
I-5
FlexMotion Software Reference Manual
Index
integration limit, 5-23
parameters and parameter discussion,
5-21 to 5-22
proportional gain, 5-22
velocity feedback gain, 5-25 to 5-26
velocity feedforward gain, 5-26 to 5-27
flex_load_spherical_arc function,
6-60 to 6-62
flex_load_sw_lim_pos function, 8-9 to 8-10
flex_load_target_pos function, 6-14 to 6-15
flex_load_torque_lim function, 6-84 to 6-86
flex_load_torque_offset function,
6-87 to 6-88
flex_load_var function, 12-35
flex_load_velocity function, 6-16 to 6-17
flex_load_vel_override function, 6-91 to 6-92
flex_load_vel_tc_rs function, 5-28 to 5-29
flex_load_vel_threshold function,
6-89 to 6-90
flex_load_vs_pos function, 6-18 to 6-19
flex_lshift_var function, 12-36 to 12-37
flex_mult_vars function, 12-38
flex_not_var function, 12-39
flex_or_vars function, 12-40
flex_pause_prog function, 12-12
flex_read_adc function, 10-13 to 10-14
flex_read_adc_rtn function, 10-13 to 10-14
flex_read_axis_status function, 6-20 to 6-23
flex_read_axis_status_rtn function,
6-20 to 6-23
flex_read_blend_status function, 6-24 to 6-26
flex_read_blend_status_rtn function,
6-24 to 6-26
flex_read_breakpoint_status function,
8-29 to 8-30
flex_read_breakpoint_status_rtn function,
8-29 to 8-30
flex_read_cap_pos function, 8-36 to 8-37
flex_read_cap_pos_rtn function, 8-36 to 8-37
flex_read_csr_rtn function, 13-12 to 13-13
flex_read_dac function, 6-93 to 6-94
FlexMotion Software Reference Manual
flex_read_dac_limit_status function,
6-95 to 6-96
flex_read_dac_limit_status_rtn function,
6-95 to 6-96
flex_read_dac_rtn function, 6-93 to 6-94
flex_read_encoder function, 10-15 to 10-16
flex_read_encoder_rtn function,
10-15 to 10-16
flex_read_err_msg_rtn function,
11-11 to 11-12
flex_read_follow_err function, 6-27 to 6-28
flex_read_follow_err_rtn function,
6-27 to 6-28
flex_read_home_input_status function,
8-11 to 8-12
flex_read_home_input_status_rtn function,
8-11 to 8-12
flex_read_hs_cap_status function,
8-38 to 8-40
flex_read_hs_cap_status_rtn function,
8-38 to 8-40
flex_read_limit_status function, 8-13 to 8-14
flex_read_limit_status_rtn function,
8-13 to 8-14
flex_read_mcs_rtn function, 6-29 to 6-30
flex_read_port function, 10-17 to 10-18
flex_read_port_rtn function, 10-17 to 10-18
flex_read_pos function, 6-31 to 6-32
flex_read_pos_rtn function, 6-31 to 6-32
flex_read_program_status function,
12-13 to 12-14
flex_read_rpm function, 6-33 to 6-34
flex_read_rpm_rtn function, 6-33 to 6-34
flex_read_steps_gen function, 6-97 to 6-98
flex_read_steps_gen_rtn function,
6-97 to 6-98
flex_read_target_pos function, 6-99 to 6-100
flex_read_target_pos_rtn function,
6-99 to 6-100
flex_read_trajectory_data function,
6-101 to 6-102
I-6
www.natinst.com
Index
flex_read_trajectory_data_rtn function,
6-101 to 6-102
flex_read_trajectory_status function,
6-35 to 6-38
flex_read_trajectory_status_rtn function,
6-35 to 6-38
flex_read_var function, 12-41 to 12-42
flex_read_var_rtn function, 12-41 to 12-42
flex_read_velocity function, 6-39 to 6-40
flex_read_velocity_rtn function, 6-39 to 6-40
flex_read_vs_pos function, 6-41 to 6-42
flex_read_vs_pos_rtn function, 6-41 to 6-42
flex_reset_defaults function, 13-14
flex_reset_encoder function, 10-19
flex_reset_pos function, 6-43 to 6-44
flex_run_prog function, 12-15
flex_save_defaults function, 13-15
flex_select_signal function, 10-20 to 10-22
flex_set_adc_range, 10-23 to 10-24
flex_set_bp_momo function, 8-31 to 8-32
flex_set_home_polarity function, 8-15 to 8-16
flex_set_hs_cap_pol function, 8-41 to 8-42
flex_set_inhibit_momo function, 8-17 to 8-18
flex_set_irq_mask function, 13-16 to 13-18
flex_set_limit_polarity function, 8-19 to 8-20
flex_set_op_mode function, 6-45 to 6-48
example, 6-48
NIMC_ABSOLUTE_POSITION, 6-46
NIMC_MODULUS_POSITION, 6-48
NIMC_RELATIVE_POSITION,
6-46 to 6-47
NIMC_RELATIVE_TO_CAPTURE, 6-47
NIMC_VELOCITY, 6-47
parameters and parameter
discussion, 6-45
flex_set_port_direction function,
10-25 to 10-26
flex_set_port_momo function, 10-27 to 10-29
flex_set_port_pol function, 10-30 to 10-31
flex_set_status_momo function,
12-16 to 12-17
© National Instruments Corporation
flex_set_stepper_loop_mode function,
5-30 to 5-31
flex_start function, 7-5 to 7-7
flex_stop_motion function, 7-8 to 7-11
flex_stop_prog function, 12-18
flex_sub_vars function, 12-43
flex_wait_for_blend_complete function,
6-49 to 6-51
flex_wait_for_move_complete function,
6-52 to 6-54
flex_wait_on_condition function,
12-19 to 12-23
flex_xor_vars function, 12-44
FlexCommander application, 1-1
FlexMotion controller, installing, 1-2
FlexMotion data structures, 3-5 to 3-6
FlexMotion software
API functional organization, 4-1 to 4-2
axes, 4-2 to 4-4
communication with host computer,
4-20 to 4-22
board ID, 4-20
packets, handshaking, and FIFO
buffers, 4-21
return data buffer, 4-21 to 4-22
errors and error handling, 4-22 to 4-25
error handling techniques,
4-24 to 4-25
fatal hardware and communication
errors, 4-24
modal and non-modal errors,
4-22 to 4-24
function types and parameters,
4-10 to 4-12
bitmapped versus per-resource
functions, 4-10
input and return vectors, 4-11
I-7
FlexMotion Software Reference Manual
Index
onboard variables, 4-12
single and double-buffered
parameters, 4-10 to 4-11
general-purpose I/O ports, 4-8
initialization overview, 4-12 to 4-14
installing FlexMotion controller, 1-2
language support, 1-3
motion resources, 4-4 to 4-7
ADC channels, 4-5 to 4-6
DAC outputs, 4-6 to 4-7
encoders, 4-4 to 4-5
stepper outputs, 4-7
motion trajectories, 4-14 to 4-20
trajectory parameters, 4-17 to 4-20
trajectory types and modes,
4-14 to 4-17
overview, 1-1
requirements for getting started, 1-2
resource IDs, 4-2
software programming choices, 1-2
vector spaces, 4-8 to 4-10
Windows libraries, 2-1
FlexMotion Windows libraries, 2-1 to 2-3
creating 32-bit Windows applications,
2-2 to 2-3
LabWindows/CVI application, 2-2
Microsoft or Borland C/C++
application, 2-2 to 2-3
Visual Basic application, 2-3
overview, 2-1
function return status, 3-3
function types and parameters, 4-10 to 4-12
bitmapped versus per-resource
functions, 4-10
input and return vectors, 4-11
onboard variables, 4-12
single and double-buffered parameters,
4-10 to 4-11
FlexMotion Software Reference Manual
functions
advanced functions, 13-1 to 13-18
analog & digital I/O functions,
10-1 to 10-31
API functional organization, 4-1 to 4-2
axis & resource configuration functions,
5-1 to 5-31
default parameters (table), C-1 to C-4
analog & digital I/O parameters, C-4
axis & resource configuration
parameters, C-1 to C-2
motion I/O parameters, C-3 to C-4
trajectory parameters, C-2 to C-3
error & utility functions, 11-1 to 11-12
Find Home & Find Index functions,
9-1 to 9-8
functions with more than one data
parameter (table), D-1 to D-2
motion I/O functions, 8-1 to 8-42
onboard programming functions,
12-1 to 12-44
return status, 3-3
start & stop motion functions, 7-1 to 7-11
summary (table), B-1 to B-7
trajectory control functions, 6-1 to 6-102
ValueMotion to FlexMotion function
cross-reference (table), B-7 to B-10
G
gearing, electronic, 4-16
gearing functions, 6-63 to 6-71
flex_config_gear_master, 6-64 to 6-65
flex_enable_gearing, 6-66 to 6-67
flex_enable_gearing_single_axis,
6-68 to 6-69
flex_load_gear_ratio, 6-70 to 6-71
summary (table), B-3
general-purpose I/O ports
purpose and use, 4-8
resource IDs (table), 4-8
I-8
www.natinst.com
Index
H
load functions
advanced trajectory functions
flex_load_base_vel, 6-75
flex_load_blend_fact, 6-76 to 6-78
flex_load_pos_modulus, 6-79
flex_load_rpm_thresh, 6-80 to 6-81
flex_load_scurve_time, 6-82 to 6-83
flex_load_torque_lim, 6-84 to 6-86
flex_load_torque_offset,
6-87 to 6-88
flex_load_vel_override, 6-91 to 6-92
flex_load_vel_threshold,
6-89 to 6-90
analog & digital I/O functions
flex_load_dac, 10-11
flex_load_pwm_duty, 10-12
arcs functions
flex_load_circular_arc, 6-56 to 6-57
flex_load_helical_arc, 6-58 to 6-59
flex_load_spherical_arc,
6-60 to 6-62
axis & resource configuration functions
flex_load_counts_steps_rev,
5-17 to 5-18
flex_load_pid_parameters,
5-19 to 5-20
flex_load_single_pid_parameter,
5-21 to 5-27
flex_load_vel_tc_rs, 5-28 to 5-29
breakpoint functions
flex_load_bp_modulus, 8-25 to 8-26
flex_load_pos_bp, 8-27 to 8-28
data operations functions
flex_load_var, 12-35
gearing functions
flex_load_gear_ratio, 6-70 to 6-71
motion I/O functions
flex_load_sw_lim_pos, 8-9 to 8-10
object management functions
flex_load_description, 12-25
handshaking, in host-FlexMotion board
communication, 4-21
high-speed capture functions, 8-33 to 8-42
flex_enable_hs_caps, 8-34 to 8-35
flex_read_cap_pos, 8-36 to 8-37
flex_read_cap_pos_rtn, 8-36 to 8-37
flex_read_hs_cap_status, 8-38 to 8-40
flex_read_hs_cap_status_rtn,
8-38 to 8-40
flex_set_hs_cap_pol, 8-41 to 8-42
summary (table), B-4 to B-5
I
initialization, 4-12 to 4-14
overview, 4-12
recommended procedure, 4-13 to 4-14
establishing position reference
(per-axis), 4-13
motion I/O configuration, 4-13
per-axis configuration, 4-13
system configuration, 4-13
trajectory parameter initialization
(per-axis), 4-13
input and return vectors
functions with more than one data
parameter (table), D-1 to D-2
programming considerations, 3-10
purpose and use, 4-11
installing FlexMotion controller, 1-2
integral gain, changing, 5-23
integration limit, changing, 5-23
L
LabVIEW software, 1-2
LabWindows/CVI software
creating 32-bit Windows applications, 2-2
overview, 1-2
linear and circular interpolation, 4-16
© National Instruments Corporation
I-9
FlexMotion Software Reference Manual
Index
onboard programming functions
flex_load_delay, 12-11
trajectory control functions
flex_load_acceleration, 6-6 to 6-7
flex_load_follow_err, 6-8 to 6-9
flex_load_rpm, 6-10 to 6-11
flex_load_rpsps, 6-12 to 6-13
flex_load_target_pos, 6-14 to 6-15
flex_load_velocity, 6-16 to 6-17
flex_load_vs_pos, 6-18 to 6-19
flex_read_breakpoint_status_rtn,
8-29 to 8-30
flex_set_bp_momo, 8-31 to 8-32
summary (table), B-4
default parameters (table), C-3 to C-4
flex_configure_inhibits, 8-2 to 8-3
flex_enable_home_inputs, 8-4 to 8-5
flex_enable_limits, 8-6 to 8-8
flex_load_sw_lim_pos, 8-9 to 8-10
flex_read_home_input_status,
8-11 to 8-12
flex_read_home_input_status_rtn,
8-11 to 8-12
flex_read_limit_status, 8-13 to 8-14
flex_read_limit_status_rtn, 8-13 to 8-14
flex_set_home_polarity, 8-15 to 8-16
flex_set_inhibit_momo, 8-17 to 8-18
flex_set_limit_polarity, 8-19 to 8-20
high-speed capture functions,
8-33 to 8-42
flex_enable_hs_caps, 8-34 to 8-35
flex_read_cap_pos, 8-36 to 8-37
flex_read_cap_pos_rtn, 8-36 to 8-37
flex_read_hs_cap_status,
8-38 to 8-40
flex_read_hs_cap_status_rtn,
8-38 to 8-40
flex_set_hs_cap_pol, 8-41 to 8-42
summary (table), B-4 to B-5
summary (table), B-4 to B-5
motion resources, 4-4 to 4-7
ADC channels, 4-5 to 4-6
DAC outputs, 4-6 to 4-7
encoders, 4-4 to 4-5
stepper outputs, 4-7
motion trajectories, 4-14 to 4-20. See also
trajectory control functions.
trajectory parameters, 4-17 to 4-20
acceleration in RPS/s, 4-19
arc angles in degrees, 4-19 to 4-20
velocity in counts/s or steps/s, 4-18
M
manual. See documentation.
Measurement & Automation Explorer, 1-1
Microsoft C/C++ application, creating,
2-2 to 2-3. See also C/C++ applications.
modal and non-modal errors, 4-22 to 4-24
communication versus individual
function entry points, 4-23
error message stack, 4-23
onboard programs, 4-24
MOMO protocol functions. See
MustOn/MustOff (MOMO) protocol
functions.
motion boards
flex_get_motion_board_info function,
11-6 to 11-8
flex_get_motion_board_name function,
11-9 to 11-10
installing FlexMotion controller, 1-2
motion I/O configuration, in
initialization, 4-13
motion I/O functions, 8-1 to 8-42
breakpoint functions, 8-21 to 8-32
flex_enable_bp, 8-22 to 8-24
flex_load_bp_modulus, 8-25 to 8-26
flex_load_pos_bp, 8-27 to 8-28
flex_read_breakpoint_status,
8-29 to 8-30
FlexMotion Software Reference Manual
I-10
www.natinst.com
Index
velocity in RPM, 4-18
velocity override in percent, 4-19
trajectory types and modes, 4-14 to 4-17
electronic gearing, 4-16
linear and circular interpolation, 4-16
move blending, 4-15
pull-in moves, 4-17
trapezoidal point-to-point position
control, 4-14 to 4-15
velocity control, 4-15
move blending, 4-15
move functions. See also blend functions.
flex_check_move_complete_status,
6-4 to 6-5
flex_wait_for_move_complete,
6-52 to 6-54
MustOn/MustOff (MOMO) protocol
functions
flex_set_bp_momo function, 8-31 to 8-32
flex_set_inhibit_momo function,
8-17 to 8-18
flex_set_port_momo function,
10-27 to 10-29
flex_set_status_momo function,
12-16 to 12-17
onboard programming functions,
12-1 to 12-44
data operations functions, 12-31 to 12-44
flex_add_vars, 12-32
flex_and_vars, 12-33
flex_div_vars, 12-34
flex_load_var, 12-35
flex_lshift_var, 12-36 to 12-37
flex_mult_vars, 12-38
flex_not_var, 12-39
flex_or_vars, 12-40
flex_read_var, 12-41 to 12-42
flex_read_var_rtn, 12-41 to 12-42
flex_sub_vars, 12-43
flex_xor_vars, 12-44
summary (table), B-6 to B-7
flex_begin_store, 12-2 to 12-3
flex_end_store, 12-4
flex_insert_program_label, 12-5
flex_jump_label_on_condition,
12-6 to 12-10
flex_load_delay, 12-11
flex_pause_prog, 12-12
flex_read_program_status,
12-13 to 12-14
flex_run_prog, 12-15
flex_set_status_momo, 12-16 to 12-17
flex_stop_prog, 12-18
flex_wait_on_condition, 12-19 to 12-23
object management functions,
12-24 to 12-30
flex_load_description, 12-25
flex_object_mem_manage,
12-26 to 12-27
flex_read_description_rtn, 12-28
flex_read_registry_rtn,
12-29 to 12-30
summary (table), B-6
summary (table), B-6
N
National Instruments application software, 1-2
National Instruments Web support, E-1 to E-2
O
object management functions, 12-24 to 12-30
flex_load_description, 12-25
flex_object_mem_manage,
12-26 to 12-27
flex_read_description_rtn, 12-28
flex_read_registry_rtn, 12-29 to 12-30
summary (table), B-6
© National Instruments Corporation
I-11
FlexMotion Software Reference Manual
Index
onboard variables
functions with more than one data
parameter (table), D-1 to D-2
overview, 4-12
online problem-solving and diagnostic
resources, E-1
operation mode, setting. See
flex_set_op_mode function.
flex_set_port_direction, 10-25 to 10-26
flex_set_port_momo, 10-27 to 10-29
flex_set_port_pol, 10-30 to 10-31
position reference, establishing, in
initialization, 4-13
primary data types (table), 3-2
problem-solving and diagnostic resources,
online, E-1
programming functions, onboard. See onboard
programming functions.
programming language considerations,
3-1 to 3-10
board identification parameter, 3-4
C/C++ for Windows, 3-4 to 3-6
data returned by reference, 3-4 to 3-5
data returned in arrays, 3-5
FlexMotion data structures,
3-5 to 3-6
FlexMotion Windows libraries, 2-1 to 2-3
function return status, 3-3
Read functions, 3-9 to 3-10
using functions with input vectors, 3-10
variable data types, 3-1 to 3-3
arrays, 3-2
primary types (table), 3-2
structures and other user-defined data
types, 3-3
Visual Basic for Windows, 3-6 to 3-9
data returned by reference, 3-7
data returned in arrays, 3-7 to 3-8
u8 data type not supported, 3-6 to 3-7
user-defined data types, 3-8 to 3-9
proportional gain, changing, 5-22
pull-in moves, 4-17
pulse width modulation (PWM) functions
flex_configure_pwm_output,
10-4 to 10-6
flex_load_pwm_duty, 10-12
P
packets, in host-FlexMotion board
communication, 4-21
parameters
default parameters (table), C-1 to C-4
analog & digital I/O parameters, C-4
axis & resource configuration
parameters, C-1 to C-2
motion I/O parameters, C-3 to C-4
trajectory parameters, C-2 to C-3
function types and parameters,
4-10 to 4-12
bitmapped versus per-resource
functions, 4-10
input and return vectors, 4-11
onboard variables, 4-12
single and double-buffered
parameters, 4-10 to 4-11
functions with more than one data
parameter (table), D-1 to D-2
trajectory parameters, 4-17 to 4-20
per-axis configuration, in initialization, 4-13
per-resource functions versus bitmapped
functions, 4-10
PID parameters
flex_load_pid_parameters, 5-19 to 5-20
flex_load_single_pid_parameter,
5-21 to 5-27
port functions
flex_read_port, 10-17 to 10-18
flex_read_port_rtn, 10-17 to 10-18
FlexMotion Software Reference Manual
I-12
www.natinst.com
Index
R
high-speed capture functions
flex_read_cap_pos, 8-36 to 8-37
flex_read_cap_pos_rtn, 8-36 to 8-37
flex_read_hs_cap_status,
8-38 to 8-40
flex_read_hs_cap_status_rtn,
8-38 to 8-40
motion I/O functions
flex_read_home_input_status,
8-11 to 8-12
flex_read_home_input_status_rtn,
8-11 to 8-12
flex_read_limit_status, 8-13 to 8-14
flex_read_limit_status_rtn,
8-13 to 8-14
object management functions
flex_read_description_rtn, 12-28
flex_read_registry_rtn,
12-29 to 12-30
onboard programming functions
flex_read_program_status,
12-13 to 12-14
programming considerations, 3-9 to 3-10
trajectory control functions
flex_read_axis_status, 6-20 to 6-23
flex_read_axis_status_rtn,
6-20 to 6-23
flex_read_blend_status, 6-24 to 6-26
flex_read_blend_status_rtn,
6-24 to 6-26
flex_read_follow_err, 6-27 to 6-28
flex_read_follow_err_rtn,
6-27 to 6-28
flex_read_mcs_rtn, 6-29 to 6-30
flex_read_pos, 6-31 to 6-32
flex_read_pos_rtn, 6-31 to 6-32
flex_read_rpm, 6-33 to 6-34
flex_read_rpm_rtn, 6-33 to 6-34
flex_read_trajectory_status,
6-35 to 6-38
read functions
advanced functions
flex_read_csr_rtn, 13-12 to 13-13
advanced trajectory functions
flex_read_dac, 6-93 to 6-94
flex_read_dac_limit_status,
6-95 to 6-96
flex_read_dac_limit_status_rtn,
6-95 to 6-96
flex_read_dac_rtn, 6-93 to 6-94
flex_read_steps_gen, 6-97 to 6-98
flex_read_steps_gen_rtn,
6-97 to 6-98
flex_read_target_pos, 6-99 to 6-100
flex_read_target_pos_rtn,
6-99 to 6-100
flex_read_trajectory_data,
6-101 to 6-102
flex_read_trajectory_data_rtn,
6-101 to 6-102
analog & digital I/O functions
flex_read_adc, 10-13 to 10-14
flex_read_adc_rtn, 10-13 to 10-14
flex_read_encoder, 10-15 to 10-16
flex_read_encoder_rtn,
10-15 to 10-16
flex_read_port, 10-17 to 10-18
flex_read_port_rtn, 10-17 to 10-18
breakpoint functions
flex_read_breakpoint_status,
8-29 to 8-30
flex_read_breakpoint_status_rtn,
8-29 to 8-30
data operations functions
flex_read_var, 12-41 to 12-42
flex_read_var_rtn, 12-41 to 12-42
error & utility functions
flex_read_err_msg_rtn,
11-11 to 11-12
© National Instruments Corporation
I-13
FlexMotion Software Reference Manual
Index
start & stop motion functions, 7-1 to 7-11
flex_blend, 7-1 to 7-11
flex_start, 7-1 to 7-11
flex_stop_motion, 7-8 to 7-11
summary (table), B-4
stepper outputs
purpose and use, 4-7
resource IDs (table), 4-7
structures, 3-3, 3-5 to 3-6
system configuration, in initialization, 4-13
flex_read_trajectory_status_rtn,
6-35 to 6-38
flex_read_velocity, 6-39 to 6-40
flex_read_velocity_rtn, 6-39 to 6-40
flex_read_vs_pos, 6-41 to 6-42
flex_read_vs_pos_rtn, 6-41 to 6-42
requirements for getting started, 1-2
reset functions
flex_reset_defaults function, 13-14
flex_reset_encoder function, 10-19
flex_reset_pos function, 6-43 to 6-44
resource configuration functions. See axis &
resource configuration functions.
resource IDs
ADC resource IDs (table), 4-6
axis resource IDs (table), 4-4
DAC resource IDs (table), 4-7
encoder resource IDs (table), 4-5
I/O port resource IDs (table), 4-8
purpose and use, 4-2
stepper output resource IDs (table), 4-7
vector space control resource IDs
(table), 4-9
return data buffer, in host-FlexMotion board
communication, 4-21 to 4-22
return status for functions, 3-3
return vectors. See input and return vectors.
T
technical support resources, E-1 to E-2
trajectory control functions, 6-1 to 6-102
advanced trajectory functions,
6-72 to 6-102
flex_acquire_trajectory_data,
6-73 to 6-74
flex_load_base_vel, 6-75
flex_load_blend_fact, 6-76 to 6-78
flex_load_pos_modulus, 6-79
flex_load_rpm_thresh, 6-80 to 6-81
flex_load_scurve_time, 6-82 to 6-83
flex_load_torque_lim, 6-84 to 6-86
flex_load_torque_offset,
6-87 to 6-88
flex_load_vel_override, 6-91 to 6-92
flex_load_vel_threshold,
6-89 to 6-90
flex_read_dac, 6-93 to 6-94
flex_read_dac_limit_status,
6-95 to 6-96
flex_read_dac_limit_status_rtn,
6-95 to 6-96
flex_read_dac_rtn, 6-93 to 6-94
flex_read_steps_gen, 6-97 to 6-98
flex_read_steps_gen_rtn,
6-97 to 6-98
flex_read_target_pos, 6-99 to 6-100
S
setup functions. See configuration functions.
shutdown function (flex_enable_shutdown),
13-9 to 13-10
signal selection function (flex_select_signal),
10-20 to 10-22
single and double-buffered parameters,
4-10 to 4-11
software programming choices, 1-2. See also
programming language considerations.
software-related resources, E-2
FlexMotion Software Reference Manual
I-14
www.natinst.com
Index
flex_read_target_pos_rtn,
6-99 to 6-100
flex_read_trajectory_data,
6-101 to 6-102
flex_read_trajectory_data_rtn,
6-101 to 6-102
summary (table), B-3
arcs functions, 6-55 to 6-62
flex_load_circular_arc, 6-56 to 6-57
flex_load_helical_arc, 6-58 to 6-59
flex_load_spherical_arc,
6-60 to 6-62
summary (table), B-3
default parameters (table), C-2 to C-3
flex_check_blend_complete_status,
6-2 to 6-3
flex_check_move_complete_status,
6-4 to 6-5
flex_load_acceleration, 6-6 to 6-7
flex_load_follow_err, 6-8 to 6-9
flex_load_rpm, 6-10 to 6-11
flex_load_rpsps, 6-12 to 6-13
flex_load_target_pos, 6-14 to 6-15
flex_load_velocity, 6-16 to 6-17
flex_load_vs_pos, 6-18 to 6-19
flex_read_axis_status, 6-20 to 6-23
flex_read_axis_status_rtn, 6-20 to 6-23
flex_read_blend_status, 6-24 to 6-26
flex_read_blend_status_rtn, 6-24 to 6-26
flex_read_follow_err, 6-27 to 6-28
flex_read_follow_err_rtn, 6-27 to 6-28
flex_read_mcs_rtn, 6-29 to 6-30
flex_read_pos, 6-31 to 6-32
flex_read_pos_rtn, 6-31 to 6-32
flex_read_rpm, 6-33 to 6-34
flex_read_rpm_rtn, 6-33 to 6-34
flex_read_trajectory_status, 6-35 to 6-38
flex_read_trajectory_status_rtn,
6-35 to 6-38
flex_read_velocity, 6-39 to 6-40
flex_read_velocity_rtn, 6-39 to 6-40
© National Instruments Corporation
flex_read_vs_pos, 6-41 to 6-42
flex_read_vs_pos_rtn, 6-41 to 6-42
flex_reset_pos, 6-43 to 6-44
flex_set_op_mode, 6-45 to 6-48
flex_wait_for_blend_complete,
6-49 to 6-51
flex_wait_for_move_complete,
6-52 to 6-54
gearing functions, 6-63 to 6-71
flex_config_gear_master,
6-64 to 6-65
flex_enable_gearing, 6-66 to 6-67
flex_enable_gearing_single_axis,
6-68 to 6-69
flex_load_gear_ratio, 6-70 to 6-71
summary (table), B-3
summary (table), B-1 to B-2
trajectory parameters, 4-17 to 4-20
acceleration in RPS/s, 4-19
arc angles in degrees, 4-19 to 4-20
initializing, 4-13
velocity in counts/s or steps/s, 4-18
velocity in RPM, 4-18
velocity override in percent, 4-19
trajectory types and modes, 4-14 to 4-17
electronic gearing, 4-16
linear and circular interpolation, 4-16
move blending, 4-15
pull-in moves, 4-17
trapezoidal point-to-point position
control, 4-14 to 4-15
velocity control, 4-15
trapezoidal point-to-point position control,
4-14 to 4-15
I-15
FlexMotion Software Reference Manual
Index
U
velocity override in percent, 4-19
Visual Basic for Windows
creating 32-bit Windows applications, 2-3
programming considerations, 3-6 to 3-9
data returned by reference, 3-7
data returned in arrays, 3-7 to 3-8
u8 data type not supported, 3-6 to 3-7
user-defined data types, 3-8 to 3-9
u8 data type not supported, Visual Basic for
Windows, 3-6 to 3-7
user-defined data types
programming considerations, 3-3
Visual Basic for Windows, 3-8 to 3-9
utility functions. See error & utility functions.
V
W
ValueMotion to FlexMotion function
cross-reference (table), B-7 to B-10
variable data types, 3-1 to 3-3
arrays, 3-2
primary types (table), 3-2
structures and other user-defined data
types, 3-3
variable manipulation functions. See data
operations functions.
variables, onboard
functions with more than one data
parameter (table), D-1 to D-2
overview, 4-12
vector spaces
3D resources (figure), 4-9
control resource IDs (table), 4-9
purpose and use, 4-8 to 4-10
velocity control, 4-15
velocity feedback gain, changing, 5-25 to 5-26
velocity feedforward gain, changing,
5-26 to 5-27
velocity functions
flex_load_base_vel, 6-75
flex_load_velocity, 6-16 to 6-17
flex_load_vel_override, 6-91 to 6-92
flex_load_vel_tc_rs, 5-28 to 5-29
flex_load_vel_threshold, 6-89 to 6-90
flex_read_velocity, 6-39 to 6-40
flex_read_velocity_rtn, 6-39 to 6-40
velocity in counts/s or steps/s, 4-18
velocity in RPM, 4-18
FlexMotion Software Reference Manual
watchdog timer function
(flex_enable_1394_watchdog), 13-7
Web support from National Instruments,
E-1 to E-2
online problem-solving and diagnostic
resources, E-1
software-related resources, E-2
Windows libraries. See FlexMotion Windows
libraries.
Worldwide technical support, E-2
I-16
www.natinst.com