1
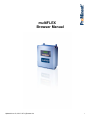
multiFLEX
Browser Manual
Updated June 23, 2015 - M714_Browse.doc
1
Contents: M714_Browser
Safety
1. Browser Services
3
1.1 View
1.2 Controls
1.2.1 Setpoints
1.2.2 Timed Events
1.2.3 Special Controls
1.2.4 Boiler Blowdown Timing
1.2 Sensors
1.3 Alarms
1.4 Communicate
1.5 System
2. Connecting to Controllers
13
2.1 LAN Communications
2.2 Browse
2.3 View- Modify IP Address
3. Resources
17
3.1 Browsing a non-LAN Controller
Application Note AN_T004
3.2 Technical Support
Updated June 23, 2015 - M714_Browse.doc
2
Safety
CAUTION: The operator of this instrument is advised that if the equipment is used in a manner
not specified in this manual, the protection provided by the equipment may be impaired.
Electrical Shock Hazard
Opening the controller enclosure with the controller plugged in, exposes the user to AC line
voltages on the lower of the two controller circuit boards.
USER WARNING : CAUTION
Water Treatment Controllers operate steam and water valves and may pump
hazardous, corrosive and toxic chemicals. Opening the controller enclosure
exposes user to the risk of electrical shock at power line voltages.
Understand fully the implications of the control setpoints, interlocks and alarms that
you select. Harm to personnel and damage to equipment may result from misapplication.
Unplug or turn OFF the AC power to the controller if you have any concerns
regarding safety or incorrect controller operation and notify supervisory staff.
INDIVIDUAL CONTROLLERS
Controllers are supplied in many different configurations.
The HELP section in the M714_User manual contains the information for
terminating the sensors supplied with each controller.
The HELP section in the M714_User manual depicts the installation plumbing
header showing the sensor set supplied with each controller.
Updated June 23, 2015 - M714_Browse.doc
3
1.1
View is HOME for the controller. Return to HOME by
View
or
View
Cancel
Letters ‘A’ to ‘Z’ : Inputs
Displays the value of analog sensors, volume today for water meters, state for contact sets.
Locates sensor inputs in the controller enclosure.
Numbers ‘1’ to ’10’, C1 to C8 : Outputs
Displays the state of the pump or valve and run time.
Locates relay 1..10 outputs in the controller enclosure.
C1..C8 are 4-20mA outputs. Current mA level displayed.
Controlling sensors are grouped with the relays that they control followed by Monitoring Sensors,
Relays controlled by Time and Unused Outputs.
The View auto-configures as the user modifies controls, enables & disables I/O, adds feed events…
The left side Services menu responds immediately when a menu item is selected.
Updated June 23, 2015 - M714_Browse.doc
4
1.2
Controls Services
Select
Controls
Select an Activity and an Output from the pull down and
Activity
Activity Services
Submit
Notes
Diagnostic
Prime, state, setpoint, special control status, run stats, biocide day
1.
Configure
Setpoint, Control Equation, Interlocks, Blocking, Special Controls
2.
Alarms
Feed limit timers, action on alarm and clear alarms.
3.
Timed Events
Biocide timing, start and run times, frequency
Naming & Timing
Modify Name, Log period, Timed Event Cycle, Disable Output
Variable Cycles
Set 3 Make-up Conduct. Ranges & Cycles. Set Max. Tower Conductivity
Feed Verification
Option: Set Verify meter location and cycles of concentration method
5.
7.
Notes
1. Best tool to find out what’s happening with your control. Very useful with special controls.
2. View current settings & Modify. Select Variable Cycles & Feed Verification (optional).
3. Clear Alarms ends Priming, Biocide Events & Lockouts. Zeroes time owed.
5. Event Cycle may be set to 1,7 or 28 days for each relay.
7. Set the A..Z locations used for ppm and tank inventory logging.
Updated June 23, 2015 - M714_Browse.doc
5
1.2.1
Select
Controls
Setpoints
Activity = Configure
Displays current Settings. Modify and
Field
Function
Submit
Notes
Control by:
Letter(s) of sensor(s) controlling the relay. Example: watermeter ‘O’
1.
Measure volume
Every 100 gallons measured on water meter ‘O’
2.
Then turn ON for
Turns ON the Inhibitor Feed pump for 20 seconds.
3.
Interlocked by
Flowswitch or Contact set(s), must be closed for Relay to turn ON
4.
Blocking Relays
This relay will NOT turn ON when the blocking relay is ON
5.
Feed Verify
Optional ppm, fail-to-feed & tank level services turned ON
Notes
1. Setpoints vary with controlling sensor type. Control equations combine more than one sensor.
2. Analog sensors, A..N, show Turn ON setpoint in place of Measure Volume.
3. Analog sensors show Turn OFF setpoint. ON time accumulates while volume increases.
4. Interlocks may be ANDed or OR’d in more complex control schemes.
5. This example prevents inhibitor from pumping down the drain when the bleed is ON.
Updated June 23, 2015 - M714_Browse.doc
6
1.2.2
Controls
Select
Timed Events
Activity = Timed Events
Pull down displays current Timed Events. Modify and
Field
Function
Select Activity
Options limited to ‘Add an Event’, if no events exist.
Edit or Delete
1-28 events may be set on each relay 1..10.
Start Day
Day 1 is Sunday for 28 and 7 Day Event Cycles.
Start Time
24 Hour clock from 00:00 to 23:59.
ON Time
Pump run time from 1 to 1440 minutes. 1440 minutes = 1 day.
Event frequency
Frequency options vary with Event Cycle: 1,7 or 28 Days.
Submit
Notes
3.
Notes
3. One day event cycles are always Day 1.
The Red ‘Events Added’ Message above the Blue header, confirms a previous activity
or advises you of problems.
Updated June 23, 2015 - M714_Browse.doc
7
1.2.3
Controls
Select
Special Controls
Activity = Configure
Pull down displays special control options. Select and
Control
Submit
Function
Bleed & Feed
Select Bleed Solenoid Relay and % of Feed time in every 300 seconds of Bleed
Bleed then Feed
Select Bleed Solenoid Relay and % of Feed time after Bleed ends.
Captured Sample
Boiler blowdown option – refer to 1.2.4
Percentage Time
Set % of ON time every 300 seconds. Stops accumulating on an open interlock.
Prebleed-Lockout
Select Bleed Solenoid, Prebleed time & conductivity, Lockout after Prebleed
Time Modulation
Set period. ON time decreases as the Turn OFF setpoint is approached.
Holding Time
Controlling sensor value is averaged over user set period.
Timed Cycling
Feed for user set time then wait period. Used in slow-to-respond processes.
Updated June 23, 2015 - M714_Browse.doc
8
1.2.4
Boiler Blowdown Timing
Select
Controls
Activity = Configure
Displays current Captured Sample timing. Modify and
Field
Function
Submit
Notes
Sampling Time
Blowdown valve ON to acquire new sample at conductivity sensor.
1.
Measure Time
Valve OFF. Control decision made only at end of Measure.
2.
Blowdown Time
Valve ON if conductivity > Setpoint at end of Measure.
Re-sample delay
Valve OFF if conductivity < Setpoint at end of Measure.
Fail-to-Sample
Optional thermal switch at conductivity sensor
Notes
1. Conductivity sensor installed on surface blowdown line, upstream of blowdown valve.
2. Measure-Blowdown sequence repeats until conductivity below setpoint.
Updated June 23, 2015 - M714_Browse.doc
9
1.3
Sensors Services
Select
Sensors
Select an Activity and a Sensor from the pull down and
Activity
Activity Services
Submit
Notes
Calibrate
Single point for A..N., Key Value for Manual Entry, Reset to Factory
1.
Alarms
Set & View High & Low Alarm & Action On Alarm
2.
Configure
Naming, units, resolution, compensation type, log period, disable input
3.
Diagnostic
State, driver type, log stats, current & default OFFSETs & GAINs.
4.
Notes
1. Calibration method varies with sensor type. 4-20mA inputs are 2 point calibration.
2. Analog sensors A..N include ‘Delay on Alarm’ to suppress transients. Contact set alarms have
both ON Time and a No Flow Alarm that trips on OFF time. Action on Alarm may set Alarm
Relay and/or Dial-out on modem equipped controllers
3. View and/or modify. Add and/or modify Thermal, Manual and Rate-to-Volume compensation.
Verify Corrosion Rate, Calculated (ppm) and Inventory type compensation.
4. Displays sensor mV levels, driver card ID levels, current compensation type
Updated June 23, 2015 - M714_Browse.doc
10
1.4
Select
Alarms
Alarms
To clear all active alarms, select YES and
Submit
Each active alarm has a Name, Cause and Date & Time tripped.
Alarm
Type & Detail
Tower Conductivity
Analog Sensors A..N.
High or Low alarm trips after user set delay, which blocks transient alarms
Tower Make-up
Digital Inputs – Water Meters, Contact Sets O..Z
Meters have both high volume alarm and low volume checked at midnight.
Contact sets have both time closed and time open (no flow) alarms.
Tower Bleed
Control Relays 1…10
Feed Limit alarms on Time/Actuation and Time/Day.
User set Action on Alarm, turns Relay OFF or Ignores.
Relay 6-10 Fuse
System Level Alarms
Trips on fuse failures. Trips on Configuration, A/D & power supply faults.
Updated June 23, 2015 - M714_Browse.doc
11
Communicate
1.5
Select
Communicate
Select an Activity and
Activity
Activity Services
View Activity Log
Log of hardware changes, control modifications
Configure
View-Modify IP, Netmask, Gateway, HTML & Telnet Ports. View MAC
Modem Setup
Set up to 4 dial-out phone numbers, set pager message & pager delay
Diagnostic
Force dial-out, Carrier detect state, Mirror LCD. View refresh time
Submit
Notes
2.
4.
Notes
1. Requires Admin password. Includes modem ringcount and initialization.
View-modify controller location timezone with respect to GMT:
PACIFIC = –8, MOUNTAIN= –7, CENTRAL= –6, EASTERN= –5.
4. Display the User view of the controller four line LCD character display.
Includes Parser mirror for encoded URL & telnet API developers.
Updated June 23, 2015 - M714_Browse.doc
12
1.6
System Services
Select
System
Select a system service and
Selection
Services
Submit
Notes
Diagnostic
Fuse, power supply status, S/N, Firmware version, AC current, Options
Enable I/O
Select from lists of disabled Inputs A..Z & Outputs 1..10, C1..C8
Login-Logout
Logout Sets user to ‘Public’, Displays current user & userid set.
Alarms
Clear all alarms, Active Alarm table with cause & date, time tripped
Time & Date
Modify Date, Time & day of week.
Upgrade
Enter code to reset passwords and/or add Ethernet & FV options.
System Alarms
Select Alarm Relay & Dial-out options for each system level alarm.
Configure
Metric units, Keypad password switch, Load & Save Configuration.
8
Passwords
Changes password for current user, case sensitive.
9
3
Notes
3. Browser will auto-logout after 30 minutes of no user activity
8. Admin password required
9. Keypad userid passwords are limited to A..Z caps & 0..9.
Updated June 23, 2015 - M714_Browse.doc
13
2.1
LAN Communications
Controllers not connected to a
network may be browsed
using a crossover cable and a
notebook’s or local PC’s browser
Refer to Section 3.1 for detail on
notebook browser set-up.
Controllers use a static IP address to communicate using TCP/IP 10 base T.
Site IT provides LAN IP addresses and they may also wish to modify the ports used for HTML (default
80) and Telnet (default 23) . They may also require the controller MAC.
Key ENTER @ System and DOWN to ‘LAN Setup’ to view & modify IP, Netmask & Gateway.
MAC, HTML & Telnet ports are view only. Ports can be modified using a browser connection.
CAUTION: Exercise caution in making the controller Internet accessible. At a minimum, modify the
factory default passwords for Admin and Users 1-7, before making a controller Internet accessible.
Updated June 23, 2015 - M714_Browse.doc
14
2.2
Browse
Open your browser.
Most users will select the Internet Explorer
icon on their PCs or notebook’s desktop.
Your browser will connect or try to connect
you to your Home page.
In this example YAHOO is the Home page.
Your Home page may differ.
Edit the address line of your browser, inserting the
controller IP address and keying ENTER
In this example the IP address is 10.10.6.106.
If you do not know the address of your controller,
refer to section 2.3 View –Modify IP Address.
If you’ve previously connected to the controller, the
browser will supply likely addresses as you type.
If the controller browser port has been changed
from the default Port 80,
you’ll need to add :Port# to the controller address.
In this example, the port has been changed to 5080
NOTEBOOK – CROSSOVER CABLE USERS
If you are at the controller, you’ll see the green
LINK light ON when the crossover cable is
connected & your notebook is ON
The yellow ACTIVE light will flicker as the controller serves up the initial View display.
If you don’t connect, refer to Appendix, App. Note AN_T004.
Updated June 23, 2015 - M714_Browse.doc
15
2.3
View-Modify IP Address
.
.
Key ENTER at System:
.
WARNING: Only site IT staff can assign
IP Addresses, Netmasks & Gateways
.
.
.
.
.
Key DOWN to LAN Setup and key ENTER
.
.
Key DOWN to view the LAN parameters
.
.
.
Current Address is 10.10.6.106
Key ENTER to modify
Example on Page 2
.
.
.
.
Current Netmask is 255.255.255.0
Key ENTER to modify
.
.
.
.
.
Current Gateway is 10.10.6.19
Key ENTER to modify
.
.
.
.
.
Browser port is Default, Port 80
Browser connect to modify
.
1 of 2
System:2003-11-06
S/N: M0386034
Alarms: 16:38:11
D G 2 Sys
System:
Configure
Time & Date
LAN Setup
then
System:
LAN Setup...........
IP Address
10.10.6.106
System:
LAN Setup...........
Netmask
255.255.255.0
System:
LAN Setup...........
Gateway
10.10.6.19
System:
LAN Setup...........
Browser-HTML Port
80
Continued on Page 2
Updated June 23, 2015 - M714_Browse.doc
16
2.3
View-Modify IP Address
2 of 2
.
.
.
Telnet port is Default, Port 23
Browser connect to modify
.
.
.
.
.
MAC Address may be required by network admin.
View only.
.
.
EXIT to return to System: display.
System:
LAN Setup...........
Telnet Port
23
WARNING: Only site IT staff can assign
IP Addresses
.
.
.
Key ENTER to modify IP Address
.
.
.
.
Key UP DOWN to change each of
the four address numbers
.
then key RIGHT, to edit the next number
.
Key ENTER to modify or EXIT to leave IP unchanged
.
.
.
ENTER or EXIT displays current IP address
.
Modifying the IP Address
.
Updated June 23, 2015 - M714_Browse.doc
System:
LAN Setup...........
MAC Address
00:90:c2:c1:8c:42
or
System:
LAN Setup...........
IP Address
10.10.6.106
System:
IP Address..........
168.013.031.106
__
Executes
Exits
then
System:
LAN Setup...........
IP Address
168.013.031.106
17
3.1
Browsing a non-LAN Controller
1of 3
1. Overview – Application Note AN_T004
‘Crossover’ cables are used to browse the controller when the controller is not connected to the site
Ethernet LAN. They are widely available. Comp USA is a typical vendor.
If the controller were connected to the site LAN, you’d browse it from one of the PCs on the LAN.
Connecting to a controller using a ‘crossover’ cable requires that the notebook and the controller be
on the same subnet. This application note details set-up verification.
2. NETMASK & IP Internet Protocol Addresses
Assuming that the controller NETMASK is the default 255.255.255.0.
The first three numbers of the controller and the notebook IP addresses must be the same.
For example; if the controller IP = 10.10.6.106 (default) the notebook IP could be 10.10.6.100.
If any of the first three numbers don’t match, you won’t be able to use a crossover cable to browse
the controller.
3. Finding & Editing the controller’s IP
Key ENTER at System: 2003-04-10 (Today’s date)
Key DOWN to LAN Setup & key ENTER.
Displays the default controller IP = 10.10.6.106
If you wish to edit the controller IP, Key ENTER.
Warning:
Do not change the IP, Netmask or Gateway of any controller connected to a local LAN.
The system administrator will have assigned these numbers.
4. Verify the controller’s Browser Port#
Key ENTER at System: (Today’s Date)
Key DOWN to LAN Setup & key ENTER.
Key DOWN to Browser-HTML Port.
If the Port = 80 (default), ignore. It’s also your browser’s default Port#.
If not 80, note the Port#, you’ll need to add it to your IP. Refer to step 6.
Updated June 23, 2015 - M714_Browse.doc
18
3.1
Browsing a non-LAN Controller
2of 3
5. Finding your Notebook’s IP
WINDOWS XP
Select Start -> Control Panel -> Network Connections -> NetworkBridge
Double click: NetworkBridge,
Select:
General -> Properties -> Internet Protocol (TCP-IP) -> Properties -> Alternate
Configuration
Check:
User Configured
Assuming that the User Configured fields are blank. Set the IP address = 10.10.6.100, assuming
that the controller IP address (See Section 3.) is 10.10.6.106. Set the Subnet mask = 255.255.255.0
& select OK.
Any pair of Notebook & Controller IPs will work if:
1. The first three numbers are the same
2. The last numbers are never ‘0’ or ‘255’
WINDOWS 98 & ME
Select: Start -> Settings -> Control Panel -> Network
You may have several options under Network, Select the TCP-IP option which is NOT dial-up. & then
select IP Address (This tab is usually the default)
Option 1. ‘Obtain an IP Address Automatically’ is Checked
If you connect your notebook to your company’s LAN, you’ll likely have ‘Obtain an IP Address
Automatically’ checked. Select ‘Specify an IP Address’ , set the IP Address to 10.10.6.100 and
Subnet Mask to 255.255.255.0.
Select OK, Your notebook may restart.
Note: Once you have finished browsing the controller, check ‘Obtain an IP Address Automatically’ so
you can log back into your corporate LAN.
Option 2. ‘Specify an IP Address’ is Checked
Use the controller keypad (See Section 3.) to set the controller the IP where the first 3 numbers
match the notebook IP and the third number is any number but ‘0’ or ‘255’
For example: If you notebook is 12.135.120.58, make the controller 12.135.120.68
Warning:
Do not change the IP, Netmask or Gateway of any controller connected to a local LAN.
The system administrator will have assigned these numbers.
Updated June 23, 2015 - M714_Browse.doc
19
3.1
Browsing a non-LAN Controller
3of 3
6. Browsing the Controller
1. Connect a crossover cable to your notebook’s RJ45 Ethernet network jack and the controller’s
RJ45 network jack located in the center, front of the top controller circuit board.
2. The green LNK, link light will turn ON beside the controller jack, indicating you have a connection.
3. Double click on the Internet Explorer desktop icon and enter 10.10.6.106, or the current controller
IP in the browser Address line & key ENTER.
4. If your controller’s Browser-HTML Port is NOT 80, add :Port# to the IP. For example, if the
controller Browser-HTML Port = 5080, the browser Address line would be 10.10.6.106:5080.
5. The yellow ACT, active light on the controller will flicker as the controller serves the VIEW home
page.
6. If the yellow ACT light does not turn ON, there is an error in setup, IP address or port#.
If the green LNK light is not ON, it’s likely that you are not using a crossover cable.
Updated June 23, 2015 - M714_Browse.doc
20
3.2
Technical Support
1 of 2
Aquatrac Phone Support
800-909-9283
909-476-2333
On-Line Help
Internet HELP is linked in real time by browser users
with internet accessible controllers.
Keypad User Manual
Download M714_user from www.aquatrac.com
A copy of M714_user is shipped with each controller.
Controller – Sensor Set
The installation instructions for specific controllers are detailed in the M714_user
manual shipped with the controller in the HELP section YELLOW pages.
Controller Technical Manual
Download M714_tech from www.aquatrac.com
Upgrade Kits
Controls can be added to installed controllers.
Upgrade kits include sensor(s), entry fitting(s), driver card and installation instructions.
Updated June 23, 2015 - M714_Browse.doc
21
3.2
Technical Support
2 of 2
Fusing
Protects
Power Relays
Fuse 1-5
&
Fuse 6-10
Rating / Type
Manufacturer – Vendor
6.3 Amps @ 120VAC
3.15 Amps @ 250VAC
5mm x 20mm,
Fast Acting
Controller – Modem
Control Fuse
1 Amp @ 120VAC
½ Amp @ 250VAC
Littlelfuse, Type 217, 250VAC
Digikey Part# F953-ND
Digikey Part# F950-ND
www.digikey.com 1-800-344-4539
Cooper Bussmann, PC-TRON,
PCC Series, 250VAC
Digikey Part# 283-2118-ND
Digikey Part# 283-2120-ND
www.digikey.com 1-800-344-4539
Controller Parts
Part#
Fuses-M
Cable-Xover
Description
120VAC Fuse Kit, 20 x 6.3A Relay Fuses,
4 x 1 Amp control fuses
Crossover cable, Controller RJ45 to Notebook NIC
Mod-LCD4
Replacement 4x20 LCD Display
Mod-M3000
Micro controller module
Mod-M7
Seven analog, Six digital input module
Mod-M14
Fourteen analog, Twelve digital input module
Mod-PR5
Five power relay, power module
Mod-PR10
Ten power relay, power module
Modem
Modem, serial cable & power cube
PBOX4
120VAC Four Plug box, flex conduit & fittings, pre-wired
PBOX2
120VAC Two Plug box, flex conduit & fittings, pre-wired
H-SEN6
Sensor entry gland, six cable seal
Updated June 23, 2015 - M714_Browse.doc
22