1
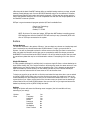
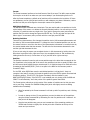
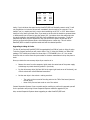
RamFAST Manual
By Howard Katz, Sue McKinnell, Joe Walters, and Gary Welsh
ABOUT THIS MANUAL
This is not an official manual from Sequential Systems. It does however contain major excerpts
from the Sequential Systems manual. The use of these excerpts has been permitted by Mr.
Joseph Yandrofski, President of Sequential Systems. His e-mail on the subject follows:
Mr. Walters:
This note is to confirm that you have the permission of
myself as President of Sequential Systems, Inc. to publish
and sell your owner's manual for our RamFast SCSI
interface for Apple II.
Joseph A. Yandrofski,
President Sequential Systems, Inc.
Voice: (303) 666-4549
http://www.sequential.com
Despite the permissions given above Sequential Systems still retains the copyright to those
portions of the manual that are excerpted here and are not in the public domain.
Acknowledgements
There were four people involved in directly generating this manual: Howard Katz, Sue McKinnell,
Joe Walters, and Gary Welsh. Jawaid Bazyar was extremely valuable in providing explanations of
areas we didn't understand and text for areas he felt that the manual should address.
Finally, we wish to thank Joe Yandrofski for allowing us to bring this manual to you. However,
despite Joseph Yandrofski's statement above that we could sell this manual, it is not for sale. It is
free, however, we wish to stress once again, the copyright remains with Sequential Systems and
Mr. Yandrofski so you must contact them if you wish to use the material in this manual for your
own purpose.
Disclaimer of Warra
Warranty
arranty and
and Limitation of Liability
Liability
Even though the authors have reviewed this documentation, they make no warranty or
representation, either express or implied, with respect t it's quality, performance, or fitness for a
particular purpose. As a result, this information is distributed "as is" and you the user, are
assuming the entire risk as to its quality and performance.
In no event will the authors be liable for direct, indirect, special, incidental, or consequential
damages resulting from any defect in the information presented here, even if advised of the
possibility of such damages, In particular, the authors shall have no liability for any programs or
date stored in or used with this product, including the costs of recovering such programs or data.
Any errors, omissions, or suggestions for improvement should be sent to: [email protected].
This version of the manual was finalized 3/17/97.
LIMITED WARRANTY
Sequential Systems warrants this product against defects in materials and workmanship for two
years from the time you, the original consumer, purchase it. This warranty applies only should
the product fail to function properly under normal use.
During the warranty period, Sequential Systems will repair (or, at its option, replace), at no
charge, components that prove to be defective, provided the product is returned (shipping
prepaid and properly packed) to Sequential Systems.
Before returning any item you must first call (800) 999-1717 to obtain an RMA (Return
Merchandise Authorization) number. This number must be prominently marked on the outside of
the shipping container and on a letter enclosed inside that lists your name, address, and reason
for returning the item. Also, a copy of your purchase receipt or other proof of original purchase
and the serial number (Rev D cards manufactured by Sequential Systems do *not* have a serial
number so this requirement is waived for such boards), must be provided when requesting
warranty service. Sequential Systems will consider an on-file registration card in your name
RamFAST/SCSI as proof of purchase. (See, it *does* pay to send those registration cards in.)
This warranty does not apply if in the opinion of Sequential Systems, the product has been
damaged by accident, misuse, neglect, improper packing or improper modifications.
This warranty is in lieu of all other express warranties, statements, or representations, and unless
stated herein, all such warranties, statements, or representations, made by any other person or
firm is void.
In the event that this product shall prove defective in workmanship or materials, your sole
remedy shall be the repair or remedy as stated in this warranty, and under no circumstances
shall Sequential Systems be liable for any loss or damage, direct, incidental, or consequential,
arising out of the use of, or inability to use, this product caused by any defect in the product.
Sequential Systems
1200 Diamond Circle
Lafayette, CO 80025
Ph: (303) 666-4549 Fax: (303) 665-0933
About the RamFAST/SCSI
Congratulations! You have just purchased the ultimate hard drive controller for the Apple ][ line
of computers. The RamFAST/SCSI is the only DMA (Direct Memory Access) hard drive controller
that supports true 1:1 interleave. No other controller in the Apple ][ market can make that claim.
What this means is that you can expect unparalleled speed and performance (2 to 13 times that
of other controllers).
Features
•
•
•
•
•
•
•
•
•
•
•
1 Megabyte/second transfer rate
256K of on-board cache upgradable to 1Meg
GS/OS driver included
Configuration/Utility program included
Built in RomDISK, no floppies to mess with
Supports up to 12 drives/partitions at a time
Access to all of them, even under ProDOS 8
Compatible with the Apple //e and IIgs
Supports the older SASI drives (Sider D2, D4, and D4T)
Easy installation - just plug and go
Limited two year warranty
General Theory of Operation
The RamFAST/SCSI accelerates your hard drive performance by using an on-board processor and
state-of-the-art hardware caching techniques, coupled with DMA to take the burden of disk I/O
off of the Apple CPU. All that is necessary is for code on the Apple to tell the RamFAST/SCSI
what data it wants and where it wants it put and the RamFAST/SCSI does the rest. And since the
RamFAST/SCSI keeps the most recently accessed data in its on-board memory at all times, the
data are often available almost immediately.
Even when it is necessary to actually access the disk to get the data, the RamFAST/SCSI gets the
data as fast as physically possible. Since the processor on the RamFAST/SCSI runs at 10Mhz, it
has no problems keeping up with an interleave of 1:1. This allows the RamFAST/SCSI to read an
entire track of the drive in one revolution. And what's more, even when writing to the disk, the
RamFAST/SCSI is able to keep up with this 1:1 interleave.
INTRODUCTION AND QUICKSTART
If you are upgrading the ROM(s) on your RamFAST/SCSI from a version previous to V3.0 you
should have received an instruction sheet with the ROM(s) with instructions on how to install the
ROM chip. Just follow the installation instructions on that sheet and you should be all set. You
should still browse through the manual to get yourself familiar with the differences between V3.0
and the version that was installed previously. One thing to be aware of if you are upgrading from
a previous version of the RamFAST/SCSI is that: Tape backups made by versions previous to
V3.0 are not compatible with the current software in the RamFAST/SCSI.
Conventions Used In This Manual
S*n* (where *n* can be 1, 2, 3, 4, 5, 6, or 7), is used to refer to a slot number in your
computer.
D*n* is used to refer to which ProDOS 8 drive number is assigned to a volume (or partition if you
prefer that nomenclature). Together then, S7,D2 refers to Slot 7, Drive 2. If you are still
lost then you should read the chapters in your computer's user's manual that refer to
ProDOS 8 and disk drives.
It is assumed that you will be using a mouse to interact with the utility program that is built into
the RamFAST ROM. If this is not the case (i.e., //e users without a mouse and keyboard
orientated users), the following steps can be used to reproduce the actions of the mouse:
To execute commands that the mouse clicks at the top of the screen you can hold down the
COMMAND key (OPEN-APPLE) and the highlighted letter in the command at the same time. For
example, to execute the SCSIUTILS command (the letter "U" is highlighted), you would hold down
the COMMAND key and U at the same time. (It makes no difference whether you use upper or
lower case U.)
When told to select something you can move the cursor bar with the arrow keys and select the
highlighted item you want by pressing RETURN or SPACE BAR.
QUICKSTART GUIDE
If the following list makes no sense whatsoever then you should just go on to the sections on
Hardware Installation and System Setup and follow the step-by-step instructions for getting the
RamFAST/SCSI up and running.
•
On IIGS machines, make sure that the control panel setting for the slot that you intend
to plug the RamFAST/SCSI into is set to "Your Card."
•
Turn off the power to your computer but do NOT unplug it from the wall outlet.
•
Remove the cover from the computer, lightly touch the metal case of the power supply
to discharge any static electricity present in your body, and plug the RamFAST/SCSI into
any available slot except slot 3. (Periodically touch the power supply to discharge any
static electricity that might build up. You cannot be too safe on this issue.)
•
Connect the 25 pin connector to the back panel of your computer. See the owner's
manual for your particular Apple - i.e., //e or IIGS.
•
Using the appropriate cable, connect your Hard Drive (HD) to the RamFAST/SCSI card.
•
Turn on power and boot your machine.
•
If necessary, format and partition the hard drive using the RamFAST/SCSI Utilities
program. It's especially important to do this if your hard drive is formatted at an
interleave other than 1:1. (See Note)
•
Install the operating system from floppy or restore your backup to the hard drive. (See
Note)
•
Boot the hard drive, run (double click) the RamFAST.System program (it's on the
ROMDISK volume CVTech.ROM), and execute the Install command to copy the
RamFAST/SCSI System Files onto the hard drive.
•
Disable the ROMDISK with the Options command. (The ROMDISK overrides your second
partition as long as it is enabled!)
•
If you already have data on the drive, BACK IT UP BEFORE PROCEEDING!
NOTE: This step is not necessary if you are just upgrading from a previous version of the
RamFAST/SCSI.
HARDWARE INSTALLATION
This section covers the steps necessary to physically install the RamFAST/SCSI into your
computer. The only tool you should need is the hex wrench that came with your computer so
that you can tighten the screws on the cable connector on the end of the short cable from the
RamFAST/SCSI to the back of your computer. Also, if the hard drive has already been used with
another controller - MAKE SURE YOU HAVE BACKED UP ANY DATA ON THE DRIVE
BEFORE YOU CONTINUE.
Installing on a Sider Hard Drive
NOTE: If you are not installing the RamFAST/SCSI with a Sider hard drive you can
ignore this section.
If you are installing the RamFAST/SCSI with a Sider hard drive you need to check the back and
bottom of the Sider hard drive for a plate or sticker that says something like this: "This drive
supplies terminator power to the bus. Make sure you modify the controller board to NOT supply
terminator power." If you find such a warning you MUST remove the jumper that is in the upper
left hand corner of the RamFAST/SCSI Rev D (just above where the cable connects, it is labeled,
"JP1").
DETAILED INSTALLATION PROCEDURES
•
If you are installing a RamFAST/SCSI Rev C (full size board), you should turn on DIP
switch #1. If it is being installed into an Apple //e you must *also* turn on DIP Switch
#2.
•
There is one bank of 8 DIP switches in a single package. The switches are clearly marked
as to what direction is on or off.
•
These DIP switches do NOT exist in Rev D and later versions of the RamFAST/SCSI.
•
If more than one drive (or other SCSI devices, such as a tape drive) is being installed
make sure that they each have a unique SCSI ID. A SCSI ID number is an "address" on
the SCSI bus for the device; it has no connection with the slot number that you install
the RamFAST/SCSI in.
Note: The SCSI ID of your boot HD must be the *highest* numbered SCSI ID on the
SCSI bus.
•
The SCSI ID is set by either switches or straps on/in the SCSI device. Consult the manual
that came with your SCSI device for the details concerning your device.
•
Turn off the power to your computer and all of your peripherals. DO NOT disconnect the
power cable to the wall.
•
Remove the cover from the computer. Lightly touch the metal case of the power supply.
This will discharge any static electricity your body might contain. Such discharges can
easily damage components on the card. Repeat this lightly touching of the power
supply's metal case prior to touching any electronic device such as the RamFAST/SCSI.
Finally, *never, never* touch any part of the card's gold fingers that plug into your
computer.
•
If there is another controller card for the drive installed, detach its cable from the back of
the computer and remove the old card from the computer. (Don't forget to lightly touch
the power supply case.)
•
Install the RamFAST/SCSI in an available slot in the computer. Most people install a hard
drive controller in slot 7; however, it is possible to install the RamFAST/SCSI in any open
slot (except slot 3). If you are installing the RamFAST/SCSI in a IIGS you need to make
sure that the setting in the control panel for the slot you selected is set to "Your Card." If
you don't know what the control panel is then you need to read the chapters in your
computer's user's manual that refer to the Control Panel.
•
Now attach the cable to the back of the computer. Remove the hex shaped screws from
the short ribbon cable coming from the RamFAST/SCSI card, insert the cable in an
available hole in the back of the computer, and then screw the hex head screws back in
from the outside of the case to hold it in position. Check to make sure that the
connection to the RamFAST/SCSI has the cable installed so that the red wire (it might be
blue), is toward the bottom of the board (and computer). Ribbon cables have one wire
painted a different color to designate pin 1. It is this colored wire that must be installed
toward the bottom of the board (towards the floor). Do NOT go by the orientation of
anything that may be written on the cable itself!
•
Connect the SCSI cable to the RamFAST/SCSI connector on the back of the computer
and to the hard drive itself.
•
Replace the cover onto the computer
It's now time to prepare the hard drive for use. Turn to the next section (System Setup) for
instructions on how to install an operating system (ProDOS 8, GS/OS, etc.) onto the hard drive.
SYSTEM SETUP
SETUP
If you bought your RamFAST/SCSI and hard drive as a package they should be configured to
work together from the start. If that is the case your hard drive should boot right up after the
hardware installation is done. If this is the case you can skip the rest of this discussion and start
using your hard drive. Otherwise, continue reading for information on how to get your system up
and running.
If this is the first time you have used your computer with the RamFAST/SCSI the utility program
should auto-boot on its own. But, if for some reason it does not, you can force it to come up by
holding down the "0" (zero) key when you turn on your computer. (Make sure that you hold it
down for a few seconds *AFTER* the RamFAST/SCSI displays its "Searching the SCSI bus..."
message appears or until the utility program screen appears.)
Once you are in the utility program go ahead and click OK if any other message appears
(CONFIGURATION DATA MISSING is the most likely).
FORMAT HARD DRIVE
If the hard drive has any data on it that you want to save you should skip this step (at least for
now) until you have backed up the HD. (See the section titled, Backup).
Click on the command SCSIUTILS at the top of the screen. If you have only one drive attached
then the screen will change to the SCSI Utilities screen. If you have more than one device
attached you will first be presented with a list of Online SCSI Devices on the left lower part of the
screen; you should select the drive that you want to work with from the list.
If, when you click on SCSIUTILS, you are presented with a message stating that "The
RamFAST/SCSI did not find any SCSI devices..." then you should turn everything off again and
check to make sure that the card and cables are installed correctly. If you still get the message
you should turn to the Trouble Shooting section and read about possible causes/solutions for this
message.
Once you make it to the SCSI Utilities screen, you should see your partitions listed under the
column labeled Partition Name and if the entry for Interleave is 1:1 then it is not necessary to reformat the HD. If you see your partitions, but the Interleave is something other than 1:1 it is
strongly recommended that you go ahead and re-format the drive; running with an Interleave
other than 1:1 will slow the RamFAST/SCSI down a lot. If you don't see any partitions listed
under Partition Name you will have to format the HD in order to use it with the RamFAST/SCSI.
To format the drive just click on FORMAT.
If the drive you are formatting is a SASI drive (Sider) you then be asked to specify which one it
is. After that you will be presented with a message telling you that FORMAT will wipe out any data
on the drive! If you have data on the drive that is not backed up STOP NOW and BACK IT UP!
We are NOT responsible if you click OK but didn't mean it.
Formatting the drive can take anywhere from a few seconds to several minutes (and up to 30
minutes for a Sider D2). After the formatting is completed the RamFAST/SCSI will put a default
set of partitions(s) on the drive (it makes as many equal sized partitions as it can). If you want to
change the size and/or names of the partitions you should read the section concerning the
PARTITION command under RamFAST/SCSI Utilities.
Once you are satisfied with the partitions you can click on QUIT to return to the Volumes screen
where you should see your partitions listed under GS/OS Volumes. It's now time to move on to
the next section and install the system software onto the drive.
MAKING THE HARD DRIVE BOOTABLE
BOOTABLE
If you are still looking at the SCSI Utilities screen go up and click on Quit again. You should get a
message with two choices: SELECT and BOOT
If you received the HD pre-formatted from the seller you should be able to select BOOT. If it
boots up, great! If you get the message UNABLE TO LOAD PRODOS or the system just hangs,
then you need to shut off the computer and turn it back on while holding down the 0 key. This
should take you back to the Volumes screen. Now just click on QUIT again and this time pick
SELECT.
If you just formatted the HD or you landed here because BOOT didn't work then click on SELECT.
On the left hand side of the screen a cursor bar will appear. You need to make sure you have a
current system disk in your 3.5" or 5.25" drive and know what slot is associated with that floppy
drive. Move the cursor bar so that the slot for the 3.5" or 5.25" drive with the disk in it is
highlighted and press RETURN. You should now be booting the floppy.
If you are using a IIGS you should now read up on the Installer if you are not familiar with it and
use it to install the current GS/OS operating system on your first HD partition.
If you are using an enhanced //e you should use Copy ][ Plus (or any file copying program you
are familiar with) to put a copy of ProDOS 8 and whatever else you want on the HD. Keep in
mind that ProDOS 8 loads the first *.System file that it finds so the first one you copy on to the
HD should be some type of program launcher such as: ProSel, Squirt or any of the others that
are available.
It's now time for the acid test. Turn OFF the computer, turn it back ON, and it should boot your
hard drive. If it doesn't, try going through the installation again making sure to follow each step
in order. If the HD boots like it's supposed to you are almost done. The only thing left is to go
onto the next section and install the RamFAST/SCSI System Software.
INSTALLING THE RamFAST/SCSI SOFTWARE
You should now be sitting at the GS/OS Finder screen or whatever you use as a program
launcher.
If you are using the GS/OS Finder you need to open (double-click) the drive icon that is labeled
CVTECH.ROM. Inside you will find two files: RAMFAST.SYSTEM and RAMFAST.DRIVER. Double-click
on RAMFAST.SYSTEM (this is the Utility Program). You should see the Volumes screen.
First, go up and click on INSTALL. You will be asked to select the volume to install the two files.
Click on the first partition listed under GS/OS Volumes. You should see a message at the top of
the screen informing you that we are copying the files onto the HD
NOTE: if you are installing onto a //e then only one file is copied.
Now go up and click on the OPTION command. Click on the YES next to RomDISK and it should
change to NO. Also, if you do not have a TranswarpGS in your computer you should click on the
YES next to TWGS and it will also change to NO. Finally, go up and click on QUIT. You should
return to whatever program you used to launch the utility program (probably GS/OS Finder).
If you are using a IIGS do a SHUTDOWN and reboot so that the RamFAST/SCSI driver can be
loaded. That's it!
IF PROBLEMS OCCUR
•
If you are having problems and you have double-checked the installation and you are
installing on a //e, turn to the Trouble Shooting section.
•
If you are having problems and you have double-checked the installation and you are
installing on a IIGS, some other things you should check are:
a) Are you SURE that the setting in the Control Panel for the RamFAST/SCSI slot is set to
YOUR CARD and the boot slot is set to boot the RamFAST/SCSI? Double check!
b) Desk Accessories - Try booting without ANY desk accessories and see if the problems
go away. Many desk accessories have the potential to interfere with a DMA HD
controller. See the section titled, "Desk Accessories," for suggested methods for
temporally removing INITs and DAs.
•
TranswarpGS If you are having problems and you have a TranswarpGS in the system
then pull it out. (See your TranswarpGS docs for the removal procedure. In general it
consists of turning off the power, opening the top of your computer, touching the power
supply to discharge your body, and removing the card.)
If the problems go away you should turn to the Trouble Shooting section to see if you
TranswarpGS is one that needs an update or if you need to disable DMA on the
RamFAST/SCSI because of your memory card.
•
ZipGS - If you are having problems and you have a ZipGS then pull it out. (See your
ZipGS docs for the removal procedure. In general it consists of turning off the power,
opening the top of your computer, touching the power supply to discharge your body,
and removing the card.)
If the problems go away you should turn to the Trouble Shooting section to see if your
ZipGS is one that needs to be upgraded.
•
Lastly, can you boot a system floppy and access the HD? If so then you probably haven't
installed the operating system correctly.
If after this you are still having problems you should turn to the Trouble Shooting section for a
more detailed examination of what could be causing problems in your system.
RamFAST/SCSI UTILITIES
The purpose of the RamFAST/SCSI Utilities program is to allow you to setup and fine tune your
HD and the RamFAST/SCSI. The program and the GS/OS driver for the RamFAST/SCSI are stored
on a RomDISK that is stored in the RamFAST/SCSI. This RomDISK will show up as a volume
named CVTECH.ROM on the GS/OS Finder desktop. Under ProDOS 8 it shows up as D2 of the slot
that the RamFAST/SCSI is installed in. So, if the RamFAST/SCSI is installed in S7 of your
computer then the RomDISK, if enabled (see Options RomDISK 13.5.3), will show up as S7,D2
for use by any ProDOS 8 program.
There are two screens associated with the RamFAST/SCSI Utilities. The Volumes screen
described in sections 13.1 through 13.6 and the ScsiUtils described in sections 13.7 through
13.13.
Volumes Screen
The utilities program is broken up into two different sections. The first is what we are going to
call the Volumes screen. The second, which we call the SCSI Utilities screen, will be covered in a
later section. Each screen has a command bar at the top of the screen that can be clicked on
with the mouse (or accessed via keyboard commands) to execute commands.
ProDOS 8 VOLUMES
The RamFAST/SCSI allows you to have access to all of your partitions even under ProDOS 8. We
do this by "mapping" entries for any or all of your volumes into the ProDOS 8 device table.
You can tell us exactly where to map each volume by clicking on its name under the column
labeled GS/OS Volumes. You should see a cursor bar appear on the left side of the screen in the
section labeled ProDOS 8 Volumes (it may have already been highlighted). You can now click on
any slot/drive position in the ProDOS 8 display and the name of the volume should move into
that spot. To remove a volume from the ProDOS 8 device table you can click on its name under
GS/OS Volumes and then click on the spot labeled UNMAP VOLUME. If a volume is not currently
mapped into the ProDOS 8 table then the UNMAP VOLUME is what will be highlighted if that volume
is selected from the list of GS/OS Volumes.
The latest version of ProDOS 8, version 2 (or greater) also has the ability to map extra volumes
to free slots. Therefore, it is necessary to choose which method you want to use to do the
mapping (since if we both do it ProDOS gets very confused). The way you map your devices into
the ProDOS 8 Volumes table in the Utility Program determines who's responsible. If you map any
volumes into a slot other than the slot that the RamFAST/SCSI is installed in then the
RamFAST/SCSI card will do the mapping of volumes. If you only map volumes into the slot that
the RamFAST/SCSI is installed in then ProDOS 8 will handle the mapping of volumes (this is the
default).
Apple //e users: You must map all of your partitions into the ProDOS 8 Volumes table in order to
have access to them e.g., the RamFAST will NOT do it for you.
Lookahead and Write Protect
There is a column labeled Lookahead next to the list of GS/OS volume names. This is the largest
amount of disk data that the RamFAST/SCSI will read ahead on an operating system read call in
anticipation of having the data for the next call available immediately. Normally the
RamFAST/SCSI will adjust the value on the fly and you shouldn't need to change it from Auto.
(Auto does an automatic lookahead of 12K or so. With older, slow drives, a person could try
different settings to optimize cache efficiency, but any drive made after 1990 or so works best on
the Auto setting.)
Some lookahead points to keep in mind:
•
The available lookahead cache values do not change based on the amount of cache
available, i.e., 256K and 1Meg. However, when you have more cache memory more of
the hard drive can be cached at any one time. The lookahead settings tell the card how
much data to read ahead for small requests. This is why ProDOS 8 *stuff* is so much
faster on a RamFAST than a High Speed SCSI card.
•
You do not gain speed by having all your data in one partition. The RamFAST cache is
pretty smart and works a bit better when a large drive is partitioned. There is a logical
cache for each partition; they all share the same physical memory, of course, but it
works out that a partitioned drive caches a bit better for the types of stuff we care about
caching (directories, volume bitmaps, etc) than a single huge drive.
The last column in the display is labeled WrProt. The RamFAST/SCSI allows you to write protect
any and all volumes whenever you want. This will prevent the operating system (programs) from
writing to that volume. Keep in mind though that this does NOT prevent the ability to do a low
level format or partition of the drive in the RamFAST/SCSI Utility program. It also does not
prevent doing a built-in Backup/Restore to the hard drive/volume.
Backup
The RamFAST/SCSI has the built-in ability to backup and restore your hard drive to a SCSI tape
drive or optionally a [removable] hard drive such as the SyQuest hard drives. To allow the
selection of removable media and/or another HD as the destination of a BACKUP command you
will need to set the HD Backup option to YES. This is done by clicking on OPTIONS in the RamFAST
menu and then clicking on HD BACKUP until it reads, YES.
To begin the process just go up and click on BACKUP. You will be prompted for what volume(s)
you want to backup. Select as many as you want from the right lower section of the screen under
the GS/OS heading (a second click on a volume deselects it). A running total of the amount of
space needed for the backup is displayed above the Volumes line. Do NOT select more than your
tape can hold! (A 60Mb tape holds approximately 60,000K; a 155Mb tape holds approximately
155,000K; etc.)
When you have selected all of the volumes that you want backed up then go up and click on
Backup again. You will be asked to confirm that you want to overwrite any data that may be on
the tape (or the destination hard drive if you have enabled that option). If everything's O.K. then
click on OK.
Now, if you want, you can boot up a game or anything else you want. The RamFAST/SCSI will
continue to backup your HD in the background! Keep in mind though that your hard drive
partitions are WRITE-PROTECTED until the backup completes. (So, there will be NO updating of
your high scores if your game partition is being backed up. Tough luck, pilgrim!)
Note: The RamFAST SCSI backup utilities work as outlined in this manual, however, if you have a
IIGS and a tape drive and need a file-oriented, backup utility that will give you much greater
control of the archival process then consider GSTape. Some of the many features that GSTape
offers beyond the basic RamFAST backup utility are multiple backup sessions per tape, scripted
backups, timed backups, and of course full GS/OS desktop control for the selection of volumes,
directories and files for both backup and restore processes. GSTape was also written with the
help of the RamFAST designers so it is both compatible with and uses the unique capabilities of
the RamFAST whenever possible.
GSTape is a great commercial program priced at $35 and is available from:
County Line Technology
PO Box 462283
Garland, TX 75046
NOTE: By virtue of its name and nature, GSTape does NOT backup to anything except
SCSI tape devices while the RamFAST SCSI will back up to any (removable) SCSI hard
drive or SCSI tape connected to the system.
Restore
Volume Restore
The RESTORE command is the partner of BACKUP. You can select any volume on a backup tape and
have it restored to any volume listed under GS/OS Volumes. To begin, go up and click on
RESTORE. You will be prompted to select the volume name on the tape you want to restore from.
After you select the volume from the tape you are prompted to select the volume you want to
OVERWRITE from those listed under GS/OS volumes. You will be asked to confirm that you want
to overwrite any data that may be on the destination volume. If everything's O.K. then click on
OK.
Single File Restore
It is also possible (although it's painfully slow) to restore a single file from a volume backed up to
tape. Before starting this, if the original volume is still being used under the same name as it was
backed up as, you need to change its name to something else. This is because we are going to
make the backed up volume come up on the desktop just like any other volume and GS/OS
refuses to see two volumes with the same name on-line at the same time.
To begin you need to go up and click on SCSIUTILS and select the tape drive when you are asked
to choose a SCSI device. When you are on the SCSIUTILITIES screen you need to go over to the
column labeled ACTIVE and change the entry for the volume that contains the file to "Y". Now go
up and click on QUIT. When you are back on the VOLUMES screen you should see the backed up
volume listed as one of those GS/OS Volumes. Now you can click on QUIT again and access the
backed up volume just like a (VERY SLOW) hard drive.
Options
Clicking on Options will cause the following menu to appear (the Yes's and No's will vary
according to your setup).
Options
Menu
DMA
Transwarp
AutoSave
Mouse
Password
RomDISK
HD Backup
Short Timeout
Yes
Yes
Yes
Yes
No
No
No
No
Each of these settings affects the way that the RamFAST/SCSI works in your system. To change
an option just click on the current setting (YES/NO) next to the option you wish to change.
Following is a description of each option:
DMA - Determines whether the RamFAST/SCSI should use DMA in your system. If you have a
non DMA-compatible memory card installed then you should set this option to No.
TranswarpGS - If you have a TranswarpGS installed then make sure this option is set to Yes. If
it is set to No and you have a Transwarp the RamFAST/SCSI will not work properly.
AutoSave - If set to Yes (the default) then the current configuration will be saved to disk each
time you quit from the RamFAST/SCSI utility program. If you change this option to No you will
have to explicitly click on the Save command to update the saved configuration data.
Mouse - Set this option to No If the RamFAST/SCSI is installed in a IIGS and you do want not to
use the mouse. Default is Yes.
Password - If you don't want others to be able to change your RamFAST/SCSI configuration
you can require the user to enter a password in order to access the RamFAST/SCSI utility
program. Make sure you are VERY careful when you set a password as it is CASE SENSITIVE i.e.,
Fred and FrEd are two totally different passwords. Finally, WRITE IT DOWN and keep it in a safe
place.
To set the password click on "No" and you will be presented with an inverse typing area. Type:
"YourPassword" <Return>. The "No" area will become "Yes" and the next time you enter the
configuration menu you will be prompted for the password. (See the screen associated with,
"RamFAST/SCSI Utilities" for location of the Password prompt.)
If after providing the password you no longer want to have a password simply click on Password
from the Options screen and it will become, "No."
See the Trouble Shooting section if despite your best efforts your forget your password.
RomDISK - This setting should normally be No after you get your system setup and running.
When this setting is Yes your second drive on the boot slot is named CVTech.ROM, overriding the
normal partition name for that slot and drive. See installation procedures for more details.
HD Backup - Normally the built-in Backup and Restore deal only with tape drives. If you wish to
backup to a (presumably removable) hard drive you must set this option to Yes. You will be
asked to choose a source and destination device whenever you click on Backup or Restore
Short Timeout - If you normally leave some of your SCSI drives powered down (such as a tape
drive or CD) you can set this option to Yes to get rid of the 45 second delay at power-up while
the RamFAST/SCSI is waiting for those devices to appear. NOTE: If you set this option to Yes
you must power-up your HD before you turn on your computer.
TranswarpGS and DMA note: The setting of the DMA option is ignored if you have a Rev D (or
later) RamFAST/SCSI card and you set the TranswarpGS option to No. This is because the Rev D
RamFAST/SCSI card can DMA into any memory card, independent of its DMA capability, provided
you DO NOT have a TranswarpGS in the system.
Install
The Install command is used when you are first setting up the RamFAST/SCSI. It is used to place
a copy of RamFAST.System into the Boot folder and RamFAST.Driver into Boot/System/Drivers
folder. (Only RamFAST.System is installed on a //e.) Click on install and you will be prompted for
the volume to install the files on. Just click on the name under GS/OS Volumes. Neither file is
installed if an error is encountered while installing either. The most probable error is trying to
install on a non-boot volume i.e., Boot/System doesn't exist. If you want both files on such a
volume you must install GS/OS on that volume. If all you want is RamFAST.System on that
volume, simply copy it from the boot volume to the desired non-boot volume(s).
ScsiUtils
The ScsiUtils screen allows you to Format and Partition your HD. It also allows you to control
whether a partition is visible to the operating system (Active) or ignored (Inactive). For those of
you with very old HDs there is also a Headpark command. And lastly there is a Rewind command
for use with tape drives.
When you click on ScsiUtils in the Volumes screen, and if you have more than one SCSI device
attached to the RamFAST/SCSI, you will be prompted to select which one you want to work with
from a list such as the one below:
Online SCSI Devices
ID7
ID6
ID5
ID4
ID3
ID2
ID1
ID0
SyQuest SQ555
IOMEGA Zip 100
Sider SASI Tape Drive
Sony CD-ROM CDR35
NOTE: The IDx in the above is referring to the SCSI ID and has no association with slots.
Once you have selected a device, and it is a HD, (if you have only one it is selected for you
automatically), the screen should change and you should see a display of information about the
device on the top half of the screen and a list of all of the partitions on the drive will appear on
the bottom of the screen. This is the SCSI Utilities screen.
SCSI Utilities Screen
At the top of the screen is a display similar to the one below. The major entry to take note of (for
hard drives) is the value for Interleave. If the interleave is not 1:1 you should definitely consider
reformatting the HD. Any interleave other than 1:1 will slow the RamFAST/SCSI's performance
down considerably (2:1 cuts it in half, 3:1 cuts it to a third, etc.). Some Sider hard drives are an
exception to this rule. If you have a Sider SASI hard drive the best interleave it supports is 4:1.
Format
The Format command performs a low-level format of the HD or tape. This WILL erase any data
that may be on the drive so make sure you have a backup if you need anything that's on it!
After the format completes, a default set of partitions will be created on the hard drive. If these
are satisfactory you can just Quit and continue on with whatever you please. Otherwise, read on
and find out how you can change the sizes and/or names of the partitions.
Add/Delete Partitions
The Add and Delete commands are a linked pair. They are used to add a new partition to the list
at the bottom of the screen or to delete the currently selected partition. You can add up to a total
of twelve (12) partitions onto any single drive. If you wish to change the name just select the
partition that you wish to change and press the DELETE key. The line will clear and you will be
able to type in a new name; after you finish with the name just press RETURN.
Resizing Partitions
There are two thermometers. One changes the partition size in 1Mb increments/decrements and
the other by 32K increments/decrements. To change the size of a selected partition you can use
the mouse to click on one end or the other of the thermometer to decrease or increase its size by
the amount stated under that thermometer. The left side of a thermometer decreases the size
and the right side increases the size.
If you are not using the mouse you can adjust the size in 1Mb increments by holding down the
OPEN-APPLE key and the left or right arrow keys. You can adjust the size in 32K increments by
holding down the OPTION (or CLOSED-APPLE on a //e) and the left or right arrow keys.
Partition
The Partition command is used to write a new partition map to the drive that corresponds to the
list of partitions in the bottom half of the screen. Any partitions less than or equal to 32Mb in size
will also have a blank ProDOS directory structure put on it. Partitions larger than 32Mb will not be
formatted by the RamFAST/SCSI. (There is no space in the ROM for the necessary code to
format HFS style).
For the IIGS, when GS/OS later sees the uninitialized partition it will say that it does not
recognize it and asks if you want to format the partition using the HFS file system. Go ahead and
format the partition. The HFS FST (File System Translator) must be installed in your:
BOOT/SYSTEM/FSTS folder. If the HFS FST is not installed your only choice will be ProDOS and
32MB. This will effectively "lose" that portion of the partition greater than 32Mb.
The Format option referred you to this section if the number of partitions and or their size was
not to your liking. Consider the IOMEGA 100Meg disk (which has slightly more than 96Meg
available when formatted):
•
When formatted by the Format command it will end up with five partitions, each 19+Meg
in size.
•
In order to change to three 32 meg partitions you need to delete two of the partitions
using the Delete command OR by decreasing the size of a partition until it reaches 0. At
that point it will disappear.
•
Once the two partitions are gone you can increase two of the remaining partitions to
32768K and the third to slightly less. At that point click of Partition at the top of the
screen and you are done.
Headpark
The Headpark command is not necessary on any drive manufactured in the last few years. All
drives manufactured today have an auto-headpark feature built-in. If you do need to park your
heads you can use this command or create a .System file using the code fragment below to do it
for you. (If the code fragment below is meaningless to you then you should consult with
someone who understands 65816 assembly language.)
Rewind
Rewind is used to rewind a tape in a tape drive that is not at the beginning. This shouldn't
normally be needed since the built-in Backup and Restore commands rewind the tape before
doing any processing.
ACTIVE VERSUS INACTIVE PARTITIONS
The last column in the display at the bottom of the screen is labeled Active and has entries below
it that say "Yes" or "No". This means that you can selectively choose which partitions you want
the system to have access to at any given time. The main use of this feature is by those people
with multiple hard drives with a total of more than twelve (12) partitions. This feature allows you
to switch among the partitions you need to have access to up to a maximum of twelve at a time.
SPECIAL FEATURES AND UPGRADES
Keys Used During the Boot Process
One thing that has only been mentioned in passing up to now is that the RamFAST/SCSI also
allows you to change the way it behaves at power up by holding down certain keys. It is also
possible to use these keys when you do an Open-Apple/Control/Reset, but this might seem better
suited to an octopus.
If you hold down a number key from "1" through "9" when you turn the power on then the
partition in the Logical Devices list corresponding to the number held down is booted. For
example: holding down the "2" key will boot the second partition in the list; holding down the "6"
key will boot the sixth partition in the list; etc. This can be very handy if you sometimes want to
boot GS/OS and other times want to boot ProSel or even ProDOS 8. One thing to be aware of is
that the selected partition becomes the default boot partition until another key is held down or
you turn off the power to the computer. You can make the change permanent by running the
Utility program and saving the current configuration.
Also, if you hold down the "0" key at power up the utility program will boot. This can be handy if
you have lost or misplaced the copy of the utility program that the Install command put on your
hard drive.
Note that the above defeats the GS/OS convention that holding down the "8" key while booting
will boot into ProDOS 8. Holding down the "8" key when the RamFAST/SCSI is installed will result
in partition 8 being booted (if the partition is bootable).
The following patch was posted on GEnie in 1994 by Mark Miller. It will allow IIGS users to boot
into ProDOS 8 by pressing the CAPS LOCK key down, as opposed to holding the '8' key down. If
the CAPS LOCK key is up, the IIGS will boot the system start file (i.e., the Finder in most cases).
Using ProSel-16 or some other block editor, make the following modifications to the ProDOS boot
file in the root directory (NOT P8 in the System folder):
Offset
-----$42A:
$42D:
$430:
Was
-----$00
$FF
$B8
Now
-----$25
$04
$04
Lastly, if you hold down the space bar the RamFAST/SCSI will "basically cease to exist." It will
not put partitions in its device list and will immediately boot through to the next slot. This is
handy if you (or, maybe your kids,) want to boot something on the 3.5" or 5.25" disks without
having to worry about your hard drive. If you want to do this with the hard drive powered down
or disconnected you will have to have the jumper (JP1, just above where the cable plugs onto
the card) installed or the RamFAST/SCSI will crash immediately into the monitor. To get the
partitions back after you have booted this way you can turn the power off and back on or
perform an OPEN-APPLE/CONTROL/RESET while holding down a number key. This will tell the
RamFAST/SCSI to rebuild its partition table and boot the selected partition.
Upgrading to 1Meg of Cache
The Rev D (and beyond) RamFAST/SCSI is upgradeable from 256K of cache to 1Meg of cache.
To do the upgrade yourself you will need to order: Two (2) 1Meg X 4 DRAMs in a 300mil DIP
package. The Toshiba part number for these chips is "TC514400AP-10 or~-8." Your vendor
should be able to convert from this part number to whatever manufacturer's chips they have in
stock.
Once you obtain the new memory chips all you need to do is:
•
Remove the cover from the computer, lightly touch the metal case of the power supply
to discharge any static electricity present in your body.
•
Pry the old memory chips (U19 and U20 in the upper right hand corner of the board), out
of their sockets with a small flathead screwdriver.
•
Put the new chips in the sockets - making sure that:
o
o
The notch on the one end of the chip points to the TOP of the board (same as
the old chips).
None of the pins are bent under or out of the socket.
Contact Sequential Systems if you are unable and/or unwilling to perform this upgrade yourself
for the procedure and pricing to have Sequential Systems make the upgrade for you.
Also, contact Sequential Systems about upgrading an older RamFAST/SCSI card.
TROUBLE SHOOTING
The first thing to do if you are experiencing problems is to TURN POWER OFF TO YOUR
COMPUTER AND DRIVES and then make sure that:
•
•
All of the cables are plugged in securely;
The RamFAST/SCSI is securely seated.
At this point, turn power back ON and make sure power is present on all of your drives and your
computer.
If everything seems to be installed correctly, scan through the list of problems below, read the
descriptions, and follow the directions for any that apply to your system. (Keep in mind that you
must turn off power BEFORE touching the RamFAST/SCSI card, removing/connecting cables i.e.,
before any and all hardware modifications/checks that require you to physically touch any
hardware.)
Finally, if you receive an RamFAST error code when first turning on your computer consult the
following table:
RamFAST
$00
$01-08
$09
$0C
$0D
$0E
Fatal Memory Fault
Unknown, probably means that the RamFAST is very confused
DRAM memory test failure
EPROM checksum failure
Z180 processor crashed, indicates some hardware fault
Error writing cache data to disk
Termination power error
All Computers
Applied Engineering Software, Repairs, and Parts
Many of the following trouble shooting sections mention the need for a modification and/or part
for AE products. Unfortunately, AE went out of business a number of years ago and since that
time there has been NO source of AE modifications or parts in the United States.
At the time of this update the situation is somewhat better because there is now a source for
some AE software, repairs, and parts. Please contact, ABC Direct, David Hardaway 214-3065494, [email protected]," to see if David can fill your needs.
Recently Modified/Updated Boot Partition
If you recently updated anything on your boot partition, e.g., the System Software, go through
the installation section and verify that your RamFAST/SCSI is still properly set up.
Terminating Resistor Plugs
There can be only one (1) set of terminating resistors installed on the SCSI bus. This usually
takes the form of an external terminator plug that is installed in the daisy-chain connector of the
last drive in the chain. Some drives are supplied with internal terminators. If you know this to be
the case with your drive you do not need (or want) an external terminator. If you are not sure
whether your drive has internal terminators installed you can consult the documentation supplied
with it or contact the seller of the drive and ask.
FAQs
Q: What are the symptoms of not having a terminator on the SCSI?
A: The drive does not appear when you go into "ScsiUtils" in the Utility program.
Q: What are the symptoms of having two terminators on the SCSI (internal to a drive
and a plug)?
A: Possibly no symptoms, possibly it won't work as above. Improper termination can also
cause unreliable access (works sometimes, doesn't work other times).
Q: What can be (needs to be) done if I have N drives and each has an internal
terminator?
A: If the setup is working fine, you can leave it. But, the best thing to do is to have all
the internal terminators removed, and to use an external terminator block.
Terminator Power
(Note: RamFAST/SCSI Rev C users should read DIP switch #1 when the text mentions JP1. JP1
installed is the same as DIP switch #1 on. Removing JP1 is the same as DIP switch #1 off.)
At *least* one device on the SCSI bus must supply terminator power. If your drive(s) do not
supply terminator power to the SCSI bus you must make sure the jumper (JP1) on the upper-left
corner of the RamFAST/SCSI is installed. (JP1 is on the component side of the board.)
If you are not sure whether your drive supplies terminator power then consult either your drive
vendor or the supplied documentation. (It is usually perfectly fine for the card and the drive(s) to
jointly supply terminator power so if in doubt, install the jumper unless the next paragraph
forbids it.)
If your drive (most notably Siders) has a sticker on the back saying that the drive supplies
terminator power and the SCSI controller card must be modified to NOT supply terminator power
- then make sure the jumper is removed from JP1.
Cables
If you have checked all of your cables and they seem to be tightened down correctly then it's
time to think about the length of the cables. Long cables (six feet or more) can cause problems
at the speed that the RamFAST/SCSI operates, especially when connecting multiple drives to the
RamFAST/SCSI. If you are having problems and you have a long cable it is worth a try if you can
(temporally) obtain a shorter one. The symptoms of too long a cable are: Data corruption, Apple
"hangs," and all sorts of evil things.
Your Power Supply
If you have a number of cards installed in your computer and you still have the "stock" power
supply that came with your computer you may experience problems with the RamFAST/SCSI:
from random crashes to total failure to function. This is especially a problem in an Apple IIGS
with an AE TransWarpGS, an AE P-C Transporter, and a RamFAST/SCSI. This can also be a
problem in an Apple //e if there are a lot of peripherals installed.
If it sounds like this could be the case you should remove some of the cards installed in your
computer and see it that cures the problem. If it does, you should definitely consider getting a
heavy-duty power supply before reinstalling everything in your computer.
CMS Hard Drives
There is a set of DIP Switches on the back of most CMS hard drives. One of these controls how
the drive is "talked to." You must turn on the DIP Switch that makes the drive compatible with
the Apple McIntosh. If you are not sure how to do this you can consult the documentation
supplied with the drive or contact the seller of the drive.
Multiple Drives/Devices with Conflicting SCSI ID Numbers
If you have connected multiple devices to the RamFAST/SCSI you must be sure that the SCSI ID
numbers assigned to the devices do not overlap. SCSI ID numbers range from 0 through 7 and
no two devices on the same SCSI bus can have the same ID number. Information on how to
determine and/or change the SCSI ID number of a device can be found in the documentation
that came with the device.
Note: The RamFAST does not take up a SCSI ID number, so you can have up to 8
devices (instead of 7 which is the case on most SCSI controllers).
AE Ramfactor
If you have a RamFactor installed in your computer and are having problems, try removing the
RamFactor and see if the problems go away. Some RamFactors cause problems (especially in an
Apple IIGS) just being installed in the same computer as the RamFAST/SCSI. If the
RamFAST/SCSI works with the RamFactor out of the system and doesn't work when it is in the
system, there not anything that can be done beyond removing the RamFactor because the
RamFactor feeds power &/or substantial noise into the IIGS bus, interfering with the RamFAST.
There are no ways to identify the "bad" RamFactors by serial number, revision, etc. If they work,
they work, if they don't, they don't.
Apple //e Computers
While Sequential Systems has not extensively tested the Rev D RamFAST with //e systems,
reports from the field have said it works flawlessly in a non-DMA mode. If the Rev D card does
not work on your //e system you may return the card within 30 days, depending on the policy of
the reseller you purchased the card from, for a full refund or based on availability and your
wishes Sequential Systems will replace it with a modified Rev C board.
Your //e is Unenhanced
The RamFAST/SCSI will NOT work in an unenhanced //e. You will have to purchase an
enhancement kit for your //e from a mail-order firm and install it before the RamFAST/SCSI will
work in your system.
Apple //e with a Number of Cards Installed
In an Apple //e it is also possible to see the same problems described above for weak power
supplies even if you have a heavy duty power supply. This is a problem that is associated with
the design of the Apple //e and there is nothing (very little), that can be done about it. If the
RamFAST/SCSI works in your Apple //e with no (or few) cards installed and doesn't work with all
of them installed then, unless one of the peripherals is mentioned below as causing specific
problems, it is possible that the RamFAST/SCSI may not be able to function in this computer
unless some of the cards are removed permanently.
There are a couple of potential problems/solutions with a RamFAST in a //e.
•
Power distribution. Supposedly, the +5 traces on the //e backplane are pretty thin.
Sometimes, soldering a heavier wire from +5 on the power supply connector straight to
•
•
•
the +5 pins on the back of the motherboard can cure this. (This is the "very little" from
above.)
Noise. Not much can be done about this, the //e motherboard is pretty noisy.
The HCT (high speed CMOS) parts are sometimes incapable of driving the TTL bus
buffers on the //e motherboard.
The best overall solution is for //e people to locate a used RamFAST Rev C card. (Call
Sequential Systems for availability.)
Apple //e Accelerators
The 10Mhz RocketChip will not work in the same system as a RamFAST/SCSI and there is
nothing that Sequential Systems can do about it.
Initially there were no accelerators for the Apple //e that were DMA compatible. Now the 8MHz
Zip Chip is *mostly* DMA compatible. A slight modification to the Rev C board makes it
compatible. Call Sequential Systems if have a Rev C board that is not DMA compatible and you
wish to pursue this issue. The Rev D board cannot be modified in this manner and thus is not
DMA compatible with the Zip.
Some of the 8Mhz ZipChips have had problems in the same system as a RamFAST/SCSI even
when DMA is disabled. If you are having problems with an 8Mhz ZipChip try replacing it with the
original 65C02 processor and see if the problems go away. If they do then you need to call Zip
Technologies and get it replaced.
Apple //e 40 Column versus 80 Column
If you are installing the RamFAST/SCSI into an Apple //e it is required that you have an 80
column card. The Utility program will not function without it.
Apple IIGS Computers
Apple IIGS Control Panel Settings
In an Apple IIGS you need to make sure that the control panel setting for the slot that the
RamFAST/SCSI is installed in is set to "Your Card," and that the boot slot is set to "Scan" or to
the slot that the RamFAST/SCSI is installed in.
Apple SCSI Drivers
Previously you were instructed to remove the Apple DMA SCSI drivers unless you had an Apple
High Speed DMA High Speed card installed in your system. This is no longer true. Apple fixed the
problem in System 5.0.4.
Can't Run ProDOS 8 Software from GS/OS
In the following the devices are shown as 5/6 where 5 is for GS/OS 5.04 and 6 is for GS/OS 6
and beyond i.e., 8/12 = 8 for 5.04 and 12 for 6 and beyond.
If you are having problems running ProDOS 8 software from GS/OS you probably have more than
8/12 devices in the ProDOS device table. This is a problem inherent in GS/OS. You cannot have
more than 8/12 total devices available under ProDOS if you are going to launch your applications
from GS/OS (Note: this is not a problem if the hard drive boots ProDOS 8 directly). To see if this
may be the problem, total up all of your 3.5" drives, 5.25" drives, and any RamFAST/SCSI
partitions you have mapped into the ProDOS Block Device table. If the total is greater than 7/11
you will have this problem (the /RAM3 RAMdisk gets added in too). To fix this you need to
unmap some of the partitions on the RamFAST/SCSI or possibly turn off the slot for your 3.5" or
5.25" drives if you are not using them.
Desk Accessories
If you suspect problems with one or more desk accessories and if you have System 6.0 or later,
then hold down either Shift key when booting. You can release it when you see the phrase, "No
Inits/DAs" below the "Welcome to GS/OS" box. If this clears the problem then you will have to
remove Inits, CDAs, and NDAs one at a time and boot the system, keeping this up until the
problem disappears. Then you should put back all but the offending Init/DA to make sure that it
was the only DA causing the problem. For //e and IIGS not using System 6.0 or later, see the
following note for a way to temporally remove INITs and/or DAs.
Note: One approach to removing INITs or DAs is to create a folder labeled, "SaveInit" or
"SaveDA" in the appropriate folder and simply copy one or more INITs or DAs to or from
the save folder prior to booting the machine again.
If you are using something older than System 6.0 then you cannot disable the Inits/DAs as a
quick check. Rather, you will need to remove them one at a time.
Here are the names of a few of the known troublesome Inits/DAs: Mr. Apple, Fancy Apple;
Twilight; Carpet Bag; FastSpeed; Ram.Namer.
Also, if you must use a screen-blanker you should use the one from ProSel or Phantasm. If you
have another one and are having problems, either remove or disable it.
Zip GSx Accelerator
Check the version number of your board. If it is V1.01 or earlier then you need to contact Zip
Technologies for a free (as this is written) upgrade in order to function with the RamFAST/SCSI.
Apple IIGS with a TWGS and a RamFAST/SCSI Rev C
AE TranswarpGS Accelerator
If you experience problems with the RamFAST/SCSI check to see if there is a part labeled TWGS2A installed on your TranswarpGS. (At the top right-hand side of the TWGS there are two chips
with stickers on them. The top one should be TWGS-1A and the one below should be TWGS-2B.
If this chip is labeled TWGS-2A you will need to contact Sequential Systems to see if a
replacement source has been identified for the TWGS-2B). The RamFAST/SCSI will not function
in your computer until you get this replacement part.
If there already is a TWGS-2B part in your TranswarpGS then you should replace the Transwarp
with the original 65C816 processor and see if the problems go away. If they do, contact
Sequential Systems Technical Support to see if a source for further modifications has been
identified.
AE TWGS Accelerator - RamFAST/SCSI Options
You must have the Option (in the Utility program) for TranswarpGS set to "Yes." If you don't, you
will have problems.
AE TWGS Control Panel - Appletalk/IRQ
The TranswarpGS's control panel Desk Accessory has a section labeled "Configure" which in turn
has the entry "AppleTalk/IRQ." Make sure it is ON. If it is OFF, you will have problems.
AE GS-RAM
The GS-Ram Revision A, will not function with the RamFAST/SCSI under any circumstances.
Disable the DMA option in the Utility program for GS-Ram Revisions B, C, and D. Only Revision E
(and "some" Revision D cards) and later are completely DMA compatible. You will have to
determine for yourself if your Rev D card is or isn't compatible (some Rev D cards arrived from
AE with a "flyer" saying that they were DMA compatible and they were).
To determine the revision of the GS-Ram card you must remove it from your computer and look
at the supporting "leg" of the card (half-way between the card-edge connector and the back end
of the card). On the front or back there will be a message that reads: "REV x" where "x" can be
A, B, C, D, or E.
AE GS-RAM Plus Rev A, CheckMate Memory, or RamPack 4GS
If you have any of these products installed in your computer you will have to disable the DMA
option in the Utility program in order to avoid problems. To determine the revision of a GS-Ram
Plus use the same method outlined in the above AE GS-Ram problem description.
AE RamKeeper
If there are two (2) memory cards installed in the RamKeeper you will have to disable DMA using
the Utility program. You should not have any problems if there is only one (1) memory card
installed in the BACK pocket of the RamKeeper and the memory card itself is DMA compatible.
Top Six Questions Received at Tech Support Central
Q: I just installed my RamFAST SCSI card and attached my hard drive to it. When I boot the
computer, the second partition is missing!
A: All you have to do is run the program "RamFAST.System" on the volume "CVTech.ROM" and
use the Options menu to turn off the ROMDisk option (the Options menu is detailed in section
13.5.3 of this manual). Take this opportunity to verify the settings of the other Options. When
done, click on the 'Save' item to make the new settings permanent.
Q: I just attached a CD-ROM drive to my SCSI chain, but when I try to boot, the computer
crashes or just hangs.
A: Make sure that the SCSI ID of the CD-ROM drive (or any removable type drive) is _lower_
than the SCSI ID of your hard drive. For example, if your hard drive's SCSI ID is 5, your CD-ROM
should be set to SCSI ID 4 or less. If you use a SyQuest or other read-write removable device in
place of a hard drive, treat the SyQuest as your hard drive.
Q: I just upgraded to a RamFAST, and when I go into the utility program the only volume that is
shown is "CVTech.IDX.A". No other partitions appear.
A: Call Sequential Systems tech support for information on how to correct this.
Q: When I try to boot to GS/OS directly from a 3.5" floppy disk on power-up, the computer
crashes about halfway through the boot process.
A: The RamFAST gets confused if you boot GS/OS off a floppy on power-up. Simply do a warmreboot (Control-Apple-RESET) after it crashes and the computer will then boot properly.
Q: I just installed AppleWorks 4.0 (or another ProDOS-8 application) on my hard drive, but when
I try to run it I get an error "Please Insert Volume: ????X".
A: Run the RamFAST utility program and ensure that any partitions that contain ProDOS-8
applications are mapped into the ProDOS-8 Slot/Drive Table. (See section 13.2.)
Q: I have a hard drive with three or more partitions, but only the first two partitions show up as
icons in the Finder. What happened to the other partitions?
A: You need to install the RamFAST.Driver into the System/Drivers folder of your hard drive. You
can do this by using the 'Install' feature of the RamFAST utility program (see section 13.6), or by
turning on the ROMDisk and copying the RamFAST.Driver file to the System/Drivers folder
manually. You must then shut down the computer and restart it for the driver to load. The other
partitions will show up then.
If All Else Fails...
If you have read and tried everything in the Trouble Shooting section and you are still having
problems, then gather the following information:
1. What kind of computer (//e, IIGS ROM 01, or IIGS ROM 03, etc.).
2. Serial number (see section 1, "Limited Warranty," for serial number discussion) and ROM
version of your RamFAST/SCSI (See section titled, "Volumes Screen," to see where the ROM
version is displayed.)
3. A list of the other cards, and their version, installed in your computer.
4. A list containing the complete details about the equipment attached to the RamFAST/SCSI.
5. Your name, address, and daytime phone number.
6. A description of the problem you are having, and if possible, a way to reproduce it.
and send it to:
Sequential Systems
1200 Diamond Circle
Lafayette, CO 80026
Ph: (303) 666-4549
Fax: (303) 665-0933
For on-line technical assistance, contact:
www.sequential.com
[email protected]
WARRANTY REGISTRATION
Be sure to fill out the Warranty Registration card and send it in. It is the only way that we can
know that you are out there and can contact you with news of upgrades, etc. If by chance you
threw the card away you can send us the information asked for in items 1 through 5 in the "If All
Else Fails..." section.