1
USER'S GUIDE
SUPER
Dark Box HD Rev 2008 - S HD CXCI
Dark Box HD Rev 2008 - Combo HD CXCI
HIGH-DEFINITION DIGITAL SATELLITE
(OPTION: TERRESTRIAL) CONAX WITH
2 COMMON INTERFACE
IXl/DOLBVI
DIGITAL
1. OVERVIEW
PREFACE
1. INTRODUCTION
1 OVERVIEW
This product is designed for using Digital Salellile (Option
Terreslrial) and allows you to enjoy a lot of broadcasling
whenever you want 10 walch It anytime. By simply pressing the button of the remote control unit, the vivid picture and
1. INTRODUCTION
2. FEATURES
3. ACCESSORIES
4. REMOTE CONTROL UNIT
5. FRONT PANEL
6. REAR PANEL
7. CONNECTION DIAGRAM
life -like sound of digital broadcasting that your TV portrays through this product. allows you to watch whatever
channel you wish of the digital broadcasting.
Through this manual you will notice that (he operation is easy to use.
This manual will help you get the most from this product and guide you through Installation, channel selection and
many other functions.
In case you experience any difficulties 10 use this product. please consulllhe relevant section of this manual.
From now on, enjoy dlgi!al broadcasling wilh digllal satellite (Oplion Terreslrial) received!!
2 OPERATION
2. FEATURES
1. START UP
2. INSTALLATION
3. CHANNEL EDIT
4. USER SETUP
5. SYSTEM SETUP
6. USB MODE
7. COMMON INTERFACE
8. CHANNEL LIST
9. PROGRAM GUIDE
10. AUDIO CHANGE
11. RECALL THE FAVORITE CHANNEL
12. TELETEXT
13. SUBTITLE
3 SPECIFICATIONS
4 TROUBLE SHOOTING
2
2.1 Key Features
•
Full Compliant of MPEG-S & DVB-S2 Digital & DVB broadcasting
•
Slandard DefinItion/High Definition contents (MPEG2 and support MPEG4 AVC/H.264)
•
High Definition Video output
•
Event Timer by EPG
•
Audio Decoding :ISOIIEC13818-3(MPEG-2 audio/MUSICAM) DolbyAC-3
•
User selectable output resolulion
•
Integraled USB 2.0 (Host) . Support 10 USB Memory stick
•
Software upgrade via USB
HDMI(HDCP) and Componenl (YPbPr)
2.2 Main Features
•
950-2150 MHllnput Frequency (IF Loop Throughout))
•
Satellite Scan - Slmullaneous Scan with 10 Satellites
•
Flexible receplion of SCPC & MCPC from C/Ku-Band Satellites
•
Variable InpuI Symbol Rate (1-45 Msps)
•
Video outpul resolulion: 576p,720p,1080i
•
EPG (Electronic Program GUide)
•
11 Mulli Language OSDs
•
Fast Channel Change
•
10.000 Channels TV & Radio program
•
Timer Function (Automatic Turn anI Off by Selting Function)
3
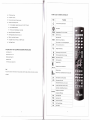
4. HOW TO USE THE REMOTE CONTROL KEY
•
RTC (Real Time Clock)
•
PIG (Picture In Graphic)
•
5 Favorile LIst & Unlllllll f Pr
•
Powerful ChannQI Edllmq f'uncllon
dlelhte. Parenlal Lock. CAS, 5·10. TP Order. All
•
Sonlng Alphaooll
•
Move. Delers. Favorlle Edit
•
--
----
-~
r ms per each
Parental Lotio" Channel Rename. Channel Skip
•
Manual PIOI Satelllle & TPI Network Scan
•
S/POIF (Digital AudIo or Oolby AC3 stream oUI)
•
DiSEQC 1 2 .nd USALS Compalible
•
Comparable 01 ~Plllng Iht1' rrequency for SMATV System
•
Oolby 0'91Ial Dncoder
Key
I
6
Function
Turn the selected equipment onloff
-
e--
I-
I~
Sound OHIOn
~
'---=-
TV/RA 0
Toggle between the TV servrce and radio
Multi
Multi reed Program
Setecl audio mode
AUDIO
(Slereo. lefl only and rig hi only)
SAT
Enter programmed satelli1A li~l
0-9
-
Change channel dIrectly
~
Ex cute page up function in Ihe menu
S eet
';I
uagl1 an case of Multilingual program
---~
3 PLEASE CHECK THE FOLLOWING ACCESSORIES ARE ENCLOSED
• User Manual 1 Set
· Remote ContrOl UnIt 1 Sel
~
• Balle"es (AAA Type) 2EA
MENU
Execute page down funclion In the menu
Enter main menu scr en
~
• HDMI Cable 1EA
EXIT
~-
• 3 Pin UK (anneclor (Option) 1EA
Move to upper menu
VOlume down/up
-
Change the value of a selecled line
VOL "I~
-
Nolo'
If any of the accessones I led above are missing. please conlact the sales outlet where this product was initially
purchaSed.
~"
!CH
I
I-
Channel up/down
Moves the cursor upward/downward in the menu screen
OK
Show channel list Confirms selection
EPG
Show program information
---~
Show channel inlOfmallon. such as ch nnel
Info
~hannel name. frequency. polarity.
-
symbol rale. scrambled/Oolby/fav()rltellock
Change the output resolution
V Formal
(Componenl & HDMI only)
SIG
Show signal quallly
FIND
Quick channel find
TIME
Time show current time
FAV
Enler Favonle Program
TTX
Show Teletexl
--
Available for Telelext Sublille
Sub.T
DVB-Sublltle later
LAST
[PAUSE
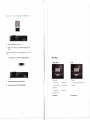
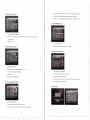
5. FRONT PANEL
Return 10 prevIous pr.ogram
~ Ihe plclure or le a=s==lhe==p=a=u~s_e
--,
26
Operating Principle
· Select an Ilem by using up and down key and change the value of the highlighted (selected) Ilem by using keys
shown on the screen. Press OK 10 enl
• The items are automatically stored a
to the ub-menu if there is no instruclion marks on the screen.
moved the upoer menu by presstng the "EXIT key
• You can relurn to normal mode at dOy lIme by vressing the menu key from the menu mode
1.
POWER
To put Power in and out of standby mode.
2.
CHANNEL
To move up and down in the menus, To change channels.
3.
VOLUME
To make volume up and down & to change the value of a selected line
4.
Menu
To enter main menu screen.
5.
Exit
To move to previous upper menu.
6.
OK
To confirm selection.
7.
Display
To show channel service name number. resolution, remote control commands and time in
standby mode.
8.
CAM Slots
2 slots for Common interlace ( PC MC lA ) .
9.
CA
1 smart card reader.
10.
usa
Connect to
6
usa mass
storage device for s/w upgrade.
7
6.
REAR PANEL
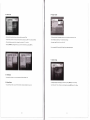
7. CONNECTION
,.t"h " ~
~ () :-.', -,-'
l ~J @
b 5
__""'",
J
NO
.-'
.
".
,.:
;0 .' -..
:. . .
:)(\ --.
-
_
NAME
FUNCTION
1
IF INPUr
IF INPUT frorn LNB 10 ree ver
2
IF OUTPUT
IF Loop-through output to 21..:' receiver
3
TVSC<l1l
TV Scart Oulpul
4
VCRSC<lrt
VCR SC<lrt Oulpul
5
VIDEO
Camp site Video Output
- ...
J,
J"'l
"
' .=: ::__«>
.. ~
(OIlIl..<lill(1 10 ulCtilill TV whith
(1080i,1 )0",&16p) II~III11 YPbPr IKlrl>
AUDIO L
Left AudiO Output
7
AUDIO R
Right Audio Output
1.
8
y
COrt1ponenl Video Output
2.
9
Pb
10
Pr
--
- l - HDMI
II
I
eSATA
Component Video Outpul
.
COMllct STirs
s.t STB5
c
'"pport
L.II'
mode to 10801 ot nUl> 01 5161>
PIi';;<-e ch«k TVs llSeI manua! tOt
_
HDMIOulpul
SATA OUlpul 10 exlernal HOD (This eSATA will be available
12
laler)
14
S/PDIF
For Digital Audio Output
'RS232
Senal port used for Software upgrade
15
ANTENNA
Input from terrestrial antenna (opllon)
16
TV/VCR
Antenna signal loop out (option)
17
AC Switch
I
18
TV OUT
19
ANT IN
-
AC Power On / Off
I
Oulpul to TV (oplion)
Inpul frorn oH air TV or cable ele (option)
8
no 'v.F or.al' . pt d .
conno<Jlno _ _ of the YPllPr -'llUllXllt,
l-
n
resollllioll
WbPr our and audio IIR OUT to YP!lP! III and aYdIo L}llIN eX TV,
Component Video Output
-
HO
9
<. llllt:,(,ino 10 PC llIonilor or tliljil.ll IV will< h h.h HDMl Input port>
.-0-~
1. c
2,
C "
0·'
"
'.
,
ST8'. Hor-n ovr to fCJMllN 01 mcntto<
SEt ST!l', ,doo COJlIll.( modillD 10ll0t or 72
TV.
oI.<motIJ
'v.Fonoar'
01 5761>
ClltlltOlIi!<
<Connecting to AN receiver ( Dolby digital amplifier»
Menu Map
2, EDIT
1. INSTALLATION
-0--
r •
o'
.
'
V-,
1,
2,
.
2.1 Channel Edit
1.1 Satellite Setup
Connect STB's optical audio out to AN receiller.
Press Audio key and sets "Dolby digital Language."
1.1.1 Antenna Setup
1.1.2 Satellite Scan
1.1 3 Advanced & TP Scan
1.1.4 EdIt lPI Satellile
2.1.1 Sort. Move. Delele. P-Lock. Skip, Rename
2.2 Favorite Edit
1.2 DVB-T Setup
1.2.1 Automatic Scan
1 2.2 Manual Scan
1.2.3 Antenna Power
4. System Setup
3. User Setup
lO
II
3.1 Timer setting
4.1 System Informallon
3.2 Parenlal Control
4.2 Factory Selling
This Receiver supports 11 languages.
English, German. Fr och Portuguese. Spani~h. Tw·klsh Italian. Arabic. Czech. Polish. Dutch
3.3 Language Setting
3 4AV Seltlng
3.5 OSD Selling
2. Installation
5.USB
6. Common Interface
5.1 Channel Dala
6.1 SLOT NB
Press the OK key. Antenna setup is appeared on screen as uppEU ftgure. Channel edil is nol accessible until satellite
5.2 Code
6 2 Embedded 5101
channel scanned and saved.
2. OPERATING
1. Start Up
Please follow the brief procedure below and watch the satellile programs.
I)
Selecllhe language
2)
Select the antenna setup in main menu screen
3)
Adjust LNB configuration per each satellite
4)
Execute scanning to find program
5)
Exit from Installation atter all programs are searched.
1.1 Language
When the receiver
IS
turned on for the first time. the language selection menu is appeared as in the Fig 1-1.
Select the deSired language and press OK to confirm it.
13
12
2.1 Antenna Setup
2.1.6 Positioner Selting
In this section, all parameters can be set 10 get enough signal & qualily levels to be locked
It is used to setlhe DiSEqC 1.2 or & USALS molor.
If you have no posltianer equipment. select ~Disabre" Otherwise. you can select either DISEqC 1.2 or USALS
1) DiSEqC 1.2 (manual operation)
(1) Current posillon
Select the position number by using'" Il> keys (#0-#26 default define. #27-#49: user define)
(2) Movement
Select Eastl West by using <Ill Il> keys.
(3) Slore
Please select .. Store" and the current position will be saved.
(4) East Limit Set
2.1.1 Satellite
Move the POSition 10 the mosl eastern position and press OK then Easl Limit is Slored.
Select the satellite by using
" ... ~ ~ and press OK to enter
(5) West Limll Sel
Move the POSItion 10 the mosl western position and press OK then West Limit is stored.
2.1.2 LNB type
Select LNB Iype using
(6) Umits Disable
~ ~
keys.
Select Disable limits by using OK key
There are 7 LNB alternatives.
(7) Go to reference
• Universal 1 (9750MHz & 10600 MHz)
Select go to reference by using OK key
• Universat2 (9750MHz & 10750 MHz)
• Single·SL (5150MHz & 5750 MHz)
If the motor shifted 10 one Side (usually it happens after used), you can resynchronize by using DiSEqC 1.2 "go la
• Single·SH (5150MHz & 5750 MHz)
reference" and Ihen go back 10 programmed mode
• Slandard (User can define)
• Single Slack (10750(V)MHz or 10175(H)MHz)
2) USALS (DISEqC 1.3) - automatic operation
• Dish Pro
(1) Satellite Position
22KHz control is automatically set lor each LNB alternative or you can change it by yourself.
It POints out the position of saved satellite. You can change the position of the satellite by numeric keys.
(2) My LongItUde
2.1.3 LNB Local·Freq
Please inpul local Longitude by numeric keys
If the required LNB frequency is nol available. select "Standard" and then input the frequency manually using the
numeric keys
(3) My latitude
Please input Local Latitude by numeric keys
(4) Reference position
2.1.422Khz
This is the same as DiSEqC 1.2 Reference
In case you are using a Dual lNB or two antennas connected to a 22KHz lone swllch box. make 22KHz lone swi1ch
"ON" or "OFF" 10 select an LNB or an antenna
(5) Move
The satellite's pOSItion of (1) and the one calculated by value of (2) & (3) will be shown. Press OK key and it will
move.
2.1.5 DiSEqC
(6) Store
• DiSEqC 2Xl & 4Xl is usually available.
Please select "Store" and the current pOSition will be saved .
• Select the port connected 10 the LNB or LNBF.
14
15
2.17 TP
Select a specIfic transponder by using the '4 .. keys
2.1.8 Satellite Scan
After all LNB selling
IS
finished. adjust antenna direction toward satellite unlit signal & quality level maximized. Then
select and confirm Satellite Scan to start scan and saved.
# Below the Menu. Signal and Quality
Will
be displayed
111
the screen.
2.1.9 Auto DiSEqC
2.3.2 Down Frequency
Select a Aula DiSEqC settIng by using (he RCU Green keys.
Input the Frequency that is down converted through LNB in common
When you press OK key. TP Lisl Will be displayed and if you press Left I Right key on the RCU. you can
select Multi TP.
2.2 Satellite Scan
2.3.3 Polarity
Scan alllhe transponder of selected satellites.
~
Select Horizontal or Vertical by using
• keys.
2.3.4 Symbol Rate
Input correct value using numeric keys.
2.3.5 Tuner Type
DVB-S(QPSK). DVB-S2(QPSK). DVB-S2(BPSK)
When you press OK key Tuner type
WIll
be displayed and if you press ...... ~ • key on the RCU. you can select
Tuner Type
{1 )Pr€ss OK key and select l,'Janled satellite by using'" & ... keys.
(If you want to scan several satellites once. you can control 4 .. keys.)
Then press OK key to execute scanning.
(2) You can select satellite whatever you chose lhough.
(3) Transponder will be consecutively scanned all selected S81ellites
2.3 Advanced & TP Scan
2.3.1 Satellite
Select a satellite by using ..... keys Select items in the list and press OK.
2.3.6 FEC
Select items in the list by using <Ill ... keys
2.3.7 PlO Scan
You can sel PlO to search for services.
Select Items in the manual mode by uSing OK keys.
16
17
Use the'" ... key or numenc key to input the value.
• The satellite which has had already searched channels
IInot be deleted.
• To restore the deleted satellite, move the cursor to the deleted satellite and press OK key. Then select
2.3.8 Scan Option
Select Scan Option by using
~Restore"
the screen and press OK key
~ ~
keys (ALL. FTA).
2.4.4 How to add a new transponder
2.3.9 Network Scan
Select 'ON' or 'OFF by uSing
• Press OK after selecting a satellile
~ ~
keys
• Select Edit TP and then Transponder Itst
• Press OK key selecling
2.3.10 Start Scan
~NEW~
IS
shown.
In the transponder list
• Enter the Down frequency. Symbol Rate and LNB Polarity, Tuner Type. Modulation, FEC.
After all setting is finished. then press OK 10 search in Scan Start rh)r
S.ltl'IIiU~
Scnn or TT'. can I.
2.4 Edit TP/Satellite
• Press EXIT or OK. Then new transponder Informalion
1$
stored.
2.4.5 How to delete or update a transponder added
• Press OK key after selecling a satellite
In this mode. you can add the New Satellite and lhe New transponder informalion.
Also you can update or delete the transponder information.
• Selecl Edit TP. then transponder list is shown
• Select a transponder you want to delete or update
• Press OK on the TP you wanl 10 Edit or Delete.
· You can see the Edit or Delele in the small-menu.
• In case you want to edit a TP list,
Select EDIT and press OK key.
Enter Down frequency, polarity and Symbol Rate Tuner Type, Modulation. FEC and press EXIT or OK
Then New TP dale is automatically updated
• In case you want 10 delete a TP
Setecl Delele in the small menu. press OK key.
2.4.1 How to add a new satellite
· Select
~New"
Then the TP selected is deleted.
in the satellite name by using CH ...... keys. Press VOL .... keys to move digit.
• Maximum number of characters is 12-diglt.
2.5 DVB-T Setup ( Option)
• Press OK key.
• Enter the Down frequency, Symbol Rate, LNB Polarity, Tuner Type. Modulation, FEe.
• Press EXIT or OK key, then new transponder Information is stored
2.4.2 How to rename a satellite
• Press OK after selecting a satellite of which you want to change name
• Selecl
~Rename"
in the menu.
• Enter new name by using VOL ... .. Keys CH ...... keys and press OK key.
2.4.3 How to Delete/Restore a satellite
• Press OK key atter selecting a satellite you want to delete.
• Press OK to confirm. olherwise press EXIT to cancel. The calor of the deleted satellite name in the list is changed.
18
19
in
2.5.1 Automatic Scan
3. Channel Edit
3.1 Channel Edit
\
.1
In the menu. You can se! terrestrial channel automatIcally.
(1) You can adjust the start and end frequency by using ... Ill> ktiy.
(:') Pre~s lho i....IK 10 ~ldJl (;. ':.Jnllei searUlil ~
You can edil channels of Satellite in IhlS mode.
2.5.2 Manua' Scan
can sort
(1)
You
(2)
You can rearrange Ihe channel lisl
the channels out upon yCl:,' l'(l:!erence.
(3)
You can delete channels
(4)
You
(5)
You can skip ch"nnels
(6)
You can change the channel name,
can sel
'I P-Loclo; Menu.
a~,
,ll', want.
3.1.1 How to sort the channel
"."aoual search IS more convenient to search a specific MUX.
This menu searches also all channels broadcasted over a specific MUX using ils detected inrormation
(1) Select the "manual Scan" on the terrestrial setup menu.
(2) You can adjusllhe channel (MUX ) by USI09 ... ~ '<oy,
(3) You can inolJt b numorrr: \<.ey~ It has bas.'c lie IJency on cnanne
(4)
ou can s~leCI "Disable- 01
Enable-
I ne walk scan by
(5) You C30 se eCI 7 . eMI', s',n WIdth by.'......
(6) Press ha
K ,e, to ~ all c:h
sill
... ~ Key.
... ~ Key.
(1)
"el s~",ch", ,.
Press OK after selecling Sort
(2) Sub mode will be appeared as follows
·ALL
I
2.5.3 Antenna Power
(1) Select the ~Anlenna Power"
·A-Z
1
(2) You can SWItch the power supply On or Off.
• SAT
• TP order
• CAS
• P-Lock
• S-ID
Select Ihe mode that you want to son and press OK
(3)
20
Pness EXIT 10 exit from this mode
21
3.1.2 How to move the channel
(4)
You can release lhe locked channel
(5)
Once locked channel
(6)
Picture and sound is appeared after the correct password is given by preSSIng the numeric key.
IS
jf
you press .... keys after selecting the locked channel
selected while watching television. password is requested
3.1.5 How to SKIP the channel
(1)
Press OK key after Selecling Move key
(2)
Press...
using CH
(3)
keys to select a channel 10 move and then move the selected channel 10 Ihe new posit ton by
keys.
Repress ~ • keys
3.1.3 How to delete the channel
(1)
Select SKIP and pu,ss OK
(2)
Select (ho
annellhat
~ou
want to hide and press
~
... keys
3.1.6 How to rename the channel
(1) Select Delele and press OK
(2 Seleel a channel you want 10 delete by using the OK or ... ... keys
(One channel. All channel. Satellite. DVB- T (option)).
(1)
Press OK after selecling RENAME mede
(3) Press OK key.
(2)
Select the channel of which you want to change name
(4) All channels that you selected are deleted.
(3)
Press OK to enter the character Input mode
3.1.4 How to locklunlock the channel
(4)
Put new names. a3 you want using the 4 arrows keys. The maximum number 01 characters IS 20.
(4)
After completion of entenng new, press OK
3.2 Favorite Edit
(l)
Select P-LOCK and press OK.
(2)
Select Ihe channel that you want 10 lock and press .... keys
(3)
This channel is now locked and the symbol at loCk will be shown as a locked channel.
22
23
4.1.2 Timer
(1) Select one channel of channel list.
(2) Press OK. then thIs channel is moved to the favorite channel list.
(3) For deleting a channel from the favmite list. press RCU RED key to go to Favorite list. select one channel
to delete and press OK. The selected channel disappears in favonte list.
4. U!\er Setup
Aner selecling Timer. you can see Timer list and adjust thollme
- Timer Mode>
d
rollows.
nee. Daily
- Wakeup Time> Set up by pressing numeric keys
- Wakeup S t J Ch elling
- See TIme > > Sel up y pressmg rlur',.eIlC keys
In this USER SETUP mode, you can select lhe sub-mode by pressing OK and CH ..... key
The changed sel-up
IS
acHvated and stored by pressing EXIT key.
4.2. Parental Control
After ~c'ccling Parental conlrol and entering Ihe correcl password.
the sueen as Sh vn
4.1 Time Setting
IS ~Q..O-O-O·'You
III
the right appears. The default password at lhe factory
may change the PIN code. which
IS
your password
In other words, and lock the receiver to prevent children
4.1.1 Current Time
from watching programs.
After selecling Time mode. you can adjuslthe time as follows.
. Time zone
4.2.1 Menu lock
- Summer Time
If you select "ON". you will have 10 enter the PIN code every lime when you enter the menu kp-y.
- Current Year> Set up by pressing numeric keys
- Current Month I Day> Set up by pressing numenc keys
4.2.2 Rating
- Current Time> Set up by pressing numeric keys
You can sel an age limit (All, 12. 15. 18).
4.2.3 Change PIN Code
You can change the PIN Code (Password) if you want.
(1) Enter the new password.
24
25
(2) Reenter Ihe new password 10 confirm.
Warning!
You must remember the exchanged password because it is used in several Functlons as follows.
Password required
(l)
To show parental locked channels
(2)
To enter Parental Control menu
(3)
To execule faclory selling
(4)
To Video Format Change Menu
(5)
To enter main menu ( In case of menu lock)
4.4.1 TV Screen Format
You can set the TV aspect ratio (4:3 for normal TV & 16:9 for wlde TV) by pressing VOl ...
~
keys
4.3 language
4.4.2 Video Format
You can set il by pressing VOl <4
4.3.1 OSD language
~
keys (1 80i, 720p, 576p)
When you change VIdeo Formal, enler the Password.
4.4.3 Display Format
You can selecl Full or Letter Box.
4.4.4 SCART output
Press EXIT key after you select your preferable language and audio language by using VOl «lI
English, German, French. Portuguese, Spanlsh. Turkish. Italian. Arabic
•
~
keys .
You can set it by pressIng VOl <4
~
keys (RGB. CVBS. S.VIOEO)
~
keys (RGB. YCbCr)
4.4.5 HDMI output
You can se' it by pressing VOl <4
4.3.2 Audio language
Select the preferable Audio language by using the «lI .. keys
4.5 OSD Setting
You can adjust the transparency level and Banner timeouL screen saver IImeoul by using «lI
4.3.3 Subtitle language
SeleCI the preferable Subtille language by using the «lI
~
keys
4.4 AN Setting
26
27
~
key
5. System Setup
5.1 System Information
Warning!
Show the information of model name. data and version of 5T8.
Please use USB Memory Stick only.
Don't use any other product like USB Charger.
Don't use USB related products which cannot meet DC5V, & Max .100mA.
1. USB menu can be walched after inserting usa Stick in Normal Vkjeo mode and the Menu list can be displayed.
2 Flash ROM Wriling file IS m Code Backup folder and Channel Data IS In Channel Data Backup folder.
3. Select Flash ROM Writing file and press 'OK' API Code TranSfer Menu is display d and API Code Download is
executed
4. After API Code Downlo3d is done. ~Complele" message i:;i displayed and then the receiver starts rebootmg.
S Select the file in ChanOOI Data folder and press 'OK' key Cndnnt:!1 Data Transfer Menu IS dIsplayed and Channel
Data .;;lowllload executed.
5 API Code and CH Data uploadlng ;s possible
7. In API Code uploadlng API code 18 saved In Code Bad;up rota .1' of use ana '" Chnnnc' Data up!oading ct1l3nnel
data I~i} Is sall'6 In Channel Dala Backup folder of use. Se'e ted hies (LIp 10 20) wdl bE~ played one by one.
5.2 Factory Setting
Once the Factory selting IS sekN:1ed and the collect password IS gi'olen by pressing 4-digil nUnlenc keys followed by OK
key, whole parameters are ('.hanged le tt1e value Wr1tlen
In
lhA factory That is. factory selling functions your STS (Set
Top Box) the first stage If you do not wanl to continue thIs mode, press EXIT key before you enter password.
Common password is '0000",
7. Common Interface & CAS
"~
~'~~
,
. I
I I
,, __...J
~~'.
You can select factory setting as foUows'
7.1 Cl
-Channel Data default setting
Select uCommon Interface" menu In Main Menu and the following screen will be displayed.
-All Dala default selling
When a Common Interface module (CAM) is Inserted inside the PCMCIA slot. the receiver detecls the type of the CAM
automalrcally and displays the name on the menu screen.
On choosing this menu, you can access different options available Wllh the type of the CAM e.g. Consullation.
6. USB Mode
Authorization, Module Information and etc.
The user can receive the scrambled channels WIth a smart card and a common Interlace CAM (Conditlonal Access
Module). If you wanllo subscnbe the servIce more than CA servIce. you have to change with different Smart Card and
CAM.
7.2 Embedded CAS
• If you insert SMART CARD into lhe receIver's smart card reader the receiver will recognize it automatically
28
29
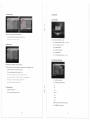
8. Channel List
9. Program Guide
• You can see lhe channel lisI as shown In the above figure by pressing OK key
• The title and start lIme of the program IS shown as in t
• To watch another channel. move the cursor to the channel you want by using ... PG i PG l and press OK key
• Select the particular channel you The channel will be changed.
• If favonle channels are saved, the list is changed from c annet list TV 10 favorile 1151
• If you want 10 watch TV wilh 11)11 screen, Press EXIT,
right figUle after pressing EPG key.
• Pressing TV/RADIO key changed lisl Radio. you can exit from the lisl menu by pressing EXIT key.
When you press the RED key on Ihe RCU, Single Cl1anoffi Mode will be execuled.
10. Audio change
8.1 Red Bullon
If you press the red bulton. you can sort the channels by Satellite. Alphabet. CAS.
8.2 Green Bullon
• In multilingual program, favorite lan!luage IS selecled by pressing AUDIO key and CH .. ~ keys
If you press the green button. you can find the channels Including the alphabet which you insert.
30
• Audio mode (l·le~. R-<ighl. UR·Slereo) can be Changed by pressIng AUDIO key and VOl .... key.
3. SPECIFICATION
11. Recall the Favorite channel
Tuner I LNB (Satellite)
1 lnpul Connector
F·lype. IEC 169-24
IF Inpul Frequency
950MHz 10 21S0MHt
IF Loop Throughout
950MHz 10 21 50Mllz
Inpul Level
-65 dBm--25 dB",
LNB Power
13/18VDC 1500mA M"x
OiSEqC
1.0.1 2 &USAI S UJmprlllble
Control
• Press FAV key to recall a stored favorite channel.
Band Switch
• Favorite channel is programmed and stored In the Favorite Edit menu.
Modulation method
LDPC/BCH(DVB·S2) 8PSK/OPSK. DVB-S OPSK
Symbol Rate
LDPCIBCH(DVB-S2) 8PSK/OPSK 10-JOMsps
22KHz Tone(22 +1- 4KHz.Amphlude 06 +1- 02V)
DVB-S OPSK
I -45Msps
12. Teletext
Viterbl Decoding Rate
112.2/3.314.5/6 and 718
On some services. such informatIon as weather reports. news or slock quotations is provided by means of teletext.
Band width
36MHz
If the current service provides teletext. the teletext symbol WIll be dIsplayed on the information box
LDPC/BCH
Punclured Code .1/2.213.314.315.415.5/6.819.9110 in DVB-S2
1.
Press "TTX' key.
2.
The teletext screen shows.
3.
Press "EXI, or "TTX" key 10 ex I!.
Tuner / Channel (Terrestrial) - Option
Input Conneclor
13. Subtitle
IEC-Type IEC 169-24. Female
VHF
174MHz - 230MHz
UHF
470MHz - 860MHz
Input Level
-90dbm - ·15dbm
Guard internal mode
1/32.1/16.1/8.1/4
Aclive symbol duration
Some programmes are provided with SUblitle tracks in one or more languages.
When the subtitle data in the channel.
Demodulation
OFDM 2K I 8K Carrier
1.
Press ·Sub" key.
Band Width
7MHz 18MHz (Europe)
2.
Select language lhal you want.
Vilerbi Decoding Rate
1/2. 2/3. 3/4. 5/6. 718
3.
Select "Off' In the subtItle menu 10 exit.
Reed Solomon Decoding
FEC 204.188.1=8
Antenna Power
5V
MPEG transport Stream
32
AN Decoding
Oemultiplex
According 10 ISOIlEC 13818·1(MPEG·2 syslem)
Input syream
Max. 90MbiVs
Aspect Ratio
4:3(defaull). 16.9 lellerbox
Vldoe Oeocding
ISOIlEC 138 I 8-2(MPEG2 vldoe) MP@HUSOIlEC 14496·10 HP@L4
Video Resolution
576p.720p.I080i
Audio Decoding
ISOIlEC13818-3(MPEG2 audio/MUSICAM). Dolby AC·3
:n
Audio Mode
Single Channel/Dual Channel. Stereo. Jornt Stereo
Video Ouput
HDMI/HDCP (Option).SCART.RCA
Remote Controt
Type
IR RCU
Ballery
2x1 SV AAA Type
Microprocessor & Memories
CPU Clock
Electrical and Mechanical
280MtPS
Flash
Input Voltage
AC 90·250V.
Power Consumphon
Max. 45 Walls
SO/60Hz
4 Mbyte
Memory
SDRAM
160 Mbyte
Slandby
EEPROM
32 Kbll
Power
Max 18 Waits
AlVoutput
Digital output
HDMIIHDCP (Option). YPbPr
TV SCART
Video oulpul(CVBS.RGB.S,VldeoIAudio lelt/right
VCR SCART
Video Input(CVBS). Vldoe outpul(CVBS) .audlo in/output (le"" ht)
Video RCA
1 output
Audio RCA
2 output
DIgital Audio
1 oplical oUlput S/PDIF
VFD
Ch. Service Name Display
Front Panel
8 keys
Power. Channel Down/Up. Volume up/down. Menu. Exit. OK
USB
USB2.0 Hosl
Smart Card Reader
Cona, CAS 7 Embedded
Common Interface
2CI Slots
IF Inpul
F -type Connector
IF Loopthrough output
F-type Connector
Rear Panel
Antenna
1EC-Type connector (option)
TV /VCR
1EC-Type connector (option)
6RCA
Video. Audio L. Audio
Scart
TV /VCR
S/PDIF
Optical
R. YPbPr
HDMI
Type A
SATA
eSATA will be available later
RS232
9 Pin D·Sub Type
Modulator
Channel 21-69
34
Dimension (WxOxH)
340x245x65mm
Weight
3.0kg
4. TROUBLE SHOOTING
There may be various reasons for the abnormal of the unit. Therefore, if the unit does not work properly,
Check the unit according to Ihe procedures shown 10 the table below.
Problem
VFO on froi'll panel
Possible causes
AC Power cord disconnected
Does not IIghl
No Picture or Sound
Remedy
Connect power cord properly inlo Ihe
power socket
Wrong connection of the
Video/audio outpul 10 TV input
With HDMI or scart cable or RCA
Terminal
cable
Wrong connection of antenna
Connect the antenna cable
cable
Correctly
Wrong direction of antenna
Adjusl the direction of antenna
No signal or weak signal
Check the cable connections,
Wrong selling 01 channels
Type the selling value correctly
Information in MENU screen
Blaek-and-whlte
Your TV mode is different from
Screen or V-Hold
broadcasting mode
Use TV of same mode
•
Connection 10 Ihe receiver and TV
The remote eonlroller
Ballery exhausted
Change the batteries
Fluorescent light interfering with
Switch off the lighl
is not working
the remote controller
Remote controller is incorrectly
Aim the remote conlrol al Ihe
aimed
receiver
Dislorted menu
Too high brightness and contrast
Adjust brightness and contrast to low
screen
level of TV set
level
Not working
Process Down
Remove the power code or
AC switch OFF/ON
36
Declaration of Conformity
Connect two terminals correctly
The eou pmen ~pecl'le<l above IS In corn
rals
95147iCE concerOl
em'SSlon 0
t
0 l n 19101
Y 7th 1999
In
l(ul,)J t~IS
Ulpmenl is
complaoce
tec:M,cal IO"'~
om", nee iJ
. UE lE
'9" VId J Broaoca IIn
CE
fiance With E ropean Directive
acknOwledged
I aly as by law
with reoulrerrents decided "0
SI CENELEC standard DVe
ri' . "<lu'pme'll specIfied abov conlorm to the
h,lIcw", O"ecLves.
,.. rlJl[ l C 93168iE C Low Vo ,age 0" • we
!I',/:! ",EEC 92/~1/EC 93/6BiEEC 2 4/10B/EC
I M
["tIC '""