1
P3PC-4422-01ENZ2
Basic Operation Guide
Contents
About This Manual ................................................................................................................. 5
Safety Information..................................................................................................................................6
Manuals ...............................................................................................................................................7
Trademarks......................................................................................................................................... 10
Manufacturer....................................................................................................................................... 11
Symbols Used in This Manual................................................................................................................ 12
Arrow Symbols in This Manual............................................................................................................... 13
Screen Examples in This Manual ........................................................................................................... 14
For Windows 8 Users ........................................................................................................................... 15
Abbreviations Used in This Manual ........................................................................................................ 16
What You Can Do with the ScanSnap ................................................................................. 18
Scanning a Document.......................................................................................................... 21
Scanning a Book .................................................................................................................. 26
Scanning Multiple Documents at Once ................................................................................ 31
ScanSnap Overview............................................................................................................. 36
Parts and Functions ............................................................................................................................. 37
ScanSnap Manager Icon....................................................................................................................... 40
Right-Click Menu ................................................................................................................................. 41
ScanSnap Setup Dialog Box ................................................................................................................. 43
Turning the ScanSnap On/Off................................................................................................................ 45
Turning the ScanSnap On.............................................................................................................. 46
Turning the ScanSnap Off.............................................................................................................. 48
Sleep Mode.................................................................................................................................. 49
Automatic Power OFF ................................................................................................................... 50
Documents to Scan.............................................................................................................................. 51
How to Place Documents ...................................................................................................................... 52
Using the ScanSnap According to Your Needs ................................................................... 55
Managing Business Forms in ScanSnap Organizer .................................................................................. 56
Saving Business Cards in CardMinder .................................................................................................... 59
Reproducing a Book in Rack2-Filer Smart ............................................................................................... 62
Useful Usages...................................................................................................................... 67
Scanning Documents Using Page Turning Detection ................................................................................ 68
Scanning Documents Using Timed Mode................................................................................................ 72
Scanning Documents with Two ScanSnaps Connected to a Computer........................................................ 76
Correcting the Scanned Images........................................................................................... 77
Scanning Books................................................................................................................................... 78
Correcting Distorted Book Images ................................................................................................... 79
Splitting a Double-Page Spread Image into Two Page Images ............................................................ 84
Filling in Fingers Captured in a Scanned Image ................................................................................ 87
Scanning Multiple Documents at Once ................................................................................................... 91
2
Correcting the Scanned Image Orientation ....................................................................................... 92
Modifying the Crop Area ................................................................................................................ 95
Adding the Necessary Scanned Images........................................................................................... 97
Deleting Unnecessary Scanned Images........................................................................................... 99
Troubleshooting ................................................................................................................. 102
How to Find Your Resolution ............................................................................................................... 103
If Your First Attempt to Install Failed ..................................................................................................... 104
If You Have Installed the Software Before ............................................................................................. 105
Uninstalling the Software ............................................................................................................. 106
Removing the Installation Information ............................................................................................ 107
Installing the Software from the [ScanSnap Setup] Dialog Box .......................................................... 112
Installing One Software at a Time.................................................................................................. 113
When the ScanSnap Manager Icon Does Not Appear ............................................................................. 114
Displaying the ScanSnap Manager Icon......................................................................................... 115
When ScanSnap Manager Does Not Operate Normally .......................................................................... 116
Removing Unnecessary Icons from the Notification Area.................................................................. 117
Checking the Connection between the ScanSnap and the Computer ................................................. 118
Checking If ScanSnap Manager Is Operating Normally .................................................................... 119
Removing the ScanSnap's Connection Information ......................................................................... 122
When You Cannot Uninstall the Software.............................................................................................. 124
Installing and Uninstalling .................................................................................................. 125
Installing the Software ........................................................................................................................ 126
Bundled Software Overview ......................................................................................................... 127
System Requirements ................................................................................................................. 129
How to Install the Software........................................................................................................... 131
Standard Installation.................................................................................................................... 133
Installation of Each Application ..................................................................................................... 139
Installing from the Download Web Page......................................................................................... 142
Installing from Rack2-Filer Smart with Magic Desktop ...................................................................... 145
Installing Adobe Acrobat .............................................................................................................. 146
Uninstalling the Software .................................................................................................................... 148
Cleaning ............................................................................................................................. 150
Cleaning Materials ............................................................................................................................. 151
Cleaning the ScanSnap ...................................................................................................................... 152
Appendix ............................................................................................................................ 153
Purchasing and Cleaning the Background Pad ...................................................................................... 154
Specification ..................................................................................................................................... 155
Documents That Can Be Scanned with the ScanSnap and How to Load Them (Models
Other than SV600) ....................................................................................................... 156
Documents for Scanning (For iX500/S1500/S1500M/S510) ..................................................................... 157
Conditions for Documents to Scan (For iX500/S1500/S1500M/S510) ................................................ 158
Conditions for Using the Carrier Sheet (For iX500/S1500/S1500M/S510) ........................................... 160
How to Load Documents (For iX500/S1500/S1500M/S510) ..................................................................... 163
Documents for Scanning (For S1300i/S1300/S300) ................................................................................ 167
How to Load Documents (For S1300i/S1300/S300) ................................................................................ 169
Documents for Scanning (For S1100) ................................................................................................... 172
Conditions for Documents to Scan (For S1100) .............................................................................. 173
Conditions for Using the Carrier Sheet (For S1100) ......................................................................... 175
3
How to Load Documents (For S1100) ................................................................................................... 177
About Customer Support and Maintenance ....................................................................... 179
4
About This Manual
About This Manual
l "Safety Information" (page 6)
l "Manuals" (page 7)
l "Trademarks" (page 10)
l "Manufacturer" (page 11)
l "Symbols Used in This Manual" (page 12)
l "Arrow Symbols in This Manual" (page 13)
l "Screen Examples in This Manual" (page 14)
l "For Windows 8 Users" (page 15)
l "Abbreviations Used in This Manual" (page 16)
5
Safety Information
Safety Information
The attached "Safety Precautions" manual contains important information about the safe and correct
use of the ScanSnap. Make sure that you read and understand it before using the ScanSnap.
6
Manuals
Manuals
Read the following manuals according to your needs when using the ScanSnap.
Before Using the ScanSnap
Manual
Description and Location
Safety Precautions
This manual contains important information about the safe use of the ScanSnap.
Make sure you read this manual before using the ScanSnap.
Safety Precautions is included in the package.
In addition, when the software is already installed, this manual can be accessed by
selecting [Start] menu → [All Programs] → [ScanSnap Manager] → [Safety
Precautions] (for Windows 8, by right-clicking the Start screen, and then selecting [All
apps] on the app bar → [Safety Precautions] under [ScanSnap Manager]).
When Setting Up the ScanSnap
Manual
Description and Location
ScanSnap SV600 Getting
Started
This manual explains the setup procedure from the moment you open the package to
testing the operations.
Getting Started is included in the package.
When Operating the ScanSnap
Manual
Description and Location
ScanSnap SV600 Basic
Operation Guide (this
manual)
This manual explains the basic operations and cleaning procedure for the ScanSnap.
ScanSnap Advanced
Operation Guide
This manual describes operations including various scanning methods and useful
usages of the ScanSnap.
Visit the following web page to refer to the Advanced Operation Guide:
http://www.pfu.fujitsu.com/imaging/downloads/manual/advanced/v62/en/common/
index.html
ScanSnap Manager Help
This Help file describes the windows, operational troubles and the resolution, as well
as messages of the ScanSnap Manager.
This Help file can be accessed by one of the following methods:
in the notification area, and select
l Right-click the ScanSnap Manager icon
[Help] → [Help] from the "Right-Click Menu" (page 41).
l Select [Start] menu → [All Programs] → [ScanSnap Manager] → [ScanSnap
Manager Help] (for Windows 8, right-click the Start screen, and select [All apps] on
the app bar → [ScanSnap Manager Help] under [ScanSnap Manager]).
l Click the Help button (
) for ScanSnap Manager.
l Press the [F1] key on the keyboard while a dialog box is displayed.
l Click the [Help] button in any dialog box.
7
Manuals
When Saving Scanned Images to a Mobile Device
Manual
Description and Location
ScanSnap Connect
Application User's Guide
(iOS)
This manual describes operations to be performed on an iOS-based mobile device
when you save scanned images to the mobile device.
This manual can be accessed by the following method:
1. Start up ScanSnap Connect Application on the mobile device.
a The [File List] screen appears.
2. Tap the [
] button.
a The [Information] screen appears.
3. Tap the [Help] button.
ScanSnap Connect
Application User's Guide
(Android)
This manual describes operations to be performed on an Android-based mobile device
when you save scanned images to the mobile device.
This manual can be accessed by the following method:
1. Start up ScanSnap Connect Application on the mobile device.
a The [File List] screen appears.
2. Open the menu.
Perform one of the following operations:
l Press the [Menu] button on the mobile device.
l Tap the [Menu] button displayed on the screen of the mobile device.
a The menu appears.
3. Tap the [
] button.
a The [Information] screen appears.
4. Tap the [Help] button.
Scan to Mobile Help
This Help file describes the operations, windows, and messages of Scan to Mobile.
This Help file can be accessed by one of the following methods:
l The [Scan to Mobile] icon is displayed in the menu that appears when you click
in the notification area. Right-click the [Scan to Mobile] icon, and select [Help]
from the menu that appears.
l Press the [F1] key on the keyboard while a dialog box is displayed.
l Click the [Help] button in any dialog box.
When Updating the Software
Manual
Description and Location
ScanSnap Online Update
Help
This Help file describes the operations, windows, and messages of ScanSnap Online
Update.
This Help file can be accessed by one of the following methods:
l Select [Start] menu → [All Programs] → [ScanSnap Online Update] → [Help] (for
Windows 8, right-click the Start screen, and select [All apps] on the app bar →
[Help] under [ScanSnap Online Update]).
l Press the [F1] key on the keyboard while a dialog box is displayed.
l Click the Help button in any dialog box.
8
Manuals
When Using Bundled Applications
Manual
Description and Location
ScanSnap Organizer Help
This Help file describes the operations, windows, and messages of ScanSnap
Organizer.
This Help file can be accessed by one of the following methods:
l Select [Start] menu → [All Programs] → [ScanSnap Organizer] → [Help] (for
Windows 8, right-click the Start screen, and select [All apps] on the app bar →
[Help] under [ScanSnap Organizer]).
l Click the Help button (
) for ScanSnap Organizer.
l Press the [F1] key on the keyboard while a dialog box is displayed.
l Click the [Help] button in any dialog box.
CardMinder Help
This Help file describes the operations, windows, and messages of CardMinder.
This Help file can be accessed by one of the following methods:
l Select [Start] menu → [All Programs] → [CardMinder] → [Help] (for Windows 8,
right-click the Start screen, and select [All apps] on the app bar → [Help] under
[CardMinder]).
l Click the Help button (
) next to the Basic Search Toolbar.
l Press the [F1] key on the keyboard while a dialog box is displayed.
l Click the [Help] button in any dialog box.
ABBYY FineReader for
ScanSnap User's Guide
This manual describes the overview and operations of ABBYY FineReader for
ScanSnap.
This manual can be accessed by one of the following methods:
l Select [Start] menu → [All Programs] → [ABBYY FineReader for ScanSnap(TM)
5.0] → [User's Guide] (for Windows 8, right-click the Start screen, and select [All
apps] on the app bar → [User's Guide] under [ABBYY FineReader for
ScanSnap(TM) 5.0]).
l Press the [F1] key on the keyboard while a dialog box is displayed.
l Click the [Help] button in any dialog box.
Rack2-Filer Smart Help
For details about referring to this Help file, refer to Getting Started bundled with
Rack2-Filer Smart with Magic Desktop.
Adobe Acrobat Help
This Help file can be accessed by selecting [Help] → [Adobe Acrobat XI Help] from the
menu bar of Adobe Acrobat.
9
Trademarks
Trademarks
Microsoft, Windows, Windows Vista, Excel, PowerPoint, Outlook, SharePoint, Windows Live,
Internet Explorer, and Entourage are either registered trademarks or trademarks of Microsoft
Corporation in the United States and/or other countries.
Word is the product of Microsoft Corporation in the United States.
Adobe, the Adobe logo, Acrobat, and Reader are either registered trademarks or trade names of
Adobe Systems Incorporated in the United States and/or other countries.
Intel and Intel Core are registered trademarks or trademarks of Intel Corporation in the United States
and other countries.
ABBYY™ FineReader™ Engine © ABBYY. OCR by ABBYY
ABBYY and FineReader are trademarks of ABBYY.
Evernote is a registered trademark or trademark of Evernote Corporation.
Google, Google Docs, Android, and Google Play are registered trademarks or trademarks of Google
Inc.
Salesforce, the Salesforce logo, and Salesforce CRM are registered trademarks or trademarks of
salesforce.com, inc. in the United States and other countries.
ScanSnap, the ScanSnap logo, ScanSnap Manager, ScanSnap Organizer, CardMinder, and Rack2Filer are registered trademarks or trademarks of PFU LIMITED in Japan.
Other company names and product names are the registered trademarks or trademarks of the
respective companies.
10
Manufacturer
Manufacturer
PFU LIMITED
International Sales Dept., Imaging Business Division, Products Group Solid Square East Tower 580
Horikawa-cho, Saiwai-ku, Kawasaki-shi, Kanagawa 212-8563, Japan
Phone: (81-44)-540-4538
©PFU LIMITED 2013
11
Symbols Used in This Manual
Symbols Used in This Manual
The following indications are used in this manual to obviate any chance of accident or damage to
you and people near you, and your property. Warning labels indicate the warning level and
statements. The symbols indicating warning levels and their meanings are as follows.
Indication
Description
WARNING
This indication alerts operators to an operation that, if not strictly observed, may result
in severe injury or death.
CAUTION
This indication alerts operators to an operation that, if not strictly observed, may result
in safety hazards to personnel or damage to the product.
12
Arrow Symbols in This Manual
Arrow Symbols in This Manual
Right-arrow symbols (→) are used to connect icons or menu options you should select in
succession.
Example: Select [Start] menu → [Computer].
13
Screen Examples in This Manual
Screen Examples in This Manual
Microsoft product screenshots are reprinted with permission from Microsoft Corporation.
The screenshots used in this manual are of Windows 7.
The actual windows and operations may differ depending on the operating system.
Icon in the Notification Area
The ScanSnap Manager icon
notification area.
is displayed in the menu which appears when you click
To have the ScanSnap Manager icon
and drop it onto the notification area.
in the
always displayed in the notification area, drag the icon
The notification area is located at the far right of the taskbar.
The explanations in this manual use the case in which the ScanSnap Manager icon
displayed in the notification area.
14
is always
For Windows 8 Users
For Windows 8 Users
To start ScanSnap applications or display Control Panel, use the All apps screen.
The All apps screen is displayed by following the procedure below.
1.
Right-click the Start screen.
2.
Click [All apps] on the app bar.
15
Abbreviations Used in This Manual
Abbreviations Used in This Manual
When a ScanSnap model is referred to in this manual, "Color Image Scanner ScanSnap" is omitted.
Also, the following abbreviations are used in this manual.
Abbreviation Used
Designation
Windows 8
Windows® 8 operating system, English Version
Windows® 8 Pro operating system, English Version
Windows® 8 Enterprise operating system, English Version
Windows 7
Windows® 7 Starter operating system, English Version
Windows® 7 Home Premium operating system, English Version
Windows® 7 Professional operating system, English Version
Windows® 7 Enterprise operating system, English Version
Windows® 7 Ultimate operating system, English Version
Windows Vista
Windows Vista® Home Basic operating system, English Version
Windows Vista® Home Premium operating system, English Version
Windows Vista® Business operating system, English Version
Windows Vista® Enterprise operating system, English Version
Windows Vista® Ultimate operating system, English Version
Windows XP
Windows® XP Home Edition operating system, English Version
Windows® XP Professional operating system, English Version
Windows
Windows 8, Windows 7, Windows Vista, or Windows XP operating system
Microsoft Office
Microsoft® Office
Word
Microsoft® Word 2013
Microsoft® Word 2010
Microsoft® Office Word 2007
Microsoft® Office Word 2003
Excel
Microsoft® Excel® 2013
Microsoft® Excel® 2010
Microsoft® Office Excel® 2007
Microsoft® Office Excel® 2003
PowerPoint
Microsoft® PowerPoint® 2013
Microsoft® PowerPoint® 2010
Microsoft® Office PowerPoint® 2007
Microsoft® Office PowerPoint® 2003
SharePoint
Microsoft® SharePoint® Server 2010, English Version
Microsoft® Office SharePoint® Server 2007, English Version
Microsoft® Office SharePoint® Portal Server 2003, English Version
Microsoft® SharePoint® Foundation 2010, English Version
Microsoft® Windows® SharePoint® Services 2.0/3.0, English Version
Internet Explorer
Windows® Internet Explorer®
Microsoft® Internet Explorer®
.NET Framework
Microsoft® .NET Framework
Adobe Acrobat
Adobe® Acrobat®
16
Abbreviations Used in This Manual
Abbreviation Used
Designation
ABBYY FineReader for
ScanSnap
ABBYY FineReader for ScanSnap™
Google Docs
Google Docs™
Android
Android™
ScanSnap
Color Image Scanner ScanSnap series (*1)
Carrier Sheet
ScanSnap Carrier Sheet
All the descriptions in this manual assume the usage of ABBYY FineReader for
ScanSnap bundled with the ScanSnap. Unless otherwise specified, the term ABBYY
FineReader for ScanSnap refers to the ABBYY FineReader for ScanSnap bundled
with the ScanSnap.
Note that ABBYY FineReader for ScanSnap may be upgraded without notice. If the
descriptions in this manual differ from the actual displayed screens, refer to the
ABBYY FineReader for ScanSnap User's Guide.
*1: The ScanSnap N1800 series is not included.
17
What You Can Do with the ScanSnap
What You Can Do with the ScanSnap
The ScanSnap model that performs overhead scanning has a scanning unit that does not touch
documents. The following scanning operations can be performed with this model:
l A book or booklet that is up to A3 in size can be scanned without cutting pages out.
l Multiple documents such as business cards or other types of cards can be scanned at once.
The scanned images created by scanning documents are corrected automatically.
l When a booklet-like document is scanned
The page distortion is corrected automatically.
l When multiple documents are scanned at once
The scanned images are cropped into separate images for respective documents.
In addition, continuous scanning can be started automatically and scanned images can be corrected
after documents are scanned.
Page Turning Detection
When a page is turned, the ScanSnap automatically starts continuous scanning.
This is useful for scanning multiple pages of a book or booklet-like document.
For details, refer to "Scanning Documents Using Page Turning Detection" (page 68).
Timed Mode
The ScanSnap automatically starts scanning after the specified time period passes.
18
What You Can Do with the ScanSnap
This is useful also for scanning multiple documents (of any type) consecutively.
There are two types of settings for timed mode:
l Setting the time period before the ScanSnap starts scanning a document after the [Scan] button
is pressed
l Setting the time period for the ScanSnap to start the next scan when a document is scanned
continuously
For details, refer to "Scanning Documents Using Timed Mode" (page 72).
Correcting Scanned Images
After the documents are scanned with the ScanSnap, the scanned images can be corrected.
The following functions are available:
When a book is scanned
l "Correcting Distorted Book Images" (page 79)
l "Splitting a Double-Page Spread Image into Two Page Images" (page 84)
1
2
l "Filling in Fingers Captured in a Scanned Image" (page 87)
19
What You Can Do with the ScanSnap
When multiple documents are scanned at once
l "Correcting the Scanned Image Orientation" (page 92)
l "Modifying the Crop Area" (page 95)
l "Adding the Necessary Scanned Images" (page 97)
l "Deleting Unnecessary Scanned Images" (page 99)
Scanning Documents with Two ScanSnaps Connected to a Computer
You can use SV600 and another ScanSnap connected to a computer.
For details, refer to "Scanning Documents with Two ScanSnaps Connected to a Computer" (page
76).
20
Scanning a Document
Scanning a Document
1.
Press the [Scan] or [Stop] button on the ScanSnap to turn the power on.
[Stop] Button
[Scan] Button
a The power LED lights up in blue.
In addition, the ScanSnap Manager icon in the notification area changes from
2.
to
Place the Background Pad on the front side of the ScanSnap.
Place the Background Pad so that it is in contact with the ScanSnap.
3.
Place a document in the scan area of the ScanSnap and press the [Scan]
button.
For details, refer to "How to Place Documents" (page 52).
a Scanning starts.
21
.
Scanning a Document
White Sheets
ATTENTION
l Do not perform the following operations during scanning. Doing so will stop scanning.
-
Connect or disconnect the ScanSnap and other USB devices.
-
Switch users.
-
Allow the computer to enter sleep mode.
l Do not cover the white sheet with an object or hand during scanning. The color reproduction
of the scanned image will be affected.
l Do not shake the table or desk when the ScanSnap is being used or move the documents
while they are being scanned. Doing so may distort the scanned image or blur the color.
HINT
You can also start scanning a document by right-clicking the ScanSnap Manager icon
notification area and then selecting [Scan] from the "Right-Click Menu" (page 41).
in the
a The power LED on the ScanSnap flashes in blue while the documents are being scanned.
The [ScanSnap Manager - Image scanning and file saving] window appears.
22
Scanning a Document
a When scanning is complete, the [ScanSnap Manager - Image scanning and file saving]
window displays a scanning standby status.
HINT
To continue scanning, place down the next document to be scanned, and then perform one of
the following operations. Continuous scanning starts.
l Clicking the [Continue Scanning] button in the [ScanSnap Manager - Image scanning and file
saving] window
l Pressing the [Scan] button on the ScanSnap
4.
To finish scanning, click the [Finish Scanning] button or press the [Stop]
button on the ScanSnap.
a A window is displayed for selecting how to save the scanned images.
In the preview area, the scanned images are cropped and displayed.
23
Scanning a Document
5.
Select [Crop and save flat document images as-is], and then click the [Save
this image] button.
a The Quick Menu appears.
6.
In the Quick Menu, click the icon of the application to link with ScanSnap
Manager.
When you select
application.
, you can manage scanned images by folder in a file management
For details, refer to "Managing Business Forms in ScanSnap Organizer" (page 56).
24
Scanning a Document
a The selected application starts up. For details, refer to the Advanced Operation Guide.
ATTENTION
l You cannot start scanning when the Quick Menu is displayed. Either select an icon from the
Quick Menu and finish the process, or close the Quick Menu before you perform the next
scan.
l Do not move, delete, or rename scanned images using other applications while the Quick
Menu is displayed.
HINT
displays the description of an application. Placing the mouse cursor over the
l Clicking
icon of another application displays the description of the application.
l Performing a scan while an application that can be automatically linked with is active
automatically starts the linkage between ScanSnap Manager and the application.
For details, refer to the Advanced Operation Guide.
25
Scanning a Book
Scanning a Book
1.
Press the [Scan] or [Stop] button on the ScanSnap to turn the power on.
[Stop] Button
[Scan] Button
a The power LED lights up in blue.
In addition, the ScanSnap Manager icon in the notification area changes from
2.
to
.
Place the Background Pad on the front side of the ScanSnap.
Place the Background Pad so that it is in contact with the ScanSnap.
3.
Place a book in the scan area of the ScanSnap and press the [Scan] button.
For details, refer to "How to Place Documents" (page 52).
a Scanning of the book starts.
26
Scanning a Book
White Sheets
ATTENTION
l Do not perform the following operations during scanning. Doing so will stop scanning.
-
Connect or disconnect the ScanSnap and other USB devices.
-
Switch users.
-
Allow the computer to enter sleep mode.
l Do not cover the white sheet with an object or hand during scanning. The color reproducibility
of the scanned image will be affected.
l Do not shake the table or desk when the ScanSnap is being used or move the documents
while they are being scanned. Doing so may distort the scanned image or blur the color.
HINT
l You can also start scanning a book by right-clicking the ScanSnap Manager icon
notification area and then selecting [Scan] from the "Right-Click Menu" (page 41).
in the
l When page turning detection is used, turning a book's page automatically starts scanning.
For details, refer to "Scanning Documents Using Page Turning Detection" (page 68).
l When timed mode is used, after the specified time the ScanSnap automatically starts
scanning. For details, refer to "Scanning Documents Using Timed Mode" (page 72).
a The power LED on the ScanSnap flashes in blue while the book is being scanned.
The [ScanSnap Manager - Image scanning and file saving] window appears.
27
Scanning a Book
a When scanning the book is complete, the [ScanSnap Manager - Image scanning and file
saving] window displays a scanning standby status.
HINT
To continue scanning the book, open the next page to be scanned, and then perform one of
the following operations: Continuous scanning of the book starts.
l Click the [Continue Scanning] button in the [ScanSnap Manager - Image scanning and file
saving] window.
l Press the [Scan] button on the ScanSnap.
4.
To finish scanning the book, click the [Finish Scanning] button or press the
[Stop] button on the ScanSnap.
a A window is displayed for selecting how to save the scanned images.
In the preview area, the scanned images of the book are displayed with the distorted
images corrected.
28
Scanning a Book
5.
Select [Correct and save double-page spread document images (book/
magazine)], and then click the [Save this image] button.
HINT
Click the [Check/Correct] button in the [ScanSnap Manager - Image scanning and file saving]
window to correct the scanned image. The following functions are available:
l "Correcting Distorted Book Images" (page 79)
l "Splitting a Double-Page Spread Image into Two Page Images" (page 84)
l "Filling in Fingers Captured in a Scanned Image" (page 87)
a The Quick Menu appears.
6.
In the Quick Menu, click the icon of the application to link with ScanSnap
Manager.
By selecting
, you can reproduce the digitalized book and work on it on your computer.
For details, refer to "Reproducing a Book in Rack2-Filer Smart" (page 62).
29
Scanning a Book
a The selected application starts up. For details, refer to the Advanced Operation Guide.
ATTENTION
l You cannot start scanning when the Quick Menu is displayed. Either select an icon from the
Quick Menu and finish the process, or close the Quick Menu before you perform the next
scan.
l Do not move, delete, or rename scanned images using other applications while the Quick
Menu is displayed.
HINT
displays the description of an application. Placing the mouse cursor over the
l Clicking
icon of another application displays the description of the application.
l Performing a scan while an application that can be automatically linked with is active
automatically starts the linkage between ScanSnap Manager and the application.
For details, refer to the Advanced Operation Guide.
30
Scanning Multiple Documents at Once
Scanning Multiple Documents at Once
1.
Press the [Scan] or [Stop] button on the ScanSnap to turn the power on.
[Stop] Button
[Scan] Button
a The power LED lights up in blue.
In addition, the ScanSnap Manager icon in the notification area changes from
2.
to
Place the Background Pad on the front side of the ScanSnap.
Place the Background Pad so that it is in contact with the ScanSnap.
3.
Place documents in the scan area of the ScanSnap and press the [Scan]
button.
For details, refer to "How to Place Documents" (page 52).
a Scanning starts.
31
.
Scanning Multiple Documents at Once
White Sheets
ATTENTION
l Do not perform the following operations during scanning. Doing so will stop scanning.
-
Connect or disconnect the ScanSnap and other USB devices.
-
Switch users.
-
Allow the computer to enter sleep mode.
l Do not cover the white sheet with an object or hand during scanning. The color reproducibility
of the scanned image will be affected.
l Do not shake the table or desk when the ScanSnap is being used or move the documents
while they are being scanned. Doing so may distort the scanned image or blur the color.
HINT
You can also start scanning documents by right-clicking the ScanSnap Manager icon
notification area and then selecting [Scan] from the "Right-Click Menu" (page 41).
in the
a The power LED on the ScanSnap flashes in blue while the documents are being scanned.
The [ScanSnap Manager - Image scanning and file saving] window appears.
32
Scanning Multiple Documents at Once
a When scanning is complete, the [ScanSnap Manager - Image scanning and file saving]
window displays a scanning standby status.
HINT
To continue scanning, place down the next document to be scanned, and then perform one of
the following operations. Continuous scanning starts.
l Click the [Continue Scanning] button in the [ScanSnap Manager - Image scanning and file
saving] window.
l Press the [Scan] button on the ScanSnap.
4.
To finish scanning, click the [Finish Scanning] button or press the [Stop]
button on the ScanSnap.
a A window is displayed for selecting how to save the scanned images.
In the preview area, the scanned images are cropped and each scanned image is
displayed as a separete document.
33
Scanning Multiple Documents at Once
5.
Select [Crop and save flat document images as-is], and then click the [Save
this image] button.
HINT
Click the [Check/Correct] button in the [ScanSnap Manager - Image scanning and file saving]
window to correct the scanned image. The following functions are available:
l "Correcting the Scanned Image Orientation" (page 92)
l "Modifying the Crop Area" (page 95)
l "Adding the Necessary Scanned Images" (page 97)
l "Deleting Unnecessary Scanned Images" (page 99)
a The Quick Menu appears.
6.
In the Quick Menu, click the icon of the application to link with ScanSnap
Manager.
By selecting
, you can save card data in a business card application.
For details, refer to "Saving Business Cards in CardMinder" (page 59).
34
Scanning Multiple Documents at Once
a The selected application starts up. For details, refer to the Advanced Operation Guide.
ATTENTION
l You cannot start scanning when the Quick Menu is displayed. Either select an icon from the
Quick Menu and finish the process, or close the Quick Menu before you perform the next
scan.
l Do not move, delete, or rename scanned images using other applications while the Quick
Menu is displayed.
HINT
displays the description of an application. Placing the mouse cursor over the
l Clicking
icon of another application displays the description of the application.
l Performing a scan while an application that can be automatically linked with is active
automatically starts the linkage between ScanSnap Manager and the application.
For details, refer to the Advanced Operation Guide.
35
ScanSnap Overview
ScanSnap Overview
This section provides an overview that you should be aware of before operating ScanSnap.
l "Parts and Functions" (page 37)
l "ScanSnap Manager Icon" (page 40)
l "Right-Click Menu" (page 41)
l "ScanSnap Setup Dialog Box" (page 43)
l "Turning the ScanSnap On/Off" (page 45)
l "Documents to Scan" (page 51)
l "How to Place Documents" (page 52)
36
Parts and Functions
Parts and Functions
This section explains the names and functions of the ScanSnap parts.
Front
1
2
3
4
5
6
7
8
No.
Name
Description
1
Head
-
2
Neck
-
3
[Scan] button (*1)
l Turns on the ScanSnap.
l Starts scanning.
4
[Stop] button (*1)
l Turns the ScanSnap on or off.
l Stops scanning.
5
Base
-
6
Power LED
Indicates the status of the ScanSnap as follows:
Blue (lit): Ready
Blue (flashing): Scanning
Orange (flashing): Error
7
White sheet
Used to determine the starting position for scanning documents and
is also the standard color reference for the color of documents when
documents are scanned.
8
Centering mark
When placing a book or standard size document, align the center of
the document with the centering mark.
*1: If the ScanSnap has turned off automatically because of the automatic power off function, press
the [Scan] or [Stop] button to turn the ScanSnap back on. (Pressing the [Scan] button does not
start scanning.)
For details, refer to "Automatic Power OFF" (page 50).
37
Parts and Functions
ATTENTION
When carrying the ScanSnap, hold its base and neck. Do not carry the scanner by the head.
Back
9
10
11
No.
Name
Description
9
Security cable slot
Used to connect an anti-theft security cable (commercially available).
10
USB connector
Used to connect a USB cable.
11
Power connector
Used to connect the AC cable.
Scanning Unit
Operates when documents are scanned.
38
Parts and Functions
12
13
14
15
No.
Name
Description
12
Camera
Detects page turning and glossy papers.
13
Infrared LED
Irradiates the scan area with infrared to detect page turning and
glossy papers.
14
Glass
Protects the lens used to scan a document.
15
Lamp
Illuminates the document to be scanned.
39
ScanSnap Manager Icon
ScanSnap Manager Icon
When ScanSnap Manager is running, the ScanSnap Manager icon is displayed in the notification
area. The notification area is located at the far right of the taskbar.
The ScanSnap Manager icon indicates whether or not ScanSnap Manager is successfully
communicating with the ScanSnap. The appearance of the icon changes according to the
communication status as shown below.
Communication Status
ScanSnap Manager icon
Communicating
Not communicating
HINT
l Turn the ScanSnap on to begin communication between ScanSnap Manager and the ScanSnap.
For details about how to turn on the ScanSnap, refer to "Turning the ScanSnap On" (page 46).
l When two ScanSnaps are connected to a computer and both of them are communicating with
ScanSnap Manager, the following ScanSnap Manager icon is displayed.
For details, refer to "Scanning Documents with Two ScanSnaps Connected to a Computer" (page
76).
You can display the menu for scanning documents and ScanSnap Manager settings from the
ScanSnap Manager icon.
l Right-clicking
Displays the "Right-Click Menu" (page 41).
l Left-clicking
Displays the Left-Click Menu.
For details, refer to the Advanced Operation Guide.
40
Right-Click Menu
Right-Click Menu
This menu appears when you right-click the ScanSnap Manager icon
.
Item
Function
Scan
Scans the document placed in the scan area of the ScanSnap. Follows the settings
configured in [Scan Button Settings].
Scan Button Settings
Displays the "ScanSnap Setup Dialog Box" (page 43). You can configure the scan
settings in this window.
Profile Management
The [ScanSnap Manager - Profile Management] dialog box appears.
You cannot select [Profile Management] when the [Use Quick Menu] check box is
selected in the ScanSnap setup dialog box.
For details, refer to the Advanced Operation Guide.
ScanSnap Folder Settings
Displays the ScanSnap setup dialog box. You can configure the scan settings for
using ScanSnap Folder in this dialog box.
For details, refer to the Advanced Operation Guide.
Show scanning results
After scanning is completed, a message appears to inform you whether the image is
rotated.
Preferences
Displays the [ScanSnap Manager - Preferences] dialog box.
41
Right-Click Menu
Item
Function
Help
Displays the following menu:
l Help
Opens the ScanSnap Manager Help.
l Troubleshooting
Displays [Troubleshooting] in the ScanSnap Manager Help.
l ScanSnap Portal Site
Opens the ScanSnap global homepage (http://scansnap.fujitsu.com).
l About ScanSnap Manager
Displays the [ScanSnap Manager - Version Information] dialog box.
l Online Update
Starts the ScanSnap Online Update.
For details, refer to the Advanced Operation Guide.
To establish connection
Displayed when ScanSnap Manager is not communicating with the ScanSnap
correctly.
Exit
Exits ScanSnap Manager.
HINT
When SV600 and one of iX500, S1500, S1500M, S1300i, S1300, S1100, S510, and S300 are
connected to a computer, the Right-Click Menu displays items relevant to each of the connected
ScanSnap models.
For details, refer to the ScanSnap Manager Help.
When SV600 and iX500 are connected to a computer
42
ScanSnap Setup Dialog Box
ScanSnap Setup Dialog Box
in the notification area, and select [Scan
When you right-click the ScanSnap Manager icon
Button Settings] from the "Right-Click Menu" (page 41), the following ScanSnap setup dialog box
appears.
In the ScanSnap setup dialog box, you can use the [Use Quick Menu] check box to specify whether
or not to use the Quick Menu. You can also use the profile buttons and detail setting tabs to specify
scan settings according to your scanning needs.
For details, refer to the ScanSnap Manager Help.
Profile Buttons
Detail Setting Tabs
HINT
When SV600 and one of iX500, S1500, S1500M, S1300i, S1300, S1100, S510, and S300 are
connected to a computer, you can change the scan settings for each of the connected ScanSnap
models by selecting the model name from [Scanner] on the ScanSnap setup dialog box.
43
ScanSnap Setup Dialog Box
44
Turning the ScanSnap On/Off
Turning the ScanSnap On/Off
This section explains how to turn the ScanSnap on or off.
l "Turning the ScanSnap On" (page 46)
l "Turning the ScanSnap Off" (page 48)
l "Sleep Mode" (page 49)
l "Automatic Power OFF" (page 50)
45
Turning the ScanSnap On/Off
Turning the ScanSnap On
1.
Turn on the computer.
a Windows starts up and the ScanSnap Manager icon
appears in the notification area.
HINT
l If the ScanSnap Manager icon
is not displayed in the notification area, select [Start]
menu → [All Programs] → [ScanSnap Manager] → [ScanSnap Manager] to start up
ScanSnap Manager (for Windows 8, right-click the Start screen, and select [All apps] on the
app bar → [ScanSnap Manager] under [ScanSnap Manager] to start up ScanSnap Manager).
l If ScanSnap Manager does not automatically start when you log on to your computer, change
the setting in the following procedure:
1. Right-click the ScanSnap Manager icon
in the notification area and select
[Preferences] from the "Right-Click Menu" (page 41).
a The [ScanSnap Manager - Preferences] dialog box appears.
2. In the [Auto Startup] tab, select the [Start up ScanSnap Manager when you log on] check
box.
2.
Press the [Scan] or [Stop] button on the ScanSnap to turn the power on.
[Stop] Button
[Scan] Button
ATTENTION
When turning the power on, do no cover the white sheet with a hand.
a The [Scan] button lights up in blue.
In addition, the ScanSnap Manager icon in the notification area changes from
46
to
.
Turning the ScanSnap On/Off
HINT
l It may take more time for the ScanSnap Manager icon in the notification area to change to
depending on computer performance, operating environment, or loading, for example,
when many software programs are running at the same time.
l When the ScanSnap is turned on, a pop-up balloon notifies you of the ScanSnap's
communication status.
To disable notifications of the ScanSnap's communication status, click the pop-up balloon,
and in the [Status Display] tab of the [ScanSnap Manager - Preferences] dialog box, clear the
[Notify of the communication status] check box.
47
Turning the ScanSnap On/Off
Turning the ScanSnap Off
1.
Press the [Stop] button on the ScanSnap for three seconds or longer.
a The power LED turns off.
In addition, the ScanSnap Manager icon in the notification area changes from
to
.
ATTENTION
If moving the ScanSnap, first turn the power off and remove all cables.
HINT
l When the ScanSnap is turned off, a pop-up balloon notifies you of the ScanSnap's
communication status.
To disable notifications of the ScanSnap's communication status, click the pop-up balloon,
and in the [Status Display] tab of the [ScanSnap Manager - Preferences] dialog box, clear the
[Notify of the communication status] check box.
l When the computer is turned off, the ScanSnap is also turned off.
48
Turning the ScanSnap On/Off
Sleep Mode
When the ScanSnap is on and has not been used for 15 minutes, it enters sleep (power saving)
mode.
49
Turning the ScanSnap On/Off
Automatic Power OFF
When the ScanSnap is turned on and left unused for the specified time (default is "4 hours"), it will
turn itself off automatically.
To turn the ScanSnap back on, perform one of the following operations:
l Press the [Scan] button on the ScanSnap (this will not start scanning)
l Press the [Stop] button on the ScanSnap
HINT
l To continue using the ScanSnap, reset the time until auto power-off by pressing the [Scan] button
on the ScanSnap.
l You can change the time of the ScanSnap to turn off automatically or change the setting so that it
will not turn off automatically. Set according to the following procedures:
1. Right-click the ScanSnap Manager icon
from the "Right-Click Menu" (page 41).
in the notification area and select [Preferences]
a The [ScanSnap Manager - Preferences] dialog box appears.
2. In the [Power] tab, select one of the setting items for [Power off after].
l A pop-up balloon notifies you 5 minutes before the ScanSnap turns off automatically.
50
Documents to Scan
Documents to Scan
The following documents can be scanned because the scanning unit does not touch the documents.
l Thick documents, such as books
l Documents that you want to keep intact, such as photographs and handwritten illustrations
Conditions for Documents to Scan
Document type
Flat documents, such as standard office paper,
postcards, and business cards
Thick documents, such as books
Document
thickness
5 mm (0.2 in.) or less
5 to 30 mm (0.2 to 1.18 in.)
Paper size
Width: 25.4 to 432 mm (1 to 17 in.)
Length: 25.4 to 300 mm (1 to 11.8 in.)
Width: 25.4 to 400 mm (1 to 15.7 in.)
Length: 25.4 to 300 mm (1 to 11.8 in.)
ATTENTION
l When you scan a glossy document, the scanned image may be affected as follows:
-
Part of the scanned image appears brighter or darker than the original
-
Glare from the lamp is caught in the scanned image
l If a document has wrinkles, curls, or folds, smooth it out before scanning. Otherwise, the scanned
image may be affected as follows:
-
The scanned image is distorted
-
The scanned image is blurred
-
Part of the document does not appear in the scanned image
l When you scan irregular shaped documents that are not rectangular or square, the scanned
images are not corrected automatically.
HINT
You can show a confirmation message in the case of scanning documents that reflect lamp light
causing glare, such as glossy paper.
For details, refer to the ScanSnap Manager Help.
51
How to Place Documents
How to Place Documents
When you place down documents, use the Background Pad.
If you scan documents without using the Background Pad, the document edges may not be detected
correctly and the created scanned image may be different from the document.
For details about documents that can be scanned with the ScanSnap, refer to "Documents to Scan"
(page 51).
l "Scan Area" (page 52)
l "When Placing a Standard Size Document" (page 53)
l "When Placing a Book" (page 53)
l "When Placing Multiple Documents at Once" (page 53)
Scan Area
Place a document with the scanned side face-up in the following scan area.
Use the following to determine the scan area.
l Area: Reference marks of the Background Pad
l Height: Lines on the base of the ScanSnap
Line
30 mm (1.18 in.)
5 mm (0.2 in.)
300 mm (11.81 in.)
400 mm
(15.75 in.)
432 mm
(17.01 in.)
ATTENTION
If a document is placed outside of the scan area, part of the scanned image may be left out or blurred.
52
How to Place Documents
When Placing a Standard Size Document
When you select an option other than [Automatic detection] for [Paper size] on the [Paper] tab in the
"ScanSnap Setup Dialog Box" (page 43), align the center of the document with the centering mark
on the ScanSnap.
SV600
When Placing a Book
Place a book as follows:
l Open a book horizontally.
l Align the center of the opened book face-up with the centering mark.
l Hold the book down with fingers within the appropriate areas.
When holding the book down, use your fingers as follows:
-
Keep your fingers straight.
-
When using multiple fingers to hold down the book, keep fingers apart by at least 2 cm (0.79
in.).
Appropriate Areas for Holding the Book Down
SV600
20 mm (0.79 in.)
20 mm (0.79 in.)
50 mm (1.97 in.)
When Placing Multiple Documents at Once
To scan multiple documents at once, place them in the following conditions:
l The documents must be placed at least 15 mm (0.59 in.) apart from each other.
53
How to Place Documents
l The number of documents placed must not exceed 10.
SV600
15 mm (0.59 in.) or More
15 mm (0.59 in.) or More
54
Using the ScanSnap According to Your Needs
Using the ScanSnap According to Your Needs
This section explains how to scan a document and link with a bundled application according to your
needs when using the ScanSnap.
l "Managing Business Forms in ScanSnap Organizer" (page 56)
l "Saving Business Cards in CardMinder" (page 59)
l "Reproducing a Book in Rack2-Filer Smart" (page 62)
55
Managing Business Forms in ScanSnap Organizer
Managing Business Forms in ScanSnap Organizer
This section explains how to digitize business forms such as quotation sheets and manage the data
for each customer company in a file management application.
In the following, ScanSnap Organizer is used as the file management application.
1.
Scan a quotation sheet with the ScanSnap.
For details about scanning a document, refer to "Scanning a Document" (page 21).
a The Quick Menu appears.
2.
Click the [ScanSnap Organizer] icon
a The [ScanSnap Organizer] window appears.
56
in the Quick Menu.
Managing Business Forms in ScanSnap Organizer
3.
Click
on the [Home] tab.
a A new cabinet is created in the folder list.
4.
Rename the created cabinet to the customer company name.
HINT
To create multiple cabinets for each customer company, repeat steps 3 to 4.
5.
Select the scanned image of the quotation sheet from the file list, and drag
and drop it to the cabinet for the customer company.
57
Managing Business Forms in ScanSnap Organizer
a The scanned image of the quotation sheet is moved to the cabinet for the customer
company.
HINT
ScanSnap Organizer has various functions for using saved files.
For details, refer to the ScanSnap Organizer Help.
58
Saving Business Cards in CardMinder
Saving Business Cards in CardMinder
This section explains how to digitize business cards and save the card data in a business card
application.
In the following, CardMinder is used as the business card application.
ATTENTION
If you do not log on as a user with Administrator privileges, you may not be able to link the ScanSnap
with another application properly.
1.
Scan business cards with the ScanSnap.
For details about scanning business cards, refer to "Scanning Multiple Documents at Once"
(page 31).
a The Quick Menu appears.
2.
Click the [Scan to CardMinder] icon
a The [CardMinder] window appears.
59
in the Quick Menu.
Saving Business Cards in CardMinder
3.
Check the card data.
Make sure that the text on the card images are displayed correctly in the Edit Data pane.
If the card data must be corrected, click the text to be corrected and then directly edit it.
Card Image Pane
Edit Data Pane
60
Saving Business Cards in CardMinder
HINT
When you scan double-sided business cards, you must scan one side of each card and edit the card
data in CardMinder.
For details, refer to the CardMinder Help.
61
Reproducing a Book in Rack2-Filer Smart
Reproducing a Book in Rack2-Filer Smart
This section explains how to digitize a book, and reproduce and manage the digitized book in
Rack2-Filer Smart.
You can scan the front cover, pages, back cover, and spine of a book, and import the scanned
images to Rack2-Filer Smart.
You can use Easy Book Creation to reproduce a book. The following functions are available:
l The size of the scanned book can be reproduced.
l The front cover and spine of the book can be set.
l After scanning the facing pages as a single image, it can be viewed as a double-page spread.
l Based on the page size, the size of the page in the binder is automatically changed.
Rack2-Bookshelf Window
XXXXXXXXXXXX
The front cover and spine
of the book can be set
The size of the scanned book
can be reproduced
The facing pages can be viewed
as a double-page spread
The size of the page is
automatically changed
1.
Viewer Window
Scan a book with the ScanSnap.
Scan the book in the following order:
1. Front cover
2. Pages
3. Back cover
62
Reproducing a Book in Rack2-Filer Smart
XX
XX
For details about scanning a book, refer to "Scanning a Book" (page 26).
a The Quick Menu appears.
2.
Click the [Scan to Rack2-Filer Smart] icon
a A binder selection dialog box appears.
3.
Click the [New Binder] button.
63
in the Quick Menu.
Reproducing a Book in Rack2-Filer Smart
a The [Import Settings] dialog box appears.
4.
Select the book opening direction and click the [OK] button.
a The scanned images of the book are added in the Rack2-Bookshelf window.
64
Reproducing a Book in Rack2-Filer Smart
XXXX
Also, the Viewer Window opens and displays the scanned images.
Importing of scanned images from a book is now complete.
Setting the spine of a book
The spine of the scanned book can be specified for the created binder. The spine for the
binder can be set on the [Binder Settings] dialog box in Rack2-Filer Smart.
65
Reproducing a Book in Rack2-Filer Smart
Also, you can change the setting so that the scanned image of the spine of the book can be
imported immediately after the scanned images of the covers and pages of the book are
imported.
For details, refer to the Rack2-Filer Smart Help.
ATTENTION
When you scan the spine of a book, place the book as shown in the following figure:
On the [ScanSnap Manager - Image scanning and file saving] window, which appears after
scanning, select [Crop and save flat document images as-is], and then click the [Save this
image] button.
Correcting scanned images
is displayed on each of the pages scanned from the book. Work data used for
correcting scanned images is attached to each page on which
is displayed.
You can correct distorted scanned images in Book Image Viewer, which is displayed by
double-clicking
.
For details, refer to the Book Image Viewer Help, which appears when the Help button (
is clicked.
ATTENTION
Work data is stored in the hard disk. It is recommended that you delete work data if there is no
problem with the corrected image.
For details, refer to the Rack2-Filer Smart Help.
66
)
Useful Usages
Useful Usages
This section explains how to start continuous scanning automatically and how to carry out scanning
with two ScanSnap scanners simultaneously connected to a computer.
l "Scanning Documents Using Page Turning Detection" (page 68)
l "Scanning Documents Using Timed Mode" (page 72)
l "Scanning Documents with Two ScanSnaps Connected to a Computer" (page 76)
67
Scanning Documents Using Page Turning Detection
Scanning Documents Using Page Turning Detection
This section explains how to detect page turning to start scanning automatically.
ATTENTION
When the installation environment of the ScanSnap or the specification of the book to be scanned
encounters any of the following, use timed mode to scan a document.
l Installation environment of the ScanSnap
-
The ScanSnap is installed under direct sunlight
-
The ScanSnap is installed under lighting that emits a lot of infrared rays such as incandescent
lamps
-
The ScanSnap is under uneven lighting caused by some environmental factors such as the use
of a spotlight
-
An object other than the book to be scanned is placed on the Background Pad
-
A device that emits infrared light such as a heater is placed near the ScanSnap
-
Movement of shadow such as a person appears on the Background Pad
l Book specifications
Books that are smaller than A4 (210 × 297 mm)/Letter (8.5 × 11 in. (216 × 279.4 mm)) when
opened in a double-page spread
Example: Comic books or pocket edition books
HINT
When scanning a document, you can also enable page turning detection by holding down the [Scan]
button on the ScanSnap for 2 seconds or longer. When this is the case, after you finish scanning the
documents, page turning detection becomes disabled again.
1.
Right-click the ScanSnap Manager icon
in the notification area, and select
the [Scan Button Settings] from the "Right-Click Menu" (page 41).
a The "ScanSnap Setup Dialog Box" (page 43) appears.
2.
In the ScanSnap setup dialog box, select the [Scanning] tab, and click the
[Option] button.
68
Scanning Documents Using Page Turning Detection
a The [Scanning mode option] dialog box appears.
3.
Select the [Configure settings for starting the next scan.] check box and then
[Page turning detection mode].
4.
Click the [OK] button to close all the dialog boxes.
5.
Open the page of a book you want to scan and place the book in the scan
area of the ScanSnap.
69
Scanning Documents Using Page Turning Detection
For details, refer to "How to Place Documents" (page 52).
6.
Press the [Scan] button on the ScanSnap to start scanning the book.
a The [ScanSnap Manager - Image scanning and file saving] window appears.
a Once the scanning of the book page is complete, [Turn the page.] appears on the
[ScanSnap Manager - Image scanning and file saving] window.
7.
Open the next page to be scanned.
Turn the pages at a constant speed. The recommended page turning speed is approximately
one to two seconds per page.
70
Scanning Documents Using Page Turning Detection
a The page turning is detected and continuous scanning starts.
ATTENTION
l While the [Turn the page.] message appears on the [ScanSnap Manager - Image scanning
and file saving] window, if you hold or move your hand over the Background Pad, such
motion may be incorrectly detected as page turning.
l If continuous scanning does not start after a page is turned, click the [Continue Scanning]
button in the [ScanSnap Manager - Image scanning and file saving] window or press the
[Scan] button on the ScanSnap.
HINT
l To make page turning easy to detect, turn each page as follows:
-
Pinch the bottom part of the page and turn it.
-
Keep the page straight when turning it.
l You can change the time before the ScanSnap starts to scan a document after page turning
is detected.
On the [Scanning mode option] dialog box shown in step 3, select the [Specify the waiting
time to start scanning after pressing the [Scan] button.] check box, and change [Waiting
time].
l To continue scanning, repeat step 7.
8.
To finish scanning, click the [Finish Scanning] button or press the [Stop]
button on the ScanSnap.
71
Scanning Documents Using Timed Mode
Scanning Documents Using Timed Mode
This section explains how to automatically start scanning by setting the time period for the document
scanning to start.
1.
Right-click the ScanSnap Manager icon
in the notification area, and select
[Scan Button Settings] from the "Right-Click Menu" (page 41).
a The "ScanSnap Setup Dialog Box" (page 43) appears.
2.
In the ScanSnap setup dialog box, select the [Scanning] tab, and click the
[Option] button.
a The [Scanning mode option] dialog box appears.
3.
Set the time period before the ScanSnap starts scanning a document.
l To set the time period before the ScanSnap starts scanning a document after the [Scan]
button is pressed:
Select the [Specify the waiting time to start scanning after pressing the [Scan] button.]
check box, and then specify [Waiting time].
72
Scanning Documents Using Timed Mode
l To set the time period for the ScanSnap to start the next scan when a document is
scanned continuously:
1. Select the [Configure settings for starting the next scan.] check box, and then select
[Timed interval (Timed mode)].
2. Specify [Scan interval].
73
Scanning Documents Using Timed Mode
4.
Click the [OK] button to close all open dialog boxes.
5.
Place a document with the scanned side face-up in the scan area of the
ScanSnap.
For details, refer to "How to Place Documents" (page 52).
6.
Press the [Scan] button on the ScanSnap.
a Scanning starts after the time period specified in [Waiting time] passes.
7.
Place the next document to be scanned with the scanned side face-up in the
scan area.
For details, refer to "How to Place Documents" (page 52).
a Scanning starts after the time period specified in [Scan interval] passes.
HINT
To continue scanning, repeat step 7.
74
Scanning Documents Using Timed Mode
8.
To finish scanning, click the [Finish Scanning] button or press the [Stop]
button on the ScanSnap.
75
Scanning Documents with Two ScanSnaps Connected to a Computer
Scanning Documents with Two ScanSnaps
Connected to a Computer
You can use SV600 and another ScanSnap connected to a computer. When both of the ScanSnap
models are connected and turned on, you can use one of them at a time.
When the two ScanSnap models are turned on, the ScanSnap Manager icon in the notification area
changes from
to
.
Note that you cannot scan a document with two ScanSnap models simultaneously. Before switching
the ScanSnap to use, make sure that a series of operations (from scanning a document to linking
the ScanSnap with an application) has been completed.
The following ScanSnap models can be connected to a computer and used together with SV600:
l iX500
l S1500
l S1500M
l S1300i
l S1300
l S1100
l S510
l S300
HINT
When you want to create a single PDF file from multiple PDF files created by scanning documents with
each of the ScanSnap models, you can use ScanSnap Organizer or Adobe Acrobat to merge the PDF
files.
For details, refer to the Help file of each application.
76
Correcting the Scanned Images
Correcting the Scanned Images
The scanned images can be corrected before ScanSnap Manager is linked with an application. The
scanned images can be corrected in the following cases:
l "Scanning Books" (page 78)
l "Scanning Multiple Documents at Once" (page 91)
77
Scanning Books
Scanning Books
The book image correction allows you to correct scanned images.
The book image correction refers to making the following corrections to the images scanned from
books with the ScanSnap:
l "Correcting Distorted Book Images" (page 79)
l "Splitting a Double-Page Spread Image into Two Page Images" (page 84)
l "Filling in Fingers Captured in a Scanned Image" (page 87)
78
Scanning Books
Correcting Distorted Book Images
To correct the distortion of a scanned image from a book, follow the procedure below.
ATTENTION
l To correct the distortion of a scanned image, the shape of the book needs to be detected.
If a book is scanned as follows, the shape of the book may not be detected correctly.
-
When a book to be scanned is held down outside of the appropriate areas (Figure 1)
-
When a book is scanned without the Background Pad (Figure 2)
-
When a book to be scanned is spread open and is placed face-down (Figure 3)
-
When a book to be scanned is placed in a vertical orientation (Figure 4)
-
When a book that is not rectangular or square is scanned (Figure 5)
-
When a book that has a background color other than white (such as a comic magazine) is
scanned (Figure 6)
-
When a book that has a narrow margin space (such as a catalogue or a magazine) is scanned
(Figure 7)
-
When a book that is smaller than A5 size (148 × 210 mm: 5.83 × 8.27 in.) in a double-page
spread is scanned (Figure 8)
1
2
5
6
3
7
4
8
l Follow the procedure below to perform multiple book image correction for one page.
1. Edit in book image correction mode (
-
Correcting a distorted book image
-
Splitting a double-page spread image
).
79
Scanning Books
2. Edit in point retouch mode (
-
).
Filling in the captured fingers in image
If you edit in the book image correction mode after editing in the point retouch mode, the edited
results in point retouch mode are overridden.
1.
On the window that appears after a book is scanned, select [Correct and
save double-page spread document images (book/magazine)] and click the
[Check/Correct] button.
For details about scanning a book, refer to "Scanning a Book" (page 26).
a The [ScanSnap Manager - Book Image Viewer] dialog box appears.
2.
Select the page to correct the distortion in [Final image].
3.
Click
.
a The shape of the book is automatically detected, and the following items are displayed on
the page:
l Corner points
Corner points are displayed around the corners of the book and both ends of the gutter.
l Outline
The shape of the book is indicated with a red dashed outline.
80
Scanning Books
HINT
For the output format selection button, select
4.
.
On the page, drag the corner points to move the corners of the book and
both ends of the gutter to any location.
On the front and back cover of the book, make the middle outline for the gutter parallel to the
right and left outlines.
If the outline of the book is not aligned with the shape of the book in the scanned image, drag
the upper part and lower part of the outline to correct each position.
HINT
If the shape of the book was not detected, the corner points and the outline are displayed on the
entire window.
If this is the case, align the corner points and the outline with the shape of the book.
81
Scanning Books
Follow the procedure below to modify the corner points and the outline.
1. Modify the corner points.
The corner points can be modified by either of the following:
l Drag the corner points to move them to the corners of the book and both ends of the
gutter.
l Double-click the corners of the book and both ends of the gutter.
a The corner points automatically move to the corners of the book and both ends of the
gutter.
2. Modify the outline.
Drag the outline to align it with the shape of the book. If it is hard to align the outline with the
shape of the book, position the outline little by little.
To make it easy, click an outline near the corner points and drag and drop the outline to align
it with the shape of the book repeatedly.
5.
Click the [Apply] button.
a A message for confirming the correction target appears.
6.
Click the [Selected Pages] button.
a The page distortion is corrected.
When you have completed correcting the page distortion, click the [Save and Exit] button.
82
Scanning Books
HINT
To correct another distorted page, select the page for which the distortion is to be corrected in
[Final image], and repeat steps 2 to 6.
83
Scanning Books
Splitting a Double-Page Spread Image into Two Page Images
The double-page spread image can be split into the right and left pages.
When a JPEG file is split, the file is divided into two files.
1
2
ATTENTION
Follow the procedure below to perform multiple book image correction for one page.
1. Edit in book image correction mode (
).
l Correcting a distorted book image
l Splitting a double-page spread image
2. Edit in point retouch mode (
).
l Filling in the captured fingers in image
If you edit in the book image correction mode after editing in the point retouch mode, the edited results
in point retouch mode are overridden.
1.
On the window that appears after a book is scanned, select [Correct and
save double-page spread document images (book/magazine)] and click the
[Check/Correct] button.
For details about scanning a book, refer to "Scanning a Book" (page 26).
84
Scanning Books
a The [ScanSnap Manager - Book Image Viewer] dialog box appears.
2.
Select the page to be split in [Final image].
3.
Click
, and then click
or
a The split line is indicated with a green dashed line.
85
.
Scanning Books
If the split line is not aligned correctly, drag the corner points to move them to both ends of
the gutter.
4.
Click the [Apply] button.
a A message for confirming the split target appears.
5.
Click the [Selected Pages] button.
a The page is split.
When you have completed splitting the page, click the [Save and Exit] button.
86
Scanning Books
Filling in Fingers Captured in a Scanned Image
Fingers that are captured when a book is scanned can be filled in.
ATTENTION
l To fill in fingers captured in the scanned image, the fingers need to be detected.
If a book is scanned in the following ways, captured fingers may not be detected correctly.
-
When two or more fingers that are used to hold down a book to be scanned are touching each
other (Figure 1)
-
When you hold down a book to be scanned with manicured fingers or fingers with artificial nails
(Figure 2)
-
When you hold down a book to be scanned with your fingers bent (Figure 3)
-
When fingers that are used to hold down a book to be scanned are captured 1 cm or more
(Figure 4)
-
When there is text or an image within 5 mm (0.2 in.) around the fingers that are used to hold
down a book to be scanned (Figure 5)
-
When a book that has a background color other than white (such as a comic magazine) is
scanned (Figure 6)
-
When a book is scanned after [Gray], [B&W], or [Color high compression] is selected from the
[Color mode] drop-down list in the [Scanning] tab of the ScanSnap setup dialog box
1
2
3
4
1 cm (0.39 in.) or More
5
6
5 mm (0.2 in.) or Less
l Follow the procedure below to perform multiple book image correction for one page.
1. Edit in book image correction mode (
-
Correcting a distorted book image
-
Splitting a double-page spread image
2. Edit in point retouch mode (
-
).
).
Filling in the captured fingers in image
87
Scanning Books
If you edit in the book image correction mode after editing in the point retouch mode, the edited
results in point retouch mode are overridden.
HINT
Up to five fingers on each side (right/left) can be filled in.
1.
On the window that appears after a book is scanned, select [Correct and
save double-page spread document images (book/magazine)] and click the
[Check/Correct] button.
For details about scanning a book, refer to "Scanning a Book" (page 26).
a The [ScanSnap Manager - Book Image Viewer] dialog box appears.
2.
Select the page for filling in captured fingers in [Final image].
3.
Click
4.
Click on a finger captured in a scanned image with the mouse.
.
a When a finger is detected, it is indicated with a red dashed outline.
To change a range of the outline, drag the white dot on the outline.
88
Scanning Books
HINT
When a finger captured in a scanned image is not detected, a default outline is displayed
around the finger.
In that case, drag the white dot on the outline to align the outline with the shape of the finger.
5.
Click the [Apply] button.
a The finger captured in a scanned image is filled in.
89
Scanning Books
When you have completed filling in the captured finger, click the [Save and Exit] button.
90
Scanning Multiple Documents at Once
Scanning Multiple Documents at Once
When multiple documents are scanned at once with the ScanSnap, the following corrections can be
made on the scanned images:
l "Correcting the Scanned Image Orientation" (page 92)
l "Modifying the Crop Area" (page 95)
l "Adding the Necessary Scanned Images" (page 97)
l "Deleting Unnecessary Scanned Images" (page 99)
91
Scanning Multiple Documents at Once
Correcting the Scanned Image Orientation
The orientation of scanned images that are skewed or upside-down can be corrected.
1.
On the window that appears after multiple documents are scanned at once,
select [Crop and save flat document images as-is] and click the [Check/
Correct] button.
For details about scanning multiple documents, refer to "Scanning Multiple Documents at
Once" (page 31).
a The [ScanSnap Manager - View cropped images] window is displayed.
2.
Select which scanned image to correct the orientation for.
92
Scanning Multiple Documents at Once
3.
Click
or
.
a The scanned image is rotated by 90 degrees.
93
Scanning Multiple Documents at Once
When you have completed correcting the orientation, click the [Save and Exit] button.
HINT
To fine-tune the orientation of the crop frame, select which scanned image you want to rotate and then
perform one of the following operations:
l Drag the green operating point that appears at the top of the crop frame by as little or as much as
you want.
l Click
or
.
94
Scanning Multiple Documents at Once
Modifying the Crop Area
The size of the crop frame that is used to crop the scanned image can be modified.
1.
On the window that appears after multiple documents are scanned at once,
select [Crop and save flat document images as-is] and click the [Check/
Correct] button.
For details about scanning multiple documents, refer to "Scanning Multiple Documents at
Once" (page 31).
a The [ScanSnap Manager - View cropped images] window is displayed.
2.
Select the crop area of the scanned image to change the crop area.
3.
Drag the operating points of the crop frame to change the crop area.
95
Scanning Multiple Documents at Once
4.
Click any position on the dialog box.
a The crop area is fixed.
When you have completed changing the crop area, click the [Save and Exit] button.
HINT
To move a crop frame, place the mouse inside the crop frame and drag it when all the operating points
have turned red.
96
Scanning Multiple Documents at Once
Adding the Necessary Scanned Images
If the necessary scanned images do not become the targets to be cropped, you can manually add
them to the targets.
Up to 20 crop frames can be added for one scanned image.
1.
On the window that appears after multiple documents are scanned at once,
select [Crop and save flat document images as-is] and click the [Check/
Correct] button.
For details about scanning multiple documents, refer to "Scanning Multiple Documents at
Once" (page 31).
a The [ScanSnap Manager - View cropped images] window is displayed.
2.
Frame the scanned image to be cropped by dragging the mouse.
97
Scanning Multiple Documents at Once
a A crop frame is added to the scanned image that is automatically recognized, and the
scanned image that was cropped by dragging the mouse is added to the end of [Cropped
image].
After you have added a crop frame, click the [Save and Exit] button.
98
Scanning Multiple Documents at Once
Deleting Unnecessary Scanned Images
When there are multiple scanned images, unnecessary crop frames can be deleted.
Scanned images without crop frames are not output and cannot be linked with an application.
1.
On the window that appears after multiple documents are scanned at once,
select [Crop and save flat document images as-is] and click the [Check/
Correct] button.
For details about scanning multiple documents, refer to "Scanning Multiple Documents at
Once" (page 31).
a The [ScanSnap Manager - View cropped images] window is displayed.
2.
Select a scanned image to remove the crop frame.
99
Scanning Multiple Documents at Once
3.
Click
.
a A confirmation message appears.
4.
Click the [Yes] button.
a The crop frame is removed from the selected scanned image, and the scanned image
disappears from [Cropped image].
100
Scanning Multiple Documents at Once
After you have removed the crop frame from the unnecessary scanned image, click the
[Save and Exit] button.
101
Troubleshooting
Troubleshooting
This section explains how to solve troubles you may encounter upon installing or uninstalling the
bundled software.
l "How to Find Your Resolution" (page 103)
l "If Your First Attempt to Install Failed" (page 104)
l "If You Have Installed the Software Before" (page 105)
l "When the ScanSnap Manager Icon Does Not Appear" (page 114)
l "When ScanSnap Manager Does Not Operate Normally" (page 116)
l "When You Cannot Uninstall the Software" (page 124)
For details about troubles you may encounter while using the ScanSnap and their solutions, refer to
"Troubleshooting" in the ScanSnap Manager Help.
"Troubleshooting" in the ScanSnap Manager Help
in the notification area, and
To display this section, right-click the ScanSnap Manager icon
select [Help] → [Troubleshooting] from the "Right-Click Menu" (page 41).
If you cannot solve the problem after referring to the above section, contact your FUJITSU scanner
dealer or an authorized FUJITSU scanner service provider.
102
How to Find Your Resolution
How to Find Your Resolution
When software installation fails, or the ScanSnap does not operate normally after installation is
complete, refer to the flow chart below for troubleshooting.
Yes
No
1
Have you installed
the software before?
2
Is the installation
complete?
3
Does the ScanSnap Manager
icon
appear
in the notification area?
4
No.
Topic to Be Referred to
1
"If Your First Attempt to Install Failed" (page 104)
2
"If You Have Installed the Software Before" (page 105)
3
"When the ScanSnap Manager Icon Does Not Appear" (page 114)
4
"When ScanSnap Manager Does Not Operate Normally" (page 116)
103
If Your First Attempt to Install Failed
If Your First Attempt to Install Failed
This section explains how to troubleshoot when the first attempt to install the bundled software
failed.
If any software bundled with the ScanSnap (including models other than SV600) has been installed
before, refer to "If You Have Installed the Software Before" (page 105).
1.
Restart the computer and log on as a user with Administrator privileges.
2.
Reinstall the software.
For details, refer to "Installing the Software" (page 126).
104
If You Have Installed the Software Before
If You Have Installed the Software Before
This section explains how to troubleshoot if your attempt to reinstall the software bundled with the
ScanSnap (including models other than SV600) failed.
l "Uninstalling the Software" (page 106)
l "Removing the Installation Information" (page 107)
l "Installing the Software from the [ScanSnap Setup] Dialog Box" (page 112)
l "Installing One Software at a Time" (page 113)
105
If You Have Installed the Software Before
Uninstalling the Software
Uninstall the software that is already installed.
The uninstallation procedure is as follows.
1.
If the ScanSnap is connected to the computer, unplug the USB cable from
the computer.
2.
Log on as a user with Administrator privileges.
3.
If anti-virus software is running, disable the software temporarily.
ATTENTION
If you cannot disable the anti-virus software, check if the software is set to lock the application.
4.
Uninstall the software.
The following software programs must be uninstalled:
l ScanSnap Manager
l ScanSnap Organizer
l CardMinder
For details, refer to "Uninstalling the Software" (page 148).
l If the software was successfully uninstalled, proceed to "Installing the Software from the [ScanSnap Setup]
Dialog Box" (page 112).
l If the software still remains in the list, proceed to the next topic "Removing the Installation Information" (page
107).
106
If You Have Installed the Software Before
Removing the Installation Information
If the name of the software that you tried to uninstall still remains in the list in [Programs and
Features] of the Control Panel, or if the software cannot be uninstalled for some reason, the
installation information needs to be removed.
Remove the installation information in the following procedure.
ATTENTION
If you cannot successfully remove the installation information, contact your FUJITSU scanner dealer or
an authorized FUJITSU scanner service provider.
1.
Log on as a user with Administrator privileges.
2.
Insert the Setup DVD-ROM into the DVD-ROM drive.
a The [ScanSnap Setup] dialog box appears.
3.
Click the [Close] button to close the [ScanSnap Setup] dialog box.
4.
Start up the tool for removing the installation information.
l Windows 8/Windows 7/Windows Vista
1. From Windows Explorer, open the [Tool] folder in the Setup DVD-ROM.
2. Right-click "SSClean.exe" and select [Run as administrator] from the displayed menu.
a The [User Account Control] dialog box appears.
3. Click the [Yes] button ([Continue] button in Windows Vista).
a The [Remove Installation Information] dialog box appears.
l Windows XP
1. From Windows Explorer, open the [Tool] folder in the Setup DVD-ROM and doubleclick "SSClean.exe".
a The [Remove Installation Information] dialog box appears.
5.
Select the software from which you want to remove the installation
information.
l ScanSnap Manager
1. Select [ScanSnap Manager] and click the [Remove] button.
107
If You Have Installed the Software Before
a A confirmation message appears.
2. Click the [Yes] button.
a A message appears to check whether or not to remove the profile information.
3. Click the [Yes] button to remove and the [No] button to keep the profile information.
108
If You Have Installed the Software Before
ATTENTION
If the problem persists when you kept the profile information then reinstalled the
software, try again after removing the profile information.
a The installation information is removed, and the following message appears.
4. Click the [OK] button to close the [Remove Installation Information] dialog box.
l ScanSnap Organizer/CardMinder
1. Select [ScanSnap Organizer] or [CardMinder], and click the [Remove] button.
109
If You Have Installed the Software Before
a A confirmation message appears.
2. Click the [Yes] button.
a The installation information is removed, and the following message appears.
110
If You Have Installed the Software Before
3. Click the [OK] button to close the [Remove Installation Information] dialog box.
6.
By repeating step 5, remove the installation information of all the software
listed in the [Remove Installation Information] dialog box.
7.
Click the [Close] button to close the [Remove Installation Information] dialog
box.
8.
Confirm that the installation folder no longer exists.
If the [ScanSnap] folder remains in the following location, rename the folder (such as [ScanSnap]). This folder can later be deleted once the installation is successfully completed.
Path: Drive name (such as C):\Program Files\PFU
After completing the procedure, proceed to "Installing the Software from the [ScanSnap Setup] Dialog Box" (page
112).
111
If You Have Installed the Software Before
Installing the Software from the [ScanSnap Setup] Dialog Box
Once the software is uninstalled or the installation information is removed, install the software from
the [ScanSnap Setup] dialog box.
Install the software in the following procedure.
1.
Restart the computer.
2.
Log on as a user with Administrator privileges.
3.
If anti-virus software is running, disable the software temporarily.
ATTENTION
If you cannot disable the anti-virus software, check if the software is set to lock the application.
4.
Install the software.
For details, refer to "Standard Installation" (page 133).
If you did not perform the procedure in "Removing the Installation Information" (page 107) and then failed to install
the software, perform the following procedures again:
l "Uninstalling the Software" (page 106)
l "Removing the Installation Information" (page 107)
l "Installing the Software from the [ScanSnap Setup] Dialog Box" (page 112)
If you still could not reinstall the software after performing the above procedures, proceed to "Installing One
Software at a Time" (page 113).
112
If You Have Installed the Software Before
Installing One Software at a Time
Install the software one by one in the following procedure.
1.
Restart the computer.
2.
Log on as a user with Administrator privileges.
3.
If anti-virus software is running, disable the software temporarily.
ATTENTION
If you cannot disable the anti-virus software, check if the software is set to lock the application.
4.
Insert the Setup DVD-ROM into the DVD-ROM drive.
a The [ScanSnap Setup] dialog box appears.
5.
Click the [Close] button to close the [ScanSnap Setup] dialog box.
6.
Install the software.
Open the Setup DVD-ROM from Windows Explorer, and run the "setup.exe" of each software.
l ScanSnap Manager
DVD-ROM drive:\Software\ScanSnap\setup.exe
l ScanSnap Organizer
DVD-ROM drive:\Software\Organizer\setup.exe
l CardMinder
DVD-ROM drive:\Software\Card\setup.exe
Install one of the software above, and then install the following application.
l ScanSnap Online Update
DVD-ROM drive:\Software\Online Update\Setup.exe
a The setup dialog box appears.
Follow the instructions on the screen to continue with the installation.
If you cannot proceed further because a message appears to indicate that the software is
already installed, start over again from the procedure in "Uninstalling the Software" (page
106).
7.
Restart the computer.
113
When the ScanSnap Manager Icon Does Not Appear
When the ScanSnap Manager Icon Does Not Appear
does not appear in
This section explains how to troubleshoot when the ScanSnap Manager icon
the notification area even though the software is installed and the ScanSnap is connected to the
computer.
l "Displaying the ScanSnap Manager Icon" (page 115)
114
When the ScanSnap Manager Icon Does Not Appear
Displaying the ScanSnap Manager Icon
1.
Start up ScanSnap Manager by selecting [Start] menu → [All Programs] →
[ScanSnap Manager] → [ScanSnap Manager] (for Windows 8, start up
ScanSnap Manager by right-clicking the Start screen, and selecting [All
apps] on the app bar → [ScanSnap Manager] under [ScanSnap Manager]).
HINT
If the problem is solved, you can change the setting so that ScanSnap Manager will start up
automatically from the next time you log on to the computer. The procedure is as follows.
1. Right-click the ScanSnap Manager icon
from the "Right-Click Menu" (page 41).
in the notification area and select [Preferences]
a The [ScanSnap Manager - Preferences] dialog box appears.
2. In the [Auto Startup] tab, select the [Start up ScanSnap Manager when you log on] check
box.
If the problem persists, refer to "When ScanSnap Manager Does Not Operate Normally" (page 116).
115
When ScanSnap Manager Does Not Operate Normally
When ScanSnap Manager Does Not Operate
Normally
If the ScanSnap Manager icon in the notification area is displayed as
even though the software
is installed and the ScanSnap is connected to the computer, perform the following procedures.
l "Removing Unnecessary Icons from the Notification Area" (page 117)
l "Checking the Connection between the ScanSnap and the Computer" (page 118)
l "Checking If ScanSnap Manager Is Operating Normally" (page 119)
l "Removing the ScanSnap's Connection Information" (page 122)
116
When ScanSnap Manager Does Not Operate Normally
Removing Unnecessary Icons from the Notification Area
1.
Check the software icons in the notification area, and exit the software that
you are not using.
a The icon is removed from the notification area.
2.
in the notification area and select
Right-click the ScanSnap Manager icon
[Exit] from the "Right-Click Menu" (page 41).
3.
Start up ScanSnap Manager by selecting [Start] menu → [All Programs] →
[ScanSnap Manager] → [ScanSnap Manager] (for Windows 8, start up
ScanSnap Manager by right-clicking the Start screen, and selecting [All
apps] on the app bar → [ScanSnap Manager] under [ScanSnap Manager]).
If the problem persists, refer to "Checking the Connection between the ScanSnap and the Computer" (page
118).
117
When ScanSnap Manager Does Not Operate Normally
Checking the Connection between the ScanSnap and the
Computer
1.
Unplug the USB cable from the computer and the ScanSnap, then plug it
back in.
Make sure to leave at least 5 seconds between unplugging and plugging the cable.
If you are using a USB hub, connect the USB cable to the computer directly.
If the problem persists, refer to "Checking If ScanSnap Manager Is Operating Normally" (page 119).
118
When ScanSnap Manager Does Not Operate Normally
Checking If ScanSnap Manager Is Operating Normally
1.
Turn off the ScanSnap and then turn it on again.
Make sure to leave at least 5 seconds between turning off and on the ScanSnap.
If the problem persists, proceed to step 2.
2.
If you are using a USB hub, connect the ScanSnap to the computer directly
with a USB cable.
If the problem persists, proceed to step 3.
3.
If a USB device other than the ScanSnap is connected to the computer,
disconnect it.
If the problem persists, proceed to step 4.
4.
If anti-virus software is running, disable the software temporarily.
ATTENTION
If you cannot disable the anti-virus software, check if the software is set to lock the application.
If the problem persists, proceed to step 5.
5.
If there is more than one USB port on the computer, connect the USB cable
to a different USB port.
If the problem persists, proceed to step 6.
6.
Check the privileges to access the installation files.
1. Select [Start] menu → [All Programs] → [ScanSnap Manager] → [ScanSnap Support Tool]
(for Windows 8, right-click the Start screen, and select [All apps] on the app bar →
[ScanSnap Support Tool] under [ScanSnap Manager]).
a The [ScanSnap Support Tool] dialog box appears.
2. Click the [Check] button on the [Recover] tab, and proceed by following the instructions
displayed on the screen.
119
When ScanSnap Manager Does Not Operate Normally
a If the message "The recommended privileges have been applied." appears, turn off the
ScanSnap and then turn it on again. Make sure to leave at least 5 seconds between
turning off and on the ScanSnap.
If the message "Failed to change the privileges. Uninstall ScanSnap Manager then install it again."
appears or the problem still persists, proceed to step 7.
7.
Recover the connection with the ScanSnap.
1. Select [Start] menu → [All Programs] → [ScanSnap Manager] → [ScanSnap Support Tool]
(for Windows 8, right-click the Start screen, and select [All apps] on the app bar →
[ScanSnap Support Tool] under [ScanSnap Manager]).
a The [ScanSnap Support Tool] dialog box appears.
2. Click the [Recover] button on the [Recover] tab, and proceed by following the instructions
displayed on the screen.
120
When ScanSnap Manager Does Not Operate Normally
8.
Turn off the ScanSnap and restart the computer.
If the problem persists, refer to "Removing the ScanSnap's Connection Information" (page 122).
121
When ScanSnap Manager Does Not Operate Normally
Removing the ScanSnap's Connection Information
The ScanSnap might have been connected to the computer before the software was installed. In this
case, the ScanSnap's connection information needs to be removed. Remove the ScanSnap's
connection information in the following procedure.
1.
Connect the ScanSnap to the computer, and turn on the ScanSnap.
2.
Open Device Manager.
l Windows 8
Right-click the Start screen, and select [All apps] on the app bar → [Control Panel] under
[Windows System] → [Hardware and Sound] → [Device Manager].
l Windows 7
Select [Start] menu → [Control Panel] → [Hardware and Sound] → [Device Manager].
l Windows Vista
Select [Start] menu → [Control Panel] → [System and Maintenance] → [Device Manager].
l Windows XP
Select [start] menu → [Control Panel] → [Performance and Maintenance] → [System] →
[Hardware] tab → [Device Manager] button.
3.
Select [Imaging devices] and right-click on [ScanSnap SV600] (or [Other
devices] → [ScanSnap SV600]), and then select [Uninstall] from the
displayed menu.
4.
If other USB ports have been used to connect to the ScanSnap, perform
steps 1 to 3 for each of the ports.
5.
Turn off the ScanSnap.
6.
Unplug the USB cable from the computer.
7.
Restart the computer.
8.
Connect the USB cable to the computer.
9.
Turn on the ScanSnap.
a The ScanSnap Manager icon appears in the notification area. Make sure that the displayed
icon is
.
122
When ScanSnap Manager Does Not Operate Normally
If the problem persists, refer to "If You Have Installed the Software Before" (page 105).
If the problem still persists, perform the procedures described in "When ScanSnap Manager Does Not Operate
Normally" (page 116) once again.
If the above procedures do not solve the problem, please attach the data of your system information to an email and
send it to your FUJITSU scanner dealer or an authorized FUJITSU scanner service provider. For details about how
to collect system information, refer to "Troubleshooting" in the ScanSnap Manager Help.
123
When You Cannot Uninstall the Software
When You Cannot Uninstall the Software
This section explains how to troubleshoot when you cannot uninstall ScanSnap Manager, ScanSnap
Organizer, or CardMinder.
1.
Restart the computer and log on as a user with Administrator privileges.
2.
Remove the installation information.
a For details, refer to "Removing the Installation Information" (page 107).
3.
Install the software.
a For details, refer to "Standard Installation" (page 133).
4.
Uninstall the software.
a For details, refer to "Uninstalling the Software" (page 148).
124
Installing and Uninstalling
Installing and Uninstalling
This section explains how to install and uninstall the software bundled with the ScanSnap.
l "Installing the Software" (page 126)
l "Uninstalling the Software" (page 148)
125
Installing the Software
Installing the Software
This section explains the software bundled with the ScanSnap and how to install them.
l "Bundled Software Overview" (page 127)
l "System Requirements" (page 129)
l "How to Install the Software" (page 131)
l "Standard Installation" (page 133)
l "Installation of Each Application" (page 139)
l "Installing from the Download Web Page" (page 142)
l "Installing from Rack2-Filer Smart with Magic Desktop" (page 145)
l "Installing Adobe Acrobat" (page 146)
126
Installing the Software
Bundled Software Overview
This section gives an overview of each bundled software and their functions. You can edit, manage,
and arrange the scanned image by using the following software:
Software That Can Be Installed from the Setup DVD-ROM
ScanSnap Manager
This scanner driver is required to scan documents with the ScanSnap. Scanned images can be
saved as PDF or JPEG files to a computer.
You need to have ScanSnap Connect Application installed on your mobile device to save PDF or
JPEG files to your mobile device.
You can download ScanSnap Connect Application for your mobile device from its application
market.
ScanSnap Organizer
You can use this application to display image data (PDF or JPEG files) without opening them,
create folders and arrange files as you like.
CardMinder
You can use this application to efficiently digitalize a large number of business cards.
Text recognition can be performed on business cards and you can create a database to facilitate
card data management and searches. Data in the database can be printed and linked with various
applications.
ABBYY FineReader for ScanSnap
This application can perform text recognition on the scanned images using OCR (Optical
Character Recognition) to convert the image data to Word, Excel, or PowerPoint files that can be
edited.
ScanSnap Online Update
This application checks if any updates have been released on the download server, and
automatically updates the programs.
Evernote for Windows
You can easily save files in Evernote using the ScanSnap.
Software That Can Be Installed from Rack2-Filer Smart with Magic
Desktop
Rack2-Filer Smart
This application provides integrated management of digitalized paper documents (electronic
documents) and digital data created with a computer, as if you are filing paper documents in
actual binders.
Magic Desktop
This application enables you to sort data scanned from the ScanSnap, or memos and images
created on a mobile device into various work or personal groups for management.
127
Installing the Software
Software That Can Be Installed from the Adobe Acrobat DVD-ROM
Adobe Acrobat XI Standard
This is a global standard application for creating, editing, managing, and utilizing PDF format
electronic documents.
Software That Can Be Downloaded and Installed
The Setup DVD-ROM contains links to the download web pages of the following software programs.
Download the latest programs from the download web pages and install them.
SugarSync Manager for Windows
You can easily save files to your SugarSync folder using the ScanSnap.
Dropbox for Windows
You can easily save files to your Dropbox folder using the ScanSnap.
Scan to Microsoft SharePoint
You can easily save files in SharePoint using the ScanSnap.
128
Installing the Software
System Requirements
The ScanSnap has the following system requirements.
For the latest information on requirements, please visit the ScanSnap Support Site at:
http://scansnap.fujitsu.com/g-support/en/
Operating system
Windows 8 (32-bit/64-bit) (*1)
Windows 7 (32-bit/64-bit)
Windows Vista (32-bit/64-bit) (*2)
Windows XP (32-bit) (*3)
CPU
Intel® Core™ i5 2.5 GHz or higher
Memory
4 GB or more
Display resolution (*4)
Windows 8: 1024 × 768 pixels or higher
Windows 7/Windows Vista/Windows XP: 800 × 600 pixels or higher
Disk space
Free space required to install the software bundled with the ScanSnap is as
follows:(*5)
l ScanSnap Manager: 700 MB
l ScanSnap Organizer: 670 MB
l CardMinder: 660 MB
l ABBYY FineReader for ScanSnap: 620 MB
l ScanSnap Online Update: 10 MB
l Evernote for Windows: 150 MB
l ScanSnap SV600 Basic Operation Guide: 200 MB
l Adobe Acrobat XI Standard: 1.5 GB
USB port
USB3.0(*6)/USB2.0/USB1.1
*1: The software bundled with the ScanSnap operates as a desktop application.
*2: Service Pack 2 or later is required.
*3: Service Pack 3 or later is required.
*4: When the font size is large, some screens may not be displayed correctly.
In such a case, use a smaller font size.
*5: To save scanned images, more free space is required.
For details about estimated image data size, refer to the ScanSnap Manager Help.
*6: Even if you connect the ScanSnap to a USB3.0 compatible port, the scanner operates as a
USB2.0 device.
ATTENTION
l If the system requirements above are not satisfied, the ScanSnap may not operate.
l If a USB port on the keyboard or on the monitor is in use, the ScanSnap may not operate.
l When using a commercially available USB hub, use a type that is powered from an electrical power
supply (and that comes with an adapter).
l Scanning speed decreases in the following cases:
-
The CPU or the memory does not meet the recommended specifications.
-
The version of the USB port or the USB hub is USB 1.1.
129
Installing the Software
l The actual disk space used for the installation of the software and the disk space required for the
installation may be different because of the disk management in your Windows system.
l To scan a document, a disk space that is approximately three times larger than the size of the file
to be saved is required.
l If characters are not correctly displayed when using CardMinder, Scan to Mobile, or Scan to
Salesforce Chatter, perform the following.
-
Windows XP
l Select [Control Panel] → [Regional and Language Options] → [Install files for East Asian
languages] in the [Language] tab.
l Install the universal font (Arial Unicode MS) from the setup disk of Microsoft Office 2000 or
later.
-
Windows Vista/Windows 7/Windows 8
Install the universal font (Arial Unicode MS) from the setup disk of Microsoft Office 2003 or later.
HINT
l For Windows 8, Windows Vista, or Windows XP, when the following software programs are
installed, .NET Framework 3.5 SP1(which requires 500 MB of free disk space at most) may be
installed at the same time:
-
ScanSnap Manager
-
ScanSnap Organizer
-
CardMinder
l For Windows XP, when Scan to Microsoft SharePoint is installed, .NET Framework 2.0 (which
requires 280 MB of free disk space at most) may be installed at the same time.
130
Installing the Software
How to Install the Software
When you insert the Setup DVD-ROM into the DVD-ROM drive on your computer, the [ScanSnap
Setup] dialog box appears.
The functions of each button in the [ScanSnap Setup] dialog box are as follows.
Button
Function
Readme
Displays the [Readme] dialog box. You can refer to the Readme file of each software
in this dialog box.
131
Installing the Software
Button
Function
Install Products
Displays the [Install Products] dialog box.
l [ScanSnap] button
Installs the following software:
- ScanSnap Manager
- ScanSnap Organizer
- CardMinder
- ABBYY FineReader for ScanSnap
- ScanSnap Online Update
l [Dropbox] button
Opens the Dropbox for Windows download web page.
l [Evernote] button
Opens the [Evernote] dialog box. You can install Evernote for Windows or display
the download web page.
l [SugarSync] button
Opens the SugarSync Manager for Windows download web page.
l [Scan to Microsoft SharePoint] button
Opens the Scan to Microsoft SharePoint download web page.
Manuals
Displays the [Manuals] dialog box. You can refer to Safety Precautions, Getting
Started, and the manual of each software program in this dialog box.
Browse DVD Contents
Opens Windows Explorer to display the files from the DVD-ROM.
Support
Displays contact information for customer support.
132
Installing the Software
Standard Installation
HINT
When the installation is complete, a pop-up balloon which indicates that the latest updates are
available on the download server may appear. For details, refer to the ScanSnap Online Update Help.
Install the following software:
l ScanSnap Manager
l ScanSnap Organizer
l CardMinder
l ABBYY FineReader for ScanSnap
The following software is installed at the same time as the above software:
l ScanSnap Online Update
The procedure is as follows.
1.
Turn on the computer and log on as a user with Administrator privileges.
2.
Insert the Setup DVD-ROM into the DVD-ROM drive.
a The [ScanSnap Setup] dialog box appears.
HINT
If the [ScanSnap Setup] dialog box does not appear, double-click "ScanSnap.exe" in the Setup
DVD-ROM via Windows Explorer.
3.
Click the [Install Products] button.
133
Installing the Software
a The [Install Products] dialog box appears.
4.
Click the [ScanSnap] button.
134
Installing the Software
a The [ScanSnap] dialog box appears, displaying the [Welcome to the InstallShield Wizard
for ScanSnap] screen.
5.
Click the [Next] button.
a The [ScanSnap Setup] appears.
6.
Read the message about anti-virus software, and click the [OK] button.
a [Setup Type] appears.
7.
Click the [Next] button.
135
Installing the Software
a A confirmation about accepting the license agreement appears.
8.
Read the "END-USER LICENSE AGREEMENT", select [I accept the terms of
the license agreement], and then click the [Next] button.
a The [Start Copying Files] screen appears.
9.
Confirm the settings, and then click the [Next] button.
a Installation starts. When the installation is complete, the [About ScanSnap's Auto Power
OFF function] screen appears.
10.
Read the explanation, and then click the [Next] button.
136
Installing the Software
a The [Install Complete] screen appears.
11.
Click the [Complete] button.
a When you installed ScanSnap Manager, the [ScanSnap - Connecting ScanSnap] dialog
box appears.
When you do not have ScanSnap Manager installed, proceed to step 13.
137
Installing the Software
12.
Follow the instructions on the screen to check the connection between the
ScanSnap and the computer.
13.
Remove the Setup DVD-ROM from the DVD-ROM drive.
ATTENTION
If the installation is not successfully completed, refer to "Troubleshooting" (page 102).
138
Installing the Software
Installation of Each Application
Install Evernote for Windows.
The procedure is as follows.
1.
Turn on the computer and log on as a user with Administrator privileges.
2.
Insert the Setup DVD-ROM into the DVD-ROM drive.
a The [ScanSnap Setup] dialog box appears.
HINT
If the [ScanSnap Setup] dialog box does not appear, double-click "ScanSnap.exe" in the Setup
DVD-ROM via Windows Explorer.
3.
Click the [Install Products] button.
a The [Install Products] dialog box appears.
4.
Click the [Evernote] button.
139
Installing the Software
a The [Evernote] dialog box appears.
5.
Click the [Install Product] button.
140
Installing the Software
HINT
If you require the latest version of Evernote for Windows, click the [Download latest version]
button. A web browser starts up and the Evernote for Windows download web page opens.
Download and install Evernote for Windows.
a Installation starts.
6.
Follow the instructions on the screen to complete the installation.
7.
Click the [Complete] button when the installation complete notification is
displayed.
8.
Remove the Setup DVD-ROM from the DVD-ROM drive.
141
Installing the Software
Installing from the Download Web Page
ATTENTION
To install from the download web page, an Internet connection is required.
Install the following software:
l Dropbox for Windows
l SugarSync Manager for Windows
l Scan to Microsoft SharePoint
The procedure is as follows.
1.
Turn on the computer and log on as a user with Administrator privileges.
2.
Insert the Setup DVD-ROM into the DVD-ROM drive.
a The [ScanSnap Setup] dialog box appears.
HINT
If the [ScanSnap Setup] dialog box does not appear, double-click "ScanSnap.exe" in the Setup
DVD-ROM via Windows Explorer.
3.
Click the [Install Products] button.
142
Installing the Software
a The [Install Products] dialog box appears.
4.
Click the button of the application you want to install.
143
Installing the Software
a A web browser starts up and the download web page of the selected application opens.
Download and install the application.
5.
When the installation is complete, remove the Setup DVD-ROM from the
DVD-ROM drive.
144
Installing the Software
Installing from Rack2-Filer Smart with Magic Desktop
The following applications can be installed by selecting Rack2-Filer Smart with Magic Desktop.
l Rack2-Filer Smart
l Magic Desktop
For details, refer to the Readme document bundled with Rack2-Filer Smart with Magic Desktop.
145
Installing the Software
Installing Adobe Acrobat
The procedure is as follows.
ATTENTION
Adobe Acrobat can be used in the following operating systems:
l Windows 8
l Windows 7
l Windows XP (Service Pack 3 or later required)
Additional requirements are as follows:
l Internet Explorer 7.0 or later/Firefox (ESR)/Google Chrome
l A display resolution of 1024 × 768 pixels or higher
HINT
Adobe Acrobat can display the scanned image through linkage with ScanSnap Manager. If the latest
version of Adobe Acrobat is already installed on your computer, you do not need to install it again.
1.
Insert the Adobe Acrobat DVD-ROM into the DVD-ROM drive.
a The [AutoPlay] dialog box appears.
2.
Click [Run Setup.exe].
a The [Setup] dialog box appears.
3.
Select the language of your operating system and click the [OK] button.
a The Adobe Acrobat XI Standard setup dialog box appears.
4.
Click the [Next] button.
146
Installing the Software
5.
Follow the instructions on the screen to complete the installation.
HINT
l For details about the installation of Adobe Acrobat, refer to "Readme" included on the Adobe
Acrobat DVD-ROM.
To open Readme, open the file below via Windows Explorer.
DVD-ROM drive: \ ReadMeJ.htm
l For details about how to use Adobe Acrobat, refer to the Adobe Acrobat Help.
6.
When the installation is complete, remove the Adobe Acrobat DVD-ROM from
the DVD-ROM drive.
147
Uninstalling the Software
Uninstalling the Software
This section explains how to uninstall the following software programs:
l ScanSnap Manager
l ScanSnap Organizer
l CardMinder
l ABBYY FineReader for ScanSnap
l Evernote for Windows
HINT
If all of the following software programs are uninstalled, ScanSnap Online Update is also uninstalled at
the same time:
l ScanSnap Manager
l ScanSnap Organizer
l CardMinder
The procedure is as follows.
1.
Turn on the computer and log on as a user with Administrator privileges.
2.
Exit all running software programs.
3.
Select [Start] menu → [Control Panel] → [Uninstall a program] under
[Programs] (for Windows 8, right-click the Start screen, and select [All apps]
on the app bar → [Control Panel] under [Windows System] → [Uninstall a
program] under [Programs]).
a The [Uninstall or change a program] dialog box appears with a list of currently installed
software programs.
4.
Select a software program to uninstall.
HINT
To uninstall more than one software program, repeat steps 4 to 6 for each software program.
5.
Click the [Uninstall] button.
a A confirmation message appears.
6.
Click the [Yes] button.
a The software program is uninstalled.
148
Uninstalling the Software
ATTENTION
l Screen displays may vary slightly depending on the operating system that you are using. In
that case, follow the instructions by the operating system.
Example:
-
[Programs and Features]
In Windows XP: [Add or Remove Programs]
-
The [Uninstall] button
In Windows XP: [Remove] button
l If you cannot successfully uninstall the following software programs, refer to "When You
Cannot Uninstall the Software" (page 124):
-
ScanSnap Manager
-
ScanSnap Organizer
-
CardMinder
149
Cleaning
Cleaning
This section explains about the cleaning materials and how to clean the ScanSnap.
l "Cleaning Materials" (page 151)
l "Cleaning the ScanSnap" (page 152)
150
Cleaning Materials
Cleaning Materials
Cleaning materials and their part numbers are as below.
Product Name
Part No.
Unit
Note
Cleaner F1
PA03950-0352
1 bottle
Size: 100 ml
Cleaning Paper (*1)
CA99501-0012
1 pack
10 sheets
Cleaning Wipe (*2)
PA03950-0419
1 pack
24 packets
Lint-free dry cloth (*3)
Commercially
available
-
-
Cotton swabs
Commercially
available
-
Used to clean small parts such
as the camera or infrared LED.
PFU LIMITED
*1: Used with Cleaner F1.
*2: The cleaning wipes are wet tissues that have been soaked with cleaner F1. In place of this
product, you can use a cloth soaked with cleaner F1.
*3: Any lint-free cloth can be used.
Contact your FUJITSU scanner dealer or an authorized FUJITSU scanner service provider for
details about purchasing the cleaning materials.
For details, refer to the following web page:
http://scansnap.fujitsu.com/
151
Cleaning the ScanSnap
Cleaning the ScanSnap
This section explains how to clean the outside of the ScanSnap.
If the white sheet, glass, camera, lamp, or infrared LED is dirty, errors may appear in the scanned
images. Whenever an error appears in a scanned image, clean the ScanSnap.
1.
Unplug the cables from the ScanSnap.
2.
Clean the outside of the ScanSnap with a dry cloth, or a cloth moistened with
Cleaner F1/a mild detergent.
Use a cotton swab to clean small parts such as the camera or infrared LED of the ScanSnap.
ATTENTION
l Never use paint thinner or any other organic solvents. The shape or color may be changed.
l When cleaning the ScanSnap, prevent liquids from entering the ScanSnap.
l It may take a long time for Cleaner F1 to dry if an excessive amount is used. Moisten the
cloth with moderate quantity. Wipe off the cleaner completely with a soft cloth to leave no
residue on the cleaned parts.
l When cleaning the ScanSnap, hold the neck of the ScanSnap with your hand to prevent it
from falling over.
Cloth
Cleaner F1 or
a Mild Detergent
Infrared LED
Camera
Lamps
Glass
White Sheets
152
Appendix
Appendix
l "Purchasing and Cleaning the Background Pad" (page 154)
l "Specification" (page 155)
153
Purchasing and Cleaning the Background Pad
Purchasing and Cleaning the Background Pad
This section explains how to purchase and clean the Background Pad.
Purchasing
The product name and part number of the Background Pad are as follows.
Product Name
Qty.
Part No.
Background Pad
1 sheet PA03641-0052
Contact your FUJITSU scanner dealer or an authorized FUJITSU scanner service provider for
details about purchasing the Background Pad.
For details, refer to the following web page:
http://scansnap.fujitsu.com/
Cleaning
As you keep using the Background Pad, dirt and dust will accumulate on the surface.
Clean the Background Pad with a dry or damp cloth.
ATTENTION
l Do not use any detergent.
l Keep the Background Pad away from fire or high-temperature objects.
l Do not wrinkle or fold the Background Pad.
l It is recommended that you store the Background Pad in the tube and bag in which the Background
Pad was packaged.
l Keep the Background Pad out of direct sunlight when storing it.
154
Specification
Specification
The following table summarizes the specifications of the ScanSnap.
Item
Specification
Product name/part no.
ScanSnap SV600/FI-SV600
Scanning method
Overhead scanning
Scanning color mode
Color/gray/black and white/auto (automatic color, gray, and
B&W detection)
Optical system/image sensor
Lens reduction optics/color CCD × 1
Light source
(White LED + lens illumination) × 2
Scanning speed
3 sec/sheet
Scan area
Automatic detection (maximum), automatic detection (A4
landscape/letter landscape), A3 landscape, A4 landscape,
A5 landscape, A6 landscape, B4 landscape, B5 landscape,
B6 landscape, Post card landscape, Business card, Letter
landscape, Legal landscape, 11 × 17 in. landscape, custom
size (maximum: 432 × 300 mm/17.01 × 11.81 in., minimum:
25.4 × 25.4 mm/1.00 × 1.00 in.)
Magnification in vertical scanning (length)
± 1.5%
Document thickness
30 mm (1.18 in.) or less
Interface
USB 2.0/USB 1.1 (connector: B type)
Input power
Voltage
100 to 240 V ±10%
Phase
Single phase
Frequency range
50/60 Hz
Power consumption
Temperature/humidity
allowable ranges
During operation: 20 W or less
During sleep mode: 2.6 W or less
Temperature
During operation: 5 to 35 degrees C/41 to 95 degrees F
During standby: -20 to 60 degrees C/-4 to 140 degrees F
During storage/transportation: -20 to 60 degrees C/-4 to 140
degrees F
Humidity
During operation: 20 to 80%
During standby: 8 to 95%
During storage/transportation: 8 to 95%
Outer dimensions (Width × Depth × Height)
210 × 156 × 383 mm/8.27 × 6.14 × 15.08 in.
Weight
3.0 kg (approx. 6.62 lb)
Environmental specification
Compliant with the International Energy Star Program, and
RoHS Directive
Bundled software
Scanner driver
ScanSnap Manager V6.2
File management
ScanSnap Organizer V5.1
Business card
management
CardMinder V5.0
Text recognition
ABBYY FineReader for ScanSnap 5.0
Document filing
Rack2-Filer Smart with Magic Desktop
PDF editing
Adobe Acrobat XI Standard, English Version
Evernote
Evernote for Windows 4.5
155
Documents That Can Be Scanned with the ScanSnap and How to Load Them (Models Other than SV600)
Documents That Can Be Scanned with the
ScanSnap and How to Load Them (Models Other
than SV600)
This section describes the documents that can be scanned with the following ScanSnap models and
explains how to load the documents.
l iX500
l S1500
l S1500M
l S1300i
l S1300
l S1100
l S510
l S300
l "Documents for Scanning (For iX500/S1500/S1500M/S510)" (page 157)
l "How to Load Documents (For iX500/S1500/S1500M/S510)" (page 163)
l "Documents for Scanning (For S1300i/S1300/S300)" (page 167)
l "How to Load Documents (For S1300i/S1300/S300)" (page 169)
l "Documents for Scanning (For S1100)" (page 172)
l "How to Load Documents (For S1100)" (page 177)
156
Documents for Scanning (For iX500/S1500/S1500M/S510)
Documents for Scanning (For iX500/S1500/S1500M/
S510)
This section explains about the documents that can be scanned with the ScanSnap and the
conditions for using the Carrier Sheet.
l "Conditions for Documents to Scan (For iX500/S1500/S1500M/S510)" (page 158)
l "Conditions for Using the Carrier Sheet (For iX500/S1500/S1500M/S510)" (page 160)
157
Documents for Scanning (For iX500/S1500/S1500M/S510)
Conditions for Documents to Scan (For iX500/S1500/S1500M/
S510)
iX500
S1500/S1500M
S510
Document type
Standard office paper,
Standard office paper, postcards, business cards
postcards, business cards,
Plastic cards conforming to the
ISO781A ID-1 type (54 × 86
mm/2.1 × 3.4 in.)
Paper weight
40 to 209 g/m2 (10.7 to 55.7 lb) 52 to 127 g/m2 (13.9 to 33.9 lb)
l Long page documents
52 to 127 g/m2 (13.9 to 33.9
lb)
l A8 size (52 × 72 mm) or
less
127 to 209 g/m2 (33.9 to
55.7 lb)
l Plastic cards
0.76 mm (0.03 in.) or less
(embossed cards can be
used)
Paper size
Width: 50.8 to 216 mm (2 to 8.5 in.)
Length: 50.8 to 360 mm (2 to 14.17 in.)
l For long page (*1)
216 × 863 mm (8.5 × 34 in.)
Width: 50.8 to 216 mm (2 to
8.5 in.)
Length: 50.8 to 360 mm (2 to
14.17 in.)
*1: Scanning starts when you hold down the [Scan] button on the ScanSnap for 3 seconds or longer.
ATTENTION
l The following types of documents must not be scanned:
-
Documents attached with the metals such as paper clips or staples that can damage the inside
of the ScanSnap
Remove the metals for scanning.
-
Documents on which the ink is still wet
Wait until the ink dries completely to scan these documents.
-
Documents larger than the following:
iX500/S1500/S1500M: width 216 mm (8.5 in.), length 863 mm (34 in.)
S510: width 216 mm (8.5 in.), length 360 mm (14.17 in.)
-
Documents other than paper such as fabric, metal foil and OHP film
l When you scan picture postcards, be aware that the picture side may get damaged. It is the
responsibility of the customer to scan picture postcards.
l When you scan plastic cards, in [Multifeed Detection] of the [Paper] tab of the "ScanSnap Setup
Dialog Box" (page 43), select [None] or [Check Length].
l Be careful of the following when you scan plastic cards:
-
Cards that are bent may not be fed properly.
-
If the surface of the card is dirty with grease marks such as fingerprints, perform scanning after
wiping the dirt off.
158
Documents for Scanning (For iX500/S1500/S1500M/S510)
-
When you scan plastic cards with strong luster, some parts of the image may appear lighter or
darker than the original.
Example: gold colored credit card
-
When you scan embossed cards, put the embossed side down, and insert the card in
landscape orientation.
-
If the embossed characters are not coated in gold or silver and the background color of the card
and the color of the embossed characters are similar, it may be difficult for the ScanSnap to
recognize embossed characters.
In which case, performing the following may result in an improvement.
1. Click the [Option] button in the [Scanning] tab of the "ScanSnap Setup Dialog Box" (page
43).
a The [Scanning mode option] dialog box appears.
2. Select the [Increase text contrast] check box.
159
Documents for Scanning (For iX500/S1500/S1500M/S510)
Conditions for Using the Carrier Sheet (For iX500/S1500/
S1500M/S510)
The bundled Carrier Sheet is a sheet designed to transport documents through the ScanSnap.
You can scan documents that are larger than A4/Letter size, photographs and clippings.
Conditions for documents that can be scanned using the Carrier Sheet are as follows:
CAUTION
l Do not use a damaged Carrier Sheet. Otherwise, it may damage or cause
the ScanSnap to malfunction.
l Be careful not to cut your finger on the edge of the Carrier Sheet.
iX500
S1500/S1500M
Paper type
Documents that cannot be loaded directly into the ScanSnap
Paper weight
Up to 209 g/m2 (55.7 lb)
l When scanning documents
folded in half:
Up to 104.5
Paper size
g/m2
S510
Up to 127 g/m2 (34 lb)
l When scanning documents folded in half:
Up to 63.5 g/m2 (17 lb)
(27.9 lb)
Carrier Sheet size (216 × 297 mm)
A3 (297 × 420 mm) (*1)
A4 (210 × 297 mm)
A5 (148 × 210 mm)
A6 (105 × 148 mm)
B4 (257 × 364 mm) (*1)
B5 (182 × 257 mm)
B6 (128 × 182 mm)
Postcard (100 × 148 mm)
Business card (90 × 55 mm, 55 × 90 mm)
Letter (8.5 × 11 in. (216 × 279.4 mm))
11 × 17 in. (279.4 × 431.8 mm) (*1)
l Custom size
Width: 25.4 to 216 mm (1 to 8.5 in.)
Length: 25.4 to 297 mm (1 to 11.69 in.)
Carrier Sheet size (216 × 297
mm)
A3 (297 × 420 mm) (*1)
A4 (210 × 297 mm)
A5 (148 × 210 mm)
A6 (105 × 148 mm)
B4 (257 × 364 mm) (*1)
B5 (182 × 257 mm)
B6 (128 × 182 mm)
Postcard (100 × 148 mm)
Business card (90 × 55 mm, 55
× 90 mm)
Letter (8.5 × 11 in. (216 ×
279.4 mm))
11 × 17 in. (279.4 × 431.8 mm)
(*1)
l Custom size
Width: 50.8 to 216 mm (2 to
8.5 in.)
Length: 50.8 to 297 mm (2
to 11.7 in.)
*1: Fold in half to scan.
Documents for Which the Carrier Sheet is Recommended for
Scanning
It is recommended that you use the Carrier Sheet to scan the following documents.
l Documents written in pencil
Because there may be black traces left on the documents, it is recommended that you use the
Carrier Sheet to scan such documents.
160
Documents for Scanning (For iX500/S1500/S1500M/S510)
Clean the rollers occasionally when you scan such documents directly without using a Carrier
Sheet because dirt accumulating on the rollers may cause feeding errors.
For details about how to perform cleaning, refer to "Troubleshooting" in the ScanSnap Manager
Help.
l Carbonless paper
Because carbonless paper may contain chemicals that can harm the ScanSnap internal rollers, it
is recommended that you use the Carrier Sheet to scan such documents.
Make sure to clean the rollers occasionally to maintain the scanner performance when scanning
carbonless paper directly without using the Carrier Sheet. For details about how to perform
cleaning, refer to "Troubleshooting" in the ScanSnap Manager Help.
Depending on the type of carbonless paper, the life span of the scanner may be shortened
compared to scanning standard office paper.
l Scanning the following types of documents without using the Carrier Sheet can result in
documents being damaged or scanned incorrectly
-
Documents smaller than width 50.8 mm (2 in.), length 50.8 mm (2 in.)
-
Documents that weigh less than the following:
iX500: 40 g/m2 (10.7 lb)
S1500/S1500M/S510: 52 g/m2 (14 lb)
-
Documents with an uneven surface (such as envelopes and paper sheets with attached
materials)
-
Wrinkled or curled documents
-
Folded or torn documents
-
Tracing paper
-
Coated paper
-
Photographs (photographic paper)
-
Perforated or punched documents
-
Documents that are not rectangular or square
-
Carbon paper or thermal paper
-
Documents with memo papers or sticky notes attached
ATTENTION
l Using the Carrier Sheet
Be careful of the following when you use the Carrier Sheet:
-
Do not stain, or cut the end with a black & white pattern. Otherwise, the Carrier Sheet will not be
recognized properly.
-
Do not place the Carrier Sheet upside down. Otherwise, a paper jam may occur and damage
the Carrier Sheet and the document inside.
-
Do not fold or pull the Carrier Sheet.
-
Paper jams may occur when several small size documents such as photographs and postcards
are placed inside the Carrier Sheet to be scanned at once. It is recommended that you scan
such documents one at a time.
-
If paper jams occur frequently, feed about 50 sheets of PPC paper (recycled paper) before
scanning with the Carrier Sheet. The PPC paper can either be blank or printed.
l Storing the Carrier Sheet
Be careful of the following when you store the Carrier Sheet:
-
Do not leave your document inside the Carrier Sheet for a long time. Otherwise, the ink on the
document may be transferred onto the Carrier Sheet.
161
Documents for Scanning (For iX500/S1500/S1500M/S510)
-
To avoid deformation, do not use or leave the Carrier Sheet in high temperature places such as
under direct sunlight or near a heating apparatus for a long time.
-
To avoid deformation, store the Carrier Sheet on a flat surface without any weight on it.
162
How to Load Documents (For iX500/S1500/S1500M/S510)
How to Load Documents (For iX500/S1500/S1500M/
S510)
Load documents in the ScanSnap in the following procedure.
For details about documents that can be loaded, refer to "Documents for Scanning (For iX500/
S1500/S1500M/S510)" (page 157).
1.
If you are loading multiple sheets, check the number of sheets.
The maximum number of sheets in the ScanSnap is as follows:
For A4 or smaller sizes: Up to 50 sheets can be loaded (with paper weight of 80 g/m2 [20 lb]
and thickness of the document stack under 5 mm [0.2 in.]).
ATTENTION
If you try to scan more than the maximum amount that can be loaded, the following problems
may occur:
l Files cannot be properly created due to excessive file size.
l Paper jams occur during scanning.
2.
Fan the documents.
1. Hold both ends of the documents and fan them a few times.
2. Rotate the documents 90 degrees and fan them in the same manner.
3.
Straighten the edges of the documents and slightly displace the top edges at
an angle.
163
How to Load Documents (For iX500/S1500/S1500M/S510)
B
a
c
k
At an Angle
Feed Direction
ATTENTION
Paper jams or damage to documents may occur if you scan the documents without aligning the
edges first.
4.
Open the ADF paper chute (cover) of the ScanSnap.
ADF Paper Chute (Cover)
5.
Pull the stacker towards you.
Stacker
6.
Depending on documents to scan, pull out the extension on the ADF paper
chute (cover) and open the stacker.
164
How to Load Documents (For iX500/S1500/S1500M/S510)
Extension
Stacker
7.
Load the documents in the ADF paper chute (cover).
Load the documents face-down and top-first with their back facing you. Use the reference
marks within the side guides to adjust the number of the documents to be loaded.
Side Guide
ATTENTION
l Do not accumulate more than 50 sheets (with paper weight of 80 g/m2 [20 lb]) in the stacker.
l In the "ScanSnap Setup Dialog Box" (page 43), select the [Scanning] tab, and click the the
[Option] to show the [Scanning mode option] dialog box. If the [Place document face up]
check box is selected in the [Scanning mode option] dialog box, load the documents face-up
with the bottom part of the documents first.
165
How to Load Documents (For iX500/S1500/S1500M/S510)
8.
Adjust the side guides to the width of the documents.
Hold each side guide in the middle to adjust them. Otherwise, the documents may be fed
skewed.
Documents
166
Documents for Scanning (For S1300i/S1300/S300)
Documents for Scanning (For S1300i/S1300/S300)
Standard Office Paper, Postcards, Business Cards
S1300i
S1300
Document type
Standard office paper, postcards, business cards
Paper weight
64 to 104.7 g/m2 (17 to 20 lb)
Paper size
Width: 50.8 to 216 mm (2 to 8.5 in.)
Length: 50.8 to 360 mm (2 to 14.17 in.)
l For long page (*1)
216 × 863 mm (8.5 × 34 in.)
S300
Width: 50.8 to 216 mm (2 to
8.5 in.)
Length: 50.8 to 360 mm (2 to
14.17 in.)
*1: Scanning starts when you hold down the [Scan] button on the ScanSnap for 3 seconds or longer.
ATTENTION
The following types of documents must not be scanned:
l Documents attached with the metals such as paper clips or staples that can damage the inside of
the ScanSnap
Remove the metals for scanning.
l Documents on which the ink is still wet
Wait until the ink dries completely to scan these documents.
l Documents larger than the following:
S1300i/S1300: width 216 mm (8.5 in.), length 863 mm (34 in.)
S300: width 216 mm (8.5 in.), length 360 mm (14.17 in.)
l Documents other than paper such as fabric, metal foil, OHP film, or plastic card
l Documents with photographs or memo papers attached
Documents that you need to treat with caution
l Documents written in pencil
When you scan documents written in pencil, there may be black traces left on them. Also, dirt
accumulating on the rollers may cause feeding errors. Clean the rollers occasionally when you
scan such documents. For details about how to perform cleaning, refer to "Troubleshooting" in
the ScanSnap Manager Help.
l Carbonless paper
Carbonless paper may contain chemicals that can harm the pad assy and the pick roller inside
the ScanSnap. Make sure to perform cleaning occasionally to maintain the scanner
performance when scanning carbonless paper. For details about how to perform cleaning,
refer to "Troubleshooting" in the ScanSnap Manager Help. Depending on the type of
carbonless paper, the life span of the scanner may be shortened compared to scanning
standard office paper.
l Scanning the following types of documents can result in documents being damaged or
scanned incorrectly.
-
Documents smaller than width 50.8 mm (2 in.), length 50.8 mm (2 in.)
-
Documents that weigh less than 64 g/m2 (17 lb)
-
Documents with an uneven surface (such as envelopes and paper sheets with attached
materials)
-
Wrinkled or curled documents
167
Documents for Scanning (For S1300i/S1300/S300)
-
Folded or torn documents
-
Tracing paper
-
Coated paper
-
Photographs (photographic paper)
-
Perforated or punched documents
-
Documents that are not rectangular or square
-
Carbon paper or thermal paper
-
Documents with memo papers or sticky notes attached
Picture Postcards
Picture postcards can be scanned when a power cable connection is used.
S1300i
S1300
S300
Document type
Picture postcards
-
Paper weight
64 to 326 g/m2 (17 to 87 lb)
-
Paper size
Width: 50.8 to 100 mm (2 to 3.9 in.)
Length: 50.8 to 148 mm (2 to 5.8 in.)
-
ATTENTION
l All conditions below must be satisfied when scanning picture postcards. Otherwise, paper jam may
occur.
-
Power cable connection
-
Normal room temperature and humidity levels
-
Load the picture postcard face-down in the ScanSnap
l When you scan photographs or picture postcards, be aware that the picture side may get damaged.
It is the responsibility of the customer to scan photographs or picture postcards.
168
How to Load Documents (For S1300i/S1300/S300)
How to Load Documents (For S1300i/S1300/S300)
Load documents in the ScanSnap in the following procedure.
For details about documents that can be loaded, refer to "Documents for Scanning (For S1300i/
S1300/S300)" (page 167).
1.
If you are loading multiple sheets, check the number of sheets.
The maximum number of sheets in the ScanSnap is as follows:
For A4 or smaller sizes: Up to 10 sheets can be loaded (with paper weight of 80 g/m2 [20 lb]
and thickness of the document stack under 1 mm [0.04 in.]).
ATTENTION
If you try to scan more than the maximum amount that can be loaded, the following problems
may occur:
l Files cannot be properly created due to excessive file size.
l Paper jams occur during scanning.
2.
Fan the documents.
1. Hold both ends of the documents and fan them a few times.
2. Rotate the documents 90 degrees and fan them in the same manner.
Straighten the edges of the documents and slightly displace the top edges at
an angle.
At an Angle
Ba
c
k
3.
Feed Direction
169
How to Load Documents (For S1300i/S1300/S300)
ATTENTION
Paper jams or damage to documents may occur if you scan the documents without aligning the
edges first.
4.
Open the ADF paper chute (cover) of the ScanSnap.
ADF Paper Chute (Cover)
5.
Pull out the extension.
Extension
6.
Load the documents in the ADF paper chute (cover).
Load the documents face-down and top-first with their back facing you. Use the reference
marks within the side guides to adjust the number of the documents to be loaded.
170
How to Load Documents (For S1300i/S1300/S300)
Side Guide
ATTENTION
In the "ScanSnap Setup Dialog Box" (page 43), select the [Scanning] tab, and click the the
[Option] to show the [Scanning mode option] dialog box. If the [Place document face up] check
box is selected in the [Scanning mode option] dialog box, load the documents face-up with the
bottom part of the documents first.
7.
Adjust the side guides to the width of the documents.
Hold each side guide in the middle to adjust them. Otherwise, the documents may be fed
skewed.
Documents
171
Documents for Scanning (For S1100)
Documents for Scanning (For S1100)
This section explains about the documents that can be scanned with the ScanSnap and the
conditions for using the Carrier Sheet.
l "Conditions for Documents to Scan (For S1100)" (page 173)
l "Conditions for Using the Carrier Sheet (For S1100)" (page 175)
172
Documents for Scanning (For S1100)
Conditions for Documents to Scan (For S1100)
S1100
Eject method
With the output guide closed
With the output guide open
Document type
Standard office paper, postcards, business cards,
Plastic cards conforming to the ISO7810 ID-1 type (54 ×
86 mm)
Standard office paper
Paper weight
52.3 to 209.3 g/m2 (14 to 56.1 lb)
l Plastic cards
0.76 mm (0.03 in.) (embossed cards can be used)
52.3 to 80 g/m2 (14 to 20 lb)
Paper size
Width: 25.4 to 216 mm (1 to 8.5 in.)
Length: 25.4 to 360 mm (1 to 14.17 in.)
l For long page (*1)
216 × 863 mm (8.5 × 34 in.)
*1: Scanning starts when you hold down the [Scan/Stop] button on the ScanSnap for 3 seconds or
longer.
ATTENTION
l The following types of documents must not be scanned:
-
Documents attached with the metals such as paper clips or staples that can damage the inside
of the ScanSnap
Remove the metals for scanning.
-
Documents on which the ink is still wet
Wait until the ink dries completely to scan these documents.
-
Documents smaller than width 216 mm (8.5 in.), length 863 mm (34 in.)
-
Documents other than paper such as fabric, metal foil and OHP film
l When you scan picture postcards, be aware that the picture side may get damaged. It is the
responsibility of the customer to scan picture postcards.
l Be careful of the following when you scan plastic cards:
-
Cards that are bent may not be fed properly.
-
If the surface of the card is dirty with grease marks such as fingerprints, perform scanning after
wiping the dirt off.
-
Insert the plastic card straight into the feeding section of the ScanSnap. Do not tilt the plastic
card when you insert it because the plastic card may not be fed properly.
-
When you scan plastic cards with strong luster, some parts of the image may appear lighter or
darker than the original.
Example: gold colored credit card
-
Insert embossed cards in landscape orientation to achieve better scanning results.
-
If the embossed characters are not coated in gold or silver and the background color of the card
and the color of the embossed characters are similar, it may be difficult for the ScanSnap to
recognize embossed characters.
In which case, performing the following may result in an improvement.
1. Click the [Option] button in the [Scanning] tab of the "ScanSnap Setup Dialog Box" (page
43).
a The [Scanning mode option] dialog box appears.
173
Documents for Scanning (For S1100)
2. Select the [Increase text contrast] check box.
174
Documents for Scanning (For S1100)
Conditions for Using the Carrier Sheet (For S1100)
The Carrier Sheet (sold separately) is a sheet designed to transport documents through the
ScanSnap.
You can scan documents that are larger than A4/Letter size, photographs and clippings.
Conditions for documents that can be scanned using the Carrier Sheet are as follows:
CAUTION
l Do not use a damaged Carrier Sheet. Otherwise, it may damage or cause
the ScanSnap to malfunction.
l Be careful not to cut your finger on the edge of the Carrier Sheet.
S1100
Eject method
With the output guide closed
Document type
Documents that cannot be loaded directly into the ScanSnap
Paper weight
Up to 127 g/m2 (34 lb)
l When scanning documents folded in half:
Up to 63.5 g/m2 (17 lb)
Paper size
Carrier Sheet size (216 × 297 mm)
A3 (297 × 420 mm) (*1)
A4 (210 × 297 mm)
A5 (148 × 210 mm)
A6 (105 × 148 mm)
B4 (257 × 364 mm) (*1)
B5 (182 × 257 mm)
B6 (128 × 182 mm)
Postcard (100 × 148 mm)
Business card (90 × 55 mm, 55 × 90 mm)
Letter (8.5 × 11 in. (216 × 279.4 mm))
11 × 17 in. (279.4 × 431.8 mm) (*1)
l Custom size
Width: 25.4 to 216 mm (1 to 8.5 in.)
Length: 25.4 to 297 mm (1 to 11.69 in.)
*1: Fold in half to scan.
Documents for Which the Carrier Sheet is Recommended for
Scanning
It is recommended that you use the Carrier Sheet to scan the following documents.
l Documents written in pencil
Because there may be black traces left on the documents, it is recommended that you use the
Carrier Sheet to scan such documents.
Clean the rollers occasionally when you scan such documents directly without using a Carrier
Sheet because dirt accumulating on the rollers may cause feeding errors.
For details about how to perform cleaning, refer to "Troubleshooting" in the ScanSnap Manager
Help.
175
Documents for Scanning (For S1100)
l Carbonless paper
Because carbonless paper may contain chemicals that can harm the ScanSnap internal rollers, it
is recommended that you use the Carrier Sheet to scan such documents.
Make sure to clean the rollers occasionally to maintain the scanner performance when scanning
carbonless paper directly without using the Carrier Sheet. For details about how to perform
cleaning, refer to "Troubleshooting" in the ScanSnap Manager Help.
Depending on the type of carbonless paper, the life span of the scanner may be shortened
compared to scanning standard office paper.
l Scanning the following types of documents without using the Carrier Sheet can result in
documents being damaged or scanned incorrectly
-
Documents smaller than width 50.8 mm (2 in.), length 50.8 mm (2 in.)
-
Documents that weigh less than 52.3 g/m2 (14 lb)
-
Documents with an uneven surface (such as envelopes and paper sheets with attached
materials)
-
Wrinkled or curled documents
-
Folded or torn documents
-
Tracing paper
-
Coated paper
-
Photographs (photographic paper)
-
Perforated or punched documents
-
Documents that are not rectangular or square
-
Carbon paper or thermal paper
-
Documents with memo papers or sticky notes attached
ATTENTION
l Using the Carrier Sheet
Be careful of the following when you use the Carrier Sheet:
-
Do not stain, or cut the end with a black & white pattern. Otherwise, the Carrier Sheet will not be
recognized properly.
-
Do not place the Carrier Sheet upside down. Otherwise, a paper jam may occur and damage
the Carrier Sheet and the document inside.
-
Do not fold or pull the Carrier Sheet.
-
Paper jams may occur when several small size documents such as photographs and postcards
are placed inside the Carrier Sheet to be scanned at once. It is recommended that you scan
such documents one at a time.
l Storing the Carrier Sheet
Be careful of the following when you store the Carrier Sheet:
-
Do not leave your document inside the Carrier Sheet for a long time. Otherwise, the ink on the
document may be transferred onto the Carrier Sheet.
-
Do not leave the Carrier Sheet in high temperature places such as under direct sunlight or near
devices that generate heat for a long time. Also, do not use it in high temperature places.
Otherwise, the Carrier Sheet may deform.
-
To avoid deformation, store the Carrier Sheet on a flat surface without any weight on it.
176
How to Load Documents (For S1100)
How to Load Documents (For S1100)
Load documents in the ScanSnap in the following procedure.
For details about documents that can be loaded, refer to "Documents for Scanning (For S1100)"
(page 172).
ATTENTION
You can only load one document at a time in the ScanSnap.
1.
Open the feed guide of the ScanSnap.
ADF Paper Chute (Cover)
HINT
l If you want the document to be ejected from the front of the ScanSnap or when there is not
enough space where the document exits the ScanSnap, open the output guide.
For details about documents that can be scanned with the output guide open, refer to
"Documents for Scanning (For S1100)" (page 172).
Output Guide
l How the document is ejected differs as below depending on whether the output guide is open
or closed.
With the output guide closed
2.
With the output guide open
Insert the document straight into the feeding section of the ScanSnap, with
the scanning side facing up.
177
How to Load Documents (For S1100)
a The document is pulled in until it is set inside the ScanSnap.
ATTENTION
l When you select an option other than [Automatic detection] for [Paper size] on the [Paper]
tab in the "ScanSnap Setup Dialog Box" (page 43), insert the document by aligning it with the
left edge of the feeding section.
l When you perform scanning with the output guide closed, leave enough space at the back of
the ScanSnap to allow the document to be completely ejected.
Make sure that the area where the document exits the scanner is clear of any obstacles.
Otherwise, paper jam may occur.
l If you scan the following documents with the output guide open, a paper jam may occur and
damage the documents. Scan the following documents with the output guide closed.
-
Thick paper (80 g/m2 [20 lb] or heavier)
-
Postcards
-
Business cards
-
Plastic cards
-
Carrier Sheet
Output Guide
178
About Customer Support and Maintenance
About Customer Support and Maintenance
Customer Support
l Adobe Acrobat
Refer to the following web page:
http://www.adobe.com/support/
l ABBYY FineReader for ScanSnap
Refer to [Start] menu → [All Programs] → [ABBYY FineReader for ScanSnap(TM) 5.0] → [User's
Guide] → [Technical Support].
l Evernote
Refer to the following web page:
http://www.evernote.com/about/contact/support/
l Google Docs
Refer to the Google Docs Help Center or Google Help Forum.
To open them, select [Help] in Google Docs.
l Salesforce
Contact the system administrator of your Salesforce.
l SugarSync
Refer to the following web page:
https://sugarsync.custhelp.com/
l Dropbox
Refer to the following web page:
http://www.dropbox.com/contact
l ScanSnap
For other inquiries on the ScanSnap, refer to the following web page:
http://scansnap.fujitsu.com/g-support/en/
If your problem cannot be solved after referring to the above web pages, visit the following web
page to check the contact information of a suitable Fujitsu office and contact the Fujitsu office.
http://imagescanner.fujitsu.com/warranty.html
Suppliers of Consumables/Options
http://scansnap.fujitsu.com/
Maintenance
Contact your FUJITSU scanner dealer or an authorized FUJITSU scanner service provider for
repairs on this product.
For details, refer to the following web page:
http://imagescanner.fujitsu.com/warranty.html
179
About Customer Support and Maintenance
ATTENTION
For safety reasons, never attempt repairs by yourself.
180


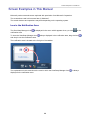


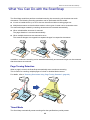

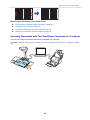

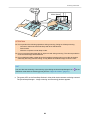

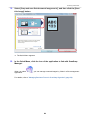
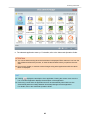

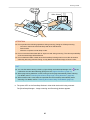
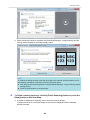


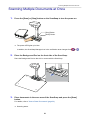


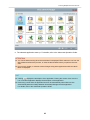

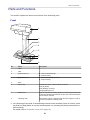
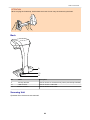

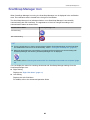
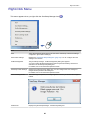
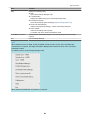
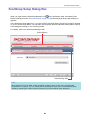

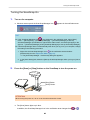

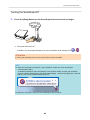


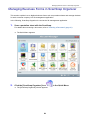
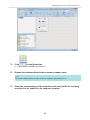
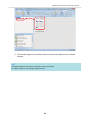
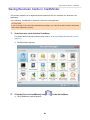


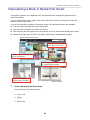
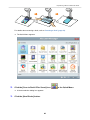
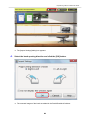
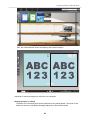


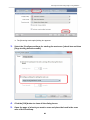
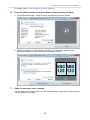

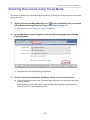


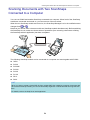


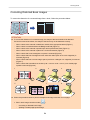
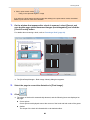

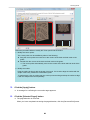

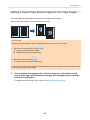

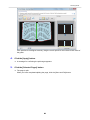


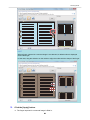


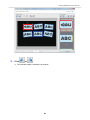

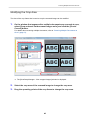


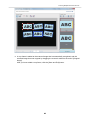

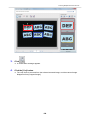
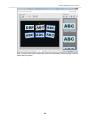


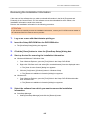

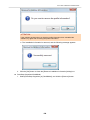


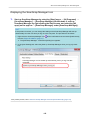

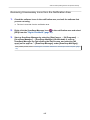

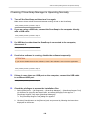
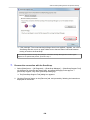
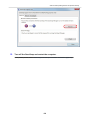


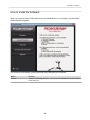


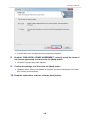

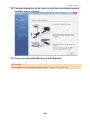
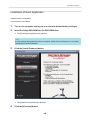
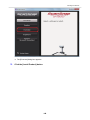
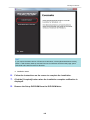
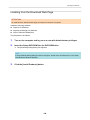
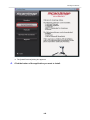


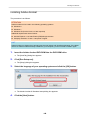


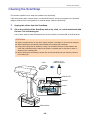


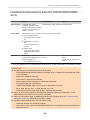


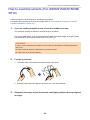
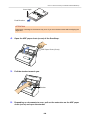

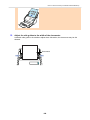


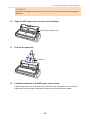
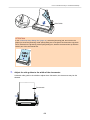


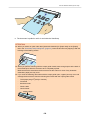


![3. Clique no botão [OK]](http://vs1.manualzilla.com/store/data/006085780_1-1e963248ed17cdf0be3b5a5218e98297-150x150.png)
![3. Clique no botão [Aplicar]](http://vs1.manualzilla.com/store/data/006085959_1-abc442ce88b6545b36fcdec1f957320c-150x150.png)
![3. Cliccare il tasto [OK]](http://vs1.manualzilla.com/store/data/006155166_1-66b7bb98c98d41f6181cd20c0b775e39-150x150.png)

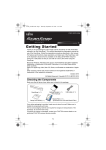


![[Scan] button on the ScanSnap.](http://vs1.manualzilla.com/store/data/005658366_1-513fc66afaf683e0c3b25d8948918383-150x150.png)