1
CHAPTER 17
Advanced Coding and
Memory Handling
17.0 Introduction
As you do more with your Arduino, your sketches need to become more efficient. The
techniques in this chapter can help you improve the performance and reduce the code
size of your sketches. If you need to make your sketch run faster or use less RAM, the
recipes here can help. The recipes here are more technical than most of the other recipes
in this book because they cover things that are usually concealed by the friendly Arduino
wrapper.
The Arduino build process was designed to hide complex aspects of C and C++, as
well as the tools used to convert a sketch into the bytes that are uploaded and run on
an Arduino board. But if your project has performance and resource requirements beyond the capability of the standard Arduino environment, you should find the recipes
here useful.
The Arduino board uses memory to store information. It has three kinds of memory:
program memory, random access memory (RAM), and EEPROM. Each has different
characteristics and uses. Many of the techniques in this chapter cover what to do if you
do not have enough of one kind of memory.
Program memory (also known as flash) is where the executable sketch code is stored.
The contents of program memory can only be changed by the bootloader in the upload
process initiated by the Arduino software running on your computer. After the upload
process is completed, the memory cannot be changed until the next upload. There is
far more program memory on an Arduino board than RAM, so it can be beneficial to
store values that don’t change while the code runs (e.g., constants) in program memory.
The bootloader takes up some space in program memory. If all other attempts to minimize the code to fit in program memory have failed, the bootloader can be removed
to free up space, but an additional hardware programmer is then needed to get code
onto the board.
583
If your code is larger than the program memory space available on the chip, the upload
will not work and the IDE will warn you that the sketch is too big when you compile.
RAM is used by the code as it runs to store the values for the variables used by your
sketch (including variables in the libraries used by your sketch). RAM is volatile, which
means it can be changed by code in your sketch. It also means anything stored in this
memory is lost when power is switched off. Arduino has much less RAM than program
memory. If you run out of RAM while your sketch runs on the board (as variables are
created and destroyed while the code runs) the board will misbehave (crash).
EEPROM (electrically erasable programmable read-only memory) is memory that code
running on Arduino can read and write, but it is nonvolatile memory that retains values
even when power is switched off. EEPROM access is significantly slower than for RAM,
so EEPROM is usually used to store configuration or other data that is read at startup
to restore information from the previous session.
To understand these issues, it is helpful to understand how the Arduino IDE prepares
your code to go onto the chip and how you can inspect the results it produces.
Preprocessor
Some of the recipes here use the preprocessor to achieve the desired result. Preprocessing
is a step in the first stage of the build process in which the source code (your sketch) is
prepared for compiling. Various find and replace functions can be performed. Preprocessor commands are identified by lines that start with #. You have already seen them
in sketches that use a library—#include tells the preprocessor to insert the code from
the named library file. Sometimes the preprocessor is the only way to achieve what is
needed, but its syntax is different from C and C++ code, and it can introduce bugs that
are subtle and hard to track down, so use it with care.
See Also
AVRfreaks is a website for software engineers that is a good source for technical detail
on the controller chips used by Arduino: http://www.avrfreaks.net.
Technical details on the C preprocessor are available at http://gcc.gnu.org/onlinedocs/
gcc-2.95.3/cpp_1.html.
The memory specifications for all of the official boards can be found on the Arduino
website.
17.1 Understanding the Arduino Build Process
Problem
You want to see what is happening under the covers when you compile and upload a
sketch.
584 | Chapter 17: Advanced Coding and Memory Handling
Solution
You can choose to display all the command-line activity that takes place when compiling or uploading a sketch through the Preferences dialog added in Arduino 1.0. Select
File→Preferences to display the dialog box to check or uncheck the boxes to enable
verbose output for compile or upload messages.
In releases earlier than 1.0, you can hold down the Shift key when you click on Compile
or Upload. The console area at the bottom of the IDE will display details of the compile
process.
In releases earlier than 1.0, you need to change a value in the Arduino preferences.txt
file to make this detail always visible. This file should be in the following locations:
Mac
/Users/<USERNAME>/Library/Arduino/preferences.txt
Windows XP
C:\Documents and Settings\<USERNAME>\Application Data\Arduino\preferences.txt
Windows Vista
c:\Users\<USERNAME>\AppData\Roaming\Arduino\ preferences.txt
Linux
~/.arduino/preferences.txt
Make sure the Arduino IDE is not running (changes made to preferences.txt will not be
saved if the IDE is running). Open the file and find the line build.verbose=false (it is
near the bottom of the file). Change false to true and save the file.
Discussion
When you click on Compile or Upload, a lot of activity happens that is not usually
displayed on-screen. The command-line tools that the Arduino IDE was built to hide
are used to compile, link, and upload your code to the board.
First your sketch file(s) are transformed into a file suitable for the compiler (AVRGCC) to process. All source files in the sketch folder that have no file extension are
joined together to make one file. All files that end in .c or .cpp are compiled separately.
Header files (with an .h extension) are ignored unless they are explicitly included in the
files that are being joined.
#include "Arduino.h" (WProgram.h in previous releases) is added at the top of the file
to include the header file with all the Arduino-specific code definitions, such as digi
talWrite() and analogRead(). If you want to examine its contents, you can find the file
on Windows under the directory where Arduino was installed; from there, you can
navigate to Hardware→Arduino→Cores→Arduino.
17.1 Understanding the Arduino Build Process | 585
On the Mac, Ctrl+click the Arduino application icon and select Show Package Contents
from the drop-down menu. A folder will open; from the folder, navigate to Contents→Resources→Java→Hardware→Arduino→Cores→Arduino.
The Arduino directory structure may change in new releases, so check
the documentation for the release you are using.
To make the code valid C++, the prototypes of any functions declared in your code are
generated next and inserted.
Finally, the setting of the board menu is used to insert values (obtained from the
boards.txt file) that define various constants used for the controller chips on the selected
board.
This file is then compiled by AVR-GCC, which is included within the Arduino main
download (it is in the tools folder).
The compiler produces a number of object files (files with an extension of .o that will
be combined by the link tool). These files are stored in /tmp on Mac and Linux. On
Windows, they are in the applet directory (a folder below the Arduino install directory).
The object files are then linked together to make a hex file to upload to the board.
Avrdude, a utility for transferring files to the Arduino controller, is used to upload to
the board.
The tools used to implement the build process can be found in the hardware\tools
directory.
Another useful tool for experienced programmers is avr-objdump, also in the tools folder.
It lets you see how the compiler turns the sketch into code that the controller chip runs.
This tool produces a disassembly listing of your sketch that shows the object code
intermixed with the source code. It can also display a memory map of all the variables
used in your sketch. To use the tool, compile the sketch and navigate to the folder
containing the Arduino distribution. Then, navigate to the folder with all the intermediate files used in the build process (as explained earlier). The file used by
avr-objdump is the one with the extension .elf. For example, if you compile the Blink
sketch you could view the compiled output (the machine code) by executing the following on the command line:
..\hardware\tools\avr\bin\avr-objdump.exe -S blink.cpp.elf
It is convenient to direct the output to a file that can be read in a text editor. You can
do this as follows:
..\hardware\tools\avr\bin\avr-objdump.exe -S blink.cpp.elf > blink.txt
586 | Chapter 17: Advanced Coding and Memory Handling
This version adds a list of section headers (helpful for determining memory usage):
..\hardware\tools\avr\bin\avr-objdump.exe -S -h blink.cpp.elf > blink.txt
You can create a batch file to dump the listing into a file. Add the path
of your Arduino installation to the following line and save it to a batch
file:
hardware\tools\avr\bin\avr-objdump.exe -S -h -Tdata %1 > %1%.txt
See Also
For information on the Arduino build process, see http://code.google.com/p/arduino/
wiki/BuildProcess.
The AVRfreaks website: http://www.avrfreaks.net/wiki/index.php/Documentation:AVR
_GCC.
17.2 Determining the Amount of Free and Used RAM
Problem
You want to be sure you have not run out of RAM. A sketch will not run correctly if
there is insufficient memory, and this can be difficult to detect.
Solution
This recipe shows you how you can determine the amount of free memory available to
your sketch. This sketch contains a function called memoryFree that reports the amount
of available RAM:
void setup()
{
Serial.begin(9600);
}
void loop()
{
Serial.print(memoryFree());
Serial.print(' ');
delay(1000);
}
// print the free memory
// print a space
// variables created by the build process when compiling the sketch
extern int __bss_end;
extern void *__brkval;
// function to return the amount of free RAM
int memoryFree()
17.2 Determining the Amount of Free and Used RAM | 587
{
int freeValue;
if((int)__brkval == 0)
freeValue = ((int)&freeValue) - ((int)&__bss_end);
else
freeValue = ((int)&freeValue) - ((int)__brkval);
return freeValue;
}
Discussion
The memoryFree function uses system variables to calculate the amount of RAM. System
variables are not normally visible (they are created by the compiler to manage internal
resources). It is not necessary to understand how the function works to use its output.
The function returns the number of bytes of free memory.
The number of bytes your code uses changes as the code runs. The important thing is
to ensure that you don’t consume more memory than you have.
Here are the main ways RAM memory is consumed:
• When you initialize constants:
#define ERROR_MESSAGE "an error has occurred"
• When you declare global variables:
char myMessage[] = "Hello World";
• When you make a function call:
void myFunction(int value)
{
int result;
result = value * 2;
return result;
}
• When you dynamically allocate memory:
String stringOne = "Arduino String";
The Arduino String class uses dynamic memory to allocate space for strings. You can
see this by adding the following line to the very top of the code in the Solution:
String s = "\n";
and the following lines just before the delay in the loop code:
s = s + "Hello I am Arduino \n";
Serial.println(s);
// print the string value
You will see the memory value reduce as the size of the string is increased each time
through the loop. If you run the sketch long enough, the memory will run out—don’t
endlessly try to increase the size of a string in anything other than a test application.
588 | Chapter 17: Advanced Coding and Memory Handling
Writing code like this that creates a constantly expanding value is a sure way to run
out of memory. You should also be careful not to create code that dynamically creates
different numbers of variables based on some parameter while the code runs, as it will
be very difficult to be sure you will not exceed the memory capabilities of the board
when the code runs.
Constants and global variables are often declared in libraries as well, so you may not
be aware of them, but they still use up RAM. The Serial library, for example, has a 128byte global array that it uses for incoming serial data. This alone consumes one-eighth
of the total memory of an old Arduino 168 chip.
See Also
A technical overview of memory usage is available at http://www.gnu.org/savannah
-checkouts/non-gnu/avr-libc/user-manual/malloc.html.
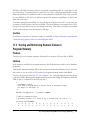
17.3 Storing and Retrieving Numeric Values in
Program Memory
Problem
You have a lot of constant numeric data and don’t want to allocate this to RAM.
Solution
Store numeric variables in program memory (the flash memory used to store Arduino
programs).
This sketch adjusts a fading LED for the nonlinear sensitivity of human vision. It stores
the values to use in a table of 256 values in program memory rather than RAM.
The sketch is based on Recipe 7.2; see Chapter 7 for a wiring diagram and discussion
on driving LEDs. Running this sketch results in a smooth change in brightness with the
LED on pin 5 compared to the LED on pin 3:
/*
* ProgmemCurve sketch
* uses table in program memory to convert linear to exponential output
* See Recipe 7.2 and Figure 7-2
*/
#include <avr/pgmspace.h>
// needed for PROGMEM
// table of exponential values
// generated for values of i from 0 to 255 -> x=round( pow( 2.0, i/32.0) - 1);
const byte table[]PROGMEM = {
0,
0,
0,
0,
0,
0,
0,
0,
0,
1,
1,
1,
0,
1,
0,
1,
0,
1,
0,
1,
0,
1,
0,
1,
0,
1,
0,
1,
0,
1,
0,
1,
17.3 Storing and Retrieving Numeric Values in Program Memory | 589
1,
1,
1,
1,
1, 1,
1,
1, 1,
1,
1,
2,
2,
2,
2,
2, 2,
2,
2, 2,
2,
3,
3,
3,
3,
3,
3, 3,
4,
4, 4,
4,
4,
5,
5,
5,
5,
5, 5,
5,
6, 6,
6,
6,
7,
7,
7,
8,
8, 8,
8,
8, 9,
9,
9,
10, 11, 11, 11, 11, 12, 12, 12, 12, 13, 13,
15, 15, 16, 16, 16, 17, 17, 18, 18, 18, 19,
22, 22, 23, 23, 24, 24, 25, 25, 26, 26, 27,
31, 32, 32, 33, 34, 35, 35, 36, 37, 38, 39,
44, 45, 46, 47, 48, 49, 51, 52, 53, 54, 55,
63, 64, 66, 67, 69, 70, 72, 73, 75, 77, 78,
90, 91, 94, 96, 98, 100, 102, 104, 107, 109, 111,
127, 130, 133, 136, 139, 142, 145, 148, 151, 155, 158,
180, 184, 188, 192, 196, 201, 205, 210, 214, 219, 224,
};
const int rawLedPin = 3;
const int adjustedLedPin = 5;
2,
2,
2,
2,
2,
3,
3,
3,
3,
3,
4,
4,
4,
4,
5,
6,
6,
6,
7,
7,
9,
9, 10, 10, 10,
13, 14, 14, 14, 15,
19, 20, 20, 21, 21,
28, 28, 29, 30, 30,
40, 40, 41, 42, 43,
56, 58, 59, 60, 62,
80, 82, 84, 86, 88,
114, 116, 119, 122, 124,
161, 165, 169, 172, 176,
229, 234, 239, 244, 250
// this LED is fed with raw values
// this LED is driven from table
int brightness = 0;
int increment = 1;
void setup()
{
// pins driven by analogWrite do not need to be declared as outputs
}
void loop()
{
if (brightness > 254)
{
increment = -1; // count down after reaching 255
}
else if (brightness < 1)
{
increment = 1; // count up after dropping back down to 0
}
brightness = brightness + increment; // increment (or decrement sign is minus)
// write the brightness value to the LEDs
analogWrite(rawLedPin, brightness); // this is the raw value
int adjustedBrightness = pgm_read_byte(&table[brightness]); // adjusted value
analogWrite(adjustedLedPin, adjustedBrightness);
}
delay(10); // 10ms for each step change means 2.55 secs to fade up or down
Discussion
When you need to use a complex expression to calculate a range of values that regularly
repeat, it is often better to precalculate the values and include them in a table of values
(usually as an array) in the code. This saves the time needed to calculate the values
repeatedly when the code runs. The disadvantage concerns the memory needed to place
these values in RAM. RAM is limited on Arduino and the much larger program memory
590 | Chapter 17: Advanced Coding and Memory Handling
space can be used to store constant values. This is particularly helpful for sketches that
have large arrays of numbers.
At the top of the sketch, the table is defined with the following expression:
const byte table[]PROGMEM = {
0, . . .
PROGMEM tells the compiler that the values are to be stored in program memory rather
than RAM. The remainder of the expression is similar to defining a conventional array
(see Chapter 2).
The low-level definitions needed to use PROGMEM are contained in a file named
pgmspace.h and the sketch includes this as follows:
#include <avr/pgmspace.h>
To adjust the brightness to make the fade look uniform, this recipe adds the following
lines to the LED output code used in Recipe 7.2:
int adjustedBrightness = pgm_read_byte(&table[brightness]);
analogWrite(adjustedLedPin, adjustedBrightness);
The variable adjustedBrightness is set from a value read from program memory. The
expression pgm_read_byte(&table[brightness]); means to return the address of the
entry in the table array at the index position given by brightness. Each entry in the
table is one byte, so another way to write this expression is:
pgm_read_byte(table + brightness);
If it is not clear why &table[brightness] is equivalent to table + brightness, don’t
worry; use whichever expression makes more sense to you.
Another example is from Recipe 6.5, which used a table for converting an infrared
sensor reading into distance. Here is the sketch from that recipe converted to use a table
in program memory instead of RAM:
/* ir-distance_Progmem sketch
* prints distance & changes LED flash rate depending on distance from IR sensor
* uses progmem for table
*/
#include <avr/pgmspace.h> // needed when using Progmem
// table entries are distances in steps of 250 millivolts
const int TABLE_ENTRIES = 12;
const int firstElement = 250; // first entry is 250 mV
const int interval = 250; // millivolts between each element
// the following is the definition of the table in Program Memory
const int distanceP[TABLE_ENTRIES] PROGMEM = { 150,140,130,100,60,50,
40,35,30,25,20,15 };
// This function reads from Program Memory at the given index
int getTableEntry(int index)
{
17.3 Storing and Retrieving Numeric Values in Program Memory | 591
}
int value = pgm_read_word(&distanceP[index]);
return value;
The remaining code is similar to Recipe 6.5, except that the getTableEntry function is
used to get the value from program memory instead of accessing a table in RAM. Here
is the revised getDistance function from that recipe:
int getDistance(int mV)
{
if( mV > interval * TABLE_ENTRIES )
return getTableEntry(TABLE_ENTRIES-1); // the minimum distance
else
{
int index = mV / interval;
float frac = (mV % 250) / (float)interval;
return getTableEntry(index) - ((getTableEntry(index) getTableEntry(index+1)) * frac);
}
}
See Also
See Recipe 17.4 for the technique introduced in Arduino 1.0 to store strings in flash
memory.
17.4 Storing and Retrieving Strings in Program Memory
Problem
You have lots of strings and they are consuming too much RAM. You want to move
string constants, such as menu prompts or debugging statements, out of RAM and into
program memory.
Solution
This sketch creates a string in program memory and prints its value to the Serial Monitor
using the F("text") expression introduced in Arduino 1.0. The technique for printing
the amount of free RAM is described in Recipe 17.2:
/*
* Write strings using Program memory (Flash)
*/
void setup()
{
Serial.begin(9600);
}
void loop()
{
Serial.print(memoryFree());
// print the free memory
592 | Chapter 17: Advanced Coding and Memory Handling
Serial.print(' ');
// print a space
}
Serial.print(F("arduino duemilanove "));
delay(1000);
// print the string
// variables created by the build process when compiling the sketch
extern int __bss_end;
extern void *__brkval;
// function to return the amount of free RAM
int memoryFree()
{
int freeValue;
if ((int)__brkval == 0)
freeValue = ((int)&freeValue) - ((int)&__bss_end);
else
freeValue = ((int)&freeValue) - ((int)__brkval);
return freeValue;
}
Discussion
Strings are particularly hungry when it comes to RAM. Each character uses a byte, so
it is easy to consume large chunks of RAM if you have lots of words in strings in your
sketch. Inserting your text in the F("text") expression stores the text in the much larger
flash memory instead of RAM.
If you are using an earlier Arduino release you can still store text in program memory,
but you need to add a little more code to your sketch. Here is the same functionality
implemented for releases earlier than 1.0:
#include <avr/pgmspace.h> // for progmem
//create a string of 20 characters in progmem
const prog_uchar myText[] PROGMEM = "arduino duemilanove ";
void setup()
{
Serial.begin(9600);
}
void loop()
{
Serial.print(memoryFree());
Serial.print(' ');
}
printP(myText);
delay(1000);
// print the free memory
// print a space
// print the string
// function to print a PROGMEM string
17.4 Storing and Retrieving Strings in Program Memory | 593
void printP(const prog_uchar *str)
{
char c;
}
while((c = pgm_read_byte(str++)))
Serial.write(c);
// variables created by the build process when compiling the sketch
extern int __bss_end;
extern void *__brkval;
// function to return the amount of free RAM
int memoryFree(){
int freeValue;
}
if((int)__brkval == 0) freeValue = ((int)&freeValue) - ((int)&__bss_end);
else freeValue = ((int)&freeValue) - ((int)__brkval);
return freeValue;
See Also
See Recipe 15.11 for an example of flash memory used to store web page strings.
17.5 Using #define and const Instead of Integers
Problem
You want to minimize RAM usage by telling the compiler that the value is constant and
can be optimized.
Solution
Use const to declare values that are constant throughout the sketch.
For example, instead of:
int ledPin=13;
use:
const int ledPin=13;
Discussion
We often want to use a constant value in different areas of code. Just writing the number
is a really bad idea. If you later want to change the value used, it’s difficult to work out
which numbers scattered throughout the code also need to be changed. It is best to use
named references.
594 | Chapter 17: Advanced Coding and Memory Handling
Here are three different ways to define a value that is a constant:
int ledPin = 13;
const int ledPin =
#define ledPin 13
13;
//
//
//
//
a variable, but this wastes RAM
a const does not use RAM
using a #define
the preprocessor replaces ledPin with 13
pinMode(ledPin, OUTPUT);
Although the first two expressions look similar, the term const tells the compiler not
to treat ledPin as an ordinary variable. Unlike the ordinary int, no RAM is reserved to
hold the value for the const, as it is guaranteed not to change. The compiler will produce
exactly the same code as if you had written:
pinMode(13, OUTPUT);
You will sometimes see #define used to define constants in older Arduino code, but
const is a better choice than #define. This is because a const variable has a type, which
enables the compiler to verify and report if the variable is being used in ways not appropriate for that type. The compiler will also respect C rules for the scope of a const
variable. A #define value will affect all the code in the sketch, which may be more than
you intended. Another benefit of const is that it uses familiar syntax—#define does not
use the equals sign, and no semicolon is used at the end.
See Also
See this chapter’s introduction section for more on the preprocessor.
17.6 Using Conditional Compilations
Problem
You want to have different versions of your code that can be selectively compiled. For
example, you may need code to work differently when debugging or when running
with different boards.
Solution
You can use the conditional statements aimed at the preprocessor to control how your
sketch is built.
This example from sketches in Chapter 15 includes the SPI.h library file that is only
available for and needed with Arduino versions released after 0018:
#if ARDUINO > 18
#include <SPI.h>
#endif
// needed for Arduino versions later than 0018
17.6 Using Conditional Compilations | 595
This example, using the sketch from Recipe 5.6, displays some debug statements only
if DEBUG is defined:
/*
Pot_Debug sketch
blink an LED at a rate set by the position of a potentiometer
Uses Serial port for debug if DEBUG is defined
*/
const int potPin = 0;
const int ledPin = 13;
int val = 0;
// select the input pin for the potentiometer
// select the pin for the LED
// variable to store the value coming from the sensor
#define DEBUG
void setup()
{
Serial.begin(9600);
pinMode(ledPin, OUTPUT);
}
void loop() {
val = analogRead(potPin);
digitalWrite(ledPin, HIGH);
delay(val);
digitalWrite(ledPin, LOW);
delay(val);
#if defined DEBUG
Serial.println(val);
#endif
}
// declare the ledPin as an OUTPUT
//
//
//
//
//
read the voltage on the pot
turn the ledPin on
blink rate set by pot value
turn the ledPin off
turn LED off for same period as it was turned on
Discussion
This recipe uses the preprocessor used at the beginning of the compile process to change
what code is compiled. The first example tests if the value of the constant ARDUINO is
greater than 18, and if so, the file SPI.h is included. The value of the ARDUINO constant
is defined in the build process and corresponds to the Arduino release version. The
syntax for this expression is not the same as that used for writing a sketch. Expressions
that begin with the # symbol are processed before the code is compiled—see this chapter’s introduction section for more on the preprocessor.
You have already come across #include:
#include <library.h>
The < > brackets tell the compiler to look for the file in the location for standard
libraries:
#include "header.h"
The compiler will also look in the sketch folder.
596 | Chapter 17: Advanced Coding and Memory Handling
You can have a conditional compile based on the controller chip selected in the IDE.
For example, the following code will produce different code when compiled for a Mega
board that reads the additional analog pins that it has:
/*
* ConditionalCompile sketch
* This sketch recognizes the controller chip using conditional defines
*/
int numberOfSensors;
int val = 0;
// variable to store the value coming from the sensor
void setup()
{
Serial.begin(9600);
#if defined(__AVR_ATmega1280__)
numberOfSensors = 16;
#else
numberOfSensors = 6;
#endif
//
//
//
//
defined when selecting Mega in the IDE
the number of analog inputs on the Mega
if not Mega then assume a standard board
analog inputs on a standard Arduino board
Serial.print("The number of sensors is ");
Serial.println(numberOfSensors);
}
void loop() {
for(int sensor = 0; sensor < numberOfSensors; sensor++)
{
val = analogRead(sensor);
// read the sensor value
Serial.println(val);
// display the value
}
Serial.println();
delay(1000);
// delay a second between readings
}
See Also
Technical details on the C preprocessor are available at http://gcc.gnu.org/onlinedocs/
gcc-2.95.3/cpp_1.html.
See the Discussion section of Recipe 16.4 for an example of conditional compilation
used to handle differences between Arduino 1.0 and previous releases.
17.6 Using Conditional Compilations | 597