1
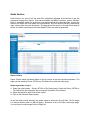
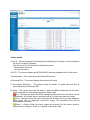
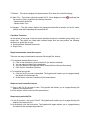
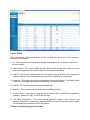
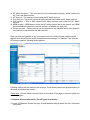
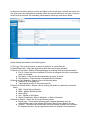
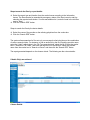
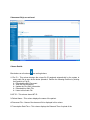
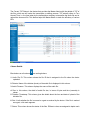
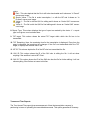
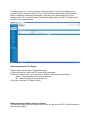
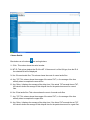
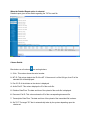
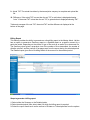
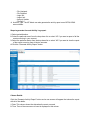
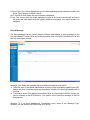
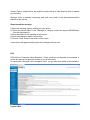
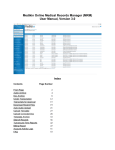
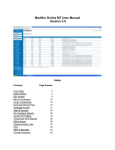
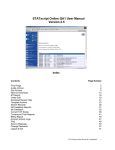
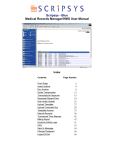
Medikin Online Master Administrator User Manual, Version 3.0 Index Contents Front Page Audio Archive Doc Archive Account List Create New Account Search Records Current TAT Status Turnaround Time Reports Billing Report Account Activity Logs Send A Message FAQ Logout & Exit Page Number 2 4 7 10 19 20 26 28 31 36 38 40 40 Front Page The front page appears when the user successfully logs in. The Master Admin can manage and control his entire account from this page. 1. The company logo and the site name are on the top frame of the page.. 2. There is an orange Help image on every page that contains online help for that specific page. 3. Below the logo and name, the system shows the MRM greeting with current time as per EST. It also shows the IP address information along with last login time. This way, you can track if someone is logging into your account. 4. On upper left corner, you will find the Audio Archive and Doc Archive. Audio Archive shows the details of all audio files. Doc Archive gives the details of all transcribed files. 5. Particulars of recent account activity are displayed next. The system shows details of the last 50 activities of the account with date, time of occurrence of event, type of event, account ID and IP address from where the login was made. The recent activity log contains all of the past date wise details. 6. Navigation Menu options are located within the blue toolbar on the left of the screen. Options available to the Master Admin are: Account List – A list of the various accounts and provides the account details to modify the accounts. Create New Account – The Master Admin can create new Doctor, MRM, MT, QA1 and QA2 accounts here. Search Records – Audio and transcribed files can be retrieved based upon the selected criteria. Current TAT Status – This option displays Turn-Around Time details for files under transcription process. Turnaround Time Reports – This option displays the Turn-Around Time details for completed transcribed files. Billing report – Helps to generate summary or detailed billing report depending upon the selected criteria. Account Activity Logs – Helps to generate a detailed report of all events occurring in the account. Send A Message – This option helps to send message regarding any problem (transcription or technical) to the necessary party. FAQ –These are frequently asked questions. They answer most of the Master Admin’s general queries. Logout & Exit – The Master Admin can logout by clicking this button. Audio Archive Audio Archive is a store of all the audio files (dictations) uploaded by the doctor as per the contractual storage time period. This feature enables the MRM to perform various activities: listen to, download, delete the audio files, view and download the transcribed files, monitor the status of the audio files, and update the files attributes. All of the files are sorted in descending order, starting from the most recent date. This page shows the activity of the last fifteen days by default, but a date sorted report with other Report Criteria can also be generated. Report Criteria Report Criteria allows the Master Admin to sort the report as per the required parameters. The report can be sorted by Doctor, MT/QA and File Status for a particular date range. Steps to generate a report 1. Select the criteria basis – Doctor, MT/QA or File Status basis: Select the Doctor, MT/QA or File Status from the drop down lists as required. By default All is selected. 2. Select the period for which files will be viewed. 3. Click on the Generate Report button. As per the report criteria selected, the system shows a total count of audio files. The file length is in minutes and the size is in KB (kilo bytes). By default, a list of 100 files is shown per page. You can jump to another page from the Page List. Column details: Blue buttons on all columns are sorting buttons. 1. File ID – This column displays the unique file ID assigned automatically by the system to every audio file after the Doctor uploads it. Click the link to the File ID to perform the following functions: − Update File Information this Audio File − Listen to this Audio File − Download 2. Audio File Name – This column shows the audio file name. 3. Size - This column displays the audio file length in seconds and the size in Kbytes. It shows 0 sec/K if no information is available in the file header information. 4. Dictation Date/Time – This column shows the upload date and time of the audio file by the doctor as per EST. 5. Stat – If the doctor marks the audio file Urgent at the time of upload, this column shows a red tick to signify that this audio file is to be transcribed/edited on a priority basis. 6. Status – This column shows the audio file status. It helps the MRM to determine the file status which is depicted in a color schema to make it clearly visible. Red - File in Transit: When the file is to be downloaded by the transcriptionist, it shows a red button with a "File in Transit" mouse-over image. Yellow - In Process: When the file is downloaded and being worked by the MT, it shows a simple yellow button with an "In Process" mouse-over image. Yellow 1 – Under QA1: When the QA1 is editing the file, it shows a yellow button (“1” image on it) with an “Under QA1” mouse-over image. Yellow 2 – Under QA2: When the file is with the QA2 for further editing, it shows a yellow button (“2” image on it) with an “Under QA2” mouse-over image. Green – Completed: After the final file is completed and assigned to the doctor, it shows a green button (tick mark on it) with a "Completed" mouse-over image. Green – e Signed: When the doctor e-signs the file, the status changes to a green button (“e” image on it) with an “e Signed” mouse-over image. Once a file is e signed by the doctor, the system locks it so that no other operations can be performed on the document file. 7. MT ID – This column shows the MT (MT/QA1/QA2) ID who was assigned the file for transcription/editing. 8. Document File – This column displays the document file ID and a blue button for the files which are completed. Click the file ID or blue button to perform the following functions: Download this document Review Audio/Document 9. Attachment – The doctor can upload any attachment along with the audio file. This column displays a paper clip image to signify that there is a file attachment with the audio file. Download the attachment by clicking this image. 10. Remarks – The last column depicts the dictator's (doctor’s) remarks for the transcriptionist of the file. Checkbox Functions At the bottom of the page, there are certain checkbox functions to facilitate group activity on a single click. The MRM can checkmark selected audio files and can perform the following functions on all of the files at once: Download Selected Audio Files Delete Selected Audio Files Steps to play an Audio File: 1. In the first column, click on the File ID. The hyperlink will redirect you to a page showing the details of the audio file. 2. At the bottom, click the “Listen to this audio file” button. Steps to download an audio file: There are two ways to download an audio file through Audio Archive: 1. To download multiple files at a time: Click on the check box in front of the file ID you want to download. You can select multiple files to download. Go to the bottom of the page and select the Download Selected Audio Files radio button. Click the Perform Checkbox Operation button. 2. To download a single file: Click on the File ID you want to download. The hyperlink will redirect you to a page showing the details of the audio file. At the bottom, click the Download this Audio file button. Steps to update file information: 1. In the first column, click on the file ID you want to update. The hyperlink will redirect you to a page showing the details of the audio file. 2. Make the changes in text boxes next to the following file attributes as required: Associated template – Upload a new template, make changes to the existing one, and update the template information anytime. This template will be made available to the MT’s when they download the audio files for transcription. Report Type – Select any report type from the drop down list and update information. Location – The doctor has the option to assign certain codes to the locations where he/she will send his/her dictations. The settings will be made to his/her account accordingly. The MRM can select the required location ID from this drop down list. E.g. Clinic-1, Home-2, Laboratory-3, Hospital- 4. Doctor’s Remark – The dictator can use this to enter a short note as a reminder for them for that specific report. He/she can also enter remarks for the transcriptionist. 3. At the bottom, click the Update File Information button. Steps to listen the audio file and view the corresponding transcribed file: 1. Click on the blue button or document file ID in the Document File column. The hyperlink will redirect you to a page showing the details of the document file. 2. At the bottom, click the Review Audio/Doc button. This enables the MRM to review the transcribed file while listening to the audio file. Doc Archive Document Archive stores all of the transcribed reports uploaded by the MT/QA1/QA2. The MRM can view, download, email, and fax the document files, as well as download and listen to the linked audio file. He/she can monitor file status with the help of color schema and also reject the files. All of the files are sorted in descending order, starting from the most recent date. This page shows the activity of the last fifteen days by default, but a date-sorted report with other Report Criteria can also be generated. Column details: 1. File ID – Shows the unique file ID assigned automatically by the system to every transcribed file as soon as the MT uploads it. Click the link to File ID to perform the following functions: − Download this document − View this Document 2. MT ID – This column displays the MT/QA1/QA2 ID who last uploaded the file for the doctor. 3. Patient Name – This column shows the Patient/Client name. 4. Document File – This column displays the document file name. 5. Transcription Date/Time – This column shows the details of upload date and time of document file by MT/QA as per EST. 6. Status – This column shows the file status. It helps the MRM to determine the file status, which is depicted in a color schema to make it clearly visible. Red – For Approval: When the MT/QA uploads the document file but the doctor has not downloaded it, this column shows a red button with a For Approval mouse-over image. Green – Approved: When the doctor downloads the document file, this column displays a green button with an "Approved" mouse-over image. The transcribed file must be downloaded by the doctor. Green – e Signed: When the doctor e-signs the document file, this column shows a green button (‘e” image on it) with an “e Signed” mouse-over image. 7. Dictator – This column displays the dictator/doctor ID to whom the audio file belongs. 8. Audio File – This column shows the audio file ID. It also displays a button file is online. Click it to perform the following functions: − Download this Audio File − Review Audio / Doc signifying that 9. Remarks – The last column depicts the transcriptionist’s/editor’s remarks for the file which he/she made while uploading the transcribed file. Checkbox Functions At the bottom of the page, there are certain checkbox functions to facilitate group activity on a single click. The doctor can check-mark selected audio files and can perform the following functions on all the files at once: Download/View Selected Documents Reject Files Steps to download a transcribed report: There are two ways to download a document file through Doc Archive: 1. To download multiple files at a time Click on the check box in front of the file ID you want to download. You can select multiple files to download. Go to the bottom of the page and select Download/View Selected Documents. Click Perform Checkbox Operation. 2. To download a single file Click the file ID you want to download. The hyperlink will redirect you to a page showing the details of the document file. At the bottom, click the Download this Document button. Steps to view a transcribed report: 1. Click on the File ID you want to view. The hyperlink will redirect you to a page showing the details of the document file. 2. At the bottom, click the View this Document button. Steps to play an Audio File: 1. In the first column, click on the File ID. The hyperlink will redirect you to a page showing the details of the document file. 2. At the bottom, click the blue button. The hyperlink will again redirect you to a page showing the details of the corresponding audio file. 3. At the bottom, click the Listen to This Audio File button. Steps to download an audio file: First Way 1. In the first column, click on the File ID. The hyperlink will redirect you to a page showing the details of the file. 2. At the bottom, click the blue button. The hyperlink will again redirect you to a page showing the details of the corresponding audio file. 3. At the bottom, click the Download this Audio File button. Second Way 1. In the Audio File Column, click the green button or the file ID. The hyperlink will redirect you to a page showing the details of the audio file. 2. At the bottom, click the Listen to This Audio File button. Steps to review the transcribed file: 1. In the Audio File Column, click the green button or the file ID. The hyperlink will redirect you to a page showing the details of the audio file. 2. At the bottom, click the Review Audio/Doc. This enables the Master Admin to review the transcribed file while listening to its corresponding audio file. Account List The Account list for the Master Admin shows the list of Clinic/Hospital accounts, in addition to the MT, QA1 and QA2 accounts. From here he/she can see the account details and make changes in the account settings. The “Total Registered Users” are the number of users: MRMs, Doctors, MTs and QAs, under this login. Column Details Every column has a blue button before its title. Clicking this button will sort the entire list according to that column. 1. ID – This column shows the account ID assigned automatically by the system at the time of account creation. 2. User’s Name – This column shows the user name for the account. By clicking any of the User Name hyperlinks, the account details can be viewed and modified. 3. Login ID - This column shows the User ID for the system through which the user logs into the system. The Login ID is case sensitive and cannot be changed once it is assigned. 4. Password – This column shows the user password to log into the system. The Master Admin or the user can change the password anytime from the online interface. 5. Created – This column shows the account creation date. 6. Modified – This column shows the account’s last modification date. 7. Account Type – This column shows the account type. It can be an MRM (hospital/clinic manager), Doctor, MT, QA1, or a QA2 account type. 8. MT Admin Assignment – This column shows Doctor-MT linkage for the “Doctor” type account. Every doctor is linked to an individual MTSO so that all of the audio files for doctor can be routed to that particular MTSO (MT Admin). There are the following types of accounts: MT Admin Accounts – This is the account of the transcription company, which handles the MT, QA1, and QA2 accounts. MT Account – This account is listed under the MT Admin account. QA1 Account – This is QA1 (first level editor) account listed under the MT Admin account. QA2 Account – This is QA2 (second level editor) account listed under the MT Admin account. MRM Account – MRM account is like the MT Admin Account but at the doctors’ end. MRM account handles the account of various doctors in a hospital or a large clinic. Doctor Accounts – Doctor account can be separate for the individual doctor (who does his own practice) or can be under the HMO account. When you click the hyperlink on any user name in the User’s Name column, another screen appears from where you can modify the specific account settings. For example, if you click the MT account hyperlink, following screen appears Following settings can be made for the accounts. These setting options are given according to the scope of the particular account. Please note: Click the Modify Account button at the bottom of the page to save and update the account changes. 1.0 General Account Information: (For all Types of Accounts) 1.1 Login ID/Password: Shows the Login ID and password through which the user will access the system. 1.2 User’s Name: The user’s name will be displayed on the site. 1.3 User’s Initials: The user’s initials can be a maximum length of 5 characters. 1.5 Display format: ID/Initials/Full Names. For confidentiality reasons, the Master Admin can restrict the MT Admin from seeing the account IDs of the Doctor/MT or can go a step lower to show initials or otherwise to show full names as per the option selected in the Combo Box. 1.6 Display Style: Normal or compatibility. Certain features of Windows (like combo box, drop down lists etc.) do not display properly on a slow/old computer (P I/II). The compatibility option solves this problem. 1.8 Enable feature: Document Comparison? : This option enables the Master Admin to set compared documents settings for the subsidiary (MT/QA1/QA2) accounts. The system is capable of automatically generating compared documents for the MT/editor for the changes made by the senior editor or the doctor. That way, the MT/editor does not have to manually compare their files with the final document. They can just download the compared document and have direct feedback. This feature can be enabled for retrospective date also. The system will automatically compare all of the files from the date chosen here. 1.9 Enable Feature: Doctor Messaging?: This option helps the Master Admin to set a functionality for the MT Admin through which he/she can also send messages to the doctors whose accounts are handled by him/her. 1.15 Company Name: Name of the MTSO. 1.16 Site Name: Site Name as displayed for the MTSO. 2.0 Contact Information: (For all types of Accounts) 2.1 Address: 2.2 City, State, Zip: 2.3 Country: 2.4 Main Phone: 2.5 Alternate Phone: 2.6 Fax: 2.7 Web: Website Address of the MTSO must be noted here. 2.8 Logout Return Site – When the MT Admin logs out, he/she will be redirected to the page entered here. (2.11 – 2.13) The system sends an email notification to the MT Admin on these emails whenever the doctor uploads the audio file or the MT uploads the transcribed file. 2.11 System Email Notification #1 2.12 System Email Notification #2: 2.13 System Email Notification #3: 2.14 Company Logo: MTSO’s logo. 2.15 Contact Name: Name of the MT Admin account user. 2.16 Title: Designation of the MT Admin Account user in the company. 2.17 Contact Phone: 2.18 Mobile Phone: 2.19 Residence Phone: Residence phone number of the MT Admin if any. 2.20 Message email address: This is the email address of the MT Admin where he/she will receive the messages regarding any technical or transcription problem sent by the doctor or MT/QA. 3.0 Billing Settings: (For all types of Accounts) 3.4 Enable menu button: Billing Report? : If this option is enabled, the MT Admin can generate the billing report according to set criteria. A new option of “Billing Report” appears on the Navigation Menu. 3.5 Enable menu button: Billing Setup? : Different clients ask for different billing formulae. With the help of this feature, the MT Admin can set billing formulae for his/her clients individually. This option, if enabled, helps the MT Admin to set the billing formula according to the negotiated specifications of his/her clients. 3.6 Enable feature: Suggested Line Count? : If this feature is enabled, the file will go for auto extraction if this option is enabled despite the even if “Manual Entry” is enabled in billing setup for the doctor. 4.0 Automated ASP MT FTP Audio File Delivery: (For MT, QA1 and QA2 accounts.) This feature helps the MT to download audio files in less time. If this feature is enabled, ASP sends the copy of the audio files to the specified FTP server when the doctor uploads them. When the MT logs in, these files will be automatically downloaded to his/her PC into a specified folder. The Auto Download ATX feature must be enabled for this. 4.1 Enable feature? : This feature works only when this box is checked. 4.2 sFTP Address: The IP Address of the FTP Server where audio files will be stored is noted. 4.3 sFTP Username: Folder with this user name for the account is created on the FTP Server. Through this, the FTP Server confirms the identity of the authorized system. 4.4 sFTP Password: Password for the above folder through which the FTP Server confirms that the files are coming from an authorized source. 4.5 sFTP Target Path: Name of the folder and its path on the FTP Server where audio files will be stored. 5.0 ATX Download Settings: (For MT, QA1, QA2 and doctor accounts.) The Auto Download feature enables the MT to download the audio files automatically. The system will automatically pick up the files from the specified FTP Server where they will be transferred when the doctor uploads the files. These audio files will be downloaded to the MT’s PC. 5.1 Enable feature? – This feature will work only when this checkbox is enabled. 5.2 Enable Auto-run at login? – If the Master Admin checks this box, this feature will automatically run whenever the MT logs in. 5.3 sFTP Address: – The IP Address of the FTP Server from where the audio files will be picked up is noted. 5.4 sFTP Username: A folder with this name is created on the FTP Server. Through this, the FTP Server confirms the identity of the authorized system. 5.5 sFTP Password – Password for the above folder through which the FTP Server confirms that the authorized system is trying to access it. 5.6 sFTP Path: – The system will pick up the audio files from this directory on the FTP Server. 5.7 User's Local Download Location – The system will automatically download these audio files in this directory on the MT’s PC where he/she can work on them. 6.0 TAT Settings: (For the doctor account) TAT refers to Turn Around Time. This is the time taken by the transcription company to convert an audio file into a document file and send it back to the doctor. 6.1 Normal TAT (hours): Refers to the TAT specified by the doctor for the normal files. 6.2 Urgent TAT (hours): Refers to the TAT for the files marked by the doctor as urgent. 6.3 Enable feature Next Day TAT? : Check Box must be enabled for the system to calculate Real Next day TAT. If the doctor dictates the audio files after a stipulated time, real next day TAT will be calculated. 6.4 Time Difference from EST (hours): The difference in time zones is taken into consideration when calculating the TAT. 7.0 Hospital/Clinic Specific Information: (For Medical Records Manager/HMO Account) The details about the hospital are set: 7.1 Departments: Number of departments existing in the hospital is noted here. 7.2 Method: 7.3 Number of beds: Total number of beds in the hospital is specified. 7.4 Number of patients: Number of patients that are being looked after by the doctors working in the hospital. 7.5 Number of transactions: 7.6 Number of doctors: Number of doctors working in the hospital 9.0 Manual e-signature Settings: (For the doctor account) The doctor can approve transcribed reports by e signing them or depending on his/her choice, the system will automatically approve his/her files. 9.1 Enable feature? : The doctor will be able to e-sign the files if this option is enabled. 9.2 e-signature ID: The system asks for the doctor’s ID to approve the file. It can be similar to the doctor’s account Login ID. 9.3 e-signature Password: The system asks for the doctor’s password to approve the file. It can be similar to the doctor’s account password. 10.0 Direct FTP Pickup: (For the doctor account) Certain hospitals or clinics have their own in-house dictation system with their own FTP Server where the audio files of their doctors are stored. From there, the vendor’s system automatically picks up those files. This is when the feature of direct FTP pickup is useful. 10.1 Enable feature? : This feature works only when this option is checked. 10.2 sFTP Address: IP Address of the FTP Server maintained by the hospital or clinic. 10.3 sFTP Username 10.4 Password: Through this, the FTP Server checks that an authenticated user (our system) has logged in. 10.5 sFTP Pickup location: Name of the folder (where the hospital stores the audio files) on the FTP Server of Hospital with entire path. The system picks up the file from this folder. 10.6 #1 File pickup conditions: The FTP Server picks up the files that start with the word or letter written in the text box. 10.7 #2 File pickup conditions: The FTP Server picks up the files, which start with, contain, or end with (any one option is to be chosen from the drop down menu) the word or letter entered in the text box or you can choose “all files.” 10.12 #3 File pickup conditions: The FTP Server picks up the files, which start with, contain, or end with (any one option is to be chosen from the drop down menu) the word or letter entered in the text box or you can choose “all files.” 11.0 Email/Fax Services: (For the doctor account) The document file will be sent to the doctor via email or fax on demand or automatically if the Master Admin enables this feature. 11.1 Enable feature: Document Email-On-Demand? : If this check box is enabled, the document will be sent to the doctor via email on demand. 11.2 Enable feature: Document Fax-On-Demand? : If this check box is enabled, the document will be sent to the doctor via fax on demand. 11.3 Enable feature: Document Auto-email? l: If this check box is enabled, the document will be sent automatically to the doctor via email. 11.4 Auto-email recipient address #1: The doctor’s email address where the document will be sent. 11.5 Auto-email recipient address #2: The doctor’s 2 be sent. nd Email Address where the document will 11.6 Enable feature: Document Auto-fax? : If this check box is enabled, the document will be sent automatically to the doctor via fax. st 11.7 Auto-fax recipient number #1: 1 fax number of the doctor. nd 11.12 Auto-fax recipient number #2: 2 fax Number of the doctor. 12.0 Automated Document Delivery (via FTP): (For the doctor account) This feature helps the doctor to download audio files in less time. When the MT uploads the document files, ASP also sends the copy of them to the specified FTP server, if this feature is enabled. When the doctor logs in, these files will be automatically downloaded to his/her PC into a specified folder. The Auto Download ATX feature must be enabled for this. 12.1 Enable feature? : This feature works only when this box is checked. 12.2 sFTP Address: The Address of the FTP Server where ASP will store audio files is mentioned. 12.3 sFTP Username: User name for the account. Through this, the FTP Server confirms the identity of the user. 12.4 sFTP Password: Through this, FTP Server checks the identity of the user. 12.5 sFTP Upload Path: Name of the folder and its path on the FTP Server. 13.0 Toll Free Dictation/FTP Pickup Settings: (For the doctor account) Medikin Online accepts the audio files dictated through the Toll Free Telephone Number. The Master Admin is required to fill information such as the ID and password assigned to the doctor. The doctor dictates his/her files on this number after the recording machine confirms his/her identity by asking for his/her ID and Password. These audio files are converted into digital format and stored in the specified folder on the FTP Server. 13.1 Dictation Service Telephone: Toll Free Telephone number provided to the doctor. 13.2 Dictation Service User ID: Login ID of the Dictator/Doctor assigned to him/her by the site administrator. 13.3 Dictation Service Password: Password of the Dictator/Doctor assigned to him/her by the site administrator. 13.4 Keypad Map (Maximum 5 Characters): Telephone keys are given special meaning. For instance # - start the dictation, * - end of dictation, etc. The doctor can get the individual keypad settings. 13.5 Enable feature: Automated FTP Pickup (Audio)? : This feature works only when this option is checked. 13.5a FTP Address: IP Address of the FTP Server where the audio files will be stored. 13.5b FTP Username 13.5c FTP Password: Through this, the FTP Server checks that files have come from an authenticated destination. 13.5d FTP Pickup Path: Our system picks up the audio files from this folder on the FTP Server. 13.5e #1 File pickup condition: The FTP Server picks up the files that start with the word or letter entered in the text box. 13.5f #2 File pickup condition: The FTP Server picks up the files, which start with, contain, or end with (any one option is to be chosen from the drop down menu) the word or letter entered in the text box or you can choose “all files.” 13.5g #3 File pickup condition: The FTP Server picks up the files, which start with, contain, or end with (any one option is to be chosen from the drop down menu) the word or letter written in the text box or you can choose “all files.” When the audio file is uploaded, its name gives all of the details about the file according to the set algorithm in the Information Parsing Feature. 13.6 Enable feature: Filename Information Parsing? : This feature works only when this check box is enabled. 13.7a FTP Regex algorithm (do not change): According to this algorithm, the audio file name will be displayed. 13.7b Priority Indicator: Any letter or number is entered to indicate that the file must be given priority. 13.7c to 13.7l Audio filename field 1 to 10 contains: When the file will be uploaded, its name will contain all these data points: Priority tag, MRN Tag, SSN Tag, Worktype Tag, Location Tag in the order in which algorithm has been set in 11.2. 16.0 ATX Upload Settings: (For the doctor account and HMO Account) The Auto Upload ATX feature enables the doctor to upload the audio files automatically as soon as he/she logs in. A specified FTP Server will automatically pick up the audio files from the specified folder in the doctor’s PC. The files are also stored in specified backup file in the doctor’s PC for future reference by him/her. 16.1 Enable feature? : This feature will work only when this box is checked. 16.2 Enable Auto-run at login? : This feature will automatically run whenever the doctor logs in if this box is checked. 16.3 sFTP Address: The FTP Server’s IP Address where the audio files will be uploaded. 16.4 sFTP Username: 16.5 sFTP Password: Through this, the FTP Server checks that an authenticated user has sent the files. 16.6 sFTP Upload path: Path of the folder on the FTP Server where the audio files will be stored. 16.7 User's Upload folder location: Path of the folder in the doctor’s PC from which the audio files will be picked up for uploading. 16.12 User's Backup folder location: This is the backup folder in the doctor’s PC where the audio files will be stored for future reference Following settings are for only the doctor accounts. 16.9 #1 File pickup condition: The FTP Server picks up the files that start with the word or letter entered in the text box. 16.10 #2 File pickup condition: The FTP Server picks up the files which start with, contain, or end with (any one option is to be chosen from the drop down menu) the word or letter entered in the text box or you can choose “all files.” 16.11 #3 File pickup condition: The FTP Server picks up the files, which start with, contain, or end with (any one option is to be chosen from the drop down menu) the word or letter entered in the text box or you can choose “all files.” 17.0 Report/Work Type Matching (For the doctor account) The doctors according to their specialization can dictate different reports. Master Administrator can assign the specific number to various report types in this setting so that system recognizes the report type when the specific number is entered and filename is displayed accordingly. 17.1 to 17.10: Settings can be made here. 18.0 Location Type: (For the doctor account) The doctor can dictate the files from different locations. Master Administrator can assign the specific number to various locations according to the doctor’s requirements. 18.1 to 18.10: Settings can be made here. 19.0 TAT/Template with Report/Work type Settings: (For the doctor account) The doctor can get the individual TAT and Template settings for the different types of reports. For instance, if the doctor sets a specific TAT and template for a cardiology report, the system then automatically considers the specific TAT and downloads the template set here instead of a default TAT and Template. 19.1 to 19.42: Different types of report names are given. Different TAT and Templates can be set for each report in the text box. 20.0 Workpool Information -(For MT, QA1, QA2 accounts) In Workpool Information, working criteria for the MT can be set up. If the file routing is set to be fixed or auto, the audio files will be transferred to the respective MT accounts according to these criteria 20.1 Available for work? : According to the presence or absence of the MT, this option must be selected. 20.2 If unavailable, he/she will be available again from: The date the MT will be available must be noted here. 20.3 Workdays: The days when the MT will work. There are three options: Weekends Only, Weekdays Only, and Everyday. 20.4 Ranking: The ranking is given to the particular MT according to his/her efficiency, accuracy, and punctuality. The ranks are A++, A+, A, B, C. This setting will affect the transfer of audio files. If any doctor’s setting is such that his/her files must be given high priority, then his/her audio file will be transferred to the MT with the highest rank 20.5 CPL - Charge Per Line: The money amount that the MT will take for transcribing each line. 20.6 Maximum assignment of files per day: Maximum number of files the particular MT will be able to transcribe in a day. 20.7 Maximum assignment of minutes per day: The time the MT will work per day must be in minutes. The files will be transferred accordingly. 20.12 Maximum assignment of minutes per week: The time the MT will work per week must be in minutes. 20.10 Red Flag Settings: There are two options available: Auto File Routing to QA1 (MT -> Doc) – If this option is enabled and the MT red flags any file while uploading it, it is automatically routed to the QA1 and not to the MT Admin. A specific QA1 can be selected from the drop down list. If none is selected, then the file will be routed to the QA1 available at the time provided the feature of accepting red flag files is enabled in his/her account settings. Auto File Routing to QA1 (MT->QA1->Doc) – Before this feature was launched, many doctor clients’ workflow was set as (MT->QA1->Doc). In this case, whenever the MT redflags the file, it is routed to the MT Admin. Now if this option is enabled and the MT redflags the file, it is automatically routed to the QA1. A specific QA1 can be selected from the drop down list. If none is selected, then the file will be routed to the QA1 available at the time provided the feature of accepting red flag files is enabled in his/her account settings. They will go to the MT Admin only when these checkboxes are not checked. 20.12 Alternative MT/QA File assignment: This setting is done to direct the system to assign the audio file to the alternative MT selected from the drop down list if file assignment conditions (e.g. Maximum assignment of files/minutes per day/week, workdays, and unavailability) of the concerned MT are fulfilled. 20.9 Accept stat files? : If this option is enabled, it ensures the system that the urgent files can be assigned to this MT. 20.14 Accept all Report Types? : If this option is enabled, it ensures the system that all kinds of audio files can be assigned to the MT. Report/Work Type Preference: Some MTs are specialized in transcribing reports for specific medical areas such as cardiology, pathology, orthopedics, etc and so they prefer to transcribe reports for their specialized area. MT preferences can be set up to four levels or none if he/she has no such preferences. Files will be transferred to him/her accordingly. st 20.15 1 Report/Work Type Preference nd 20.16 2 Report/Work Type Preference rd 20.17 3 Report/Work Type Preference th 20.18 4 Report/Work Type Preference 20.19 Accept all dictators? : If this option is enabled, the MT is ready to transcribe reports for all of the dictators (doctors). Dictator Preference: Some MTs prefer to transcribe the files of particular doctors. The MT doctor (dictator) preference can be set up here and files will be assigned accordingly. st 20.20 1 Dictator Preference nd 20.21 2 Dictator Preference rd 20.22 3 Dictator Preference th 20.23 4 Dictator Preference 22.0 IP Tracking and Blocking: (For all types of accounts) The MT Admin can track the IP Addresses from which login and logout events occur if the Master Admin enables this feature. 22.1 Enable feature: IP Tracking? – The user can track the IP Addresses from which his/her account is accessed if this feature is enabled. 22.2 Enable feature: IP-specific access? – If the Master Admin enables this feature, the system will not allow anyone to log into the MT Admin’s account from the IP Addresses other than those specified below: 22.2a #1 Allow login from IP: 22.2b #2 Allow login from IP: 22.2c #3 Allow login from IP: 22.2d #4 Allow login from IP: 22.2e #5 Allow login from IP: 22.3 Enable feature: IP Range Blocking? - If the Master Admin enables this feature, the system will not allow anyone to log into the MT Admin’s account from the IP Address belonging to the specified range here: 22.3a #1 Blocked IP Range: 22.3b #2 Blocked IP Range: 22.3c #3 Blocked IP Range: 22.3d #4 Blocked IP Range: Create New Account “Create New Account” enables the Master Admin to create a new account for the doctor. Steps to create a new account: 1. Login ID: The user logs into the system through the Login ID. 2. Login Password: This authenticates the user to log into the system. 3. User's Name: Name of the user of the account. 4. User's Initials: User’s initials have to be entered as required. 5. Display file owner IDs as: Depending upon the radio button checked, this option displays the File Owner ID as ID Number Only, Initials, or Full name. 6. This doctor is a member of – If the doctor is a member of Viv HMO or is an individual doctor, the Master Admin should select Viv HMO or NA/No HMO accordingly. 7. Click the “Create New Account Button.” Search Records Search EPR is one of the most attractive features of Medikin Online. It helps the Master Admin to retrieve the medical (patient) records according to the criteria given. He/she can search the files (both audio and transcribed) uploaded within the selected period on the basis of various criteria such as file fields, file ownership, patient details, report type, and doctor details. Search Criteria are based on the following points: 1. File Type - This gives the option to search an audio file or a document file. 2. Upload Date From - Select the approximate date when the file was uploaded. 3. Search on File Fields - Search a file depending on its matching fields as mentioned below: File ID - Search the file on the basis of ID which is assigned to the file by the system when it is uploaded. File Name – Files can also be searched by the name of the file. File Extension – Files can also be searched by file extension. 4. Search on file Ownership - Search a file on the following basis: Dictator’s ID of the audio file. Transcriptionists (MT) ID of the document file. 5. Search for Patient Details - Search a file by entering the details of a patient as mentioned below: SSN – Social Security Number MRN – Medical Record Number Date of Birth Sex – Gender of the Patient Date of Consultation, Date of Admission, or Date of Operation 6. Search on Report - Search the file on the following criteria: Report type – There can be different types of reports depending upon the specialization areas in the medical field. Search the file on the basis of its type. Location - The doctor can dictate audio files from different locations such as home, the hospital, the clinic, and any department within the hospital. Files can also be searched by the location where they were dictated. Stat- Search the file if it was marked stat (urgent) or normal. Note- File can also be searched by any specific note attached to the file. 7. Search on Doctors - Search the file on the following points: Providers name Referring physician Steps to search files: 1. Select the Audio or the Document radio button as required. 2. Select the approximate Upload Date, i.e. the time period when the file was uploaded. 3. If the Master Admin wants to search the files by any file field, he/she should select the one which matches his requirement. 4. If the Master Admin wants to search the files by file ownership, he/she should select dictator ID for an audio file or transcriptionist ID for a document file. 5. If the Master Admin wants to search the files by patient details, he/she should enter information such as the patient name, SSN, MRN, date of birth, sex, admit date, consultation date, or operation date. 6. If the Master Admin wants to search the files by report details, he/she should enter information such as report type, location, or stat (normal or urgent). 7. If the Master Admin wants to search the files by doctor details, he/she should enter information such as the doctor or provider name and the referring physician. 8. Click on the “Search EPR” button. Steps to search the files by file fields: Select the file type – audio or document Select the duration Select the search field – File ID, File Name or File Extension and then enter the required matching value for the field selected. Click the “Search EPR” button. Steps to search the files by file ownership: Select the dictator ID from the combo box to search for the audio file. Select the transcriptionist ID from the combo box if to search for the document file. Click the “Search EPR” button. Steps to search the files by patient details: Enter the name, SSN, MRN, Date of Birth, or whatever information you have. If the gender is known, select it. The consultation date, admit date, or operation date can be selected from the combo box below the option of “Sex.” Click the “Search EPR” button. Steps to search the files by report details: Select the report type and location from the combo boxes according to the information known. The files can also be searched by emergency status of the files (normal or stat) by selecting the required radio button. If a note was attached to it, enter the note in the text box next to “Note.” Click the “Search EPR” button. Steps to search the files by the doctor details: Select the name of the provider or the referring physician from the combo box. Click the “Search EPR” button. The system allows searches for files not only on one-search criteria but also on the combination of various search criteria. For instance, to find an audio file by the file ID and the provider name, select the “Audio” radio button in the File Type search criteria, select the file ID from the combo box in “Search on File Fields,” and enter the required ID in the text box. Select the provider name from the combo box in “Search on Doctor” and then click the “Search EPR” button. The report generated depends on the chosen criteria. The following are the column details: If Audio file(s) are retrieved Column Details: Blue buttons on all columns are sorting buttons. 1. File ID – This column displays the unique file ID assigned automatically by the system to every audio file as soon as the doctor uploads it. The following functions can be performed by clicking the hyperlink to File ID: Download this Audio File Listen to this Audio File Update the File (QA2) Information Download the MT/QA1/QA2 Document View the MT/QA1/QA2 Document 2. Doc ID - This column shows the name of the doctor (dictator). 3. Audio Filename - This column shows the name of audio file. 4. Length - Length of the file in seconds is displayed in this column. 5. Transcription Date/Time – This column displays the Date and Time of upload of the file as per EST. 6. Stat – If the audio file is marked “Urgent” by the doctor, a red tick is shown. 7. Status – This column shows the file status. It helps the Master Admin track the file online. Different colors are assigned for each file status. If an audio file is being viewed, its status can be tracked this way: Red - File in Transit: When the file has to be downloaded by the transcription company, it has a red sign with a "File in Transit" mouse-over image. Yellow - In Process: When the file is downloaded and being worked on, it shows a yellow sign with an "In Process" mouse-over image. Simple yellow depicts that the MT has the file. Yellow 1 means that the file is under the QA1 for editing. Yellow 2 means that the file is under the QA2 for further editing. Green – Completed: When the transcription company uploads the report, the status changes to green with a "Completed" mouse-over image. Green – e Sign: When the doctor e signs the file, its status changes to green with an “e” image on it. 8. MT ID – This column displays the ID of the MT who transcribed the file. 9. Document File – This column displays: The orange button with an up arrow if the file is being transcribed or edited. Click this button and a new screen will appear that will help you to upload the document file. If file is complete, this column displays the blue buttons for the MT/QA1/QA2 File. Download and view the MT/QA1/QA2 document file and update the file attributes of the QA2 document by clicking it. 10. Remarks – The last column depicts the dictator's (doctor’s) remarks for the transcriptionist of the file. If document file(s) are retrieved Column Details: Blue buttons on all columns are sorting buttons. 1. File ID – This column displays the unique file ID assigned automatically by the system to every audio file as soon as the doctor uploads it. Perform the following functions by clicking the hyperlink to File ID: Download the QA2 Document View the QA2 Document Update the File (QA2) Information Download this Audio File Listen to this Audio File 2. MT ID – This column shows MT ID. 3. Patient Name – This column displays the name of the patient. 4. Document File – Name of the document file is displayed in this column. 5. Transcription Date/Time – This column displays the Date and Time of upload of the transcribed file. 6. Status – This column shows the file status. It helps track the file online. Different colors are assigned to each file status. Red – File is complete and is ready for approval by the doctor. It displays a “For Approval” mouse-over image. Green () – Approved: When the doctor downloads the file, the status changes to green () and displays an "Approved" mouse-over image. Green (e) – e Signed: When the doctor e signs the file, the status changes to green (e) and displays an “e Signed” mouse-over image. 7. Doc ID – This column displays the doctor’s ID. 8. Audio File – This column displays: The green button if the audio file is online. The red button if the audio file is offline. Send a message to the administrator to make the file online by clicking on the red button. 9. Remarks – This column displays the comment made by the transcriptionists while uploading the file. Note: More information will lead to a narrower search and less time consumed for searching the files Current TAT Status The Current TAT Status is the feature that provides the Master Admin with the details of TAT of the files, which are still under the transcription or editing process. TAT actually refers to Turn Around Time, i.e. the time taken by the transcription company to transcribe the audio file and to upload the document file. This feature helps the Master Admin to track the efficiency of various MTs. Column Details: Blue buttons on all columns are sorting buttons. 1. Audio File ID: This column shows the file ID that is assigned to the file when the doctor uploads it 2. Dictator: Name of the dictator (doctor) of the audio file is displayed in this column. 3. Audio Filename: This column displays the name of the audio file. 4. Size: In this column, the detail of audio file size, in terms of bytes and time (seconds) is shown. 5. Dictation Timestamp: This column gives the details about the time and date of upload of the dictation file. 6. Stat: It tells whether the file is normal or urgent as marked by the doctor. If the file is marked as urgent, a tick mark appears. 7. Status: This column shows the status of the files. Different colors are assigned to depict each status. Red – This color depicts that the file is still to be downloaded and it shows an “In Transit” mouse-over image. Simple Yellow – The file is under transcription, i.e. with the MT and it shows an “In Process” mouse-over image. Yellow 1 – The file is with the QA1 for editing and it shows an “Under QA1” mouse-over image. Yellow 2 – The file is with the QA2 for final editing and it shows an “Under QA2” mouseover image. 8. Report Type: This column displays the type of report as marked by the doctor. If a report type is not given, none is shown there. 9. TAT target: This column shows the actual TAT target within which the file has to be transcribed. 10. TAT Remaining: Here, the remaining time for the transcription is displayed. Every time the page is refreshed, the remaining time changes. If the file is not transcribed within the TAT target, it displays the overdue time in red. 11. MT ID: This column depicts the ID of the MT who has transcribed the file. 12. QA1 ID: This column shows the ID of the QA1 who is editing the file. It will not show anything if the workflow is set as MT Client. 13. QA2 ID: This column shows the ID of the QA2 who has the file for further editing. It will not show anything if the file has not come to him/her. Turnaround Time Reports The Turn Around Time report gives an assessment of how the transcription company is performing in terms of uploading the transcribed documents. This option generates a Summary or Detailed report on an account basis for a particular period. The Summary Report gives a snap-shot view of the set and actual TAT for normal as well as urgent reports for the selected period. It shows the number of files dictated, a total time count, the average set TAT, the average actual TAT, and the difference. The Detailed Report gives file-to-file TAT details of an account for the selected period. Steps to generate the TAT Report: 1. Select either the Summary or the detailed option. 2. Select the period for which the TAT report will be generated. 3. Select the report format, i.e. the account for which the report must be generated. Doctor – Select the doctor from the drop down list. MT – Select the MT from the drop down list. 4. Click the "Generate TAT Report" button. When the Summary Report option is selected: The Summary Report gives a snap-shot view of the set and the actual TAT for both normal as well as urgent reports. Column Details: Blue buttons on all columns are sorting buttons. 1. S No.: This column shows the serial number. 2. MT ID: This column depicts the ID of the MT. If the account is of the QA type, then the ID of the selected QA will be displayed. 3. No. Of normal audio files: This column shows the count of normal audio files. 4. Avg. TAT: This column shows the average of the actual TAT, i.e. the average of the time actually taken to complete the normal files. 5. Avg. Delay: It displays the average of the delay time. If the actual TAT exceeds the set TAT, this column shows the average of this delayed time for the particular account for normal files. 6. No. Of stat audio files: This column shows the count of normal audio files. 7. Avg. TAT: This column shows the average of the actual TAT, i.e. the average of the time actually taken to complete the urgent files. 8. Avg. Delay: It displays the average of the delay time. If the Actual TAT exceeds the set TAT, this column shows the average of this delayed time for the particular account for urgent files. When the Detailed Report option is selected: Detailed report gives all the details regarding the TAT for each file. Column Details: Blue buttons on all columns are sorting buttons. 1. S No.: This column shows the serial number. 2. MT ID: This column depicts the ID of the MT. If the account is of the QA type, then ID of the selected QA will be displayed. 3. Doc ID: ID of the dictator or the doctor is displayed. 4. Audio File ID: This column displays the ID of the audio file. 5. Dictation Date/Time: The date and time of the upload of the audio file is displayed. 6. Document File ID: This column shows the ID of the corresponding document file. 7. Transcription Date/Time: The date and time of the upload of the transcribed file is shown. 8. Set TAT: The target TAT that is automatically taken by the system depending upon the criteria set. 9. Actual TAT: The actual time taken by the transcription company to complete and upload the file. 10. Difference: If the actual TAT is more than the set TAT, a red button is displayed showing “Late.” If the actual TAT is less than the set TAT, a green button is displayed showing “OK.” Totals and averages of the set TAT, the actual TAT and the difference is displayed at the bottom of the page. Billing Report This feature provides the ability to generate an online billing report to the Master Admin. He/she has an option to generate a Summary report or a Detailed report on a specific account for a particular period, depending on the choice of type of file such as an audio file or document file. The Summary report gives a snap-shot view of the number of lines transcribed, the number of dictation minutes, and the number of fax pages sent from the server during the selected period. The Detailed report gives file-to-file billing details of the account for the selected period. Steps to generate a billing report 1. Select either the Summary or the Detailed option 2. Select duration/period (from date to date) for which the billing report is required. 3. Select the report format such as the account of Dictator or Transcriptionists from the options given. 4. Click the "Generate Billing Report" button. Column Details: When choosing Report Style – Summary, Report Format – Doctor Based, Audio Files 1. Dictator: User’s name of the doctor (dictator) who has dictated the file. 2. No. Reports: This column displays the number of reports dictated by the doctor for the particular period. 3. Tollfree File Size: Size of the files dictated through the Toll Free Service is displayed in terms of bytes. 4. Tollfree File Length: Size or length of the files through the Toll Free Service is displayed in terms of seconds (time). 5. Other File Size: Size of the files dictated through other modes is displayed in terms of bits. 6. Other File Size: Size of the files dictated through other modes is displayed in terms of seconds (time). 7. Faxed: Count of pages of documents is shown. When choosing Report Style –Detailed, Report Format – Doctor Based, Audio Files 1. 2. 3. 4. Audio File ID – ID of the audio file is displayed. Dictation Date – This column displays the date of the dictation of the file. Dictator: ID of the doctor is shown. Status: It shows the status of the file. Simple yellow – file is with the MT, Yellow 1 – file is with the QA1, Yellow 2 – file is with the QA2, Green – file is complete, and Red – file is in transit. 5. Audio File Name: Name of the audio file is displayed. 6. Tollfree File Size: Size of the files dictated through the Toll Free Service is displayed in terms of bytes. 7. Tollfree File Length: Size or length of the files through the Toll Free Service is displayed in terms of seconds (time). 8. Other File Size: Size of the files dictated through other modes is displayed in terms of bits. 9. Other File Size: Size of the files dictated through other modes is displayed in terms of seconds (time). 10. Faxed: Count of pages of documents is shown. When choosing Report Style – Summary, Report Format – Doctor Based, Document Files 1. Dictator: User’s name of the doctor (dictator) who dictated the file. 2. No. Reports: This column displays the number of document files. 3. Extracted Line Count: This column shows the line count generated by the system as per the doctor specific billing attributes if “Auto Extraction” feature is enabled for the doctor concerned. 4. Entered Line Count: This column displays the line count entered by the MT/QA at the time of file upload, if “Manual Entry” is enabled under “Billing Choice” in “Billing Setup” for the doctor. 5. Final Line Count: This column displays the final line count after the applicable MT Admin formula changes. There are three cases: • When “Auto Extraction” feature is enabled for the doctor, this column displays the line count generated by the system. • When “Manual Entry” feature is enabled for the doctor, this column displays the line count entered by the MT/QA at the time of file upload. • When the “Suggested Line Count Feature” is enabled in account settings of MT Admin, this column displays the line count entered by the MT/QA. 6. Audio File Length: Size or length of the corresponding file is displayed. 7. Line/Length: Calculated result of line divided by length is displayed. 8. Faxed: Count of pages of documents is shown. When choosing Report Style –Detailed, Report Format – Doctor Based, Document Files 1. Document File ID: ID of the document file is displayed in this column. 2. Work Date: Date is shown when the MT uploaded the transcribed file. 3. MT: This column shows the name of the MT who last uploaded the file. It can be an MT, a QA1, or a QA2. 4. Dictator: User’s name of the doctor (dictator) is displayed here. 5. Patient Name: Name of the patient is shown in this column. 6. Document File Name: Name of the document file is displayed. 7. Document File Size: Size of the document file is shown. 8. Extracted Line Count: This column shows the line count generated by the system as per the doctor specific billing attributes if “Auto Extraction” feature is enabled for the doctor concerned. 9. Entered Line Count: This column displays the line count entered by the MT/QA at the time of file upload, if “Manual Entry” is enabled under “Billing Choice” in “Billing Setup” for the doctor. 10. Final Line Count: This column displays the final line count after the applicable MT Admin formula changes. There are three cases: • When “Auto Extraction” feature is enabled for the doctor, this column displays the line count generated by the system. • When “Manual Entry” feature is enabled for the doctor, this column displays the line count entered by the MT/QA at the time of file upload. • When the “Suggested Line Count Feature” is enabled in account settings of MT Admin, this column displays the line count entered by the MT/QA. 11. Audio File Length: Size or length of the corresponding audio file is displayed. 12. Line/Length: Calculated result of line divided by length is displayed. 13. Faxed: Count of pages of documents is shown. When choosing Report Style –Summary, Report Format –MT/QA Based, All Level of Document Files 1. MT: User’s name of the MT or QA is displayed. 2. Account Type: Information regarding the type of account is shown. (MT, QA1, QA2) 3. No. Reports: This column displays the number of document files. 4. Extracted Line Count: This column shows the line count generated by the system as per the doctor specific billing attributes if “Auto Extraction” feature is enabled for the doctor concerned. 5. Entered Line Count: This column displays the line count entered by the MT/QA at the time of file upload, if “Manual Entry” is enabled under “Billing Choice” in “Billing Setup” for the doctor. 6. Final Line Count: This column displays the final line count after the applicable MT Admin formula changes. There are three cases: • When “Auto Extraction” feature is enabled for the doctor, this column displays the line count generated by the system. • When “Manual Entry” feature is enabled for the doctor, this column displays the line count entered by the MT/QA at the time of file upload. • When the “Suggested Line Count Feature” is enabled in account settings of MT Admin, this column displays the line count entered by the MT/QA. 7. Audio File Length: Size or length of the corresponding audio file is displayed in terms of seconds (time). When choosing Report Style –Detailed, Report Format –MT/QA Based, All Level of Document Files 1. Document File ID: ID of the document file is displayed in this column. 2. Work Date: Date is shown when the MT uploaded the transcribed file. 3. MT: This column shows the ID of the MT who last uploaded the file. It can be an MT, a QA1, or a QA2. 4. Dictator: User’s name of the doctor (dictator) is displayed here. 5. Patient Name: Name of the patient is shown in this column. 6. Document File Name: Name of the document file is displayed. 7. Document File Size: Size of the document file is shown. 8. Extracted Line Count: This column shows the line count generated by the system as per the doctor specific billing attributes if “Auto Extraction” feature is enabled for the doctor concerned. 9. Entered Line Count: This column displays the line count entered by the MT/QA at the time of file upload, if “Manual Entry” is enabled under “Billing Choice” in “Billing Setup” for the doctor. 10. Final Line Count: This column displays the final line count after the applicable MT Admin formula changes. There are three cases: When “Auto Extraction” feature is enabled for the doctor, this column displays the line count generated by the system. When “Manual Entry” feature is enabled for the doctor, this column displays the line count entered by the MT/QA at the time of file upload. When the “Suggested Line Count Feature” is enabled in account settings of MT Admin, this column displays the line count entered by the MT/QA. 11. Audio File Length: Size or length of the corresponding audio file is displayed. 12. Line/Length: Calculated result of line divided by length is displayed. 13. Faxed: Count of pages of documents is shown. When choosing Report Style –Summary, Report Format –MT/QA Based, Completed Document Files Only 1. MT: User’s name of the MT or the QA is displayed. 2. Account Type: Information regarding the type of account is shown. (MT, QA1, QA2) 3. No. Reports: This column tells the number of document files. 4. Extracted Line Count: This column shows the line count generated by the system as per the doctor specific billing attributes if “Auto Extraction” feature is enabled for the doctor concerned. 5. Entered Line Count: This column displays the line count entered by the MT/QA at the time of file upload, if “Manual Entry” is enabled under “Billing Choice” in “Billing Setup” for the doctor. 6. Final Line Count: This column displays the final line count after the applicable MT Admin formula changes. There are three cases: • When “Auto Extraction” feature is enabled for the doctor, this column displays the line count generated by the system. • When “Manual Entry” feature is enabled for the doctor, this column displays the line count entered by the MT/QA at the time of file upload. • When the “Suggested Line Count Feature” is enabled in account settings of MT Admin, this column displays the line count entered by the MT/QA. 7. Audio File Length: Size or length of the corresponding audio file is displayed in terms of seconds (time). When choosing Report Style –Summary, Report Format –MT/QA Based, Completed Document Files Only 1. Document File ID: ID of the document file is displayed in this column. 2. Work Date: Date is shown when the MT uploaded the transcribed file. 3. MT: This column shows the ID of the MT who last uploaded the file. It can be an MT, a QA1, or a QA2. 4. Dictator: User’s name of the doctor (dictator) is displayed here. 5. Patient Name: Name of the patient is shown in this column. 6. Document File Name: Name of the document file is displayed. 7. Document File Size: Size of the document file is shown. 8. Extracted Line Count: This column shows the line count generated by the system as per the doctor specific billing attributes if “Auto Extraction” feature is enabled for the doctor concerned. 9. Entered Line Count: This column displays the line count entered by the MT/QA at the time of file upload, if “Manual Entry” is enabled under “Billing Choice” in “Billing Setup” for the doctor. 10. Final Line Count: This column displays the final line count after the applicable MT Admin formula changes. There are three cases: When “Auto Extraction” feature is enabled for the doctor, this column displays the line count generated by the system. When “Manual Entry” feature is enabled for the doctor, this column displays the line count entered by the MT/QA at the time of file upload. When the “Suggested Line Count Feature” is enabled in account settings of MT Admin, this column displays the line count entered by the MT/QA. 11. Audio File Length: Size or length of the corresponding audio file is displayed. 12. Line/Length: Calculated result of line divided by length is displayed. 13. Faxed: Count of pages of document files is shown. Account Activity Logs The Recent Activity Log is the feature, which helps the Master Admin track of all the activities taking place in his/her account. It gives the details regarding the type of activity (event), date and time of its occurrence, and the account ID from where the event occurred. The Master Admin can also generate the report of recent activity on the event (activity) and date basis. Report Criteria Date From – To -: The doctor can generate the report of recent activity for a particular duration for which he/she wants to view the report. Event Type: The MT Admin can generate the report on event basis. He/she can select the particular event from the drop down list. By default, “All” is selected. The following events are shown in the drop down list: − Routing − Audio − Document event − Template event − Logo event − File Deleted − Message Sent − File Emailed − File Faxed − File Corrected − File eSigned − File Unsigned − File Rejected − Login info − Logout info − Account Update − File Split Account Type: The MT Admin can also generate the activity report on an MT/QA1/QA2 account basis. Steps to generate Account Activity Log report: 1. Select period/duration. 2. Select the particular event from the drop down list or select “All” if you want a report of all the events occurring in your account. 3. Select the particular doctor from the drop down list or select “All” if you want to view the report of the events occurring from all doctor accounts. 4. Click the "Generate Activity Report" button. Column Details: Click the “Generate Activity Report” button and a new screen will appear that shows the report with all of the details. 1. Date: This column shows the date when the event occurred. 2. Time: Time of the occurrence of event is displayed in this column. 3. Event Type: This column displays the type of event depending upon the selection made in the Event Type Category in Report Criteria. 4. ID: Account ID from where the event occurred is displayed. 5. Log: This column gives the details regarding the type of file (audio or document) involved in the event and other details such as upload, download, completed, or to which account it is assigned. Send A Message The Send Message Function feature helps the Master Administrator to send messages to the site administrator if he/she faces any technical problem and to the MTs/ QAs/Doctors if he/she has any transcription problem. Message Type: Select the message type by enabling the required radio button. Technical issue: If the Master Administrator faces any technical problem regarding the ASP, he/she can send a message explaining the problem in detail to the Site Administrator and no one else. Transcription issue: If the Master Administrator faces any transcription problem, he/she can send a message to the MT/QA/Doctor. The system will not send this message to the Site Administrator. Message To: If you have selected the “Transcription Issue” option in the “Message Type” category, you can select the MT/QA/Doctor from the list. Subject: Enter a subject title for the recipient to give him/her an idea about the kind of problem you are facing. Message: Enter a message concerning each and every detail of the technical/transcription problem in this text box. Steps to send the message: 1. Select the message type by enabling the radio button. 2. Select the required option in the “Message to” category. Select the required MT/QA/Doctor from the drop down list. 3. Enter the subject for the message in the text box. 4. Enter the message in detail in the text box. 5. Click the “Send” button at the bottom of the screen. A new screen will appear confirming that the message had been sent. FAQ FAQ refers to Frequently Asked Questions. These questions are designed and answered in such a way that you will get quick answer to your queries easily. On clicking the FAQ option on the navigation menu, you get the screen similar to the one below. Logout & Exit When Master Administrator clicks this option, he is logged out of the system.