1
WA R N I N G !
For protection from dangerous electric shock, the fixture must be grounded
(earthed). The AC mains supply shall be fitted with a fuse or circuit breaker and
ground-fault protection.
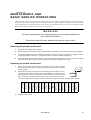
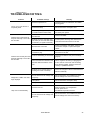
Install a plug on the power cord
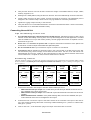
You may need to install a cord cap that fits your supply on the power cable. A 3-prong grounding-type plug must be installed
following the manufacturer’s instructions. Connect the wires to the pins as listed below. Note: The table shows some possible
pin identification schemes; if the pins are not clearly identified, or if you have any doubts about proper installation, consul t a
qualified electrician.
Wire Color
Pin
Symbol
Screw (US)
brown
live
“L”
yellow or brass
blue
neutral
“N”
silver
yellow/green
ground
green
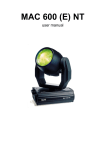
Connect the MAC 600/E directly to AC power. Do not connect it to a dimmer system; doing so may damage the fixture. To
apply power, set the power switch on the base to the “I” position.
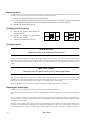
Rigging the fixture in place
WA R N I N G !
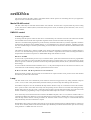
Use 2 clamps to rig the fixture. Lock each clamp with both 1/4-turn fasteners. The
fasteners are locked only when turned fully clockwise.
Attach an approved safety cable to the base.
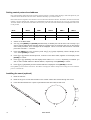
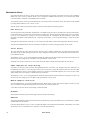
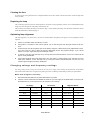
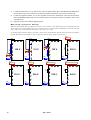
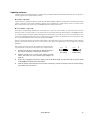
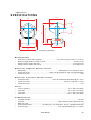
The MAC 600/E can be placed directly on the stage floor or rigged in any orientation on a truss. The integrated Fast-Lock system enables quick and easy fastening of the clamp adapters in 4 different positions as shown below.
safety wire
attachment point
arrow points to front
(neutral pan)
4
1.
Verify that the rigging clamps (not included) are undamaged and can bear at least 10 times the weight
of the fixture. Bolt the clamps securely to the clamp brackets with a grade 8.8 (minimum) M12 bolt and
lock nut, or as recommended by the clamp manufacturer.
2.
Tip the MAC 600/E on its side or install the clamps while the fixture is in the flight case.
3.
Align a clamp with 2 mounting points. Insert the fasteners into the base and turn both levers a full 1/4turn clockwise to lock. Install the second clamp.
MAC 600/E