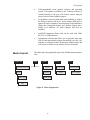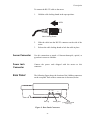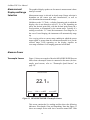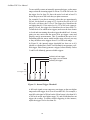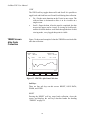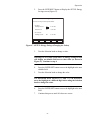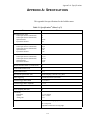
1
User Manual
LabMax™-TOP
Laser Power/Energy Meter
User Manual
LabMax-TOP
Laser Power/Energy Meter
7470 SW Bridgeport Rd.
Portland, OR 97224
LabMax-TOP User Manual
This document is copyrighted with all rights reserved. Under the copyright
laws, this document may not be copied in whole or in part or reproduced
in any other media without the express written permission of Coherent, Inc.
Permitted copies must carry the same proprietary and copyright notices as
were affixed to the original. This exception does not allow copies to be
made for others, whether or not sold, but all the material purchased may
be sold, given or loaned to another person. Under the law, copying
includes translation into another language.
Coherent and the Coherent Logo are registered trademarks of Coherent,
Inc. LabMax is a trademark of Coherent, Inc.
Every effort has been made to ensure that the data given in this document
is accurate. The information, figures, tables, specifications and schematics
contained herein are subject to change without notice. Coherent makes no
warranty or representation, either expressed or implied with respect to this
document. In no event will Coherent be liable for any direct, indirect,
special, incidental or consequential damages resulting from any defects in
its documentation.
Technical Support
In the U.S.:
Should you experience difficulties with your product, or need technical
information, please visit our website: www.Coherent.com. You can obtain
additional support by either telephoning our Technical Support Hotline at
1.800.343.4912,
or
e-mailing
our
Support
Team
at
[email protected]. Telephone coverage is available
Monday through Friday (except U.S. holidays).
If you call outside our office hours, your call will be taken by our answering
system and will be returned when the office reopens.
If there are technical difficulties with your product that cannot be resolved
by support mechanisms outlined above, please e-mail or telephone
Coherent Technical Support with a description of the problem and the
corrective steps attempted. When communicating with our Technical
Support Department, via the web or telephone, the model and serial
number of the product will be required by the Support Engineer responding
to your request.
Outside the U.S.:
If you are located outside the U.S., visit our website for technical
assistance, or telephone our local Service Representative. Representative
phone numbers and addresses can be found on the Coherent website:
www.Coherent.com.
Coherent provides web and telephone technical assistance as a service to
its customers and assumes no liability thereby for any injury or damage
that may occur contemporaneous with such services. These support
services do not, under any circumstances, affect the terms of any warranty
agreement between Coherent and the buyer. Operating a Coherent
product with any of its interlocks defeated is always at the operator's risk.
ii
Table of Contents
TABLE OF CONTENTS
Preface .................................................................................................................................. xi
RoHS Compliance ................................................................................................................ xi
U.S. Export Control Laws Compliance ................................................................................ xi
Publication Updates .............................................................................................................. xi
Firmware Updates................................................................................................................. xi
Symbols Used in This Document ........................................................................................ xii
Safety ...........................................................................................................................................1
Waste Electrical and Electronic Equipment (WEEE, 2002) ...................................................2
Declaration of Conformity......................................................................................................3
Software Installation ..........................................................................................................5
Windows XP and Windows 2000 ...........................................................................................6
Windows Vista ........................................................................................................................8
Quick Start .............................................................................................................................11
Measuring Power With a Thermopile or Optical Sensor......................................................12
Measuring Energy With a Pyroelectric Sensor .....................................................................13
Saving Data to a File on the Local Drive..............................................................................14
Moving a File to the USB Flash Drive .................................................................................15
Description
............................................................................................................................17
Product Overview .................................................................................................................17
Product Features ...................................................................................................................18
Menu Layout.........................................................................................................................19
Front Panel ............................................................................................................................20
Buttons .........................................................................................................................20
Soft Keys......................................................................................................................21
Power On/Off Button...................................................................................................21
Selection Knob.............................................................................................................21
Side Panel .............................................................................................................................22
USB Flash Drive Connector ........................................................................................22
Mini-USB Connector ...................................................................................................22
RS-232 Connector........................................................................................................22
Sensor Connector .........................................................................................................23
Power Jack Connector .................................................................................................23
Rear Panel .............................................................................................................................23
Ext Trig Connector.......................................................................................................24
Analog Out Connector .................................................................................................24
GPIB Connector...........................................................................................................24
Battery Indicators..................................................................................................................24
Battery Charging Procedure.........................................................................................25
Battery Pack Replacement ....................................................................................................27
AC Adapter ...........................................................................................................................27
iii
LabMax-TOP User Manual
Operation ................................................................................................................................29
Units......................................................................................................................................29
MEASURE ...........................................................................................................................29
Measurement Display and Range Selection ................................................................30
Measure Power ............................................................................................................30
Thermopile Sensors ............................................................................................30
Thermopile Quad Sensors...................................................................................32
Optical Sensors ...................................................................................................33
Measure Energy ...........................................................................................................34
Thermopile Sensors, Long Pulse Joules .............................................................34
Pyroelectric Sensors............................................................................................37
Triggering............................................................................................................39
Internal Triggering Mode....................................................................................39
Trigger States and the Trigger Annunciator........................................................41
Pulse Sampling ...................................................................................................41
Statistics .......................................................................................................................42
Detailed Procedures .....................................................................................................49
POSITION STABILITY .....................................................................................49
TUNE....................................................................................................................................51
Strip Chart....................................................................................................................51
Bar Chart......................................................................................................................53
TREND .................................................................................................................................54
TREND Screen During Data Collection......................................................................57
TREND Screen After Data Collection.........................................................................58
Detailed Procedures .....................................................................................................60
Name Log File ....................................................................................................60
File Manager .......................................................................................................63
TREND Setup .....................................................................................................68
ZERO ....................................................................................................................................71
SETUP ..................................................................................................................................72
Display Smoothing ......................................................................................................73
Speedup........................................................................................................................75
Area Correction............................................................................................................76
Gain Compensation......................................................................................................78
Wavelength Correction ................................................................................................80
Wavelength Table Edit .................................................................................................81
Adding a Wavelength..........................................................................................82
Deleting a Wavelength ........................................................................................83
Power Measure Units...................................................................................................83
Resolution ....................................................................................................................84
Analog Output..............................................................................................................85
Trigger..........................................................................................................................85
Communications ..........................................................................................................88
Date/Time.....................................................................................................................90
Energy Savings ............................................................................................................92
Screen Contrast ............................................................................................................94
Serial Number ..............................................................................................................96
iv
Table of Contents
Version .........................................................................................................................96
Soft Keys......................................................................................................................96
Detailed Procedures .....................................................................................................97
Save Current Config ...........................................................................................97
Manage Configs ..................................................................................................99
HELP ..................................................................................................................................102
Context-Sensitive Help ..............................................................................................102
General Help ..............................................................................................................103
BACKLIGHT .....................................................................................................................103
Special Topics .....................................................................................................................105
Analog Output.....................................................................................................................105
Understanding the External Trigger Circuit........................................................................105
Host Interface .....................................................................................................................109
Special Considerations........................................................................................................109
Message Terminators .................................................................................................109
Messages Received by the Meter......................................................................109
Messages Sent by the Meter .............................................................................109
Using the RS-232 Interface........................................................................................110
Data Flow Control ............................................................................................110
Service Request.................................................................................................110
Using the GPIB Interface...........................................................................................110
IEEE-488.1 Interface Capabilities ....................................................................110
Service Request................................................................................................. 111
Using the USB Interface ............................................................................................111
Service Request................................................................................................. 111
Binary Streaming Data......................................................................................111
Notation Conventions ................................................................................................ 111
Syntax ........................................................................................................................111
Host Command Quick Reference .......................................................................................113
Commands and Queries ......................................................................................................122
SCPI Common Commands ........................................................................................122
IEEE-488.2 Common Commands ....................................................................123
System Options ..........................................................................................................123
Local Control Lockout......................................................................................123
System Status ....................................................................................................124
Backlight Control..............................................................................................125
Power Auto-Off ................................................................................................125
Meter Configuration Management....................................................................126
Communications ........................................................................................................127
Interface Select .................................................................................................127
Message Handshaking ......................................................................................128
Serial Port-Specific ...........................................................................................128
IEEE-488.1 GPIB Port-Specific .......................................................................129
USB Port-Specific.............................................................................................130
Error Record Reporting and Collection .....................................................................130
v
LabMax-TOP User Manual
Error Count Query ............................................................................................131
Error Query .......................................................................................................132
All Error Query .................................................................................................132
All Error Clear ..................................................................................................133
Measurement Setup and Control................................................................................133
Measurement Mode Select................................................................................133
Power Measurement Units Select .....................................................................133
Display Mode Select .........................................................................................133
Area Correction.................................................................................................135
Analog Output Full Scale Voltage ....................................................................136
Speedup.............................................................................................................136
Display Data Smoothing ...................................................................................137
Wavelength Correction .....................................................................................137
Gain Compensation...........................................................................................138
Probe Zero.........................................................................................................139
Range Select .....................................................................................................139
Statistics Mode Control.....................................................................................140
Position Stability Mode Control .......................................................................143
Tune Mode Control...........................................................................................143
Trend Mode Control..........................................................................................144
Measurement Data Format................................................................................152
Trigger Parameters............................................................................................158
Numeric Display Resolution.............................................................................159
Sample Measurement Data Collection ......................................................................160
Data Gating .......................................................................................................160
Data Query ........................................................................................................161
Statistics Data Collection...........................................................................................162
Statistics Data Gating........................................................................................162
Statistics Data Query.........................................................................................163
Display .......................................................................................................................164
Contrast .............................................................................................................164
Display Text ......................................................................................................165
Text Clear..........................................................................................................165
Meter and Sensor Device Information.......................................................................165
Meter .................................................................................................................165
Sensor................................................................................................................167
Host Interface Glossary ......................................................................................................168
Calibration and Warranty .........................................................................................171
Calibration ..........................................................................................................................171
Coherent Calibration Facilities and Capabilities ................................................................171
Limited Warranty ................................................................................................................172
Extended Lifetime Warranty...............................................................................................172
Warranty Limitations ..........................................................................................................173
Obtaining Service ...............................................................................................................173
Product Shipping Instructions.............................................................................................174
vi
Table of Contents
Appendix A: Specifications........................................................................................175
RS-232 Pinouts ...................................................................................................................177
Persistent Parameters ..........................................................................................................177
Appendix B: Errors ........................................................................................................181
Measurement Errors............................................................................................................181
Meter and Sensor Errors .....................................................................................................181
Appendix C: Onscreen Indicators .........................................................................183
Index ........................................................................................................................................187
LIST OF TABLES
1.
2.
3.
4.
5.
6.
7.
8.
9.
10.
11.
12.
13.
14.
15.
16.
17.
18.
19.
20.
21.
22.
Battery Life Indicator.........................................................................................................24
Joules and Watts Units .......................................................................................................29
Approximate Pulse Sampling Based on the Number of Incoming Pulses.........................41
Sensor Resolution Ranges .................................................................................................84
Trigger Range and Factory Defaults..................................................................................86
Communication Values and Factory Defaults ...................................................................88
Date/Time Ranges and Factory Defaults ...........................................................................90
Energy Savings Ranges and Factory Defaults ...................................................................92
Custom Configuration File Meter Settings ........................................................................97
IEEE-488.1 Interface Functions ......................................................................................110
Host Command Quick Reference ....................................................................................113
Status Bit Definitions.......................................................................................................124
Error Codes and Description Strings ...............................................................................130
Display Mode Headers.....................................................................................................134
Measurement Data Value Selections................................................................................155
FLAG Bit Definitions ......................................................................................................156
Coherent Service Centers.................................................................................................174
Specifications...................................................................................................................175
RS-232 Pinouts ................................................................................................................177
Persistent Parameters .......................................................................................................177
Meter and Sensor Errors ..................................................................................................181
Onscreen Indicators .........................................................................................................183
vii
LabMax-TOP User Manual
LIST OF FIGURES
1.
2.
3.
4.
5.
6.
7.
8.
9.
10.
11.
12.
13.
14.
15.
16.
17.
18.
19.
20.
21.
22.
23.
24.
25.
26.
27.
28.
29.
30.
31.
32.
33.
34.
35.
36.
37.
38.
39.
40.
41.
Waste Electrical and Electronic Equipment Label...............................................................2
Quick Start: Measuring Power With a Thermopile or Optical Sensor...............................12
Quick Start: Measuring Energy With a Pyroelectric Sensor..............................................13
Quick Start: Saving Data to a File on the Local Drive ......................................................14
Quick Start: Moving a File to the USB Flash Drive..........................................................15
Menu Organization ............................................................................................................19
Front Panel .........................................................................................................................20
Side Panel Connectors .......................................................................................................22
Rear Panel Connectors.......................................................................................................23
Battery Pack Replacement .................................................................................................27
MEASURE POWER: Thermopile Sensors .......................................................................30
MEASURE POWER: Thermopile Quad Sensors .............................................................32
MEASURE POWER: Optical Sensors ..............................................................................33
MEASURE ENERGY: Thermopile Sensors (Long Pulse Joules).....................................35
MEASURE ENERGY: Thermopile Sensors (Long Pulse - Active)..................................35
MEASURE ENERGY: Thermopile Sensors (Long Pulse - After Pulse) ..........................36
MEASURE ENERGY: Pyroelectric Sensors.....................................................................37
Average Power Diagram ....................................................................................................39
Internal Trigger Threshold .................................................................................................40
STATS: Thermopile and Optical Sensors ..........................................................................42
STATS: Pyroelectric Sensors .............................................................................................42
STATS: Data Collection (In Process) ................................................................................43
STATS: Statistics Readout .................................................................................................44
STATS: Change Stats .........................................................................................................45
STATS: Setup (Thermopile and Optical Sensors) .............................................................46
STATS: Setup (Pyroelectric Sensors - Power)...................................................................47
STATS: Setup (Pyroelectric Sensors - Energy)..................................................................47
MEASURE POWER: POSITION STABILITY................................................................49
POSITION STABILITY: Duration ....................................................................................50
TUNE: Strip Chart (Thermopile and Optical Sensors)......................................................51
TUNE: Bar Chart (Thermopile and Optical Sensors)........................................................53
TREND: Thermopile and Optical Sensors ........................................................................55
TREND: Pyroelectric Sensors ...........................................................................................55
TREND: During Data Collection ......................................................................................57
TREND: After Data Collection .........................................................................................58
TREND: File Manager (Save Data)...................................................................................59
TREND: Save Tmp As ......................................................................................................59
TREND: Name Log File....................................................................................................61
TREND: File Manager.......................................................................................................63
TREND: File Manager (File Deletion Confirmation) .......................................................65
TREND: File Manager (Folder Deletion Confirmation) ...................................................66
viii
Table of Contents
42.
43.
44.
45.
46.
47.
48.
49.
50.
51.
52.
53.
54.
55.
56.
57.
58.
59.
60.
61.
62.
63.
64.
65.
66.
67.
68.
69.
70.
71.
72.
73.
74.
75.
76.
77.
78.
79.
80.
TREND: Rename File or Folder ........................................................................................66
TREND: Create New Folder..............................................................................................68
TREND: Setup (Thermopile and Optical Sensors)............................................................69
TREND: Setup (Pyroelectric Sensors) ..............................................................................70
SETUP ...............................................................................................................................72
SETUP: Display Smoothing ..............................................................................................73
SETUP: Display Smoothing (Thermopile and Optical Sensors - Manual Mode) .............74
SETUP: Display Smoothing (Pyroelectric Sensors - Manual Mode)................................74
SETUP: Speedup ...............................................................................................................75
SETUP: Area Correction ...................................................................................................76
SETUP: Gain Compensation .............................................................................................79
SETUP: Wavelength Correction ........................................................................................80
SETUP: Wavelength Table Edit.........................................................................................81
SETUP: Edit Wavelength Table.........................................................................................82
SETUP: Edit Wavelength Table (Adding a Wavelength) ..................................................82
SETUP: Power Measure Units ..........................................................................................83
SETUP: Resolution............................................................................................................84
SETUP: Analog Output .....................................................................................................85
SETUP: Trigger .................................................................................................................86
SETUP: Trigger (Changing the Values).............................................................................87
SETUP: Communications..................................................................................................88
SETUP: Communications (Changing the Values) .............................................................89
SETUP: Date/Time ............................................................................................................90
SETUP: Date/Time (Changing the Values) .......................................................................91
SETUP: Energy Savings ....................................................................................................92
SETUP: Energy Savings (Changing the Values) ...............................................................93
SETUP: Screen Contrast....................................................................................................94
SETUP: Screen Contrast (Changing the Values) ...............................................................95
SETUP: Serial No. .............................................................................................................96
SETUP: Version .................................................................................................................96
SETUP: Save Current Config ............................................................................................98
SETUP: Manage Configs...................................................................................................99
SETUP: Manage Configs (File Deletion Confirmation) .................................................100
SETUP: Rename Config ..................................................................................................101
HELP (Context-Sensitive) ...............................................................................................102
HELP (All Topics) ...........................................................................................................103
External Trigger Input Circuitry ......................................................................................105
External Trigger Minimum Pulse Width..........................................................................106
Boosting Source Current of Triggering Device ...............................................................107
ix
LabMax-TOP User Manual
x
Preface
Preface
This manual contains user information for the LabMax™-TOP
Laser Power/Energy Meter.
RoHS
Compliance
This Coherent product is RoHS compliant.
U.S. Export
Control Laws
Compliance
It is the policy of Coherent to comply strictly with U.S. export
control laws.
Export and re-export of lasers manufactured by Coherent are subject
to U.S. Export Administration Regulations, which are administered
by the Commerce Department. In addition, shipments of certain
components are regulated by the State Department under the International Traffic in Arms Regulations.
The applicable restrictions vary depending on the specific product
involved and its destination. In some cases, U.S. law requires that
U.S. Government approval be obtained prior to resale, export or
re-export of certain articles. When there is uncertainty about the
obligations imposed by U.S. law, clarification should be obtained
from Coherent or an appropriate U.S. Government agency.
Publication
Updates
To view information that may have been added or changed since this
publication went to print, connect to www.Coherent.com.
Firmware
Updates
To obtain the latest version of LabMax firmware:
1.
Connect to www.Coherent.com.
2.
Download the firmware to a USB flash drive.
To install the update:
1.
Plug LabMax into an AC power source and then turn the meter
ON.
Do not use battery power when installing a firmware update. A
power loss during the installation process will damage the
meter, which must then be returned to Coherent for repair.
xi
LabMax-TOP User Manual
2.
Connect the flash drive to the USB flash drive connector on the
side panel of LabMax.
3.
When the menu appears on the LCD, turn the Selection knob
to highlight the firmware name and then press the Enter/Set
button (Selection knob) to begin the installation.
4.
When prompted on the installation menu, remove the flash
drive and press the Exit soft key to reboot LabMax.
Symbols Used in
This Document
This symbol is intended to alert the operator to the presence of
exposure to hazardous visible and invisible laser radiation.
This symbol is intended to alert the operator to the presence of
dangerous voltages associated with the product that may be of
sufficient magnitude to constitute a risk of electrical shock.
This symbol is intended to alert the operator to the presence of
important operating and maintenance instructions.
xii
Safety
SAFETY
Carefully review the following safety information to avoid personal
injury and to prevent damage to this meter or any sensor connected
to it. This equipment contains no user-serviceable parts. For service
information, refer to “Obtaining Service” on page 173.
The use and measuring of lasers is potentially dangerous. This
instrument operates over wavelengths that include non-visible
laser emissions.
Proper laser operating practice in accordance with manufacturer
recommendations is vital.
Eyewear and other personal protective equipment must be used in
accordance with applicable laws and regulations.
If in doubt of correct operating procedures, consult the laser manufacturer and your laser safety officer.
The equipment is not for use in critical medical environments.
Do not operate this instrument if its panels are removed or any
of the interior circuitry is exposed.
Do not operate this instrument in wet or damp conditions, or in
an explosive atmosphere.
Operate this instrument only within the specified voltage range.
1
LabMax-TOP User Manual
Do not operate this instrument if there are suspected failures.
Refer damaged equipment to qualified Coherent service
personnel.
Do not use battery power when installing a firmware update. A
power loss during the installation process will damage the
meter, which must then be returned to Coherent for repair.
Waste Electrical
and Electronic
Equipment
(WEEE, 2002)
The European Waste Electrical and Electronic Equipment (WEEE)
Directive (2002/96/EC) is represented by a crossed-out garbage
container label (see Figure 1, below). The purpose of this directive
is to minimize the disposal of WEEE as unsorted municipal waste
and to facilitate its separate collection.
Figure 1. Waste Electrical and Electronic Equipment Label
2
Safety
Declaration of
Conformity
3
LabMax-TOP User Manual
4
Software Installation
SOFTWARE INSTALLATION
This section explains how to install the LabMax software on the
following operating systems:
•
Windows XP and Windows 2000 (page 6)
•
Windows VISTA (page 8)
Install the LabMax software before physically connecting the
meter to the computer.
5
LabMax-TOP User Manual
Windows XP and
Windows 2000
Insert the LabMax CD into your CD-ROM drive. If Autorun is enabled on your system,
installation will start automatically; otherwise,
select “Run” from the Start menu and then type
D:\Setup.exe (substitute the appropriate letter
of your CD-ROM drive for D).
Click “Next.”
Read the License Agreement and then
select “I accept the license agreement.”
Click “Next.”
(your name)
Fill in your name and the name
of your organization.
(your organization)
Select “Only for me (your name)”
and then click “Next.”
(your name)
Select the default destination
folder by clicking “Next.”
6
Software Installation
Click “Next” to automatically
install the LabVIEW® drivers
and create a LabMax
desktop icon.
Begin the installation process by clicking
“Next.”
The Updating System screen displays
while the program is installing . . .
Click “Finish” to complete the software
installation and view the README file.
7
LabMax-TOP User Manual
Windows Vista
Insert the LabMax CD into your CD-ROM drive. If Autorun is enabled on your system,
installation will start automatically; otherwise,
select “Run” from the Start menu and then type
D:\Setup.exe (substitute the appropriate letter
of your CD-ROM drive for D).
Click “Allow.”
Click “Next.”
Read the License Agreement and then
select “I accept the license agreement.”
Click “Next.”
Fill in your name and the name
of your organization.
Select “Only for me (your name)”
and then click “Next.”
(your name)
(your organization)
(your name)
8
Software Installation
Select the default destination
folder by clicking “Next.”
Click “Next.”
Begin the installation process by clicking
“Next.”
The Updating System screen displays
while the program is installing . . .
9
LabMax-TOP User Manual
Click “Install this driver software
anyway.”
Click “Finish” to complete the software
installation and view the README file.
10
Quick Start
QUICK START
This section presents “mini-tutorials” that explain how to connect a
sensor to your LabMax meter, begin taking measurements within
minutes, and save your data for later viewing.
•
Measuring power with a thermopile or optical sensor (page 12)
•
Measuring energy with a pyroelectric sensor (page 13)
•
Saving data to a file on the local drive (page 14)
•
Moving a file to the USB flash drive (page 15)
For detailed information about each step of the procedures introduced in this section, refer to “Operation” on page 29.
Follow all laser safety procedures. The laser must be blocked or
switched OFF before beginning any of the procedures described
in this section.
Power to the LabMax meter must be OFF before beginning any
of the procedures described in this section.
Do not exceed the power/energy density limits of the sensor.
11
LabMax-TOP User Manual
Measuring
Power With a
Thermopile or
Optical Sensor
The tutorial describes how to take a power measurement using a
thermopile or optical sensor.
Connect a thermopile or optical sensor to the
25-pin connector and turn the meter ON.
Note: Contact Coherent if the sensor has a
BNC plug and did not ship with a 25-pin
adapter (refer to the “Calibration and Warranty”
section of this manual for contact information).
Press the MEASURE button.
Press the RANGE soft key
and then turn the Selection
knob to select the range.
Select Auto if you want
the meter to select the best
measurement range for you.
?
MEASURE
TUNE
TREND
Selection Knob
ZERO
Block the beam and then press the ZERO
button to set the baseline for the new
measurement.
Unblock the beam, take the measurement, and observe the result on the display.
Figure 2. Quick Start: Measuring Power With a Thermopile or Optical Sensor
12
Quick Start
Measuring
Energy With a
Pyroelectric
Sensor
This tutorial shows how to take an energy measurement using a
pyroelectric sensor.
Connect a pyroelectric sensor to the 25-pin
connector and turn the meter ON.
Note: Contact Coherent if the sensor has a
BNC plug and did not ship with a 25-pin
adapter (refer to the “Calibration and Warranty”
section for contact information).
Press the MEASURE button.
If Watts mode is currently selected,
toggle the UNITS soft key to select
Joules mode.
?
MEASURE
Press the RANGE soft key
and then turn the Selection
knob to select the range.
Note: Auto range is not
available for this type of
sensor.
TUNE
TREND
Selection Knob
ZERO
Press the TRIG LEV soft key and then turn the
Selection knob to adjust the trigger threshold.
Make sure the trigger threshold is set below
the energy level you plan to measure and above
the level at which the system triggers on noise.
Take the measurement and observe the result on the display.
Figure 3. Quick Start: Measuring Energy With a Pyroelectric Sensor
13
LabMax-TOP User Manual
Saving Data to a
File on the Local
Drive
In this tutorial you will learn how to create—and save data to—a file
that’s stored on the local drive (/loc). The tutorial on page 15 shows
how to move a file to the USB flash drive. You can also save data
directly to the USB flash drive by navigating to the USB drive in
Step 2, in the following illustration.
Press the TREND button.
?
MEASURE
TUNE
TREND
Press the FILE MANAGER soft key
and navigate to the /loc drive.
Note: The drive (/loc or /usb) that
opens in FILE MANAGER defaults
to the last drive accessed during
the previous session, or to the
/loc drive if no USB flash drive is
attached to the meter.
Press the EXIT soft key.
ZERO
Press the TREND SETUP soft key.
Press the CREATE
FILE soft key.
the Duration value to the sample size you
Set
want to save to file.
Press the SAVE soft key.
Create a file name on the TREND: Name Log File screen.
?
Press the SAVE soft key.
MEASURE
TUNE
TREND
Press the START soft key.
ZERO
When data collection is complete,
press the RESET soft key.
Data is now saved in the file created in step 8.
Figure 4. Quick Start: Saving Data to a File on the Local Drive
14
Quick Start
Moving a File to
the USB Flash
Drive
This tutorial shows how to move a file from the local drive (/loc) to
the USB flash drive (/usb) connected to LabMax.
Attach a USB flash drive to the
connector on the side panel.
Press the TREND button.
?
MEASURE
TUNE
Press the FILE MANAGER soft
key and navigate to the /loc drive.
Note: The drive (/loc or /usb) that
opens in FILE MANAGER defaults
to the last drive accessed during
the previous session, or to the
/loc drive if no USB flash drive is
attached to the meter.
Highlight the file you want to move.
TREND
Selection Knob
ZERO
Press the COPY MOVE soft key.
Navigate to a folder using the
Selection knob, if you wish, and
then press the MOVE soft key.
Press the ENTER/Set button to dismiss the confirmation dialog box.
The file selected in step 4 has been moved to
the /usb drive and removed from the /loc drive.
Figure 5. Quick Start: Moving a File to the USB Flash Drive
15
LabMax-TOP User Manual
16
Description
DESCRIPTION
Thank you for purchasing the LabMax™-TOP Laser Power/Energy
Meter—a versatile, easy-to-use, single-channel power/energy meter
designed for anyone who needs to measure and analyze laser output.
This section discusses:
Product
Overview
•
Product overview (this page)
•
Product features (page 18)
•
Menu layout (page 19)
•
Front panel (page 20)
•
Side panel (page 22)
•
Rear panel (page 23)
•
Battery indicators (page 24)
•
Battery pack replacement (page 27)
•
AC adapter (page 27)
The LabMax-TOP Laser Power/Energy Meter meets your needs in
new ways via onboard data logging as well as support for logging
data directly to a USB flash drive. It also offers enhanced data analysis and statistics, and a form factor that allows flexible positioning
and viewing angles so it can be used in areas with limited bench
space. LabMax is directly compatible with most Coherent thermal,
pyroelectric, and semiconductor sensors (with no need for adapters)
and displays beam position for quick and accurate setup. Performance is enhanced in the form of low noise pulse energy measurement and high resolution power measurement.
17
LabMax-TOP User Manual
Product
Features
Specific features of your LabMax meter include:
•
Compatible with LM-, PM-, and PS- model thermopile
sensors, and OP-2 and LM-2 model optical sensors. No
adapters required.
•
Displays beam position with LM-model sensors
•
Supports 5-digit resolution with thermopile and optical sensors
(user selectable).
•
Pyroelectric:
•
Measures energy to 10000 pps and captures every pulse
to 1000 pps with J-model and EnergyMax sensors.
Streams data over USB to 1000 Hz. Also measures rep.
rate and calculates average power. (LabMax is not
compatible with the legacy LM-P model energy sensors.)
•
Large, graphical display with backlight. Ergonomic interface
with easily accessible buttons for all features and modes. Flexible positioning of the display allows viewing from many
angles.
•
Digital tuning indicators - horizontal bar and trend chart
formats with peak indicators.
•
Onboard statistics (mean, minimum, maximum, standard deviation, range, three stability parameters, dose, and missed
pulses). Display up to six user-selectable statistical parameters
at a time.
•
Data logging can be performed directly to a USB flash drive,
or up to 400,000 points can be retained onboard the meter. The
meter has a file management system that allows naming and
renaming files, auto increments file names for repetitive
logging events, supports folder creation and renaming, and
transfers files and folders from onboard memory to USB flash
drive.
•
USB, RS-232, and GPIB (LabMax-TOP w/GPIB model only)
computer interfaces with full host control and drivers for both
VisualBasic and LabVIEW™ programmers. Plug-and-play
applications software is also supplied standard, along with
USB and RS-232 cables (an optional GPIB cable is also available through Coherent).
•
Analog output with user-selectable full-scale voltage of 1, 2 or
4V. RCA-to-BNC converter included (standard).
•
External trigger input with user-selectable slope and trigger
delay.
18
Description
Menu Layout
MEASURE
POSITION STABILITY
(thermopile quads only)
STATS
STATS: Setup
•
Field-upgradeable meter internal software and operating
system, with updates available on the Coherent website or
e-mailed directly to the user. This feature ensures that you
always have the latest LabMax features.
•
Li-ion battery powered (4400 mAh pack standard), as well as
the ability to operate with an AC power adapter (PSE and UL
approved). Meter contains a smart charging circuit onboard to
charge the rechargeable battery pack and the display has a
battery level indicator. AC power adapter and cord are
included.
•
LabVIEW Instrument Driver that can be used with USB,
RS-232, or GPIB interfaces.
•
Applications software that allows you to plug the meter into
your PC and immediately analyze data and log it to a file. The
software is contained on the CD that ships with the meter and
will also be available on our website as a free download.
The following chart graphically depicts the LabMax menu organization.
TUNE
(no submenus)
SETUP
TREND
TREND: Name
Log File
SETUP: Save
Current Config
TREND: File
Manager
SETUP: Manage
Configs
TREND: Setup
STATS: Change
Stats
Figure 6. Menu Organization
19
HELP
HELP:
(context-sensitive)
HELP: All Topics
LabMax-TOP User Manual
Front Panel
The front panel (shown in Figure 7) includes a large liquid crystal
display (LCD), as well as buttons, a Selection knob, and soft keys
that are used to enter parameters, select modes, and change ranges.
Setup Button
Help Button Backlight Button
?
LCD
Measure Button
MEASURE
TUNE
Tune Button
TREND
Trend Button
Selection Knob
(Enter/Set Button)
ZERO
Power On/Off
Button
Soft Keys
Zero Button
Figure 7. Front Panel
Buttons
LabMax has the following buttons (refer to Figure 7 for button locations):
•
SETUP
•
HELP
•
BACKLIGHT
•
MEASURE
•
TUNE
•
TREND
•
ZERO
•
Power On/Off
•
Selection knob (which also functions as the Enter/Set button
when pressed, rather than turned)
For detailed information about each of the buttons, refer to “Operation” on page 29.
20
Description
Soft Keys
The five soft keys—just below the LCD—are used for three main
functions:
•
Navigating to a different screen. Examples: POSITION
STABILITY and TREND SETUP.
•
Performing an action. Examples: START and RESET.
•
Making a selection from a list of possible choices. Examples:
RANGE and UNITS.
For detailed information about soft keys, refer to “Operation” on
page 29. To learn how to change a value, refer to “Selection Knob”
on page 21.
Power On/Off
Button
If a sensor is connected to the meter when it is turned on,
the meter defaults to the last mode (MEASURE, TUNE,
TREND, or SETUP) used with that specific type of
sensor (thermopile, optical, or pyroelectric). If the wavelength of the new sensor is out of range of the previously-selected
wavelength for the sensor typed attached, the meter automatically
switches to the calibration wavelength for that sensor.
A “Searching for sensor” error message will appear on the LCD if
the meter is turned on without a sensor connected to it. (See “Meter
and Sensor Errors” on page 181 for a complete listing and description of all error messages.)
Selection Knob
To change a value, first turn the Selection knob to select
a specific value, and then press the Selection knob
(which also functions as an Enter/Set button when
pressed, rather than turned) to save the value.
21
LabMax-TOP User Manual
Side Panel
Figure 8 shows the location of the LabMax connectors on the side
panel. Each of these connectors is discussed, below.
USB Flash Drive
Mini-USB (PC Interface)
Power Jack
RS-232
Sensor
Figure 8. Side Panel Connectors
USB Flash Drive
Connector
This is an input connector for a USB (FAT16) flash drive.
Mini-USB
Connector
Attaching the cable—shipped with the meter—to this mini-USB
connector allows communication between LabMax and a computer
that has a USB interface.
Install the LabMax software before physically connecting the
meter to the computer. For information about installing the software, refer to “Software Installation” on page 5.
RS-232 Connector
This is an RS-232, female, miniature 6-pin DIN. For a list of pin
assignments, refer to Table 19 on page 177.
22
Description
To connect the RS-232 cable to the meter:
1.
Hold the cable locking sheath in the open position:
OPEN
Cable Locking Sheath
2.
Slide the cable into the RS-232 connector on the side of the
meter.
3.
Release the cable locking sheath to lock the cable in place.
Sensor Connector
Use this connection to attach a Coherent thermopile, optical, or
pyroelectric sensor to LabMax.
Power Jack
Connector
Connect the power cord—shipped with the meter—to this
connector.
Rear Panel
The following figure shows the location of the LabMax connectors
on the rear panel. Each of these connectors is discussed, below.
EXT
TRIG
ANALOG
OUT
GPIB
Ext Trig
Analog Out
GPIB
(LabMax-TOP w/GPIB
model only)
Figure 9. Rear Panel Connectors
23
LabMax-TOP User Manual
Ext Trig Connector
(Trigger In) Attach an external trigger source to this connection.
This source is used if external triggering is specified. For more information about trigger settings, refer to “Trigger” on page 85
Analog Out
Connector
When power is on, the Analog Out connector outputs a voltage
proportional to the current laser measurement with respect to the
measurement range. The output voltage is zero (0) volts when the
measured energy or power is zero (0) or less. The output voltage is
the full-scale output voltage when the measured energy or power is
full-scale or overranged. The full-scale output voltage (1, 2, or 4V)
is selected in the SETUP screen or via the host interface. Factory
default full-scale output voltage is 2V.
GPIB Connector
This is an IEEE-488 computer interface found on the LabMax-TOP
w/GPIB model.
Battery
Indicators
This section discusses three indicators that provide information on
the status of the internal battery. These indicators appear in the upper
left corner of the LCD.
The Battery Life indicator visually represents the
percentage of remaining battery life (refer to Table 1).
This indicator only appears on the screen when a battery
is installed in the meter.
The Battery Life indicator will begin flashing shortly before the
battery is completely discharged. To avoid loss of data, immediately either save the current information to a file, or connect AC
power to the meter.
Table 1. Battery Life Indicator (Sheet 1 of 2)
NUMBER OF VISIBLE BARS
REMAINING BATTERY LIFE
5
81 to 100%
4
61 to 80%
3
41 to 60%
2
21 to 40%
24
Description
Table 1. Battery Life Indicator (Sheet 2 of 2)
NUMBER OF VISIBLE BARS
REMAINING BATTERY LIFE
1
11 to 20%
0
0 to 10%
The Charging indicator signals that the battery is
currently being charged. It only appears on the screen
when the meter is running on AC power and the installed
battery has less than 100% charge. Once the battery is
completely charged, the Charging indicator disappears.
The Charging Malfunction indicator only appears when
there is something wrong with the battery charging
process. To attempt to solve the problem, begin by
removing the battery and then re-attaching it. Then
unplug the AC power source from the meter and then plug it back in.
If this does not clear the error, fully drain the battery and recharge it
(refer to “Battery Charging Procedure,” below, for information
about discharging and recharging the battery). If the Charging
Malfunction indicator continues to display, call Coherent for assistance (refer to Table 17, “Coherent Service Centers,” on page 174
for contact information).
Battery Charging
Procedure
To achieve greater battery fuel gauge accuracy, complete the
following procedure. This procedure must be repeated whenever
a new battery pack is installed (including when you first receive the
meter) and can be repeated at any time to reset the fuel gauge
registers.
1.
Install the battery pack into LabMax (in the case of a new
meter, the battery pack comes already installed). Refer to
“Battery Pack Replacement” on page 27 to see how to attach
the battery connector to the meter.
2.
Fully-charge the battery pack by running the meter on AC
power for at least eight hours.
25
LabMax-TOP User Manual
3.
Fully-discharge the battery pack by unplugging LabMax from
the AC source and then running the meter using only battery
power. Let the meter run until it automatically shuts off (which
indicates a dead battery).
4.
Fully-charge the battery pack again (> 8 hr.).
It can take up to one minute for LabMax to update the Battery
Charge indicator after the installation of a new battery or after
attaching an AC power adapter.
26
Description
Battery Pack
Replacement
Figure 10 illustrates how to replace the LabMax standard battery
pack. To review battery specifications, refer to “Appendix A: Specifications” on page 175.
Lay the meter face down on a flat surface and open the stand.
Open the battery cover.
Carefully lift the battery pack to expose
the battery connector. Be careful to not
pull the wires out of the battery connector.
Push down on the tab and pull the
battery connector out of the socket.
Tab
Battery Connector
Remove the battery pack. When installing a new battery
pack, make sure the battery connector is pressed back
into the socket and the wires are situated under the battery
pack.
Figure 10. Battery Pack Replacement
AC Adapter
Using an AC adapter prolongs battery life. LabMax automatically
senses when an adapter is being used.
27
LabMax-TOP User Manual
28
Operation
OPERATION
This section discusses:
Units
•
Units (this page)
•
MEASURE (this page)
•
TUNE (page 51)
•
TREND (page 54)
•
ZERO (page 71)
•
SETUP (page 72)
•
HELP (page 102)
•
BACKLIGHT (page 103)
Measurement units are expressed in terms listed in the following
table:
Table 2. Joules and Watts Units
JOULESA
WATTSA
pJ (picojoules)
pW (picowatts)
nJ (nanojoules)
nW (nanowatts)
mJ (microjoules)
mW (microwatts)
mJ (millijoules)
mW (milliwatts)
J (joules)
W (watts)
kW (kilowatts)
A. When area correction is enabled, all units are expressed in terms of per cm2. In
other words, the /cm2 suffix is always appended to the units.
MEASURE
MEASURE
The MEASURE mode provides three primary functions:
Measure Power, Measure Energy, and Statistics. Each of
these functions are discussed in detail, below.
29
LabMax-TOP User Manual
Measurement
Display and Range
Selection
The graphical display update rate for numeric measurement is three
times per second.
Measurement range is selected in decade steps. Range selection is
dependent on the sensor type and characteristics, as well as
user-determined measurement settings.
LabMax uses the “3’s” Rule—a display formatting rule in which the
display value is not allowed to exceed 3, 30, or 300, depending on
where the decimal point falls, with the decimal point located in a
fixed position, as determined by the current range. Typically if a
reading exceeds the “3’s” limit, the instrument is over-ranged or, in
the case of Auto Ranging, the instrument will automatically range
up.
Over-ranging refers to a meter setup condition in which the sensor
output signal is greater than the maximum allowable level for the
selected range. OVR appearing on the display signifies an
over-range condition. Over-ranging generates invalid data.
Measure Power
Thermopile Sensors
Figure 11 shows an example of how the MEASURE POWER screen
looks when a thermopile sensor is connected to the meter (for thermopile quad sensors, refer to “Thermopile Quad Sensors” on
page 32):
MEASURE POWER
22.1
Wavelength:
514
RANGE
Auto
nm
Gain:
OFF
UNITS
Watts
W
Smoothing:
OFF
STATS
Figure 11. MEASURE POWER: Thermopile Sensors
This screen contains the live reading and also shows the following
indicators: Wavelength, Gain, and Smoothing. Note that Figure 11
shows an example screen with Area Correction turned OFF. With
30
Operation
Area Correction turned ON, the screen looks slightly different. (A
summary of indicator behavior is provided in “Appendix C:
Onscreen Indicators” on page 183.)
Soft Keys
There are three soft keys on this screen: RANGE, UNITS, and
STATS.
RANGE
•
Available values (thermopile and optical sensors): Auto
(factory default) and the allowable ranges for the attached
sensor.
•
Available values (pyroelectric sensors): Sensor-dependent.
To adjust the range:
1.
Press the RANGE soft key.
2.
Turn the Selection knob to change the range value.
3.
When the desired value appears, press the RANGE soft key (or
the ENTER/SET button) to lock in the RANGE value.
UNITS
Pressing the UNITS soft key toggles the measurement units between
Watts and Joules.
STATS
Refer to “Statistics” on page 42 for information about the STATS
menu.
Over-Temperature Condition
(thermopile sensors only) Whenever the meter detects a sensor
over-temperature condition, a Sensor Over Temp dialog message
appears on the screen. This message does not appear unless a sensor
over-temperature condition exists.
If a Sensor Over Temp message appears on the screen, turn the
laser off immediately and let the sensor cool down.
31
LabMax-TOP User Manual
Thermopile Quad
Sensors
Figure 12 shows an example of how the MEASURE POWER screen
looks when a thermopile quad sensor is connected to the meter. In
addition to the live display, there is a positional target that is used to
make sure the beam is aligned to the center of the sensor before
taking a measurement. The outer edge of the bulls eye target represents the outer edge of the sensor's active area.
MEASURE POWER
9.4
514 nm
Wavelength:
TARGET
Small
RANGE
Auto
Gain:
W
OFF
UNITS
Watts
Smoothing:
POSITION
STABILITY
OFF
STATS
Figure 12. MEASURE POWER: Thermopile Quad Sensors
This screen contains the live reading and also shows the following
indicators: Wavelength, Gain, and Smoothing. (A summary of indicator behavior is provided in “Appendix C: Onscreen Indicators” on
page 183.)
Soft Keys
There are five soft keys on this screen: TARGET, RANGE, UNITS,
POSITION STABILITY, and STATS.
TARGET
Available values: Small and Large.
To adjust the size of the target, toggle the TARGET soft key.
RANGE
•
Available values (thermopile and optical sensors): Auto
(factory default) and the allowable ranges for the attached
sensor.
•
Available values (pyroelectric sensors): Sensor-dependent.
32
Operation
To adjust the range:
1.
Press the RANGE soft key.
2.
Turn the Selection knob to change the range value.
3.
When the desired value appears, press the RANGE soft key (or
the ENTER/SET button) to lock in the RANGE value.
UNITS
Pressing the UNITS soft key toggles the measurement units between
Watts and Joules.
POSITION STABILITY
Refer to “POSITION STABILITY” on page 49.
STATS
Refer to “Statistics” on page 42 for information about the STATS
menu.
Optical Sensors
Figure 13 shows an example of how the MEASURE POWER screen
looks when an optical sensor is connected to the meter:
MEASURE POWER
21
Wavelength:
Gain:
532 nm
OFF
nW
Offset:
Smoothing:
RANGE
Auto
--OFF
STATS
Figure 13. MEASURE POWER: Optical Sensors
This screen contains the live reading and also shows the following
indicators: Wavelength, Offset, Gain, and Smoothing. (A summary
of indicator behavior is provided in “Appendix C: Onscreen Indicators” on page 183.)
33
LabMax-TOP User Manual
Soft Keys
There are two soft keys on this screen: RANGE and STATS.
RANGE
•
Available values (thermopile and optical sensors): Auto
(factory default) and the allowable ranges for the attached
sensor.
•
Available values (pyroelectric sensors): Sensor-dependent.
To adjust the range:
1.
Press the RANGE soft key.
2.
Turn the Selection knob to change the range value.
3.
When the desired value appears, press the RANGE soft key (or
the ENTER/SET button) to lock in the RANGE value.
STATS
Refer to “Statistics” on page 42 for information about the STATS
menu.
Measure Energy
Thermopile Sensors,
Long Pulse Joules
Connecting a thermopile sensor to the meter and switching to Joules
mode displays the screen shown in Figure 14. This mode measures
the energy of single pulses between 1 millisecond and 10 seconds in
34
Operation
length, and with energies from 5 mJ to hundreds of joules. The
energy range is sensor dependent. More sensitive thermopiles (such
as a PS10Q) are required to measure long mJ pulses.
MEASURE ENERGY
READY
3.11
mJ
5.2 mW
Wavelength:
1.064 µm
Gain:
OFF
UNITS
Joules
STATS
Figure 14. MEASURE ENERGY: Thermopile Sensors (Long Pulse Joules)
Display Smoothing and Speedup are not active in this mode. When
a pulse is received, the READY indicator in the upper left of the
screen changes to CALCULATING, the position indicator shows
the beam position in the crosshairs, and a plot of the thermopile
response begins (Figure 15).
MEASURE ENERGY
CALCULATING
3.11
mJ
5.2 mW
Wavelength:
1.064 µm
Gain:
OFF
UNITS
Joules
STATS
Figure 15. MEASURE ENERGY: Thermopile Sensors (Long Pulse - Active)
35
LabMax-TOP User Manual
Once the calculation has been completed, the new Joules value is
displayed, the CALCULATING indicator is replaced with READY,
and the plot stops (Figure 16). After two seconds, the Joules value
dims and the beam position dims in its final position)):
MEASURE ENERGY
READY
3.11
mJ
5.2 mW
Wavelength:
1.064 µm
Gain:
OFF
UNITS
Joules
STATS
Figure 16. MEASURE ENERGY: Thermopile Sensors (Long Pulse - After Pulse)
RANGE
When measuring energy with a thermopile sensor, the meter automatically determines the appropriate range. The range value cannot
be manually changed.
UNITS
Pressing the UNITS soft key toggles the measurement units back to
Watts and displays the MEASURE POWER screen.
STATS Soft Key
Pressing the STATS soft key displays the STATS screen. For details
on the STATS screen, refer to “Statistics” on page 42.
36
Operation
Pyroelectric Sensors
Pressing the MEASURE button when a pyroelectric sensor is
attached to the meter will display a screen similar to the one shown
below.
The unit that appends to the live reading is determined by the
type of measurement selected with the UNITS soft key: Joules or
Watts.
MEASURE ENERGY
TRIGGER
20
µJ
595 Hz
Wavelength:
1.064 µm
RANGE
300 µJ
Gain:
OFF
UNITS
Joules
Smoothing:
TRIG LEV
02%
OFF
STATS
Figure 17. MEASURE ENERGY: Pyroelectric Sensors
This screen contains the live reading and the rep rate. It also shows
the following indicators: Wavelength, Gain, and Smoothing. (A
summary of indicator behavior is provided in “Appendix C:
Onscreen Indicators” on page 183.)
Soft Keys
There are four soft keys on this screen: RANGE, UNITS, TRIG
LEV(el) (for internal trigger source) or TRIG DLY(delay) (for
external trigger source), and STATS.
RANGE
•
Available values: Sensor-dependent.
To adjust the range:
1.
Press the RANGE soft key.
2.
Turn the Selection knob to change the range value.
3.
When the desired value appears, press the RANGE soft key (or
the ENTER/SET button) to lock in the RANGE value.
37
LabMax-TOP User Manual
UNITS
Pressing the UNITS soft key toggles the measurement units between
Watts and Joules.
TRIG LEV(el) (for internal trigger source)
Available values: 2 (factory default) to 20%.
To adjust the level:
1.
Press the TRIG LEV soft key.
2.
Turn the Selection knob to change the value. The result of the
adjustment can be seen in the live measurement display.
Adjust the trigger threshold as low as possible to avoid noise
triggers while the laser is not firing.
3.
When the desired value appears, either press the TRIG LEV
soft key or press the ENTER/SET button to lock in the value.
TRIG DLY(delay) (for external trigger source)
Available values: 0 (factory default) to 1000.
To adjust the level:
1.
Press the TRIG DLY soft key.
2.
Turn the Selection knob to change the value. When the desired
value appears, either press the TRIG DLY soft key or press the
ENTER/SET button to lock in the value.
Trigger Delay can also be adjusted on the Trigger screen in
SETUP. For more information, refer to “Trigger” on page 85
STATS
Refer to “Statistics” on page 42 for information about the STATS
menu.
Pyroelectric Watts Mode
Using an attached pyroelectric sensor, LabMax-TOP can measure
average power from a series of pulses. By pressing the UNITS soft
key, the instrument toggles between displaying energy and
displaying average power.
Average power is calculated by measuring the energy of the pulses
and dividing by the periods between them and, thus, requires at least
two pulses to make a power measurement. Each subsequent pulse
38
Operation
defines the period for the previous pulse until the last pulse (see
Figure 18, below). The last pulse in a pulse burst will not yield a
power measurement since the period after the last pulse is indeterminate. This method allows more accurate tracking of initial average
power transients for pulsed lasers.
E1
E0
t0
E3
E2
t1
t2
En
t3
tn
indeterminate
Figure 18. Average Power Diagram
When measuring the average power of a laser burst or continuous
pulse train, the frequency of the pulses must be greater than or equal
to 1 Hz, and less than or equal to the maximum repetition rate capability of a compatible pyroelectric sensor. Multiple bursts separated
by one second or less are treated as a single burst and, accordingly,
the gap between bursts appears as a lower power.
Short bursts with rep rates greater than 1 kHz may not yield a
measurement.
Triggering
LabMax must trigger reliably for each laser pulse.
LabMax may be triggered externally via the Ext Trig connector (see
“Ext Trig Connector” on page 24). This is particularly useful in a
noisy environment. LabMax can be set to synchronize with either
the positive or negative transition of this external signal.
Without a reliable external trigger, set LabMax to use its own
internal circuitry to extract a trigger from the incoming signal. This
is called Internal Triggering (discussed, below). For more information about setting the trigger source, refer to “Trigger” on page 85.
Internal Triggering
Mode
Internal triggering refers to finding a trigger automatically from the
incoming signal.
39
LabMax-TOP User Manual
To successfully extract an internally-generated trigger, set the meter
range so that the incoming signal is at least 5% of the full scale. Set
the trigger level at least 2% above the noise level and at least 2%
below the percent of full scale that you plan to measure.
For example if you plan to measure pulses that are approximately
300 mJ, set the meter to a range of 3J. A peak will occur at 10% of
full scale, well above the 5% level. The trigger level should not be
set higher than 8%. If the noise level is 5% of full scale (approximately 150 mJ), the trigger level should not be set lower than 7%.
To find the level at which noise triggers, make sure the laser shutter
is closed and start turning down the trigger threshold level. At some
point you may notice that the meter picks up trigger events and
displays energy measurements. This is considered the noise level.
Depending upon the sensor model and the range selected, you may
or may not detect noise triggers above 2% of full scale range.
In Figure 19, the internal trigger threshold has been set to 8%
(shown as a dashed line). Pulse A will definitely not generate a reliable trigger. Pulse B may generate a trigger, but not reliably. Pulses
C and D will definitely generate reliable triggers.
Definitely will not trigger
May trigger, but not reliable
Definitely will trigger
15%
10%
8% Trigger Level
5%
A
B
C
D
Figure 19. Internal Trigger Threshold
A full-scale signal on one range may not trigger on the next higher
range unless the trigger level is set to less than 10%. For example, a
near full-scale signal of 280 mJ on the 300 mJ range is less than 10%
of full scale on the next higher range (3J), and would therefore not
trigger the reading. To obtain reliable triggering in this instance,
adjust the trigger level to less than 8%.
40
Operation
The trigger is synchronous with the leading edge of the pulse, but the
actual peak is determined algorithmically by sampling the input
signal near the trigger. From the trigger point forward, the algorithm
searches for peaks and from the trigger point back, it searches for a
baseline.
Trigger States and the
Trigger Annunciator
The trigger state is always displayed when a pyroelectric sensor
is attached and the trigger source is set to Internal.
Two annunciators indicate the trigger state of the meter: TRIGGER
and the ? segment that follows it.
There are two possible trigger states when a pyroelectric sensor is
attached: triggered and wait for trigger. The triggered state indicates
that the meter is capturing laser pulses (or is triggering on noise).
The wait for trigger state indicates an absence of pulse triggers.
When a pulse is captured, the trigger state becomes active and the
wait for trigger state becomes inactive. If no pulses are captured
within 2 seconds since the last pulse was captured, the wait for
trigger state becomes active and the triggered state becomes inactive. The TRIGGER annunciator reads “TRIGGER” in the triggered
state and “TRIGGER?” in the wait for trigger state.
Pulse Sampling
Pulse sampling refers to how many pulses are read within a series of
pulses. For example, when receiving 2,500 pulses per second, pulse
sampling reads (that is, samples) every third incoming pulse. Table 3
shows how many pulses are sampled, depending on the number of
incoming pulses per second.
Table 3. Approximate Pulse Sampling Based on the Number of Incoming Pulses (Sheet 1 of 2)
INCOMING PULSES
<1,000
PULSES READ
Every pulse is read (pulse sampling is not active)
1,000 to 2,000
Every second pulse is read
2,001 to 3,000
Every third pulse is read
3,001 to 4,000
Every fourth pulse is read
4,001 to 5,000
Every fifth pulse is read
5,001 to 6,000
Every sixth pulse is read
6,001 to 7,000
Every seventh pulse is read
41
LabMax-TOP User Manual
Table 3. Approximate Pulse Sampling Based on the Number of Incoming Pulses (Sheet 2 of 2)
INCOMING PULSES
PULSES READ
7,001 to 8,000
Every eighth pulse is read
8,001 to 9,000
Every ninth pulse is read
9,001 to 10,000
Every tenth pulse is read
>10,000
Statistics
Pulse sampling continues to approx. 15 kHz but is not guaranteed to
meet instrument specifications
Pressing the STATS soft key from the MEASURE screen will
display the screen in Figure 20 (for thermopile or optical sensors), or
Figure 21 (for pyroelectric sensors).
STATS
Duration: 00:10
Elapsed: 00:00
22.1W
Live:
Min:
---
Max:
---
Mean:
---
Std Dev:
---
OFF
Smoothing:
Wavelength:
START
514 nm
RANGE
Auto
Gain:
RESTART
Manual
OFF
CHANGE
STATS
STATS
SETUP
Figure 20. STATS: Thermopile and Optical Sensors
STATS
Duration: 10
Elapsed:
0
TRIGGER
15 µJ
Live:
581 Hz
Min:
---
Max:
---
Mean:
---
Std Dev:
---
Wavelength:
START
1,064 µm
RANGE
300 µJ
Gain:
OFF
RESTART
Manual
Smoothing:
STATS
SETUP
OFF
CHANGE
STATS
Figure 21. STATS: Pyroelectric Sensors
42
Operation
The STATS screen displays the live measurement and, by default,
the Min, Mean, Max, and Standard Deviation values. It is possible
to modify the parameters shown on this screen by selecting up to six
statistics for display. (To learn how to select different statistics, refer
to “CHANGE STATS” on page 45.)
The Duration indicator in the upper left corner of the STATS screen
can be changed in Stats Setup (discussed under “STATS SETUP
Description” on page 46). See “Appendix C: Onscreen Indicators”
on page 183 for a summary of indicators and their behavior.
Soft Keys
There are five soft keys on this screen: START, RANGE,
RESTART, STATS SETUP, and CHANGE STATS.
START
Pressing the START soft key begins data collection. The statistics
appear on the screen as the batch is collected (see the following
example):
STATS
Duration: 00:10
Live:
Elapsed: 00:03
22.2 W
Min:
22.2 W
Max:
22.3 W
Mean:
22.2 W
Std Dev:
3.90 mW
Wavelength:
STOP
514 nm
RANGE
Auto
Gain:
OFF
RESTART
Manual
Smoothing:
STATS
SETUP
OFF
CHANGE
STATS
Figure 22. STATS: Data Collection (In Process)
Pressing the STOP key—which appears in place of the START
key during data collection—ends data collection.
RANGE
•
Available values (thermopile and optical sensors): Auto
(factory default) and the allowable ranges for the attached
sensor.
43
LabMax-TOP User Manual
•
Available values (pyroelectric sensors): Sensor-dependent.
To adjust the range:
1.
Press the RANGE soft key.
2.
Turn the Selection knob to change the range value.
3.
When the desired value appears, press the RANGE soft key (or
the ENTER/SET button) to lock in the RANGE value.
RESTART
The RESTART soft key on the STATS screen toggles between
Manual (factory default) mode and Auto mode.
STATS
Duration: 00:10
Live:
Elapsed: 00:10
22.2 W
Min:
22.2 W
Max:
22.2 W
Mean:
22.2 W
Std Dev:
6.74 mW
Wavelength:
START
514 nm
RANGE
Auto
Gain:
OFF
RESTART
Manual
Smoothing:
STATS
SETUP
ON
CHANGE
STATS
Figure 23. STATS: Statistics Readout
Manual Mode
In Manual mode, pressing the START soft key begins data collection. Data collection ends by:
•
Pressing the STOP soft key—which appears in place of the
START key during data collection.
•
Reaching the time duration that was set for data collection (see
“STATS SETUP Description” on page 46 for information
about setting the time duration).
Auto Mode
Auto mode acts similar to Manual mode, except that once data
collection reaches the time duration, the batch automatically starts
over.
44
Operation
As with Manual RESTART, pressing the STOP soft key immediately stops data collection.
STATS SETUP
Refer to “STATS SETUP Description” on page 46.
CHANGE STATS
Pressing the CHANGE STATS soft key on the STATS screen
displays the following screen:
STATS: Change Stats
Min
Max
Mean
Standard deviation
Range
σ /mean in %
2 σ /mean in % (stability)
3 σ / mean in %
Select up to
6 parameters
to display
Dose
Missed Pulses
EXIT
Figure 24. STATS: Change Stats
The Dose parameter appears only when using a pyroelectric
sensor in energy mode. The Missed Pulses parameter is available
only when in external trigger mode with a pyroelectric sensor.
Up to six items can be selected for display on the STATS screen.
To select an item:
1.
Turn the Selection knob to move the highlight up or down the
list.
2.
Press the ENTER/SET button to select or de-select an item.
3.
Press the EXIT soft key to save the settings and exit Change
Stats mode.
45
LabMax-TOP User Manual
STATS SETUP Description
Statistics batch size is specified on this screen. The total amount of
time and the rate at which data is collected can be adjusted. Note that
with pyroelectric energy sensors, the batch size is specified in terms
of pulses, not time.
By default, thermopile and optical sensors are sampled 10 times per
second. This is the maximum sampling rate possible. Pyroelectric
energy sensors have a factory default sample rate of one sample per
laser pulse. Using the STATS Setup screen lets you set the meter so
that it does not sample every single laser pulse.
To change the current stat settings, press the STATS SETUP soft
key. Depending on the type of sensor attached to the meter and the
measurement being taken, one of the following STATS: Setup
screens will appear:
•
Thermopile or optical sensor (Figure 25)
•
Pyroelectric sensor measuring power (Figure 26)
•
Pyroelectric sensor measuring energy (Figure 27)
STATS: Setup
Display units:
Watts
Duration:
00:00:00:10
Sampling rate:
10
Batch Size:
100
<<-
(days:hr:min:sec)
samples every
(hr:min:sec)
->>
00:00:01
SAVE
CANCEL
Figure 25. STATS: Setup (Thermopile and Optical Sensors)
46
Operation
STATS: Setup
Display units:
Duration:
Watts
0000000010
Sampling rate:
1
Batch Size:
10
<<-
pulses
sample every
pulse(s)
->>
00001
SAVE
CANCEL
Figure 26. STATS: Setup (Pyroelectric Sensors - Power)
STATS: Setup
Display units:
Joules
Duration:
0000000010
Sampling rate:
Batch Size:
<<-
1
pulses
samples every
pulse(s)
00001
10
->>
SAVE
CANCEL
Figure 27. STATS: Setup (Pyroelectric Sensors - Energy)
Soft Keys
There are four soft keys on this screen: <<-/->> (Previous/Next
directional arrows), SAVE, and CANCEL.
<<- and ->> (directional arrows)
Parameters on this screen are changed by using one of the following
procedures. The procedure that should be used depends on the type
of parameter you want to modify.
47
LabMax-TOP User Manual
“Single” Parameters
This type of parameter—Display units, for example—has only one
modifiable field. To change a value for this type of parameter:
1.
Press the ENTER/SET button until the parameter you want to
change is highlighted.
2.
Turn the Selection knob to change the parameter value.
3.
Press the ENTER/SET button to move to the next parameter.
4.
Continue this process until the values for all the parameters are
correct.
5.
Once the values for all the parameters are correct, press the
SAVE soft key to save the parameters and display the STATS
screen.
“Multiple” Parameters
This type of parameter—Duration, for example—contains several
fields that can be modified. To change a value for this type of parameter:
1.
Press the ENTER/SET button until the parameter you want to
change is highlighted.
2.
Turn the Selection knob to change the parameter value.
3.
Press either of the directional arrows soft keys (<<- or ->>) to
move the highlight to another value within the same parameter.
4.
Repeat steps 2 and 3 until all values for that parameter are
correct.
5.
Press the ENTER/SET button to move to the next parameter.
6.
Once the values for all the parameters are correct, press the
SAVE soft key to save the parameters and display the STATS
screen.
SAVE
Pressing the SAVE soft key saves whatever changes were made
since the last SAVE and displays the STATS screen.
CANCEL
Pressing the CANCEL soft key discards all changes that were made
since the last SAVE and displays the STATS screen.
48
Operation
Detailed
Procedures
This section provides in-depth information about specific topics that
were briefly discussed earlier.
POSITION STABILITY
When a quad thermopile sensor is attached to the meter, pressing the
POSITION STABILITY soft key on the MEASURE POWER
screen will display a screen similar to the following:
POSITION STABILITY
Duration: 01:00
Elapsed: 00:00
X: 0.2 mm
Y: -0.5 mm
9.5
-9.5
01:00
START
VIEW
Scroll
CHANGE
DURATION
EXIT
Figure 28. MEASURE POWER: POSITION STABILITY
The X-axis of the graph is time and the Y-axis is based on the diameter of the sensor active area.
The Duration indicator in the upper left shows how long the meter
will collect data.The Elapsed indicator in the upper right corner
begins its count when the START soft key is pressed.
The actual X and Y values (just above the graph) update as the data
is collected.
Soft Keys
There are four soft keys on this screen: START, VIEW, CHANGE
DURATION, and EXIT.
START
Pressing the START soft key starts data collection and toggles the
soft key to STOP. When data collection completes (either by
pressing the STOP button or as determined by the previously-set
duration), the button toggles to START again. Pressing START
when there is already data on screen, clears that data and starts data
collection over.
49
LabMax-TOP User Manual
VIEW
The VIEW soft key toggles between Scroll and Fit:
•
Fit—Fits the entire duration on the X-axis in one screen
•
Scroll—Pages the data every minute
CHANGE DURATION
Pressing the CHANGE DURATION soft key accesses the Duration
field in the upper left corner of the screen, as shown here:
POSITION STABILITY
Duration: 00:00:01
X: 0.2 mm
Elapsed: 00:00
Y: -0.5 mm
9.5
-9.5
00:01
<<-
->>
CHANGE
DURATION
EXIT
Figure 29. POSITION STABILITY: Duration
To change the duration:
1.
Use the left and right arrow soft keys to highlight an individual
duration field (hours, minutes, or seconds).
2.
Turn the Selection knob to change the value of the
currently-highlighted field.
3.
Repeat steps 1 and 2 until the desired duration has been
entered.
4.
To save the duration, either press the ENTER/SET button
(which will display the POSITION STABILITY screen), or
press the EXIT soft key (which will exit POSITION
STABILITY mode and display the MEASURE POWER
screen).
EXIT
Pressing the EXIT soft key displays the MEASURE POWER
screen.
50
Operation
TUNE
Pressing the TUNE button on the front panel of the meter
will enter the TUNE mode. This mode is used in place of
TUNE
an analog needle to monitor the laser output while tuning
or tweaking the laser. Typically the laser output is being
maximized during the process, and both tuning screens—Strip chart
and Bar chart—contain peak indicators and display the maximum
measured value since the laser Reset event. Details of the strip chart
and bar chart are discussed next.
Strip Chart
Figure 30 shows an example Strip chart screen for both thermopile
and optical sensors. Press the RESET soft key to reset the peak indicator, maximum measured value, and vertical scale. When the
Vertical scale factor is set to 1X, pressing the RESET soft key will
also clear the display. When in a higher scale factor, the screen is not
cleared but the factors are reset and the plot is centered on the live
reading.
TUNE
Live:
22.3
Max: 22.4
W
W
25
0
60 sec
Wavelength:
VIEW Strip
Chart
532 nm
RANGE
Auto
Gain:
OFF
VERT
1X
Smoothing:
HORIZ
1X
OFF
RESET
Figure 30. TUNE: Strip Chart (Thermopile and Optical Sensors)
Soft Keys
There are five soft keys on this screen: VIEW, RANGE, VERT,
HORIZ, and RESET.
VIEW
Pressing the VIEW soft key at the bottom of the TUNE screen
toggles between the Strip chart and the Bar chart (for more information about Bar charts, refer to “Bar Chart” on page 53).
51
LabMax-TOP User Manual
RANGE
•
Available values (thermopile and optical sensors): Auto
(factory default) and the allowable ranges for the attached
sensor.
•
Available values (pyroelectric sensors): Sensor-dependent.
To adjust the range:
1.
Press the RANGE soft key.
2.
Turn the Selection knob to change the range value.
3.
When the desired value appears, press the RANGE soft key (or
the ENTER/SET button) to lock in the RANGE value.
VERT
Pressing the VERT soft key zooms in and out on the Y-axis
presented in the TUNE chart. Zooming does not disturb data collection. Available zoom levels are 1, 2, 5, 10, and 20X.
To change the VERT level:
1.
Press the VERT soft key.
2.
Turn the Selection knob to change the VERT value.
3.
When the desired value appears, press the VERT soft key (or
the ENTER/SET button) to lock in the VERT value.
HORIZ
Pressing the HORIZ soft key zooms in and out on the X-axis
presented in the TUNE chart. Zooming does not disturb data collection. Available zoom levels are 1, 2, 5, 10, and 20X.
To change the HORIZ level:
1.
Press the HORIZ soft key.
2.
Turn the Selection knob to change the HORIZ value.
3.
When the desired value appears, press the HORIZ soft key (or
the ENTER/SET button) to lock in the HORIZ value.
RESET
Pressing this soft key resets the Max value.
52
Operation
Bar Chart
Figure 31 shows an example Bar chart screen for thermopile and
optical sensors. Press the RESET soft key to reset the peak indicator,
maximum measured value, and vertical scale. When the Zoom scale
factor is set to anything greater than 1X, pressing the RESET soft
key will also reset the x-axis scale factors to center the indicator bar
on the live value.
TUNE
Live:
22.2
Max:
W
27.7
W
50
0
514 nm
Wavelength:
VIEW Bar
Chart
RANGE
Auto
Gain:
OFF
Smoothing:
ZOOM
1X
OFF
RESET
Figure 31. TUNE: Bar Chart (Thermopile and Optical Sensors)
Soft Keys
There are four soft keys on this screen: VIEW, RANGE, ZOOM,
and RESET.
VIEW
Pressing the VIEW soft key at the bottom of the TUNE screen
toggles between the Bar chart and the Strip chart (for more information about Strip charts, refer to “Strip Chart” on page 51).
RANGE
•
Available values (thermopile and optical sensors): Auto
(factory default) and the allowable ranges for the attached
sensor.
•
Available values (pyroelectric sensors): Sensor-dependent.
To adjust the range:
1.
Press the RANGE soft key.
2.
Turn the Selection knob to change the range value.
3.
When the desired value appears, press the RANGE soft key (or
the ENTER/SET button) to lock in the RANGE value.
53
LabMax-TOP User Manual
ZOOM
Pressing the ZOOM soft key zooms in and out on the Y-axis
presented in the TUNE chart. Zooming in on the displayed data is
useful if you are trying to resolve small changes in laser output that
cannot be easily seen in the full scale, non-zoomed state. Zooming
does not disturb data collection. Available zoom levels are 1, 2, 5,
10, and 20X.
To change the ZOOM level:
1.
Press the ZOOM soft key.
2.
Turn the Selection knob to change the ZOOM value.
3.
When the desired value appears, press the ZOOM soft key (or
the ENTER/SET button) to lock in the ZOOM value.
RESET
Pressing this soft key resets the Max value.
TREND
TREND
Trend is the mode in which data can be logged to a file
onboard the meter or to a USB flash drive. Additionally,
the trend history of the data is displayed as it is logged.
Versatile data logging in trend mode is supported by a
File Management function that provides file naming (including
auto-sequencing of file names), folder creation, as well as saving,
moving, and deleting files and folders.
54
Operation
Depending upon the sensor and display units in use, pressing the
TREND button on the front panel displays one of the following
screens:
TREND
Duration: 00:10
Live:
Min:
Elapsed: 00:00
22.2 W
---
Std Dev:
Mean:
---
Max:
-----
3.00
0.00
00:10
CREATE
FILE
START
FILE
MANAGER
TREND
SETUP
VIEW
Scroll
Figure 32. TREND: Thermopile and Optical Sensors
TREND
Duration: 10
Live:
Min:
Elapsed: 0
17
---
TRIGGER?
µJ
Mean:
---
Std Dev:
Max:
-----
3.00
0.00
START
CREATE
FILE
FILE
MANAGER
TREND
SETUP
VIEW
Scroll
Figure 33. TREND: Pyroelectric Sensors
The indicator in the upper left corner—Duration—displays the
factory default batch size setting. If this setting is acceptable, press
the START soft key to begin data collection. To change the duration:
•
Press the TREND SETUP soft key on the TREND screen to
display the TREND: Setup menu.
•
Use the left arrow and right arrow soft keys to advance through
the individual duration fields (days, hours, minutes, or
seconds).
55
LabMax-TOP User Manual
•
When a specific field is highlighted, turn the Selection knob to
change the value of that field.
•
Press the SAVE soft key to save the new duration and display
the TREND screen.
•
Press the START soft key to begin data collection.
To save the data locally, do one of the following:
•
Use the CREATE FILE soft key to create and name a file
before starting data collection (refer to “Name Log File” on
page 60).
•
Use the SAVE DATA soft key—which appears in place of the
CREATE FILE soft key once data collection is complete—to
save a file after data collection. This is useful if you decide you
want to keep the data after collecting it and viewing it on the
trend chart. For more information, refer to “TREND Screen
After Data Collection” on page 58.
Soft Keys
There are five soft keys on the main TREND screen: START,
CREATE FILE, FILE MANAGER, TREND SETUP, and VIEW.
START
Pressing the START soft key on the main TREND screen starts data
collection.
CREATE FILE
Refer to “Name Log File” on page 60.
FILE MANAGER
The FILE MANAGER screen is discussed in detail under “File
Manager” on page 63.
TREND SETUP
The TREND SETUP screen is discussed in detail under “TREND
Setup” on page 68.
VIEW
The VIEW soft key on the main TREND screen toggles between
Scroll and Fit:
•
Fit—Fits the entire duration on the X-axis in one screen
•
Scroll—Pages the data every minute
56
Operation
TREND Screen
During Data
Collection
Figure 34 shows an example of how the TREND screen looks during
data collection:
TREND
Duration: 00:10
Live:
Min:
Elapsed: 00:07
22.2 W
10.4 W
Std Dev: 2.63 mW
Mean:
14.3 W
Max: 21.5 W
25
0
00:10
RESET
STOP
ZOOM
1X
VIEW
Scroll
Figure 34. TREND: During Data Collection
Soft Keys
There are four soft key on this screen: STOP, RESET, ZOOM, and
VIEW
STOP
Pressing the STOP soft key immediately stops batch collection and
displays the soft keys described under the heading “TREND Screen
After Data Collection” on page 58.
RESET
Pressing the RESET soft key stops batch collection, clears the
screen, and displays the soft keys described under the heading
“TREND” on page 54.
ZOOM
The ZOOM soft key zooms in or out on the Y-axis presented in the
TREND chart. Zooming does not disturb data collection.
To change the zoom:
1.
Press the ZOOM soft key.
2.
Turn the Selection knob to select a new zoom level.
3.
When the desired value appears, press the ZOOM soft key (or
the ENTER/SET button) to lock in the ZOOM value.
57
LabMax-TOP User Manual
VIEW
The VIEW soft key toggles between Fit and Scroll. It is possible to
toggle back and forth between Fit and Scroll during data collection.
TREND Screen
After Data
Collection
•
Fit—Fits the entire duration on the X-axis in one screen. The
collected data is decimated to allow it to be viewable on a
single screen.
•
Scroll—Pages the data. After the trend is completed, the data
on previous pages can be viewed. If viewing in Scroll mode,
turn the Selection knob to scroll back through the data. In this
viewing mode, every logged data point is visible.
Figure 34 shows and example of what the TREND screen looks like
after data collection:
TREND
Duration: 00:10
Min:
Elapsed: 00:07
22.2 W
Live:
10.4 W
Std Dev:
Mean: 14.3 W
Max:
2.63 mW
21.5 W
25
0
00:10
RESET
SAVE
DATA
ZOOM
1X
VIEW
Scroll
Figure 35. TREND: After Data Collection
Soft Keys
There are four soft keys on this screen: RESET, SAVE DATA,
ZOOM, and VIEW.
RESET
Pressing the RESET soft key stops batch collection, clears the
screen, and displays the soft keys described under the heading
“TREND” on page 54.
58
Operation
SAVE DATA
Pressing this soft key displays the following screen:
TREND: File Manager
/loc
Name
..
Size (bytes)
190
Tmp Data Save
SAVE
AS
CREATE
FOLDER
CANCEL
Figure 36. TREND: File Manager (Save Data)
There are three soft keys on this screen: SAVE AS, CREATE
FOLDER, and CANCEL.
Pressing the SAVE AS soft key will display the TREND: Save Tmp
As screen:
TREND: Save Tmp As
a b c d e f g h i j
k l m n o p q r s t
u v w x y z 0 1 2 3
4 5 6 7 8 9 -
BACK
SPACE
space
SAVE
Rotate Knob
to choose letter.
Press to select.
CANCEL
Figure 37. TREND: Save Tmp As
To create a file:
1.
Select the first character of the file name by turning the Selection knob and then pressing the ENTER/SET button when the
59
LabMax-TOP User Manual
desired letter or number is highlighted. The character will
appear in the blank box immediately below the screen heading.
To delete a character, use the BACKSPACE soft key.
2.
Repeat step 1 until the entire new file name appears in the box.
3.
Press the SAVE soft key, which will display a file management dialog screen confirming the file is being copied.
4.
Once copying is complete (as indicated by the bar on the
dialog screen displaying the text, 100%), press the
ENTER/SET button to dismiss the dialog box.
Pressing the CREATE FOLDER soft key on the TREND: File
Manager screen displays the TREND: Create New Folder screen
(refer to “CREATE FOLDER” on page 67).
Pressing the CANCEL soft key displays the main TREND screen.
ZOOM
The ZOOM soft key zooms in or out on the Y-axis presented in the
TREND chart. Zooming does not disturb data collection.
To change the zoom:
1.
Press the ZOOM soft key.
2.
Turn the Selection knob to select a new zoom level.
3.
When the desired value appears, press the ZOOM soft key (or
the ENTER/SET button) to lock in the ZOOM value.
VIEW
The VIEW soft key toggles between Fit and Scroll.
•
Fit—Fits the entire duration on the X-axis in one screen
•
Scroll—Pages the data every minute
Detailed
Procedures
This section provides in-depth information about specific topics that
were briefly discussed earlier.
Name Log File
Use this screen to create a file before starting data collection. The log
file is saved to the location previously navigated in File Manager.
For example, if you use File Manager to navigate to a USB flash
60
Operation
drive that is attached to the meter, and then subsequently create a
named log file, the file will be saved to the folder in the USB flash
drive you had previously navigated to. If you did not previously
navigated to a specific location in File Manager, the file is saved to
the local drive in the meter.
To create a file:
1.
Press the CREATE FILE soft key on the TREND screen to
display the TREND: Name Log File screen (Figure 38):
TREND: Name Log File
a
b
c
d
e
f
g
h
i
j
k
l
m n
o
p
q
r
s t
u
v
w x
y
z
0
1
2 3
4
5
6 7
8
9
-
space
Rotate Knob
to choose letter.
Press to select.
/loc/.csv
BACK
SPACE
Pattern
Sequence
None
SAVE
CANCEL
Figure 38. TREND: Name Log File
2.
Select the first character of the file name by turning the Selection knob and then pressing the ENTER/SET button when the
desired letter or number is highlighted. The character will
appear in the blank box immediately below the screen heading.
To delete a character, use the BACKSPACE soft key.
3.
Repeat step 2 until the entire file name appears in the box.
4.
Press the SAVE soft key to save the new file name and display
the TREND screen.
The new file name will appear on the bottom left of the TREND
screen (just above the START soft key).
61
LabMax-TOP User Manual
Soft Keys
There are five soft keys on this screen: BACKSPACE, Pattern,
Sequence, SAVE, and CANCEL.
BACKSPACE
This soft key backspaces one editable field and deletes the character
that was there.
Pattern
Pressing this soft key appends the current date to the file name. This
feature is a useful way to manage logged data. The date is appended
to any name you entered in the Name File dialog box. For example,
if today is February 2, 2008, and you name a file /loc/test.csv,
pressing the Pattern soft key will change the file name to
/loc/test02-04-08.csv. Note that pressing this soft key also changes
the soft key name from Pattern to Pattern Date.
Sequence
The Sequence soft key toggles between Auto and None (factory
default).
•
Auto—Appends a sequentially-incrementing identification
number to the file name. As files are created by pressing the
START and STOP soft keys (on the TREND screen), the identification number in the file name automatically increments.
This is useful if you are creating several similar log files and
want to prevent accidental overwriting of one of the data files.
It is also useful in identifying the order in which data files were
created. The Pattern and Sequence functions can be used
together.
•
None—Does not append an identification number to the file
name
SAVE
Pressing the SAVE soft key saves whatever changes were made
since the last SAVE and displays the TREND screen.
CANCEL
Pressing the CANCEL soft key discards all changes that were made
since the last SAVE and displays the TREND screen.
62
Operation
File Manager
This screen allows the user to modify or delete current files and
directories, or create a new folder. Figure 39 shows an example of
the TREND: File Manager screen, which is available by pressing the
FILE MANAGER soft key on the main TREND screen:
TREND: File Manager
/loc
Name
Size (bytes)
..
10
test.csv
6300
COPY
MOVE
DELETE
RENAME
CREATE
FOLDER
EXIT
Figure 39. TREND: File Manager
To navigate to a specific directory:
1.
Turn the Selection knob to highlight the name of the folder you
want to access.
2.
Press the ENTER/SET button. If the folder is closed, pressing
the ENTER/SET button will open and expand its contents.
Likewise, pressing this button will close an open folder.
Opening a folder displays all the subfolders and files within
that particular folder.
To display a list of files and directories stored on a USB flash
drive that is attached to the meter, turn the Selection knob to
highlight the top line of the names (“..”) that appear on the
TREND: File Manager screen and then press the ENTER/SET
button. The USB flash drive will be shown in the list of drives.
The LOC (local) drive is flash memory onboard the meter. Files
saved to the local drive are retained after powering down the
meter.
Soft Keys
There are five soft keys on this screen: COPY MOVE, DELETE,
RENAME, CREATE FOLDER, and EXIT.
63
LabMax-TOP User Manual
COPY MOVE
To copy a file to another location (while retaining the file in its original location):
1.
Turn the Selection knob to highlight the name of the file you
want to copy.
2.
Press the COPY MOVE soft key on the TREND: File Manager
screen. (Pressing this soft key changes the name of the first soft
key to COPY and the second soft key to MOVE.)
3.
Use the Selection knob to navigate to the location where you
want to copy the file. Note that you can create a new folder
during this process by pressing the Create Folder soft key.
4.
Press the COPY soft key, which will display a file management dialog screen confirming the file is being copied.
5.
Once copying is complete (as indicated by the bar on the
dialog screen displaying the text, 100%), press the
ENTER/SET button to dismiss the dialog box.
To move a file to another location (and delete the file from its original location):
1.
Turn the Selection knob to highlight the name of the file you
want to move.
2.
Press the COPY MOVE soft key on the TREND: File Manager
screen. (Pressing this soft key changes the name of the first soft
key to COPY and the second soft key to MOVE.)
3.
Use the Selection knob to navigate to the location where you
want to move the file. Note that you can create a new folder
during this process by pressing the Create Folder soft key.
4.
Press the MOVE soft key, which will display a file management dialog screen confirming the file is being moved.
5.
Once moving is complete (as indicated by the bar on the dialog
screen displaying the text, 100%), press the ENTER/SET
button to dismiss the dialog box.
64
Operation
DELETE
Copying, moving, or deleting an entire folder affects all of the
contents (files and subfolders) of that particular directory.
These functions allow quick folder/file management to a USB
flash drive or onboard local memory. Keep in mind, however,
that once a folder and its contents are deleted, they cannot be
recovered. Whenever a file or folder is deleted, a deletion confirmation box will appear on the screen.
To delete a file:
1.
Turn the Selection knob to highlight the file name.
2.
Press the DELETE soft key. The following confirmation
message will appear:
SETUP: Manage Configs
Confirm deletion of file:
Available Configurations
[file name]
Press knob to finish selection.
Delete
Cancel
Figure 40. TREND: File Manager (File Deletion Confirmation)
3.
Turn the Selection knob to highlight Delete in the Delete File
Confirmation window.
4.
Press the ENTER/SET button to delete the file and display the
TREND: File Manager screen.
To delete a folder:
1.
Turn the Selection knob to highlight the name of the folder you
want to delete.
65
LabMax-TOP User Manual
2.
Press the DELETE soft key. The following confirmation
message will appear:
SETUP: Manage Configs
Confirm deletion of folder and all contents:
Available
Configurations
[folder name]
Press knob to finish selection.
Delete
Cancel
Figure 41. TREND: File Manager (Folder Deletion Confirmation)
3.
Turn the Selection knob to highlight Delete.
4.
Press the ENTER/SET button to delete the folder and display
the TREND: File Manager screen.
RENAME
Use this function to rename a file or folder.
1.
On the TREND: File Manager screen, turn the Selection knob
to highlight the name of the file or folder you want to rename.
2.
Press the RENAME soft key to display a screen similar to the
one shown in Figure 42.
TREND: Rename File
[file or folder name]
a b c d e f g h i j
k l m n o p q r s t
u v w x y z 0 1 2 3
4 5 6 7 8 9 -
space
Rotate Knob
to choose letter.
Press to select.
/loc/[file or folder name].csv
BACK
SPACE
SAVE
CANCEL
Figure 42. TREND: Rename File or Folder
66
Operation
3.
Using the BACKSPACE soft key, delete the current name.
To delete a character at any time, use the BACKSPACE soft
key.
4.
Select the first character of the new name by turning the Selection knob and then pressing the ENTER/SET button when the
desired letter or number is highlighted. The character will
appear in the blank box immediately below the screen heading.
5.
Repeat step 4 until the entire name appears in the box.
6.
Press the SAVE soft key to save the new name and display the
TREND: File Manager screen.
Soft Keys
There are three soft keys on the TREND: Rename File screen:
BACKSPACE, SAVE, and CANCEL.
BACKSPACE
This soft key backspaces one editable field at a time and deletes the
character that was there.
SAVE
Pressing the SAVE soft key saves whatever changes were made
since the last SAVE.
CANCEL
Pressing the CANCEL soft key discards all changes that were made
since the last SAVE and returns to the TREND: File Manager
screen.
CREATE FOLDER
Use this function on the TREND: File Manager screen to create a
folder on the local drive or USB flash drive. Subfolders can be
created within a folder.
67
LabMax-TOP User Manual
Pressing the CREATE FOLDER soft key displays the screen shown
in Figure 43:
TREND: Create New Folder
a b c d e f g h i j
k l m n o p q r s t
u v w x y z 0 1 2 3
4 5 6 7 8 9 -
BACK
SPACE
space
SAVE
Rotate Knob
to choose letter.
Press to select
CANCEL
Figure 43. TREND: Create New Folder
Soft Keys
There are three soft keys on this screen: BACKSPACE, SAVE, and
CANCEL.
BACKSPACE
This soft key backspaces one editable field at a time and deletes the
character that was there.
SAVE
Pressing the SAVE soft key saves whatever changes were made
since the last SAVE.
CANCEL
Pressing the CANCEL soft key discards all changes that were made
since the last SAVE and returns to the TREND: File Manager
screen.
EXIT
Pressing the EXIT soft key in the File Manager screen displays the
main TREND screen.
TREND Setup
Use Trend Setup to select the batch duration and sampling rate:
•
For thermopiles and optical sensors, the duration is in terms of
time.
68
Operation
•
For pyroelectric sensors the duration is in terms of measured
laser pulses.
The factory default (and maximum) sampling rate for both thermopile and optical sensors is 10 samples per second. The factory
default sampling rate for pyroelectric sensors is one sample per
measured pulse.
The ability to specify both a duration and a sampling rate offers the
flexibility of collecting data on the performance of a laser over a
desired period of time while managing the quantity of data gathered.
Example: If you are using a thermopile sensor, you could set up the
meter to log one data point per minute for seven days, resulting in
10,080 data points.
Example: If you are using a pyroelectric sensor and measuring
pulses on a 1 kHz laser, you could choose to log one point per 1000
pulses for a day, resulting in 86,400 data points.
Depending upon the sensor and display units in use, pressing the
TREND SETUP soft key on the main TREND screen displays a
screen similar to one of the following:
TREND: Setup
Display units:
Watts
Duration:
00:00:00:10
Sampling rate:
10
Batch Size:
100
Maximum Batch Size:
466,033
<<-
(days:hr:min:sec)
samples every
(hr:min:sec)
->>
00:00:01
SAVE
CANCEL
Figure 44. TREND: Setup (Thermopile and Optical Sensors)
69
LabMax-TOP User Manual
TREND: Setup
Display units:
Joules
Duration:
0000000010
Sampling Rate:
1
Batch Size:
10
Maximum Batch Size:
466,033
<<-
pulses
samples every
pulses(s)
->>
00001
SAVE
CANCEL
Figure 45. TREND: Setup (Pyroelectric Sensors)
Soft Keys
There are four soft keys on this screen: <<-/->>(Previous/Next
directional arrows), SAVE, and CANCEL.
<<- and ->> (directional arrows)
Parameters on this screen are changed by using one of the following
procedures. The procedure that should be used depends on the type
of parameter you want to modify.
“Single” Parameters
This type of parameter—Display units, for example—has only one
modifiable field. To change a value for this type of parameter:
1.
Press the ENTER/SET button until the parameter you want to
change is highlighted.
2.
Turn the Selection knob to change the parameter value.
3.
Press the ENTER/SET button to move to the next parameter.
4.
Continue this process until the values for all the parameters are
correct.
5.
Once the values for all the parameters are correct, press the
SAVE soft key to save the parameters and display the STATS
screen.
70
Operation
“Multiple” Parameters
This type of parameter—Duration, for example—contains several
fields that can be modified. To change a value for this type of parameter:
1.
Press the ENTER/SET button until the parameter you want to
change is highlighted.
2.
Turn the Selection knob to change the parameter value.
3.
Press either of the directional arrows soft keys (<<- or ->>) to
move the highlight to another value within the same parameter.
4.
Repeat steps 2 and 3 until all values for that parameter are
correct.
5.
Press the ENTER/SET button to move to the next parameter.
6.
Once the values for all the parameters are correct, press the
SAVE soft key to save the parameters and display the STATS
screen.
SAVE
Pressing the SAVE soft key saves whatever changes were made
since the last SAVE and displays the TREND screen.
CANCEL
Pressing the CANCEL soft key discards all changes that were made
since the last SAVE and displays the TREND screen.
ZERO
(thermopile and optical sensors only)
Pressing the ZERO button sets the current sensor input
ZERO voltage as the zero baseline voltage. ZERO is not functional when the meter is in HELP mode.
If zeroing is unsuccessful—which means that the power input is too
large to null—re-zero in a more stable environment or select a
different range.The meter always zeros all available ranges for the
attached sensor. When a zero procedure is in process, no other
button events are queued or activated until the procedure ends. The
zero procedure immediately terminates if the sensor is disconnected
or if an error is encountered.
Normally you should press ZERO while the laser is turned off, or
while the laser beam is blocked. If a finite power level is present at
the sensor, the instrument will attempt to null it out.
71
LabMax-TOP User Manual
The meter is only able to zero a finite level of offset. When zeroing
on a selected range is unsuccessful, the text “Zeroing…” is replaced
with the following error dialog: “Bad zero. The power input is too
large to null. Re-zero in a more stable environment or select a
different range.”
SETUP
Pressing the SETUP button on the front panel will
display the main SETUP screen (Figure 46):
SETUP
11:11 AM
Turn knob to select item: Press ENTER to edit
Display smoothing:
Auto
Speedup
Area correction:
OFF
Gain compensation:
OFF
Wavelength correction:
1064 nm
Wavelength table edit
Power measure units:
Watts
Resolution:
3 digits
SAVE
CONFIG
MANAGE
CONFIGS
EXIT
Figure 46. SETUP
On the SETUP screen, a diamond indicator appears to the left of the
currently-selected item. To change the value of an item, turn the
Selection knob to move the indicator up or down the list and when
the bullet is next to the desired item, press the ENTER/SET button
(the Selection knob) to select that item. (See Figure 8 on page 22 for
the location of the Selection knob, all buttons, and the soft keys.)
Depending on which item is selected, editing will be available either
on a list that appears to the right of the selected item, or on a new
screen that will automatically open when an item is selected.
To leave SETUP:
•
Press the EXIT soft key (directly below the LCD, first key on
the right),
or
72
Operation
•
Press the MEASURE, TUNE, or TREND button
Unless a setting is incompatible with the attached sensor, all
SETUP parameters remain in effect—even if the meter is shut
down and powered up at a later time.
Display Smoothing
Display smoothing uses a rolling box-car average to smooth the
displayed measurement. This can be useful if individual measurement values are too noisy. Smoothing is applied to all displayed
measurements on all screens. In the case of quadrant position-sensing thermopile sensors, display smoothing is applied to the
position indicator within the bulls eye.
SETUP
11:11 AM
Turn knob to select item: Press ENTER to edit
Display smoothing:
Auto
Speedup
Area correction:
OFF
Gain compensation:
OFF
Wavelength correction:
1064 nm
Wavelength table edit
Power measure units:
Watts
Resolution:
3 digits
SAVE
CONFIG
MANAGE
CONFIGS
EXIT
Figure 47. SETUP: Display Smoothing
Available values: AUTO (factory default), MANUAL, and OFF.
To change a value:
1.
On the main SETUP screen, turn the Selection knob to move
the diamond indicator to Display smoothing.
2.
Press the ENTER/SET button to highlight the editable field
(Figure 47).
3.
Turn the Selection knob to change the value.
73
LabMax-TOP User Manual
4.
Press the ENTER/SET button to save the value and return to
the main SETUP screen.
If you select Manual as the Display Smoothing value, pressing
the ENTER/SET button will display either the screen shown in
Figure 48 (for thermopile and optical sensors) or the screen
shown in Figure 49 (for pyroelectric sensors). This allows the
results of smoothing the setting to be observed on the live
measurement during setup. Continue to step 5.
SETUP
Turn knob to change value and press ENTER.
Display Smoothing:
Manual
01
secs
22.5W
<<-
->>
EXIT
Figure 48. SETUP: Display Smoothing (Thermopile and Optical Sensors - Manual Mode)
SETUP
Turn knob to change value and press ENTER.
Display Smoothing:
Manual
032
pulses
TRIGGER
5.06mW
<<-
EXIT
->>
Figure 49. SETUP: Display Smoothing (Pyroelectric Sensors - Manual Mode)
74
Operation
Turn the Selection knob to change the number of seconds (thermopile and optical sensors) or pulses (pyroelectric sensors).The directional arrow soft keys (<<- and ->>) can be used to move the
highlight to a different digit before using the Selection knob to
change the value.
5.
Press the ENTER/SET button—or the EXIT soft key—to save
the value and exit Display Smoothing mode.
Press the EXIT soft key at any time to save all current values
and return to the main SETUP screen.
Speedup
(thermopile sensors only) This command selects the speedup mode
for the host interface data output.
SETUP: Speedup
Turn knob to change value and press ENTER.
Tune:
ON
Measure:
ON
Analog Out:
ON
Data Store:
ON
EXIT
Figure 50. SETUP: Speedup
Available values: ON (factory default) and OFF.
Speedup can be turned ON or OFF for the following features: Tune,
Measure, Analog Out, and Data Store.
To change a value:
1.
On the main SETUP screen, turn the Selection knob to move
the diamond indicator to Speedup.
2.
Press the ENTER/SET button to Display the SETUP: Speedup
screen (Figure 50).
75
LabMax-TOP User Manual
3.
Press the ENTER/SET button to highlight the value of the
feature you want to change.
4.
Turn the Selection knob to change the value.
5.
Press the ENTER/SET button to lock in the current value and
move the highlight to the next editable field.
Pressing the ENTER/SET button after highlighting Data Store,
or pressing the EXIT soft key at any time will save all the
locked-in values, exit Speedup mode, and return to the main
SETUP screen.
Area Correction
Area Correction allows the measurement value to be displayed in
terms of a unit area. The measured value (in watts or joules) is
divided by the area entered here. This mode is most commonly used
in processes where the energy density (fluence) or power
density—rather than the absolute energy or power—is of paramount
importance. Typically in these applications the sensor aperture is
completely flooded by laser light, and the sensor aperture is entered
here.
SETUP
11:11 AM
Turn knob to select item: Press ENTER to edit
Display smoothing:
Auto
Speedup
Area correction:
ON
Gain compensation:
OFF
Wavelength correction:
1064 nm
001.00
cm2
Wavelength table edit
Power measure units:
Watts
Resolution:
3 digits
<<-
->>
cm2
EXIT
Figure 51. SETUP: Area Correction
Available values: ON and OFF (factory default).
Available range: 0.01 to 500.00 cm2 or 0.1 to 250 mm.
76
Operation
Available units: cm2 and mm. The area can be entered in terms of
area in square centimeters or in terms of the diameter of the active
area in millimeters. When entering the active area in terms of the
diameter, the active area must be circular.
Most Coherent sensors utilize circular apertures, so the ability
to enter the active area in terms of the diameter in millimeters is
often an easier process than calculating the area yourself.
To change a value:
1.
On the main SETUP screen, turn the Selection knob to move
the diamond indicator to Area Correction.
2.
Press the ENTER/SET button to highlight the editable field
(Figure 51).
3.
Turn the Selection knob to change the value.
4.
Press the ENTER/SET button to save the value.
If you select ON as the Area Correction value, pressing the
ENTER/SET button will display the range field (shown as
001.00 in Figure 51, above) and the unit of measurement (cm2 in
Figure 51). Continue to step 5.
5.
Turn the Selection knob to change the range value.
The directional arrow soft keys (<<- and ->>) can be used to
move the highlight to a different digit before using the Selection
knob to change the value.
6.
Press the ENTER/SET button to save the value and exit Area
Correction mode.
Pressing the EXIT soft key at any time while in SETUP will
leave the SETUP program.
To change the unit of measurement:
1.
On the main SETUP screen, turn the Selection knob to move
the diamond indicator to Area Correction.
77
LabMax-TOP User Manual
2.
Press the ENTER/SET button to highlight the first field and set
Area Correction to ON.
3.
Press the ENTER/SET button to move the highlight to the
Area Correction value field. This action will display the Unit
soft key (next to EXIT at the bottom of the LCD).
4.
Toggle the Unit soft key to select either cm2 or mm as the unit
of measurement.
5.
Press the ENTER/SET button to save the value.
If there is a diameter in the sensor EEPROM, it is used as the
default when the meter powers up; otherwise, the last-entered
value is used.
Gain
Compensation
Gain Compensation lets the user adjust the measured values based
upon the gain factor entered here. Measurement values are multiplied by the gain factor.
Gain compensation has several uses:
•
Accounting for filters or other optical attenuators upstream in
the beam path.
•
Measuring a small pick-off beam from a beamsplitter and
wanting to calibrate the meter to display the power or energy
of the main beam.
78
Operation
•
Self-calibrating a meter and sensor system, based upon the
your own calibration system.
If you are using gain as a calibration factor, be sure to save a
custom configuration (refer to “Save Current Config” on
page 97). It is possible to save multiple configurations for
multiple sensor serial numbers, which allows you to recall
particular configurations by pressing the MANAGE CONFIGS
soft key and then selecting a particular configuration file.
SETUP
11:11 AM
Turn knob to select item: Press ENTER to edit
Display smoothing:
Auto
Speedup
Area correction:
OFF
Gain compensation:
ON
Wavelength correction:
1064 nm
000001.000
Wavelength table edit
Power measure units:
Watts
Resolution:
3 digits
<<-
EXIT
->>
Figure 52. SETUP: Gain Compensation
Available values: ON and OFF (factory default).
Available range: 0.001 to 100000
To change a value:
1.
On the main SETUP screen, turn the Selection knob to move
the diamond indicator to Gain Compensation.
2.
Press the ENTER/SET button to highlight the first field.
3.
Turn the Selection knob and display ON in the Gain Compensation field and then press the ENTER/SET button to move the
highlight to the Gain Compensation value field (shown as
000001.000 in Figure 52).
79
LabMax-TOP User Manual
4.
Turn the Selection knob to change the value.
The directional arrow soft keys (<<- and ->>) can be used to
move the highlight to a different digit before using the Selection
knob to change the value.
5.
Press the ENTER/SET button to save the value and exit Gain
Compensation mode.
Pressing the EXIT soft key at any time while in SETUP will
leave the SETUP program.
Wavelength
Correction
Wavelength Correction lets the user select the sensor wavelength.
SETUP
11:11 AM
Turn knob to select item: Press ENTER to edit
Display smoothing:
Auto
Speedup
Area correction:
OFF
Gain compensation:
OFF
Wavelength correction:
1064 nm
Wavelength table edit
OFF
Power measure units:
1064 nm
Resolution:
3 digits
SAVE
CONFIG
MANAGE
CONFIGS
EXIT
Figure 53. SETUP: Wavelength Correction
Available values: OFF and wavelengths that are available for the
attached sensor.
To change a value:
1.
On the main SETUP screen, turn the Selection knob to move
the diamond indicator to Wavelength Correction.
2.
Press the ENTER/SET button to display a dropdown list of
available wavelengths (similar to the list shown in Figure 53,
above).
80
Operation
Wavelength Table
Edit
3.
Turn the Selection knob to highlight the desired value.
4.
Press the ENTER/SET button to save the value and exit Wavelength Correction mode.
This item lets the user add or delete sensor wavelengths.
SETUP
11:11 AM
Turn knob to select item: Press ENTER to edit
Display smoothing:
Auto
Speedup
Area correction:
OFF
Gain compensation:
OFF
Wavelength correction:
1064 nm
Wavelength table edit
Power measure units:
Watts
Resolution:
3 digits
SAVE
CONFIG
MANAGE
CONFIGS
EXIT
Figure 54. SETUP: Wavelength Table Edit
Available values: All available pre-set wavelengths.
To access the Edit Wavelength Table screen:
1.
On the main SETUP screen, turn the Selection knob to move
the diamond indicator to Wavelength Table Edit (Figure 54).
2.
Press the ENTER/SET button to display the SETUP: Edit
Wavelength Table screen. From this screen, you can add or
delete a wavelength, as explained next.
On this screen, wavelengths below 1000 nm display in terms of
nanometers, and wavelengths above 1000 nm display in terms of
microns.
81
LabMax-TOP User Manual
Adding a Wavelength
SETUP: Edit Wavelength Table
Turn knob to select wavelength:
Note: current
operating
wavelength
is not editable.
193 nm
Current Sensor
248 nm
Min:
248 nm
Op:
1.064 µm
Cal:
514 nm
266 nm
532 nm
1,064 µm
10,600 µm
Max: 10,600 µm
ADD
DELETE
EXIT
Figure 55. SETUP: Edit Wavelength Table
From the SETUP: Edit Wavelength Table screen (Figure 55):
1.
Press the ADD soft key.
2.
Turn the Selection knob to display a new wavelength. The
wavelength will appear at the bottom of the dropdown list (in
the following example, the new wavelength is 00337 nm).
The directional arrow soft keys (<<- and ->>) can be used to
move the highlight to a different digit before using the Selection
knob to change the value.
SETUP: Edit Wavelength Table
Turn knob to select wavelength:
193 nm
Note: current
operating
wavelength
is not editable.
248 nm
Current Sensor
Min:
248 nm
Op:
1.064 µm
Cal:
514 nm
266 nm
532 nm
1,064 μm
10,600 μm
Max: 10.600 µm
00337 nm
<<-
CANCEL
->>
Figure 56. SETUP: Edit Wavelength Table (Adding a Wavelength)
82
Operation
Deleting a
Wavelength
3.
Press the ENTER/SET button to add the new wavelength to the
dropdown list.
4.
Press the EXIT soft key to exit Edit Wavelength Table mode
and return to the main SETUP screen.
From the SETUP: Edit Wavelength Table screen (Figure 55):
1.
Turn the Selection knob to highlight the wavelength you want
to delete.
2.
Press the DELETE soft key to remove the wavelength from the
dropdown list.
3.
Press the EXIT soft key to exit Edit Wavelength Table mode
and return to the main SETUP screen.
Power Measure
Units
SETUP
11:11 AM
Turn knob to select item: Press ENTER to edit
Display smoothing:
Auto
Speedup
Area correction:
OFF
Gain compensation:
OFF
Wavelength correction:
1064 nm
Wavelength table edit
Power measure units:
Watts
Resolution:
3 digits
SAVE
CONFIG
MANAGE
CONFIGS
EXIT
Figure 57. SETUP: Power Measure Units
Available values: Watts (factory default) and dBm.
To change a value:
1.
On the main SETUP screen, turn the Selection knob to move
the diamond indicator to Power Measure Units.
2.
Press the ENTER/SET button to highlight the value field
(Figure 57).
3.
Turn the Selection knob to change the value.
83
LabMax-TOP User Manual
4.
Press the ENTER/SET button to save the value and exit Power
Measure Units mode.
Resolution
SETUP
11:11 AM
Turn knob to select item: Press ENTER to edit
Wavelength correction:
1064 nm
3 digits
Wavelength table edit
4 digits
Watts
5 digits
3 digits
Power measure units:
Resolution:
Analog output:
2V
Trigger
Internal
Communications
USB
Date/time:
07-10-07
SAVE
CONFIG
MANAGE
CONFIGS
EXIT
Figure 58. SETUP: Resolution
Available values: See the following table:
Table 4. Sensor Resolution Ranges
SENSOR TYPE
RANGE
FACTORY DEFAULT
Thermopile
3, 4, 5
3
Optical
3, 4, 5
3
Pyroelectric
3, 4
3
To change a value:
1.
On the main SETUP screen, turn the Selection knob to move
the diamond indicator to Resolution.
2.
Press the ENTER/SET button to display a dropdown list of
available resolutions (similar to the list shown in Figure 58,
above).
3.
Turn the Selection knob to highlight the desired value.
4.
Press the ENTER/SET button to save the value and exit Resolution mode.
84
Operation
Analog Output
SETUP
11:11 AM
Turn knob to select item: Press ENTER to edit
Wavelength correction:
1064 nm
Wavelength table edit
Power measure units:
Watts
Resolution:
3 digits
Analog output:
2V
Trigger
1V
Communications
2V
Date/time:
4V
07-10-07
SAVE
CONFIG
MANAGE
CONFIGS
EXIT
Figure 59. SETUP: Analog Output
Available values: 1, 2 (factory default), and 4V.
To change a value:
Trigger
1.
On the main SETUP screen, turn the Selection knob to move
the diamond indicator to Analog Output.
2.
Press the ENTER/SET button to display a dropdown list of
available voltages (similar to the list shown in Figure 59,
above).
3.
Turn the Selection knob to highlight the desired value.
4.
Press the ENTER/SET button to save the value and exit
Analog Output mode.
(pyroelectric sensors only) This is where the trigger source—either
internal or external—is defined. If the laser has a trigger output, use
external triggering to provide the most accurate readings. Since the
meter is not looking for trigger events itself, the measured value will
be an actual laser pulse. Using external trigger also allows monitoring the missed pulses in Statistics mode, which can be useful
when diagnosing laser problems.
85
LabMax-TOP User Manual
External triggers can be selected as negative or positive, and a
trigger delay can be entered if the laser pulse occurs after the
external trigger event.
SETUP
11:11 AM
Turn knob to select item: Press ENTER to edit
Wavelength correction:
1064 nm
Wavelength table edit
Power measure units:
Watts
Resolution:
3 digits
Analog output:
2V
Trigger
Internal
Communications
USB
Date/time:
07-10-07
SAVE
CONFIG
MANAGE
CONFIGS
EXIT
Figure 60. SETUP: Trigger
Available values: See the following table:
Table 5. Trigger Range and Factory Defaults
SETTING
RANGE
FACTORY DEFAULT
Source
Internal, External
Internal
Delay
0 to 1000 µs
0 µs
Trigger Edge
Positive, Negative
Positive
To change a value:
1.
On the main SETUP screen, turn the Selection knob to move
the diamond indicator to Trigger (Figure 60).
86
Operation
2.
Press the ENTER/SET button to display the SETUP: Trigger
screen (Figure 61).
SETUP: Trigger
Turn knob to change value and press ENTER.
Source:
External
0000 µs
Delay:
Trigger edge:
<<-
Positive
->>
EXIT
Figure 61. SETUP: Trigger (Changing the Values)
3.
Turn the Selection knob to change the value of the source.
4.
If you select Internal as the source, press the EXIT soft key to
save the value, exit Trigger mode, and return to the main
SETUP screen; there are no other option selections available.
Selecting External as the source value (as shown in Figure 61)
will display editable fields next to Delay and Trigger Edge.
Continue to step 5.
5.
Press the ENTER/SET button to move the highlight to the
Delay field.
6.
Turn the Selection knob to change the value.
The directional arrow soft keys (<<- and ->>) can be used to
move the highlight to a different digit within the Delay field
before using the Selection knob to change the value.
7.
Press the ENTER/SET button to lock in the Delay value and
move the highlight to Trigger Edge field.
8.
Turn the Selection knob to select a value.
9.
Press the EXIT soft key to save all the Trigger values, exit
Trigger mode, and return to the main SETUP screen.
87
LabMax-TOP User Manual
Communications
Use Communications to define the host interface type that will be
used to communicate with a PC. The factory default is USB. If you
cannot communicate with the meter via a PC, the most likely reason
is that the Communications type is not set correctly on this screen.
SETUP
11:11 AM
Turn knob to select item: Press ENTER to edit
Wavelength correction:
1064 nm
Wavelength table edit
Power measure units:
Watts
Resolution:
3 digits
Analog output:
2V
Trigger
Internal
Communications
USB
Date/time:
07-10-07
MANAGE
CONFIGS
SAVE
CONFIG
EXIT
Figure 62. SETUP: Communications
Available values: See the following table:
Table 6. Communication Values and Factory Defaults
SETTING LABEL
VALUES
FACTORY DEFAULT
Host
USB, GPIB, RS-232
USB
RS-232 Baud Rate
9600, 19200, 38400, 57600, 115200
19200
RS-232 Stop Bits
1, 2
1
RS-232 Parity
None, Odd, Even
None
RS-232 Flow Control
None, Xon/Xoff
None
GPIB Id
1 to 30
1
To change a value:
1.
On the main SETUP screen, turn the Selection knob to move
the diamond indicator to Communications (Figure 62).
88
Operation
2.
Press the ENTER/SET button to Display the SETUP: Communications screen (Figure 63).
SETUP: Communications
Turn knob to change value and press ENTER.
Host:
RS-232
RS-232 Baud rate:
19200
RS-232 Stop bits:
1
RS-232 Parity:
None
RS-232 Flow control:
None
GPIB Id:
EXIT
Figure 63. SETUP: Communications (Changing the Values)
3.
Turn the Selection knob to change a value.
Selecting RS-232 or GPIB as the Host value will display the editable fields shown in Figure 63. Continue to step 4.
4.
Press the ENTER/SET button to lock in the value and move
the highlight to the next editable field (except for USB, which
does not have other editable fields).
5.
Continue the process until all the values on the screen are
correct.
6.
Press the EXIT soft key to save the values and exit Communications mode.
89
LabMax-TOP User Manual
Date/Time
Enter the date and time here. Date/time is only used for naming files
and for date and time information within the Microsoft Windows
operating system file manager.
SETUP
11:11 AM
Turn knob to select item: Press ENTER to edit
Wavelength correction:
1064 nm
Wavelength table edit
Power measure units:
Watts
Resolution:
3 digits
Analog output:
2V
Trigger
Internal
Communications
USB
Date/time:
07-10-07
SAVE
CONFIG
MANAGE
CONFIGS
EXIT
Figure 64. SETUP: Date/Time
Available values: See the following table:
Table 7. Date/Time Ranges and Factory Defaults
SETTING
RANGE
FACTORY DEFAULT
Date Format
mm-dd-yy
dd-mm-yy
mm-dd-yy
Date
Limits of Data function
Initially set during Factory testing
Time
hr:min (24-hour format)
Initially set during Factory testing
To change a value:
1.
On the main SETUP screen, turn the Selection knob to move
the diamond indicator to Date/Time (Figure 64).
90
Operation
2.
Press the ENTER/SET button to Display the SETUP: Date
screen (Figure 65).
SETUP: Date
11:11 AM
Turn knob to change value and press ENTER.
Date Format:
mm-dd-yy
Date:
2007
Time:
11 : 11
10
07
EXIT
Figure 65. SETUP: Date/Time (Changing the Values)
3.
Turn the Selection knob to change a value.
4.
Press the ENTER/SET button to lock in the value and move to
the next editable field.
5.
Continue the process until all the values on the screen are
correct.
6.
Press the EXIT soft key to save the values and exit Date mode.
Pressing the EXIT soft key at any time will save the current
values and return to the main SETUP screen.
91
LabMax-TOP User Manual
Energy Savings
SETUP
11:11 AM
Turn knob to select item: Press ENTER to edit
Analog output:
2V
Trigger
Internal
Communications
USB
Date/time:
07-10-07
Energy savings:
62
Screen contrast:
Serial No: 123456789
Version: 1.1 - Jul 1 2007
SAVE
CONFIG
MANAGE
CONFIGS
EXIT
Figure 66. SETUP: Energy Savings
Available values: See the following table:
Table 8. Energy Savings Ranges and Factory Defaults
SETTING
RANGE
FACTORY DEFAULT
Backlight Auto Off
OFF, ON (1 to 60 min. idle)
Battery:
AC:
OFF
OFF
Meter Auto Off
OFF, ON (1 to 60 min. idle)
Battery:
AC:
OFF
N/A
To change a value:
1.
On the main SETUP screen, turn the Selection knob to move
the diamond indicator to Energy Savings (Figure 66).
92
Operation
2.
Press the ENTER/SET button to Display the SETUP: Energy
Savings screen (Figure 67).
SETUP: Energy Savings
Turn knob to change value and press ENTER.
On battery:
Backlight Auto off:
ON
01 min idle
Meter Auto off:
ON
15 min idle
ON
01 min idle
On AC Power:
Backlight auto off:
<<-
EXIT
->>
Figure 67. SETUP: Energy Savings (Changing the Values)
3.
Turn the Selection knob to change a value.
Selecting ON as a value on the SETUP: Energy Savings screen
will display an editable field next to that value (as shown in
Figure 67). Continue to step 4.
4.
Press the ENTER/SET button to move the highlight to the next
editable field.
5.
Turn the Selection knob to change the value.
The directional arrow soft keys (<<- and ->>) can be used to
move the highlight to a different digit before using the Selection
knob to change the value.
6.
Press the ENTER/SET button to move the highlight to the next
field.
7.
Continue that process until all values are correct.
93
LabMax-TOP User Manual
8.
Press the EXIT soft key to save the values and exit Energy
Savings mode.
Pressing the EXIT soft key at any time will save the current
values and return to the main SETUP screen.
Screen Contrast
SETUP
11:11 AM
Turn knob to select item: Press ENTER to edit
Analog output:
2V
Trigger
Internal
Communications
USB
Date/time:
07-10-07
Energy savings:
62
Screen contrast:
Serial No: 123456789
Version: 1.1 - Jul 1 2007
SAVE
CONFIG
MANAGE
CONFIGS
EXIT
Figure 68. SETUP: Screen Contrast
Available values: 1 to 99.
To change a value:
1.
On the main SETUP screen, turn the Selection knob to move
the diamond indicator to Screen Contrast (Figure 68).
94
Operation
2.
Press the ENTER/SET button to Display the SETUP: Contrast
screen (Figure 69).
SETUP: Contrast
Turn knob to change value and press ENTER.
Contrast:
<<-
67%
EXIT
->>
Figure 69. SETUP: Screen Contrast (Changing the Values)
3.
Turn the Selection knob to change the contrast value.
The directional arrow soft keys (<<- and ->>) can be used to
move the highlight to a different digit before using the Selection
knob to change the value.
4.
Press the EXIT soft key to save the value and exit Contrast
mode.
95
LabMax-TOP User Manual
Serial Number
This field displays the instrument serial number.
SETUP
11:11 AM
Turn knob to select item: Press ENTER to edit
Analog output:
2V
Trigger
Internal
Communications
USB
Date/time:
07-10-07
Energy savings:
62
Screen contrast:
Serial No: 123456789
Version: 1.1 - Jul 1 2007
SAVE
CONFIG
MANAGE
CONFIGS
EXIT
Figure 70. SETUP: Serial No.
Version
This field displays the version number of the installed firmware.
SETUP
11:11 AM
Turn knob to select item: Press ENTER to edit
Analog output:
2V
Trigger
Internal
Communications
USB
Date/time:
07-10-07
Energy savings:
62
Screen contrast:
Serial No: 123456789
Version: 1.1 - Jul 1 2007
SAVE
CONFIG
MANAGE
CONFIGS
EXIT
Figure 71. SETUP: Version
Soft Keys
There are three soft keys on the main SETUP screen: SAVE
CONFIG, MANAGE CONFIGS, and EXIT.
SAVE CONFIG
Refer to “Save Current Config” on page 97.
96
Operation
MANAGE CONFIG
Refer to “Manage Configs” on page 99.
EXIT
Pressing this soft key will exit SETUP and display the screen last
viewed prior to entering SETUP mode.
Detailed
Procedures
This section provides in-depth information about specific topics that
were briefly discussed earlier.
Save Current Config
This function saves a custom configuration file that records the
meter settings listed in the following table:
Table 9. Custom Configuration File Meter Settings (Sheet 1 of 2)
Analog output voltage scale
Power measure units
Area correction area
RS-232 baud rate
Area correction area specification units
RS-232 flow control
Area correction on/off state
RS-232 parity
Auto range on/off state
RS-232 stop bits
Backlight auto off time under AC power
Speedup applied to analog output on/off state
Backlight auto off time under battery power
Speedup applied to host data on/off state
Backlight on/off state under AC power
Speedup applied to numerical display on/off state
Backlight on/off state under battery power
Speedup applied to tune graph on/off state
Current full scale range
Statistics batch size for pyroelectric sensors
Date format
Statistics batch size for thermopile and optical sensors
Display contrast
Statistics display sub mode
Display mode
Statistics output selections
Display smoothing on/off state for pyroelectric sensors
Statistics restart mode
Display smoothing on/off state for thermopile and
optical sensors
Statistics sub sample rate for pyroelectric sensors
Display smoothing window size for pyroelectric sensors
Statistics sub sample rate for thermopile and optical
sensors
97
LabMax-TOP User Manual
Table 9. Custom Configuration File Meter Settings (Sheet 2 of 2)
Display smoothing window size for thermopile and
optical sensors
Trend batch size for pyroelectric sensors
External trigger delay
Trend batch size for thermopile and optical sensors
Favorite wavelength list
Trend display sub mode
Gain compensation factor
Trend sub sample rate for pyroelectric sensors
Gain compensation on/off state
Trend sub sample rate for thermopile and optical
sensors
GPIB address (LabMax-TOP w/GPIB meters only)
Trend view mode
Host communication port
Trigger level
Joules/Watts mode
Trigger slope
Meter auto off time
Trigger source
Meter on/off state
Tune view mode
Numerical display resolution
Wavelength correction on/off state
Position stability graph duration
Wavelength of operation
Position stability view mode
Pressing the SAVE CONFIG soft key on the main SETUP screen
displays the following screen:
SETUP: Save Current Config
a b c d e f g h i j
k l m n o p q r s t
u v w x y z 0 1 2 3
4 5 6 7 8 9 -
BACK
SPACE
space
SAVE
Rotate Knob
to choose letter.
Press to select.
EXIT
Figure 72. SETUP: Save Current Config
98
Operation
To create a new configuration file name:
1.
Select the first character of the file name by turning the Selection knob and then pressing the ENTER/SET button when the
desired letter or number is highlighted. The character will
appear in the blank box immediately below the screen heading.
To delete a character, use the BACKSPACE soft key.
2.
Repeat step 1 until the entire file name appears in the box.
3.
Press the SAVE soft key to save the new file name, exit Save
Current Config mode, and display the SETUP: Manage
Configs screen, discussed next.
Pressing the EXIT soft key at any time will display the main
SETUP screen.
Manage Configs
This screen allows you to work with previously-created configuration files. Pressing the MANAGE CONFIGS soft key on the main
SETUP screen (or saving a current configuration, as explained
above) displays the following screen:
SETUP: Manage Configs
Available Configurations
config 1
config 2
config 3
Rotate Knob to select
LOAD
FACTORY
DELETE
RENAME
LOAD
EXIT
Figure 73. SETUP: Manage Configs
Soft Keys
There are five soft keys on this screen: LOAD FACTORY,
DELETE, RENAME, LOAD, and EXIT.
99
LabMax-TOP User Manual
LOAD FACTORY
To load the configuration file that was shipped with your LabMax,
press the LOAD FACTORY soft key. This action will load the
factory defaults and exit the Setup program.
DELETE
To delete a file:
1.
Turn the Selection knob to highlight the file name you want to
delete.
2.
Press the DELETE soft key. The following confirmation
message will appear:
SETUP: Manage Configs
Confirm delete of config: [file name]
Available Configurations
Press knob to finish selection.
Delete
Cancel
Figure 74. SETUP: Manage Configs (File Deletion Confirmation)
3.
Turn the Selection knob to highlight Delete.
4.
Press the ENTER/SET button to delete the file and return to
the SETUP: Manage Configs screen. The file that was just
deleted will no longer appear on the list of available configurations.
RENAME
To rename a configuration file:
1.
Turn the Selection knob to highlight the file you want to
rename.
100
Operation
2.
Press the RENAME soft key to display the following screen:
SETUP: Rename Config
[original_name]
a b c d e f g h i j
k l m n o p q r s t
u v w x y z 0 1 2 3
4 5 6 7 8 9 -
BACK
SPACE
space
SAVE
Rotate Knob
to choose letter.
Press to select.
EXIT
Figure 75. SETUP: Rename Config
3.
Press the BACKSPACE soft key to erase the old file name
(labeled original_name in Figure 75, above).
4.
Select the first character of the new file name by turning the
Selection knob and then pressing the ENTER/SET button
when the desired letter or number is highlighted. The character
will appear in the blank box immediately below the screen
heading.
To delete a character, use the BACKSPACE soft key.
5.
Repeat step 1 until the entire file name appears in the box.
6.
Press the SAVE soft key to save the new file name and display
the SETUP: Manage Configs screen. The file that was just
renamed will appear on the list of available configurations.
LOAD
To load a previously-saved configuration file:
1.
Turn the Selection knob to highlight the file name in the Available Configurations list.
2.
Press the LOAD soft key. This action will load the highlighted
file and return to the main SETUP screen.
101
LabMax-TOP User Manual
EXIT
Pressing this soft key will exit Manage Configs mode and display
the main SETUP screen.
HELP
LabMax offers two types of Help: Context-sensitive and general.
This section describes both types.
Context-Sensitive
Help
Pressing this front panel button at any time will access
information specific to the current screen. For example,
pressing the HELP button while viewing the TUNE
screen will display help specific to TUNE:
HELP: TUNE
This screen displays the live measurement, as well as
Wavelength, Gain, and Smoothing settings.
Soft keys:
[VIEW] - Toggles between two types of data charts: Strip and
Bar.
[RANGE] - To adjust the range (sensor-specific):
- Press the RANGE soft key.
- Change the value by turning the Selection knob.
- When the desired value appears, press either [RANGE] or
[ENTER/SET] to lock in the range value.
[VERT] - To change the vertical zoom level (Strip chart view
only):
- Press [VERT] to highlight the current value.
VIEW ALL
TOPICS
EXIT
Figure 76. HELP (Context-Sensitive)
If the Help information is more than one screen long, turn the Selection knob to scroll.
Soft Keys
There are two soft keys on this screen: VIEW ALL TOPICS and
EXIT.
VIEW ALL TOPICS
Pressing this soft key will access a list of all available Help topics
(refer to “General Help”, below).
EXIT
Pressing this soft key will exit SETUP and display the screen last
viewed prior to entering SETUP mode.
102
Operation
General Help
Pressing the VIEW ALL TOPICS soft key at the bottom of any
context-sensitive Help screen will access a list of all available Help
topics:
HELP: All Topics
MEASURE
Power
Statistics
SETUP
Display Smoothing
Saving a Config File
Loading a Config File
Managing Config Files
TUNE
EXIT
Figure 77. HELP (All Topics)
Turn the Selection knob to highlight an item and then press the
ENTER/SET button to view the Help for that specific topic.
Soft Keys
There is one soft key on this screen: EXIT.
EXIT
Pressing this soft key will exit SETUP and display the screen last
viewed prior to entering SETUP mode.
BACKLIGHT
Press this button to turn the LCD backlight ON or OFF.
103
LabMax-TOP User Manual
104
Special Topics
SPECIAL TOPICS
This section discusses:
•
Analog output (this page)
•
Understanding the external trigger circuit (this page)
Analog Output
When power is on, the Analog Out connector outputs a voltage
proportional to the current laser measurement. The output voltage is
zero (0) volts when the measured energy or power is zero (0) or less.
The output voltage is the full-scale output voltage when the
measured energy or power is full-scale or overranged. The full-scale
output voltage (1, 2, or 4V) is selected via the meter or the host interface. Factory default full-scale output voltage is 2V.
Understanding
the External
Trigger Circuit
To prevent ground loop noise from interfering with accurate
measurement, the external trigger input is optically isolated from the
LabMax internal ground by an optoisolator. The following figure
shows a simplified schematic of the external trigger input circuitry.
Ext Trigger
RCA Jack
2 to 7V
7V
Optoisolator
5.11K
221
25 mA
Max
Continuous
50 mA Peak
+ 3.3V
VF = 1.5V
Typ.
Ctr = 25% Typical
Figure 78. External Trigger Input Circuitry
105
To Trigger
Processing
Circuitry
LabMax-TOP User Manual
Figure 79 shows the minimum pulse width required by the external
trigger pulse.
Pyro Pulse
Amplitude = C
Ext. Trigger Pulse
Active High
0 VDC
A
Min. Pulse Width High
B
Min. Pulse Width Low
Amplitude = C
Ext. Trigger Pulse
Active Low
0 VDC
C = 2 VDC
C = 5 VDC
Min. Width A
2.5 μS
350 nS
Min. Width B
350 nS
2.5 μS
Figure 79. External Trigger Minimum Pulse Width
106
Special Topics
To turn on the optoisolator LED, the external trigger source must be
capable of sourcing at least 5 mA at a minimum of 2 VDC into the
external trigger input. If the trigger source is not capable of sourcing
these minimum values, the trigger source will need to be buffered.
One possible buffer circuit is shown in Figure 80.
LabMax
+ 5V
Instrument
Trigger
Signal
Buffer
Circuit
Trigger In
BNC
Common
Figure 80. Boosting Source Current of Triggering Device
The external trigger signal can be either a rising or a falling edge.
Trigger polarity is selected in the SETUP: Trigger menu.
Trigger signals greater than 7 VDC can damage the optoisolator
and should be avoided.
107
LabMax-TOP User Manual
108
Host Interface
HOST INTERFACE
This section discusses:
•
Special considerations (this page)
•
Host Command quick reference (page 113)
•
Commands and queries (page 122)
•
Host Interface glossary (page 168)
Special
Considerations
Message
Terminators
Messages between the meter and the host computer are comprised
entirely of ASCII string characters. No binary messages are
supported. All message strings passing through the host interface
will be terminated to signal the end of a message string.
Messages Received
by the Meter
Messages received by the meter must be terminated by a carriage
return (decimal 13). A line feed (decimal 10) following the carriage
return is ignored so that messages can be terminated with a carriage
return and line feed pair. A command or query is considered incomplete without the terminator.
Messages Sent by the
Meter
All messages sent by the meter, with the exception of USB Binary
Streaming Data, are terminated by a carriage return (decimal 13) and
line feed (decimal 10) pair. The EOI control line is used to indicate
the end of the message transmission (the string message followed by
the carriage return and line feed terminator) when a GPIB interface
module is selected for use. The maximum length of any message
sent by the meter is limited to 4096 bytes.
109
LabMax-TOP User Manual
Using the RS-232
Interface
Data Flow Control
The host controls the flow of data from the meter using software
flow control. Software flow control uses standard bi-directional
XON/XOFF methods for serial communication software flow
control. Flow control selection is user-configurable.
Service Request
The meter signals the host that data is available to read—specifically, when either the measurement data or error queues transition
from empty to non-empty. The host waits for the service request
marker (ASCII ENQ or decimal 5 byte), which will indicate that
data is available. Available data is either measurement data records
or statistics data records (see “Sample Measurement Data Collection” on page 160), or error records (see “Error Record Reporting
and Collection” on page 130). The service request marker is not sent
when the meter sends a reply from a query.
Using the GPIB
Interface
IEEE-488.1 Interface
Capabilities
IEEE-488.1 is available only on the LabMax-TOP w/GPIB model.
Table 10 contains a list of the IEEE-488.1 Interface functions for the
meter.
Table 10. IEEE-488.1 Interface Functions
SH1
Source Handshaking (fully supported)
AH1
Acceptor Handshaking (fully supported)
T6
Basic Talker
L4
Basic Listener
SR0
Incoming Service Request (not supported)
RL1
Remote/Local mode (fully supported)
PP0
Parallel Pole operations (not supported)
DC1
Device Clear (fully supported)
DT0
Device Trigger (not supported)
C0
Bus Controller functionality (not supported)
110
Host Interface
Service Request
Out-going Service Requests are issued to provide a means of asynchronous communication over the IEEE-488 bus. The meter asserts
the Service Request hardware line (SRQ) to indicate that data or
error information is available to be read (specifically, when either
the measurement data or error queues transition from empty to
non-empty). Available data is either measurement data records or
statistics data records (see “Sample Measurement Data Collection”
on page 160), or error records (see “Error Record Reporting and
Collection” on page 130).
When the host senses the assertion of SRQ, it uses a serial poll of the
Status Byte Register (STB) for each device on the bus to determine
the device requesting the service. The currently polled device is
requesting service if bit 6 of the STB register is set. When the host
discovers that the meter is requesting service, it issues the appropriate commands to determine the type of records that are available
to be read.
Using the USB
Interface
Service Request
The meter signals the host that data is available to read—specifically, when either the measurement data or error queues transition
from empty to non-empty. The host waits for the attention message,
which will indicate that data is available. Available data is either
measurement data records or statistics data records (see “Sample
Measurement Data Collection” on page 160), or error records (see
“Error Record Reporting and Collection” on page 130). The attention message is not sent when the meter sends a reply from a query.
Binary Streaming
Data
When the meter is connected to a host and USB is enabled, the meter
can optionally send a binary record for each measurement sample.
This capability may be enabled by the host via the streaming data
commands.
Notation
Conventions
Notation conventions specified by the SCPI and IEEE 488.2 Standards are followed unless otherwise specified.
Syntax
Syntax specified by the SCPI and IEEE 488.2 Standards is followed
unless otherwise specified.
111
LabMax-TOP User Manual
The base-10 numeric data format specification is used heavily in this
section and covered in the IEEE 488.2 Standard. Unless otherwise
specified, numeric data items are represented as:
•
Integer values
•
Non-scientific notation floating point values
•
Scientific notation floating point values (upper or lower case
E)
For example, the following data values are functionally equivalent:
•
31256
•
31256.0
•
3.1256E4
•
31.256E3
•
+3.1256E+4.
Unless otherwise specified, non-numeric data items (typically
referred to as strings) are not quoted.
The meter interprets hexadecimal data using the following rules:
•
Upper case and lower case are accepted (“FE” is the same as
“fe”)
•
Leading zeroes are not required and will be accepted (“0A” is
the same as “A”)
•
The data string may optionally be preceded by a “0x” or “0X”
C hexadecimal notation idiom (0xD2C4 is the same as D2C4)
•
Following the optional “0x” prefix, the acceptable characters
comes from the list 0, 1, 2, 3, 4, 5, 6, 7, 8, 9, a, b, c, d, e, f, A,
B, C, D, E, and F
Enumerated values must match exactly using the long form/short
form comparison rules defined under the SCPI Standard.
112
Host Interface
Host Command
Quick
Reference
The following table gives a brief description of all LabMax Host
commands. For detailed information about a specific command, go
to the page referenced in the right-hand column.
Table 11. Host Command Quick Reference (Sheet 1 of 10)
SCPI COMMON COMMANDS
COMMAND
DESCRIPTION
PAGE #
IEEE-488.2 Common Commands
*IDN?
Queries the meter identification string, such as
model name, firmware version, and firmware
date.
123
SYSTEM OPTIONS
COMMAND
DESCRIPTION
PAGE #
Local Control Lockout
SYSTem:REMote
Places the meter in remote mode.
123
SYSTem:LOCal
Places the meter in local mode.
123
Queries the system status.
124
DISPlay:BACKlight
Controls the backlight on/off state.
125
DISPlay:BACKlight?
Queries the backlight on/off state.
125
SYSTem:OPTion:BACKlight:AOFF:ACPower
Controls the LCD backlight auto-off timeout timer
when the meter is under AC power.
125
SYSTem:OPTion:BACKlight:AOFF:ACPower?
Queries the LCD backlight auto-off timeout timer
when the meter is under AC power.
125
SYSTem:OPTion:BACKlight:AOFF:BPOWer
Controls the LCD backlight auto-off timeout timer
when the meter is under battery power.
125
SYSTem:OPTion:BACKlight:AOFF:BPOWer?
Queries the LCD backlight auto-off timeout timer
when the meter is under battery power.
125
SYSTem:OPTion:POWer:AOFF
Sets the power auto-off timeout when the meter is
under battery power.
125
SYSTem:OPTion:POWer:AOFF?
Queries the power auto-off timeout when the
meter is under battery power.
125
System Status
SYSTem:STATus?
Backlight Control
Power Auto-Off
113
LabMax-TOP User Manual
Table 11. Host Command Quick Reference (Sheet 2 of 10)
Meter Configuration Management
MEMory:STATe:CATalog?
Queries the list of stored configuration files that
was saved by the user.
126
MEMory:STATe:SAVE
Stores the current configuration to the named
configuration file.
126
MEMory:STATe:RECall
Loads and activates the configuration held in the
named configuration file.
127
MEMory:STATe:DELete
Deletes the named configuration file.
127
MEMory:STATe:REName
Renames the named configuration file.
127
COMMUNICATIONS
COMMAND
DESCRIPTION
PAGE #
Interface Select
SYSTem:COMMunicate:INTerface
Selects the interface for host communication.
127
SYSTem:COMMunicate:INTerface?
Queries the interface for host communication.
127
SYSTem:COMMunicate:HANDshaking
Selects the state of SCPI message round trip handshaking.
128
SYSTem:COMMunicate:HANDshaking?
Queries the state of SCPI message round trip
handshaking.
128
SYSTem:COMMunicate:SERial:BAUD
Selects the transmit and receive baud rates
together.
128
SYSTem:COMMunicate:SERial:BAUD?
Queries the transmit and receive baud rates
together.
128
SYSTem:COMMunicate:SERial:PARity
Selects the parity bit setting.
128
SYSTem:COMMunicate:SERial:PARity?
Queries the parity bit setting.
128
SYSTem:COMMunicate:SERial:SBITs
Selects the number of stop bits used.
129
SYSTem:COMMunicate:SERial:SBITs?
Queries the number of stop bits used.
129
SYSTem:COMMunicate:SERial:PACE
Selects the flow control method for meter to host
communication.
129
SYSTem:COMMunicate:SERial:PACE?
Queries the flow control method for meter to host
communication.
129
SYSTem:COMMunicate:SERial:SERVice
Selects the state of the service request marker
feature
129
SYSTem:COMMunicate:SERial:SERVice?
Queries the state of the service request marker
feature
129
Message Handshaking
Serial Port-Specific
114
Host Interface
Table 11. Host Command Quick Reference (Sheet 3 of 10)
IEEE-4888.1 GPIB Port-Specific
SYSTem:COMMunicate:GPIB:ADDRess
Selects the GPIB bus address of the meter.
129
SYSTem:COMMunicate:GPIB:ADDRess?
Queries the GPIB bus address of the meter.
129
SYSTem:COMMunicate:USB:STREam
Enables the transmission of binary streaming data
on the USB interface.
130
SYSTem:COMMunicate:USB:STREam?
Queries the transmission of binary streaming data
on the USB interface.
130
USB Port-Specific
ERROR RECORD REPORTING AND COLLECTION
COMMAND
DESCRIPTION
PAGE #
Error Count Query
SYSTem:ERRor:COUNT?
Queries the number of error records in the error
queue
131
Queries the next error record(s) in the error queue.
132
Queries all error records in the error queue.
132
Clears all error records in the error queue.
133
Error Query
SYSTem:ERRor:NEXT?
All Error Query
SYSTem:ERRor:ALL?
All Error Clear
SYSTem:ERRor:CLEar
MEASUREMENT SETUP AND CONTROL
COMMAND
DESCRIPTION
PAGE #
Measurement Mode Select
CONFigure:MEASure
Sets the meter measurement mode
133
CONFigure:MEASure?
Queries the meter measurement mode
133
CONFigure:PUNits
Sets the display measurement units for power
measurements
133
CONFigure:PUNits?
Queries the display measurement units for power
measurements
133
Sets the display mode.
133
Power Measurement Units Select
Display Mode Select
CONFigure:DISPlay:PRImary
CONFigure:DISPlay:STATistics
CONFigure:DISPlay:PSTability
CONFigure:DISPlay:TUNE
CONFigure:DISPlay:TRENd
115
LabMax-TOP User Manual
Table 11. Host Command Quick Reference (Sheet 4 of 10)
CONFigure:PSTability:VMOde
Sets the position stability view mode to be used
when position stability display mode is active.
134
CONFigure:PSTability:VMOde?
Queries the position stability view mode.
134
CONFigure:TUNE:VMOde
Sets the tune view mode to be used when tune
display mode is active.
134
CONFigure:TUNE:VMOde?
Queries the tune view mode.
134
CONFigure:TREND:VMOde
Sets the trend chart view mode to be used when
trend display mode and trend chart display sub
mode are active.
134
CONFigure:TREND:VMOde?
Queries the trend chart view mode.
134
CONFigure:AREA:CORRection
Enables or disables area correction.
135
CONFigure:AREA:CORRection?
Queries area correction.
135
CONFigure:AREA:APERture
Sets the aperture area
135
CONFigure:AREA:APERture?
Queries the aperture area
135
CONFigure:AOUT:FSCale
Selects the full scale output voltage at the analog
output connector.
136
CONFigure:AOUT:FSCale?
Queries voltage at the analog output connector.
136
CONFigure:SPEedup:HOST
Selects the speedup mode for the host interface
data output.
136
CONFigure:SPEedup:HOST?
Queries the speedup mode for the host interface
data output.
136
CONFigure:SPEedup:AOUT
Selects the speedup mode for the analog output.
136
CONFigure:SPEedup:AOUT?
Queries the speedup mode for the analog output.
136
CONFigure:SPEedup:DISPlay
Selects the speedup mode for the panel numeric
display.
136
CONFigure:SPEedup:DISPlay?
Queries the speedup mode for the panel numeric
display.
136
CONFigure:SPEedup:TUNE
Selects the speedup mode for the panel tune
display.
136
CONFigure:SPEedup:TUNE?
Queries the speedup mode for the panel tune
display.
136
Sets the display data smoothing window size in
number of pulses.
137
Area Correction
Analog Output Full Scale Voltage
Speedup
Display Data Smoothing
CONFigure:AVERage:PULSe
116
Host Interface
Table 11. Host Command Quick Reference (Sheet 5 of 10)
CONFigure:AVERage:PULSe?
Queries the display data smoothing window size.
137
CONFigure:AVERage:TIME
Sets the display data smoothing window size in
seconds.
137
CONFigure:AVERage:TIME?
Queries the display data smoothing window size.
137
CONFigure:WAVElength:CORRection
Enables or disables wavelength corrrection.
137
CONFigure:WAVElength:CORRection?
Queries wavelength corrrection.
137
CONFigure:WAVElength:WAVElength
Sets the operational wavelength.
138
CONFigure:WAVElength:WAVElength?
Queries the operational wavelength.
138
CONFigure:WAVElength:LIST
Sets the wavelength table entries for the meter.
138
CONFigure:WAVElength:LIST?
Queries the wavelength table entries.
138
CONFigure:GAIN:COMPensation
Enables or disables gain compensation.
138
CONFigure:GAIN:COMPensation?
Queries gain compensation.
138
CONFigure:GAIN:FACTor
Sets the gain compensation factor
139
CONFigure:GAIN:FACTor?
Queries the gain compensation factor
139
CONFigure:ZERO
Sets the current sensor input voltage as the zero
baseline voltage.
139
CONFigure:ZERO?
Queries the current sensor input voltage.
139
CONFigure:RANGe:SELect
Selects the meter measurement range.
139
CONFigure:RANGe:SELect?
Queries the meter measurement range.
139
CONFigure:RANGe:AUTO
Enables or disables automatic selection of the
meter measurement range.
140
CONFigure:RANGe:AUTO?
Queries the meter measurement range.
140
CONFigure:STATistics:BSIZe:PULSe
Sets the statistics batch size (pulses).
140
CONFigure:STATistics:BSIZe:PULSe?
Queries the statistics batch size.
140
CONFigure:STATistics:BSIZe:TIME
Sets the statistics batch size (time).
141
CONFigure:STATistics:BSIZe:TIME?
Queries the statistics batch size.
141
CONFigure:STATistics:RATE:PULSe
Sets the statistics sampling rate (pulses).
141
CONFigure:STATistics:RATE:PULSe?
Queries the statistics sampling rate (pulses).
141
Wavelength Correction
Gain Compensation
Probe Zero
Range Select
Statistics Mode Control
117
LabMax-TOP User Manual
Table 11. Host Command Quick Reference (Sheet 6 of 10)
CONFigure:STATistics:RATE:FREQuency
Sets the statistics sampling rate (time).
142
CONFigure:STATistics:RATE:FREQuency?
Queries the statistics sampling rate.
142
CONFigure:STATistics:RMOde
Selects the action to be taken at the end of a statistical batch.
142
CONFigure:STATistics:RMOde?
Queries the action to be taken at the end of a statistical batch.
142
CONFigure:STATistics:STARt
Terminates the current statistical batch and starts a
new one.
142
CONFigure:STATistics:STOP
Terminates the current statistical batch if a batch is
in progress.
142
CONFigure:PSTability:DURation
Sets the position stability cycle time.
143
CONFigure:PSTability:DURation?
Queries the position stability cycle time.
143
CONFigure:PSTability:STARt
Terminates the current position stability display
cycle and starts a new one.
143
CONFigure:PSTability:STOP
Terminates the current position stability display
cycle if a position stability display cycle is in
progress.
143
CONFigure:TUNE:SCHart:ZOOM:VERTical
Sets the vertical zoom mode when the tune strip
chart display mode is active.
143
CONFigure:TUNE:SCHart:ZOOM:VERTical?
Queries the vertical zoom mode when the tune
strip chart display mode is active.
143
CONFigure:TUNE:SCHart:ZOOM:HORizontal
Sets the horizontal zoom mode when the tune strip
chart display mode is active.
144
CONFigure:TUNE:SCHart:ZOOM:HORizontal?
Queries the horizontal zoom mode when the tune
strip chart display mode is active.
144
CONFigure:TUNE:CLEar
Clears the tune strip or bar chart display,
depending on which one is active.
144
CONFigure:TRENd:STARt
Terminates the current trend cycle and starts a new
one.
144
CONFigure:TRENd:STOP
Terminates the current trend cycle if a cycle is in
progress.
145
CONFigure:TRENd:BSIZe:PULSe
Sets the trend cycle duration.
145
CONFigure:TRENd:BSIZe:PULSe?
Queries the trend cycle duration.
145
CONFigure:TRENd:BSIZe:TIME
Sets the trend cycle duration.
145
Position Stability Mode Control
Tune Mode Control
Trend Mode Control
118
Host Interface
Table 11. Host Command Quick Reference (Sheet 7 of 10)
CONFigure:TRENd:BSIZe:TIME?
Queries the trend cycle duration.
145
CONFigure:TRENd:RATE:PULSe
Sets the trend sampling rate.
146
CONFigure:TRENd:RATE:PULSe?
Queries the trend sampling rate.
146
CONFigure:TRENd:RATE:FREQuency
Sets the trend sampling rate.
146
CONFigure:TRENd:RATE:FREQuency?
Queries the trend sampling rate.
146
MMEMory:CATalog?
Queries trend data file mass storage information
and a list of trend data files stored in the current
working directory.
147
MMEMory:CDIRectory
Sets the current working directory.
148
MMEMory:CDIRectory?
Queries the current working directory.
148
MMEMory:MDIRectory
Creates a new directory.
148
MMEMory:DELete
Deletes a file.
149
MMEMory:RDIRectory
Removes a directory.
149
MMEMory:REName
Renames a file or directory.
149
MMEMory:COPY
Copies a source file to a destination.
150
MMEMory:STORe
Stores data generated from the last completed and
unnamed trend cycle to a trend data file in mass
storage.
150
MMEMory:NAME
Sets the name of the file that will apply when the
next open command is sent.
151
MMEMory:OPEN
Opens the previously-named file for transmission
by placing all data records contained in the file in
the record transmit queue.
151
MMEMory:FETCh:NRECords?
Queries the number of unread data records available from the data stream of the currently-open
trend data file.
151
MMEMory:FETCh:NEXT?
Queries the next unread and available data
record(s) of the currently-open trend data file.
152
MMEMory:FETCh:ALL?
Queries all unread and available data records of
the currently-open trend data file.
152
MMEMory:CLOSE
Closes the currently-open file.
152
CONFigure:READings:SEND
Selects which values are sent when sample data
records are reported over the host interface.
155
CONFigure:READings:SEND?
Queries which values are sent when sample data
records are reported over the host interface.
155
Measurement Data Format
119
LabMax-TOP User Manual
Table 11. Host Command Quick Reference (Sheet 8 of 10)
CONFigure:READings:HEADers
Selects whether or not data value identification
strings will prefix data values reported over the
host interface.
158
CONFigure:READings:HEADers?
Queries whether or not data value identification
strings will prefix data values reported over the
host interface.
158
CONFigure:READings:CONTinuous
Selects if data delivery is presented in a continuous stream or the last available data record.
158
CONFigure:READings:CONTinuous?
Queries type of data delivery.
158
TRIGger:SOURce
Selects the trigger source.
158
TRIGger:SOURce?
Queries the trigger source.
158
TRIGger:LEVel
Sets the trigger level.
159
TRIGger:LEVel?
Queries the trigger level.
159
TRIGger:SLOPe
Selects the external trigger edge.
159
TRIGger:SLOPe?
Queries the external trigger edge.
159
TRIGger:DELay
Selects the external trigger delay time.
159
TRIGger:DELay?
Queries the external trigger delay time.
159
CONFigure:RESolution:THERmopile
Sets the number of display digits used when a
thermopile sensor is attached.
159
CONFigure:RESolution:THERmopile?
Queries the number of display digits used when a
thermopile sensor is attached.
159
CONFigure:RESolution:OPTical
Sets the number of display digits used when an
optical sensor is attached.
160
CONFigure:RESolution:OPTical?
Queries the number of display digits used when an
optical sensor is attached.
160
CONFigure:RESolution:PYRoelectric
Sets the number of display digits used when an
optical sensor is attached.
160
CONFigure:RESolution:PYRoelectric?
Queries the number of display digits used when an
optical sensor is attached.
160
Trigger Parameters
Numeric Display Resolution
SAMPLE MEASUREMENT DATA COLLECTION
COMMAND
DESCRIPTION
PAGE #
Data Gating
INITiate
Enables measurement data collection.
161
ABORt
Disables measurement data collection.
161
120
Host Interface
Table 11. Host Command Quick Reference (Sheet 9 of 10)
Data Query
FETCh:NRECords?
Queries the number of unread data records available at the time of the query.
161
FETCh:NEXT?
Queries the next unread available measurement
data record(s) at the time of the query.
161
FETCh:ALL?
Queries all unread available measurement data
records at the time of the query.
162
FETCh:MISSing?
Queries the missing data count due to a measurement data transmission queue full condition.
162
STATISTICS DATA COLLECTION
COMMAND
DESCRIPTION
PAGE #
Statistics Data Gating
STATistics:INITiate
Enables statistical data collection
163
STATistics:ABORt
Disables statistics data collection
163
STATistics:FETCh:NRECords?
Queries the current number of unread statistics
data records available
163
STATistics:FETCh:NEXT?
Queries the next unread available statistics data
record(s)
164
STATistics:FETCh:ALL?
Queries all unread available statistics data records
164
STATistics:FETCh:MISSing?
Queries the missing record count due to a statistics
data transmission queue full condition
164
Statistics Data Query
DISPLAY
COMMAND
DESCRIPTION
PAGE #
Display Contrast
DISPlay:CONTrast
Sets the display contrast.
164
DISPlay:CONTrast?
Queries the contrast value.
164
Sets the display text in the measurement display
area.
165
Clears the display text and enables measurement
data to be displayed live.
165
Display Text
DISPlay:TEXT
Text Clear
DISPlay:CLEar
121
LabMax-TOP User Manual
Table 11. Host Command Quick Reference (Sheet 10 of 10)
METER AND SENSOR DEVICE INFORMATION
COMMAND
DESCRIPTION
PAGE #
Meter
SYSTem:TIME
Sets the time maintained within the meter.
165
SYSTem:TIME?
Queries the time maintained within the meter.
165
SYSTem:DATE
Sets the date maintained within the meter.
165
SYSTem:DATE?
Queries the date maintained within the meter.
165
SYSTem:DATE:FORMat
Sets the panel display date format used by the
meter.
166
SYSTem:DATE:FORMat?
Queries the panel display date format used by the
meter.
166
SYSTem:INFormation:INSTrument:SNUMber?
Queries the meter serial number.
166
SYSTem:INFormation:INSTrument:CDATe?
Queries the calibration date of the meter.
166
SYSTem:INFormation:INSTrument:TYPE
Sets the meter type.
166
SYSTem:INFormation:INSTrument:TYPE?
Queries the meter type.
166
SYSTem:INFormation:PROBe:TYPE?
Queries the currently-connected sensor type.
167
SYSTem:INFormation:PROBe:MODel?
Queries the currently-connected sensor model.
167
SYSTem:INFormation:PROBe:SNUMber?
Queries the serial number of the sensor.
167
SYSTem:INFormation:PROBe:RESPonsivity?
Queries the currently-connected sensor calibration responsivity.
168
SYSTem:INFormation:PROBe:CDATe?
Queries the calibration date of the sensor.
168
SYSTem:INFormation:PROBe:TEMPerature?
Queries the head temperature of the sensor.
168
SYSTem:INFormation:PROBe:DIAMeter?
Queries the sensor diameter.
168
Sensor
Commands and
Queries
SCPI Common
Commands
The SCPI Standard specifies a standard set of IEEE-488.2 common
commands. All common commands and queries start with an
asterisk.
122
Host Interface
IEEE-488.2 Common
Commands
To maintain compatibility with the USB and RS-232 communication channels of the meter, only those commands which are common
to all channels are supported.
Identification Query
Queries the meter identification string, such as model name, firmware version, and firmware date.
Query: *IDN?
Reply: “Coherent, Inc - LabMax - “ + <version> + “ - “ + <firmware
date>
The dash sign separates all fields within the reply string. The first
field is always “Coherent, Inc”. The second field is the product
name, “LabMax”. The third field is the version number, having the
format “V<major>.<minor><optional qualifier characters>”. The
fourth field is the firmware date, having the form “<3 character
month name> <day of the month> <year>”. The reply string is not
quoted.
For example, a typical identification string looks like:
“Coherent, Inc - LabMax - V1.3 - Jul 05 2006” (note that the quotes
are not transmitted)
System Options
The system commands control functionality that is exclusive of the
meter measurement functions. These commands can be sent at any
time without affecting a measurement in progress.
Local Control Lockout
Remote Mode
This command places the meter in remote mode. The data wheel and
all front panel buttons, except the power button, are ignored while
remote mode is active. To cancel remote mode, either turn off the
software controlling the meter or press any key on the meter to bring
up a dialog that will allow remote mode to be canceled. Note: It is
possible for the software to get out of sync with the meter if local
control is taken while the application software is running.
Command: SYSTem:REMote
Query: None
Local Mode
This command places the meter in local mode. The data wheel and
all front panel buttons are enabled while local mode is active.
Command: SYSTem:LOCal
123
LabMax-TOP User Manual
Query: None
System Status
This query gets the system status. Status is returned in a string
expressed in upper case hexadecimal integer form. The 32-bit status
word is a bit-mapped status indicator. If a bit is set, the associated
status is active; otherwise it is inactive. Table 12 describes the status
bit mapping.
Table 12. Status Bit Definitions
BIT NUMBER
MASK
STATUS DESCRIPTION
0
00000001
Battery is low
1
00000002
Sensor damage temperature is exceeded
2
00000004
Valid sensor is attached
3
00000008
USB flash drive is attached
4
00000010
Future use
5
00000020
Batch data collection is in progress
6
00000040
Trend data collection is in progress
7
00000080
Meter power is on (will always be 1)
8
00000100
Future use
9
00000200
Data logging to flash active
10
00000400
Data logging to in-memory FIFO active
11
00000800
Remote mode enabled
12
00001000
Host file copy in progress
Unspecified bits are reserved and will be zero.
Command: None
Query: SYSTem:STATus?
Reply: <status>
As an example, if the battery is low and the sensor damage temperature has been exceeded, the system status query will return:
00000003 (Battery is low, sensor damage temperature exceeded)
124
Host Interface
Backlight Control
On/Off State
This command controls the backlight on/off state. The backlight
automatically turns off at the expiration of the backlight auto-off
timer, if the backlight auto-off is enabled.
Command: DISPlay:BACKlight {DEFault|ON|OFF}
Default: ON
Query: DISPlay:BACKlight?
Reply: ON|OFF
Auto-Off Mode
The meter can be configured to automatically turn off the backlight
after the specified front panel idle period. The backlight timeout
value is expressed in minutes, rounded to the nearest integer. Specifying OFF disables the backlight timeout timer.
Under AC Power
This command controls the LCD backlight auto-off timeout timer
when the meter is under AC power.
Command: SYSTem:OPTion:BACKlight:AOFF:ACPower
{DEFault|OFF|1..60}
Default: OFF
Query: SYSTem:OPTion:BACKlight:AOFF:ACPower?
Reply: OFF|1..60
Under Battery Power
This command controls the LCD backlight auto-off timer when the
meter is under battery power.
Command: SYSTem:OPTion:BACKlight:AOFF:BPOWer
{DEFault|OFF|1..60}
Default: OFF
Query: SYSTem:OPTion:BACKlight:AOFF:BPOWer?
Reply: OFF|1..60
Power Auto-Off
This command sets the power auto-off timeout when the meter is
under battery power. The power auto-off timeout value is expressed
in minutes rounded to the nearest integer. The meter can be configured to automatically power off after the specified front panel idle
period when the meter is under battery power. Setting the timeout to
OFF will disable the power auto-off function.
Command: SYSTem:OPTion:POWer:AOFF
{DEFault|OFF|1..60}
Default is OFF
125
LabMax-TOP User Manual
Query: SYSTem:OPTion:POWer:AOFF?
Reply: OFF|1..60
Meter Configuration
Management
Meter configurations are stored as named files. If the software
implementation requires a file extension for internal configuration
file storage, the file extension is not used as part of the configuration
file name.
The following rules apply to naming configuration files:
•
The configuration name may use space characters, dash characters, and all alphabet and number characters
•
The configuration name length will not exceed 40 characters
•
The first character of the configuration name is not a space
character
•
Configuration name matching for comparison purposes is
case-insensitive
•
A configuration name containing the string “Factory Settings”
is considered an invalid name
An attempt to specify an invalid configuration name in a command
will raise error 101.
Catalog
This query gets the list of stored configuration files that was saved
by the user. Note that the length of the meter response is limited to
the maximum message size.
Command: None
Query: MEMory:STATe:CATalog?
Reply: <comma separated list of quoted configuration names>
Save
This command stores the current configuration to the named configuration file. The named configuration file is overwritten if the
configuration name matches an existing configuration file. An
attempt to save to the “Factory Settings” configuration raises error
101.
Command:
MEMory:STATe:SAVE <quoted configuration name>
Default: not applicable.
Query: None
126
Host Interface
Recall
This command loads and activates the configuration held in the
named configuration file. An attempt to recall a non-existent configuration raises error 101.
Command: MEMory:STATe:RECall <quoted configuration name>
Default: not applicable.
Query: None
Delete
This command deletes the named configuration file. An attempt to
delete a non-existent configuration raises error 101. An attempt to
delete the “Factory Settings” configuration raises error 101.
Command: MEMory:STATe:DELete <quoted configuration name>
Default: not applicable.
Query: None
Rename
This command renames the named configuration file. Error 101 is
raised if the source configuration does not exist. This Error 101 is
raised if the destination configuration exists.
Command: MEMory:STATe:REName <quoted source configuration name>,<quoted destination configuration name>
Default: not applicable.
Query: None
Communications
Communications parameters may be changed remotely. Any
changes to the communications settings take effect immediately
after the command is processed and the handshaking response, if
any, is transmitted.
Interface Select
This command selects the interface for host communication.
Command: SYSTem:COMMunicate:INTerface
{DEFault|RS232|GPIB|USB}
Default: USB
Query: SYSTem:COMMunicate:INTerface?
Reply: RS232|GPIB|USB
127
LabMax-TOP User Manual
Message
Handshaking
This command selects the state of SCPI message round trip handshaking.
Command: SYSTem:COMMunicate:HANDshaking
{ON|OFF}
Reply: OK if ON is selected; otherwise no reply is sent
Query: SYSTem:COMMunicate:HANDshaking?
Reply: ON|OFF
If handshaking is ON:
•
Empty commands (commands with only whitespace characters) reply with “OK\r\n”
•
Valid commands with valid data reply with “OK\r\n”
•
Valid queries with valid data reply as explicitly defined elsewhere in this section, followed by “OK\r\n”
•
Valid commands or queries which result in an error reply with
“ERR<n>\r\n” where <n> is the error code number Available
data is either measurement data records (see “Sample
Measurement Data Collection” on page 160) or error records
(see “Error Record Reporting and Collection” on page 130).
•
Unrecognized commands or queries reply with “ERR100\r\n”
•
Error queuing occurs as explicitly defined elsewhere in this
section
If handshaking is OFF:
•
Serial Port-Specific
All command and query response behavior is explicitly
defined elsewhere in this section
Baud Rate
This command selects the transmit and receive baud rates together.
Command: SYSTem:COMMunicate:SERial:BAUD
{DEFault|9600|19200|38400|57600|115200}
Default: 19200
Query: SYSTem:COMMunicate:SERial:BAUD?
Reply: 9600|19200|38400|57600|115200
Parity
This command selects the parity bit setting.
Command: SYSTem:COMMunicate:SERial:PARity
{DEFault|EVEN|ODD|NONE}
Default: NONE
128
Host Interface
Query: SYSTem:COMMunicate:SERial:PARity?
Reply: EVEN|ODD|NONE
Stop Bits
This command selects the number of stop bits used.
Command: SYSTem:COMMunicate:SERial:SBITs
{DEFault|1|2}
Default: 1
Query: SYSTem:COMMunicate:SERial:SBITs?
Reply: 1|2
Flow Control
This command selects the flow control method for meter to host
communication. XON represents the XON/XOFF pacing method
(see“Data Flow Control” on page 110).
Command: SYSTem:COMMunicate:SERial:PACE
{DEFault|XON|NONE}
Default: NONE
Query: SYSTem:COMMunicate:SERial:PACE?
Reply: XON| NONE
Service Request
This command selects the state of the service request marker feature
(see“Service Request” on page 110).
Command: SYSTem:COMMunicate:SERial:SERVice
{DEFault|OFF|ON}
Default: OFF
Query: SYSTem:COMMunicate:SERial:SERVice?
Reply: OFF|ON
IEEE-488.1 GPIB
Port-Specific
IEEE-488.1 is available only on the LabMax-TOP w/GPIB model.
Device Address
This command selects the GPIB bus address of the meter. The
address value must be an integer value.
Command: SYSTem:COMMunicate:GPIB:ADDRess
{DEFault|1..30}
Default: 1
Query: SYSTem:COMMunicate:GPIB:ADDRess?
Reply: 1..30
129
LabMax-TOP User Manual
USB Port-Specific
Binary Streaming Data
This command enables the transmission of binary streaming data on
the USB interface.
Command: SYSTem:COMMunicate:USB:STREam
{DEFault|ON|OFF}
Default: OFF
Query: SYSTem:COMMunicate:USB:STREam?
Reply: ON|OFF
Error Record
Reporting and
Collection
Programming and system errors will occasionally occur while
testing or debugging remote programs and during measurement.
Error strings will follow the SCPI Standard for error record definition:
<error code>,<quoted error string><CR><LF>
The host queries for errors in two steps. First, the host queries for the
number of error records available (N) and second, the host queries N
times for the error records. Errors are stacked up to 20 deep. In the
case of error overflow, the last error in the error list is an indication
of error overflow.
The possible error strings are shown in Table 13.
Table 13. Error Codes and Description Strings (Sheet 1 of 2)
ERROR CODE NUMBER
QUOTED ERROR STRING
ERROR DESCRIPTION
-350
“Queue overflow”
Error queue is full
-321
“Out of memory”
Meter internal memory is exhausted
-310
“System error”
Unexpected/unrecoverable hardware
or software fault
-254
“Media full”
No more storage available on the mass
storage volume
-200
“Execution error”
Command is out of order
0
“No error”
No error
100
“Unrecognized command/query”
The command or query is not recognized
101
“Invalid parameter”
The command or query parameter is
invalid
200
“Directory does not exist”
The specified directory does not exist
201
“File does not exist”
The specified file does not exist
130
Host Interface
Table 13. Error Codes and Description Strings (Sheet 2 of 2)
ERROR CODE NUMBER
QUOTED ERROR STRING
ERROR DESCRIPTION
202
“Directory already exists”
The specified directory already exists
203
“File already exists”
The specified file already exists
204
“Directory is not empty”
The specified directory is not empty
205
“File query is not possible”
The file query is not possible because
the file is not opened
206
“File to open not named”
The file open is not possible because
the named file has not been named
Error -350 is raised when the error queue becomes full. Non-“Queue
overflow” errors are replaced by “Queue overflow” errors when
there is exactly one available storage location available in the error
queue. No additional errors are added to the error queue if the error
queue is full.
Error -321 is raised when there is an internal memory allocation
error. This error typically happens when malloc(), calloc(), or
strdup() fails and usually leads to an unrecoverable meter firmware
condition.
Error -310 is raised when the meter firmware detects an unexpected
or unrecoverable error. This error condition includes unrecoverable
hardware faults.
Error -254 is raised when an attempt to write a trend data file to the
local or USB mass storage volumes exceeds the storage limit of the
volume. When a mass storage volume becomes full, the growing file
that caused the error is immediately closed and error -254 is raised.
Error -200 is raised when a file name/open/close sequence happens
out of order.
Error 100 is raised when the meter receives an unrecognized
command or query.
Error 101 is raised when the meter receives a command or query
with one or more invalid data parameters.
The remaining errors are raised for specific mass storage operational
errors described elsewhere in this section.
Error Count Query
This query gets the number of error records in the error queue at the
time of the query.
Command: none
131
LabMax-TOP User Manual
Query: SYSTem:ERRor:COUNT?
Reply: <count of error records stored in integer format>
Error Query
This query gets the next error record(s) in the error queue. More than
one error record may be queried using the optional <error record
count> parameter, which must be an integer value. A single error
record is returned if <error record count> is not specified. No reply
is transmitted if no error records are available.
As the meter transmits each error record:
•
The error record is permanently removed from the error queue
•
The queued error record count decrements by one
Command: none
Query: SYSTem:ERRor:NEXT? [<error record count>]
Default: not applicable.
Reply: <next available error record(s)>
All Error Query
This query gets all error records in the error queue at the time of the
query. No reply is transmitted if no error records are available.
After the completion of the reply transmission:
•
The error queue is empty
•
The queued error record count is zero
Command: none
Query: SYSTem:ERRor:ALL?
Reply: <all available error record(s)>
132
Host Interface
All Error Clear
This command clears all error records in the error queue.
Command: SYSTem:ERRor:CLEar
Query: none
Measurement
Setup and Control
The meter may be configured to measure data through the host interface or the front panel. Many of the setup commands have an identical corresponding host command.
Measurement Mode
Select
This command sets the meter measurement mode to select either
power (Watts) or energy (Joules) measurement mode.
Command: CONFigure:MEASure {DEFault|J|W}
Default: W (Watts) mode when a thermopile or optical sensor is
attached and J (Joules) mode when a pyroelectric sensor is attached.
Query: CONFigure:MEASure?
Reply: J|W
The command is ignored when an optical sensor is attached or if a
valid sensor is not attached.
Power Measurement
Units Select
This command sets the display measurement units for power
measurements (Watts or dBm).
Command: CONFigure:PUNits {DEFault|W|DBM}
Default: W (Watts)
Query: CONFigure:PUNits?
Reply: W|DBM
Display Mode Select
This command sets the display mode.
Command: CONFigure:DISPlay:PRImary
Command: CONFigure:DISPlay:STATistics
Command: CONFigure:DISPlay:PSTability
Command: CONFigure:DISPlay:TUNE
Command: CONFigure:DISPlay:TRENd
Query: None
The position stability display mode command (CONF:DISP:PST) is
ignored if an LM sensor is not attached.
133
LabMax-TOP User Manual
The command header that follows CONFigure:DISPlay: has the
function shown in Table 14.
Table 14. Display Mode Headers
HEADER
DISPLAY MODE
PRImary
Non-statistics
STATistics
Statistics
PSTability
Position stability
TUNE
Tune
TRENd
Trend
Display View Mode Select
Position Stability View Mode
This command sets the position stability view mode to be used when
position stability display mode is active.
Command: CONFigure:PSTability:VMOde
{DEFault|SCRoll|FTSCreen}
Default: SCRoll
Query: CONFigure:PSTability:VMOde?
Reply: SCR|FTSC
Tune View Mode
This command sets the tune view mode to be used when tune display
mode is active.
Command: CONFigure:TUNE:VMOde
{DEFault|SCHart|BCHart}
Default: SCHart
Query: CONFigure:TUNE:VMOde?
Reply: SCH|BCH
Trend Chart View Mode
This command sets the trend chart view mode to be used when trend
display mode and trend chart display sub mode are active.
Command: CONFigure:TREND:VMOde
{DEFault|SCRoll|FTSCreen}
Default: SCRoll
Query: CONFigure:TREND:VMOde?
Reply: SCR|FTSC
134
Host Interface
Area Correction
Enable/Disable State
This command enables or disables area correction.
Command: CONFigure:AREA:CORRection
{DEFault|ON|OFF}
Default: OFF
Query: CONFigure:AREA:CORRection?
Reply: ON|OFF
Aperture Area
This command sets the aperture area expressed in square centimeters
(cm2).
Command: CONFigure:AREA:APERture
{DEFault|0.01..500.00}
Default: 1.0
Query: CONFigure:AREA:APERture?
Reply: 0.01..500.00
135
LabMax-TOP User Manual
Analog Output Full
Scale Voltage
This command selects the full scale output voltage at the analog
output connector.
Command: CONFigure:AOUT:FSCale {DEFault|1|2|4}
Default: 2
Query: CONFigure:AOUT:FSCale?
Reply: 1|2|4
Speedup
Host Data Output
This command selects the speedup mode for the host interface data
output.
Command: CONFigure:SPEedup:HOST
{DEFault|OFF|ON}
Default: ON
Query: CONFigure:SPEedup:HOST?
Reply: OFF|ON
Analog Output
This command selects the speedup mode for the analog output.
Command: CONFigure:SPEedup:AOUT
{DEFault|OFF|ON}
Default: ON
Query: CONFigure:SPEedup:AOUT?
Reply: OFF|ON
Panel Numeric Display
This command selects the speedup mode for the panel numeric
display.
Command: CONFigure:SPEedup:DISPlay
{DEFault|OFF|ON}
Default: ON
Query: CONFigure:SPEedup:DISPlay?
Reply: OFF|ON
Tune Display
This command selects the speedup mode for the panel tune display.
Command: CONFigure:SPEedup:TUNE
{DEFault|OFF|ON}
Default: ON
136
Host Interface
Query: CONFigure:SPEedup: TUNE?
Reply: OFF|ON
Display Data
Smoothing
Display data smoothing is controlled differently, depending on the
type of sensor attached.
Pulses
This command sets the display data smoothing window size
expressed in number of pulses rounded to the nearest integer. This
command applies only when a pyroelectric sensor is attached.
Display data smoothing is not active in Joules mode when a thermopile sensor is attached.
Command: CONFigure:AVERage:PULSe
{DEFault|OFF|AUTO|2..999}
Default: AUTO
Query: CONFigure:AVERage:PULSe?
Reply: OFF|AUTO|2..999
Time
This command sets the display data smoothing window size
expressed in seconds rounded to the nearest integer. This command
applies only when a thermopile or optical sensor is attached in Watts
mode.
Command: CONFigure:AVERage:TIME
{DEFault|OFF|AUTO|1..60}
Default: AUTO
Query: CONFigure:AVERage:TIME?
Reply: OFF|AUTO|1..60
Wavelength
Correction
Enable/Disable State
This command enables or disables wavelength corrrection.
Command: CONFigure:WAVElength:CORRection
{DEFault|OFF|ON}
Default: OFF
Query: CONFigure:WAVElength:CORRection?
Reply: OFF|ON
137
LabMax-TOP User Manual
Operational Wavelength
This command sets the operational wavelength expressed in units of
nm rounded to the nearest integer. When MIN is specified, the
minimum allowable wavelength for the attached sensor is used.
When MAX is specified, the maximum allowable wavelength for
the attached sensor is used. Otherwise, the range of wavelengths
permitted for this command is controlled by MIN and MAX.
Command: CONFigure:WAVElength:WAVElength
{MIN|MAX|1..99999}
Default: not applicable.
Query: CONFigure:WAVElength:WAVElength?
[MAXimum|MINimum]
Reply: 1..99999
Using the optional MAX and MIN parameters results in the
maximum or minimum wavelengths that can be used for the
currently connected sensor. If there is no sensor attached, the
maximum is 99999 nm and the minimum is 1 nm.
The numerically-specified wavelength must be one of the wavelengths in the wavelength table for the attached sensor type. Error
101 is raised if the numerically specified wavelength is not one of
the wavelengths in the wavelength table for the attached sensor type.
If no sensor is attached, any numerically-specified wavelength
within the range stated above is accepted.
Wavelength Table Definition
This command sets the wavelength table entries for the meter. The
old list is replaced by the list of wavelengths specified in the
command. Each wavelength is expressed in units of nm rounded to
the nearest integer. Each wavelength ranges from 1 to 99999. Error
101 is raised if the list length exceeds 100 entries. Note that the list
returned by the query will always include the calibration wavelength
of the current sensor.
Command: CONFigure:WAVElength:LIST
<comma separated list of wavelengths>
Default: not applicable.
Query: CONFigure:WAVElength:LIST?
Reply: <comma separated list of wavelengths>
Gain Compensation
Enable/Disable State
This command enables or disables gain compensation.
138
Host Interface
Command: CONFigure:GAIN:COMPensation
{DEFault|OFF|ON}
Default: OFF
Query: CONFigure:GAIN:COMPensation?
Reply: OFF|ON
Factor
This command sets the gain compensation factor. The gain compensation factor has no units.
Command: CONFigure:GAIN:FACTor
{DEFault|0.001..100000.0}
Default: 1.0
Query: CONFigure:GAIN:FACTor?
Reply: <gain compensation factor>
Probe Zero
This command sets the current sensor input voltage as the zero baseline voltage. Using command will result in no internal action taken
if a pyroelectric sensor is attached or if a valid sensor is not attached.
Command: CONFigure:ZERO
The zero query returns the offset in Watts used to generate the
zeroed output if a valid thermopile or optical sensor is attached.
Otherwise, 0 is returned.
Query: CONFigure:ZERO?
Reply: <zero offset in Watts>
Range Select
Range Value Select
This command selects the meter measurement range expressed in
the units defined under the current measurement mode (Joules or
Watts). The measurement range is selected by expressing the
maximum expected measurement, which must be greater than 0.0.
The <granted full scale range> value is the lowest available
full-scale range that can measure the <maximum expected measurement>. For example, if the list of available ranges is
3 mW, 30 mW and 300 mW, and the maximum expected measurement is 10 mW, the granted range is 30 mW. The <granted full scale
range> is the top range available if the <maximum expected
measurement> exceeds the top range value.
Command: CONFigure:RANGe:SELect
<maximum expected measurement>
Default: not applicable.
139
LabMax-TOP User Manual
Query: CONFigure:RANGe:SELect? [MAXimum|MINimum]
Reply: <granted full scale range>
Using the optional MAX and MIN parameters will result in the
maximum or minimum available range, respectively. It is possible
that the range returned from the query will not be the same as the
range selected, if auto ranging is active.
Auto Range Enable/Disable State
This command enables or disables automatic selection of the meter
measurement range. The meter hunts for the best measurement
range for the current sensor and laser conditions when auto ranging
is active. The hunt procedure may require several samples to arrive
at the best range. Auto ranging applies only when a thermopile or
optical sensor is attached.
Command: CONFigure:RANGe:AUTO
{DEFault|ON|OFF}
Default: OFF
Query: CONFigure:RANGe:AUTO?
Reply: ON|OFF
Statistics Mode
Control
Sets statistics calculation parameters to be used in the statistics operating mode.
Display Item Select
This command selects the statistics display items, which takes effect
at the end of the current statistical batch. The data argument is a
comma-separated list of one or more tokens shown below. At least
one token must be specified. The tokens may be specified in any
order. Duplicated tokens are ignored. Error 101 is raised if the list
length exceeds 10 entries.
One or more display items may be selected but only the first six list
items are displayed. The query returns all selected
tokens—including non-displayed tokens—following the order
stated in the reply list below.
Batch Size
Pulses
This command sets the statistics batch size, which takes effect at the
end of the current statistical batch. The batch size units are pulses
rounded to the nearest integer. This command applies only under
one of the following conditions:
•
a pyroelectric sensor is attached
140
Host Interface
•
a thermopile sensor is attached and Joules mode is selected
Command: CONFigure:STATistics:BSIZe:PULSe
{DEFault|2..99999}
Default: 100
Query: CONFigure:STATistics:BSIZe:PULSe?
Reply: 2..99999
Time
This command sets the statistics batch size, which takes effect at the
end of the current statistical batch. The batch size includes 0 to 999
days and is expressed in units of days:hours:minutes:seconds. Each
numeric component of hours:minutes:seconds must be an integer.
Days must range from 0 to 999. Hours must range from 0 to 24.
Minutes must range from 0 to 59. Seconds must range from 0 to 59.
This command applies only when a thermopile or optical sensor is
attached in Watts mode.
Command: CONFigure:STATistics:BSIZe:TIME
{DEFault|00:00:01..24:00:00}
Default: 00:01:00
Query: CONFigure:STATistics:BSIZe:TIME?
Reply: 00:00:01..24:00:00
Sampling Rate
Pulse Event Based Measurements
This command sets the statistics sampling rate, which takes effect at
the end of the current statistical batch. The sampling rate units are
expressed pulses rounded to the nearest integer. This command
applies only under one of the following conditions:
•
a pyroelectric sensor is attached
•
a thermopile sensor is attached and Joules mode is selected
Measurement data is added to the batch on a sub-sampled basis
ranging from as low as 1 pulse added per 99999 measured to as high
as 1 pulse added per 1 measured. The statistics sampling rate will
indicate the number of pulses that will be measured for every one
pulse added to the batch.
Command: CONFigure:STATistics:RATE:PULSe
{DEFault|1..99999}
Default: 1
Query: CONFigure:STATistics:RATE:PULSe?
Reply: 1..99999
141
LabMax-TOP User Manual
Time Based Measurements
This command sets the statistics sampling rate, which takes effect at
the end of the current statistical batch. The sampling interval rate is
expressed in units of samples per second. This command applies
only when a thermopile or optical sensor is attached and is in Watts
mode.
The sampling rate is 1, 2, 5, or 10 (max.) samples/sec. The true
sampling rate is integer submultiples of 10 samples/sec as the
internal sensor sampling rate is fixed at exactly 10 samples/sec.
Command: CONFigure:STATistics:RATE:FREQuency
{DEFault|1.157E-5..1.0E1}
Default: 1.0E1
Query: CONFigure:STATistics:RATE:FREQuency?
Reply: 1.157E-5..1.0E1
Restart Mode
This command selects the action to be taken at the end of a statistical
batch. AUTomatic begins a new batch immediately upon logging
the data from the previous batch. MANual requires the start signal
(see “Start a New Batch” on page 142).
Command: CONFigure:STATistics:RMOde
{DEFault|MANual|AUTomatic}
Default: MANual
Query: CONFigure:STATistics:RMOde?
Reply: MAN|AUT
Batch Initiation and Termination
Start a New Batch
This command terminates the current statistical batch and starts a
new one.
Command: CONFigure:STATistics:STARt
Query: None
The command is ignored if statistics display mode is not active.
Stop a Batch
This command terminates the current statistical batch if a batch is in
progress.
Command: CONFigure:STATistics:STOP
Query: None
142
Host Interface
The command is ignored if statistics display mode is not active or a
batch is not in progress.
Position Stability
Mode Control
Cycle Duration
This command sets the position stability cycle time, which takes
effect at the end of the current position stability cycle. The position
stability cycle time is expressed in units of hours:minutes:seconds.
Each numeric component of hours:minutes:seconds must be an
integer. Hours must range from 0 to 24. Minutes must range from 0
to 59. Seconds must range from 0 to 59. This command applies only
when a quad thermopile sensor is attached in one of the position
stability display modes.
Command: CONFigure:PSTability:DURation
{DEFault|00:00:01..24:00:00}
Default: 00:01:00
Query: CONFigure:PSTability:DURation?
Reply: 00:00:01..24:00:00
Cycle Initiation and Termination
Start a New Cycle
This command terminates the current position stability display cycle
and starts a new one.
Command: CONFigure:PSTability:STARt
Query: None
The command is ignored if position stability display mode is not
active.
Stop a Cycle
This command terminates the current position stability display cycle
if a position stability display cycle is in progress.
Command: CONFigure:PSTability:STOP
Query: None
The command is ignored if position stability display mode is not
active or a position stability display cycle is not in progress.
Tune Mode Control
Zoom Level
Strip Chart
Vertical
143
LabMax-TOP User Manual
This command sets the vertical zoom mode when the tune strip chart
display mode is active. The vertical zoom mode value is unit-less.
Command: CONFigure:TUNE:SCHart:ZOOM:VERTical
{DEFault|AUTO|1|2|5|10|20}
Default: AUTO
Query: CONFigure:TUNE:SCHart:ZOOM:VERTical?
Reply: AUTO|1|2|5|10|20
Horizontal
This command sets the horizontal zoom mode when the tune strip
chart display mode is active. The horizontal zoom mode value is
unit-less.
Command: CONFigure:TUNE:SCHart:ZOOM:HORizontal
{DEFault|1|2|5|10|20}
Default: 1
Query: CONFigure:TUNE:SCHart:ZOOM:HORizontal?
Reply: 1|2|5|10|20
Clear
This command clears the tune strip chart display.
Command: CONFigure:TUNE:CLEar
Query: None
Trend Mode Control
The trend mode is controllable from the CONFigure and MMEMory
command nodes from the host interface. The CONFigure commands
provide all host configuration of the trend mode operation. The
MMEMory commands provide all data file management and data
file transfer commands and queries for data generated when trend
display mode is active.
Operational Control
Cycle Initiation and Termination
Start a New Cycle
This command terminates the current trend cycle and starts a new
one. An optional, fully-qualified filename may be included to
specify the location where the trend data will be stored. (Fully-qualified filenames are defined under the heading, “Data Storage” on
page 146.) If a filename is not specified, the data will be buffered
internally and may be saved at a later time using mass memory
commands.
144
Host Interface
Command:
CONFigure:TRENd:STARt [<quoted fully qualified filename>]
Query: None
The command is ignored if trend display mode is not active.
Stop a Cycle
This command terminates the current trend cycle if a cycle is in
progress.
Command: CONFigure:TRENd:STOP
Query: None
The command is ignored if trend display mode is not active or a
trend cycle is not in progress.
Cycle Parameters
Cycle Duration
Pulses
This command sets the trend cycle duration, which takes effect at the
end of the current trend cycle. The trend cycle duration units are
pulses rounded to the nearest integer value. This command applies
only under one of the following conditions:
•
a pyroelectric sensor is attached
•
a thermopile sensor is attached and Joules mode is selected
Command: CONFigure:TRENd:BSIZe:PULSe
{DEFault|2..99999}
Default: 10
Query: CONFigure:TRENd:BSIZe:PULSe?
Reply: 2..99999
Time
This command sets the trend cycle duration, which takes effect at the
end of the current trend cycle. The trend cycle duration is expressed
in units of hours:minutes:seconds. Hours must range from 0 to 24.
Minutes must range from 0 to 59. Seconds must range from 0 to 59.
This command applies only when a thermopile or optical sensors is
attached in Watts mode.
Command: CONFigure:TRENd:BSIZe:TIME
{DEFault|00:00:01..24:00:00}
Default: 00:01:00
Query: CONFigure:TRENd:BSIZe:TIME?
Reply: 00:00:01..24:00:00
145
LabMax-TOP User Manual
Sampling Rate
Pulse Event Based Measurements
This command sets the trend sampling rate, which takes effect at the
end of the current trend cycle. The sampling rate units are expressed
pulses rounded to the nearest integer. This command applies only
under one of the following conditions:
•
A pyroelectric sensor is attached
•
A thermopile sensor is attached and Joules mode is selected
Measurement data is added to the trend on a sub-sampled basis
ranging from as low as 1 pulse added per 99999 measured to as high
as 1 pulse added per 1 measured. The trend sampling rate indicates
the number of pulses that are measured for every one pulse added to
the trend.
Command: CONFigure:TRENd:RATE:PULSe
{DEFault|1..99999}
Default: 1
Query: CONFigure:TRENd:RATE:PULSe?
Reply: 1..99999
Time Based Measurements
This command sets the trend sampling rate, which takes effect at the
end of the current trend cycle. The sampling interval rate is
expressed in units of samples per seconds. This command applies
only when a thermopile or optical sensor is attached in Watts mode.
The sampling rate is 1, 2, 5, or 10 (max.) samples/sec. The true
sampling rate is integer sub-multiples of 10 samples/sec as the
internal sensor sampling rate is fixed at exactly 10 samples/sec.
Command: CONFigure:TRENd:RATE:FREQuency
{DEFault|1.157E-5..1.0E1}
Default: 1.0E1
Query: CONFigure:TRENd:RATE:FREQuency?
Reply: 1.157E-5..1.0E1
Data Storage
Trend mode data storage (also known as mass memory) is in USB
and/or internal flash memory. Data is stored in files within a hierarchical directory-based file system.
The full file format is \<volume>\[<directory>[\<directory>]…].
Files and directories are not limited to the 8.3 format. A fully-qualified combined directory path and file name will not exceed 260 char-
146
Host Interface
acters in length. Valid directory and file name characters are ASCII
characters 0x20-0x7E, except for the characters '<', '>', ':', '“' (double
quote), '/' (forward slash), '\' (backward slash), and '|'.
The file name will not end with a trailing space or period. (Note that
the graphical interface of the meter may only allow user entry of a
subset of the file name characters supported by the host interface.)
The only file names considered valid for trend data storage purposes
are Comma Separated Value (CSV) files, and in all cases the “.csv”
file name extension are appended to valid trend data file names.
There are two mass storage volumes: removable USB flash memory
and local flash memory. The string “usb” identifies USB flash
memory volume. The string “loc” identifies local flash memory
volume.
Volume name, directory name, and file name matching is
case-sensitive for comparison and file storage purposes. The case is
preserved at all times.
Forward slashes ('/') and backward slashes ('\') separating <directory> and <volume> entries in the full file and directory formats are
accepted interchangeably on input. Backward slashes are always
used on full file and directory format outputs. The full file string
format is a quoted concatenation of the full directory path, followed
by a slash separator, which is followed by the file name.
A file or directory may be specified as a relative name (non-absolute
path, starting with the conventional “.” and “..” relative symbols), or
a fully-qualified absolute name in command arguments. Relative
names are relative to the current working directory (see “Change
Directory” on page 148). Files and directories returned in replies are
absolute names.
Directory and File Manipulation
Directory List
Note: SCPI specifies using the term “catalog” in lieu of the term
“directory” as the header to request a list of files contained in a directory. In that context, catalog and directory are synonymous.
This query gets trend data file mass storage information and a list of
trend data files stored in the current working directory. The reply to
the query returns data in comma-separated list format. The first list
item is the estimated number of allocated trend data storage bytes
used on the current volume. The second list item is the estimated
number of allocated trend data storage bytes remaining for new
trend data storage. All remaining list items are file entries. Each file
entry is a trio of data items. Each trio is identified by position only.
The first item in a file entry trio is the quoted file name. The second
147
LabMax-TOP User Manual
item is the file type, with ASC always representing ASCII file type.
The third item is the file size in bytes (an estimated value in the case
of active open files).
For example, a valid reply might be:
10012321,392323,“file1.csv”,ASC,1250,“file2.csv”,ASC,3250
The reply string indicates the following:
•
10012321 bytes of storage allocated for trend files are in use
•
392323 bytes of storage allocated for trend files are available
for new trend data file storage
•
There are two files in the current working directory: file1.csv
and file2.csv
•
file1.csv is an ASCII file containing 1250 bytes
•
file2.csv is an ASCII file containing 3250 bytes
Note that the length of the meter response is limited to the maximum
message size.
Command: None
Query: MMEMory:CATalog?
Reply: <bytes used>,<bytes available>,<comma separated list of
file entries>
Change Directory
This command sets the current working directory. The command
argument is a quoted string indicating the directory. An attempt to
set the current working directory to a non-existent directory will
raise error 200. The query gets the quoted current working directory.
The current working directory is the root directory of the internal
data storage directory tree after a power off/on cycle.
Command:
MMEMory:CDIRectory <quoted directory name>
Default: not applicable.
Query: MMEMory:CDIRectory?
Reply: <quoted current working directory name>
Create Directory
This command creates a new directory. The command argument is a
quoted string indicating the directory. An attempt to create an
existing directory will raise error 202. An attempt to create a directory using the name of an existing file will raise error 202. An
attempt to create a new directory when the storage volume is full
will raise error -254.
148
Host Interface
Command:
MMEMory:MDIRectory <quoted directory name>
Default: not applicable.
Query: None
Delete File
This command deletes a file. The command argument is a quoted
string indicating the file, including the “.csv” file name extension.
An attempt to delete a non-existent file will raise error 201. An
attempt to delete a file being populated by the currently active trend
cycle will raise error 101. An attempt to delete a file open for file
transfer will raise error 101.
Command: MMEMory:DELete <quoted file name>
Default: not applicable.
Query: None
Remove Directory
This command removes a directory. An attempt to remove a directory that does not exist will raise error 200. An attempt to remove a
directory that contains files or subdirectories will raise error 204.
Command:
MMEMory:RDIRectory <quoted directory name>
Default: not applicable.
Query: None
Rename File or Directory
This command renames a file or directory. Only directories and
“.csv” files may be renamed using this command. Renaming a file
requires that the “.csv” file name extension be specified for both the
original file name and the new file name. An attempt to rename a file
or directory that does not exist will raise error 201. An attempt to
rename a file or directory to a file or directory that already exists will
raise error 202 or 203, depending if the original file is a directory or
a file. An attempt to rename a file being populated by the
currently-active trend cycle will raise error 101. An attempt to
rename a file open for file transfer will raise error 101. An attempt
to rename a file or directory when the storage media is full will raise
error -254.
Command: MMEMory:REName <quoted original file or directory
name>,<quoted new file or directory name>
Default: not applicable.
Query: None
149
LabMax-TOP User Manual
Copy File
This command copies a source file to a destination. The <quoted
source> parameter indicates a relative or absolute source path to an
existing file. The <quoted destination> parameter may indicate a
relative or absolute path to a new non-existent destination file or an
existing destination directory. The current working directory is
assumed if the directory component of either source or destination
path is omitted. A duplicate of the source file is created with the
destination file name in the specified directory, if the destination
parameter represents a file. A duplicate of the source file is created
with the same source file name in the specified directory, if the destination parameter represents a directory. Copying a file requires that
the “.CST” file name extension be specified for source files and
destination file names (not destination directories). An attempt to
copy a file that does not exist will raise error 201. An attempt to copy
a file to a destination file that already exists will raise error 202 or
203, depending if the destination is a directory or a file. An attempt
to copy a file when the storage media is full will raise error -254. An
attempt to copy a source file that is currently in use will raise error
101.
Note that file copies may be lengthy operations and, for this reason,
they are performed in the background. The result code returned by
this command represents a “good faith” effort at predicting the
results of the subsequent copy operation. If the background copy
ultimately fails, error -200 is raised after the initial reply to this
command has been returned. The system status word contains a bit
to indicate that a host file copy is in progress. The host may check
this bit to see if any copies are in progress.
Command:
MMEMory:COPY <quoted source>,<quoted destination>
Default: not applicable.
Query: None
Store Data to File
This command stores data generated from the last completed and
unnamed trend cycle since the last power off/on cycle to a trend data
file in mass storage. This command is ignored if a trend cycle is in
progress. This command is ignored if no trend cycle has completed
since the last power off/on cycle. An attempt to operate on a file
being populated by the currently-active trend cycle will raise error
101. An attempt to store to a file open for file transfer will raise error
101.
Command: MMEMory:STORe <quoted file name>
Default: not applicable.
150
Host Interface
Query: None
File Transfer to Host
The host interface provides facility for transferring a trend data file
in meter mass storage to the host computer via the host interface.
The model for the facility will be:
1.
Set file name
2.
Open file
3.
Fetch data record(s)
4.
Close file
Only one file will be open at any time. Failing to follow the above
order for file data access will raise error -200. The open/close state
of a file will not persist across after a power off/on cycle. All files
will be closed after a power off/on cycle.
Data records are defined as a single ASCII line in a comma-separated values data file. Data records are fetched in start-to-finish
sequential order. Each data record is removed from the open file data
stream as it is transmitted, until all data records have been read from
the data stream.
Name File to Open
This command sets the name of the file that will apply when the next
open command is sent. An attempt to set the name of a file while a
previously opened file remains open will raise error 101
Command: MMEMory:NAME <quoted file name>
Default: not applicable.
Query: None
Open Named File
The command opens the previously-named file for transmission by
placing all data records contained in the file in the record transmit
queue. An attempt to open a file that has not been named will raise
error 206. An attempt to open a file that does not exist will raise error
201. An attempt to open a file being populated by the currently
active trend cycle will raise error 101.
Command: MMEMory:OPEN
Query: None
File Record Count Query
This query gets the number of unread data records available from the
data stream of the currently-open trend data file. An attempt to issue
this query while a file is not open will raise error 205.
151
LabMax-TOP User Manual
Command: None
Query: MMEMory:FETCh:NRECords?
Reply: <count of records available>
Fetch Next Available Record(s)
The query gets the next unread and available data record(s) of the
currently-open trend data file. An attempt to issue this query while a
file is not open will raise error 205. An attempt to fetch more data
records than are available will result in the exact number of data
records available being transmitted.
As the meter transmits each data record:
•
The data record is permanently removed from the record
transmit queue
•
The queued data record count decrements by one
Command: None
Query: MMEMory:FETCh:NEXT? [<record count>]
Reply: <next available record(s)>
Fetch All Available Records
This query gets all unread and available data records of the currently
open trend data file.
After the completion of the reply transmission:
•
The record transmit queue will be empty
•
The queued data record count will be zero
Command: None
Query: MMEMory:FETCh:ALL?
Reply: <all available records>
Close Named File
This command closes the currently-open file. This command is
ignored if a file is not open.
Command: MMEMory:CLOSE
Query: None
Measurement Data
Format
The data format commands are used to configure the form in which
the meter sends measurement data and statistical data to the host.
Data records are sent to the host in ASCII text form. A data record
is a set of one or more comma-delimited data values generated at the
same instant, ending in “<CR><LF>”.
152
Host Interface
The selected meter measurement mode controls the type of measurement data that is sent over the host interface. The user receives
energy readings from the host interface if the measurement mode is
J. The user receives power readings from the host interface if the
measurement mode is W. Watts or Joules are expressed as units per
square centimeter, if area correction is active.
Two types of data records are available to the host: Sample and
Statistics. Sample data records that represent data from a single
measurement pulse or sample are available anytime the meter has
acquired data and sample data logging has been initialized. Statistic
data records are available when statistics mode is active, and when
one or more statistical batches have been completed and statistics
data logging has been initialized.
Sample Data Record Format
The following information is available with each data record:
•
Measurement value in "%.3E" format (when pyroelectric
sensors are connected) and "%.4E" format (for any other
sensor type)
•
Quad Sensor X distance in MM in "%.1f" format (data is 0 if
quad sensor is not used)
•
Quad Sensor Y distance in MM in "%.1f" format (data is 0 if
quad sensor is not used)
•
Coded format ID indicating the exact format string used for
meter measurement display (refer to Table 15, “Measurement
Data Value Selections,” on page 155 for coded format ID definitions)
•
Coded engineering units scale multiplier ID (refer to Table 15,
“Measurement Data Value Selections,” on page 155 for coded
scale multipler ID definitions)
•
Encoded Units ID byte.
•
Bit 7 indicates the measurement value units, SET indicates Watts, CLEAR indicates Joules
•
Bit 6 indicates if units represent area, SET indicates units
are in CM2, CLEAR indicates no area
•
Bits 5-0 represent the following units:
•
Femto
•
Pico
•
Nano
•
Micro
153
LabMax-TOP User Manual
•
Milli
•
Fundamental
•
Kilo
•
Mega
•
Giga
•
Flags (defined in Table 16, “FLAG Bit Definitions,” on
page 156)
•
Pulse period in microseconds (valid if a pyroelectric sensor is
attached)
•
Sequence number
The meter internally generates a data record according to the
following rules:
•
With every pulse when a thermopile sensor is attached and
Joules mode is selected
•
10 times per second when a thermopile or optical sensor is
attached and Watts mode is selected
•
With every pulse when a pyroelectric sensor is attached
Since thermopile and optical power measurements are continuous in
nature (not event-based as with pyroelectric sensors), the delivery of
this data may be configured as a stream of sampled points or simply
the last point recorded (see “Continuous Data Delivery Mode” on
page 158).
The host may configure the presentation of data in a record. Data ID
tags and content are configurable. The host may control the expression of data ID tags that precede each data item in a batch record.
The host may control the data contents and the expression of data ID
tags that precede each data item (see “Sample Data Value Set Send”
on page 155 and “Data Value Headers” on page 158).
154
Host Interface
Sample Data Value Set Send
This command—which takes effect at the next data measurement
taken (but not already queued)—selects which values are sent when
sample data are reported over the host interface. One or more of the
selections from Table 15 may be selected.
Table 15. Measurement Data Value Selections
TOKENS
DATA DESCRIPTION
EXPRESSED IN
PRI
Primary data value (includes Watts or
Joules)
Scientific notation (for example, “2.88E-3”)
QUAD
Quad distance X/Y data in mm (valid
only when an LM sensor is attached)
Two floating point values in X,Y order (for example,
“-1.2,+1.5”)
FMT
Primary data value display format
Coded print format ID followed by a “/” followed by a
coded engineering units scale multiplier (for example, 5/3
represents a %6.2f print format string and a 1.0E-9 engineering units scake multipler). Coded IDs are as follows:
Coded Print Format IDs
1.
2.
3.
4.
5.
6.
7.
8.
9.
10.
11.
12.
“%4.0f”
“%5.1f”
“%5.2f”
“%6.1f”
“%6.2f”
“%6.3f”
“%7.2f”
“%7.3f”
“%7.4f”
“%8.3f”
“%8.4f”
“%8.5f”
Coded Scale Multiplier IDs
1.
2.
3.
4.
5.
6.
7.
8.
9.
10.
11.
1.0E-15
1.0E-12
1.0E-9
1.0E-6
1.0E-3
1.0
1.0E+3
1.0E+6
1.0E+9
1.0E+12
1.0E+15
UNIT
Primary data value display units
String format (for example, “mW/cm2”)
PER
Pulse period in microseconds
32-bit unsigned integer form
FLAG
Flags
8-bit hexadecimal integer form
SEQ
Sequence ID
32-bit unsigned integer form
155
LabMax-TOP User Manual
The data argument is a comma-separated list of one or more tokens
shown below and in Table 15. At least one token must be specified.
The tokens may be specified in any order. Duplicated tokens will be
ignored. Error 101 will be raised if the list length exceeds 7 entries.
The presentation of the data items in a data record is: PRI, QUAD,
FMT, UNIT, PER, FLAG, then SEQ order, depending on which
tokens were specified.
The labels in the former list also serve as data header strings (see
“Data Value Headers” on page 158).
The query returns all selected tokens following the order stated in
the reply list below.
Command: CONFigure:READings:SEND
{DEFault|PRI,QUAD,FMT,UNIT,PER,FLAG,SEQ}
Default: PRI
Query: CONFigure:READings:SEND?
Reply: PRI,QUAD,FMT,UNIT,PER,FLAG,SEQ
The FLAG data item may be used so that accompanying qualification information is reported with each data record. Qualification
information includes various error conditions. The flag word is
reported in the ASCII form of an 8-bit, uppercase hexadecimal
number. Each bit has a qualification meaning as described in
Table 16.
Table 16. FLAG Bit Definitions
BIT POSITION
HEX BIT MASK
QUALIFICATION MEANING
DATA ERROR STRING
0
01
Minimum baseline error
BCLIP
1
02
Overrange error
OVR
2
04
Pulse sampled data
(none)
3
08
Negative power
(none)
6
40
Measurement is sped up
(none)
7
80
Sample included in TREND
(none)
Unspecified bits are reserved and will be 0.
The appropriate data error string indicated above will replace the
PRI measurement value if a data record is generated with a data
error. In situations where more than one flag condition is set, the
lowest bit position condition will be indicated in the PRI measurement value.
156
Host Interface
As an example, indicating to send PRI and FLAG, the host interface
could send the following data records:
PRI=1.449E-03,FLAG=00 (this record shows a data value of 1.449
mJ and no flag bits set)
PRI=OVR,FLAG=02 (this record shows an invalid data value with
the overrange bit set)
Statistics Data Record Format
If statistics mode is active, the following data is available in a single
data record at the completion of collection of a batch:
•
AVG (mean of all pulses in batch, formatted as %.3E for pyroelectric sensors and %.4E for all other sensor types)
•
DEV (standard deviation of the batch, formatted as %.3E)
•
MIN (minimum measurement of the batch)
•
MAX (maximum measurement of the batch, formatted as
%.3E for pyroelectric sensors and %.4E for all other sensor
types)
•
DOSE (formatted as %.3E and only valid when a pyroelectric
sensor is attached)
•
MISSED (missed pulse count, formatted as a decimal
integer—valid only when a pyroelectric sensor is attached
with external triggering selected, or 0 otherwise)
•
SEQ (batch sequence number, incremented once for each new
set of batch results and formatted as a decimal integer)
The delivery of these data records may be configured as a buffered
stream of batch results or simply the last batch result recorded see
“Continuous Data Delivery Mode” on page 158).
The host may configure Data ID tags to be prepended to each data
value in a record (see “Sample Data Value Set Send” on page 155
and “Data Value Headers” on page 158).
The presentation of the data items in a statistics data record is fixed
in the following order: AVG, DEV, MIN, MAX, DOSE, MISSED,
SEQ.
The labels in the former list will also serve as data header strings (see
“Data Value Headers” on page 158).
If an error (Over range, Baseline clip, etc.) occurs while a batch
measurement sample is being taken, the batch may not be valid. This
situation is indicated by a returned average value of 9.99E99.
157
LabMax-TOP User Manual
Data Value Headers
This command selects whether or not data value identification
strings will prefix data values reported over the host interface.
Headers are in the form of “<header>=<value>”. The <header> is
literally one of the ID tag strings used in the data value send
command.
Command: CONFigure:READings:HEADers
{DEFault|ON|OFF}
Default: OFF
Query: CONFigure:READings:HEADers?
Reply: ON|OFF
For example, if headers is ON, a data record could look like
“PRI=1.449E-03”. If headers is OFF, a data record could look like
“1.449E-03”.
Continuous Data Delivery Mode
This command will select if measurement sample data records and
statistical data records are buffered as a continuous stream of
sampled data records or simply the last available data record. When
this mode is set to LAST, each data record placed into the buffer will
overwrite the previous data record.
If this command is issued while data collection is enabled, the
setting will not take effect until data collection mode is ABORted
and INITiated again (see “Data Gating” on page 160).
Command: CONFigure:READings:CONTinuous
{DEFault|LAST|STREam}
Default: LAST
Query: CONFigure:READings:CONTinuous?
Reply: LAST|STREam
Trigger Parameters
Trigger Source
This command selects the trigger source. Selecting external trigger
source automatically results in internal trigger source selection when
thermopile and optical sensors are attached.
Command: TRIGger:SOURce
{DEFault|INTernal|EXTernal|BUS}
Default: INTernal
158
Host Interface
Query: TRIGger:SOURce?
Reply: INTernal|EXTernal|BUS
Internal Trigger
Level
This command sets the trigger level expressed as a percentage of full
scale capability for pyroelectric sensors.
Command: TRIGger:LEVel {DEFault|2..20}
Default: 5
Query: TRIGger:LEVel?
Reply: 2..20
External Trigger
Edge Select
This command selects the external trigger edge. The selected trigger
edge is the external trigger event.
Command: TRIGger:SLOPe
{DEFault|POSitive|NEGative}
Default: POSitive
Query: TRIGger:SLOPe?
Reply: POSitive|NEGative
Delay
This command selects the external trigger delay time. The internal
trigger happens at the time marked by the external trigger delay time
after the selected external trigger edge. The trigger delay time units
are microseconds.
Command: TRIGger:DELay {DEFault|0..1000}
Default: 0
Query: TRIGger:DELay?
Reply: 0..1000
Numeric Display
Resolution
Front panel numeric display resolution is configurable from among
the following set of display digit counts: 3, 4, and 5.
Thermopile
This command sets the number of display digits used when a thermopile sensor is attached.
159
LabMax-TOP User Manual
Command: CONFigure:RESolution:THERmopile
{DEFault|3|4|5}
Default: 3
Query: CONFigure:RESolution:THERmopile?
Reply: 3|4|5
Optical
This command sets the number of display digits used when an
optical sensor is attached.
Command: CONFigure:RESolution:OPTical
{DEFault|3|4|5}
Default: 3
Query: CONFigure:RESolution:OPTical?
Reply: 3|4|5
Pyroelectric
This command sets the number of display digits used when an
optical sensor is attached.
Command: CONFigure:RESolution:PYRoelectric
{DEFault|3|4}
Default: 3
Query: CONFigure:RESolution:PYRoelectric?
Reply: 3|4
Sample
Measurement
Data Collection
Measurement data records is placed in the measurement data transmission queue as the meter generates measurement data while data
collection is enabled. The queue storage capacity is 200,000 records.
A missing data count increments by one for every data record that is
generated but not added to the queue due to a full queue condition.
Data Gating
The host has control over when measurement data is queued for
reading from the host interface. Data collection is enabled and
disabled using the INITiate and ABORt commands, respectively.
Data collection is enabled after an INITiate command. Data collection is disabled after an ABORt command. Measurement data
records are queued for transmission as the meter generates measurement data while data collection is enabled.
160
Host Interface
For more information, refer to “Continuous Data Delivery
Mode” on page 158.
The host gating commands does not affect front panel operation.
Initiate Command
This command enables measurement data collection. It automatically resets the measurement data buffer to empty and clears the
missing data count. This command is ignored if data collection is
enabled.
Command: INITiate
Query: none
Abort Command
This command disables measurement data collection. This
command is ignored if data collection is disabled.
Command: ABORt
Query: none
Data Query
The host must query for measurement data in two steps. First, query
for the number of data records available (N) and second, query N
times for the data records (see “Measurement Data Format” on
page 152).
Data record queries are destructive reads. The data record count
decrements by one automatically as the host reads each data record.
Fetch Available Record Count
This query gets the number of unread data records available at the
time of the query.
Command: none
Query: FETCh:NRECords?
Reply: <count of records available>
Fetch Next Available Record(s)
The query gets the next unread available measurement data record(s)
at the time of the query. More than one data record may be queried
using the optional <record count> parameter, which must be an
161
LabMax-TOP User Manual
integer value. If <record count> is not specified, a single data record
is returned. No reply is transmitted if there are no measurement data
records available.
Command: none
Query: FETCh:NEXT? [<record count>]
Default: not applicable
Reply: <next available record(s)>
Fetch All Available Records
This query gets all unread available measurement data records at the
time of the query. No reply is transmitted if there are no measurement data records available.
Command: none
Query: FETCh:ALL?
Reply: <all available records>
Fetch Missing Data Count
This query gets the missing data count due to a measurement data
transmission queue full condition.
Command: none
Query: FETCh:MISSing?
Reply: <integer count of missing data records>
Statistics Data
Collection
Statistics Data Gating
The host has control over when statistics data is queued for reading
from the host interface. Statistical data collection is available only
when statistics is active on the meter, at which time statistics data
collection can be enabled or disabled using the STATistics:INITiate
and STATistics:ABORt commands, respectively. Data collection is
enabled after a STATistics:INITiate command. Data collection is
disabled after a STATistics:ABORt command. Statistical data
records are queued for transmission as the meter generates statistics
data while statistics is active and data collection is enabled.
162
Host Interface
For more information, refer to “Continuous Data Delivery
Mode” on page 158.
The host gating commands do not affect front panel operation.
Statistics Initiate Command
This command enables statistical data collection. It automatically
resets the statistics data buffer to empty and clears the missing data
count. This command is ignored if statistics data collection is
already enabled. Note that this command only enables queuing of
statistical results for transmission to the host; it does not enable
statistics mode on the meter.
Command: STATistics:INITiate
Query: none
Statistics Abort Command
This command disables statistics data collection. This command is
ignored if statistics data collection is disabled. Note that this
command disables queuing of statistical results for transmission to
the host; it does not disable statistics mode on the meter.
Command: STATistics:ABORt
Query: none
Statistics Data Query
The host must query for statistics data in two steps. First, query for
the number of statistics data records available (N) and second, query
N statistics data records. See “Statistics Data Record Format” on
page 157 for detailed information on the definition of statistics data
records.
Statistics data record queries are destructive reads. The statistics
data record count automatically decrements by one as the host reads
each data record.
Fetch Available Statistics Record Count
This query gets the number of unread statistics data records available at the time of the query.
Command: none
Query: STATistics:FETCh:NRECords?
Reply: <count of records available>
163
LabMax-TOP User Manual
Fetch Next Available Statistics Record(s)
The query gets the next unread available statistics data record(s) at
the time of the query. More than one data record may be queried
using the optional <record count> parameter, which must be an
integer value. If <record count> is not specified, a single statistics
data record is returned. No reply is transmitted if there are no statistics data records available.
Command: none
Query: STATistics:FETCh:NEXT? [<record count>]
Reply: <next available record(s)>
Fetch All Available Statistics Records
This query gets all unread available statistics data records at the time
of the query. No reply is transmitted if there are no statistics data
records available.
Command: none
Query: STATistics:FETCh:ALL?
Reply: <all available records>
Fetch Missing Statistics Data Count
This query is the missing record count due to a statistics data transmission queue full condition.
Command: none
Query: STATistics:FETCh:MISSing?
Reply: <integer count of missing statistics records>
Display
Contrast
This command sets the display contrast between no contrast and
maximum contrast as displayed. The parameter ranges in value from
0.00 to 1.00. 0.00 indicates no contrast and 1.00 indicates maximum
contrast. On input the contrast value is rounded to two decimal
places.
Command: DISPlay:CONTrast {DEFault|0.00..1.00}
Default: 0.50
Query: DISPlay:CONTrast?
Reply: <contrast value>
164
Host Interface
Display Text
This command sets the display text in the measurement display area.
When text is displayed through the host interface, it remains until it
is cleared from the front panel, changed again from the host interface, or until a display clear (DISP:CLE) is sent. The string is
displayed centered. Oversized strings are left and right truncated. All
text within the quoted string is displayed.
The characters acceptable for the <quoted display text> are from the
set of all 7-bit ASCII characters, starting with and including the
space character (20 hex), and up to and including the tilde character
(7E hex), except for the double quote character (22 hex). The double
quote character is reserved to close the quote of the <quoted display
text>. Any characters that follow the closing double quote are not
displayed and are discarded.
Command: DISPlay:TEXT <quoted display text>
Query: none
Text Clear
This command clears the display text and enables measurement data
to be displayed live. This command should also be used to clear
dismissible error displays on the LCD.
Command: DISPlay:CLEar
Query: none
Meter and Sensor
Device
Information
The meter and any compatible sensors can be queried for device
information for the purposes of unit identification and quality
control.
Meter
Date and Time
Current Time
The command sets the time maintained within the meter. The query
gets the time maintained within the meter.
Command: SYSTem:TIME <hour>,<minute>,<second>
Default: not applicable.
Query: SYSTem:TIME?
Reply: <hour>,<minute>,<second>
<hour> ranges from 0 to 23. <minute> ranges from 0 to 59.
<second> ranges from 0 to 59.
Current Date
165
LabMax-TOP User Manual
The command sets the date maintained within the meter. The query
gets the date maintained within the meter.
Command: SYSTem:DATE <year>,<month>,<day>
Default: not applicable.
Query: SYSTem:DATE?
Reply: <year>,<month>,<day >
<year> is indicated by the four-digit year number. <month> ranges
from 1 to 12. <day> ranges from 1 to 31.
Date Format
This command sets the panel display date format used by the meter.
Command: SYSTem:DATE:FORMat
{DEFault|MDY|DMY}
Default: MDY
Query: SYSTem:DATE:FORMat?
Reply: MDY|DMY
MDY indicates month-day-year
day-month-year format.
format.
DMY
Serial Number
This query gets the meter serial number.
Command: none
Query: SYSTem:INFormation:INSTrument:SNUMber?
Reply: <quoted meter serial number>
Calibration Date
This query gets the calibration date of the meter.
Command: none
Query: SYSTem:INFormation:INSTrument:CDATe?
Reply: <quoted meter calibration date>
Meter Type
This command gets the meter type.
Command: SYSTem:INFormation:INSTrument:TYPE
Default: not applicable.
Query: SYSTem:INFormation:INSTrument:TYPE?
Reply: TOP|TO
166
indicates
Host Interface
Sensor
Type
This query gets the currently-connected sensor type.
Command: none
Query: SYSTem:INFormation:PROBe:TYPE?
Reply: <type>,<qualifier>
<type> is one of NONE, THERMO, PYRO, or OPT.
<qualifier> is one of NONE, SINGLE, QUAD, or NOSPEC.
NONE,NONE is returned when a valid sensor is not attached.
THERMO,QUAD or THERMO,SINGLE is returned when a valid
thermopile sensor is attached. PYRO,NOSPEC is returned when a
valid pyroelectric sensor is attached. OPT,NOSPEC is returned
when a valid optical sensor is attached.
Model
This query gets the currently-connected sensor model.
Command: none
Query: SYSTem:INFormation:PROBe:MODel?
Reply: <probe model string>
The sensor model string is the name string of the attached sensor.
The sensor model string is the generic name of the attached sensor if
the string does not exist. The reply string is not quoted.
The following naming rules apply in order:
1.
An empty string if a valid sensor is not attached
2.
The sensor model string stored within the sensor EEPROM, if
a sensor model string exists
3.
“LM” if a valid LM style sensor is attached and a sensor model
string does not exist
4.
“PM” if a valid PM-style sensor is attached and a sensor model
string does not exist
5.
“Unknown” in all other cases
Serial Number
This query gets the serial number of the sensor.
Command: none
Query: SYSTem:INFormation:PROBe:SNUMber?
Reply: <sensor serial number>
An empty string is returned if a valid sensor is not attached.
167
LabMax-TOP User Manual
Responsivity
This query gets the currently-connected sensor calibration responsivity. Responsivity units depend on the sensor type.
Query: SYSTem:INFormation:PROBe:RESPonsivity?
Reply: <responsivity>
0.0 is returned if a valid sensor is not attached.
Calibration Date
This query gets the calibration date of the sensor.
Command: none
Query: SYSTem:INFormation:PROBe:CDATe?
Reply: <probe calibration date>
The date is expressed using the ASCII string format of “<3 character
month name> <day of the month> <year>”. An empty string is
returned if a valid sensor is not attached.
Head Temperature
This query gets the head temperature of the sensor.
Command: none
Query: SYSTem:INFormation:PROBe:TEMPerature?
Reply: <sensor head temperature in degrees Celsius in integer
format>
The literal string “NA” (quotes not included) is returned if a valid
sensor is not attached or the attached sensor does not have a temperature measurement device.
Diameter
This query gets the sensor diameter.
Command: none
Query: SYSTem:INFormation:PROBe:DIAMeter?
Reply: <probe diameter in mm>
The literal string "NA" (quotes not included) is returned if a valid
sensor is not attached or the attached sensor diameter value is not
known.
Host Interface
Glossary
Power off/on cycle - The action of turning off the meter using the
panel Power button and then turning it back on again using the same
button. The state of the meter electronics is sleep mode at a signifi168
Host Interface
cantly reduced level of power consumption between the power off
and power on events. The power off/on cycle transitions across this
sleep mode.
Valid probe - A sensor attached to the meter with all of the
following characteristics:
•
Either a fully-functional Molectron PowerMAX sensor,
Molectron SmartProbe, or Coherent LM sensor all having an
EEPROM for sensor calibration data storage
•
Valid EEPROM checksum(s) that validates the data stored
within
Front panel idle period - The period of time during which neither
front panel button press/release events or data wheel movement
events have happened. The following events are not included as
events that will end a front panel idle period:
•
Sensor attach and remove events
•
USB flash drive attach and remove events
•
Host port cable attach and remove events
•
Host interface commands and queries
•
Any data measurement events
Dose - The sum of pulse energies of all pulses contained within a
batch of pulses.
Minimum baseline error - A pulse measurement error condition
during which the meter and sensor system is in a state which is
driving the analog-to-digital converter to a voltage less than it can
measure. Also known as baseline clipping error.
Baseline clipping error - See Minimum baseline error.
Overrange error - A measurement error condition during which the
measurement exceeds the full scale range setting.
Pulse sampling - A measurement situation in which pulse energy
measurements are subsampled (every Nth pulse, N > 1) due to meter
pulse processing capacity limits.
Sequence ID - The identification number used to synchronize data
from multiple meters that share the same trigger signal. The
sequence ID increments by one and accompanies each measurement
data record transmitted. It is unique in a stream of data transmissions
until it wraps around from 2147483647 to 0 or until it is set by the
TRIG:SEQ command.
169
LabMax-TOP User Manual
Ignored command /query - A defined meter response for
commands or queries in which no internal or external action is taken
and the command or query is dropped. The meter responds to
ignored commands/queries as if the command/query was never sent.
Directory - The pathname component of the fully qualified filename. For example, “greenbuster” is one of three directories in the
fully qualified filename “usb:\data\greenbuster\config\file.txt”. The
other directories are “data” and “config”.
Dirty batch - A batch that contains indeterminate data. Indeterminate data is characterized as having errors associated with it (for
example: overranged, baseline clipped, or missing data). Batch
results from a dirty batch cannot be computed due to the indeterminate data it contains.
170
Calibration and Warranty
CALIBRATION AND WARRANTY
This section discusses:
•
Calibration (this page)
•
Coherent calibration facilities and capabilities (this page)
•
Limited warranty (page 172)
•
Extended lifetime warranty (page 172)
•
Warranty limitations (page 173)
•
Obtaining service (page 173)
•
Product shipping instructions (page 174)
Calibration
Coherent laser power and energy meters are precision instruments,
capable of delivering very accurate measurements, as well as
providing many years of useful service. To maintain this high level
of performance, it is important to have your measurement system
serviced and recalibrated once a year.
Coherent
Calibration
Facilities and
Capabilities
As the largest laser manufacturer in the world, Coherent has been
able to build state-of-the-art calibration facilities containing the
widest possible range of laser types and technologies. This enables
us to perform instrument and sensor calibration under virtually any
combination of wavelength, power, and operating characteristics.
Sensors are calibrated against NIST-traceable working standard
sensors which are, in turn, calibrated against NIST-calibrated golden
standard sensors. These working and golden standards are maintained with the utmost care, recalibrated annually, and verified even
more regularly. We maintain multiple NIST-calibrated standards at
many laser wavelengths to support the growing calibration needs of
our customers. Optical calibration is a core competency at Coherent
and we strive to continually improve our methods, precision, and
repeatability. Additionally, most of the calibrations are performed
with highly automated systems, thus reducing the possibility of
human error to nearly zero. Strict quality inspections during many
stages of calibration and testing assure a precise and accurate instrument that is NIST traceable and CE marked. The benefit to our
customers is that instruments calibrated by Coherent will consis-
171
LabMax-TOP User Manual
tently perform as expected under their actual use conditions. We are
a registered ISO 9001:2000 company, our products are NIST traceable, and our calibration labs are fully ANSI Z540 compliant.
In addition to the technological advantage, we also strive to deliver
the best service in the industry, with a knowledgeable and responsive
staff, and rapid turnaround.
Limited
Warranty
Coherent, Inc. (the “Company”) warrants its laser power and energy
meters and sensors products (“Products”) to the original purchaser
(the “Customer”) that the product is free from defects in materials
and workmanship and complies with all specifications, active at the
time of purchase, for a period of twelve (12) months.
Coherent, Inc. will, at its option, repair or replace any product or
component found to be defective during the warranty period. This
warranty applies only to the original purchaser and is not transferable.
Extended
Lifetime
Warranty
Coherent, Inc. (the “Company”) offers original purchasers (the
“Customer”) purchasing laser power and energy meters and sensors
products (“Products”) an extended, lifetime warranty program,
which includes all parts and labor. In order to qualify for this
warranty, a Customer must return the Product to the Company for
recalibration and recertification (traceable to NIST and
MIL-STD-45662A) within one year from the date of purchase, and
annually thereafter. The Company will recertify the Product, provide
software upgrades, and perform any needed repairs, for a fixed
service fee (as established by the Company from time to time and in
effect at the time of service).
If the Product fails and is returned to the Company within one year
following the date of recalibration service, the Company will, at its
option, repair or replace the Product or any component found to be
defective. This warranty applies only to the original purchaser and is
not transferable.
If the Product is not returned for recalibration or service prior to the
one-year anniversary, the lifetime warranty program expires. The
lifetime warranty program may be reinstated, at Coherent's option,
after completion of a fee-based product evaluation and repair, and
subsequent recalibration and recertification service.
172
Calibration and Warranty
Warranty
Limitations
The foregoing warranties shall not apply, and Coherent reserves the
right to refuse warranty service, should malfunction or failure result
from:
•
Damage caused by improper installation, handling, or use.
•
Laser damage (including sensor elements damaged beyond
repair).
•
Failure to follow recommended maintenance procedures.
•
Unauthorized product modification or repair.
•
Operation outside the environmental specifications of the
product.
Coherent assumes no liability for Customer-supplied material
returned with Products for warranty service or recalibration.
THIS WARRANTY IS EXCLUSIVE IN LIEU OF ALL OTHER
WARRANTIES WHETHER WRITTEN, ORAL, OR IMPLIED.
COHERENT SPECIFICALLY DISCLAIMS THE IMPLIED
WARRANTIES OF MERCHANTABILITY AND FITNESS FOR
A PARTICULAR PURPOSE. IN NO EVENT SHALL THE
COMPANY BE LIABLE FOR ANY INDIRECT, INCIDENTAL,
OR CONSEQUENTIAL DAMAGES IN CONNECTION WITH
ITS PRODUCTS.
Obtaining
Service
In order to obtain service under this warranty, Customer must notify
the Company of the defect before the expiration of the warranty
period and make suitable arrangements for the performance of
service. The Company shall, in its sole discretion, determine
whether to perform warranty service at the Customer's facility, at the
Company's facility or at an authorized repair station.
If Customer is directed by the Company to ship the product to the
Company or a repair station, Customer shall package the product (to
protect from damage during shipping) and ship it to the address
specified by the Company, shipping prepaid. The customer shall pay
the cost of shipping the Product back to the Customer in conjunction
with annual recalibration and repair; the Company shall pay the cost
of shipping the Product back to the Customer in conjunction with
product failures within the first twelve months of time of sale or
between annual recalibrations.
A Returned Material Authorization number (RMA) assigned by the
Company must be included on the outside of all shipping packages
and containers. Items returned without an RMA number are subject
to return to the sender.
173
LabMax-TOP User Manual
For the latest Customer Service information, refer to our website:
www.Coherent.com.
Detailed instructions on how to prepare a product for shipping are
given under “Product Shipping Instructions,” below.
Table 17. Coherent Service Centers
LOCATION
PHONE
FAX
E-MAIL
USA
1.800.343.4912
971.327.2778
[email protected]
Europe
+49 (6071) 9680
971.327.2778
[email protected]
International
971.327.2700
971.327.2778
[email protected]
Product
Shipping
Instructions
To prepare the product for shipping to Coherent:
1.
Contact Coherent Customer Service (refer to Table 17, above)
for a Return Material Authorization number.
2.
Attach a tag to the product that includes the name and address
of the owner, the person to contact, the serial number, and the
RMA number you received from Coherent Customer Service.
3.
Wrap the product with polyethylene sheeting or equivalent
material.
4.
If the original packing material and carton are not available,
obtain a corrugated cardboard shipping carton with inside
dimensions that are at least 6 in. (15 cm) taller, wider, and
deeper than the product. The shipping carton must be
constructed of cardboard with a minimum of 375 lb. (170 kg)
test strength. Cushion the instrument in the shipping carton
with packing material or urethane foam on all sides between
the carton and the product. Allow 3 in. (7.5 cm) on all sides,
top, and bottom.
5.
Seat the shipping carton with shipping tape or an industrial
stapler.
6.
Ship the product to:
Coherent, Inc.
7470 SW Bridgeport Rd.
Portland, OR 97224
Attn: RMA # (add the RMA number you received from
Coherent Customer Service)
174
Appendix A: Specifications
APPENDIX A: SPECIFICATIONS
This appendix lists specifications for the LabMax meter.
Table 18. SpecificationsA (Sheet 1 of 2)
PARAMETER
DESCRIPTION
Maximum Sensor Input
Thermopile Sensors (LM models)
Thermopile Sensors (PM models)
Optical Sensors
Pyroelectric Sensors
2V
2V
20 mA
16V
Minimum Sensor Input
Thermopile Sensors (LM models)
Thermopile Sensors (PM models)
Optical Sensors
Pyroelectric Sensors
50 µV
20 µV
1 nA
1 mV
Noise
Thermopile Sensors (LM models)
Thermopile Sensors (PM models)
Optical Sensors
Pyroelectric Sensors
1.2 µV
500 nV
4.6 pA
20 µV
Measurement Resolution (% of full scale)
0.1B
Positional Resolution (mm)
0.1
Repetition Rate Error
< 1%
Maximum Repetition Rate (Hz)
10,000 sampling (1,000 Hz every pulse)
Pulse Triggering
Internal and external (selectable)
External Trigger Pulse Width
1.3 µS (min.)
External Trigger Pulse Amplitude
2 to 7V
Power Sampling Rate (Hz)
10
Uncertainty
Instrument
System
Analog Out
± 1% of reading
meter + sensor
± 2%
Display
112 x 78 mm backlight graphic LCD
480 x 320 pixels
Adjustable contrast and viewing angle
175
LabMax-TOP User Manual
Table 18. SpecificationsA (Sheet 2 of 2)
Measurement Analysis
Min., max., mean, range, standard deviation, energy dose, and
stability
Trend charting, tuning, positional display, and analysis of beam
stability
Computer Interface
USB, RS-232 and GPIB (with GPIB model)
Analog Output (VDC)
0 to 1, 2, or 4 VDC (selectable)
Analog Output Update Rate
10 Hz for thermopile and optical
Up to 1,000 Hz for pyroelectric
Instrument AC Power Adapter (incl.)
100 to 240 VAC, 50/60 Hz
Output: + 12 VDC (center-positive), 1.25A, 15W (max.)
Instrument Batteries
4400 mAH Li-ion battery (included)
8800 mAH Li-ion battery (optional)
Battery Life
4400 mAH
8800 mAH
8 hr., backlight off
7 hr., backlight on
16 hr., backlight off
14 hr., backlight on
Temperature
Operating
Storage
5 to 40°C (41 to 104°F)
-20 to 70°C (-4 to 158°F)
Regulations Met
Instrument
AC Adapter and Cord
CE, RoHS, WEEE
PSE and UL
Size (H x W x D)
152 x 229 x 53 mm (6.0 x 9.0 x 2.1 in.)
Weight (including 4400 mAH battery)
1.04 kg (2.3 lb.)
LabMax-TOP Meter Part Number
1104622
A. Meter supplied with 4400 mAH Li-ion battery, AC power adapter, power cord, 6-ft. USB cable, RS-232 adapter,
256 MB USB flash drive, three RCA-to-BNC adapters, user manual, software and driver CD, soft carrying case,
and certificate of calibration. (An optional GPIB cable is available from Coherent.)
B. User-selectable display resolution (3, 4, or 5 digits).
176
Appendix A: Specifications
RS-232 Pinouts
Table 19 shows the LabMax RS-232 connector pinouts.
Table 19. RS-232 Pinouts
PIN
ASSIGNMENT
1
GND
2
Receive (from computer to LabMax)
3
Transmit (from LabMax to computer)
6
8
3
5
5
2 1
6
8
Persistent
Parameters
Table 20 lists the LabMax persistent parameters.
Table 20. Persistent Parameters (Sheet 1 of 3)
PARAMETER DESCRIPTION
DATA ARGUMENT RANGE
FACTORY DEFAULT
Backlight auto off time under AC
power
OFF | 1..60
OFF
Backlight auto off time under battery
power
OFF | 1..60
OFF
Meter power auto off time
OFF | 1..60
OFF
Selected host interface *
RS232 | GPIB | USB
USB
Host serial port baud rate *
9600 | 19200 | 38400 | 57600 |
115200
19200
Host serial port parity *
Even | Odd | None
N
Host serial port stop bits *
1|2
1
Host serial port data pacing *
XON | None
None
Host GPIB port data address *
1..30
1
Display date format
MDY | DMY
MDY
Measurement mode
J|W
J if a valid pyroelectric sensor is
attached; otherwise, W
Display power units
W | DBM
W
177
LabMax-TOP User Manual
Table 20. Persistent Parameters (Sheet 2 of 3)
PARAMETER DESCRIPTION
DATA ARGUMENT RANGE
FACTORY DEFAULT
Display mode
Pri | Stat | Pstab | Tune | Trend
Pri
Display sub mode for statistics
Numbers
Numbers
Display sub mode for trend
Chart
Chart
Display view mode for position
stability
Scroll | Fit-to-screen
Scroll
Display view mode for tune
Strip-chart | Bar-chart
Strip-chart
Display view mode for trend
Scroll | Fit-to-screen
Scroll
Area correction state
ON | OFF
OFF
Area correction aperture
0.01..500.00
1.0
Analog output full scale voltage
1|2|5
2
Speedup applied to host data store
OFF | ON
ON
Speedup applied to analog output
OFF | ON
ON
Speedup applied to measure display
OFF | ON
ON
Speedup applied to tune display
OFF | ON
ON
Numeric display smoothing window
size for pulses
OFF | AUTO | 2..999
AUTO
Numeric display smoothing window
size for time
OFF | AUTO | 1..60
AUTO
Wavelength correction state *
OFF | ON
ON
Wavelength of operation *
1..99999
193
Wavelength selection list *
Comma-separated list of wavelengths ranging from 1 to 99999 nm
193, 248, 266, 337, 532, 1064, 2100,
10600
Gain compensation state
OFF | ON
OFF
Gain compensation factor
0.001..100000.0
1.0
Selected range
The maximum measurement
expected
3.0
Auto ranging state
ON | OFF
ON
Statistics mode display output selection
Comma-separated list of Mean, Min,
Max, Stdv, 1sig, 2sig, 3sig, Range,
Dose, Missed
Mean, Min, Max, Stdv
Statistics mode batch size for pulses
2..99999
10
Statistics mode batch size for time
00:00:01..24:00:00
00:00:10
Statistics mode sample rate for
pulses
1..99999
1
178
Appendix A: Specifications
Table 20. Persistent Parameters (Sheet 3 of 3)
PARAMETER DESCRIPTION
DATA ARGUMENT RANGE
FACTORY DEFAULT
Statistics mode sample rate for time
1.157E-5..1.0E1
1.0
Statistics mode restart mode
Manual | Automatic
Manual
Position stability mode duration
00:00:01..24:00:00
00:01:00
Tune mode strip chart view vertical
zoom level
AUTO | 1 | 2 | 5 | 10 | 20
AUTO
Tune mode strip chart view horizontal zoom level
1 | 2 | 5 | 10 | 20
1
Tune mode bar chart view zoom
level
1 | 2 | 5 | 10 | 20
1
Trend mode scroll view vertical
zoom level
1 | 2 | 5 | 10 | 20
1
Trend mode batch size for pulses
2..99999
10
Trend mode batch size for time
00:00:01..24:00:00
00:00:10
Trend mode sample rate for pulses
1..99999
1
Trend mode sample rate for time
1.157E-5..1.0E1
1.0
Numeric display resolution for thermopile sensors
3|4|5
3
Numeric display resolution for
optical sensors
3|4|5
3
Numeric display resolution for pyroelectric sensors
3|4
3
Trigger source
Internal | External
Internal
Trigger level
2..20
5
Trigger slope
Positive | Negative
Positive
Trigger delay
0..1000
0
Trigger bus direction
Host | Guest | Independent
Independent
Display contrast
0.0..1.0
0.5
* = parameter is not included when restoring the configuration from the last sensor used
179
LabMax-TOP User Manual
180
Appendix B: Errors
APPENDIX B: ERRORS
Measurement
Errors
WHEN THE METER DETECTS:
MEASUREMENT VALUES ARE REPLACED BY:
An overrange condition
OVER RANGE
A sensor saturation condition (optical sensor only)
SATURATED
Pressing the HELP button when an error is displayed will explain
what caused the error and what to do about it.
Meter and
Sensor Errors
Table 21. Meter and Sensor Errors (Sheet 1 of 2)
SYMPTOM
CAUSE
CORRECTIVE ACTION
Searching for sensor
Sensor not connected
Connect a sensor to the meter
Sensor over temp
The sensor has overheated
Turn the laser off immediately and let the sensor cool
down
NVRAM communication failure
A failure occurred while reading the
internal EEPROM
Contact a Coherent Service
Center
Sensor checksum error
The sensor internal EEPROM
checksum check failed, causing the
meter to give non-calibrated readings.
Contact a Coherent Service
Center
Sensor communication failure
Sensor and/or meter communication has
failed
Disconnect and reconnect
the sensor. If problem
persists, contact a Coherent
Service Center.
Sensor/firmware
mismatch
The meter does not recognize the
EEPROM format of the sensor
Contact a Coherent Service
Center for a firmware
upgrade
Sensor NVRAM
corrupt
The sensor EEPROM is corrupted
Contact a Coherent Service
Center
181
LabMax-TOP User Manual
Table 21. Meter and Sensor Errors (Sheet 2 of 2)
SYMPTOM
Unrecognized sensor
CAUSE
CORRECTIVE ACTION
The meter does not recognize this sensor
The sensor is either incompatible, or does not have a
functioning EEPROM. If the
problem persists, contact a
Coherent Service Center.
Fatal initialization
error
Contact a Coherent Service
Center
182
Appendix C: Onscreen Indicators
APPENDIX C: ONSCREEN INDICATORS
This section presents a summary of all the onscreen indicators.
Table 22. Onscreen Indicators (Sheet 1 of 3)
Battery Life
Appears on:
Onscreen location:
Onscreen label:
Range of values:
Behavior:
Edited in:
All screens when meter is running on battery
Upper left corner
Icon
5 bars = 81to 100% of remaining battery life
4 bars = 61 to 80%
3 bars = 41 to 60%
2 bars = 21 to 40%
1 bar = 11-20%
0 bars = 0 to 10%
Displays currently remaining battery life
Updates as battery life decreases
Blinks when remaining battery life is 10% or less
N/A
Wavelength
Appears on:
Onscreen location:
Onscreen label:
Range of values:
Behavior:
Edited in:
All MEASURE screens
Lower left corner
Wavelength:
Sensor-dependent
Displays current value
SETUP
Appears on:
Onscreen location:
Onscreen label:
Range of values:
Behavior:
Edited in:
All MEASURE screens
Lower left corner
Gain:
OFF, .001 to 999.999
Displays ON or OFF
SETUP
Gain
Display Smoothing
Appears on:
Onscreen location:
Onscreen label:
Range of values:
Behavior:
Edited in:
All MEASURE screens
Lower right corner
Smoothing:
ON/OFF
Displays current value
SETUP
183
LabMax-TOP User Manual
Table 22. Onscreen Indicators (Sheet 2 of 3)
Bull’s-Eye
Appears on:
Onscreen location:
Onscreen label:
Range of values:
Behavior:
Edited in:
MEASURE
POWER
Upper right corner
Icon
Presence/absence of dot
N/A
N/A
Elapsed
Appears on:
Onscreen location:
Onscreen label:
Range of values:
Behavior:
Edited in:
STATS
Upper right corner
Elapsed:
N/A
Starts at 0
Begins countup when you press START
STATS & TREND: Setup
Duration
Appears on:
Onscreen location:
Onscreen label:
Range of values:
Behavior:
Edited in:
STATS
Upper right corner, below “Elapsed:”
Batch:
N/A
Displays the value indicated in the STATS Setup screen
STATS & TREND: Setup
Trigger/Trigger?
Appears on:
Onscreen location:
Onscreen label:
Range of values:
Behavior:
Edited in:
MEASURE
STATS
TREND
Whenever a pyroelectric sensor is connected
Upper left above measurement value but below stats and trend
“Remaining:” indicator
TRIGGER
TRIGGER?
N/A
TRIGGER appears when a pulse is received
If no other pulse is received after two (2) seconds, TRIGGER is replaced by
TRIGGER?
N/A
184
Appendix C: Onscreen Indicators
Table 22. Onscreen Indicators (Sheet 3 of 3)
Ready/Calculating for Thermopile Joules
Appears on:
Onscreen location:
Onscreen label:
Range of values:
Behavior:
Edited in:
MEASURE
STATS
TREND
Whenever a thermopile is in use and Joules is selected
Upper left above measurement value but below stats and trend “Remaining:”
indicator
READY
CALCULATING
N/A
CALCULATING appears when a pulse is received and is replaced by READY when
the measurement value appears
N/A
Old Data
Appears on:
Onscreen location:
Onscreen label:
Range of values:
Behavior:
Edited in:
MEASURE
STATS
TREND
Whenever Joules is selected
Just to the upper right of the measurement value
OLD
N/A
Appears when the measurement value is stale
Appears simultaneously with READY (for thermopile sensors)
and TRIGGER? (for pyroelectric sensors).
N/A
Zero for Optical Sensors
Appears on:
Onscreen location:
Onscreen label:
Range of values:
Behavior:
Edited in:
MEASURE screen when optical sensor is in use
Just to the upper right of the measurement value
ZERO
N/A
Appears when you press the ZERO button while using an optical sensor
N/A
185
LabMax-TOP User Manual
186
Index
INDEX
A
Host interface command
Smoothing 73
AC adapter 27
Adding a wavelength 82
Analog
Out connector 24
Output 85
Area correction 76
E
Energy savings 92
Errors
Measurement 181
Record reporting and collection
Ext trig connector 24
Extended lifetime warranty 172
B
BACKLIGHT button 103
Bar charts 53
Battery
Charge indicator 24
Pack replacement 27
Buttons 20
BACKLIGHT 103
HELP 102
MEASURE 29
SETUP 72
TREND 54
TUNE 51
ZERO 71
130
F
Features, product 18
Firmware
Updates xi
Version 96
Flash drive, USB 22
Front panel 20
Buttons 20
Power on/off button
Selection knob 21
Soft keys 21
21
G
C
Calibration 171
Charts
Bar 53
Strip 51
Coherent calibration facilities and capabilities
Commands and queries, host 122
Communications 88, 127
Compliance
RoHS xi
U.S. export control laws xi
Connectors
Analog out 24
Ext trig 24
Mini-USB 22
Power jack 23
RS-232 22
Sensor 23
USB flash drive 22
Context-sensitive help 102
Correction, area 76
164
Gain compensation
General help 103
78
H
HELP
Button 102
Context-sensitive 102
General 103
Host command quick reference 113
Host interface
Commands and queries 122
Communications 127
Display 164
Error record reporting and collection 130
Measurement data collection 160
Measurement setup and control 133
Meter and sensor device information 165
SCPI common commands 122
System options 123
Glossary 168
Host command quick reference 113
Notation conventions 111
Persistent parameters 177
RS-232 interface, using 110
Special considerations 109
Syntax 111
171
D
Date/time 90
Declaration of conformity 3
Deleting a wavelength 83
Display
187
LabMax-TOP User Manual
USB interface, using
Measure units 83
On/off button 21
Preface xi
Product
Compliance
RoHS xi
U.S. export control laws
Features 18
Overview 17
Shipping instructions 174
Specifications 175
Publication updates xi
Pulse sampling 41
Pyroelectric sensors 37
111
I
Indicators, onscreen 183
Installation
Software 5
Windows 2000 6
Windows Vista 8
Windows XP 6
Instructions, product shipping
Internal triggering mode 39
174
L
Limited warranty
172
M
Q
Manage configs 99
MEASURE
Button 29
Detailed procedures 49
POSITION STABILITY 49
Energy, pyroelectric sensors 37
Power 30
Optical sensors 33
Thermopile quad sensors 32
Thermopile sensors 30
Statistics 42
Measure
Energy 34
Power 30
Measurement
Data collection 160
Setup and control 133
Measuring
Energy with a pyroelectric sensor (Quick Start) 13
Power with a thermopile or optical sensor (Quick
Start) 12
Meter and sensor device information 165
Mini-USB connector 22
Mode, internal triggering 39
Moving a file to the USB flash drive (Quick Start) 15
Quick Start
Measuring energy with a pyroelectric sensor 13
Measuring power with a thermopile or optical
sensor 12
Moving a file to the USB flash drive 15
Saving data to a file on the local drive 14
R
Rear panel 23
Analog out connector 24
Ext trig connector 24
Replacement, battery pack 27
Resolution 84
RoHS compliance xi
RS-232
Connector 22
Pinouts 177
S
Safety 1
Declaration of conformity 3
Waste electrical and electronic equipment (WEEE,
2002) 2
Sampling, pulse 41
Save current config 97
Saving data to a file on the local drive (Quick Start) 14
SCPI common commands 122
Screen contrast 94
Selection knob 21
Sensor
Connector 23
Over-temperature condition 31
Sensors
Optical 33
Pyroelectric 37
Thermopile 30
Thermopile quad 32
Serial number 96
Service 173
SETUP
O
Onscreen indicators 183
Optical sensors 33
Over-temperature condition
Overview, product 17
xi
31
P
Panel
Front 20
Rear 23
Side 22
Persistent parameters 177
Positiion stability 49
Power
Jack connector 23
188
Index
Button 54
Detailed procedures 60
File manager 63
Name log file 60
TREND setup 68
During data collection 57
Trigger 85
Boosting source current of triggering device
External circuit 105, 106
States and the trigger annunciator 41
TUNE
Bar charts 53
Button 51
Strip charts 51
Analog output 85
Area correction 76
Button 72
Communications 88
Date/time 90
Detailed procedures 97
Manage configs 99
Save current config 97
Display smoothing 73
Energy savings 92
Gain compensation 78
Power measure units 83
Resolution 84
Screen contrast 94
Serial number 96
Soft keys 96
Speedup 75
Trigger 85
Version 96
Wavelength
Correction 80
Table edit 81
Side panel 22
Mini-USB connector 22
Power jack connector 23
RS-232 connector 22
Sensor connector 23
USB flash drive connector 22
Soft keys 21
Software installation 5
Windows 2000 6
Windows Vista 8
Windows XP 6
Specifications 175
Speedup 75
Statistics soft key 42
Strip charts 51
Symbols used in this document xii
System options 123
U
U.S. export control laws compliance
Updates
Firmware xi
Publication xi
USB flash drive connector 22
V
Version, firmware
96
W
Warranty
Extended lifetime 172
Limitations 173
Limited 172
Waste electrical and electronic equipment (WEEE,
2002) 2
Wavelength
Adding 82
Correction 80
Deleting 83
Table edit 81
Windows installation
2000 6
Vista 8
XP 6
T
Thermopile
Quad sensors 32
sensors 30
TREND
After data collection
xi
Z
ZERO button
58
189
71
107
LabMax-TOP User Manual
190
LabMaxTM-TOP User Manual
© Coherent, Inc. 3/2008 (RoHS). Printed in the U.S.A.
Part No. 1143715, Rev. AB