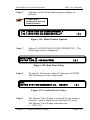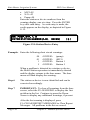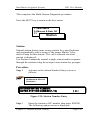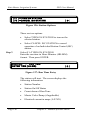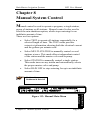
1
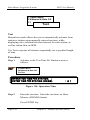
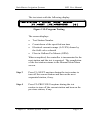
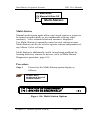
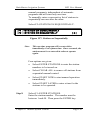
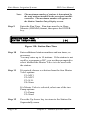
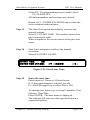
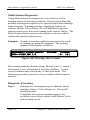
Rain Master Irrigation Systems
DX2 User Manual
Chapter 8
Manual System Control
Manual control is used to operate a program, a single station,
group of stations or all stations. Manual control is also used to
select the rain shutdown option, which stops watering for an
indefinite amount of time.
There are four options.
•
Select TEST to operate all stations sequentially for a
selected length of time. The TEST mode provides
extensive information showing both the electrical current
and the gallons per minute used.
•
Select MULTI-STATION to manually control several
stations at once. This mode allows independent control
of the station and the master valve and/or pump.
•
Select STATION to manually control a single station.
This mode turns on any station and automatically selects
the proper master valve and pump.
•
Select RAIN OFF to stop watering for up to an indefinite
amount of time.
F1=Main Menu
F4=Manual & Rain Off
Chapter 8: Manual System Control
Manual Control
Figure 113: Manual Main Menu
Chapter 8:
MANUAL: |F1|=TEST |F2|=MULTI-STATION
|F3|=STATION |F4|=RAIN OFF
|½|
Page 133
Rain Master Irrigation Systems
DX2 User Manual
F1 Main Menu
F4 Manual & Rain Off
F1
Test
Test
Manual test mode allows the user to automatically advance from
station to station using manually entered run time, while
displaying valve solenoid electrical current for each station, as
well as station flow in GPM.
Use Test to operate all stations sequentially for a specified length
of time.
Procedure
Step 1
Advance to the Test Time Per Station screen as
follows:
F1=Main Menu
F4=Manual & Rain Off
F1=Test
OPERATION TIME PER STATION: :
ENTER TIME PER STATION (HH:MM)
|½|
Figure 114: Operation Time
Step 2
Enter the run time. Enter the run times in Hour:
Minutes (HH:MM) format.
Press ENTER key.
Page 134
Chapter 8: Manual System Control
Rain Master Irrigation Systems
DX2 User Manual
The test starts with the following display:
TEST STATION 1 0:01:00 I=0.25 GPM=50
|F1|=NEXT |F2|=PREVIOUS
|½|
Figure 115: Program Testing
The screen displays:
•
Test Station Number
•
Count-down of the specified run time
•
Electrical current in amps (I=X.XX) drawn by
the field valve solenoid
•
Flow in Gallons Per Minute (GPM)
When completed, the controller is incremented to the
next station and the test is repeated. The completion
of the last station returns to the Manual Main Menu
screen.
Step 3
Press F1=NEXT anytime during the test routine to
turn off the current station and turn on the next
sequential station, if any.
Step 4
Press F2=PREVIOUS anytime during the test
routine to turn off the current station and turn on the
previous station, if any.
Chapter 8: Manual System Control
Page 135
Rain Master Irrigation Systems
Note:
DX2 User Manual
Prior to a station turning on, the station is analyzed
by the controller to determine if the station is used
in an existing program.
If the station is used in a program and the program
includes a master valve or pump, the controller will
activate the master valve/pump with the station.
If the station is not used by any program, no master
valve or pump will be activated for that station.
This completes the Manual Test procedure.
Press the QUIT key to return to the base menu.
Page 136
Chapter 8: Manual System Control
Rain Master Irrigation Systems
DX2 User Manual
F1 Main Menu
F4 Manual & Rain Off
F2
Multi-Station
Multi-Station
Manual multi-station mode allows any single station or output to
be turned on individually or in combination with any other
station(s). Valve solenoid electrical current is displayed.
Use Multi-Station to manually control several stations at once.
Multi-Station can also be used to operate stations independent of
any Master Valve or Pump.
Multi-Station is additionally useful in analyzing problems by
locating defective stations or devices (refer to Multi-Station
Diagnostics procedure, page 8-9).
Procedure
Step 1
Proceed to the Multi-Station option display as
follows:
F1=Main Menu
F4=Manual & Rain Off
F2=Multi-Station
|F1|=STATION ON CONCURRENTLY
|F2|=STATION ON SEQUENTIALLY
|½|
Figure 116: Multi-Station Options
Chapter 8: Manual System Control
Page 137
Rain Master Irrigation Systems
DX2 User Manual
The screen displays two options:
•
Select STATION ON CONCURRENTLY to
operate several stations at the same time or to
run a station independent of any Master Valve
and/or Pump.
•
Select STATION ON SEQUENTIALLY to
operate each station in sequential order.
Step 2
Select F1=STATION ON CONCURRENTLY.
Step 3
Enter the Run Time, then press ENTER. Run time
must be between 0 and 59 minutes.
Step 4
Enter the station number. The number must be
between 1 and 48, then press ENTER. The station
will turn on.
Step 5
Enter zero (0X) to select the master valve/pump.
01 = MV1
02 = MV2
03 = N.O. MV
04 = Pump
Step 6
Enter additional station numbers as necessary.
Stations selected are shown on the display.
Note:
Stations may be alternately turned On/Off (toggled)
by re-entering the station number followed by the
ENTER key.
At the end of the run time, the Multi-Station Option
menu is displayed, or presses the Up Arrow key to
display the previous menu.
Step 7
Page 138
Manually Entered Program
Allows user to enter a one-time program to be run
immediately or scheduled for later in the day. The
Chapter 8: Manual System Control
Rain Master Irrigation Systems
DX2 User Manual
manual program is independent of automatic
programs and will start only one time.
To manually enter a consecutive list of stations to
sequentially run one after the other:
Select F2=STATION ON SEQUENTIALLY.
|F1|=STATION ON CONCURRENTLY
|F2|=STATION ON SEQUENTIALLY
|½|
Figure 117: Station on Sequentially
Note:
This one-time program will execute either
immediately or at a future time. Once executed, the
stations must be re-entered in order to operate
again.
Four options are given:
Step 8
•
Select ENTER STATIONS to enter the station
numbers to be turned on.
•
Select CLEAR ALL to remove all stations from
sequential manual control.
•
Select START NOW to start manual operation
immediately.
•
Select START LATER to enter a time for the
stations to be operated.
Select F1=ENTER STATIONS.
Enter the station number. The number must be
between 1 and 48. Then press the ENTER key.
Chapter 8: Manual System Control
Page 139
Rain Master Irrigation Systems
Note:
Step 9
DX2 User Manual
The maximum number of stations is determined by
the total stations installed in the associated satellite
controller. The maximum number will appear on
the Station Number Entry Display screen.
Enter the Run Time. Run time must be in Hour:
Minutes (HH:MM) format, then press the ENTER
key.
STATION RUN TIME: :
ENTER TIME(HH:MM)
|½|
Figure 118: Station Run Time
Step 10
Enter additional station numbers and run times, as
necessary.
You may enter up to 10 stations. If the station is not
used by a program or ISC, you are then prompted to
select whether the Master Valve is to be used with
the station.
Step 11
If required; choose a selection from the four Master
Valve options:
F1=MV1
F2=MV2
F3=N.O.
F4=None
If a Master Valve is selected, select one of the two
Pump options:
F1=Pump
F2=None
Step 12
Page 140
Press the Up Arrow key to return to the Station On
Sequentially menu.
Chapter 8: Manual System Control
Rain Master Irrigation Systems
DX2 User Manual
Clear All- If a programming error is made, select:
F2=CLEAR ALL.
All station numbers and run times are cleared.
Return to F1= ENTER STATIONS and re-enter the
correct stations and run times.
Step 13
The Start Now option immediately executes the
entered stations.
Select F3=START NOW. The stations selected are
run in numerical order.
When completed, the screen returns to the previous
menu.
Step 14
Start Later postpones or delays the manual
execution.
Select F4=START LATER.
START TIME: : AM
ENTER TIME (HH:MM)
|F1|=AM/PM
|½|
Figure 119: Start Later Time
Step 15
Enter the start time.
Enter times in 12 hour or 24 hour format.
If 12 hour time format is selected, use the
F1=AM/PM toggle key to select AM or PM.
To change time format, go to Setup Controller, User
Options, Time/Date.
Press ENTER. The base menu is displayed.
The stations will turn on at the specified time in a
sequential fashion.
Chapter 8: Manual System Control
Page 141
Rain Master Irrigation Systems
DX2 User Manual
Multi-Station Diagnostics
Using Multi-Station for diagnostics is an effective tool in
locating station field wiring problems. Detected problems that
produce warning messages may be checked and isolated through
manual testing. Warning messages displaying failures in
stations, Master Valves/Pump, etc. will indicate the specific
stations and devices that were running at the time of failure. The
Multi-Station feature exercises the stations or devices which
isolates the specific problem area.
Example: Assume a warning condition occurred as the result
of running an automatic program. The warning
appears in the display as follows:
WARNING = SHORT CIRCUIT
STA = PUMP, MV, 1, 5
06/27/96
12:05AM
|¾||½|
Figure 120: Warning, Short Circuit
The warning indicates that the Pump, Master Valve 1, station 1
and station 5 were all running at the time of failure. A short
circuit condition may exist in any of the listed items. The
following procedure provides a way to isolate which output is
shorted:
Diagnostic Procedure
Step 1
Page 142
Examine the warning message to identify station
numbers, Master Valves/Pump, etc. Record all
identified items.
If multiple short circuit warnings appear, the
problem is most likely a short in the Master Valve
and/or Pump circuit.
Chapter 8: Manual System Control
Rain Master Irrigation Systems
Step 2
DX2 User Manual
Advance to the Multi-Station option display as
follows:
F1=Main Menu
F4=Manual & Rain Off
F2=Multi-Station
|F1|=STATION ON CONCURRENTLY
|F2|=STATION ON SEQUENTIALLY
|½|
Figure 121: Multi-Station Options
Step 3
Select F1=STATION ON CONCURRENTLY. The
following screen is displayed:
RUN TIME: 10
ENTER TIME (0 – 59 MINUTES)
|½|
Figure 122: Run Time Entry
Step 4
To run for 10 minutes, enter 10 then press ENTER.
The following screen is displayed:
ON:
ENTER STATION NUMBER (1-48,
OX=MV)
|½|
Figure 123: Station/Device Entry
Step 5
The Master Valve/Pump is selected by any number
between 1 and 4 which is preceded by a 0 (zero).
The Master Valve/Pump selections are:
• MV1=01
Chapter 8: Manual System Control
Page 143
Rain Master Irrigation Systems
DX2 User Manual
•
•
•
MV2=02
N.O.=03
Pump=04
Enter the station or device numbers from the
warning display, one at a time. Press the ENTER
key after each entry. As each entry is made, the
result appears on the display, as depicted in Figure
8-12.
ON: PUMP, MV1, 1, 5
ENTER STATION NUMBER (1-49,
OX=MV)
|½|
Figure 124: Station/Device Entry
Example: Enter the following short circuit warnings:
04
01
1
5
<ENTER>
<ENTER>
<ENTER>
<ENTER>
(pump)
(MV1)
Station 1
Station 5
When a problem is detected in a station or device,
the Multi-Station operation is immediately aborted
and the display returns to the base menu. The base
menu will then display the warning.
Step 6
The station or device is now identified and can be
corrected accordingly.
Step 7
IMPORTANT: To clear all warnings from the base
screen, select the F2=WARNING to display the first
problem in the list. Continue to press the Down
Arrow to display any additional warnings, if present.
After the last warning is displayed, press
F1=CLEAR REPORT MESSAGES to Clear Report
Messages. All problems in the list are erased.
Page 144
Chapter 8: Manual System Control
Rain Master Irrigation Systems
DX2 User Manual
This completes the Multi-Station Diagnostic procedure.
Press the QUIT key to return to the base menu.
F1 Main Menu
F4 Manual & Rain Off
F3
Station
Station
Manual station feature turns on any station for a specified time
and automatically selects usage of the proper Master Valve
and/or Pump for this station. The valve solenoid electrical
current is displayed.
Use Station to manually control a single station and/or sequence
through the stations using the next/previous station key prompts.
Procedure
Step 1
Advance to the station Number Entry screen as
follows:
F1=Main Menu
F4=Manual & Rain Off
F3=Station
STATION OR ISC NUMBER:
ENTER STATION NUMBER (1-12)
|½|
Figure 125: Station Number Entry
Step 2
Enter the station or ISC number then press ENTER.
The following option screen is displayed:
Chapter 8: Manual System Control
Page 145
Rain Master Irrigation Systems
DX2 User Manual
|F1|=TURN ON STATION
|F2|=CANCEL ISC STATION
|½|
Figure 126: Station Options
There are two options.
Step 3
•
Select TURN ON STATION to turn on the
selected station.
•
Select CANCEL ISC STATION to cancel
operation of an Individual Station Control (ISC)
station.
Select F1=TURN ON STATION.
Enter the run time in Hour: Minutes (HH:MM)
format. Then press ENTER.
STATION 1 RUN TIME:
ENTER TIME (HH:MM)
|½|
Figure 127: Run Time Entry
The station will start. The screen displays the
following information:
Page 146
•
Station Number
•
Station On/Off Status
•
Count-down of Run Time
•
Master Valve/Pump (if applicable)
•
Electrical current in amps (I=X.XX)
Chapter 8: Manual System Control
Rain Master Irrigation Systems
DX2 User Manual
STATION 1=ON 0:04:25
I=0.05
|F1|=ON/OFF |F2|=NEXT |F3|=PREVIOUS|½|
Figure 128: Station Run Status
Note:
Prior to a station turning on, the station is analyzed
by the controller to determine if the station is used
in an existing program.
If the station is used in a program and the program
includes a Master Valve or Pump, the controller will
activate the Master Valve or Pump with the station.
If the station is not used by any program, no Master
Valve or Pump will be activated for that station.
Step 4
F1=ON/OFF
The F1=ON/OFF toggle key alternately turns the
station on and off.
Press F1=ON /OFF and verify that the station status
changes accordingly.
The run time will continue to count down whether
the station is on or off.
Step 5
F2=NEXT
The F2=NEXT key turns off the current station and
turns on the next station. The process continues
until the last station of the controller is reached.
Press the F2=NEXT key and verify that the next
station turns on.
The Run Time will continue to count down
regardless of station number.
Chapter 8: Manual System Control
Page 147
Rain Master Irrigation Systems
DX2 User Manual
Controllers are equipped with station configurations
that range from 6 to 48 in increments of six stations.
If the last station is displayed, the F2=NEXT key
advances to station 1.
Step 6
F3=PREVIOUS
The F3=PREVIOUS key turns off the current station
and turns on the previous station. If currently at
station 1, the F3=PREVIOUS key decrements to the
last station in the controller configuration.
The Run Time will continue to count down
regardless of the station number.
Step 7
Press the Up Arrow to return to the Manual On/Off
menu options.
MANUAL: |F1|=TEST
|F2|=MULTI-STATION
|F3|=STATION |F4|=RAIN OFF
|½|
Figure 129: Manual Operations Menu
This completes the Manual Operations procedure.
Press the QUIT key to return to the base menu.
Page 148
Chapter 8: Manual System Control
Rain Master Irrigation Systems
DX2 User Manual
F1 Main Menu
F4 Manual & Rain Off
F4
Rain Off
Rain Off
Use the Rain Off mode to stop watering for either a programmed
amount of days or to turn off the controller for an indefinite
amount of time.
Procedure
Step 1
Proceed to the Rain Off Option menu as follows:
F1=Main Menu
F4=Manual & Rain Off
F4=Rain Off
|F1|=RAIN SHUTDOWN |F2|=NO WATER WINDOW
|F3|=PROGRAMMABLE RAIN SHUTDOWN
|½|
Figure 130: Rain Off
There are three options:
•
Select RAIN SHUTDOWN to stop all watering
indefinitely until manually returned to the
automatic mode.
•
Select NO WATER WINDOW to enter a period
of time (up to 23 hours and 59 minutes) to
establish a time period during the day when
watering is not allowed.
•
Select PROGRAMMABLE RAIN
SHUTDOWN to stop watering from one to
seven days.
Chapter 8: Manual System Control
Page 149
Rain Master Irrigation Systems
Step 2
DX2 User Manual
Select F1=RAIN SHUTDOWN.
RAIN SHUTDOWN: OFF
|F1|=ON |F2|=OFF (AUTOMATIC MODE)
|½|
Figure 131: Rain Shutdown
Press F1=ON to place the controller in rain
shutdown mode.
Warning:
Note:
When rain shutdown is ON, No Watering
will occur (assuming the program has rain
shutdown enabled. See Setup, Program,
Rain Shutdown, Chapter 4).
During rain shutdown, the base screen displays
"RAIN SHUTDOWN" in place of the valid
programs list.
To start automatic watering operations again, rain
shutdown mode must be turned Off.
Step 3
Press F2=OFF to return the controller to automatic
mode.
Step 4
If a no water window is desired, select F2=NO
WATER WINDOW.
NO WATER WINDOW selects a period of time (up
to 23 hours and 59 minutes) to establish a time
period during the day when watering is not allowed.
Page 150
Chapter 8: Manual System Control
Rain Master Irrigation Systems
DX2 User Manual
Enter the start time for when the no watering
period is to occur in Hour: Minutes (HH:MM)
format.
If 12 hour time format is selected for the
controller, use F1=AM/PM toggle key to select
AM or PM, and then press ENTER.
START TIME FOR WINDOW: 5:00 PM
ENTER TIME (HH:MM) |F1|=AM / PM
|½|
Figure 132: No Water Window Time
Enter the end time for no watering period to occur in
Hour: Minutes (HH:MM) format, then press
ENTER.
Note:
Step 5
Any scheduled start times which occur during the
no water window period will be ignored. Also,
attempting to start a program with the PROGRAM
ON/OFF key will have no effect.
Programmable Rain Shutdown allows a controller to
be off for a specified number of days.
Select F3=PROGRAMMABLE RAIN
SHUTDOWN.
NUMBER OF RAIN SHUTDOWN DAYS:
ENTER NUMBER OF DAYS (1-7)
3
|½|
Figure 133: Programmable Rain Shutdown
Enter the number of days for no watering (rain
shutdown), then press ENTER.
Chapter 8: Manual System Control
Page 151
Rain Master Irrigation Systems
DX2 User Manual
The Manual On/Off menu options are displayed.
Press the QUIT key to return to the base menu.
Once programmable rain days have been entered, the base menu
shows RAIN SHUTDOWN DAYS LEFT=X, where X is the
number of programmed days entered.
This number automatically decrements at 12:00 AM each day.
Note:
Non irrigation programs are not affected by rain
shutdown and will continue to operate as
programmed.
This completes the procedure for Manual Rain Off.
Page 152
Chapter 8: Manual System Control