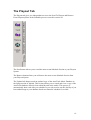
1
AutoTrack Manual
Last Updated 02/05/2002
Table Of Contents
Introduction...................................................................................................................6
Basic System Overview ............................................................................................6
Installation.....................................................................................................................8
Importing Your Old Auto Schedule System From Myriad v2....................................12
Adding Your First Song To AutoTrack ......................................................................13
General Information ................................................................................................13
More Information ....................................................................................................19
Restrictions..............................................................................................................20
Song Notes ..............................................................................................................21
Copyright Information ............................................................................................22
Adding Your Next Song..........................................................................................22
Searching For A Song .................................................................................................23
The Rest Of The Song Tab..........................................................................................25
The Deck Viewer ....................................................................................................25
Artist and Song Histories ........................................................................................26
Adding a Jingle ...........................................................................................................28
Adding A Jingle: General Information ...................................................................28
More Information ....................................................................................................32
Restrictions, Notes & Copyright Information.........................................................32
The Rest Of The Jingle Section ..................................................................................33
Searching For A Jingle............................................................................................33
The Deck Viewer ....................................................................................................33
Jingle Histories........................................................................................................33
The Schedule Tab (Setting Up A Schedule) ...............................................................34
Running Orders (RO) Overview .............................................................................34
Format (Fmt) Overview ..........................................................................................34
Rules Overview.......................................................................................................35
Assign Overview.....................................................................................................35
Creating A New Running Order .................................................................................35
Live Assist Mode: ...................................................................................................36
Automated:..............................................................................................................36
Run To Time: ..........................................................................................................36
Item Types...............................................................................................................37
Item: Time...........................................................................................................38
Item: Cart ............................................................................................................38
Item: Jing.............................................................................................................38
Item: Ad ..............................................................................................................38
Item: Hdwr ..........................................................................................................38
Item: Song ...........................................................................................................38
Item: Text ............................................................................................................38
Item: Format........................................................................................................39
Item: CMD ..........................................................................................................39
List Running Orders....................................................................................................39
Creating A New Format (Fmt)....................................................................................41
Media Types............................................................................................................41
The Song Categories ...............................................................................................41
Song Types..............................................................................................................42
Song Styles..............................................................................................................42
2
Jingle Categories .....................................................................................................43
Characteristic Rules ................................................................................................44
List Formats (Fmt) ......................................................................................................45
Creating A New Rules Set ..........................................................................................46
Song Category Rules (Song Cat. Rules) .................................................................47
Characteristics’ Rules..............................................................................................49
Listing Rules ...............................................................................................................49
Running Order Assignments .......................................................................................50
Scheduling Music........................................................................................................51
Under Run Report ...................................................................................................54
Schedule Masking ...................................................................................................56
Styles .......................................................................................................................57
Removing Old Logs From Myriad Q-NXT ............................................................57
Un-Schedule (Un-Sched) ............................................................................................57
View Schedule (View) ............................................................................................58
Schedule History (History) .....................................................................................59
The Playout Tab ..........................................................................................................61
The File Menu .............................................................................................................62
New .........................................................................................................................62
Close........................................................................................................................62
Import / Create ........................................................................................................62
Print Setup...............................................................................................................63
Print .........................................................................................................................63
Change Working Database......................................................................................63
Exit ..........................................................................................................................63
The Songs Menu .........................................................................................................63
Categories................................................................................................................64
Styles .......................................................................................................................65
View Song Decks....................................................................................................65
Advanced.................................................................................................................67
Shuffle Song Deck ..............................................................................................67
Rebuild Song Decks............................................................................................68
Squash Song Decks .............................................................................................68
The Jingles Menu ........................................................................................................69
Categories................................................................................................................69
View Jingle Decks...................................................................................................70
Advanced.................................................................................................................71
Shuffle Jingle Decks ...........................................................................................71
Rebuild Jingle Decks...........................................................................................71
Squash Jingle Decks............................................................................................72
The Carts Menu...........................................................................................................72
Cart Browser ...........................................................................................................72
Myriad Audio Wall Update Utility .........................................................................74
The Reports & Statistics Menu ...................................................................................75
Carts ........................................................................................................................75
Run A General Cart Report.................................................................................76
Cart Range.......................................................................................................76
Compression Options ......................................................................................77
Cart Length Options........................................................................................77
Report Results .................................................................................................79
3
The Report Tool Bar .......................................................................................80
Play Cart..........................................................................................................80
Edit Cart ..........................................................................................................80
Print Report .....................................................................................................80
Block Copy......................................................................................................80
Block Move.....................................................................................................81
Update Cart Chunk Information......................................................................82
Export To Pad .................................................................................................82
Erase Last Play History...................................................................................82
Mass Delete.....................................................................................................83
WARNING – Moving Carts Does Not Move The Song Record Information83
Display A List Of All Carts Not In The Database ..............................................83
Copyright Report.....................................................................................................83
Overview .............................................................................................................84
Description of the Reports (Profiles) ..................................................................85
General Myriad Copyright Information ..............................................................85
Commercial Return / Music Return Profiles.......................................................85
UK PRS Music Return ........................................................................................86
UK PRS Commercial Return ..............................................................................87
Adding the Copyright Information to a Cart.......................................................88
Running a Report ................................................................................................89
Obtaining Information from Terminals...............................................................90
Start / End Cart Numbers ....................................................................................90
Print / Run the Report .........................................................................................91
Database Reports.....................................................................................................91
Category Statistics...............................................................................................91
Schedule Statistics...............................................................................................92
Advanced.................................................................................................................94
Expire Old Histories And Log Files....................................................................94
The Settings Menu ......................................................................................................95
Database Settings ....................................................................................................95
General Settings ..................................................................................................96
The General Tab..............................................................................................96
Station Information .........................................................................................96
Station ID Code...............................................................................................96
Use Myriad Compatible Description And Buttons .........................................96
Only Allow Hard Disk Items ..........................................................................96
After Auto-Scheduling ....................................................................................97
Display The Schedule Information .................................................................97
And Automatically Send Logs To Playout System?.......................................97
Run The Under Run Report Using The Default Settings................................97
Automatically Remove Old Log Files And Schedule Histories .....................97
Number Of Days Logs Are Kept Before Being Removed..............................97
Ask For Confirmation Before Removing........................................................98
AutoTrack Settings..........................................................................................98
Characteristic Information ..............................................................................98
Adding A New Characteristic .........................................................................98
Removing A Characteristic ...........................................................................100
Amending An Existing Characteristic ..........................................................100
Only Have One Set Of Characteristics For Both The Start And End ...........100
4
Minimum Time That Must Pass…(Artist / Title Minimum Separation) ......100
Q-NXT Settings ............................................................................................101
Allow Songs To Be Dropped When Running To Time................................101
Allow Songs To Be Faded When Running To Time ....................................101
Before Sending To Q-NXT, Automatically Remove Older Logs.................101
Q-NXT v2.6 Database...................................................................................102
Q-NXT v2 Database......................................................................................103
Report Settings ..............................................................................................103
Hardware Line Names.......................................................................................103
Myriad Settings .....................................................................................................104
File Locations....................................................................................................104
Program Settings ...................................................................................................105
When AutoTrack Starts…Use Last Database ...................................................105
User Must Login Before Using AutoTrack.......................................................105
Change The Directory The AutoTrack Uses To Store It’s Files.......................106
License Details ......................................................................................................107
The Windows Menu..................................................................................................107
The Help Menu .........................................................................................................107
5
AutoTrack User Manual
Introduction
AutoTrack is a complete music and jingle scheduling system for radio stations of all
sizes. Combining powerful features and rules with simple window driven ease of use,
AutoTrack is ideal for stations of all sizes and genres and with the added
enhancements available in AutoTrack Pro, AutoTrack works with a range of playout
systems but enjoys enhanced capabilities when combined with a Myriad playout and
automation system.
Basic System Overview
Before we get started on how to use AutoTrack, it is important that we examine the
basic mechanics of the system as an understanding of these simple principles will
make learning the system easier and should lead to a high level of control over the
system when you come to programming your station.
Let us forget about radio for a second and think back to the distant days of DJ’ing at
the local school disco. If at this stage you are thinking ‘I didn’t ever do that’ then that
is OK, we will just pretend. So back at the school disco, you have cheesy disco lights,
cherryade and a record box with all the records in it. The Bee Gee’s Stayin’ Live is
just coming to an end and you need a record to play. You grab the next record out of
the bag, ‘Oh No, “Tragedy” by the Bee Gee’s, can’t play that for a while, better put
that towards the back of the box’. Next out of the box is “Waterloo” by ABBA but
you played “Dancing Queen” only twenty minutes ago so can’t play that either. The
next track is “Le Freak” by Chic, ‘Perfect, you haven’t played that or another Chic
song recently and the song’s characteristics will follow Stayin’ Alive well, after all
they are both funky tracks. You get the needle on the record with only seconds to
spare, the crowd goes wild as the flashing lights synchronise with the thumping disco
beats and out of the corner of your eye you spot Sarah from 4B smiling at you, you
know then that you made the right choice this time.
This little fantasy trip down memory lane is a little glib but it demonstrates the
principles that AutoTrack uses when it selects music. In essence, AutoTrack goes
through the same thought processes that you did when selecting the next track or
jingle to play. It has a record bag or ‘Deck’ of tracks and when it needs to select the
next track, it will start with the track on the top of the deck, look at it and decide if it
is suitable based on criteria such as if it has been played recently, if any other tracks
by the same artist or band has been played recently, whether the sound of the song
will fit with the previous song according to the preferences of the system. Finally the
system decides whether selecting the song will break any of the other rules or
guidelines imposed on the system, if not then the song or jingle will be selected as the
next track. If it fails at any of these stages, it is either placed back at the top of the
Deck, or at the back depending on what it failed on and how badly it failed.
6
The diagram above shows how each Song or Jingle in AutoTrack is represented by a
Record Card, which in turn is part of the ‘Deck’. Information about the song or jingle
is stored on the Record Card and used to determine whether the track is suitable.
AutoTrack actually consists of more than one Deck of Records Cards, Jingles have
their own ‘Deck’ and each song ‘Category’ has it’s own ‘Deck’.
So, we now know the principle that AutoTrack uses to pick Songs and Jingles there is
a lot more to creating a schedule. Firstly you need to create a Running Order for a
show, this tells AutoTrack what you want your show to consist of in terms of how
many Songs, Advert Breaks, Jingles etc that you want and in what order. You can also
apply format information to guide the types of music in the show and apply any rules
or guidelines that you want. Finally, a show is assigned to each hour of the week to
make up a complete 24/7schedule framework that AutoTrack uses to generate a
complete schedule.
7
Getting Started
Installation
The target PC for AutoTrack should have a fully configured and working version of
Myriad v2 or v2.5 installed prior to AutoTrack installation. This will greatly speed up
the installation and setup process, as it will automatically read several of the settings
from your Myriad system.
To install AutoTrack, place the AutoTrack CD into your computers CD ROM drive,
AutoTrack will automatically start the installation process. If nothing happens once
you have placed the CD into your computers CD Rom drive then double click on My
Computer and double click on your CD Rom drive letter (often D but not always).
Scroll through the files until you see Setup.exe , double click on this Icon to begin the
installation process. Follow the on screen instructions to full install AutoTrack.
Once you have agreed to the license details and selected the type of installation that
you want (Complete installation should always be used unless otherwise instructed by
P Squared), the installer will start to install all the files needed to run AutoTrack.
8
Once the install process has completed, you will be able to run AutoTrack for the first
time.
9
Running AutoTrack For the First Time
Once AutoTrack is installed you are ready to run AutoTrack for the first time, to do
this click on the AutoTrack icon on the Start bar.
If the PC you have just run AutoTrack on already has Myriad installed then you will
be asked if you want to copy the Myriad system data to the AutoTrack directory.
Answer Yes when prompted.
Before AutoTrack starts you will see the Database Selection Tool. This window is
used to select the AutoTrack Database you want to work on. Having selected your
Database, AutoTrack will automatically select this database the next time round so
you will only see this screen when you deliberately want to change AutoTrack
Databases in the future.
You will see from the screen shot above that a new AutoTrack installation
automatically generates a generic AutoTrack Station Database. This generic database
contains most of the common AutoTrack settings and examples to help you get
started. The AutoTrack Station Database initially contains no songs or jingles and can
be used for your station’s AutoTrack database.
Click on the ‘OK’ button to continue.
AutoTrack will now auto-setup based on the information copied from your Myriad
system. Firstly, it will ask you if you want it to connect to your existing Q-NXT
database. Click on the Yes button to continue.
10
Once you have clicked on Yes, AutoTrack will confirm whether it has successfully
connected with your Q-NXT database.
Next you will be asked if you want AutoTrack to automatically connect to your QNXT v2.5 Database. This is a new feature of Myriad v2.5, if you do not have Myriad
v2.5 installed on the machine then you will not be asked this question.
Click on the ‘Yes’ button to confirm.
Clicking on the OK button will load AutoTrack.
11
Importing Your Old Auto Schedule System From
Myriad v2
If you have a new Myriad v2.5 system and do not have any old Auto Schedule
databases to import then you can skip this section and go straight to ‘Adding Your
First Song To AutoTrack’.
For Myriad v2 customers converting to AutoTrack, to make the transition and quick
and simple as possible, AutoTrack can automatically import all your old Music,
Jingles, Schedules and Running Orders, making any adjustments it needs to for
compatibility. You can use the Automatic Import functions to import selected areas
from your old system or from multiple Myriad systems but the simplest way is to let it
import your complete Auto Schedule system in to AutoTrack.
To do this, click on the File menu and select Myriad v2 Files > Automatically Import
Information .
You will be asked a series of questions to confirm that you want to import the various
sections of Auto Schedule. You will also be asked to locate three files from your old
system. These three files are your old Music Database, Jingles Database and Schedule
Databases from your old Myriad System directory. If you are not sure exactly which
files you need you should look in Myriad Configuration – Database Setup for Myriad
v2 to confirm their file names or contact P Squared for assistance.
12
Adding Your First Song To AutoTrack
You are now ready to add your first song to AutoTrack. To do this, make sure that the
Songs tab is selected and click on the Add Song button as shown below.
This will bring up the New Song Card.
General Information
13
This Song Card contains all the information about the particular Song on the system.
You can see from the screen shot above that there is plenty of information to fill in
but you do not have to do it all at once and you do not have to fill in the same
information on all cards. AutoTrack will simply not enforce rules that do not apply to
particular Songs or Jingles because they do not have the relevant information.
To link this Song Card to a Cart on your Audio Wall, Click on the Browse to bring up
the Cart Browser.
The Cart Browser is effectively a mini version of the Audio Wall in Myriad. You can
use it to find the Cart you want to add to the system. The ‘F’ for Find key will bring
up the standard Audio Wall Find Cart window which will allow you to enter a Song
or Artist Name to search for. The Find Window will display the results, simply double
click on the one you want to display in the Cart Browser. If you know what Cart
Number you are looking for you can Jump straight to it by pressing the ‘J’ key on the
keyboard and typing in the number. Once you have the Cart you want to add to
AutoTrack highlighted (in a blue bar), press the ‘Return’ key on the keyboard or
double click on it.
14
You will see that Artist and Title information you have completed on the Audio Wall
is copied into the Song Card however, you should bare in mind that this is a copy so
any changes you make in the future to the Audio Wall will not be carried over into
AutoTrack. The reverse is also true with changes in AutoTrack not being transferred
to the Audio Wall.
You will also notice that all the Song Length information and the Ending type have
also been copied in.
If you are not happy with any of the information copied from the Audio Wall, you can
change it now or at any time in the future by simply clicking in the relevant box and
typing. The Artist and Title fields in AutoTrack can accept much more information
than on the Audio Wall so if you have had to abbreviate any Artists or Titles, you can
fix that now. You should also add any secondary or Artists or Groups to the spare
Artist fields as this will allow you to stop Artists such as Paul McCartney and The
Beatles from being scheduled too close together.
Spelling of Artists and Song Titles are also important because AutoTrack does not
know that NSYNC and N-SYNC are the same group so it may schedule them close
together. You can use the drop down Artist lists to help reduce this by selecting an
Artist name rather than typing it in again.
15
When you are happy with the information that is copied from the Audio Wall, it is
time to start to add the additional information AutoTrack needs to schedule the Song.
The Category list allows you to group Songs or similar eras or genres. Each Category
is actually it’s own Deck (see introduction) with the songs rotating within it. Later, we
will see how we can use Categories to define the sound of our station and to lay down
a few ground rules that we don’t want AutoTrack to break. If you had Music Types in
your old Myriad v2 system and imported all the information (see section 4) then the
Categories should look familiar. If you are setting a system up from scratch then
AutoTrack would have created some default Categories for you but you can alter
these by Clicking on the Songs menu and selecting Categories.
You can edit the Categories from here by clicking into the Category and changing the
name but you should remember that once you start adding Songs to a Category,
changing the Category Name will simply re-name the Category Deck so it is a good
idea to set these up the way you want them before you start adding songs. You can
have up to 32 Categories and a single Song can belong to several Categories by
having multiple Song Cards.
16
To select a Category for the Song, click on the drop down menu and select from the
list.
Next come the Song’s characteristics. By default these will be set to Energy and
Tempo where Energy is the power, passion or strength of a Song and Tempo is speed
or pace of the song. AutoTrack allows you to set a beginning and end level for each
characteristic, these can be selected by clicking on the corresponding drop down box
and picking the level that best describes the Song in question. Additional
Characteristics and Levels can be added from the Settings – Database Settings –
General Settings menu option on the AutoTrack Setting Tab.
When setting Energy and Tempo, it is often helpful to hear what the track sounds like.
You can do this if your PC is equipped with a standard sound card and a pair of
speakers, by clicking on the Play button.
17
The Song will be played by the Cart Player that appears at the bottom of the screen.
To control the Cart Player click on the Play, Pause, Re-Cue and Eject buttons, you can
also jump to the middle of a Song by right clicking on the thin progress bar.
Once the Characteristics are added for the Song, I can add in the Song’s release year
and BPM (Beats Per Minute) if I like. Just click in the boxes and type in the values
you want.
We have now finished the Song’s basic Song Card and if we do not want to add any
additional information then we can simply click on the OK button which will save the
Song Card and open a new blank Card ready for the next Song.
You may notice that we have left the Song No. blank. That is because we want
AutoTrack to automatically add a unique Song Number to this Song Card.
If we wish to add a little more information to the Song Card then we can move on to
the Additional Song Card Information Fields by clicking on the Tabs at the top of the
Card.
18
More Information
If you want to add a little More Information to your Song Card to help you fine tune
your scheduling to exactly what you want, you can do so on the More Information
tab.
The ‘Throw’ number refers to the percentage down the Song’s Category Deck the
Song goes once it has been successfully scheduled. In this case the Song will go 100%
down the Deck or in other words to the back once it has been selected but if the Song
was a popular choice, you might set the ‘Throw’ to say 75% which means in practice
it should come to the top of the stack in ¾ of the time of other Songs in the Category.
You should leave the majority of the Songs in a Category with a ‘Throw’ of 100%
because the more Songs that have shorter ‘Throws’ the less impact the ‘Throw’
number will have.
Underneath the ‘Throw’ number is the Styles window. If you have nothing in this
window then you will need to set up some Styles before you can use them. Styles are
used to generally classify a Song regardless of its actual Category. The screen shot
above shows some examples of Styles, they are usually more general descriptions that
cover the ‘feel’ of the music. Each Song can belong to as many different Styles as you
like, simply click the appropriate box.
19
To add some Styles to your system, click on the Songs menu and select Styles .
Finally, Artist and Song History can be found on the More Information tab. These will
not be much if this is the first Song in the system but the History shows every time an
Artist or a Song has been used in the Schedule.
Restrictions
The next tab along is the Restrictions tab. This allows you to ban a song from being
scheduled at certain times of the week.
20
Use the mouse to change the colour of squares from green (ok to schedule) to red (do
not schedule in this hour).
You can also specify a start and end date between which it is ok to schedule. To use
this facility, tick the appropriate option and use the drop down calendar to select the
date you want.
Song Notes
The Song Notes tab allows you to add notes to the Song Card. These are not used in
scheduling but can be displayed on the Q-NXT log for the presenter. Any Text
Information on the Audio Wall would have been copied into the Song Notes.
21
Copyright Information
Copyright Information is not included in the standard version of AutoTrack, for more
information on AutoTrack Pro contact P Squared Ltd.
Adding Your Next Song
Once you are happy with the Song Card, you can either save the information and open
another Song Card by clicking on OK or you can close the Song Card by clicking on
the cross in the top right hand corner. If the Song Card has changed, you will be asked
whether you want to save the changes or disregard them.
22
Searching For A Song
Once you have a few Songs in the database, it would be handy to know how to search
for them so that you can alter them if you want to. To do this, click on the Search
button.
This will open the Basic Search window.
You can use the Basic Search window to enter the most common search elements. In
this case I have put in an Artist name of Janet to see if I could find the Janet Jackson
song we were working on in the previous sections.
23
Clicking on the OK button will start the search and after a few seconds the results are
displayed as below.
Double clicking on a Song will open its Song Card and as with a spreadsheet, clicking
on the title of each column in the Search Results window will sort the results by that
column.
If I you click on OK with no criteria entered into the Basic Search window then all the
items in your database will be listed in the results.
The Advanced Search tab allows you to add more criteria to your search for more
accurate results.
24
The Rest Of The Song Tab
The Deck Viewer
As explained in section 1, each Category is actually a deck of Song Cards that rotate
to decide what Song is Scheduled next. The Deck Button allows you to view and even
alter the Deck of any given Category. The Deck Viewer is available for both Songs
and Jingles.
25
Artist and Song Histories
As mentioned in Adding A Song, AutoTrack keeps a record of everything that it
schedules and the View Song and Artist Histories gives you access to those records.
Once you have started scheduling you can use the histories by selecting an Artist,
Jingle or Song and clicking on the View button to see when the program has
historically selected the Artist, Song or Jingle.
26
27
Adding a Jingle
The Jingle Tab gives you access to the Jingles section of AutoTrack. Using the Jingles
section is very similar to using the Songs section so you should get the hang of it very
quickly.
Adding A Jingle: General Information
To add a Jingle, click on the New Jingle button (see above).
You will notice that many of the fields are the same as when we added a new song,
again, we click on the Browse button to browse for the Cart we want.
28
The Cart Browser is effectively a mini version of the Audio Wall in Myriad. You can
use it to find the Cart you want to add to the system. The ‘F’ for Find key will bring
up the standard Audio Wall Find Cart Window which will allow you to enter a Jingle
Title to search for. The Find Window will display the results, simply double click on
the one you want to display it in the Cart Browser. If you know what Cart Number
you are looking for you can Jump straight to it by pressing the ‘J’ key on the keyboard
and typing in the number. Once you have the Cart you want to add to AutoTrack
highlighted (in a blue bar), press the ‘Return’ key on the keyboard or double click on
it.
29
AutoTrack will again fill in any information it can base on the Audio Walls Cart
Details.
Jingle Categories are set up by default by AutoTrack but you can change them by
clicking on the Jingles menu and selecting Categori es.
You can alter them by clicking in the Name box and typing in the new category
names.
N.B. If you alter the Jingle Categories whilst a Jingle Card
Once you are happy with the Jingle Categories, select one for this Jingle Card by
using the drop down box.
30
If you are used to Myriad v2’s Auto Schedule you will be familiar with the Sweeper
Category of Jingle having the special property of being Sweepable (embedded into the
intro of a song) automatically by Q-NXT. In AutoTrack., the Sweeper Category has
no special property but rather any jingle can be given ‘Sweeper’ status by checking
the ‘This is a Sweeper (Dry Voice)’ box.
You can also set a Jingle to have Energy and Tempo’s in the same way as a Song. Use
the drop down lists to select the appropriate levels but bear in mind that you do not
have to set either if you do not want to. If, for example, you decided to leave out
Tempo on a given Jingle then all it would mean was that AutoTrack would not apply
Tempo rules when using that Jingle, in other words that Jingle could follow a Song
with any level of Tempo.
You can add the BPM (Beats Per Minute) if you wish but essentially you have
finished General Information for this Jingle Card. If you do not want to use any of the
additional information tabs then you can either click on the OK button to save this
Jingle Card and move on to a blank one or click on the Close button in the top right
hand corner to close the Jingle Cards, you will be asked if you want to save any
changes you may have made to the Card.
31
More Information
The More Information tab on the Jingle Card allows you to specify a bit more detail
about how AutoTrack should handle this particular Jingle.
The ‘Throw’ number works the same as in Song Cards. If it is set to 100% then once
the Jingle is picked, it will go to the back of the Jingle Deck but if it is set to 80% then
it will be placed 20% in from the back. This feature can be used to rotate important or
favourite Jingles faster than the rest but should only be used on a few Jingles for
maximum effect.
The bottom section allows you to specify which Categories of songs, this Jingle can
proceed. This means that if it is Jingle that states that your station plays the best 60’s
Music and you have a Category of 60’s Music then you could ensure that the Jingle is
only ever used when a 60’s song is coming next. You can de-select as many
Categories as you like for each Jingle Card.
Restrictions, Notes & Copyright Information
For more information on the additional information tabs, please refer to the Song
Record Card section of this document as it explains their function in details.
32
The Rest Of The Jingle Section
Searching For A Jingle
Searching for a Jingle uses virtually the same procedures as searching for a Song. For
more details please refer to section
The Deck Viewer
The Deck Button allows you to view and even alter the Deck of any given Jingle
Category. The Deck Viewer is available for both Songs and Jingles.
Jingle Histories
As mentioned previously, AutoTrack keeps a record of everything that it schedules
and the Jingle Histories gives you access to those records. Once you have started
scheduling you can use the histories by selecting an Artist, Jingle or Song and
clicking on the View button. (See Song and Artist Histories for more details).
33
The Schedule Tab (Setting Up A Schedule)
Before we get started on the individual elements of the Schedule tab, it would be
useful to briefly explain what each element is and how it contributes to the overall
Scheduling process.
Running Orders (RO) Overview
A Running Order (RO) is a framework for any given show. It is effectively a
list of what happens in the show. A typical Running Order could be:
Song
Jingle
Song
Song
Advert
Jingle
Song etc
90’s Pop
Station ID
Free Choice
Free Choice
Free Choice
Every show must have a Running Order although the same Running Order can
be used in several different shows.
Format (Fmt) Overview
The Format is a general guide for the mix of music and jingles in any given
hour. AutoTrack uses the Format to decide what Categories of Songs and
Jingles to use when it is not specifically specified in the Running Order. A
Running Order usually contains one or more Formats although one Format is
34
always assigned as default and used if no specific Format is specified in the
Running Order.
Rules Overview
The Rules outlines a set of boundaries that control AutoTrack’s scheduling.
The Station Default Rules apply to all running orders in the Schedule
Assign Overview
The Assign button allows you to assign Running Orders to hour long slots
throughout the week.
Creating A New Running Order
To Create a new Running Order, click on the New RO button. A blank Running Order
will appear.
The first thing to do is give the Running Order a unique Reference. This Reference
should be something descriptive as you will need to enter it into the Assign grid to use
this Running Order in your actual schedule. The Reference is restricted to eight
characters although you can add a much longer Title to the right of the Reference box.
Below the Reference section is the Running Order Options field. There are two
options available, the first is a check box for Run To Time. This tells Q-NXT whether
this hour needs to automatically be back timed to Absolute Time markers or not.
35
Manual and Live Assist shows would not usually have this box checked but
Automated shows would.
Playout Mode refers to how this Running Order is going to be used. Three modes are
available.
Live Assist Mode:
A mix of manual and automated links throughout the show. Q-NXT will follow the
link information outlined in the running order or altered by the presenter.
Automated:
In this mode all links will be automated regardless of what it says in the Running
Order. This mode eliminates the chance of an automated show stopping because of a
wayward stop event in the Running Order. In this mode, the presenter can not alter the
ending type in Q-NXT
Run To Time:
You can also tick the Run To Time option for to make Q-NXT ‘back time’ an
Automation show so that it hits time critical events (like news) at the correct times.
You can now start to fill in the actual Running Order for the show. To do this, click
on a white box on the Type column and a drop down list will appear. This list allows
you to select what type of item you want at that position in the Running Order. The
picture below may make it a little clearing.
36
The picture above shows the typical start to a running order. You can see that the
show starts with a Song and by using the drop down list on the Category Tab, I have
specified that I want the first Song to be from the Chart Category. The next item has
been set to a Jingle and again, the Category has been selected to ensure that it is a
Sweeper Jingle. The next Song has been left blank which means that AutoTrack will
refer to the Format to determine what Category to pick. This means that the second
Song in the Running Order may be a Chart Song one week and a Last 6 Months the
next. You may notice that I have not specified a Format anywhere yet but that is OK
because there is a Station Default Format that will take over if I don’t bother to
specify what Format I want to use.
Item Types
The Types available are:
Type
Time
Cart
Jing
Ad
Hdwr
Song
Text
Format
CMD
Full Name
Absolute Time Marker
Cart Number
Jingle
Advert
Hardware Event
Song
Text
Format
Command
Description
A Specific Time In the Show
Plays A Specific Cart Number
Plays A Jingle
Inserts An Advert Break
Triggers A Hardware Event
Plays A Song
Inserts Text Into The Log
Applies A Format From This Point
Performs A Command At This Point
37
Each one of these Item Types allows you to enter additional information although
some have more fields than others. Below is a list of all the Items and the fields that
you can add additional information to.
Item: Time
Info: Set Time (min:sec:hundredths)
Category: NA
Type: NA
Item: Cart
Info: Specific Cart Number
Category: Select Button To Open Cart Browser
Type: NA
Item: Jing
Info: Jingle Card Item Number
Category: Specific Jingle Category
Type: NA
Item: Ad
Info: Playout Time (min.sec)
Category: NA
Type: NA
Item: Hdwr
Info: Hardware Line Number
Category: NA
Type: Action (Set, Clear, Flash, Pulse)
Item: Song
Info: Song Card Number
Category: Song Category
Type: NA
Item: Text
Info: NA
Category: NA
Type: NA
Description: Text Message Goes Here
38
Item: Format
Info: Format Name
Category: NA
Type: NA
Item: CMD
Info: Specific Command (set up using Myriad Config)
Category: NA
Type: NA
In each case (with the exception of Text) the Description column gives a brief
description of the item, the Extra column displays any additional information and the
E column shows the End Type of the item. A Green Block means that the item will
automatically be segued into the next, a Red Block shows that Q-NXT will pause at
the end of the Item and wait for the presenter to press Go. These End Types only
apply in Live Assist Mode as Manual and Automation Modes both over rule the End
Types.
Continue to build your Running Order until you have enough items to cover about one
hour and five minutes, an estimated time is displayed at the bottom of the screen.
The Running Order is now complete.
List Running Orders
Clicking on the List RO button displays a list of all the Running Orders on the system.
39
You can edit one of the listed Running Orders by double clicking on it to open it.
Once it is open you can edit it, once you have finished, click on the OK button which
will ask if you want to save the changes. If you give the edited Running Order a new
Reference it will effectively become a new Running Order. This is a simple way to
copy existing Running Orders to cut down on the time it takes to create a new one
from scratch.
40
Creating A New Format (Fmt)
As outlined earlier, the Format is a general music policy that AutoTrack follows when
specific Song and Jingle Categories are not assigned in the Running Order. You can
have as many Formats as you like on the system and you can assign several Formats
to a Running Order. Only one Format can be assigned as the Station Default.
To create a new format, click on the New Fmt button.
The Format window will appear on the General tab. This tab is used to give the
Format a unique Format Reference and a description.
Media Types
This option is not available in the standard version of AutoTrack.
The Song Categories
This tab allows you to add weightings to the different Categories of Songs. In the
example below, 90’s Pop carries the highest weighting followed by Current and 80’s
Pop. The rest of the Categories carry a lower weight so will make up a smaller part of
the overall show.
41
To the right of the Weightings is the Max and Min settings. These refer to the
maximum and minimum number of Songs from a particular Category that are allowed
in a row. This means that we will never have more than two 80’s Pop songs in a row
using the above format.
Song Types
These are not used in AutoTrack., only in AutoTrack Pro
Song Styles
The Song Styles tab allows you to specify that you only want Songs that have the
selected Styles when using this Format.
42
If this is specified in a Format, AutoTrack will follow all the other rules as normal so
Category weighting etc will still be valid, it will simply discard any Songs that do not
belong to the selected Styles.
Jingle Categories
The Jingle Categories tab works in the same way as the Songs Categories tab. The
Jingle weightings are used by AutoTrack to decide what Jingles to play in a Running
Order when they are not specifically requested. In the above example, when given
free choice, AutoTrack will mostly pick Station ID’s with a Sweeper every so often.
The Max and Min settings also work the same as Music Categories. The Max is the
most Jingles from a Category that can be played in a row and Min is the least. In this
case, both have been set to 1 which means that AutoTrack will not allow two or more
Jingles in a row under any circumstances.
43
Characteristic Rules
The final tab on our New Format window is the Characteristics’ Rules. This allows
you to set a minimum and maximum number of Songs in a row for each level of each
Characteristic on your system. This usually means Energy and Tempo but you can
add more Characteristics such as Texture used in the above example. Use the drop
down list to select the Characteristic you want to edit. Once you have done that, the
levels within the Characteristic will be listed below with a Max and Min value to the
right. The number in the Max and Min specifies the maximum and minimum number
of Songs with the Characteristic of that level allowed in a row. In the above example,
all levels have been set to a minimum of 1 and a maximum of 3. This means that you
will never get more than three Songs of Energy Moderate in a row, regardless of
Category, Styles and all the elements that we have discussed. This screen is a
powerful tool in shaping the way AutoTrack will select your music schedule.
44
List Formats (Fmt)
The List Format (Fmt) button allows you to view a list of all the formats that have
been set up on your AutoTrack system. Clicking on the button will display the Format
List window.
You can sort the Formats listed by clicking on the title bar of each column.
You will notice that the Main Format above is highlighted in green. This indicates
that it is the stations default Format. This means that whenever a specific Format is
not specified in a Running Order, the Main Format will be used. To set a different
Format as the default Format, right click on the new Format and select the Set As
Default option. The new default Format will be highlighted in green.
45
Creating A New Rules Set
So far we have looked at the Running Order to create the basic framework for a show
and Formats to help AutoTrack decide what type of music to play when it is not
specified in the Running Order. The final element in AutoTrack’s scheduling arsenal
is the Rules Set. These specify a number of rules that AutoTrack must follow at all
times. You can only have one Rules Set for your station and it applies to all shows
scheduled using AutoTrack. You can store several different Rule Sets in AutoTrack
but only the Default Rules will be used by AutoTrack.
To create a new Rules Set, click on the New Rules button.
As before, the General Tab allows you to give the Rules Set a unique Rules Reference
and a Description.
Schedule Rules and Schedule Guides are not needed within AutoTrack.
46
Song Category Rules (Song Cat. Rules)
The Song Category Rules allow you to tell AutoTrack how hard to search each
Category for a Song. It also allows you to restrict what can follow a Song from a
particular Category.
The top section of the Song Category Rules window is concerned specifically with the
Search Depth for each Category. You can see from the screen shot above, in this case
each Category Search Depth has been set to 50. In the case of A List, Recurrent and
Held, this refers to 50%. This means that AutoTrack will search through up to 50% of
the Category before deciding that no Song will match it’s criteria and list the track as
Un-Scheduled AutoTrack. In the case of B List Category, the Search Depth has been
set to 50 Songs. This means that AutoTrack will only search through 50 songs before
giving up. The Search Depth can be altered by typing in the value into the Search
Depth box. Switching between Percentage and No Songs can be done by simply
clicking on the box.
The bottom section of the screen is responsible for restricting any Categories from
directly following a given Category. In the case of the above screen shot, B List has
been selected by clicking on the B List Category in the top window. The bottom
window shows all the Categories available on the system, each ticked Category
signifies that it is OK to follow a B List Song.
Song Type Rules do not apply to AutoTrack
47
The Song Category Pass Order (Song Cat Pass Order) tab allows you to specify the
order in which AutoTrack will attempt to Schedule Music Categories. This is
important because there may be Categories (such as A List) that are important to your
station but contains only a few Songs. By Scheduling them first, they are less likely to
fail on Artist or Song Title restrictions. This means that the A-List songs stand a better
chance of being rotated without interruption. You can change the Pass Order by
selecting a Category and clicking on the Move Up or Move Down buttons.
48
Characteristics’ Rules
The Characteristics’ Rules tab allows you to enforce Rules regarding what Levels of
Characteristic are valid to directly follow another Song from the same Category.
The drop down box at the top of the screen allows you to select the Characteristic you
want to alter the Rules for. You will see that the individual Levels for your selected
Characteristics. Below each Level is a white box that contains a list of all the other
Characteristic Levels with a tick box beside each to signify that it is allowed to
follow. In the above example, the Boring Level of Energy can be followed by another
Boring, Slight, Moderate or Strong Song but not a Powerful Song or a Hurricane
Song. The Slight Energy can be followed by anything other than Hurricane Level.
In this way, you can control the jumps in Characteristics between Songs regardless of
Categories.
The Gender Rules and BPM Rules are not needed in AutoTrack.
When you have finished with your new Rules Set, click on the OK button on the
bottom right of the window to save and close.
Listing Rules
Clicking on the List Rules button displays a list of all the Rule Sets on your system.
To select Rule Set you want to use for your station, right click on it and select Default
Rules. The new selection will be highlighted in green.
49
Running Order Assignments
The Running Order Assignments grid allows you to tell AutoTrack what Running
Orders to use for each hour of the day throughout the week. Click on the Assign
button to open the Running Order Assignment grid.
To select a Running Order for an hour of the week, select the day from the tab strip at
the top of the window. The scroll down to the hour of the day you want to assign and
click in the Reference box to select a Running Order from the drop down menu. You
should specify a Running Order for every hour of the week even if the Running Order
for some hours is effectively empty.
50
The Auto Schedule Tab
The Auto Schedule tab is used to tell AutoTrack to actually go off and pick the Music
and Jingles for a specific time period.
Scheduling Music
Auto scheduling is the actual process of going through the Running Orders, applying
the Formats and Rule Sets to select appropriate Songs. Jingles and other Running
Order items and finally producing a Schedule from the Running Order. The Schedule
button allows you to select the time and date range you want to Schedule into.
51
The General tab is the most commonly used section of the Auto Schedule process, it
is used to specify when to Schedule from and to and also whether to send it to Myriad
ready to be played on air.
The Current Information box tells you the last time and date that AutoTrack was used
to Schedule up to. In the above example, the last Scheduling session produced logs
that would run out at 23:59:59 on 27th September 2000.
The Time & Date Range allows you to specify the Start of the Schedule Range for the
current session and the End of the Time and Date Range. In this case, it has been set
to Start at midnight on the 28th (taking over where the last one was due to end) for the
entire day. You can either type the Start or End Time and Dates directly into the white
boxes or Click on the Select button for each date to open the Date Select window.
Use the Calendar to set a Date and the ‘Dart Board’ to set the Time. The inner ‘green’
circle is for AM times and the outer ‘red’ circle is for PM times. When you are happy
click on the OK button.
The After Scheduling section allows you to choose whether you want to be prompted
to send the log to Myriad, automatically send it to Myriad or not bother.
52
The most common setting for this option is to select Ask To Send To Playout System
with the Display The Schedule Information option ticked. This will show you a copy
if the Schedule that it has generated before asking you whether to confirm sending it
to the Playout System (Myriad).
Finally, to begin Auto Scheduling, click on the Beginning Scheduling button.
53
The progress bars indicated how AutoTrack is getting on, once you have OK’d a
Schedule (or you selected Automatically Send To Playout option), the Sending To
Playout progress bar will appear.
Once this final stage is completed, you have finished Auto Scheduling and have sent
the final log to your Myriad system.
Under Run Report
AutoTrack can be configured to automatically monitor all shows that it schedules
looking for any that’s complete running time falls short of a preset minimum show
length. This is very important because most playout systems require automated shows
to be greater than an hour in order to allow them to ‘cut’ music to fit around time
critical events such as external news feeds. In this example, the Under Run Report has
been set to automatically run after scheduling and to display any shows that have a
total duration of less than 1 hour and 5 minutes. These settings can be altered in the
Database Settings>General Settings section of the Settings menu.
54
The Under Run Report window appears directly after scheduling and lists all the
shows that have been scheduled that do not meet the minimum running time that you
have specified. You can then print out the report and use Myriad to add additional
items to these shows to ensure they are long enough.
You can also double click on any of the shows in the Under Run Report to actually
see what was scheduled and why the show is shorter than you wanted. Double
clicking will open the Schedule View and automatically jump to the hour of the
schedule that you requested.
55
In the example above, we double clicked on the 14:00 show on the 5th of May because
it appeared in the Under Run Report. A quick glance at the Schedule Viewer shows
that there was an unscheduled song in that hour which is probably why it is short.
This information on it’s own is not much use but if we double click on the
unscheduled song in the Schedule Viewer then AutoTrack will also tell us why it
could not schedule a song in that position which allows us to see if it was just an
unlucky event or a problem with the Running Order which is likely to cause problems
in the future.
For more details on using the Schedule Viewer, please consult the View Schedule
section of the documentation.
Schedule Masking
The Schedule Masking tab of the Schedule window allows you to select the hours of
the day that you want to schedule within the selected date range. This means that you
can schedule all the music for a week except the breakfast and drive time shows, then
come back later and schedule the breakfast and drive time shows in to the gaps in the
schedule.
To use schedule masking, first select the date range you want to schedule for on the
General Tab of the Schedule window, then switch to the Schedule Masking Tab on
which you will see a grid showing every hour of the week. To ‘mask’ a section of the
week from scheduling, simple click on the grid to switch from green (schedule) to red
(don’t schedule) and vice versa. You can also use the mouse to select several hours by
‘dragging’ the selected section over several bits of the grid. In the example above, we
56
have selected the breakfast and drive time shows so when we start scheduling,
AutoTrack will leave a gap so that these shows can be scheduled and pushed in to the
playout system at a later date.
N.B. This facility will only work with Myriad v2.6 or higher.
Styles
The Styles tab allows you to override the Formats for a Scheduling session and apply
one or more Styles for all Shows Scheduled in this session.
To apply one or more Styles, simple put ticks into the relevant tick boxes.
Removing Old Logs From Myriad Q-NXT
As part of the Send Logs To Playout Process, AutoTrack checks to see if any old or
expired Q-NXT logs are present and deletes them as a matter of routine. This means
that it is totally self maintaining and will not need you to manually ‘purge’ the QNXT log as in Myriad v2.
Un-Schedule (Un-Sched)
The Un-Schedule button allows you to unscheduled a time and date range. This will
release all restriction caused by the schedule and makes them available for scheduling
again. Clicking on the Prompt to remove from Playout system option will also remove
any logs from Myriad, that have been sent in the selected Date Range
57
You can use the Select Start and End Date buttons as in Auto Scheduling, when you
are ready, click on the Begin Un-Scheduling button to start the process. The status
will appear in the form or a progress bar which will show you how long is left. Once
the AutoTrack information has been un-scheduled, you will be asked to confirm
erasing the Myriad logs as well. CAUTION – Only do this to a live Myriad system if
you are positive you want to as removing a section of a log that is use by Myriad will
probably cause an interruption in service from your Myriad system.
You can use the Schedule Mask to selectively Un-Schedule certain hours of the day.
For more information on using Schedule Masking see the Schedule Masking section
in Scheduling Music.
The Styles tab is not used in Un-Scheduling.
View Schedule (View)
The View button is used to view the schedule that has been generated by AutoTrack.
58
You can select the time and date that you want to look at by using the Display Log
From button or typing in the time and date that you want and pressing View. Once
the schedule is loaded, you will see all the items in the hour listed. If you double click
on any of these items, the items song or jingle record card is opened. The exception to
this is any Non Scheduled items (shown as a red block) which are that appear in the
Running Order but AutoTrack has failed to find a suitable song or jingle to fill the
gap. In these cases, double clicking on the Non Scheduled item will bring up a
message box that tells you exactly why AutoTrack failed to help you track down the
cause of repeated Non Scheduled events.
N.B. You cannot edit this View, to edit a log you must use the Q-NXT screen on
Myriad.
Schedule History (History)
The View Schedule History button allows you to review at a glance, when has been
Scheduled and when has not.
59
The screen shot above shows a typical Schedule History. We can see from the grid
that for the week beginning the 25th September 2000, the first two days are in red
which means that they have not been Scheduled. The next three days are all green
which means that they have been Scheduled. The final two days of the week are in red
so they still need doing.
Currently in AutoTrack, there is no way of ‘going back’ and Scheduling the first two
days, if you wanted to fix this situation you would have to Un-Schedule for the 27th –
29th, removing the log from the Playout System at the same time. You could then
Schedule from the beginning of the week correcting the oversight.
60
The Playout Tab
The Playout tab gives you independent access to the Send To Playout and Remove
From Playout options in the Schedule process covered in section 10.
The Send button allows you to send the most recent Schedule Session to your Playout
System.
The Remove button allows you to Remove the most recent Schedule Session from
your Playout System.
The Update Info button sends an updated copy of the AutoTrack Music Database to
the Songs section of Myriad. This section allows you to search and view a copy of the
AutoTrack database directly from within Myriad in the studio. This process is
automatically done each time you schedule so you only need to use this facility of you
have added songs to your database but do not intend to schedule for a while.
61
The File Menu
The File Menu gives you access to the basic file operation available in AutoTrack.
The options on the menu are outlined below.
New
The New option allows you to add new Songs, Jingles and Running Orders to the
system. It also has the New Item option which allows you to use Ctrl + N on the
keyboard to add a new Song the system.
Close
The Close option closes the highlighted window in AutoTrack.
Import / Create
The Import / Create option allows you to import an existing music database from
either an older Myriad v2 Auto Schedule or from an Excel™ spread sheet. For more
details on importing a Myriad v2 Auto Schedule database, see Importing Your Old
62
Auto Schedule Database section of this document. For details of importing from an
Excel spread sheet, please contact P Squared.
Print Setup
The Print Setup option allows you to select the default printer for AutoTrack to use. It
also allows you to alter the paper orientation and other options depending on the exact
printer that you have attached to your system.
Print
The Print option becomes available whenever a window that contains printable
information is highlighted in AutoTrack. Almost all the areas of AutoTrack that report
information to you are print enabled. You can also use Ctrl +P to print information in
AutoTrack.
Change Working Database
AutoTrack can be used to schedule and maintain several stations simultaneously
depending on whether you have adequate AutoTrack licenses to gain access to
multiple AutoTrack databases. Assuming that you have, you can use Change Working
Database to switch between different AutoTrack databases in a single working
session. Selecting this option opens the AutoTrack Database Browser, which allows
you to select the database you want to open by double clicking on it.
Exit
Quits from AutoTrack.
The Songs Menu
The Songs menu offers access to range of tools that are related to the songs that you
have on your AutoTrack database.
63
Categories
The Categories option allows you to add new Categories of songs to your database or
to alter the names of existing Categories.
Selecting this option will open the Song Categories window, which lists all the
available Category slots on the system. To add a category, click on an empty slot and
type in the new Category title that you want. To alter an existing Category, click on
the Category you want to alter and type in the amendments that you want.
N.B. If Category 1 is you’re A-List but you later decide to change Category 1 to be
Thrash Metal, you must remember to re-categorise all of the Songs that were in the AList because otherwise, they would reside in the Thrash Metal Category because
AutoTrack only uses the Category number not the name you give to a Category.
You can set up to 32 categories per AutoTrack database.
64
Styles
The Styles option allows you to add new Styles to your AutoTrack system or to
amend the names of existing styles. Styles are used in addition to Categories to help
classify different types of music. Styles are available to Songs regardless of which
Category the Song is in.
To add a new Style, click on an empty Style slot and type in the new Style name. To
amend an existing Style, click on the Style you want to amend and type in the new
Style name.
View Song Decks
Each Category in AutoTrack has a Song Deck which is a list of all the Songs that are
in the Category. The Song at the top of the Song Deck is the next Song to be picked
from that Category assuming that it passes all the rules and guides and once it has
been scheduled, it moves to the back of the Song Deck. This is how AutoTrack selects
Songs and keeps the music rotating correctly.
The View Song Desks button allows you to open up the Song Deck Viewer which
allows you to select a Category and see what the current Song Deck look likes for that
Category.
65
Use the drop down list to select the Song Deck that you want to view and right click
on individual items within the Song Deck if you want to move their position in the
Song Deck.
You can also Edit the Song Card for the item and view the Song History.
66
Advanced
The Advanced option on the Songs menu expands to reveal additional options to
allow you to maintain your AutoTrack music databases Song Decks.
The options available are outlined below.
Shuffle Song Deck
This option will shuffle the order of the Songs in ALL your Categories. This is very
useful if you have noticed that the same songs tend to be scheduled together or you
originally entered the Songs from Artist Albums which tends to lead to several Songs
from the same Artist being next to each other in the Song Deck. The down side is that
the Song rotations will effectively be lost as the Song Decks will be shuffled to a new
random order.
Once you have selected this option, the first thing that you will be asked is to enter a
percentage value below which to start the shuffle process. Lets say you want to
shuffle the Song Decks but you really want to maintain the recent Song rotation
information to avoid the Songs that have been scheduled recently from coming up too
soon. In this case, you could set the start percentage to 25% which means the first
quarter of each Song Deck will remain untouched with the rest being shuffled.
67
Next you will be asked to confirm your action. Remember that this will effectively
destroy the existing rotation of you music (except for the percentage of the Song Deck
you have opted not to shuffle) so you must be sure before you proceed.
If you click on Yes then all the Song Decks will be shuffled as per your request. Once
it has finished, AutoTrack will let you know.
Rebuild Song Decks
The Rebuild Song Decks option allows you to recover should your Song Decks ever
become corrupted so that AutoTrack cannot use them.
The Song Decks will also be squashed to remove gaps and also refreshed as part of
this process.
Squash Song Decks
Under normal circumstances, if you delete a Song from the system or move it in to a
different Category, the Song is removed from the original Category’s Song Deck
leaving a gap in the database. Usually, this will cause you no problems whatsoever
but, if you remove or re categorise a lot of Songs then the amount of gaps in the
database increases and eventually it will start to slow the scheduling process.
Squashing the Song Decks goes through the Songs Decks removing all the gaps to
return them to optimum efficiency.
68
Song Decks are automatically Squashed as part of the scheduling process so you
should only have to use this option if you have done a lot of work to you database but
do not intend to schedule in the near future.
The Jingles Menu
AutoTrack includes a dedicated Jingle scheduling system but it does work on the
same principle as the Songs scheduling system and so shares a lot of the same option
on the Jingle Menu. These options are outlined below.
Categories
You can add new Jingle Categories to your system or amend existing ones by using
the Categories option on the Jingle Menu.
69
To add a new Jingle Category, click on an empty Jingle Category slot and type in the
new Jingle Category name. To amend an existing Category, click on the Category you
want to change and type in the new Category Name. You should bear in mind that
AutoTrack uses the Jingle Category Number not the name so if you changed Jingle
Category 1 from Jingle to Dry Stab then all of the Jingles that were originally in
Category 1 as Jingles would now be classified and Dry Stabs so you would need to go
and re-categorise them accordingly.
View Jingle Decks
Just as with Songs, each Category of Jingle has a Jingle Deck, which contains a list of
all the Jingles within the Category. The Jingle at the top of the Jingle Deck will be the
next one to be selected from that Category assuming it reaches all the other criteria
specified in the Running Orders, Formats and Station Rules. The View Jingle Desks
option allows you to view the Jingle Decks and to alter the order of items in the Jingle
Decks.
70
You can select the Jingle Category that you want to view using the drop down list and
right clicking on individual items in the Jingle Deck allows you to move the item
around within the Song Deck, Edit the item view it’s History.
Advanced
The Advanced option on the Jingle Menu allows you to maintain your Jingle Decks.
The available options are outlined below.
Shuffle Jingle Decks
This option will shuffle the order of the Jingles in each Jingle Deck. This is very
useful if you notice that the Jingles sometimes play in the same order. Just like Songs,
Shuffling the Jingles Deck will effectively destroy your Jingle rotation but also like
Songs, you can opt to leave a percentage of the Jingle Decks as they are to preserve
the recent rotation histories. For more details on using the Shuffle Deck function see
Shuffle Song Decks.
Rebuild Jingle Decks
If your Jingle Decks ever got corrupted so that AutoTrack could not use them then the
Rebuild option on the Advanced menu will recover the corrupted Jingle Decks. For
more details on Rebuilding Decks see Rebuild Song Decks.
71
Squash Jingle Decks
Whenever you re-categorise or remove a Jingle from the system, it leaves a gap in the
original Jingle Deck. If you move or delete a number of Jingles then these gaps can
accumulate and affect the speed of scheduling Jingles. The Squared Jingle Decks
option goes through the Jingle Decks and removes the gaps returning them to
optimum efficiency.
The Jingle Decks are automatically squashed every time you use AutoTrack to
schedule so you should only every have to use this option if you have done a lot of
work to your database but do not intend to schedule for a while.
The Carts Menu
The Carts Menu gives you access to the Myriad Audio Wall from within AutoTrack
via the Cart Browser. It also allows you to ‘push’ or ‘pull’ a range of information
between AutoTrack and the Myriad Audio Wall so if you have spent time adding
information to one, there is no need to repeat the process with the other.
Cart Browser
The Cart Browser option allows you to open the Myriad Cart Browser to access the
Carts stored on the Myriad Audio Wall. The Cart Browser is used throughout
AutoTrack (and all other P Squared products) to allow you to select Carts from the
Audio Wall but you can also use the Cart Browser option on the Carts menu to open a
Cart Browser, which you can then use to review Carts.
72
To jump to a specific Cart on the Audio Wall, type in the Cart that you want to jump
to and click on the Jump button. You can also search the Audio Wall for a specific
Cart by clicking on the Find button. The Up and Down buttons allow you to scroll
around the Audio Wall either Cart or Page at a time.
To play a Cart from the Audio Wall (or the Find Cart results) simply drag the Cart
you want in to the Cart Player at the bottom of the screen.
73
The Cart will then start to play as normal.
You can also drag a Cart from the Cart Browser directly on to the main AutoTrack
window to start to add the Cart to AutoTrack as a new Song.
Myriad Audio Wall Update Utility
The Myriad Audio Wall Update Utility option opens the Myriad Audio Wall Update
Utility which can be used to exchange information between the Myriad Audio Wall
and your AutoTrack system. This means that if you spend time adding the Copyright
Information or Cart Notes on the Audio Wall, you can import the additional
information in to AutoTrack and vice versa.
74
To use the Utility, firstly select the direction that you want to update the information
in. Next, select whether you want to update information on Jingles, Songs or both.
Finally tick the boxes for each of the information types that you want to be updated
then click OK.
You will be asked to confirm after which you will see a brief progress bar showing
the progress of the update. Once the process has finished, you will be informed with a
message box.
The Reports & Statistics Menu
The Reports and Statistics menu offers a range of tools to provide you with a wealth
of information about your AutoTrack system.
Carts
The Carts sub menu allows you to extract a range of information about the actual
Carts that are stored on your Myriad system’s Audio Wall.
75
Run A General Cart Report
The Run A General Cart Report option opens the standard Myriad Cart Reporting
facility which allows you to perform a number of different searches of the Audio Wall
depending on what you wish to know.
To run one of the many reports that you can get from the Audio Wall, click on the
Report button on the Audio Wall tab.
Cart Range
You can select which area of the Audio Wall you want to search, by using the Cart
Range settings and typing in the numbers of the Carts that want to search between
(inclusively). If you are not sure of the exact number then you can use the Browse
button to open the familiar Cart Browser window, which you can use to select the
Cart Numbers by double clicking on the desired Cart.
As with other areas of Myriad, you can use the Cart Browser in the same way you use
the main Audio Wall to find the Carts you are looking at. The “J” key or J button will
76
allow you to Jump to a specific Cart Number whilst the “F” Key or the F button will
allow you to search the Audio Wall for a specific Cart name.
Tip: You can use Cart Ranges to narrow the resu lts of your Reports. Say for example
you want to look for uncompressed Adverts on the system, if you limit the Cart Range
to just the area of the Audio Wall where your adverts are stored (and select the
Compressed Carts only option) then you will get the R eport that you want.
Compression Options
You can use the Compression Options to prepare Cart Reports based on whether
Carts are compressed (for instance, using IMA ADPCM 4:1 compression) or linear
(un-compressed or PCM).
Show all Carts regardless of compression: lists all the Carts in the Cart Range
regardless of whether they are compressed or not.
Only show Carts that are compressed: only list Carts in the Cart Range that are
compressed.
Only show Carts that are linear (non compressed): will only list Carts in the Cart
Range that have no compression at all.
Only show Carts that aren’t 44100 Stereo: will only show Carts that are not of the
audio quality and format that you specify.
Cart Length Options
Only show Carts with Extro lengths greater than XX seconds: This option allows
you to list all the Carts in the Cart Range that have an Extro length greater than the
time you set. This is really useful when you want to check the Audio Wall for Carts
that have overly long Extros that you feel will not sound great ‘on air’. Long Extros
usually make for sloppy sounding automation so it is useful to be able to keep on top
of it with this report.
77
Only show Carts from XX to XX seconds long: Allows you to limit the report
results to Carts within a specific running time range.
Only show Carts whose file lengths don’t match their Cart lengths: When you
first record or import a Cart in to Myriad, Myriad works out the Carts length based on
the length of the file at that time. Once it has done this, it will only check the length
again if you go in to Edit Cart on the Audio Wall, otherwise, it assumes that nothing
is different.
Now, lets say we imported a Billie Piper song some time ago and Myriad worked out
(correctly) that the track was 3 minutes and 20 seconds long. We have not edited it
since so Myriad still knows that the length is correct. Now, lets say that last week our
troublesome breakfast jock was playing around with Cool Edit, but instead of opening
it through Edit Cart>Edit Audio on the Audio Wall he just ran Cool from the Start
menu. Say he then trims 20 seconds off of the end of the track. Because he did not do
it through Edit Cart>Edit Audio, Myriad doesn’t know that the length has changed.
Myriad still thinks it is 3min 20 seconds long even although it is now only 3 minutes
long. Later that day, the same track is due to be played in an automated show and of
course Q-NXT thinks it is 20 seconds longer than it actually is so when it comes to
play it, it will end 20 seconds early which momentarily confuses Q-NXT. Q-NXT will
recovers by recalculating any Auto-Fading to ensure that any Absolute Time Markers
are hit correctly - so other than a sloppy segue, no harm is done. Unless you spot the
problem though, it will happen every time the song is scheduled to play.
This Report Option allows you to track down rogue problems like this by comparing
Myriad Cart lengths with the actual file lengths and reporting any Carts that show
discrepancies. You also have the option to automatically fix these problems as Myriad
Manager runs the report. If you select this option then you will get a list of incorrect
Carts but they will all be fixed before the report is produced.
It is unlikely that you will get many situations like this - but if you do, this Report is
your only way of tracking it down short of listening every to every Cart on the Audio
Wall.
78
Report Results
Once you have entered your Cart Ranges and any Report Options that you want to
apply, click on the OK button to start the Report running, and after a brief delay the
Report Results will be displayed:
The Report Results are displayed initially in Cart number order, although you can sort
the results by clicking on the column titles (just like in Windows™ Explorer). If you
double click on one of the results, it will open the Edit Cart screen for that Cart,
allowing you to adjust the title, Intro & Extro times, Notes, Internet hyperlinks etc.
For more information on Edit Cart, please see the Myriad Manual.
79
The Report Tool Bar
You may have noticed that the Report Results window had a number of icon buttons
along the top. These perform a range of tasks, which are outlined below.
Play Cart
The Play Cart button will load the last selected Cart from the report in to the Cart
Player so that you can listen to it.
Edit Cart
This button will open up the Myriad Edit Cart screen for the last selected Cart from
the report (see above).
Print Report
This allows you to get a hard copy of any reports you run. If you click on the Print
Report button you will then have the option to select a printer if you have more than
one set up on your computer, if not it will use your default printer.
Block Copy
You can select multiple Carts from within the report window by either using the
mouse to drag a ‘rubber band’ around the Carts you want to select, or using the Alt
key on the keyboard and clicking on several items. Once you have selected the items
that you want to work with, the Block Copy button will allow you to copy those Carts
to a new location on the Audio Wall.
To do this, the first thing you need to do is select more than one Cart from the results.
80
Next click on the Block Copy button and the Cart Browser will appear.
Use the Cart Browser to find the position on the Audio Wall that you want to copy the
Carts to then double click on it.
You will be asked to confirm the position you want to copy to, click on Yes to
confirm.
Next you will be asked if you want to overwrite any existing Carts that are in the
range you are copying to. If you say yes then Myriad Manager will overwrite them. If
you say no then Myriad Manager will work around existing Carts ensuring no loss of
data.
Whatever you decide, a progress bar will appear to tell you how the copy is preceding
and when it is finished you will get a confirmation message.
Block Move
81
Block Move works in exactly the same way as Block Copy (see above) but instead of
copying the Carts, the Carts are actually moved from the original position to the
destination.
CAUTION! If you Block Move Carts that have been added to AutoTrack as either
Songs, Adverts or Jingles then AutoTrack will not know that they have been moved
and so will continue to schedule them using their old Cart Numbers. This will have
major consequences on the reliability of your scheduling and automation. If you move
Carts on the Audio Wall, you must update AutoTrack accordingly.
Update Cart Chunk Information
Cart Chuck is a new international standard for embedding Artist, Title, Intro, Extro
and additional information about songs, adverts and jingles in to the actual file header
of a .WAV file. The theory is that it will make audio transferable between different
playout systems and make the distribution of audio easier. Myriad is now fully Cart
Chuck compliant but as it is a new standard, Carts created with older versions of
Myriad do not include the Cart Chunk information. This tool allows you to select a
range of Carts and then have the system go through them and ‘stamp’ the Cart Chunk
information in the file headers.
Before performing this conversion, you should check that all the audio editors and
tools you use support Cart Chunk because although the theory is that non compliant
software will ignore the extra information, it is always worth checking because the
info can not be removed from the header once in. Our tests indicate that Cool Edit
works fine with Cart Chunk enabled .WAV files.
Export To Pad
The Export To Pad button allows you to save the selected Carts as a Pad run for
loading in to Myriad at a later stage. Once you have selected the Carts you want to
include, click on the Export To Pad button and choose the file name and location of
your new Pad run.
You will now be able to load the Pad run using Myriad.
Erase Last Play History
82
Whenever a Cart is played in Myriad, it is noted down in two separate places. Firstly
the Play Logs are maintained by Myriad and are a definitive list of all Carts played on
the system. Secondly, each Cart on the Audio Wall keeps track of the last five times it
has been played so that the User can quickly see when a Cart was last played and who
played it (this information is also used to mark Carts as recently played if that option
is enabled). The Erase Last Play History button allows you to select a range of Carts
and then erase the record of the last five times that they were played. This does not
affect the record in the Myriad Play Logs so you can still get the information through
Myriad Manager if you have to.
Mass Delete
The final tool on the tool bar is the Mass Delete function which allows you to select a
range of Carts and then delete them from the Audio Wall
CAUTION! Use this feature with care, you will be asked to confirm several times but
if you do proceed with the Mass Delete process then there is no way to recover the
deleted Carts so BE CAREFUL.
WARNING – Moving Carts Does Not Move The Song Record Information
Although the General Cart Report facility allows you to perform Block Moves,
Copies and Deletions from the Audio Wall, it does not automatically update the Songs
Record Cards in AutoTrack so any thing you do to the Audio Wall must be manually
reconciled with your AutoTrack database. Failure to do this will result in AutoTrack
scheduling Songs and Jingles that are not available in Myriad which could have a
detrimental effect on playout system.
Display A List Of All Carts Not In The Database
The second report in the Carts section of Reports and Statistics is the Display A list
Of All Carts Not In The Database option that allows you compare what is on your
Myriad Audio Wall with what is in your database. It then lists all the items that appear
as Carts on your Audio Wall but do not have corresponding entries in AutoTrack.
To use this facility, select the option and select the Cart Number that you want to start
the search number at by double clicking on it in the Cart Browser.
The search will take a few moments because it involves cross checking the Audio
Wall against your database but once complete, the results will be displayed in the
Report Results window (see General Cart Report).
Copyright Report
The Copyright Report option on the Reports and Statistics menu opens the P Squared
Copyright Report Generator which is a sub program that generates logs of played
Carts based on Myriad’s Play Logs, in a format suitable for a number of copyright
protection bodies. Use of the Copyright Report Generator is outlined below.
83
Overview
The P Squared Ltd. Copyright Report Generator is a solution to the problem of ‘PRS
Sweeps’. Basically, it does exactly what it says on the tin! It generates copyright
reports. However, the reports generated are only as good as the information you put
into them. If you take the time and trouble to put complete copyright information into
Myriad, then this program will make the dreaded nightmare of PRS returns a breeze* .
For those of you who don’t know, ‘PRS Sweeps’ are the checks made periodically by
the Performing Rights Society, which require just about every piece of copyright
information you have on what you play ‘On Air’. PRS Sweeps can last from as little
as 24 hours, to a few weeks at a time. It all depends on your TSA (Transmission
Service Area) and how accurate your last returns were. The more accurate the
information you supply, the shorter the Sweep will last.
However, it is not always that easy to supply accurate information at a moment’s
notice. You may have the constant problem of chasing up DJs to make sure they
supply you with the details of any music beds they decided to play on their shows.
Furthermore, you can spend days talking to agencies, most of whom don’t even know
that their 26 week, 7 different ads a day, campaign was heard outside of London! You
have to do a lot of work, collating how many times jingles were played, what different
ads were transmitted, and also you have to collate the commercial returns separately
from the music returns.
Traditionally, this has involved printing reports from several computer systems,
liasing with different departments, and often, getting the returns in late.
The P Squared Ltd. Copyright Report Generator interfaces directly with the audio
played within Myriad and Q-NXT allowing all returns to be quickly and accurately
generated from one, user- friendly program. At a glance, you can check on whether
your presenters have accurate copyright information for their personal jingles or
sweepers.
84
Description of the Reports (Profiles)
Within Copyright Report Generator you can view, but not alter, copyright
information, which is entered into the Audio Wall (see Adding Copyright information
to a Cart later in this guide). This information is displayed for viewing, and printing
from, different ‘Profiles’.
The Copyright Report Generator has a ‘General’ profile where all the possible
information for played Carts can be viewed (as shown below); the Performing Rights
Society however will never require this type of report. In a PRS Sweep, the
Performing Rights Society requires 2 different types of information: a Music Return
and a Commercial Return, which have different fields of information that need to be
supplied.
General Myriad Copyright Information
This report outputs all the possible, available information on played Carts from the
Audio Wall.
Commercial Return / Music Return Profiles
The File menu is where you can select the different report profiles, and which profile
is displayed when you launch the program (e.g. Default).
85
N.B. The Copyright Report Generator also allows you to save the report out to a file;
this is a particular file type that can be imported into other software, for example:
Microsoftä Excelä or Lotus123ä . This is known as ‘Comma Separated Variables’
or ‘CSV’.
UK PRS Music Return
For a Music Return, PRS require the following information (shown in the left hand
column of the diagram below), the example being “Sitting Down Here” by Lene
Marlin (which is the 3rd song from the top on the screen-shot above):
Music Title
Code
Performer
Composer /
Arranger
The title of the song “Sitting Down Here”
Is it a D= Disc / C= Commercial / P= Promo / S=Station ID / L= Live or Local
“Lene Marlin” can be identified on the CD / LP sleeve notes
“Lene Marlin” can be identified on the CD / LP sleeve notes
86
Publisher
Record
Label
Record(ing)
Number
Duration
“EMI” can be identified on the CD / LP sleeve notes by a ‘(P)’ symbol
“Virgin” can normally be identified on the CD / LP sleeve by a logo
“CDVIR83” is a unique number assigned to each CD / LP produced by the record
company and is found on the sleeve
“3:51” is the exact duration played on air
N.B. Although a Cart Number field is displayed on screen, it is not needed by PRS,
and is therefore not included in the final printout. It is there to allow you to generate a
report, identify which carts need the information entering, and regenerate the report.
UK PRS Commercial Return
For a Commercial Return, PRS require the following information in addition to a
copy of your advert logs:
Cart
Number
Product
Title
Play Count
Music Title
Composer /
Arranger
Publisher
Record(ing)
Number
This number is referenced against your advert logs which you will have to supply to
PRS for the duration of the sweep
Normally this is the ‘Client’ of the advert for example: Vodafone
How many times this ad was played over the report duration
This is the title of the music used in the advert
This can be identified on the CD sleeve notes, or from IMD or your commercial
production departments consignment notes
This can be identified on the CD sleeve notes, or from IMD or your commercial
production departments consignment notes
This can be identified on the CD sleeve notes, or from IMD or your commercial
production departments consignment notes
87
Music
Duration
Duration
This is the duration of the music contained in the advert. A 30sec ad may only have
a 10 second piece of music at the end
This is the duration of the entire advert, e.g. 30sec
Adding the Copyright Information to a Cart
To be able to generate a report, the program needs the copyright information to begin
with. There is no way around it, you (or someone you know), will have to fill this
information in manually.
When you edit a Cart on the Audio Wall, you may have noticed the Copyright tab.
This is where the information is entered.
This is where you enter the details you have found out from the CD / LP sleeve notes.
The Copy button next to the Product Title field, will copy the information you have
added onto line 1 of your Cart Description (within the General tab, of Edit Cart). This
is also the case for the Music Title field.
The Performer field’s Copy button, copies the information entered onto Cart
Description lines 2 and 3, separated by a comma.
These details are unique to the Cart, and are saved in a file in addition to the audio.
Therefore if you delete the audio, you also delete the file with the details in.
For example: Your PRS Sweep runs from Mon 1st December to Fri 5th December,
you generate your report on Mon 8th December, and go off in search of details. By that
Friday you have found all the music details, entered it onto the Audio Wall and
decided to have a couple of days off. However, the “evil traffic manager” has decided
88
to tidy up and delete some Carts before you get back off holiday. Therefore when you
next run your report, all the details are missing, because the carts have been deleted.
So, it is vitally important that no one deletes the Carts before you have completed
your PRS returns.
Running a Report
When you launch the Copyright Report Generator for the first time, it will default to
the General Myriad Copyright Information section (described earlier in this guide).
This is a good starting point, as it will show you all of the information associated to
the Carts, and you can change the profile at any point during this process to become a
UK PRS Commercial Return or a UK PRS Music Return by clicking on the File and
Select Profile buttons as shown above.
Start / End Time of Report
Press the Start Time button, to select the beginning of the PRS Sweep. This will
launch a now familiar screen.
Press the End Time button, to select the end of the PRS Sweep.
89
This will now display the PRS Sweep duration in the information banner at the top of
the window prefixed by Date/Time range.
Obtaining Information from Terminals
Use the Start/End Terminal boxes to select where you obtain the played Cart
information from. If you only used one studio ‘On-Air’ during your PRS Sweep then
select the Terminal name from the drop down menu, and make sure the End
Terminal displays the same location.
Start / End Cart Numbers
To select the played Carts that you wish to display information for, enter the numbers
in the Start/End Cart boxes. Most radio stations have assigned Cart groupings to
various Cart types, for example, Adverts start at Cart 1000 and end at Cart 1999.
Songs start at 3000 and go to 7999, it all depends on how you have organised your
own Audio Wall. Now you need to collect the information from a certain Cart range,
obviously if you are about to prepare the UK PRS Commercial Return report, you
don’t want to search through all of your songs, just the adverts. Just type the Cart
number you want the report to start at in the Start Cart field, and type where the
report will end in the End Cart field.
90
Print / Run the Report
If you have been a good boy (& or) girl, and entered complete copyright details every
time you have recorded audio onto the Audio Wall, then all you need do now is press
the Print button, take the printed report and put it in an envelope. Send it to PRS and
sit back and wait for 6 years until the next PRS sweep!
However mostly, for one reason or another, the information is incomplete. Therefore
you need to amend it. To do this, press the Run button; this will generate the report
on screen. Now you can go through the list and spot which Carts need the information
adding, and add it via the Audio Wall (see instructions above for adding copyright
information to a Cart).You can run and re-run a report as many times as you like to
get it right.
Database Reports
Database Reports offers reports based on the Song and Jingle databases that
AutoTrack maintains.
Category Statistics
The Category Statistics option shows a breakdown of the Categories that you are
using in AutoTrack. Selecting this option will open the Category Statistics window
which can be configured so show either Songs or Jingles on your system.
91
Select either Songs or Jingles from the drop down list and then click on either the
Statistics tab or the All Categories Graph tab depending on whether you want to see
the data as text or a graph. Finally, when viewing the graph, you can select to view the
information as a pie chart (as above) or as a 3D bar graph.
Schedule Statistics
The Schedule Statistics option on the Database Reports sub menu allows you to
manually run the Under Run report that is usually displayed after you have scheduled
a period of time. It also allows you to adjust the criteria you are looking for with the
report.
To use this facility, select the Start Time and Date and the End Time and Date using
the appropriate buttons. If you click on the buttons, you will get the standard Time
and Date Selector window that you will have used elsewhere in AutoTrack and other
P Squared products.
Once your time and date range have been set up, you can adjust the Under Run Time
below which hours will be included for this report and choose whether you want to
assume that the adverts breaks will be full when running the report. Finally, once you
have finished with the settings, click on the Run Report button to start the report.
The results are displayed in the standard Under Run Reports window which is the
same as the window you get after you have finished scheduling (assuming that the
option is switched in AutoTrack).
92
The Under Run Report window lists all the shows within the selected time and date
range that do not meet the minimum running time that you have specified. You can
then print out the report and use Myriad to add additional items to these shows to
ensure they are long enough.
You can also double click on any of the shows in the Under Run Report to actually
see what was scheduled and why the show is shorter than you wanted. Double
clicking will open the Schedule View and automatically jump to the hour of the
schedule that you requested.
93
In the example above, we double clicked on the 14:00 show on the 5th of May because
it appeared in the Under Run Report. A quick glance at the Schedule Viewer shows
that there was an unscheduled song in that hour which is probably why it is short.
This information on it’s own is not much use but if we double click on the
unscheduled song in the Schedule Viewer then AutoTrack will also tell us why it
could not schedule a song in that position which allows us to see if it was just an
unlucky event or a problem with the Running Order which is likely to cause problems
in the future.
For more details on using the Schedule Viewer, please consult the View Schedule
section of the documentation.
Advanced
The Advanced option on the Reports & Statistics menu allows you to perform some
of the more advanced maintenance features of AutoTrack although most of these are
now performed automatically or you are prompted to perform them periodically by
the system.
Expire Old Histories And Log Files
The Expire Old Histories and Log Files option on the Advanced sub menu allow you
to delete old Songs and Jingle schedule histories and also old schedule logs from the
system. These old files usually take up space and slow the system down unnecessarily
so whilst it is useful to keep some more recent history, the older stuff should usually
be deleted regularly.
Once you have selected the option, you will be told what date the logs will be deleted
up to and asked if you want to proceed. This date is based on the Expired Log setting
in the General Database Settings section of the Settings menu (see Settings Menu).
94
You can also configure AutoTrack to automatically expire the old Histories and Log
Files after a certain time so you will not need to use this facility.
If you choose to proceed (click on Yes) then you will see a brief progress bar
followed by confirmation that the old Histories and Log Files have been deleted.
The Settings Menu
The Settings Menu is where all the various settings and configuration options for
AutoTrack, are stored. You should not alter any of the settings on the Settings Menu
unless you are sure of what you are doing as they can seriously affect scheduling
performance and could result on data loss.
Database Settings
The Database Settings option expand so a sub menu to allow you to access the various
settings in AutoTrack the refer to the Song and Jingle databases as well as how
AutoTrack performs scheduling.
There are two options under Database Settings. These are outlined below.
95
General Settings
The General Settings section of the Database Settings menu gives access to the
AutoTrack Database Settings window which allows you adjust all of the major
settings relating to AutoTrack, it’s databases and how it schedules music and jingles.
The General Tab
Station Information
Station ID Code
The first configuration option on the General tab of AutoTrack Database Settings is
the Station ID code, which is a unique code for the AutoTrack database you use for a
station. This code must be unique for each AutoTrack database and will be randomly
generated when you first install AutoTrack. You can then change it using this setting.
Use Myriad Compatible Description And Buttons
If you are using AutoTrack Pro, two more options become available. Use Myriad
Compatible Descriptions and Buttons should be ticked if you are using AutoTrack Pro
and Myriad and should be unchecked if you are using AutoTrack Pro and a third party
playout system.
Only Allow Hard Disk Items
AutoTrack Pro users will also have the option to restrict AutoTrack to using only
Hard Disk based items (tick Only Allow Hard Disk Items) or allowing other types of
music such as CD, Minidiscs etc (by not checking the option).
For more information on upgrading to AutoTrack Pro, please contact P Squared.
96
After Auto-Scheduling
The After Auto-Scheduling section allows you to alter what happens directly after you
have finished scheduling music and jingles using AutoTrack.
Display The Schedule Information
If you tick this option, whenever AutoTrack schedules music and jingles for a
specified time and date period, it will automatically show you what it has scheduled
using the Schedule View window. The default setting for this option is not selected.
And Automatically Send Logs To Playout System?
Directly below the Display The Schedule Information option is a drop down menu
which determines what AutoTrack will do with the Schedule once it has finished
compiling it. The options are:
Automatically Send Logs To Playout System: Once finshed, it will automatically
‘push’ the logs in to your playout system (i.e. Myriad) without prompting you. This is
the default option.
Ask If Logs Should Be Sent To Playout System: With this option selected, once it
has finished compiling the Schedule, it will ask you if you want it ‘pushing’ in to the
playout system.
Do Not Send Logs To Playout System: This final option will leave you to manually
‘push’ the logs to your playout system using the Playout tab in AutoTrack.
Run The Under Run Report Using The Default Settings
As the name suggests, ticking this option will make AutoTrack automatically look at
each hour that it schedules and check that the combined running time for the hour is
greater than the specified minimum (see Report Settings).
Automatically Remove Old Log Files And Schedule Histories
When ever it schedules, AutoTrack keeps track of what has been scheduled and also
makes a note on each Song and Jingle that has been scheduled to provide schedule
histories on items in your AutoTrack database. These Log Files and Schedule
Histories can become large which in turn reduces the efficiency of AutoTrack. If you
tick the Automatically Remove Old Log Files and Schedule Histories option then
AutoTrack will automatically delete records after a specified time frame to keep the
system at optimum efficiency.
Number Of Days Logs Are Kept Before Being Removed
This option allows you to specify the amount of days to keep old logs before the
system removes them. Make sure that this id sufficient to get all the information from
the system that you might need because once the files have been deleted, you can not
recover them.
97
Ask For Confirmation Before Removing
If you would prefer AutoTrack to ask you before it removes old Log Files and
Histories then tick this option. AutoTrack will then ask each time and you can choose
whether to let it or not.
AutoTrack Settings
The AutoTrack Settings tab contains various settings that directly affect the
AutoTrack database and how the system picks music when scheduling.
Characteristic Information
Characteristics play a very important role in AutoTrack as they are used to describe
the individual Songs that are stored in AutoTrack. When we started developing
AutoTrack, it became clear that no matter what Characteristics were ‘hard coded’ in
to Auto Track, we could never hope to cover all Characteristics for every conceivable
Category of Song that might be used in AutoTrack so instead we decided that we
would leave the Characteristics up to the user so that they could customise them to
suit their needs.
The Characteristic Information section of the AutoTrack Settings allows you to add
new Characteristics, amend existing Characteristics or even remove characteristics
altogether. You can also set the six strength levels for each Characteristic, these are
then used on each Song and Jingle so show how strongly the Song Or Jingle reflects
the Characteristic in question.
Adding A New Characteristic
98
To Add a new Characteristic to your AutoTrack system, click on one of the unused
Characteristic tabs. In the example above, Characteristic 2 is not currently used so we
might as well use that one.
Lets say we want to create a new Characteristic called Tempo. All we need to do is
type Tempo in to the Characteristic Name field.
Next we can fill in the six strength levels for the Tempo Characteristic. To do this,
just type in a suitable description in to each of the provided boxes.
As you can see from the example above, we have now created the new Tempo
Characteristic and added six strength levels so that we can add the appropriate level of
99
Tempo to the Songs and Jingles in our AutoTrack database. Click on OK to save the
new Characteristic Information.
Removing A Characteristic
You can also remove Characteristics from the AutoTrack database by clicking on the
Characteristic you want to remove and deleting the Characteristic Name.
Click on OK to close the AutoTrack Database Settings window. The next time you
open it, the removed Characteristics will have disappeared.
Amending An Existing Characteristic
In the same way as you created a new Characteristic, you can amend the
Characteristic Name or the strength levels for any Characteristic by simply clicking
on the appropriate Characteristic tab and typing in the changes you want to make.
Once you have finished, click on OK for the changes to take affect.
Only Have One Set Of Characteristics For Both The Start And End
The final option in the Characteristic Information section allows you to set whether
AutoTrack allows you to set different Characteristic strength for the start and end of
each item. If this option is not set then you can only have one strength level, per
Characteristic for the entire duration of the item. This option is ticked by default.
Minimum Time That Must Pass…(Artist / Title Minimum Separation)
This option allows you to put in a minimum amount of time that must elapse before a
song by the same Artist or the same Song itself can be scheduled to be played again.
This is a hard rule that over rules all other rules except for if you have specified the
particular Cart or Song to play in the Running order.
100
To alter the settings, just type in the amount of hours that you want to delay be in the
appropriate box.
N.B. You must use whole hours and the minimum is one hour. If you want songs to
play more frequently, you will have to manually schedule them.
Q-NXT Settings
The Q-NXT Settings tab is designed to allow you to set up the specific details for
interaction between AutoTrack and Myriad, more specifically, the Q-NXT section of
Myriad that is responsible for playing the schedule logs that AutoTrack generates.
Allow Songs To Be Dropped When Running To Time
If this option is not ticked then all of the items that AutoTrack schedules for a given
hour will be played, however, if Q-NXT is also instructed to ‘Run To Time’ in that
hour in order to hit time critical events such as external news feeds then it will have to
fade more songs early in order to compensate for it not being allows to drop whole
songs. It is highly recommended that this option remains ticked.
Allow Songs To Be Faded When Running To Time
With this option ticked, Q-NXT can fade songs out early if it needs to in order to hit a
time critical event such as external news. If this option is not ticked, Q-NXT will
attempt to drop songs (assuming that option is ticked) to get as close as possible but it
is unlikely to be able to run exactly to time. It is highly recommended that this option
remains ticked at all times.
Before Sending To Q-NXT, Automatically Remove Older Logs
101
Using this option, you can configure AutoTrack to automatically remove old logs
from your Myriad system so that your Myriad system maintains optimum
performance and does not have the schedule from weeks ago, hanging around and
slowing things down. Once ticked, this option allows you to specify how many days
of logs to keep in Myriad. The default is 5 days but you can alter this to suit your
needs. It is highly recommended that you keep this feature enabled as it will keep you
Myriad system working correctly and remove the need for any maintenance on your
Q-NXT Log.
Q-NXT v2.6 Database
In order to ‘push’ the Schedule Logs in ton your Myriad system, you must select the
Q-NXT database that you want to use. If you are using Myriad v2.6 or higher than
you need to specify the Q-NXT v2.6 database by clicking on the Change button. This
will open the database browser window which allows you to select the database you
want by double clicking on it.
You can also use this window to copy, delete, rename or create new Q-NXT databases
by right clicking on it.
It is not recommended that you do any of these things unless you have a good
understanding of both AutoTrack and Myriad and know what the consequences will
be for both products.
You can also edit the settings for the selected Q-NXT v2.6 database by clicking on the
Settings. For details on the Q-NXT Database settings, please consult the Myriad
Configuration Manual or the Myriad Manual.
102
Q-NXT v2 Database
If you are using Myriad v2.5.95 or lower then you will also have to specify a Q-NXT
v2 database. To select the database that you want to use, click on the Change button
and use the Database Browser (see above) to select the database you want to use. You
can also un-select a database by clicking on the Clear button.
Report Settings
The Report Settings tab allows you to alter the settings used to generate the Under
Run Report that lists any generated shows that total running time falls short of a
specified minimum.
You can alter the minimum desired length of shows and whether you want to assume
that the advert breaks are fully populated.
Hardware Line Names
The second option on the Database Settings sub menu is Hardware Line Names which
allows you to assign names to specific Hardware I/O lines on your Myriad system.
Most Myriad systems include a Hardware I/O card that has several inputs and outputs
in the form of logics. These can be thought of as electronic switches that can be used
to control things inside Myriad or for Myriad to control external devices. Lets say you
wired the audio switcher that switches IRN on and off to Hardware Line 17 on your
Myriad system. In AutoTrack, you would want to put the event to switch on IRN in to
the Running Order for a show so you would want to instruct Myriad to switch on
Hardware Line 17. This is made easier by the fact that the Hardware Line Names
section allows us to add the name IRN Switcher to Hardware Line 17 so that when we
103
want to add it to a Running Order we do not have to remember the number we want to
use but rather just select the name of the device we want to switch.
To add a Hardware Line Name, open the Hardware Line Window by selecting
Hardware Line Names from the Database Settings Menu, then click on the Hardware
Line Number you want to add and type in the new name.
N.B. If you have set up this information in Myriad it will automatically be displayed
in AutoTrack.
Myriad Settings
The Myriad Settings option deal with settings that relate directly to Myriad.
File Locations
The File Locations option allows you to specify the location of both the data and the
Audio Wall files that you want to use with both Myriad and AutoTrack. Usually you
would not have to alter these settings because AutoTrack gets the information directly
from Myriad so if you ‘point’ your Myriad system at a new data or audio location,
AutoTrack will also change to follow suit.
104
CAUTION! Editing these settings effects both AutoTrack and Myriad so be careful.
Program Settings
The Program Settings sub menu provides a range of tools concerned with the
operation of AutoTrack as a whole. These settings are not database specific.
When AutoTrack Starts…Use Last Database
This option allows you to set AutoTrack to automatically open the database that was
last in use when it starts up. Most stations will only have one AutoTrack database in
which case, this option should be ticked but if you do have multiple AutoTrack
database then un-checking this option allow you to select the database that you want
to work with each time you restart AutoTrack.
User Must Login Before Using AutoTrack
When this option is ticked, AutoTrack must Login to the system with a valid Myriad
User Name and Password with sufficient rights to use Autotrack, in order to gain
access to the system. If this option is off then anybody can load AutoTrack and start
to use it.
105
Change The Directory The AutoTrack Uses To Store It’s Files
This final option on the Program Settings menu allows you to specify the location of
the database and support files that AutoTrack uses when running.
If you select this option, you will first be asked to confirm that you want to proceed.
If you select Yes then you will be asked to find the new location that you want to use.
Once you have located the new folder, click on OK.
Next you will be asked if you want to transfer your existing database to the new
location. If you way Yes then the AutoTrack Database will be copied to you new
location. If you say no then a new database will be started in the new location.
If a database already exist with the same name in your new location, you will be
asked of you want to overwrite it or not.
CAUTION! Be careful not to copy databases the wrong way round and overwrite
your full database with a nice new empty one!
106
License Details
The final option on the Settings menu is the License Details option which allows you
to add or review the License Code issued to you by P Squared to allow you to use
AutoTrack. P Squared operate a policy of issuing time restricted License Codes to all
customers so periodically your license code will expire and you will need to get a new
one from P Squared. Before this happen you will get warning messages from
AutoTrack to say that you license will expire soon and you should also receive your
new license code through the post, from P squared before your old one expires but if
not, email [email protected] to get a new license code.
Once you have your new License Code from P squared, you are ready to enter it in to
AutoTrack. The License Code consists of two parts, the Licensee Name is the name of
the person or station that the product is licensed to and the code itself is a long alphanumeric code. The Licensee name and License Code are linked so you must ensure
that you enter BOTH the LICENSEE NAME and the CODE exactly as they appear on
you’re the License Code sheet that you get from P Squared.
Once you have done click on the OK button to confirm your new License Code.
The Windows Menu
The Windows Menu offers a range of standard options for arranging the various
windows that are opened whilst using AutoTrack.
The Help Menu
Provides access to the AutoTrack online help system as well as the About AutoTrack
screen which you may need to see in order to get the exact version number of
AutoTrack you are using. You will need this information before phone or email P
squared with any technical questions.
107