1
Manual
MacFinish II Ethernet & MacFinish III Ethernet
MacFinish 2D 200 & MacFinish 2D 300
MacFinish III Ethernet
MacFinish 2D 300
MacFinish II Ethernet
MacFinish 2D 200
Version: 2015 v1
TimeTronics Photo Finish Systems
MacFinish Users Manual
page 1
Table of contents
PREFACE ..................................................................................................................................................................... 4
1
Hardware setup ................................................................................................................................................. 5
1.1
Basic MacFinish ETHERNET Configuration (with 5-wire cabling on the track)............................................. 5
1.2
Extended MacFinish ETHERNET Configuration (with 12-wire cabling) ........................................................ 5
2
General operation principles for the MacFinish photo finish use...................................................................... 7
3
How do we connect all cables? ......................................................................................................................... 8
3.1
Camera-connection (MacFinish Interface Box <-> Camera) ............................................................................ 8
3.2
Mounting the camera on the tripod and lens on the camera .............................................................................. 9
3.3
Start Detection................................................................................................................................................. 10
3.3.1
Starting Pistol .............................................................................................................................................. 10
3.3.2
Manual Start Push Button ........................................................................................................................... 10
3.3.3
Cable to switch of starting gate ................................................................................................................... 11
3.4
Finish Detection .............................................................................................................................................. 11
3.4.1
Photocells .................................................................................................................................................... 11
3.4.2
Manual Finish Push Button ......................................................................................................................... 12
3.5
Arrival Remote Control box............................................................................................................................ 12
3.6
Serial port for Scoreboard (SB) ....................................................................................................................... 13
3.7
Serial port for Windspeed (WS) ...................................................................................................................... 13
3.8
Serial port for FieldTerminal (FT) .................................................................................................................. 13
3.9
Power = 12Vdc battery, with optional battery charger................................................................................... 13
4
Software Installation ....................................................................................................................................... 14
4.1
General ............................................................................................................................................................ 14
4.2
Installation of the MacFinish software. ........................................................................................................... 14
4.3
Getting familiar with the MacFinish windows ................................................................................................ 16
4.4
Entering Your Registration Key ...................................................................................................................... 18
5
Aligning the camera and adjusting the lens ..................................................................................................... 20
5.1
Using the Preview window ............................................................................................................................. 20
5.2
Mounting the camera....................................................................................................................................... 22
5.3
Checking the Spirit Level on the Camera ....................................................................................................... 23
5.4
In Extension of the Finish line ........................................................................................................................ 23
5.5
Camera’s Vertical Direction (TILT), and lens zoom ...................................................................................... 25
5.6
Camera’s Horizontal Direction ....................................................................................................................... 25
5.7
Adjusting the Lens iris. ................................................................................................................................... 26
5.8
Adjusting the Lens focus. ................................................................................................................................ 27
5.9
Steamy lenses. ................................................................................................................................................. 28
5.10
Black Blocks on the Finish line (only Athletics T&F) ................................................................................ 28
5.11
Checklist to align the camera and adjust the lens ........................................................................................ 30
5.12
MacFinish 2D 200 and MacFinish 2D 300 ................................................................................................. 31
6
MacFinish Preferences .................................................................................................................................... 33
6.1
Document Preferences .................................................................................................................................... 33
6.1.1
Photo Direction ........................................................................................................................................... 33
6.1.2
Display Resolution ...................................................................................................................................... 34
6.1.3
Lane order ................................................................................................................................................... 34
6.1.4
Miscellaneous .............................................................................................................................................. 34
6.1.5
Time Lines .................................................................................................................................................. 35
6.2
Scoreboards Preferences ................................................................................................................................. 35
6.3
General Preferences ........................................................................................................................................ 37
MacFinish II and III Ethernet - MacFinish 2D 200 and 300
TimeTronics Photo Finish Systems
MacFinish Users Manual
page 2
6.3.1
Number........................................................................................................................................................ 37
6.3.2
Maximize when zoom ................................................................................................................................. 38
6.3.3
Pixelshiftcalculation .................................................................................................................................... 38
6.3.4
Slow computer ............................................................................................................................................ 38
6.3.5
Enable Function Keys ................................................................................................................................. 38
6.4
MacFinish Preferences .................................................................................................................................... 38
6.5
MeetManager Preferences ............................................................................................................................... 40
6.6
Serial ‘Port’ Manager ...................................................................................................................................... 41
6.7
Key Registration Preferences .......................................................................................................................... 42
6.8
MacFinish photo ‘Window’ Preferences ......................................................................................................... 42
6.9
Result-‘Table’ Preferences .............................................................................................................................. 42
6.10
Closing the Preferences Window ................................................................................................................ 43
7
Recording a race.............................................................................................................................................. 44
7.1
Selecting the recording speed .......................................................................................................................... 44
7.2
Single race recording (one race at a time) ....................................................................................................... 45
7.2.1
Recording of Electronic Split Times by means of Photocells: .................................................................... 47
7.2.2
Non-electronic split times registration (manual, without photocells!) ........................................................ 48
7.2.3
Windspeed User Mode ................................................................................................................................ 49
7.2.4
Running Time on Scoreboard After Arrival of First Athlete ...................................................................... 49
7.3
Multiple races recording (multiple races possible at a time) ........................................................................... 50
7.4
Testing the Starting System ............................................................................................................................ 52
8
Reading the Race Results ................................................................................................................................ 53
8.1
How Is the Image Structured on your Computer Screen? ............................................................................... 55
8.2
Zooming .......................................................................................................................................................... 55
8.3
Filling the 'Results table' ................................................................................................................................. 56
8.3.1
Races Finishing in Lanes............................................................................................................................. 57
8.3.2
Races Not Finishing in Lanes...................................................................................................................... 60
8.3.3
Time Lines When Filling In Results ........................................................................................................... 60
8.3.4
Absolute or Relative times in the ‘Result table’ .......................................................................................... 61
8.4
Using the ‘Overview’ window ........................................................................................................................ 62
9
Printing the Photo or Race results ................................................................................................................... 63
10
Using a link with a MeetManager database .................................................................................................... 65
10.1
One-directional data transfer to MeetManager............................................................................................ 65
10.2
Two-directional data communication with MeetManager .......................................................................... 66
10.2.1 Installation of the MeetManager function ................................................................................................... 66
10.2.2 Import MeetManager data ........................................................................................................................... 66
10.2.3 Filling in Results when Linked to Meet Manager ....................................................................................... 67
10.2.4 Export MeetManager data ........................................................................................................................... 68
11
Overview of the MacFinish Menu Items ......................................................................................................... 69
11.1
Help Menu................................................................................................................................................... 69
11.2
File Menu .................................................................................................................................................... 69
11.3
Edit Menu .................................................................................................................................................... 70
11.4
Document Menu .......................................................................................................................................... 71
11.4.1 Import, Export, Show Competitors ............................................................................................................. 71
11.4.2 Send Results, Export Results to File... ........................................................................................................ 71
11.4.3 Flip Image ................................................................................................................................................... 72
11.4.4 Flip Lanes .................................................................................................................................................... 72
11.4.5 Crop............................................................................................................................................................. 72
11.4.6 Hide table and Show table ........................................................................................................................... 73
11.4.7 Hide Overview and Show Overview ........................................................................................................... 73
MacFinish II and III Ethernet - MacFinish 2D 200 and 300
TimeTronics Photo Finish Systems
MacFinish Users Manual
page 3
11.4.8 Time Lines .................................................................................................................................................. 74
11.4.9 Timecorrection... ......................................................................................................................................... 75
11.4.10
Presentation ............................................................................................................................................. 75
11.5
Box Menu .................................................................................................................................................... 77
11.5.1 Connect Box ................................................................................................................................................ 77
11.5.2 Read Image ................................................................................................................................................. 77
11.6
Windows Menu ........................................................................................................................................... 78
11.6.1 Tools Window with color calibration function and PixelShift .................................................................... 78
11.6.2 Image Eye (= Optional feature) ................................................................................................................... 83
11.6.3 Camera Window.......................................................................................................................................... 84
11.7
Shortcuts...................................................................................................................................................... 84
12
Frequent Questions.......................................................................................................................................... 85
13
Troubleshooting .............................................................................................................................................. 87
APPENDIX A: “Send Results“ Protocol .................................................................................................................... 88
APPENDIX B: “IE 1.0.1.“ Protocol (ASCII) String Length = 8 chars. ...................................................................... 89
APPENDIX C: “IE Extended res.” Protocol (ASCII) String Length = 11 Chars ....................................................... 90
APPENDIX D: Explanation of Words ........................................................................................................................ 91
APPENDIX E: Pin Connections ................................................................................................................................. 92
APPENDIX F: What is the correct time?.................................................................................................................... 93
MacFinish II and III Ethernet - MacFinish 2D 200 and 300
TimeTronics Photo Finish Systems
MacFinish Users Manual
page 4
PREFACE
MacFinish Photo-finish: Concept-Idea
The idea of photo-finish is, as the name indicates, to take pictures of the
finish line when an athlete or object arrives. Contrary to ordinary ‘still’
pictures taken with your camera, the MacFinish system records only the
finish line. With a range from 100 to 2000 lines per second, the
MacFinish sends the resulting picture to the MacFinish PC. This allows
the operator to read times with an accuracy of up to 0.5 thousandth of a
second.
Welcome to the "MacFinish 2D 200 and MacFinish 2D 300" user manual.
We would like to advise you to read also the release notes for MacFinish 2D 200 and MacFinish 2D 300.
The manual is primarily written for the use of our MacFinish (II or III) ethernet type of photo finish system for
athletics (Track&Field), but where necessary the interfacing and differences are explained for other sports. In this
manual, we will dilate upon the handling of MacFinish in an operational environment, in other words, on the track
itself. Of course you can start setting up the system and software in your office or at home, but keep in mind that we
will refer in the text to the track or race conditions and environment.
May we recommend you to gently leaf through the entire manual first, just to have an initial idea of how the book is
structured. As we cannot possibly explain all details simultaneously, this might help you a bit in understanding and
tracing things back. Of course, the table of contents will also help you in doing so.
If you, after reading this document, have any further question regarding the operation or service of this or any other
TimeTronics equipment, please contact your local distributor or TimeTronics directly, by email;
[email protected], or call us at (32) 14 / 23.19.11
Please also contact us if you have any remarks or advise regarding this user manual; [email protected].
Good luck with MacFinish and thank you for your confidence in the TimeTronics products and services.
The editors.
© Copyright 1998...2012 TimeTronics. All rights reserved.
TimeTronics
Lammerdries 23B
B-2250 Olen
Belgium
Tel.: (32) 14 - 23.19.11
Fax: (32) 14 - 23.19.44
MacFinish II scsi and MacFinish ethernet are registered trademarks of TimeTronics.
TimeTronics specifications or functional features are subject to change without notice.
TimeTronics is not responsible for the consequences of erroneous usage or functioning of the
MacFinish (any version).
Windows and Windows XP are registered trademarks of Microsoft Corporation.
MacFinish II and III Ethernet - MacFinish 2D 200 and 300
TimeTronics Photo Finish Systems
MacFinish Users Manual
page 5
1 HARDWARE SETUP
When opening the MacFinish carrying case for the first time, you will notice that a variety of products are included.
Besides the main MacFinish camera plus lens and the supplied MacFinish interface box, a number of cables and
accessories are supplied, to make up a complete configuration. We will first try to explain how such a complete
configuration look likes, and how each component is interconnected with the other elements.
1.1 BASIC MACFINISH ETHERNET CONFIGURATION (WITH 5-WIRE CABLING
ON THE TRACK)
Photo of cable reel with 50m (P063) or 100m (P064) cable of 5 wires and 5-pins connectors, to connect the start
detector and the photocell receiver to the MF interface box.
As you can see on the schematic drawing above, with only a few connections you can start with photo finish timing.
Also an optional timing scoreboard can be connected to the serial port of your pc with a serial Interface cable (P244)
and a 5-wire cable reel as above, but if you think you will connect in the future also other optional interfaces like;
- an ultrasonic WindSpeed anemometer
- one or more FieldTerminals with corresponding FieldScoreboard(s), WindSpeed and Laser Distance
Measurements
then it is wiser to immediately purchase the 12-wire cable system, that is explained in the next chapter.
1.2 EXTENDED MACFINISH ETHERNET CONFIGURATION (WITH 12-WIRE
CABLING)
As an alternative to the above shown 5-wire extension cables, you can choose to use the TimeTronics 12-wire
cabling system. The advantage is that with such a 12-wire system ALL the mentioned optional elements
(scoreboards, WindSpeed, FieldTerminals, etc.) can be connected, all around the track, just with one loop of
cables around your 200m (indoor) or 400m (outdoor) track. Please notice already that you can further choose
between the 12-wire "mobile" cable reels (each 80m long), and the 12-wire "fixed" underground solution, with
removable connection boxes (to store these away during night and/or winter periods). Both the 12wire cable
reels and the connection boxes have the same 5-pins connectors for (1) Start signal, (2) Photocell, (3)
MacFinish II and III Ethernet - MacFinish 2D 200 and 300
TimeTronics Photo Finish Systems
MacFinish Users Manual
page 6
WindSpeed, (4) Timing Scoreboard, and (5) FieldTerminals, and are thus fully compatible.
Cable reel with 80m cable of 12 wires + connector panel.
12 wire cable for underground use +
removable connection box.
The schematic drawing above shows the mobile configuration with cable reels. With these 5 reels, you have
ALL connections available at the 5 most important locations around the track. Similarly a fixed configuration
can be made, if you replace the 5 cable reels with 12-wire underground cables and 5 removable connection
boxes.
MacFinish II and III Ethernet - MacFinish 2D 200 and 300
TimeTronics Photo Finish Systems
MacFinish Users Manual
page 7
2 GENERAL OPERATION PRINCIPLES FOR THE
MACFINISH PHOTO FINISH USE.
1.
The user sets up the complete configuration; hardware, software, cables, camera adjustment,... In the next
chapters we will explain how to do this.
2.
The user prepares MacFinish for recording a race by choosing the settings and putting the MacFinish
"Ready".
3.
The starter gives the starting signal with the starting pistol (or for some sports with a pushbutton) and the
start detector (on the barrel of the pistol) renders a start signal to the MacFinish.
4.
At the finish line, recording of the arrival is performed automatically (via photocells) or manually (via
the arrival remote control push button). The usage hereof is explained later in this manual.
5.
During the arrival of the athletes, canoes, etc. the MacFinish stores the image from the camera and the
corresponding times into its memory.
6.
As soon as all competitors have finished the race, the operator stops the recording.
7.
The operator asks the computer program to transmit the complete image to the computer (hard disk).
Subsequently, the image appears on your computer screen, with corresponding times.
8.
The operator sets the MacFinish ready for the next race. Before the start of, or during the next race, the
operator can already read the competitors’ places and times, draw up a result table, print out the picture
and the results of that previous race. This reading of the official results can also be done on a second
computer if you want to divide the photo finish responsibility over two persons, each with their own
computer. In that case you will connect both pc's in an Ethernet computer network, and share the
recorded photo finish files with any number of network users.
9.
We will later explain how it is (optionally) possible to connect the MacFinish PC with a "MeetManager"
PC which is running a database program containing all race data, participating athlete information, time
schedule, etc. By means of a simple serial cable between the two PC's, the MF-pc automatically gets all
race and athlete information from the MM-pc, and the MM-pc receives all race results from the MF-pc.
This way the MF system can show the live results (running time and unofficial finish time from the first
athlete) on the timing scoreboard(s), and the MM system can show the official results to the public (on
stadium scoreboards, television screens, HTML screens, paper printouts, website,..)
MacFinish II and III Ethernet - MacFinish 2D 200 and 300
TimeTronics Photo Finish Systems
MacFinish Users Manual
page 8
3 HOW DO WE CONNECT ALL CABLES?
In the following procedure we will explain the connections of the MacFinish ethernet system. We trust that you have
an 100Mb/s ethernet interface on your pc. This can be an on-board ethernet interface, a removable "PCMCIA" type
of card for a portable pc, or a "PCI" type of card for your desktop pc A suitable ethernet-cable of 6m (crossed
version) is included in the delivery of each complete MacFinish configuration. Longer lengths of such an Ethernet
cable, up to 100m without extra electronics, can be delivered by TimeTronics, or your local computer shop. Be sure
that your computer is switched OFF, and that the battery for the MacFinish Interface Box is NOT YET plugged in!
Let us first take a look at the back panel of the "MacFinish Interface Box", and you see on the left the cable to the
camera (with 8pins round metal connector, carrying power supply and start and finish signals), and on the right the
optional 12-pin connector with signals to and from the track.
3.1 CAMERA-CONNECTION (MACFINISH INTERFACE BOX <-> CAMERA)
First you connect the camera cable with the 8pins round metal connector to the rear of the (MacFinish II or III)
Ethernet camera (middle-right position; see drawing below).
NOTE; We normally will connect (see later) a battery pack to the interface box, so that we DO NOT NEED an
extra battery on the camera. It is however possible to power the camera directly, trough the larger 14-pins round
plastic connector on the rear of the camera, and to take pictures of for example cycling races without a MacFinish
interface box. In that case we will not have electronic start and finish signals, which are sometimes (for some
cycling races) not necessary. The setup is then even simpler, and we will use the PC keyboard and mouse to start the
timer, and to record a photo.
NOTE;If you choose to power the camera by means of a battery directly on the camera, (we have included in each
configuration a suitable power cable with 14-pins connector), the ‘Power switch’ (rear of the camera, top-left) will
be functional. If you choose to power the camera by means of a battery connected to the interface box, the ‘Power
switch’ will NOT be functional, it will be always ‘ON’ after you connected the battery.
MacFinish II and III Ethernet - MacFinish 2D 200 and 300
TimeTronics Photo Finish Systems
MacFinish Users Manual
page 9
The next step is to connect the camera Ethernet connector (bottom-right of the previous picture) with your PC
Ethernet connector, by means of the Cat4 crossed Ethernet cable that we supplied with the system. It is perfectly
possible (but we do not advise it) to integrate the MacFinish camera and MacFinish PC in a 100Mb Ethernet
network, which includes an Ethernet hub and other Ethernet devices.
3.2 MOUNTING THE CAMERA ON THE TRIPOD AND LENS ON THE CAMERA
Now attach the camera head on the tripod or camera pole. Then attach the camera on the camera head.
FOR MacFinish IIethernet; Attach the F-mount (NIKON bayonet mount) lens to the camera. Make sure that the
little white ball on the lens is facing up, slide the lens into the camera, and turn to the left until you hear a ‘click’.
The lens is now fixed to the camera. Completely open the lens diaphragm (= iris) (on the smallest number, for
example "F2.8"). Adjust the focus between 10 meters and “infinite“ and zoom out (if you use a zoom lens).
FOR MacFinish IIIethernet with manual lens; Attach the C-mount (=1” screw tread mount) lens to the camera.
After you strongly turned the lens fully clockwise to the end, you can turn the lens back so that the text indicators on
the lens (zoom + focus + iris) are facing upward. An internal lens mechanism will prevent that the lens will come
out of the camera, but of course, do not turn back too far (maximum 330 degrees). The lens is now fixed to the
camera. Completely open the lens diaphragm (= iris) (on the smallest number, for example "F2.0"). Adjust the focus
between 10 meters and “infinite“ and zoom out (if you use a zoom lens).
FOR MacFinish IIIethernet with motorised lens; Attach the C-mount (=1” screw tread mount) lens to the
camera. After you strongly turned the lens fully clockwise to the end, you can turn the lens back so that the lens
comes to a ‘normal’ position (text not upside down). An internal lens mechanism will prevent that the lens will
come out of the camera, but of course, do not turn back too far (maximum 330 degrees). The lens is now fixed to the
camera. You can now connect the lens control cable with the special power cable. This power cable has an extra
4pins DIN connector, which carries the control signals for the motorised lens. We will soon control the initial lens
settings from the computer screen, after we made all the cable connections, and installed the computer software.
Let us now take a look at the front panel of the "MacFinish Interface Box", for the connections from left to right; (1)
the start detector, (2) the finish detector, (3) the arrival remote control, (4,5,6) serial ports of your pc, and (7) the
battery for power supply. Please also notice, completely at the left side, the two red Leds, to test the two channels of
the NEW double channel start detector (explained later).
MacFinish II and III Ethernet - MacFinish 2D 200 and 300
TimeTronics Photo Finish Systems
MacFinish Users Manual
page 10
3.3 START DETECTION
The system can use different start signal sources, depending on the sport for which the system is being used:
• starting pistol, for example with athletics
• manual start push button, for example with road cycling races of many hours.
• cable to be connected to a starting switch of the race track, for example at greyhound races.
Plug the cable of the chosen start-sensor into “Start “ = leftmost connector on the front of the "MacFinish Interface
Box", OR in the start connector of the 12-wire cabling system (cable-reel or Connection-box).
3.3.1 Starting Pistol
The start detector (as shown below) is a little blue aluminium box, which should be attached to the barrel of the
starting pistol. If the detector cannot be attached to the barrel, it must be positioned at a maximum distance of 10 cm
from the pistol’s barrel. The start detector’s sensitivity is later discussed in this manual.
Note: TimeTronics also offers their customers a DOUBLE CHANNEL start detector, which is completely
compatible with the (older) single channel (=standard) start detector. This double channel version has TWO build-in
start sensors, and two electronic circuits, to avoid a timing problem if suddenly their would be a breakdown of a
sensor. If one or both of these sensors detect a starting shot, a start is given to the MacFinish system. But how can
YOU test that both sensors and corresponding circuits are still working correctly, even after a number of years? If
you plug such a double channel start detector DIRECTLY IN THE START CONNECTOR OF THE MACFINISH
INTERFACE (so not in the 12-wire cable reel or connection box on the track !), and you give it a large shock to
simulate a start, you should see that both red leds (on the MacFinish interface) will light up during a few seconds. If
only one of the leds flash, then one of the sensors inside the start detector is damaged. Note; If you smoothly knock
on one side of the start detector, for example with a finger, then only ONE of the leds will illuminate. You can even
test which sensor is mounted on the top of the start detector, and which one is mounted on the opposite side of the
detector.
3.3.2 Manual Start Push Button
If no starting pistol is used, a manual start push button can initiate the timing process, however without correct
"electronic timing", but only with "manual timing accuracy".
MacFinish II and III Ethernet - MacFinish 2D 200 and 300
TimeTronics Photo Finish Systems
MacFinish Users Manual
page 11
3.3.3 Cable to switch of starting gate
It is also possible to use your own switch (a normally open-contact, with a closing contact when the race is started)
to get the MacFinish system started. Please look for the correct pin-connections in the appendix of this manual. Do
NOT worry if other people tell you that a normally closed contact is much better, to be able to test the start cable
BEFORE the start of the race. This is because we have included a 2K2 resistor in parallel to the start switch, so that
the MacFinish system can also test the start cable, and give a warning beep if the cable is BROKEN or if the cable is
SHORT CIRCUITED. Our method is therefore better than a start switch with normally closed contact, which can
only test a broken cable...!
3.4 FINISH DETECTION
The system can use different finish signal sources, depending on the sport for which the system is being used:
• photocells, for example with athletics
• manual finish push button, for example with road cycling races of many hours.
Plug the cable of the chosen finish sensor into “Arrival“ on the front of the "MacFinish Interface Box", OR in the
finish connector of the 12-wire cabling system (cable-reel or Connection-box).
3.4.1 Photocells
Photocells are used to give an arrival signal to the MacFinish Interface Box, so that the recording of photo and time
could take place automatically. The photocells consist of an infrared light transmitter and receiver module, which
should be installed close to the finish line, on the left and right side of the track. Mount them at a suitable height
(between athlete chest and hip height), depending on the age of the athletes that you want to record. Make sure that
you do not mount them too high, as (small) athletes who do not interrupt the photocells will not be recorded
automatically. The schematic representation may give you an idea.
finish-line
photocells
height H
distance X
Try to position the photocells as close to the finish line as possible, but make sure that they do not obscure the view
of your camera!
- The photocell transmitter is simply connected to a battery pack (12Vdc), to receive power.
- The photocell receiver is connected to the MacFinish system (interface box or 12-wire cabling).
You can identify the transmitter and receiver by the following;
- On the photocell transmitter you see an arrow (-->) pointing AWAY from the photocell.
- On the photocell receiver you see an arrow (<--) pointing TO the photocell.
MacFinish II and III Ethernet - MacFinish 2D 200 and 300
TimeTronics Photo Finish Systems
MacFinish Users Manual
page 12
You can fix your photocells easily with Velcro strips on the L-shaped metal plate, which can be screwed on top of
the included tripods. Of course, they can also be fixed more permanently by means of the screws.
When the IR light beam is interrupted between the transmitter and receiver, a signal is sent to the MacFinish
Interface Box, indicating that a competitor is finishing, or just has finished.
You may wonder how images are correctly being recorded when the photocells are placed just behind the finish
line! Well, further in this manual (see Parameter Setup window), we will see how we can determine the amount of
photo, which is digitally recorded before and after the beam is interrupted.
Make sure that both photocell modules are correctly pointed towards each other, enabling the receiver to correctly
receive the infrared light from the transmitter. You can later verify this, when you have powered the MacFinish
system with a battery; the led on the arrival remote control box (see chapter 3.6) should be out.
Note: TimeTronics also offers their customers a DOUBLE CHANNEL photocell pole, which is completely
compatible with the (older) single channel (=standard) finish detector. This double channel version is a blue
lacquered aluminium bar with TWO build-in photocell beams, and an electronic circuit, to give the MacFinish an
arrival signal only when BOTH parallel beams are broken. The purpose of the two beams is that the scoreboard can
now be stopped (showing the UNOFFICIAL time of the first competitor) when the body or torso of an athlete is
passing the finish line, and not yet when a hand of a competitor is blocking a single infra-red beam ! The result is a
(statistically) more correct (unofficial) time on the scoreboard, and on television ! We can not GUARANTEE that it
will always be more correct, because it could still be possible that the hand of one athlete is blocking the upper
beam, and the hand of another athlete is blocking the lower beam...! But as said, statistically the scoreboard time
will be MUCH MORE CORRECT.
3.4.2 Manual Finish Push Button
MacFinish can also be used without the use of photocells. In that case, recording of a photo-finish picture will be
done manually by operating the 'Manual Arrival' Button:
3.5 ARRIVAL REMOTE CONTROL BOX
The use of any finish detector can be combined with an 'Arrival Remote Control box', equipped with an
'Off/Auto/Manual switch' plus a 'led' which indicates the status of the finish detector:
Connect the plug of the 'Arrival Remote Control box' to 'Arrival Remote Control' at the front panel of the
'MacFinish Interface Box'. The switch on the control box makes it possible for the operator to disable ('off' position)
or enable ('auto' position) the finish detector (photocells), for example if some athletes are passing the finish line, but
you do not want to take a picture, if they still have to run one or more laps. The third position of the remote control
switch (press completely down) is to manually generate an arrival signal if:
- No finish detector connected.
- No finish detector signal; for example; athlete diving under the photocell beam.
MACFINISH 2D 200: Why do I get a warning “Start detection is not connected”?
MacFinish2D 200 has two start signal inputs and the flag that indicates if a start detection is connected is only
sensing for a start detection on the 12 pole cable (back of the interface box). So you can connect a start detection to
the front of the interface box, but still get a warning that there is no start detection connected.
MacFinish II and III Ethernet - MacFinish 2D 200 and 300
TimeTronics Photo Finish Systems
MacFinish Users Manual
page 13
3.6 SERIAL PORT FOR SCOREBOARD (SB)
This connector should be connected by means of a TimeTronics serial cable with product number 'P244' to a RS232
serial port of your MacFinish computer, if you want to drive a timing scoreboard (of any brand of type). The
scoreboard(s) itself should be connected to a cable reel (mobile 12-wire cables) OR connection box (underground
12-wire cables), by means of the 12m cable (P229) that is supplied with the scoreboard, or any compatible 5-wire
extension cable P063 (=50m) or P064 (=100m).
3.7 SERIAL PORT FOR WINDSPEED (WS)
This connector should be connected by means of a TimeTronics serial cable with product number 'P244' to a RS232
serial port of your MacFinish computer, if you want to use an (optional) ultrasonic "WindSpeed" anemometer. The
WindSpeed itself should be connected by means of the ‘P532’ serial cable to a 12-wire cable reel, or a 12-wire
connection box on the track.
3.8 SERIAL PORT FOR FIELDTERMINAL (FT)
This connector should be connected by means of a TimeTronics serial cable with product number "P244" to a
RS232 serial port of your MeetManager computer, if you want to use one or more FieldTerminal(s). The
FieldTerminal (s) itself should be connected to a cable reel (mobile 12-wire cables) OR connection box
(underground 12-wire cables), by means of the 50m cable (P063) that is supplied with the FieldTerminal, or any
compatible 5-wire extension cable P229 (=12m) or P064 (=100m).
3.9 POWER = 12VDC BATTERY, WITH OPTIONAL BATTERY CHARGER
You can now power-up the MacFinish system, by connecting a fully charged 12Vdc battery pack (P041) to the
rightmost connector on the front of the MF Interface Box, marked with "12VDC Power supply". If you think that
you will need to use the MacFinish for several hours, you better immediately connect a battery charger to the battery
pack, so that the battery remains fully charged.
Warning : Be sure to protect the battery charger for rain or other water sources, as it has an open structure
and it is not protected against water! This could be dangerous!
Immediately when you have plugged in the battery, you will hear a beep. Wait for two seconds to give the
MacFinish time to start up. If photocells are being used, check whether the led on the arrival remote control box is
out.
Note: This is only the case if nobody stands between the detectors, if both detectors are correctly pointed
towards each other and if the photocell transmitter is powered with a battery!
NOTE: From a distance it is easier to verify the adjustment of the photocell transmitter and receiver than from a
short distance, in other words; stand a few meters behind and besides the photocells to check the direction of the
photocell transmitter and receiver modules.
You may now switch on your computer and your computer screen. We take it for granted that the computer system
software has already been installed. If not: please consult your computer manual! The hardware configuration has
now been installed; we will explain in the next chapter how you can install the (MacFinish) software.
MacFinish II and III Ethernet - MacFinish 2D 200 and 300
TimeTronics Photo Finish Systems
MacFinish Users Manual
page 14
4 SOFTWARE INSTALLATION
4.1 GENERAL
It will quickly become clear that operating a computer is quite simple and straightforward; once you are used to the
‘pull-down’ menus and handling of the mouse, most programs can be operated in the same way, including MF7.x.
A shortcut is also available for some MacFinish menu-functions by means of the "control" key + another key!
Consult your computer manual for more information on the basic computer operation (Microsoft windows).
4.2 INSTALLATION OF THE MACFINISH SOFTWARE.
The MacFinish software "MF7.x" is delivered on a CD.
Note:
It is strongly recommended to preserve the original CD as a backup. Before going to an event, we
would advise you to take a backup of the software and to take the registration key with you.
First of all, copy the complete CD contents onto your computer hard disk, to have a backup of the software.
When you double click the icon shown above, a screen appears, telling you more about the installation process:
Click ‘Next’. Now subsequent dialogue window appears. Select the folder on your hard disk where you want to
install the software. Click ‘Next’ , select which version (single and/or regatta) you would like to install, and click
‘Next’ again to start the installation process.
MacFinish II and III Ethernet - MacFinish 2D 200 and 300
TimeTronics Photo Finish Systems
MacFinish Users Manual
page 15
Installation will be completed as soon as the bar is completely filled:
After the installation process, you may get the following dialogue window:
The new MacFinish folder on your hard disk contains at least the following four items:
Starting the MacFinish 7.x photo-finish program is done by double clicking its icon (see above), or by means of the
Windows START menu.
A (similar) warning message could appear on your computer screen:
This message simply means that no user-authorization-key has been entered yet. Just click ‘OK’ to proceed now!
We will explain in chapter 4.4 how you can enter your key, to enable (the entitled) functions of the software.
MacFinish II and III Ethernet - MacFinish 2D 200 and 300
TimeTronics Photo Finish Systems
MacFinish Users Manual
page 16
4.3 GETTING FAMILIAR WITH THE MACFINISH WINDOWS
When you have started the MacFinish 7.x software, you can notice one or more of the following 6 MacFinish
windows;
1) General box window (window title is "Actions"); to control the race recording.
2) "Tools" window; to control the light intensity and contrast of every photo window (plus Preview window).
3) "Parameters" window; to control the MacFinish recording speed, and WindSpeed anemometer parameters.
4) "Preview" window; to verify the correct adjustment of the camera and lens settings.
5) "Image Eye" window; to zoom with a 3x higher resolution on a part of the photo finish picture (only
available for MacFinish II Ethernet, not for MacFinish III Ethernet).
6) "Camera" window; to digitally control the red+green+blue sensitivity and offset of the camera, the
motorized lens and the motorized camera head.
If you do not see the “Actions” window, try to (re-)connect the MacFinish system by the menu-selection
“Box/Connect box..”. You should then get the “Connect box” window, informing you about the “Box ID” (=serial
number of your camera(s)) that were found over the Ethernet connection. Select the camera of your choice, and
press the ‘Connect’ button.
If this does not work out, check the Ethernet connection again, and check that you have powered your MacFinish
interface box OR camera correctly, with a fully charged battery. Remember that you should hear one short beep,
followed by two short beeps from the MacFinish Ethernet camera when you plug in the battery.
You can check at any time, now and in the future, if your connection with the MacFinish box is working, and read
the identification of the MacFinish box, by using the menu-selection “Help/About MacFinish…”
MacFinish II and III Ethernet - MacFinish 2D 200 and 300
TimeTronics Photo Finish Systems
MacFinish Users Manual
page 17
You will then see the following window, with serial number, Calibration,.… of your MF-system.
If you continue to have problems with the connection of MacFinish to your pc, completely restart your
pc.
If your connection is ok, but you do not see the “Preview”, “Parameters”, “Tools”, or “Image Eye” window, you can
invoke these (if enabled) by the MacFinish menu-selection “Window/…”.
MacFinish II and III Ethernet - MacFinish 2D 200 and 300
TimeTronics Photo Finish Systems
MacFinish Users Manual
page 18
4.4 ENTERING YOUR REGISTRATION KEY
When starting up the program for the very first time, you should not forget to enter your registration key.
Your key (code) can be found on a simple .txt type of text file, which is delivered together with the MacFinish
system on a floppy disk or on a cd with the software. Please look at the example here below:
MacFinish Software version (key): SOFT 6.2
Your MacFinish Box number is: 1_3_83
Your Key registration number is: 1A38A461385C0DA717AAF7C384D01EF11346D67F
This Key is active from 16-12-2003 until 16-12-2015
Options are: MM /TIT /VM /REG /HD /DCAM /PRN /SAV /PRES /IE /PC /LINE 2000
Note: Do not forget that the MacFinish camera should be connected to your pc (by means of the ethernet cable)
and powered (by battery and optional battery charger) before you start your computer!!
For as long as no key has been entered, you can only record MacFinish images at 100 lines per second (=very
slow)!
To enter your key, select ‘Preferences’ under the ‘File’ menu, and the following window will appear:
If necessary, click the ‘Registration key’ tab and fill in the key (by typing or 'copy' from the .txt file + 'paste'). Press
'Apply' to check the status. If you entered the right key, you will get something like (please notice the green light);
Click ‘Ok to leave ‘Preferences’ and to return to the main screen.
You may also encounter one of these messages after having entered (a wrong) key:
MacFinish II and III Ethernet - MacFinish 2D 200 and 300
TimeTronics Photo Finish Systems
MacFinish Users Manual
page 19
Or “Your key will expire in x days”. In this case, we recommend you to first check that you have typed the correct
key, and if it still does not work then contact your dealer, distributor, or TimeTronics directly.
Remember that;
-
a key is made specifically for a certain serial number of MacFinish box (in the example above
"1/3/83"; check your box number and the number in your key code file !)
-
the character "0" in a key code is always the number 0 and not the character O (for example from the
name "Oscar").
If one or more features shows the status "Disabled", then that means that you are not authorized to use that
(optional) function. For example, if the feature 'Image Eye' is 'Disabled', then the menu selection 'Window/Image
Eye' will be shown in grey color, and disabled. You can order a new key, which can be send to you by fax, mail,
email, sms, or even by telephone.
When you stop the MacFinish software in a normal way ('File' menu, 'Quit' selection, or 'Ctrl+Q' on the keyboard),
then the software will save most settings, including the MacFinish key code, so that you can immediately start the
next time with the real work; recording photo finish during the races.
MacFinish II and III Ethernet - MacFinish 2D 200 and 300
TimeTronics Photo Finish Systems
MacFinish Users Manual
page 20
5 ALIGNING THE CAMERA AND ADJUSTING THE LENS
If you have read trough chapters 1...4 and completely installed the hardware and software (including the user-key),
you already have familiarized yourself with the different MacFinish windows (chapter 4.3). In this chapter (5) we
will explain how we will use the 'Preview' window to adjust the lens and to align the camera exactly on the finish
line.
5.1 USING THE PREVIEW WINDOW
'Scroller'
button
'Photo'
button
'Race
type'
Lane
markers
Vertical
elevator
'Zoom'
selector
'X/Y
scale'
The Preview-window is a window that is used for:
1) 'Scrolling mode'; Display of the live image (=recorded lines registered by the camera)
2) 'Photo mode'; Display of the latest photo and time that was recorded and still in memory.
- The 'photo' mode will be explained later, after we have recorded a race, or a race simulation.
- In 'scrolling mode' the live recorded lines will be moving over your screen from left to right (or from right to left,
depending on the camera direction in your ‘Preferences’ settings). In other words, if we turn the camera or change
the lens settings, we can verify the result on the computer screen! Its like looking trough the lens, but not with an
internal prism system (old fashion photo camera), but by means of the digital recording of MacFinish and a display
on your computer screen.
IMPORTANT: To use the 'scrolling mode' the camera has to be 'active', this means that the 'Actions' window has to
show a 'Ready' status (=before the race), or a 'Running' status (=during the race).
WARNING: The scrolling does NOT work if the ‘Stop’ button is highlighted:
MacFinish II and III Ethernet - MacFinish 2D 200 and 300
TimeTronics Photo Finish Systems
MacFinish Users Manual
page 21
To be sure that we will later record a "normal" image (not too dark or too light), we will first give the MacFinish a
"reasonable" recording speed, for example 400 lines/second. If a lot of light; use more, if very dark; use less.
1) Press the stop button; if not stopped, you can NOT change the recording speed!
2) Select the parameters window and select a recording speed of 400 l/s.
Now you can go to 'Ready' status, by clicking the lamp icon (leftmost button) in your 'Actions' window:
Go from 'Ready' status to 'Running' status by clicking the 'start pistol' icon, or give an external start signal:
Now click the 'scrolling' button (=double arrow) in your Preview window to start scrolling, and use the controls in
the ‘Camera’ window to further adjust the system.
NOTE: As already said before, the 'scrolling mode' works before the race, but also after the starting shot has been
given, which means that you can verify the camera signals during a race to check whether for example the light
conditions have not changed too much, or to verify that the camera is still aligned correctly on the finish line!
NOTE, if a MacFinish II or III is used with a manual lens : Of course, if during the race, or during your camera
and lens adjustment, the picture in the 'Preview' window is too dark, open the lens iris (= smaller F-stop number), or
lower the MacFinish recording speed in the 'Parameters' window. If the picture is too light, close the lens iris (=
larger F-stop number), or increase the recording speed in the 'Parameters' window. Of course, changing the
recording speed is only possible for the NEXT race! Do NOT press the 'stop' button during a race, as you would
loose a correct time recording for that race!
NOTE, if a MacFinish III is used with a motorised lens : If during the race, or during your camera and lens
adjustment, the picture in the 'Preview' window is too dark, open the lens iris (= smaller F-stop number), by means
of the ‘Top-left’ button in the ‘Lens’ group of the ‘Camera’ control window. The longer you press the button with
the mouse, the more the iris of the motorised lens will open ! The bottom-left button is to close the lens, the two
buttons in the middle is to zoom in and out, and the two buttons on the right is to focus at a large and short distance.
MacFinish II and III Ethernet - MacFinish 2D 200 and 300
TimeTronics Photo Finish Systems
MacFinish Users Manual
page 22
IMPORTANT NOTICE: If during a future race, or now during your camera and lens adjustment, the picture in
the 'Preview' window is too dark or too light, you can and should also control the digitally programmable camera
gain by means of the ‘Gain’ slider(s). We advise to enable the ‘Linked’ function (see picture below) so that the
‘Gain’ settings of all 3 colors will move TOGETHER. Try it out for yourself ! In the example below the gain is set
for 49, the gain range is from 1 (minimum) to 64 (maximum). The offset should be a number very close to 0, to
make all black object look really black on the ‘Preview’ window, and not dark grey or light grey or white.
Now check the live camera data in the ‘Preview’ window, when you turn your camera over the finish line. If your
recording speed, lens settings AND digitally programmable camera gain is set correctly, you could see
something like the picture below. The white part, with the black horizontal lines IS THE FINISH LINE in athletics
T&F. To the left of that you see the white lane numbers, painted on the red track. The distortion on the numbers
comes from the fact that the camera is manually moved, and the speed is therefore not constant !
To stop the 'scrolling' mode, simply click again on the 'scrolling' button (=double arrow). The 'scrolling' will also
stop whenever a start signal is given or an arrival is detected.
5.2 MOUNTING THE CAMERA
There are different types of camera heads, and depending on the distance from the camera to the widest edge of the
finish line, you can work with a simple camera head like on the left photo (small distance; 5...25m) or you will need
a professional camera head like on the right photo (long distance; 30...100m).
MacFinish II and III Ethernet - MacFinish 2D 200 and 300
TimeTronics Photo Finish Systems
MacFinish Users Manual
page 23
m ou n tin g of ca mer a
lever t o a dju st th e
ca mer a ’s in clin a t ion
a n gle
lever t o a dju st th e
ca mer a ’s spir it level
lever t o tu r n t h e ca mer a
h or izon ta lly (left - r igh t)
m ou n tin g of gea r ed
h ea d on tr ipod or
pole
This camera head can be mounted on:
- a tripod ; most common used, for any sport, very flexible and practical for mobile use.
- a construction that is fixed on the floor, wall or ceiling (see 2 middle photos); most practical for fixed installation.
- a camera pole (three pieces; mobile or fixed) ; used on inside of track, for athletics or sometimes for horse races.
5.3 CHECKING THE SPIRIT LEVEL ON THE CAMERA
Use the spirit level mounted underneath the camera to position the camera PERFECTLY horizontally. If the
camera is tilted to the left or right, you will have a lot of problems in the next chapters to record the FULL finish
line, in other words, the line that you will record will cross the finish line, and not overlap it.
IMPORTANT; If you later move the camera to the left or right (finding the extension of the finish line), or up and
down (tilt adjustment), then first check again that the camera is still perfectly horizontal (check spirit level). If not,
re-adjust it before continuing.
5.4 IN EXTENSION OF THE FINISH LINE
For every sport, it is very important that the camera is set up exactly in the extension of the finish line and that the
camera’s range of vision covers the entire finish line (all lanes).
camera
BAD
8 7 6
5
4 3 2 1
OK
BAD
NOTE: For athletics T&F, the exact finish position is the FRONT of the finish line ( line is 5 cm wide) !
TIP : Should your camera be mounted on a pole, here’s a trick to exactly position the camera in the extension of the
finish line: Extend the finish line, for example with a rope, by holding one end of the rope stable at the front of the
MacFinish II and III Ethernet - MacFinish 2D 200 and 300
TimeTronics Photo Finish Systems
MacFinish Users Manual
page 24
finish line, then pulling the rope and moving until the (strait) rope is hanging exactly above the front of the finish
line. Now hang a plumb line from the centre of the camera and smoothly move the pole with the camera until the
plumb line is hanging exactly above the rope (=extension of finish line). Continuously check that the pole is
perfectly vertical (=camera horizontal; look at spirit level).
Camera with
plumb line
4
3
2
1
Plumb line
string
finish-line
TIP: If it is difficult to find the extension of the line, for example if the camera is mounted high above in a photo
finish room here is another tip. After you have checked that the camera is positioned at spirit level, the two
following examples will immediately show you whether the camera is positioned 'before' or 'behind' the finish line.
Note: the camera must turn in the direction of the arrow, otherwise the reverse applies.
a) If your camera is positioned 'before' the finish line, the white color of the finish line will first appear on
top of your Preview window (in scrolling mode, and scrolling from left to the right!):
b) If your camera is positioned 'behind' the finish line, the white color of the finish line will first appear on
the bottom of your Preview window (in scrolling mode, and scrolling from left to the right!) :
c) If your camera is positioned in the extension of the finish line, the white color of the finish line will
appear simultaneously on top and bottom of your Preview window (in scrolling mode, and scrolling to the right!):
MacFinish II and III Ethernet - MacFinish 2D 200 and 300
TimeTronics Photo Finish Systems
MacFinish Users Manual
page 25
5.5 CAMERA’S VERTICAL DIRECTION (TILT), AND LENS ZOOM
You will have to adjust the camera so that all athletes (in any lane 1...8) or horses or bicycles, or ... are completely
visible, from top to bottom. You can do this by starting the 'scrolling' mode and having two athletes cross the finish
line. One should WALK (=slow) in the first lane and the other in the last lane; both athletes must come into the
camera’s range of vision so that afterwards times can be read off properly. This means that you will now have to
adjust the vertical direction of the camera (='tilt') AND the zoom of the lens (of course, if your lens has a zoom
function).
camera
camera
camera
Bad
OK
Bad
NOTE: For long-distance races in Track & Field, you can 'zoom in' on lane 1 and 2, to have a more detailed picture
of these races, but this will give you more work, and always a risk of problems if an athlete would finish in lane 5 or
6... Be careful with this, we do not advise you to do this if you are not yet very experienced with photo finish.
TIP : If you do not have any volunteers to walk over the finish line, you slowly turn the camera to the left and right ,
over the finish line, and verify the actual vertical viewing angle in the 'Preview' window.
5.6 CAMERA’S HORIZONTAL DIRECTION
The last control is to direct the camera horizontally on the finish line.
camera
Bad
OK
Bad
The camera is positioned correctly (for athletics T&F) when the image on the 'Preview' window is white with black
horizontal lines.
MacFinish II and III Ethernet - MacFinish 2D 200 and 300
TimeTronics Photo Finish Systems
MacFinish Users Manual
GOOD
page 26
BAD
TIP: A smooth and accurate horizontal adjustment of the camera can be done by a small movement (a few mm) of
one leg of the camera tripod, in a direction so that the tripod and camera 'turns' a little bit. This is sometimes
much easier than turning the camera head to the perfect direction, and then loosing that direction if you turn
the screws of the head to lock it.
finish-line
start-line
100 m
camera
tripod
For the optimal direction, in the interest of the athletes, move one tripod leg until you see the red/orange color of the
track before the finish, and slightly turn right until the white finish line becomes again visible in your scrolling
window from top to bottom. Now you are aligned with the front edge of the finish line = finish point.
5.7 ADJUSTING THE LENS IRIS.
Of course, the further adjustment of the lens can only be done while you are still using the 'scroller' mode, in
other words, while you can verify in the 'Preview' window what the live result is of a lens adjustment.
MacFinish II and III Ethernet - MacFinish 2D 200 and 300
TimeTronics Photo Finish Systems
MacFinish Users Manual
page 27
By means of the iris on the lens, you can determine the amount of light entering the CCD chip (the light sensor of
the camera). The (F-stop) numbers on the iris of the lens may vary from for example 2.8 to 22.
Small numbers = iris open (a lot of light entering the CCD), for example F2.8
Large numbers = iris closed (limited light entering the CCD), for example F22
Reduce or increase the aperture of the lens depending on the amount of light that is available.
NOTE, if a MacFinish III is used with a motorised lens : If during a future race, or during your camera and lens
adjustment, the picture in the 'Preview' window is too dark, open the lens iris (= smaller F-stop number), by means
of the ‘Top-left’ button in the ‘Lens’ group of the ‘Camera’ control window. The longer you press the button with
the mouse, the more the iris of the motorised lens will open ! The bottom-left button is to close the lens, the two
buttons in the middle is to zoom in and out, and the two buttons on the right is to focus at a large and short distance.
NOTE on the use of the infrared filter on the lens : An infrared filter (also called 'Hot Mirror', looks like a
transparent glass, mounted in a metal ring with screw thread), is delivered with your MacFinish configuration, and it
has to be attached in front of the lens of your color camera. The recorded images can only have the optimal colors
when using this infrared filter. Of course we will also have to calibrate these colors with our MacFinish software;
this is explained later. An other advantage of using the infrared filter is that you will record sharper pictures, by
reducing the spectral range of the light that enters the lens.
Because the filter slightly reduces the camera’s sensitivity, you can take it off when recording images in the evening
or at night, if there is insufficient light to record a quality picture.
5.8 ADJUSTING THE LENS FOCUS.
Focus on the appropriate distance (camera <-> track). Adjust the focus of the lens (0.1m .... infinite) so that the
image on your screen is as sharp as possible. For this, we recommend you to (even temporarily) zoom in the scrollwindow.
We also recommend to focus on a distance of 1/3 of the finish line:
MacFinish II and III Ethernet - MacFinish 2D 200 and 300
TimeTronics Photo Finish Systems
MacFinish Users Manual
page 28
finishline
track
focus
on this
point
camera
5.9 STEAMY LENSES.
You could sometimes struggle with a steamy lens in hot and moist countries. When having stored the equipment in a
cool or air-conditioned room, the wet air may start condensing on the cold lens glass during the first quarter of an
hour when exposed to this ‘tropical’ weather. Water may start dropping from the lens. In this case, we recommend
you to just wait for a quarter of an hour to have the equipment adapted to this new temperature. Subsequently, you
should dry both the lens glass and the CCD-sensor with a dry and clean cloth.
5.10 BLACK BLOCKS ON THE FINISH LINE (ONLY ATHLETICS T&F)
In this manual, we have already repeatedly given instructions on how to correctly direct the camera on the finish
line. Well, here’s a new tip, which will prevent the athletes from running one centimetre too much! For that, the
camera should be aimed at the very front side of the finish line. To have this accomplished in the easiest way, the
intersection of the white finish line and the white lane marker should NOT be painted completely black, but only
half or even smaller. We will only paint the front side (for example 2cm) of the finish line with black and the rear
will remain white. This way we can easily identify on our computer screen if the camera is directed to the front of
the finish line (white background with black horizontal lines) or the rear of the finish line (completely white). The
schematic drawing will clarify what we mean:
MacFinish II and III Ethernet - MacFinish 2D 200 and 300
TimeTronics Photo Finish Systems
MacFinish Users Manual
page 29
finish-line
BC
starting
line
1
Preview Scrolling
D
A
10-25 mm
2
A
3
B
C
D
bad
bad
perfect
100.00 m
Starting point
still
homologated
5 0 mm
arrival point
Now aim the camera at position B to get the best camera position! Use the 'Scrolling' mode and look in the 'Preview'
window for the correct result. A completely white background on a photo finish picture is also officially approved
(for example for World Record) as the athlete then has run a few cm too much, but it is far less recommended in the
interest of the athlete!
NOTE: The material used to color the black dots is mat black paint. Never use tape or reflective paint!! Why?
When there is a lot of backlight from the sun, reflective black paint will turn grey or even white on your screen.
TIP: When scrolling, it is sometimes hard to find out at first sight on which lanes you are actually scrolling. To help
you with this struggle, it is wise to affix two black blocks on the middle lane borders (= between lane 4 & 5 for an 8
lanes track and between lane 3 & 4 for an 6 lanes track):
finish-line
1
2
3
4
5
6
7
8
finish-line
1
2
3
4
5
6
8 lanes
6 lanes
When scrolling, it will become absolutely and immediately clear where the camera is pointing to.
MacFinish II and III Ethernet - MacFinish 2D 200 and 300
TimeTronics Photo Finish Systems
MacFinish Users Manual
page 30
5.11 CHECKLIST TO ALIGN THE CAMERA AND ADJUST THE LENS
Please remember that the order in which you try to adjust the camera and lens is important.
Although you cannot verify the camera direction if the iris of the lens is completely closed (= you have to start with
reasonable settings) you should not adjust the vert.+ hor. direction of the camera first and later adjust the spirit level
because you will then have to start all over again from the beginning!
Camera Control
1. Adjust the spirit level of the camera (CONTINOUSLY!).
2. Position the camera in the extension of the finish line.
camera
BAD
8 7 6
5
4 3 2 1
OK
BAD
3. Adjust vertical angle of the camera + zoom of the lens.
camera
camera
camera
Bad
OK
Bad
4. Adjust horizontal direction of the camera.
camera
Bad
OK
Bad
Lens Control
1. Adjust iris for optimal light setting; possibly adjust digital camera ‘gain' control in the ‘Camera’
window.
2. Adjust focus for sharpest image possible.
MacFinish II and III Ethernet - MacFinish 2D 200 and 300
TimeTronics Photo Finish Systems
MacFinish Users Manual
5.12 MACFINISH 2D 200 AND MACFINISH 2D 300
Aligning the camera
In the camera control window, there is an extra button to open a 2
dimensional view (live video).
This 2D view can only be opened when the camera is in idle-mode
(the light on the left of the actions window is off). Be sure to always
close the 2D view before recording a race, are closing the
software, otherwise the camera can still be in 2D mode when you
restart the software. Also, do not change the linerate (lines per
second) while the 2D view is open (only for MF 2D 200).
Zooming
With the “+”- and the “-”-button, you can zoom the total view from
50% up to 200%.
Auto white balance
With the “AWB”-button, you can automatically adjust the color
balance of the camera. Note that the values for the color-gains in the
camera control will change.
Total view
On the left side you get a total view. The red line is the line that will
be recorded, when in photofinish mode (after closing this 2D view).
Detailed view
On the top-right side, there is a detailed view. This view is always
100%, or the actual size of the image. You can select a different part
of the total image, simply by clicking on the total image.
Focus assistants
There are two focus assistants, the upper one is calculated on the
detailed image, the lower one on the total image. When you move the
focus of the lens slowly from far to near, you will notice that there is
always a top in
the focus assistants. For the best focus, you have to adjust the lens, so
the focus assistant stays on this top (especially for the detailed view,
that can be placed around lane 3).
MacFinish II and III Ethernet - MacFinish 2D 200 and 300
page 31
TimeTronics Photo Finish Systems
MacFinish Users Manual
page 32
Motorized lens
To let the lens adjust in small steps, use right mouse click on the lens control buttons. For bigger steps, use the left
mouse button, the lens will stop when you release the left mouse button.
MacFinish II and III Ethernet - MacFinish 2D 200 and 300
TimeTronics Photo Finish Systems
MacFinish Users Manual
page 33
6 MACFINISH PREFERENCES
The 'preference settings' of the MacFinish program define the preferential way how YOU would like the
program to behave, during the hundreds of races that you will record. This contains the way how the program
will automatically display the photo, show the time results, adjust the colors etc.etc. This does NOT mean that
you cannot change a setting any more after the race, but if you would have to do the same manipulation on
dozens or hundreds of photos pro day, you would preferred to have it correct from the first time. That's why we
developed the "Program Preferences". So before recording real races with any version of MacFinish system, it is
wise to first determine your program preferences, to gain a lot of time later on, and they will be automatically
saved when you close the ‘Preferences’ window. To change or verify the 'Preferences setting', select
‘Preferences’ under the File menu:
6.1 DOCUMENT PREFERENCES
Document preferences are the settings given to a new document when an image is read from the MacFinish-box. If
not yet selected, click on the document tab (= the label on top of the window, with the name 'Document').
Let’s have a look at the various items listed in this window:
6.1.1 Photo Direction
MacFinish II and III Ethernet - MacFinish 2D 200 and 300
TimeTronics Photo Finish Systems
MacFinish Users Manual
page 34
Select the desired photo direction by clicking the corresponding radio button once.
6.1.2 Display Resolution
Choose between a display resolution of 1/10, 1/100 or 1/1000 (of a second). This simply means that the times
underneath your photo-finish photo will automatically be displayed as such (see later). The accuracy of timing will
NEVER change, you will always record pictures with the maximum timing resolution.
6.1.3 Lane order
Here you can define the number of lanes on the track and the order (up or down). To increase the number of lanes,
click the upper small arrow. Select the lane order (counting downwards or upwards) by clicking the bigger arrows.
These selections will determine the lane fields in your Preview window, which are used for all later recorded photofinish pictures. Further up in this manual we will see how to align these fields with the track lanes as visible on your
photo.
6.1.4 Miscellaneous
If you enable the checkbox 'Export results to file' the MacFinish software will automatically create a .TXT text file
with the "Place+ID+Time" results from the result table, at the moment that you save the photo finish picture. The
name of the .TXT file will be the same as your photo finish filename.
MacFinish II and III Ethernet - MacFinish 2D 200 and 300
TimeTronics Photo Finish Systems
MacFinish Users Manual
page 35
6.1.5 Time Lines
With the "Screen" checkbox you can determine whether or not vertical time lines should be shown on the photofinish picture whenever times are read in the result table (see example above). If you would also select the ‘Printer’
checkbox, these vertical time lines will also be printed on paper. By clicking on the little arrow (to the right side of
the red colored rectangle), the 'color selection' window will appear in which you can determine the color of the time
lines.
By clicking on 'Other', you have the choice between any possible color that you select or choose by RGB values.
You can also change the thickness of these lines by modifying ‘1’ to ‘2’ or ‘3’....;
Note; A thickness larger than '1' will only be visible in the ‘Presentation mode’, see later.
‘Apply’ makes changes active while the ‘Preferences’ window stays open.
‘OK’ = Apply + ‘Preferences’ window will be closed.
6.2 SCOREBOARDS PREFERENCES
This window can be used to change the settings for a timing scoreboard that is connected to one of the (RS232 or
RS422) serial ports of your computer. This can be a TimeTronics scoreboard, or a board from another manufacturer.
MacFinish II and III Ethernet - MacFinish 2D 200 and 300
TimeTronics Photo Finish Systems
MacFinish Users Manual
page 36
Select the type of scoreboard driver that corresponds to the scoreboard that you are using, by clicking on the little
arrow under 'select scoreboard', for example ;
•
•
Select "Scoreboard IE 101" if you use a TimeTronics timing scoreboard.
Select "Scoreboard IE Extended" for sending a ‘running time’ to television.
Which scoreboard drivers you can select from the pop-up list depends on the contents of the "Plug-Ins" folder. This
folder should be present in the folder of your MacFinish program.
Do NOT forget to select the “Running Time“ check box, to display the running time (during the race) on your board
! When the ‘Result table’ checkbox is marked (currently always), then the software supports the ‘send result’
command (see later), to send the "Place+ID+Time" results on the stadium scoreboard, over the same serial port!
Baud rate, databits, parity and stop bits shouldn’t normally be touched, as they are normally correct by default. Next
to ‘Lap Display Time’, you can select the amount of seconds during which the display of split times will be shown
(frozen) on the scoreboard. Next to ‘Running Time', you determine how many times pro second the scoreboard
should be updated; for TimeTronics (electromagnetic type of) scoreboards 1 tps, for running time on television 10
tps.....
MacFinish II and III Ethernet - MacFinish 2D 200 and 300
TimeTronics Photo Finish Systems
MacFinish Users Manual
page 37
6.3 GENERAL PREFERENCES
In this window you can find, as the names implies, a number of general settings.
6.3.1 Number
You can select the parameters for rounding of manual and automatic times in the 'Result table'. Just click in the pop
up field and select the required item. For example; round up, round down or round. Precision of 1/10, 1/100 or
1/1000 of a second:
Round up:
Round down:
Round:
.350 -> .35
.350 -> .350
.350 -> .35
.351 -> .36
.351 -> .350
.351 -> .35
.352 -> .36
.352 -> .350
.352 -> .35
.353 -> .36
.353 -> .350
.353 -> .35
.354 -> .36
.354 -> .350
.354 -> .35
.355 -> .36
.355 -> .350
.355 -> .36
.356 -> .36
.356 -> .350
.356 -> .36
.357 -> .36
.357 -> .350
.357 -> .36
.358 -> .36
.358 -> .350
.358 -> .36
.359 -> .36
.359 -> .350
.359 -> .36
You could also select a predefined standard rounding. For example: none, athletics, regatta,...
For athletic events under IAAF rules, select ‘athletics’:
When selecting ‘Athletics’ or ‘Regatta’, the manual and automatic parameter rounding are disabled (= grey). Yet
they show the standard parameter settings for either Athletics or Regatta. When printing the result table, these
rounding parameters will be printed on the right bottom of the paper.
MacFinish II and III Ethernet - MacFinish 2D 200 and 300
TimeTronics Photo Finish Systems
MacFinish Users Manual
page 38
When selecting 'Precision Linked' (marked with 'v'), the times in the 'Result Table' will NOT be rounded, but will be
shown with a resolution identically to the time resolution underneath the photo-finish photo: for example; 1/10 sec
on photo -> 1/10 sec in result table. For athletics we advise to disable the 'Precision Linked' feature, and to display
+ print an (IAAF) rounded time result.
6.3.2 Maximize when zoom
If you select 'Maximize when zoom', your photos will be extended over your entire screen when zooming in.
6.3.3 Pixelshiftcalculation
Select this function for an automatic pixelshiftcalculation (ONLY MacFinish III ethernet) !!! See also chapter
11.6.1.
6.3.4 Slow computer
Select this function to have a better performance if you have a ‘slow’ pc (less than 1 Ghz)
6.3.5 Enable Function Keys
Select this function if you would like to use function keys ‘F5...F8’ to control the ‘Actions’ window, for respectively
‘Ready’, ‘Start’, ‘Finish’, and ‘Stop’ function.
6.4 MACFINISH PREFERENCES
In the MacFinish Preferences window, you can make a list for every kind of race with the corresponding recording
settings. You can give each element from this list an appropriate name, for example "Sprint" , "Long Distance" or
MacFinish II and III Ethernet - MacFinish 2D 200 and 300
TimeTronics Photo Finish Systems
MacFinish Users Manual
page 39
"1500m"..... By now defining for each element (race type) the desired recording speed, lines before +lines after, and
'WindSpeed' measurement, you can later gain a lot of time, and avoid errors, during the races, when everything has
to go very quickly. The list already contains the first item; "Default", and these settings will be used 'by default'
whenever the MacFinish operator starts up the system, and not yet selected a specific other recording setting.
You can add an element to the list, by clicking on the
button. Now the word ‘empty’ will appear.
Point with the mouse and click ‘empty’ twice and type a new name, for example "Sprint". If you click the
button again, you can type the next item, for example "Hurdle races". Continue like this for all required race
types.
To delete an item from the list, just click it once (highlighted) and press the
button.
button in case you want a dotted line between two items in the list.
Click on the
Now you can start to specify the required settings for each item from the list, first for "Default", then for
"Sprint"... Please click on each item in the list, and control all its settings !
1)
The recording speed is expressed in "Lines Per Sec", which means that the camera will
record so many times the second the photographic image of the finish line, and of course
also registers the corresponding time for each line.
Remember:
- The faster the race, the more lines pro sec you will need to show a good
picture.
- The more light there is available, the more lines you can record pro second.
Guidelines for min & max recording speed, depending on age category:
Athletics T&F ->
->
->
Horse races
->
Greyhound races
Cycling
->
Canoe & Kayak ->
800-1200 l/s (Sprint races)
600-1000 l/s (400-1500m)
400-800 l/s (Long distance)
800-1200 l/s
->
1000-1400 l/s
1400-2000 l/s
200-500 l/s
MacFinish II and III Ethernet - MacFinish 2D 200 and 300
TimeTronics Photo Finish Systems
MacFinish Users Manual
page 40
2)
To change the ‘Lines Before’ and ‘Lines After’, (= the amount of lines recorded before and after
interruption of the photocells) drag over the number and enter the new amount. By typing here
the desired numbers (1...100) YOU can define how wide the photo is recorded around each
athlete, to be sure that not only the body of the athlete is visible on the photo, but also the arms
and legs.
3)
To select the mode of WindSpeed recording, click ‘None’ and select the required WSmeasurement:
Used as :
5s
10s
10/10s
13s
Manual
User Mode
->
->
->
->
->
->
60m race (national rule for Germany and ...)
100m race
200m race (automatic WS start 10 sec after race start)
110 meters hurdles race
200m race WindSpeed measurement started by dedicated operator
200m race WindSpeed measurement started by MF operator (see later)
4)
Single/Dual camera; Only one (1) camera can be connected to the MFIIethernet version.
5)
Hard disk; Feature NOT available for the MacFinishIIethernet version.
Click the ‘OK’ button to save the modified parameters:
You can later use this list of recording settings for the recording of real races, by selection in the 'Parameters'
window OR in the 'Preview' window.
6.5 MEETMANAGER PREFERENCES
MacFinish is able to communicate with a MeetManager database system, and it does the communication via a serial
RS232 (or optionally a RS422) connection.
The intention is that the MacFinish (MF) requests the MeetManager (MM) database for the complete list of races,
and after the MF operator has selected the race, the MF will request the MM for the names, team, lane # etc of all
the participants of that race.
After the race the MF will send (on command of the MF-operator) the result data (Place+ID+Time) over the same
MacFinish II and III Ethernet - MacFinish 2D 200 and 300
TimeTronics Photo Finish Systems
MacFinish Users Manual
page 41
serial cable to the MM database, which can print it out, send it to the stadium scoreboard, send the results to
television, etc.
If you want to use the MeetManager communication (and enabled by your ‘user-key’) please select “Hytek
compatible” by means of the list under ‘Select MeetManager’.
Next to ‘Precision’, you can select to which time resolution you would like to send the results to the MeetManager
computer, the choices are; ‘General Prefs’, or rounding to one tenth, one hundredth or one thousandth of a second.
The ‘Mode’ radio button defines how the ‘Read Image’ command will work. With the "Mode" set to "Automatic",
the MeetManager list of races will automatically be shown to the user when the photo is transferred from the
MacFinish box to the computer, by the ‘Read Image’ command (see chapter 7.2).
If not automatic, the (later) import of MeetManager data can be executed manually (under the ‘Document’ menu). A
possible reason for not selecting ‘automatic’ may be that the MeetManager is temporarily not available. The
operator can then manually import the MM-data later on (for example after the races).
6.6 SERIAL ‘PORT’ MANAGER
MacFinish II and III Ethernet - MacFinish 2D 200 and 300
TimeTronics Photo Finish Systems
MacFinish Users Manual
page 42
Here, both the Scoreboard serial port number (Com 'x') , the MeetManager serial port, and the WindSpeed serial port
number should be chosen. Do bear in mind that all ports should be different, and available (=not yet used by another
program !) on your computer ! If you do not need or want to use a serially driven timing scoreboard, or the
MeetManager connection, or the WindSpeed, select ‘none’ for that feature.
6.7 KEY REGISTRATION PREFERENCES
See ‘Entering your Registration Key’, in chapter 4.4
6.8 MACFINISH PHOTO ‘WINDOW’ PREFERENCES
The settings in this window make it possible to choose;
- If and where (top/bottom/left/right) you would like to show the ‘ResultTable’.
- If and where (top/bottom) you would like to show the ‘Overview’.
- Also the size (in pixels on screen) of these windows can be adjusted.
The schematic representation below the settings gives you a live idea how the MacFinish window, with
its different parts, will be visible later.
6.9 RESULT-‘TABLE’ PREFERENCES
The settings in this window make it possible to choose;
- If and how large you would like to show the ‘Competitors Table’.
- Which column you want to work with to identify the participants.
- How large each of the columns preferable should be.
MacFinish II and III Ethernet - MacFinish 2D 200 and 300
TimeTronics Photo Finish Systems
MacFinish Users Manual
page 43
6.10 CLOSING THE PREFERENCES WINDOW
Close the Preferences window by clicking the ‘OK‘ button. The (modified) parameters are automatically saved
when quitting the program or closing the Preferences window.
MacFinish II and III Ethernet - MacFinish 2D 200 and 300
TimeTronics Photo Finish Systems
MacFinish Users Manual
page 44
7 RECORDING A RACE
In the previous chapters we have familiarized ourselves with the different MacFinish windows (chapter 4.3), the
adjustment of the camera and lens (chapter 5), and the preferential settings of serial ports, recording speed,.. etc
(chapter 6). This means that we now can start with the real thing: recording a race !
For most sports (except regatta = canoe / kayak / rowing) there will only be one race at a time. This means that we
put the MF-system ready to detect the start, have a race, record the finish, transfer the data to the PC, put the MFsystem ready for the next race, and while we are waiting for the next start, we can read the results of the previous
race.
At regatta events it is common to have multiple races at the same time, to prevent too much delays and time loss.
Therefore a start is given for example every five minutes, but the races itself take 6 to 8 minutes, so there can be 2 or
3 races going on simultaneously.
Therefore we have developed two versions of the MacFinish software: a 'standard' version and a 'regatta' version.
The first one has a simple 'Action' window, which controls 1 timer and the image memory for the 'Single' races.
The second has an extended 'Action' window, which controls the 4 timers and the image memory for the 'Multiple'
races. This software has a suffix '-r' in its name (for example MF6.2.7r) and can only be used if the registration key
is made for this kind of regatta races ; see 'Multi-race' in chapter 4.4.
7.1 SELECTING THE RECORDING SPEED
If you know which is the next race to run, you can choose the desired recording speed, number of lines before &
after, and the required type of WindSpeed measurement in the 'Parameters' window. But if you have predefined all
the recording settings for all types of races in the 'Preferences' window (See chapter 6.4), you can now simply
choose from the list of race types! Select it in the 'Parameters' window or in the 'Preview' window. This is much
easier and faster!
MacFinish II and III Ethernet - MacFinish 2D 200 and 300
TimeTronics Photo Finish Systems
MacFinish Users Manual
page 45
7.2 SINGLE RACE RECORDING (ONE RACE AT A TIME)
If you know which is the next race to run, you can choose the desired recording speed in the camera window,
and the number of lines before & after and the required type of WindSpeed measurement in the 'Parameters'
window. But if you have predefined all the recording settings for all types of races in the 'Preferences' window
(See chapter 6.4), you can now simply choose from the list of race types! Select it in the 'Parameters' window
or in the 'Scrolling camera view' window. This is much easier and faster!
Action Window
The 'Action' window as shown below will always be visible on your computer screen for as long as the program
is activated and the MacFinish 2D-100 camera is connected. It is used to control the race recording, and
displays the timer.
•
•
•
Top row, from L to R : Start list / Split timing / Time display / Continue time on SB
Buttons on middle, from L to R : Ready / Start / Finish / Stop / Save / Empty trash
Arrow button on bottom right: Further open actions window.
Before the start of a race, the operator presses the lamp-icon to put the MacFinish in 'ready' mode.
It is also possible to switch to 'Ready mode' by the 'F5' key of the keyboard, if 'functions keys' are enabled in
the preferences.
Automatically, the lamp-icon will turn 'yellow', meaning that the system is ready to register the start of the
race.
If you use a start detector on a start pistol, the red led on the start detector will be on now !
At the same time the 'hand' icon (Stop button) has turned grey! As soon as the starting shot is fired or the start
push button is pressed, the timer starts running, the light on the start detector goes out, the pistol-icon rotates
to a horizontal position, its red 'dot' turns green and a starting shot is heard through the computer speaker(s).
The operator himself can also manually give a start by clicking the pistol-icon, for example if the automatic
start detector did not function. He will always hear a superficial starting shot from the computer speakers. In
that case all timing results for that race will indicate a prefix ‘M’, indicating that the start was given manually.
This new version of MacFinish also has the capability to record ALL start signals, not just the first start after the
'ready' position. It is also possible to give a manual start signal by the 'F6' key of the keyboard, if 'functions
keys' are enabled in the preferences. We will explain these functions in detail in chapter 7.2.1
Remote Arrival Control
When the athletes, horses, cyclists,... are crossing the finish line, the arrival detector
(photocells or manual push button) will give an arrival signal to the MacFinish system. At that
moment, the switch of the 'arrival remote control box' (see picture below) decides whether or
not a photo and time is recorded in memory.
•
•
•
Off position : no images will be recorded, even when a finish detector gives a signal.
Auto position, : an image will automatically be recorded if the finish detector gives a
signal.
Manual position : lines are recorded (independent from finish detector signal) , until the memory is
full.
MacFinish II and III Ethernet - MacFinish 2D 200 and 300
TimeTronics Photo Finish Systems
MacFinish Users Manual
page 46
It is also possible to give an arrival signal by the 'F7' key of the keyboard, if 'functions keys' are enabled in the
preferences.
During the period that the MacFinish is storing image lines in its memory, the 'Memory Usage' bar in your boxwindow will gradually be filled (= will turn grey), and the flag-icon will quickly flip over showing ‘A’ (arrival), as
if a real flag was being waved at the finish of each competitor.
The easiest recording of photo finish pictures is in automatic mode, with photocell detectors. But practice has
shown that it may sometimes (very exceptionally) occur that a hurdle-runner stumbles just before the finish
line and crosses the finish below photocell height. If you do not react, the athlete will not appear on the photofinish photo. To avoid this kind of a situation, you should switch immediately to manual recording just before
the athlete in question would cross the finish line. Of course, here the operator must be capable to react in a
fraction of a second !
As soon as all competitors have finished, the operator must click the 'hand'-icon (= 'Stop' button).
The hand-icon will turn red and the pistol will again turn to the initial vertical position. The trash-icon turns grey
and cannot be clicked upon. Now, we can transfer the recorded photo-finish photo from the memory to the
hard disk of the computer by clicking the disk icon in your 'Action' window, or press the key F11 (if enabled) :
The program will ask you to immediately save the document (now as type “.MF4”) under a given name:
Type in a filename, select the map in which to store the image and click ‘Save’. If you select ‘Cancel’, the
reading function will not be executed.
This new version of MacFinish also has the capability to record participants, even AFTER you have saved the
image to a file on disk. We will explain these functions in detail in chapter 7.2.3
The trash-icon can only be clicked during a race to delete an image recorded by mistake (for example a
photographer walking over the finish line, or a recording of (an) athlete(s) that still had to run a number of
laps). Do NOT first press the 'Stop' button of the 'Actions' window, as this would also stop the timer ! After you
clicked the trash-icon, a message will appear;
Click OK to delete the COMPLETE image, and ‘Cancel’ to preserve the recorded image.
The same dialogue-box will appear after having clicked the ‘ready’ icon (which will always delete the recorded
image) or after having changed any recording parameters (recording speed, line before or after, WindSpeed
settings,...).
Note: In case of a false start, click the 'Stop' button followed by the 'Ready' button.
MacFinish II and III Ethernet - MacFinish 2D 200 and 300
TimeTronics Photo Finish Systems
MacFinish Users Manual
page 47
7.2.1 Recording of Electronic Split Times by means of Photocells:
By means of the extension in the box-window (click on the small arrow facing down), you can select the points at
which a split time should be registered electronically by means of photocells. To use this extension, click the small
arrow on the right of your box-window. As you can see, the box-window is extended with some 'Split timing'
buttons.
We will explain the usage hereof on subsequent pages. We can already reveal that the four operating buttons
underneath ‘Split’ correspond with the following four points on the athletic track:
(2)
(1)
(3)
(4)
For MacFinish Ethernet; only button nr 4 can be used !
1. To register a split time at the finish line, click button 4 under ‘SPLIT’, before the
athletes reach this point. The button first becomes highlighted (red) and later will turn
grey as soon as the first athlete crosses the finish line. Disable the 'Record' and 'Arrival'
button, as you DO NOT want to record a photo (but only a split time) and you DO NOT
want to want to permanently stop the running time display (but only for a few seconds).
2. Switch your Arrival Remote Control box to AUTO:
MacFinish II and III Ethernet - MacFinish 2D 200 and 300
TimeTronics Photo Finish Systems
MacFinish Users Manual
page 48
3. When the photocells are now interrupted by the leading athlete, the MacFinish system will register a split time
which is displayed on your 'Actions' box-window (in the example below 51.44 sec) and on your scoreboards for a
number of seconds (period is adjustable in the scoreboard 'Preferences'). The red button '4' automatically turns grey
(= split time 4 is switched off again).
4. Just before the finish of the first athlete, activate recording of a photo-finish photo plus a final time by clicking the
‘Arrival’ button!! You will notice that automatically the ‘Record’ check box is selected as well (both are linked
when clicking ‘Arrival’). Your Arrival Remote Control box stays on ‘AUTO’.
So when a race is about to arrive, you should NOT use button ‘4’!
REMEMBER: For split times at the finish line, keep the ‘Arrival’ check box disabled! For finish times at the finish
line, select the ‘Arrival’ button.
When closing the ‘split times’ extension again, ‘Arrival’ and ‘Record’ will be automatically ON:
If you want to record an image of a passage at the finish line, yet without a final time, only select the ‘Record’
checkbox, possibly in combination with the ‘4’ button (split time on scoreboard) :
7.2.2 Non-electronic split times registration (manual, without photocells!)
For a non-electronic registration of split times, just click with the mouse in the small button in your 'Actions'
window, with two red vertical lines in it;
Time will halt in your 'Actions' window and on your scoreboards for a number of seconds as adjusted in your
‘Scoreboard Preferences’: After that period, the running time display will start again.
WARNING; Be VERY CAREFULL that you do NOT press the STOP button (hand icon) inside the ‘Actions’
window, as this would STOP the timing of your race !!!!!!!
NOTE; Another (safer) method for ‘manual split timing’ is the following; you could use the ‘split timing’ method
described under chapter 7.2.1, and let the photo finish operator press the button of the ‘arrival remote control’ fully
down, to the ‘manual’ position. Very useful when the leading athlete is passing the 200m point (2000m/4000m split
time in a 5000m race), or passing the 300m point (400/800/1200m split time in a 1500m race).
MacFinish II and III Ethernet - MacFinish 2D 200 and 300
TimeTronics Photo Finish Systems
MacFinish Users Manual
page 49
7.2.3 Windspeed User Mode
When having selected the Windspeed ‘User Mode’ (see Preferences and Parameter setup window), an air sock icon
will appear on the 'Actions' window enabling the MacFinish operator to manually give a start to the WindSpeed
measurement for a 200m race. According to the IAAF rules, this should be done "as soon as the FIRST runner
enters the straight". Please notice that the icon will remain grey for as long as a start hasn’t been given !
If a start signal is given, the air sock icon becomes highlighted and the MacFinish operator can now click it in order
to start a 10 seconds wind measurement. The shortcut to do this = "Control-key + W".
On the photo-finish window itself you will find ‘??’ in front of the windspeed indication, telling you that the ‘user
mode’ was applied in this race:
7.2.4 Running Time on Scoreboard After Arrival of First Athlete
At arrival of the first athlete, the unofficial time of that first athlete will be displayed on the scoreboard and in your
'Actions' window. Now suppose that we are dealing with a 1500m race in athletics. Wouldn’t it be interesting for the
other runners that they could still keep an eye on their running time? Indeed, that is possible. After arrival of the first
athlete, your box window might look like:
The time as portrayed in your 'Actions' window (and on your scoreboard) is halted. To display the running time for
the other athletes, simply click the small button in the top-right corner, showing a small arrow to the right. As you
will notice, now the real time display starts running again:
Keep recording the photo-finish photos for as long as athletes are arriving. When the last athlete has crossed the
finish line, click the STOP-button in your 'Actions' window and read the photo-finish photo.
MacFinish II and III Ethernet - MacFinish 2D 200 and 300
TimeTronics Photo Finish Systems
MacFinish Users Manual
page 50
7.3 MULTIPLE RACES RECORDING (MULTIPLE RACES POSSIBLE AT A TIME)
Let’s have a closer look at the window and its operation method. As you can see, there are a number of
chronometers available on the box-window, enabling the operator to register and record four races simultaneously.
Each chronometer has got six different buttons, a WindSpeed indicator and its timer:
Each time a race is about to start, the operator presses the grey arrow on the left-hand side of the next available
chronometer.
The grey arrow will now turn green, meaning that the operator has denominated the selected chronometer to record
the race. In fact by clicking a specific ‘on air’ arrow, the running time of that particular race will be shown on the
scoreboard (of course if connected and appropriate protocol selected).
Subsequently the operator clicks the ‘ready’ icon (lamp button), to put the MacFinish 'ready' to record the start time.
The lamp icon will turn yellow, and the ‘Ready’ modes of the other races are disabled = turn grey.
As soon as the start signal is given (starting pistol or manual push button), the timer starts running, the pistol-icon
rotates to a horizontal position and its red led turns green. Also notice that the air shaft-icon is highlighted whenever
a 'WindSpeed' apparatus is connected and if the wind speed measurement is selected (see parameter window). The
wind speed can only be measured after the race has been started.
Pay attention: always read the windspeed measurement result (by clicking the air-shaft icon) before putting
another race into the ‘Ready’ mode! The air-shaft icon becomes highlighted! If not, the result will have
vanished!
Note; Manual start by clicking the pistol-icon!
Lets
imagine
that
the
second
race
starts
about
one
minute
after
the
first
race.
No problem for the operator; again he should set the second chronometer bar in ‘ready’ mode and have the race
started.
You will notice that the timer of the second race indicates a time difference of about 1 minute compared to timer 1:
You can do the same for the chronometer 3 and 4.
Warning; If you already recorded something in the 'image memory', BEFORE the finish of the first competitor,
(look in the 'Memory Usage bar' = top part of the 'Actions' window), clear that unwanted photo by clicking in the
'Trash' icon !
As soon as any competitor is about to arrive, the operator should press the 'Arrival Remote Control' switch (no
photocells are used). Then a photo-finish photo is manually being recorded. Naturally the operator needs to be
sharp-eyed and alert!
Each time the Arrival Remote Control button is pressed, the flag-icon will quickly flip over showing ‘A’ (arrival), as
MacFinish II and III Ethernet - MacFinish 2D 200 and 300
TimeTronics Photo Finish Systems
MacFinish Users Manual
page 51
if a real flag was being waved at the finish of each competitor:
Do notice that for as long as the Arrival Remote Control push button is pressed (= as long as recording is going on),
the 'Memory Usage bar' on top will gradually be filled with grey, marking the amount of box memory that has been
used so far.
So each time the Remote Arrival button is pressed, we are recording a part of a photo-finish photo.
In order to have a look at what we have recorded so far (even if not all of the competitors have finished yet), you
should click the eye-icon in the Preview-window:
The recorded image will be shown in your 'Preview' window.
As soon as all competitors have finished and the photo-finish photo has fully been recorded, the operator will click
the Stop-icon (hand) of that race;
Next, we can read the recorded photo-finish photo by clicking the disk-icon of that race in the 'Actions' window:
The program will now ask you to save the document under a given name:
Now type a filename and click ‘SAVE’. In case you would select ‘CANCEL’, the reading function will not be
executed.
The chronometer automatically jumps back to 00:00:00. This means that the race photo has been read and saved to
disk.
WARNING: After the document has been saved on disk, click the trash-icon:
That way you can clear the used image memory. The 'Memory Usage bar' will then become empty, to record the
next finish :
In case you would forget to do this, the memory used to record the last race will be adhered to the memory used to
record the next race. As a consequence, the photo-finish picture of the next recorded race will be attached to the
photo-finish photo of the race as previously recorded. This would make everything very complicated, and possibly
prevent you of recording all competitors if the memory gets 100% filled up!
After having clicked the trash-icon, the following message will appear:
Click OK to delete or CANCEL to preserve the recorded image.
MacFinish II and III Ethernet - MacFinish 2D 200 and 300
TimeTronics Photo Finish Systems
MacFinish Users Manual
page 52
7.4 TESTING THE STARTING SYSTEM
The test can be performed when the starter makes use of a starting pistol, on which we attach an electronic start
detector. The test is merely meant to verify whether the 'start detection' timing is functioning well. It should be
executed before the start of an important (international) meet or championship.
The starter should put the barrel of the pistol on top of the finish line, and fire the gun.
Before that shot the MacFinish operator should click the 'Ready' button in the 'Actions' window, and continuously
put the 'Arrival Remote Control' box in the 'Manual' position, until he hears the starting shot. That way he will
take an image of the flash from the starting pistol.
start detector
finish-line
flash from the gun on top
of the finish-line.
As soon as the sensor(s) inside the start detector register the explosion, time will start running within 0.5
microseconds after the starting shot. This should coincide with the camera registration of the flash from the starting
pistol:
P ict u r e of t h e fla sh fr om t h e
gu n on t h e fin ish -lin e.
F ir st ver t ica l m a r ker a t
0.01 = on e h u n dr ed of a
secon d a ft er t h e
st a r t in g sh ot
Te s t OK; tim e
s ta rte d ru n n in g
im m e d ia te ly
a fte r th e s h o t
h a d be e n fire d .
0.1 = on e t en t h of a
secon d a ft er t h e st a rt in g
sh ot .
Th is t im e ba r below t h e
im a ge ca n be m a de
visible (on pa per ) by
select in g P r in t Win dow.
As you can see from the picture taken, a number of lines before and after the starting shot are recorded.
Note; Be sure that the starter or any other person or object is not hiding the flash of the pistol for the camera.
MacFinish II and III Ethernet - MacFinish 2D 200 and 300
TimeTronics Photo Finish Systems
MacFinish Users Manual
page 53
8 READING THE RACE RESULTS
First some notes on the two different type of image sensors that are used with the MFII and MFIII.
All MacFinish II versions (MFIIscsi and MFIIethernet) have a ‘1-line’ ccd sensor, where all
the 3 colors (red, green + blue) are recorded on one single line. This means that there will
never be a color distortion on the picture in the horizontal (=running) direction. The
disadvantage of this type of sensor is that the (vertical) pixel resolution is limited (to 500 pixels
for example), and even with this resolution you will need a large type of lens (F-Mount). Such
an F-type of lens is more expensive for a certain F-stop (for example F2.8) than a (smaller) Cmount lens.
The MacFinish III ethernet however uses a 3-line ccd, which is smaller in size, AND has a
much better vertical resolution (for example 2000 pixels). Because of the smaller size, we
can use manual OR MOTORISED C-mount lenses. The disadvantage is that the colors are
recorded one by one, as the object will pass over the finish line. This will give us only a
problem if the participants have a DIFFERENT speed from each other, as we can compensate
for this delay, by commanding the program to ‘shift’ the red and blue colors on top of the
green, which will make thr picture look sharp again. This is called ‘PixelShift’, which can be
done manually or automatically.
IMPORTANT NOTES, if you use the MacFinish III ethernet version (3-line sensor) ;
1) With MFIII the operator should align the camera, so that the green sensor line is aligned with the finish line !!!
2) If you open the ‘Tools’ window, and open the ‘Calibration + Pixelshift’ controls (use the small black ‘arrow’),
you will see a bad color display if the ‘Pixelshift’ slider is exactly in the middle, see example below;
MacFinish II and III Ethernet - MacFinish 2D 200 and 300
TimeTronics Photo Finish Systems
MacFinish Users Manual
page 54
By moving the ‘Pixelshift’ slider to the left (if the horses or bicycles move from left to right over the finish line,
otherwise slider to the right) you can have a corrected photo finish picture, where the colors for the horse and
carriage are displayed correctly. Only the legs, which have a totally different speed than the body of the horse, is
showing a distortion, but this should not be a real problem, as the place and time is always interpreted on the nose of
the horse, or the front of the wheel in cycling. Read also chapter 11.6.1 which explains further the manual AND
AUTOMATIC PixelShift !
MacFinish II and III Ethernet - MacFinish 2D 200 and 300
TimeTronics Photo Finish Systems
MacFinish Users Manual
page 55
8.1 HOW IS THE IMAGE STRUCTURED ON YOUR COMPUTER SCREEN?
1. Optional
indication of
wind speed (type
of measurement
and result (m/s))
2. Amount of
3. Recording
MacFinish
speed
memory that has
been used for the
picture
Table of results: places, lanes (explanation see
further up in the manual), times (rounding
according to predefined parameters)
‘Lane indication fields’.
Tip: first acknowledge
the size of all lanes (first
lane 1). Adaptation is
valid for all images
which are used from
that moment on.
‘Lane separation line’.
Pinpoint the cursor
exactly to this location.
The cursor’s arrow will
be converted into a
small cross, indicating
that you’re right on top
of the separation line.
Press mouse button and
drag the lane separation
line to correct position.
4. Date and hour 5. Titling pop-up menu
(see Preferences):
of recording
predefined titles can be
selected by clicking and
dragging
Scroll bars; by clicking the grey bars or arrows,
you can both horizontally and vertically ‘walk’
through the photo-finish picture
Pinpoint the cursor
(vertical time line)
and read the
corresponding time.
Times can be
rendered in one
thousandth, one
hundredth or one
tenth of a second.
Simply click this field
again and again.
Zooming field: click and drag
towards the required
zooming scale. Zoom selection
field: click to
select horizontal, vertical or
horizontal and vertical
zooming.
Horizontal line moving simultaneously with the cursor.
This line helps you to identify and determine the lanes.
8.2 ZOOMING
You can make your selection by simply clicking the particular zooming fields underneath the photo-finish photo.
The first thing what you can do is change the vertical to horizontal relationship, to make an object (athlete / horse /
bicycle) look wider or taller. In other words, to make it look more natural or realistic.
MacFinish II and III Ethernet - MacFinish 2D 200 and 300
TimeTronics Photo Finish Systems
MacFinish Users Manual
page 56
If the picture of a bicycle would look like this;
Then we could change the vert:hor relationship to 1:2 to make the bicycle look ‘normal’.
Now we can start zooming in or out.
Notice that when zooming out to a line width on screen that is smaller than 1/100 sec, a ‘±’ is put before the times
corresponding with your cursor on the picture. The reason for this is that when zooming out so large, the times as
shown underneath will no longer be accurate enough for an 'official' time reading.
The maximum zooming scale is 600%. In the example below we have zoomed in to 400%
The zooming will generally be concentrated on the centre of the photo-finish picture.
8.3 FILLING THE 'RESULTS TABLE'
MacFinish II and III Ethernet - MacFinish 2D 200 and 300
TimeTronics Photo Finish Systems
MacFinish Users Manual
page 57
Lane Popup Menu
The second column we call the "Identification" column, where we need to fill in the identification of the athlete.
Normally you will use lane numbers for 'sprint' races that are run in lanes, and ID's or HIP numbers for 'long
distance' races , in which the competitors do not finish in separate lanes, but normally all in lane 1.
Click the small vertical arrow in the 'Lane' column, which will reveal a 'Lane/Hip/ID' popup menu. Select the item
that you wish to use to fill in the result table.
Lane = lane number.
Hip = hip number, usually coinciding with the lane number.
ID = a registration / identification number (might be the chest number or a fixed ID federation number of
the athlete).
8.3.1 Races Finishing in Lanes
Note; Before you start filling in the results, make sure that the lane indication fields in the photo are correctly
positioned! Do remember that it is the best to align these 'lane indicators' in the 'Preview' window, BEFORE the
race. This way you will have to do this only once, as these alignments will then be used for all the next photo
recordings also!
To select a random field in the result table, just click in it! The field is now highlighted ( = selected). The 'fill' color
will depend on your system settings (Windows): for example
First click in the field which is to be entered under “Lane“:
Next, press the 'Control'-key and click the mouse in the correct 'Lane'-field, lane 5 in the example below;
MacFinish II and III Ethernet - MacFinish 2D 200 and 300
TimeTronics Photo Finish Systems
MacFinish Users Manual
page 58
+ click in ‘Lane’ field
'Control'-key
The number of the lane will now appear in the previously selected field under “Lane“.
The following field is automatically selected. Notice that the corresponding lane indication field has turned black
meaning that it has already been used! Follow the same procedures for ALL the lanes where a competitor has run or
should have run.
To fill in the corresponding times, you should follow subsequent procedure: move the cursor to the field which is to
be selected under “Time“ and click. The field is now being selected:
Next, drag the vertical line on your image (cursor) to the front (torso) of the athlete (wheel, horse,..) (for athletics
see APPENDIX F) in question (e.g. winning competitor in lane 1), pinpoint the cursor correctly, press the 'Control'key and click the mouse button. The corresponding time (rounded according to predefined parameters) will now
appear under “Time“. The field underneath is automatically selected. Follow the same procedure for all lanes.
In case there is an ‘M’ positioned in front of the times, the start has been given manually (thus by clicking the pistolicon on the operator’s 'Actions' window). If the start is given by pressing the Remote Control Start button or by the
starting pistol itself, there will be no ‘M’ in front of the times (as in the example above).
To select multiple fields (e.g. to copy them or to erase a number of fields), you should select a first field by clicking
MacFinish II and III Ethernet - MacFinish 2D 200 and 300
TimeTronics Photo Finish Systems
MacFinish Users Manual
page 59
in it, then press the 'Shift' button on the keyboard and click in the second field, in the opposite corner. The result:
A much faster way to simultaneously fill in both the lane numbers and corresponding times; select the next lane
field;
then move your cursor in the photo-finish photo, press the ‘Control’ key (keep it pressed) and click the cursor after
having positioned the mouse so that the VERTICAL line is positioned on the torso, wheels,.... and the
HORIZONTAL line is positioned in the correct lane field (lane 7 in the example below);
Now, both lane numbers and corresponding times are simultaneously being filled! Automatically the following field
underneath ‘Lane’ is selected. Follow the same procedure for all competitors.
In the time fields, you can also enter the following options;
DNF: Did not finish
DNS: Did not start
DIS: Disqualified
NR: No result.
To do that, just 'Control'-click in a random time field and drag towards the required option:
MacFinish II and III Ethernet - MacFinish 2D 200 and 300
TimeTronics Photo Finish Systems
MacFinish Users Manual
page 60
8.3.2 Races Not Finishing in Lanes
For races not finishing in lanes (e.g. a 1500m or 5000m race), select ‘ID’ in the ‘Lane Popup Menu’, WITH THE
RIGHT MOUSE BUTTON DOWN !
Now click the first field under ‘ID’ to select it. Now you can manually type the ID-number of the corresponding
athlete:
Press the ‘Return’ key to jump to the following field under ‘ID’.
Follow the same procedure for all competitors. As soon as all ID-numbers have been completed, you can again enter
the times in the way as explained above. A possible result:
8.3.3 Time Lines When Filling In Results
As we have already explained before, you can attach vertical time lines to your photo-finish picture when
completing results. To do so, select ‘Time Lines’ under the ‘Document’ menu. Select either ‘Screen’ or ‘Printer’ or
both and finally select the color of the time lines. This can look like this;
Of course you can also enable the automatic display of 'Time Lines' in the 'Preferences' (see chapter 6.1.5).
MacFinish II and III Ethernet - MacFinish 2D 200 and 300
TimeTronics Photo Finish Systems
MacFinish Users Manual
page 61
8.3.4 Absolute or Relative times in the ‘Result table’
Lets look at the following (theoretical) example of a cycling race, where the times have a prefix ‘C’ for ‘Corrected’
(we have typed a time of 5:26:47 for the winner and the other times are calculated by the pc). There is also a prefix
‘M’ as the start was given ‘Manually’ by the mouse button instead of by the start pistol or push button.
If you would like to know the difference time between each participant, you can select the mode ‘Relative to
Previous’ in the TOP OF THE ‘Time column’, WITH THE RIGHT MOUSE BUTTON DOWN ! Very useful for
most cycling races, because then the participants will get the same time (group time) if there is LESS THAN 1
second between two successive participants.
You can also display the time difference between each participant and the winner, by selecting “Relative to First’
(not shown).
MacFinish II and III Ethernet - MacFinish 2D 200 and 300
TimeTronics Photo Finish Systems
MacFinish Users Manual
page 62
8.4 USING THE ‘OVERVIEW’ WINDOW
The overview window, which is placed by most operators on top of the actual picture window shows the complete
race, and can sometimes very practically be used to select the next competitor. As you can see on the photo above,
the competitor nr 33 has won the race, because we selected the first part of the race (see small rectangle in the
‘Overview’ window on the top of the picture, representing the large zoomed window with cyclist 33 and the others).
By simply clicking somewhere in the overview window, we can ‘jump’ from one part of the photo to another part,
for example the end of the group of cyclists. Notice the small rectangle, on the top right corner of the picture.
MacFinish II and III Ethernet - MacFinish 2D 200 and 300
TimeTronics Photo Finish Systems
MacFinish Users Manual
page 63
9 PRINTING THE PHOTO OR RACE RESULTS
The 'File' menu contains 3 menu items, to control the printing of the MacFinish photo and/or the 'Result table'.
These selections are; Print Setup..., Print Preview and Print....
Print setup enables you to adjust your page (size, orientation, ...) for the printer.
If you want to print out a selected image, select Print... under the File menu. If you want to print the WHOLE
PHOTO (possible more than visible on screen), click the 'Photo' radio button. Now the entire picture which is
recorded will be printed (for example the red rectangle):
If you only want to print the window = ONLY THE VISIBLE part , click the 'Window' radio button;
MacFinish II and III Ethernet - MacFinish 2D 200 and 300
TimeTronics Photo Finish Systems
MacFinish Users Manual
page 64
Now you will get a print out of that part of the image that is visible on your MacFinish window, and in the very
same condition (for example zoomed in or out,...). In case you (also) want a printout of the place and time results,
select ‘Print Result Table’
Note that the 'Result Table' will be printed on a separate page than the MacFinish photo printout!
When selecting ‘Print Preview’, an example of how the photo will eventually be printed on paper will be shown on
screen. You can then make selections (Image/Result table/Both, Photo/Window, Image lines or not) and when
approved, you can give the printer the assignment to print the portrayed example. You can also cancel the printing
process.
MacFinish II and III Ethernet - MacFinish 2D 200 and 300
TimeTronics Photo Finish Systems
MacFinish Users Manual
page 65
10 USING A LINK WITH A MEETMANAGER DATABASE
If you have a separate PC running some kind of database program with the list of (athletic or other) events, the time
schedule, the names of athletes, teams, etc.. you can make a 'link' between that MeetManager computer and the
MacFinish computer to exchange information.
Such a link can be different in;
A) Type of connection;
- Serial connection (cable or wireless, RS232 or RS422)
- File transfer (diskette, network, .....)
B) One or Two-directional- One directional; MacFinish results are send to MeetManager
- Two directional; MM data is send to MF and later the MF results are
send to MM.
Note; The reason that such a MeetManager program should run on a separate computer is NOT due to computer
limitations, but due to human limitations! It is not possible for the photo finish operator to do other jobs during his
photo finish recording activities! If he also should take care of participant lists, printing jobs, sending data to
scoreboards, television, etc, that would create a disaster! Let him concentrate on one of the most difficult jobs there
are; perform a perfect timing, and remember; he only gets ONE chance, you can not re-run the race!
The top three menu selections of the “Document” menu are for the most interesting type; the two-directional data
communication with a ‘real’ MeetManager. The following two items (‘Send Results’ and ‘Export to File’) are used
for the ‘simpler’ one-directional transmission of data to a ‘simpler’ database program.
10.1 ONE-DIRECTIONAL DATA TRANSFER TO MEETMANAGER
There are NO limitations on the use of a one-directional link. In other words; you can use the following menucommands without any special registration key or license code;
- “Send Results” to send the results out over a serial port (scoreboard port).
- “Export Results to File” where the results are written in a .TXT file on your PC.
Of course, you will need to make the correct setting of serial port, baud rate speed, etc before you can use the ‘Send
Results’ feature.
The feature ‘Export Results to File’ can be set to be manually activated or automatically when you close the
MacFinish photo file. See your ‘Preferences, explained in chapter 6.1.4.
MacFinish II and III Ethernet - MacFinish 2D 200 and 300
TimeTronics Photo Finish Systems
MacFinish Users Manual
page 66
10.2 TWO-DIRECTIONAL DATA COMMUNICATION WITH MEETMANAGER
The use of a two-directional ‘link’ with a MeetManager requires that you have a valid key code (also called
registration key) to perform such a data exchange. This is explained in the following chapter. The large advantage of
such method is that the MacFinish can LIVE use the event list and participants data of the MeetManager database,
and similar the MeetManager can LIVE receive and process the MacFinish race data.
10.2.1 Installation of the MeetManager function
The installation of the MM function with MacFinish takes the following two steps;
A) Entering the valid registration key; see chapter 4.4
B) Enabling the MM function and selecting an automatic or manual import of MM data; see chapter
6.5
10.2.2 Import MeetManager data
A) If you selected “Automatic” import of data;
Then you will get automatically when you started a “Read Image” command (by 'save' button = 'diskette' icon or by
pressing the 'F11' key if function keys are enabled) the “AthleticsManager Link” window, where you see a list of races.
Automatically the next race is selected, but you can always change the order, and select the corresponding race. Then
press the ‘Select’ button.
B) If you selected “Manual” import of data;
You simply first read the Photo finish data, and later you can manually add competitor data from the MM by the ‘Import’
menu selection.
MacFinish II and III Ethernet - MacFinish 2D 200 and 300
TimeTronics Photo Finish Systems
MacFinish Users Manual
page 67
But even if you enabled the ‘automatic’ import, you can ‘re-import’ new MM-data by the ‘Import’ menu
selection!
If a communication error occurred, the following (alert and reconnection) windows can appear:
Press the ‘Link’ button to try to (re-)establish a link with the MM-computer, and then select the race in
question.
10.2.3 Filling in Results when Linked to Meet Manager
If you have recorded a photo with a
link to a 'AthleticsManager', you can
choose to display the competitor list in
the ‘Result table’, and you can choose
how to display it (width of column, ID
or lane,..).
For the identification of athletes (second column in the
'Result table'), you can now also use this competitor list.
Simply Press the control key and click in the line of the
competitor (click on the ID or the athlete name field) to
automatically fill it into the 'Result table' (at cursor
position).
You can also pinpoint your cursor in your photo-finish photo, on the chest of the first athlete to identify his time,
press the ‘Control’-key, click your mouse button and drag towards the correct ID-number of the athlete in
question. Loosen your mouse button again:
MacFinish II and III Ethernet - MacFinish 2D 200 and 300
TimeTronics Photo Finish Systems
MacFinish Users Manual
page 68
That way, both ID-numbers and times are filled in simultaneously in the
'Result' table: Follow the same procedure for all other competitors.You
can consult your competitor list to verify whether all competitors have
received a result.
If you have to wait (probably the case) for the finish line judges for the
finish order of the athletes, you can already enter the times first and later
add the identification by clicking in the 'competitor list' in the correct
order.
The (optional) Video-ID system of TimeTronics makes it of course
much easier, and faster, to identify the participants (athletes in a
long distance race or the participants in a BMX cycling race or...).
See also chapter 8.3. You can “play” the finish video file in a
separate window (see picture), or just point in the MF-photowindow to any participant, and see automatically that athlete
finishing in the video window (video-ID system will search the
corresponding point in the video file, select it, and show a static
picture). In the example on the right you see that the next finishing
athlete is ID=46. So to fill the identification column for place = 4 in
of the 'result table' you simply press the control key on the
keyboard and click on the number '46' in the ID column.
Of course, the Video-identification system can also be used in
combination with the the pop-up list (see top of this page).
10.2.4 Export MeetManager data
The 'Time and ID' results for the active MacFinish document are exported to the MeetManager PC through selection
of ‘Export...” under the ‘Document’ menu.
MacFinish II and III Ethernet - MacFinish 2D 200 and 300
TimeTronics Photo Finish Systems
MacFinish Users Manual
page 69
11 OVERVIEW OF THE MACFINISH MENU ITEMS
We would like to repeat that the MacFinish program is structured similarly to most programs on your PC, as it
contains the usual ‘pull-down’ menus. Only those commands, which are shown in black, can be executed.
Commands in grey cannot be executed at that particular moment. A command followed by three dots (for example
"Print...") evokes a new selection window. Some commands can be called up by means of a shortcut (shortcut =
control key + character, for example "control-C" for Copy).
There are 6 different menus in the MacFinish program:
Although most menu-selections already have been explained in the previous chapters, we would like to give here an
overview of the different MacFinish menus.
11.1 HELP MENU
The Help menu contains general information about the MacFinish program.
Select ‘About MacFinish’ and a window similar to the one as portrayed below will appear rendering more
information about your system:
11.2 FILE MENU
By selecting Open, an existing image can again be called up on the screen.
As soon as one or more images are on the screen, these can be closed using the close box (='X' in the upper right
corner of the window) or the Close command. The active image, the one on top, will now be closed. As soon as they
are all closed, the close command turns grey and can no longer be selected.
MacFinish II and III Ethernet - MacFinish 2D 200 and 300
TimeTronics Photo Finish Systems
MacFinish Users Manual
page 70
Save is used to write the image onto the disk under a given name. Save as is used to write an existing active image
onto the disk under a new name. In this case, a dialogue box appears on the screen enabling you to give the image a
new name. You can also select the disk and folder on which to save the image ;
If you have made changes to an image which have not been written to disk yet, these can be undone using Revert.
Revert calls back the version, which is saved on disk.
For the 'Printing' menu items; see chapter 9; Printing the Photo or Race Results.
The 'File' menu can contain a list (of up to ten) previously opened MacFinish documents. If you select any of them,
that document will be opened on top.
For the 'Preferences' menu item; see chapter 6; MacFinish Preferences.
The Quit menu item will close all open documents, after asking the operator if he wants to save any unsaved
documents, and will then end the MacFinish program.
11.3 EDIT MENU
Undo cancels the last operation (if "Can't Undo" is grey, the last operation can't be undone).
Cut cuts out the selected section and temporarily saves it on the clipboard.
Copy copies the selected section to the clipboard.
Paste pastes the contents of the clipboard at the selected cursor position.
Clear deletes whatever is selected.
Show Clipboard: shows the clipboard.
TIP; You can copy a random part of a photo by simply dragging the mouse over the part that you wish to copy.
Then release the mouse button. The piece of picture is now selected (a dotted rectangle marks out the selected part)
and can now be copied (by 'Copy' from the Edit menu, or 'Control-C') and pasted in whatever document, for
example a word processor !
MacFinish II and III Ethernet - MacFinish 2D 200 and 300
TimeTronics Photo Finish Systems
MacFinish Users Manual
page 71
Now 'Copy' the selected part of the photo to the 'Clipboard', and display the 'Clipboard' :
You can now 'Paste' this clipboard in whatever document.
11.4 DOCUMENT MENU
11.4.1 Import, Export, Show Competitors
The upper part of the Document menu covers the interaction with the MeetManager database.
Obviously you should first connect to a MeetManager program in order to activate these menu selections.
For more details regarding the use of a two-directional link with a 'MeetManager', see chapter 10.2
11.4.2 Send Results, Export Results to File...
By selecting ‘Send Result’, you can send the results from the result table to another computer, for example to show
it on a stadium scoreboard. This is done via the same port as selected for the scoreboard and with a well-determined
protocol, described in the appendix A of this manual.
By selecting ‘Export Results to File...’, you can create a ".TXT' file on disk with the results from the result table.
The format of this file is described in the appendix A of this manual.
For more details regarding the transmission of MacFinish results to a 'MeetManager', see chapter 10.1
MacFinish II and III Ethernet - MacFinish 2D 200 and 300
TimeTronics Photo Finish Systems
MacFinish Users Manual
page 72
11.4.3 Flip Image
By selecting ‘Flip Image’, you can switch the direction in which the photo-finish image is displayed (to the left or to
the right).
11.4.4 Flip Lanes
Determines the order of lanes (1 to 25 / 25 to 1) in the vertical direction. This menu selection is only enabled (shown
in black) for images, which have already been saved on disk.
11.4.5 Crop
In order to reduce the amount of megabytes (due to large images) stored on your disk, you can cut certain pieces of
image through the 'Crop' function. First make a selection by dragging the mouse over the part that you wish to cut.
press mouse button
drag
release mouse button
Select CROP under the Document menu and the strip between both arrows will be cut from the picture;
A
B
C
A
MacFinish II and III Ethernet - MacFinish 2D 200 and 300
C
TimeTronics Photo Finish Systems
MacFinish Users Manual
page 73
Example:
We have selected a part that we wish to cut (between the two vertical lines). Now we select ‘Crop’ under the
‘Document’ menu. As you can see, that part has now been cut out. This will have no influence however on the time
display for the horses, only the amount of used memory has been reduced.
11.4.6 Hide table and Show table
When selecting ‘Table’ from the ‘Document’ menu, the table of results will disappear or appear. The picture on the
left shows no ‘Table’, and the picture on the right includes a ‘Table’
11.4.7 Hide Overview and Show Overview
When selecting ‘Overview’ from the ‘Document’ menu, the ‘Overview’ window will disappear or appear.
MacFinish II and III Ethernet - MacFinish 2D 200 and 300
TimeTronics Photo Finish Systems
MacFinish Users Manual
page 74
11.4.8 Time Lines
By means of this menu selection, you can attach vertical time lines to the torsos on your photo-finish picture. In fact
you are making an imprint of your cursor. Select ‘Screen’ and/or ‘Printer’ depending on the fact whether you want
time lines only on your screen or printed on the photo as well. Now you can also select the color of the respective
time lines:
You will only see these vertical time lines on your photo-finish photo when you have read the times in the result
table.
MacFinish II and III Ethernet - MacFinish 2D 200 and 300
TimeTronics Photo Finish Systems
MacFinish Users Manual
page 75
If you’d like to remove these time lines from your picture, deselect either ‘Screen’ or ‘Printer’ again.
You will notice that the time lines will disappear.
11.4.9 Timecorrection...
The ‘Timecorrection’ mode is a software feature to recalculate all participant times, after you typed the real time of
the first competitor. If you did not register the real start of the race (for example if you were not present a the start of
a cycle race), you can simply let the pc calculate all times.
11.4.10
Presentation
The presentation mode is a software feature to display a photo finish picture 'Full screen' on your PC, in other
words, without any window header or the windows menus. The purpose is to have a nice looking photo for a live
display on local or national television, without disturbing elements.
It is possible to show or hide the 'Time Lines', even with a selectable line width, and it is further possible to display
your own '.BMP. type' of images (made for example with 'Paint' software) on top of the photo finish picture.
Note; To use this feature, you need a suitable 'registration key', see chapter 4.4, as the 'presentation' feature is
optional.
After the selection of the 'Presentation' menu item, you will see the following window;
MacFinish II and III Ethernet - MacFinish 2D 200 and 300
TimeTronics Photo Finish Systems
MacFinish Users Manual
page 76
For the example above, we have created a folder named "Graphics" that SHOULD BE PLACED inside the
MacFinish folder where you have your MacFinish software !!! Inside this folder you should place the .BMP bitmap
files of the images that you would like to display; see picture below. In the 'Presentation' window (see above) you
can select which image you want to display (2 out of 4 in the example). When you select an image from the list, it
will first be shown on the top-left corner of the photo. With the mouse you can then click and drag the image to any
desired position inside the visible part of the MacFinish photo (bottom-left in the example).
You can further select the 'Time Line Size' from a pull-down choice list, and when you click in the 'OK' button, your
MacFinish photo will be 'Presented' in 'Full screen mode'. Just click with the mouse button to end the 'Presentation
mode'.
MacFinish II and III Ethernet - MacFinish 2D 200 and 300
TimeTronics Photo Finish Systems
MacFinish Users Manual
page 77
Note; Most of the time, a photo finish operator does not have enough time to wait until the Television crew had the
chance to broadcast the race finish photo, but this should not be a problem, as most or probably all external
professional video converters ( to convert your RGB computer video signal to NTSC or PAL television video
format) have a 'freeze' function to memorize a screen. This means that the photo finish operator only has to use the
'Presentation mode' for a second, just enough time to press the 'freeze' button on the video converter, and he can
continue his normal photo finish job.
11.5 BOX MENU
11.5.1 Connect Box
If the MacFinish ETHERNET box has not been connected or powered on at the start of the program, power on the
box and select ‘Connect Box’ under the 'Box' menu.
Tip; You better power on the MacFinish ETHERNET box before starting the PC!
Should the connection between the MacFinish box and the PC fail during operation, for example due to a
disconnection of the ethernet-cable, you can use ‘Connect box’ to reestablish the link.
Now the program will start looking for the box. Subsequent window will appear. Click OK.
11.5.2 Read Image
By means of the Read Image command, the recorded image can be read from the MacFinish ETHERNET box and
saved on the computer hard disk. It will do exactly the same as the 'diskette' icon on the 'Actions' window.
We recommend you to first click the STOP-button (hand-icon in the 'Actions' window) before reading your image.
If not, reading the image will take considerably more time, and the MacFinish will not record the wind
measurement. The following window will appear, asking you to give the image a name and to store it.
Of course, also read chapter 7.2; Single race recording.
MacFinish II and III Ethernet - MacFinish 2D 200 and 300
TimeTronics Photo Finish Systems
MacFinish Users Manual
page 78
11.6 WINDOWS MENU
For the use of the ‘Preview’ window; see chapter 5.1.
For the use of the ‘Parameters’ window; see chapter 7.1.
11.6.1 Tools Window with color calibration function and PixelShift
When selecting ‘Tools’, the window as shown below appears:
Image Intensity and Contrast
With the top part of the 'Tools' window, you can adjust the intensity and the contrast of any photo window or the
'Preview' window.
Note; Remember that any modification of the 'Tools' settings for a photo window is ONLY valid for that window,
where a modification for the 'Preview' window will be valid for the 'Preview' window AND all following recorded
photos.
Just move the slider in the upper bar to the right or to the left and the image will become respectively lighter or
darker. The image contrast is increased if the slider in the lower bar is moved to the right, and the contrast is reduced
if the slider is moved to the left. Both actions will be applied to all the colors present in the picture.
By clicking the small arrows on top of each bar (arrows facing down), it is also possible to return to the default (=
original) settings.
Here is an example of how you can manipulate a picture by means of the Tools window:
In the above series, the left picture was set to its default color intensity and contrast setting.
MacFinish II and III Ethernet - MacFinish 2D 200 and 300
TimeTronics Photo Finish Systems
MacFinish Users Manual
page 79
By sliding the lower bar to the right, we have increased the contrast of the picture in the middle.
In the right photo we made the picture lighter, by sliding the upper bar (a little bit) to the right.
Click the tiny arrows on top of each bar to return to default settings.
Tip; We recommend to use the standard setting (both sliders as close as possible to the middle position) for the
'Preview' window, for the recording of new races!
RGB Color Calibration
The Red, Green and Blue on screen color calibration is a tool for color fine-tuning of the photo-finish picture.
To select the RGB color calibration function, click the little arrow facing down in the tools window, and the
extension in the tools window will appear (see right):
As you have noticed, the RGB color calibration is divided in both 'Offset' and 'Gain %'.
Offset can in fact be compared with the 'Intensity' function, be it that now you can adjust the intensity per separate
color. You can enter a value between -31 and +31 (decreasing or increasing the color components).
Gain (in %) adjusts the color contrast per color. It is an amplification or attenuation of each separate color. It is
valid for the entire picture. The 100% gain is a default setting.
Suppose we would get the following photo-finish picture on our screen after recording and for example, we amplify
the red color contrast by 265%, the green color contrast by 150% and leave the blue untouched. Just fill in these
values in the rectangles under Gain%:
Not exactly a pretty sight, is it? But of course this example was only to demonstrate what the Gain function is all
about.
To return to the default ‘Offset’ and ‘Gain’ settings, click the button covering the two green arrows;
MacFinish II and III Ethernet - MacFinish 2D 200 and 300
TimeTronics Photo Finish Systems
MacFinish Users Manual
page 80
Obviously the idea is to look for the ideal combination so as to become the perfect color proportions.
The most important (and therefore first step) is to 'calibrate' the colors so that a white object becomes really white on
your computer screen.
We all know that for athletics T&F the finish line is (or should be) perfectly white, so that we should also become a
more or less white background (being the finish line) in our picture. In the default picture of our previous example,
this is not the case. The background shows a slightly yellow undertone, due to;
- The uncalibrated RGB sensitivity of the CCD (camera sensor).
- The use or absence of the IR-filter.
- The illumination by non-white light (artificial light or even sunlight)
To change this 'yellow' into a more or less white finish line, select a part of the photo-finish picture that represents
that finish line. To do so, point, press the mouse button, move to another point, and release the mouse button. As
you can see, that part of the picture is selected. Then click the white rectangle in your RGB color calibration
window:
The result of this is visible here below; you can see that the following RGB factors (100,109,167%) are much better
than the standard numbers (100,100,100%), in case you recorded the photo with sun light and used the IR-filter in
front of the lens.
Now you can also calibrate the 'black offset'. Select a 'black' part on the photo and click the black rectangle on the
MacFinish II and III Ethernet - MacFinish 2D 200 and 300
TimeTronics Photo Finish Systems
MacFinish Users Manual
page 81
bottom of the 'Tools' window. After you have done this, the new values under ‘Gain’ and ‘Offset’ will be
automatically displayed.
The RGB color calibration is also applicable to the Preview window! We recommend you to use this feature because
this color calibration will be valid for all the following recorded pictures !
When saving this picture after you changed the color-calibration numbers, these new adjustments will be saved as
well.
The original data are always preserved meaning that you can always return to the original recording if desired.
Pixelshift functions; ONLY FOR MACFINISH III
As explained before, by opening the ‘Tools’ window further, the controls of the ‘Pixelshift’ function become
available (see chapter 8, first ‘Note’ about using the MacFinish III with a 3-line sensor )
The ‘Pixelshift’ slider can be used for a ‘Manual’ shift of ALL red + blue pixels by the same value, in other words,
the correction is the same for the WHOLE picture. But as said before, if there are objects which have a different
speed, it would be better if the different object would have their own correction, corresponding to their speed. This
takes a very complex computer calculation, which we have programmed as a special feature of our MacFinish
program, but it takes of course a few seconds to make all the millions of calculations. First choose the direction in
which the participants cross the finish line; enable the ‘Positive’ checkbox if the cyclists (or horses...) cross the
finish line from right to left, and deselect the ‘Positive’ checkbox if they pass from left to right. Now press the
‘Calculation’ button (see picture; the button with red+green+blue line and two small black arrows). You will
immediately see an update bar in the top-right corner of the photo window, and after it is completed the whole
picture is now recalculated to have the best possible color shift and photo display.
MacFinish II and III Ethernet - MacFinish 2D 200 and 300
TimeTronics Photo Finish Systems
MacFinish Users Manual
page 82
Note; You can make the ‘Automatic PixelShift’ start automatically when you load a picture from the camera, by
selecting this in the preferences, see chapter 6.3.3.
The mathematical result of the ‘Automatic PixelShift’ is stored in memory so that you can switch at any time, in a
fraction of a second, between manual correction (ONE CORRECTION FOR THE WHOLE PICTURE, controlled
by the slider) and automatic correction (ACCORDING THE DIRECTION POSITIVE OR NEGATIVE,
COMPUTER CALCULATED FOR EACH PIXEL).
If the calculation are done with the wrong direction selection, you can of course change the direction, and
recalculate a new “Automatic Pixelshift’.
MacFinish II and III Ethernet - MacFinish 2D 200 and 300
TimeTronics Photo Finish Systems
MacFinish Users Manual
page 83
If you look at the two example above, of the same MacFinish race file, you can clearly see that the top cyclist (nr
144) is shown sharp on both pictures, but that the lower cyclist (nr 33) is shown much sharper below with the
‘Automatic Pixelshift’, because he has a different speed (also possible because he is closer to the camera) and this
is corrected automatic by the computer calculation !!!
11.6.2 Image Eye (= Optional feature)
The ‘Image Eye’ function is in fact a magnifying glass applied to the photo-finish photo. For example in cycling, it
may sometimes happen that the frame plates are not always very clearly visible. To magnify the resolution of the
picture, you can use this feature. Click in the photo to zoom to a particular item.
The ‘Image Eye’ function can be applied to whatever photo-finish photo. Both the ‘Image Eye’ and ‘Tools’
functions can also be used when selecting the eye-icon in your Preview window to already take a look at what you
have recorded so far!
The image-eye is displayed in grey-scale, and shows a lot of horizontal lines, because the original photo is now
showed as a 1500 pixels picture, instead of the 500 pixels (x3 colors R,G,B) photo. Note; For the use of the 'Imageeye' , you need a 'registration key' with the 'Image-eye' feature enabled (see chapter 4.4)
The ‘Image Eye’ is only available for MacFinish II Ethernet, not for MacFinish III Ethernet.
MacFinish II and III Ethernet - MacFinish 2D 200 and 300
TimeTronics Photo Finish Systems
MacFinish Users Manual
page 84
11.6.3 Camera Window
Extended Camera window, with extra information like ccd and camera internal temperatures, external and internal
power voltages, and the cumulative number of Ethernet communication errors.
11.7 SHORTCUTS
In the MacFinish software there are some menu commands which are used more frequently than others, such as
Read Image, Save, etc. Every user who has mastered a program knows that it is faster to take a shortcut (= 'control'
key + character), than to select a command in the menu bar by means of the mouse .
The following table shows the most relevant shortcuts for MacFinish II:
Shortcut
O
S
Z
X
C
V
W
Q
I
T
R
A
Command
Standard Command in Windows
Open
Yes
Save
Yes
Undo
Yes
Cut
Yes
Copy
Yes
Paste
Yes
Close
No
Quit
No
Read Image Only MacFinish
Show / Hide Table
Only MacFinish
Show competitors
Only MacFinish
Other Camera
Only MacFinish (not available for MFIIethernet version)
MacFinish II and III Ethernet - MacFinish 2D 200 and 300
TimeTronics Photo Finish Systems
MacFinish Users Manual
page 85
12 FREQUENT QUESTIONS
Why are there no official times after a manual start (= not electronically detected)?
Because the manual start does not exactly coincide with the starting shot or signal, these times may not be officially
acknowledged. The times in the result table are showed with a ‘M’ prefix. The images however can be used at
championships to determine the competitors’ places.
How much light is required on the finish line to obtain a good image quality?
You must obtain a clear image which can possibly be adjusted by the iris (on your lens).
We advise you to have 300 lux on the finish line if you would like to record up to 1000 lines per second and if you
have a lens of F 1.4.
Other examples:
2400 lux / 1000 lines per second / F 4
600 lux / 500 lines per second / F 2.8
1200 lux / 1000 lines per second / F 2.8
REMEMBER: the more light you dispose of, the better image quality.
Especially the depth of field is better when you have more light because you can further close the iris of your lens.
Can I change the sensitivity of the start detector?
This item is actually meant for operator using a starting pistol.
From experience, the manufacturer knows how to perfectly balance and adjust the start detection device (with click
system) for a common starting pistol. As such, it is delivered with a factory adjustment that we think is the best.
TimeTronics can change the sensitivity, but the customer should not try to do this.
Why is it important that the start detection is adjusted well?
•If the start detection is too sensitive, the MacFinish box may register starts, which haven’t actually been given;
fixing the pistol’s fuse pin causes a click on the pistol and may thus be interpreted by the start detection as being the
starting signal.
For this, starters should bear in mind to fix the fuse pin with great caution!
•If the start detection is not sensitive enough, it may occur that the start detection does not “see“ or register certain
starts, which have indeed been given.
For example, a wet bullet may cause the start detection to “skip“ the start
How many serial ports on your PC are needed?
It is possible that you need one or more (RS232) serial ports on your (desktop or portable) PC, for example to drive
the (timing) scoreboard, for a serial link with the MeetManager, for a connection with the WindSpeed (only for
MacFinish II or III ETHERNET).
What to do if you do not have (enough) serial ports on your PC ?
You can plug in extra PCI serial interface card(s) if you have a desktop PC, or you can connect an USB to serial
converter (for desktop or portable PC’s). We advise the Keyspan 4-port adapter, to immediately have enough serial
ports available.
MacFinish II and III Ethernet - MacFinish 2D 200 and 300
TimeTronics Photo Finish Systems
MacFinish Users Manual
page 86
When do i need to have my MacFinish system recalibrated?
We advise our customers to send their MacFinish system each 3 years to TimeTronics, for regular check-up, and
timing verification and (re-)calibration procedure. This period is agreed with some national athletic federations, and
has nothing to do with the stability of the timing reference of the MacFinish (which is much better), but is proposed
by the federations to all photo finish manufacturers to avoid technical problems if photo finish systems would never
be checked.
MacFinish II and III Ethernet - MacFinish 2D 200 and 300
TimeTronics Photo Finish Systems
MacFinish Users Manual
page 87
13 TROUBLESHOOTING
Note: Following actions are DANGEROUS and can harm your computer if you do not follow the right steps. We
advise to contact a computer specialist if you need to follow these steps.
If due to any wrong operation or computer crash, one of the MacFinish windows (e.g. actions, tools, parameters) is
out of reach e.g. on a second or third unused computer screen, follow next steps.
Solution:
First of all close the MacFinish software.
Make sure that you have somewhere a copy of your registration ‘key’ because these steps will delete all the
MacFinish preferences and you will have to specify all settings in the preferences window again.
Click then on the ‘Start’ button at the bottom of your computer screen in the left-hand corner and select ‘Run’.
Type ‘regedit’ and click ‘OK’
Click respectively on the ‘plus’ sign of ‘Current User’, ‘Software’ and ‘TimeTronics’.
Click once on the folder MacFinish and delete it.
Now you can again start up the MacFinish software. You need to specify all the preferences again.
MacFinish II and III Ethernet - MacFinish 2D 200 and 300
TimeTronics Photo Finish Systems
MacFinish Users Manual
page 88
APPENDIX A: “SEND RESULTS“ PROTOCOL
In the MacFinish program it is possible to send the result table via the same serial port which is used for the
scoreboard. This means that during the race we CAN send the running time trough this serial port (depending on the
scoreboard settings, see chapter 6.2) and after the race, when the result table contains the Place+ID+Time results, we
can send these results over the same serial port. You just have to select “Send Result” from the document menu.
Underneath the ‘Send Result’ protocol:
PROTOCOL
Header=
Data=
End of data=
Definitions:
[SOH] @ [STX]
<File name> [TAB] <Wind result> [CR]
<place> [TAB] <Lane> [TAB] <Time> [CR]
[ETX]
[SOH]
= 01 Hex
[STX]
= 02 Hex
[ETX]
[TAB]
[CR]
@
<File name>
<Wind result>
‘n times for n participants’
= 03 Hex
= 09 Hex
= 13 Hex
= 40 Hex
= name of the document in ASCII
10_:_ {-}x.x
_ = space
13_:_ {-}x.x
{} = optional
10*:_ {-}x.x
Man:_ {-}x.x
N/A
N/A = not available
<Place>
= 1 up to 225
<Lane>
= Lane number 1 up to 32
OR
= Athlete ID 1 up 99 999
< Time>
= {M}{HH:}{MM:}{S}S.T{H} M = Manual Start Time
OR
“DNF” -Did Not Finish“DNS” -Did Not Start“DIS” -Disqualified”
“NR” -No ResultsEXAMPLE: (Note: The characters between brackets are ‘not printable’ characters)
100 m Boys Series 1[TAB]10 : -1.3[CR]
1[TAB]3[TAB]11.21[CR]
2[TAB]4[TAB]11.37[CR]
3[TAB]6[TAB]12.36[CR]
MacFinish II and III Ethernet - MacFinish 2D 200 and 300
TimeTronics Photo Finish Systems
MacFinish Users Manual
page 89
APPENDIX B: “IE 1.0.1.“ PROTOCOL (ASCII) STRING
LENGTH = 8 CHARS.
Structure of the string: [D]MMSShh[CR]
MM: minutes (with leading spaces)
SS : seconds (with leading spaces)
hh: hundredths of a second (with leading zero)
[D] : ASCII “D”
[ ] : space
[CR] : carriage return (0D Hex)
Update period = 0.1 or 1 second (see scoreboard preferences in the MacFinish program)
Lap display time = 5 , 10, 15,... seconds
MacFinish ready:
The system will send : [D][ ][ ][ ]000[CR]
Running time:
Every ‘update period’ the system sends: [D]MMSS[ ][ ][CR]
Split time :
The system sends a split time record : [D]MMSShh[CR]
The system will wait for ‘Lap display time’ seconds
Arrival time :
The system sends the arrival time record : [D]MMSShh[CR]
Example , with standard update period of 1 second, and lap time period of 5 sec :
D 000
D 1
D 2
.....
D 9
D 997
D 15
.....
D 19
D 20
D 2082
D 26
.....
D 59
D 100
D 101
D 10107
D 107
.....
D 139
D 13975
MacFinish ready
After 1 second
After 2 seconds
After 9 seconds
Split time 9”97
After 15 seconds
After 19 seconds
After 20 seconds
Split time 20”82
After 26 seconds
After 59 seconds
After 1 minute
After 1 minute 1 second
Split time 1’01”07
After 1 minute 7 seconds
After 1 minute 39 seconds
Arrival time 1’39”75
MacFinish II and III Ethernet - MacFinish 2D 200 and 300
TimeTronics Photo Finish Systems
MacFinish Users Manual
page 90
APPENDIX C: “IE EXTENDED RES.” PROTOCOL (ASCII)
STRING LENGTH = 11 CHARS
Structure of the string : [STX][Mode]HHMMSShh[CR]
[STX] = 02 Hex
= Start of text
Mode= 05 Hex -> Clock has stopped
Mode= 00 Hex -> Clock is running
Mode= 04 Hex -> Split time
[CR] = 0D Hex = carriage return
HH : hours (with leading zeros)
MM : minutes (with leading spaces)
SS : seconds (with leading spaces)
hh : hundredths of a second (with leading zero)
[ ] : ASCII space character
Update period = 0.1 or 1 second (see scoreboard preferences in the MacFinish program)
Lap display time = 5, 10, 15,... seconds
MacFinish ready : The system will send : [STX][05Hex]00000000[CR]
Running time:
Every ‘Update period’ seconds the system sends : [STX][ 00Hex]HHMMSShh[CR]
Split time:
The system sends a split time record : [STX][04Hex]HHMMSShh[CR]
The system will wait for ‘Lap display time’ seconds.
Arrival time:
The system sends the arrival time record : [STX][05Hex]HHMMSShh[CR]
Example :Update =0.1 sec and lap display = 5 sec, Start of text and Mode are not printable chars.
00000000
00000010
00000020
.....
00000100
00000110
00000120
.....
00000980
00000990
00000997
00001500
00001510
.....
00013960
00013970
00013975
MacFinish ready
After 0.1 sec
After 0.2 sec
After 1 sec
After 1.1 sec
After 1.2 sec
After 9.8 sec
After 9.9 sec
Split time 9”97
After 15 seconds
After 15.1 seconds
After 1 min 39.6 seconds
After 1 min 39.7 seconds
Arrival time 1’39”75
MacFinish II and III Ethernet - MacFinish 2D 200 and 300
TimeTronics Photo Finish Systems
MacFinish Users Manual
page 91
APPENDIX D: EXPLANATION OF WORDS
Baud
1) The signalling rate of a line. It’s the switching speed, number of transitions that are made per second. Only at low
speeds are bauds equal to bits per second; for example: 300 baud is equal to 300 bps. However, one baud can be
made to represent more than one bit per second. For example, the V.22bis modem generates 1200 bps at 600 baud.
2) Commonly (and erroneously) used to specify bits per second for modem speed. For example: 1200 baud means
1200 bps. See previous paragraph.
Baud Rate
A redundant reference to baud. Baud is a rate.
Parity bit
An extra bit attached to the byte, character or word used to detect errors in transmission.
Parity Checking
An error detection technique that tests the integrity of digital data within the computer system or over a network.
Parity checking uses an extra ninth bit that holds a 0 or 1 depending on the data content of the byte. Each time a byte
is transferred or transmitted, the parity bit is tested.
Even parity systems make the parity bit 1 when there is an even number of 1 bits in the byte. Odd parity systems
make it 1 when there is an odd number of 1 bits.
Stop Bit
In asynchronous communications, a bit transmitted after each character.
MacFinish II and III Ethernet - MacFinish 2D 200 and 300
TimeTronics Photo Finish Systems
MacFinish Users Manual
APPENDIX E: PIN CONNECTIONS
NC means Not Connected.
Pin connections on front panel MacFinish
Start detection : 1 : +12VDC (not used)
Same pin connection on cable reels
2 : ground
3 : ready led (connect to anode of led, connect cathode of Led to ground)
4 : Start signal (not connected=+12V, start det. conn.=+6v, start=<+1V)
5 : NC
Simulate start signal
2
Resistor
by connecting pin 4
2K2
to 2
4
Arrival detection :
1 : +12VDC
Same pin connection on cable reels
2 : Ground
3 : Arrival Signal (of photocells; 0V= no arrival, +12V=arrival)
4 : NC
5 : NC
Simulate arrival signal
by connecting pin 3 to
pin 1
1
3
Battery power supply:
1 : +12VDC
2 : Ground
3 : NC
4 : NC
5 : NC
Pin connections of back panel MacFinish ethernet
12wire cable to track :
1 : GROUND (for start detector)
2 : Ready Led (for start detector)
3 : Start Signal (of start detector)
4 : +12Vdc (for Arrival detection = photocells)
5 : GROUND (for ScoreBoard, WindSpeed and Arrival Dection )
6 : Arrival Signal (of photocells; 0V= no arrival, +12V=arrival)
7 : Scoreboard serial data (RS232 data from PC to scoreboard)
8 : WindSpeed serial command (signal to WindSpeed)
9 : WindSpeed serial result (signal from WindSpeed)
10 : GROUND (for Field Terminal)
11 : FieldTerminal serial command (RS232 data from MM-PC to FT)
12 : FieldTerminal serial result (RS232 data from FT to MM-PC)
Pin connections on cable reels or connection boxes in the field
Anemometer :
1 : +12VDC
2 : Ground
3 : WindSpeed serial command (signal to WindSpeed)
4 : WindSpeed serial result (signal from WindSpeed)
5 : NC
MacFinish II and III Ethernet - MacFinish 2D 200 and 300
page 92
TimeTronics Photo Finish Systems
MacFinish Users Manual
APPENDIX F: WHAT IS THE CORRECT TIME?
The pictures below should give you an indication of how to read the athletes’ time.
Solution picture 1: T1
Solution picture 2: T3
Solution picture 3: T6
MacFinish II and III Ethernet - MacFinish 2D 200 and 300
page 93


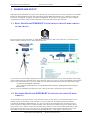
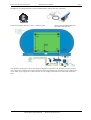

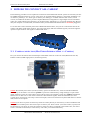
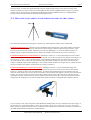

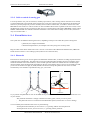


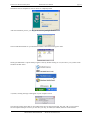
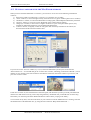


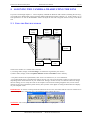
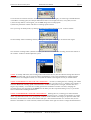


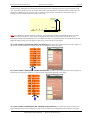

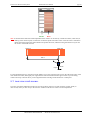


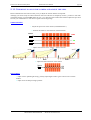


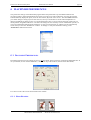
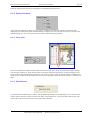

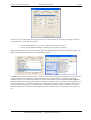
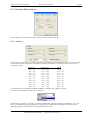


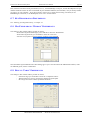

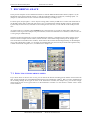


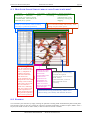
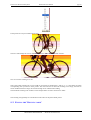
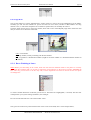

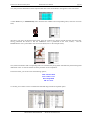
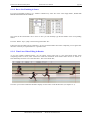
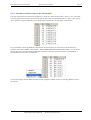

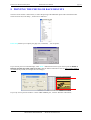


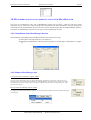
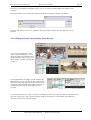


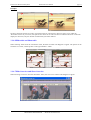
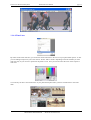

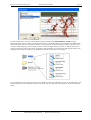
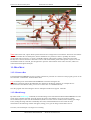

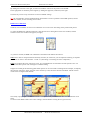
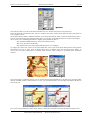
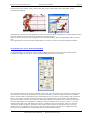

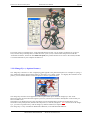


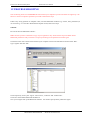
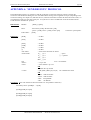


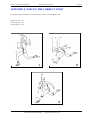
![English [2012v1]](http://vs1.manualzilla.com/store/data/005947215_1-83afe423bc1815c8427a220bc0eb1bc7-150x150.png)
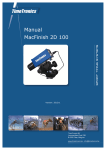


![English [2012v1]](http://vs1.manualzilla.com/store/data/005770981_1-8c196de42073f8db3e58cd387e9490be-150x150.png)


![English [2012v1]](http://vs1.manualzilla.com/store/data/005666127_1-015c2c1b906ab908850f1f1f8721a849-150x150.png)
![English [2014v1]](http://vs1.manualzilla.com/store/data/005775879_1-a83e57144a66539570f80a48a6e80397-150x150.png)

![English [2012v1]](http://vs1.manualzilla.com/store/data/005857990_1-ba5aca9850e0a37c2eb2dd5a5d355973-150x150.png)