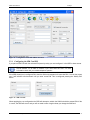
1
GRD’s User Manual
Exemys
The Exemys products are in permanent evolution to satisfy the needs of our clients.
For this reason, specifications and capabilities are subject to change without previous notice.
Please find updated information at www.exemys.com
Copyright @Exemys 2009. All Rights Reserved
Rev. 2.2.0
www.exemys.com
Rev. 2.2.0 Julio 2010
2
GRD’s User Manual
Exemys
Table of Contents
1
INTRODUCTION
1.1
1.1.1
1.1.2
1.2
1.2.1
1.2.2
10
About this manual _________________________________________________ 10
Purpose of this manual
Conventions, terms and abbreviations
10
10
General Description of the GRD______________________________________ 10
GRD and Middleware
GRD families
10
12
2
INSTALLATION
2.1
Connection to the power supply ______________________________________ 13
2.2
Serial connection __________________________________________________ 14
2.2.1
2.2.2
13
RS232
RS485
14
14
2.3
Leds indicators ____________________________________________________ 15
2.4
Installation of the SIM card _________________________________________ 15
3
CONFIGURATION AND OPERATION
3.1
3.1.1
3.1.2
3.1.3
3.1.4
3.1.5
3.2
3.2.1
3.2.2
3.2.3
3.2.4
3.2.5
3.3
3.3.1
3.3.2
3.3.3
3.3.4
4
Serial configuration ________________________________________________ 17
Installation of the GRD-XF Configurator
General description of GRD-XF Configurator
Configuration of connection with the GRD
Establishing the connection with the GRD
Organization of the GRD-XF Configurator
4.1.1
4.2
4.2.1
4.2.2
4.2.3
17
17
18
19
20
Configuration of the GRD-MW connection ____________________________ 20
Configuring the SIM Card PIN
Configuring the cellular telephone Carrier / Operator
Configuring the TCP connection
ID and password configuration
Default values
21
22
22
23
24
Monitoring the GRD-MW connection _________________________________ 25
SIM card status
Signal quality
GPRS connection status
TCP connection status
25
26
27
28
SMS MESSAGES
4.1
17
30
Verifying the status of the device _____________________________________ 30
List the current configuration
30
GRD configuration_________________________________________________ 32
ID and password configuration
Configuration of the GPRS service
TCP connection configuration
www.exemys.com
32
32
33
Rev. 2.2.0 Julio 2010
3
GRD’s User Manual
Exemys
5
GRD1000
5.1
General description of the product____________________________________ 35
5.2
Connection _______________________________________________________ 35
5.3
Configuration _____________________________________________________ 36
5.3.1
5.3.2
5.3.3
5.4
5.4.1
5.4.2
35
Connection of the GRD1000 to the GRD-XF Configurator
Configuration of the connection with the MW
Configuration of the serial port
36
36
36
Configuration through the SMS ______________________________________ 38
Serial port
Packing
38
38
6
GRD2001
6.1
General description of the product____________________________________ 40
6.2
Connection _______________________________________________________ 40
6.3
Configuration _____________________________________________________ 41
6.3.1
6.3.2
6.3.3
6.3.4
6.3.5
6.3.6
6.4
6.4.1
6.4.2
6.5
6.5.1
6.5.2
6.6
6.6.1
6.6.2
40
Connection from the GRD2001 to the GRD-XF Configurator
Configuration of the connection with the MW
Configuration of the serial port
Reports configuration
Configuration of historical
Date and records
41
41
42
43
45
48
Monitoring _______________________________________________________ 50
Digital inputs
Digital outputs
50
50
Configuration through the SMS ______________________________________ 50
Serial port
Packing
51
51
Monitoring and Control of the GRD2001 through the SMS _______________ 51
Reading the discrete inputs
Writing of discrete outputs
52
52
7
GRD3002
7.1
General description of product _______________________________________ 53
7.2
Connection _______________________________________________________ 53
7.3
Configuration _____________________________________________________ 54
7.3.1
7.3.2
7.3.3
7.3.4
7.3.5
7.3.6
7.4
7.4.1
7.4.2
53
Connection of the GRD3002 to the GRD-XF Configurator
Configuration of the connection with the MW
Configuration of the serial port
Configuration of reports
Configuration of historical
Date and records
54
55
55
57
60
67
Monitor __________________________________________________________ 68
Digital inputs
Digital outputs
www.exemys.com
68
68
Rev. 2.2.0 Julio 2010
4
GRD’s User Manual
7.4.3
7.5
7.5.1
7.5.2
7.6
7.6.1
7.6.2
7.6.3
Exemys
Analog inputs
69
Configuration through the SMS ______________________________________ 69
Serial Port
Packing
69
69
Monitoring and control of the GRD3002 through the SMS________________ 70
Reading of the discrete inputs
Writing of the discrete outputs
Reading of analog inputs
70
70
71
8
GRD3003
8.1
General description of product _______________________________________ 72
8.2
Connection _______________________________________________________ 72
8.3
Configuration _____________________________________________________ 73
8.3.1
8.3.2
8.3.3
8.3.4
8.3.5
8.3.6
8.4
8.4.1
8.4.2
8.4.3
8.5
8.5.1
8.5.2
8.6
8.6.1
8.6.2
8.6.3
72
Connection of GRD3003 to the GRD-XF Configuration
Configuration of the connection with the MW
Configuration of the serial port
Configuration of reports
Configuration of historical
Date and records
73
74
74
75
77
84
Monitor __________________________________________________________ 84
Digital inputs
Digital outputs
Analog inputs
85
85
85
Configuration through the SMS ______________________________________ 86
Serial Port
Packing
86
86
Monitoring and control of the GRD3003 through the SMS________________ 86
Reading of the discrete inputs
Writing of the discrete outputs
Reading of analog inputs
87
87
88
9
GRD4002
9.1
General description of product _______________________________________ 89
9.2
Connection _______________________________________________________ 90
9.3
Configuration _____________________________________________________ 90
9.3.1
9.3.2
9.3.3
9.3.4
9.3.5
9.3.6
9.4
9.4.1
9.4.2
9.4.3
89
Connection of GRD4002 to the GRD-XF Configuration
Configuration of the connection with the MW
Configuration of the serial port
Configuration of reports
Configuration of historical
Date and records
90
91
91
93
96
101
Monitor _________________________________________________________ 102
Digital inputs
Digital outputs
Analog inputs
www.exemys.com
103
103
103
Rev. 2.2.0 Julio 2010
5
GRD’s User Manual
9.5
9.5.1
9.5.2
9.6
9.6.1
9.6.2
9.6.3
9.6.4
Exemys
Configuration through the SMS _____________________________________ 104
Serial Port
Packing
104
104
Monitoring and control of the GRD4002 through the SMS ______________ 104
Reading of the discrete inputs
Writing of the discrete outputs
Reading of analog inputs
Reading of count inputs
105
105
106
106
10
GRD4003
10.1
General description of product ______________________________________ 107
10.2
Connection ______________________________________________________ 107
10.3
Configuration ____________________________________________________ 108
10.3.1
10.3.2
10.3.3
10.3.4
10.3.5
10.3.6
10.4
10.4.1
10.4.2
10.4.3
10.5
10.5.1
10.5.2
10.6
10.6.1
10.6.2
10.6.3
10.6.4
107
Connection of GRD4003 to the GRD-XF Configuration
Configuration of the connection with the MW
Configuration of the serial port
Configuration of reports
Configuration of historical
Date and records
108
109
109
111
116
121
Monitor _________________________________________________________ 122
Digital inputs
Digital outputs
Analog inputs
123
123
123
Configuration through the SMS _____________________________________ 124
Serial Port
Packing
124
124
Monitoring and control of the GRD4003 through the SMS ______________ 124
Reading of the discrete inputs
Writing of the discrete outputs
Reading of analog inputs
Reading of count inputs
125
125
126
126
A
INSTALLATION QUICK GUIDE
127
B
TROUBLESHOOTING QUICK GUIDE
130
C
SMS COMMANDS
132
D
DEFAULT VALUES
133
E
POWER SUPPLY AND INPUTS/OUTPUTS CONNECTIONS
133
www.exemys.com
Rev. 2.2.0 Julio 2010
6
GRD’s User Manual
Exemys
Figures
Figure 1 - MW-GRD solution ........................................................................................................... 11
Figure 2 – Power supply ................................................................................................................... 13
Figure 3 - RS232 serial connection.................................................................................................... 14
Figure 4 - RS485 serial connection................................................................................................... 14
Figure 5 - Leds indicators.................................................................................................................. 15
Figure 6 – Main Screen ..................................................................................................................... 18
Figure 7 – Serial Port Configuration.................................................................................................. 18
Figure 8 – Serial Port selection.......................................................................................................... 19
Figure 9 - Main Screen...................................................................................................................... 19
Figure 10 - Organization of the GRD-XF Configurator ..................................................................... 20
Figure 11 - Configuration of the MW-GRD Connection.................................................................... 21
Figure 12 - SIM card PIN.................................................................................................................. 21
Figure 13 - Configuration of the GPRS connection ........................................................................... 22
Figure 14 - Configuration of the TCP connection .............................................................................. 23
Figure 15 - ID and password ............................................................................................................. 23
Figure 16 - Form of default values .................................................................................................... 24
Figure 17 - Monitoring GRD-MW connection .................................................................................. 25
Figure 18 – SIM status ...................................................................................................................... 25
Figure 19 – Signal quality ................................................................................................................. 26
Figure 20 – Insufficient signal quality ............................................................................................... 27
Figure 21 – GPRS connection status ................................................................................................. 27
Figure 22 - TCP connection status..................................................................................................... 28
Figure 23 - Connection board of the GRD1000 ................................................................................. 35
Figure 24 - Access screen to the GRD-XF Configurator of the GRD1000 ......................................... 36
Figure 25 – Configuration of the serial port of GRD1000.................................................................. 37
Figure 26 - Connection board of GRD2001....................................................................................... 41
Figure27 - Access screen to the Series Configurator of GRD2001..................................................... 41
Figure 28 – Configuration of the GRD2001 serial port ...................................................................... 42
Figure 29 - Report of digital inputs of the GRD2001......................................................................... 44
Figure 30 - Report of digital outputs of GRD2001............................................................................. 45
Figure 31 - Historical of digital inputs of the GRD2001 .................................................................... 46
Figure 32 - Manual Download for the GRD2001............................................................................... 47
Figure 33 - Historical of digital outputs of the GRD2001 .................................................................. 48
Figure 34 - Date and records of the GRD2001................................................................................... 49
Figure 35 - Monitoring inputs and outputs of the GRD2001 .............................................................. 50
Figure 36 - Connection board of GRD3002....................................................................................... 54
Figure 37 - Access screen to the GRD-XF Configurator of the GRD3002 ......................................... 55
Figure 38 - Configuration of the GRD3002 serial port....................................................................... 56
Figure 39 - Report of digital inputs of the GRD3002......................................................................... 58
Figure 40 - Report of analog inputs of the GRD3002 ........................................................................ 59
Figure 41 - Report of digital outputs of the GRD3002....................................................................... 60
Figure 42 - Historical of digital inputs of the GRD3002 .................................................................... 61
www.exemys.com
Rev. 2.2.0 Julio 2010
7
GRD’s User Manual
Exemys
Figure 43 - Historical of analog inputs of the GRD3002.................................................................... 62
Figure 44 - Hysteresis for maximum value ........................................................................................ 63
Figure 45 - Hysteresis for minimum value......................................................................................... 63
Figure 46 - Historical of digital outputs of the GRD3002 .................................................................. 64
Figure 47 - Manaul Download for the GRD3002............................................................................... 65
Figure 48 - Historical of digital outputs of the GRD3002 .................................................................. 66
Figure 49 - Date and records of the GRD3002................................................................................... 67
Figure 50 - Screen of Inputs and outputs of the GRD3002................................................................. 68
Figure 51 - Connection board of GRD3003....................................................................................... 73
Figure 52 - Access screen to the GRD-XF Configurator of the GRD3003 ......................................... 73
Figure 53 - Configuration of the GRD3003 serial port....................................................................... 74
Figure 54 – Report of digital inputs of the GRD3003 ........................................................................ 75
Figure 55 – Report of analog inputs of the GRD3003........................................................................ 76
Figure 56 – Report of digital outputs of the GRD3003 ...................................................................... 77
Figure 57 – Historical of digital inputs of the GRD3003.................................................................... 78
Figure 58 – Historical of analog inputs of the GRD3003 ................................................................... 79
Figure 59 – Hysteresis for maximum value ....................................................................................... 80
Figure 60 – Hysteresis for minimum value ........................................................................................ 80
Figure 61 – Historical of digital outputs of the GRD3003.................................................................. 81
Figure 62 - Manaul Download for the GRD3003............................................................................... 82
Figure 63 - Historical of digital outputs of the GRD3002 .................................................................. 83
Figure 64 – Date and records of the GRD3003 .................................................................................. 84
Figure 65 – Screen of inputs and outputs of the GRD3003 ................................................................ 85
Figure 66 - Connection board of GRD4002 ...................................................................................... 90
Figure 67 - Access screen to the GRD-XF Configurator of the GRD4002 ......................................... 91
Figure 68 - Configuration of the GRD4002 serial port....................................................................... 92
Figure 69 - Report of analog inputs of the GRD4002 ........................................................................ 94
Figure 70 - Input count report s of the GRD4002 .............................................................................. 95
Figure 71 - Input count report s of the GRD4002 .............................................................................. 96
Figure 72 - Historical of digital inputs of the GRD4002 .................................................................... 97
Figure 73– Historical of analog inputs of the GRD4002 .................................................................... 98
Figure 74– Hysteresis for maximum value ........................................................................................ 99
Figure 75 – Hysteresis for minimum value ........................................................................................ 99
Figure 76– Historical of digital outputs of the GRD4002................................................................. 100
Figure 77 – Counts historical of the GRD4002................................................................................ 101
Figure 78 – Date and records of the GRD4002 ................................................................................ 102
Figure 79 – Screen of inputs and outputs of the GRD4002 .............................................................. 103
Figure 80 - Connection board of GRD4003..................................................................................... 108
Figure 81- Access screen to the GRD-XF Configurator of the GRD4003 ........................................ 109
Figure 82 - Configuration of the GRD4003 serial port..................................................................... 110
Figure 83– Report of digital inputs of the GRD4003 ....................................................................... 112
Figure 84– Report of analog inputs of the GRD4003....................................................................... 113
Figure 85– Report of digital outputs of the GRD4003 ..................................................................... 114
Figure 86 - Report of Count Input of the GRD4003......................................................................... 115
Figure 87 - Report of Count Input of the GRD4003......................................................................... 116
Figure 88– Historical of digital inputs of the GRD4003 .................................................................. 117
Figure 89– Historical of analog inputs of the GRD4003 .................................................................. 118
www.exemys.com
Rev. 2.2.0 Julio 2010
8
GRD’s User Manual
Exemys
Figure 90 – Hysteresis for maximum value ..................................................................................... 119
Figure 91– Hysteresis for minimum value ....................................................................................... 119
Figure 92– Historical of digital outputs of the GRD4003................................................................. 120
Figure 93 - Count Historical settings ............................................................................................... 121
Figure 94 – Date and records of the GRD4003 ................................................................................ 122
Figure 95 – Screen of inputs and outputs of the GRD4003 .............................................................. 123
Figure 96 – Digital input with single power supply ........................................................................ 135
Figure 97 – Digital input with double power supply ........................................................................ 135
Figure 98 – Digital output with single power supply ..................................................................... 135
Figure 99 – Digital output with double power supply ...................................................................... 135
Figure 100 – Output with relay (single power suply) .................................................................... 136
Figure 101 – Output whit relay (double power supply).................................................................... 136
Figure 102– Analog for a single power supply ............................................................................... 137
Figure 103– Analog for a double power supply ............................................................................. 137
Figure 104 – Analog for a passive sensor ........................................................................................ 137
Figure 105 – Analog for an active sensor ........................................................................................ 137
www.exemys.com
Rev. 2.2.0 Julio 2010
9
GRD’s User Manual
Exemys
1 Introduction
1.1
About this manual
1.1.1 Purpose of this manual
The purpose of this manual is to provide the instructions to quickly and simply install and operate the GRD.
The manual begins with a general description of the product followed by the instructions for the correct
installation of the hardware. Later, the configuration and operation of the GRD is described in detail. Lastly, a
chapter for each model is included explaining its particular features, as well as its configuration and operation.
Finally, the manual includes the quick installation guide and the quick troubleshooting guide.
1.1.2 Conventions, terms and abbreviations
Convention
Description
Courier
italic
[brackets]
This typography is used for commands
It is used to name the parameters of the commands. It must be replaced by a value
It Indicates a parameter that might be used or not according to the case
Abbreviation
Description
GPRS
GSM
SMS
SIM
PIN
PUK
TCP
APN
MW
General Packet Radio Services
Global System for Mobile Communications
Short Message System
Subscriber Identity Module
Personal Identification Number
Personal Unblocking Key
Transmission Control Protocol
Access Point Name
Middleware
1.2
General Description of the GRD
1.2.1 GRD and Middleware
www.exemys.com
Rev. 2.2.0 Julio 2010
10
GRD’s User Manual
Exemys
Exemys Cellular Telemetry solution covers field acquisition devices with GPRS communication, the
concentrating software of devices and the different collection and visualization tools and final registry of
information.
The main components of the complete solution are:
1)
2)
3)
Data acquisition (Hardware)
Communication and Intermediation (Software)
Access to Information (Final user)
Figure 1 - MW-GRD solution
It is necessary to count permanently on a MW to be able to access data and control of the GRD. The GRD
communicates only with the MW and when it is necessary to transfer information, the user always accesses the
MW and not the GRD directly; this allows a reduction of data traffic through GPRS reducing the communication
costs.
The MW stores the data delivered by the GRDs and then the user accesses data that the MW could collect. For
more information see the Middleware’s manual.
Data acquisition (GRD devices)
The data acquisition of the different devices, machines or processes to be monitored or
controlled, is carried out by the use of GRD acquisition devices with GPRS
communication.
www.exemys.com
Rev. 2.2.0 Julio 2010
11
GRD’s User Manual
Exemys
Administration of field devices and intermediation of applications (Software
Middleware):
The administration of the field devices or GRDs requires a software that allows the
configuration, handling of additions/deletions and control of the health of the devices.
This software is called Middleware.
On the other side, this same software is in charge of the intermediation between all
information of field devices and the final applications of the users.
Access and visualization of the information (final users’ applications):
The information collected by the GRD devices from the different machines or processes
that are being controlled and monitored, can be visualized or recorded by different final
applications like a SCADA software, a Webpage or custom-designed software by the
user himself.
To that effect, Middleware is in charge of providing the information needed by the users’
final applications
1.2.2 GRD families
www.exemys.com
Rev. 2.2.0 Julio 2010
12
GRD’s User Manual
Exemys
2 Installation
2.1
Connection to the power supply
Figure 2 – Power supply
www.exemys.com
Rev. 2.2.0 Julio 2010
13
GRD’s User Manual
2.2
Exemys
Serial connection
2.2.1 RS232
Figure 3 - RS232 serial connection
2.2.2 RS485
Figure 4 - RS485 serial connection
www.exemys.com
Rev. 2.2.0 Julio 2010
14
GRD’s User Manual
2.3
Exemys
Leds indicators
The GRD has 3 LED indicators: Power, GPRS and TCP
The Power LED indicates that the device is energized
The GPRS LED indicates whether the device could register to the GPRS network and is also sending/receiving
SMS.
The TCP LED indicates the status of the TCP connection and data sending and receiving by TCP
Figure 5 - Leds indicators
Power Led
GPRS Led
TCP Led
Description
Fast flashing
Slow flashing
The GRD is turning on the internal Modem
The GRD is in the serial configuration mode
The GRD is attempting to register to the GPRS network
Turn on ½ second
and turns off ½
second
Constantly on
Very fast flashing
Single flash
Very fast flashing
Turn on ½ second
and turns off ½
second
Constantly on
Single flash
Fast flashing in a
synchronized manner
with the other two
LEDs
Alternate flashing
with the GPRS LED
LEDs flash
sequentially
2.4
Fast flashing in a
synchronized manner
with the other two
LEDs
Alternate flashing
with the Power and
TCP LEDs
LEDs flash
sequentially
The GRD is registered to the GPRS network
Fails when registering to the GPRS service
or loss it. Verify that the configured
carrier is the correct one or that the
GPRS configured parameters are correct.
Sending or receiving SMS
The GRD is trying to register to the GPRS network
The GRD will try to establish the TCP connection in a few
seconds
TCP connection to the MW is established
Sending or receiving data
Fast flashing in a
synchronized manner
with the other two
LEDs
Alternate flashing
with the GPRS LED
GRD can't detect the SIM card or the PIN SIM is not
configured
LEDs flash
sequentially
The device is in critical failure. Contact us at
The signal level is not enough. Verify that the antenna is
connected correctly.
[email protected]
Installation of the SIM card
For the correct operation of the device the SIM card must comply with the following requisites:
•
The installed card must have a subscription or contract providing the GSM and GPRS services.
www.exemys.com
Rev. 2.2.0 Julio 2010
15
GRD’s User Manual
•
•
•
Exemys
Verify that you know the telephone number assigned to the SIM card.
Verify that you know the carrier/operator providing the telephone service. Currently the GRD supports the
following operators: Movistar Argentina, Personal Argentina and Claro Argentina. If you want to operate
outside Argentina or with a different operator you can configure the corresponding APN, user name and
password manually. For more information contact [email protected]
If the PIN (security code) of the SIM card is activated you should enter it into the GRD when requested by it.
www.exemys.com
Rev. 2.2.0 Julio 2010
16
GRD’s User Manual
Exemys
3 Configuration and operation
3.1
Serial configuration
The GRD-XF Configurator is the application program provided with the product used to configure the GRD.
This application was developed with the philosophy of easiness of use and allows the configuration and
monitoring of GRD. The GRD-XF Configurator can be installed on Windows 98 SE/ME, Windows 2000/NT4,
Windows XP and Windows Vista platforms.
3.1.1 Installation of the GRD-XF Configurator
To install the GRD-XF Configurator follow these steps:
•
To begin the program installation insert the GRD CD and execute “GRD-XF Configurator.exe”.
•
A welcome screen will appear, follow instructions of the installation program which will request the
necessary information for the installation. Click in “Next” to continue.
•
Destination folder: Select the folder where the application program will be installed.
•
Wait for the installation program to copy all the necessary files in your hard disk, and press “Finish” to
end the installation process.
Once installed you will be able to see in your Programs menu a folder called Exemys, containing the links to the
application programs provided by the carrier.
Inside this folder you will find another one called GRD-XF Configurator; this folder contains the following links:
GRD-XF Configurator and Uninstall GRD-XF Configurator.
3.1.2 General description of GRD-XF Configurator
The following figure shows the main screen of the GRD-XF Configurator.
www.exemys.com
Rev. 2.2.0 Julio 2010
17
GRD’s User Manual
Exemys
Figure 6 – Main Screen
3.1.3 Configuration of connection with the GRD
Before establishing the communication, it is necessary to configure the program to use the correct serial port.
Select in the menu GRD’s Communications -> Serial Port.
Figure 7 – Serial Port Configuration
And then indicate the serial port.
www.exemys.com
Rev. 2.2.0 Julio 2010
18
GRD’s User Manual
Exemys
Figure 8 – Serial Port selection
3.1.4 Establishing the connection with the GRD
To establish communication with the GRD, first connect the serial cable.
It is necessary for the cable to have the appropriate connection (see Installation Serial Connection)
To establish the connection select from the menu the option GRD’s Communications -> Connect or press
button , the screen will show the device information.
Figure 9 - Main Screen
www.exemys.com
Rev. 2.2.0 Julio 2010
19
GRD’s User Manual
Exemys
3.1.5 Organization of the GRD-XF Configurator
The configuration and monitoring of the GRDs is organized in two large modules. On one side, the configuration
and monitoring of standard parameters of the GRDs, common to all devices and on the other, configuration and
monitoring of specific characteristics of each model or family.
The standard parameters are related to the establishment of the TCP/GPRS connection. This must be done
with the Middleware (MW) provided by Exemys. For reasons of clarity, we will call it in all cases "GRD-MW
Connection". The GRD-XF Configurator will have a monitoring screen and another one of it own configuration.
The specific configuration of each model or family is related to the “GRD-XF operation”. In this case, the GRDXF Configurator also has a monitoring screen and another one as configuration screen, however, these will be
activated according to the model.
Figure 10 - Organization of the GRD-XF Configurator
If the GRD-XF Configurator finds an unknown model it will not activate any of the
screens. In this case contact [email protected] to obtain the latest software
version.
3.2
Configuration of the GRD-MW connection
The communication with the Middleware uses a TCP/GPRS connection. The following is necessary to be able
to establish communication:
•
Correct placement of the antenna and have GPRS coverage.
•
Place the SIM card and if necessary configure the PIN.
•
Configure correctly the cellular telephone carrier/operator for the establishment of the GPRS
connection.
•
Configure correctly the TCP connection.
•
Configure the GRD Id and password.
•
Have a MW server running.
To configure these parameters, access the configuration screen selecting in the menu GRD-MW Connection ->
Configuration, or press the button
www.exemys.com
Rev. 2.2.0 Julio 2010
20
GRD’s User Manual
Exemys
Figure 11 - Configuration of the MW-GRD Connection
3.2.1 Configuring the SIM Card PIN
If you place a SIM Card with the activated PIN (security code) you must configure it in the GRD to have access.
Remember that if you enter 3 consecutive times with an incorrect PIN, the SIM card
will be blocked. To be able to unblock it you must enter the PUK. For more
information check with your cellular telephone operator
If the GRD already had a configured PIN, when the SIM card requests it will enter that PIN. If it is not the correct
one, it will indicate a fault and wait until you enter a new PIN. This is configured pressing the “Modify PIN”
button.
Figure 12 - SIM card PIN
When applying the new configuration the GRD will attempt to unblock the SIM Card with the entered PIN. If this
is correct, the GRD will store it and you will not need to enter it again unless you change the SIM Card.
www.exemys.com
Rev. 2.2.0 Julio 2010
21
GRD’s User Manual
Exemys
To know if the SIM card that you placed is blocked or if the SIM that you configured is correct, see Monitoring
the MW-GRD connection – Status of the SIM card
3.2.2 Configuring the cellular telephone Carrier / Operator
The following step consists of configuring correctly the GPRS service. For this you simply have to indicate to the
device the operator corresponding to the installed SIM Card or the APN, user and password parameters.
Currently the GRDs have the configuration stored corresponding to the Personal Argentina, Movistar Argentina
and Claro Argentina operators. Their configuration is the following:
Carrier / Operator
Personal Argentina
Movistar Argentina
Claro Argentina
APN
User
Password
gprs.personal.com
wap.gprs.unifon.com.ar
internet.ctimovil.com.ar
gprs
wap
ctigprs
gprs
wap
ctigprs999
If none of these configurations is the correct one, you can configure another connection selecting the Custom
operator and entering the corresponding APN, user and password data manually.
Figure 13 - Configuration of the GPRS connection
To observe the state of the GPRS connection see State of the GPRS connection.
3.2.3 Configuring the TCP connection
The GRDs work as TCP clients, so we must count on a server (MW) awaiting the connection request.
We will now explain how to configure the GRD to establish communication with the Middleware (MW).
www.exemys.com
Rev. 2.2.0 Julio 2010
22
GRD’s User Manual
Exemys
Figure 14 - Configuration of the TCP connection
3.2.3.1 Enable MW connection
When you enable this option, you indicate the GRD to establish a connection with the specified configuration. If
this option is disabled the GRD will not establish connections.
3.2.3.2 URL / IP
In this field you must indicate the server’s IP address or URL. The GRD is capable of resolving URL to IP
addresses (using DNS)
3.2.3.3 Port
In this field you must indicate the server’s port.
3.2.3.4 Inactivity
If the TCP connection does not present activity during a determined time period the GRD will consider it down
and will close it and establish it again in a few seconds.
3.2.3.5 Retry
The GRD will attempt to reestablish the connection when this has been closed. However, if it cannot reestablish
it after a number of attempts or the connection has been closed too many times, it will wait for the configured
retry time before requesting again the connection.
3.2.4 ID and password configuration
The GRD will use this ID number and password to identify itself when establishing a connection to the MW.
Figure 15 - ID and password
3.2.4.1 ID
If the GRD must establish a connection with the Middleware (MW), it is necessary to be identified to let the
Middleware allow it to remain connected. The GRD ID is part of this identification. If the MW does not have such
ID configured as valid it will close the connection with the GRD, this is a number from 1 to 4000.
www.exemys.com
Rev. 2.2.0 Julio 2010
23
GRD’s User Manual
Exemys
3.2.4.2 Password
The GRD has a password for authentication with the MW, therefore, at the moment of connection a verification
is made to see if the GRD password coincides with the one in MW, if it does, it accepts the connection.
Additionally, the GRDs can be configured and monitored through SMS messages. In the case of configuration it
is possible to protect the same with the password. In this manner, when you send the SMS it must include the
password to be able to make modifications. The password can have a maximum length of 8 characters.
3.2.4.3 Waiting time
At the moment of production of this document, it was found that TCP communication through a cellular
telephone network has delays of approximately 1 second, sometimes more, depending on the quality of service
provided by the cellular telephone operator. For this reason it is recommended to configure the timeouts of the
user application in several seconds (Ex. 5 sec.).
3.2.5 Default values
When using the Middleware-GRD solution, all the GRDs have the same TCP configuration (IP, port).
Additionally, we usually work with a single cellular telephone operator. For this reason, the GRD-XF
Configurator allows the storage of this configuration so in the application to new GRDs it will not be necessary
to rewrite the configuration for each one.
3.2.5.1 Storing the default values
To configure the predetermined values select in the menu File->Edit default values.
The GRD-XF Configurator will show the following window
Figure 16 - Form of default values
Select the values to be configured in the GRDs and then press OK.
Some of the configuration values differ for each GRD, like for example, the ID and
PIN corresponding to the SIM card, and are not stored in the default values. Don’t
forget to configure them!
www.exemys.com
Rev. 2.2.0 Julio 2010
24
GRD’s User Manual
3.3
Exemys
Monitoring the GRD-MW connection
To enter the monitoring screen select in the menu the option GRD-MW Connection->Monitor or press the
button
You will be able to observe the following screen:
Figure 17 - Monitoring GRD-MW connection
3.3.1 SIM card status
Next we will analyze the possible states in which you can find the SIM Card.
Figure 18 – SIM status
3.3.1.1 SIM card unavailable
The GRD will indicate this message if you have not placed the SIM Card, or if it is damaged. It will also indicate
the fault with synchronized fast flashing of the 3 LEDs.
www.exemys.com
Rev. 2.2.0 Julio 2010
25
GRD’s User Manual
Exemys
If the SIM card is well placed, and the error persists please contact [email protected].
3.3.1.2 Configure PIN
If you place a SIM Card with the activated PIN (security code), the state of the SIM Card in the Monitor screen
will indicate “Configure PIN”. It will also indicate the fault by a synchronized fast flashing of the 3 LEDs.
To configure the PIN corresponding to the SIM card, see Configuring the PIN of the SIM Card.
If you enter the incorrect PIN 3 consecutive times, the SIM Card will block. In order
to unblock it, you will need to enter its PUK. For more information contact you
cellular telephone operator.
3.3.1.3 SIM card locked (PUK)
The SIM Card is blocked, in order to activate it again it is necessary to enter its PUK. It is not possible to make
this operation using a GRD, you will need a cellular telephone or another device to unblock the SIM Card.
If you introduce the PUK erroneously too many times (The quantity depends on the
telephony operator) you will have to change the SIM Card. For more information
contact your cellular telephone operator.
3.3.1.4
SIM Card OK
You have accessed the SIM card without any inconvenience.
3.3.2 Signal quality
The GRD will show the signal quality. It is necessary to count on a minimum signal for the device to function
properly.
Figure 19 – Signal quality
The signal level can vary between -113 dbm (no signal) and -33 dbm (excellent signal)
3.3.2.1 Insufficient signal quality
In case of not having the minimum signal quality necessary for operation, the GRD will indicate it in the
following manner:
www.exemys.com
Rev. 2.2.0 Julio 2010
26
GRD’s User Manual
Exemys
Figure 20 – Insufficient signal quality
It will also inform it through the GPRS LEDs, with alternate flashing between the Power LED and TCP LED.
The antenna is one of the possible causes of this failure. In this situation please verify:
•
That the antenna is connected correctly.
•
That you are in the area of coverage of your cellular telephone operator.
3.3.3 GPRS connection status
Figure 21 – GPRS connection status
3.3.3.1 Network access denied
You cannot access the GPRS network. Verify if the SIM Card has an active telephone line.
3.3.3.2 No GPRS connection
You cannot register in the network or there is no GPRS service available.
3.3.3.3 Establishing GPRS connection
The GRD is attempting to register in the network.
3.3.3.4 GPRS coverage loss
The GRD could register correctly to the network, however the service is no longer available. It makes constant
attempts to reestablish it.
3.3.3.5 GPRS connection error
The GRD could not register in the network or there is no GPRS service available. This case could be due to an
erroneous configuration of the operator in the GRD. See how to solve it in Configuring the cellular telephone
operator.
If in spite of the operator being correctly configured the GRD still cannot register in the network, verify that the
telephone line has credit and GPRS service.
www.exemys.com
Rev. 2.2.0 Julio 2010
27
GRD’s User Manual
Exemys
3.3.3.6 GPRS connection established
The GRD has successfully registered in the network and has established the GPRS connection.
3.3.4 TCP connection status
Figure 22 - TCP connection status
You will also be able to monitor the state of the TCP connection. Remember that in order to establish such a
connection, you must first have the GPRS service. This is why the state of the TCP connection will reflect the
state of the GPRS connection until such a connection has not been successfully established.
Once the GPRS connection has been established, the possible states of the TCP connection are:
3.3.4.1 TCP connection not established
TCP connection has not been enabled. In this state the TCP LED is off (see also Awaiting for retry time)
3.3.4.2 Connecting… (IP port)
The GRD is attempting to establish a connection to the indicated IP address and port. If the GRD cannot
establish the TCP connection, the amount of time in this state can be an indication of the fault. If it remains in
this state for a few seconds (less than 10), it might be attempting to connect to a closed port. If it stays in this
state during a minute or more, it might be attempting to connect to a port and/or IP address behind a firewall
and they are filtered (see Connection through a firewall).
The GRD will indicate this state with a rapid flash of the TCP LED.
3.3.4.3 Reconnecting in xx sec (IP port)
When the connection attempt fails, the GRD waits a few seconds before reattempting to establish the
connection. After some time, a connection to the indicated IP and port will be established. The GRD will indicate
this state turning the TCP LED on during one second and off during one second.
3.3.4.4 Waiting reconnection time... (xx min)
Once the maximum number of connection attempts is exceeded, the GRD will try to establish the connection
after the indicated period.
In this state the TCP LED is off (see also TCP without connection).
3.3.4.5 Logging into MW
The TCP connection is established, at this time the GRD registers in the MW, if the ID and password are valid,
the connection is accepted.
In this state the TCP LED is on, if authentication fails the TCP will disconnect.
www.exemys.com
Rev. 2.2.0 Julio 2010
28
GRD’s User Manual
Exemys
3.3.4.6 Connected (IP port)
There is a connection established with the MW and it has been validated, the GRD and MW are ready to
transmit and receive information.
In this state the TCP LED is on and flashes when it sends and receives data.
3.3.4.7 Closing TCP connection
The established connection is closing
3.3.4.8 Connect / Disconnect
The monitoring screen lets you force connections and disconnections with the “Connect” and “Disconnect”
buttons in a closing connection situation the corresponding retries will take place. On the other hand, in a
connection request, the IP address and port stored in the GRD will be used.
If you want to disable the connection see Configuration of the TCP connection – Enabling the connection.
www.exemys.com
Rev. 2.2.0 Julio 2010
29
GRD’s User Manual
Exemys
4 SMS Messages
The GRD allows a review of its status and of its TCP/GPRS configuration using SMS. It is possible, also, to
modify the part of its configuration with this same system.
The SMS messages supported by the GRDs are detailed below. In all cases in which the device recognizes the
command as valid it will respond with another message to the telephone number that had sent it.
When it is a configuration command it will indicate if the change was successful or if an error occurred.
Before beginning, you must know the password that allows the modification of the
device configuration. The factory configuration brings that password disabled, there
is nothing to enter in that field unless it is enabled. (see Password or Access
password to the configuration).
All the commands can be written in upper or lower case.
In all messages the separation between words must be exactly one space.
4.1
Verifying the status of the device
4.1.1 List the current configuration
This command returns a listing with the GPRS/TCP configured values.
Command
LIST
Description
Request the device current configuration
The device will send a SMS with the following information (plus the information corresponding to the GRD
model):
<id=xx><carrier=carrier name><inac= xxx sec><retry=xxx min> …
Ej:
<id = 1><carrier=Personal><inac=360 sec><retry=60 min>…
4.1.1.1 State of the connection
You can visualize the state of the connection with the STATE command.
Command
www.exemys.com
Description
Rev. 2.2.0 Julio 2010
30
GRD’s User Manual
Exemys
Requests the state of the connection
STATE
This command will indicate the state of the GPRS connection or the TCP connection as applicable.
The possible responses are:
•
No GPRS connection: it could not register in the network or there is no GPRS service available.
•
Establishing GPRS connection: attempting to register in the network.
•
GPRS coverage loss: It could register correctly, however the service is no longer available. It
constantly attempts to reestablish it
•
GPRS connection error: It could not register in the network or there is no GPRS service available. It
attempts to reestablish it.
•
TCP connection not established: A TCP connection has not been configured.
•
Connecting (IP Port): it is attempting to establish a connection with the server IP address and port.
•
Reconnecting in xx sec. (IP Port): When the connection attempt fails, the GRD waits a few seconds
before reattempting to establish the connection. After some time, a connection to the indicated IP
address and port will be established. The GRD will indicate this state turning the TCP LED on during
one second and off during one second.
•
Waiting reconnection time (xx min): the maximum number of connection attempts has been
exceeded. It will retry after the specified period has elapsed.
•
Logging into MW: Authenticating GRD in the MW
•
Connected (IP Port): there is an established connection with the MW in IP address and port configured
•
Closing TCP connection: the established connection is closing.
4.1.1.2 Verifying the signal level
If you want to know the signal level of the device and the BER (bit error rate) you must send the SIGNAL
command.
Command
SIGNAL
Description
Requests the signal level of the device and the BER
The response to this command is the following:
SIGNAL: -XXX dbm, Ber: XXX%
The signal level can vary between -113 dbm and -33 dbm.
The BER can vary between 0 and 7 corresponding to the GSM RXQUAL table.
RXQUAL
0
1
2
3
4
5
6
7
Max. Bit error
0,2%
0,4%
0,8%
1,6%
3,2%
6,4%
12,8%
Higher than 12,8%
www.exemys.com
Rev. 2.2.0 Julio 2010
31
GRD’s User Manual
4.2
Exemys
GRD configuration
4.2.1 ID and password configuration
4.2.1.1 Access password to the configuration
The GRD has the possibility of protecting the configuration with a password. To enable or modify such a
password the PASSW command must be sent.
Command
Description
PASSW newPass
[myPass]
Modifies or enables the password that
protects the device configuration
possible values
Up to 8 characters
The password should not exceed 8 characters and is not case sensitive.
Note: Once the password has been configured, to disable it the PASSW command followed by 2 spaces must
be sent and then the current password.
Ex. Enabling:
PASSW newpass mypass
Ex. Disabling:
PASSW
mypass
(Two spaces must be left between the command and the current password)
4.2.1.2 Identification number – ID
A way to identify the GRD that is establishing the connection to the server is through the identification number
(see Establishment of the connection). This identifier is an integer number that can be configured with the ID
command.
Command
ID number [password]
Description
Possible values
Identifying number of device
[1… 4000]
4.2.2 Configuration of the GPRS service
The first operation to do is the configuration of the GPRS service. You have to indicate to the device the
operator corresponding to the installed SIM Card (see item Installation of the SIM Card) or the APN, user and
password parameters.
4.2.2.1 Configuration of the service provided by Personal, Movistar or Claro (Argentina)
Currently the GRD has the configuration incorporated of the following companies: Personal Argentina, Movistar
Argentina and Claro Argentina. These are:
Carrier / Operator
APN
Personal Argentina gprs.personal.com
Movistar Argentina wap.gprs.unifon.com.ar
Claro Argentina
Internet.ctimovil.com.ar
User
gprs
wap
ctigprs
Password
gprs
wap
Ctigprs999
If you are using the service of any of these companies you can configure the GPRS service using the CARRIER
command
www.exemys.com
Rev. 2.2.0 Julio 2010
32
GRD’s User Manual
Exemys
Command
CARRIER carrier_name
[password]
Description
Configures the service provider. The names of possible companies
are: Personal, Movistar and Claro
Once the carrier is configured correctly and the device has registered in the GPRS network you will observe
that the GPRS LED remains constantly on.
If, in spite of being correctly configured the service provider cannot register to the GPRS network verify the
signal quality (see Verification of signal level).
4.2.2.2 Configuring the service provided manually
If your cellular telephone operator corresponds to another carrier, you will have to manually configure the APN,
user and password. To obtain this information contact your cellular telephony operator.
Command
GPRS APN userGPRS
passwordGPRS [password]
Description
Configures the GPRS service
Where:
• APN: maximum of 50 characters (it cannot be empty)
• GPRS user: maximum of 15 characters (it cannot be empty)
• GPRS password: maximum of 15 characters
Once the carrier is configured correctly and the device has been able to register in the GPRS network the
GPRS LED stays constantly on.
If, in spite of the carrier providing the service is correctly configured and cannot register to the GPRS network
verify the signal quality (see Verification of signal level).
4.2.3 TCP connection configuration
4.2.3.1 Establishment of the connection
To instruct the device that it must establish a connection the CON command must be sent. The format of the
parameters is the following:
Command
Description
CON IP port [password] Indicates to the device that must connect to the indicated IP address and port.
Where:
Parameter
IP
Port
Example:
Description
Value
IP address to connect to
Port to connect to
xxx.xxx.xxx.xxx
[1…65535]
CON 200.89.185.59 1026 mypass
www.exemys.com
Rev. 2.2.0 Julio 2010
33
GRD’s User Manual
Exemys
4.2.3.2 Disconnection
To finalize a communication to the MW the disconnection command must be sent.
Command
DISC [password]
Example:
Description
This command closes the TCP connection and avoids a reconnection
DISC mypass
4.2.3.3 Retry time
If the GRD’s TCP connection is enabled it will attempt to connect to the MW, if the establishment of the
connection fails or the connection is lost, the device will attempt to reconnect. If it does not achieve this, it will
keep trying until the maximum number of failed requests is exceeded. In this situation it will wait for a retry time
before again requesting the connection.
This period is expressed in minutes and is configured with the RETRY command
Command
RETRY value
[password]
Example:
Description
Possible value
Establishes the period, expressed in minutes, that the GRD
will wait before trying again to establish the TCP connection
(once the maximum number of retries is exceeded)
[0…6000]
RETRY 60 mypass
4.2.3.4 Inactivity time
If the communication does not present any type of activity during this period the connection will be considered
down and it will be closed. The it will open a new connection.
Command
INAC time
[password]
Description
Possible value
Time of inactivity of the TCP connection expressed in
seconds. Once this time without activity has passed the
connection is considered closed.
[0…6000]
Example: INAC 360 mypass
www.exemys.com
Rev. 2.2.0 Julio 2010
34
GRD’s User Manual
Exemys
5 GRD1000
5.1
General description of the product
The GRD1000 is a RS-232/485 converter to TCP/IP by GPRS. It allows the remote access of device such as
data acquisition devices, PLCs, alarm panels or any device having an asynchronous serial interface. This
device provides the ideal solution to access device located in remote locations.
5.2
Connection
Figure 23 - Connection board of the GRD1000
www.exemys.com
Rev. 2.2.0 Julio 2010
35
GRD’s User Manual
5.3
Exemys
Configuration
5.3.1 Connection of the GRD1000 to the GRD-XF Configurator
When connecting the GRD1000 to the GRD-XF Configurator the device model is verified, this way the
configurator enables its own options of the GRD1000 model, this can be appreciated in the following figure in
the text box corresponding to the model.
Figure 24 - Access screen to the GRD-XF Configurator of the GRD1000
5.3.2 Configuration of the connection with the MW
The GRD1000 must connect to a MW, for more information about the connection mode see Configuration of
the TCP connection.
5.3.3 Configuration of the serial port
Once connected to the GRD-XF Configurator you can access the particular configuration of the GRD1000 serial
port through the menu in GRD->Serial Port or by clicking on the GRD Serial Configuration icon
The GRD-XF Configurator presents the following options that allow the determination of the GRD1000
parameters for the serial port.
www.exemys.com
Rev. 2.2.0 Julio 2010
36
GRD’s User Manual
Exemys
Figure 25 – Configuration of the serial port of GRD1000
5.3.3.1
Serial port
It configures the characteristics of the RS232/485 port of the GRD1000.
Baud rate: Transfer speed of the serial port
Data bits: it can be 7 or 8 bits
Parity: Error control system
Flow control: Allows the automatic control of communication traffic according to the availability of the network, it
is generally used for large data transfers to avoid loss of information.
The supported values are:
Parameter
Baud rate
Data bits
Parity
Flow control by hardware
Value
1200, 2400, 4800, 9600, 19200, 38400,
57600, 115200
7, 8
n, e, o (no parity, even parity, odd parity)
on , off
5.3.3.2 Packing
The GRD1000 will attempt to gather several data before sending a packet through the network; in this manner it
takes advantage of the bandwidth and the communication costs are reduced. The criteria implemented for the
end of the packet are the following:
www.exemys.com
Rev. 2.2.0 Julio 2010
37
GRD’s User Manual
Exemys
•
Time window (0...1000 ms): once data is received, the GRD will wait a silence of this duration before
sending the packet through the network. This criterion incorporates a delay in the transmission of the
communication, and must be treated with the utmost care according to the communication protocol
being used. To disable this criterion the time window must be configured in 0 ms.
•
End character (0...255): indicates the last character of a serial stream before sending the data.
If the criterion of the end character is enabled and the time window is disabled the
GRD1000 will store the received data for an unlimited period until it receives the
configured character.
If both criteria are used the first condition to be fulfilled will prompt the sending of the data. Once the options
that adapt better to your needs are selected, the Apply button must be pressed for the changes to be
transferred to the GRD1000.
5.4
Configuration through the SMS
The configuration is generally made through the GRD-XF Configurator which provides all the necessary tools
that allows us to make the configuration rapidly and reliably, but in some cases it is necessary to change
parameters from a remote location, that is, we cannot be in front of the device to connect the PC, therefore, a
configuration by means of SMS allows us to modify the parameters with our cell phone from any location.
5.4.1 Serial port
To modify the configuration of the RS232/485 port the SERIAL command must be used.
Comnand
SERIAL baud_rate data_bits parity
flow_control_by_hardware [password]
Description
Modifies the transfer rate of the serial port
The supported values are:
Parameter
baud_rate
Value
data_bits
Parity
flow_control_by_hardware
1200, 2400, 4800, 9600, 19200, 38400,
57600, 115200
7, 8
n, e, o (no parity, even parity, odd parity)
on , off
Example:
SERIAL 9600 8 N off mypass
5.4.2 Packing
To modify the packing of the serial port the PACK must be used
Command
PACK timeWindow Endcharacter
enablingEndcharacter [password]
www.exemys.com
Description
Configuration of packing
Rev. 2.2.0 Julio 2010
38
GRD’s User Manual
Exemys
The supported values are:
Parameter
Value
timeWindow
endCharacter
enableEndCharacter
[0…1000]
[0…255]
0, 1
Example:
PACK 10 13 1 mypass
www.exemys.com
Rev. 2.2.0 Julio 2010
39
GRD’s User Manual
Exemys
6 GRD2001
6.1
General description of the product
The GRD2001 is a RS-232/485 converter to TCP/IP by GPRS having 16 discrete inputs and 14
discrete outputs. It allows the remote activation in real time of the discrete outputs by means of a
connection with MW by GPRS and its corresponding monitoring, as well as to know the state of the
discrete inputs. It also allows the storage of a history of changes by time and the state taken by the
inputs as well as the outputs at that instant.
Characteristics:
•
•
•
•
•
•
•
•
•
6.2
1 RS232/485 serial port
16 digital inputs
14 digital outputs
Report by change of the digital inputs
Report by change of the digital outputs
Historical of digital inputs
Historical of digital outputs
Monitoring, control and configuration by SMS
Serial downloable Historical reports.
Connection
www.exemys.com
Rev. 2.2.0 Julio 2010
40
GRD’s User Manual
Exemys
Figure 26 - Connection board of GRD2001
6.3
Configuration
6.3.1 Connection from the GRD2001 to the GRD-XF Configurator
When connecting the GRD2001 to the GRD-XF Configurator the device model is verified, this way,
the configurator enables its own options of model GRD2001, this can be appreciated in the following
figure in the text box corresponding to the model.
Figure27 - Access screen to the Series Configurator of GRD2001
6.3.2 Configuration of the connection with the MW
The GRD2001 must be connected to a MW, for more information about the connection mode see
Configuration of the TCP connection
www.exemys.com
Rev. 2.2.0 Julio 2010
41
GRD’s User Manual
Exemys
6.3.3 Configuration of the serial port
Once connected with the GRD-XF Configurator you can access to the particular configuration of the GRD2001
serial port through the menu in GRD->Serial Port or clicking the GRD Serial configuration icon
The GRD-XF Configurator presents the following options that allow the determination of the
GRD2001 parameters for the serial port.
Figure 28 – Configuration of the GRD2001 serial port
6.3.3.1 Serial port
It configures the characteristics of the RS232/485 serial port of GRD2001
Baud rate. Transfer speed of the serial port
Data bits: They can be 7 or 8 bits
Parity: Error control system
Flow control: Allows the automatic control of communication traffic according to the availability of the network, it
is generally used for great data transfers to avoid the loss of information.
The supported values are:
Parameter
baud_rate
www.exemys.com
Value
1200, 2400, 4800, 9600, 19200, 38400,
57600, 115200
Rev. 2.2.0 Julio 2010
42
GRD’s User Manual
data_bits
Parity
flow_control_by_hardware
Exemys
7, 8
n, e, o (no parity, even parity, odd parity)
on , off
6.3.3.2 Packing
The GRD2001 will attempt to gather several data before sending a packet through the network; this
way you take advantage of the bandwidth and the communication cost are reduced. The criteria
implemented for the end of packet are the following:
•
Time window (0...1000 ms): Once data are received, the GRD2001 will wait in silence of this
duration before sending the packet through the network. This criterion incorporates a delay in
the transmission of the communication, and it must be treated with special care according to
the serial communication protocol being used. To disable this criterion the time window must
be configured in 0ms.
•
End character (0...255): indicates the last character of a serial stream before sending the data.
If the end character criterion is enabled and time window is disabled the
GRD2001 will store the data received for an indefinite time until the
configured character is received.
If both criteria are used the condition being fulfilled first will prompt the sending of data. Once the
options that adapt better to their needs are selected the Apply button must be pressed for the
changes to be transferred to the GRD2001.
6.3.4 Reports configuration
The GRD2001 uses a report system to inform the state of its digital inputs and outputs, this has the
main function of minimizing data traffic between the GRD and MW reducing communication costs and
this is the reason why a correct configuration is needed.
To access the report configuration screen you must go to the menu in GRD->Reports or by clicking
on the reports icon
6.3.4.1 Digital Inputs report
The following figure shows the configuration screen of digital inputs
www.exemys.com
Rev. 2.2.0 Julio 2010
43
GRD’s User Manual
Exemys
Figure 29 - Report of digital inputs of the GRD2001
6.3.4.1.1 Report by change
Here the inputs that with a change of its state will produce a report are enabled. When any of the inputs is
enabled it means that when the enabled input changes its value will generate a message that is sent to the MW.
This way, only the events in which we have interest to know the moment they occur are reported, if one of the
disabled inputs changes its value it will not be reported, this input will be updated when a report is produced for
a change of an enabled input or other type of inputs report.
6.3.4.2 Report by time
It defines a time in minutes that determines how often a report message is generated. Suppose that we are
interested in updating the inputs every 5 minutes independent of a change produced in the inputs, the only thing
we have to do is to configure a refresh time of 5 minutes and this forces a message that updates the value of
inputs in the MW.
6.3.4.3 Report of digital outputs
The following figure shows the report of digital outputs, in this case we have a temporary report, the report by
change is always enabled, this means that when a change occurs in one of the outputs, it will be reported
immediately.
The objective of having a report by time is a way of ensuring a correct updating of the value of outputs.
www.exemys.com
Rev. 2.2.0 Julio 2010
44
GRD’s User Manual
Exemys
Figure 30 - Report of digital outputs of GRD2001
6.3.5 Configuration of historical
The GRD2001 has a system of historical records that allow the storage of events as changes in the inputs and
outputs with GRD on-line or off-line that are later transmitted to the MW for further visualization and analysis.
These historical allows you to know the value and number, from an input or an output that was modified and the
date and time the event occurred.
The GRD has a storage capacity of up to 50000 events in off-line mode.
To access the configuration screen of historical you must go to menu in GRD->Historical or clicking on the
historical icon
6.3.5.1 Historical of digital inputs
Enabling the historical of any of the digital inputs implies that when the enabled input is modified it will produce
a historical record that will be transmitted when there is communication between the MW and the GRD.
The following figure shows the screen for enabling the historical of the digital inputs.
www.exemys.com
Rev. 2.2.0 Julio 2010
45
GRD’s User Manual
Exemys
Figure 31 - Historical of digital inputs of the GRD2001
6.3.5.2 Historical of digital outputs
The same as the input a historical of outputs can also be created.
In this case the outputs that we want to record in the historical must be enabled, this is very useful as a way of
audit since the historical record is produced at the moment the output is modified and not at the moment that an
order is given to the MW to modify the GRD output because this depends of the availability of the
communication at that time.
On the other hand, it is a way of knowing which outputs have been modified and exactly on what date and time
by any of the available means (GPRS, SMS, GRD-XF Configurator).
6.3.5.3 Serial Port Historical Download.
The GRD can download Historical Reports at the Serial Port by clicking at the Manual Download
button in the next window.
www.exemys.com
Rev. 2.2.0 Julio 2010
46
GRD’s User Manual
Exemys
Figure 32-Manual Download for the GRD2001
Alter that you must choose a path to download the file and its name.
www.exemys.com
Rev. 2.2.0 Julio 2010
47
GRD’s User Manual
Exemys
The fields int the file are:
• GRD_ID. The ido f the GRD.
• Date of the report.
• Timestamp or time of the report.
• Channel. 8 for digital inputs.
• Values.
• Type of Historical.
• Number of input/output.
•
NULL (digital inputs).
This option is aviable only when there are Historical saved in the equipment.
Figure 33 - Historical of digital outputs of the GRD2001
6.3.6 Date and records
Within the “Others” tab you will find, as you can see in the following figure, the date of the device and the
number of historical records stored in the device, that will be transmitted to the MW once the connection is
made.
The “Update” button allows to set the device time, this is necessary if you want the historical to have a correct
date and time, this action does not change the date or time of the records already stored.
www.exemys.com
Rev. 2.2.0 Julio 2010
48
GRD’s User Manual
Exemys
Setting the GRD time does not change the records already stored
The “format” button allows the deletion of historical that has not yet been transmitted, take into account that
depending on the amount of stored information the operation might take several minutes and it may happen that
the device does not respond within that time. When you press the button to clear the memory, the
communication with the GRD will end.
Figure 34 - Date and records of the GRD2001
The historical records are not erased when the device power is turned off.
Formatting can take several minutes and it is possible that the device will not
respond.
www.exemys.com
Rev. 2.2.0 Julio 2010
49
GRD’s User Manual
6.4
Exemys
Monitoring
Once connected with the GRD-XF Configurator you can access the monitoring screen of the GRD2001 through
the menu in GRD -> Monitor or clicking on the Monitor icon of the GRD.
This way, the GRD-XF Configurator allows monitoring the inputs and outputs, and also acts on the outputs,
which are activated immediately.
The following figure shows the monitoring screen of the GRD2001
Figure 35 - Monitoring inputs and outputs of the GRD2001
6.4.1 Digital inputs
It indicates the state of the discrete inputs, this is done with the representation of a lamp on or off depending if it
is active or not respectively.
6.4.2 Digital outputs
The state of the outputs is expressed with the representation of a pressed button and not with the symbol
corresponding to that state and an On/Off text.
As it is possible to act on the outputs from the GRD-XF Configurator just press the corresponding output button
for the state to change to the opposite one that had before, this reflects immediately on the physical output of
the GRD2001.
6.5
Configuration through the SMS
The configuration is generally made through the GRD-XF configurator, which provides all the necessary tools
that allow us to make the configuration rapidly and reliably, but in some cases is necessary to change
www.exemys.com
Rev. 2.2.0 Julio 2010
50
GRD’s User Manual
Exemys
parameters from a remote location, that is, we cannot stand in from of the device to connect the PC, therefore, it
is possible to configure through the SMS to modify parameters with our cell phone from any location.
6.5.1 Serial port
To modify the configuration of the RS232/485 port the SERIAL command must be used.
Command
SERIAL baud_rate data_rate
Description
Modifies the transfer rate of the serial port
parity flow_control_by_hardware
[password]
The supported values are:
Parameter
baud_rate
Value
data_rate
Parity
Flow_control_by_hardware
1200, 2400, 4800, 9600, 19200, 38400,
57600
7, 8
n, e, o (no parity, even parity, odd parity)
on , off
Example:
SERIAL 9600 8 n off mypass
6.5.2 Packing
To modify the packing of the serial port the PACK command must be used.
Command
PACK timeWindow endCharacter
Description
Configuration of packing
endCharacterEnabling [password]
The supported values are:
Parameter
Value
windowTime
endcharacter
endcharacterEnabling
[0…1000]
[0…255]
0, 1
Example:
PACK 10 13 1 mypass
6.6
Monitoring and Control of the GRD2001 through the SMS
Monitoring and control is generally done by means of the GRD-XF Configurator or by a connection
with the MW. There is another way of knowing the state of inputs and outputs at any time, through the
SMS.
Through this means, it is not only possible to know the status of digital inputs and outputs, but also to
act on the outputs forcing a state. However, remember that the SMS could have delays and can also
arrive out of order. In this manner, if a message is sent turning on an output, and then another one
www.exemys.com
Rev. 2.2.0 Julio 2010
51
GRD’s User Manual
Exemys
turning it off, we cannot be sure of the state of the input, since it depends on the order of arrival of the
SMS. This is why this is not the recommended way of operating; however it is permitted.
6.6.1 Reading the discrete inputs
To read the state of the inputs the command INPUTS must be used.
Command
INPUTS
Description
It reads the state of the discrete inputs
The device will send you a SMS with the following information:
I1=xx
I5=xx
I9=xx
I13=xx
I2=xx
I6=xx
I10=xx
I14=xx
I3=xx
I7=xx
I11=xx
I15=xx
I4=xx
I8=xx
I12=xx
I16=xx
xx indicates the state of the discrete inputs, this can take the values on/off.
Example:
I1=on
I5=off
I9=on
I13=off
I2=off
I6=off
I10=on
I14=on
I3=on
I7=off
I11=on
I15=off
I4=off
I8=off
I12=on
I16=on
6.6.2 Writing of discrete outputs
To act on the discrete outputs the OUTPUT command must be used. With this command it is only
possible to act on one of the outputs at a time.
Command
OUTPUT output_number state [password]
Description
It forces the state of one of the outputs
Los valores soportados son:
Parameter
Output_number
State
Value
[1…14]
0 , 1 / off , on
Example:
OUTPUT 3 1 mypass
Turns on output 3
OUTPUT 5 off mypass
Turns off output 5
In each case an indication that the operation was completed will be given by SMS.
www.exemys.com
Rev. 2.2.0 Julio 2010
52
GRD’s User Manual
Exemys
7 GRD3002
7.1
General description of product
The GRD3002 is a RS232/485 converter to TCP/IP for GPRS with 16 discrete inputs, 6 discrete outputs and 6
analog inputs from 0 to 10 volts. It allows remote action in real time of the discrete outputs by means of a
connection with the MW established by GPRS and its corresponding monitoring as well as visualizing the state
of analog and discrete inputs. Additionally, it allows the storage of a history of changes, with date and time and
the state that the inputs and outputs took at that instant.
Features:
•
•
•
•
•
•
•
•
•
•
•
•
7.2
1 RS232/485 port
16 digital inputs
6 digital outputs
6 analog inputs from 0 to 10 volts.
Report by change in digital inputs
Report by change in digital outputs
Report by change in analog inputs
Historical of digital inputs
Historical of digital outputs
Historical of analog inputs by maximum and minimum
Historical of analog inputs by time
Monitoring, control and configuration by SMS
Connection
www.exemys.com
Rev. 2.2.0 Julio 2010
53
GRD’s User Manual
Exemys
Figure 36 - Connection board of GRD3002
7.3
Configuration
7.3.1 Connection of the GRD3002 to the GRD-XF Configurator
When connecting the GRD3002 to the GRD-XF Configurator the device model is verified, this way the
configurator enables its own options of model GRD3002, this can be appreciated in the following figure in the
text square corresponding to the model.
www.exemys.com
Rev. 2.2.0 Julio 2010
54
GRD’s User Manual
Exemys
Figure 37 - Access screen to the GRD-XF Configurator of the GRD3002
7.3.2 Configuration of the connection with the MW
The GRD3002 must connect to a MW, for more information about the connection mode see Configuration of
the TCP connection.
7.3.3 Configuration of the serial port
Once connected with the GRD-XF Configurator you can access the particular configuration of the GRD3002
serial port through the menu in GRD->Serial Port or clicking on the GRD Series Configuration icon
The GRD-XF Configurator presents the following options that allow the determination of the GRD3002
parameters for the serial port.
www.exemys.com
Rev. 2.2.0 Julio 2010
55
GRD’s User Manual
Exemys
Figure 38 - Configuration of the GRD3002 serial port
7.3.3.1 Serial Port
It configures the characteristics of the RS232/485 port of the GRD3002.
Baud Rate: Transfer speed of the serial port
Data Bits: They can be 7 or 8 bits
Parity: Error control system
Flow control: it allows the automatic control of communication traffic according to the availability of the network,
it is generally used for large data transfers to avoid loss of information.
The supported values are:
Parameter
baud_rate
Data_bits
Parity
flow_control_by_hardware
www.exemys.com
Value
1200, 2400, 4800, 9600, 19200, 38400,
57600,115200
7, 8
n, e, o (No parity, even parity, odd parity)
on , off
Rev. 2.2.0 Julio 2010
56
GRD’s User Manual
Exemys
7.3.3.2 Packing
The GRD3002 will attempt to collect several data before sending a packet through the network; this is way to
take advantage of the bandwidth and the communication costs are reduced. The implemented criteria for the
end of the packet are the following:
•
•
Time window (0...1000ms): Once data are received, the GRD3002 will keep silent during this duration
before sending the packet. This criterion incorporates a delay in the transmission of the communication,
which must be treated with special care depending on the serial communication protocol being used. To
disable this criterion the time window must be configured in 0ms.
End character (0...255): Indicates the last character of a serial stream before sending the data.
If the character criteria are enabled and the time window is disabled the GRD3002
will store the received data for an indefinite time until the configured character has
arrived.
If both criteria are used the condition fulfilled first will initiate the sending of data.
Once the options that adapt better to your needs are selected the Apply button must be pressed so changes are
transferred to the GRD3002.
7.3.4 Configuration of reports
The GRD3002 uses a reporting system to inform about the state of digital inputs and outputs, this has the main
function of minimizing data traffic between the GRD and the MW reducing the communication costs and this is
the reason why a correct configuration is required.
To access the report configuration screen you must go to menu GRD ->Reports or clicking in the reports icon.
7.3.4.1 Report on digital inputs
The following figure shows the configuration screen of digital inputs.
www.exemys.com
Rev. 2.2.0 Julio 2010
57
GRD’s User Manual
Exemys
Figure 39 - Report of digital inputs of the GRD3002
7.3.4.2 Report by change
Here the inputs are enabled that with the change of state will produce a report. When any of the inputs is
enabled means that when the enabled input changes value generates a message that is sent to the MW, in this
manner, only the reports of our interest are reported the moment they occur, if any of the disabled inputs
changes value it will not be reported, this input will be updated when a report is produced due to a change in an
enabled input or other type of inputs report.
7.3.4.2.1 Report by time
It defines a time in minutes that determines how often a report message is generated. Suppose that we are
interested in updating the inputs every 5 minutes independent from the change produced in the inputs, all we
have to do is set the refresh time in 5 minutes and this forces a message that updates the value of the inputs in
the MW.
7.3.4.3 Report of analog inputs
In the following screen you see the configuration screen of the analog inputs. The analog inputs have 2 types of
reports “by percentual change” or “by time”
www.exemys.com
Rev. 2.2.0 Julio 2010
58
GRD’s User Manual
Exemys
Figure 40 - Report of analog inputs of the GRD3002
7.3.4.4 Report by percentual change
In the report by percentual change the inputs we want to update in the MW are enabled. Additionally, a
percentage of change of the enabled inputs is defined to determine in which percentage of change the report
must be made, that is, as you see in the following figure, when input 3, that is enabled, its voltage is modified in
15% of the 10V and a report will be produced that updates the inputs.
If we do not want to use the report by percentual change and we want to use only the report by time, enable the
inputs you want to monitor and set the percentage of change in 100%.
7.3.4.4.1 Report by time
In the report by time the GRD sends a message to the MW in a determined amount of time updating the analog
inputs that are enabled in the percentual report.
7.3.4.5 Report of digital outputs
In the following figure you see the report of digital outputs, in this case we only have a temporary report, the
report by change is always enabled, this means that when a change is produced in one of the outputs, it will be
reported immediately. The objective of putting a report by time is to ensure a correct updating of the values of
the outputs.
www.exemys.com
Rev. 2.2.0 Julio 2010
59
GRD’s User Manual
Exemys
Figure 41 - Report of digital outputs of the GRD3002
7.3.5 Configuration of historical
The GRD3002 has a system of historical records that allow the storage of events like changes in inputs or
outputs even if the GRD is on-line or off-line that are then transmitted to the MW for further visualization and
analysis.
These historical allow you to know the value and number, of an input or an output that was modified and the
date and time the event occurred.
The GRD has the capacity to store up to 50,000 events in off-line mode.
To access the configuration screen of historical you must go to menu GRD->Historical or clicking on the
historical icon
7.3.5.1 Historical of digital inputs
To enable the historical of any of the digital inputs implies that when the enabled input is modified it will produce
a historical record that will be transmitted when there is communication between the MW and the GRD.
In the following figure you can see the screen to enable the historical of digital inputs.
www.exemys.com
Rev. 2.2.0 Julio 2010
60
GRD’s User Manual
Exemys
Figure 42 - Historical of digital inputs of the GRD3002
7.3.5.2 Historical of analog inputs
Equal to the digital inputs, it is possible to take a historical of analog inputs under two clearly defined criteria.
On one side we have a record of historical of the alarm type that allows monitoring of the limits of the tensions
with a determined value of hysteresis.
On the other side, we can create a record of historical on a temporary basis, that is, sampling the analog inputs
and storing their value at a determined time.
Once the records are stored in the GRD memory, it transmits them whenever possible, but it is not lost under
any circumstance.
www.exemys.com
Rev. 2.2.0 Julio 2010
61
GRD’s User Manual
Exemys
Figure 43 - Historical of analog inputs of the GRD3002
7.3.5.2.1 Historical by alarm
This criterion defines a band of operation through a maximum and a minimum. When the analog input exceeds
a maximum value a historical by maximum is generated, when the analog input is less than the minimum a
historical by minimum is generated and when the analog input exceeds a maximum value or from a minimum
value to a normal value placed between both values a historical by normal value is produced. We can follow the
evolution of the input when it fluctuates between the specified limits.
In addition to the maximums and minimums a value of hysteresis must be defined to avoid the case in which if
the analog signal oscillates over a threshold value historical would continually be generated.
www.exemys.com
Rev. 2.2.0 Julio 2010
62
GRD’s User Manual
Exemys
Figure 44 - Hysteresis for maximum value
For the minimum values is exactly the same but the opposite.
Figure 45 - Hysteresis for minimum value
We must take into account that it is not possible to configure a value of hysteresis greater than the difference
between the maximum and minimum, and also a maximum less than a minimum.
7.3.5.2.2 Temporary historical
The temporary historical captures the values of the analog inputs in every determined time period. For example,
if we wish to keep a record of some analog inputs every 60 minutes we only have to indicate to the GRD which
are the inputs and the time, and the device will record the values each hour.
The GRD is prepared to record by cardinal time, this means that if we configure the time in 60 minutes at 8:38
hrs. it will record for the first time at 9:00 hrs, then at 10:00 hrs. and so on.
www.exemys.com
Rev. 2.2.0 Julio 2010
63
GRD’s User Manual
Exemys
7.3.5.3 Historical of digital outputs
Equal to the inputs you can create an historical of outputs. In this case the outputs we wish to record in the
history must be enabled, this is very useful in an audit mode since the historical record is produced at the same
time the output is modified and not at the moment when the MW is ordered to indicate the GRD that one of the
outputs must be modified.
Take into account that modifying one of the outputs depends on the availability of the GPRS communication at
that moment if you want to act through the MW.
On the other side, it is a way to know which outputs have been modified and exactly on what date and time by
any of the available means (GPRS, SMS, GRD-XF Configurator).
Figure 46 - Historical of digital outputs of the GRD3002
7.3.5.4 Serial Port Historical Download.
The GRD can download Historical Reports at the Serial Port by clicking at the Manual Download
button in the next window.
www.exemys.com
Rev. 2.2.0 Julio 2010
64
GRD’s User Manual
Exemys
Figure 47 - Manaul Download for the GRD3002
Alter that you must choose a path to download the file and its name.
www.exemys.com
Rev. 2.2.0 Julio 2010
65
GRD’s User Manual
Exemys
The fields int the file are:
• GRD_ID. The ido f the GRD.
• Date of the report.
• Timestamp or time of the report.
• Channel.
•
8 for digital inputs.
•
9 for digital outputs.
• 11 for analogical inputs.
•
•
•
Value (0000 to 1000).
Type of Historical.
Number of input/output.
•
•
•
•
•
NULL (digital inputs).
1
(time report of analogical inputs)
2
(below minimun analogic report)
3
(analogical inputs between minimun and maximun)
4
(analogical input above maximun)
This option is aviable only when there are Historical saved in the equipment.
Figure 48 - Historical of digital outputs of the GRD3002
www.exemys.com
Rev. 2.2.0 Julio 2010
66
GRD’s User Manual
Exemys
7.3.6 Date and records
Within the “Others” tab you will find, as you see in the following figure, the date of the device and the number of
historical records stored in the device, that will be transmitted to the MW as soon as a connection is obtained.
The “Update” button allows setting the device time, this is necessary of you want to have the historical with the
correct date and time, this action does not modify the date and time of the records already stored.
Setting the GRD time does not modify the date of records already stored.
The “Format” button allows the elimination of stored historical that have not been transmitted yet, take into
consideration that depending on the amount of information already stored, the operation might take several
minutes and it may happen the device does not respond during that time. When the button is pressed to clear
memory, the communication with the GRD will end.
Figure 49 - Date and records of the GRD3002
The historical records are not erased if the device is turned off. Formatting may take
several minutes and it is possible the device won’t respond.
www.exemys.com
Rev. 2.2.0 Julio 2010
67
GRD’s User Manual
7.4
Exemys
Monitor
Once connected with the series configurator you can access monitoring of the GRD3002 through the menu in
GRD-MW Connection -> Monitor or clicking in the GRD Monitoring icon
The GRD-XF Configurator, this way, allows monitoring the state of analog inputs and outputs, and also acts on
the outputs, which are activated immediately.
The following figure shows the monitoring screen of the GRD3002.
Figure 50 - Screen of Inputs and outputs of the GRD3002
7.4.1 Digital inputs
It indicates the state of discrete inputs, this is done with the representation of a turned-on lamp or turned-off
lamp when the input is active or not respectively.
7.4.2 Digital outputs
The state of the outputs is expressed with the representation of a pressed button or not accompanied by the
corresponding symbol to this state and an On/Off text.
As it is possible to act on the outputs from the GRD-XF Configurator you only need to press the button of the
corresponding output for the state to change to the opposite one it had before, this is reflected immediately on
the physical output of the GRD3002.
www.exemys.com
Rev. 2.2.0 Julio 2010
68
GRD’s User Manual
Exemys
7.4.3 Analog inputs
The state of analog inputs is represented with its corresponding numerical expression in volts and with a
dynamic bar that allows viewing and have and idea of the tension in the input connectors.
7.5
Configuration through the SMS
The configuration is generally done through the GRD-XF Configurator, which provides all the necessary tools
that allow us to configure rapidly and reliably, but in some cases it is necessary to change the parameters from
a remote location, that is, we cannot stand in front of the device to connect the PC, therefore, a configuration
with SMS allows us to modify the parameters with our cell phone from any location.
7.5.1 Serial Port
To modify the configuration of the RS232/485 port the SERIAL command must be used.
Command
SERIAL baud_rate data_bit parity
flow_control_by_hardware [password]
Description
Modifies the transfer rate of the serial port.
The supported values are:
Parameter
baud_rate
Value
Data_bits
Parity
Flow_control_by_hardware
1200, 2400, 4800, 9600, 19200, 38400,
57600, 115200
7, 8
n, e, o (no parity, even parity, odd parity)
on , off
Example:
SERIAL 9600 8 n off mypass
7.5.2 Packing
To modify the packing of the serial port the PACK command must be used
Command
PACK timeWindow endCharacter
endCharacterEnable [password]
Description
Configuration of packing
The supported values are:
Parameter
timeWindow
endCharacter
endCharacterEnable
Value
[0…1000]
[0…255]
0, 1
Example:
PACK 10 13 1 mypass
www.exemys.com
Rev. 2.2.0 Julio 2010
69
GRD’s User Manual
7.6
Exemys
Monitoring and control of the GRD3002 through the SMS
Monitoring and control is generally done by means of the GRD-XF Configurator or by means of a connection
with the MW. There is another way to know the state of inputs and outputs at any time, through the SMS.
Through this means it is not only possible to know the state of digital and analog inputs and discrete outputs,
but also allows action on the outputs forcing a state. However, remember that the SMS not only can have
delays but also arrive out of order. If you send a message turning on an output, and then turning it off, you
cannot be sure which the state of the output is since it depends on the order of arrival of the SMS. This is why
we don't recommend this type of operation; however it is permitted.
7.6.1 Reading of the discrete inputs
To read the state of inputs the INPUTS command must be used
Command
INPUTS
Description
Reads the state of discrete inputs
The device will send an SMS with the following information:
I1=xx
I5=xx
I9=xx
I13=xx
I2=xx
I6=xx
I10=xx
I14=xx
I3=xx
I7=xx
I11=xx
I15=xx
I4=xx
I8=xx
I12=xx
I16=xx
xx indicates the state of discrete inputs, and it can take the values on/off
Example:
I1=on
I5=off
I9=on
I13=off
I2=off
I6=off
I10=on
I14=on
I3=on
I7=off
I11=on
I15=off
I4=off
I8=off
I12=on
I16=on
7.6.2 Writing of the discrete outputs
To act on the discrete outputs the OUTPUT command must be used. With this command it is only possible to
act on one of the outputs at a time.
Command
OUTPUT output_number state
[password]
Description
It forces the state of one of the outputs
The supported values are:
Parameter
Output_number
State
Value
[1…6]
0 , 1 / off , on
Example:
OUTPUT 3 1 mypass
Turns on output 3
www.exemys.com
Rev. 2.2.0 Julio 2010
70
GRD’s User Manual
Exemys
OUTPUT 5 off mypass
Turns off output 5
Each one of the cases will indicate if the operation was carried out.
7.6.3 Reading of analog inputs
To read the value of analog inputs the ANALOG command is used
Command
ANALOG
Description
Reads the state of analog inputs
The device will send an SMS with the following information
Ana1=xx.xx
Ana2=xx.xx
Ana3=xx.xx
Ana4=xx.xx
Ana5=xx.xx
Ana6=xx.xx
V
V
V
V
V
V
xx.xx represents the voltage in the connectors of the corresponding input
Example:
Ana1=3.23
Ana2=6.44
Ana3=9.10
Ana4=0.27
Ana5=0.21
Ana6=1.27
V
V
V
V
V
V
www.exemys.com
Rev. 2.2.0 Julio 2010
71
GRD’s User Manual
Exemys
8 GRD3003
8.1
General description of product
The GRD3003 is a RS232/485 converter to a TCP/IP with 16 discrete inputs, 6 discrete outputs and 6 analog
inputs from 0 to 20mA. It allows remote activation in real time of the discrete outputs by means of a connection
with the MW established by the GPRS and its corresponding monitoring, as well as the knowledge of the state
of analog and discrete inputs. It also allows the storage of change history, with the date and time of the moment
inputs and outputs took the state.
Features:
•
•
•
•
•
•
•
•
•
•
•
•
8.2
1 RS232/485 port
16 digital inputs
6 digital outputs
6 analog inputs of 0 to 20 mA
Instant report of change of digital inputs
Instant report of change of digital outputs
Instant report of change of analog inputs
Historical of digital inputs
Historical of digital outputs
Historical of analog inputs by maximum and minimum
Historical of analog inputs by time
Monitoring and control by SMS
Connection
www.exemys.com
Rev. 2.2.0 Julio 2010
72
GRD’s User Manual
Exemys
Figure 51 - Connection board of GRD3003
8.3
Configuration
8.3.1 Connection of GRD3003 to the GRD-XF Configuration
When connecting the GRD3003 to the GRD-XF configurator the device model is verified, this way, the
configurator enables its own options of the model GRD3003, this can be appreciated in the following figure in
the text box corresponding to the model.
Figure 52 - Access screen to the GRD-XF Configurator of the GRD3003
www.exemys.com
Rev. 2.2.0 Julio 2010
73
GRD’s User Manual
Exemys
8.3.2 Configuration of the connection with the MW
The GRD3003 must connect to a MW, for more information about the connection mode see Configuration of
the TCP connection.
8.3.3 Configuration of the serial port
Once connected with the GRD-XF Configurator you can access the particular configuration of the GRD3003
serial port through the menu in GRD->Serial Port or clicking on the GRD Series Configuration icon
The GRD-XF Configurator presents the following options that allow the determination of the GRD3003
parameters for the serial port.
Figure 53 - Configuration of the GRD3003 serial port
8.3.3.1 Serial Port
It configures the characteristics of the RS232/485 port of the GRD3003
Baud Rate: Transfer speed of the serial port
Data Bits: They can be 7 or 8 bits
Parity: Error control system
Flow control: it allows the automatic control of communication traffic according to the availability of the network,
it is generally used for large data transfers to avoid loss of information.
The supported values are:
www.exemys.com
Rev. 2.2.0 Julio 2010
74
GRD’s User Manual
Parameter
baud_rate
Data_bits
Parity
Flow_control_by_hardware
Exemys
Value
1200, 2400, 4800, 9600, 19200, 38400,
57600, 115200
7, 8
n, e, o (No parity, even parity, odd parity)
on , off
8.3.3.2 Packing
The GRD3003 will attempt to collect several data before sending a packet through the network; this is way to
take advantage of the bandwidth and the communication costs are reduced. The implemented criteria for the
end of the packet are the following:
•
•
Time window (0...1000ms): Once data are received, the GRD3003 will keep silent during this duration
before sending the packet. This criterion incorporates a delay in the transmission of the communication,
which must be treated with special care depending on the serial communication protocol being used. To
disable this criterion the time window must be configured in 0ms.
End character (0...255): Indicates the last character of a serial stream before sending the data.
If the character criteria are enabled and the time window is disabled the GRD3003
will store the received data for an indefinite time until the configured character has
arrived.
If both criteria are used the condition fulfilled first will initiate the sending of data.
Once the options that adapt better to your needs are selected the Apply button must be pressed so changes are
transferred to the GRD3003.
8.3.4 Configuration of reports
The GRD3003 uses a reporting system to inform about the state of digital inputs and outputs, this has the main
function of minimizing data traffic between the GRD and the MW reducing the communication costs and this is
the reason why a correct configuration is required.
To access the report configuration screen you must go to menu GRD ->Reports or clicking in the reports icon.
8.3.4.1 Report on digital inputs
The following figure shows the configuration screen of digital inputs.
Figure 54 – Report of digital inputs of the GRD3003
8.3.4.1.1 Report by change
Here the inputs are enabled that with the change of state will produce a report. When any of the inputs is
enabled means that when the enabled input changes value generates a message that is sent to the MW, in this
manner, only the reports of our interest are reported the moment they occur, if any of the disabled inputs
changes value it will not be reported, this input will be updated when a report is produced due to a change in an
enabled input or other type of inputs report.
8.3.4.1.2 Report by time
It defines a time in minutes that determines how often a report message is generated. Suppose that we are
interested in updating the inputs every 5 minutes independent from the change produced in the inputs, all we
www.exemys.com
Rev. 2.2.0 Julio 2010
75
GRD’s User Manual
Exemys
have to do is set the refresh time in 5 minutes and this forces a message that updates the value of the inputs in
the MW.
8.3.4.2 Report of analog inputs
In the following screen you see the configuration screen of the analog inputs. The analog inputs have 2 types of
reports. On one side the reports by percentual change on the other the temporary report.
Figure 55 – Report of analog inputs of the GRD3003
8.3.4.2.1 Report by percentual change
In the report by percentual change the inputs we want to update in the MW are enabled. Additionally, a
percentage of change of the enabled inputs is defined to determine in which percentage of change the report
must be made, that is, as you see in the following figure, when input 3, that is enabled, its voltage is modified in
15% of the 10V and a report will be produced that updates the inputs.
If we do not want to use the report by percentual change and we want to use only the report by time, enable the
inputs you want to monitor and set the percentage of change in 100%.
8.3.4.2.2 Report by time
In the report by time the GRD sends a message to the MW in a determined amount of time updating the analog
inputs that are enabled in the percentual report.
8.3.4.3 Report of digital outputs
In the following figure you see the report of digital outputs, in this case we only have a temporary report, the
report by change is always enabled, this means that when a change is produced in one of the outputs, it will be
www.exemys.com
Rev. 2.2.0 Julio 2010
76
GRD’s User Manual
Exemys
reported immediately. The objective of putting a report by time is to ensure a correct updating of the values of
the outputs.
Figure 56 – Report of digital outputs of the GRD3003
8.3.5 Configuration of historical
The GRD3003 has a system of historical records that allow the storage of events like changes in inputs or
outputs even if the GRD is on-line or off-line that are then transmitted to the MW for further visualization and
analysis.
These historical allow you to know the value and number, of an input or an output that was modified and the
date and time the event occurred.
The GRD has the capacity to store up to 50,000 events in off-line mode.
To access the configuration screen of historical you must go to menu GRD->Historical or clicking on the
historical icon
8.3.5.1 Historical of digital inputs
To enable the historical of any of the digital inputs implies that when the enabled input is modified it will produce
a historical record that will be transmitted when there is communication between the MW and the GRD.
www.exemys.com
Rev. 2.2.0 Julio 2010
77
GRD’s User Manual
Exemys
In the following figure you can see the screen to enable the historical of digital inputs.
Figure 57 – Historical of digital inputs of the GRD3003
8.3.5.2 Historical of digital inputs
Equal to the digital inputs, it is possible to take a historical of analog inputs under two clearly defined criteria.
On one side we have a record of historical of the alarm type that allows monitoring of the limits of the tensions
with a determined value of hysteresis.
On the other side, we can create a record of historical on a temporary basis, that is, sampling the analog inputs
and storing their value at a determined time.
Once the records are stored in the GRD memory, it transmits them whenever possible, but it is not lost under
any circumstance.
www.exemys.com
Rev. 2.2.0 Julio 2010
78
GRD’s User Manual
Exemys
Figure 58 – Historical of analog inputs of the GRD3003
8.3.5.3 Historical by alarm
This criterion defines a band of operation through a maximum and a minimum. When the analog input exceeds
a maximum value a historical by maximum is generated, when the analog input is less than the minimum a
historical by minimum is generated and when the analog input exceeds a maximum value or from a minimum
value to a normal value placed between both values a historical by normal value is produced. We can follow the
evolution of the input when it fluctuates between the specified limits.
In addition to the maximums and minimums a value of hysteresis must be defined to avoid the case in which if
the analog signal oscillates over a threshold value historical would continually be generated.
www.exemys.com
Rev. 2.2.0 Julio 2010
79
GRD’s User Manual
Exemys
Figure 59 – Hysteresis for maximum value
For the minimum values is exactly the same but the opposite.
Figure 60 – Hysteresis for minimum value
We must take into account that it is not possible to configure a value of hysteresis greater than the difference
between the maximum and minimum, and also a maximum less than a minimum.
8.3.5.3.1 Temporary historical
The temporary historical captures the values of the analog inputs in every determined time period. For example,
if we wish to keep a record of some analog inputs every 60 minutes we only have to indicate to the GRD which
are the inputs and the time, and the device will record the values each hour.
The GRD is prepared to record by cardinal time, this means that if we configure the time in 60 minutes at 8:38
hrs. it will record for the first time at 9:00 hrs, then at 10:00 hrs. and so on.
www.exemys.com
Rev. 2.2.0 Julio 2010
80
GRD’s User Manual
Exemys
8.3.5.4 Historical of digital outputs
Equal to the inputs you can create an historical of outputs. In this case the outputs we wish to record in the
history must be enabled, this is very useful in an audit mode since the historical record is produced at the same
time the output is modified and not at the moment when the MW is ordered to indicate the GRD that one of the
outputs must be modified.
Take into account that modifying one of the outputs depends on the availability of the GPRS communication at
that moment if you want to act through the MW.
On the other side, it is a way to know which outputs have been modified and exactly on what date and time by
any of the available means (GPRS, SMS, GRD-XF Configurator).
Figure 61 – Historical of digital outputs of the GRD3003
8.3.5.5 Serial Port Historical Download.
The GRD can download Historical Reports at the Serial Port by clicking at the Manual Download
button in the next window.
www.exemys.com
Rev. 2.2.0 Julio 2010
81
GRD’s User Manual
Exemys
Figure 62 - Manaul Download for the GRD3003
Alter that you must choose a path to download the file and its name.
www.exemys.com
Rev. 2.2.0 Julio 2010
82
GRD’s User Manual
Exemys
The fields int the file are:
• GRD_ID. The ido f the GRD.
• Date of the report.
• Timestamp or time of the report.
• Channel.
•
8 for digital inputs.
•
9 for digital outputs.
• 11 for analogical inputs.
•
•
•
Value (0000 to 1999).
Type of Historical.
Number of input/output.
•
•
•
•
•
NULL (digital inputs).
1
(time report of analogical inputs)
2
(below minimun analogic report)
3
(analogical inputs between minimun and maximun)
4
(analogical input above maximun)
This option is aviable only when there are Historical saved in the equipment.
Figure 63 - Historical of digital outputs of the GRD3002
www.exemys.com
Rev. 2.2.0 Julio 2010
83
GRD’s User Manual
Exemys
8.3.6 Date and records
Within the “Others” tab you will find, as you see in the following figure, the date of the device and the number of
historical records stored in the device, that will be transmitted to the MW as soon as a connection is obtained.
The “Update” button allows setting the device time, this is necessary of you want to have the historical with the
correct date and time, this action does not modify the date and time of the records already stored.
Setting the GRD time does not modify the date of records already stored.
The “Format” button allows the elimination of stored historical that have not been transmitted yet, take into
consideration that depending on the amount of information already stored, the operation might take several
minutes and it may happen the device does not respond during that time. When the button is pressed to clear
memory, the communication with the GRD will end.
Figure 64 – Date and records of the GRD3003
The historical records are not erased if the device is turned off. Formatting may take
several minutes and it is possible the device won’t respond.
8.4
Monitor
Once connected with the series configurator you can access monitoring of the GRD3003 through the menu in
GRD-MW Connection -> Monitor or clicking in the GRD Monitoring icon
www.exemys.com
Rev. 2.2.0 Julio 2010
84
GRD’s User Manual
Exemys
The GRD-XF Configurator, this way, allows monitoring the state of analog inputs and outputs, and also acts on
the outputs, which are activated immediately.
The following figure shows the monitoring screen of the GRD3003.
Figure 65 – Screen of inputs and outputs of the GRD3003
8.4.1 Digital inputs
It indicates the state of discrete inputs, this is done with the representation of a turned-on lamp or turned-off
lamp when the input is active or not respectively.
8.4.2 Digital outputs
The state of the outputs is expressed with the representation of a pressed button or not accompanied by the
corresponding symbol to this state and an On/Off text.
As it is possible to act on the outputs from the GRD-XF Configurator you only need to press the button of the
corresponding output for the state to change to the opposite one it had before, this is reflected immediately on
the physical output of the GRD3003.
8.4.3 Analog inputs
The state of analog inputs is represented with its corresponding numerical expression in miliamper (mA) and
with a dynamic bar that allows viewing and have and idea of the tension in the input connectors.
www.exemys.com
Rev. 2.2.0 Julio 2010
85
GRD’s User Manual
8.5
Exemys
Configuration through the SMS
The configuration is generally done through the GRD-XF Configurator, which provides all the necessary tools
that allow us to configure rapidly and reliably, but in some cases it is necessary to change the parameters from
a remote location, that is, we cannot stand in front of the device to connect the PC, therefore, a configuration
with SMS allows us to modify the parameters with our cell phone from any location.
8.5.1 Serial Port
To modify the configuration of the RS232/485 port the SERIAL command must be used.
Command
SERIAL baud_rate data_bit parity
flow_control_by_hardware [password]
Description
Modifies the transfer rate of the serial port.
The supported values are:
Parámetro
baud_rate
Valor
Data_bits
Parity
Flow_control_by_hardware
1200, 2400, 4800, 9600, 19200, 38400,
57600, 115200
7, 8
n, e, o (no parity, even parity, odd parity
on , off
Example.:
SERIAL 9600 8 n off mypass
8.5.2 Packing
To modify the packing of the serial port the PACK command must be used
Comando
PACK timeWindow endCharacter
endCharacterEnable [password]
Descripción
Configuration of packing
The supported values are:
Parameter
timeWindow
endCharacter
endCharacterEnable
Value
[0…1000]
[0…255]
0, 1
Example.:
PACK 10 13 1 mypass
8.6
Monitoring and control of the GRD3003 through the SMS
Monitoring and control is generally done by means of the GRD-XF Configurator or by means of a connection
with the MW. There is another way to know the state of inputs and outputs at any time, through the SMS.
Through this means it is not only possible to know the state of digital and analog inputs and discrete outputs,
but also allows action on the outputs forcing a state. However, remember that the SMS not only can have
www.exemys.com
Rev. 2.2.0 Julio 2010
86
GRD’s User Manual
Exemys
delays but also arrive out of order. If you send a message turning on an output, and then turning it off, you
cannot be sure which the state of the output is since it depends on the order of arrival of the SMS. This is why
we don't recommend this type of operation; however it is permitted.
8.6.1 Reading of the discrete inputs
To read the state of inputs the INPUTS command must be used
Command
INPUTS
Description
Reads the state of discrete inputs
The device will send an SMS with the following information:
I1=xx
I5=xx
I9=xx
I13=xx
I2=xx
I6=xx
I10=xx
I14=xx
I3=xx
I7=xx
I11=xx
I15=xx
I4=xx
I8=xx
I12=xx
I16=xx
xx indicates the state of discrete inputs, and it can take the values on/off.
Example:
I1=on
I5=off
I9=on
I13=off
I2=off
I6=off
I10=on
I14=on
I3=on
I7=off
I11=on
I15=off
I4=off
I8=off
I12=on
I16=on
8.6.2 Writing of the discrete outputs
To act on the discrete outputs the OUTPUT command must be used. With this command it is only possible to
act on one of the outputs at a time
Command
OUTPUT output_number state
[password
Description
It forces the state of one of the outputs
The supported values are:
Parameter
Output_number
State
Value
[1…6]
0 , 1 / off , on
Example:
OUTPUT 3 1 mypass
Turns on output 3
OUTPUT 5 off mypass
Turns off output 5
Each one of the cases will indicate if the operation was carried out.
www.exemys.com
Rev. 2.2.0 Julio 2010
87
GRD’s User Manual
Exemys
8.6.3 Reading of analog inputs
To read the value of analog inputs the ANALOG command is used
Command
ANALOG
Description
Reads the state of analog inputs
The device will send an SMS with the following information
Ana1=xx.xx
Ana2=xx.xx
Ana3=xx.xx
Ana4=xx.xx
Ana5=xx.xx
Ana6=xx.xx
mA
mA
mA
mA
mA
mA
xx.xx represent the current in the connectors of the corresponding input
Example:
Ana1=3.23 mA
Ana2=6.44 mA
Ana3=9.10 mA
Ana4=0.27 mA
Ana5=1.10 mA
Ana6=17.32 mA
www.exemys.com
Rev. 2.2.0 Julio 2010
88
GRD’s User Manual
Exemys
9 GRD4002
9.1
General description of product
The GRD4002 is a RS232/485 converter to a TCP/IP with 16 discrete inputs, 6 discrete outputs and 6 analog
inputs from 0 to 20mA. It allows remote activation in real time of the discrete outputs by means of a connection
with the MW established by the GPRS and its corresponding monitoring, as well as the knowledge of the state
of analog and discrete inputs. It also allows the storage of change history, with the date and time of the moment
inputs and outputs took the state.
Features:
•
•
•
•
•
•
•
•
•
•
•
•
•
•
•
•
•
1 RS232/485 port
16 digital inputs
6 digital outputs
4 analog inputs of 0 to 10V
2 counts inputs of 1 to 1000000000 counts
Frecuency divisor with 1 to 255 counts
Instant report of change of digital inputs
Instant report of change of digital outputs
Instant report of change of analog inputs
Time reports of count inputs
Count reports of count inputs
Historical of digital inputs
Historical of digital outputs
Historical of analog inputs by maximum and minimum
Historical of analog inputs by time
Monitoring and control by SMS
Frecuency input up to 50hz and 10ms minimum pulse wide
www.exemys.com
Rev. 2.2.0 Julio 2010
89
GRD’s User Manual
9.2
Exemys
Connection
Figure 66 - Connection board of GRD4002
9.3
Configuration
9.3.1 Connection of GRD4002 to the GRD-XF Configuration
When connecting the GRD4002 to the GRD-XF configurator the device model is verified, this way, the
configurator enables its own options of the model GRD4002, this can be appreciated in the following figure in
the text box corresponding to the model.
www.exemys.com
Rev. 2.2.0 Julio 2010
90
GRD’s User Manual
Exemys
Figure 67 - Access screen to the GRD-XF Configurator of the GRD4002
9.3.2 Configuration of the connection with the MW
The GRD4002 must connect to a MW, for more information about the connection mode see Configuration of
the TCP connection.
9.3.3 Configuration of the serial port
Once connected with the GRD-XF Configurator you can access the particular configuration of the GRD4002
serial port through the menu in GRD->Serial Port or clicking on the GRD Series Configuration icon
The GRD-XF Configurator presents the following options that allow the determination of the GRD4002
parameters for the serial port.
www.exemys.com
Rev. 2.2.0 Julio 2010
91
GRD’s User Manual
Exemys
Figure 68 - Configuration of the GRD4002 serial port
9.3.3.1 Serial Port
It configures the characteristics of the RS232/485 port of the GRD4002
Baud Rate: Transfer speed of the serial port
Data Bits: They can be 7 or 8 bits
Parity: Error control system
Flow control: it allows the automatic control of communication traffic according to the availability of the network,
it is generally used for large data transfers to avoid loss of information.
The supported values are:
Parameter
baud_rate
Data_bits
Parity
Flow_control_by_hardware
www.exemys.com
Value
1200, 2400, 4800, 9600, 19200, 38400,
57600, 115200
7, 8
n, e, o (No parity, even parity, odd parity)
on , off
Rev. 2.2.0 Julio 2010
92
GRD’s User Manual
Exemys
9.3.3.2 Packing
The GRD4002 will attempt to collect several data before sending a packet through the network; this is way to
take advantage of the bandwidth and the communication costs are reduced. The implemented criteria for the
end of the packet are the following:
•
•
Time window (0...1000ms): Once data are received, the GRD4002 will keep silent during this duration
before sending the packet. This criterion incorporates a delay in the transmission of the communication,
which must be treated with special care depending on the serial communication protocol being used. To
disable this criterion the time window must be configured in 0ms.
End character (0...255): Indicates the last character of a serial stream before sending the data.
If the character criteria are enabled and the time window is disabled the GRD4002
will store the received data for an indefinite time until the configured character has
arrived.
If both criteria are used the condition fulfilled first will initiate the sending of data.
Once the options that adapt better to your needs are selected the Apply button must be pressed so changes are
transferred to the GRD4002.
9.3.4 Configuration of reports
The GRD4002 uses a reporting system to inform about the state of digital inputs and outputs, this has the main
function of minimizing data traffic between the GRD and the MW reducing the communication costs and this is
the reason why a correct configuration is required.
To access the report configuration screen you must go to menu GRD ->Reports or clicking in the reports icon.
9.3.4.1 Report on digital inputs
The following figure shows the configuration screen of digital inputs.
Figure 64 – Report of digital inputs of the GRD4002
9.3.4.1.1 Report by change
Here the inputs are enabled that with the change of state will produce a report. When any of the inputs is
enabled means that when the enabled input changes value generates a message that is sent to the MW, in this
manner, only the reports of our interest are reported the moment they occur, if any of the disabled inputs
changes value it will not be reported, this input will be updated when a report is produced due to a change in an
enabled input or other type of inputs report.
9.3.4.1.2 Report by time
It defines a time in minutes that determines how often a report message is generated. Suppose that we are
interested in updating the inputs every 5 minutes independent from the change produced in the inputs, all we
have to do is set the refresh time in 5 minutes and this forces a message that updates the value of the inputs in
the MW.
9.3.4.2 Report of analog inputs
In the following screen you see the configuration screen of the analog inputs. The analog inputs have 2 types of
reports. On one side the reports by percentual change on the other the temporary report.
www.exemys.com
Rev. 2.2.0 Julio 2010
93
GRD’s User Manual
Exemys
Figure 69 - Report of analog inputs of the GRD4002
9.3.4.2.1 Report by percentual change
In the report by percentual change the inputs we want to update in the MW are enabled. Additionally, a
percentage of change of the enabled inputs is defined to determine in which percentage of change the report
must be made, that is, as you see in the following figure, when input 3, that is enabled, its voltage is modified in
15% of the 10V and a report will be produced that updates the inputs.
If we do not want to use the report by percentual change and we want to use only the report by time, enable the
inputs you want to monitor and set the percentage of change in 100%.
9.3.4.2.2 Report by time
In the report by time the GRD sends a message to the MW in a determined amount of time updating the analog
inputs that are enabled in the percentual report.
9.3.4.3 Report of digital outputs
In the following figure you see the report of digital outputs, in this case we only have a temporary report, the
report by change is always enabled, this means that when a change is produced in one of the outputs, it will be
reported immediately. The objective of putting a report by time is to ensure a correct updating of the values of
the outputs.
Figure 66 – Report of digital outputs of the GRD4002
www.exemys.com
Rev. 2.2.0 Julio 2010
94
GRD’s User Manual
Exemys
9.3.4.4 Input count reports.
The GRD4002 has two ways to make a count report. A time limit and a count number report.
The next Picture contains the two mentioned ways.
Figure 70 - Input count report s of the GRD4002
9.3.4.5 Time count reports.
The GRD sends a messaje to the MW when a time limited is passed. In this report only appear the
counts of the aviable inputs.
www.exemys.com
Rev. 2.2.0 Julio 2010
95
GRD’s User Manual
Exemys
Figure 71 - Input count report s of the GRD4002
9.3.4.6 Count number reports.
The GRD sends a messaje to the MW when a count limited is passed. One more time the GRD only
send the counts of the inputs who are aviable.
The GRD automately sends a count report when he make a connection with the WM.
9.3.5 Configuration of historical
The GRD4002 has a system of historical records that allow the storage of events like changes in inputs or
outputs even if the GRD is on-line or off-line that are then transmitted to the MW for further visualization and
analysis.
These historical allow you to know the value and number, of an input or an output that was modified and the
date and time the event occurred.
The GRD has the capacity to store up to 50,000 events in off-line mode.
www.exemys.com
Rev. 2.2.0 Julio 2010
96
GRD’s User Manual
Exemys
To access the configuration screen of historical you must go to menu GRD->Historical or clicking on the
historical icon
9.3.5.1 Historical of digital inputs
To enable the historical of any of the digital inputs implies that when the enabled input is modified it will produce
a historical record that will be transmitted when there is communication between the MW and the GRD.
In the following figure you can see the screen to enable the historical of digital inputs.
Figure 72 - Historical of digital inputs of the GRD4002
9.3.5.2 Historical of analogical inputs
Equal to the digital inputs, it is possible to take a historical of analog inputs under two clearly defined criteria.
On one side we have a record of historical of the alarm type that allows monitoring of the limits of the tensions
with a determined value of hysteresis.
On the other side, we can create a record of historical on a temporary basis, that is, sampling the analog inputs
and storing their value at a determined time.
Once the records are stored in the GRD memory, it transmits them whenever possible, but it is not lost under
any circumstance.
www.exemys.com
Rev. 2.2.0 Julio 2010
97
GRD’s User Manual
Exemys
Figure 73– Historical of analog inputs of the GRD4002
9.3.5.3 Historical by alarm
This criterion defines a band of operation through a maximum and a minimum. When the analog input exceeds
a maximum value a historical by maximum is generated, when the analog input is less than the minimum a
historical by minimum is generated and when the analog input exceeds a maximum value or from a minimum
value to a normal value placed between both values a historical by normal value is produced. We can follow the
evolution of the input when it fluctuates between the specified limits.
In addition to the maximums and minimums a value of hysteresis must be defined to avoid the case in which if
the analog signal oscillates over a threshold value historical would continually be generated.
www.exemys.com
Rev. 2.2.0 Julio 2010
98
GRD’s User Manual
Exemys
Figure 74– Hysteresis for maximum value
For the minimum values is exactly the same but the opposite.
Figure 75 – Hysteresis for minimum value
We must take into account that it is not possible to configure a value of hysteresis greater than the difference
between the maximum and minimum, and also a maximum less than a minimum.
9.3.5.3.1 Temporary historical
The temporary historical captures the values of the analog inputs in every determined time period. For example,
if we wish to keep a record of some analog inputs every 60 minutes we only have to indicate to the GRD which
are the inputs and the time, and the device will record the values each hour.
The GRD is prepared to record by cardinal time, this means that if we configure the time in 60 minutes at 8:38
hrs. it will record for the first time at 9:00 hrs, then at 10:00 hrs. and so on.
www.exemys.com
Rev. 2.2.0 Julio 2010
99
GRD’s User Manual
Exemys
9.3.5.4 Historical of digital outputs
Equal to the inputs you can create an historical of outputs. In this case the outputs we wish to record in the
history must be enabled, this is very useful in an audit mode since the historical record is produced at the same
time the output is modified and not at the moment when the MW is ordered to indicate the GRD that one of the
outputs must be modified.
Take into account that modifying one of the outputs depends on the availability of the GPRS communication at
that moment if you want to act through the MW.
On the other side, it is a way to know which outputs have been modified and exactly on what date and time by
any of the available means (GPRS, SMS, GRD-XF Configurator).
Figure 76– Historical of digital outputs of the GRD4002
9.3.5.5 Historical of the input counts
The count Historical can be generated only by setting a time limit. The GRD only sends historicals of
the aviable inputs.
www.exemys.com
Rev. 2.2.0 Julio 2010
100
GRD’s User Manual
Exemys
Figure 77 – Counts historical of the GRD4002
9.3.6 Date and records
Within the “Others” tab you will find, as you see in the following figure, the date of the device and the number of
historical records stored in the device, that will be transmitted to the MW as soon as a connection is obtained.
The “Update” button allows setting the device time, this is necessary of you want to have the historical with the
correct date and time, this action does not modify the date and time of the records already stored.
Setting the GRD time does not modify the date of records already stored.
The “Format” button allows the elimination of stored historical that have not been transmitted yet, take into
consideration that depending on the amount of information already stored, the operation might take several
minutes and it may happen the device does not respond during that time. When the button is pressed to clear
memory, the communication with the GRD will end.
www.exemys.com
Rev. 2.2.0 Julio 2010
101
GRD’s User Manual
Exemys
Figure 78 – Date and records of the GRD4002
The historical records are not erased if the device is turned off. Formatting may take
several minutes and it is possible the device won’t respond.
9.4
Monitor
Once connected with the series configurator you can access monitoring of the GRD4002 through the menu in
GRD-MW Connection -> Monitor or clicking in the GRD Monitoring icon
The GRD-XF Configurator, this way, allows monitoring the state of analog inputs and outputs, and also acts on
the outputs, which are activated immediately.
The following figure shows the monitoring screen of the GRD4002.
www.exemys.com
Rev. 2.2.0 Julio 2010
102
GRD’s User Manual
Exemys
Figure 79 – Screen of inputs and outputs of the GRD4002
9.4.1 Digital inputs
It indicates the state of discrete inputs, this is done with the representation of a turned-on lamp or turned-off
lamp when the input is active or not respectively.
9.4.2 Digital outputs
The state of the outputs is expressed with the representation of a pressed button or not accompanied by the
corresponding symbol to this state and an On/Off text.
As it is possible to act on the outputs from the GRD-XF Configurator you only need to press the button of the
corresponding output for the state to change to the opposite one it had before, this is reflected immediately on
the physical output of the GRD4002.
9.4.3 Analog inputs
The state of analog inputs is represented with its corresponding numerical expression in volts (V) and with a
dynamic bar that allows viewing and have and idea of the tension in the input connectors.
9.4.3.1 Count Inputs
This shows the counts value of both inputs. The GRD store the last value to recover later on in case of
electrical failure. You can set the count value if you want to begin to count from a inicial value. The maximun
count value is 1000000000, if you set this value the count will reset to 0.
www.exemys.com
Rev. 2.2.0 Julio 2010
103
GRD’s User Manual
9.5
Exemys
Configuration through the SMS
The configuration is generally done through the GRD-XF Configurator, which provides all the necessary tools
that allow us to configure rapidly and reliably, but in some cases it is necessary to change the parameters from
a remote location, that is, we cannot stand in front of the device to connect the PC, therefore, a configuration
with SMS allows us to modify the parameters with our cell phone from any location.
9.5.1 Serial Port
To modify the configuration of the RS232/485 port the SERIAL command must be used.
Command
SERIAL baud_rate data_bit parity
flow_control_by_hardware [password]
Description
Modifies the transfer rate of the serial port.
The supported values are:
Parámetro
baud_rate
Valor
Data_bits
Parity
Flow_control_by_hardware
1200, 2400, 4800, 9600, 19200, 38400,
57600, 115200
7, 8
n, e, o (no parity, even parity, odd parity
on , off
Example.:
SERIAL 9600 8 n off mypass
9.5.2 Packing
To modify the packing of the serial port the PACK command must be used
Comando
PACK timeWindow endCharacter
endCharacterEnable [password]
Descripción
Configuration of packing
The supported values are:
Parameter
timeWindow
endCharacter
endCharacterEnable
Value
[0…1000]
[0…255]
0, 1
Example.:
PACK 10 13 1 mypass
9.6
Monitoring and control of the GRD4002 through the SMS
Monitoring and control is generally done by means of the GRD-XF Configurator or by means of a connection
with the MW. There is another way to know the state of inputs and outputs at any time, through the SMS.
Through this means it is not only possible to know the state of digital and analog inputs and discrete outputs,
but also allows action on the outputs forcing a state. However, remember that the SMS not only can have
www.exemys.com
Rev. 2.2.0 Julio 2010
104
GRD’s User Manual
Exemys
delays but also arrive out of order. If you send a message turning on an output, and then turning it off, you
cannot be sure which the state of the output is since it depends on the order of arrival of the SMS. This is why
we don't recommend this type of operation; however it is permitted.
9.6.1 Reading of the discrete inputs
To read the state of inputs the INPUTS command must be used
Command
INPUTS
Description
Reads the state of discrete inputs
The device will send an SMS with the following information:
I1=xx
I5=xx
I9=xx
I13=xx
I2=xx
I6=xx
I10=xx
I14=xx
I3=xx
I7=xx
I11=xx
I15=xx
I4=xx
I8=xx
I12=xx
I16=xx
xx indicates the state of discrete inputs, and it can take the values on/off.
Example:
I1=on
I5=off
I9=on
I13=off
I2=off
I6=off
I10=on
I14=on
I3=on
I7=off
I11=on
I15=off
I4=off
I8=off
I12=on
I16=on
9.6.2 Writing of the discrete outputs
To act on the discrete outputs the OUTPUT command must be used. With this command it is only possible to
act on one of the outputs at a time
Command
OUTPUT output_number state
[password
Description
It forces the state of one of the outputs
The supported values are:
Parameter
Output_number
State
Value
[1…6]
0 , 1 / off , on
Example:
OUTPUT 3 1 mypass
Turns on output 3
OUTPUT 5 off mypass
Turns off output 5
Each one of the cases will indicate if the operation was carried out.
www.exemys.com
Rev. 2.2.0 Julio 2010
105
GRD’s User Manual
Exemys
9.6.3 Reading of analog inputs
To read the value of analog inputs the ANALOG command is used
Command
ANALOG
Description
Reads the state of analog inputs
The device will send an SMS with the following information
Ana1=xx.xx
Ana2=xx.xx
Ana3=xx.xx
Ana4=xx.xx
Ana5=xx.xx
Ana6=xx.xx
V
V
V
V
V
V
xx.xx represent the current in the connectors of the corresponding input
Example:
Ana1=3.23
Ana2=6.44
Ana3=9.10
Ana4=0.27
Ana5=1.10
Ana6=1.32
V
V
V
V
V
V
9.6.4 Reading of count inputs
To read the value of count inputs the COUNTS command is used
Command
COUNTS
Descripción
Reads the state of count inputs
The device will send an SMS with the following information
:
P1=xxxxxxxxxxxx
P2=xxxxxxxxxxxx
xxxxxxxxxxxx represent the counts in the connectors of the corresponding input
Example:
P1=5000
P2=2980
www.exemys.com
Rev. 2.2.0 Julio 2010
106
GRD’s User Manual
Exemys
10 GRD4003
10.1 General description of product
The GRD4003 is a RS232/485 converter to a TCP/IP with 16 discrete inputs, 6 discrete outputs and 6 analog
inputs from 0 to 20mA. It allows remote activation in real time of the discrete outputs by means of a connection
with the MW established by the GPRS and its corresponding monitoring, as well as the knowledge of the state
of analog and discrete inputs. It also allows the storage of change history, with the date and time of the moment
inputs and outputs took the state.
Features:
•
•
•
•
•
•
•
•
•
•
•
•
•
•
•
•
•
1 RS232/485 port
16 digital inputs
6 digital outputs
4 analog inputs of 0 to 20mA
2 counts inputs of 1 to 1000000000 counts
Frecuency divisor with 1 to 255 counts
Instant report of change of digital inputs
Instant report of change of digital outputs
Instant report of change of analog inputs
Time reports of count inputs
Count reports of count inputs
Historical of digital inputs
Historical of digital outputs
Historical of analog inputs by maximum and minimum
Historical of analog inputs by time
Monitoring and control by SMS
Frecuency input up to 50hz and 10ms minimum pulse wide
10.2 Connection
www.exemys.com
Rev. 2.2.0 Julio 2010
107
GRD’s User Manual
Exemys
Figure 80 - Connection board of GRD4003
10.3 Configuration
10.3.1 Connection of GRD4003 to the GRD-XF Configuration
When connecting the GRD4003 to the GRD-XF configurator the device model is verified, this way, the
configurator enables its own options of the model GRD4003, this can be appreciated in the following figure in
the text box corresponding to the model.
www.exemys.com
Rev. 2.2.0 Julio 2010
108
GRD’s User Manual
Exemys
Figure 81- Access screen to the GRD-XF Configurator of the GRD4003
10.3.2 Configuration of the connection with the MW
The GRD4003 must connect to a MW, for more information about the connection mode see Configuration of
the TCP connection.
10.3.3 Configuration of the serial port
Once connected with the GRD-XF Configurator you can access the particular configuration of the GRD4003
serial port through the menu in GRD->Serial Port or clicking on the GRD Series Configuration icon
The GRD-XF Configurator presents the following options that allow the determination of the GRD4003
parameters for the serial port.
www.exemys.com
Rev. 2.2.0 Julio 2010
109
GRD’s User Manual
Exemys
Figure 82 - Configuration of the GRD4003 serial port
10.3.3.1 Serial Port
It configures the characteristics of the RS232/485 port of the GRD4003
Baud Rate: Transfer speed of the serial port
Data Bits: They can be 7 or 8 bits
Parity: Error control system
Flow control: it allows the automatic control of communication traffic according to the availability of the network,
it is generally used for large data transfers to avoid loss of information.
The supported values are:
Parameter
baud_rate
Data_bits
Parity
Flow_control_by_hardware
www.exemys.com
Value
1200, 2400, 4800, 9600, 19200, 38400,
57600, 115200
7, 8
n, e, o (No parity, even parity, odd parity)
on , off
Rev. 2.2.0 Julio 2010
110
GRD’s User Manual
Exemys
10.3.3.2 Packing
The GRD4003 will attempt to collect several data before sending a packet through the network; this is way to
take advantage of the bandwidth and the communication costs are reduced. The implemented criteria for the
end of the packet are the following:
•
•
Time window (0...1000ms): Once data are received, the GRD4003 will keep silent during this duration
before sending the packet. This criterion incorporates a delay in the transmission of the communication,
which must be treated with special care depending on the serial communication protocol being used. To
disable this criterion the time window must be configured in 0ms.
End character (0...255): Indicates the last character of a serial stream before sending the data.
If the character criteria are enabled and the time window is disabled the GRD4003
will store the received data for an indefinite time until the configured character has
arrived.
If both criteria are used the condition fulfilled first will initiate the sending of data.
Once the options that adapt better to your needs are selected the Apply button must be pressed so changes are
transferred to the GRD4003.
10.3.4 Configuration of reports
The GRD4003 uses a reporting system to inform about the state of digital inputs and outputs, this has the main
function of minimizing data traffic between the GRD and the MW reducing the communication costs and this is
the reason why a correct configuration is required.
To access the report configuration screen you must go to menu GRD ->Reports or clicking in the reports icon.
10.3.4.1 Report on digital inputs
The following figure shows the configuration screen of digital inputs.
www.exemys.com
Rev. 2.2.0 Julio 2010
111
GRD’s User Manual
Exemys
Figure 83– Report of digital inputs of the GRD4003
10.3.4.1.1 Report by change
Here the inputs are enabled that with the change of state will produce a report. When any of the inputs is
enabled means that when the enabled input changes value generates a message that is sent to the MW, in this
manner, only the reports of our interest are reported the moment they occur, if any of the disabled inputs
changes value it will not be reported, this input will be updated when a report is produced due to a change in an
enabled input or other type of inputs report.
10.3.4.1.2 Report by time
It defines a time in minutes that determines how often a report message is generated. Suppose that we are
interested in updating the inputs every 5 minutes independent from the change produced in the inputs, all we
have to do is set the refresh time in 5 minutes and this forces a message that updates the value of the inputs in
the MW.
10.3.4.2 Report of analog inputs
In the following screen you see the configuration screen of the analog inputs. The analog inputs have 2 types of
reports. On one side the reports by percentual change on the other the temporary report.
www.exemys.com
Rev. 2.2.0 Julio 2010
112
GRD’s User Manual
Exemys
Figure 84– Report of analog inputs of the GRD4003
10.3.4.2.1 Report by percentual change
In the report by percentual change the inputs we want to update in the MW are enabled. Additionally, a
percentage of change of the enabled inputs is defined to determine in which percentage of change the report
must be made, that is, as you see in the following figure, when input 3, that is enabled, its voltage is modified in
15% of the 10V and a report will be produced that updates the inputs.
If we do not want to use the report by percentual change and we want to use only the report by time, enable the
inputs you want to monitor and set the percentage of change in 100%.
10.3.4.2.2 Report by time
In the report by time the GRD sends a message to the MW in a determined amount of time updating the analog
inputs that are enabled in the percentual report.
10.3.4.3 Report of digital outputs
In the following figure you see the report of digital outputs, in this case we only have a temporary report, the
report by change is always enabled, this means that when a change is produced in one of the outputs, it will be
reported immediately. The objective of putting a report by time is to ensure a correct updating of the values of
the outputs.
www.exemys.com
Rev. 2.2.0 Julio 2010
113
GRD’s User Manual
Exemys
Figure 85– Report of digital outputs of the GRD4003
10.3.4.4 Input count reports.
The GRD4003 has two ways to make a count report. A time limit and a count number report.
The next Picture contains the two mentioned ways.
www.exemys.com
Rev. 2.2.0 Julio 2010
114
GRD’s User Manual
Exemys
Figure 86 - Report of Count Input of the GRD4003
10.3.4.5 Time count reports.
The GRD sends a messaje to the MW when a time limited is passed. In this report only appear the counts of the
aviable inputs.
www.exemys.com
Rev. 2.2.0 Julio 2010
115
GRD’s User Manual
Exemys
Figure 87 - Report of Count Input of the GRD4003
10.3.4.6 Count number reports.
The GRD sends a messaje to the MW when a count limited is passed. One more time the GRD only send the
counts of the inputs who are aviable.
The GRD automately sends a count report when he make a connection with the WM.
10.3.5 Configuration of historical
The GRD4003 has a system of historical records that allow the storage of events like changes in inputs or
outputs even if the GRD is on-line or off-line that are then transmitted to the MW for further visualization and
analysis.
These historical allow you to know the value and number, of an input or an output that was modified and the
date and time the event occurred.
The GRD has the capacity to store up to 50,000 events in off-line mode.
To access the configuration screen of historical you must go to menu GRD->Historical or clicking on the
historical icon
www.exemys.com
Rev. 2.2.0 Julio 2010
116
GRD’s User Manual
Exemys
10.3.5.1 Historical of digital inputs
To enable the historical of any of the digital inputs implies that when the enabled input is modified it will produce
a historical record that will be transmitted when there is communication between the MW and the GRD.
In the following figure you can see the screen to enable the historical of digital inputs.
Figure 88– Historical of digital inputs of the GRD4003
10.3.5.2 Historical of analogical inputs
Equal to the digital inputs, it is possible to take a historical of analog inputs under two clearly defined criteria.
On one side we have a record of historical of the alarm type that allows monitoring of the limits of the tensions
with a determined value of hysteresis.
On the other side, we can create a record of historical on a temporary basis, that is, sampling the analog inputs
and storing their value at a determined time.
Once the records are stored in the GRD memory, it transmits them whenever possible, but it is not lost under
any circumstance.
www.exemys.com
Rev. 2.2.0 Julio 2010
117
GRD’s User Manual
Exemys
Figure 89– Historical of analog inputs of the GRD4003
10.3.5.3 Historical by alarm
This criterion defines a band of operation through a maximum and a minimum. When the analog input exceeds
a maximum value a historical by maximum is generated, when the analog input is less than the minimum a
historical by minimum is generated and when the analog input exceeds a maximum value or from a minimum
value to a normal value placed between both values a historical by normal value is produced. We can follow the
evolution of the input when it fluctuates between the specified limits.
In addition to the maximums and minimums a value of hysteresis must be defined to avoid the case in which if
the analog signal oscillates over a threshold value historical would continually be generated.
www.exemys.com
Rev. 2.2.0 Julio 2010
118
GRD’s User Manual
Exemys
Figure 90 – Hysteresis for maximum value
For the minimum values is exactly the same but the opposite.
Figure 91– Hysteresis for minimum value
We must take into account that it is not possible to configure a value of hysteresis greater than the difference
between the maximum and minimum, and also a maximum less than a minimum.
10.3.5.3.1 Temporary historical
The temporary historical captures the values of the analog inputs in every determined time period. For example,
if we wish to keep a record of some analog inputs every 60 minutes we only have to indicate to the GRD which
are the inputs and the time, and the device will record the values each hour.
The GRD is prepared to record by cardinal time, this means that if we configure the time in 60 minutes at 8:38
hrs. it will record for the first time at 9:00 hrs, then at 10:00 hrs. and so on.
www.exemys.com
Rev. 2.2.0 Julio 2010
119
GRD’s User Manual
Exemys
10.3.5.4 Historical of digital outputs
Equal to the inputs you can create an historical of outputs. In this case the outputs we wish to record in the
history must be enabled, this is very useful in an audit mode since the historical record is produced at the same
time the output is modified and not at the moment when the MW is ordered to indicate the GRD that one of the
outputs must be modified.
Take into account that modifying one of the outputs depends on the availability of the GPRS communication at
that moment if you want to act through the MW.
On the other side, it is a way to know which outputs have been modified and exactly on what date and time by
any of the available means (GPRS, SMS, GRD-XF Configurator).
Figure 92– Historical of digital outputs of the GRD4003
10.3.5.5 Historical of the input counts
The count Historical can be generated only by setting a time limit. The GRD only sends historicals of
the aviable inputs.
www.exemys.com
Rev. 2.2.0 Julio 2010
120
GRD’s User Manual
Exemys
Figure 93 - Count Historical settings
10.3.6 Date and records
Within the “Others” tab you will find, as you see in the following figure, the date of the device and the number of
historical records stored in the device, that will be transmitted to the MW as soon as a connection is obtained.
The “Update” button allows setting the device time, this is necessary of you want to have the historical with the
correct date and time, this action does not modify the date and time of the records already stored.
Setting the GRD time does not modify the date of records already stored.
The “Format” button allows the elimination of stored historical that have not been transmitted yet, take into
consideration that depending on the amount of information already stored, the operation might take several
minutes and it may happen the device does not respond during that time. When the button is pressed to clear
memory, the communication with the GRD will end.
www.exemys.com
Rev. 2.2.0 Julio 2010
121
GRD’s User Manual
Exemys
Figure 94 – Date and records of the GRD4003
The historical records are not erased if the device is turned off. Formatting may take
several minutes and it is possible the device won’t respond.
10.4 Monitor
Once connected with the series configurator you can access monitoring of the GRD4003 through the menu in
GRD-MW Connection -> Monitor or clicking in the GRD Monitoring icon
The GRD-XF Configurator, this way, allows monitoring the state of analog inputs and outputs, and also acts on
the outputs, which are activated immediately.
The following figure shows the monitoring screen of the GRD4003.
www.exemys.com
Rev. 2.2.0 Julio 2010
122
GRD’s User Manual
Exemys
Figure 95 – Screen of inputs and outputs of the GRD4003
10.4.1 Digital inputs
It indicates the state of discrete inputs, this is done with the representation of a turned-on lamp or turned-off
lamp when the input is active or not respectively.
10.4.2 Digital outputs
The state of the outputs is expressed with the representation of a pressed button or not accompanied by the
corresponding symbol to this state and an On/Off text.
As it is possible to act on the outputs from the GRD-XF Configurator you only need to press the button of the
corresponding output for the state to change to the opposite one it had before, this is reflected immediately on
the physical output of the GRD4003.
10.4.3 Analog inputs
The state of analog inputs is represented with its corresponding numerical expression in miliAmps (mA) and
with a dynamic bar that allows viewing and have and idea of the tension in the input connectors.
10.4.3.1 Count Inputs
This shows the counts value of both inputs. The GRD store the last value to recover later on in case of
electrical failure. You can set the count value if you want to begin to count from a inicial value. The maximun
count value is 1000000000, if you set this value the count will reset to 0.
www.exemys.com
Rev. 2.2.0 Julio 2010
123
GRD’s User Manual
Exemys
10.5 Configuration through the SMS
The configuration is generally done through the GRD-XF Configurator, which provides all the necessary tools
that allow us to configure rapidly and reliably, but in some cases it is necessary to change the parameters from
a remote location, that is, we cannot stand in front of the device to connect the PC, therefore, a configuration
with SMS allows us to modify the parameters with our cell phone from any location.
10.5.1 Serial Port
To modify the configuration of the RS232/485 port the SERIAL command must be used.
Command
SERIAL baud_rate data_bit parity
flow_control_by_hardware [password]
Description
Modifies the transfer rate of the serial port.
The supported values are:
Parámetro
baud_rate
Valor
Data_bits
Parity
Flow_control_by_hardware
1200, 2400, 4800, 9600, 19200, 38400,
57600, 115200
7, 8
n, e, o (no parity, even parity, odd parity
on , off
Example.:
SERIAL 9600 8 n off mypass
10.5.2 Packing
To modify the packing of the serial port the PACK command must be used
Comando
PACK timeWindow endCharacter
endCharacterEnable [password]
Descripción
Configuration of packing
The supported values are:
Parameter
timeWindow
endCharacter
endCharacterEnable
Value
[0…1000]
[0…255]
0, 1
Example.:
PACK 10 13 1 mypass
10.6 Monitoring and control of the GRD4003 through the SMS
Monitoring and control is generally done by means of the GRD-XF Configurator or by means of a connection
with the MW. There is another way to know the state of inputs and outputs at any time, through the SMS.
Through this means it is not only possible to know the state of digital and analog inputs and discrete outputs,
but also allows action on the outputs forcing a state. However, remember that the SMS not only can have
www.exemys.com
Rev. 2.2.0 Julio 2010
124
GRD’s User Manual
Exemys
delays but also arrive out of order. If you send a message turning on an output, and then turning it off, you
cannot be sure which the state of the output is since it depends on the order of arrival of the SMS. This is why
we don't recommend this type of operation; however it is permitted.
10.6.1 Reading of the discrete inputs
To read the state of inputs the INPUTS command must be used
Command
INPUTS
Description
Reads the state of discrete inputs
The device will send an SMS with the following information:
I1=xx
I5=xx
I9=xx
I13=xx
I2=xx
I6=xx
I10=xx
I14=xx
I3=xx
I7=xx
I11=xx
I15=xx
I4=xx
I8=xx
I12=xx
I16=xx
xx indicates the state of discrete inputs, and it can take the values on/off.
Example:
I1=on
I5=off
I9=on
I13=off
I2=off
I6=off
I10=on
I14=on
I3=on
I7=off
I11=on
I15=off
I4=off
I8=off
I12=on
I16=on
10.6.2 Writing of the discrete outputs
To act on the discrete outputs the OUTPUT command must be used. With this command it is only possible to
act on one of the outputs at a time
Command
OUTPUT output_number state
[password
Description
It forces the state of one of the outputs
The supported values are:
Parameter
Output_number
State
Value
[1…6]
0 , 1 / off , on
Example:
OUTPUT 3 1 mypass
Turns on output 3
OUTPUT 5 off mypass
Turns off output 5
Each one of the cases will indicate if the operation was carried out.
www.exemys.com
Rev. 2.2.0 Julio 2010
125
GRD’s User Manual
Exemys
10.6.3 Reading of analog inputs
To read the value of analog inputs the ANALOG command is used
Command
ANALOG
Description
Reads the state of analog inputs
The device will send an SMS with the following information
Ana1=xx.xx
Ana2=xx.xx
Ana3=xx.xx
Ana4=xx.xx
Ana5=xx.xx
Ana6=xx.xx
mA
mA
mA
mA
mA
mA
xx.xx represent the current in the connectors of the corresponding input
Example:
Ana1=3.23
Ana2=6.44
Ana3=9.10
Ana4=0.27
Ana5=1.10
Ana6=1.32
mA
mA
mA
mA
mA
mA
10.6.4 Reading of count inputs
To read the value of count inputs the COUNTS command is used
Command
COUNTS
Descripción
Reads the state of count inputs
The device will send an SMS with the following information
:
P1=xxxxxxxxxxxx
P2=xxxxxxxxxxxx
xxxxxxxxxxxx represent the counts in the connectors of the corresponding input
Example:
P1=5000
www.exemys.com
Rev. 2.2.0 Julio 2010
126
GRD’s User Manual
Exemys
A Installation Quick Guide
1) Install GRD-XF Configurator
2) Configure the Serial Port to configure the GRD
3) Connect the computer to the GRD (It is necessary for the cable to have the appropriate connection, see
Installation - Serial Connection)
4) Establish the connection
www.exemys.com
Rev. 2.2.0 Julio 2010
127
GRD’s User Manual
Exemys
5) Check the SIM card status and the signal level on the Monitor screen
www.exemys.com
Rev. 2.2.0 Julio 2010
128
GRD’s User Manual
Exemys
6) Configure PIN / GPRS / TCP
a. If the SIM Card has a configured PIN type it (press the Modify PIN button)
b. Configure GPRS configuration preconfigured Operator or APN/User/Password
c. Configure TCP connection (MW IP address and port)
d. Configure the GRD ID and password (Remember to create this GRD ID on the MW)
7) Check if the GRD-MW connection is established on the monitor screen
www.exemys.com
Rev. 2.2.0 Julio 2010
129
GRD’s User Manual
Exemys
B Troubleshooting Quick Guide
1. GRD is no responding SMS
1.1. If the GRX-XF configurator shows a crossed antenna
Power and TCP LEDs).
(GPRS flashes alternately with the
1.1.1. GRD has no signal. Check if:
1.1.1.1. The antenna is properly connected
1.1.1.2. The GRD is located in zone with GPRS service.
1.2. SIM card is failing (All LEDs flash in a synchronized manner).
1.2.1. GRD can’t access the SIM
1.2.1.1. GRX-XF configurator shows “SIM card unavailable”. Check if there’s a SIM card installed.
1.2.1.2. GRX-XF configurator shows “Configure PIN”: SIM card has a PIN. Configure the right PIN
(see Configuring the SIM Card PIN).
1.2.1.3. GRX-XF configurator shows “SIM card locked (PUK)”: SIM card is locked. You need to
unlocked it using the PUK.
1.3. No errors detected
1.3.1. Check if the SIM card has credit
1.3.2. Check if the SIM card allows the use on SMS (use it on the phone)
1.3.3. Check if the SIM card phone number is the one you are sending the messages to.
1.3.4. Check if you are sending a valid message and password.
2. Can’t establish GPRS connection
2.1. Check GRD state using the GRD-XF configurator or send a message with the “state” command
2.1.1. “GPRS connection error” (GPRS flashing fast). Check if the configured Operator matched the
SIM card operator (You can check the configured operator using the command “list”). For more
information go to Configuring the cellular telephone Carrier / Operator
2.1.2. “GPRS coverage loss” (GPRS LED flashes fast) The GRD might be in an area with no GPRS
coverage or the GPRS service is momentarily down.
2.1.3. “Establishing GPRS connection” (GPRS LED Turns on ½ second and turns off ½ second),
Usually all you have to do is to wait until you have another message.
2.1.4. “Access denied” (GPRS flashes fast). Check if the SIM card is enabled by the operator and
has credit
3. Can’t establish TCP connection
3.1. “GPRS connection error” (GPRS flashing fast) GPRS service is not working properly. Before
establishing a TCP connection the GRD needs GPRS service up.
3.2. “TCP connection not established” (TCP LED is off): There isn’t a TCP connection configured.
www.exemys.com
Rev. 2.2.0 Julio 2010
130
GRD’s User Manual
Exemys
3.3. “Waiting reconnection time...” (TCP LED is off): GRD is waiting for the configured retry time to past.
You can force a connection using the CON commando o pressing “Connect” on the configurator.
3.4. “Conecting…” (TCP LED flashes fast)
3.4.1. If the LED flashes fast for a minute or more check this:
3.4.1.1. The MW might be installed on a computer behind a firewall. You need to configure the
firewall to let the GRD to gain access to the MW.
3.4.1.2. GPRS quality must be acceptable. You can try using GPRS on a cell phone on the same
place the GRD is installed.
3.4.2.
If the LED flashes fast a few seconds (2 o 3) and then it flashes slow check this:
3.4.2.1. The configured IP address and port of the MW are OK.
3.4.2.2. The configured GRD ID and password are configure in the GRD and the MW with the same
value.
For more troubleshooting information contact as at [email protected]
www.exemys.com
Rev. 2.2.0 Julio 2010
131
GRD’s User Manual
Exemys
C SMS Commands
Message
PASSW
ID
Description
Configuration
Change SMS and MW password
Change GRD ID
Sintax
passw newPass [currentPass]
id number [Pass]
carrier name [password]
CARRIER Set carrier/operator of the GPRS service
Set APN, user and password for GPRS gprs APN userGPRS passwordGPRS
GPRS
CON
DISC
INAC
RETRY
connection
Configures the TCP connection
Disconnects the GRD from the MW
Configure inactivity time (seconds)
Configure retry time (minutes)
LIST
STATE
List GRD configuration
Lists GPRS / TCP connection state
list
state
SIGNAL
Request signal level
signal
PACK
Change serial data packing
SERIAL
Change serial port configuration
INPUTS
OUTPUT
ANALOG
Read digital inputs’ state
Change digital outputs’ state
Read analog inputs’ state
[password]
con ip port [password]
disc [password]
inac time [password]
retry time [password]
Monitoreo
GRD2001/3002/3003
www.exemys.com
pack TimeWindow endCharacter
EnablingEndCharacter [password]
serial baudRate DataBits parity
flowControl [password]
inputs
output out value [password]
analog
Rev. 2.2.0 Julio 2010
132
GRD’s User Manual
Exemys
D Default Values
Parameters
Operator / Carrier
IP address
Port
Inactivity
Retry
Maximum retry
Description
GPRS Configuration
Mobile operator / Carrier
Factory value
Configurable
by SMS
Movistar
Argentina
X
TCP Configuration
IP address of the MW
www.exemys.com
Port of the MW
40000
Inactivity time
660 seconds
Retry time
1 minute
Maximum number of connection
20
retries before waiting retry time
X
X
X
X
Fixed
Packing
Time window
End character
Enabling end
character
Baud rate
Data bits
Parity
Flow control
Time window for data packing
End character for data packing
(ASCII Value)
Enabling end character criterion
for data packing
Serial Port
Transfer speed of the serial port
It can be 7 or 8 bits
Error control system
Hardware flow control
www.exemys.com
50 ms
10
X
X
0
X
9600
8
n
off
X
X
X
X
Rev. 2.2.0 Julio 2010
133
GRD’s User Manual
Exemys
E Power Supply and Inputs/Outputs connections
The minimum and maximum admissible values in inputs as well as current and voltage outputs, and
consumption of GTS are detailed below:
Power Supply
Parameter
Input voltage
Consumption idle
Consumption in
transmission
Condition
GRD to
GRD to
GRD to
GRD to
24
12
24
12
Vdc
Vdc
Vdc
Vdc
Minimum Maximum
10
30
25
40
1
1
Units
Vdc
mA
A
Digital inputs
In order to activate digital inputs an external continuous voltage must be applied. This power supply has to
share the GND terminal with the GTS power supply. If necessary, the same power supply used to power the
GTS can be used.
The input is sinking type. It accepts PNP sourcing type sensors or devices.
Parameter
Activated input
Input impedance
Minimum
3.5
2
Maximum
28
Units
Vdc
KΩ
Two examples of how to connect directly from the same power source of the GTS as well as an external power
supply where it can be seen that they must share a common terminal are shown
www.exemys.com
Rev. 2.2.0 Julio 2010
134
GRD’s User Manual
Exemys
Figure 96 - Digital input with single power supply Figure 97 - Digital input with double power supply
Digital outputs
The digital outputs are open collector type. The load to be connected must be supplied with and external power
supply and they have to share the same GND terminal with the GTS power supply. If necessary, the same
power supply to power the equipment can be used. The output is of the NPN sourcing type.
Parameter
Supported voltage
Current
Minimum
Maximum
45
50
Units
Vdc
mA
Figure 98 – Digital output with single power supply Figure 99 – Digital output with double power supply
www.exemys.com
Rev. 2.2.0 Julio 2010
135
GRD’s User Manual
Exemys
Digital output to drive a relay
When used one digital output is used to a relay is necessary add in the connection a protection diode to avoid
damage in the equipment. The diode must be connected in reverse (the anode to the output terminal of the
equipment and the cathode to the positive terminal that feeds the relay).
The relay must be feed using a external power supply, sharing the GND terminal to the power supply of the
equipment, or if necessary you can use the same source which feeds the GTS.
Figure 100 - Output with relay (single power supply) Figure 101 - Output whit relay (double power supply)
Analog inputs
The analog inputs are referred to the GND terminal of the GTS, so the power supply to feed the sensor must
share the GND terminal with the GTS.
GRD3002
Parameter
Bottom of scale
Precision
Tolerance
Input impedance
Value
10.00
0.01
±0.2
13.3
Units
Vdc
Vdc
full scale %
KΩ
Two examples of how to connect an analog input of voltage for a single power supply and for independent
power supplies are shown below.
www.exemys.com
Rev. 2.2.0 Julio 2010
136
GRD’s User Manual
Figure 102 – Analog for a single power supply
Exemys
Figure 103 – Analog for a double power supply
GRD3003
Parameter
Bottom of scale
Precision
Tolerance
R of shunt
Value
20.00
0.01
±0.4
124
Units
mA
mA
full scale %
Ω
Two examples where you can see the connection of a 4 – 20 ma sensor sharing the power supply with the GTS
for passive sensors or for active sensors with independent power supply are shown below.
Figure 104 – Analog for a passive sensor
www.exemys.com
Figure 105 – Analog for an active sensor
Rev. 2.2.0 Julio 2010
137