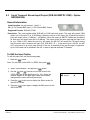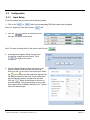
1
RD1000 / RD1002 Receiver Descrambler User Manual (Release 7.7.1) Edition A www.thomson-networks.com This document and any updates and/or supplemental information, including any copies thereof, cannot be reproduced, neither communicated to a third party, without written authorization from THOMSON. 2012 THOMSON All rights reserved BLANK PAGE Page 2 Edition A THOMSON RD1000 / RD1002 Receiver Descrambler - User Manual (release 7.7.1) THOMSON RD1000 / RD1002 Receiver Descrambler - User Manual (release 7.7.1) Page 3 Edition A FCC Class A Information The RD1000 and RD1002 have been tested and found to comply with the limits for a Class A digital device, pursuant to Part 15 of the FCC Rules. These limits are designed to provide reasonable protection against harmful interference when the equipment is operated in a commercial environment. This equipment generates, uses, and can radiate radio frequency energy and, if not installed and used in accordance with the instructions, may cause harmful interference to radio communications. Operation of this equipment in a residential area is likely to cause harmful interference in which case the user will be required to correct the interference at his or her own expense. Shielded cables must be used with this unit to ensure compliance with the Class A FCC limits. Warning: Changes or modifications to this unit not expressly approved by the party responsible for compliance could void the user’s authority to operate the equipment. Registered Trademarks Dolby and the double-D symbol are registered trademarks of Dolby laboratories. As regards the broadcasting of televised programmes, MPEG-4 licences are unlike MPEG-2 ones in that they are linked to services and not devices (Encoders and Decoders). Content providers or operators are therefore requested to familiarise themselves with the licensing conditions for MPEG4-AVC technology and to obtain the rights from the relevant bodies before broadcasting programmes in MPEG-4. Page 4 Edition A THOMSON RD1000 / RD1002 Receiver Descrambler - User Manual (release 7.7.1) WARNING PLEASE OBSERVE THESE SAFETY PRECAUTIONS There is always a danger present when using electronic equipment. Unexpected high voltages can be present at unusual locations in defective equipment and signal distribution systems. Become familiar with the equipment that you are working with and observe the following safety precautions. • Every precaution has been taken in the design of your unit to ensure that it is as safe as possible. However, safe operation depends on you the operator. • Always be sure your equipment is in good working order. Ensure that all points of connection are secure to the chassis and that protective covers are in place and secured with fasteners. • Never work alone when working in hazardous conditions. Always have another person close by in case of an accident. • Always refer to the manual for safe operation. If you have a question about the application or operation call THOMSON for assistance. • Never allow your equipment to be exposed to water or high moisture environments. If exposed to a liquid, remove power safely (at the breaker) and send your equipment to be serviced by a qualified technician. THOMSON RD1000 / RD1002 Receiver Descrambler - User Manual (release 7.7.1) Page 5 Edition A BLANK PAGE Page 6 Edition A THOMSON RD1000 / RD1002 Receiver Descrambler - User Manual (release 7.7.1) Contents Overview ........................................................................................................................................................ 9 Ordering references ...................................................................................................................................... 10 Section 1 – Getting Started .............................................................................................................................. 11 1.1 Installation ..................................................................................................................................... 12 1.2 Quick Start Guide .......................................................................................................................... 13 1.3 Maintenance ................................................................................................................................. 13 Section 2 – Controls and Configuration ........................................................................................................... 15 2.1 Front of Unit .................................................................................................................................. 16 2.2 Rear of Unit ................................................................................................................................... 16 2.3 Front Panel Display Layout ........................................................................................................... 16 2.4 Front Panel Indicators ................................................................................................................... 17 2.5 Input Error Logic ........................................................................................................................... 17 2.6 Temperature Error Logic ............................................................................................................... 17 2.7 Fan Error Logic ............................................................................................................................. 17 2.8 SNMP Traps ................................................................................................................................. 17 2.9 Input/Output Slot Organization ...................................................................................................... 17 Section 3 – Option Cards Overview ................................................................................................................. 19 3.1 8VSB/QAM Receiver – Option NRD00HCSAA.............................................................................. 21 3.2 Serial Transport Stream I/O (DVB-ASI/SMPTE 310M) – Option NRD00H02AA ............................ 21 3.3 GPIO Module – Option NRD00H10AA .......................................................................................... 21 3.4 Dual Input COFDM Receiver – Option NRD00H04AA ................................................................... 21 3.5 Quad Input DVB-S/DVB-S2 with LNB – Option NRD00H12AB ..................................................... 21 3.6 CAM Decryption – Basic feature ................................................................................................... 21 3.7 Dual MPEG over IP Input/ UDP Output – Option NRD00H05AA ................................................... 22 3.8 Dual MPEG over IP output with PID filtering – Option NRD00H13AA ........................................... 22 3.9 Advanced Satellite Features – Option NRD00S02AA.................................................................... 23 Section 4 – Using the Front Panel to Configure the unit................................................................................... 25 4.1 Input Option – Active Input and Backup Configuration Selection ................................................... 26 4.2 8VSB/QAM Receiver – Option NRD00HCSAA.............................................................................. 29 4.3 Serial Transport Stream Input/Output (DVB-ASI/SMPTE 310M) – Option NRD00H02AA ............. 32 4.4 GPIO Module – Option NRD00H10AA .......................................................................................... 34 4.5 Dual Input COFDM Receiver – Option NRD00H04AA ................................................................... 35 4.6 Quad Input DVB-S/DVB-S2 Receiver with LNB – Option NRD00H12AB....................................... 38 4.7 CA Decryption – Basic feature ..................................................................................................... 43 4.8 Dual MPEG over IP Input/ UDP Output – Option NRD00H05AA ................................................... 48 4.9 Dual MPEG over IP output with PID filtering – Option NRD00H13AA ........................................... 64 4.10 Active Errors ................................................................................................................................. 70 4.11 Event Log ...................................................................................................................................... 71 4.12 Password Strength ........................................................................................................................ 73 4.13 Network Security ........................................................................................................................... 75 4.14 Network Setup .............................................................................................................................. 77 4.15 Panel Lock .................................................................................................................................... 79 4.16 SNMP Configuration ..................................................................................................................... 81 4.17 SMPTE 333M Configuration .......................................................................................................... 83 THOMSON RD1000 / RD1002 Receiver Descrambler - User Manual (release 7.7.1) Page 7 Edition A 4.18 4.19 System Information ....................................................................................................................... 84 Feature Licensing ......................................................................................................................... 88 Section 5 – Using the Web Client to Configure the unit.................................................................................... 89 5.1 Login ............................................................................................................................................. 90 5.2 Status Indicators ........................................................................................................................... 90 5.3 Configuration................................................................................................................................. 91 5.4 Unit ............................................................................................................................................... 93 5.5 Profiles .......................................................................................................................................... 96 5.6 Web Passwords .......................................................................................................................... 101 5.7 Password Strenght ...................................................................................................................... 101 5.8 Network Services ........................................................................................................................ 102 5.9 Reset Unit ................................................................................................................................... 102 5.10 Software Updates ....................................................................................................................... 103 5.11 Diagnostics ................................................................................................................................. 103 5.12 About .......................................................................................................................................... 104 5.13 Feature Licensing ....................................................................................................................... 104 Section 6 – Appendices ................................................................................................................................. 105 Appendix A – Acronyms and Glossary ........................................................................................................... 106 Appendix B – Error/Event List ........................................................................................................................ 109 Appendix C – Specifications ........................................................................................................................... 111 Appendix C.a. Device – base unit ........................................................................................................ 111 Appendix C.b. CAM Decryption – Basic feature ................................................................................... 113 Appendix C.c. 8VSB/QAM Receiver – Option NRD00HCSAA .............................................................. 114 Appendix C.d. Serial TS Input/Output (DVB-ASI /SMPTE 310M) – Option NRD00H02AA ................... 115 Appendix C.e. GPIO Module – Option NRD00H10AA .......................................................................... 116 Appendix C.f. Dual Input COFDM Receiver – Option NRD00H04AA ................................................... 116 Appendix C.g. Quad Input DVB-S/DVB-S2 Receiver with LNB – Option NRD00H12AB ...................... 117 Appendix C.h. Dual Input MPEG over IP Receiver/UDP Output – Option NRD00H05AA ..................... 118 Appendix C.i. Dual MPEG over IP output with PID filtering – Option NRD00H13AA............................. 119 Appendix C.j. DVB-S2 advanced features – Software Option NRD00S02AA ...................................... 120 Appendix D – Coordinated Universal Time ..................................................................................................... 121 Page 8 Edition A THOMSON RD1000 / RD1002 Receiver Descrambler - User Manual (release 7.7.1) Overview The RD1000 or RD1002 is extremely versatile piece of equipment and in order to further expand its capabilities its internal setup can be factory configured in a number of different ways. The RD1000 is a mono channel receiver – descrambler. This configuration provides no decoded video output. The placement of input/output cards can be in slots 1-2, 1-3, 1-4, 2-2, 2-3, 2-4. No video output cards may be installed. This configuration is usually used as a satellite receiver or in combination with an MPEG/IP card to encapsulate the TS from the active input and transmit it via IP. Only one input may be active at a time. The RD1002 is a dual channels receiver - descrambler This configuration provides no decoded video output. This configuration offers 2 independent receivers descramblers, each having its own inputs and outputs. The placement of input/output cards can be in slots 1-2, 1-3, 1-4 for receiver #1 (RDS1) and 2-2, 2-3, 2-4 for receiver #2 (RDS2). No video output cards may be installed. Only one input per receiver may be active at a time. THOMSON RD1000 / RD1002 Receiver Descrambler - User Manual (release 7.7.1) Page 9 Edition A Ordering references • Base Unit References Name NRD10000AA RD1000 NRD10020AA RD1002 • Description Base unit : 1RU chassis Single Multiservices descrambler, AC Power Supply 2 Common interface (up to 48 PIDs CAS dependent) Base unit : 1RU chassis Dual Multiservices descrambler, AC Power Supply 2 Common interface (up to 48 PIDs CAS dependent) Options References Name Description NRD00H02AA ASI in/out Hardware Option. ASI input/output (DVB-ASI or SMPTE310M selectable) NRD00H12AB DVB-S2 in Hardware Option. DVB-S/DVB-S2 quad port interface NRD00H04AA COFDM Hardware Option. COFDM input interface NRD00HCSAA 8VSB Hardware Option. 8 VSB input interface NRD00H05AA MPEGoIP Hardware Option. MPEG over IP input with FEC, and output over 2xGiga interfaces NRD00H13AA PID Filter MPEGoIP Hardware Option. Dual MPEG over IP output with PID filtering NRD00H10AA GPIO Hardware Option. General Purpose In and Out NRD00S02AA DVB-S2 adv modes Software Option; DVB-S2 Advanced modes (16APSK, 32APSK, ISI filtering, VCM) Page 10 Edition A THOMSON RD1000 / RD1002 Receiver Descrambler - User Manual (release 7.7.1) Section 1 – Getting Started Introduction This section includes the following topics: 1.1 1.2 1.3 Installation ..................................................................................................................................... 12 Quick Start Guide .......................................................................................................................... 13 Maintenance ................................................................................................................................. 13 THOMSON RD1000 / RD1002 Receiver Descrambler - User Manual (release 7.7.1) Page 11 Edition A 1.1 Installation Cooling The unit is cooled via forced induction through the front of the unit and exhausted through the vents on either side. The unit is equipped with a temperature controlled status indicator. If the temperature in the inside of the unit exceeds 70° C the red “Error” LED will illuminate and a description of the error will appear in the “Error List.” Rack Information The unit is intended to be mounted in a standard 19” rack. It occupies 1RU of rack space and the connections are all on the rear of the unit. Rack Installation To install the unit into a rack use the following steps: 1. Determine the desired position in the rack for the unit making sure that the air intake on the front of the unit and the exhausts on the sides of the unit will not be obstructed. 2. Insert the rack mount clips into place over the mounting holes in the rack. 3. Slide the unit into position in the rack. 4. Secure the unit to the rack by installing the four supplied screws through the front mounting holes and tightening. Page 12 Edition A THOMSON RD1000 / RD1002 Receiver Descrambler - User Manual (release 7.7.1) Power Connection Using the proper power connections is vital to the safe operation of the unit. Only use the supplied 3-prong power connector or one with equal specifications. NEVER tamper with or remove the 3rd – prong grounding pin. This could cause damage to the unit, personnel, or property. AC Power Connection The unit is intended for use on either 120V or 240V systems. The power supply will automatically detect the system it is connected to. To hook up the power use the following steps: 1. Locate the AC power cord that was included with the unit. 2. Plug the female end of the power cord (end with no prongs) into the back of the unit. 3. Locate a protected outlet (usually inside of the rack) to plug the male end of the power cable into. 1.2 Quick Start Guide Quick Start To get the unit up and running there is a few things that need to be done. 1. Select the desired input as active. 2. Setup the Source ID. 3. Setup the desired output(s). The easiest way to set these options up is to refer to Section 4. At the beginning of Section 4 is a table that shows the specific cards included in that section. Find the desired card in the table, then navigate to the corresponding page number and follow the step-by-step instructions. 1.3 Maintenance The unit is virtually a maintenance-free piece of equipment. There are no user serviceable parts on the inside of the unit however it is recommended that the user cleans the intake filter on the front right side of the unit on a regular basis to ensure the unit has an unobstructed cool air intake. This filter is removed easily, for cleaning, by opening the door on the front right side of the unit and removing the filter. THOMSON RD1000 / RD1002 Receiver Descrambler - User Manual (release 7.7.1) Page 13 Edition A BLANK PAGE Page 14 Edition A THOMSON RD1000 / RD1002 Receiver Descrambler - User Manual (release 7.7.1) Section 2 – Controls and Configuration Introduction This section includes an overview of the unit. 2.1 2.2 2.3 2.4 2.5 2.6 2.7 2.8 2.9 Front of Unit .................................................................................................................................. 16 Rear of Unit ................................................................................................................................... 16 Front Panel Display Layout ........................................................................................................... 16 Front Panel Indicators ................................................................................................................... 17 Input Error Logic ........................................................................................................................... 17 Temperature Error Logic ............................................................................................................... 17 Fan Error Logic ............................................................................................................................. 17 SNMP Traps ................................................................................................................................. 17 Input/Output Slot Organization ...................................................................................................... 17 THOMSON RD1000 / RD1002 Receiver Descrambler - User Manual (release 7.7.1) Page 15 Edition A 2.1 Front of Unit 2.2 Rear of Unit 2.3 Front Panel Display Layout The following figure shows a typical screen on the front panel. Several important features have been circled and noted below. These features are common to all screens and assist when navigating, viewing and editing unit information. The button will return the user to the home level while in any screen. In order to edit a selected parameter, the button must be pressed. Once a parameter has been changed, the button must be pressed again before the change takes effect on the unit. Pressing the button will leave an edit mode without changes taking effect. 1 3 1. 2. 3. 4. Page 16 Edition A 2 ↓↑ RDS1 Serv Setup Tune Mode:PID Lock PID Select:Manual ►PCR PID :0x0031 1 ↵ 4 Icons indicate which control buttons are currently valid for entry. Screen title. Cursor shows which line is active. When editing, active character or item is highlighted. THOMSON RD1000 / RD1002 Receiver Descrambler - User Manual (release 7.7.1) 2.4 Front Panel Indicators The unit has three internal error parameters: INPUT, FAN and TEMPERATURE. These parameters can be monitored locally or remotely. Locally the unit’s status can be checked by visually looking at the INPUT LED and the ERROR LED on the front panel, then use the “Error List” under the button to pinpoint the error. Remotely, the unit’s status can be checked by using the web client and looking at the status icons on the top of the main window. To see a detailed list of errors, click on the tab from the web client. The INPUT LED indicates the presence of a stream at the user-selected input. “Stream present” is represented by a green INPUT LED while “stream NOT present” is represented by a dark INPUT LED. The ERROR LED represents the combined status of the unit’s error indicators. If INPUT, TEMP, or FAN status is in the error state, the LED will be red. If all error indicators are good, the LED will be dark. 2.5 Input Error Logic The input status is based on the selected input card’s status and the transport error indicator bit in the transport stream being decoded. For example if the current input is VSB, the input status is based on: VSB receiver lock, RF channel level, and the MER level. The RF channel and MER thresholds can be set by the user. If the unit detects the presence of the transport error bit in a transport packet header, the input status will be an error for 0.5 seconds each time the TS error bit is set. The system must detect a constant cadence of sync bytes (0x47h) every 188 bytes and detect a valid PAT at least every 500 ms in order for the INPUT LED to illuminate. 2.6 Temperature Error Logic The temperature error indicator is based on the correct operation of the unit. If the unit’s internal temperature exceeds 70 degrees C, the temperature status will be in the error state. 2.7 Fan Error Logic If the fan in the unit fails, the fan status will be in the error state. The fan status will be good as long as the fan is spinning at the proper RPM. 2.8 SNMP Traps The unit contains separate SNMP Traps for Fan Status, Temperature Status, Input Status, and IP Receive Group. Whenever any item changes state, a trap is sent to the configured host. 2.9 Input/Output Slot Organization The unit’s modular design allows many different input/output configurations. An indexing system is used to identify module slots for configuration and monitoring reference. The bottom row of slots is numbered 1-1 through 1-4 (left to right). The top row is numbered 2-1 through 2-4 as shown. THOMSON RD1000 / RD1002 Receiver Descrambler - User Manual (release 7.7.1) Page 17 Edition A BLANK PAGE Page 18 Edition A THOMSON RD1000 / RD1002 Receiver Descrambler - User Manual (release 7.7.1) Section 3 – Option Cards Overview Introduction This section includes a brief overview of the different option cards that are available for the unit. There are descriptions of each card as well as pictures of the various inputs and outputs for each card. 3.1 3.2 3.3 3.4 3.5 3.6 3.7 3.8 3.9 8VSB/QAM Receiver – Option NRD00HCSAA.............................................................................. 21 Serial Transport Stream I/O (DVB-ASI/SMPTE 310M) – Option NRD00H02AA ............................ 21 GPIO Module – Option NRD00H10AA .......................................................................................... 21 Dual Input COFDM Receiver – Option NRD00H04AA ................................................................... 21 Quad Input DVB-S/DVB-S2 with LNB – Option NRD00H12AB ..................................................... 21 CAM Decryption – Basic feature ................................................................................................... 21 Dual MPEG over IP Input/ UDP Output – Option NRD00H05AA ................................................... 22 Dual MPEG over IP output with PID filtering – Option NRD00H13AA ........................................... 22 Advanced Satellite Features – Option NRD00S02AA.................................................................... 23 THOMSON RD1000 / RD1002 Receiver Descrambler - User Manual (release 7.7.1) Page 19 Edition A 3.1 8VSB/QAM Receiver – Option NRD00HCSAA 3.2 Serial Transport Stream I/O (DVB-ASI/SMPTE 310M) – Option NRD00H02AA 3.3 GPIO Module – Option NRD00H10AA 3.4 Dual Input COFDM Receiver – Option NRD00H04AA 3.5 Quad Input DVB-S/DVB-S2 with LNB – Option NRD00H12AB 3.6 CAM Decryption – Basic feature 3.7 Dual MPEG over IP Input/ UDP Output – Option NRD00H05AA 3.8 Dual MPEG over IP output with PID filtering – Option NRD00H13AA 3.9 Advanced Satellite Features – Option NRD00S02AA Page 20 Edition A THOMSON RD1000 / RD1002 Receiver Descrambler - User Manual (release 7.7.1) 3.1 8VSB/QAM Receiver – Option NRD00HCSAA This card will receive a TS that is demodulated from an 8VSB signal or it will demodulate a QAM64B or QAM256B RF input. With an 8VSB input, the card will tune to channels 2 – 69. With a QAM input, the card will tune to channels 2 – 134 in three cable frequency bands (FCC, IRC, and HRC). The unit will show a valid input if the following conditions are met: the receiver equalizer and the FEC are locked. If the RF level is lower than the “Low Warning Setting” or the MER is lower than the “Low MER Warning Setting”, the red “Error” LED will illuminate on the front panel and there will be an error recorded in the Error List. 3.2 Serial Transport Stream I/O (DVB-ASI/SMPTE 310M) – Option NRD00H02AA This card will receive a TS from either a DVB-ASI input or a SMPTE 310M input. Only one format may be selected at a time. For an ASI input, the bitrate of the TS must be between 1.5 Mb/s and 160 Mb/s. For a SMPTE 310M input, the bitrate of the TS must be 19.392658 Mb/s. The selected input format will also be the output format. In ASI mode the ASI OUT will output the TS signal after de-scrambling coming from the active input, whatever the input (ASI, DVB S/S2, IP...) 3.3 GPIO Module – Option NRD00H10AA This module is considered a global unit option. In other words, the inputs and outputs of a single installed module can be accessed by functions associated with general system features, or RDS specific features in any unit configuration. Only one GPIO module can be installed in a unit. 3.4 Dual Input COFDM Receiver – Option NRD00H04AA This card will input a (49 – 861 MHz) COFDM signal for use in electronic news gathering (U.S.) or any COFDM Terrestrial Broadcast (DVB-T, European) applications. The card provides A and B inputs, which may be independently configured, but only one may be active at a time. 3.5 Quad Input DVB-S/DVB-S2 with LNB – Option NRD00H12AB This card will input a satellite L-band (950 MHz – 2150 MHz) signal for demodulation of KU-band or C-band DVB-S QPSK signals or DVB-S2 QPSK/8PSK signals. The symbol rate ranges from 1 MSym/s to 45 MSym/s for both DVB-S and DVB-S2. This card provides LNB power and 22 kHz control tone to the active input. This card has advanced feature options of multistream input, support for VCM, and support for 16APSK and 32APSK modulation. The “Input” LED will only illuminate if the card detects frequency, symbol rate, FEC lock (Carrier Lock), and TS sync (Sync Lock). The card provides A, B, C and D inputs, which may be independently configured, but only one may be active at a time. 3.6 CAM Decryption – Basic feature This is a factory installed slot that will allow for up to two CAM cards to be installed at a time, giving the unit the ability to decrypt Conditional Access transport streams. In a single channel configuration, the two CAM slot are automatically daisy chained. It allows supporting up to two CAS systems per incoming Transport Stream. In dual channels configuration, a CAM slot is allocated to each channel. THOMSON RD1000 / RD1002 Receiver Descrambler - User Manual (release 7.7.1) Page 21 Edition A The CAM interface bitrate is limited to 72Mbps. It receives the total incoming TS, not only the scrambled services. Caution: Some input interfaces could provide more than 72Mbps, thus preventing correct decryption. This option also enables BISS mode 1 & E descryption. It manages one key per channel, means one key for a single configuration and two keys for a dual configuration. 3.7 Dual MPEG over IP Input/ UDP Output – Option NRD00H05AA This card is a dual purpose card in that it can receive and/or transmit from the internal TS bus, MPEG over IP. It has two physical connectors that can be configured independently. Up to two multicasts can be subscribed to, allowing for a backup multicast to be chosen and two UDP mirrored unicasts can be transmitted to allow for redundancy Example Configurations: IP Address Selection “Leave” IGMP V2 & V3 Multicast/Unicast Filter Mode: Include IP list: empty Unicast: X.X.X.X – 223.255.255.255 Multicast: 224.X.X.X – 239.255.255.255 Suggested Multicast Range: 239.192.X.X “Join” IGMP V2 & V3 Multicast/Unicast Filter Mode: Exclude IP list: empty Suggested Port Selection “Join Filtered” IGMP V3 Multicast/Unicast Filter Mode: Include IP: X.X.X.X Or Filter Mode: Exclude IP: X.X.X.X 3.8 - Choose a port number of 5000 or more - Choose even numbered ports - If using FEC the following example applies - Destination port = 5000 - Column FEC = 5002 - Row REC = 5004 - Next available multicast port = 5006 Dual MPEG over IP output with PID filtering – Option NRD00H13AA This card has the ablility to “remultiplex” the active input TS into a transport stream with reduced services and/or a lower bitrate before transmission onto the network. The NRD00H13AA option is a single slot output only card that supports PID filtering and automatic table modification. The NRD00H13AA output cardwill use two Ethernet connections independently to transmit MPEG2 transport streams over IP networks from a valid input source (ASI, DVB-S2, IP input, etc.) A multi program transport stream (MPTS) input can be reduced into as many as 5 output transport streams. Any combination of services present in the source stream may be selected for the output transport stream. Each output IP stream can then be routed to one of two Ethernet ports as desired. The NRD00H13AA can also adapt the transport stream bitrate and recalculate the PCR values in the output transport streams to be correct for the new multiplex. IP Address Selection Unicast: X.X.X.X – 223.255.255.255 Multicast: 224.X.X.X – 239.255.255.255 Suggested Multicast Range: 239.192.X.X Page 22 Edition A THOMSON RD1000 / RD1002 Receiver Descrambler - User Manual (release 7.7.1) 3.9 Advanced Satellite Features – Option NRD00S02AA This software option enable the Advanced Satellite Features of the NRD00H12AB (DVB-S/DVB-S2 Quad port receiver optional card). If the NRD00S02AA option is installed, the”Multistream” settings will be available and the NRD00H12AB card will be able to receive multistream transport streams, VCM, 16APSK modulation and 32APSK modulation. THOMSON RD1000 / RD1002 Receiver Descrambler - User Manual (release 7.7.1) Page 23 Edition A BLANK PAGE Page 24 Edition A THOMSON RD1000 / RD1002 Receiver Descrambler - User Manual (release 7.7.1) Section 4 – Using the Front Panel to Configure the unit Introduction This section describes how to navigate through the configuration menus on the front panel of the unit. Note: All instructions in this manual are based on the unit software versions 7.6.x. Newer versions of software, when released, may operate slightly different in regards to menus and configuration. 4.1 4.2 4.3 4.4 4.5 4.6 4.7 4.8 4.9 4.10 4.11 4.12 4.13 4.14 4.15 4.16 4.17 4.18 4.19 Input Option – Active Input and Backup Configuration Selection ................................................... 26 8VSB/QAM Receiver – Option NRD00HCSAA.............................................................................. 29 Serial Transport Stream Input/Output (DVB-ASI/SMPTE 310M) – Option NRD00H02AA ............. 32 GPIO Module – Option NRD00H10AA .......................................................................................... 34 Dual Input COFDM Receiver – Option NRD00H04AA ................................................................... 35 Quad Input DVB-S/DVB-S2 Receiver with LNB – Option NRD00H12AB....................................... 38 CA Decryption – Basic feature ..................................................................................................... 43 Dual MPEG over IP Input/ UDP Output – Option NRD00H05AA ................................................... 48 Dual MPEG over IP output with PID filtering – Option NRD00H13AA ........................................... 64 Active Errors ................................................................................................................................. 70 Event Log ...................................................................................................................................... 71 Password Strength ........................................................................................................................ 73 Network Security ........................................................................................................................... 75 Network Setup .............................................................................................................................. 77 Panel Lock .................................................................................................................................... 79 SNMP Configuration ..................................................................................................................... 81 SMPTE 333M Configuration .......................................................................................................... 83 System Information ....................................................................................................................... 84 Feature Licensing ......................................................................................................................... 88 THOMSON RD1000 / RD1002 Receiver Descrambler - User Manual (release 7.7.1) Page 25 Edition A 4.1 Input Option – Active Input and Backup Configuration Selection General Information The selection of the Active input and configuration of the Backup input are described in this section. Supported Option Cards: NRD00HCSAA (8VSB Input interface), NRD00H02AA (ASI Input/Output), NRD00H04AA (COFDM Input) and NRD00H05AA (MPEG over IP Input/Output). Description: The Active input specifies the card that is being used as the input option. The Backup configuration enables/disables the switching to a backup input, defines the Primary Input and Backup Input, when to restore to the Primary Input and a timeout before switching to the Backup Input or restoring to the Primary Input. Changing the Active Input To set an Active Input, use the following steps: 1. Press the button. Note: For dual units, select RDS1 or RDS2, then press ↓↑ Input ►Active Input Backup Mode Input Modules . 2. Press the button to edit the Active Input. The current Active Input is displayed along with a “(P)” for Primary or “(B)” for Backup if the Backup Mode in enabled. 3. Press the Edition A ↓↑ Active Input Active Input: ASI/310M 2-3 (P) ↵ button again to edit the Active Input. 4. Press the button again to use the and buttons to change the Active Input selection, then press the button to save the selection. Page 26 ↵ ↓↑ Input Active Input: ► ASI/310M 2-3 (P) ↵ THOMSON RD1000 / RD1002 Receiver Descrambler - User Manual (release 7.7.1) Note: When Backup Mode is enabled, only the Primary or Backup input option can be made the active input. If Backup Mode is disabled, any installed input option can be made the active input. Configuring Input Backup Settings 1. Press the button. 2. Use the and buttons to move the cursor to “Backup Mode”, then press the button. 3. Press the button again to edit the Backup settings. ↓↑ ↵ ↓↑ ↵ ↓↑ ↵ ↓↑ ↵ Input Active Input ►Backup Mode Input Modules Setting the Backup Mode 1. Use the and buttons to move the cursor to “Backup:”, then press the button. 2. Use the and buttons to select “Enabled” or Disabled” and then press the button to save the selection. Backup Mode ►Backup:Enabled Primary Input: ASI/310M 1-2 Setting the Primary Input 1. Use the and buttons to move the cursor to the input shown as the Primary Input, then press the button. 2. Use the and buttons to select the input option to use as the Primary and then press the button to save the selection. Backup Mode Backup:Enabled Primary Input: ► ASI/310M 1-2 Setting the Backup Input 1. Use the and buttons to move the cursor to the input shown as the Backup Input, then press the button. 2. Use the and buttons to select the input option to use as the Backup and then press the button to save the selection. THOMSON RD1000 / RD1002 Receiver Descrambler - User Manual (release 7.7.1) Backup Mode ASI/310M 1-2 Backup Input: ► MPEG/IP 1-3 Page 27 Edition A Setting the Primary Restore Setting 1. Use the and buttons to move the cursor to the “Primary Restore” setting, then press the button. ↓↑ ↵ ↓↑ ↵ Backup Mode MPEG/IP 1-3 Primary Restore: ► Never 2. Use the and buttons to select “Never”, “When Primary Rtns” or “On Backup Failure”, then press the button to save the selection. Setting the Backup Timeout Setting 1. Use the and buttons to move the cursor to the “Switchover:” setting, then press the button. 2. Use the and buttons to select the column to edit and use the and buttons to set the value of the timeout (3 – 45 seconds), then press the button to save the selection. Page 28 Edition A Backup Mode Primary Restore: Never ►Switchover:05 secs THOMSON RD1000 / RD1002 Receiver Descrambler - User Manual (release 7.7.1) 4.2 8VSB/QAM Receiver – Option NRD00HCSAA General Information Install Location: Any slot except 1-1 and 2-1. I/O: (1) 75Ω Female F Connector Supported Formats: 8VSB, QAM64B, QAM256B Description: This card provides demodulation of 8VSB or QAM. For 8VSB the card is able to tune to channels 2-69 on UHF/VHF and channels 2-134 on the cable channel bands of FCC cable, IRC, and HRC. For QAM, the card is able to receive both QAM64B and QAM256B and is able to tune to channels 2-134 in the cable bands of FCC cable, IRC, and HRC. To Edit the Option Card Input Settings To edit this input card, use the following steps: 1. Press the button. Note: For dual units, select RDS1 or RDS2, then press 2. Use the press the . and buttons to select “Input Modules”, and button. 3. Use the and buttons to move the cursor to the “VSB/QAM” card of the specific slot (e.g. 1-4). Notice the location diagram in the upper right corner of the screen changes as the cursor moves by each card. 4. Press the button once to display the Status screen for the VSB/QAM card. ↓↑ Input Active Input Backup Mode ►Input Modules ↓↑ Input ↵ ↵ ASI/310M 1-2 MPEG/IP 2-3 ►VSB/QAM 1-4 5. Press the button again to display the Edit screen for the VSB/QAM card. THOMSON RD1000 / RD1002 Receiver Descrambler - User Manual (release 7.7.1) Page 29 Edition A Channel 1. Use the and then press the buttons to move the cursor to “Chan:” button. ↓↑ VSB/QAM 1-4 ►Chan:32 Modulation:8VSB Air/CATV:OffAir 2. Use the and buttons to tune to the specific RF channel of interest, then press the button to save the selection. ↵ Note: The Channel selection is (2 – 69) for “Air/CATV:” set to “OffAir”, and (2 – 134) for the other “AirCATV:” settings. Modulation 1. Use the and buttons to move the cursor to “Modulation:” then press the button. 2. Use the and buttons to choose the appropriate modulation type (“8VSB”, “QAM64B”, “QAM256B”), then press the button to save the selection. ↓↑ ↵ ↓↑ ↵ VSB/QAM 1-4 Chan:32 ►Modulation:8VSB Air/CATV:OffAir Channel Bands 1. Use the and buttons to move the cursor to “Air/CATV:” then press the button. 2. Use the and buttons to choose the appropriate channel band (“OffAir”, “Cable-FCC”, “Cable-HRC”, “CableIRC”), then press the button to save the selection. VSB/QAM 1-4 Modulation:8VSB ►Air/CATV:OffAir Low:+00dBmV Set Low Signal and MER Error Levels These two values are user defined threshold levels for the signal level and MER level. Once these values are set, if the input levels drops below the defined value, an error will be triggered which will cause the red “Error” LED to illuminate on the front panel, a description of the error will be shown in the “Active Errors” menu under the button, and an entry will be logged in the event log. Page 30 Edition A THOMSON RD1000 / RD1002 Receiver Descrambler - User Manual (release 7.7.1) 1. Use the and then press the buttons to move the cursor to “Low:” button. 2. Use the and buttons to select the column to edit and use the and buttons to set the value of the low signal alarm threshold (-30dBmV - +40dBmV), then press the button to save the selection. 1. Use the and then press the buttons to move the cursor to “MER:” button. 2. Use the and buttons to select the column to edit and use the and buttons to set the value of the low MER alarm threshold (0dB – 40dB), then press the button to save the selection. ↓↑ ↵ ↓↑ ↵ VSB/QAM 1-4 Modulation:8VSB Air/CATV:OffAir ►Low:+00dBmV VSB/QAM 1-4 Air/CATV:OffAir Low:+00dBmV ►MER:10dB Reset FEC Error Counters The unit counts the FEC errors on the input. These counters can be reset to “0” so that monitoring of the counts can beginning from a known reference point. 3. Use the and buttons to move the cursor to “Reset Counters” then press the button. 4. Press the button again to reset the FEC error counters. THOMSON RD1000 / RD1002 Receiver Descrambler - User Manual (release 7.7.1) ↓↑ VSB/QAM 1-4 Low:+00dBmV MER:10dB ►Reset Counters ↵ Page 31 Edition A 4.3 Serial Transport Stream Input/Output (DVB-ASI/SMPTE 310M) – Option NRD00H02AA General Information Install Location: Any slot except 1-1 and 2-1. I/O: (1) 75Ω Female BNC Input, (1) 75Ω Female BNC Output Supported Formats: DVB-ASI, 310M Description: This card provides either DVB-ASI or 310M input and output. The card will provide 310M output only if the input TS is 19.39 Mb/sec. When the card is in ASI mode, the TS bitrate for both the input and output is from 1.5 Mb/sec – 160 Mb/sec. When the card is in SMPTE 310M mode, the bitrate for both input and output must be 19.39 Mb/sec. The output will be the same type that the input is set for (e.g. 310M or ASI). When the card is in ASI mode, the ASI OUT will output the TS signal coming from the active input, whatever the input (ASI, DVB S/S2, IP...). If the active input is ASI IN, the ASI OUT will function as an active loop through. If the unit is powered off the loop through is inoperative. Up to 6 ASI cards can be installed in the unit, in order to provide duplicate TS streams. To Edit the Input Option To edit this input card, use the following steps: 1. Press the button. Note: For dual units, select RDS1 or RDS2, then press 2. Select “Input Modules”, and press the . button. 3. Use the and buttons to move the cursor to the “ASI/310M” card of the specific slot (e.g. 2-3). Notice the location diagram in the upper right corner of the screen changes as the cursor moves by each card. ↓↑ Input ↵ 4. Press the button once to display the Status screen for the ASI/310M card. 5. Press the button again to display the Edit screen for the ASI/310M card. Page 32 Edition A THOMSON RD1000 / RD1002 Receiver Descrambler - User Manual (release 7.7.1) Input Type 1. Use the and then press the buttons to move the cursor to “Type:” button. 2. Use the and buttons to select the appropriate input (“ASI”, “310M”), then press the button to save the selection. THOMSON RD1000 / RD1002 Receiver Descrambler - User Manual (release 7.7.1) ↓↑ ASI/310M 2-3 ►Type:ASI Page 33 Edition A 4.4 GPIO Module – Option NRD00H10AA General Information Install Location: Any slot except 1-1 or 2-1. I/O: Logic Input, Open-Collector, and Relay Contact Description: This module is considered a global unit option. In other words, the inputs and outputs of a single installed module can be accessed by functions associated with general system features, or RDS specific features in any unit configuration. Only one GPIO module can be installed in a unit. Pinout 1 2 3 4 5 6 7 8 9 10 11 12 13 14 15 16 17 18 Page 34 Edition A GND Logic Input #1 Logic Input #2 Logic Input #3 Logic Input #4 +Vcc GND Open-Collector Output #1 GND Open-Collector Output #2 GND Open-Collector Output #3 Relay Contact #1 Relay Contact #1 Relay Contact #2 Relay Contact #2 Relay Contact #3 Relay Contact #3 THOMSON RD1000 / RD1002 Receiver Descrambler - User Manual (release 7.7.1) 4.5 Dual Input COFDM Receiver – Option NRD00H04AA General Information Install Location: Any slot except 1-1 or 2-1. I/O: (2) 75Ω Female F Connectors Supported Formats: COFDM Description: This card will allow the unit to receive a COFDM signal for use in electronic news gathering (U.S.) or any COFDM Terrestrial Broadcast (DVB-T, European) applications. Only one input may be selected at a time. To Edit the Option Card Input Settings To edit this input card, use the following steps: 1. Press the button. Note: For dual units, select RDS1 or RDS2, then press 2. Use the press the . and buttons to select “Input Modules”, and button. 3. Use the and buttons to move the cursor to “Dual COFDM” card of the specific slot (e.g. 1-4). Notice the location diagram in the upper right corner of the screen changes as the cursor moves by each card. ↓↑ Input ↵ 4. Press the button once to display the Status screen for the COFDM card. 5. Press the button again to display the Edit screen for the COFDM card. Source This option will select which input, on the back of the card, will be active. THOMSON RD1000 / RD1002 Receiver Descrambler - User Manual (release 7.7.1) Page 35 Edition A 1. Use the and then press the buttons to move the cursor to “Source:” button. 2. Use the and buttons to select which input to be active (“A”, “B”), then press the button to save the selection. ↓↑ Dual COFDM 1-4 ►Source:A Input A Center Preq:049MHz Input A These settings correspond to the input on “Source A.” Center Frequency A The COFDM card tunes to the center frequency of the channel to tune to. 1. Use the and buttons to move the cursor to “Center Freq:” then press the button. ↓↑ Dual COFDM 1-4 2. Use the and buttons to select the column to edit and use the and buttons to change the center frequency (49 MHz – 861 MHz), then press the button to save the selection. Input A ► Center Freq:050MHz Channel BW:8 MHz Channel Bandwidth A 1. Use the and buttons to move the cursor to “Channel BW:” then press the button. ↓↑ Dual COFDM 1-4 Input A Center Freq:050MHz ► Channel BW:8 MHz 2. Use the and buttons to change the channel bandwidth (“6 MHz”, “7 MHz”, “8 MHz”), then press the button to save the selection. Spectrum A 1. Use the and buttons to move the cursor to “Spectrum:” then press the button. ↓↑ Dual COFDM 1-4 2. Use the and buttons to change the spectrum (“Normal”, “Inverted”), then press the button to save the selection. Center Freq:049MHz Channel BW:8 MHz ► Spectrum:Normal Input B These settings correspond to the input on “Source B.” Center Frequency B The COFDM card tunes to the center frequency of the channel to tune to. Page 36 Edition A THOMSON RD1000 / RD1002 Receiver Descrambler - User Manual (release 7.7.1) 1. Use the and buttons to move the cursor to “Center Freq:” then press the button. 2. Use the and buttons to select the column to edit and use the and buttons to change the center frequency (49 MHz – 861 MHz), then press the button to save the selection. ↓↑ Dual COFDM 1-4 Spectrum:Normal Input B ► Center Freq:050MHz Channel Bandwidth B 1. Use the and buttons to move the cursor to “Channel BW:” then press the button. 2. Use the and buttons to change the channel bandwidth (“6 MHz”, “7 MHz”, “8 MHz”), then press the button to save the selection. ↓↑ Dual COFDM 1-4 Input B Center Freq:050MHz ► Channel BW:8 MHz Spectrum B 1. Use the and buttons to move the cursor to “Spectrum:” then press the button. 2. Use the and buttons to change the spectrum (“Normal”, “Inverted”), then press the button to save the selection. THOMSON RD1000 / RD1002 Receiver Descrambler - User Manual (release 7.7.1) ↓↑ Dual COFDM 1-4 Center Freq:050MHz Channel BW:8 MHz ► Spectrum:Normal Page 37 Edition A 4.6 Quad Input DVB-S/DVB-S2 Receiver with LNB – Option NRD00H12AB General Information Install Location: Any slot except 1-1 or 2-1. I/O: (2) 75Ω Female F Connectors Supported Formats: DVB-S/DVB-S2 Description: This input receives a satellite L-band (950 MHz – 2150 MHz) signal for demodulation of KUband or C-band DVB-S QPSK signals or DVB-S2 QPSK/8PSK signals. The symbol rate ranges from 1 MSym/s to 45 MSym/s for both DVB-S and DVB-S2. This card provides LNB power and 22 kHz control tone to the active input. This card has advanced feature options of multistream input, support for VCM, and support for 16APSK and 32APSK modulation. The “Input” LED will only illuminate if the card detects frequency, symbol rate, FEC lock (Carrier Lock), and TS sync (Sync Lock). The card provides A, B, C and D inputs, which may be independently configured, but only one may be active at a time. Warning: The NRD00H12AA (means revision A) quad DVB-S2 interface board does not support advanced features. The advanced features modes are only supported from NRD00H12AB (means revision B). To Edit the Option Card Input Settings To edit this input card, use the following steps: 1. Press the 2. Use the press the button. and buttons to select “Input Modules”, and button. 3. Use the and buttons to move the cursor to the “DVB-S/S2” card of the specific slot (e.g. 1-4). Notice the location diagram in the upper right corner of the screen changes as the cursor moves by each card. ↓↑ Input ↵ 4. Press the button once to display the Status screen for the DVB-S/S2 card. 5. Press the button again to display the Edit screen for the DVB-S/S2 card. Page 38 Edition A THOMSON RD1000 / RD1002 Receiver Descrambler - User Manual (release 7.7.1) Source This option will select which input, on the back of the card, will be active. 1. Use the and buttons to move the cursor to “Source Select:” then press the button. 2. Use the and buttons to select which input to be active (“A”, “B”, “C”, “D”), then press the button to save the selection. ↓↑ DVB-S/S2 1-4 ►Source Select:A Source A Source B ↵ Source Settings These settings correspond to the “Source” input that is selected. Repeat these steps for each input source, “Source A”, “Source B”, “Source C” and “Source D”. Selecting the Source The DVB-S/S2 card can receive either DVB-S or DVB-S2 transmission. 1. Use the and buttons to move the cursor to the Source (“Source A” , “Source B”, “Source C”, “Source D”) to edit the settings, then press the button. ↓↑ DVB-S/S2 1-4 Source Select:A ►Source A Source B ↵ DVB Mode The DVB-S/S2 card can receive either DVB-S or DVB-S2 transmission. 1. Use the and buttons to move the cursor to “DVB Mode:” then press the button. 2. Use the and buttons to select either (“DVB-S”, “DVB-S2”), then press the button to save the selection. DVB-S/S2 1-4 ↵ ►DVB Mode:DVB-S2 Multistream:Disabled LNB Power:Off ↓↑ Enabling Advanced DVB-S2 Capabilities The NRD00H12AB option card can support Multistream input, VCM, 16APSK and 32APSK Modulation. These advanced capabilities are enabled with an “Advanced Satellite Features” license, see Section 4.19 and 5.13. The license is enabled by entering a License Key and the status of the License is noted in the License “Feature List”. The license enables the “Advanced Satellite Features” capabilities for all NRD00H12AB option cards in the unit. When licensed, the “Multistream” settings will be available and the NRD00H12AB option card will be able to receive multistream transport streams, VCM, 16APSK modulation and 32APSK modulation. THOMSON RD1000 / RD1002 Receiver Descrambler - User Manual (release 7.7.1) Page 39 Edition A Multistream Mode When “Multistream” is disabled (or not licensed), the card will not be able to receive multistream inputs. The card will identify the input error as a multistream input. 1. Use the and buttons to move the cursor to “Multistream:” then press the button. 2. Use the and then press the DVB-S/S2 1-4 ↵ DVB Mode:DVB-S2 ►Multistream:Disabled LNB Power:Off ↓↑ buttons to select either (“Off”, “On”), button to save the selection. ISI Note: The setting of the “ISI” is only available when the “Multistream Mode” is set to “On”. 1. Use the and buttons to move the cursor to “ISI Mode:” then press the button. DVB-S/S2 1-4 ↵ Multistream:Enabled ►ISI Mode:Manual ISI:17 ↓↑ 2. Use the and buttons to select either (“Manual”, “List”), then press the button to save the selection. Available ISI The selection of ISI values are from the ones available within the multistream input. 1. Use the and buttons to select an ISI that is available in the multistream input, then press the button to save the selection. DVB-S/S2 1-4 ↵ Multistream:Enabled ISI Mode:Manual ►ISI:17 ↓↑ Manual ISI The ISI value is entered independent of the ISI values present in the input multistream. This is used when the Source is being configured without the source being the active input. 1. Use the and buttons to select the column to edit and use the and buttons to change the ISI value (0 – 255), then press the button to save the selection. DVB-S/S2 1-4 ↵ Multistream:Enabled ISI Mode:Manual ►ISI:17 ↓↑ LNB Power LNB power is configurable separately for each Source input, but is only supplied to the active source. In addition, the power is used to transmit the polarization to the LNB. Page 40 Edition A THOMSON RD1000 / RD1002 Receiver Descrambler - User Manual (release 7.7.1) 1. Use the and buttons to move the cursor to “LNB Power:” then press the button. 2. Use the and buttons to select “Off”, “13VDC” or “14VDC” for vertical polarization, “18VDC”or “19VDC” for horizontal polarization, then press the button to save the selection. ↵ ↓↑ DVB-S/S2 1-4 DVB Mode:DVB-S2 ►LNB Power:Off 22kHz Tone:off 22 kHz Tone 22 kHz Tone is configurable separately for each Source input, but is only supplied to the active source. The 22 kHz Control Tone setting is either on or off. Note: The 22 kHz Tone is only sent if the is LNB Power being supplied – the LNB Power is not set to “off”. 1. Use the and buttons to select “Off”, “13VDC”, “14VDC”, “18VDC”, “19VDC”, then press the button to save the selection. 2. Use the and buttons to move the cursor to “22 kHz Tone:” then press the button. ↵ ↓↑ DVB-S/S2 1-4 DVB Mode:DVB-S2 ►LNB Power:Off 22kHz Tone:off Tuning Frequency The DVB-S/S2 card tunes by the L-band frequency rather than the transponder frequency or local oscillator value. The L-band frequency is the difference between the downlink transponder frequency “Sat Freq:” and the LNB local oscillator frequency “LO Offset:”. The IRD will calculate the actual frequency in which the card tunes; saving the user time and possible miscalculation errors. Local Oscillator Offset The Local Oscillator Offset provides preset values that can be selected using the List mode. Any valid Local Oscillator Offset value can be entered using the Manual mode. 1. Use the and buttons to move the cursor to “LO Offset Mode:” then press the button. ↓↑ 2. Use the and buttons to select “Man” (for manual) or “List”, then press the button to save the selection. DVB-S/S2 1-4 ►LO Offset Mode:Man LO Offset:00000MHz Sat Freq:00950 Mhz 3. When in “List” mode, use the and buttons to move the cursor to “LO Offset:”, then press the button. ↓↑ 4. Use the and buttons to select “00000MHz”, 05150MHz”, 09750MHz”, “10600MHz”, “10750MHz” or “11250MHz” as the “LO Offset” setting, then press the button to save the setting. THOMSON RD1000 / RD1002 Receiver Descrambler - User Manual (release 7.7.1) ↵ DVB-S/S2 1-4 ↵ LO Offset Mode:List ►LO Offset:00000MHz Sat Freq:00950 Mhz Page 41 Edition A 5. When in “Man” mode, use the and buttons to move the cursor to “LO Offset:” then press the button. DVB-S/S2 1-4 ↵ ►LO Offset:00000MHz Sat Freq:00950 Mhz = L-Band: 00950 MHz ↓↑ 6. Use the and buttons to select the column to edit and use the and buttons to change the Local Oscillator Offset (0 – 13550 MHz), then press the button to save the selection. Note: If a value is entered results in a calculated L-Band that is out of range, an “Out of Range!” message will be shown. Note: The L-Band calculation is shown after the “Sat Freq:” line. The valid L-Band frequency range is 950 – 2150 MHz. Satellite Frequency 1. Use the and buttons to move the cursor to “Sat Freq:” then press the button. DVB-S/S2 1-4 ↵ LO Offset:00000MHz ►Sat Freq:00950 Mhz = L-Band: 00950 MHz ↓↑ 2. Use the and buttons to select the column to edit and use the and buttons to change the frequency (950 MHz – 14500 MHz), then press the button to save the selection. Note: If a value is entered results in a calculated L-Band that is out of range, an “Out of Range!” message will be shown. Note: The L-Band calculation is shown after the “Sat Freq:” line. The valid L-Band frequency range is 950 – 2150 MHz. Symbol Rate 1. Use the and then press the 2. Use the and use the and MSps – 45 MSps). 3. Then press the Page 42 Edition A buttons to move the cursor to “Sym Rt:” button. buttons to select the column to edit and buttons to change the symbol rate (1 DVB-S/S2 1-4 ↵ Sat Freq:00950 MHz = L-Band: 00950 Mhz ►Sym Rt:27.000000MSps ↓↑ button to save the selection. THOMSON RD1000 / RD1002 Receiver Descrambler - User Manual (release 7.7.1) 4.7 CA Decryption – Basic feature General Information Install Location: Factory Installed I/O: Two external slots in the front of the unit. The transport stream is input and output through the various other option cards Description: The unit can decrypt a Conditional Access transport stream. In Config 1 the dual CAM functionality can be used to decrypt multiple services to send out ASI, essentially looping the stream through the unit for decryption. This feature also provides BISS decryption. CAM Decryption Setup To setup the unit to decrypt Conditional Access Streams use the following steps. 1. Press the button to bring the display back to the RDS status screen. 2. Press the button to access the RDS 1 Menu. RDS 1 Source ID BISS Decryption ►CA Systems Note: For dual units, all of the following instructions apply exactly the same except, use the access the RDS 2 Menu. 3. Use the and buttons to move the cursor to “CA Systems”, then press the button to display the CAM status. 4. Press the button again to edit the CAM settings. ←→↵ ↓↑ button to ↵ ↓↑ CA Systems RDS1 Descramble:Enabled CAM Operation Mode: Use Decoded PIDs RDS CAM Usage Setting The PIDs are sent to the CA System whenever it is enabled. When disabled, the PIDs are not sent to the CA System for decryption. 1. Use the and buttons to move the cursor to “Descramble”, then press the button. 2. Use the and buttons to change the setting (“Enabled” or “Disabled”), then press the button to save the selection. THOMSON RD1000 / RD1002 Receiver Descrambler - User Manual (release 7.7.1) ↓↑ CA Systems RDS1 ↵ ►Descramble:Enabled CAM Operation Mode: Use Decoded PIDs Page 43 Edition A Setting the CAM Operation Mode 1. Use the and buttons to move the cursor to “CAM Operation Mode”, then press the button. 2. Use the and buttons to change the mode (“Use Decoded PIDs” or “Use Selected PIDs”), then press the button to save the selection. ↓↑ CA Systems RDS1 ↵ ►CAM Operation Mode: Use Decoded PIDs CAM2:NagraVision Note: Depending on the mode selection, the menus below the mode options will have changed. Use Decoded PIDs In the “Use Decoded PIDs” operation mode, the CAM will decrypt the audio and video programs that are decoded by the unit. The Service Selection tuning determines the program that is sent to the CAM for decrypting before the decoding takes place. Only the program used for decoding is sent to the CAM no matter how many programs the CAM is capable of decrypting. If programs other than ( or in addition to) the one being decoded is to be sent to the CAM for decryption, the “Use Selected PIDs” mode should be used. Use Selected PIDs The “Use Selected PIDs” operation mode allows the selection of individual video and audio PIDs to send to the CAM for decryption. There is no restriction on which PIDs can be selected (audio and video PIDs need not be in the same program). The PIDs are selected from the PIDs that are available in the PMT of the input. If there is no input PMT available, the selection of PIDs will not be possible. If a selected PID is no longer listed in the input PMT, the Service that contained the PID will be listed followed by a “*” indication. The Services with PIDs that are no longer in the PMT can be found on the bottom of the Service list. Once “CAM Operation Mode” has been set to “Use Selected PIDs”, use the following steps to configure your unit to decrypt selected PIDs. Note: It is only possible to decrypt more than one program at a time, if the CAM module supports multiple program decrypting. 1. The Services that are sent to the CAMs are listed under the “CAM1” or “CAM2” (with the CAM name if available). ↓↑ CA Systems RDS1 2. Use the and buttons to move the cursor to the program (Service) which contains the PIDs to be selected, then press the button. ↓↑ CA Systems RDS1 3. The video and audio PIDs that are available for that Service in the PMT are listed. Page 44 Edition A ↵ ►CAM2:NagraVision SVC:816 ABCHE Svc:892 CBCMH ↵ CAM2:NagraVision ► SVC:816 ABCHE Svc:892 CBCMH THOMSON RD1000 / RD1002 Receiver Descrambler - User Manual (release 7.7.1) 4. Use the and buttons to move the cursor to the PID to be selected or deselected, then press the button. 5. Press the 6. Use the status. button to edit the selection. and 7. Press the buttons to change the selection ↵ ↓↑ CA Systems RDS1 SVC:816 ABCHE ♦x1234 MPEG2 video ►◊x1235 ATSC AC3 button to save the selection. Note: The short name is listed (if available) with the Service. The PIDs video type and audio language information is shown along with the PID. Note: The symbol “♦” denotes that the PID is a selected PID (being sent to the CAM). The symbol “◊” denotes that the PID is not selected (not being sent to the CAM). PIDs No Longer in the Input PMT The selected PIDs that are no listed in the PMT are listed followed with a “*” under the associated CAM. The list contains the Services, with PID selection available after selecting the Service. These PIDs can be selected or deselected. It they remain selected and appear in the PMT, those PIDs will be sent to the CAM for decryption. 1. Use the and buttons to move the cursor to a “*”’ed Service, then press the button. 2. Use the and buttons to move the cursor to the PID to be selected or deselected, then press the button. 3. Use the status. and 4. Press the ↵ ↓↑ CA Systems RDS1 SVC:816 ABCHE Svc:892 CBCMH ► SVC:1030 CBCMB * ↵ ↓↑ CA Systems RDS1 SVC:1030 CBCMB * ♦x1111 MPEG2 Video ►♦x1114 ATSC AC3 buttons to change the selection ↵ ↓↑ CA Systems RDS1 button to save the selection. 5. The display will return to the PID selection list (Step 3) with the correct “♦” or “◊”. SVC:1030 CBCMB * ♦x1111 MPEG2 Video ►◊x1114 ATSC AC3 Note: When the Service no longer has PIDs that are not in the PMT, it will not be listed as a “*”’ed Service. THOMSON RD1000 / RD1002 Receiver Descrambler - User Manual (release 7.7.1) Page 45 Edition A BISS Setup To setup the unit to be able to decrypt a BISS encrypted transport stream use the following steps: 1. Press the button to bring the display back to the RDS status screen. 2. Press the ↓↑ RDS 1 Audio 2 Setup Source ID ►BISS Decryption button to access the RDS 1 Menu. 3. Use the and buttons to move the cursor to “BISS Decryption,” then press the button. 4. Press the ←→↵ button again to edit the Source ID settings. Note: To configure dual units, all of the following instructions apply exactly the same except, use the button to access the RDS 2 Menu. 5. Use the and then press the buttons to move the cursor to “Mode:” button. 6. Use the and buttons to change the mode (“BISS 1” or “BISS E”) then press the button to save the selection. ↓↑ BISS RDS 1 ►Mode:BISS 1 Session Word ↵ Note: Depending on the mode selection, the menus below the mode options will have changed. Mode BISS 1 Once the unit has been set to use Mode 1, use the following steps to enter the “Session Word:” 1. Use the and buttons to move the cursor to “Session Word” then press the button. ↓↑ 2. Use the and buttons to select the column to edit and use the and buttons to enter the session word, then press the button to save the selection. BISS RDS 1 Mode:BISS 1 ►Session Word 0x000000000000 ↵ Mode BISS E Once the unit has been set to use Mode E, use the following steps to enter the “Encrypted Session Word” and “Injected ID:” 1. Use the and buttons to move the cursor to “Encrypt Session Word” then press the button. Page 46 Edition A BISS RDS 1 ↵ Mode:BISS E ►Encrypt Session Word 0x0000000000000000 ↓↑ 2. Use the and buttons to select the column to edit and use the and buttons to enter the encrypted session word, then press the button to save the selection. THOMSON RD1000 / RD1002 Receiver Descrambler - User Manual (release 7.7.1) 3. Use the and buttons to move the cursor to “Injected ID” then press the button. 4. Use the and buttons to select the column to edit and use the and buttons to enter the injected ID, then press the button to save the selection. THOMSON RD1000 / RD1002 Receiver Descrambler - User Manual (release 7.7.1) BISS RDS 1 ↵ Encrypt Session Word ►Injected ID 0x00000000000000 ↓↑ Page 47 Edition A 4.8 Dual MPEG over IP Input/ UDP Output – Option NRD00H05AA General Information Install Location: Installs in 1–2 through 1–4 and/or 2–2 through 2–4. I/O: (2) 10/100/1000 Auto-negotiating Base-T RJ-45 Ethernet Port Supported Formats: Receive UDP or RTP Multicasts and Unicasts. Transmit: UDP only Description: This card encapsulates the TS from the bus and will transmit IP streams. It can also take in IP streams and place them on the bus for an ASI/310M card. Up to two multicasts can be subscribed to, allowing for a backup multicast to be chosen and two mirrored unicasts can be transmitted to allow for redundancy. The two physical connectors can be configured independently. Menu Control This menu is used to setup the IP address, Subnet Mask, and Gateway for the MPEG/IP card. These settings need to be set to proper values for the network that the unit is being used on. These values can usually be obtained from the local network administrator. 1. Press the button. 2. Use the and buttons to move the cursor to “MPEG/IP NetCfg”, then press the button. 3. Select “Port 1” or “Port 2” and then press the button. ↓↑ ↵ ↓↑ MPEG/IP NetCfg ↵ Menu ►MPEG/IP NetCfg Genlock Reference System Select a Port ►Port 1 Port 2 IP Address/Subnet Mask/Gateway 1. Use the and buttons to move the cursor to “IP Address”, then press the button. 2. Use the and buttons to select the column to edit and use the and buttons to change the IP, then press the button to save the selection. 3. The cursor will now be on, “Subnet Mask”. 4. Use the and buttons to select the column to edit and use the and buttons to change the Subnet Mask, then press the button to save the selection. Page 48 Edition A ↓↑ MPEG/IP 1-4 Net←→↵ IP Address ► 010.000.000.051 Subnet Mask ↓↑ MPEG/IP 1-4 Net←→↵ 10.0.0.51 Subnet Mask ► 255.000.000.000 THOMSON RD1000 / RD1002 Receiver Descrambler - User Manual (release 7.7.1) 5. The cursor will now be on, “Gateway.” 6. Use the and buttons to select the column to edit and use the and buttons to change the Gateway, then press the button to save the selection. MAC Address This option will show the physical MAC Address of the MPEG/IP card. 1. Use the and buttons to move the cursor to “MAC Address” to view the MPEG/IP card’s physical MAC Address. To Edit the Option Card Input Settings To edit this input card, use the following steps: 1. Press the button. Note: For dual units, select RDS1 or RDS2, then press 2. Use the press the . and buttons to select “Input Modules”, and button. 3. Use the and buttons to move the cursor to the “MPEG/IP” card of the specific slot (e.g. 1-4). Notice the location diagram in the upper right corner of the screen changes as the cursor moves by each card. ↓↑ Input ↵ 4. Press the button once to display the Status screen for the MPEG/IP card. 5. Press the button again to display the Edit screen for the MPEG/IP card. THOMSON RD1000 / RD1002 Receiver Descrambler - User Manual (release 7.7.1) Page 49 Edition A Group Selection Settings This section allows the user to specify which Receive Group is active (Receive 1 or Receive 2), if one of the receive groups acts as a backup for the other receive group (setting the “Active Group:” to “Auto”) and then setting the backup options. The backup options assign a primary receive group, what is used to trigger the switchover to the backup receive group, when the Primary should be restored and the timeout before switching to the Backup or restoring to the Primary. The unit is usually configured to have either the MPEG/IP backup enabled or the Input Option backup enabled, not both. Selecting the Active Receive Group 1. Use the and buttons to move the cursor to “Active Group:” then press the button. 2. Use the press the MPEG/IP 1-4 ↵ ►Active Group:Auto Pri Group:1 SwtchOver:TrigTsErr ↓↑ and buttons to select “1”, “2” or “Auto”, then button to save the selection. Note: Using “Auto” will enable the backup functionality. Note: When the backup functionality is being used, the user can choose which Receive Group is being used as follows: setting the “Pri Group:” to the desired group or by setting the “Active Group:” to the desired group, and then activating the backup functionality again by setting the “Active Group:” to “Auto”. Setting the Primary Receive Group Note: The Receive Group that is not selected as the Primary Receive Group will be the Backup Receive Group. 1. Use the and buttons to move the cursor to “Pri Group:” then press the button. MPEG/IP 1-4 ↵ Active Group:Auto ►Pri Group:1 SwtchOver:TrigTsErr ↓↑ 2. Use the and buttons to select “1” or “2”, then press the button to save the selection. Setting the Switchover Trigger This sets the failure that is used to initiate a switchover to the backup. It is either a failure of the Receive Group reception (“TrigTSErr”) that is detected by a lack of TS Presence in the Receive Group, or when the video cannot be decoded (“TrigDecErr”). When “TrigDecErr” is used, the “Pri Rest” (Primary Restore) will be set to “Never” and the “Pri Rest:” option is not presented. This is done because the Primary restore uses the TS Presence (“TrigTSErr”) to detect when the primary is present, and unstable operation could take place if the switchover triggers are not consistent. Page 50 Edition A THOMSON RD1000 / RD1002 Receiver Descrambler - User Manual (release 7.7.1) 1. Use the and buttons to move the cursor to “SwtchOver:” then press the button. 2. Use the and buttons to select “TrigTsErr” or “TrigDecErr”, then press the button to save the selection. MPEG/IP 1-4 ↵ Active Group:1 Pri Group:1 ►SwtchOver:TrigTsErr ↓↑ Note: Using “TrigDecErr” sets “Pri Rest” to “Never” and does not is to be changed. Setting when to Restore to the Primary Note: This is not changeable when using “TrigDecErr” (“Pri Rest” is set to “Never” is this case). 1. Use the and buttons to move the cursor to “Pri Rest:” then press the button. 2. Use the and buttons to select “Never”, “WhnPriRet” (When the Primary Returns), or “OnBkpFail” (On Backup Failure), then press the button to save the selection. MPEG/IP 1-4 ↵ SwtchOver:TrigTsErr ►Pri Rest:Never Timeout:0.5s ↓↑ Setting the Switchover Timeout The Switchover Timeout is the delay between the detection of the failure and the switch to either the backup or back to the primary (controlled by the Restore to Primary setting) receive group. 1. Use the and buttons to move the cursor to “Timeout:” then press the button. 2. Use the and buttons to select the time in seconds (from 0 to 10 seconds in 0.5 second intervals), then press the button to save the selection. MPEG/IP 1-4 ↵ SwtchOver:TrigTsErr Pri Rest:Never ►Timeout:0.5s ↓↑ Receive 1 This section allows the user to setup the receive function of the first receive group. 1. Use the and buttons to move the cursor to “Receive 1” then press the button. THOMSON RD1000 / RD1002 Receiver Descrambler - User Manual (release 7.7.1) ↓↑ MPEG/IP 1-4 Timeout:0.5s ►Receive 1 Receive 2 ↵ Page 51 Edition A 2. Use the and buttons to move the cursor to “Receive:” then press the button. ↵ ↓↑ ↵ MPEG/IP 1-4 1 ►Receive:Enable Phys Conn:Port 1 Ip:239.192.0.1 3. Use the and buttons to “Enable” or “Disable” Receive 1, then press the button to save the selection. 4. Use the and buttons to move the cursor to “Phys Conn:” then press the button. 5. Choose the physical connector using the buttons (“Port 1” or “Port 2”) then press the ↓↑ and button. MPEG/IP 1-4 1 Receive:Enable ►Phys Conn:Port 1 Ip:239.192.0.1 IP 1. Use the and then press the buttons to move the cursor to “IP:” button. 2. Use the and buttons to select the column to edit and use the and buttons to change the IP, then press the button to save the selection. MPEG/IP 1-4 1 ←→↵ ►Ip:239.192.001.050 Dest Port:01050 FEC:Disable ↓↑ Notes:- A Unicast or Multicast IP address may be chosen. Unicast: X.X.X.X – 223.255.255.255 Multicast: 224.0.0.0 – 239.255.255.255 Suggested Multicast Range: 239.192.X.X. - In case of unicast reception, the unit takes into account only the port number and not the source IP address. Destination Port 1. Use the and buttons to move the cursor to “Dest Port:” then press the button. 2. Use the and buttons to select the column to edit and use the and buttons to change the port (0 – 65536), then press the button to save the selection. Page 52 Edition A MPEG/IP 1-4 1 ←→↵ Ip:239.192.1.50 ►Dest Port:01050 FEC:Disable ↓↑ THOMSON RD1000 / RD1002 Receiver Descrambler - User Manual (release 7.7.1) Forward Error Correction This setting lets the unit know if it should be expecting FEC data with the active receive group. If no FEC data is expected, this setting can be disabled to allow multicasts closer together on the same IP. 1. Use the and buttons to move the cursor to “FEC:” then press the button. 2. Use the and buttons to select “enable” or “disable”, then press the button to save the selection. ↓↑ MPEG/IP 1-4 1 Ip:239.192.1.50 Dest Port:01050 ►FEC:Disable ↵ Synchronized Source Setup 1. Use the and buttons to move the cursor to “SSRC:” then press the button. 2. Use the and buttons to select “Enable” or “Disable”, then press the button to save the selection. MPEG/IP 1-4 1 ↵ FEC:Disable ►SSRC:Disable SSRC Filt:0x00000000 ↓↑ Synchronized Source Setup Filter 1. Use the and buttons to move the cursor to “SSRC Filt:” then press the button. 2. Use the and buttons to select the column to edit and use the and buttons to change the SSRC Filter, then press the button to save the selection. MPEG/IP 1-4 1 ←→↵ FEC:Disable SSRC:Disable ►SSRC Filt:0x00000000 ↓↑ Buffer 1. Use the and buttons to move the cursor to “Buffer:” then press the button. 2. Use the and buttons to select the column to edit and use the and buttons to change the Buffer (from 3999 kb to 100 kb), then press the button to save the selection. MPEG/IP 1-4 1 ←→↵ SSRC Filt:0x00000000 ►Buffer:0100kb IGMP V3 Src Filter ↓↑ IGMP V3 Source Filter Note: Any emitter can send IP packets to a multicast address, so it could happen that by mistake two emitters send to the same multicast address. The resultant multicast stream would be completely garbled. IGMP V3 gives the user the possibility to indicate a source address, so that by indicating "IGMP V3 include <IP multicast source address> the unit will take only the IP packets coming from the indicated source address, thus eliminating the garbling problem. THOMSON RD1000 / RD1002 Receiver Descrambler - User Manual (release 7.7.1) Page 53 Edition A Alternately, if the offending source address is known, the user can indicate "IGMP V3 exclude <IP multicast source address of the scrambler>, and the unit will not take into account IP packets coming from the indicated address. To not use the IGMP V3 filter, simply select "IGMP V3 exclude" and do not indicate any IP address to exclude. Beware if you select "IGMP V3 include" and you do not indicate the multicast source address the unit will receive nothing. 1. Use the and buttons to move the cursor to “IGMP V3 Src Filter”, then press the button to access the Edit screen. MPEG/IP 1-4 1 ↵ SSRC Filt:0x00000000 Buffer:0100kb ►IGMP V3 Src Filter ↓↑ Filter Mode 1. Use the and buttons to move the cursor to “Filter Mode:” then press the button. 2. Use the and buttons to select either “Include” or “Exclude”, then press the button to save the selection. MPEG/IP 1-4 1 ↵ ►Filter Mode:Include Add IP Clear All ↓↑ Add IP 1. Use the and IP”, then press the 2. Press the list. buttons to move the cursor to “Add button. button again to add an IP address to the MPEG/IP 1-4 1 ↵ Filter Mode:Include ►Add IP Clear All ↓↑ Note: Existing IP addresses are shown before the “Add IP” option. 3. Use the and buttons to select the column to edit and use the and buttons to change the IP address, then press the button to save the selection. MPEG/IP 1-4 1 ←→↵ Filter Mode:Include 000.000.000.000 Clear All ↓↑ Note: A maximum of 64 IP addresses may be added to the list. Page 54 Edition A THOMSON RD1000 / RD1002 Receiver Descrambler - User Manual (release 7.7.1) Edit/Remove an IP Note: Existing IP addresses are shown before the “Add IP” option. 1. Use the and buttons to move the cursor to the desired IP address to edit, then press the button. ↓↑ 2. Use the and buttons to select either “Edit” or “Remove”, then press the button. ↓↑ MPEG/IP 1-4 1 ►239.192.20.3 Add IP Clear All ↵ MPEG/IP 1-4 1 ←→↵ Filter Mode:Include Edit Remove Add IP Clear All This option will clear all IP addresses in the filter list. 1. Use the and All”, then press the buttons to move the cursor to “Clear button. 2. Press the button one more time to clear all the IP addresses in the list. ↓↑ MPEG/IP 1-4 1 239.192.20.3 Add IP ►Clear All ↵ Receive 2 This section allows the user to setup the receive function of the second receive group. 1. Use the and buttons to move the cursor to “Receive 1” then press the button. ↓↑ ↵ 2. Use the and buttons to move the cursor to “Receive:” then press the button. ↓↑ ↵ ↓↑ ↵ 3. Use the and buttons to “Enable” or “Disable” Receive 1, then press the button to save the selection. 4. Use the and buttons to move the cursor to “Phys Conn:” then press the button. 5. Choose the physical connector using the buttons (“Port 1” or “Port 2”) then press the THOMSON RD1000 / RD1002 Receiver Descrambler - User Manual (release 7.7.1) and button. MPEG/IP 1-4 Timeout:0.5s Receive 1 ►Receive 2 MPEG/IP 1-4 2 ►Receive:Enable Phys Conn:Port 1 Ip:239.192.0.1 MPEG/IP 1-4 2 Receive:Enable ►Phys Conn:Port 1 Ip:239.192.0.1 Page 55 Edition A IP 1. Use the and then press the buttons to move the cursor to “IP:” button. 2. Use the and buttons to select the column to edit and use the and buttons to change the IP, then press the button to save the selection. MPEG/IP 1-4 2 ←→↵ ►Ip:239.192.001.050 Dest Port:01050 FEC:Disable ↓↑ Notes:- A Unicast or Multicast IP address may be chosen. Unicast: X.X.X.X – 223.255.255.255 Multicast: 224.0.0.0 – 239.255.255.255 Suggested Multicast Range: 239.192.X.X. - In case of unicast reception, the unit takes into account only the port number and not the source IP address. Destination Port 1. Use the and buttons to move the cursor to “Dest Port:” then press the button. 2. Use the and buttons to select the column to edit and use the and buttons to change the port (0 – 65536), then press the button to save the selection. MPEG/IP 1-4 2 ←→↵ Ip:239.192.1.50 ►Dest Port:01050 FEC:Disable ↓↑ Forward Error Correction This setting lets the unit know if it should be expecting FEC data with the active receive group. If no FEC data is expected, this setting can be disabled to allow multicasts closer together on the same IP. 1. Use the and buttons to move the cursor to “FEC:” then press the button. ↓↑ 2. Use the and buttons to select “enable” or “disable”, then press the button to save the selection. MPEG/IP 1-4 2 Ip:239.192.1.50 Dest Port:01050 ►FEC:Disable ↵ Synchronized Source Setup 1. Use the and buttons to move the cursor to “SSRC:” then press the button. 2. Use the and buttons to select “Enable” or “Disable”, then press the button to save the selection. Page 56 Edition A MPEG/IP 1-4 2 ↵ FEC:Disable ►SSRC:Disable SSRC Filt:0x00000000 ↓↑ THOMSON RD1000 / RD1002 Receiver Descrambler - User Manual (release 7.7.1) Synchronized Source Setup Filter 1. Use the and buttons to move the cursor to “SSRC Filt:” then press the button. 2. Use the and buttons to select the column to edit and use the and buttons to change the SSRC Filter, then press the button to save the selection. MPEG/IP 1-4 2 ←→↵ FEC:Disable SSRC:Disable ►SSRC Filt:0x00000000 ↓↑ Buffer 1. Use the and “Buffer:” then press the buttons to move the cursor to button. 2. Use the and buttons to select the column to edit and use the and buttons to change the Buffer (from 3999 kb to 100 kb), then press the button to save the selection. MPEG/IP 1-4 2 ←→↵ SSRC Filt:0x00000000 ►Buffer:0100kb IGMP V3 Src Filter ↓↑ IGMP V3 Source Filter Note: Any emitter can send IP packets to a multicast address, so it could happen that by mistake two emitters send to the same multicast address. The resultant multicast stream would be completely garbled. IGMP V3 gives the user the possibility to indicate a source address, so that by indicating "IGMP V3 include <IP multicast source address> the unit will take only the IP packets coming from the indicated source address, thus eliminating the garbling problem. Alternately, if the offending source address is known, the user can indicate "IGMP V3 exclude <IP multicast source address of the scrambler>, and the unit will not take into account IP packets coming from the indicated address. To not use the IGMP V3 filter, simply select "IGMP V3 exclude" and do not indicate any IP address to exclude. Beware if you select "IGMP V3 include" and you do not indicate the multicast source address the unit will receive nothing. 1. Use the and buttons to move the cursor to “IGMP V3 Src Filter”, then press the button to access the Edit screen. THOMSON RD1000 / RD1002 Receiver Descrambler - User Manual (release 7.7.1) MPEG/IP 1-4 2 ↵ SSRC Filt:0x00000000 Buffer:0100kb ►IGMP V3 Src Filter ↓↑ Page 57 Edition A Filter Mode 1. Use the and buttons to move the cursor to “Filter Mode:” then press the button. 2. Use the and buttons to select either “Include” or “Exclude”, then press the button to save the selection. MPEG/IP 1-4 2 ↵ ►Filter Mode:Include Add IP Clear All ↓↑ Add IP 1. Use the and IP”, then press the 2. Press the list. buttons to move the cursor to “Add button. button again to add an IP address to the MPEG/IP 1-4 2 ↵ Filter Mode:Include ►Add IP Clear All ↓↑ Note: Existing IP addresses are shown before the “Add IP” option. 3. Use the and buttons to select the column to edit and use the and buttons to change the IP address, then press the button to save the selection. MPEG/IP 1-4 2 ←→↵ Filter Mode:Include 000.000.000.000 Clear All ↓↑ Note: A maximum of 64 IP addresses may be added to the list. Edit/Remove an IP Note: Existing IP addresses are shown before the “Add IP” option. 1. Use the and buttons to move the cursor to the desired IP address to edit, then press the button. ↓↑ 2. Use the and buttons to select either “Edit” or “Remove”, then press the button. ↓↑ Page 58 Edition A MPEG/IP 1-4 2 ►239.192.20.3 Add IP Clear All ↵ MPEG/IP 1-4 2 ←→↵ Filter Mode:Include Edit Remove Add IP THOMSON RD1000 / RD1002 Receiver Descrambler - User Manual (release 7.7.1) Clear All This option will clear all IP addresses in the filter list. 1. Use the and All”, then press the buttons to move the cursor to “Clear button. 2. Press the button one more time to clear all the IP addresses in the list. Reset Counters This option will reset the counters on the status screen for the MPEG/IP card. 1. Use the and buttons to move the cursor to “Reset Counters”, then press the button. 2. Press the button again to reset the counters. Output Control To configure this card as an output use the following steps: 1. Press the button. Note: For dual units, select RDS1 or RDS2, then press . 2. Use the and buttons to move the cursor to the “MPEG/IP” card of the specific slot (e.g. 1-4). Notice the location diagram in the upper right corner of the screen changes as the cursor moves by each card. ↓↑ Output ↵ 3. Press the button once to display the selection screen for “Transmit 1” and “Transmit 2” of the MPEG/IP card. THOMSON RD1000 / RD1002 Receiver Descrambler - User Manual (release 7.7.1) Page 59 Edition A Transmit 1 1. Use the and buttons to move the cursor to “Transmit 1”, then press the button. The status will be displayed. 2. Press the screen. ↓↑ ↵ ↓↑ ↵ ↓↑ ↵ MPEG/IP 1-4 ►Transmit 1 Transmit 2 button one more time to get to the Edit 3. Use the and buttons to move the cursor to “Transmit:” then press the button. MPEG/IP 1-4 ►Transmit:Enabled Phys Conn:Port 1 IP:239.192.0.1 4. Use the and buttons to set the Transmit 1 to “Enabled” or “Disabled”, then press the button to save the selection. 5. Use the and buttons to move the cursor to “Phys Conn:” then press the button. 6. Choose the physical connector using the buttons (“Port 1” or “Port 2”) then press the and button. MPEG/IP 1-4 Receive:Enable ►Phys Conn:Port 1 IP:239.192.0.1 IP 1. Use the and then press the buttons to move the cursor to “IP:” button. MPEG/IP 1-4 ←→↵ ►IP:239.192.000.001 Dest Port:01030 Source Port:01030 ↓↑ 2. Use the and buttons to select the column to edit and use the and buttons to change the IP, then press the button to save the selection. Destination Port 1. Use the and buttons to move the cursor to “Dest Port:” then press the button. 2. Use the and buttons to select the column to edit and use the and buttons to change the destination port (1025 – 65536), then press the button to save the selection. Page 60 Edition A MPEG/IP 1-4 ←→↵ IP:239.192.0.1 ►Dest Port:01030 Source Port:01030 ↓↑ THOMSON RD1000 / RD1002 Receiver Descrambler - User Manual (release 7.7.1) Source Port 1. Use the and buttons to move the cursor to “Source Port:” then press the button. 2. Use the and buttons to select the column to edit and use the and buttons to change the destination port (1025 – 65536), then press the button to save the selection. MPEG/IP 1-4 ←→↵ IP:239.192.0.1 Dest Port:01030 ►Source Port:01030 ↓↑ Packets Per Frame 1. Use the and buttons to move the cursor to “Packets/Ip:” then press the button. 2. Use the and buttons to select the column to edit and use the and buttons to change the number of packets per frame (1 –7), then press the button to save the selection. ↓↑ ↵ ↓↑ ↵ ↓↑ ↵ ↓↑ ↵ MPEG/IP 1-4 Source Port:01030 ►Packets/Ip:7 DiffServ:Default Differentiated Services 1. Use the and buttons to move the cursor to “DiffServ:” then press the button. 2. Use the and buttons to select the column to edit and use the and buttons to change between (“Default”, “AF11”, “AF12”, “AF13”, “AF21”, “AF22”, “AF23”, “AF31”, “AF32”, “AF33”, “AF41”, “AF42”, “AF43”, “EF”), then press the button to save the selection. MPEG/IP 1-4 Source Port:01030 Packets/Ip:7 ►DiffServ:Default Transmit 2 1. Use the and buttons to move the cursor to “Transmit 2”, then press the button. 2. Press the screen. button one more time to get to the Edit 3. Use the and buttons to move the cursor to “Transmit:” then press the button. 4. Use the and buttons to change the selection to, “Enabled”, then press the button to save the selection. THOMSON RD1000 / RD1002 Receiver Descrambler - User Manual (release 7.7.1) MPEG/IP 1-4 Transmit 1 ►Transmit 2 MPEG/IP 1-4 ►Transmit:Enabled Phys Conn:Port 1 IP:239.192.0.1 Page 61 Edition A 5. Use the and buttons to move the cursor to “Phys Conn:” then press the button. 6. Choose the physical connector using the buttons (“Port 1” or “Port 2”) then press the and button. ↓↑ MPEG/IP 1-4 Receive:Enabled ►Phys Conn: Port 2 IP: 239.192.0.1 ↵ IP 1. Use the and then press the buttons to move the cursor to “IP:” button. MPEG/IP 1-4 ←→↵ ►IP:239.192.000.001 Dest Port:01030 Source Port:01030 ↓↑ 2. Use the and buttons to select the column to edit and use the and buttons to change the IP, then press the button to save the selection. Destination Port 1. Use the and buttons to move the cursor to “Dest Port:” then press the button. 2. Use the and buttons to select the column to edit and use the and buttons to change the destination port (1025 – 65536), then press the button to save the selection. MPEG/IP 1-4 ←→↵ IP:239.192.0.1 ►Dest Port:01030 Source Port:01030 ↓↑ Source Port 1. Use the and buttons to move the cursor to “Source Port:” then press the button. MPEG/IP 1-4 ←→↵ IP:239.192.0.1 Dest Port:01030 ►Source Port:01030 ↓↑ 2. Use the and buttons to select the column to edit and use the and buttons to change the destination port (1025 – 65536), then press the button to save the selection. Packets Per Frame 1. Use the and buttons to move the cursor to “Packets/Ip:” then press the button. ↓↑ 2. Use the and buttons to select the column to edit and use the and buttons to change the number of packets per frame (1 –7), then press the button to save the selection. Page 62 Edition A MPEG/IP 1-4 Source Port:01030 ►Packets/Ip:7 DiffServ:Default ↵ THOMSON RD1000 / RD1002 Receiver Descrambler - User Manual (release 7.7.1) Differentiated Services 1. Use the and buttons to move the cursor to “DiffServ:” then press the button. 2. Use the and buttons to select the desired differentiated services (“Default”, “AF11”, “AF12”, “AF13”, “AF21”, “AF22”, “AF23”, “AF31”, “AF32”, “AF33”, “AF41”, “AF42”, “AF43”, “EF”), then press the button to save the selection. THOMSON RD1000 / RD1002 Receiver Descrambler - User Manual (release 7.7.1) ↓↑ MPEG/IP 1-4 Source Port:01030 Packets/Ip:7 ►DiffServ:Default ↵ Page 63 Edition A 4.9 Dual MPEG over IP output with PID filtering – Option NRD00H13AA General Information Install Location: Installs in 1–2 through 1–4 and/or 2–2 through 2–4. O: (2) 10/100/1000 Auto-negotiating Base-T RJ-45 Ethernet Port Supported Formats: Transmit: UDP only Description: This card supports PID filtering and automatic table modification. The NRD00H13AA output cardwill use two Ethernet connections independently to transmit MPEG2 transport streams over IP networks from a valid input source (ASI, DVB-S2, IP input, etc.) A multi program transport stream (MPTS) input can be reduced into as many as 5 output transport streams. Any combination of services present in the source stream may be selected for the output transport stream. Each output IP stream can then be routed to one of two Ethernet ports as desired. The NRD00H13AA card can also adapt the transport stream bitrate and recalculate the PCR values in the output transport streams to be correct for the new multiplex. Up to 4 cards can be installed per chassis Menu Control This menu is used to set the Default Gateway Port, configure ICMP, find the MAC address, and setup the IP addresses, Subnet Masks, and Gateways for both ports on the PID Filtering card. These settings need to be set to proper values for the network that the unit is being used on. These values can usually be obtained from the local network administrator. 1. Press the button. 2. Use the and buttons to move the cursor to “PID Filter IP NetCfg”, then press the button. Menu ↵ ►PID Filter IP NetCfg Genlock Reference System ↓↑ Default Gateway Port: 1. To set Default Gateway Port, use the and buttons to move the cursor to “Set Default Gw Port”, then press the 2. Press button. again and use the and select “Port1” or “Port2”, then press the ICMP(Ping): 1. Use the and Edition A button. buttons to move the cursor to “Set ICMP(Ping)”, then press the Page 64 buttons to button. ↓↑ PID Filter IP Cfg ↵ Port 1 Port 2 ►Set Default Gw Port ↓↑ PID Filter 1-4 IP ↵ ► Default Gw:Port ↓↑ PID Filter IP Cfg ↵ Port 2 Set Default Gw Port ►Set ICMP(Ping) THOMSON RD1000 / RD1002 Receiver Descrambler - User Manual (release 7.7.1) 2. Press again and use the and buttons to select “Enabled” or “Disabled”, then press the Port Setup 1. Select “Port 1” or “Port 2” and then press the ↓↑ PID Filter 1-4 IP ↵ ► ICMP(ping):Enabled button. button. ↓↑ PID Filter IP Cfg ↵ ►Port 1 Port 2 Set Default Gw Port 2. The MAC address is now displayed for the port that was chosen. The Link status and Agr Bit Rate is also displayed. 3. Press the button. IP Address/Subnet Mask/Gateway 1. Use the and buttons to move the cursor to “IP Address”, then press the button. ↓↑ PID Filtr Port 1 ↵ MAC:00:01:2A:BC:D1:23 Link: Down Agr Bit Rt:39.33Mbps ↓↑ PID Filtr Port 1←→↵ IP Address ► 010.000.000.051 Subnet Mask 2. Use the and buttons to select the column to edit and use the and buttons to change the IP, then press the button to save the selection. 3. The cursor will now be on, “Subnet Mask”. ↓↑ PID Filtr Port 1←→↵ 4. Use the and buttons to select the column to edit and use the and buttons to change the Subnet Mask, then press the button to save the selection. 5. The cursor will now be on, “Gateway.” 10.0.0.51 Subnet Mask ► 255.000.000.000 6. Use the and buttons to select the column to edit and use the and buttons to change the Gateway, then press the button to save the selection. 255.0.0.0 Gateway ► 000.000.000.000 ↓↑ PID Filtr Port 1←→↵ Output Control 1. Press the button. Note: For dual units, select RDS1 or RDS2, then press THOMSON RD1000 / RD1002 Receiver Descrambler - User Manual (release 7.7.1) . Page 65 Edition A 2. Use the and buttons to move the cursor to the “PID Filter IP” card of the specific slot (e.g. 1-4). Notice the location diagram in the upper right corner of the screen changes as the cursor moves by each card. 3. Press the button once to display the selection screen for “Transmit 1”, “Transmit 2”, “Transmit 3”, Transmit 4”, and “Transmit 5” of the PID Filter IP card. ↓↑ Output ↵ Transmit 1 Note: Transmit 2-5 can be set up using the same instructions 1. Use the and buttons to move the cursor to “Transmit 1”, then press the button. Transmit Status/Set 1. Use the and buttons to move the cursor to “Transmit Status/Set”, then press the button. The status screen is now displayed. 2. Press the screen. button one more time to get to the Edit 3. Use the and buttons to move the cursor to “Transmit:” then press the button. 4. Use the and buttons to set the Transmit to “Enabled” or “Disabled”, then press the button to save the selection. 5. Use the and buttons to move the cursor to “Filtering:” then press the button. 6. Use the and buttons to set the Filtering to “Enabled” or “Disabled”, then press the button to save the selection. 7. Use the and buttons to move the cursor to “Processing:” then press the button. 8. Use the and buttons to set the Filtering to “PSI(MPEG)” or “SI(DVB)”, then press the button to save the selection. Page 66 Edition A ↓↑PID Filter IP 1-4↵ ►Transmit 1 Transmit 2 Transmit 3 Transmit 1 ↵ ►Transmit Status/Set Service Filter Setup PID Filter Setup ↓↑ ↓↑Transmit 1 Setup↵ ►Transmit:Enabled Filtering:Enabled Processing:PSI(MPEG) ↓↑Transmit 1 Setup↵ Transmit:Enabled ►Filtering:Enabled Processing:PSI(MPEG) ↓↑Transmit 1 Setup↵ Transmit:Enabled Filtering:Enabled ►Processing:PSI(MPEG) THOMSON RD1000 / RD1002 Receiver Descrambler - User Manual (release 7.7.1) 9. Use the and buttons to move the cursor to “Out TS Rt:” then press the button. 10. Use the and buttons to select the column to edit and use the and buttons to change the Output Bitrate, then press the button to save the selection. 11. Use the and buttons to move the cursor to “Phys Conn:” then press the button. 12. Use the and buttons to set the Filtering to “Port 1” or “Port 2”, then press the button to save the selection. IP 1. Use the and “IP:” then press the 2. Use the and edit and use the then press the buttons to move the cursor to button. buttons to select the column to and buttons to change the IP, button to save the selection. Destination Port 1. Use the and buttons to move the cursor to “Dest Port:” then press the button. 2. Use the and buttons to select the column to edit and use the and buttons to change the destination port (1025 – 65536), then press the button to save the selection. Source Port 1. Use the and buttons to move the cursor to “Source Port:” then press the button. 2. Use the and buttons to select the column to edit and use the and buttons to change the destination port (1025 – 65536), then press the button to save the selection. THOMSON RD1000 / RD1002 Receiver Descrambler - User Manual (release 7.7.1) ↓↑Transmit 1 Setup↵ Filtering:Enabled Processing:PSI(MPEG) ►Out TS Rt:012.00 ↓↑Transmit 1 Setup↵ Processing:PSI(MPEG) Out TS Rt:012.00 ►Phys Conn:Port 1 ↓↑Transmit 1 Setup←→↵ ►IP:239.192.000.001 Dest Port:01030 Source Port:01030 ↓↑Transmit 1 Setup←→↵ IP:239.192.0.1 ►Dest Port:01030 Source Port:01030 ↓↑Transmit 1 Setup←→↵ IP:239.192.0.1 Dest Port:01030 ►Source Port:01030 Page 67 Edition A Packets Per Frame 1. Use the and buttons to move the cursor to “Packets/Ip:” then press the button. ↓↑Transmit 1 Setup↵ Source Port:01030 ►Packets/Ip:7 TTL:255 2. Use the and buttons to select the column to edit and use the and buttons to change the number of packets per frame (1 –7), then press the button to save the selection. Time To Live 1. Use the and buttons to move the cursor to “TTL:” then press the button. ↓↑Transmit 1 Setup↵ Source Port:01030 Packets/Ip:7 ►TTL:255 2. Use the and buttons to select the column to edit and use the and buttons to change to a value between “000” and “255”, then press the button to save the selection. Service Filter Setup 1. Use the and buttons to move the cursor to “Service Filter Setup”, then press the button. Transmit 1 ↵ Transmit Status/Set ►Service Filter Setup PID Filter Setup ↓↑ 2. Use the and buttons to move the cursor to the desired program, then press the button. ↓↑ Transmit 1 SVCs 3. Use the and buttons to turn on filtering for the desired program by changing the symbol from to , then press the button. PID Filter Setup 1. Use the and buttons to move the cursor to “PID Filter Setup”, then press the button. Transmit 1 ↵ Transmit Status/Set Service Filter Setup ►PID Filter Setup ↓↑ 2. Use the and buttons to move the cursor to “PID 1:0x”, then press the button. 3. Use the and buttons to select the column to edit and use the and buttons to set the PID to a Hex value, then press the button to save the selection. Page 68 Edition A ↵ ►3 WXYZ-HD 4 WXYZ-SD ↓↑ Transmit 1 PIDs ↵ ►PID 1:0x0000 PID 1:Disabled THOMSON RD1000 / RD1002 Receiver Descrambler - User Manual (release 7.7.1) Note: Use the same steps to set the PID value for PIDs 210. 4. Use the and buttons to move the cursor to “PID 1:”, then press the button. 5. Use the and buttons to set the PID 1 to “Enabled” or “Disabled”, then press the button to save the selection. Note: Use the same steps to Enable or Disable PIDs 210. THOMSON RD1000 / RD1002 Receiver Descrambler - User Manual (release 7.7.1) ↓↑ Transmit 1 PIDs ↵ ►PID 1:0x0000 PID 1:Enabled Page 69 Edition A 4.10 Active Errors Description: Whenever an error occurs on any of the four internal status indicators in the unit, the Error LED will illuminate on the front panel and the details of the error will be listed in the Active Errors. An extensive listing of errors and their definitions is included in Appendix B. Active Errors Display To display the current errors on the unit use the following steps: 1. Press the button. ↓↑ Menu ►Active Errors Event Log Network 2. Use the and buttons to move the cursor to “Active Errors”, then press the button. 3. Use the errors. and ↵ buttons to scroll through the list of 4. Here is the meaning of the error codes: - 0-0 global (such as fan error) - 1-1 error in slot 1 (bottom row) - 1-2 error in slot 2 (bottom row) - 1-3 error in slot 3 (bottom row) - 1-4 error in slot 4 (bottom row) ↓↑ Active Errors 0-0 Fan Error 1-0 No TS Present Er 1-3 Not Rcving IPPck - 2-1 error in slot 1 (top row) - 2-2 error in slot 2 (top row) - 2-3 error in slot 3 (top row) - 2-4 error in slot 4 (top row) 5. The and buttons can be used to scroll left or right if the error listing text cannot be entirely displayed on the front panel. Page 70 Edition A THOMSON RD1000 / RD1002 Receiver Descrambler - User Manual (release 7.7.1) 4.11 Event Log Description: The unit has user selectable event logging that it stores to a list. The list includes the date and time of each event, a short description of the event, and which card was affected by the event. To configure the unit to log specific events from a predefined list, use the steps below. Event Log To setup and display the current errors on the unit use the following steps: 1. Press the button. 2. Use the and Log,” then press the Menu.” ↓↑ buttons to move the cursor to “Event button to enter the “event Log Menu ►Event Log Network Lock Panel ↵ Event Logging Setup Note: The Event Log List is dependent on the installed options. To setup which events will log into the Event Log, follow the steps below: 1. Use the and buttons to move the cursor to “Event Logging Setup,” then press the button. ↵ ►Event Logging Setup Event Log 2. Use the and buttons to select which event to turn enable or disable, then press the button. 3. Select either “On” or “Off”, then press the ↓↑ Event Log Menu button. ↓↑ Event Log List ↵ ►Vid Not Decode:On Vid Type:On Vid Unknown:On Event Log Display To display the current errors on the unit use the following steps: 1. Use the and buttons to move the cursor to “Event Log”, then press the button to choose which day to view. 2. Use the and buttons to move the cursor to choose either “current”, “day 1 log”, “day 2 log” or “day 3 log”, then press the button. THOMSON RD1000 / RD1002 Receiver Descrambler - User Manual (release 7.7.1) ↓↑ Event Log Menu ↵ Event Logging Setup ►Event Log Event Log ►current day 1 log day 2 log Page 71 Edition A 3. Use the and buttons to move the cursor to “display” and press the button. ↓↑ current ►display clear 4. Use the and buttons to scroll and view the whole event, and use the and buttons to move from one event to another. The “1/15” meant the first listed event of a total of 15 events. ↵ ↓↑ 1/15 ←→ Jan 1 00:01:00 1970 Received System Server Has Been Clear Error List This clears the error log for the log that was selected, either the “current”, “day 1 log”, “day 2 log” or “day 3 log” error log. 1. Use the and buttons to move the cursor to “display” and press the button. ↓↑ current display ►clear ↵ CAUTION: If “clear” is selected, all of the events that have been logged under the time selected will be erased from memory, and cannot be recovered. 2. The log selected will be listed followed by “has been cleared!” Page 72 Edition A current has been cleared! THOMSON RD1000 / RD1002 Receiver Descrambler - User Manual (release 7.7.1) 4.12 Password Strength Description: Determines the password strength for access through the Web Client Character Type If set to enable, the Web Client Password will contain at least three of the following classes : lower case letters, upper case letters, digits, or special characters To enable/disable Character Type password requirement, use the following steps: 1. Press the button. ↓↑ Menu ►Pwd Strength 2. Use the and buttons to move the cursor to Network Services “Pwd Strength”, then press the button. Network Interface 3. Use the and buttons to move the cursor to “Char Type:” then press the button. 4. Use the and then press the buttons to change the selection, button to save the selection. ↵ Pwd Strength ↵ ►Char Type :Disabled Repeats :Disabled Not UID :Disabled ↓↑ Repeats If set to enable, no character in the password can be repeated more than three times consecutively To enable/disable No Repeats password requirement, use the following steps: 1. Press the button. ↓↑ 2. Use the and buttons to move the cursor to “Pwd Strength”, then press the button. Menu ►Pwd Strength Network Services Network Interface 3. Use the and buttons to move the cursor to “Repeats:” then press the button. ↓↑ 4. Use the and then press the buttons to change the selection, button to save the selection. ↵ Pwd Strength ↵ Char Type :Disabled ►Repeats :Disabled Not UID :Disabled Not User ID If set to enable, the password cannot be the same as the user ID or the user ID reversed To enable/disable Not User ID password requirement, use the following steps: 1. Press the button. ↓↑ 2. Use the and buttons to move the cursor to “Pwd Strength”, then press the button. THOMSON RD1000 / RD1002 Receiver Descrambler - User Manual (release 7.7.1) Menu ►Pwd Strength Network Services Network Interface ↵ Page 73 Edition A 3. Use the and buttons to move the cursor to “Not UID:” then press the button. 4. Use the and then press the Pwd Strength ↵ Char Type :Disabled Repeats :Disabled ►Not UID :Disabled ↓↑ buttons to change the selection, button to save the selection. Not In List If set to enable, the password cannot be any of the following English words or these variants : reversed spelling, changed capitalization of the letters, 1 for i, | for i, ! for i, 1 for l, | for l, ! for l, 0 for o, or $ for s The following is a list of the words that are disallowed as passwords. admin decoder user root To enable/disable Not In List password requirement, use the following steps: 1. Press the button. ↓↑ 2. Use the and buttons to move the cursor to “Pwd Strength”, then press the button. Menu ►Pwd Strength Network Services Network Interface 3. Use the and buttons to move the cursor to “Not In List:” then press the button. ↓↑ 4. Use the and then press the Page 74 Edition A buttons to change the selection, button to save the selection. ↵ Pwd Strength ↵ Repeats :Disabled Not UID :Disabled ►Not In List:Disabled THOMSON RD1000 / RD1002 Receiver Descrambler - User Manual (release 7.7.1) 4.13 Network Security Description: Network Security provides protection from unauthorized manipulation and configurations of an RD1000 / RD1002 when it is connected to the network. HTTP To enable/disable HTTP access to the RD1000 / RD1002, use the following steps: 1. Press the button. ↓↑ Menu Pwd Strength 2. Use the and buttons to move the cursor to ►Network Services “Network Services”, then press the button. Network Interface ↵ 3. Use the and buttons to move the cursor to “HTTP:” then press the button. ↓↑ Network Sercices 4. Use the and then press the ►HTTP :Enabled HTTPS:Enabled SNMP :Enabled buttons to change the selection, button to save the selection. ↵ HTTPS To enable/disable HTTPS access to the RD1000 / RD1002, use the following steps: 1. Press the button. ↓↑ Menu Pwd Strength 2. Use the and buttons to move the cursor to ►Network Services “Network Services”, then press the button. Network Interface 3. Use the and buttons to move the cursor to “HTTPS:” then press the button. 4. Use the and then press the buttons to change the selection, button to save the selection. ↵ ↓↑ Network Sercices ↵ HTTP :Enabled ►HTTPS:Enabled SNMP :Enabled SNMP To enable/disable SNMP access to the RD1000 / RD1002, use the following steps: 1. Press the button. ↓↑ Menu Pwd Strength 2. Use the and buttons to move the cursor to ►Network Services “Network Services”, then press the button. Network Interface 3. Use the and buttons to move the cursor to “SNMP:” then press the button. 4. Use the and then press the buttons to change the selection, button to save the selection. THOMSON RD1000 / RD1002 Receiver Descrambler - User Manual (release 7.7.1) ↵ ↓↑ Network Sercices ↵ HTTP :Enabled HTTPS:Enabled ►SNMP :Enabled Page 75 Edition A SSH To enable/disable SSH access to the RD1000 / RD1002, use the following steps: 1. Press the button. ↓↑ ↵ 2. Use the and buttons to move the cursor to “Network Services”, then press the button. Menu Pwd Strength ►Network Services Network Interface 3. Use the and buttons to move the cursor to “SSH:” then press the button. ↓↑ Network Sercices ↵ 4. Use the and then press the SNMP :Enabled ►SSH :Enabled ICMP :Enabled buttons to change the selection, button to save the selection. ICMP To enable/disable ICMP access to the RD1000 / RD1002, use the following steps: 1. Press the button. ↓↑ Menu Pwd Strength 2. Use the and buttons to move the cursor to ►Network Services “Network Services”, then press the button. Network Interface 3. Use the and buttons to move the cursor to “ICMP:” then press the button. 4. Use the and then press the Page 76 Edition A buttons to change the selection, button to save the selection. ↓↑ Network Sercices ↵ ↵ SNMP :Enabled SSH :Enabled ►ICMP :Enabled THOMSON RD1000 / RD1002 Receiver Descrambler - User Manual (release 7.7.1) 4.14 Network Setup Description: The unit can be setup on a network connection to allow remote management and SNMP configuration. For these features to work, the network settings for the unit must first be configured properly for the network it is connected to. Static IP Address To setup the unit with a static IP address, use the following steps: 1. Press the button. ↓↑ Menu Error List ►Network Password ↵ 2. Use the and buttons to move the cursor to “Network”, then press the button. 3. Use the and then press the buttons to move the cursor to “DHCP:” button. ↓↑ ↵ 4. Use the and then press the buttons to change the selection to, “off”, button to save the selection. Network ►Dhcp:off IP Address 0.0.0.0 IP Address/Subnet Mask/Gateway 1. Use the and buttons to move the cursor to “IP Address”, then press the button. 2. Use the and buttons to select the column to edit and use the and buttons to change the IP, then press the button to save the selection. 3. The cursor will now be on, “Subnet Mask.” 4. Use the and use the and then press the buttons to select the column to edit and buttons to change the Subnet Mask, button to save the selection. 5. The cursor will now be on, “Gateway.” 6. Use the use the press the and buttons to select the column to edit and and buttons to change the Gateway, then button to save the selection. Network ←→↵ Dhcp:off IP Address ► 000.000.000.000 ↓↑ Network ←→↵ 10.0.0.50 Subnet Mask ► 255.000.000.000 ↓↑ Network ←→↵ 255.0.0.0 Gateway ► 000.000.000.000 ↓↑ DHCP The unit can be configured to use DHCP to obtain an IP address/Subnet Mask/Gateway. THOMSON RD1000 / RD1002 Receiver Descrambler - User Manual (release 7.7.1) Page 77 Edition A 1. Use the and ™ buttons to move the cursor to “Dhcp:” then press the button. 2. Use the and then press the buttons to change the selection to, “on”, button to save the selection. ↓↑ Network ►Dhcp:on IP Address 10.0.0.50 ↵ Note: It may take up to a minute for the unit to obtain an IP address. During this time the unit will display a “busy” message next to DHCP. Page 78 Edition A THOMSON RD1000 / RD1002 Receiver Descrambler - User Manual (release 7.7.1) 4.15 Panel Lock Description: The unit has the option to lock out the front panel with a user defined password. Follow the steps below to the unit front panel. A Locked front panel prevents the user from changing any of the settings. All menu status displays are still available. Locking 1. Press the button. ↓↑ 2. Use the and buttons to move the cursor to “Lock Panel” then press the button. Menu Event Log Network ►Lock Panel ↵ Note: In order to lock the Front Panel, the unit must have a password. When Locking for the first time, user is prompted to enter a password. The message “No Password set. Please set Password” is displayed and the unit goes to the Set Password menu. Set Password Menu To set the password, use the following steps: 1. Use the then the character. and and buttons to change the character and buttons to move to the next ↓↑ Set Password ←→↵ ---------- 2. Press the button when finished, to save the password. The unit goes to the Lock Menu. Lock Menu 1. The current password is displayed. 2. To change the password, use the and buttons to move to cursor to the shown password and press the button. The unit displays the Set Password Menu. 3. To lock the front panel, use the and buttons to move to cursor to “Lock Panel” and press the button. Set Password ←→↵ Current Password ► xxxxxx Lock Panel ↓↑ Set Password ←→↵ Current Password xxxxx ►Lock Panel ↓↑ Unlocking 1. Press the button. 2. Use the and buttons to move the cursor to “Unlock Panel” then press the button. THOMSON RD1000 / RD1002 Receiver Descrambler - User Manual (release 7.7.1) ↓↑ Menu Event Log Network ►Unlock Panel ↵ Page 79 Edition A 3. Use the then the 4. Press the Page 80 Edition A and and buttons to change the character and buttons to move to the next character. button to unlock the front panel. ↓↑ To Unlock ←→↵ Enter Password ---------- THOMSON RD1000 / RD1002 Receiver Descrambler - User Manual (release 7.7.1) 4.16 SNMP Configuration Description: The trap reporting to SNMP allows the user to set which traps will be sent. SNMP control of the unit requires the unit to identify the “Community” for read only and read/write access. These are configured using the steps below. To access the SNMP configuration, use the following steps: 1. Press the button. 2. Use the and then press the buttons to move the cursor to “SNMP”, button. ↓↑ ↵ ↓↑ ↵ ↓↑ ←→↵ Menu Lock Panel ►SNMP MPEG/IP NetCfg RO Community Setup To change the RO Community, follow the steps below: 1. Use the and buttons to move the cursor to “RO Community”, then press the button. SNMP ►RO Community RW Community Trap Setup Name 1. Use the press the and buttons to select “Name:”, then button. 2. Use the then the press the and buttons to change the character and and buttons to change the Name, then button to save the selection. RO Community ►Name:public---Ip1:10.0.15.10 Port1:0162 Connection 1 1. Use the and the button. buttons to select “Ip1:”, then press 2. Use the and then the and then press the buttons to change the character and buttons to change the IP address, button to save the selection. 3. Use the press the and buttons to select “Port1:”, then button. 4. Use the and then the and then press the RO Community ←→↵ Name:public---►Ip1:010.000.015.010 Port1:0162 ↓↑ buttons to change the character and buttons to change the Port1 value, button to save the selection. THOMSON RD1000 / RD1002 Receiver Descrambler - User Manual (release 7.7.1) ↓↑ RO Community Name:public---Ip1:10.0.15.10 ►Port1:0162 ←→↵ Page 81 Edition A Connection 2 1. Use the and the button. buttons to select “Ip2:”, then press 2. Use the and then the and then press the buttons to change the character and buttons to change the IP address, button to save the selection. 3. Use the press the and buttons to select “Port2:”, then button. 4. Use the and then the and then press the RO Community ←→↵ Port1:0162 ►Ip2:000.000.000.000 Port2:0162 ↓↑ buttons to change the character and buttons to change the Port2 value, button to save the selection. ↓↑ ←→↵ ↓↑ ↵ ↓↑ ←→↵ RO Community Name:public---Ip2:0.0.0.0 ►Port2:0162 RW Community Setup To change the RW Community, follow the steps below: 1. Use the and buttons to move the cursor to “RW Community”, then press the button. SNMP RO Community ►RW Community Trap Setup Name 1. Use the press the and buttons to select “Name:”, then button. 2. Use the then the press the and buttons to change the character and and buttons to change the Name, then button to save the selection. RW Community ►Name:private--Ip1:10.0.15.10 Port1:0162 Connection 1 1. Use the and the button. buttons to select “Ip1:”, then press 2. Use the and then the and then press the buttons to change the character and buttons to change the IP address, button to save the selection. 3. Use the press the and buttons to select “Port1:”, then button. 4. Use the and then the and then press the Page 82 Edition A RW Community ←→↵ Name: private--►Ip1:010.000.015.010 Port1:0162 ↓↑ RW Community ←→↵ Name: private--Ip1:10.0.15.10 ►Port1:0162 ↓↑ buttons to change the character and buttons to change the Port1 value, button to save the selection. THOMSON RD1000 / RD1002 Receiver Descrambler - User Manual (release 7.7.1) Connection 2 1. Use the and the button. buttons to select “Ip2:”, then press 2. Use the and then the and then press the buttons to change the character and buttons to change the IP address, button to save the selection. 3. Use the press the and buttons to select “Port2:”, then button. 4. Use the and then the and then press the RW Community ←→↵ Port1:0162 ►Ip2:000.000.000.000 Port2:0162 ↓↑ buttons to change the character and buttons to change the Port2 value, button to save the selection. ↓↑ RW Community Name:public---Ip2:0.0.0.0 ►Port2:0162 ←→↵ 4.17 SMPTE 333M Configuration Description: The unit can be configured to output SMPTE 333M Closed Caption signals from the SMPTE 333M port on the back of the unit. Configuration 1. Press the button. 2. Use the and button to move the cursor to “SMPTE 333M” then press the button. 3. Press the button one more time to edit, “333M:” 4. Use the and buttons to enable or disable SMPTE 333M, then press the button to save the selection. THOMSON RD1000 / RD1002 Receiver Descrambler - User Manual (release 7.7.1) Menu SNMP ►SMPTE 333M System ↵ SMPTE 333M ►333M:Enabled ↵ ↓↑ Page 83 Edition A 4.18 System Information Description: The unit information for unit can be shown using the System menu. The system information contains the unit version, saving and loading of unit profiles (the configuration of the unit and its options), viewing the options that are installed in the unit, the unit temperature and the unit time. The System information is accessed using the following steps: 1. Press the button. 2. Use the and then press the ↓↑ button to move the cursor to “System” button. Menu Genlock Reference SMPTE 333M ►System ↵ Versions This displays the unit’s software version and the software versions of options that have versions enumerated separately from the unit’s version. 1. Use the and then press the button to move the cursor to “Versions” button. 2. The versions of the unit and its options are listed. ↓↑ System ►Versions Profiles Hardware ↵ Versions Unit 6.6.1 Decoder 1 MpegIp 1-3 2.0.4.50309 Profiles This allows the user to save the configuration of the unit and its options. It also allows the user to load a previously saved profile or to delete a saved profile. 1. Use the and then press the Page 84 Edition A button to move the cursor to “Profiles” button. ↓↑ System Versions ►Profiles Hardware ↵ THOMSON RD1000 / RD1002 Receiver Descrambler - User Manual (release 7.7.1) Saving a Profile 1. Use the and button to move the cursor to “Save Current Profile” then press the button. 2. Use the then the character. and and 3. Press the buttons to change the character and buttons to move to the next button when finished, to save the Profile. ↓↑ Profiles ►Save Current Profile Stored Profiles profile1 Profiles ←→↵ ►Name:--------------Stored Profiles profile1 ↓↑ Loading / Deleting a Stored Profile 1. Use the and button to move the cursor to the stored profile (“profile1” in the example) then press the button. 2. Use the and then press the buttons to select “Apply” or “Delete”, button. Profiles ↵ Save Current Profile Stored Profiles ► profile1 ↓↑ Profiles ←→↵ Save Current Profile Stored Profiles Apply Delete ↓↑ Hardware This lists the hardware of the unit and options that are installed along with the option slot. The indicated numbers follow the same rules as the active errors. See chapter 0 Active Errors 1. Use the and button to move the cursor to “Hardware” then press the button. 2. Use the press the hardware. and buttons to select a hardware unit and button to see details about the selected 3. Use the and buttons to scroll up and down through the details. Press the button to return to the Hardware list. THOMSON RD1000 / RD1002 Receiver Descrambler - User Manual (release 7.7.1) ↓↑ ↵ ↓↑ ↵ System Versions Profiles ►Hardware Hardware ►0-0 Controller 1-0 Backplane 2-0 Backplane ↓↑ 0-0 Controller P/N: Assembly 3 Page 85 Edition A Temperature This lists the temperature inside the unit unit in both oC and oF. 1. Use the and button to move the cursor to “Temperature” then press the button. 2. Press the ↓↑ System Hardware ►Temperature Time button to return to the System menu. ↵ Temperature 32oC 89oF Time Allows setting and displaying to the unit’s clock. 1. Use the and then press the button to move the cursor to “Time” button. ↓↑ ↵ ↓↑ ↵ ↓↑ ↵ System Hardware Temperature ►Time Set Auto Update 1. Use the and button to move the cursor to “Auto Update:” then press the button. 2. Use the press the and button to select “Off” or “On”, then button to save the selection. System Time ►Auto Update:Off Check Time: Manual Time Entry: Display the Current Time 1. Use the and button to move the cursor to “Check Time:” then press the button. Page 86 Edition A System Time Auto Update:Off ►Check Time: Manual Time Entry: THOMSON RD1000 / RD1002 Receiver Descrambler - User Manual (release 7.7.1) 2. Press the button to return to the Time menu. Current Time is: Feb 4 10:10:11 2010 Manual Time Entry 1. Use the and button to move the cursor to “Manual Time Entry:” then press the button. ↓↑ ↵ ↓↑ ↵ System Time Auto Update:Off Check Time: ►Manual Time Entry: 2. The following entries are shown for entry: “Month:”, “Day:”, “Year:”, Hour:” and ”Minute:”. 3. For each entry, use the the character and then the to the next character. and and buttons to change buttons to move System Time Auto Update:Off Check Time: ►Month:01 4. Press the button to save the value and to move to the next entry. THOMSON RD1000 / RD1002 Receiver Descrambler - User Manual (release 7.7.1) Page 87 Edition A 4.19 Feature Licensing Feature Licensing provides enabling advanced capabilities of the unit options. 1. Click the button. 2. Use the press the and buttons to select “System”, and then button. 3. Use the press the and buttons to select “License”, and then button. ↓↑ ↵ ↓↑ License Key Menu ↵ System Hardware ►License Temperature To View the Current Licensing 1. To view your current licenses select “Feature List”, and then press the button. Key Entry ►Feature List To Enter the License Key 1. To enter a new license key press the Entry” is selected. button when “Key 2. Use the and buttons to edit the character and use the and buttons to move to then next character. Press the button when finished. ↓↑ License Key Menu ↵ ►Key Entry Feature List Key Entry ↵ Enter Key for Unit S/N: XXXXXXX -------- ↓↑ Note: If you incorrectly enter the license key, you can go back and try again. Note: A reboot will be required when the unit has finished saving the settings. Page 88 Edition A THOMSON RD1000 / RD1002 Receiver Descrambler - User Manual (release 7.7.1) Section 5 – Using the Web Client to Configure the unit Introduction This section describes how to navigate through the configuration menus on the web client of the unit. Note: All instructions in this manual are based on unit software 7.6.x. Newer versions of software, when released, may operate slightly different in regards to menus and configuration. 5.1 5.2 5.3 5.4 5.5 5.6 5.7 5.8 5.9 5.10 5.11 5.12 5.13 Login ............................................................................................................................................. 90 Status Indicators ........................................................................................................................... 90 Configuration................................................................................................................................. 91 Unit ............................................................................................................................................... 93 Profiles .......................................................................................................................................... 96 Web Passwords .......................................................................................................................... 101 Password Strenght ...................................................................................................................... 101 Network Services ........................................................................................................................ 102 Reset Unit ................................................................................................................................... 102 Software Updates ....................................................................................................................... 103 Diagnostics ................................................................................................................................. 103 About .......................................................................................................................................... 104 Feature Licensing ....................................................................................................................... 104 THOMSON RD1000 / RD1002 Receiver Descrambler - User Manual (release 7.7.1) Page 89 Edition A 5.1 Login To login to the remote web client for the unit, use the following steps: 1. Open an Internet Explorer browser window or a Firefox browser window, then type the IP address of the unit into the address box and press ENTER. Note: The IP address of the unit can be found from the front panel “Network Setup” settings, see Section 4.12. 2. Select either the “admin (read-write)” or “user (read-only)” Username, and enter the associated password. Press the button to log into the unit. Note: By default there is no password. Note: If the password was changed (see Section 5.6) it can be recorded in the provided space below. Password:__________________________ 5.2 Status Indicators Once logged into the web client, there are many things to take note of. The first things are the four status indicators along the top of the screen. These indicators directly reflect the two status LEDs on the front panel. A green LED means the status of that object is good and a red LED means that status of that object is in error. If any of the indicators are red, a more detailed explanation is provided by clicking on the tab and looking under the first section, “Error List.” Refer to Appendix B for a more detailed explanation of the individual errors. Page 90 Edition A THOMSON RD1000 / RD1002 Receiver Descrambler - User Manual (release 7.7.1) 5.3 5.3.1 Configuration Input Setup To set the desired input as active use the following steps: 1. Click on the or tab of the corresponding RDS that needs to be configured. Note: In a single unit, there will only be a tab. 2. Click the button on the same line as the input you wish to make active. Note: The input is already active if the button looks like this: 3. A dialog box will appear asking “Are you sure you want to change the active input?” Click to approve the action. 4. Once the desired input had been set to active, the specific options of that input card can be set by clicking on the icon next to the active input. When the icon is clicked, an edit window will appear with the specific options for that card. Use the drop down menus and input boxes to complete the edit form. Click the button at the bottom of the form to save the settings. The current settings for any of the input cards can be verified by clicking on the button next to the desired input. THOMSON RD1000 / RD1002 Receiver Descrambler - User Manual (release 7.7.1) Page 91 Edition A 5.3.2 Service / Source ID Setup To setup the Source ID, use the following steps: 1. Click on the or tab of the corresponding RDS that needs to be configured. 2. Under the “Services” heading, click on the next to the Source ID option. button 3. A new window will pop up in the middle of the screen. Use the drop down menu at the top to choose the “Lookup Mode.” 4. Then use the next drop down box to choose the desired “ID Timeout” (in seconds). 5. Enter a “Manual Station Name:” and then click the button to save the changes. Note: If no source is found in the allotted time the “Manual Station Name:” is displayed. 5.3.3 PSIP Information To view the PSIP information for the applied TS, select the RDS ( or ) and then click the button which is located right next to the “Inputs” heading towards the top of the page. This will open a new window that displays all of the PSIP information for the applied TS. The PSIP Tables are grouped into “MPEG”, “ATSC” and “DVB” tables. The table groups are selected using the selection radial buttons , or . The MPEG table grouping includes displaying the PAT, PMT or CAT. Click the tabs at the top of the window to view the corresponding table. The ATSC table grouping includes displaying the MGT, TVCT, EIT or STT. Click the tabs at the top of the window to view the corresponding table. Page 92 Edition A THOMSON RD1000 / RD1002 Receiver Descrambler - User Manual (release 7.7.1) The DVB table grouping displays the SDT. The PSIP Table display window can be resized to fit the table being displayed. Scroll bars allow displaying the parts of the table that do not fit in the window. The displayed table is not automatically updated if the content changes. Use the button to update the table display. Changing tables will also display the current table information. In order to close the PSIP table display window, use the or button. 5.4 Unit This section will describe what information is included under the 5.4.1 tab. Active Errors The first thing under this tab is the “Active Errors.” If any of the status indicators across the top of the web client are indicating an error (i.e. red circle) this section will give a more detailed description of the specific error along with the location of the item that is producing the error. THOMSON RD1000 / RD1002 Receiver Descrambler - User Manual (release 7.7.1) Page 93 Edition A 5.4.2 Event Logging Just below the “Active Errors” is the “Event Logging” section. This section shows all the possible events that the unit will log. Follow the steps below to either enable or disable an event. 1. Click the button under the “Event Logging” heading. This will bring up a new edit form in the middle of the screen. 2. Choose either the “General, Video, Audio, DPI, or System” tab to enable or disable events under those headings. 3. Then click the save the settings. 5.4.3 button, at the bottom of the form, to Unit Date/Time The next section is the “Unit Date/Time” section. This section gives an overview of how to configure the date and time of the unit. 1. Click the button under the “Unit Date/Time” heading. This will bring up a new edit form in the middle of the screen. 2. Use the drop down menu to select either “Auto, or Manual.” 3. If “Auto” is selected, the option to use a time server is available. Enter the IP address of the Time Server in the space provided. 4. Then click the Page 94 Edition A button to save the changes. THOMSON RD1000 / RD1002 Receiver Descrambler - User Manual (release 7.7.1) 5. If “Manual” is selected, click the date. button to choose the 6. Then enter the time manually in the space provided. 7. Click the 5.4.4 button to save the changes. SNMP MIB Modules In order to control the unit using SNMP, the MIB modules need to be downloaded. The THOMSON specific MIB modules are displayed under the “Admin/SNMP MIB Modules” heading. The generic MIB modules can be viewed and downloaded by clicking on the “View All MIB Modules…” hyperlink. That will bring up a new window displaying all the generic MIB modules. To download these, right-click on the desired MIB module under the “SNMP MIB Modules” heading and select “Save Target As…” 5.4.5 SNMP Settings The next section is the SNMP settings. This section gives an overview of all the SNMP settings as well as the configuration of SNMP. To edit the SNMP settings use the following steps: THOMSON RD1000 / RD1002 Receiver Descrambler - User Manual (release 7.7.1) Page 95 Edition A 1. Click the button under the “SNMP Settings” heading. This will bring up a new edit form in the middle of the screen. 2. Use the drop down menus and input boxes to configure SNMP to the desired settings. 3. At the top of the edit form there are five drop down menus for enabling or disabling five separate SNMP traps as well. 4. When all of the settings have been configured, click the button, at the bottom of the form, to save the settings. 5.4.6 SMPTE333M To enable SMPTE333M, use the following steps: 1. Click the button next to the SMPTE333M title. This will bring up a new edit form in the middle of the screen. 2. Use the drop down menu to enable or disable SMPTE333M. 3. Click the the settings. 5.5 button, at the bottom of the form, to save Profiles Profiles are the means for saving and applying a group of settings on an unit for a particular use. By applying a particular profile, the user can recall the settings of the unit for different demodulation and decoding needs. Up to 24 different profiles can be stored on an unit. New profiles can be added to the unit by configuring the various settings of the unit, then “saving” this profile and giving it a name. New profiles can also be added to an Page 96 Edition A THOMSON RD1000 / RD1002 Receiver Descrambler - User Manual (release 7.7.1) unit by transferring them from a PC via the web client interface. Profiles can be deleted, by name, to make room for others. To configure profiles, first click on the tab to display the profiles section. 5.5.1 Saving a Profile Once the unit is configured as required for a specific use and environment, the settings can be saved to the unit by a named profile. To save a profile, use the following steps: 1. Click the button. 2. Enter a name for the profile. 3. Click the 4. Click the saved. button to save the profile. button after the profile has been successfully Note: The profile name should be no more than 15 characters long. THOMSON RD1000 / RD1002 Receiver Descrambler - User Manual (release 7.7.1) Page 97 Edition A 5.5.2 Deleting a Profile If a given profile is no longer needed or more space is needed on the unit for more profiles, it may be necessary to delete a profile. To delete a profile, use the following steps: 1. Use the drop down menu to select the profile to be deleted. 2. Click the button. 3. A dialog box will appear and ask, “Are you sure you want to delete this profile?” Be sure to check the profile name in the dropdown box because that is the profile that will be deleted. 4. Click the the delete. button in the dialog box to confirm 5. After the profile has been deleted, click the button to close the dialog box. 5.5.3 Renaming a Profile If a particular profile’s name needs to be changed for one reason or another, use the following steps to change the name of the profile: 1. Use the drop down menu to select the profile to be renamed. 2. Click the Page 98 Edition A button. THOMSON RD1000 / RD1002 Receiver Descrambler - User Manual (release 7.7.1) 3. A dialog box will appear that has the current name of the profile in it. Type a new name for the profile in the input box. 4. Click the rename. button in the dialog box to confirm the 5. After the profile has been renamed, click the to close the dialog box. 5.5.4 button Applying a Saved Profile Once one or more profiles have been saved in the unit it is possible to apply any of the saved profiles. When the selected profile is applied, the settings that were saved in that profile will now be applied. To apply a saved profile, use the following steps: 1. Choose the desired profile from the drop down menu. 2. Click the button. 3. It may take up to a minute to apply the new profile. When the profile has been successfully loaded click the button to close the dialog box. 5.5.5 Viewing a Saved Profile To view the settings contained in a saved profile choose the desired profile from the drop down list then click the button. A new window will appear with all of the settings contained in that profile. 5.5.6 Downloading a Saved Profile The unit is capable of downloading a saved profile to a local computer. This option can be extremely useful if more than 24 profiles are needed. Since only 24 profiles can be stored on the unit, new profiles can be created on the unit and then downloaded to the local computer. To download a profile from the unit, use the following steps: THOMSON RD1000 / RD1002 Receiver Descrambler - User Manual (release 7.7.1) Page 99 Edition A 1. Choose the desired profile from the drop down menu. 2. Click the button. 3. A new dialog box will appear and ask what to do with the file. Click the button and then point to a location on the local computer. 4. Click the 5.5.7 button again. Uploading a Saved Profile When a saved profile on a local computer is needed, it is necessary to upload that profile back to the unit. To upload a profile, from a local computer, back to the unit, use the following steps: 1. Click the button. 2. A new window will appear with a space to provide the path of the profile to upload. Click the button and navigate to the location of the profile on the local computer. Select the file and then click . 3. The file path box should now be filled in with the location of the profile. Click the button. Page 100 THOMSON RD1000 / RD1002 Edition A Receiver Descrambler - User Manual (release 7.7.1) 5.6 Web Passwords The password on the web client for the admin account and user account should be changed to something other than the default passwords. The process is the same for both the admin account and the user account, just click on the button next to the account of the password to change. To change either the admin account password or the user account password, use the following steps: 1. Click on the button next to the account to edit. 2. A new window will appear in the middle of the screen. Type the new password in both of the fields and then click the button to save the new password. 5.7 Password Strenght If desired, the password strength for the web client can be increased from the default value. To change the password strength required, click on the button in the Password Strength Section. To change any of the password strength settings: 1. Click on the edit. button in the Password Strength Section to 2. A new window will appear in the middle of the screen. Change the settings desired and then click the button to save the settings. THOMSON RD1000 / RD1002 Page 101 Receiver Descrambler - User Manual (release 7.7.1) Edition A 5.8 Network Services If desired, the Network Secrity can be increased from the default value by disabling any or all of the Network Services. To change any of the network services, click on the button in the Network Services Section. To change any of the network service settings: 1. Click on the edit. button in the Network Services section to 2. A new window will appear in the middle of the screen. Change the settings desired and then click the button to save the settings. 5.9 Reset Unit If a problem should ever arise where the unit has locked up, or malfunctioned in some manner, it is possible to perform a soft reset from the web client. A soft reset will reboot the unit and hopefully take care of any previous problems the unit was exhibiting. A soft reset will not change any setting. To perform a soft reset, use the following steps: 1. Click the “Reset Unit” hyperlink under the “Reset Unit” heading. 2. A new dialog box will appear asking “Are you sure that you want to reset the unit?” Click the button to reset the unit. Caution: Resetting the unit is a service affecting event and service will be interrupted while the unit is rebooting. 3. A progress bar will appear on the screen as the unit is resetting. It may take up to 5 minutes for the unit to restart depending on the configuration. Page 102 THOMSON RD1000 / RD1002 Edition A Receiver Descrambler - User Manual (release 7.7.1) 4. Once the unit has restarted the web client will be redirected back to the login page for the unit. 5.10 Software Updates Occasionally THOMSON will release new software for the unit to provide new features and bug fixes. NEVER PERFORM A SOFTWARE UPDATE UNLESS INSTRUCTED TO DO SO BY A THOMSON REPRESENTATIVE. If an update is warranted, the representative will provide the software and instructions for the update. 5.11 Diagnostics 5.11.1 Processes This section is primarily used THOMSON representative to aid in troubleshooting a problem. By clicking on the “View Processes Window…” hyperlink, under the “Diagnostics” heading, it will bring up a new window that shows all the running processes of the unit’s operating system. There are no user-definable parameters under this menu. 5.11.2 Network Interface Information This section displays detailed information about the network portion of the unit. It also allows a new IP address to be set in the unit. To set a new IP address, use the following steps: Warning: Use caution when changing IP settings or the unit may be rendered unreachable. 1. Click the “View Network Interface Window…” hyperlink, under the “Diagnostics” heading. 2. A new window will appear in the middle of the screen. This new windows will give all of the details for the network interface of the unit, as well as contain three input boxes to set a new IP address. 3. Fill in the three fields, “IP Address”, “Subnet Mask”, and “Gateway.” 4. Click the the network settings. button to save THOMSON RD1000 / RD1002 Page 103 Receiver Descrambler - User Manual (release 7.7.1) Edition A 5.12 About Under the tab, there are no user definable parameters but there is information about how to contact THOMSON, as well as information about the software versions on the unit, and which option cards are installed. 5.13 Feature Licensing The Web Client is the easiest way to upgrade the licensing on the unit. The following license is available for the option • “Advanced Satellite Features” – allows multistream, VCM, 16APSK and 32APSK – NRD00S02AA Simply login to the unit Remote Web Client as an administrator, and then click the tab. The first section under this tab is “Feature Licensing”. The unit’s options determine the licenses that are applicable to the unit, in the example “Advanced DVB-S2” is listed as well as “SCTE35/104” each followed by either “Enabled” or “Disabled”. If all listed features are “Enabled” then you do not need to upgrade the licensing. When a license is upgraded, the entire unit and all of the options that support the licensed features can now support the additional feature capabilities. Follow these steps to upgrade 1. Click on the button on the left under “Feature Licensing”. 2. Enter your newly acquired license key in the space provided, and then press the button. 3. When the unit is finished saving the settings a reboot will be required. Page 104 THOMSON RD1000 / RD1002 Edition A Receiver Descrambler - User Manual (release 7.7.1) Section 6 – Appendices Introduction This section includes the following appendices Appendix A – Acronyms and Glossary ........................................................................................................... 106 Appendix B – Error/Event List ........................................................................................................................ 109 Appendix C – Specifications ........................................................................................................................... 111 Appendix C.a. Device – base unit ........................................................................................................ 111 Appendix C.b. CAM Decryption – Basic feature ................................................................................... 113 Appendix C.c. 8VSB/QAM Receiver – Option NRD00HCSAA .............................................................. 114 Appendix C.d. Serial TS Input/Output (DVB-ASI /SMPTE 310M) – Option NRD00H02AA ................... 115 Appendix C.e. GPIO Module – Option NRD00H10AA .......................................................................... 116 Appendix C.f. Dual Input COFDM Receiver – Option NRD00H04AA ................................................... 116 Appendix C.g. Quad Input DVB-S/DVB-S2 Receiver with LNB – Option NRD00H12AB ...................... 117 Appendix C.h. Dual Input MPEG over IP Receiver/UDP Output – Option NRD00H05AA ..................... 118 Appendix C.i. Dual MPEG over IP output with PID filtering – Option NRD00H13AA............................. 119 Appendix C.j. DVB-S2 advanced features – Software Option NRD00S02AA ...................................... 120 Appendix D – Coordinated Universal Time ..................................................................................................... 121 . THOMSON RD1000 / RD1002 Page 105 Receiver Descrambler - User Manual (release 7.7.1) Edition A Appendix A – Acronyms and Glossary 8VSB: Vestigial sideband modulation with 8 discrete amplitude levels. 16VSB: Vestigial sideband modulation with 16 discrete amplitude levels. AC-3: Also known as Dolby Digital AAC: Advanced Audio Coding AES: Audio Engineering Society ASI: Asynchronous Serial Interface ATSC: Advanced Television Systems Committee AV: Audio Video Bit Rate: The rate at which the compressed bit stream is delivered from the channel to the input of a decoder. BNC: British Naval Connector BPS: Bits per second. CAT: Conditional Access Table CAT6: Category 6 – Cable standard for gigabit Ethernet CC: Closed Caption CoP: Code of Practice CRC: Cyclic Redundancy Check CVCT: Cable Virtual Channel Table DHCP: Dynamic Host Configuration Protocol DTVCC: Digital Television Closed Captioning DVB: Digital Video Broadcasting EBU: European Broadcasting Union EIA: Electronic Industries Alliance EIT: Event Information Table EPG: Electronic Program Guide ETM: Extended Text Message ETT: Extended Text Table Event: An event is defined as a collection of elementary streams with a common time base, an associated start time, and an associated end time. FCC: Federal Communications Commission FEC: Forward Error Correction Field: For an interlaced video signal, a “field” is the assembly of alternate lines of a frame. Therefore, an interlaced frame is composed of two fields, a top field and a bottom field. Frame: A frame contains lines of spatial information of a video signal. For progressive video, these lines contain samples starting from one time instant and continuing through successive lines to the bottom of the frame. For interlaced video a frame consists of two fields, a top field and a bottom field. One of these fields will commence one field later than the other. HANC: Horizontal Ancillary HD: High Definition High level: A range of allowed picture parameters defined by the MPEG-2 video coding specification which corresponds to high definition television. I/O: Input/Output IP: Internet Protocol LED: Light Emitting Diode LNB: Low-Noise Block MAC: Medium Access Control Main level: A range of allowed picture parameters defined by the MPEG-2 video coding specification with maximum resolution equivalent to ITU-R Recommendation 601. Page 106 THOMSON RD1000 / RD1002 Edition A Receiver Descrambler - User Manual (release 7.7.1) Main profile: A subset of the syntax of the MPEG-2 video coding specification that is expected to be supported over a large range of applications. Mbps: 1,000,000 bits per second. MER: Modulation Error Ratio MGT: Master Guide Table MIB: Management Information Base MP@HL: Main profile at high level. MP@ML: Main profile at main level. MPEG: Refers to standards developed by the ISO/IEC JTC1/SC29 WG11, Moving Picture Experts Group. MPEG may also refer to the Group. MPEG-2: Refers to ISO/IEC standards 13818-1 (Systems), 13818-2 (Video), 13818-3 (Audio), 13818-4 MPTS: Multiprogram Transport Stream NTSC: National Television System Committee OSD: On Screen Display PAL: Phase-Alternating Line PAT: Program Association Table PCM: Pulse-Code Modulation PCR: Program Clock Reference PID: Packet Identifier. A unique integer value used to associate elementary streams of a program in a single or multi-program transport stream. PMT: Program Map Table Profile: A defined subset of the syntax specified in the MPEG-2 video coding specification Program specific information (PSI): PSI consists of normative data which is necessary for the demultiplexing of transport streams and the successful regeneration of programs. Program: A program is a collection of program elements. Program elements may be elementary streams. Program elements need not have any defined time base; those that do have a common time base and are intended for synchronized presentation. PTS: Presentation Time Stamp QAM: Quadrature Amplitude Modulation QPSK: Quadrature Phase-Shift Keying RDS: Receiver Decoder System RF: Radio Frequency RGBHV: Red, Green, Blue, Horizontal, Vertical RO: Read Only RPM: Revolutions Per Minute RRT: Rating Region Table RS-232: Recommended Standard. A standard for serial binary data interconnection. RU: Rack Unit RW: Read/Write SD: Standard Definition SDI: Serial Digital Interface SFP: Small Form-Factor Pluggable THOMSON RD1000 / RD1002 Page 107 Receiver Descrambler - User Manual (release 7.7.1) Edition A SI: System Information SMPTE: Society of Motion Pictures and Television Engineers SNMP: Simple Network Management Protocol SSRC: Synchronization Source STD input buffer: A first-in, first-out buffer at the input of a system target decoder for storage of compressed data from elementary streams before decoding. STD: System Target Decoder. A hypothetical reference model of a decoding process used to describe the semantics of the Digital Television Standard multiplexed bit stream. STT: System Time Table TS: Transport Stream TVCT: Terrestrial Virtual Channel Table UTC: Coordinated Universal Time VANC: Vertical Ancillary VCT: Virtual Channel Table. Used in reference to either TVCT or CVCT. XLR: Cannon “X” series connector, with a Latch, and Rubber around the contacts. YPbPr: Component Red, Green, Blue Page 108 THOMSON RD1000 / RD1002 Edition A Receiver Descrambler - User Manual (release 7.7.1) Appendix B – Error/Event List General • • • • • • • • • • • • • • • • • • • • • • • • • • • • • • Bitrate Error - The TS bitrate is not within 100 bps of 19.392 Mbps while using the 310M card, or it is greater than 160 Mbps while using ASI. Tuner Lock Error – The FEC is not synchronized. Data on carrier is not synchronized. Video Unsupported Profile/Level - The video is not of a supported profile/level. Carrier Lock Error - Cannot detect the carrier signal. TS Rate Invalid - A burst of packets caused the receive FIFO to overflow. Not Receiving Packets - The card is not receiving IP packets within 1 FEC period (1 second). No TS Present Error - There is no sync byte (0x47) found in a 1 second period. Transport Packet Error - There was an error in the transport stream. Lock Error - A carrier cannot be found. Low MER - The MER is lower than the threshold set by the user. Low Level - The signal level is lower than the threshold set by the user. System Time Event – If the unit is powered on/off, the time is manually updated, or the time server is invalid, this event will be triggered. CA Service Not Found- The CAM is configured to use selected PIDs, but the selected PID is no longer available in the PMT. Program Not Found – The Program / Service that is selected is not available. Band Frequency Error – The Satellite Receiver tuning using Frequency and Offset is not within the Receiver’s tuning range. FP Login Error Event – There was an attempt to unlock that front panel using the wrong password. All SDI Jacks Squelched Error – Uncorrectable FEC Error Event – There was an FEC error that was uncorrectable. Corrected FEC Error Event – There was an FEC error that was corrected. Out of Order Packet Error Event – The IP connection has received an out of order packet that is not able to be restored to its correct order. Duplicate Packet Error – The IP connection has received a duplicate packet that was disgarded. Not Receiving IP Packets Error – An incoming IP connection is no longer receiving any packets. IP TS Sync Loss Error – An incoming IP connection has lost its TS synchronization, it could still be receiving packets. DMIP Failover Backup Error – The NRD00H05AA (MPEG over IP Input/Output card) IP backup IP Receive Group is now being used as the Active Receive Group. DMIP Temperature Error – The NRD00H05AA (MPEG over IP Input/Output card) has exceeded its normal operating temperature limit. Input Switched to Backup Error – The Backup input option has replaced the Primary input option as the active input. Line Conflict – An SDI output VANC line has a conflicting data trying to be placed on the same line. FEC Error Counter Rollover Event – The FEC error counter has restarted at 0. FEC Error Counter Reset Event – There has been an FEC counter reset, setting all of the FEC counters for the input option to 0. AFD Code Not Present Event – The unit is configured to use or embed the AFD code in the VANC, and the AFD code is not present with the input video. THOMSON RD1000 / RD1002 Page 109 Receiver Descrambler - User Manual (release 7.7.1) Edition A System • • • Fan Error - The fan is spinning at less than 500 RPM. Temperature Error - The internal temperature has exceeded 70 Celsius. DPI Stream Type Locked Error- User is not licensed to decode the selected stream. Page 110 THOMSON RD1000 / RD1002 Edition A Receiver Descrambler - User Manual (release 7.7.1) Appendix C – Specifications Appendix C.a. Device – base unit ROHS Compliant Includes: System – Display type: Display Configuration: Keypad: Front Panel Lockout: Configurations Allowed: Rear panel: Remote Operation/Update Interface – Type: Rear panel indicators: Connector: Serial Remote operation interface – Type: Protocol: Connector: Front Panel Indicators – Input LED: Error LED: AC Power – Operating Voltage: Max Power: Current Draw/Power: Typical 1 Receiver with 4 option cards: Typical 2 Receivers with 8 option cards: Frequency: Connector: Line Cord: Yes Display, keypad, embedded controller, Chassis/case, Power Supply/line cord VFD (Vacuum Fluorescent Display) 4 lines x 20 characters Membrane switches Password control, up to 10 alpha-numeric characters (no punctuations or spaces allowed Single channel configuration – 8-Slot Dual channels configuration – 4-Slot Eight available slots Six I/O interface slots Two video output slots (one per channel) Ethernet, 10/100 Link (Green LED), Activity (Amber LED) RJ45 RS232 115, 8, N, 1 9-pin D-sub, male Green indicates valid input on selected input Off indicated no valid signal on the selected input Constant Blinking Green for dual units indicates one valid input and one invalid input Red indicates error is occurring Off indicated no errors detected 95–135 VAC or 180–265 VAC 200 W 0.40 A / 50 W 0.60 A / 70 W 47–63 Hz IEC C14 Detachable, 6 foot, 3-prong THOMSON RD1000 / RD1002 Page 111 Receiver Descrambler - User Manual (release 7.7.1) Edition A Device – base unit (Continued) General – Operating Temperature: Heat dissipation Typical 1 Receiver with 4 option cards: Typical 2 Receivers with 8 option cards: Operating Humidity: Cooling: Temperature monitor: Size: Weight: Pollution Degree: Installation Category: Grounding Post: Noise Standards 0 to 45 degrees C 171 BTU/Hour 239 BTU/Hour <95% Non-Condensing Forced air, front intake, rear exhaust Fan failure, internal temperature sensor Height – 1RU (1 ¾”), Width = 19”, Depth = 19” 19” rack mountable, with removable ears Rack clips and screws included 9.5 lbs. (base unit) 12.75 lbs. (fully loaded) 2 II On chassis 50 dB SPL at 1 m, C weighted FCC Part 15 ICES-003 EN 55022 EN 55024 EN 61000-3-2 EN 61000-3.3 UL 60065 CAN/CSA 60065-03 (Canada) IEC 60065 :2001 (International) EN 60065 :2002 (Europe) Page 112 THOMSON RD1000 / RD1002 Edition A Receiver Descrambler - User Manual (release 7.7.1) Appendix C.b. CAM Decryption – Basic feature CAM Decryption – ROHS Compliant General – Compatibility Standard: Number of CAM Slots: Bottom slot assignment: Top slot assignment: Auto CAM insertion/removal detection: CAM usage: CAM name display: Multicrypt Support: Decryption Selection – Elementary Stream types: Selection Modes: Maximum TS bit-rate: CAS Supported – BISS – Compatibility Standard: Supported Modes: Max TS Bit Rate: Key: Services: Yes DVB-CI EN 50221 2 RDS 1 In single unit, RDS 1 –both CAMs used by RDS 1 In dual unit, RDS 2 Yes Selectable, Enable/Disable Yes Yes Video (both MPEG2 and MPEG4), Audio Decoded streams Individually elementary streams (Multi-service) 72 Mbps. The descrambler receives the total input TS bitrate, even if only one service needs descrambling, and the descrambler cannot accept more than 72 Mbit/s. Some inputs can deliver more than 72 Mbit/s." All major CAM modules, including: ® NagraVision ® Irdeto ® Viaccess ® Conax ® NDS CryptoWorks Mediaguard AstonCrypt DVB-CSA Mode 1 and Mode E (Injected ID only No Buried ID) 120 Mbps per RDS 1 BISS Word per RDS 10 services per RDS THOMSON RD1000 / RD1002 Page 113 Receiver Descrambler - User Manual (release 7.7.1) Edition A Appendix C.c. 8VSB/QAM Receiver – Option NRD00HCSAA ROHS Compliant RF Input Frequency Range: CATV Offsets: Sensitivity: Dynamic Range: Modulation: Connector: Impedance: MER: Input Level Flag: Yes 50-850 MHz VHF/UHF (Ch2 – Ch69) CATV (Ch2 – Ch134) FCC, IRC, HRC –15 dBmV >35 dB 8VSB, QAM-B F-81 Type, panel mount, female 75 ohms Accuracy: +/- 1 dB Range: 0 – 35 dB – 38 dB (QAM 256) Low limit flag: User defined Range: –15 dBmV to +20 dBmV Accuracy: +/-5 dB Low flag limit: User defined QAM Standard: QAM Mode: De-interleaver: Nyquist Roll Off (Alpha): ITU-T, Annex B (SCTE DVS-031) 64 and 256 I=1-128, J=128/1 12%, 18% 8VSB Standard: Decoding Levels: Nyquist Roll Off (Alpha): ATSC A/53E 8 11.5% Page 114 THOMSON RD1000 / RD1002 Edition A Receiver Descrambler - User Manual (release 7.7.1) Appendix C.d. Serial TS Input/Output (DVB-ASI /SMPTE 310M) – Option NRD00H02AA ROHS Compliant General Configuration: Connector: Impedance: Yes ASI or 310M, selectable (Not simultaneously) (2) BNC, female 75 ohms ASI Serial TS Input / Output Number of ASI Inputs: Number of ASI Outputs: Standard: Data Bit Rate: Max TS Rate Supported: 1 1 (non loop-through) EN50083-9 (V2:3/98) DVB ASI 270 Mbps 160 Mbps (Dependent on configuration) 310M Serial TS Input / Output Number of 310M Inputs: Number of 310M Outputs: Standard: Data Bit Rate: 1 1 (non loop-through) SMPTE 310M 19.39 Mbps, synchronous THOMSON RD1000 / RD1002 Page 115 Receiver Descrambler - User Manual (release 7.7.1) Edition A Appendix C.e. GPIO Module – Option NRD00H10AA ROHS Compliant General – Remote Interfaces: +Vcc Voltage Level Relay Type: Contact Ratings: Event Types: Suggested Connector Type: I/O – Logic Input: Logic Outputs: Voltage Range: Short circuit protection: Relay Contact: Appendix C.f. Yes Web GUI and SNMP +5 @ 800 mA High-cycle, High-reliability >30 VDC @ 500 mA OON (Out-Of-Network) and RTN (Return-To-Network) Phoenix 2.5 mm Pluggable Terminal Block Provides four logic inputs Provides three open-collector outputs 5 – 24 volts logic switching and current limiting Yes Provides three relay contact outputs Dual Input COFDM Receiver – Option NRD00H04AA ROHS Compliant General – Compatibility Standard: Spectrum: Frequency range: RF Input Level Channel bandwidth: Guard interval: FFT size: Code rate: Constellation: Connector: Impedance: Return Loss: Yes EN 300 744 Normal or Inverted 49 MHz – 861 MHz -70 dBm to -20 dBm 6 MHz, 7 MHz, 8 MHz 1/4, 1/8, 1/16, 1/32 2K, 8K 1/2, 2/3, 3/4, 5/6, 7/8 QPSK, QAM16, QAM64 2-F-81 Type, panel mount, female 75 Ohms >9 dB Page 116 THOMSON RD1000 / RD1002 Edition A Receiver Descrambler - User Manual (release 7.7.1) Appendix C.g. Quad Input DVB-S/DVB-S2 Receiver with LNB – Option NRD00H12AB ROHS Compliant General – Frequency Range: Number of inputs: Connector: Impedance: Return Loss: Separation: RF frequency: Tuning: Satellite frequency: LO frequency: Packet size: Transport Stream: Nyquist root filter roll-off factors: RF Input Level: Carrier Loop capture range: Input RF Spectrum: Image rejection: Noise figure: IF filter bandwidth: LNB Power and 22 kHz Tone – Settings (LNB voltage / tone): LNB Current: LNB over current protection: LNB voltage regulation: 22 kHz Tone: DVB-S – Standard: FEC Code: Modulation: Modulation/Coding supported: Code rates: QPSK Symbol rate: BER: DVB-S2 – Standard: Decoding type: Modulation: Modulation/Coding supported: FEC Framing Type QPSK supported rates: 8PSK supported rates: Symbol rate: PER: Pilot: Yes 950 MHz – 2150 MHz 4 (A, B, C and D) F-81 Type, Female (4) 75 Ohms >9 dB >50 dB adjacent, >60 dB non-adjacent 950 MHz to 2150 MHz Difference between Satellite frequency and LO frequency 950 – 14500 MHz 0 – 12000 MHz, with presets of 0, 5150, 9750, 10600, 10750 and 11250 MHz 188 bytes Up to 81 Mbps .20, .25, .35 -65 dBm to -25 dBm ± 5 MHz Normal/Inverted Auto Detect >30 db 15 dB Automatic selection (dependent on symbol rate) 0/off, 13/off, 13/on, 14/off, 14/on, 18/off, 18/on, 19/off, 19/on >450 mA DC Folback current limiting ± 4% 650 mV (± 250 mV) peak-peak EN 300 421 Conv. + Reed-Solomon QPSK CCM 1/2, 2/3, 3/4, 5/6, 7/8 1-45 MSym/s Observable via front panel and web interface EN 302 307 LDPC and BCH QPSK, 8PSK CCM Short frame size (16200), Normal frame size (64800) 1/4, 1/3, 2/5, 1/2, 3/5, 2/3, 3/4, 4/5, 5/6, 8/9, 9/10 3/5, 2/3, 3/4, 5/6, 8/9, 9/10 1-45 MSym/s Observable via front panel and web interface On/Off Auto Detect THOMSON RD1000 / RD1002 Page 117 Receiver Descrambler - User Manual (release 7.7.1) Edition A Appendix C.h. Dual Input MPEG over IP Receiver/UDP Output – Option NRD00H05AA ROHS Compliant General – Connector: FEC Receive: Multicast Filtering: Receive – Input Format: Receiver Capability: Buffer size: Bitrate Range: Packets/IP Frame: IGMP Compatibility: Transmit – Output Format: Bitrate Range: Packets/IP Frame: Number of Outputs: Yes 2 – 10/100/1000 Auto-negotiating Base-T RJ-45 Ethernet Port Licensed – Pro MPEG CoP3 SMPTE 2022 Range: L*D<100 1<L<20 4<D<20 Annex B Filters based on IP address (Avoids Problematic 30 IP – 1 MAC) UDP, RTP, and RTP with extension headers Multicast and Unicast CBR, VBR, Null Stripped 2 simultaneous MPEG over IP transport streams with automatic failover 1 – 4000 KB, user settable 1 – 160 Mbps 1-7 MPEG Packets/IP Frame Version 1, 2, and 3 UDP 1 – 160 Mbps 1-7 MPEG Packets/IP Frame 2 Mirrored TS – Unicast and/or Multicast Page 118 THOMSON RD1000 / RD1002 Edition A Receiver Descrambler - User Manual (release 7.7.1) Appendix C.i. Dual MPEG over IP output with PID filtering – Option NRD00H13AA ROHS Compliant General – Connector: Card Latency: Transmit – Output Format: Bitrate Range: Packets/IP Frame: Number of Outputs: Service/PID Filtering – PCR: Services Table Manipulation: Yes 2 – 10/100/1000 Auto-negotiating Base-T RJ-45 Ethernet Port ≤1000ms UDP 1 – 160 Mbps per TS (constant bit rate) 400 Mbps Aggregate 1-7 MPEG Packets/IP Frame 5 Independent TS (MPTS or SPTS), each routed to one of two Ethernet ports as desired – Unicast and/or Multicast PCR restamping Max 25 filtered services per transmit group Automatic table adjustment In MPEG mode: • Adjusted tables: PAT, PMT • Pass through tables: CAT, NIT • Discarded tables: all remaining tables In DVB mode: • Adjusted tables: PAT, PMT, SDT actual • Pass through tables: CAT, NIT, BAT, etc • Discarded table: TSDT THOMSON RD1000 / RD1002 Page 119 Receiver Descrambler - User Manual (release 7.7.1) Edition A Appendix C.j. DVB-S2 advanced features – Software Option NRD00S02AA Software option to enable advanced DVB-S2 modes apply to Quad DVB-S/S2 interface (NRD00H12AB). It enable additional DVB-S2 features. The software option apply at unit level, it means one license whatever it is a single or dual channels model. General – Software option to enable advanced DVB-S2 modes apply to Quad DVB-S/S2 interface. DVB-S2 – additional features Modulation: Modulation/Coding supported: 16APSK supported rates: 32APSK supported rates: Symbol rate: Pilot: Multistream 16APSK, 32APSK VCM 2/3, 3/4, 4/5, 5/6, 8/9, 9/10 3/4, 4/5, 5/6, 8/9, 9/10 1-45 MSym/s On/Off Auto Detect Support DVB-S2 multi-stream input. One incoming TS could be selected based on Stream Identifier (ISI) Page 120 THOMSON RD1000 / RD1002 Edition A Receiver Descrambler - User Manual (release 7.7.1) Appendix D – Coordinated Universal Time -12:00 Eniwetok -11:00 Midway -10:00 Hawaii -09:00 Alaska -08:00 Pacific -07:00 Mountain -06:00 Central -05:00 Eastern -04:00 Atlantic -03:30 Newfoundland -03:00 Greenland -02:00 Mid-Atlantic -01:00 Azores 00:00 Greenwich 01:00 Amsterdam 02:00 Athens 03:00 Baghdad 03:30 Tehran 04:00 Abu Dhabi 04:30 Kabul 05:00 Ekaterinburg 05:30 Calcutta 05:45 Kathmandu 06:00 Amaty 06:30 Rangoon 07:00 Bangkok 08:00 Beijing 09:00 Osaka 09:30 Adelaide 10:00 Brisbane 11:00 Magadan 12:00 Auckland 13:00 Nuku THOMSON RD1000 / RD1002 Page 121 Receiver Descrambler - User Manual (release 7.7.1) Edition A