1
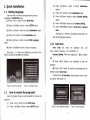
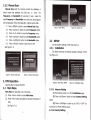
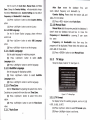
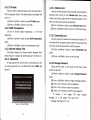
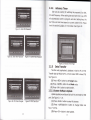
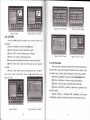
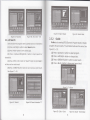
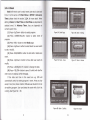
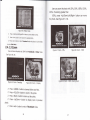
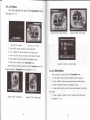
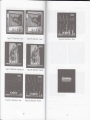
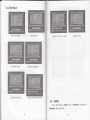
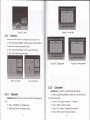
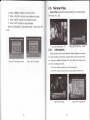
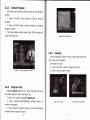
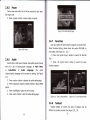
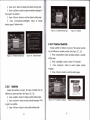
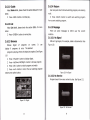
DVB.T MOBILE TV
User Manual
F:
F
1
2.3
2.4
2.5
2.6
(3) Press <Up/Down> button to select Installation
1. Quick Installation
1.1
option.
Setting Language
(4) Press <OK> button to enter Installation page.
(s) Press <Up/Down> button to select Country Setting
User can select a preferred language among various
languages at Installation page.
(1)
Press <menu> button
(2)
Press
(3)
Press <UplDown> button
(4)
Press <OK> button
(5)
Press <Up/Down> button
(6) Press <Left/Right> button to set Country Setting.
(7) Press <RED/GREEN> button to Auto Scan or Manual
Scan.
See Figure 1, 2. If there is no database in the STB, itwill
start at step (5) when booting.
<Left/Right> button to select SETUP option.
to select Installation option.
to enter Installation page.
to select OSD Language
option.
(5)
option.
to enter Main Menu.
1.2.1 Auto Scan
Press
Auto Scan will erase the database first,
<Left/Right> button to select a language.
See Figure 1,2. If there is no database (scan result) in the
STB, it will start at step (5) when booting.
and
scans default frequency and bandwidth by
Country Setting. Follow the steps (1) - (5) at section
1.2..
7)
Press <RED> button
to be confirmed to
clear the
database.
(8)
Press <OK> button
to confirm the database will
be
cleared and start Auto Scan.
It costs time to do Auto Scan, user can press <exit> to exit
at anytime. See Figure 3, 4.
Figure 1. Main Menu,
L.2
SETUP
Figure 2. Installation Page
How to receive the programs?
Scan the possible frequency and bandwidth to receive the
programs.
(1) Press <menu> button to enter Main Menu.
(2) Press <Left/Right> button to select SETUP option.
Figure 3. Clear database message
Figure 4. Auto Scan Page
L.2.2 Manual Scan
Manual Scan adds the scanning results into database, it
doesn't erase the database. But User has to know the
Frequency and Bandwidth for scanning. If user scans the
same Frequency and Bandwidth more then once, the programs
will be duplicated. Follow the steps (1) - (6) at section 1.2..
(7) Press <GREEN> button to enter Manual Scan page.
(8) Press <Up/Down> button to select Frequency option.
(9) Press <0-9> button to input the Frequency value.
( 10) Press <Up/Down> button to select Bandwidth option.
(11) Press <Left/Right> button to set Bandwidth value.
(.L2) Press <OK/exit> button to start scan or exit.
Figure 7. Main Menu
2.2
SETUP
Set the system settings of STB. See Figure 9.
2.2.!
See Figure 5, 6.
Figure 8. Version Info
Installation
Set about receiving and playing program settings of
STB.
See Figure 10.
Figure 5. Manual Scan Page
Figure 6. Manual Scan Result
2. STB Operation
Figure 9. Main Menu, SETUP
Figure 10. Installation Page
Describe how to operate the STB.
2.1
Main Menu
Main Menu for operating a lot of functions.
(1) Press <menu> button to enter Main Menu.
(2) Press <info> button to display the version information of
STB.
See Figure 7, B.
2.2.1.1 Antenna Setting
Set the antenna power on or off at Installation page.
(1) Press <UplDown> button to select Antenna Setting
option.
(2)
Press <Left/Right> button
turning on or off the antenna power.
2.2.1.2 Country Setting
7
to set
"ON,'
or
"OFF" for
Set the country for Auto Scan, Manual Scan and Time
Zone. Change the Country Setting. will automatically change
the default Time Zone value. Country Setting also has default
Frequency and Bandwidth for Auto Scan.
(1) Press <UplDown> button to select Country Setting
option.
(2)
Press
<Left/Right> button to set the Country.
2.2.L.3 OSD Language
Set the On Screen Display Language, please
section 1.1.
(1) Press <UplDown> button
reference
to select OSD Language
option.
(2) Press <Left/Right> button to set the language.
2.2.1.4 Audio Language
Set the audio language for watching program.
(1)
Press <UplDown> button
to select Audio
Language option.
(2) Press <Left/Right> button to set the language.
Auto Scan erases the database first,
and
scans default frequency and bandwidth by
Country Setting. Please check the section 1.2.
and
1.2.1. for more detail.
(1) Press <RED> button to staft Auto Scan.
2,2.L.A Manual Scan
Manual Scan adds the scanning results into database, it
doesn't erase any database. But user has to know the
Frequency and Bandwidth for scanning. If user scans
the same
Frequency and Bandwidth more then once, the
programs will be duplicated. Please check the section 1.2.
and 1.2.2. for more detail.
(1) Press <GREEN> button to start Manual Scan.
2.2.2
TV Setup
Setup the display mode for
ry.
See Figure 11.
2.2.L.5 Subtitle Language
Set the language for displaying subtitle.
(f)
Press <Up/Down> button
to
select Subtitle
Language option.
(2) Press <Left/Right> button to set the language.
2.2.L.6 Time Zone
Set the Time Zone for adjusting the system time. Some
Countries are covered with more than one Time Zone.
(1) Press <UplDown> button to select Time Zone
option.
(2)
Press <Left/Right> button
value.
2.2.L.7 Auto Scan
to set the Time Zone
Figure 11.
ry
Setup page
2.2.2.1 TV Format
Set display format for watching program, such as 4:3LB,
4:3PS, 16:91B, 16:9FIT.
(1) Press <UplDown> button to select TV Format option.
(2) Press <Left/Right> button to set format.
9
2.2.2.2 TV Mode
2.2.3.1Channel Lock
Set PAL, NTSC or AUTO for display. AUTO will switch PAL or
NTSC by program content. This setting should be matched with
Lock the channel (program) which has been set lock status by
password when turning on the Channel Lock. About setting
program lock status, please check the section 2.3.1.3. for more
detail. And lock many functions by password.
(1) Press <Up/Down> button to select Channel Lock option.
(2) Press <Left/Right> button to turn on or offthe lock setting.
user's TV.
(l)
Press <Up/Down> button
to select TV Mode option.
(2) Press <Left/Right> button to set mode.
2.2.2.3 OSD Transparency
Set the On Screen Display transparency. 1 is the
most
2.2.3.2 Censorship Lock
diaphanous.
(1)
Press <Up/Down> button to select OSD
Transparency
option.
(2) Press <Left/Right> button to set transparent
2.2.2.4 Banner Display Time
value.
Set Banner displays time. Banner doesn't disappear when
setting "Always". It displays at watching program. See Figure 12.
2.2.3
Lock the program by password and censorship threshold. The
censorship info is in program content. Under the censorship rating,
user has to enter the password for watching program.
(1)
(2)
Password
To setup password for channel lock or censorship lock. User
can change password here. The default PIN Code is OOOO. See
Figure 14.
Press <UplDown> button
to select Censorship Lock
option.
Press
<Left/Right> button to set the rating.
2.2.3.3 Change Password
Change the PIN Code.
contact the provider.
(1)
If
user forget the pIN Code, please
Press <UplDown> button to select Change password
option.
(2) Press <Left/Right> button to trigger changing password.
(3) Press <0-9> button to enter old password.
(4) Press <0-9> button to enter new password.
(5) Press <0-9> button to confirm new password.
If success, it will display pIN Code changed
message. Or it will display pIN Code Error
message. See Figure 15
Figure 14. Password Page
-
19.
2,2.4
Advance Timer
User can set event(s) for watching the program(s) by date,
time and frequency. When setting date and start time is up, STB
lvill automatically switch to program user sets. Setting here, the
start time and end time depend on current system time. please
check the section 2.3.2,1. for more detail. See Figure 20
Transfer code (application), database or both to pC or STB.
Transfer data by RS232 to pC, or from master STB to slave STB.
See Figure 21.
(1) Press <RED> button to set Target value.
(2) Press <GREEN> button to set Mode value.
(3) Press <OK> button to start transfer.
2.2.5.1 System Software Update
Update application and tsboofl by build-in card reader or USB
port. See Figure 27
Figure 18. PIN Code Changed
Figure 19. PIN Code Error
(1)
*
24.
Press <BLUE> button
to enter file browser.
button to change folder and
(2) Press <Left/Right/OK>
focus *.crd file.
(3) Press <OK> button to start update.
l2
13
2.3
TVIRADTO
There are two types of program. One is ry and the other is
ladio. The operation of the List and Guide at TV and Radio are
:he same. Here using TV to be example. See Figure 27,28.
WM
Figure 21. Data Transfer Page
Figure 23. Confirm to Staft Update
2.2.6
Figurc 24. Updating
Set Default
Reset STB to factory default. All settings by user has been
operated will be reset default, and database will be erased at
same time. See Figure 25, 26.
Figure 27. Main Menu - TV
2.3.L
Figure 28. Main N4enu - Radio
List
User can operate some functions in List. The result of
operating will be displayed. See Figure 29, 30.
(1) Press <Left/Right> button to select Tool (operation).
(2) Press <UplDown> button to select the program,
(3) Press <RED/GREEN/YELLOW/1-B> button to operate.
Buttons depend on operation.
Figure 29.
ry
List
Fiqure 26. Saving
Figure 25. Set Default
11
15
2.3.L.1Delete
Delete will delete the program perpetually
2.3.1.2 Skip
from
database . User must rescan to recover it.
(1) Press <Left/Right> button to select Delete option.
(2) Press <UplDown> button to select the program.
(3) Press <RED/GREEN> button to set delete status.
(4) Press <YELLOW > button to confirm the operation
and save the result.
Program status is changed after operating. And press
<Left/Right> button will confirm and save. See Figure 31 34.
Skip will skip the program by channel upldown when
rvatching program.
(1) Press <Left/Right> button to select Skip option.
(2) Press <UplDown> button to select the program.
(3) Press <RED> button to set skip status.
(4) Press <YELLOW > button to confirm the operation
and save the result.
Program status is changed after operating. And press
<Left/Right> button will confirm and save. See Figure 35, 36.
Figure 35. Skip
Figure 31. Delete - Select
Figure 32. Delete - Select All
Figure 33. Delete - Save
Fiqure 34, Delete -Saving
l6
Figure 36. Skip
-
Select
2.3.1.3 Lock
Lock will confirm password before watching this
program when Channel Lock is turned on. please check the
section 2.2.3.L. for more detail.
(1) Press <Left/Right> button to select Lock option.
(2) Press <UplDown> button to select the program.
(3) Press <RED> button to set lock status.
(4) Press <YELLOW > button to confirm the operation
and save the result. Program status is changed after
operating. And press <Left/Right> button will confirm and
save. See Figure 37, 38.
Figure 41- Edit - Editing
Figure 37.
Lock
Figure 38. Lock
Figurc 42. Edit - Editing
- Select
2.3.1.4 Edit
User can use Edit to edit the program name, maximum length is 16
cha racters.
(1) Press <Left/Right> button to select Edit option.
(2) Press <Up/Down> button to select the program.
(3) Press <RED> button to display program info page.
(4) Press <OK> button to edit program name.
(5) Press<Up/Down/Left/Right/OK>button to select the character.
(6) Press <RED>/<OK> button on "Save" button to return program
info page.
(7) Press <RED> button to save the editing and return to List. If
press <exit> button at step (7), lt returns to List without saving. See
Figure 39
-
44.
Figure 43. Edit
-
Done
Figure 44. Edit
-
Save
2.3.1,5 Favorites
User can quickly channel up/down the favorite programs by
favorite filter. There are B kinds of favorite for user setting. They
are News, Sprot, Movie, Music, Shopping, Travel, Boy, and Girl.
(1) Press <Left/Right> button to select Favorites option.
(2) Press <Up/Down> button to select the program.
(3) Press <1-B> button to set the kind of favorite.
(4) Press <YELLOW > button to confirm the operation and
save the result.
Program status is changed after operating. And press
<Left/Right> button will confirm and save. See Figure 45, 46.
Figure 40. Edit
Figure 39. Edit
l8
- Select
Figure 49. Search Result
Figure 46. Favorites
Figure 45. Favorites
-
Set
2.3.1.6 Search
User can search the program name by partial keyword or character(s)
(1)
(2)
(3)
Press <Left/Right> button to select Search option.
to input
keyword or
character(s).
(4)
Press <RED>/<OK> button on "Search" button to return
List. It
will focus on the match result.
(5)
Guide
Guide is also naming EPG (Electronic program Guide). Display
program info and events. TV and Radio Guide are the same. See
Figure 51
Press <RED> button to entry search page.
Press <Up/Down/Left/Right/OK> button
2.3.2
Figure 50. Search Next
-
53.
(1) Press <UplDown> button to select program.
(2) Press <Left/Right> button to change date.
(3) Press <GREEN/YELLOW> button to select event.
(4) Press <BLUE> bu
event more detail.
Press <GREEN/YELLOW> button to next or previous match result.
See Figure 47
-
50.
51. TV Guide
Figure 47. Search
Figure 48. Search character "U"
Figure 53. Guide
20
I
I
1,,
-
- Event Detail
2.3.2.1 Book
Book will remain user to watch event user sets by date and
is the same with Main Menu,rE SETUP,€ Advance
Timer, please check the section 2.2.4. for more detail. When
editing in Book, the Start Time and End Time are depended on
selected event. In Advance Timer, they are depended on
time. It
current system time.
(1) Press <Up/Down> button to select program.
(2) Press <GREEN/YELLOW> button to select event of
Figure 54. Book Page
Figure 55. Book
-
Editing
Figure 56. Book - Save
Figure 57. Book
-
Delete
program.
(3) Press <RED> button to enter Book page,
(4) Press <Up/Down> button to select Event row user wants
to set or modify.
(5)
Press <RED/GREEN> button to start edit or delete one
event.
(6)
Press <Up/Down> button to focus item user wants to
modify.
(7) Press <Left/Right/0-9> button to change the data.
(8) Press <YELLOW> button to save. If conflict with itself or
other event, it displays conflict message.
If the date and time in the event are up,
STB will
automatically switch to setting program in event. Press any key
except <Vol-/Vol+/mute> button, STB asks user to abort it or not
at watching program. User can delete the event while it isn't at
running. See Figure 54 - 59.
Figure 58. Book - Conflict
Figure 59. Abort
23
2.4
MULTIMEDIA
2.4.L.1Thumbnail
Multimedia must be used with build-in card reader or USB
port. Enter My Album and My Music, it displays "Initializing"
when
If there is no photo in device root folder, it will start at
Thumbnail mode. Or it will start at Folder mode. It displays
IPG EXIF info (Width, Height and Date) of selected photo.
just inserting device or "Device is not readyl" without
device. See Figure 60
-
61.
f
See Figure 63.
t
Figure 60,
Multimedia
Figure 61. Device is not Ready!
Figure 63. Thumbnail mode
2.4.L
My Album
Z
My Album can display JPG photo and operate it.
Remove device when playing photo, itdisplays "Device is not
Press <Up/Down/Left/Right> button to change selected
photo or page.
Z
Z
Z
ready!" message and return to Main Menu. See Figure 62.
Press <RED/OK> button to zoom selected photo.
Press <GREEN> button to rotate selected photo,
Press <YELLOW> button to do slide show at current
folder.
Z
I
I
Figure 62. Remove device when playing
Press <BLUE> button
to
browse folders and files
(photos).
2.4.L.2 Folder
If there is no photo in device root folder, it will
at Folder mode. Or it will start at Thumbnail
mode. User can browser folders and files. It also
start
displays JPG EXIF info of selected photo. See Figure 64.
25
User can zoom the photo with 25o/o, 50o/o, TOOo/o, t50o/o,
200o/o. If zooming greater then
1007o, press <Up/Down/Left/Right> button can move
the photo. See Figure 67 - 69.
Figure 64. Folder mode
z
z
Z
Press <UplDown/Left/Right/oK> button to browse fotders
or files.
Press <OK> button to vjew (zoom) the selected photo.
Press <exit> button to return Thumbnail mode with photos
in current folder,
or return Main Menu.
2.4.L.3 Zoom
View and zoom the photo at 100o/o from Thumbnail or Folder mode.
See Figure 65, 66.
Figure 65. Zoom - Decoding
Z
Z
Z
Z
Figure 66. Zoom
Press <GREEN> button
Figure 68. zoom
50o/o
Display
to browse folders and files.
Press <YELLOW> button to zoom in the photo.
Press <BULE> button to zoom out the photo.
Press <UplDown> button
photo.
Z
-
Figure 67. Zoom -
Press
to display next or
previous
<exit> button to return Thumbnail mode.
26
27
-
l50o/o
2.4.L.4 Rotate
View and rotate/flip the photo from Thumbnail mode.
See Figure 70,71.
Figure 74. Edit - Flip horizontal
Figure 70. Edit - Decoding
z
Z
Z
Z
Z
Figure 71. Edit
-
Figure 75. Edit
-
Flip vertical
Display
Press <RED> button, the photo will be rotated left.
Press <cREEN> button, the photo will be rotated right.
Press <YELLOW> button, the photo will be flipped horizontal.
Press <BLUE> button, the photo will be flipped vertical.
<exit> button to return Thumbnail mode.
After rotating or flipping the photo and return Thumbnail mode, the
result will display on Thumbnail mode. See Figure 72 76.
Press
Figure 76. Thumbnail - After editing
2.4,L.5 Slide Show
Slide all photos in current folder from Thumbnail mode.
Z
Z
Z
Z
Press <RED> button
to play the slide show when pausing.
to pause the slide show when playing.
Press <GREEN> button
Press <YELLOW> button to set repeating or once.
Press <BLUE> button to set the time interval between current and
next photo.
Figure 72. Edit
- Rotate left
Figure 73. Edit - Rotate right
Z
Press <Up/Down> button to next or previous photo right away.
See Figure 77
*
43.
29
Figure 77. Slide Show
- play
Figure 79. Slide Show - Repeat once
Figure 81. Slide Show
E-
-
Fast
Figure 78. Slide Show - pause
Figure 80. Slide Show - Repeat
Figure 82. Slide Show
-
Medium
Figure 83. Slide Show
- Slow
2.4.2 My Music
Figure 85. Browse
Figure 89. Random
Figure 86. Play
Figure 92. Mute
Figure 91. Mute with volume
Figure 90. Play and Volume
2.5
GAME
There two items in Game. One is Gomoku, the other is
Calendar. See Figure 93.
33
I
f
h-
2,5.1
Figure 96. Current Date
Figure 93. came
Gomoku
User can play with computer oT someone else. See Figure 94, 95.
Z
Z
Z
Z
Press <Up/Down/Left/Right> button to set play mode and difficult.
Press <OK> button to start play Gomoku.
Press <Up/Down/Left/Right> button to select the posiilon.
Press <OK> button to place the piece"
Figure 97. Change year
Figure 94 Gomoku
Figure 95. Playing
2.5.3
2.5.2
Calendar
98.
Z
Z
Calculator
Calculator can used for mathematical calculations.
Calendar displays the year, month, and date. See Figure 96
-
Figure 98. Change month
Press <Left/Right>
Press <Up/Down>
to change year.
to change month.
Z Press <UplDown/Left/Right> button to move the focus to
the symbol you want.
Z Press < 1-9> button to select 1-9 number.
Z Press <INFO> button to select.
Z Press <OK> button to calculate the answer.
Z Press <RED> button to do plus funtion.
2.6 Normal Play
Z
Z
Z
Z
Press
Press
Press
Press
<GREEN> button to do sub funtion.
<YELLOW> button to do multiply function.
<BLUE> button to do divide function.
Normal Play means STB under watching TV or playing Radio.
See Figure 101, 102.
<EXIT> button to out calculator.
While use calculator to calculate number . See Figure 99
100.
Figure 101. Normal Play
-
2,6.L Information
ry
Figure 102. Normal Play - Radio
Display program's info or more detail info. Banner displays the program
\o,, favorite setting, current time, program name, current and next event,
Fiqure 99. Calculatinq number
Figure 100. The answer
ock, scramble, subtitle and teletext info. More detail info displays about
:uner info. See Figure 103, 104.
Z
Z
Press <info> button to display banner to show program info.
Press <info> button when banner exist to display program more detai info.
Figure 104. Program Info
Figure 103. Banner
36
37
2.6.2
Switch Program
User can channel up/down to switch program or input program
number.
Z
Press <Ch Up/Ch Down> button
to next or
previous
pro9ram.
Z Press <0-9/OK> button to switch program by inputting
program number.
f the input program number doesn't exist, STB will ignore the
input. See Figure 105.
Figure 106. Program List
2,6.4
Volume
User can adjust the volume or mute.
Figure 105. Input program number
2.6.3
If adjust the volume with
mute, mute will be canceled.
See Figure 107, 108.
Z Press <Vol-/Vol+> button to adjust the volume.
Z Press <mute> button to mute.
Program List
Display Program List with No., name, and state. And user
can switch program at here. See Figure 106.
Z Press <OK> button to display Program List.
Z Press <UplDown/Left/Right/Page UplPage Down> to
preview the program.
Z Press <OK/exit> to switch program or return last watching
program before pressing OK button.
38
Figure 107. Mute
Figure 108. Volume Bar
2.6.5
Pause
Pause video and audio. But
it will be canceled by any input.
See Figure 109.
Z
Press <pause> button
to pause video and audio.
Figure 110. Audio Setting Page
2.6.7
Favorites
User can switch the same favorite program by favorite filter.
About favorites setting, please check the section 2.3.1.5. for
more detail. See Figure 711, tL2.
Z Press <fav Up/fav Down> button to switch the favorite
Figure 109. Pause
2.6.6
filter.
Audio
Switch Main or SAP sound channel. And switch output channel
with LR or L or R. If setting audio language at Main Menu
Installation E
E
Audio Language, the
Z Press <Ch Up/Ch Down> button
favorite program.
to switch the
same
audio
channel default language will be chosen by setting. See Figure
110.
Z
Z
Press <audio> button to display the audio setting page.
Press < Up/Down > button to select Channel or Sound Mode
option.
Z
Z
Press
Press
<Left/Right> button to set the value.
<exit> button to exit the audio setting page.
Figure 111. Turn on favorite filter
filter
2.6.8
Figure 112. Turn off favorite filter
Teletext
Display teletext on screen, the style of teletext may be
different by content provider. See Figure lt3, 114.
4t
Z
Z
Press <text> button to display the teletext setting page.
Press <UplDown> button to select the teletext language, if
the program has teletext.
Z Press <OK/exit> button to exit the teletext setting page.
Z Press <0-9/Up/Down/Left/Right> button
teletext page, if teletext exists.
to
change
Figure 115. Subtitle Setting Page
Figure 116. Subtitle
2.6.1O Teletext Subtitle
Figure 113. Teletext Setting Page
Figure 114. Teletext Sample
Display subtitle by teletext, the style of the teletext subtitle
may be different by content provider. See Figure LL7, LtB.
Z Press <text/subtitle> button to display teletext or subtitle
setting page.
Z Press <Left/Right> button to select "TTX Subtitle".
Z Press <Up/Down> button to select teletext subtitle
lang uage.
Z
2.6.9
Press
<OK/exit> button to exit the setting page.
Subtitle
Display the subtitle on screen, the style of subtitle may be
different by content provider. See Figure 115, 116.
Z Press <subtitle> button to display subtitle setting page.
Z Press <Up/Down> button to select subtitle language, if the
program has subtitle.
Z Press <OK/exit> button to exit subtitle setting page.
42
Figure 117. TTX Subtitle in Teletext
2.6,L4 Return
2.6.LL Guide
About Guide detail, please check the section 2.3.2. for more
Z
User can quick return the last watching program, also naming
reca I l.
deta i l.
Z Press <BLUE> button to switch last watching program
from current watching program.
Press <RED> button at normal play.
2.6.12 List
About List detail, please check the section 2.3.1. for more
detail.
Z
Press <GREEN> button at normal play.
2.6.15 Message
There are some
messages
to inform user the
current
condition.
2.6.15.1 No Signal
2.6,L9 Browse
Browse digest of programs on screen' It
display 9 programs at once. The selected
STB can't get signal,
can
for example, cable is disconnected. See
Figure 120.
program is playing, others will display its snapshot. See Figure
119
Z
Z
Z
Z
Press <YELLOW> button
to display digest.
to browse program.
Press <Up/Down/Left/Right> button
to switch program and watch.
Press <exit> button to return the last watching program
before press yellow button.
Press <OK> button
Figure 120. No Signal
2.6.L5.2 No Service
Program doesn't have any content to play. See Figure 121.
Figure 119. Digest
Figure 121. No Service
45
2.6. 15.3 Service Scrambled
Program is scrambled for payment, contact the content
provider to know how to descramble it. See Figure 122.
2.5.15.5 HDTV not support
This STB doesn't support HDTV.
this message.
If the
program content is
HDTV, STB will display
See Figure 124.
Figure 122. Service Scrambled
Figure 124. HDTV Not Suppert
2.6.15.4 Antenna Overload
The power of antenna is overload. See Figure 123.
2.6.15.6 Locked
Program is locked by setting lock (please check
the
section 2.3.1.3.) and turning on password setting (please check the
section 2.2.3.1.). User must input correct password to watch program. See
Figu!'e 125, 126.
Figure 123. Antenna Overload
Figure 125. Lock by password
Figure 126. This channel is locked.