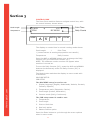
1
thermopatch.com
DP-2000-T User manual
Copyrights
© 2009, Thermopatch bv, Almere, The Netherlands. No
part of this publication may be reproduced by any means
without the prior written permission of Thermopatch bv, The
Netherlands.
thermopatch.com
Thermopatch and the Thermopatch logo, Thermoseal and
Thermocrest are registered trademarks of Thermopatch.
2
Preface
Dear user,
Welcome to the growing group of Thermopatch users. The
product you have purchased has been carefully designed
and manufactured to ensure that you, the user, will gain the
maximum benefit.
All Thermopatch products are specifically designed to ensure
ease of use with particular attention to safety requirements.
thermopatch.com
Should you discover any fault or damage upon receipt of
this product, you should immediately contact your local
Thermopatch establishment.
3
Table of Contents
EC - Statement Of Conformity 5
WARRANTY 6
Section 1 7
INTRODUCTION TO THE DECO-PRINT
7
SAFETY INFORMATION
8
MACHINE SPECIFICATIONS
9
FACTORY SETTINGS
10
Section 2
11
DP2000T SETUP OR PREPARE FOR SHIPMENT
11
ADJUSTING THE PRINTING PRESSURE AND PLATEN HEIGHT
16
SETUP FOR (2) OR MORE RIBBONS
16
INSERTING THE PRINTING PLATE
17
CHOOSING THE PLATEN
18
TESTING THE SET-UP
18
Section 3
20
20
CONTROL BOX
Section 4
22
TROUBLESHOOTING
22
OPERATIONAL MESSAGES
24
Section 5
25
25
PARTS IDENTIFICATION AND LOCATION
Section 6
56
56
MAINTENANCE
Section 7
57
57
thermopatch.com
CUSTOMER SERVICE
4
EC Declaration Of Conformity
For Machinery
(according to Annex II A of the Machinery Directive)
We,
Thermopatch B.V.
Draaibrugweg 14
1332 Almere
The Netherlands
herewith declare, on our own responsibility, that the
machinery:
marking machine Thermopatch DP-2000 T
which this declaration refers to, is in accordance with the
conditions of the following Directive(s):
2006/42/EG 2004/108/EG (Machinery directive)
(EMC directive)
The Netherlands, Almere, 29-09-2009
thermopatch.com
Jan Bausch,
Director
5
WARRANTY
thermopatch.com
Thermopatch Corporation, Syracuse, New York (“Seller”)
warrants this product to be free from defects in material and
workmanship under normal use and service. Any part which
proves to be defective in material or workmanship within one
year of the date of original purchase for use, will be repaired
or replaced, at Seller’s option, free of service or labor
charges, with a new or functionally operative part. Seller’s
liability under the Warranty shall be limited to repairing or
replacing at its own factory or through an authorized service
distributor or dealer, material which is determined by Seller to
have been defective in manufacture and upon which a claim
has been made by the original purchaser or user to Seller
(or an authorized distributor or dealer) within the warranty
period. Claims under this Warranty will be honored only upon
written approval by an authorized officer of Seller. Approved
return of parts or products will be on a prepaid transportation
charges basis only. Claims under this Warranty will be
honored only upon Seller’s determination that the claim is
covered by this Warranty, and Seller shall incur no obligation
under this Warranty prior to such determination. This
Warranty does not apply: (1) To any machinery or equipment
which has been altered or repaired, except by Seller or
its authorized representatives, or (2) to any machinery or
equipment which has been subject to misuse, negligence,
or accident, including, without limitation, use and operation
of such machinery or equipment while parts are loose,
broken, out of order, or damaged by the elements. Parts
replaced under this Warranty are warranted only through
the remainder of the original Warranty. Any and all claims
for warranty service must include such information as Seller
designates, and shall include specifically the serial number of
each unit (if appropriate).
The foregoing shall constitute the sole and exclusive remedy
of any using purchaser and the sole and exclusive liability
of Seller in connection with this product. THIS WARRANTY
IS IN LIEU OF ALL OTHER WARRANTIES, EXPRESS, IMPLIED
OR STATUTORY, INCLUDING BUT NOT LIMITED TO, ANY
WARRANTY OF MERCHANTABILITY OR FITNESS AND
ALL OTHER OBLIGATIONS OR LIABILITIES OF SELLER,
INCLUDING ANY TORT LIABILITY, FOR NEGLIGENT DESIGN
OR MANUFACTURE OF THIS PRODUCT, OR OTHERWISE. It is
expressly agreed that Buyer shall not be entitled to recover
any incidental or consequential damages, as those terms are
defined in the Uniform Commercial Code, and that Buyer shall
have no right of rejection or of revocation of acceptance of
any part or of revocation of acceptance of any part or all of
the goods covered hereby.
6
Section 1
INTRODUCTION TO THE DECO-PRINT
The DECO-PRINT Model DP2000T machine as shipped, is
set-up with a soft Platen and a Teflon covered heat plate, to
apply inked transfers from a supply roll 7” or less in diameter.
New features on this Machine is the opacity sensor to locate
the transfer under the heat plate and an adjustable laser
target dot that would appear on the garment where the
transfer, label or imprint is to be. Also with this platen setup the machine will heat seal individual labels, patches and
transfers.
With the optional Printing Kit and accessories it achieves
direct, permanent printing on most natural or synthetic
fabrics by means of a heated printing device (printing plate),
briefly striking on inked ribbon against the material to be
marked. Depending on a customer’s requirements, the
printing plate may be an engraved plate, changeable type
slugs, or a combination.
A few applications for the DECO-PRINT machine are:
• Apply preprinted dry ink transfers from supply roll with
automatic feed.
•
Heat seal individual: garment identification labels,
mending patches and transfers.
With the Optional PRINTING KIT and ACCESSORIES, direct
printing can be done, as shown below.
• Printing of property marks, logos, and other information
on sheets and the inside layers of pants, jackets, and
other garments.
• Printing of company logos directly on suit bags, hospital
linen, table linen, or shop wear.
thermopatch.com
•
Print any of the above with different colors. Up to four, 1”
wide ribbons or any combination up to 4” total width.
The DP2000T has a foot operated, electrically initiated print
stroke and an air operated, electrically timed power print
cycle. The transfer roll or ink ribbon roll advance is achieved
by a motor drive. The heater is a cast aluminum block (called
the heater head) directly above the heat or print plate.
The head contains the cast in heating element controlled
by an electronic heat control. Since the heat or print plate
slides into guides attached to the heater head, it is easily
changeable.
ACCESSORIES INCLUDED:
Hard rubber printing platen, 45637. See page 16.
(3) Separator discs,46780, to be used between different
colored ribbon rolls (C-TAPE) on supply side. See page 15.
Print plate holder, 46007. See page 16.
7
PRINTING OPTIONS:
45957 - Special adapter plate to mount narrow plates
previously used in the Model PAP304 machine.
PM-1330 - TYPE FONT KIT, 94 pieces, ¼” high to fit standard
print plates listed below.
PP0500-01
PP0500-02
PP0500-03
PP0500-04
–
–
–
–
Print
Print
Print
Print
plate
plate
plate
plate
with
with
with
with
(1)
(2)
(3)
(4)
track.
tracks.
tracks.
tracks.
CUSTOM PRINT PLATES
Print plates can be fabricated to fit individual requirements
using customer supplied artwork. Design can include tracks
for individual type fonts or full phrase slugs.
Maximum design area using 4” wide ribbon is 4 ¾” x 3 ¾”.
If the intent is to print with (2) or more different colored
ribbons, the relief or space between adjacent fonts or
engravings should be 7/32”. Keeping in mind that ink ribbons
are available in 13 standard or any custom color. Standard
widths are 1”, 2”, 3” and 4” wide.
SAFETY INFORMATION
Each DECO-PRINT machine is equipped with a safety guard
feature for the protection of the operator. The safety guard
can be activated by two different methods: sensing the touch
of your hand activates the metal bar on the safety guard. The
safety guard also has switches that sense any obstruction.
Once the safety guard is activated, the downward movement
of the print will be interrupted and the “CLEAR” button must
be pressed before the next print cycle. If an obstruction is
met before this point, the power print cycle will not occur.
thermopatch.com
An Emergency Stop switch is provided which will immediately
interrupt the downward movement of the printing head or
power printing cycle and return to the normal positions. The
switch must be reset before resuming operation.
CLEAN MACHINE PARTS WITH NON-FLAMMABLE
CLEANING FLUIDS ONLY.
CAUTION:PRESSURE READING ON AIR GAUGE MUST
NOT EXCEED 100 PSI (7.0 BAR)
The electrical system is three-wire and fully grounded. THIS
THREE WIRE ELECTRICAL POWER CORD AND PLUG MUST
ALWAYS BE USED WITH A PROPERLY GROUNDED OUTLET.
8
CAUTION:THE PRINTING HEAD AND PLATE MAY REACH
TEMPERATURES AS HIGH AS 550°F (288°C)
DURING NORMAL OPERATION. ALWAYS
KEEP HANDS CLEAR OF THE PRINTING HEAD
WHEN OPERATING MACHINE.
DO NOT LEAVE MACHINE UNATTENDED,
IF POWER IS ON, LOSS OF AIR PRESSURE
OCCURS, AND A GARMENT IS RESTING ON
PLATEN. HEAD WOULD LOWER AND COULD
CAUSE FIRE.
A CHECK VALVE IS IN PLACE TO PREVENT
THIS, BUT IF THERE IS A SMALL AIR LEAK
THE HEAD WILL COME DOWN AT SOME
POINT.
Before operating make sure all covers are in place, and keep
loose jewelry and clothing clear of machine during operation.
Before servicing machine, unplug electrical cord, disconnect
air supply, and let printing head cool down.
MACHINE SPECIFICATIONS
Electrical Requirements : 5 Amps @ 110 VAC 50/60 HZ
Or
2.5 Amps @ 220 VAC, 50/60 HZ
thermopatch.com
Operating Air Pressure
: 25 PSI (1.8 BAR) Minimum to
70 PSI (4.8 BAR) Maximum
1.3 CFM (0.6 Liters/sec)
Dwell Time Setting
: 0.1 Seconds to 99.9 Seconds
Heat Range
: 200°-500°F (93° - 260°C)
Maximum Print Area
: 4-3/4” wide x 3-3/4” deep
Transfer Advance (Roll)
: Sensor controlled stop is
adjustable from 7 ½” to 13 ½”
from the centerline of the platen
Ribbon Advance
: 0.1” to 6.0” (2.5mm to 152mm)
Ink Ribbon Width
: 4, 3, 2, and 1 inch (102, 76, 51,
and 25 mm)
Multiple colors and widths: any combinations up to 4” total
width
Opening Height
(Between Printing
Plate and Platen)
: 5.0” (127 mm)
Clearance
(From Back of
Platen to Machine)
: 1-3/4” (44 mm)
Weight
: 115 lbs. 52 kg.
9
FACTORY SETTINGS
Temperature
:
500°F (260°C)
Transfer time
:
2.0 seconds
Label seal time
:
12.0 seconds
Printing time
:
0.5 seconds
Air Pressure
:
50 PSI (3.5 BAR)
5.0 in (126-128 mm)
Ribbon Advance
5.0 in (126-128 mm)
thermopatch.com
Transfer (Roll) Advance :
10
:
Section 2
DP2000T SETUP
Installation
SEE PAGE 25 Loosen the two screws on the top of the case
in the back and install control box bracket,
Item 5.
Insert the control box, Item 6, with the LCD up
and pointing to the front of the machine.
Plug one side of the coil cable, Item 20, into the
control box, Item 6, connector.
Plug the other end of the coil cable, Item 20, into
the connector on the side of the machine.
SEE PAGE 45 Turn “Emergency Stop” switch, Item 4, in the
direction of the arrow to make sure it is out.
SEE PAGE 48 - 49 Attach air filter/regulator, with fittings to
the bulkhead fitting, Item 5, on the back of the
machine. Orient as shown with the gauge facing
forward.
Connect air supply to the male hose adaptor,
Item 4.
SEE PAGE 52 Connect the foot pedal plug into the
connector, Item 3 on right side of machine.
Connect power line cord to the machine power
entry module, Item 4, and to power outlet.
Turn on the machine by pressing the rocker
switch on the power entry module, Item 4, on
the right side of the machine as viewed from the
front.
SEE PAGE 35 - 36 Place flange assemblies on supply and
take-up shafts.
thermopatch.com
Refer to pages 12 and 13 to set-up for transfer
roll or ribbon (c-tape) roll
DP2000T SHIPMENT
Reverse setup procedure shown above.
A check valve between air supply and air cylinder will prevent
head from lowering. To lower head, Remove Cover, top rear,
Item 3, see page 25. With a pen or other tool, push button on
air solenoid to relieve pressure to air cylinder. The air solenoid
is located on the left side at the rear of the machine, slightly
forward of the cover opening. See page 48-49.
The machine should be shipped in a suitable shipping
container, preferably, the one it was received in.
11
TRANSFER ROLL THREADING
TRANSFER ROLL THREADING
LASER TARGET ADJ., FRONT TO BACK
INSIDE SUPPLY FLANGE, OUTSIDE
FLANGE REMOVED FOR CLARITY.
LASER TARGET ADJ., SIDE TO SIDE
ROLL, WOUND WITH
TRANSFERS ON OUTSIDE
INSIDE TAKE-UP FLANGE.
OUTSIDE FLANGE RMV'D
FOR CLARITY
2" DIAMETER CORE,
RESTS ON SHAFT
TAKE-UP
SHAFT
(SEE VIEW
BELOW)
DANCER ROLL
TOUCH GUARD (SAFETY)
FEED ROLL
SENSOR POSITION ADJUSTMENT CLAMP SCREW
thermopatch.com
SENSOR ROLL
ALIGN SENSOR WITH PROMINATE
LEADING EDGE OF TRANSFER BY
THUMB SCREWS BELOW SENSOR
TAKE-UP SHAFT
TAKE-UP ATTACHMENT
INK
SIDE
FOLD 3 TO 4 INCHES OF TAPE BACK, INK
SIDE TO INK SIDE. THREAD THRU SLOT IN
TAKE-UP SHAFT AS SHOWN.HOLD LOOSE END
WITH FINGER AGAINST SHAFT AND PRESS
JOG BUTTON UNTIL LOOSE END IS WRAPED IN.
12
RIBBON ROLL THREADING
RIBBON ROLL THREADING
INSIDE SUPPLY FLANGE, OUTSIDE
FLANGE REMOVED FOR CLARITY.
LASER TARGET ADJ., FRONT TO BACK
LASER TARGET ADJ., SIDE TO SIDE
ROLL, WOUND WITH
INK ON INSIDE.
INSIDE TAKE-UP FLANGE.
OUTSIDE FLANGE REMOVED
FOR CLARITY.
1" DIAMETER CORE
FITS OVER SHAFT.
TAKE-UP
SHAFT
(SEE VIEW
BELOW)
DANCER ROLL
TOUCH GUARD (SAFETY)
FEED ROLL
thermopatch.com
TIGHTEN CLAMP SCREW
TO LOCK SENSOR ROLLER
IN POSITION SHOWN.
SENSOR ROLL
SENSOR NOT ACTIVE
IN PRINTING MODE,
MOVE TO REAR.
TAKE-UP SHAFT
TAKE-UP ATTACHMENT
FOLD 3 TO 4 INCHES OF TAPE BACK. INK
SIDE TO INK SIDE. THREAD THRU SLOT IN
TAKE-UP SHAFT AS SHOWN. HOLD LOOSE END
WITH FINGER AGAINST SHAFT AND PRESS
JOG BUTTON UNTIL LOOSE END IS WRAPED IN.
13
INK
SIDE
Transfer Tape Setup Feed Adjustment
The Setup Feed Adjustment is determined by measuring the
Feed Length of the transfers on the roll. The Feed Length is
the distance from the leading edge of an inked image to the
next leading edge. The measured distance between leading
edge of transfers is entered into the Operator’s Control
Module entitled Feed Length. The Feed Cycle begins upon
completion of a Heating Cycle. The Take up Motor will start
and the transfer tape will be advanced and stopped by the
Sensor Eye. During the last ½” [12.70mm] of the Feed
Cycle, the Sensor Eye will be activated and stop the Feed
Cycle upon encounter of the following leading edge. Please
review page 12 to ensure correct threading and correct
Sensor Eye position.
Adjustment of the Outside Supply Flange will provide enough
drag to maintain a taut span of transfer roll tape under the
Upper Heating Plate.
To determine the Stop Position of the transfer roll; center the
transfer over the Lower Sealing Platen and position sensor
eye approx ¼” [6.35mm] past the edge of transfer.
Sensor Setup
The Sensor Eye adjustment range is 7 ½” [19.1cm] - 13 ½”
[34.3cm] from the centerline of the Lower Sealing Platen.
The following are examples of proper Sensor Eye distances:
1. A transfer has a Feed Length of 4” [10.2 cm] and the
transfer is 1” [2.54 cm] long, the Sensor Eye would be set
to a distance of 7 ½” [19.1 cm] from the centerline of the
platen (minimum distance). The Feed Length entered into
the Operator’s Control Module would be 4” [10.13 cm].
thermopatch.com
2. A transfer has a Feed Length of 2” [5.1 cm] and the
transfer is 1” [2.54 cm] long, the Sensor Eye would be set
to a distance of 7 ½” [19.1cm] from the centerline of the
platen (minimum distance). The Feed Length entered into
the Operator’s Control Module would be 2” [5.1 cm].
3. Transfer Rolls That Cannot Be Used: all transfer rolls that
measure more than 13 ½” [34.3 cm] from the leading
edge to the centerline of the following transfer, and the
transfer image is 4 ½” [11.43 cm] long, cannot be used in
this machine.
Place Sensor Eye over the transfer roll webbing paper
(transfer roll paper backing) in between transfer images. If
the green and red output lights are illuminated and an *
is displayed on the Operator’s Control Module, push both
(normal) and (translucent) buttons simultaneously on the
Sensor Eye proper. This procedure inverts the output to the
correct status, green light on.
Place the Sensor Eye over the transfer roll webbing. If the
transfer roll has a clear (transparent) paper backing, depress
14
the normal button on the Sensor Eye proper until the output
LED blinks. If the transfer roll has a translucent paper
backing (not transparent), depress the translucent button
on the Sensor Eye proper until the output LED blinks. This
procedure sets the lowest level of opacity, any higher level
will trigger the sensor.
Move transfer image or Sensor Eye so that eye is over the
edge of transfer image (stop position). In this position, the
red light will be on, * will be displayed on the Operator’s
Control Module.
Ribbon Tape Setup Feed Adjustment
The Ribbon Tape Feed Value advances the Ribbon Tape
after printing. The entered Feed Value indexes the Ribbon
Tape to the next position for the next print. The Feed Value
(the distance that the machine indexes the Ribbon Tape) is
entered and adjusted through the Operator’s Control Module.
thermopatch.com
Caution; Ribbon Tape Tension may cause less Ribbon Tape
to index than indicated on the Operator Control Module LCD
Panel. Please review pages: (Ribbon Tape Feed Length, 18 19) and (Adjustment of Ribbon Tape, 16, Step 3).
Image edge
Plate
[95.25MAX]
3.75MAX
hctapomrohT
noitaroproC
The distance between the left and right
edges of the plate image determines
the Feed Value for the amount of
Ribbon Tape to index. To develop an
approximate Feed Value, measure the
length of the plate image and add a
correction factor of .2” - .4” (5.1 mm 10.2 mm) to the plate image dimension.
The above image is an example
of a plate image with a horizontal
edge to edge measurement of 4.75”
[120.65mm]. Using a correction factor
of .2” - .4” [5.1mm – 10.16mm] we
develop a Feed Value range of 4.95” –
5.15” [125.7mm – 130.8mm].
[120.65MAX]
4.75MAX
Measurement from edge to edge
15
ADJUSTING THE PRINTING PRESSURE AND PLATEN
HEIGHT
Printing Pressure
Printing pressure is preset at the factory to 50 PSI. The
printing pressure range is from 25 PSI (1.8 BAR) minimum
to 70 PSI (4.8 BAR) maximum. NEVER EXCEED 70 PSI. In
general, the larger the printing area, the higher the pressure
required. The air regulator is located outside, at the rear
of the machine. At the top of the regulator is a black knob.
Pull upward to change the current setting. Turn the knob
clockwise to increase the air pressure or counterclockwise
to decrease the air pressure. After pressing down on the
foot pedal and then releasing, check the air gauge reading.
Readjust if necessary, then activate the foot pedal and release
again for a new gauge reading. To lock in a setting, push the
black knob down into its original position.
Printing Platen Adjustment
Occasionally, it may be necessary to increase the pressure
on one corner or side of the printing platen in order to make
it print better in that area. This might be true where an
engraved design has a denser area in one corner. To adjust,
locate the appropriate thumb screws below the rubber platen.
Looking from the top, turn the screw counterclockwise to
increase the pressure. NOTE: The platen is level when all
screws are turned clockwise and the platen is put in its lowest
position.
thermopatch.com
SETUP FOR (2) 0R MORE RIBBONS
1. Multiple ribbons of different colors are threaded the same
as a single ribbon shown on page 13. The rolls must be
separated by a thin disc, to prevent interaction, when
they are different outside diameters. Three discs are
provided in the Optional Printing Kit, and are to be used
on the unwind, or supply shaft.
2. Place one roll on shaft followed by a disc and push to
rear. Repeat this procedure for each roll added. No disc
is required after the last roll added. Replace the supply
flange and clamp collar. If a single ribbon is used, push
the three thin separator discs to the rear, against the
supply flange or remove from machine for storage.
3. Usually the outer clamp collar can be adjusted to
minimize endplay of the roll, because of the drag from the
roll insert on the shaft. If the roll turns freely on the shaft,
push the clamp collar in to create drag on the roll. Too
much drag may cause the ribbon to break or the motor to
stall. Do not stall motor.
16
4. Thread the tape through the machine: Refer to page 13
for a visual aid.
• Unroll approximately two feet of tape off the roll.
•
• Attach to take-up shaft as shown on page 13.
• Press the JOG button until the tape is taut through the machine.
Feed the tape under the sensor roller, under the heating iron, up and around the feed roller,
down under the dancer roll, and up to the take-up shaft.
thermopatch.com
INSERTING THE PRINTING PLATE
The above drawing shows a DP2000T Printing Plate
(Item 1) (CUSTOM PART) and a Printing Plate Holder
(Item2) P/N (46007). The Printing Plate Holder is provided
for installation and removal of the Printing Plate. With the
artwork facing down on the Printing Plate, apply a downward
force just enough to slide the Printing Plate Holder forward.
This locks the Printing Plate into place. Insert the plate into
the plate mounting brackets on either side of the iron. Slide
the plate in fully. Apply the same downward force and slide
the Printing Plate Holder away from the machine. To remove
the Printing Plate from the machine, just reverse the process.
The Printing Plate is extremely HOT so caution must be taken
when removing and placing it on a heat protective surface.
Avoid any side to side motion of the Plate Holder while
17
Thorm
Corp opatch
oratio
n
inserting or withdrawing Print Plates. This motion tends to
bend side guides and loosen heater mounting screws.
Note:If you bump the touch guard, press the CLEAR button on the controller box to reset.
CHOOSING THE PLATEN
Make sure the proper platen is being used. For printing the
hard rubber platens are used. Use the soft rubber platen for
heat sealing and dry ink transfers.
There should be a distance of at least 1/8” to 1/4” between
the printed image and the outer edge of the platen.
thermopatch.com
TESTING THE TRANSFER ROLL FEED SET-UP
Run the machine through a few cycles holding a scrap cloth in
place over the platen. Check to see if the machine is properly
feeding the transfer tape, enough to position the next transfer
in the correct position.
The transfer image target position is controlled by the
location of the sensor when it stops the following transfer.
To change this position, move sensor roll arm and retighten
clamp screw.
The machine is ready to be operated.
TESTING THE RIBBON FEED ROLL SET-UP
Run the machine through a few cycles holding a scrap cloth in
place over the platen. Check to see if the machine is properly
feeding the tape, enough to clear for the next print. There
should be a gap of 1/4” or more between the printed images
on the used tape.
If there is less than 1/4”, increase the feed value slightly. If
there is more than 1/4”, decrease the value slightly to reduce
waste.
18
CORRECTING TAKE-UP PROBLEMS
Check that the used ribbon or transfer tape on the take-up
shaft is not trying to fold over on the flange. If it is, the
take-up flanges can be moved to the front or back of the
machine to compensate. If this tracking problem continues,
it may be caused by:
1. Not enough tape tension. Push in on the outer supply
flange and tighten the thumb screw to produce more
drag. A slack tape will tend to creep down the slope of
the feed roll, since it is feeding in the up position.
2. The dancer or sensor roll being out of alignment. These
rolls must be parallel, both horizontal and vertical with
feed roll. The brackets these rolls are mounted to could
become bent during shipment or by being bumped.
Usually they can be bent and gauged by eye to the
correct position.
Make sure the used end of the ribbon is attached as shown on
page 13. If the ink side of the ribbon is touching the take-up
shaft or it’s slot, or if tape tension is excessive the slot will
close in and the used roll will be difficult to remove.
thermopatch.com
The machine is ready to be operated.
19
Section 3
CONTROL BOX
The Deco-Print machine features a digital control box, with
six control buttons, shown below:
Feed Length
Temperature
5.4 IN
F500
Print Time
.6 S
DC 00000
MODE
ENTER JOG
Daily Counter
CLEAR
The display on control box in normal running mode shows:
Feed Length
*
Print Time
* (means sensor is sensing stop position on transfer)
Temperature Daily Counter
Press the ΔUP or DOWN button once to change the Daily
Counter (DC) to Continuous Counter (CC).
NOTE: The software version number will appear when
machine is turned on.
Δ
To zero the Daily Counter (DC), press the ΔUP and DOWN
buttons simultaneously while the Daily Counter (DC) is
displayed.
Δ
The Mode button switches the display to menu mode with
2 selections.
MACHINE SETUP
JOB SETUP
thermopatch.com
The MACHINE setup is used to set:
1. Display language (English, Nederlands, Italanio, Deutsch,
Francais, Espanol)
2. Temperature scale (Fahenheit, Celcius)
3. Feed length (Inches, Millimeters)
4. Counter mode (Daily, Continuous)
The JOB setup menu is used to set:
1. Temperature
2. Feed length
3. Print or Seal time
4. Seal only option
5. Pattern marker option
Press the Enter button to cycle through the menu options
when in menu mode.
20
Δ
The ΔUP and
settings.
DOWN arrow buttons increase or decrease the
The Jog button advances the tape.
Note: Once the touch guard is activated, you must
press CLEAR before the machine can print.
MACHINE SETUP
Press MODE to show choice of Job Setup or Machine. Press UP
or DOWN button to select MACHINE SETUP.
1. Press Enter and select language. Press UP or DOWN
button to select ENGLISH.
2. Press Enter and choose the temperature scale. Press UP
or DOWN button to select FAHRENHEIT.
3. Press Enter and select feed length unit. Press UP or
DOWN button to select INCH.
4. Press Enter and choose the counter, DC or CC. Press UP
or DOWN button to select DC (daily counter).
Press Enter to save the last setting.
JOB SETUP: To run Transfer Roll
Press MODE and select JOB SETUP with UP or DOWN button.
1. Press Enter and set temperature at 500 degrees F, or to
suit, with UP or DOWN button.
2. Press Enter and set Feed Length at 4 inches by pressing
UP or DOWN button
3. Press Enter and set Print Time at 2 seconds by pressing
UP or DOWN button.
4. Press Enter and set Seal Only to NO, with the UP or
DOWN button.
thermopatch.com
5. Press Enter and set Pattern Marker to YES with the UP or
DOWN button.
Press enter to save the last setting.
If the Job is using Ribbon (C-Tape), set Pattern Marker to NO.
Leave Seal Only set to NO.
Change temperature, feed length, and time to suit.
If the JOB is to seal individual labels, patches, or transfers,
Set Pattern Marker to NO. Set Seal Only to YES, this will
disable the roll feed. Set temperature, time, and pressure to
suit.
Press ENTER Button after each selection to save the settings.
The machine will automatically exit the menu mode if none of
the buttons are pressed within 5 seconds.
21
Section 4
TROUBLESHOOTING
Before referring to the information below, check for proper
set-up and operation as outlined in “DP2000T Setup”.
Solutions are listed with the most probable ones listed first.
Some procedures may require completion by a person with
some mechanical and electrical skill.
Call Customer Service for assistance or to order replacement
parts.
Problem
Display is blank
No heat
thermopatch.com
High or low heat
Possible Cause
Solution
Machine is unplugged or outlet has no power
Check
Emergency stop activated
Check
Electrical power switch or light not “ON” or is
defective
Check/Replace
Loose or broken wires or connectors
Check/Repair
Machine is unplugged or outlet has no power
Check
Electrical power switch is not “ON” or is
defective
Check/Replace
Temperature reading is incorrect
Replace
Print head heat is defective
Replace
Heat sensor is defective
Replace
Defective temperature control
Replace
Loose or broken wires or connectors
Check/Repair
High limit thermostat is defective
Replace
Heat sensor is defective
Replace
Defective temperature controller
Replace
Temperature reading is incorrect
Adjust
Loose or bad connectors
Check/Repair
Short between sensor wires (high heat only)
Check/Repair
Print pressure drops Leak in air supply hose
or fluctuates
Dust is lodged in the air lines, regulator, or
(on air gauge or
solenoid air Valves
hisses)
22
Repair/Replace
Disassemble and
clean
Problem
Print head will not
descend
Solution
Touch guard activated
Press Clear
Temperature not ready
Wait
Solenoid air valve not shifting
Replace
Air supply not connected
Check
Foot switch is unplugged or bad
Check/Replace
Leak or restriction in air line or connections
Check/Repair
Print head too slow
or fast
Flow control(s) adjustment is incorrect
See pg. 50-51 item 5
Mechanical binding
Check & Correct
Timed power print
cycle does not
activate
Garment or cloth is too thick
Check
Leak in hose or connections
Repair/Replace
Defective microswitch
Replace
Mechanical binding
Check & Correct
Air solenoid valve not shifting
Check/Replace
Leak or restriction in air line or connections
Check/Repair
Mechanical binding
Check & Correct
Air pressure is too low
See pg. 16
Temperature is too low
See pg. 20
Time setting is too low
See pg. 20
Ink ribbon feed not working properly
Check threading
per pg. 13
Rubber print platen is dirty or worn
Clean or replace
Ink ribbon not properly guided left to right
Check ink
ribbon threading
Overlap of printed impressions in used ink
ribbon
Adjust longer
see pg. 18-20
Ink ribbon not wide enough
Use wider ribbon
One corner of rubber platen needs adjustment
See pg. 16
Temperature is too low
See pg. 20
Time setting is too low
See pg. 20
Engraved plate is dirty
Clean
Pressure incorrect
Check & Correct
Print Head does not
rise to the open
position
Overall print is too
light
Parts of design are
not printed
thermopatch.com
Possible Cause
Center of “O” “A”,
etc. is filled with
ink, imprint is
unclear
23
Problem
Possible Cause
When type slugs
are used, print is
unclear
Solution
Type slugs are dirty
Clean
Deformed type slugs caused by high heat
Adjust heat per
Pg. 20-21
Replace slugs
Ink marks on back
side of Garment
Pressure incorrect
Check & Correct
Ink build-up on rubber platen
Clean platen
See page 56
Emergency stop
Push button is defective
push button will not
operate
Replace
See page 45
OPERATIONAL MESSAGES
On power-up machine identification and version number will
momentarily appear on the LCD display. The temperature wait
message shown at the main display will be replaced by the
continuous count or the daily count when the temperature is
within 15 degrees Fahrenheit or 7 degrees Celsius of the set
point temperature. The operator can change options during
the warm-up period.
Temperature Controller Messages
The temperature controller will be interrogated and if a fault
is detected one of the following messages will appear:
thermopatch.com
Line 1
Meaning/Response
Heater Failure Logic board
Temperature control board is either bad or
unplugged
Heater Failure Heat Sensor
Temperature sensor is either bad or
disconnected
Heater Failure Slow heat rise
Heater is bad or disconnected or temperature
sensor is bad, disconnected or shorted
Heater Failure High temperature
Relay is bad or shorted, temperature sensor
is bad or Shorted. Bad connections
Heater failure Unknown
Contact Thermopatch
Seal Switch ERR
Display when touch guard is activated.
This indicates the seal down switch was not
activated
During a seal cycle if the top platen did not
come down
Check seal down switch and wiring
TOUCH GUARD FAULT
This indicates the guard was hit. Press the
CLEAR Button.
WAIT/TEMP
This indicates the machine is heating up
24
Section 5
PARTS IDENTIFICATION AND LOCATION
SEE PAGE 5-6 BEFORE REMOVING COVER
22
3
21
27
4
16 LOWER LEFT REAR
18
18
17 UPPER REAR
20 LOWER REAR
26
15
23
2
13
5
1
11 12
8
25
7
19
14
28 PRESS ARM
9 SCREW (USE 290 LOCKTITE)
24 6
10 PIVOT STUD
thermopatch.com
DP2000T MACHINE ASSEMBLY
25
thermopatch.com
DP2000T MACHINE ASSEMBLY
ITEM
NO.
PART NUMBER
DESCRIPTION
1
46876
CASE WELDMENT
1
2
PLATEN
ASSEMBLY
SEE PAGE 27 - 28
1
3
46882
COVER, TOP REAR
1
4
46788
BRACKET, CONTROL
BOX
1
5
21021-06-A
L'W - INT NO. 8
8
6
21028-36
HEX STANDOFF #8-32
4
7
45678
COVER, CASE FRONT
1
8
21021-07-A
L'W - INT NO. 10
11
9
21062-04-G
FHSCS 1/4 - 20 X 5/8
LG
1
10
45576
STUD, PIVOT
1
11
21028-38
RUBBER BUMPER
4
12
21060-04-H
BHS 10-32 X 5/16 LG
4
13
20220-37
SHIELDED SERIES
CABLE
1
14
43025
FOOT SWITCH W/
GUARD
1
15
44771
LABEL - MADE IN USA
1
16
42550
LABEL - SOLD AND
SERVICED
1
17
DH-6785
LABEL, AIR SUPPLY
1
18
45426
LABEL, HIGH VOLTAGE
2
19
(Note 1)
20080-70
CORD - LINE 110V IEC
CONN
1
20
46277
LABEL - SERIAL NO. /
SPECS
1
21
PNEUMATICS
SEE PAGE 48 - 51
1
22
HEAD ASSY
SEE PAGE 35 - 36
1
23
ELEC BOX ASSY
SEE PAGE 52
1
24
21058-05-F
PHS 8-32 X 3/8 LG
4
25
21058-05-H
PHS 10-32 X 3/8 LG
11
26
46879
PLATE, R.H. SIDE
1
27
47149
CONTROL BOX ASSY
1
28
PRESS ARM
ASSY
SEE PAGE 29 - 30
1
QTY.
NOTE 1:FOR A 220V MACHINE, USE CORD #41969 10A
220V IEC OMIT ITEMS 15 AND 16
DP2000T MACHINE ASSEMBLY
26
13
6
12
3
10
5
11
2
5
1
7
14
thermopatch.com
4
8
10
11
9
PLATEN ASSEMBLY
27
ITEM
NO.
PART NUMBER
DESCRIPTION
QTY.
1
45587
PLATEN BLOCK
1
2
45619
RETAINER, PLATEN
HOLDER
1
3
45621
PLATEN HOLDER
1
4
45642
SPRING ADJUSTMENT
SCREW ASSY
4
5
21029-32
THUMB SCREW 1/4-20
X 3/4 LG X 3/4 HD
4
6
45582
PLATEN HOLDER
GUIDE WELDMENT
2
7
21062-03-D
FLAT SOC HD SCR
8-32 X 1/2
4
8
24075-26
SPRING COMPRESSION
4
9
46833
COVER, PLATEN BASE
1
10
21021-05-A
L'W - INT NO. 6
10
11
21069-03-E
PHS 6-32 X 1/4 LG SS
10
12
45620
STOP, PLATEN HOLDER
1
13
(Note 1)
46009
SEALING PAD
ASSEMBLY
1
14
21006-06-C
SHLD SCR 3/8 X
1 1/4 LG
1
NOTE 1:IF MACHINE IS SET-UP FOR PRINTING, USE PRINT
PLATEN #45637.
thermopatch.com
PLATEN ASSEMBLY
28
NOTE: ITEM 5,
SHARP EDGE TO FRONT,
CHAMFERED EDGE TO REAR.
8
14
5
7
3
18
12
9
10
22
23
2
26
22
12
13
24
12
11
1
15
21
19
25
16
20
6
16
17
thermopatch.com
PRESS ARM
ARM ASSEMBLY
PRESS
ASSEMBLY
29
thermopatch.com
ITEM
NO.
PART NUMBER
DESCRIPTION
QTY.
1
45591
ARM SUPPORT ASSY
1
2
22010-57
PIVOT MOUNT BRKTS
(BIMBA)
1
3
22010-56
AIR CYLINDER, 2 1/2
BORE 3 1/2 STROKE
1
4
22010-56R
ROD, PART OF
22010-56
1
5
45578
UPPER LINK ASSY
1
6
46055
LOWER LINK ASSY
1
7
45589
CLEVIS - CYLINDER
1
8
21051-20-C
NUT, HEX JAM 1/2-20
1
9
45593
SHAFT, PRESS ARM
1
10
24016-22
SET SCREW COLLAR
3/8 BORE
2
11
21023-02
WASHER, FLAT 1/4
2
12
21021-09-C
L'W - SPLIT 1/4
10
13
21063-10-K
SHCS 1/4-20 X 1
1/2 LG
2
14
21022-12
THRUST WASHER 3/8
I.D.X3/4O.D.X.06TK
2
15
45573
SHAFT, CENTER LINK
PIVOT
1
16
21011-05-L
SET SCW - CUP
1/4-20 X 1/4 LG
4
17
45583
SHAFT, LOWER LINK
PIVOT
1
18
22015-34
ELBOW - 1/4 MPT X
3/8 TUBE
2
19
21058-05-E
PHS - 6-32 X 3/8 LG
2
20
21021-05-A
L'W - INT NO. 6
2
21
46937
COVER, FRONT
1
22
21063-08-K
SHCS 1/4-20 X
1.0 LG
8
23
21051-11-A
HEX NUT 1/4 - 20
4
24
HEATER ASSY
SEE PAGE 31
1
25
SUPPORT AND
SWITCH ASSY
SEE PAGE 31
1
26
46947
PRESS ARM
MACHINING
1
PRESS ARM ASSEMBLY
30
APPLY CLEAR RTV TO RING TERMINALS
AND 2 OPENINGS IN CERAMIC COVERS,
WHICH ARE INSTALLED AFTER TERM.
NUT IS TIGHTENED.
6 SEE NOTE 2
17
5
11
10
3
4
9
7
16
1
3
13
9
2
14
7
8
7
12
15
7
thermopatch.com
HEATER ASSEMBLY
31
thermopatch.com
ITEM
NO.
PART
NUMBER
DESCRIPTION
QTY.
1
(NOTE 1)
45585
SEALING IRON
MACHINING 110V
1
2
45579
INSULATOR BLOCK
1
3
45849
GUIDE WELDMENT,
2
4
45643
STOP, PRINTING
PLATE
1
5
21021-10-C
L'W #5/16 SPLIT
2
6
21050-192
SHCS 5/16-18 X 2.0
LG S.S.
2
7
21021-05-A
L'W - INT NO. 6
10
8
21069-05-E
PHS 6-32 X
3/8 LG SS
2
9
21069-03-E
PHS 6-32 X
1/4 LG SS
6
10
21021-06-B
L'W - EXT NO. 8
1
11
21069-03-F
PHS 8-32 X
1/4 LG SS
1
12
45451
ADAPTER, HIGH
LIMIT
1
13
20018-24
THERMOSTAT- HI
LIMIT
1
14
21069-02-E
PHS 6-32 X 3/16
LG SS
2
15
(NOTE 3)
46012
SEALING PLATE
ASSEMBLY
1
16
46942
PLATE, PRINT GUIDE
SUPPORT
2
17
46904
TEMPERATURE
SENSOR ASSY
1
NOTES: 1. FOR A 220V MACHINE, USE SEALING IRON #45639.
2. APPLY ANTI-SEIZE COMPOUND TO THREADS, WHEN MOUNTING. TORQUE TO 60 IN-LBS AND RE-TORQUE AFTER INITIAL HEATING.
3. IF MACHINE IS SET-UP FOR PRINTING, USE CUSTOM PRINT PLATE OR MULTI-TRACK PRINT PLATE, SEE PAGE 17 - 18.
HEATER ASSEMBLY
32
4
3
USE 292 LOCTITE
1
2
14
6
3
5
13
15
12
7
9
10
thermopatch.com
8
11
16
3
4
SUPPORT AND SWITCH ASSEMBLY
33
ITEM
NO.
PART NUMBER
DESCRIPTION
QTY.
1
45576
STUD, PIVOT
1
2
21062-04-G
FHSCS 1/4 - 20 X
5/8 LG
1
3
21021-09-C
L'W - SPLIT 1/4
4
4
21063-04-K
SHCS - 1/4-20 X 1/2
LONG
3
5
45613
BRACKET, SEAL
SWITCH
1
6
45712
NUT PLATE, SEAL
SWITCH
1
7
20055-73
SWITCH - MICRO
1
8
21033-03-B
SPRING PIN, 3/32 X
3/8 LG
1
9
21058-05-E
PHS - 6-32 X 3/8 LG
2
10
21021-05-A
L'W - INT NO. 6
2
11
21023-22
WASHER - FLAT
NO. 6
2
12
21057-08-C
RHS 4-40 X 5/8 LG
2
13
21021-03-A
L'W - INT NO 4
2
14
46940
ROD, SUPPORT
1
15
21063-10-K
SHCS, 1/4-20 X
1 1/2 LG
1
16
46946
SUPPORT, WELD &
MACHING R.H.
1
thermopatch.com
SUPPORT AND SWITCH ASSEMBLY
34
8
1
CAUTION: BEFORE REMOVING COVER, TURN
BOTH THUMB SCREWS COMPLETLY UP TO
PREVENT DAMAGE TO THE TILT MECHANISM,
WHEN COVER IS REINSTALLED.
1
12
1
13 7
4
15
6
3
14
14
2
thermopatch.com
HEAD ASSEMBLY
35
1
7
11 5
9 10
MOUNTS HEAD
TO PRESSARM
ITEM
NO.
PART NUMBER
DESCRIPTION
QTY.
1
46893
FLANGE ASSY
4
2
46916
DRIVE ROLL ASSY
1
3
TOUCH GUARD
ASSY
SEE PAGE 43 - 44
1
4
COVER ASSY,
HEATER
SEE PAGE 45
1
5
REAR PLATE
ASSY
SEE PAGE 39 - 40
1
6
21021-07-A
L'W - INT NO. 10
11
7
21011-04-K
SET SCREW 10-32 X
3/16 LG
4
8
COVER ASSY,
HEAD
SEE PAGE 46 - 47
1
9
21063-05-K
SHCS 1/4 - 20 X
3/4 LG
4
10
21021-09-C
L'W - SPLIT 1/4
4
11
FRONT PLATE
ASSEM
SEE PAGE 37 - 38
1
12
21065-05-D
THUMB SCREW
10-32 X 1"
W/ NYLON TIP
4
13
46895
SHAFT, TAKE UP
1
14
DANCER ROLL
ASSY
SEE PAGE 42
1
15
21058-05-H
PHS 10-32 X 3/8 LG
11
thermopatch.com
HEAD ASSEMBLY
36
18
TO ITEM 6
22
PLACE 16" FROM SENSOR,
28 ON SENSOR CABLE
3
27 30 26
TO ITEM 29
7
6
15
17
1
24
22
23
4
11
14
29
5
28 29 30
SENSOR CABLE
9
27 26
2
21
12
19
8
10
21
16
13
20
25
26
FRONT PLATE ASSEMBLY
thermopatch.com
27
37
thermopatch.com
ITEM
NO.
PART NUMBER
DESCRIPTION
QTY.
1
46899
BRACKET, SENSOR
1
2
46900
SHAFT, SENSOR
ROLL
2
3
46901
PLATE, SENSOR
BRACKET SPACER
1
4
46902
SPACER, CLAMP
SCREW
1
5
21023-02
WASHER, FLAT 1/4
1
6
21006-01-B
SHOULDER SCREW
5/16 X 3/8 LG
1
7
21050-232
BELLEVILLE DISC
SPRING .317 X .625
X .042
2
8
D-9702
E-RING 1/4 5133-25
4
9
20055-73
SWITCH - MICRO
1
10
21057-09-C
RHS 4-40 X 3/4 LG
2
11
21021-03-A
L'W - INT NO 4
2
12
46885
PLATE ASSY, FRONT
1
13
46939
ROLLER ASSY, IDLER
2
14
46941
THUMB SCREW ASSY
1/4-20 X 5"LG
1
15
46943
SPACER, HEAD
PLATES
1
16
46921
SPACER, HEAD
PLATE
2
17
21021-07-A
L'W - INT NO. 10
16
18
21021-09-C
L'W - SPLIT 1/4
1
19
46903
BRACKET, SENSOR
ADJ.
1
20
46944
SENSOR ASSEMBLY
1
21
21029-61
THUMB SCREW ASSY
1/4-20 X 3/8"LG
2
22
21051-11-A
HEX NUT 1/4 - 20
5
23
21051-03-A
HEX NUT 4-40
2
24
21058-05-H
PHS 10-32 X 3/8 LG
16
25
21058-13-F
PHS - 8-32 X
1 1/4 LG
2
26
21021-06-A
L'W - INT NO. 8
4
27
21051-07-A
HEX NUT - NO. 8-32
4
28
D-1453-1
CLAMP - 3/16 CABLE
2
29
21058-07-F
PHS 8-32 X 1/2 LG
2
30
21023-23
WASHER - FLAT
NO. 8
2
FRONT PLATE ASSEMBLY
38
3
10
17
11
16
20
1
3
9
7
13
4
12
18
19
2
13
6
8
15
8
14
7
20
3
11
5
19
18
thermopatch.com
REAR PLATE ASSEMBLY
39
PART NUMBER
DESCRIPTION
QTY.
1
46886
PLATE ASSY, REAR
1
2
46778
SHAFT, UNWIND
1
3
D-9705
E-RING 5133-37
3
4
46936
BRACKET, LASER
SPRING
1
5
46915
SHAFT, DRIVE ROLL
1
6
46919
PIN, DRIVE ROLL
SPRING
1
7
DF-7180
SPRING - EXT
LE-029C-4
2
8
D-9701
E - RING 5133-18
2
9
D-9702
E-RING 1/4 5133-25
2
10
24080-36
SPRING - EXT
LE-031C-1
2
11
21063-03-J
SHCS - 10-32 X 3/8
LONG
6
12
21063-04-K
SHCS - 1/4-20 X 1/2
LONG
1
13
LASER ASSY
SEE PAGE 41
1
14
46881
SHAFT, TAKE-UP
DRIVE
1
15
21021-09-C
L'W - SPLIT 1/4
1
16
46892
MOTOR ASSY,
CAPSTAN
1
17
46891
MOTOR ASSY,
TAKE-UP
1
18
24035-26
GEAR, 60T 32DP
1/4 BORE
2
19
46956
GEAR, 24T 3/8 BORE
MODIFIED
2
20
21021-07-C
L'W - SPLIT #10
6
thermopatch.com
ITEM
NO.
REAR PLATE ASSEMBLY
40
4
5
1
3
6
7
8
2
9
thermopatch.com
LASER ASSEMBLY
ITEM
NO.
PART NUMBER
DESCRIPTION
QTY.
1
46922
YOKE ASSY, LASER
1
2
46934
BLOCK, LASER
1
3
46933
PIN, LASER BLOCK
1
4
46935
BRACKET, LASER
BLOCK
1
5
D-9701
E - RING 5133-18
2
6
21058-03-F
PHS 8 - 32 X 1/4 LG
2
7
21021-06-A
L'W - INT NO. 8
2
8
21011-04-H
SET SCREW 8-32 X
3/8 LG
1
9
46896
LASER LIGHT ASSY
1
LASER ASSEMBLY
41
11
9
6
2
3
7
NOTE 1.
4
NOTE 1.
10
1
8
5
DANCER ROLL ASSEMBLY
thermopatch.com
NOTE 1.ADJUST FOR APPROX .02 SHAFT ENDPLAY,
TO ENABLE FREE MOVEMENT OF ITEM 2.
ITEM
NO.
PART NUMBER
DESCRIPTION
QTY.
1
46912
BLOCK, LEAF SPRING
1
2
46914
LEAF SPRING
1
3
46913
HANDLE, SPRING
1
4
46909
SHAFT, PIVOT
1
5
46905
ARM ASSY, DANCER
ROLL
1
6
46910
ARM ASSY, SPRING
1
7
21011-04-K
SET SCREW 10-32 X
3/16 LG
2
8
D-9702
E-RING 1/4 5133-25
2
9
21021-07-A
L'W - INT NO. 10
2
10
46939
ROLLER ASSY, IDLER
1
11
21058-05-H
PHS 10-32 X 3/8 LG
2
DANCER ROLL ASSEMBLY
42
18
2
21
20
11
22
24
19
17
4
5
23
7
9
1
8
6
9
20
12
13
14
16
15
10
11
thermopatch.com
TOUCH GUARD ASSEMBLY
43
3
thermopatch.com
ITEM
NO.
PART NUMBER
DESCRIPTION
QTY.
1
45609
GUARD/SWITCH
BRKT, R.H.
1
2
45610
GUARD/SWITCH
BRKT, L.H.
1
3
46053
SPRING BRKT ASSY,
R.H.
1
4
46054
SPRING BRKT ASSY,
L.H.
1
5
21022-12
THRUST WASHER 3/8
I.D.X3/4O.D.X.06TK
2
6
46056
PIN, SHOULDER
2
7
21050-111
COTTER PIN 1/16 X
1/2 LG
2
8
45612
SPRING RETAINER
2
9
24075-39
SPRING,
COMPRESSION
2
10
21060-04-C
BHS 4-40 X 5/16 LG
2
11
21021-04-A
L'W - INT NO. 4
6
12
45606
TOUCH GUARD
WELDMENT
1
13
45605
SPACER, TOUCH
GUARD INSULATOR
2
14
45604
INSULATOR, TOUCH
GUARD
2
15
21063-08-K
SHCS 1/4-20 X
1.0 LG
2
16
21021-09-C
L'W - SPLIT 1/4
2
17
45657
PLATE, R.H. SWITCH
MTG
1
18
45658
PLATE, L.H. SWITCH
MTG
1
19
20056-23
SWITCH - MICRO
2
20
21021-05-A
L'W - INT NO. 6
4
21
21058-03-E
PHS 6 - 32 X 1/4 LG
4
22
21057-08-C
RHS 4-40 X 5/8 LG
4
23
21021-07-A
L'W - INT NO. 10
4
24
21063-03-J
SHCS - 10-32 X 3/8
LONG
4
TOUCH GUARD ASSEMBLY
44
9
1
5
8
4
END TO BE AGAINST FLANGE.
SAME FOR LEFT SIDE,EXCEPT
NO'S WILL BE UPSIDE DOWN.
3
2
2
6
thermopatch.com
HEATER COVER ASSEMBLY
7
ITEM
NO.
PART NUMBER
DESCRIPTION
QTY.
1
46884
COVER, HEATER
1
2
45597
TAPE GUIDE
2
3
46938
LABEL, DP2000T
FRONT
1
4
20055-75
STOP SWITCH
ACTUATOR
1
5
20056-28
CONTACT BLOCK,
E-STOP
1
6
21021-06-A
L'W - INT NO. 8
4
7
21069-03-F
PHS 8-32 X 1/4
LG SS
4
8
46880
SCALE, 4" TAPE
WIDTH
2
LABEL, HIGH
VOLTAGE
HEATER COVER ASSEMBLY
9
45426
45
1
2
5
4
thermopatch.com
1
2
3
HEAD COVER ASSEMBLY
46
ITEM
NO.
PART NUMBER
DESCRIPTION
QTY.
1
46883
COVER, HEAD
1
2
21029-60
THUMB SCREW,
1" DIA KN'D HD,
1/4-20 1 1/4 LG
2
3
D-7212
ACORN HEX NUT
1/4-20
2
4
45426
LABEL, HIGH
VOLTAGE
1
5
46945
LABEL, LASER
TARGET
1
thermopatch.com
HEAD COVER ASSEMBLY
47
2
3
SEE NOTE 1
1
2
4
3
7
7
NOTE: PUSH BUTTON TO REMOVE
AIR PRESSURE, THIS WILL PERMIT
HEAD TO BE LOWERED FOR
SHIPMENT OR MAINTAINANCE.
10
2
5
8
13
9
12
6
11
14
9
9
thermopatch.com
2: SEE PAGE 50 PNEUMATIC FOR COMPLETE PNEUMATIC DIAGRAM.
48
ITEM
NO.
PART NUMBER
DESCRIPTION
QTY.
1
22045-91
AIR REGULATOR/
FILTER/GAUGE
0-150 PSI
1
2
DH-6786
NIPPLE - HEX 1/4
MPT
3
3
DH-6761
ELBOW - 90 DEG 1/4
FPT
2
4
DH-6797
ADAPTER - MALE
HOSE 1/4 MPT
1
5
22030-38
FITTING - BULKHEAD
1/4 FPT
1
6
22045-89
VALVE - IN LINE
CHECK 1/4 FPT
1
7
22046-09
AIR FLOW CONTROL
RT ANGLE 1/4 NPT
2
8
22015-34
ELBOW - 1/4 MPT X
3/8 TUBE
1
9
22005-45
CONN - 1/4 MPT X
3/8 TUBE
5
10
21058-15-I
PAN HEAD SCREW
1/4-20 X 1 3/4
2
11
21021-09-A
L'W - INT NO. 1/4
2
12
21051-11-A
HEX NUT 1/4 - 20
2
13
TUBE, 2.0 LONG
POLY-FLOW 3/8 O.D
X 1/4 I.D.
1
14
46898
AIR SOLENOID ASSY
W/CONNECTOR
1
NOTE 1: FOR A 220V MACHINE, USE 22045-94 REGULATOR
0-10 BARS.
2:SEE PAGE 50 FOR COMPLETE PNEUMATIC DIAGRAM.
thermopatch.com
49
13 14"
13 10"
1
5
8 16"
8
5
11 1/2"
1
2
2
6
15
1
7
10
4
8
6
13"
3
8 12 1/2"
6
14
8
2"
7
9
7
8
SEE NOTE 1
11
2
12
thermopatch.com
NOTE 1: FOR A 220V MACHINE, USE 22045-94 REGULATOR 0-10 BARS.
50
10 1/2"
PART NUMBER
DESCRIPTION
QTY.
1
DH-6786
NIPPLE - HEX
1/4 MPT
3
2
DH-6761
ELBOW - 90 DEG
1/4 FPT
3
3
DH-6797
ADAPTER - MALE
HOSE 1/4 MPT
1
4
22030-38
FITTING - BULKHEAD
1/4 FPT
1
5
22046-09
AIR FLOW CONTROL
RT ANGLE 1/4 NPT
2
6
22015-34
ELBOW - 1/4 MPT X
3/8 TUBE
3
7
22005-45
CONN - 1/4 MPT X
3/8 TUBE
5
8
22030-09
POLY-FLOW 3/8 O.D
X 1/4 I.D.
65.5"
9
22045-89
VALVE - IN LINE
CHECK 1/4 FPT
1
10
22010-56
AIR CYLINDER, 2 1/2
BORE 3 1/2 STROKE
1
11
22030-53
BRANCH WYE 1/4
MPT X 3/8 TUBE
1
12
22045-84
MUFFLER 1/4 MPT
POREX N250
1
13
20081-57
VARGLAS SLEEVING
7/16
24"
14
22045-91
AIR FILTER/
REGULATOR
& GAUGE
(WILKERSON)
1
15
46898
AIR SOLENOID ASSY
W/CONNECTOR
1
thermopatch.com
ITEM
NO.
51
52
thermopatch.com
CHASSIS
GRN/YEL
DC HARNESS
46954
SEE PAGE 5-19
GND
AC HARNESS
46953
SEE PAGE 5-18
9 PIN
CONNECTOR
37 PIN
CONNECTOR
MAIN ELECTRONICS MODULE
SEE PAGE 5-16
47184 [110v]
47185 [220v]
thermopatch.com
SHIELDED SERIES
CABLE
20220-37
LINE CORD
110V 20080-70
220V 41969
LCD CONTROL MODULE
47149
FOOT SWITCH
AND GUARD
43025
53
“E” STOP
ACTUATOR
200055-75
2
1
11 CONTACT
BLOCK
21 20056-28
12
22
5
4
6
HI LIMIT
THERMOSTAT
20018-24
GND
SCR
HEATER
SEE PAGE 5-4
110V 45585
220V 45639
5
5
21021-06-B #8 EXT L’W
21060-05-F #8-32 X 3/8”
GND SCR ON ARM
thermopatch.com
CLAMP 3/8 D-1454
21060-05-F #8-32 X 3/8”
21021-06 #8 INT L’W
21023-23 #8 FLAT’W
CLAMP 3/8 D-1454
1st WIRE ON GND SCR
GND SCR ON
MACHINE FRAME
ORDER OF ASSEM
SCREW 21060-11-H #10-32 X 1”
LOCK WASHER (4) 21021-07-A
NUT (4) 21051-09-A
TERMINAL
LOCKWASHER
NUT
9 PIN
CONNECTOR
AC HARNESS
46953
54
CAPSTAN MOTOR
CCW 46891
R.H.
TAKE UP MOTOR
CW 46892
L.H.
TENSION SWITCH
20055-73
GUARD SWITCH
20056-23
LABEL SENSOR
46944
LASER
46896
TEMPERATURE
SENSOR 46904
GND SHIELD FROM
MOTOR CABLE
GND SHIELD FROM
25 WIRE CABLE
GND SCR AT TOP OF ARM
21069-03-E #6-32 X 1/4”
21021-05-B #6 EXT L’W
GND SCR AT TOP OF ARM
21069-03-E #6-32 X 1/4”
21021-05-B #6 EXT L’W
LOCATED ON VERTICAL
WEB OF SEAL ARM
D-1455 CLAMP 1/2”
21060-05-F #8-32 X 3/8
21021-06 #8 INT L’W
21023-23 #8 FLAT’W
L.H. SIDE TOUCH
GUARD BAR
45606
CLAMP
DOWN SWITCH
20055-73
ARI SOLENOID
VALVE 46898
LOCATED ON HORIZ.
WEB OF SEAL ARM
D-1455 CLAMP 1/2”
21060-05-F #8-32 X 3/8
21021-06 #8 INT L’W
21023-23 #8 FLAT’W
thermopatch.com
GUARD SWITCH
20056-23
CLAMP
DC HARNESS
46954
37 PIN
CONNECTOR
55
Section 6
MAINTENANCE
Rubber Print Platen
Clean often by wiping with a soft, clean rag. Replace the pad
when it becomes worn. To replace pad, slide old pad assembly
out of the lower platen, and install a new assembly.
Compressed Air Supply
Maintain a filtered air supply. Check air filter daily. Drain by
pushing up on button at bottom of filter bowl.
General
Keep inside of machine free of foreign material, including lint.
Teflon/Fiberglass Shield (Used for Heat Sealing)
Clean often by wiping with a soft, clean rag. A non-flammable
cleaner such as “EZ-Off”, part no. DH-6873, may be used
according to the manufacturer’s instructions.
thermopatch.com
Never use a flammable solvent or abrasive cleaner on
this surface.
56
Section 7
CUSTOMER SERVICE
Thermopatch Corporation’s U. S. And International
network of sales representatives, as well as its internal
customer Service Department, offer their assistance in the
development of effective heat-seal mending, marking, and
identification programs.
Thermopatch markets a complete line of heat-seal and
marking machine, as well as a complete line of materials and
supplies.
Label Print Machines - Manual, automatic, and computer
controlled.
Marking Machines - High speed permanent imprinting of
decorative or informative marks on most woven fabrics.
Heat-Seal Machines - Manual, semi-automatic, and
completely automatic, with high inter-platen pressure
to assure excellent adhesion of label tapes and mending
materials.
Label Tapes - Specially woven 100% cotton and blends
with adhesives to match specific processing requirements.
Emblems - High quality blank emblems with screen print
or merrowed borders.
Hot Paper Transfers - In sizes 1 to 100 square inches in
rolls or cut and stacked. Custom or stock designs in one to
four colors.
When ordering machine parts, please include model and
serial number of the equipment.
thermopatch.com
In the U.S.A
: Thermopatch Corporation
P.O. Box 8007
Syracuse, New York 13217-8007
Phone:
315-446-8110
Fax:
315-445-8046
Toll Free: 800-252-6555
(in the USA only)
In Canada
: Thermopatch (Canada) Inc.
25 Groff Place, Unit #5
Kitchener, Ontario N2E 2L6
Phone:
519-748-5027
Fax:
519-748-1543
Toll Free: 800-265-6416
(in Canada only)
In Australia
:
57
Thermopatch (Australia) Pty. Ltd.
477 Warrigal Road, Unit No. 9
Moorabbin, Victoria 3189
Phone:
011-61-3-9532-5722
Fax:
011-61-3-9532-5652
In the Netherlands :
Thermopatch BV
P.O. Box 50052
1305 AB Almere
Netherlands
Phone:
011-31-36-549-1111
Fax:
011-31-36-532-0398
Germany
:
Thermopatch Deutschland
Grunteweg 33
26127 Oldenburg
Deutschland
Phone:
+49 441-380210
Fax :
+49 441-3802121
E-mail:
[email protected]
France
:
Thermopatch France
7 Rue Chappe-Z.I. Des Garennes
B.P. 1011
Les Mureaux Cedex 78131
France
Phone:
011-33-1-3022-0808
Fax:
011-22-1-3022-1866
: http://www.thermopatch.com
E-mail Address
: [email protected]
thermopatch.com
Internet Address
58
thermopatch.com
Thermopatch Corporate Headquarters
Thermopatch European Headquarters
Thermopatch Australia Pty Ltd
Thermopatch Canada Inc
Kannegiesser UK Ltd.
USA
The Netherlands
Australia
Canada
United Kingdom
T
T
T
T
T
+1 315 446-8110
+31 36 549 11 11
+61 395325722
+1 519 748-5027
+44 1539 722122
F
F
F
F
F
+1 315 445-8046
+31 36 532 03 98
+386 2 80 55 232
+1 519 748-1543
+44 1539 721000
[email protected]
[email protected]
[email protected]
[email protected]
[email protected]