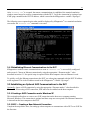
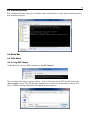
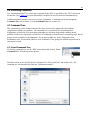
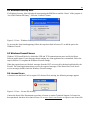
1
Kozio® Host Tools User Manual 1 Product names mentioned in this document are trademarks of their respective manufacturers and are used here only for identification purposes. © Copyright 2011, Kozio, Inc. All Rights Reserved. Information in this document is subject to change without notice. The software described in this document is furnished under a license agreement. The software may be used, copied or distributed only in accordance with that agreement. No part of this publication may be reproduced, stored in a retrieval system, or transmitted in any form or any means, electronically or mechanically, including photocopying and recording for any purpose without the written permission of Kozio Inc. HS-DOC-UM-41-R1-2011-DJ 2 Contents 1 Introduction to Kozio® Host Tools Software ..............................................................................................5 1.1 Quick Start Instructions .......................................................................................................................6 2 Installation ...................................................................................................................................................7 2.1 DUT Installation Instructions ...............................................................................................................7 2.2 Host Tool Installation Instructions for Windows .................................................................................7 2.3 Windows Firewall Instructions ..........................................................................................................13 2.4 Updating a Previous Version of the Host Tools ................................................................................15 3 Communications Setup – Host Computer to DUT ...................................................................................19 3.1 kDiagnostics® Remote Communications ...........................................................................................19 3.1.1 Displaying Remote Communications Variables .........................................................................20 3.1.2 Enabling kDiagnostics® Remote Communications.....................................................................20 3.1.3 Establishing Ethernet Communications to the DUT ...................................................................21 3.2 Establishing an Optional SLIP Communications to the DUT ...........................................................21 3.2.1 Creating a SLIP Connection under Windows XP .......................................................................21 3.2.2 SLIP — Creating a New Network Connection ...........................................................................21 3.2.3 SLIP — Create a New Direct Connection ..................................................................................22 3.2.4 SLIP — Setting the Kozio Target Properties ..............................................................................22 3.2.5 SLIP — Establishing a ―Kozio Target‖ Network Connection ....................................................22 3.2.6 SLIP — Restarting the Windows SLIP Connection ...................................................................23 3.2.7 SLIP — Verifying the Windows SLIP Connection ....................................................................23 3.3 Kozio Properties Files ........................................................................................................................24 3.3.1 KozioServer Properties File Variables ........................................................................................26 3.3.2 SequenceRunner Properties File Variables .................................................................................26 3.3.3 Restarting KozioServerTM ...........................................................................................................29 4 ValidationAssistant™ ...............................................................................................................................30 4.1 Getting Started ...................................................................................................................................30 4.1.1 Start-Up Banner ..........................................................................................................................30 4.1.2 Welcome Screen..........................................................................................................................31 4.1.3 Screen Overview .........................................................................................................................32 4.2 DUT Status .........................................................................................................................................32 4.3 Validating Setup .................................................................................................................................33 4.4 Menu Bar............................................................................................................................................33 4.4.1 File Menu ....................................................................................................................................33 4.4.1.1 Log DUT Output ..................................................................................................................33 4.4.1.2 Log Commands ....................................................................................................................34 4.4.1.3 Load Command Tree............................................................................................................34 4.4.1.4 Exit .......................................................................................................................................34 4.4.2 Edit Menu ....................................................................................................................................34 4.4.2.1 Clear Window ......................................................................................................................34 4.4.3 DUT Menu ..................................................................................................................................34 4.4.3.1 Stop DUT Command............................................................................................................34 4.4.3.2 Download File to DUT ........................................................................................................35 4.4.3.3 Execute Script ......................................................................................................................36 4.4.4 Help Menu...................................................................................................................................37 4.5 Status Line Indicators.........................................................................................................................37 4.6 Commands .........................................................................................................................................37 4.6.1 Executing Commands .................................................................................................................38 4.7 Command Tree ...................................................................................................................................38 3 4.7.1 Load Command Tree ..................................................................................................................38 4.7.2 Executing Tests through the Command Tree ..............................................................................39 4.7.3 Command Tree Prompt ...............................................................................................................39 4.8 Command Line ...................................................................................................................................39 4.9 Low-Level Commands .......................................................................................................................40 4.9.1 Low-Level Help ..........................................................................................................................40 4.10 Test Methods ....................................................................................................................................41 4.11 Performance Tests ............................................................................................................................41 4.12 Diagnostic Tests ...............................................................................................................................41 4.13 Test Suites ........................................................................................................................................42 4.13.1 Test Suites Tree .........................................................................................................................43 4.13.2 Test Suites Report .....................................................................................................................43 4.14 Troubleshooting Test Failures .........................................................................................................43 4.14.1 Troubleshooting with Test Methods .........................................................................................43 4.14.2 Troubleshooting with Tracing ...................................................................................................43 4.14.3 Troubleshooting with Looping..................................................................................................45 4.14.4 Memory Test .............................................................................................................................46 4.15 Downloading Scripts ........................................................................................................................46 4.16 TFTP File Transfer ...........................................................................................................................47 4.17 Shortcuts, Keyboard .........................................................................................................................47 5 SequenceRunner™ ....................................................................................................................................48 5.1 Launching SequenceRunnerTM...........................................................................................................48 5.2 Log In .................................................................................................................................................49 5.3 Executing Test Sequences ..................................................................................................................49 5.4 Detailed Log .......................................................................................................................................52 5.5 Command Line Interface (CLI) .........................................................................................................53 5.6 CLI Return Value ...............................................................................................................................53 5.7 CLI Options ........................................................................................................................................54 5.8 Executing Commands with CLI .........................................................................................................54 5.9 Executing a Test Script with CLI .......................................................................................................54 5.10 Executing a Test Sequence with CLI ...............................................................................................55 Report Files ..............................................................................................................................................56 5.11 SQL Database...................................................................................................................................57 5.12 XML Validation ...............................................................................................................................57 5.13 Test Sequence Files ..........................................................................................................................57 5.13.1 TestSequence Tag .....................................................................................................................58 5.13.2 Action Tags ...............................................................................................................................58 5.13.2.1 Connect ..............................................................................................................................59 5.13.2.2 Disconnect ..........................................................................................................................59 5.13.2.3 DownloadImage .................................................................................................................59 5.13.2.4 DownloadScript .................................................................................................................60 5.13.2.5 ExecuteCommand ..............................................................................................................60 5.13.2.6 GetDatabase .......................................................................................................................62 5.13.2.7 GetFile ................................................................................................................................62 5.13.2.8 GetValue ............................................................................................................................63 5.13.2.9 Message ..............................................................................................................................64 5.13.2.10 OperatorComment ............................................................................................................64 5.13.2.11 Prompt ..............................................................................................................................66 5.13.2.12 PutDatabase ......................................................................................................................67 5.13.2.13 PutFile ..............................................................................................................................68 4 5.13.2.14 ScanBarcode.....................................................................................................................68 5.13.2.15 ScanLabel .........................................................................................................................69 5.13.2.16 SetSerialNumber ..............................................................................................................70 5.13.2.17 SystemCommand .............................................................................................................70 5.13.3 Passing Values between Test Sequence Actions ......................................................................71 6 SequenceReporter™ .................................................................................................................................72 6.1 Switching Database Settings ..............................................................................................................73 6.2 Generate Report .................................................................................................................................74 6.3 Print Query Results ............................................................................................................................75 6.4 Save Report ........................................................................................................................................76 7 Multi-device Testing .................................................................................................................................79 7.1 Multi-device Testing Equipment Virtual Fixture Set Up Example ...................................................79 7.2 Software Installation ..........................................................................................................................79 7.3 Properties File ....................................................................................................................................79 7.4 SequenceRunnerTM .............................................................................................................................80 8 kHeader .....................................................................................................................................................81 9 Troubleshooting ........................................................................................................................................83 9.1 Timeout on command acknowledgement from DUT ........................................................................83 9.2 Windows Security Alert .....................................................................................................................84 9.3 Windows Firewall Issues ...................................................................................................................84 9.4 License Errors ....................................................................................................................................84 10 Best Practices, Acronyms & Glossary ....................................................................................................86 10.1 Best Practices ...................................................................................................................................86 10.2 Acronyms .........................................................................................................................................86 10.3 Glossary ...........................................................................................................................................86 11 Contact Information ................................................................................................................................88 5 ® 1 Introduction to Kozio Host Tools Software Kozio‘s Host Tools consists of programs that provide a simple yet powerful user interface to Kozio‘s kDiagnostics®. For engineering, the Host Tools streamline the creation, execution, and automated recording of boardlevel test sequences used to quickly validate, troubleshoot and program hardware devices. The Host Tools offer an effective means of providing in-system programming. For manufacturing, the Host Tools efficiently validate and serialize devices during the manufacturing and support phases of a product‘s lifecycle. Manufacturers save time and money while increasing test coverage and gaining efficiency in design and manufacturing processes. Kozio‘s integrated In-System Diagnostics solution includes: kDiagnostics® - The foundational component of Kozio's complete In-system Diagnostics platform. It is a binary application that executes from the CPU on your embedded system. It contains a test and diagnostics interpreter and executive that runs on your target hardware and executes tests under user control from a test library. ValidationAssistantTM - a remote interactive hardware debugging and fault isolation tool for engineers working with embedded hardware systems. ValidationAssistantTM runs on any computer in the network and interacts with a test executive running directly on the Device Under Test. kDev™ - Allows a developer to extend the capabilities of kDiagnostics by compiling and linking in custom source code test routinesinto new kDiagnostics binaries. kPOST™ - Permits kDiagnostics users to ship Kozio's high-integrity, high-coverage test capabilities with their finished products, enabling a full hardware check to be performed at every power cycle. SequenceRunner™ –Test operator‘s interface for automated testing and configuration of embedded systems including operator prompting, real-time functional tests, device programming, file transfers, unique id automation and integrated SQL database for test tracking. SequenceRunnerCLI™ - provides the power of ValidationAssistant and SequenceRunner in a simple command line-oriented program, perfect for power users, scripting, and integrating Kozio software with your existing production test process. SequenceReporter™ –Test reporting and tracking used to report the status of board testing by a variety of criteria. KozioServerTM - an application that connects all clients to multiple targets simultaneously. KozioServer maintains the direct connection to the target. Requirements for using the Kozio Host Tools: Windows XP, Windows Vista, or Windows 7. If you are using Windows Vista or Windows 7, Microsoft removed support for SLIP (Serial Line IP). As a result, if you are using SLIP and a serial connection from the Kozio host tools to a DUT 6 you must find a SLIP connection or install the Windows XP emulation mode which still offers SLIP. Release 2008.2 or later of kDiagnostics® NOTE: Execution of any of ValidationAssistant™ requires the acquisition of a license. Once purchased, a license can be obtained by going to www.kozio.com/license and providing information that validates the purchase of Kozio software. 1.1 Quick Start Instructions The steps below provide a brief description of the steps that must be taken to get Kozio‘s automated design and manufacturing tests running on the test station. On the Device Under Test (DUT) 1) 2) 3) 4) 5) 6) 7) 8) Program or load kDiagnostics® on to the DUT. (If not already running on the DUT). Configure the kDiagnostics® remote communications variables using kDiagnostics and a terminal emulator Enable kDiagnostics® remote communication using the kDiagnostics command ―kremote.run‖. (This may be done automatically by creating a kDiagnostics binary that runs this command automatically.) Section On the Host Section 2.1 3.1 3.1.2 Install the host tools using kozio-install-va.exe to install all products or use kozio-install-va-eval.exe to only install ValidationAssistant Add exceptions to Windows Firewall settings [Optional] Establish a SLIP connection to the DUT if using a serial connection. Run ValidationAssistant, SequenceRunner or SequenceReporter UsingValidationAssistantTM type in ―version‖ in the command line to verify quickly that all steps have been completed properly. 2.2 2.3 3.2.1 4.1 4.3 7 2 Installation The Host Tools installation program installs the tool on one or more host computers for use by engineering, manufacturing and support. The execution requires the installation of kDiagnostics® on the Device Under Test (DUT). ValidationAssistant interacts with kDiagnostics® through KozioServerTM. KozioServerTM can run from the same computer as ValidationAssistant or from any computer that is network accessible. When using a direct connection, such as serial, KozioServer must be installed on the computer connected to the DUT. 2.1 DUT Installation Instructions There are two main options for executing kDiagnostics; either program the self-booting kDiagnostics® image into the boot memory on the DUT; or use an external loader to load the kDiagnostics® binary image that executes directly from RAM. A boot loader or JTAG interface can be used to load and run kDiagnostics® from RAM on the device under test. This manual does not provide instructions for installing kDiagnostics® on the DUT. However; kDiagnostics® setup instructions are included in section 3.1.2 of the kDiagnostics® User Manual which is a separate document provided through your private FTP site. 2.2 Host Tool Installation Instructions for Windows Execute the Host Tools installer executable provided. There are several install files available. The installer for ValidationAssistant only is: kozio-install-va-RxxByy.exe The installer for the full product suite is: kozio-install-sw-RxxByy.exe Note: RxxByy indicates the version, for example R41B19 is Release 4.1 Build 19. NOTES: If installing only ValidationAssistant on a single computer, you can use ―kozio-install-vaeval-RxxByy.exe‖. This installer installs KozioServer and ValidationAssistant and uses default configuration parameters thereby simplifying the installation process. The JAVA JRE is required to run the Host Tools. The installer will attempt to install the latest version if it does not exist on the host computer. Adding Kozio exceptions to Windows Firewall is critical for proper execution of ValidationAssistant. Instructions are provided in Section 2.3. Be sure to save the installer file for future use. You will need it if you wish to upgrade the software to a newer version or if you wish to remove the software. 8 1. Launch the install file. 2. Select ―Next‖. 3. Read the Kozio End User License Agreement. 4. Select the ―I accept the terms of the License Agreement‖ check box. 9 5. Select ―Next‖ to continue. 6. In the setup dialog box below, enter your name, company name and very important IP addresses. a. The ―Client IP Address‖ must contain the IP address of the computer where the Host Tools are installed. b. The ―KozioServer IP Address‖ must contain the IP address of the computer where KozioServerTM is installed. Use the command ―ipconfig /all‖ in a Microsoft Windows Command Prompt to list a computer‘s IP address. c. The ―DUT IP Address‖ may change but put in a valid IP address to start. See Section 3.3 for information on how to update these values after installation. NOTE: The entries shown below are examples only. Provide values that are valid for your network configuration. This dialog only appears when using the full product installer. 7. Select ―Next‖. 10 8. The dialog box below selects which programs will be installed on the host computer. Select a feature on the left panel and the feature description is updated. Use the right-mouse menu over a feature to exclude or include a feature. The installation path may also be changed, but it is recommended to select the default path, C:\Program Files\Kozio. 9. Select ―Next‖. 11 10. You can enter the name of the Windows Start Menu group identifier in the dialog box below but we suggest using the default value. 11. Select ―Next‖. The system is now ready to be updated. The ―Previous‖ button returns to the previous page to allow modification any of the parameters specified prior to completing the installation. 12 12. Select ―Next‖. 13. The Installer will now install all Host Tools selected. 14. When the Kozio Host Tools installation is finished, the final Kozio installation dialog box is displayed. 13 15. When the Kozio license has been received, be sure to copy the license file into the installation directory (recommended location: C:\Program Files\Kozio). 2.3 Windows Firewall Instructions The latest Service Packs from Microsoft automatically enable the Windows Firewall feature. This feature adds a level of security to the host computer. One feature of the firewall is that many TCP and UDP ports are blocked unless specific access is allowed. ValidationAssistant uses TCP and UDP ports for communications. If Windows Firewall is used, and it may be automatically enabled, the host computer must be configured for access in order to receive communications over four specific ports. Without this access, the Kozio software cannot function properly. This step is only required once, even if Kozio software is uninstalled and reinstalled. 14 Follow these steps to enable the necessary ports. 1. 2. 3. 4. From the Windows task bar, select ―Start‖ Select ―Control Panel‖ Double-click ―Windows Firewall‖ Select the ―Exceptions‖ tab 5. Select the ―Add Port…‖ button 6. Execute these four steps to add all four ports. a. Select the ―Add Port…‖ button. Type ―TFTP‖ into the ―Name:‖ text box. Type ―69‖ into the ―Port number:‖ text box. Select the ―UDP‖ radio button. Select OK. This step enables Ethernet communications for TFTP file transfers and image downloads. b. Select the ―Add Port…‖ button. Type ―Kozio Server Port 1‖ into the ―Name:‖ text box. Type ―4333‖ into the ―Port number:‖ text box. Select the ―UDP‖ radio button. Select OK. This step enables Ethernet communications between the DUT and Kozio Server. This port number must match the kozioserver.properties file settings and 4333 is the default value. c. Select the ―Add Port…‖ button. Type ―Kozio Server Port 2‖ into the ―Name:‖ text box. Type ―4334‖ into the ―Port number:‖ text box. Select the ―UDP‖ radio button. Select OK. 15 TM This step enables Ethernet communications between the DUT and KozioServer . This port number must match the kozioserver.properties file settings. The port number is 4333+1, the initial port plus one. d. Select the ―Add Port…‖ button. Type ―Kozio RMI‖ into the ―Name:‖ text box. Type ―1099‖ into the ―Port number:‖ text box. Select the ―UDP‖ radio button. Select OK. This step enables Ethernet communications between the clients and KozioServerTM. 7. Select ―OK‖ to close the ―Windows Firewall‖ dialog box. 2.4 Updating a Previous Version of the Host Tools To install or update a new version of the Host Tools, back up all test sequence and log files, and then uninstall the current version. NOTE: you will need the install file that you used to install the previous version of the software. The uninstall procedure uses this file and will not work without it. To uninstall, follow these steps: 1. 2. 3. 4. From the Windows task bar, select ―Start‖ Select ―Control Panel‖ Double-click ―Add or Remove Programs‖ Scroll down and select the ―Kozio Suite‖ item 5. Select the ―Uninstall‖ radio button 16 6. The Kozio Installer will launch. Select the ―Uninstall Kozio Suite‖ radio button and then select ―Next‖. 7. Select ―Next‖ to begin uninstalling the Kozio Host Tools. 17 8. After the process completes, select ―Finish‖ closing the last dialog box. NOTE: This process will not uninstall the Java Runtime Environment (JRE). If uninstalling those items is necessary, return to Windows ―Start / Control Panel / Add or Remove Program‖ and remove these applications from that dialog box. 18 It is important to note that the install file should not be deleted as it will be needed for upgrading or removing the product. Install the new version of the Kozio Host Tools by running the latest Kozio installer as described in Section 2.2 Host Tool Installation Instructions. Review the test and configuration files that were backed up. Merge or overwrite changes with the new files as required. 19 3 Communications Setup – Host Computer to DUT This section provides information on how to configure the DUT and adjust KozioServerTM properties as necessary to allow communication between the Host Tools and the DUT. With the Kozio Host Tools installed, the host computer is now ready to communicate with the DUT. Before beginning a testing sequence, a kDiagnostics® command to enable DUT and Host Tools communication MUST be executed. The required kDiagnostics® command enables a communication protocol between kDiagnostics® and KozioServerTM. This command may be executed automatically through a kScript file built into the DUT image or manually from the kDiagnostics® command line. kDiagnostics® is typically delivered with the remote communications protocol (kRemote) automatically enabled. To manually manage the remote communications protocol, modify the communications settings as described below and then start the kRemote communications protocol on the DUT. NOTE: KozioServerTM is automatically launched during the Host Tools installation. Details about changing server configuration properties and restarting KozioServerTM to work with the network configuration changes are provided in section 3.3. The Host Tools, SequenceRunner™, ValidationAssistant™, or the SequenceRunner/CLI can be used to remotely communicate with the DUT. 3.1 kDiagnostics® Remote Communications The variables used by kRemote are listed in the following table. Before starting kRemote you should review each variable setting and make any changes that may be necessary as described in 3.1.1. Variable Example Description To Update $ip.target 192.168.1.210 ip/192.168.1.210 $ip.target $ip.gateway $ip.netmask $kremote.port 192.168.1.0 255.255.255.0 4333 $kremote.netdev 3 The IP address of the DUT. This value is required by KozioServerTM. The network gateway used by the DUT. The network mask used by the DUT. The TCP/UDP port number used for communications between the DUT and server. The network communications device that the DUT will use for remote communications. Note: Use “-1 netdev.show” to list all available network devices. ip/192.168.1.0 $ip.gateway ip/255.255.255.0 $ip.netmask 4333 -> $kremote.port 3 $kremote.netdev The last column describes how to update a given variable. For IP address updates, the ―ip/‖ precedes the new IP address in dot notation. The right arrow (), a minus sign followed immediately by a greater than sign, denotes a variable assignment. The last item is the variable name to be updated. Update any variable by using the kDiagnostics® command line or save the commands in a text file and have kDiagnostics parse the file. 20 Kozio uses the ―*.ksc‖ extension to denote a kScript test file. Files of this type are ASCII text files containing Kozio kScript commands. Once saved in a file, commands can be built into an updated kDiagnostics® binary image file or parsed in real time by kDiagnostics. The script file can be sent to kDiagnostics® using ValidationAssistant, terminal emulation software (such as TeraTerm), or to an associate via email. 3.1.1 Displaying Remote Communications Variables Use ―kremote.debug‖ to display current remote communication variables and their values. 3.1.2 Enabling kDiagnostics® Remote Communications Use the command ―kremote.run‖ to enable the communications between kDiagnostics® and KozioServerTM. This kDiagnostics® command relies on a number of environment variables for configuring network parameters as described in Section 3.1. NOTE: This step is not required if kDiagnostics® has been built to automatically run the ―kremote.run‖ command. 21 After ―kremote.run‖ is executed, the remote communications is established, the terminal emulation window can no longer be used for communication with the DUT. Verify the connection by issuing a host ICMP ping command to the DUT IP address, which is stored in the kDiagnostics® variable ―$ip.target‖. The following screen capture depicts what would be displayed by kDiagnostics® on a terminal emulation screen after the ―kremote.run‖ command is executed. 3.1.3 Establishing Ethernet Communications to the DUT kDiagnostics® enables remote communications as soon as ―kremote.run‖ is successfully configured and executed. Choose an Ethernet connection by using the appropriate ―$kremote.netdev‖ value described in section 3.1. No special setup is required for the host computer when an Ethernet is used. To quickly verify the Ethernet connection to the DUT, use a host ping command with the DUT IP address as the argument. This is the IP address stored in the kDiagnostics® variable ―$ip.target‖. 3.2 Establishing an Optional SLIP Communications to the DUT Optionally, choose a SLIP connection by using the appropriate ―$kremote.netdev‖ value described in Section 3.1. When using a SLIP connection, SLIP must also be enabled on the host computer. 3.2.1 Creating a SLIP Connection under Windows XP This section describes how to create a new SLIP connection on the host server computer running Microsoft Windows. This connection is optional and these steps are not required if an Ethernet connection is chosen from the host computer to the DUT. 3.2.2 SLIP — Creating a New Network Connection Complete the steps below once, for setting up a host computer to communicate with a DUT over SLIP for the first time. 22 3.2.3 SLIP — Create a New Direct Connection Select ―Start->Settings->Control Panel‖ Double-Click ―Network Connections‖ Select ―File->New Connection…‖ Select ―Next‖ on the New Connection Wizard dialog box. Select ―Set up an advanced connection‖ and then select ―Next‖ Select ―Connect directly to another computer‖ and then select ―Next‖ Select ―Guest‖ and then select ―Next‖ Type ―Kozio Target‖ in the ―Computer Name‖ text field and then select ―Next‖ Choose the correct COM port in the ―Select a device:‖ pull-down selection box and then select ―Next‖ Select the ―Add a shortcut to this connection to my desktop‖ check box. Select ―Finish‖ 3.2.4 SLIP — Setting the Kozio Target Properties The ―Connect Kozio Target‖ dialog should appear immediately following step 1. Select the ―Properties‖ button On the ―General‖ tab, click ―Configure…‖ Set the ―Maximum Speed (bps):‖ pull-down to 115200 (or as documented in the release notes for the kDiagnostics® firmware image) Deselect ―Enable hardware flow control‖. Ensures that ―Enable modem error control‖ and ―Enable modem compression‖ are not selected Select ―OK‖ Select the ―Options‖ tab Deselect the ―Prompt for name and password, certificate, etc.‖ check box Select the ―Networking‖ tab Select ―SLIP: Unix Connection‖ in the ―Type of dial-up server I am calling:‖ pull-down box Deselect all options under ―This connection uses the following items:‖ except for ―Internet Protocol (TCP/IP)‖ and ―QoS Packet Scheduler‖. Highlight the ―Internet Protocol (TCP/IP)‖ option under ―This connection uses the following items:‖ Select the ―Properties’ button Type in the server IP address to use in the ―Use the following IP address:‖ field. This value must match the setting configured in the DUTs ―$ip.peer‖ script value. Both the configured IP addresses ―$ip.peer‖ and ―$ip.target‖ should reside on the same subnet. The DUT command ―kremote.debug‖ displays the settings of all script values controlling the kDiagnostics® remote connection. Select the ―Advanced…‖ button Select the ―General‖ tab if not already selected Deselect the ―Use default gateway on remote network‖ check box Deselect the ―Use IP header compression‖ check box Select ―OK‖ on the ―Advanced TCP/IP Settings‖ dialog Select ―OK‖ on the ―Internet Protocol (TCP/IP) Settings‖ dialog Select ―OK‖ on the ―Kozio Target Properties‖ dialog 3.2.5 SLIP — Establishing a ―Kozio Target‖ Network Connection The first time the prior steps are executed, the host computer will immediately attempt to communicate with the DUT via a serial connection. The DUT should be running and have executed the ―kremote.run‖ command. If this is true, a network connection between the host computer and the DUT will be established. 23 3.2.6 SLIP — Restarting the Windows SLIP Connection After the connection has been disconnected, for whatever reason, reestablishing the connection can be accomplished using the ―Kozio Target‖ desktop icon. Double-click on the icon and the host will attempt to connect to the DUT. If the connection fails, restart the DUT making sure that the ―kremote.run‖ command has been executed. A failed connection displays: 3.2.7 SLIP — Verifying the Windows SLIP Connection Follow these instructions to verify the SLIP connection: Launch the ―Network Connections‖ dialog box if it is not already running. o Select ―Start->Settings->Control Panel‖ o Double-Click on ―Network Connections‖ Under ―Direct‖, the ―Kozio Target‖ should have a ―Status‖ of ―Connected‖ with possibly other attributes. As a second step, ping the DUT: o Launch a ―Command Prompt‖ window o Execute ―ping 192.168.240.2‖ but use the DUT‘s SLIP IP address. This value is a kDiagnostics® remote connection variable as described in Section 3.1kDiagnostics® Remote Communications. If the IP address has been changed, be sure to use the new value. 24 3.3 Kozio Properties Files KozioServerTM and the client applications each use a properties file for configuration values. These files are located in the root folder of the Kozio Host Tools installation directory, e.g. ―C:\Program Files\Kozio‖. The following files are used: Application Program KozioServer SequenceRunner and SequenceRunnerCLI SequenceReporter ValidationAssistant NOTE: Properties File kozioserver.properties seqrunner.properties kozioreporter.properties va.properties kozioserver.properties contains configuration data linking one or more Virtual Fixtures to their IP Addresses. A Virtual Fixture is either an actual hardware networking device provided by Kozio or the DUT directly. The client applications, such as ValidationAssistant, refer to a Fixture which is mapped by KozioServer to an actual DUT. This allows the client applications to always refer to the same Fixture even though a given DUT may be repeatedly swapped out for a new DUT on the production line. Verify that this information matches your network configuration. The lines below are an example of the Fixture to IP address declarations. If this file is altered, the Kozio Server must be restarted. The installation program will only generate settings for one Fixture. If you are licensed for multiple Fixtures, you must manually edit kozioserver.properties to insert the additional settings (Fixture2 through Fixture4 in this example). 25 NumberOfFixtures Fixture1 Fixture2 Fixture3 Fixture4 = = = = = 4 192.168.1.200 192.168.1.201 192.168.1.202 192.168.1.203 Starting with Release 4.1, fixture names may optionally be assigned in the properties file as shown in the following example: FixtureName1 = Debby 8313 DUT 1 FixtureName2 = Debby 8313 DUT 2 FixtureName3 = Debby Blaze If fixture names are not specified, the fixtures will be named Fixture1, Fixture2, etc. by default. Update the properties file any time a change is made to the IP addresses for the server or device under test. By specifying these values during installation, changes to this file will not be needed unless the IP address(es) of the DUT(s) changes. If kozioserver.properties is modified, KozioServerTM must be stopped and started. Refer to Section 3.3.3 for details. 26 3.3.1 KozioServer Properties File Variables This table describes the variables found in kozioserver.properties. Modify the variables as needed. Variable Example Description EventIP 192.168.1.32 EventPort 4333 The IP address of the computer running KozioServerTM. The base IP port used by KozioServerTM. Two port numbers are used: EventPort and EventPort+1. ClientIP 192.168.1.32 The IP address of the computer running a client application such as TM ValidationAssistant . TargetIP 192.168.1.100 The IP address of the DUT. TargetPort 4333 TftpRoot myTests/ The IP port used by the by the Device Under Test. This variable specifies the root folder where files downloaded from the host to the DUT will be stored. TftpPort 69 The TFTP port number. RMIRegistryHost 192.168.1.32 The IP address of the computer running KozioServerTM. Notes The port number for the host computer(s) and ® kDiagnostics remote communications variable $kremote.port must match (section 3.1) This value is only used by the client application and has no affect on the server settings. This value must match the ® kDiagnostics remote communications variable $ip.target (Section 3.1). This value must match EventPort. This is the place to store kScript files, image files for downloading to the DUT, and test sequence files. Set this value to zero (0) to disable the TFTP server. 3.3.2 SequenceRunner Properties File Variables This table describes the variables found in seqrunner.properties. Modify the variables as needed. 27 Example Description Notes LogToFile true Valid options are “true” or “false”. LogFileName koziolog The name of the file used for test logging when LogToFile is “true”. Set to “true” to log all test results to text file stored in the “/logs” folder under the main installation folder. Created in the “/logs” folder under the main installation folder. LogFileExtension .log ReportFileName kozioreport ReportFileExtension .log LogFileSave always The extension of the file used for test logging when LogToFile is “true”. The name of the file used for test reports. The extension of the file used for test reports. Valid options are “always”, “never”, or “error”. DBURL jdbc:postgresql://192.168.1.22/kozio Valid JDBC URL for the database. DBUserName kozio_user User name for database access. DBPassword koziouser Password for database access This variable determines when a detailed execution log is saved to disk. This log is useful for troubleshooting. This field is only needed if the optional database is installed and enabled. Used by application programs to access the database. 28 29 3.3.3 Restarting KozioServerTM Anytime kozioserver.properties is modified, KozioServerTM must be stopped and restarted. NOTE: Using ―Restart‖ does not work. The proper sequence is to first ―Stop” then ―Start” KozioServerTM. 1. From the Windows task bar, select ―Start‖ 2. Select “Control Panel‖ (for Vista users, it is recommended to switch to ‗Classic‘ mode to execute these instructions). 3. Select ―Administrative Tools‖ 4. Select ―Services‖ 5. Highlight the line labeled ―KozioServer‖ 6. Select ―Stop‖ the service. 7. Select ―Start‖ the service. NOTE: It is good practice to run ValidationAssistantTM and type in the simple ―version‖ command to verify server to DUT communications. 30 4 ValidationAssistant™ 4.1 Getting Started ValidationAssistantTM provides a means to execute test commands and acts as an event listener displaying all information received from a device under test (DUT). Launch ValidationAssistantTM using the desktop shortcut. 4.1.1 Start-Up Banner ValidationAssistantTM displays a startup banner followed by a welcome screen and the main operator interface. 31 4.1.2 Welcome Screen A welcome screen will pop-up providing shortcuts to valuable information and documents. Click the red ―X‖ in the upper right-hand corner of the screen to close. A ―Don’t show again‖ box is also provided in the bottom left-hand corner. Use ValidationAssistantTM to execute test commands on the DUT as specified by ‗Fixture‘. (If multiple devices are being tested simultaneously, see Chapter 5 for more information on multi-device testing.) 32 4.1.3 Screen Overview 4.2 DUT Status Located at the bottom on the ―Status Line‖ is the DUT indicator showing whether the DUT is online or offline. Online indicates that a status command was successfully sent from the server to the DUT and back again. Offline indicates a communications problem between the server and DUT. 33 4.3 Validating Setup Run ValidationAssistantTM and type in ―version‖ in the command line to verify quickly that all steps have been completed properly. 4.4 Menu Bar 4.4.1 File Menu 4.4.1.1 Log DUT Output On the Menu bar, click on ―File‖ and then on ―Log DUT Output‖. This command will bring up a pop-up window. Type in a file name for the DUT log and click on the ―Start Logging‖ button. This will begin the logging process which logs all interactions with the DUT This is useful for sharing information with support or other engineers. 34 A Stop DUT logging command becomes available in the ―File‖ menu once the logging command has been executed. 4.4.1.2 Log Commands Command logging is also available in ValidationAssistant. Click on the ―Log Command‖ menu from the ―File‖ menu to execute this command. This feature logs all commands sent to the target and logs only commands. It is useful for capturing commands and then creating a script file of the specific commands you need to execute in order to complete a given task. 4.4.1.3 Load Command Tree See Section 4.6.1 for more information on loading the command tree. 4.4.1.4 Exit Go to the ―File‖ menu located on the menu bar and click on ―Exit‖ to close ValidationAssistantTM. 4.4.2 Edit Menu 4.4.2.1 Clear Window Go to the ―File‖ menu and click. This will bring the pull down menu up. Click on the ―Clear Output Window‖ option to clear all of the text previously displayed text in the results box. 4.4.3 DUT Menu 4.4.3.1 Stop DUT Command 35 Use the ―Stop DUT Command” option to cancel a command in progress. You can also use the ―Escape‖ key as a shortcut for aborting a command in progress. 4.4.3.2 Download File to DUT To download files to the DUT, select the DUT item located on the menu bar. This will bring up a pop-up menu. Select the menu option ―Download File to DUT…‖ which will bring up a dialog box. Type in the name of the file to be downloaded, or click on the ―Browse‖ radio button to locate the file. Click on the ―Download‖ radio button to begin the operation. Note: For this release, to program a device on the target with a downloaded file the user must select an image file that has been wrapped using the Kozio utility kHeader.exe. This utility is freely available from Kozio. This utility will encode information into the image file such as where to 36 program the data on the target, such as Flash memory. This method also provides a cyclic redundancy check (CRC) for the image to verify the transfer. 4.4.3.3 Execute Script The execute script command can be found on the ―DUT‖ menu located on the menu bar. Click on the ―Execute Script‖ option to download and execute a script. 37 4.4.4 Help Menu Product registration can be found under the ―Help‖ command which is located on the menu bar. To register, click on ―Register Product‖ under the ―Help‖ menu and fill out the form with the requested information. From the Platform pull-down, select the platform being used for the DUT. Listed on the Platform pull-down are evaluation platforms and a separate item for purchased products. These two choices work by taking you to a Kozio web page form where you data is transferred. A license file will be generated and sent to the email address included in the registration information. 4.5 Status Line Indicators A green status bar located on the ―Status Line” at the botton of ValidationAssistant indicates the status of the test being run. A spinning arrow at the bottom left-hand side of the screen indicates the DUT is busy executing a command. This indicator only appears when the DUT is busy executing a command. The DUT online or offline status is located on the status line next to the busy indicator. 4.6 Commands The kDiagnostics architecture is built using a hierarchy of commands that range from low-level commands for probing the hardware to fully functional test suites that can test every component on the board. 38 4.6.1 Executing Commands Use ValidationAssistantTM to execute test commands on the DUT as specified by the ‗DUT‘ selector on the task bar. (See Chapter 5 for more information if multiple devices are under test simultaneously.) ValidationAssistant provides two ways to execute Commands. Commands can be run through the Command Tree (see section 4.3) or the Command Line (see section 4.11). 4.7 Command Tree The command tree can be found on the left side of the screen and is organized by the hardware components available on a platform. The command tree is customized for each platform that kDiagnostics is delivered on by providing commands only for those components available on that platform. Under each component, a second level of commands is divided into five potential groups, but all groups are not available for all components. The groups available are: Suites, Diagnostics tests, Performance tests, Test methods, and Low-level commands. These groups are defined in great detail in subsequent sections. 4.7.1 Load Command Tree To load the command tree, use the ―File” menu option and click on ‖Load Command Tree” from the top menu options. Find the location of the *.kct file (Kozio Command Tree File) for the DUT and double click. The command tree will automatically load into ValidationAssistant™. 39 4.7.2 Executing Tests through the Command Tree Navigate down to the specific component to be run and double click or use the ―Execute Script‖ option located in the ―Menu Bar‖ to select a script file that is sent to the DUT for interpretation. Commands can also be executed by typing the command in the Command Line. (See Section 4.7 for more information on the Command Line. 4.7.3 Command Tree Prompt For a number of test commands, kDiagnostics requires confirmation from the operator. When ValidationAssistant receives such a prompt from the target, a dialog box is presented to the operator. Click ―Yes or ―No‖ to complete each action. Selecting ―No‖ will fail the test. 4.8 Command Line Tests can be executed through the Command Line. Type in the name of the command in the Command Line and press the Enter key. ValidationAssistantTM will send each command to the DUT and all output from kDiagnostics will appear in the Output Window. To send multiple commands to the the DUT, select the text and copy it, then select the Command Line and paste the text. All copies lines will be sent to the DUT for interpretation by kDiagnostics and all output will be sent to the Output Window. This option can also be used to send an entire script file to the DUT. A third option of executing commands stored in a script file is to browse for the file using a tool such Windows Explorer and then drag the file onto the Output Window. All lines of the file will be sent to the DUT and interpreted by kDiagnostics. 40 4.9 Low-Level Commands Many low-level commands are available for the operator to execute. Low-level commands require parameters. Each high-level component, such as SDRAM, may have low-level command. Double click on the command to be executed. A dialogue box will appear prompting for the parameters. Type in the parameters for the specific command and click ―Execute‖. A right-mouse button pop-up menu is available for all Low-level Commands. One menu option displays help for the command and one executes the command. 4.9.1 Low-Level Help A help menu is available for all low-level commands. To access this menu, select the command and then use the right mouse button. This will bring up the ―Help‖ option. Click on the ―Help” button. A box will appear on the screen providing command, synopsis, description, usage and environment for the selected command. 41 4.10 Test Methods Test methods are a set of diagnostics tests that deliver a pass / fail result. Double click on the name of a test method to run it. Type in the parameters for the specific command and click on ―Execute‖. The results will be displayed in the Output Window. A right-mouse button pop-up menu is available for all Test Methods. One menu option displays help for the command and one executes the command. 4.11 Performance Tests Some components, such as SDRAM, have a number of performance tests associated with that component. Double-click on a performance test to display a characterization of a given performance characteristic. A right-mouse button pop-up menu is available for all Performance Tests. One menu option displays help for the command and one executes the command. 4.12 Diagnostic Tests A set of diagnostic tests has been built on top of test methods. The tests are pre-configured for a custom board based on the layout and build of materials for that board design. The diagnostic tests deliver a pass/fail result and do not require parameters. For instance, if the SDRAM address bus test is run, it will use an SDRAM Address Test to test the entire range of SDRAM memory that is available on the platform. 42 A right-mouse button pop-up menu is available for all Diagnostic Tests. One menu option displays help for the command and one executes the command. 4.13 Test Suites Test suites are collections of diagnostic tests or other test suites. Quick and comprehensive test suites are available for all devices. Test suites can also be nested. For example, under the ―All Components‖ folder on the command tree, over 140 tests are packaged into a single command labeled ―Example Test Suite – long version‖. Multiple components are tested and there are multiple levels of nesting under each suite. A right-mouse button pop-up menu is available for all Test Suites. One menu option displays help for a test and one executes the test. Test Suites also have two additional menu options labeled ―Tree‖ and ―Report‖ which are described in the next two sections. 43 4.13.1 Test Suites Tree The Tree command can be accessed by right on a highlighted test suite. Select ―Tree‖ and a listings of all of the nested suites and tests that are in the suite will be displayed on the Output clicking complete included Window. This same information can be accessed by entering the ―tree‖ command followed by a test suite name on the command line. For example, on the command line enter ―tree test.sdram‖ and press the Enter key. 4.13.2 Test Suites Report Click on ―Report‖ and ValidationAssistant displays a full report on the selected test suite. The information displayed is the test name followed by a status of Pending, Passed, or Failed. Pending indicates that the test has not been executed yet. This information is cleared when the platform is rebooted. This same information can be accessed by entering the ―report‖ command followed by a test suite name on the command line. For example, on the command line enter ―report test.sdram‖ and press the Enter key. 4.14 Troubleshooting Test Failures In the case of test failures, ValidationAssistant provides several different options for troubleshooting. 4.14.1 Troubleshooting with Test Methods Go to the Test Methods command and change the input parameters down to a smaller range or a specific device that is failing (see section 4.9 for details on Test Methods). A logic analyzer or other hardware devices can be hooked up to try to diagnose the failure. 4.14.2 Troubleshooting with Tracing kDiagnostics has tracing built into the product and this can be accessed through ValidationAssistant. For example, if the command test.sdram.address is typed into the command line, limited information is provided. In this case, only the test range information is displayed in the Output Window for testing the address bus bits. 44 To change the trace level, type the trace level in the Command Line and hit ―Enter.‖ The command to change the trace level echoing is ―<level> trace.level.echo‖ where <level> is an integer from 0 to 6. The value of zero turns off all echoing of trace commands and the larger the integer the more data that is displayed on the Output Window. After changing the trace echo level, reenter the command test.sdram.address. More information about the test being run is displayed about what the test is doing in the Output Window. For example, with a trace level of 3, a few additional lines of information is displayed. 45 If the trace level is turned up to 6, every single read and write memory access is displayed while executing this test. The tracing feature provides additional information that is very useful for fault isolation and learning how to configure interfaces and devices.. 4.14.3 Troubleshooting with Looping The looping feature provides a way to troubleshoot problems or run regression suites on the board. In the Command Line, type in the number of times the test is to loop followed by the command, ―<loop_count> test.loop test.sdram.address‖ and hit ―Enter‖, where <loop_count> is the number of times to execute the command. Use a loop_count of zero (0) to run infinite times. To stop the looping, use the ―Esc‖ key. If a failure is detected, the test will stop automatically. This feature can be used for to loop any command. There are alternate ways of looping available and those are described in the ―kDiagnostics kScript Reference‖ document. To stop a running test, go to the ―DUT‖ menu located on the menu bar and click on the ―Stop DUT Command ― or press the ―Esc‖ key on the keyboard. 46 4.14.4 Memory Test It is important to note that if you interrupt a test in progress kDiagnostics may leave data caching turned off. If data caching is disabled, all commands will run much slower. To display the current status of data caching, enter the command ―cpu.dcache .hex‖. This will display a 0x0 or 0x1 indicating that data caching is either off or on, respectively. To turn the data cache back on, enter the command ―cpu.dcache.enable‖ and press ―Enter‖. This will turn data caching back on. A full list of all available commands is provided in the ―kDiagnostics Command Reference‖. This document is provided with purchased products only. 4.15 Downloading Scripts To download a script file select the ―DUT‖ menu and then select ―Download File to DUT.‖ This will bring up a pop-up menu. Click on the ―Browse‖ button and find the location of the desired *.ksc file. Kozio uses the *.ksc file extension to differentiate Kozio kScript files. Select the file. Then click on the ―Download‖ button located in the pop-up window. The scripts will automatically be downloaded to the DUT and the also displayed in the Output Window. 47 For more information on Script and Command creation, see the kDiagnostics User Manual. 4.16 TFTP File Transfer TFTP file transfer is available through ValidationAssistant for kScript and kHeader-wrapped files only. The kHeader program is freely distributed by Kozio. Please inquire through [email protected] if you would like to receive this additional tool. 4.17 Shortcuts, Keyboard To do this Clear the screen Abort a command Cut Copy Paste Press CTL + L Esc CTL + X CTL + C CTL + V ValidationAssistant provides a buffer of previously executed commands. This includes all commands typed in as well as executed through the command tree. To re-enter a previous command, press the up arrow or down-arrow key on the keyboard. This will cycle through all commands entered. Press the ‗Enter‖ key to execute that command. You can also scroll commands and then modify the command by selecting the Command Line text entry box and making modifications before pressing Enter. 48 5 SequenceRunner™ 5.1 Launching SequenceRunnerTM Launch SequenceRunnerTM using the desktop shortcut. SequenceRunnerTM displays a startup banner followed by the main operator interface. Figure 5.1. SequenceRunnerTM – Startup Banner Figure 5.2. SequenceRunnerTM – Initial Screen with DUT Online 49 5.2 Log In The operator must log in. Select the ―File‖ menu and then select the ―Login…‖ option as shown below. Enter the operator‘s name. This name is stored in the central database as the operator‘s name and is tracked with all test executions. Once logged in, additional menu options are available to open a test sequence file and to logout. To switch operators, select the ―File->Logout‖ menu option and then log in the new operator. 5.3 Executing Test Sequences One of the main purposes of SequenceRunnerTM is to execute test sequences. All test sequences are stored in ASCII files using XML tags. Find additional information on the format of test sequence files in Section 5.13 Test Sequence Files. Several example sequence files and kScript files are provided under the ―examples‖ folder in C:/Program Files/Kozio/examples. To start the testing process, load a test sequence file using one of two methods: Choose ―File -> Open Sequence…‖ and then select the Open Sequence File icon. Choose the task bar icon for Open Sequence File The Open dialog box allows browsing of the test sequence files available. Select the desired test sequence file and then select Open. SequenceRunnerTM opens and validates the file. Section 5.12 XML Validation section describes the validation process. NOTE: Anytime a test sequence file is modified, that file must be reopened so that it is re-validated. After the test sequence file is loaded, the title bar, ―Platform:‖ text, and ―Sequence File:‖ text are updated based on data from the test sequence file. In addition, the START button becomes active. NOTE: Sample test sequence files have been provided, but these must be checked and edited, if necessary, to match the DUT. 50 Figure 5.3. SequenceRunnerTM – With SystemCommand.xml Loaded Press the START button to begin executing a test sequence. As the test sequence executes the screen will be updated as follows: DUT: This specification selects the fixture under test. Default Fixture Number = 1. Serial Number: This field is updated by the SetSerialNumber action. Overall Status: This field is updated with a pass or fail message after the test sequence is executed. Overall Progress: This progress bar is updated after each action in the test sequence is completed. Current Action: This field is updated as each action is executed. The text displayed is taken directly from the ―Name‖ attribute of each action tag in the XML file. Test Progress: This field displays status information directly from the DUT. The test designer does not have control over this text. 51 Select the ―Start‖ button to execute the test sequence. Here is an example of a test in progress: Figure 5.4. SequenceRunnerTM – Test in Progress 52 Figure 5.5. SequenceRunnerTM – Test PASS & FAIL Status 5.4 Detailed Log A SequenceRunnerTM log file stores a record of all activities. This log file is useful for debugging a configuration or setup issue. View the log file using one of the following two methods: Using ―View -> Detailed Log‖ Alternately, view the log file using SequenceReporterTM and the integrated database. For more information see Chapter 6 SequenceReporterTM. 53 An example of a run log is shown below after executing a version command on the DUT. Figure 5.6. SequenceRunnerTM – Detailed Log Viewer 5.5 Command Line Interface (CLI) The Command Line Interface (CLI) allows test commands and script files to be sent to kDiagnostics® running on the device under test (DUT). Select the fixture under test using the -f option. The CLI program communicates with KozioServer which then sends commands to the DUT specified by the -f option. The default value for -f is 1. The CLI can be invoked directly from a command window or from third party programs, so it can easily be added into existing production test processes. The CLI is a host tool that can be used by third party programs to execute Kozio functional tests on the DUT. The CLI tool can be called by scripting languages such as Perl. The main benefit is the ability to quickly add Kozio functional tests into an existing production test process. 5.6 CLI Return Value In accordance with DOS program conventions, the CLI returns a positive integer exit status code. A return value of zero (0) indicates success. A positive value indicates that an error occurred, as shown in the following table: Exit Status Code 0 1 Meaning Success kDiagnostics test failed or sequence execution failed 54 2 3 4 Input error, e.g. file not found Runtime error, e.g. no license file Invalid kDiagnostics command or other DUT error The best way to capture the exact error codes for each failure is to redirect output to a log file and parse that log file when a positive return value is encountered. More information about the failure may also be found in the Kozio log file, logs\koziologs.log. 5.7 CLI Options Execute ―sequencerunnercli –h‖ to view a list of available options: usage: SequenceRunnerCLI [options] command -abort Abort currently executing command -f <fixture-number> Specify Fixture Number -h Print help for this application -help Print help for this application -i <ip-address> Specify DUT IP address -k <script-name> Execute kScript file -l <log-file> Capture output to logfile -o Overwrite old logfile contents -q Execute commands in quiet mode -r <repeat-count> Repeat command -s <sequence-name> Load and execute sequence file -t <cmd-timeout> Specify command timeout value (seconds) -u <user-name> Set user name -v Display version information -version Display version information 5.8 Executing Commands with CLI To execute a test command use: sequencerunnercli command The ―command” string is any valid kDiagnostics® command such as ―test.sdram”, ―version”, ―cpu.mmu”, etc. This option sends the command to the DUT for immediate interpretation. Results are displayed to the output console and the overall success of execution is given by the program‘s exit status code. A list of available commands is documented in the kDiagnostics® Command Reference manual. 5.9 Executing a Test Script with CLI To execute a test script for a single fixture use: sequencerunnercli -k script-file-name 55 NOTE: CLI defaults to Fixture 1 when the ―-f‖ parameter is not specified. To execute a test script for a Fixture other than the default, use: sequencerunnercli –f # -k script-file-name Where # is the desired Fixture number and script-file-name is any valid kDiagnostics® script file (*.ksc). This sends the entire script file to the DUT for line-by-line interpretation. Results are displayed to the output console and the overall success of execution is returned as a DOS exit status code as shown in the table above [TODO: need table number]. 5.10 Executing a Test Sequence with CLI Kozio Test Sequence files may be executed from CLI with the –s option as shown here: sequencerunnercli –s sequence-file-name where sequence-file-name is the name of any valid Kozio Test Sequence file, for example ―mytests\mfg_test.xml‖. The –f option may also be used to specify the desired Fixture number, as with any CLI command. 56 Report Files A report file for each test suite execution is created based on the configuration options chosen in seqrunner.properties. The report filename includes the Serial Number that is retrieved from a ScanBarcode action. All report files are stored in the ―logs‖ directory and in the database. This report can be printed and packaged with a DUT. View the report file using one of three methods: Using ―View -> Summary Report‖ Using the View Summary Report button on task bar. Alternately, the test report can be accessed using SequenceReporterTM, if an integrated database is being used. This is discussed in Chapter 6 SequenceReporterTM. A sample summary report file is shown below: Figure 5.7. SequenceRunnerTM – Sample Summary Test Report File 57 5.11 SQL Database The database provides a means for tracking test stations, operators, and test results. A full test report is stored for each DUT based on barcode and serial number. The DUT serial number can be a simple barcode label value, or a database mapping of barcode values to UUT Serial Number can be created. The database must be pre-filled with Barcode/UUT Serial Number mappings for this method. The entire database schema is open. The pgAdmin tool can also be used to traverse the database and execute queries. A graphical reporting tool called SequenceReporterTM provides a quick and easy means of creating custom reports. 5.12 XML Validation Every test sequence file must follow a strict set of XML rules defined in a file called KozioSequenceFile.dtd. Every time a new test sequence file is opened in SequenceRunnerTM, it is validated against this set of rules. The syntax rules of XML are very simple and very strict. 5.13 Test Sequence Files Test sequence files are ASCII text files containing XML tags describing the circuit board test process. Each XML performs a given test action. Create test sequence files that combine various test actions required for the test process. The first line in a test sequence file is the XML declaration and it defines the XML version and the character encoding used in the document. Such as: <?xml version=‖1.0‖ ?> All sequence file documents must conform to the 1.0 specification of XML. For more information on the specification, see: http://www.w3.org/TR/REC-xml/. The next line declares the root element of the document and points to the Document Type Definition (DTD) file: <!DOCTYPE TestSequence SYSTEM ―KozioSequenceFile.dtd‖> The first tag is the <TestSequence> tag. Within enclosing TestSequence tags, one or more action tags can be listed. Action tags are defined in section 5.13.2 Action Tags. Some quick notes: All XML elements must have a closing tag XML tags are case sensitive With XML, the tag <Letter> is different from the tag <letter> Opening and closing tags must therefore be written with the same case XML elements must be properly nested XML attribute values must be quoted With XML, White Space is preserved The syntax for writing comments in XML is similar to that of HTML o <!—This is a comment With XML, it is illegal to omit the closing tag 58 5.13.1 TestSequence Tag Defines a test sequence with a varying number of action tags. <TestSequence> … </TestSequence> Attributes Author The author‘s name specified will appear in the database and in the report files. SequenceName This name appears in the database and in the report file. Platform The name of the platform that will appear in SequenceRunnerTM, the database, and report files. Example <TestSequence Author=‖Kozio‖ SequenceName=‖Example‖ Platform=‖Evaluation‖> 5.13.2 Action Tags Test sequences are created using actions that allow the operator to be prompted, connection to a DUT to be established, execution of test commands, and a number of other options. A test sequence file contains any number of action tags. Here is listing of available actions. Action Tag Connect Disconnect DownloadImage DownloadScript ExecuteCommand GetDatabase GetFile GetValue Message OperatorComment Prompt PutDatabase PutFile ScanBarcode ScanLabel SetSerialNumber SystemCommand Brief Description Establish a connection with a DUT. Disconnect from a DUT. Download a binary file from the host to the DUT and store it in the indicated memory location. Download a kScript file to the DUT using a running TFTP server. This is the most efficient means of transferring an entire script file for later execution. Execute a test kScript command on the DUT. Retrieve a value from a database. The user chooses which table to access. Get the contents of a disk file and store it in a variable. Parse the text stored in a variable and return a substring. Display a message to the operator. Prompt the operator to enter a comment. Prompt the operator for input data. Store a value in the database. The user chooses which table to update. Save sequence variable contents to disk file. Prompt the user to scan a barcode label on the DUT. [Deprecated] Prompt the user to scan a label on the DUT. The results are stored in the specified variable. Store the DUT‘s unique serial number and use that serial number for all database logging.. [Required] Execute a system command. 59 5.13.2.1 Connect Establish a connection to a DUT. Attributes Name The name of this action as it will appear after ―Current Action:‖ on the SequenceRunnerTM user interface screen. Validate Verify that communication is setup with the right type of DUT. Permissible values are ―Yes‖ or ―No‖. [Not implemented in this release.] Timeout The number of seconds to wait for a response before aborting the action. Example <Connect Name="Establish Connection" Validate="Yes" Timeout="30" /> 5.13.2.2 Disconnect Disconnect from a DUT. Attributes The name of this action as it will appear after ―Current Action:‖ on the SequenceRunnerTM user interface screen. Name Example <Disconnect Name="Disconnect from DUT" /> 5.13.2.3 DownloadImage Download an image from the host to the DUT. Typical uses are to download a firmware image or application image to be programmed into flash memory. Any other type of binary image can also be downloaded and programmed into any programmable logic device such as an FPGA, CPLD, or other device. This action provides a very fast means of transferring and programming a new image during production runs or during interactive validation. The maximum length of the filename, including extension, is limited to 14 characters. Attributes Name Timeout – – The name of this action as it will appear after ―Current Action:‖ on the SequenceRunnerTM user interface screen. The number of seconds to wait for a response before aborting this action. Additional Tags <Path> – The full path name of the file to download. The path is relative to the TFTP folder specified in kozioserver.properties, such as ―myTests‖. 60 <ServerIP> <Output> Example – The actual filename, including extension, must be 14 characters or less. The IP address of the server that will perform the TFTP transfer. – A variable to store results. <DownloadImage Name="Simple Image Download" Timeout="30"> <Path>customapp.bin</Path> <ServerIP>192.168.1.32</ServerIP> <Output>dummy-output</Output> </DownloadImage> 5.13.2.4 DownloadScript Download a kScript file to the DUT using a running TFTP server. This is the most efficient means of transferring an entire script file for later execution. The script file is sent in a single transfer to the DUT and interpreted. It is best for the script file to contain definitions of new commands for later execution. The maximum length of the filename, including extension, is limited to 14 characters. Attributes Name Timeout – – The name of this action as it will appear after ―Current Action:‖ on the SequenceRunnerTM user interface screen. The number of seconds to wait for a response before aborting this action. Additional Tags <Path> – <ServerIP> – The full path name of the file to download. The path is relative to the TFTP folder specified in kozioserver.properties, such as ―myTests‖. The actual filename, including extension, must be 14 characters or less. The IP address of the server that will perform the TFTP transfer. – A variable to store results. <Output> Example <DownloadScript Name="Simple kScript Command" Timeout="90"> <Path>Report.ksc</Path> <ServerIP>192.168.1.32</ServerIP> <Output>dummy-output</Output> </DownloadScript> 5.13.2.5 ExecuteCommand Command kDiagnostics® to execute a test command on the DUT. Attributes Name Timeout Additional Tags – – The name of this action as it will appear after ―Current Action:‖ on the SequenceRunnerTM user interface screen. The number of seconds to wait for a response before aborting this action. 61 <Command> – <FilePath> – <Input> <Output> – – ® The kDiagnostics command to be executed. The command must exist in kDiagnostics® either from the default list of commands provided by Kozio or from a user defined command. The filename of the script file to download to the DUT. The actual filename, including extension, must be 14 characters or less. Note: See Example 2 below, this shows a script file is sent to the DUT defining a new test suite name and then that test suite is executed using second ExecuteCommand action. The value of the variable is used as the command to execute on the DUT. This tag is optional. Note: See the Example 3 below where the variable ―kScriptCommand‖ is set using a Prompt action and then passed to the ExecuteCommand action. A variable to store results. Example 1 <ExecuteCommand Name="kScript Command - test.sdram" Timeout="30"> <Command>test.sdram.quick</Command> <Output>script-results</Output> </ExecuteCommand> Example 2 <ExecuteCommand Name="kScript Command - test.custom.final" Timeout="30"> <Command /> <FilePath>Mfg_Test.ksc</FilePath> <Output>script-results</Output> </ExecuteCommand> <ExecuteCommand Name="kScript Command - test.custom.final" Timeout="60"> <Command>test.custom.final</Command> <Output>script-results</Output> </ExecuteCommand> Example 3 <Prompt Name="Prompt to Execute Test Command" OkCancel="Yes" Timeout="30"> <Title>Prompt to Execute Test Command</Title> <MessageText><![CDATA[<html><b>Enter a test command to execute on the UUT.<br> <br> Type a kScript command into the prompt box below.<br> <br> This command will be sent to the UUT and executed.<br> <br> This demonstrates the use of passing variables from one Action to another.</b></html.]]></MessageText> <Output>kScriptCommand</Output> </Prompt> 62 <Connect Name="Connect To DUT" Validate="Yes" Timeout="30" /> <ExecuteCommand Name="Execute kScript Command" Timeout="15"> <Command /> <Input>kScriptCommand</Input> <Output>script-results</Output> </ExecuteCommand> 5.13.2.6 GetDatabase This test action retrieves a value from a database table. Use this action to retrieve values from the Common or DUT tables. Attributes Name – The name of this action as it will appear after ―Current Action:‖ on the SequenceRunnerTM user interface screen. <Table> – <RowName> – <FieldNumber> – Read a value from this database table, with valid values of ―common‖ or ―dut‖. The label used to identify a given row of the table. See the PutDatabase action for how to create or update rows. Read this user field number from the row. Valid values are 1 to 20. – A variable to store results. Additional Tags <Output> Example <GetDatabase Name="GetDatabase Test Action"> <Table>common</Table> <RowName>DebbyTest0022</RowName> <FieldNumber>3</FieldNumber> <Output>GetDatabaseOutput</Output> </GetDatabase> 5.13.2.7 GetFile This test action reads the contents of a disk file and stores that data in a variable. Attributes Name – The name of this action as it will appear after ―Current Action:‖ on the SequenceRunnerTM user interface screen. This optional attribute specifies whether to use a file browser for selecting which file to be read. Valid options are ―yes‖ or ―no‖ and the default is ―no‖, do not use a file browser. <Output> – A variable that stores what was read from the file. <FilePath> – Optional field denotes the file path relative to TftpRoot value, which is defined in kozioserver.properties. If omitted, file will be placed in TftpRoot. The name of the file to be read. FileDialog – Additional Tags <FileName> Example – <!-- read a file, browse for the filename --> 63 <GetFile Name="Read Disk File" FileDialog="yes"> <Output>GetFileContent</Output> <FileName>GetFileTest.xml</FileName> </GetFile> <!-- display the file contents --> <Message Name="Data Display" OkCancel="yes"> <Title>File Data</Title> <MessageText><![CDATA[<html><b> The data read was: </b><br> %GetFileContent%.<br></html.]]> </MessageText> </Message> <!-- read a file, with no browsing --> <GetFile Name="Read Disk File" FileDialog="no"> <Output>GetFileContent</Output> <FileName>example.txt</FileName> </GetFile> <!-- display the file contents --> <Message Name="GetFile Data Display" OkCancel="yes"> <Title>File Data</Title> <MessageText><![CDATA[<html><b> The data read was: </b><br> %GetFileContent%.<br> </html.]]></MessageText> </Message> 5.13.2.8 GetValue This test action retrieves a value from a variable by parsing the text. Use this action to retrieve values from barcode labels and strings stored in user fields in the database. Attributes Name – The name of this action as it will appear after ―Current Action:‖ on the SequenceRunnerTM user interface screen. <Title> – The text that will appear on the dialog‘s title bar. <Input> – The variable value to parse. <LineNumber> – The line of the text to parse. Line numbers start at 1 in the text. <StartOffset> – The first character in the text to extract. The first character is offset 0. <SubstringLength> – <Output> – The number of characters in the text to extract. Parsing will stop once the end of line character is reached even if the number of characters read is less than the value specified here. This allows variable length values to be read with one test sequence file as long as each variable is on a separate line. A variable to store results. Additional Tags Example 64 <GetValue Name="GetValue Action"> <Title>Parse Scanned Label</Title> <Input>ScannedLabel</Input> <LineNumber>1</LineNumber> <StartOffset>3</StartOffset> < SubstringLength >127</SubstringLength> <Output>SerialNumber</Output> </GetValue> 5.13.2.9 Message Display a message to the operator. Attributes Name OkCancel – – The name of this action as it will appear after ―Current Action:‖ on the SequenceRunnerTM user interface screen. The option to display ―OK‖ and ―Cancel‖ buttons. Permissible values are ―Yes‖ or ―No‖. Additional Tags <Title> – The text that will appear on the dialog‘s title bar. <MessageText> – The text that will appear in the dialog box. Either a simple text or HTML formatted text can be used that is contained within a ―<![CDATA[…]]>‖ tag construct. Example <Message Name="Welcome" OkCancel="Yes"> <Title>Welcome!</Title> <MessageText><![CDATA[<html><font size="+1" face="Verdana"> <br> <center><u>Operator</u></center><br> Plug the phone cable into voice port one (1).<br> <br> Click OK to proceed.<br> <br> </b></font></html]]> </MessageText> </Message> Figure 5.8. Message Action from the Example 5.13.2.10 OperatorComment Prompt the operator to enter a comment. The comment is stored in the database as part of the test results record. This action must be placed after actions for executing commands, for example the ExecuteCommand action. 65 Attributes Name – OkCancel – AskWhen – Timeout – The name of this action as it will appear after ―Current Action:‖ on the SequenceRunnerTM user interface screen. The option to display ―OK‖ and ―Cancel‖ buttons. Permissible values are ―Yes‖ or ―No‖. Defines when the operator should be prompted to enter a comment into the test database. Permissible values are ―OnError‖ or ―Always‖. The number of seconds to wait for a response before aborting this action. Additional Tags <Title> – The text that will appear on the dialog‘s title bar. <MessageText> – The text that will appear in the dialog box. Either a simple text or HTML formatted text can be used that is contained within a ―<![CDATA[…]]>‖ tag construct. This example uses simple text. Example <OperatorComment Name="Enter Comment" OkCancel="Yes" AskWhen="OnError" Timeout="30"> <Title>Enter Comment</Title> <MessageText>Enter a comment regarding the nature of the failure!</MessageText> </OperatorComment> Below is what the above example looks like with some operator text filled in. Figure 5.9. OperatorComment Action Example 66 5.13.2.11 Prompt Prompt the operator for input. Attributes Name – OkCancel – Timeout – The name of this action as it will appear after ―Current Action:‖ on the SequenceRunnerTM user interface screen. The option to display ―OK‖ and ―Cancel‖ buttons. Permissible values are ―Yes‖ or ―No‖. The number of seconds to wait for a response before aborting this action. Additional Tags <Title> – The text that will appear on the dialog‘s title bar. <Image> – An image to display. <MessageText> – The text that will appear in the dialog box. Either a simple text or HTML formatted text can be used that is contained within a ―<![CDATA[…]]>‖ tag construct. A variable to store results. <Output> Example – <Prompt Name="Prompt with image display" OkCancel="Yes" Timeout="30"> <Title>Prompt with image display</Title> <Image>example.jpg</Image> <MessageText><![CDATA[<html><b>This prompt displays a picture.<br> <br> There are several options with prompt actions: <ul> <li>Display <b>with</b> an image</li> <li>Display <b>without</b> an image</li> <li>Display and receive user input from a <b>barcode reader</b></li> <li>Display and receive user input from a <b>text box</b></li> <li>Store data in a variable to pass to other actions</li> </ul> <p> Select OK to continue<br> </b></html.]]></MessageText> <Output>kScriptCommand</Output> </Prompt> 67 Figure 5.10. Prompt Action from previous Example 5.13.2.12 PutDatabase This test action stores a value in a database table; either in the Common or DUT table may be specified. Attributes Name – The name of this action as it will appear after ―Current Action:‖ on the SequenceRunnerTM user interface screen. Additional Tags <Table> – Specify the database table, with valid values of ―common‖ or ―dut‖. <RowName> – The label used to identify a given row of the table. If RowName does not exist, a new row is created. If the RowName exists, the row is updated. This field only applies to the Common table. For the DUT table, we use the row associated with the DUT currently being tested. (An error is generated if SetSerialNumber has not been executed to assign a serial number with a DUT.) – Read this user field number from the row. Valid values are 1 to 20. <FieldNumber> <Input> Example – A variable storing a value to be placed in the database. <PutDatabase Name="PutDatabase Test Action"> <Table>common</Table> <RowName>DebbyTest002</RowName> <FieldNumber>3</FieldNumber> <Input>ScannedLabel</Input> </PutDatabase> 68 5.13.2.13 PutFile This test action saves the contents of a sequence variable to a disk file. This action is useful for exporting database contents or variable values. Attributes Name – The name of this action as it will appear after ―Current Action:‖ on the SequenceRunnerTM user interface screen. <Input> – A variable storing a value that will be written to the file. <FilePath> – <FileName> – This optional field denotes the file path relative to the TftpRoot value (which is defined in kozioserver.properties). If omitted, the file will be placed in TftpRoot. The name of the file to be created or overwritten. – A variable storing a value to be placed in the database. Additional Tags <Input> Example <!-- Get the serial number for test documentation and device programming --> <ScanLabel Name="Input Test Script" OkCancel="yes"> <Title>Scan Label</Title> <MessageText><![CDATA[<html><b> This test uses a 2D scanner to scan a 1D label. <br>Scan the label when ready and click OK when done:</b></html.]]></MessageText> <LineCount>2</LineCount> <Output>ScannedText</Output> </ScanLabel> <PutFile Name="Save to Disk"> <Input>ScannedText</Input> <FilePath>label</FilePath> <FileName>label_info.txt</FileName> </PutFile> 5.13.2.14 ScanBarcode Receive input from a barcode reader. It is recommended that you use ScanLabel in new sequence files as a replacement for ScanBarcode. Note that ScanBarcode requires SetSerialNumber. Attributes Name – OkCancel – Timeout – Additional Tags Name of this action as it will appear after ―Current Action:‖ on the SequenceRunnerTM user interface screen. The option to display ―OK‖ and ―Cancel‖ buttons. Permissible values are ―Yes‖ or ―No‖. Number of seconds to wait for a response before aborting this action. 69 <Title> – The text that will appear on the dialog‘s title bar. <Image> – An image to display. <MessageText> – The text that will appear in the dialog box. Either a simple text or HTML formatted text can be used that is contained within a ―<![CDATA[…]]>‖ tag construct. A variable to store results. <Output> Example – <ScanBarcode Name="Scan Barcode to Start Test" OkCancel="Yes" Timeout="30"> <Title>Scan Barcode</Title> <Image>images\\example.jpg</Image> <MessageText><![CDATA[<html><font size="+1" face="Verdana"> <br>Verify that all cables are connected and power on the unit.<br> <br> <b>Scan the barcode to proceed.<br></b></html.]]> </MessageText> <Output>SerialNumber</Output> </ScanBarcode> 5.13.2.15 ScanLabel Receive input from a barcode reader and store the results in a variable. Use this action to retrieve barcode text to parse using the GetValue action or store in the database using the PutDatabase action. Attributes Name OkCancel – – The name of this action as it will appear after ―Current Action:‖ on the SequenceRunnerTM user interface screen. The option to display ―OK‖ and ―Cancel‖ buttons. Permissible values are ―yes‖ or ―no‖. When ―yes‖ is chosen, the operator is forced to select a button to continue the test sequence. When ―no‖ is chosen, the dialog disappears after <LineCount> number of lines are read. Additional Tags <Title> – The text that will appear on the dialog‘s title bar. <MessageText> – <LineCount> – <Output> – The text that will appear in the dialog box. Use simple text or HTML formatted text that is contained within a ―<![CDATA[…]]>‖ tag construct. The number of text lines to read from the barcode label. When the line count is reached, no more input is stored in the variable, and the dialog is closed. This variable allows the test sequence to continue automatically once a barcode is scanned, instead of the operator selecting the OK button. A variable to store results. Example <ScanLabel Name="Enter Serial Number" OkCancel="no"> 70 <Title>Scan Label</Title> <MessageText><![CDATA[<html><b> This test uses the 2D scanner to scan a 1D ADI label. <br> Scan the label when ready and click OK when done: </b></html.]]> </MessageText> <LineCount>2</LineCount> <Output>ScannedLabel</Output> </ScanLabel> 5.13.2.16 SetSerialNumber This action stores a serial number used for all DUT related database queries. This action is required, even is a default serial number is used for all DUTs. If each DUT has a unique serial number, that value can be used for report generation. Attributes Name – The name of this action as it will appear after ―Current Action:‖ on the SequenceRunnerTM user interface screen. <Title> – The text that will appear on the dialog‘s title bar. <Input> – A variable containing the serial number used to identify uniquely a DUT. Additional Tags Example <SetSerialNumber Name="SetSerialNumber Action"> <Title>Set Serial Number</Title> <Input>SerialNumber</Input> </SetSerialNumber> 5.13.2.17 SystemCommand Execute a command on the host computer. This command can be used to perform any number of tasks using simple programs. Possible tasks could include executing database queries, using the Command Line Interface to execute DUT commands as shown below, or using a program to convert a barcode value into other data. Attributes Name – The name of this action as it will appear after ―Current Action:‖ on the SequenceRunnerTM user interface screen. <Command> – The system command to be executed. <Output> – A variable to store results. Additional Tags Example <SystemCommand Name="Example of External Command Execution"> <Command>cli -s Report.ksc</Command> 71 <Output>system-cmd-results</Output> </SystemCommand> 5.13.3 Passing Values between Test Sequence Actions Pass values from one action to the next using the <Output> and <Input> variable tags. To pass a value, declare a variable name using the <Output> tag in one action, for example: <Output>kScriptCommand</Output> The output from that action tag is stored in the variable. Access that value using the <Input> tag in a subsequent action tag. Such as: <Input>kScriptCommand</Input> The name of the variable must match exactly and is case sensitive. See ExecuteCommand for an example. 72 6 SequenceReporter™ SequenceReporter™ allows the generation, saving, and printing of test reports for publishing from any LAN connection. Given the right networking set up, checks on contract manufacturers‘ test results over a WAN connection can also be made. The SequenceReporterTM user interface allows an engineer or manager instant access to circuit board test results and generates queries to see full circuit board test results. Report data includes board type, serial #, test date, operator, station, operator notes, and a complete test summary. Launch SequenceReporterTM using the desktop shortcut. SequenceReporterTM displays a startup banner followed by the main operator interface. Figure 6.1. SequenceReporterTM – Startup Banner 73 Figure 6.2. SequenceReporterTM – Initial Screen In old version of screen above, Database connected message was green. When SequenceReporterTM runs, it uses saved values from a prior run and automatically attempts to connect to a database. The database connection status is show on the status line at the bottom of the window. In this screen shot, we see we have a successful connection. 6.1 Switching Database Settings Select the menu ―Settings Database‖ to update database settings. Figure 6.3. SequenceReporterTM – Database Settings Dialog Fill in ―Database Server‖ with the IP address of the machine running the PostgreSQL database. The ―Database Name‖, ―User name‖, and ―Password‖ fields must be filled in with values entered during the database installation process. Select the ―Save‖ button to update the stored settings. Select ―Connect‖ to attempt a connection to the database using the settings that have been entered. 74 6.2 Generate Report Once connected to a database, select the ―Generate Report‖ button to query the database using the filter values that have been entered. If all filters are blank, all records from the database are retrieved and displayed. Figure 6.4. SequenceReporterTM – Report with no Filtering Use Serial Number, Date Range, Platform, Operator, and Runs filters to reduce the test results displayed. Filter Serial Number Date Range Description A text string representing a serial number. Formats that are accepted: YYYY-MM-DD HH:MM MM-DD-YY HH:MM MM-DD-YYYY HH:MM Platform Operator Runs Representing year, month, day, hour minute, and hours and minutes are optional. Dashes (-) or slashes (/) can be used between the month, day, and year. Text string representing platform name - board‘s name or project‘s name. A text string for the operator‘s name. Select to view only Passed runs, only Failed runs, or Both. Select ―Generate Report‖ or press the Enter key to update the query results after the filter settings have been modified. Here is an example with filtering. 75 Figure 6.5. SequenceReporterTM – Report with Filtering 6.3 Print Query Results Use the File->Print Report menu option to print the query results. This saves the display on the main screen. Figure 6.6. SequenceReporterTM – Print Query Results 76 6.4 Save Report Additional options are available when an item displayed in the results pane is selected. Select a line item and use the right-mouse button to display a pop-up menu. Access to information stored in the database is now available. The stored Test Summary, Detailed Log, or Operator Comments can be viewed. Figure 6.7. SequenceReporterTM – Pop-up Menu Options 77 From the Test Summary dialog, the test report can be viewed and saves to a file. From the Detailed Log dialog, the detailed log can be viewed and saved it to a file. The Operator Comments dialog displays any notes entered by the operator for that test run. Here are samples from the three choices. Figure 6.8. SequenceReporterTM – Summary Test Report Dialog 78 Figure 6.9. SequenceReporterTM – Detailed Log Dialog Figure 6.10. SequenceReporterTM – Operator Comments Dialog 79 7 Multi-device Testing Multi-device testing is an advanced feature of the kDiagnostics® Host Tools. Multi-device configuration allows software tools running on a host computer to communicate with multiple devices under test. Each Host Tool (ValidationAssistantTM, SequenceRunnerTM, and SequenceReporterTM) provides the capability to select a Virtual Fixture (VF) and send test commands to the device connected to that fixture. See the specific sections for each Host Tool for details. 7.1 Multi-device Testing Equipment Virtual Fixture Set Up Example The test set up described in Figure 1 is a configuration for testing four devices simultaneously. Complete configuration information is provided for the 16-port Switch and Virtual Fixtures. 1. 2. 3. 4. 5. Connect the 16-port switch to the test computer‘s NIC. Connect VF-1‘s WAN port to the 16-port switch, repeat for VF-2, VF-3, and VF-4. Connect VF-1‘s LAN port to DUT 1, repeat for VF-2, VF-3, and VF-4. Enable power for the switch and each Virtual Fixture. Apply power to each DUT. Figure 7.1 Four-DUT Virtual Fixture Configuration 7.2 Software Installation The device under test must be running kDiagnostics® 2008.2 or later. kDiagnostics® must be running and the remote interface must be initialized. TheVirtual Fixtures feature eliminates the requirement to alter each DUT‘s default MAC Address and IP Address. 7.3 Properties File The kozioserver.properties file contains configuration data linking a virtual fixture to an IP Address. Verify that this information matches the network configuration. The file is located in the root installation folder. The default location is: ―C:\Program Files\Kozio‖. 80 The lines below are an example of the fixture to IP address declarations. If this file is altered, Kozio Server must be restarted. NumberOfFixtures Fixture1 Fixture2 Fixture3 Fixture4 = = = = = 4 192.168.1.200 192.168.1.201 192.168.1.202 192.168.1.203 7.4 SequenceRunnerTM SequenceRunnerTM provides a single instance user interface suitable for addressing all DUTs. SequenceRunnerTM executes a selected test sequence. Sample test sequences are provided in the ―examples‖ folder of the root installation directory. SequenceRunnerTM provides the ability to select a fixture and displays a status line at the bottom of the dialog box. Figure 7.2 SequenceRunnerTM with DUT Online 81 8 kHeader Use the utility kHeader to wrap a binary file with header information before sending it to kDiagnostics® on the DUT. This feature ensures that a corrupted file is not programmed into flash memory. The header of a wrapped file contains a CRC value for the binary image. kDiagnostics® will strip the header from the downloaded file and recalculate the CRC value for the file received. An error message is displayed if the file was corrupted during transmission. Use kHeader to wrap all files before transmitting them to the DUT. Usage is displayed below. Kozio kHeader v01 Usage: kHeader.exe -i INPUT-FILE -o OUTPUT-FILE -a DEST-ADDR -d DEST-TYPE Creates a binary file with a header for use with the Kozio TFTP program. -i <file-name> Use the specified file name as input -a <address> Address to store the image in the target -d <dest-type> Defines the type of memory in which the image will be stored: 0=Flash, 1=EEPROM, 2=RAM, 3=NAND -o <file-name> Use the specified file name for output Figure 8.1. kHeader – Usage Figure 8-2Figure 8-3 ValidationAssistantTM with DUT Online 82 Enter the ―version‖ command to see if the connection to the DUT is working properly. The command is then sent to the DUT. kDiagnostics® running on the DUT will respond with version and licensing information. The following example depicts a DUT offline error message. Figure 8-4Figure 8-5 ValidationAssistantTM 2.0 with DUT Offline 83 9 Troubleshooting 9.1 Timeout on command acknowledgement from DUT When running ValidationAssistantTM and the error message ―KozioServer: Timeout on command acknowledgement from Target‖ is displayed, this is indicative of a communications problem between KozioServerTM and DUT. Figure 9-1. Error – KozioServerTM: Timeout on command acknowledgment from DUT Here are a few troubleshooting tips: Make sure the DUT is powered on. From a Microsoft Command Prompt, ping the DUT to test the connection. Cycle power on the DUT in case kDiagnostics® is no longer communicating. Make sure that kDiagnostics® did not display a message on TeraTerm such as ―Warning: link is not up for PHY31‖ This indicates that the wrong port is being used or the network connection is down. The DUT will display over the serial connection the message ―Target/Server handshake successful‖ when the DUT is connected. Verify DUT and server IP address properties. kDiagnostics® will display remote communication properties on TeraTerm. KozioServerTM stores IP properties in the kozioserver.properties file. Make sure KozioServerTM is running. Under Windows, use the Start/Control Panel/Administrative Tools/Services to check KozioServer‘s status. Use Stop and then Start to restart KozioServerTM. This is required any time kozioserver.properties is modified. Check the Windows Firewall settings to make sure that ports 4333, 4334 and 1099 are not blocked. These are the port numbers listed in the properties file. It may be necessary to disable the software firewall for testing. 84 9.2 Windows Security Alert If a Windows Security Alert is displayed when running the RMI Server and the ―Name‖ of the program is ―Java(TM) Platform SE binary‖, select the ―Unblock‖ button. Figure 9-2. Error – Windows Security Alert To prevent this Alert from happening, follow the steps described in Section 2.3 to add the port to the Windows Firewall. 9.3 Windows Firewall Issues Windows XP Firewall blocks by default the UDP and TCP communications ports used by the Kozio Software applications. If error messages about running any client application are encountered, follow the steps in Section 2.3 to update the Windows Firewall settings. When the required ports are blocked, messages from the DUT are received be the host but blocked by the firewall. The client applications do not receive the expected messages. If the Kozio Host Tools do not receive messages, double check the Windows Firewall settings. 9.4 License Errors A license to use the Host Tools is required. If a license file is missing, the following message appears. Figure 9-3. Error – License file missing Contact the Kozio Sales Department to purchase a license or contact Technical Support if a license has been purchased, but there are technical issues. Go to www.kozio.com/license/ to request a new license file. 85 The license file cannot be modified. If the file is altered, the following error message appears. Figure 9-4. Error – License file invalid To correct an invalid license issue replace the corrupted license file with the original license file. Contact Kozio Sales or Technical Support if the problem cannot be corrected. 86 10 Best Practices, Acronyms & Glossary 10.1 Best Practices Here is a collection of items that should help overall efficiency using the Kozio Host Tools. Manufacturing Suites When creating a manufacturing test suite, create a kScript file that contains the entire test configuration and test suites that are needed to validate each unit under test. Store this script in a file with a *.ksc extension. Create a test sequence file (*.xml) which will connect to the DUT. Download the kScript file, and execute the newly created test suite. Using this method allows the tests executed on the DUT to be changed without changing the test sequence file. Use one file or multiple file to store various test scripts. Create one test script file for validating the UUT and another test script file for downloading images and updating memories (Flash, EEPROM, and CPLD). Using multiple files allows separate actions to be taken and enhances reuse of the test script efforts for other projects. 10.2 Acronyms ASCII CLI DUT DTD KSC RMI SLIP XML “American Standard Code for Information Interchange (ASCII) is a character encoding based on the English alphabet. ASCII codes represent text in computers, communications equipment, and other devices that work with text.” Command Line Interface Device Under Test Document Type Definition (DTD) is one of the XML schema languages used to detail the syntactical requirements of a given XML file type. The file extension used to denote Kozio kScript files. The Java Remote Method Invocation API, or Java RMI, is a Java application programming interface for performing remote procedure calls. The Serial Line Internet Protocol (SLIP) is an encapsulation of the Internet Protocol designed to work over serial ports. It is documented in RFC 1055. SLIP is often used with microprocessors, instead of using the Point-to-Point Protocol (PPP), due to its very small overhead. The Extensible Markup Language (XML) is a general-purpose markup language, much like HTML. It allows its users to define their own tags and enables the structured sharing of data. 10.3 Glossary Connection This describes the physical cabling between the host computer and DUT. The connection types may be a serial cable, Ethernet cable, or other type of supported 87 Cygwin Ethernet Host IP Address kScript Net Mask Serial Target connection. Linux-like environment for Windows making it possible to port software running on POSIX systems (such as Linux, BSD, and Unix systems) to Windows. See www.cygwin.com for additional information. “Ethernet is a family of frame-based computer networking technologies for local area networks (LANs). The name comes from the physical concept of the ether. It defines a number of wiring and signaling standards for the physical layer, through means of network access at the Media Access Control (MAC)/Data Link Layer, and a common addressing format. Ethernet is standardized as IEEE 802.3.” A host computer is any computer used to run the software tools. This is a typical computer running Windows or Linux operating systems. The host computer may be connected to a network or may be connected directly to one or more DUTs. Acronym for Internet Protocol address. IP is the lower-level protocol within TCP/IP that is used to send data between computers over a network of computers. An IP address is an assigned number used to identify a computer that is connected to a network through TCP/IP. An IP address consists of four numbers (each of which can be no greater than 255) separated by periods, such as 192.168.1.1. The scripting language interpreted by kDiagnostics®. A separate document that describes this scripting language is available. Typically, a subnet represents all the machines at one geographic location, in one building, or on the same local area network (LAN). Having an organization’s network divided into subnets isolates activities such as test stations. Similar in form to an IP address. An example of a subnet mask value is 255.255.0.0. This is the embedded device running kDiagnostics®, also called a device under test (DUT). NOTE: Quoted text is paraphrased from Wikipedia*. 88 11 Contact Information For additional support, contact Kozio: Web site: www.kozio.com E-mail: Technical Support: [email protected] Phone: Sales: +1 (303) 776-1356 x1 Technical Support: +1 (303) 776-1356 x2 Fax: +1 (303) 776-1357 License Registration: www.kozio.com/license/