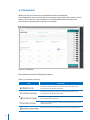
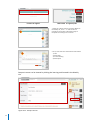
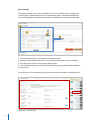
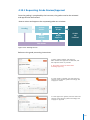
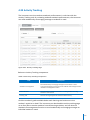
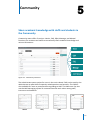
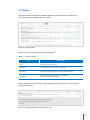
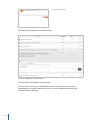
1
Learning Management System User Guide Ver 1.0 Contents 1 Overview 2 Dean 3 Course 4 Community 5 Counseling 6 Chatting 7 Grade 8 9 10 11 LMS Main Main Page Setup Color Theme Setup Dean 12 Dashboard 13 Activity Tracking 14 Encouragement Status 15 Course 16 Dashboard 17 Course Design 18 Virtual Lecture 19 Configuring the Virtual Lecture 20 Using Virtual Lecture 21 Virtual Lecture Attendances 2 22 23 Creating Media Lecture 24 Using Learning Contents Viewer 25 Activity Tracking 26 Campus Lecture 27 Creating Campus Lecture 28 Taking Students’ Offline Attendance 29 Bulletin 30 Creating Bulletin 31 Basic Bulletin 32 Media Bulletin 33 Evaluating Bulletin 34 Discussion 35 Creating Discussion 36 Individual Discussion 37 Group Discussion 38 Evaluating Individual Discussion 39 Evaluating Group Discussion 40 Assignment 41 Creating Assignment 42 Individual Assignment 43 Group Assignment 44 Plagiarism Detector 45 Evaluating Individual Assignment 46 Evaluating Group Assignment 47 48 3 Media Lecture Team Project Creating Team Project 49 Team Project 50 Evaluating Team Project 51 52 53 Creating Resource Survey 54 Creating Survey 55 Survey Result 56 Quiz (Quiz, Midterm, Final) 57 Creating Quiz 58 Online Quiz 59 Evaluating Online Quiz 60 Evaluating Offline Quiz 61 Course Audit 62 Notice 63 Creating Notice 64 Q&A 65 FAQ 66 67 Creating FAQ Template 68 Creating Survey Template 69 Creating Assignment Template 70 Course Evaluation 71 Creating Course Evaluation 72 Course Evaluation Result 73 74 75 4 Resource Grade Requesting Grade Review/Approval Activity Tracking 4 76 Community 77 Notice 78 FAQ 79 Q&A 80 81 Message 82 Received 83 Sent 84 Counseling 85 Chatting 86 Creating Chat Room 87 Chat Room 88 5 Creating Q&A Grade Overview 1 LMS provides personalized learning environment to support various educational policies of different users. The Learning Management System offers 3 default lesson types for instructors. By combining these lesson types, instructors can design a unique lesson plan, providing personalized and Blended Learning environment to students. Figure 1-1. LMS Main Page LMS offers learning tools and interface systems to build a collaborative learning environment for students and instructors to actively participate and evaluate learning process. LMS establishes the student and teacher-centered learning system and configures the environment for evaluation. LMS is composed of 6 menus. 6 1.1 Dean The Dean menu functions will vary depending on the user type (dean/hyper dean). The deans can manage their faculties' academic schedules and track instructors' activities. The hyper dean can manage all existing faculties' academic schedules. Figure 1-2. Dean 1.2 Course The Course menu displays all the courses the instructor is in charge of and the instructor can access to course information and lectures from this menu. The course menu offers course progress status and navigates the instructor to the lecture of a selected course so that the instructor can design a course. Figure 1-3. Course 7 1.3 Community The Community menu is composed of 4 sub menus to manage administrator, instructor and student communities. Instructors can view notices posted by the LMS administrator, as well as FAQs and Q&As posted in between the administrator and the students. The message tool is also available for communication purposes. Notice FAQ Q&A Message 1.4 Counseling Counseling menu manages counseling sessions registered by instructors in calendar format. Instructors can open counseling sessions, accept or reject students' counseling requests, and send counseling results. Figure 1-4. Counseling 8 1.5 Chatting Chatting menu provides chatting programs for LMS users to communicate in real time with each other. The Chatting menu provides users to instantly talk to many people at the same time by creating a chat room, or participating in existing a chat room. Figure 1-5. Chatting 1.6 Grade The Grade menu is where instructors submit students' grades, and for reviewers and approvers to view the grades. The reviewers and approvers can view students grades submitted by the instructors, so they can approve/reject them. The instructor can view the review/approval progress. Figure 1-6. Grade 9 LMS Main 2 Personalized Learning Environment Instructors can construct personalized main page by configuring course portlets to manage their entire courses’ status and the courses’ schedules as well as other academic schedules. Figure 2-1. LMS Main Page The main page can be separated into GNB and Contents Area. GNB, Global Navigation Bar, is configured to proceed to other services such as Portal, SIS, and LCMS. The Contents Area provides services for instructors to design their own personalized portlets. LMS also provides Menu Bar, where users can add additional menus. In Contents Area, instructors can design the main page to display their course status, academic schedules, or any other contents according to their needs, allowing convenient access of tools and contents . 10 Table 1. 기능별 버튼 소개 GNB Contents Area Figure 2-2. Main Page Composition The main page provides following functions. Table 2-1. Main Page Functions Button 11 Title Description Home Click to move to LMS Home Page. English/العربية Click to convert language (English/Arabic). Portal Click to move to portal. LCMS Click to move to LCMS. SIS Click to move to SIS Manual Click to download user manual. The manual will vary according to the user type. Setting Click to change LMS color theme and/or move to portlet setting page. Log-In/Log-Out Click to log in to or log out of LMS Portlet Setting Click to configure personalized portlets to the main page. 2.1 Main Page Setup Users can construct personalized & customized main page with functions available in the 'Setting' located in the GNB. 1.This screen will appear when a user logs in to the LMS for the first time. Click the Setting button located in the GNB to move to the Setting page. 1 2. In the Setting page, click the Portlet tab to view and configure portlet settings. 2 3 3. Select the portlet to add from the ‘Add Portlet’ panel. Once you click the portlet, the portlet box will be displayed on the screen. There are 4 types of portlets available. 1) Notice 2) Q&A 3) Learning Status 4) To Do List 4. The users can edit the portlet by clicking the 'Edit' icon. The course list the users can access will vary depending on the user type. 1) Dean: Can access the courses of his own faculty. 2) Hyper Dean: Can access all exisitng courses. 4 5. Click apply to save the selected settings, and saved portlets can be used in main page. 5 6. To display portlet, either click the ‘+’ icon on the main page or put a mouse over the bottom part of the main page to expose the Portlet List. Click the + button of the portlet box to present the corresponding portlet to the main page. 6 6 12 7. The selected portlet can be moved around by selecting and dragging the portlet to the desired location. The portlet can be deleted from the main page by clicking the ‘x’ button located on top right of the portlet. Please note that the portlet is deleted only from the main page. If wish to delete it from the LMS, go to the Portlet Setting menu to delete. 7 2.2 Color Theme Setup Users can set the color theme of the LMS in the Setting page. 1 1. Click the Setting icon located in the GNB area. 2. On the Setting page, click the Color tab to view color settings. 2 3. Select the desired color, and the GNB color will change accordingly. The colors available are listed below: 3 1) 2) 3) 4) 4 13 Dark Cyan White Blue Beige 4. The color theme in LMS can be changed regardless of number of times changed, and page location. 3 Dean Manage faculty's academic schedules, and track course activities. Depending on the user type (dean/hyper dean), the users can manage the faculty's academic schedules and confirm if instructors have read the academic schedules. Figure 3-1. Faculty’s Academic Calendar Also, depending on the dean status, users can either activity track their own faculty, or activity track all faculties. Faculty Dean Faculty Hyper Dean Dean = Own Faculty Faculty Faculty Hyper Dean = All Faculty 14 3.1 Schedule The deans can manage academic schedules using the calendar in the Schedule menu. The Schedule menu offers following information. Table 3-1. Schedule Information Title Description Date Displays the academic schedules added to the calendar by the dean. More The calendar can only display 3 schedules per day. Click the 'More' button to view all the schedules added to the date on a pop-up window. Schedule Details You can click the highlighted area to view the full schedule details. Once the full details been viewed, the title will be displayed on the highlighted area of the calendar. To add academic schedule, follow the instructions below. 1. Click the date on the calendar to add schedule. 1 2. On the provided pop-up window, enter the following information. 1) Title 2) Date 3) Contents 2 3 3.Click the ‘Ok’ button to add the schedule to the calendar. Once the schedule is added, deans and the hyper dean can edit or delete the schedule, and view if the instructors checked the schedule, from the schedule details window. 1. Click the highlighted area of the schedule to view the details. 1 15 2. The users can view if the instructors have read the schedule details, from the View Status section. 2 3. Click the ‘Edit’ button to edit the schedule. 3 4 4. To remove the schedule from the calendar, click the ‘Delete’ button. ※ The View status of the instructors will be reset, after the schedule have been edited/deleted. 3.2 Activity Tracking Deans and hyper dean can track the instructors' activities in the Activity Tracking menu. To track instructors’ activities, follow the instructions below. 1. Dean can track activities of his faculty's instructors. Click the 'Activity Tracking' menu to view the faculty's instructors with their courses and activities. 1 2 2. Users can also view the instructor’s course activities by using the search function. ※ Hyper dean can track all faculties instructors. Therefore, the hyper dean will be able to search the instructors by the faculty type. 3 3. Click the ‘Excel Download’ button to download the activity tracking list into Excel file. 16 3.3 Encouragement Status The users can view the history of instructors' encouragement messages sent to students. The Encouragement Status menu is available only to deans and hyper dean. To view the instructors' encouragement messages, follow the instructions below. The dean can check the status of his faculty's instructors' encouragement messages by clicking the 'Activity Tracking' menu. List of instructors with their courses will be displayed, and the dean can view how many encouragement messages instructors had sent to students per learning tool. 2. Users can also search for the instructor view the encouragement with the search menu. 2 ※ Hyper dean can view encouragement status all faculties' instructors. Therefore, the hyper dean will be able to search the instructors by the faculty. 3 17 3. Click the ‘Excel Download’ button to download the encouragement status list into Excel file. Course 4 Convenient Management of Learning History / Learning Progress Tracking and Interactive Learning Environment. LMS provides personalized learning & teaching environment equipped with various learning tools to the instructors so that they can create interactive educational curriculums, suitable to their own teaching style. Figure 4-1. Learning Tools Available in LMS Instructors can view students' learning progress, including their attendances, participation level, and posts created. LMS can also select students in need of performance review so the instructors can send students encouraging messages via LMS message, email, and/or SMS. Figure 4-2. Students’ Learning Progress 18 4.1 Dashboard When you click the course name, Dashboard tab will be displayed. In the dashboard, you can check the course's lecture plans by the day, week, and the month. The To-Do List is also available in the Dashboard so that instructors can easily find out upcoming learning tools to complete. Figure 4-3. Dashboard The dashboard provides following information. Table 4-1. Dash Board Functions Title Description Displays learning tools added to the current week. Click the title of the learning tool to view detailed information. Displays learning tools that has been completed. Click the title of the learning tool to view detailed information. Displays learning tools currently in progress. Click the title of the learning tool to view detailed information. Displays upcoming learning tools. Click the title of the learning tool to view detailed information. Displays the learning tools added to the course by the month/week/day. 19 When accessing a learning tool in the Course menu, a new tab will be created to view each learning tool's contents. The tabs created will be located on the Tabs bar, allowing the users to access to the desired learning tools conveniently. Table 4-2. Functions Available in the Course Menu Button Title Description Tab Controller When learning tools are selected, the tabs will be displayed, and you can navigate the tabs with the controller. Course Design Click to move to Course Design page of the corresponding course. Displays all the learning tools as icons provided by the LMS. The Learning Tools panel is located in the right side of the screen, and cannot be closed. Click the learning tool icon to view the complete list of the learning tool created for each course. Tools Learning tools provided by the LMS are: 1) Syllabus 2) Virtual Lecture 3) Media Lecture 4) Bulletin 5) Team Project 6) Assignment 7) Team Project 8) Resource 9) Survey 10) Quiz 11) Attendance Community Notice, Q&A, and FAQ of current course. Click the icon to move to the corresponding page. Template Manages current course's survey and assignment templates. Click the icon to move to the Template page. Weekly List Click the Edit button to configure learning tools for each week. Weekly List Learning Tool Click the Edit button to enter information and set up details for each learning tool. Semesters Lecture Plans Displays semester lecture plans by the month, week, or day. Click the icons to change. Grade Displays grades of students enrolled in current course. Click to move to the Grade page. Activity Tracking Displays learning activities done by the students enrolled in current course. Click to move to the Activity Tracking page. Course Evaluation Manages and displays the students' course evaluations. Click to move to the Course Evaluation page. 20 4.2 Course Design The Course Design program is used to create weekly lecture plans with various learning tools provided by the LMS. The Course Design is composed of Syllabus, Evaluation Plan, and Lesson Planner. Figure 4-4. Course Design : Lesson Planner 1 1Click the ‘Course Design’ icon, located left of the Learning Tools panel, to proceed to the Course Design page. In that page, you can create the followings: 1) Syllabus 2) Evaluation Plan 3) Lesson Planner 2 2. Add course information in the Syllabus tab. ※ Not required to complete the Syllabus before creating the Lesson Planner. 21 3 3. Enter the evaluation ratio of each learning tools in the Evaluation Plan tab. The total percentage cannot exceed 100%. Students will be graded according to the ratio entered in this tab. ※ Not required to complete the Evaluation Plan before creating the Lesson Planner. 4 5 4. Configure learning tools to use per each week in the Lesson Planner tab. 6 5. Select the week to configure, and detailed settings of the week will appear below. 6. If additional courses are needed than the weeks provided, you can add extra classes by drag & dropping the ‘Add extra classes’ icon to the desired location. The added extra class act as a additional week and it can be configure the same way as the rest. 7. Please select the lesson type. Once the lesson type is selected, default learning tools will be added to the lesson plan. These learning tools can be edited/deleted, if not needed. 7 8. You can drag and drop the learning tools from the Learning Tool section. Added learning tools can be edited/deleted if wish to. Click the ‘Save’ button once everything is added, and you can view the added learning tools' learning period and evaluation plan. 8 ※ Please complete the learning tool by entering the required information. Information can be added by clicking the Edit button located in the next to the added learning tools of each week. . 22 4.3 Virtual Lecture Virtual lecture is a online lecture program, where lecture are held in a virtual class. The lectures can be created by completing the settings and entering contents in the Course’s Weekly List. The real-time virtual lectures are recorded and automatically saved to LCMS, and the contents can be reused for the later use. Figure 4-5. Virtual Lecture Settings and Contents Virtual Lecture’s settings and contents are explained below: Table 4-3.Virtual Lecture의 Basic Information Title 23 Description Title Title of the Virtual Lecture. This button is activated on the scheduled virtual lecture so that users can enter the virtual lecture room by clicking the title of the virtual lecture. Date/Time Displays the period of start/end date and time for a virtual lecture. Score Setting Displays possible points students can obtain by attending the lecture. Entrance Accessibility Time Displays the time students are permitted to enter to attend the lecture. Description Displays the detailed descriptions on a lecture entered by the instructor. Attachment Displays attachments available, which have been registered by a user. Click to download the desired attachments. Attendance Displays the number of attending students. Click the Attendance button to display the full attendance list. . Table 4-4.Virtual Lecture Additional Setting Title Substitute Instructor Description Displays if substitute instructor will be attending this lecture. ※ The substitute instructor cannot configure this setting. Displays the lecture's recording types set by a user. Recording Type The recording types offered by the LMS are: 1) All (Video + Audio + Lecture ) 2) Video + Audio 3) Audio + Lecture Replay Displays Replay availability in terms of the recorded and saved real-time virtual lecture. If Replay is set to 'Yes', then replay period must be set. . Notification Displays which tools the instructor has chosen to send notification. When setting to send notification, the message will be sent 1day, 3hours, and 5minutes prior to the lecture. 4.3.1 Configuring the Virtual Lecture To use the virtual lecture, instructor must complete the settings and contents. You can register the lecture by clicking the '+' button in the tab or ‘Edit‘ button located in the weekly list. However, the '+' button will disappear once the lecture's added. + button to register Edit button to register/edit 1. After the virtual lecture has been added to the weekly list, click '+' or ‘Edit' button to proceed to the lecture information page of virtual lecture. 1 1 24 2. First, enter the basic information listed below. 2 1) 2) 3) 4) 5) 6) Title Date/Time Score Setting Entrance Accessibility Time Description Attachment 3. Next, enter the additional settings listed below. 3 1) 2) 3) 4) 4 Substitute Instructor Recording Type Replay Notification 4. After entering all the information, click 'Save' button. Virtual lectures can be viewed by clicking the learning tool located in the Weekly List. Figure 4-6. Virtual Lecture Once the virtual lecture has been added, it will be classified to 3 status types according to date and time defined by an instructor. 25 Table 4-5. Virtual Lecture Classification Title Description The lecture has not started yet, therefore, is not available. The lecture has started and is in progress. To enter the lecture, click the title or the status button. The lecture has ended, and is no longer able to enter. 4.3.2 Using Virtual Lecture While the virtual lecture is open, users can click the title of the lecture or entrance button to enter in to the virtual lecture room. Figure 4-7. Virtual Lecture Room While in the virtual lecture room, instructor can view the entered students list, chat with the students in real time, and capture feature to share the current screen with students. Real-time Chatting Function Current Screen Capture 26 The virtual lecture room is composed of 4 tabs: Document, Whiteboard, Video, and Share. The detailed descriptions are as belows. Document Tab Document tab contains all the documents used in the lecture. The documents added to this tab can be downloaded to be utilized in the corresponding virtual lecture and to be shared with students. Document types available to be used in the lecture room are: MS Office documents(Word, Excel, PowerPoint), PDF, Image and other document type files. Below are the Document tab instructions. 1. Click the document icon to upload the document files. ※ If uploaded file is set to be shared, the file will be shared with students. ※ Up to 9 files can be uploaded per tab, and if more files are uploaded, then new tab will be created. 1 2. The instructor can now proceed the lecture with the uploaded document files. 2 ※ Instructor can open the documents on the screen for students to see. (Student's screen only displays what instructor opens) ※ Documents can be opened and be moved from previous to next by using the arrows, or by clicking the specific document title desired to open. Instructor can also use annotation tools to accentuate and/or add more information during the lecture on the purpose of stimulating students’ concentration on the lecture . Below annotation tools are available in the virtual lecture. Table 4-6 Document’s Annotation Tools. Button 27 Title Description Pen Tool Draw lines by moving the mouse around. Can change the lines in the Tool Settings. Drawing Line Settings Contains 14 different line types to be used in pen tool. Table 4-6 Document’s Annotation Tools. Button Title Color Description Displays pen colors available . Pen Thickness Displays pen thicknesses. Undo Click to undo the change. Redo Click to redo the change. Erase Erase the selected by moving the mouse. Erase All Erases all the drawings on the current screen. Whiteboard Tab Whiteboard tab is a virtual whiteboard that can also be used to capture the user's current screen and edit using the annotation tools. The screen capture is mostly used to capture the whole screen, but can also capture selected parts. Whiteboard annotation Capture Area The annotation tools can also be used in the whiteboard, and the tools are explained below. Table 4-7. Whiteboard’s Annotation Tools Button Title Pen Tool Drawing Line Settings Description Draw lines by moving the mouse around. Can change the lines in the Tool Settings. Contains 14 different line types to be used in pen tool. 28 Table 4-7. Whiteboard’s Annotation Tools Button Title Color Description Displays pen colors available . Pen Thickness Displays pen thicknesses. Undo Click to undo the change. Redo Click to redo the change. Erase Erase the selected by moving the mouse. Erase All Erases all the drawings on the current screen. Video Tab The video tab is displayed when you first enter into the virtual lecture room. You can configure screen display, video and audio settings in this tab. To configure settings, click the Device Manager icon or right click on the video screen. How to configure the video screen is as below. 1 2 3 1. Displays user list currently attending the virtual lecture, and view the instructor and students' individual settings. 2. Displays camera list available in the PC. 3. Displays the video quality settings. 4. Displays the audio quality settings. 5. Displays the microphone quality settings. 4 5 Instructor can also invite up to 3 students to be viewed on the video. The instructions on the settings for inviting students and video layouts are explained below. 29 1. Go to Layout page to select the desired video layout. 1 ※ Maximum of 4 video windows are available. 2. Right click the empty video window to invite students to be viewed on the corresponding video window. 3 ※ Can appoint students‘ positions when inviting students. Share Tab Share tab is used when the instructor wants to share his screen with students. The share tab provide 5 types of sharing functions which are Desktop, Application, Area, Web, and Video. Table 4-8. Sharing Types Title Description Desktop Sharing Shares the whole PC of the instructor. Application Sharing Shares application the instructor is currently using with the students. Area Sharing Shares selected area which the instructor chose to share with the students. Web Sharing Shares web page using the URL. Video Sharing Share video contents with the students. The annotation tools are also used in the share tab to stimulate students’ concentration to the virtual lecture. Following annotation tools used in the virtual lecture room are available: 30 Table 4-9. Share Tab’s Annotation Tools Button Title Pen Tool Drawing Line Settings Color Description Draw lines by moving the mouse around. Can change the lines in the Tool Settings. Contains 14 different line types to be used in pen tool. Displays pen colors available . Pen Thickness Displays pen thicknesses. Undo Click to undo the change. Redo Click to redo the change. Erase Erase the selected by moving the mouse. Erase All Erases all the drawings on the current screen. Break Professor can pause the lecture. During the break virtual lecture will stop recording. There are 3 types of break which are prayer time, practice time, break. Break 31 1 1. First, click the break and choose the options. 1) Break types: Prayer time, Practice time, break 2) Time: 5-30 3 2. Next, the image will display the lecture tab. 2 3. If professor wants to start the lecture before the break ends, then click ‘resume’. Otherwise the lecture will be started after the break time 4.3.3 Virtual Lecture Attendances After the lecture, the instructor can manually complete the students’ attendance status, and the completed attendance status will be automatically reflected to the Grade. The instructions on the attendance status registration are explained below: 1. After the lecture, click the ‘Attendance’ button to display a pop up window. 1 2 32 2. The attendance window displays students' learning status, and after checking their progress, the instructor can complete the attendance registration.. The attendance data will automatically be reflected in Grade. 4.4 Media Lecture Instructors can create online learning sessions for students to participate individually, regardless of time and space. The media lecture can be created by entering information required with the weekly settings in Course Design. Figure 4-8. Media Lecture Information Media lecture is composed of 2 types of functions; basic functions and additional functions. Media lecture’s settings and contents are explained below. Table 4-10. Media Lecture의 Basic Information Title Description Content Name (ID) The lecture materials are imported from the LCMS. This field displays the LCMS content title and ID of the lecture material. Title Displays title of the lecture. The users can click the title to view the lecture materials regardless of the actual lecture date. Date/Time Displays the scheduled date and time of the lecture. Students can only obtain their points within this time frame. Criteria Setting Displays possible points students can obtain by attending the lecture. Description Displays lecture descriptions entered by the instructor. Attachment Displays attachments available which are registered by user. Click to download the attachments. 33 Table 4-11. Media Lecture Additional Setting Title Admitted Learning Time Description Displays time admitted by attending the lecture. The admitted learning time is set by the instructor. 4.4.1 Creating Media Lecture To use the media lecture, instructor must complete the settings and contents. You can register the lecture by clicking the '+' button in the tab or ‘Edit' button located in the weekly list. However, the '+' button will disappear once the lecture's added. + button to register Edit button to register/edit 1. After the media lecture has been added to the weekly list, click '+' or ‘Edit' button to proceed to the lecture information page to complete the settings and contents. 1 1 2 34 2. Import and upload courseware from the LCMS by clicking the ‘Attachment’ button located left of the Content Name field. 3. After the courseware is uploaded, enter the basic information below: 3 1) 2) 3) 4) 5) Title Date/Time Criteria Setting Description Attachment 3 Next, enter the additional setting below: 3 1) Admitted Learning Time 4 4. When all the information is entered, click the ‘Save’ button. Media lectures can be viewed by clicking the learning tool located in the Weekly List. Figure 4-9. Viewing Media Lecture Once the media lecture has been added, it will be classified to 3 status types according to date and time set by an instructor. 35 Table 4-12. Media Lecture Classification Title Description The lecture has not started yet, therefore, is not available for students to participate. The lecture has opened and is in progress. Click the title or the status button to enter the lecture, and student attendance will be applied. The scheduled lecture period has ended. Users can still enter the lecture by clicking the lecture title, but student attendance will not be applied. 4.4.2 Using Learning Contents Viewer To enter the media lecture, click the lecture title or the ‘Enter’ status button. Once entered, the Learning Contents Viewer will be displayed to proceed the online learning. Figure 4-10. Learning Contents Viewer The learning contents views contains following functions. Table 4-11. Learning Contents Viewer Functions Button Title Learning Progress 36 Description Click to view learning progress window, containing course information, the total duration of the learning content, the last studied date, and the learning progress. Table 4-13. Learning Contents Viewer Functions Button Title Description Displays Table of Contents for the learning content and Bookmark page. TOC displays list of contents in order of the current learning content. Bookmark only displays the list of contents selected as favorites by an user. Please note that two functions cannot be selected at the same time. TOC/Bookmark Can set/change the theme color. There are 4 colors available. Theme Settings The colors are same as the LMS colors. Choose to show and hide the table of contents with ‘-’ and ‘+’ buttons. Show/Hide Table of Contents Click ‘-’ button to hide the table of contents and expand the contents viewing screen. Click ‘+’ button to show the table of contents and reduce the contents viewing screen. Table of Contents Controller Click the arrows to navigate the table of contents. 4.4.3 Activity Tracking Media Lecture offers Activity Tracking tool. Activity Tracking automatically monitors students' attendance and learning progress, eliminating the need for the instructors to manually complete the attendance. 1. Click the 'Activity Tracking' button located on the bottom right. 1 2. Instructors can view each student’s learning progress in terms of media lecture. 2 2 The Activity Tracking offers following information: 1) 2) 3) 4) 5) 6) Week Title Period Admitted Learning Time Actual Learning Time Learning History 37 4.5 Campus Lecture The instructor can inform offline lectures to students in the campus lecture. The campus lecture can be created by entering information required with the weekly settings in Course Design Figure 4-11. . Campus Lecture Information The Campus Lecture settings and contents are explained below Table 4-12. Media Lecture Basic Information Title Description Title Displays title of the lecture. Date/Time Displays the scheduled date and time of the lecture. Criteria Setting Displays possible points students can obtain by attending the lecture. Description Displays lecture descriptions entered by the instructor. 4.5.1 Creating Campus Lecture To use the campus lecture, instructor must complete the settings and contents. You can register the lecture by clicking the '+' button in the tab or ‘Edit' button located in the weekly list. However, the '+' button will disappear once the lecture's added. 38 + button to register Edit button to register/edit 1. After the campus lecture has been added to the weekly list, click '+' or ‘Edit' button to proceed to the lecture information page to complete the settings and contents. 1 1 2. First, enter the basic information listed below. 2 1) 2) 3) 4) Title Date/Time Criteria Setting Description Campus Lecture can be viewed by clicking the learning tool located in the Weekly List. Figure 4-12. Campus Lecture 39 Once the Campus lecture has been added, it will be classified to 3 status types according to date and time defined by an instructor. Table 4-13. Campus Lecture Classification Title Description The lecture has not started yet, therefore, is not available for students to participate. The lecture has opened and is in progress. The instructors can take students’ offline attendances. The scheduled lecture period has ended. The instructors can post the students’ offline attendances. 4.5.2 Taking Students’ Offline Attendance Once the lecture is open, the instructor can take offline attendance with the attendance sheet provided by the campus lecture learning tool of the LMS. The instructor can choose to manually take the attendance in the LMS, or complete the attendances on the Excel file, and upload the file. Entering Attendance using Excel Entering Attendance to LMS The instructor can upload the attendance by entering status on the provided Excel file from LMS. 1. Click the 'Download' button to download the excel file. 1 ※ Can only use the excel file provided by the LMS. 1 1 40 2. Complete the attendance by filling in the status on the Excel file. 2 ※ Only type ‘Y’ if student is present, or ‘N’ if absent. 3. After saving the changes, click the 'Upload' button to upload the file. The attendance will be applied to LMS. 3 The instructor can manually take students’ attendances in the LMS. 1. Select either ‘Present’ or ‘Absent’, depending on the student’s status. ※ Must select either present or absent. 1 2. After completing the attendances, click the ‘Save’ button to apply the data. 2 41 4.6 Bulletin Instructors can utilize bulletin function included to Forums. Bulletin offers basic and media type, and bulletin can be created by entering information required for the weekly settings through Course Design. Figure 4-11. Bulletin Information Bulletin’s settings and contents are explained below. Table 4-16. Bulletin Basic Information Title 42 Description Title Displays the title of the post on the bulletin. Description Displays the detailed information of the bulletin post entered by the instructor. Criteria Setting Displays possible points students can obtain by completing the bulletin. Date/Time Displays the scheduled date and time students can participate in. Attachment Displays attachments available. Click to download the attachments. Grade Given Displays if grade is given or not. To evaluate students, click the ‘Evaluate’ button and move to the grade page of the corresponding bulletin. Attachment Type Displays attachment types students can upload, set by the instructor. Only displayed attachment types are available to be uploaded. 4.6.1 Creating Bulletin The bulletin can be created by entering information required in the weekly list You can register the lecture by clicking the '+' button in the tab or ‘Edit' button located in the weekly list. However, the '+' button will disappear once the bulletin information is added. Bulletin offers basic and media types, and the bulletin type can be set in the Bulletin’s basic information settings. + button to register Edit button to register/edit 1. After the bulletin has been added to the weekly list, click '+' or ‘Edit' button to proceed to the bulletin information page. 1 1 2 2. Enter the basic information shown below. 1) 2) 3) 4) 5) 6) 3 Type : Select Media or Basic Title Description Attachment Forum Availability Notification 3. Then, enter the additional information shown below. 1) 2) 3) 4) 5) 6) 7) Allow Students to write Allow reply Private Attachment Attachment Size Number of Attachment(s) Attachment Type 43 Depending on the selected bulletin type, additional settings need to be configured. For example, the basic bulletin type needs to set by the instructor if uploading attachment is allowed, and if it is which file types are allowed. The media bulletin type must contain image type attachment, and instructor must configure setting accordingly. Bulletin Type - Basic Bulletin Type - Media 4. Select if you want to import the past bulletin data from previous semesters. 4 ※ Import Past Data: Importing bulletin posts, comments, and attachments posted by the students from the previous semesters. Import Past Data options are shown below: 1) All : Articles + Comments + Attachments 2) Select : Articles + Comments + Attachments ※When choosing from Select, articles are checked as a default, and cannot be unchecked. ※ When choosing from the Select, you can choose single or multiple items. 5. Select if the bulletin will be graded or not. If it is for grade, select Yes and ‘Evaluate’ button will be created, where instructor can evaluate students. The ‘Evaluate’ button will be activated after completing the scheduled date/time of the corresponding bulletin. 5 6 44 6. When all the information is entered, click the ‘Save’ button. Bulletin can be viewed by clicking the learning tool located in the Weekly List. Figure 4-12. Bulletin Once the bulletin has been added, it will be classified to 3 status types according to date and time set by an user. Table 4-17. Bulletin Classifications Title Description The bulletin is not open yet, therefore, is not available. The bulletin is open and is in progress. Depending on the settings made, students are permitted to upload: 1) Posts 2) Comments 3) Attachments The bulletin is closed, and is no longer available since the scheduled date/time has been over. User can check the bulletin posts written by the students, but not able to write a new bulletin post. If the bulletin was for grades, instructor can evaluate students by clicking the ‘Evaluate’ button to proceed to the corresponding grade page. 4.6.2 Basic Bulletin The basic bulletin is used for students to conduct simple tasks, and like any other learning tools, and users can post bulletins only when the status is open. 45 Figure 4-13. Basic Bulletin When the bulletin status is open, instructor and students can access and post threads, and reply to any registered posts on the bulletin contents. Users can also download and view the attachments and the past bulletin contents run in previous semesters depending on the instructors setting. 1. While the bulletin is open, users can post bulletin contents by clicking the '+' button. ※ The instructor can restrict students from posting threads and/or replying. ※ The instructor can post and reply regardless. 1 2. Users can also view and reply to others' posts. 2 3. And download attachments within the scheduled date/time of the corresponding bulletin. 3 2 46 4.6.3 Media Bulletin When media bulletin is used, the media window is displayed on the bottom so students can post contents with images. Figure 4-14. Media Bulletin While the bulletin is open, users can post contents including images and view other's contents. They can also reply and view others comments as well. The images posted on the bulletin can also be downloaded, and if the past contents are imported, then past contents can also be viewed. 1. While the bulletin is open, users can post bulletin contents by clicking the '+' button. ※ The instructor can restrict students from posting and/or replying. ※ The instructor can post and reply regardless. 1 47 2. While the bulletin is open, users can view the posts via pop-up window, and can reply comments on the corresponding bulletin posts. 2 3. Users can also download attachments. 3 4.6.4 Evaluating Bulletin Once the bulletin is closed, instructor can evaluate students based on the bulletin posts. Click the ‘Evaluate’ button to evaluate students. The evaluations can be edited until the grade submission. The instructor can also send encouraging messages to students who didn’t participate. Figure 4-17. Evaluation Page 1. Click the ‘Evaluate’ button to proceed to the evaluation page. 1 48 2. On the students list, click the number under the Post section to view students' posts via popup window. 2 3. The instructor must check the boxes in front of the students’ names to enter points to grade students. Enter the points in the boxes provided under the Grade section. 3 4 4. After entering all the points, click the ‘Save’ button. To edit, check the box located in front of the students’ names, edit, then click the ‘Save’ button to finish. 5 Instructors can send encouraging messages to students with low grades via sms, email, and/or LMS message, by clicking their name. 5 49 4.7 Discussion The discussion tool, located under the Forums, is used to create group and individual discussion sessions. Discussion can be created by entering information required for the weekly settings in Course Design. Figure 4-15. Discussion Settings and Contents Discussion settings and contents are explained below: Table 4-18. Discussion Information Title 50 Description Title Displays the title of the post on the discussion Description Displays the detailed information of the discussion entered by the instructor. Criteria Setting Displays possible points students can obtain by completing the discussion. Date/Time Displays the scheduled date and time students can participate in. Attachment Displays attachments available. Click to download the attachments. Grade Displays if grade is given or not. To evaluate students, click the ‘Evaluate’ button and move to the grade page of the corresponding discussion. Attachment Type Displays attachment types students can upload, set by the instructor. Only displayed attachment types are available to be uploaded. 4.7.1 Creating Discussion Discussion can be created by entering information required for the weekly settings. You can register the discussion by clicking the '+' button in the tab or ‘Edit‘ button located in the weekly list. However, the '+' button will disappear once the discussion is created. Discussion offers group settings, and group and individual discussion sessions are created according to the setting. + button to register Edit button to register/edit 1. After the discussion has been added to the weekly list, click '+' or ‘Edit' button to proceed to the discussion information page. 1 1 2 2. Enter the basic information shown below. 1) 2) 3) 4) 5) 3 Title Description Attachment Forum Availability Notification 3. Enter the additional information shown below. 1) 2) 3) 4) 5) 6) Allow reply Private Attachment Attachment Size Number of Attachment(s) Attachment Type 51 4. Configure group settings. Depending on the group settings, either group discussion or individual discussion is created. The group settings are explained below: 4 ※ There are 2 ways to create groups. Create New Groups Reuse the Registered Groups Create New Groups You can create new groups when there is no pre-existing groups, or if new group configurations are needed. 1 2 3 1. Enter the group name to use, and click the ‘Create’ button. 2. Click the group name to assign students per group. 3. Appoint group leaders. (Only 1 leader per group). 52 Reuse Groups The group settings can be also imported from the Forums(Discussion, Assignment, Team Project) registered within the corresponding course, and if existing group is selected, then all the data entered before saving will be deleted. 2 3 4 1 1. To use existing group, click the ‘Reuse Template’ button. 2. All the groups created under the course will be displayed on a pop-up window. 3. Click the group name to view group configuration. 4. Click the Reuse button to use the group, and the group template will be added to the discussion. 5 5. Once the group settings are complete, select if you want to import the past discussions from previous semesters. ※ Import Past Data: Importing discussions, comments, and attachments posted by the students from the previous semesters. Import Past Data options are shown below: 1) All : Articles + Comments + Attachments 2) Select : Articles + Comments + Attachments ※When choosing from Select, articles are checked as a default, and cannot be un-checked. ※ When choosing from the Select, you can choose either single or multiple items. 53 6. Select if the discussion will be graded or not. If it is for grade, select Yes and ‘Evaluate’ button will be created, where instructor can evaluate students. The ‘Evaluate’ button will be activated after completing the scheduled date/time of the corresponding discussion. 6 7 7. When all the information is entered, click the ‘Save’ button. Discussion can be viewed by clicking the learning tool located in the Weekly List. Figure 4-19. Discussion Once the discussion has been added, it will be classified to 3 status types according to date and time. Table 4-19. Discussion Classifications Title Description The discussion is not open yet, therefore, is not available. The discussion is open and is in progress. Depending on the settings made, students can: 1) Post comments 2) Post attachments 3) Be in groups 54 Title Description The discussion is closed, and nothing can be posted. If the discussion was for grades, instructor can evaluate students by clicking the ‘Evaluate’ button. 4.7.2 Individual Discussion If the group settings are not used, then individual discussion will be created. Once the discussion is open, students can add discussion posts by clicking the ‘+’ button in the discussion page. Figure 4-20. Individual Discussion Once the discussion is open, instructor and students can post and view other discussions and also reply/comment and view others’ discussion posts. Users can also download attachments, like and/or recommend posts. By using the like/recommend functions, users can select which posts to read, and also distinguish users preferences in real time. If the instructor chose to import the past data, then students can also view the past discussion contents of previous semesters. 1 1. After the discussion has been added to the weekly list, click '+' or ‘Edit' button to proceed to the discussion information page. ※ Depending on the instructor's setting students may or may not be able to reply toward others’ posts. 55 2 2. While the discussion is open, users can view each other's posts and reply to them. 3 4 3. Users can also download available attachments. 4. Like and/or recommend others’ posts. 2 4.7.3 Group Discussion If the group settings are used to create discussion, then group discussion session will be created. Once the discussion is open upon the scheduled date/time decided by the corresponding instructor, discussion session per group will be created like shown below. Figure 4-21. Group Discussion 56 Group members can start the discussion in the assigned session once the discussion is open. The Instructor can enter the group discussions to view progress, discuss and comment. The instructor can also download available attachments and view the past discussions from previous semesters if available. 1 1. Click the Enter button to enter into the desired discussion group. 2. Once entered, click the ‘+’ button to post discussion. 2 ※ Instructor can restrict students from replying and commenting on others’ posts. While the discussion is open, the instructor can: 3. View students discussions and reply comments, 3 4. Download attachments, 4 5 5. Like and recommend discussion posts written by other students within the discussion session. 3 4.7.4 Evaluating Individual Discussion Once the discussion is closed, instructor can evaluate students based on the discussion. Click the ‘Evaluate’ button to evaluate students. The evaluations can be edited until the grade submission. The instructor can also send encouraging messages to students who didn’t participate. 57 Figure 4-22. Individual Evaluation Page 1. Click the ‘Evaluate’ button to proceed to the evaluation page. 1 2. On the students list, click ‘Total Post’ number under the Post session to view students' posts via pop-up window. 2 3 58 3. The instructor must check the boxes in front of the students’ names to enter points to grade students. Enter the points in the boxes provided under the Grade section. 4 4. After entering all the marks, click the ‘Save’ button. To edit, check the box located in front of the students’ names, edit, then click the ‘Save’ button to finish. 5 5 Instructors can send encouraging messages to students with low grades via sms, email, and/or LMS message, by clicking their name. 4.7.5 Evaluating Group Discussion Once the group discussion is closed, instructor can evaluate students based on the discussion. Click the ‘Evaluate’ button to evaluate students. The evaluations can be edited until the grades submission. The instructor can also send encouraging messages to students who didn’t participate. Figure 4-23. Evaluation Page 59 In group discussion, there are two ways to evaluate students. Group Evaluation Individual Evaluation Group Evaluation Group Evaluation allows instructor to give same grade to all members of the group. However, the instructor can manually change grades either per group or individual if wish to. 1. Click the ‘Evaluate’ button to proceed to the evaluation page. 1 2 2. Enter the students' points in the box provided next to the Group Evaluation field, and click the Group Evaluation button located below. The same points entered will then be filled in to all group members' grade boxes. 3. If wish to edit grades individually, check the box located in front of the student, edit, and then click the ‘Save’ button. 3 60 Individual Evaluation Individual evaluation method is identical to the individual discussion evaluation method. 1. Click the ‘Evaluate’ button to proceed to the evaluation page. 1 2. On the students list, click the ‘Total Post’ number under the Post session to view students' posts via pop-up window. 2 3. The instructor must check the boxes in front of the students’ names to enter points to grade students. Enter the points in the boxes provided under the Grade section. 3 4 4. After entering all the points, click the ‘Save’ button. To edit, check the box located in front of the students’ names, edit, then click the ‘Save’ button to finish. 5 5 Instructors can send encouraging messages to students with low grades via sms, email, and/or LMS message, by clicking their name. 61 4.8 Assignment The Assignment tool, located under the Forums is used for instructor to design and hand out assignments. The Assignment tool, located under the Forums is used to create group and individual assignments. Assignments can be created by entering information required for the weekly settings in Course Design. Figure 4-24. Assignment Settings and Contents Assignment settings and contents are explained below: Table 4-20. Assignment Information Title Description Title Displays the title of the assignment. Description Displays assignment information written by the instructor. Criteria Setting Displays possible points students can obtain by completing the assignment. Date/Time Displays the scheduled date and time students can complete the assignment. Attachment Displays attachments available. Click to download the attachments. Grade Given Displays if grade is given or not. Displays the submission method the students must hand in the assignment. There are 4 submission types available: Submission Method 62 1) Attachment 2) Hard Copy 3) Attachment + Hard Copy 4) Board Title Description Number of Submissions Allowed Displays how many times a student can submit for an assignment. An instructor can set the maximum number of assignment submission. Attachment Type Displays attachment types students can upload, set by the instructor. Only displayed attachment types can be uploaded. 4.8.1 Creating Assignment Assignment can be created by entering information needed in the weekly list. You can register the assignment by clicking the '+' button in the tab or ‘Edit‘ button located in the weekly list. However, the '+' button will disappear once the assignment is created. The Assignment tool offers group settings to select an assignment type; group or individual assignment. And either of two types of assignment is created according to the setting. + button to register Edit button to register/edit 1. After the assignment has been added to the weekly list, click '+' or ‘Edit' button to proceed to the assignment information page. 1 1 2 2. Enter the basic information shown below. 1) Title 2) Description 3) Attachment 4) Period 5) Submission Method 6) Notification 7) Grade 63 ※ To enter assignment basic information, the instructor can manually enter information, or he can import existing assignment template. Registering a New Assignment Information Importing Assignment Template To manually enter the basic information, the instructor can proceed the same as the other previous learning tools. To use the assignment template, instructor needs to import the assignment template registered in the past. To import assignment template, click the ‘Call Template’ button to display Template window. Select the desired template from the available templates. Assignment templates only include title, description, and attachment information. Therefore, the instructor must enter rest of the information manually. 3. The instructor must enter following additional information manually. 2 3 1) 2) 3) 4) Number of Submissions Allowed Attachment Size Number of Attachment(s) Attachment Type 4. Configure group settings. Depending on the group settings, either group assignment or individual assignment will be created. The group settings are explained below: 64 ※ There are 2 ways to create groups. Create New Groups Reuse Groups Create New Groups You can create new groups when there is no pre-existing groups, or if new group configurations are needed. 1 2 3 1. Enter the group name to use, and click the Create button. 2. Click the group name to select students per group. 3. Appoint a group leader per each group. (Only 1 leader per group). Reuse Groups The group settings can be also imported from the Forums(Discussion, Assignment, Team Project) registered within the corresponding course. Please be advised that when existing group is selected, all the data entered before saving will be deleted. 65 2 3 4 1 1. To use existing group, click the Reuse Template button. 2. All the groups created under the course will be displayed on a pop-up window. 3. Click the group name to view group configuration. 4. Click the Reuse button to use the group, and the group template will be added to the corresponding assignment. Assignment can be viewed by clicking the learning tool located in the Weekly List. Figure 4-25. Assignment 66 Once the assignment has been added, it will be classified to 3 status types according to the scheduled date and time set by an instructor. Table 4-21. Assignment Classifications Title Description The assignment is not open yet, therefore, is not available. The assignment is open and is in progress. Depending on the settings made, students can: 1) Post comments 2) Post attachments 3) Be in groups The assignment is closed, and nothing can be posted. If the discussion was for grades, instructor can evaluate students by clicking the ‘Evaluate’ button. 4.8.2 Individual Assignment If the group settings are not used, then individual assignment will be created. Once the assignment is open, the students can add assignment by clicking the + button in the assignment page. Figure 4-26. Individual Assignment 67 Once the assignment is open, the students can access and submit the assignment. The assignment must be submitted according to the submission method. The Instructor can not only view the assignment but can also download the attachments, and leave feedback after reviewing the submitted assignments. Once the assignment is submitted by the students, the instructor can: 1 1. View and leave feedback on the submissions. 2. Download the attachments. 2 1 4.8.3 Group Assignment If the group settings are used to create assignment, then group assignment will be created. Once the assignment is available, group sessions will be created like shown below. Figure 4-27. Group Assignment 68 Once the assignment is open, the group members can view the assignment. And once the students are finished, they can submit the assignment according to the submission method. After the assignments are submitted, the instructor can view the work, and leave feedback. If the assignment was submitted as an attachment, then the instructor must download the attachments to review the assignment. 1 1. Click the ‘Enter’ button to enter into the desired assignment group. 2. After the assignment has been submitted by each group of students, the instructor can view the submissions and leave feedback. 2 3 3. The instructor can also download and view the attachments. 2 4.8.4 Plagiarism Detector The Plagiarism detector can identify if there are any identical work in between the students, or if the students have plagiarized someone else's work by comparing any two documents. It analyzes and shows how much identical different two works. Figure 4-28. Plagiarism Detector 69 Table 4-22. Plagiarism Detector Title Description Default Area Not identical to each other Highlighted Area (Red) Identical contents / Plagiarized 1 1. To run the plagiarism detector, click the Plagiarism percentage of student you wish to examine. 2. The plagiarism detector will pop-up and the students work will be displayed on the left side. To run the detector, select other student's work to compare with. 2 3. Once the other student's work is selected, the detector will automatically analyze both documents. The instructor can change the comparing student's work to continue on the analysis. 3 4. Click the highlighted area on the either side to view the identical contents on the other side. 4 70 4.8.5 Evaluating Individual Assignment Once the assignment is past the due date, the instructor can evaluate students based on the submitted assignments. After running the plagiarism detector, click the ‘Evaluate’ button to evaluate students. The evaluations can be edited until the grades are submitted. The instructor can also send encouraging messages to students who didn’t participate. Figure 4-29. Individual Evaluation Page 1. Click the ‘Evaluate’ button to proceed to the evaluation page. 1 71 2. Run the plagiarism detector to identify plagiarism. 2 3. To enter students’ s, the instructor must check the box in front of the students’ names. Enter the marks in the box provided under the Grade section. 3 4 5 4. After entering all the points, click the ‘Save’ button. To edit, check the box located in front of the students’ names, edit, then click the ‘Save’ button to finish. 5 Instructors can send encouraging messages to students with low grades via sms, email, and/or LMS message, by clicking their name. 4.8.6 Evaluating Group Assignment Once the group assignment is past the due date, the instructor can evaluate students based on the submitted assignments. After running the plagiarism detector, click the ‘Evaluate’ button to evaluate students. The evaluations can be edited until the grades are submitted. The instructor can also send encouraging messages to students who didn’t participate. 72 Figure 4-30. Group Evaluation Page In group assignment, there are two ways to evaluate students; Group Evalution and Individual Evaluation. Group Evaluation Individual Evaluation Group Evaluation Group evaluation allows instructor to give the same grade to all members of a group. However, the instructor can change the grades manually for a group or for an individual if wish to. 73 1. Enter the students' points in the box provided next to the Group Evaluation field, and click the ‘Group Evaluation’ button located below. The point entered will then be entered in to all group members' grade boxes. 1 2. If wish to edit grades individually, check the box located in front of the student, edit, and then click the ‘Save’ button. 2 Individual Evaluation Individual evaluation method is identical to the individual assignment evaluation. 3. To enter students’ grades, the instructor must check the boxes in front of the students’ names. Enter the grades in the boxes provided under the Grade section. 3 74 4 4. After entering all the points, click the ‘Save’ button. To edit, check the box located in front of the students’ names, edit, then click the ‘Save’ button to finish. 5 5 Instructors can send encouraging messages to students with low grades via sms, email, and/or LMS message, by clicking their name. 4.9 Team Project Instructors can utilize Team Project tool located under Forums. The team project can be created by entering information required for the weekly settings in Course Design. Figure 4-31. Team Project Settings and Contents Team project’s settings and contents are explained below. Table 4-23. Team Project Basic Information Title Description Title Displays the title of the team project. Description Displays the team project information entered by the instructor. Criteria Setting Displays possible points students can obtain by submitting the team project. Date/Time Displays the scheduled date and time set by an instructor to allow students to access and submit the team project. Attachment Displays attachments available. Click to download the attachments. Grade Given Displays if grade is given or not. To evaluate students, click the ‘Evaluate’ button. Attachment Type Displays attachment types students can upload, set by the instructor. Only displayed attachment types can be uploaded. 75 4.9.1 Creating Team Project The team project can be created by entering information needed in the weekly list You can register the team project by clicking the '+' button in the tab or ‘Edit' button located in the weekly list. However, the '+' button will disappear once the team project information is added. + button to register Edit button to register/edit 1. After the team project has been added to the weekly list, click '+' or ‘Edit' button to proceed to the team project information page. 1 1 2 2. Enter the basic information shown below. 1) 2) 3) 4) 5) 6) 3 Title Description Attachment Period Notification Grade 3. Then, enter the additional information shown below. 1) Attachment Size 2) Number of Attachment(s) 3) Attachment Type 76 4. Configure the group settings. The group setting configurations are explained below. 4 ※ There are 2 ways to create groups. Create New Groups Reuse Groups Create New Groups You can create new group when there is no pre-existing groups, or if new group configurations are needed. 1 2 3 1. Enter the group name to use, and click the ‘Create’ button. 2. Click the group name to select students per group. 3. Appoint a group leader for each group. (Only 1 leader per group). 77 Reuse Groups The group settings can be also imported from the Forums(Discussion, Assignment, Team Project) registered within the corresponding course. Please be advised that when existing group is selected, all the data entered before saving will be deleted. 2 3 4 1 1. To use existing group, click the Reuse Template button. 2. All the groups created under the course will be displayed on a pop-up window. 3. Click the group name to view group configuration. 4. Click the Reuse button to use the group, and the group template will be added to the discussion. Team Project can be viewed by clicking the learning tool located in the Weekly List. Figure 4-32. Team Project 78 Once the team project has been added, it will be classified to 3 status types according to the scheduled date and time set by an instructor. Table 4-24. Team Project Classifications Title Description The team project is not open yet, therefore, is not available. The team project is open and is in progress. The team project is closed, and nothing can be posted. If the team project is for grades, instructor can evaluate students by clicking the ‘Evaluate’ button. 4.8.2 Team Project Once the team project is open, students can view the project information and post their project. Figure 4-33. Team Project Page The instructor can enter the team project groups to view and reply to the posts created by team members. 79 1 1. Click the ‘Enter’ button of the team project group to enter. 2. Click the ‘+’ button to add post. 2 3. View students posts written within the team project period set by an instructor. 4. Download attachments. 3 4 4.9.3 Evaluating Team Project Once the team project is done, the instructor can evaluate students based on the team project. Click the ‘Evaluate’ button to evaluate students. The evaluations can be edited until the grades are submitted. The instructor can also send encouraging messages to students who didn’t participate. Figure 4-34. Evaluation Page 80 In team project, there are two ways to evaluate students. Group Evaluation Individual Evaluation Group Evaluation Group Evaluation allows instructor to give same grade to all members of the group. However, the instructor can manually change grades either per group or individual if wish to. 1. Click the ‘Evaluate’ button to proceed to the evaluation page. 1 2 2. Enter the students' points in the box provided next to the Group Evaluation field, and click the ‘Group Evaluation’ button located below. The mark entered will then be entered in to all group members' grade boxes. 3. If wish to edit grades individually, check the box located in front of the student, edit, and then click the ‘Save’ button. 3 81 Individual Evaluation Individual evaluation method is identical to individual evaluation of any other learning tools. 1. Click the ‘Evaluate’ button to proceed to the evaluation page. 1 2. On the students list, click the number under the Post section to view students' posts via popup window. 2 3. the instructor must check the boxes in front of the students’ names to enter students’ points. Enter the points in the boxes provided under the Grade section. 3 82 4 4. After entering all the points, click the ‘Save’ button. To edit, check the box located in front of the students’ names, edit, then click the ‘Save’ button to finish. 5 5. Instructors can send encouraging messages to students with low grades via sms, email, and/or LMS message, by clicking their name. 4.10 Resource The instructor can provide learning materials to students via resource tool. The resource can be created by entering information required for the weekly setting in Course Design. Figure 4-35. Resource Settings and Contents Resource’s settings and contents are explained below. Table 4-25. Resource Basic Information Title Description Title Displays the title of the resource. Description Displays the resource information entered by the instructor. Link URL Displays URL link of the resource added by the instructor. Click to proceed to the corresponding URL page. Attachment Displays media lecture attachments added by the instructor. Click to download the attachment(s) 83 4.10.1 Creating Resource The resource can be created by entering information needed in the weekly list You can register the resource by clicking the '+' button in the tab or ‘Edit' button located in the weekly list. However, the '+' button will disappear once the resource information is added. + button to register Edit button to register/edit ※ There are 2 ways to create resource. Create New Resource Import Existing Resource The instructor can register the resource by clicking the '+' button in the tab or ‘Edit' button located in the weekly list. The instructor can also import existing resource from previous semesters by using the ‘Import Past Data’ function. 1. After the resource has been added to the weekly list, click '+' or ‘Edit' button to proceed to the resource information page. 1 1 2 2. Enter the basic information shown below. 1) 2) 3) 4) 84 Title Description Link URL Attachment How to import the existing resources are explained below. 1. Click the 'Import Past Data' button to display the resource list pop-up window. 1 2 2 2. Select the resources to use. Can search for specific resources using the search types, such as Year, Semester, Campus, Faculty and Department. 3. To view the detailed resources information, click the number under the Post section. Resource can be viewed by clicking the learning tool located in the Weekly List. Figure 4-36. Resource Once added to the Weekly List, the resource can be accessed and downloaded by the students anytime. The resource can also be edited and deleted by the instructor by clicking the 'Edit' button located in the Weekly List. 85 4.11 Survey The instructor can use the survey tool to collect information on the course which he is currently teaching. The survey can be created by entering information required for the Weekly settings in Course Design. Figure 4-37. Survey Settings and Contents Survey’s settings and contents are explained below. Table 4-26. Survey Basic Information Title 86 Description Title Displays the title of the survey. Date/Time Displays the duration of the survey set by an instructor. Description Displays survey information entered by the instructor. 4.11.1 Creating Survey The survey can be created by entering information required for the weekly settings in Course Design. You can register the survey by clicking the '+' button in the tab or ‘Edit' button located in the weekly list. However, the '+' button will disappear once the survey information is added. + button to register Edit button to register/edit 1. After the survey has been added to the weekly list, click '+' or ‘Edit' button to proceed to the survey information page. 1 1 2. Enter the basic information shown below. 2 1) Title 2) Period 3) Description 3 3. Click the 'Import' button to view the survey templates window. 4. Only 1 template can be used per survey. 4 Survey can be viewed by clicking the learning tool located in the Weekly List. 87 Figure 4-38. Survey Once the survey has been added, it will be classified to 3 status types according to the scheduled date and time set by an instructor. Table 4-27. Survey Classifications Title Description The survey has not started yet, therefore, is not available. The survey has started, and is in progress. The survey result will automatically applied as students complete the survey in real time. The survey has ended, and users can no longer participate in the survey. 4.11.2 Survey Result After the survey has ended, the instructor can view the survey result from the Weekly List. Figure 4-39. Survey Result 88 4.12 Quiz (Quiz, Midterm Quiz, Final quiz) Quiz tool is used to evaluate students’ understanding on the course. The quiz can be created by entering information required for the weekly settings in Course Design. Figure 4-40. Quiz Settings and Contents Quiz settings and contents are explained below. Table 4-27. Quiz Basic Information Title Description Displays the quiz type the instructor has selected. The quiz types provided in Quiz tool are explained below. Type 1) Online Quiz ( Only regular quiz can be created.) 2) Offline Quiz (Quiz, Midterm, and Final quiz is available.) Title Displays the title of the quiz. The instructor can access the quiz regardless of set time/date, by clicking the quiz title. Date/Time Displays the scheduled date and time of the quiz set by an instructor. Time Permitted (Mins.) Displays the length of time that students are permitted to take the quiz. The time is shown in minutes. (Only available in online quiz.) Criteria Setting Displays possible points students can obtain by attending the lecture. Number Of Trials Allowed Displays how many time students are allowed to take the quiz (Only available in online quiz). Quiz Score Displays if the quiz scores will be open to all students. Description Displays quiz information entered by the instructor. 89 4.12.1 Creating Quiz The quiz can be created by entering information needed in the weekly list. You can register the quiz by clicking the '+' button in the tab, or ‘Edit' button located in the weekly list. However, the '+' button will disappear once the survey information is added. Please note that quiz cannot be edited when the status is open or closed. The quiz tool is composed of online and offline quiz, and the quiz type can be configured in Basic Information section of the quiz information page. + button to register Edit button to register/edit 1. After the quiz has been added to the weekly list, click '+' or ‘Edit' button to proceed to the quiz information page. 1 1 2 2. Enter the basic information shown below. 1) 2) 3) 4) 5) 6) 7) 8) Type : Online or Offline Title Period Time Permitted (Mins.) Criteria Setting Number of Trials Allowed Quiz Score Description The basic information settings will vary depending on the quiz type. If the instructor selected online quiz, Date/Time and Time Permitted fields are required to be entered. The offline quiz does not require Date/Time and Time Permitted fields to be filled. 90 Online Quiz Offline Quiz 3. When creating an online quiz, the instructor must add quiz questions. Click the 'New' button to add the quiz questions. ※ Offline type quiz cannot upload questions to LMS. 3 4 4. After all the questions are added, each questionnaire's possible points need to be set. ※ The quiz score must total to 100, and if not, the LMS will automatically calculate to according to the percentage set by the instructor in evaluation planner. Quiz can be viewed by clicking the learning tool located in the Weekly List. Figure 4-41. Quiz 91 Once the quiz has been added, it will be classified to 3 status types according to date and time. Table 4-29. Quiz Classifications Title Description The quiz has not started yet, therefore, is not available. The questions uploaded to online quizzes will be available to instructor. The quiz is open and is in progress. Students can access the quiz and instructors can monitor the online quiz. The quiz is closed. Instructors can view quiz submitted by students to evaluate. The instructor can grade students per either group or individual in Excel file. 4.12.2 Online Quiz Online quiz offers the instructor to monitor students’ quiz progress in real time. The students can also view their quiz progress and result, once the quiz is submitted. Figure 4-42. Quiz Monitoring Page The instructor can monitor the students quiz submission status, and the date submitted. The instructor can also view students who haven't taken the quiz yet, and send them a notification message. 92 1. while the quiz is open, the instructor can view the students' submitted quiz. 1 2 2. Click the student's name to view profile, and you can message the students using the messaging tool provided in the profile window. ※ LMS cannot monitor offline quizzes. 4.12.3 Evaluating Online Quiz Once the quiz is closed, the instructor can evaluate the quiz. LMS offers Excel file for instructors to enter quiz scores. The instructor can enter the scores using the Excel file, or enter the grades individually right to the LMS. The students’ IP addresses are also available to be viewed by the instructor, so the instructor can check for any misconducts. Quiz feedback can be entered and the students can view the feedback along with the quiz result. Figure 4-43. Evaluating Online Quiz 93 LMS can automatically evaluate all types of quiz answers except for written types such as essay type question. Therefore instructor must go over the answers and manually enter the score using the Excel file provided by LMS, or to the LMS. Entering quiz score using Excel Entering quiz score to LMS Enter grades through Excel. The instructor can upload quiz scores by entering the scores in the provided Excel file from LMS. 1. Click the 'Download' button to download the excel file. ※ Can only use the excel file provided by the LMS. 1 2. Enter the students score on the spaces provided. After saving the changes, click the 'Upload' button to upload the file. The quiz scores will be applied to LMS. 2 3. To view the quiz result, click the 'Preview' button. If the instructor wants to leave a feedback, click the Feedback to open the popup window, and enter the feedback. 3 94 Entering grades to LMS Instructor can manually enter each students grade straight to LMS. 1. Click the ‘View’ button to open the student’s quiz to evaluate the written type questions of the quiz. 1 2. Enter the score the written part and save. 2 3. Click the ‘Preview’ button to confirm the quiz result. If wish to leave feedback, click the ‘Feedback’ section to do so. 3 4.12.4 Evaluating Offline Quiz After the offline quiz has finished, instructor can evaluate the quiz. The instructor can enter the quiz scores using the Excel file provided by the LMS, or can also enter the score straight to LMS. The instructor can leave quiz feedback after the students have registered the quiz submission status. Students can view the feedback as quiz result. 95 Figure 4-44. Offline Quiz Evaluation Page The LMS cannot evaluate offline Quiz. The offline quiz scores can be added straight to LMS, or through the Excel file. Enter quiz score using Excel Enter quiz score to LMS Here are instructions to enter scores using the Excel file. 1. Click the 'Download' button to download the excel file. 1 96 ※ Can only use the excel file provided by the LMS. 2. Enter the quiz scores on the spaces provided. After saving the changes, click the 'Upload' button to upload the file. The quiz scores will be applied to LMS. . 2 3. Instructor can leave feedback, and students can view the feedback as a test result. ※ Feedback button to leave feedback will be activated when students’ quiz submission status are confirmed. 3 The instructor can also enter quiz scores straight to LMS. 1. Enter the quiz scores and click the ‘Save’ button. 1 1 2. Instructor can preview feedback after leaving the feedback, and students can view the feedback as a test result. ※ Feedback button to leave feedback will be activated when students’ quiz submission status are confirmed. 2 97 4.13 Course Audit The course audit menu manages students requesting to audit the course. The instructor can search the students requesting to audit, and add them into the students list. Once the students are approved, the students will have the same responsibilities as the other enrolled students. Figure 4-45. Course Audit Page Course audit approval process is as below: 1. Student must contact the instructor to request audit. 1 2. The instructor can search for the student in the Course Audit page. 2 3. The instructor can approve the student to audit the course by clicking Approve button. 3 4 4. The table on the bottom is a list of students auditing the course. Instructor can stop the student from auditing anytime by checking the student’s box and clicking ‘Reject’ button. 98 4.14 Notice The notice board is used to upload news and important notices regarding the course. There are 2 types to post notices, which are Top notice and general notice, and only the instructor can post notice to the notice board. Figure 4-46. Notice Board Notice settings and contents are explained below. Table 4-30. Notice Basic Information Title Description Title Displays the title of the notice. Top Notice Displays if the notice will be posted as a Top notice. (Top notice: The top notices will stay on the top of the notice board, and will not move down to the bottom even if other new notices are posted). Description Displays notice information entered by the instructor. Send Notification Displays if the instructor will send notification about the notice post to the enrolled students. There are 3 ways to send notifications: email, sms, and LMS message. Attachment Displays attachments available. Click to download the attachments. 4.14.1 Creating Notice The notice an be created by clicking the '+' button in the notice tab. Students can access to posted notices, and if a notice is set as a Top notice, then the notice will be posted on very top of the list. 99 1. Click the '+' button located on the top of the notice tab to create new post. 1 2 2. Enter the basic information shown below. 1) 2) 3) 4) 5) Title Top Notice Description Send Notification Attachment The notices are available in the notice board. Figure 4-47. Notice Board Once posted in the notice board, you can click the notice title to view the notice contents. Click the 'Edit'/'Delete' button to edit/delete. 100 4.15 Q&A Questions and answers regarding the course will be posted in the Q&A board. Q&A board provides a space for students to ask questions regarding the course, and for instructors to answer. Figure 4-48.Q&A Board Q&A components are explained below. Table 4-31. Q&A Components Title Description Question Students post questions regarding the course. Answer Answers are posted by the instructor . Once the instructor views the posted question, he can post answers as a reply. The instructor can post more than 1 answer, and the answers can be edited/deleted. However, the answers cannot contain attachment. Figure 4-49.Q&A Answering Window 101 4.16 FAQ Frequently asked questions and the answers regarding to the course are managed in the FAQ board. Only the instructor can post in the FAQ board. Figure 4-50. FAQ Board The FAQ components are explained below. Table 4-32. FAQ Components Title Description Question Frequently asked questions about the course by the students. Answer The instructor’s answers to the questions. 4.16.1 Creating FAQ To create FAQ, click the '+' button in the FAQ tab to proceed to next step. Enter the FAQ information and click 'Save' to post FAQ. 1. Click the ‘+’ button to create new FAQ. 1 102 2. Enter the FAQ question and answer. 2 The FAQs are available in the FAQ board. Figure 4-51. FAQ Board Once posted to the FAQ board, users can click the title to view the information. To edit/delete. click the 'Edit'/'Delete' button accordingly. Editing/deleting function is not available to students. 103 4.17 Template The instructor can reuse the course materials repeatedly by creating templates. The templates are saved in the LMS for the instructor to import and use in assignments and surveys. The template function only offers survey type and assignment type template. Figure 4-51. Template Tab Survey and assignment template settings and information are explained below. Table 4-33. Survey Settings Title Description Title Displays the title of the survey. Type Displays the survey type. There are 2 types of surveys: Question(s) Displays how many questions are contained in the survey. Survey Availability Displays the survey availability. The survey cannot be used if select ‘No’. 104 Table 4-33. Survey Settings Title Description Survey Usage Displays if the template is in use. The template cannot be edited/deleted while in use. Copy Click the 'Copy' button to copy the template. The instructor can create new template based on the original by using this function. Table 4-34. Assignment Settings Title Description Title Displays the title of the assignment. Description Displays the assignment information entered by the instructor. Displays the submission method the students must hand in the assignment. There are 4 submission types available: Submission Method 1) Attachment 2) Hard Copy 3) Attachment + Hard Copy 4) Board Displays attachments available. Click to download the attachments. Attachment 4.17.1 Creating Survey Template Click the '+' button in the Survey section of the template tab to create a new survey. You can also copy the existing template and edit settings to reuse some contents by clicking the 'Copy' button. + button to register Copy button to reuse Instructions to create a new template is explained below. 105 1. Click the ‘+’ button to proceed to the next step. 1 2 2. Enter the basic information shown below: 1) Title 2) Type 3) Availability 3. Click the 'Add Question' button to create survey question. 3 ※ If there is no question added to the template, then the template cannot be used. 4. The question type can be set by selecting either multiple-choice or written type. Enter the information needed and click the 'Save' button. 4 To create a survey template using the copy function, refer below information. 1. Select the survey template to copy and click the ‘Copy’ button. 1 106 2 2. Change the basic information to conform to the survey purpose. 3. Change the copied Questionnaire information to conform to the survey purpose. 3 Once the template has been added, the instructor can import the template to reuse in other courses of the instructor. However, if the Survey Availability is set to No, then the template cannot be used, and it won't be displayed on the import list. Figure 4-53. Importing the Templates 4.17.2 Creating Assignment Template Click the '+' button in the Assignment section of the template tab to create a new survey. 1. Click ‘+’ button to proceed to next step. 1 107 2 Enter the following information: 1 1) 2) 3) 4) Title Description Submission Method Attachment Once the assignment template has been added, the instructor can import the template to reuse in other courses of the instructor. Figure 4-54. Importing Assignment Template 108 4.18 Course Evaluation Users can manage and view the students' course evaluations in this menu. Please note that course evaluation is mandatory for students to complete, since they cannot access their final grade without completing the course evaluation. Figure 4-55. Course Evaluation Settings and Contents Course Evaluation’s contents and settings are explained below. Table 4-35. Course Evaluation Basic Information Title Description Title Displays the course evaluation title. Period Displays the duration of the course evaluation set by the instructor. Description Displays the course evaluation information entered by the instructor. 4.18.1 Creating Course Evaluation The course evaluation can be created by entering information required for the weekly settings in Course Design. You can register the course evaluation by clicking the '+' button in the tab or ‘Edit' button located in the weekly list. However, the '+' button will disappear once the survey information is added. 109 1. Click the 'Course Evaluation' button located in the bottom right of the screen. 1 2. Click '+' or ‘Edit' button to proceed to the course evaluation information page. 2 3. Enter the basic information shown below. 3 1) Title 2) Period 3) Description 4 4. Click the 'Import' button to view the survey templates window. 5. Only 1 template can be used per survey. 5 Survey can be viewed by clicking the learning tool located in the Weekly List. 110 Figure 4-56. Course Evaluation Once the course evaluation has been added, it will be classified to 3 status types according to the scheduled date and time set by an instructor. Table 4-36. Course Evaluation Classification Title Description The course evaluation has not started yet, therefore, is not available. The course evaluation has started, and is in progress. The course evaluation result will automatically applied as students complete the course evaluation in real time. 4.18.2 Course Evaluation Result After the course evaluation has ended, the instructor can view the course evaluation result from the Weekly List. Figure 4-57. Course Evaluation Result 111 4.19 Grade The Grade menu allows instructor to view and manage the students grades. The instructor must send students’ grades to the assigned reviewer and approver to finalize grade. Figure 4-58. Grade Page Grade page components are explained below. Table 4-37. Grade Components Title Description Reviewer Search and select grade reviewer. The reviewer cannot be changed once the grade review is requested. Approver Search and select grade approver. The approver cannot be changed once the grade approval is requested. Request After selecting the reviewer and approver, click the request button. Once requested, the grades cannot be edited. Auto Grade Automatically grades students. Encouragement Send students academically encouraging message. Excel Download Download the grade into Excel format. Learning Tool Click the learning tool grades to track students learning activities. 112 All the functions and buttons in the Grade page will be inactive when first opened. Click the 'Auto Grade' button to activate the page. Figure 4-59. Click Auto Grade to Activate Grade Page. Once the page is active, the instructor can view the students grades and academic performances. The instructor can assign extra work for students, and the work can be graded in the Extra Credit section if needed. Figure 4-60. Activity Tracking Window 113 4.19.1 Requesting Grade Review/Approval Once the grading is completed by the instructor, the grades need to be reviewed and approved to be finalized. How to review and approve the requested grades are as below. Review Grades Pending Approve Grades Reject Review Reject Approval Grades are Finalized Edit Grades Figure 4-55. Grading Process Below are the grade processing instructions. 1. Select grades reviewer and approver. After reviewer and approver are selected, click the 'Request' button to proceed. 1 ※ The grades cannot be edited while reviewing/approving. 2 3 2. If the review is rejected, view the reason for rejection, then edit the grades accordingly and re-apply for review. 3. If the approval is rejected, view the reason for rejection, then edit the grades accordingly and re-apply for approval. 114 4.20 Activity Tracking The instructor can view students academic performances in real time with the Activity Tracking tool. By reviewing students academic performances, the instructor can send academically encouraging message to students in need. Figure 4-62. Activity Tracking Page Below are Activity Tracking components. Table 4-38. Activity Tracking Components Title Description Academic Encouragement Sends academically encouraging messages to the students in need. To send encouragement, check the box of students send message and click ‘Academic Encouragement’ button. Excel Download Click the button to download the data on tracking students’ learning activities as Excel format. Learning Tool Click the learning tool grade to view the student’s activity. Click the student's grade available below each learning tool sections to view student's activities in detail. The instructor can download the activity tracking page as an Excel file to monitor students’ overall learning activities, and can also use Academic Encouragement function to send academically encouraging messages to individual student in need. 115 5 Community Share academic knowledge with staffs and students in the Community. Community menu offers 5 services -Notice, FAQ, Q&A, Message, and Manual functions- for students and staffs to conveniently share academic knwoledge and various information. Figure 5-1. Community Functions The administrator posts notices for users in the notice board. FAQ is also used by the administrator to post LMS's frequently asked questions and answers. The Q&A is also available for users to post questions regarding to LMS. The LMS users can also use the LMS messaging system to communicate with each other among staff, instructors and students. Notice FAQ Q&A Message 116 5.1 Notice The notice board is used by the administrator to post notices for the LMS users. The Top notice and regular notice are used. Figure 5-2. Notice Board Notice contents and settings are explained below. Table 5-1. Notice Contents Title Description Title Displays the title of the notice. Top Notice The Top notices will always stay on top of the list. Description Displays the notice information entered by the administrator. Attachment Displays attachment(s) added by the administrator. Click to download the attachments. Newly added notices will have 'N‘ sign appearing next to the title. Click the title to view the full notice. Figure 5-3. Newly Added Notice, Notice Type: Top 117 5.2 FAQ Frequently asked questions to the administrator and the administrator’s answers are available in the Community’s FAQ board. Figure 5-4. Community FAQ Board FAQ has following components: Table 5-2. FAQ Components Title Description Question Questions frequently asked by the users to the administrator. Answer Administrator’s answers to the questions. Newly added FAQ will have 'N‘ sign appearing next to the title. Click the title to view the full details. Figure 5-5. New FAQ 118 5.3 Q&A All LMS users, including instructors can post questions, regarding to the LMS, to the administrator. Once the administrator responses to the questions, answers will be available to be viewed. Users can also view other questions and answers posted on the Q&A board. Figure 5-6.Q&A Board Q&A has following components: Table 5-3. Q&A Components Title Description Question Users post questions regarding LMS to the administrator. Answer Answers are posted by the administrator. 5.3.1 Creating Q&A To create Q&A, click the ‘+’ button on the Q&A board and post questions. 1 1. Click ‘+’ button to proceed to next page. 119 2 2. Enter the question(s). The Q&A will be uploaded to the Q&A board. Figure 5-7. Q&A Board: Answer Field Click the title of the Q&A to view full detail. You can edit or delete your own Q&A with 'Edit' and 'Delete' button. Only the administrator can edit the answers but users can only delete both question and answers of their own Q&A. 120 5.4 Message The message function offers users to send messages to other LMS users, and they can view their message histories. Sent Received Figure 5-8. Message Page The message page is composed of Received and Sent tabs. LMS users can access to all the Received messages and reply to the sender from the Received tab. The Sent tab saves all the Sent messages and can view if the message has been read or not by the receiver. Message can be sent from the Sent tab. 5.4.1 Received Received Tab’s settings and contents are explained below: Table 5-4. Received settings and contents Title Description Title Title of the Received message. Click the title to see the full message. Message will be displayed underneath the title. Description Displays full message. Delete Check the messages to delete and click the 'Delete' button. The deleted message cannot be recovered. Reply Click to reply to the message. 121 Figure 5-9. Received Messages Click the title of message to view the full message. You can delete the unnecessary messages, and/or reply to the corresponding sender. 1. Click the ‘Reply’ button to reply to the sender. Pop-up window will open. 1 2. Enter the title and message, then click ‘Send’. When replying, contents below should be filled. 2 1) Title 2) Contents 5.4.2 Sent Sent Tab settings and contents are explained below. Table 5-5. Sent Settings and Contents Title Title 122 Description Title of the Sent message. Click to message title to view the sent message's full contents. Table 5-5. Sent Settings and Contents Title Description Description Displays the Sent message contents. Delete Check the messages to delete and click the 'Delete' button. The deleted message cannot be recovered. Figure 5-10. Sent Messages When the message is first sent, the message status will be displayed as 'Unread'. After the message is received and read by the receiver, the status will change to 'Read'. To send message, click the 'New' button. 1. To send message, click the ‘New’ button. Pop-up window will be displayed. 1 2. Click the '+' button to add receiver. 2 3. Enter the message and click the 'Send' button to send the message. 3 123 6 Counseling User convenience and systematic management. By using the calendar provided by the LMS, the instructor can add counseling sessions, accept or reject requested counseling, and send counseling result. Figure 6-1. Counseling Calendar Counseling configurations are explained below. Table 6-1. Counseling Configurations Title Description Date Click the date on the calendar to create counseling session. When clicked, the pop-up window will appear and the instructor can set the time(s) for that date. Pending (Mouse Over) To view student(s) requested for counseling, move the mouse cursor over the desired Pending date. Pending (Clicked) When the pending date is clicked, the instructor can view student(s) requested for counseling, and can select student to counsel. If more than one student requested for the same counseling session, the student(s) not selected will automatically be rejected. Approved (Mouse Over) To view student approved to counsel, move the mouse cursor over the desired Approved date. 124 Table 6-1. Counseling Configuration Title Description Approved (Clicked) Click Approved date to enter the counseling result. Complete (Mouse Over) To view the counseling result, move the mouse cursor to the Complete date. Figure 6-2. Counseling Calendar : Counseling Requests Below explains counseling progress. Add Counseling Sessions Request Counseling Session Instructor Accept Reject Student Counseling Performed Not-Performed Figure 6-3. Counseling Progress To perform a counseling session by using the calendar provided from LMS, the instructor has to first create available counseling sessions. The instructor can add single and/or multiple sessions on the same day. 125 1. Click the date to create counseling session. The pop-up window containing the available time frames will be displayed.. 1 2 2. Click the time frame(s) to create counseling session(s). ※ Only 3 counseling sessions will be displayed on the calendar. If there are more than 3 sessions, the users can click the 'More' button to view the rest sessions. Once the instructor creates counseling sessions, then the students can view the available dates and hours and can request counseling on the given time. The instructor then, can view the requested counseling sessions and either accept or reject the students’ counselling requests. 1. Move the mouse cursor over the desired Pending date to view student(s) requested for counseling. 1 2. Click the Pending date to approve student for counseling. 2 ※ Only 1 student can be accepted, and the rest student(s) requested will automatically be rejected, . Once the counseling session is approved, the instructor will hold counseling session with the student on the scheduled date and time. After the counseling is finished, the counseling result will be uploaded. 126 1 1. Once the counseling session is over, the instructor can upload counseling result by clicking the corresponding session in the calendar. 2. The instructor needs to enter below information. 2 1) Overall status 2) Additional Comments The counseling calendar provides the counseling status with text and different colors, allowing the users to view the counseling progress very easily. Once the counseling session is performed, the status will display 'O', and the status will display 'X' when not performed. When the progress is complete, 'Complete' will be displayed. Also once the counseling session is complete, the counseling result will be available in pop-up window when the user moves the mouse cursor over. 127 7 Chatting Live communication between the users with the Chatting tool. The chatting tool is active as long as the user is logged in to the LMS. To chat, create a chat room, or enter the existing chat room. The Chatting tool offers users to chat 1:1 and/or with multiple users. Figure 7-1. Chatting Window and Chat Rooms Chatting settings and contents are explained below. Table 7-1. Chatting Settings and Contents Title Description Jazan Click ‘Jazan’ tab to view all chat rooms available. Users can enter into the available chat room. Course Click the 'Course' tab to select the course and view chat rooms to enter. Can also create chat room. The permitted users are limited to the course currently enrolled. Department Users enrolled in the same department can chat with each other. Create a chat room, or enter the existing chat room to chat. 128 7.1 Creating Chat Room The chat rooms can be created from 1:1 chat room to course chat room and campus chat room. The chatting history generated in the chat room is available to be viewed until the user leave the chat room. Once exited, all contents will be unavailable. 1. Depending on the users included in the chat room, select either Course or Department. 1 2. Click the 'Create Chat Room' button to proceed to next step. 2 3 3. Enter the chat room title and select users to invite into the chat room. 4. Click the 'Create' button to create a chat room. 7.2 Chat Room Once the chat room is created, the chat room users will be displayed. The users in the chat room can chat with each other by entering chats in the text box provided on the bottom of the page. 129 Figure 7-2. Chat Rooms On the top right of the chat room is an icon for setting options. Depending on the position, such as the chatting room leader and participants, the options will vary. Table 7-2. Chat Room Options Title Description Invite Click to invite participant. This function is available to everyone in the chat room. Participants Click to view the participants and their profile. This function is available to everyone in the chat room. Dismiss Click to dismiss participant(s) from the chat room. This function is only available to the chat room leader. Once dismissed, the participant can't reenter the chat room. Leave Click to leave the chat room. Once exited, all chats will be deleted and won't be able to recover. This function is available to everyone in the chat room. 130 8 Grade Review and/or approve the students’ grades of fellow instructors. This menu will be exposed only to instructors and deans who have authority to review and approve other instructor’s students’ grades. The course instructor will ask other instructors to review and approve the students’ grades once the course is done. The instructor authorized as an reviewer or approver to review the grades can approve or reject, depending on the students’ outcome. Figure 8-1. Grade Page Grade components are displayed below. Table 8-1. Grade Components Title Description Course Click the course name to proceed to the Grade page. Learning Tool Click each learning tool to view each student’s performance. 131 The Grade page provides points the students has obtained and their learning activity performances. Figure 8-2. Activity Tracking After reviewing the students' grades, the instructor can approve or reject the grade evaluation. If rejected, the grades will be sent back to the course instructor. The course instructor will edit the grades and re-apply for the review/approval. 1. Click the course name to view the grades of the students enrolled. 1 2. Approve or reject. 2 132