1
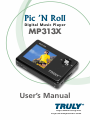
Pic ’N Roll
Digital Music Player
MP313X
User’s Manual
http://www.truly.net
http://www.picnroll.com
Overview
Welcome to the World of Pic ’N Roll! We are pleased
that you have chosen the
Pic ’N Roll MP313X
Digital Photo & Audio Player. Please be sure to read this
manual carefully before using this unit.
Safety Instructions
Please read this manual carefully before using this product
for the first time.
1. This electronic unit is of high precision. Please do
not try to disassemble this unit yourself.
2. Do not subject this unit to severe impact.
3. Do not expose to extreme temperatures, moistures,
dusty area, magnetic field or direct sunlight.
4. Clean the unit with soft cloth. Avoid using any
chemical solutions.
5. Do not subject to water. Avoid placing this unit near
objects that contain liquor, such as glasses.
6. To avoid permanent hearing loss, please adjust the
volume properly before use.
7. Do not try to modify any part of this unit.
Only use the battery, charger and accessories that
are recommended by the manufacturer. Otherwise,
8. it is dangerous and will violate the warranty terms.
2
9. Dispose of this unit and its accessories according to
your local environmental regulations.
10. If you have any problems when using this unit,
please contact your local dealer or our customer
service center.
Declarations
1. Truly Electronics Mfg. Ltd. assumes no responsibility
for any damaged or loss data caused by accidental
deletion of data as a result of malfunction, repairs
or battery replacement.
Making backups of
important data on other media to protect against
data loss is strongly recommended.
2. This manual is based on the first version of this unit.
Should there be any changes, please see the revised
manual in the supplied installation CD or the
corresponding manual on our company’s website at
www.truly.net.
3. Should there be any upgrade, please visit our
website at http://www.truly.net to download the
latest drivers.
4. The pictures shown in this manual may be different
from the actual product screen.
5. Design of this unit is subject to change without
notice.
3
FCC Notice:
This device complies with Part 15 of the FCC Rules.
Operation is subject to the following two conditions:
(1) This device may not cause harmful interference.
(2) This device must accept any interference received,
including interference that may cause undesirable
operation.
4
Contents
1. Introduction
a) Product Features
b) Package Contents
c) System Requirements
d) Connecting to your computer
e) Specifications
8
8
10
10
11
12
2. Controls
a) Controls/Jacks
b) LCD Display
c) Power
13
13
18
19
3. Operations
a) Playing Music
(1) How to set EQ modes, repeat modes
and synchronized lyric display?
(2) How to use loop repeating?
b) Recording
(1) Start Recording
(2) Quick Recording
(3) Source Selection
(4) Settings
(5) Direct Recording Setting
21
22
5
23
25
26
26
27
28
28
29
Contents
c) FM Radio
(1) Searching and storing a station
(2) Search settings
(3) FM recording
(4) Delete a station
d) Games
(1) Slide pictures
(2) Push box
(3) Calculator
(4) How to use options menu while you are
playing a game?
e) E-book
(1) How to use bookmark list?
(2) How to set auto flipping, auto flipping
speed and locate page?
(3) How to enjoy radio or music when you
are reading an E-book?
f) Browse pictures
g) System Setup
h) Memory management
30
31
32
33
34
35
36
37
37
37
39
40
41
42
43
45
44
4. Removable drive
51
5. Safely removing USB device
6
51
Contents
6. Installing, using and uninstalling
TRULY MP313X softwares
52
7. Appendix
Trouble shooting
58
58
7
1.Introduction
a) Product Features
64,000 Color LCD
• 1.8” Color Display with Photo Browser
• Holds 2500+ JPEG images (Based on 500KB
average file size)
MP3, WMA, Secured WMA Playback
• High quality digital audio playback.
• Stores up to 250 songs (128KBps)
Lyric Display
• Edit and input lyric with the included software
to display during song playback on your
MP313X.
FM Radio
• 30 Preset Channels / Direct Recording of FM
boardcasting
SD Card Slot
• Memory expandable to 2GB with a 1GB SD card.
Direct MP3 Recording
• Convert music from your favorite CDs, cassettes,
and other sources into MP3 files via the supplied
Line In cable without the use of a PC.
8
Voice Recorder
• One-touch operation. Record lectures,
seminars, and personal voice memos with the
one-touch recording button. VAD option will
activate/deactivate recording based on the
player’s preset volume level. This option is best
for recording long session with interval of
silences.
Text Viewer
• Use this feature to view saved text files.
Removable Drive
• This unit can be used as a removable disk
drive without the need to install a driver.
(Windows 98 & Mac users will require to install
the driver. Please refer to the supplied MP313X
Installation CD for driver installation.)
Rechargeable Battery
• Built-in rechargeable lithium battery provides up
to 9 hours of music playback per charge.
Games
• Built-in games that would give your mind a
workout.
Upgradable
• This unit is firmware upgradable. Please visit our
website at www.picnroll.com or www.truly.net
for the latest upgrades.
9
b) Package Contents
Please check the accessories in the package.
Contact your local dealer for any missing
accessories.
■ Earphone
■ Charger
■ USB Cable
■ Line In Cable
■ Holder
■ Armband
■ Installation CD
■ Quick Start Manual
c) System Requirements
■ Microsoft Windows 98/2000/XP/ME
■ USB port
■ CPU Pentium 200MHz
■ CD-ROM
■ Up to 60MB of available hard-disk space
■ 32MB of RAM
10
d) Connecting to your Computer
Connect the smaller connector of the supplied USB
cable into the USB jack on the unit, and the large
connector to a USB port on your computer.
ATTENTION!
WINDOWS 98 USERS:
To avoid installation problem, complete installing the
driver from the included CD-ROM before connecting
the MP313X to the PC.
11
e) Specifications
Model
Storage media
Interface
Transmission speed
Record format
Bit rate
WMA sampling
frequency
Recording length
Display
Battery
: MP313X
: 1GB Built-in Flash memory
: USB2.0 Full Speed
: > 600KBps
: MP3
: MP3 (8Kbps~384Kbps) WMA
(32Kbps~192Kbps)
: support up to 44.1KHZ
: approximately 18 hours
(1GB, Medium Quality)
: STN color LCD, 65536 colors,
160 x 128 pixels
: High capacity Li-polymer
battery
: approximately 3 hours
Battery recharge
time
Playing time
: approximately 9 hours
Maximum output : earphone 4.0mw x 2
FM frequency range : 87.500~108.000MHz (normal)
76.000~108.000MHz (broad
band)
Size
: 75mm(length) x 52mm(width)
x 15mm(height)
12
2. Locations of Controls
a) Controls / jacks
(1) (2) (3) (4) (5) (6)
(12)
(7) (9)
(11)
(8)
(10)
(17)
(13)
(14)
(15)
(16)
13
(1) Shoulder Strap Hoop
Play and Pause track.
(2) Microphone
Built-in microphone for voice recording.
(3) EQ Mode / Play Mode / Bookmarks
When in play mode, press to change the EQ mode.
When in E-book mode, press to place a bookmark.
(4) REC (loop repeating)
When in play mode, press to start loop repeating;
When in FM mode, press to start FM recording.
When in other modes except play and FM, press to
start quick recording.
(5) MENU / HOLD
When in working modes, press to show the options
menu.
When in play mode, recording or listening to a
radio program, press and hold to lock all buttons.
When all buttons are locked, press and hold to
unlock.
When in file management mode, press to delete
the selected file.
14
(6) Power (
) / Escape (ESC)
When the unit is off, press and hold to turn on this
unit.
When the unit is on, press and hold to turn off this
unit.
When in a submenu, press to go back to the
higher-level menu.
(7) Previous / Rewind (
)
Press to go to the previous track.
When in play mode, press and hold to search
within the current track.
When setting the time, press to move the cursor.
When setting EQ, press to change EQ mode.
When manually searching a station, press to
decrease the frequency.
When in game mode, press to move left.
(8) Next / Forward (
)
Press to go to the next track.
When in play mode, press and hold to search
forward within the current track.
When setting the time, press to move the cursor.
When setting EQ, press to change EQ mode.
When manually searching a station, press to
increase the frequency.
When in game mode, press to move right.
15
(9) / (10) Volume Up ( + ) / Volume Down ( – )
When in play mode, press to adjust volume.
When setting an EQ, press to adjust the value of a
selected frequency.
When in a menu, press to move the cursor.
When in game mode, press to move up / down.
(11) Play (
) / Pause (
) / Confirm
When in standby mode, press to play.
When in play or recording mode, press to pause.
When in pause mode, press to resume.
When in a menu, press to select and enter.
(12) LCD Display
Display the current status of MP313X, for example,
the title and total time of the music being played.
(Note: The text of a menu will scroll when the
length of the text exceeds the width of the
display).
(13) Earphone jack
Plug an earphone in this jack.
(14) LINE IN jack
Plug a LINE IN cable in this jack.
16
(15) USB jack / recharge jack
When used as a USB jack, connect this unit to your
computer using the supplied USB cable.
When used as a recharge jack, connect this unit to
a charger using the supplied USB cable.
(16) RESET
When the player is not functioning properly or
down, press to restart the player.
(17) SD card slot
Insert an SD card in this slot.
17
b) LCD Display
Playing Lock
Music icon
Volume
Progress bar of
playing
EQ mode
SD card
Battery status
No. of songs
Elapse time
Current folder
Title
Left/right stereo
channel
Paly mode or loop repeating
Total No. of frequencies
Current frequency no.
Radio icon
Frequency
Progress bar
of searching
Radio status
Frequency
Setting
FM level
FM recording
Current page number
SD card
Volume
Page up/down
Radio icon
Content
18
c) Power
There are two ways to recharge the battery: (a)
connect this unit to the USB port of your computer
using the supplied USB cable, press and hold REC
button. (b) connect this unit to the charger using
the supplied USB cable, as shown in the figure:
MP3 Player
Charger
LED Indicator
light
USB Cable
Note:
1. When the battery is being recharged, the battery
icon in the display will flash. When the battery is
fully recharged, the battery icon stops flashing
and a full battery icon is displayed.
19
2. It takes approximately 3 hours to fully recharge a
battery. To achieve better battery performance,
we recommend charging the unit for an extra
hour. If the battery is fully recharged avoid
keeping this unit connected to the charger for a
long tome. Recharge a battery for 5 hours after
its first fully discharge.
20
3. Operations
Turn ON:
When the unit is off, press [ESC /
on the unit.
Turn ON:
When the unit is on, long press [ESC /
turn off the unit.
* When
] to turn
] to
Auto Sleep is enabled, if the unit is in
standby and there is no operation after the set
time, MP313X will automatically turn off to save
battery. The Auto Sleep is disabled when the unit is
in working modes (playing music or game,
browsing photo or texts, receiving radio or
recording) or is connected to your computer. If the
Power Off Timer is enabled, the unit will
automatically turn off at the time you set in any
mode except when the unit is connected to your
computer.
21
a) Playing Music
In the main menu, as shown in figure 1, press
[
] or [+/–] to select “Play music” icon, press
] to select and enter the directory or music list,
[
as shown in figure 2, press [+/–] to select a directory
] to play. When playing, the
or a track and press [
lyric will be displayed when available, as shown in
figure 3. When in play mode, “
”as well as the
volume levels of the left/right stereo channels are
shown on the display, press [
] to pause and the
icon will change to “
”. Press [
] again to
resume. Press [ESC / ] to stop playing and change
to standby mode.
Fig. 1
Fig. 2
Fig. 3
22
Fig. 4
Fig. 5
Fig. 6
Fig. 7
Fig. 8
(1) How to set EQ modes, repeat modes and
synchronized lyric display?
In play mode, press [MENU] to enter the music
options menu. Press [+/–] to select EQ Adjust /
Repeat Mode / EQ Mode (figure 4).
23
EQ adjust :
Press [+/–] to select “EQ adjust”, press [
] to
enter the EQ adjust submenu (figure 5), press
[
] or [+/–] to set the value of each
frequency.
Repeat mode :
Press [+/–] to select “repeat mode”, press [
] to
enter the Repeat mode submenu (figure 6), press
[+/–] to select Repeat One/ Repeat All / Normal /
Random.
EQ mode :
Press [+/–] to select “EQ mode”, press [
] to
enter the EQ mode submenu (figure 7 and 8),
press [+/–] to select Normal / Rock / Bass / Classic /
Pop / Live / Customize EQ.
Shortcuts :
In the play mode, press and hold [EQ] to change
the repeat mode: Repeat one
, Repeat all
,
Normal
, Random
.
Press [EQ] to change the EQ mode: Normal
,
Rock
, Bass
, Classic
, Pop
, Live
, Customized EQ
.
24
Synchronized lyric display :
when playing a song (MP3/WMA format), the LRC
file, which has the same file name and in a same
folder as the song being played, will be
displayed. Up to 24 characters can be
simultaneously displayed at a time (figure 3).
(2) How to use loop repeating
Segment [A-B] Repeat: when in playing mode,
press [REC] to set the start point A, “
” will be
displayed. Press [REC] again to set the end point
B, then “
” is shown. Press [REC] again to
cancel loop repeating.
Fig. 9
Fig. 10
25
b) Recording
This unit support FM recording, voice recording
(built-in microphone), and direct recording (Line In).
The recording time varies with the selected sound
quality and the size of the available memory.
] or [+/–] to select
In the main menu, press [
“Recording” (Figure 9). Press [
] to select and
enter recording submenu (figure 10). There are
three options: Start recording, select source and set
up.
(1) Start recording
Press [+/–] to select “start recording” and press
[
] to enter the recording submenu. When in
recording mode, a working gear icon is displayed
] to pause recording and
(figure 11). Press [
] to resume
the gear icon becomes idle. Press [
recording. Press [ESC / ] to stop recording and
the system will automatically save the recorded
file in the system directory. If the recording time
is less than 2 seconds, press [ESC / ] , an error
message is displayed (figure 12) and the recorded
file is discarded.
26
Fig. 11
Fig. 12
Fig. 13
(2) Quick recording
When not in play mode or recording mode, press
and hold [REC] to enter the recording submenu.
The operations are the same as those in “start
recording”. Press [ESC / ] to stop recording and
a confirmation dialogue is shown. The recorded
file is automatically saved in the “Voice” system
directory.
27
(3) Sources Selection
MIC : built-in microphone.
LINE IN : external audio signal input via LINE IN
jack.
Note :
when “MIC” is selected as the recording source, a
“Voice” directory will be automatically created.
When “LINE IN” is selected as the recording source,
an “Audio” directory will be automatically created.
When performing an FM recording, a “Radio”
directory will be automatically created. The recorded
files will be saved to corresponding directories.
(4) Setting
Recording Setup includes: VAD setup and Quality
(figure13).
VAD setup (applies to MIC recording only):
1) Press [+/–] to select “VAD setup” and press [
]
to enter the submenu. Press [+/–] to select “VAD
on” or “VAD off”. Press [
] to return to the
Recording setup submenu. When VAD is on,
recording will not start until the volume level of
the external signal exceeds a threshold set by the
system. When VAD is off, the unit will start
recording when “start recording” is pressed
whenever there is any external source.
28
2) Press [+/–] to select “Quality” and press [
] to
enter the submenu. Press [+/–] to select the
recording quality you want: low, normal and
high. Press [
] to finish setting and go back to
the recording setup submenu.
(5) Direct recording setting
Connect one connector of the supplied LINE IN
cable into the LINE IN jack on the unit, and the
other connector to a LINE OUT jack of an audio
equipment. This will ensure the recording will not
be interfered by external noises. Press [+/–] to select
“Recording” and press [
] to enter the recording
submenu. When finishing setting, press “Start
] to start recording. The
Recording” and press [
recorded files will be automatically saved to the
corresponding directory.
Note: be sure to select “LINE IN” as the recording
source.
Fig. 14
Fig. 15
29
Fig. 16
c) FM Radio
Note: When searching for a station, the earphone
serves as an antenna. Therefore, please make
sure that the earphone is connected to the
unit. Otherwise, the unit will not be able to
find any station.
In the main menu, press [
] or [+/–] to select
“FM Radio” (figure 14). Press [
] to enter the FM
radio submenu (figure 15). Press [+/–] to select the
] to listen
station you want to listen and press [
(figure16). When in FM radio mode, press [+/–] to
] to change
adjust the volume and press [
station. Press [ESC / ] to exit and go back to the
FM Radio submenu. If there’s no station stored in
this unit, it will automatically enter the FM radio
options menu (figure17). There are five options:
Search for Channel, Frequency level, Step Setting,
Band Setting, and Storage Mode.
30
(1) Searching and storing a station
Press [+/–] to select “Search for Channel” and
] to enter “Search for Channel”
press [
submenu (figure18). Press [
] to manually
search for a station. When a frequency is found,
] to store. Press and hold [
] will
press [
enter automatic search mode and press [
] to
save a station. TRULY MP313X can store up to 30
stations. If there are more than 30 stations, an
error message will display (figure19). You will
have to delete a station before you can save a
new station in the system, or you can choose
“overwrite Station”. Press [ESC / ] to cancel the
current operation and go back to the channel
search submenu.
Note: Before channel searching, you can choose
the “Storage Mode” (figure 20). There are
two options: New Station and Overwrite
Station.
Fig. 17
Fig. 18
31
Fig. 19
Fig. 20
Fig. 21
(2) Search setting
Frequency level:
Press [+/–] to select “Frequency Level” and press
[
] to enter the “Frequency Level” submenu.
Press [+/–] to select a frequency level (Low level,
] to
Mid level or High level) and press [
confirm. This setting is trying to optimize the
performance of the automatic search in different
geographical locations.
32
Search step:
Press [+/–] to select “Step Setting” and press [
]
to enter the “Step Setting” submenu. Press [+/–]
to select search step (0.010MHz, 0.050MHz or
0.100MHz) and press [
] to confirm.
Band Setting:
Press [+/–] to select “Band Setting” and press
] to enter the “Band Setting” submenu. Press
[
[+/–] to select “US Band” or “Japan Band” and
] to confirm.
press [
Note: the frequency range of the “US Band” is
87.5~108MHz. The frequency range of the
“Japan Band” is 76.0~108MHz.
(3) FM Recording
When in FM radio mode, press [REC] to start FM
recording. A rotating “
” icon is displayed.
] to pause recording and the “
”
Press [
icon stops rotating. Press [ESC / ] to stop
recording and exit and the system will
automatically save the recorded file into the
“Radio” system directory.
33
(4) Deleting a station
In the station list, press [+/–] to select the station
you want to delete, press [EQ] button and a
“deleting a station” dialogue will pop up
(figure21). Press [
] to delete. If you want to
cancel the operation, press [ESC / ].
Fig. 22
Fig. 23
Fig. 24
Fig. 25
34
d) Games
In the main menu, press [
] or [+/–] to select
] to enter the
“Games” (figure 22). Press [
“Games” submenu (figure23). Press [+/–] to select
[Slide Picture] / [Push Box] / [Calculator] and press
[
] to enter the selected game. Press [ESC / ] to
quit. Press [MENU] to enter the game options menu
(figure 24, 25).
Fig. 26
Fig. 27
Fig. 28
35
(1) Slide Picture (figure 26)
Operations:
Press [
] to start the game. You are allowed to
move one step at a time. You can press [EQ] to
browse the original picture. Press [ESC / ] to
resume the game. Press [
] or [+/–] to move
up, down, left, and right to select the piece you
want to move. The border of the selected piece
will change to purple. Then, press [
] or
[+/–] to move the selected piece up, down, left, or
right.
Level:
There are three levels: novice, normal, expert.
There’s no time limit in the novice level and you
are allowed to look at the original picture up to 3
times. There will be a limit on the total number
of steps you can move in the normal level and
you are allowed to look at the original picture up
to 2 times. There will be limits on both the time
and the total number of steps for the expert level
and you are allowed to look at the original
picture only once.
Note: The selected piece can and only can be
moved to an area where a palm icon is
shown.
36
(2) Push Box (figure 27)
Operations:
Help the worker to push all boxes to the green
dot areas. The worker is able to push one box at
a time. The worker can enter the green dot areas
when necessary.
(3) Calculator (figure 28)
Operations:
Press [
] to enter the calculator interface. Press
] or [+/–] to select 0-9, operators, decimal
[
point and equal sign. When performing the
following calculation “42+210=252”, “42” plus
“212” equals to “252”. Select an operator to
continue operations or press “C” to reset.
(4) How to use options menu while you are
playing a game
(a) Select Picture: In the options menu, press [+/–]
] to
to select “Select Picture” and press [
enter the submenu. Press [+/–] to select a
] to load the selected
picture and press [
picture into the game interface. (Available in
the “Slide Picture” options menu only)
37
(b) Level: In the options menu, press [+/–] to select
] to enter the
“Level” and press [
submenu. Press [+/–] to select the level
and press [
] to confirm.
(c) Reset: In the options menu, press [+/–] to select
] to confirm.
“Reset” and press [
(d) Play Music:
In the options menu, press [+/–] to select “Play
Music” and press [
] to enter the submenu.
Press [+/–] to select the directory or track you
] to play and go back
want to play. Press [
to the game options menu. Press [ESC / ] to
resume the game. Now, you can enjoy the
music when you are playing games. If you
would like to adjust the volume or stop
listening, press [MENU] to select “Volume
Control” or “Exit Media” and press [
] to
enter the submenu.
Note: In the options menu, press [+/–] to select
“Enable/Disable FM Radio” (same
operation as that of “Play Music”).
38
e) E-Books
In the main menu, press [
] or [+/–] to select
] to enter the
“E-Book” (figure29). Press [
“E-Book” submenu (figure30) and press [
] to
enter the directory and file list (figure30). Press [+/–]
to select the directory or file you want to read and
press [
] to start reading (figure31). Press
] to go to the previous or next page. Press
[
[MENU] to enter the options menu. There are seven
options: Bookmark List, Auto Page On/Off, Auto
Flipping Speed, Locate Page, Play Music, Enable FM
Radio, and Exit Media (figure 32, 33).
Fig. 29
Fig. 30
Fig. 31
Fig. 32
39
Fig. 33
Fig. 34
Fig. 35
(1) How to use bookmark list
In the E-book mode, press [EQ] to place a
bookmark. A “
” will be displayed (figure31).
A file can have at most one bookmark and up to
4 bookmarks are allowed in the same directory.
In the e-book options menu, press [+/–] to select
“bookmark list” and press [
] to enter the
] to jump to the
submenu (figure34). Press [
page where the bookmark is placed. If you want
to delete a bookmark, press [EQ] and a “remove
bookmark” dialogue will pop up (figure35), press
[
] to delete. If you would like to cancel the
operation, press [ESC / ].
40
(2) How to set Auto Flipping, Auto Flipping
Speed and Locate Page
(a) In the e-book options menu (figure32), press
]
[+/–] to select “Auto Page On” and press [
to enable or disable auto flipping.
Fig. 36
Fig. 37
(b) In the e-book options menu (figure32), press
[+/–] to select “Auto Flipping Speed” and press
] to enter (figure36). Press [+/–] to set the
[
auto flipping speed and press [
] to
confirm.
(c) In the e-book options menu (figure32), press
] to
[+/–] to select “Locate Page” and press [
enter (figure37). Press [
] to move the
]
cursor. Press [+/–] to set the value. Press [
to confirm and the system will jump to the
selected page. If the selected page does not
exist, the system will jump to the last page of
the file.
41
(3) How to enjoy radio or music when you are
reading an E-book?
(a) FM Radio:
When in the E-book mode, press [MENU] to
enter the options menu. Press [+/–] to select
] to enter
“Enable FM radio” and press [
the station list. Press [+/–] to select the station
] to confirm and
you want to listen. Press [
go back to the options menu. Press [ESC / ]
to resume reading (figure31). Now, you can
enjoy the radio when you are reading
e-books. If you would like to adjust the
volume or stop listening, press [MENU] to
select “Volume Control” or “Exit Media” and
press [
] to enter the submenu.
(b) Music:
In the options menu, press [+/–] to select “Play
Music” (same operations as those of “Enable
FM Radio”).
Note: this unit only supports text file in TXT
format.
42
f) Browsing pictures
In the main menu, press [
] or [+/–] to select
“Photo Browser” (figure38). Press [
] to enter
directory and photo list (figure39). Press [+/–] to
select a directory or a file and press to confirm and
enter the photo browser mode (figure40). Press [+/–]
to change pictures. In the photo browser mode,
press [MENU] to enter the options menu (figure41).
There are two options: “Slideshow Speed” and
“Enable Slideshow”.
(1) Press [+/–] to select “Slideshow Speed” and press
] to confirm. Press [+/–] to change the
[
slideshow speed. The value of the slideshow
speed ranges from 4 to 99 seconds. Press [
] to
confirm.
(2) Press [+/–] to select “Enable Slideshow” and
press [
] to enable or disable the slideshow
function. When in the slideshow mode, press
] to pause slideshow and press [
] again to
[
resume slideshow.
Note: this unit supports BMP, JPG, and Truly’s
LOGO format.
43
Fig. 38
Fig. 39
Fig. 40
Fig. 41
Fig. 42
Fig. 43
Fig. 44
44
g) System Setup
In the main menu, pres [
] or [+/–] to select
“System Setup” (figure 42). Press [
] to enter the
“System Setup” submenu (figure43, 44). There are
seven options: Language, Backlight Timer, Adjust
Contrast, System Reset, Power Off Time, Auto
Sleep, and Version Info.
(1) Language
Press [+/–] to select “Language”, press [
] to
enter the submenu. This unit supports three
languages: English, Simplified Chinese and
Traditional Chinese. Press [+/–] to select the
language you want. Press [
] to confirm and
the system will be updated based on your setting.
(2) Backlight Timer
Press [+/–] to select “Backlight Timer”, press [
]
] to move
to enter the submenu. Press [
the cursor and press [+/–] to set the values of the
selected field and press [
] to confirm.
(3) Adjust Contrast
Press [+/–] to select “Adjust Contrast”, press [
]
to enter the submenu. Press [+/–] to adjust the
] to confirm.
contrast and press [
45
(4) System Reset
Press [+/–] to select “System Reset”, press [
]
to enter the submenu. A “system reset”
confirmation dialogue will pop up and press
[
] to confirm. The unit will be reset. If you
want to cancel the operation, press [ESC / ] .
(5) System Reset
The unit will automatically turn off at the time
you set. Press [+/–] to select “Power Off Timer”,
] to enter the submenu. Press [
] on
press [
“Timer On” to enable or disable the
automatically power off function. To set the time,
select “Set Timer”, press [
] to move the
cursor between hour, minute and second, press
[+/–] to adjust the values and press [
] to
confirm. Note that the unit will automatically
turn off at the time you have set if the function is
set to “Timer On”, no matter what operation is
being performed. The default timer is set to one
hour.
46
(6) Auto Sleep
Press [+/–] to select “Auto Sleep” press [
] to
set the time. Press [
] to move the cursor
between hour, minute and second and press [+/–]
] to confirm. When
to adjust the values. Press [
in standby mode, if there is no operation after
the time period you set, the system will
automatically turn off. The default auto sleep
time is 3 minutes.
(7) Version information
Press [+/–] to select “Version Info.”, press [
]
and you will see the model name / version number
/ internal version number / date and other system
information.
h) Memory Managent
In the main menu, press [
] or [+/–] to select
“Memory Mgmt.”. Press [
] to enter the
“Memory Mgmt.” submenu (figure 46). There are
five options: Memory Info., File Info., Quick Format,
Low Level Format, and Disk Select.
47
Fig. 45
Fig. 46
Fig. 47
(1) Memory management:
Display the total size of the memory and the
size of the available memory at the moment.
(2) File information:
Press [
] to browse all directories and files in
]
the root directory. Select a file and press [
to see the folder information. Press [MENU] to
delete the selected file. Select a directory and
press [
] to enter the selected directory.
(Note: can not delete a directory)
48
(3) Quick format:
A “Quick Format” confirmation dialogue will
pop up (figure47). Press [
] to confirm. If you
would like to cancel the operation, press [ESC /
]. (Note: ALL DATA WILL BE ERASED AFTER
FORMATTING)
(4) Low level format: (same operation as
that of quick format)
❇ What is the difference between quick format
and low level format?
The main difference between the two types
of format is that low level format will
perform an error check, but quick format will
not. If you just need to erase the data on the
flash memory, a quick format is sufficient.
However, if the unit went down from time to
time, a low level format is required.
49
(5) Disk select:
Press [+/–] to select “Disk Select” and press [
]
to enter the submenu. Press [+/–] to select the
disks, which include local disk and SD card. Press
[
] to finish setting and go back to the
System Setup submenu. When an SD card is
inserted, you can choose either of the two disks
as the active disk. When the SD card is selected
as active disk, an SD card indicator will be
displayed at the top-right corner of the user
interface. When the SD card is locked, the
system cannot delete or create files on the SD
card.
Note: Avoid removing the SD card while in use to
prevent the player from malfunctioning. If
this does occur, please press the “Reset”
button once to restore the player. Always
turn off the player before removing the SD
card.
50
4. Removable Drive
When Auto Sleep is enabled, if the unit is in standby
and there is no operation after the set time, MP313X
will automatically turn off to save battery. The Auto
Sleep is disabled when the unit is in working modes
(playing music or game, browsing photo or texts,
receiving radio or recording) or is connected to your
computer. If the Power Off Timer is enabled, the unit
will automatically turn off at the time you set in any
mode except when the unit is connected to your
computer.
g With the SD card slot, this unit can also work as SD
card reader under Windows systems.
5. Safely remove the USB device
To avoid data loss resulting from the sudden removal
of the unit, please click the “
” icon at the bottom
right corner and follow the instructions.
51
6. Installing, using and uninstalling
TRULY MP313X softwares
Note: the following operations are performed in a
Win2000 system. The screenshot may be
different when these operations are performed
in other operating system.
a) Installation
Insert the supplied installation CD in a CD-ROM in
your computer. You will see the welcome screen
shortly. (figure 48)
Fig. 48
52
(1) You can find some useful information on how to
use this unit by clicking “Read MP313X User
Manual”. This manual is in PDF format. If you can
not read PDF files, please click “Install Adobe
Acrobat Reader” and follow the instructions.
(2) You do not need to install any drives in
Win2000/ME/XP. If you are using Win98, please
click “install MP313X Win98 driver” and follow
the instructions. After the installation, connect
this unit to your computer using the supplied USB
cable, you will see a “Removable Disk” in the
“My Computer” directory.
(3) Click “Install T-Music music manager” and follow
the instructions. (including “LRC lyric editor”.
“T-Music” and “U disk detector”)
(4) Click “Image2Lgo” and follow the instructions.
53
b) Driver for MP313X Win98
Note: in Win98, this unit may not be recognized by
the operating system. An “add new
hardware” dialogue will pop up. Click “next”
➟ search for the latest version of driver for
this hardware(recommended) ➟ Click “next”
➟ select the path: C: \Windows \Inf \other ➟
Click “next” ➟ Click “next” ➟ click “finish”.
Connect this unit to your computer using the
supplied USB cable. If the unit is successfully
connected, “CONNECTED” will be displayed. At the
same time, you will see two Removable Disks in the
“My Computer” directory (say disk J and disk K).
(1) Download (from computer to player)
Copy the file you want to download and paste to
disk J/K.
(2) Upload (from player to computer)
Copy the file on disk J/K and paste to the target
directory.
(3) Delete
Select the file you want to delete, right click on
this file and select delete. You can also press the
“delete” key on the keyboard.
54
(4) Format
Right click on disk J and select “format” (figure
49). Choose “FAT” (Do NOT select FAT32 or NTFS)
in the “File System” drop down menu and click
“Start” to start formatting.
Fig. 49
c) Using T-Music Music Manager
(1) LRC lyric editor
Please see the help files for LRC lyric editor for
details.
(2) T-Music
Please see the help files for T-Music for details.
55
(3) U disk detector
If T-Music can not find the player, use U Disk
Detector to help the system identifying the
Removable Drive.
(4) Using Image2Lgo
This software will convert files in JPG, BMP, and
GIF to Truly’s LGO format that can be best
displayed by this player. Please see the help files
for Image2Lgo for details.
(5) Uninstalling T-Music1.00 Music Manager
Double click “add/delete program” in the
“Control Panel” (figure 50). Select “T-Music1.00”
and click “change/delete” and follow the
instructions. Or click “Start / Programs / T-Music /
Uninstall T-Music”. (When uninstalling
“Image2Lgo 1.0”, please follow the same steps)
56
Fig. 50
57
7. Appendix
Trouble shooting
Q: Why can some WMA format songs on the digital
player not be played?
A: There are many different music formats for songs
on the Internet and many of them are in WMA
format. Some of these WMA format songs are
subject to DRM (license) copyright protection,
which may cause unauthorized copies of some
songs to become unplayable. This system protects
the original owner of the songs. Some websites
offer songs without license protection, and you
may copy and play them as you wish - just like
songs in mp3 format. However, some websites
only offer songs in WMA format with license
protection (for example: www.napster.com and
www.musicmatch.com). To play these songs you
can only use your PC with a Windows Media
Player that has obtained the correct license
protection. (Windows Media Player is a free
Microsoft product that allows you to play WMA
streaming media files. You can download it from
many websites.) You cannot copy and play these
songs on another PC without license protection.
This prevents the spreading of unauthorized and
illegal copies of songs and protects the song’s
copyright owner.
58
If you have WMA format songs with the
corresponding license protection, you still cannot
just copy the songs from your PC to the digital
player. You need to open Windows Media Player
first. From its menu select “document”, “open”
and open all the WMA songs you want to copy (if
all of them can be played, you can transfer them
to your player). Connect the digital player to your
PC via a USB cable, and the screen of the player
will display “Communicating”. Next a portable
disk (e.g. F:\) will be displayed. Now click the
“portable device” option on the left hand side of
the Windows Media Player. A list of the music to
copy will appear. Select all the songs you want to
copy and then click the “copy music” button in
the top left hand corner of the screen. The
selected songs can now be transferred to your
player with the required license protection
authorization.
Q: How many minutes of MP3/WMA songs can be
stored on the player?
A: This depends upon the player’s memory capacity,
and how much is available for storage. One
minute’s
MP3/WMA
music
occupies
approximately 1Mb of space, so if the capacity of
the memory is 128Mb then it can store around
128 minutes of music.
59
Q: Having problems transferring files?
A: (1) Please make sure that the USB cable is
properly connected to the player and the PC.
(2) Please check that there is enough memory
available to accommodate the files that you
wish to transfer.
Q: Lost data?
A: Some data loss can be caused by an unstable
power supply during the transfer process. Our
company does take responsibility for any files
that are lost or damaged. We strongly
recommend that our customers keep back-up
copies of all important files.
Q: Why do different songs play at different
volumes?
A: Depending on how a song is recorded, and how
the volume levels were set at that time, songs can
have different volumes levels and some can
sound much louder than others.
60
Q: Why can some files, which are smaller in size
than the available space on the player, still not
be transferred?
A: The CMOS chip inside the player allocates 16KB
or 32KB to one memory track. A one Byte file will
take one track. Therefore some files are smaller
than the available memory but still cannot be
transferred to the player.
Q: Why my SD card in MP313X cannot be
recognized as a Removable Drive under
Windows 2000?
A: Try downloading Service Pack 4 (SP4) for
Windows 2000 and install it to solve this problem.
You
may
find
it
via
this
link:
h t t p : / / w w w . m i c r o s o f t . c o m
/windows2000/downloads/servicepacks/sp4/
default.asp
61
Q: Why I can only download a limited quantity of
files into my player while there is plenty of space
on it?
A: The number of files you can store in the ROOT
directory of a local disk largely depends on the
length of file names. The longer the file name is,
the fewer files. A maximum number of 512 files
are allowed to be stored in the ROOT directory.
Note that this restriction only applies to the
ROOT directory. Create as many folders as you
need to store more files.
Q: How do I create new folders in my MP3 player?
A: Connect the MP3 player to your PC using the
supplied USB cable. In the Removable Disk
window, select File > New > Folder.
Q: My player won’t start, what has happened?
Could the following have occurred? :
A: (1) During an upgrade of the player’s hardware,
an accidental error might have occurred or the
USB cable was unplugged.
(2) The Flash disk has been physically damaged.
(3) An unreliable power supply has resulted in an
automatic power off after start up.
62
Technical Support
Please visit our website at www.picnroll.com for the latest
product information & downloads. If you are unable to
find the solution in the FAQs, please contact us at
[email protected], or call us at 1-866-pic-n-roll
“Pic ’N Roll” is a registered trademark in the US Patent
& Trademark Office. All other product or service names
are the property of their respective owners.
2005 Truly (U.S.A.) Inc. All Rights Reserved. Specifications
are subject to change without notice.
63