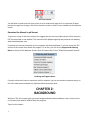
1
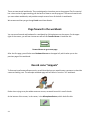
User’s Manual
SentenceShaper® 2
Version 1.0.9
Copyright©Psycholinguistic Technologies, Inc. 2013
All rights reserved
www.SentenceShaper.com
NOTE:
This PDF version of the manual is generated
automatically from the online help system within the
program. Therefore, some of the links within the
document may not work properly when exported to
PDF format.
2
Table of Contents
CHAPTER 1: READING THIS MANUAL ...................................................................................................................... 4
CHAPTER 2: BACKGROUND...................................................................................................................................... 7
CHAPTER 3: INSTALLATION AND SETUP ................................................................................................................ 18
CHAPTER 4: QUICK START GUIDE .......................................................................................................................... 22
CHAPTER 5: USING WORKBOOKS .......................................................................................................................... 38
CHAPTER 6: USER SETTINGS ................................................................................................................................... 72
CHAPTER 7: WORD-FINDING HELP ........................................................................................................................ 79
CHAPTER 8: ADDING TEXT ..................................................................................................................................... 87
CHAPTER 9: EXPORTING YOUR SPEECH ............................................................................................................... 100
CHAPTER 10: THE EDITING TOOLS ....................................................................................................................... 117
CHAPTER 11: OTHER "HOW TO"s ........................................................................................................................ 149
CHAPTER 12: TROUBLESHOOTING ...................................................................................................................... 157
CHAPTER 13: DESCRIPTIONS OF PROGRAM SCREENS ......................................................................................... 164
Credits/Acknowledgments ................................................................................................................................... 175
3
CHAPTER 1:
READING THIS MANUAL
This section tells you how to use this manual if you are viewing it from within the program.
Topics in this chapter:
Viewing the onscreen manual
Printing from the onscreen manual
How to view the onscreen manual
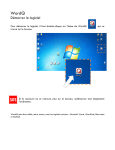
Whenever you click the HELP button on a screen, or click the F1 key on your keyboard, the manual will
open to the most relevant section.
Below on this page:
Layout of the manual
Viewing a topic
Using the navigation arrows
Opening or closing a chapter
Searching for a word or phrase
Resizing the screen
Moving the screen itself
Moving around within a page
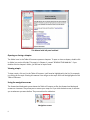
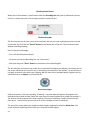
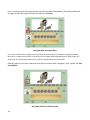
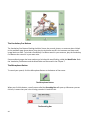
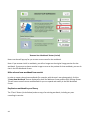
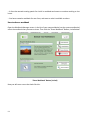
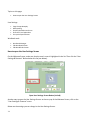
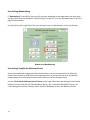
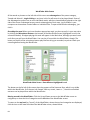
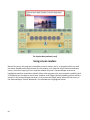
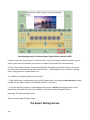
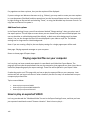
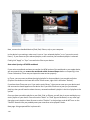
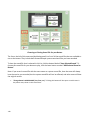
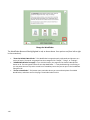
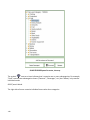
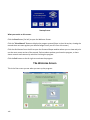
Layout of the manual
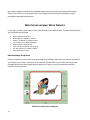
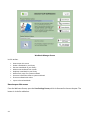
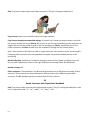
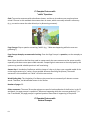
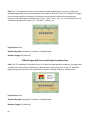
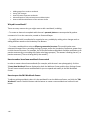
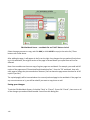
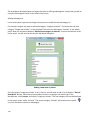
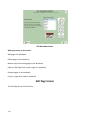
This manual has two panels. The panel on the left (outlined below) has the Table of Contents, and the
panel on the right has the text of each topic.
4
This Manual with left panel outlined
Opening or closing a chapter
The folder icons in the Table of Contents represent chapters. To open or close a chapter, double-click
its folder icon on the left side. This page is in Chapter 1, named "READING THIS MANUAL". If you
double-click the chapter's folder, you will see its topics listed.
Viewing a topic
To view a topic, click on it in the Table of Contents. It will now be highlighted in the list. For example,
try clicking on the topic Printing this manual. You will go to that topic and it will be highlighted in the
Table of Contents.
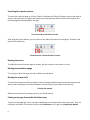
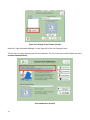
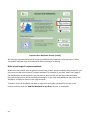
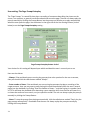
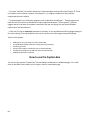
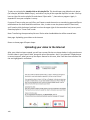
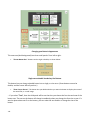
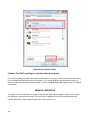
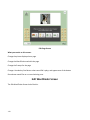
Using the navigation arrows
The forward and backward arrows above the Table of Contents act like the forward and backward
arrows on a browser. They allow you to retrace your steps. So if you click the back arrow, it will take
you to wherever you were before. They are outlined in red below:
Navigation arrows
5
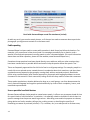
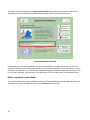
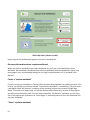
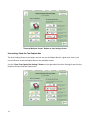
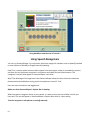
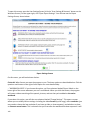
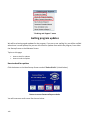
Searching for a word or phrase
To search for a word or phrase, click the "Search" tab above the Table of Contents, type in the word or
phrase, and press Enter. All pages that contain your search phrase will be listed in the left panel; the
selected page will be displayed on the right.
The Search tab on left side of screen
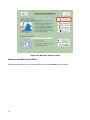
After using the search feature, you can return to the Table of Contents by clicking the "Contents" tab
(outlined in red below):
"View Contents" tab on left side of screen
Resizing the screen
To make this manual's screen larger or smaller, pull the corners of the screen in or out.
Moving around within a page
To scroll up or down the page, use the scrollbars on each panel.
Moving the screen itself
To move the screen around (for example, if you are using the Manual while running the program and
want to see something on the SentenceShaper 2 screen), drag it by the blue bar on the top.
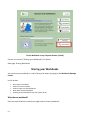
Printing the manual
Below are instructions for printing out all or part of the manual.
Printing out a page from within the help screen
To print out the page you are on, use these two buttons on the upper left of the help screen. They are
outlined in red below. The one on the left is the Print Button; to its right is the Page Setup Button.
6
The Print Buttons
You will want to make sure that your printer is set to reduce each page to fit on one sheet of paper,
because the type font is large in the online manual in order to make it more readable on the computer
screen.
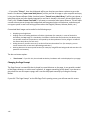
Download the Manual in pdf format
To print out a copy of the entire manual, we suggest that you use a printable version of the manual in
PDF format posted on our website. This manual will be updated regularly and posted on our website,
www.sentenceshaper.com.
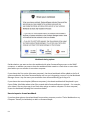
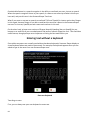
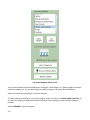
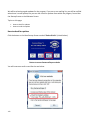
If you have an Internet connection on the computer with SentenceShaper 2, you can access this PDF
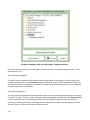
version of the manual from within the program. To do this, just click on the Support and Ordering
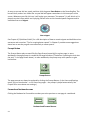
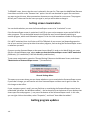
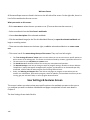
Menu at the top of the Welcome Screen. Open this menu and click on "Download printable manual":
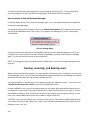
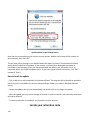
Ordering and Support Menu
If you do not have an Internet connection on this computer, you can use another computer and go to
this URL: www.sentenceshaper.com/aphasia-software/manuals.html
CHAPTER 2:
BACKGROUND
Welcome! This first chapter gives you some background about SentenceShaper: why it works, how it
can be used, and research studies about the program.
Topics in this chapter:
7
What is SentenceShaper 2?
Who can use it?
Why does it work?
A communication aid
A therapy program
Published research studies
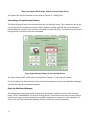
What is SentenceShaper 2?
SentenceShaper® is a novel, patented software program that helps people with aphasia to
communicate in their own voices. The user records spoken words or phrases and combines them into
sentences by dragging icons on the computer screen.
The program can be used as a communication and as a therapy tool. Its positive effects as both a
communication aid and a language therapy tool have been reported in published research studies
funded by government grants. This new version makes the program more interesting to use and allows
it to target specific linguistic structures.
Key features in SentenceShaper 2 include:
-- Pictures can be displayed on the screen, and word-finding support can be tailored to each picture or
topic.
-- Workbooks: Sequences of SentenceShaper screens can target a particular structure or type of
speech (15 workbooks are included, a total of approximately 800 screens)
For treatment, the workbooks make it possible to target specific structures or tasks through picture
description with word-finding support, spoken prompts, and models of correct answers. The support
for speech provided by SentenceShaper lets the user try to produce structures that rarely if ever
appear in their unaided speech.
For use as a communication aid, the workbook mechanism makes it possible to create electronic
scrapbooks, videos, etc., pairing personal photographs with spoken comments in the user's own voice.
A recording interface makes it easy for users to record their speech.
Three editing tools allow the caregiver, clinician, or user to make changes that can be as simple as
adding a few words to personalize the system or as ambitious as creating and distributing new
treatment workbooks or electronic photo albums.
A text area allowing users or caregivers to enter text on the main screen. This text can be created with
the help of third-party programs such as WordQ, which can play back text and even suggest new
words.
8
The ability to export user speech and images, and text for use on handheld devices, email, phone
conversations, and even movie-making.
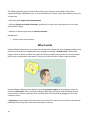
Who can use SentenceShaper 2?
Below are some notes about the kinds of people who have shown positive effects in studies to date.
-- People with fragmented, non-fluent speech are frequently able to record short sound clips and piece
them together into much longer and more grammatical structures. Their productions on the system
can also be much more fluent than their unaided speech, since they will not contain all the hesitations,
false starts, and errors created along the way.
-- People with word-finding problems may create better speech with the program by using the built-in
word-finding tools, and also by playing back words or phrases they have recorded, which can stimulate
new words.
-- People who make errors of word choice may be able to notice these errors more easily when they
play them back; they can then fix the errors by recording new sound clips.
-- People who have trouble speaking intelligibly (due to apraxia, etc.) may be able to produce much
clearer speech on the system, since they can revise and evaluate their speech. They may also benefit
from recording their utterances in small chunks...a long word can even be broken up into several
smaller chunks.
Abilities that are NOT required
-- Computer skills: While experience with a computer is useful, it is not necessary. Use of the program
requires only single-clicking and dragging. A touch screen monitor (which is often built in to tablet and
laptop computers) can be helpful for a person who has never used a mouse. However, people with
hemiplegia have operated the mouse with their non-dominant hand in several of the research studies.
-- Reading and writing: Most areas of the program do not require text skills. Vocabulary Cue Buttons
and the WordFinder display text words, but clicking these words causes their pronunciation to be
played aloud. The Caption Box allows users to or caregivers to enter text; third party programs such as
WordQ can be used to play back this text and to suggest appropriate continuation words.
Much of the text in the program is accessible to screen readers, that is, to programs which can read
text aloud. WordQ works especially well for this purpose, as it reads the text in the SentenceShaper
screen, rather than copying it into a separate window. Any text in SentenceShaper that can be
highlighted should be accessible to WordQ and other programs with text to speech capability.
Note: There is a fair amount of text in the tutorial workbooks, but it is accessible to screen readers.
Some prerequisites
9
The following abilities may be required for effective use. However, most studies to date have
emphasized largely independent use, so if the individual has a helper, these requirements may not be
as important.
-- Relatively good single word comprehension
-- Ability to detect errors when listening to speech (this is easier than noticing errors in one's own
speech while talking)
-- Absence of severe impairment to executive function.
Related topic:
Research about SentenceShaper
Why it works
SentenceShaper is based on a very simple fact: People with aphasia and other language problems may
still know a lot about their language but their language processing is slowed down. It takes them
longer to think of words, and then the words that they do produce may vanish from memory before
they can be combined with other words. They may not even be able to create simple sentences.
SentenceShaper addresses this problem by providing memory support and by making it easier for
people to self-monitor, that is, to listen carefully to what they are saying. How? By letting the user
record words or phrases, play them back, and build them into sentences by dragging icons on the
computer screen.
-- Replaying recorded speech clips allows the user to refresh his memory of the words he has already
produced, so that they don't have to be maintained in memory.
10
-- By ordering these clips in sequence, the user can create sentences (and whole messages) without
having to hold everything in her memory all at once.
-- Being able to play back their utterances allows users to self-monitor, that is, to listen to their own
speech. It is often hard for people with language problems to self-monitor at the same time as they are
speaking. Once they are finished speaking, the utterance may fade from memory quickly, making it
hard to notice errors or omissions..
Published studies have shown that it can help in two ways:
"Aided effects": Spoken utterances created while using SentenceShaper (aided utterances) are often
far better -- in terms of grammatical structure, word choice, fluency, or other measures -- than
utterances produced without using the system (unaided utterances).
Treatment effects: For some people, these aided effects carry over into spontaneous, unaided speech
after a period of SentenceShaper use. Their utterances may become longer, more structured, more
fluent, and/or more informative following regular home use of SentenceShaper for a period of time.
See the "Research" section later in this chapter for more details.
Using SentenceShaper as a communication aid
Speech created with the program can be used in many different social situations, described briefly
here. (For more details, please visit www.SentenceShaper.com, our website.) Because treatment
effects have been found when SentenceShaper is used over a period of time (see the research
summary), regular use of the program as an assistive device may bring about treatment effects as well.
That is, the user's natural, unaided speech may improve.
Topics below on this page:
Electronic scrapbooks
Emails
Public speaking
Use on portable devices
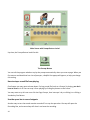
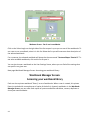
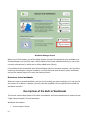
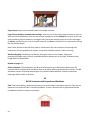
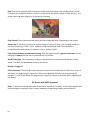
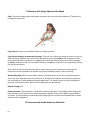
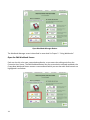
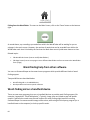
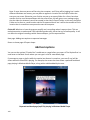
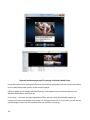
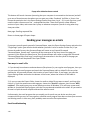
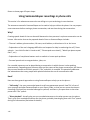
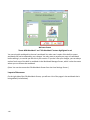
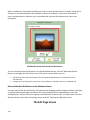
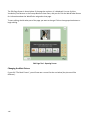
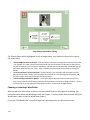
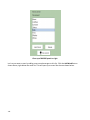
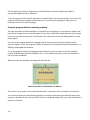
Electronic scrapbooks
We use the term "electronic scrapbook" here to refer to a SentenceShaper 2 workbook in which most
pages have the user's personal photos accompanied by spoken comments in his or her own voice.
11
Page from an electronic scrapbook
Users' speech on SentenceShaper is often much better than what they can create without this support.
Speech created with the program may have more grammatical structure, or better word choice, or
more intelligibility, or simply more fluency than the user's "offline" spontaneous speech.
If necessary, and if the clinician or caregiver has time, customized word-finding support can be added
to each page to help the user create his or her comments. Sometimes it is also helpful to record a few
key words or phrases to help organize the remarks. (Often the user and helper record these key
words/phrases together, and then the user works independently to create the comments.)
The workbook can then be opened and presented to others by clicking the forward arrows to page
through it, rather like a PowerPoint presentation.
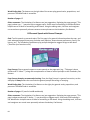
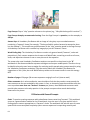
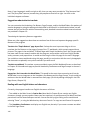
Emails
You can send the user's SentenceShaper productions as email attachments. Detailed instructions about
how to do this are provided in Chapter 9.
12
Email with SentenceShaper sound file attachment (circled)
As with any email, you can also attach pictures, so if the user has made a comment about a particular
photograph you might want to attach it to the same email.
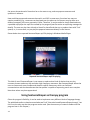
Public speaking
SentenceShaper has been used to create public speeches in both formal and informal situations. For
example, a city councilman in New Jersey used it to campaign successfully for re-election, and a
woman in Pennsylvania presented a moving speech to over a thousand people. (For more information
about these and other speeches, please visit our website, www.SentenceShaper.com.)
Sometimes these speeches have been played directly to an audience, while on other occasions they
have been transferred to a portable device and used to help the person deliver the speech "live."
There are frequently opportunities for this kind of use in small group settings. For example, people in a
travel club at one aphasia center created electronic scrapbooks about their vacations, and then these
scrapbooks were presented to the group by running them with an overhead projector. Book clubs
(often using recorded books) offer another opportunity for people with language problems to create
comments on the material in their own voices, taking all the time they need to create their comments.
These spoken productions, whether delivered to large or or small groups, can often demonstrate the
user's preserved language and cognition quite dramatically by virtue of their complexity, humor, and
emotional expressiveness.
Use on portable handheld devices
Because SentenceShaper helps people to create better speech, it offers a way to prepare ahead of time
for certain kinds of social situations. In particular, it is especially suited to situations in which there is a
specific message that the person wants to get across-- describing some medical symptoms to a doctor,
giving advice to a family member, telling a joke, making a toast, or describing the specifics of
something one wants to purchase (a house, a TV, a vacation, etc.) to a sales person.In all these cases,
13
the person knows ahead of time what he or she wants to say, and can prepare comments and
questions in advance.
How could these prepared comments be used in real life? In some cases, functional use may not
require portability (e.g., comments can be played over the phone or the listener can play them on a
desktop computer), but more commonly it does. Therefore, it may be useful to simply download onto
a portable mp3 player the mp3 files created by the program (see the section on exporting messages for
details). The user can play them silently to himself or herself and then try to produce them with "live"
speech; or, in some cases, can just play the prepared utterances directly to the listener.
Shown below is an exported SentenceShaper mp3 file playing in Windows Media Player:
Exported SentenceShaper mp3 file playing
This kind of use of SentenceShaper is not meant to replace other kinds of devices that can play
common phrases used every day and other high-frequency utterances. But SentenceShaper allows the
user to create much more complex and situation-specific utterances, which can facilitate
communication and also demonstrate that the speaker is capable of expressing much more complex
ideas than others may have appreciated.
Using SentenceShaper as therapy program
Given the program's flexibility, it can be used to implement many different kinds of language therapy.
The published studies to date have used what we'll call "Narrative-based SentenceShaper therapy", but
this is not the only way that the program can be used. (See the summary of research studies with the
program later in this chapter.)
14
Features of "Narrative-based SentenceShaper therapy:
Emphasis on creating full sentences
Participants were strongly encouraged to create full sentences in the Sentence Row.
Encouragement to self-monitor
Participants were also reminded to replay their utterances regularly, and to look for ways to improve
and expand a sentence under construction.
Narrative practice
Virtually all studies emphasized the creation of multi-sentence narratives (retelling personal stories,
movies, TV shows, etc.) rather than single picture description.
People who were too severely impaired to retell an entire movie or television show were asked to
describe multi-picture sequences or wordless picture books, such as "Carl" wordless picture book
series (http://www.gooddogcarl.com); or to create imaginary “sequels” or “prequels” for simple
pictures, imagining what might have happed after or before the scene depicted in the picture
Generalization modules
In a few studies, participants practiced a particular structure with a constrained, single-picture
description task. This was followed by a generalization module, a period of SentenceShaper use in
which the participant was asked to create speech on topics of personal interest but using the trained
structure as much as possible.
Homework
Regular homework was assigned.
Approach to word-finding problems
When word-finding problems arose, we encouraged circumlocution and use of the Vocabulary Cue
Buttons to find another way to express the idea, or even to help with idea generation.The Word-Finder
was rarely used in treatment studies, because the emphasis was on developing strategies to handle
word-finding problems.
Related topics:
15
Research about SentenceShaper
People involved in SentenceShaper research
Tips on creating better speech with the program
Research about SentenceShaper
A number of published studies have examined the program. Visit our website,
www.SentenceShaper.com, for a regularly updated PDF file summarizing SentenceShaper research to
date.
On this page:
Summary of research findings
Researchers
Publications
Summary of research findings
Two kinds of positive effects have been reported:
-- "Aided effects": Spoken utterances created while using SentenceShaper (aided utterances) are often
far better -- in terms of grammatical structure, word choice, fluency, or other measures -- than
utterances produced without using the system (unaided utterances).
-- Treatment effects: For some people, these aided effects carry over into spontaneous, unaided
speech after a period of SentenceShaper use. Their unaided multi-sentence narratives (on unpracticed
topics) may become longer, more structured, more fluent, and/or more informative following regular
home use of SentenceShaper for a period of time. This is an impressive outcome, because aphasia
treatment rarely generalizes to connected speech.
However, these studies are relatively small, and have focused entirely upon people with non-fluent
aphasia. Informal observation suggests that the program may be helpful for other populations (e.g.,
apraxia,pediatric language disorders), but there are no data as yet. In addition, the relatively small
number of participants in the existing studies, along with the methodological challenge of controlling
all variables in studies with long-term, semi-independent use of the program in participants' homes,
make it hard to predict who will show these effects, or how to bring them about most reliably.
Researchers
People who we have collaborated with in research studies about SentenceShaper:
At Moss Rehabilitation Research Institute, Philadelphia, PA:
Myrna Schwartz, Megan Bartlett, Ruth Fink, Roberta Brooks, Susan Kohn, Monica Chun, Lauren
Leiter, Laura MacMullen, Diane [Locatelli] Stephens, Jennifer Lowery
At the University of Maryland School of Medicine:
16
Rita Berndt, Denise McCall, Telana Virata
Selected publications about SentenceShaper
Linebarger, M.C., Schwartz, M.F., Romania, J.F., Kohn, S.E., & Stephens, D.L. (2000). Grammatical
encoding in aphasia: Evidence from a "processing prosthesis". Brain and Language, 75, 416-427.
Linebarger, M.C., Schwartz, M.F., & Kohn, S. E. (2001). Computer-based training of language
production: An exploratory study. Neuropsychological Rehabilitation, 11(1), 57-96.
Linebarger, M.C., McCall, D., & Berndt, R.S. (2004). The role of processing support in the remediation of
aphasic language production disorders. Cognitive Neuropsychology, 21, 267-282.
Linebarger, M.C., & Schwartz, M.F. (2005). AAC for hypothesis-testing and treatment of aphasic
language production: Lessons from a processing prosthesis. Aphasiology, 19, 930-942.
Bartlett, M.R., Fink, R.B., Schwartz, M.F., & Linebarger, M.C. (2007). Informativeness ratings of
messages created on an AAC processing prosthesis. Aphasiology, 21:5, 475-498.
Linebarger, M.C., McCall, D., Virata, T., & Berndt, R.S. (2007). Widening the temporal window:
Processing support in the treatment of aphasic language production. Brain and Language, 100, 53-68.
Fink, R.B., Bartlett, M.R., Lowery, J.S., Linebarger, M.C., and Schwartz, M.F. (2008) Aphasic speech with
and without SentenceShaper: Two methods for assessing informativeness. Aphasiology, 22, 679-690.
Albright, E., & Purves, B. (2008) Exploring SentenceShaper: Treatment and augmentative possibilities.
Aphasiology, 22, 741-752.
McCall, D., Virata, T., Linebarger, M., & Berndt, R.S. (2009) Integrating technology and targeted
treatment to improve narrative production in aphasia: A case study. Aphasiology, 23:4, 438-461.
Linebarger, M.C., Romania, J.R., Fink, R.B., Bartlett, M., & Schwartz, M.F. (2008) Building on residual
speech: A portable processing prosthesis for aphasia. Journal of Rehabilitation Research and
Development, 45:9, 1401-1414.
Dahl, D.A., Linebarger, M.C., and Berndt, R.S. (2008) Improving automatic recognition of aphasic
speech through the use of a processing prosthesis. Technology and Disability, 20, 283-294.
True, G., Bartlett, M.R., Fink, R.B., Linebarger, M.C., and Schwartz, M.F. (2009) Perspectives of persons
with aphasia towards SentenceShaper To Go: A qualitative study. In press, Aphasiology.
17
CHAPTER 3:
INSTALLATION AND SETUP
Topics in this chapter:
Computer requirements to use the software
Installing the program
Launching the program
Activating the program
Testing your microphone and speakers
Computer requirements
Operating system: Windows XP, Vista,Windows 7, or Windows 8 (full version, NOT "RT" version).
SentenceShaper does not yet run on iPads or other Apple computers, but it does run well on Windows
tablets.
Sound card, speakers, and microphone.
Disk space: The program itself requires almost 500 MB of disk space, and you will need more space to
store the sound files you will be creating.
Screen resolution: The program requires a screen resolution of at least 1024 x 768 pixels (see below
on how to adjust your screen resolution ). Most computers (with the exception of some netbooks and
tablets) have at least this resolution. If you are using a tablet with limited screen space, make sure that
it is set to display in landscape mode, so that the screen is wider than it is tall.
How to adjust your screen resolution
If SentenceShaper doesn't fit on your screen, you may need to adjust the screen resolution. To do this,
right-click on the desktop and select Properties. Under Settings, set the screen area to 1024 x 768
pixels (usually by moving a slider) and click Apply. You may want to note the original setting, in case
you wish to reset your screen after using SentenceShaper.
Computers differ in how you change the screen settings. Sometimes when you right-click on the
Desktop you will see the option Personalize, and then a set of options including Display Settings. On
other computers, you will see Screen resolution listed when you. right-click the Desktop. Please give us
a call if you run into difficulties with this.
Installing the program
On this page, we walk you through installing the program on your computer.
18
You will need to have administrator privileges to install the program, but all users on your computer
will be able to run SentenceShaper 2 once it is installed.
Topics on this page:
How to install from a CD
How to install from an Internet download
Where to find the program on your computer
How to install from a CD
1. Put the SentenceShaper 2 CD in the CD drive.
2. After inserting the CD, open Windows Explorer (also called My Computer or just Computer). You will
see your CD drive listed with the name "SentenceShaper 2" next to it.
3. Double click on it, to view the contents of the CD, unless Windows does this automatically. You
should see a file listed with the name "InstallSentenceShaper2.exe”. This file is the "installer" program
that will actually put SentenceShaper 2 on your computer.
Note: this program may also be named "setup.exe" or something else, depending upon the version and
distributor. Also, your computer may not display the ".exe" ending of the file name.
4. Now launch this "exe" file: right-click on it and choose 'Run as administrator'. There may be a delay,
possibly for as long as a minute, before you see anything happen. (Don't keep clicking on it.)
5. In most versions of Windows, you will now see messages asking you to give permission to proceed
with the install. The messages may look alarming, but they are normal, and you should click "Yes" or
"OK". If you have an antivirus program, it may well chime in with its own set of warnings and queries.
6. When the program has been installed, there will be a screen telling you that the installation is
complete.
How to install from an Internet download
Trial copies of the program (and eventually full versions as well) can be downloaded from our web site,
www.sentenceshaper.com.
When you download SentenceShaper 2, what you are downloading is a file named
"InstallSentenceShaper2<Edition>.exe”. This file is the "installer" program that will actually put
SentenceShaper 2 on your computer. Your computer will probably ask you whether you want to RUN
or SAVE the installer. We strongly recommend that you SAVE the file and remember where you put it
on your computer. (If you were to choose RUN, the installation might be incomplete and the program
might not run properly.)
19
Then locate the file on your computer, and follow steps 4-6 above.
Where to find the program on your computer
In Windows 7, the program will be installed to c:\Program Files(x86)\SentenceShaper 2. In earlier
versions of Windows, it will be in c:\Program Files\SentenceShaper 2.
Launching the program
After the installation program is finished, you will find a shortcut to SentenceShaper 2 on your desktop.
To launch the program, double-click the shortcut. It looks like this:
The desktop shortcut
In Windows 8, you will need to run SentenceShaper in Desktop mode. After installation, there will be a
shortcut to SentenceShaper on the Charms Menu. It will allow you to launch the program with a single
click.
Activating the program
Unless you are using a trial copy, the first time you run the program it will ask you to enter your
activation code. This activation process requires a one-time-only use of the Internet. If the computer
on which you have installed SentenceShaper 2 is connected to the Internet, then when you click the
Activate button and follow the instructions, your program will be activated and you will never be asked
to activate the program again on this computer.
That's all!
Further down on this page are instructions for some special situations that may complicate (but will
NOT prevent) activation. You can use these links:
What do do if you don't have an Internet connection
What to do if you are in an institution's network and there is a "proxy server"
What to do if you don't have an Internet connection
20
You can still activate the program in this case, but the process is a bit cumbersome. If you have access
to another computer that is connected to the Internet, and if you have a way of transferring files
between these two computers (a USB drive, CD, etc.), here's what you do:
1) Locate the SentenceShaper 2 folder on your computer. The installation program puts
SentenceShaper in c:/Program Files/SentenceShaper 2/ unless you chose another location during the
installation process.
Note: One easy way to find the SentenceShaper 2 folder is to right-click on the desktop shortcut, then click
"Properties", then click "Open File Location". This puts you inside the SentenceShaper 2 folder. (This may not
work on all versions of Windows.)
2) Next, copy the file named sentenceshaper.LIC from this folder onto USB flash drive, CD, or other
portable device for storing computer files. Note: this file will only be in the SentenceShaper 2 folder if
you have already tried to activate the program on your computer, and if SentenceShaper detected
that the computer was not connected to the Internet. So even though you know it will fail, click the
Activate button and wait until you see a screen that says "It looks like this computer isn't connected
to the Internet..."
(Note: depending on your computer settings, the file "sentenceshaper.LIC" may be displayed as just
"sentenceshaper". That's still the right file.)
3) Now go to any computer which has access to the Internet (it need not be your computer and can be
at a library, friend's house, etc.), and insert the USB drive, CD, etc., into this computer. Be sure to bring
your activation number with you, as you will be needing it.
4) Access the Internet and go to http://www.softworkz.com/offline
5) You will see a screen with the words Offline activation - Upload .LIC file. Click on browse, and locate
the file sentenceshaper.LIC on your USB drive or other storage media. Then click Upload file.
6) Now you will see a screen asking you to type in your activation code. It will also ask you to create a
password, and to type in your email address (if you have one). The reason it asks for your email
address is so that it can send you your password if you need it at some future time.
7) Now click Activate. Assuming that the activation is successful, you will now see be able to click on a
button labeled Download License (.CDM) File. You will be given instructions on how to download a file
called sentenceshaper.CDM onto your USB drive or whatever.
8) Now take the USB drive or whatever back to the computer where the program is installed and copy
this "sentenceshaper.CDM" file into the SentenceShaper 2 folder.
9) When you have copied this CDM file into the SentenceShaper 2 folder, SentenceShaper 2 will be
activated.
21
Institutional network with a "proxy server"
If you are having trouble accessing the Internet during activation, call the computer services staff to
help you. The activation window has a place where proxy server settings can be typed in during the
activation process.
Testing your microphone and speakers
The first time you run SentenceShaper 2, you will be asked to go through a quick test of your
microphone and speakers. This will allow you to make sure that both are hooked up and that the
volume settings are correct. You can access this test later from the Sound Test menu at the top of the
Welcome Screen.
You may want to run this test later on if you find that the speech recorded by a particular person is too
loud or too soft. It provides easy access to the Windows volume control settings.
We recommend that you plug in your microphone BEFORE launching SentenceShaper. Sometimes you
may need to go into the Windows Control Panel and open the audio settings screen to make sure that
your computer is actually set to use a particular microphone.
CHAPTER 4:
QUICK START GUIDE
This QuickStart Guide walks you through a series of steps to familiarize you with the program as quickly
as possible. It covers much of the same information as the two Sentence Shaper Tutorial Workbooks
that you will see when you first start up the program.
Topics in this chapter:
Launch the program
Open Tutorial Workbook 1
Page forward in the workbook
Record snippets
Make a sentence
Create a story
Use the Vocabulary Cue Buttons
Tips on creating better speech
Main Screen wrapup
Other available features
Exit ...what now?
Launch the program
22
Launch the program by double clicking the SentenceShaper shortcut on your desktop. It looks like this:
The desktop shortcut
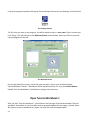
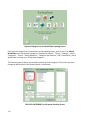
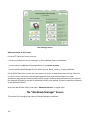
The first time you start up the program, you will be asked to type in a user name. Type in a name and
click "Done". This will take you to the Welcome Screen (shown below), where you will see your user
name highlighted on the left:
The Welcome Screen
On the right side of this screen, notice that your new user is set to run a workbook named
"SentenceShaper Tutorial 1." Workbooks will be explained shortly. For now, just click the Button
labeled "Start this Workbook" (circled above), and go to the next step.
Open Tutorial Workbook 1
After you click "Start this workbook",, you will be on the first page of the SentenceShaper Tutorial 1
workbook. A workbook is a set of screens that are grouped together like the pages in a book. (Note:
We refer to screens in workbooks as "pages", but they are not actual paper pages.)
23
There are two tutorial workbooks. They are designed to introduce you to the program.The first tutorial
has a short series of pages teaching you the basics of how to use the program. The second tutorial tells
you more about workbooks, and provides sample screens from all the built-in workbooks.
We recommend that you go through both tutorial workbooks.
Page forward in the workbook
You can move forward and backward in a workbook by clicking buttons on the screen. On the upper
right of the screen, you will see a button we will call the Forward Arrow. It looks like this:
Forward Arrow to go to next page
After the first page, you will also see a Backward Arrow on the upper left, which takes you to the
previous page of the workbook..
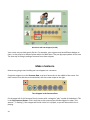
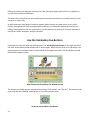
Record some "Snippets"
To illustrate how SentenceShaper works, we will describe how you would create a sentence to describe
a woman feeding a cat. The example workbook page will will show is from the "A1" workbook.
Rather than trying to say the whole sentence at once, we would record it in small chunks.
At the bottom of the screen, in the center, is the Microphone Button, which looks like this:
24
The Microphone Button
When you click this button, a small screen called the Recording Box will open up. Whenever you see
this box, it means that your voice is being recorded. It looks like this:
The Recording Box
The first time you see this box, you may be surprised, and may not have anything you want to record.
In that case, just click the red "Cancel" Button on the bottom left of the box. This will close the box
without recording anything.
Here's how you would begin:
-- First, click the Microphone Button,
-- As soon as you see the Recording Box, say "the woman."
-- Now click the green "Done" Button on the bottom of the Recording Box.
The box will close, but now an icon rather like a crystal ball will appear somewhere in this lower part of
the screen. Whenever you click this icon, it will replay your utterance ("the woman"). It will shrink as it
is played, to make it clear which one is playing. We will refer to this recorded speech fragment and its
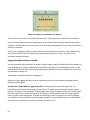
associated icon as a Snippet. It will look like this:
Brand new snippet
Repeat the process, this time recording "is feeding". A second shape will appear, playing back this
second utterance when clicked. (Note: the most recently created snippet has a purple ring around it.)
The pictures on the snippets don't mean anything. They are just arbitrary crystals to help users tell
them apart....and of course all you have to do is click a snippet to hear its sound clip.
The part of the screen where our newly recorded snippets appeared is called the Work Area. Your
screen will look something like this after you create the second snippet:
25
Work Area with two Snippets (circled)
Your screen may not look exactly like this. For example, your snippets may have different designs on
them, or they may be in different places within the Work Area. They can pop up anywhere in this area.
The next step is to begin making a sentence from these snippets.
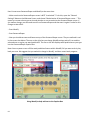
Make a Sentence
Now we are going to start building our two snippets into a sentence.
Drag both snippets up to the Sentence Row, a series of seven slots in the middle of the screen. Put
them into the first two slots as shown below, with the newer shape on the right:
Two Snippets in the Sentence Row
On the upper left of this Sentence Row is a button with a triangular "play" symbol (circled above). This
is the Play Sentence Button. Click it and listen as the system plays the two snippets in order ("the
woman", "is feeding"). Each snippet will shrink a little as it is played, so you will know which one is
playing.
26
Now let's create a word order error by re-ordering the snippets in the Sentence Row. To do this, just
drag the left-hand snippet across its neighbor to a slot somewhere on the right. (The program just
ignores empty slots, so you can put it anywhere on the right.) Now replay the sequence ("is feeding",
"a woman"). Correct the order by moving the snippets again.
This simple example shows an important function of SentenceShaper: allowing the user to selfmonitor -- to listen to his or her own speech. People with aphasia often detect errors (of word
order, morphology, word choice) when they are LISTENING to an utterance. But it is hard to listen
to their own speech while they are busy speaking, and after they are finished speaking the
memory of the words may start to fade. Playing back sequences of snippets makes it possible to
self-monitor at the sentence level.
Finally, let's record a third snippet, "the cat," and add it to the sentence.
In this example, we recorded the snippets in the same order as they appeared in the final sentence
(the subject noun, then the verb, then the object noun). But often users will think of the most salient
word first, before it can be used in the sentence. SentenceShaper allows the user to save any relevant
words by recording them as soon as they come to mind, and leaving them in the Work Area until they
can be added to the sentence. So if the user thinks of "cat" first, it can be recorded, to wait in the Work
Area until the sentence is ready for a direct object.
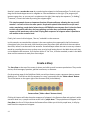
Create a Story
The Story Row at the top of the screen is where you build up multi-sentence productions. They can be
stories, email messages, speeches, political comments, or whatever.
On the previous page of the QuickStart Guide, we told you how to create a sentence about a woman
feeding a cat. To use this as the first sentence in a story, you would click the "Make a Bean" Button.
This is the button on the upper right of the Sentence Row (circled below):
Sentence Row ("Make a Bean" Button circled)
Clicking this button will take the entire sequence of snippets in the Sentence Row and replace it with a
sentence-level icon, a purple oval that we will call a "purple bean." The purple bean will appear in the
Story Row, the line of 11 slots above the Sentence Row. When you click this purple bean, it will play
back the entire sequence of snippets.
27
Here is what your screen will look like after you click the Make a Bean Button. The Sentence Row will
be empty and the Story Row will have one bean (circled below).
Story Row with one purple bean
Let's create another sentence (purple bean) and add it to the Story Row. For example, a good generalization
exercise for a simple picture like this is to ask the user to imagine what happened before or after the event in
the picture. So we could add a sentence like "Then the woman and the cat took a walk".
Now let’s play our mini-story. Above the Story Row is a button with a triangular "play" symbol, the Play
Story Button:
Story Row, Play Story Button circled
28
Clicking this button will play both sentences in order. Each purple bean will shrink as it is played.You
can also click each bean individually.
The beans in the Story Row can be moved around to reorder the narrative or to make room for a new
sentence in a given slot.
As with sentences, the program's memory support allows the user to create stories in very small
chunks, playing back the story in progress and modifying it as needed. By separating listening from
talking, the program lets the user self-monitor, and pay attention to missing or incorrect elements at
every level: words, sentences, and full narratives.
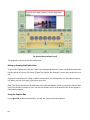
Use the Vocabulary Cue Buttons
Sometimes the user will need help finding words. The Vocabulary Cue Buttons on the right and left of
the main screen display either written text or small images. When the user clicks on a Cue Button, the
system plays a pre-recorded word or phrase aloud. On the page shown here, the Cue Buttons (circled
below) have images on them:
Main Screen with Vocabulary Cue Buttons circled
The buttons on the left play the relevant noun phrases ("the woman" and "the cat"). The button on the
right plays the verb "feeding" and displays an icon often used for verbs:
Verb Icon on Vocabulary Cue Button
29
To add a Vocabulary Cue Button word or phrase to a sentence, the user repeats the word in his or her
own voice. You may wish to try this out: click a Cue Button and record it in your own voice.
The Cue Buttons are fully customizable, using the editing tools. You can add words or phrases relevant
to the user or your treatment materials.
There is another tool to help with word-finding, called the WordFinder. It is discussed in Chapter 7
("Word-finding help").
Tips for creating better speech with the program
Below are a few suggestions for how to create better speech with SentenceShaper. They have evolved
over a number of years of research with the program, focusing primarily upon non-fluent aphasia.
Replay sound clips and sequences
It's a good idea to remind users to replay their recorded sound clips, especially when they have started
to drag shapes up to the Sentence Row. This will help to keep the material activated in memory, and
may also improve self-monitoring; users may notice errors or omissions and correct them.
Record SHORT sound clips
We suggest that users be encouraged to turn off the microphone (by clicking the Done Button in the
recording box) as soon as they feel themselves running out of words; and, more generally, that they
record fairly small chunks of speech in each shape.
This makes it easier to:
-- Revise part of a sentence without re-recording the whole thing.
-- Avoid recording long pauses, which will be annoying on playback.
-- Create more intelligible segments (for people with articulatory problems)
Encourage creation of full sentences
SentenceShaper is designed to allow creation of longer and more complex structures than may be
possible in spontaneous speech. So users may need to be encouraged to attempt more ambitious
structures in the beginning, as they may be in the habit of relying on nouns and other fragments to
convey their messages.
30
Discourage perfectionism
Excessive perfectionism should be discouraged. Correcting morphological errors may distract the user
from the deeper process of grammatical encoding. If the user's production contains a serious lexical or
grammatical error it may be more effective to ask her to replay it and try to find the error herself.
If the user experiences word-finding problems, rather than providing the word, you may want to
encourage circumlocution (finding a different way to express the idea), replay of existing material
which may trigger the word more easily as a sentence completion, or use of the Vocabulary Cue
Buttons.
Sometimes playing the Vocabulary Cue Buttons can help the user to think of what to say; see the
discussion of "Preposition/Verb Bootstrapping" in Chapter 7.
Encourage independent use
People may use SentenceShaper more effectively if they are left alone with the system for increasingly
longer periods of time.
Record everything that comes to mind
We encourage most (but not all) people to record any word that comes to mind, even if it cannot be
incorporated into the sentence at that time. The Work Area can be used to store elements that may be
useful later in the sentence. (Some people, however, may be distracted by having too many lexical
options floating around in the Work Area.)
Leave empty slots
It is best to leave a few empty slots in both the Sentence and Story Rows, so that elements can added
or re-ordered.
Create first drafts
For a longer story or message, it may be useful for the user to record a few snippets (sound clips) that
can provide a kind of rough draft or outline, by recording a key word or two for each basic idea and
moving these snippets to the Story Row. Later on, he can go back and flesh out each snippet into a full
sentence.
Chunk collapsing
People who can only produce a word or two at a time during their first attempt at producing a
sentence may benefit from a two-stage process of sentence creation: (1) first the user creates a
sentence by recording a number of shapes, each with a small sound bite such as a single word or
phrase; (2) then the user re-records this entire sentence as one utterance, i.e., in a single shape. This
31
may require frequent replay of the individual shapes. Such an exercise may improve both verbal
fluency and morale, as many people find it encouraging to hear themselves speaking in longer,
prosodically appropriate utterances.
Main Screen wrapup: More features
In this step, we take a quick look at some other features of the Main Screen. The links below will take
you to sections on this page:
How to enlarge the picture
How to delete a snippet or a bean
How to "un-delete" a snippet or bean
The "Helpful Hint" popup messages
How to play the Page Prompt
How to stop a sound file from playing
Use the space bar to record snippets
Get help with the F1 key
How to enlarge the picture
If there is a picture on the screen, you can enlarge it by holding it down with your mouse. As soon as
you release your mouse, it will return to normal size. Shown below is our screen with the picture
enlarged. Notice that the enlarged picture temporarily covers most of the Work Area and the
Sentence, and Story Rows:
Main Screen with picture enlarged
32
This can be especially useful in workbooks with very complicated pictures.
How to delete a snippet or bean
To delete a snippet or a bean, drag it to the Trash can icon on the lower left. It looks like this:
Trash Can (empty)
This will cause the Trash Can to change its appearance to show that it has a deleted item in it:
Trash Can (full)
How to "un-delete" a snippet or a bean
If you accidentally delete a snippet or bean, you can get it back by clicking directly on the Trash Can.
This only works for the last item you deleted on that page during the recording session.
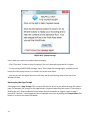
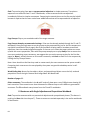
The "Helpful Hint" popup messages
At various places in the program, you will periodically see one of the program's "Helpful Hint" popup
messages, like the one shown below:
33
Helpful Hint" popup message
Here's what you need to know about these messages:
-- Click "Close Hint" in order to close the popup. (You can't do anything else while it is open.)
-- To stop seeing a PARTICULAR message, check "Don't show this message again" checkbox on the
lower left of the popup screen. It is circled in the screen shot above.
-- You can turn ALL the Helpful Hints on or off from the General Settings menu at the top of the
Welcome Screen.
How to play the Page Prompt
Some pages have a Page Prompt. This is a sound file that can be set to play when the user first opens a
page. For example, the prompt for the page below is a sentence describing the picture ("The woman is
feeding the cat"). Other workbooks have prompts that ask a question or suggest a topic. A page's
prompt (if it has one -- not all pages do) can be replayed at any time by clicking the Prompt Button.This
button is circled in the screen shot below:
34
Main Screen with Prompt Button circled
Up close, the Prompt Button looks like this:
The Prompt Button
You can tell the program whether to play the prompt automatically when you enter a page. When you
first enter a workbook that has a lot of prompts, a Helpful Hint popup will appear, to help you change
this setting.
How to stop a sound file from playing
One feature you may want to know about: If a long sound file (such as a Prompt) is playing, you don't
have to listen to it all! You can stop it from playing by clicking any button on the screen.
You may want to try this out now: click the Page Prompt, then interrupt it by re-clicking it or clicking a
Vocabulary Cue Button.
Use the space bar to record snippets
Another way to turn the sound recorder on and off is to tap the space bar. One tap will open the
Recording Box, and a second tap will close it and save the recording.
35
Use the F1 key to open the manual
In order to keep the interface simple, there is no HELP Button on the Main Screen, But you can launch
the help screen by pressing the F1 key, anywhere in the program.
Features to explore when you are ready...
This section describes some features that have NOT been covered in this QuickStart Guide. We just
want you to know that they exist when you are ready to explore them!
The Caption Box, to add text
The Export Button, to use your speech in the real world
The editing tools, to make custom materials
The Caption Box, to add text
Chapter 8 ("Adding text") tells you how to use the Caption Box, a text area on the Main Screen; and
how to run SentenceShaper simultaneously with WordQ and similar programs which can read your text
aloud ("text to speech") and suggest possible next words or phrases ("word prediction").
The Export Button, to use your speech in the real world
Chapter 9 ("Exporting your speech") tells you how to use the Export Button. This will help you use the
speech you produce with the program in real life -- creating videos and audio mp3 files that you can
post on the internet, email, or play on handheld devices.
The editing tools, to make custom materials
Chapter 10 ("The editing tools") tells you how to use three tools that allow you to create customized
materials by importing personal pictures and recording your own word cues or prompts.
Exit ...what now?
To exit from the Main Screen, click the Exit Button on the lower left. It looks like this:
36
You will be returned to the Welcome Screen, and can exit from that screen by clicking its exit button on
the lower left.
Topics on this page:
What to do next?
Getting help
Some reminders before you begin
Suggestions for what to do next
A good thing to do at this point is to familiarize yourself with the built-in workbooks. We strongly
suggest that you start with Tutorial Workbook 2 to get an overview of these workbooks, with a few
sample pages per workbook.
You can select a different workbook in the Workbook List on the Welcome Screen. Under the list, you
will see a short description of the workbook.
For a new user, the selected workbook will always be the one named "SentenceShaper Tutorial 1".
The program will not let you do much of anything until you have viewed this workbook.
If you are running a trial copy, the workbooks will not have the full set of pages, but you can still get a
feel for the process, and view the workbook descriptions.
Note: If you are upgrading from an older version of the program, you may need to create a new user to
see all the current workbooks.
Finally, you might want to try out the Export Feature...for example, create a few comments about
yourself with the B1 workbook, then export it as a video! See Chapter 9 for details.
Viewing this manual
-- The Manual Button on the blue Startup Screen opens this Manual. And the "Orders and Info" Button
on the same screen has an option to download a printable version of the Manual.
-- The Ordering and Support menu, visible on many screens within the program, has an option to
download a printable PDF copy of this Manual.
Note: If you are using a Trial copy, be sure to open the Manual from the blue Startup Screen, so that it
doesn't count against your allowed usage time. Once you click the "Start" button that that screen, the
clock is on.
-- If you see a Help Button on the screen, clicking it will open the manual to the section most relevant
to that screen. The F1 key will do the same thing even if there is no Help Button.
37
If you are interesting in adding your own pictures or vocabulary cues, you will probably want to look at
Chapter 10, about the editing tools.
Finally, you may want to take a look at the summary of program screens at the end of this manual. It
may help to give you an overview of what is available, even if you don't plan to use all the program
features.
Some reminders before you begin
Please be sure to check regularly to see if there are any program updates. See the section on updating.
Also, you should call or email us if we can be of any assistance. You can get contact information from
the "Ordering and Support" Menu.
CHAPTER 5:
USING WORKBOOKS
This chapter tells you how to use workbooks in SentenceShaper 2. A workbook is a set of screens that
are grouped together like the pages in a book. (Note: We refer to screens in workbooks as "pages", but
they are not actual paper pages.)
When you create a user, this new user will automatically be set to run "SentenceShaper Tutorial 1".
This workbook teaches you how to use the program. The second tutorial workbook gives you a quick
introduction to the built-in workbooks, and provides sample pages from all the built-in workbooks.
Topics in this chapter:
How to use a workbook page
Workbook Manager Screen: Accessing your workbook library
Descriptions of the Built-in Workbooks
Sharing your workbooks
How to use a workbook page
This section describes all the elements on a workbook page and how to use them. (Note: there is also a
labeled screen shot of the workbook screen in Chapter 13.)
38
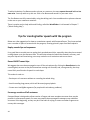
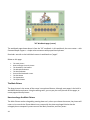
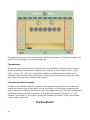
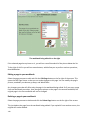
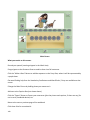
"A2" Workbook page (screen)
The workbook page shown above is from the "A2" workbook. In this workbook, the user creates -- with
SentenceShaper support -- simple active sentences with prepositional phrases.
Reminder: we refer to the individual screens in workbooks as "pages".
Below on this page:
The main picture
How to enlarge the main picture
The Vocabulary Cue Buttons
The Microphone Button
The Prompt Button
Forward and Backward arrows
The Exit Button
The Caption Box
The Export Button
The Main Picture
The large picture in the center of the screen is an optional feature, although most pages in the built-in
workbooks do have pictures. Using the editing tools, you can put your own pictures on the pages, or
create pages without pictures.
How to enlarge the Main Picture
The Main Picture can be enlarged by pressing down on it; when you release the mouse, the picture will
return to its normal size. Shown below is our screen with the picture enlarged. Notice that the
enlarged picture temporarily covers most of the Work, Sentence, and Story areas :
39
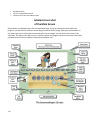
The Vocabulary Cue Buttons
The Vocabulary Cue Buttons flanking the Main Screen play a word, phrase, or sentence when clicked.
In the workbook page shown above, they play the important words in the sentence and have small
image labels on them. To include a Vocabulary Cue Button word in your sentence, play the Vocabulary
Cue Button then record it in your own voice.
Some workbook pages also have another tool to help with word-finding, called the WordFinder. Both
the Vocabulary Cue Buttons and the WordFinder are discussed in the Chapter 7.
The Microphone Button
To record your speech, click the Microphone Button at the bottom of the screen.
The Microphone Button
When you click this button, a small screen called the Recording Box will open up. Whenever you see
this box, it means that your voice is being recorded. It looks like this
The Recording Box
40
As soon as you see this box, speak, and then click the green Done Button on the Recording Box. The
box will close, and an icon rather like a crystal ball will appear somewhere in this lower part of the
screen. Whenever you click this icon, it will replay your utterance ("the woman"). It will shrink as it is
played, to make it clear which one is playing. We will refer to this recorded speech fragment and its
associated icon as a Snippet.
New snippet
See Chapter 4 ("QuickStart Guide") for a full description of how to record snippets and build them into
sentences and narratives. "Tips for creating better speech" in Chapter 2 provides some suggestions
about how to use the program most effectively to create speech.
Prompt Button
The Prompt Button plays a sound file (the Page Prompt) especially for a given page. In some
workbooks, the page prompt is a model of the target sentence ("The dancer is pushing the chair into
the pool," in the page shown above). In other workbooks, the prompt may ask a question or give
instructions.
Prompt Button
The page prompt can always be replayed by clicking the Prompt Button. (In the Users and Settings
menu, you can set whether -- or for how many pages -- the prompt is played automatically. See
Chapter 6 for more about user settings.)
Forward and backward arrows
Clicking the Backward or Forward Arrow takes you to the previous or next page in a workbook.
Backward and Forward Arrows
41
Note: On the last page of a workbook, the Forward Arrow will take you to the beginning of the
workbook. Also, you will not see the Back Arrow on the first page of a workbook.
Exit Button
The Exit Button is on the bottom left of the screen. Clicking this button will put you back in the
Welcome Screen.
Exit Button
The Caption Box (not shown here)
When you get more familiar with the program, you may want to set it to display the Caption Box, a text
area on the Main Screen. This will let you add text to the page. This feature is described in Chapter 8.
The Export Button (not shown here)
When you get more familiar with the program, you may want to set it to display the Export Button.
This will let you use speech produced with the program in applications such as email or playing on a
handheld device. This feature is described in the section on "Exporting your speech".
Next page: Choosing a workbook
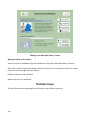
How to choose a workbook
On the Welcome Screen, there is a list of the selected user's workbooks (outlined in red below):
42
Welcome Screen - list of user's workbooks
Click on the little triangle on the right side of the list to open it up so you can see all the workbooks. To
set a user to run a workbook, select it in this list. Below the list you will now see a short description of
the selected workbook.
For a new user, the selected workbook will always be the one named "SentenceShaper Tutorial 1". To
see other available workbooks, click on this list to open it.
You can also choose a workbook on the User Settings Screen, where you can find all the settings that
are specific to a given user.
Next page:Workbook Manager Screen: Accessing your workbook library
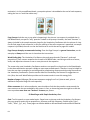
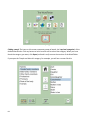
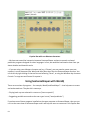
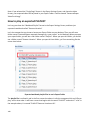
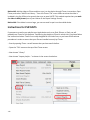
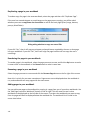
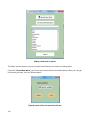
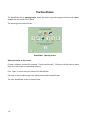
Workbook Manager Screen:
Accessing your workbook library
Each user has a private workbook "library" or set of workbooks. When a user is created, this private
library is stocked with a complete set of copies of the built-in (system) workbooks. In the Workbook
Manager Screen, you can make fresh copies of system workbooks and delete, rename, duplicate or
share your own workbooks .
43
Workbook Manager Screen
In this section:
How to open this screen
Delete a workbook in your library
Rename a workbook in your library
Make a new workbook from scratch
Duplicate a workbook in your library
Make a fresh copy of a system workbook
Get more information about a system workbook
Share a workbook with others
Import a shared workbook
How to open this screen
From the Welcome Screen, open the User Settings Screen, which is discussed in the next chapter. The
button is circled in red below:
44
'Open User Settings Screen' Button (circled)
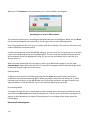
Now click "Open Workbook Manager" on the lower left of the User Settings Screen.
This will open a screen displaying two lists of workbooks. The list on the top (circled) displays the user's
personal workbook library.
User workbook list (circled)
45
The list on the bottom displays the system workbook library (circled) containing all of the built-in
workbooks, and any workbooks that have been shared by other SentenceShaper users.
System workbook list (circled)
To open the list of all system workbooks, click on the triangle on the right side of the list. The list is
large, so it will cover most of the page. When you click on the workbook you are interested in, the list
will return to normal size. You will now see a preview image for whatever workbook is selected in the
list. You can now make a private copy of the workbook or click its help button, as described below.
Delete a workbook in your library
You can only delete your own workbooks; system and shared workbooks can't be deleted. Select the
workbook in the user workbook list and click the Delete Button (circled):
46
'Delete User Workbook' Button (circled)
Rename a workbook in your library
Select the workbook in the user workbook list and click the Rename Button (circled):
47
'Rename User Workbook' Button (circled)
Now a text box will pop up for you to enter a new name for the workbook.
Note: If you rename a built-in workbook, you will no longer see the original image preview for that
workbook. If you want to choose another image to serve as the preview for that workbook, you can do
that in the Edit Workbook Screen.
Make a brand new workbook from scratch
In order to create a brand new workbook (for example, with the user's own photographs), click the
"Create New Workbook" Button displayed on both the Welcome Screen and the User Settings Screen.
This will create a small starter workbook which you can expand and modify in the Edit Workbook
Screen.
Duplicate a workbook in your library
The "Clone" Button (circled below) makes a copy of an existing workbook, including any user
recordings it contains.
48
'Duplicate User Workbook' Button (circled)
We strongly recommend that you back up any workbooks with important user productions in them.
Just make a duplicate copy of the workbook before opening it for editing.
Make a fresh copy of a system workbook
When users are created, they are given a personal copy of each system workbook. But some point, you
may want to make second copy of a system workbook. For example, if you have "used" every page in
the workbook by recording speech, you may want to start out with a fresh copy of the workbook
(perhaps saving the one you have used by renaming it). Or you may have edited your first copy of the
workbook, and want to return to the original version.
To do this, select the workbook you want to copy from the system workbook list (the list on the
bottom) and then click the "Add this Workbook to my Library" button, circled below:
49
'Add to My Library' Button (circled)
Now a copy of this workbook will appear in the user's workbook list.
Get more information about a system workbook
When you select a workbook in the system workbook list, you'll see a short description of the
workbook. More detailed information about a built-in workbook (what the workbook is about, how
many pages it has, recommended settings for the Page Prompt Autoplay, etc.) is provided in this
Manual.
Create a "session workbook"
If you are running an older Basic or Deluxe Edition and have downloaded a free update to version 1.0.5
or later, you will also see a button marked "Create Session Workbook" (circled below). This will create
a workbook called "My Sessions" containing all the recording sessions you created in Single Page
Mode. This mode is no longer used, so if you do not have one of these early versions of the program
you will not see the button at all. Once you have created the "My Sessions" workbook, you can copy
any of the page layouts (referred to as "Loose Pages" in these early versions) from this workbook into
any other workbook.
"Share" a private workbook
50
You can share a workbook in a user's library with others by clicking the "Share Workbook" Button
circled below:
'Share Workbook' Button (circled)
When you click this button, the program will make a copy of your workbook (including any sound files
that have been recorded while it was being used, along with any pictures, prompts, Vocabulary Cue
Buttons, or WordFinders that you have added to it).See the next section ("Sharing your Workbooks")
for details.
Import a shared workbook
Click the "Find a Workbook on my Computer" Button (circled below) to get a copy of a workbook that
has been shared by another user.
51
'Find a Workbook on my Computer Button (circled)
See the next section ("Sharing your Workbooks") for details.
Next page: Sharing Workbooks
Sharing your Workbooks
You can share any workbook in a user's library with others, by going to the Workbook Manager
Screen.
In this section:
Why share a workbook?
How to share a workbook
How to import a shared workbook
Note about shared workbooks
Deleting shared workbooks from the system library
Why share a workbook?
Here are some situations in which you might want to share a workbook:
52
-- A client has started creating speech for a built-in workbook and wants to continue working on it at
home.
-- You have created a workbook for one client, and want to make it available to others.
How to share a workbook
Open the Workbook Manager screen. In the list of your own workbooks (not the system workbooks),
select the workbook that you want to share. Then click the "Share Workbook" Button, circled below:
'Share Workbook' Button (circled)
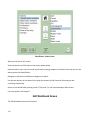
Now you will see a screen that looks like this:
53
Workbook sharing options
Decide whether you want to share the workbook with other SentenceShaper users on the SAME
computer, or whether you want to have the workbook folder saved to a flash drive or some other
place where you can transfer it to another computer.
If you choose the first option (the same computer), the shared workbook will be added to the list of
system workbooks. Any other SentenceShaper user can run it by getting a copy of it in the Workbook
Manager Screen. Any new users you create after that will automatically get a copy of it.
If you choose the second option (different computers), the shared workbook will be placed in your
Export Folder (the folder where other files created within SentenceShaper are placed --- for example,
your videos). You can then copy it to a flash drive and go to another computer. On that computer,
import the workbook following the instructions below.
How to import a shared workbook
If you have been given a shared workbook from another computer, use the "Find a Workbook on my
Computer" Button (circled below) to add it to SentenceShaper.
54
Workbook Manager Screen
When you click this button, you will be asked whether you want this workbook to be available to all
SentenceShaper users (in which case it will be added to the System Workbook Library) or just to the
currently selected user (in which case it will be added to her library).
If the workbook was shared with other SentenceShaper users on the same computer, then you don't
need to go searching for it on your computer. It will just be listed with the other system workbooks,
and you can make a copy of it for your own library as usual.
Note about shared workbooks
When you import a shared workbook, you can run it (creating your own recordings in it), and you can
also rename it or delete it. However, you can't edit the workbook. Only the person who created the
workbook can edit it.
Descriptions of the Built-in Workbooks
This section contains descriptions of the built in workbooks, and recommendations for how to set the
"Page Prompt Autoplay" for each workbook.
Workbook descriptions:
55
SentenceShaper Tutorials
A1 Simple Sentences
A2 Sentences with Prepositions
A3 BUILD Sentences with Prepositions
B1 Personal Speech with Sentence Starters
B2 Personal Speech with General Prompts
C1 Complex Pictures with WHILE Questions
C2 Complex Pictures with General Prompts
D1 Stories with WHY Questions
D2 Stories with General Prompts
E1 Blank Pages with Simple Vocabulary Cues
E2 Blank Pages with NO Vocabulary Cues
E3 Blank Pages with Advanced Vocabulary Cues
E4 Blank Pages with Picture and Simple Vocabulary Cues
F1 Sentences with Single Adjectives
F2 Sentences with Double Adjectives
F3 BUILD Double Adjective Sentences
F4 Sentences with Single Adjectives and Prepositions
F5 Sentences with Double Adjectives and Prepositions
F6 BUILD Sentences with Prepositions and Adjectives
SentenceShaper Tutorial Workbooks 1 and 2
The first tutorial workbook leads you through the basics of how to use the program, with practice
exercises on each page.
The second tutorial workbook contains a quick tour of all the built-in workbooks -- sample pages from
each workbook, along with short descriptions and recommendations for effective use. You may find it
useful if you are trying to find an appropriate workbook for a user...you can try out pages from
different workbooks, to find one with the right level of difficulty and interest.
Whenever a new user is created, the user is set to run the first tutorial workbook. Also, the program
requires that you run the first tutorial workbook once before it will let you do other things (when you
first install the program, that is, not every time you create a user).This workbook has only 22 screens,
and you can page through it quickly.
A1
Simple Sentences
Workbook
56
Goal: To practice simple subject-verb-object sentences ("The girl is hitting the teddy bear").
Page Prompt: Plays a pre-recorded model of the target sentence.
Page Prompt Autoplayrecommended settings: If the user can't create the target structure, start with
the prompt autoplay set to play Always. But as soon as the user starts producing correct sentences, we
suggest that you set the prompt to play for the first few pages (or Never), and tell the user to first
create a sentence, and then to check his or her response by clicking the Play Prompt Button.
Note: Users should not feel that they need to create exactly the same sentence as the system models.
Comparing their utterance to the one played by the system may provide valuable practice in selfmonitoring.
Word-finding help: Vocabulary Cue Buttons playing the nouns for the subject and object are on the
left; the verb is played by a button on the right. All buttons have image labels. No WordFinder
Number of pages: 30
Other comments: The workbooks in the A series all draw upon a set of 180 pictures showing 30 basic
scenarios. These scenarios are then elaborated in different ways to elicit different grammatical
structures. The A1 workbook pictures introduce these 30 core scenarios.
A2
Simple Sentences with Prepositions Workbook
Goal: To practice simple sentences with prepositional phrases ("The girl is hitting the teddy bear in the
box"). Prepositions used: "in", "on", "under", "to", "from", "into".
57
Page Prompt: Plays a pre-recorded model of the target sentence.
Page Prompt Autoplay recommended settings: If the user can't create the target structure or come up
with the correct preposition, start with the prompt autoplay set to play Always. But as soon as the user
starts producing correct sentences, we suggest that you set the prompt to play for the first few pages
(or Never), and tell the user to first create a sentence, and then to check his or her response by clicking
the Play Prompt Button.
Note: Users should not feel that they need to create exactly the same sentence. Comparing their
utterance to the one played by the system may provide valuable practice in self-monitoring.
Word-finding help: Vocabulary Cue Buttons playing the nouns for the subject, object, and
prepositional object are on the left; verb and preposition buttons are on the right. All buttons have
image labels. No WordFinder.
Number of pages: 30
Other comments: The workbooks in the A set all draw upon a set of 180 pictures based upon 30
scenarios which are elaborated in different ways to practuce different grammatical structures. The A2
workbook contains 30 pictures depicting the core scenario elaborated with a salient (sometimes
downright odd) location or direction.
A3
BUILD Sentences with Prepositions Workbook
Goal: To practice adding a prepositional phrase to a simple subject-verb-object sentence. Two-picture
sequences use materials from A1 and A2 workbooks, so that a sentence with a prepositional phrase
immediately follows its simpler counterpart.
58
Page Prompt: Plays a pre-recorded model of the target sentence.
Page Prompt Autoplay recommended settings: If the user has already worked through the A1 and A2
workbooks, then you might want to set the prompt to play automatically just for the first sequence or
two (which would be the first 4 pages). But if this workbook is being used to introduce prepositional
phrases, then the standard suggestion applies: if the user can't create the target structure or come up
with the correct preposition, start with the prompt autoplay set to play Always. As soon as the user
starts producing correct sentences, we suggest that you set the prompt to play for the first few pages
(or Never), and tell the user to first create a sentence, and then to check his or her response by clicking
the Play Prompt Button.
Note: Users should not feel that they need to create exactly the same sentence. Comparing their
utterance to the one played by the system may provide valuable practice in self-monitoring.
Word-finding help: Nouns for the subject, object, and prepositional object are on the left; verb and
preposition are on the right. Buttons have image labels. No WordFinder
Number of pages: 60
Other comments: The workbooks in the A series all draw upon a set of 180 pictures showing 30 basic
scenarios. These scenarios are then elaborated in different ways to elicit different grammatical
structures. The A3 workbook uses pictures from the A1 and A2 workbooks.
B1 Personal Speech with Sentence Starters
Goal: To elicit speech on personal topics. The first page is for general information about the user, and
each subsequent page focuses on a particular area (opinions, entertainment preferences, family, life
history, etc.). The Vocabulary Cue Buttons play sentence starter phrases ("My name is...") designed to
help the user get started.
Page Prompt: Plays a general request to create speech on the page topic (e.g., "This page is about
you...") along with an explanation of how to use the starter phrases on the Vocabulary Cue Buttons.
Page Prompt Autoplay recommended setting: Since the Page Prompt is a general instruction, set the
autoplay to Always unless the user finds the prompt distracting or annoying.
59
Word-finding help: The buttons on the right side of the screen play general verbs, prepositions, and
pronouns.The WordFinder is accessible.
Number of pages: 15
Other comments: The Vocabulary Cue Buttons are just suggestions. Replaying the page prompt ("This
page is about you..." ) may also help to suggest topics. Some users find browsing in the WordFinder a
helpful source of ideas for something to talk about. Using the editing tools, clinicians and caregivers
can record more personally relevant sentence starter phrases on the Vocabulary Cue Buttons.
B2 Personal Speech with General Prompts
Goal: To elicit speech on personal topics. The first page is for general information about the user, and
each subsequent page focuses on a particular area (opinions, entertainment preferences, family, life
history, etc.). The Vocabulary Cue Buttons play prompts designed to suggest things to talk about
("Describe your favorite movie")
Page Prompt: Plays a general request to create speech on the page topic (e.g., "This page is about
movies and TV shows...") along with an explanation of how to use the prompts on the Vocabulary Cue
Buttons.
Page Prompt Autoplay recommended setting: Since the Page Prompt is a general instruction, set the
autoplay to Always unless the user finds the general prompt distracting or annoying.
Word-finding help: The Vocabulary Cue Buttons on the right play general verbs, prepositions, and
pronouns.The WordFinder is accessible.
Number of pages: 15 (used in both B workbooks)
Other comments: The Vocabulary Cue Buttons are just suggestions. Replaying the page prompt ("This
page is about movies and TV shows..." ) may also help to suggest topics. Some users find browsing in
the WordFinder a helpful source of ideas for something to talk about. Using the editing tools, clinicians
and caregivers can record more personally relevant Vocabulary Cue Buttons.
60
C1 Complex Pictures with
"while" Questions
Goal: To practice sentences with subordinate clauses, and also to introduce more complex picture
stimuli. Pictures in this workbook show two actions or states, which are usually related in some way
(e.g., one action causes the other directly or by distracting someone).
Page Prompt: Plays a question containing "while" (e.g., "What was happening while the man was
gardening?")
Page Prompt Autoplay recommended setting: Since the Page Prompt is a question, set the autoplay to
Always.
Note: Users should not feel that they need to create exactly the same sentence as the system models,
especially with these more open-ended materials. Comparing their utterance to the one played by the
system may provide valuable practice in self-monitoring.
Answer Key: A Vocabulary Cue Button with the image of a key on it plays a pre-recorded model of the
entire target sentence (or, rather, of one possible sentence describing the picture).The model
sentences in this workbook use "while" to link the two actions.
Word-finding help: The Vocabulary Cue Buttons play some but not necessarily all relevant content
words. Therefore, the WordFinder button is also shown.
Number of pages: 20
Other comments: The same 20 complex pictures are used in both workbooks of the C series. In the C1
workbook, the page prompt is a question ("What was happening while the man was gardening?" ) In
the C2 workbook, the page prompt is a general question about what is happening in the picture.
C2 Complex Pictures with
General Prompts
61
Goal: To practice sentences with subordinate clauses and to introduce more complex picture stimuli.
Pictures in this workbook show two actions or states, which are usually related in some way (e.g., one
action causes the other directly or by distracting someone).
Page Prompt: Plays a general prompt asking the user to describe what is happening in the picture.
Answer Key: A Vocabulary Cue Button with the image of a key on it plays a pre-recorded model of a
sentence containing a "while" clause. However, the general prompt used in this workbook is
compatible with a wide variety of responses, with or without "while" .
Page Prompt Autoplay recommended setting: Since the Page Prompt is a general instruction, set the
autoplay to Always until the user is clear about the instructions.
Word-finding help: The Vocabulary Cue Buttons play some but not necessarily all relevant content
words. Therefore, the WordFinder button is also shown.
Number of pages: 20
Other comments: The same 20 complex pictures are used in both workbooks of the C series. In the C1
workbook, the page prompt is a question ("What was happening while the man was painting the
volcano?"). In the C2 workbook, the page prompt is a general request to describe what is happening in
the picture.
D1 Stories with WHY Questions
Goals: To practice sentences with subordinate clauses containing "because"; and to create speech with
some conceptual complexity (short cartoon sequences incorporating causality and motivation).
62
Page Prompt: Plays a "why" question relevant to the picture (e.g., "Why did the boy pull his mother?").
Page Prompt Autoplay recommended setting: Since the Page Prompt is a question, set the autoplay to
Always.
Answer Keys: A Vocabulary Cue Button with an image of a key plays a pre-recorded sentence
containing a "because" clause (for example, "The boy pulled his mother because he wanted to show
her the rainbow") . This models one possible answer to the "why" question posed in the Page Prompt.
A Vocabulary Cue Button with a smaller key image plays just the "because" clause.
Word-finding help: The Vocabulary Cue Buttons contain only general words ("because", verbs and
prepositions). Each cartoon sequence has its own small WordFinder, containing a small set of nouns,
verbs, and adjectives relevant to one or more pictures in the sequence.
The reason why most Vocabulary Cue Button words are not specific to the picture in the "D"
workbooks is that these workbooks represent a bridge to more open-ended speech. Therefore it may
be helpful to have the user learn strategies for retrieving and/or paraphrasing content words by using
the Vocabulary Cue Button vocabulary. (See the section about the Vocabulary Cue Buttons for
suggestions on this.) Also, the small WordFinders provide crucial content words in case this strategy
fails.
Number of pages: 124 pages (24 cartoon sequences ranging from 2 to 6 pictures each)
Other comments: As in other workbooks, users should not feel that they need to create exactly the
same sentence as the one modeled by the system. In fact, an interesting exercise would be to ask the
user to produce more than one "because" sentence per picture; these additional sentences could
provide other answers to the why question in the prompt or express other causal relationships
observed in the picture.
D2 Stories with General Prompts
Goals: To practice creating sentences with subordinate clauses containing "because". This workbook
serves as a generalization module for the D1 workbook, since the user is not given explicit help in
finding picture content appropriate to a "because" clause. The workbook also asks the user to create
speech with some conceptual complexity (short cartoon sequences incorporating causality and
63
motivation). In this second D workbook, a composite picture is also added at the end of each sequence,
asking the user to "retell the whole story."
Page Prompt: Asks the user to say what is happening in the picture. Less support is provided than in
the D1 workbook; no specific "why" question is asked in the prompt. However, the word "because" is
always included in the sample response played by the Vocabulary Cue Button with the picture of a key.
On the final page of each sequence, in which a retelling of the entire sequence is requested, no sample
response is provided; the user can use the Back Arrow to revisit the earlier pages for models.
Page Prompt Autoplay recommended setting: Since the Page Prompt is a general instruction, set the
autoplay to Always until the user is clear about the instructions.
Word-finding help: The Vocabulary Cue Buttons play only general words ("because", verbs and
prepositions). Each cartoon sequence has its own small WordFinder, containing a small set of nouns,
verbs, and adjectives relevant to one or more pictures in the sequence.
The reason why most Vocabulary Cue Button words are not specific to the picture in the D workbooks
is that these workbooks represent a bridge to more open-ended speech. Therefore it may be helpful to
have the user learn strategies for retrieving and/or paraphrasing content words by using the words on
the Vocabulary Cue Buttons. (See the section about the Vocabulary Cue Buttons for suggestions on
this.) Also, the small WordFinders provide crucial content words in case this strategy fails.
Number of pages: 148 pages (24 cartoon sequences ranging from 2 to 6 pictures each, plus an
additional composite image for each sequence).
Other comments: As in other workbooks, users should not feel that they need to create exactly the
same sentence as the one modeled by the system. In fact, an interesting exercise might be to ask the
user to produce more than one "because" sentence per picture.
E1 Blank Pages with Simple Vocabulary Cues
Goal: To elicit speech on open-ended topics. Pages have no pictures, and the Vocabulary Cue Buttons
play very general words such as prepositions, pronouns, and high-frequency, flexible verbs ("give",
"take", "have", "go", etc.). These pages can also be added to new workbooks and modified as desired.
64
Page Prompt: None
Word-finding help: In addition to the Vocabulary Cue Buttons, the WordFinder is accessible.
Number of pages: 30 (identical)
E2 Blank Pages with NO Vocabulary Cues
Goal: The "E" workbooks are meant to elicit speech on open-ended topics or to use in making new
workbook pages (add them to new workbooks and modify as desired). The "E2" workbook has no
Vocabulary Cue Buttons, which makes it useful in testing situations where you want to assess the
user's language capabilities without providing vocabulary support. Also, it can serve as a template for
making your own pages if you do not want to use any of the system vocabulary cues; you will not need
to clear these existing cues from the buttons in order to add your own.
Page Prompt: None
Word-finding help: None
Number of pages: 30 (identical)
E3 Blank Pages with Advanced Vocabulary Cues
65
Goal: The "E" workbooks are meant to elicit speech on open-ended topics or to use in making new
workbook pages (add them to new workbooks and modify as desired).In the "E3" workbook, the pages
have no pictures and the Vocabulary Cue Buttons play very general words such as prepositions,
pronouns, and high-frequency, flexible verbs ("give", "take", "have", "go", etc.) This workbook also has
subordinating conjunctions such as "if", "because". "before," etc.
Page Prompt: None
Word-finding help: Vocabulary Cue Buttons and WordFinder
Number of pages: 30 (identical)
E4 Blank Pages with Picture and Simple Vocabulary Cues
Goal: The "E4" workbook is intended to serve as a layout for imported personal photos: the pages have
a blank picture area and the Vocabulary Cue Buttons play a subset of the cues in the "E1" workbook
pages (very general words such as prepositions, pronouns, and high-frequency, flexible verbs).
Page Prompt: None
Word-finding help: Vocabulary Cue Buttons and WordFinder
Number of pages: 30 (identical)
66
F1 Sentences with Single Adjectives Workbook
Goal: To practice simple subject-verb-object sentences with one prenominal adjective ("The woman is
peeling the long carrot").
Page Prompt: Plays a pre-recorded model of the target sentence.
Page Prompt Autoplay recommended settings: If the user can't create the target structure or come up
with the correct adjective, start with the prompt autoplay set to play Always. But as soon as the user
starts producing correct sentences, we suggest that you set the prompt to play for the first few pages
(or Never), and tell the user to first create a sentence, and then to check his or her response by clicking
the Play Prompt Button.
Note: Users should not feel that they need to create exactly the same sentence. Comparing their
utterance to the one played by the system may provide valuable practice in self-monitoring.
Word-finding help: Nouns for the subject, object, and adjective are on the left; verb and preposition
are on the right. Note that there is also a button on the left for the definite article (which is played by
the noun buttons in the A workbooks without adjectives). This makes it easier to insert the adjective
been the article and the noun. Buttons have image labels. No WordFinder.
Number of pages: 30
Other comments: The workbooks in the A and F series all draw upon a set of 180 pictures showing 30
basic scenarios. These scenarios are then elaborated in different ways to elicit different grammatical
structures. The F1 workbook contains 30 pictures depicting the core scenario elaborated with a salient
quality to elicit an adjective.
F2 Sentences with Double Adjectives Workbook
67
Goal: To practice simple subject-verb-object sentences with two prenominal adjectives ("The woman is
peeling the long, crooked carrot" ).
Page Prompt: Plays a pre-recorded model of the target sentence.
Page Prompt Autoplay recommended settings: If the user can't create the target structure or come up
with the correct adjectives, start with the prompt autoplay set to play Always. But as soon as the user
starts producing correct sentences, we suggest that you set the prompt to play for the first few pages
(or Never), and tell the user to first create a sentence, and then to check his or her response by clicking
the Play Prompt Button.
Note: Users should not feel that they need to create exactly the same sentence. Comparing their
utterance to the one played by the system may provide valuable practice in self-monitoring.
Word-finding help: Nouns for the subject, object, and adjectives are on the left; verb and preposition
are on the right. Note that there is also a button on the left for the definite article (which is played by
the noun buttons in the A workbooks without adjectives). This makes it easier to insert the adjective
been the article and the noun. Buttons have image labels. No WordFinder.
Number of pages: 30
Other comments: The workbooks in the A and F series all draw upon a set of 180 pictures showing 30
basic scenarios. These scenarios are then elaborated in different ways to elicit different grammatical
structures. The F2 workbook contains 30 pictures depicting the core scenario elaborated with salient
qualities to elicit two prenominal adjectives on the same noun.
F3
BUILD Double Adjective Sentences Workbook
68
Goal: To practice going from one to two prenominal adjectives in simple sentences. Two-picture
sequences use materials from F1 and F2 workbooks, so that a sentence with two adjectives
immediately follows its simpler counterpart. Comparing the second picture to the first may be helpful
because it requires that the user notice some added feature that can be expressed with an adjective.
Page Prompt: Plays a pre-recorded model of the target sentence.
Page Prompt Autoplay recommended settings: If the user has already worked through the F1 and F2
workbooks, then you might want to set the prompt to play automatically just for the first sequence or
two (which would be the first 4 pages). But if this workbook is being used to introduce prenominal
adjectives, then the standard suggestion applies: If the user can't create the target structure or come
up with the correct preposition, start with the prompt autoplay set to play Always. But as soon as the
user starts producing correct sentences, we suggest that you set the prompt to play for the first few
pages (or Never), and tell the user to first create a sentence, and then to check his or her response by
clicking the Play Prompt Button.
Note: Users should not feel that they need to create exactly the same sentence as the system models.
Comparing their utterance to the one played by the system may provide valuable practice in selfmonitoring.
Word-finding help: Nouns for the subject, object, and prepositional object are on the left; verb and
preposition are on the right. Buttons have image labels. No WordFinder
Number of pages: 60
Other comments: The workbooks in the A and F series all draw upon a set of 180 pictures showing 30
basic scenarios. These scenarios are then elaborated in different ways to elicit different grammatical
structures. The F3 workbook uses pictures from the F1 and F2 workbooks.
F4 Sentences with Single Adjectives and Prepositions Workbook
Goal: To practice sentences with one prenominal adjective and a prepositional phrase ("The dancer is
pushing the blue chair into the pool" ). These structures are trained separately in the earlier workbooks
of the A series.
69
Page Prompt: Plays a pre-recorded model of the target sentence.
Page Prompt Autoplay recommended settings: If the user can't create the target structure or come up
with the correct prepositions or adjectives, start with the prompt autoplay set to play Always. But as
soon as the user starts producing correct sentences, we suggest that you set the prompt to play for the
first few pages (or Never), and tell the user to first create a sentence, and then to check his or her
response by clicking the Play Prompt Button.
Note: Users should not feel that they need to create exactly the same sentence as the system models.
Comparing their utterance to the one played by the system may provide valuable practice in selfmonitoring.
Word-finding help: The subject, object, prepositional object, definite article, and adjective are played
by the Vocabulary Cue Buttons on the left; verb and preposition buttons are on the right. Buttons have
image labels. No WordFinder.
Number of pages: 30
Other comments: The workbooks in the A and F series all draw upon a set of 180 pictures showing 30
basic scenarios. These scenarios are then elaborated in different ways to elicit different grammatical
structures. The F4 workbook contains 30 pictures depicting the core scenario elaborated with a salient
location or direction (to elicit a preposition) and a salient quality (to elicit an adjective).
F5 Sentences with Double Adjectives and Prepositions Workbook
Goal: To practice sentences with two prenominal adjectives and a prepositional phrase ("The dancer is
pushing the large, blue chair into the pool"). These are the most complex sentences in the A workbook
series. Their component structures are trained separately in the earlier workbooks of this series.
70
Page Prompt: Plays a pre-recorded model of the target sentence.
Page Prompt Autoplay recommended settings: If the user can't create the target structure or come up
with the correct adjectives or preposition, start with the prompt autoplay set to play Always. But as
soon as the user starts producing correct sentences, we suggest that you set the prompt to play for the
first few pages (or Never), and tell the user to first create a sentence, and then to check his or her
response by clicking the Play Prompt Button.
Note: Users should not feel that they need to create exactly the same sentence. Comparing their
utterance to the one played by the system may provide valuable practice in self-monitoring.
Word-finding help: Vocabulary Cue Buttons on the left play nouns for the subject, object, and
prepositional object, along with two adjectives and the definite article. The verb and preposition are
played by buttons on the right. Buttons have image labels. No WordFinder.
Number of pages: 30
Other comments: The workbooks in the A and F series all draw upon a set of 180 pictures showing 30
basic scenarios. These scenarios are then elaborated in different ways to elicit different grammatical
structures. The F5 workbook contains 30 pictures depicting the core scenario elaborated with a salient
location or direction (to elicit a preposition) and salient qualities to elicit two prenominal adjectives on
the same noun.
F6 BUILD Sentences with Prepositions and Adjectives Workbook
Goal: To practice going from the simplest structure in the A set (the simple transitives of the A1
workbook) to the most difficult (sentences with two prenominal adjectives and a prepositional phrase),
using a four-picture sequence for each of the core scenarios.
71
Page Prompt: Plays a pre-recorded model of the target sentence.
Page Prompt Autoplay recommended settings: If the user has already worked through these earlier
workbooks, then you might want to set the prompt to play automatically just for the first sequence or
two (which would be the first 8 pages), to remind the user that this workbook contains sequences. But
if this workbook is being used to introduce these structures, then the standard suggestion applies: If
the user can't create the target structure or come up with the correct adjective or prepositions, start
with the prompt autoplay set to play Always. But as soon as the user starts producing correct
sentences, we suggest that you set the prompt to play for the first few pages (or Never), and tell the
user to first create a sentence, and then to check his or her response by clicking the Play Prompt
Button.
Note: Users should not feel that they need to create exactly the same sentence as the system models.
Comparing their utterance to the one played by the system may provide valuable practice in selfmonitoring.
Word-finding help: The Vocabulary Cue Buttons play only the items needed to a particular picture. The
buttons on the left play (depending on the picture) nouns for the subject, object, and prepositional
object, along with adjectives and the definite article. The buttons on the right play the verb and
preposition. Buttons have image labels. No WordFinder.
Number of pages: 120
Other comments: The workbooks in the A and F series all draw upon a set of 180 pictures showing 30
basic scenarios. These scenarios are then elaborated in different ways to elicit different grammatical
structures. The F6 workbook uses materials from A1, A2, F4 and F5 workbooks.
CHAPTER 6: USER SETTINGS
This section tells you how to set up the program for each user, and make decisions such as the
following:
Which workbook should this user run?
When the user re-opens a workbook, should it open up where he left off last time, or at the beginning?
Should the Caption Box (a text box that you can type into) be displayed?
Should the user have access to the 'Export" feature, which can let her turn her workbook into a video?
Next page: The User Settings Screen
The User Settings Screen
This page tells you about the various user-specific decisions that you can make on the User Settings
Screen.
72
Topics on this page:
How to open the User Settings Screen
User Settings:
Page Prompt Autoplay
Bookmarking
Simplify the Welcome Screen
Show the Text Caption Box
Set up the Export feature
Workbook tools:
Workbook Manager
Edit Workbook Screen
Edit WordFinder Screen
How to open the User Settings Screen
On the Welcome Screen, make sure that the user's name is highlighted in the list. Then click the "User
Settings & Features" Button below this list (see below):
Open User Settings Screen Button (circled)
Another way to open the User Settings Screen: at the very top of the Welcome Screen, click on the
"User Settings & Features" menu.
Below are the settings you can change in the User Settings Screen .
73
User setting: The Page Prompt Autoplay
The "Page Prompt" is a sound file that plays a recording of a sentence describing the picture on the
screen, or a question, or general instructions about how to use the page. The user can always play the
prompt manually by clicking the Prompt Button, but the prompt can also be set to play automatically
when the user opens the page. Use the button on the right side of the User Settings Screen (circled
below) to set the Page Prompt Autoplay setting :
Page Prompt Autoplay button circled
Your choices for this setting will depend upon which workbook the user is currently set to run.
Here are the choices:
-- Always: If the workbook you are running has prompts that ask a question for the user to answer,
then you should click the radio button marked "Always."
-- Enter number of times: If the workbook you are running has prompts that play a recording of the
target sentence, then you may want to stop playing this model automatically after the user is several
pages into the workbook, by clicking "Enter the number of times..." and then typing in a number (such
as 5).This will keep the workbook from becoming a pure repetition drill, since the user will have to try
to create the sentence from scratch, not just repeat the model. The user can always replay the prompt
manually by clicking the Prompt Button.
-- Never: To stop the prompt from playing automatically, click the radio button marked "Don't play the
page prompt automatically". Remember that the user can always replay the prompt manually by
clicking the Prompt Button.
74
User Setting: Bookmarking
If "Bookmarking" is turned ON, then you will start each workbook on the page where you were when
you last exited from this workbook. If bookmarking is turned OFF, then you will always start on the first
page of the workbook.
Use the button on the right side of the User Settings Screen (circled below) to set the this feature:
Button to set Bookmarking
User setting: Simplify the Welcome Screen
Some of the workbook settings and tools described above can also be accessed on the Welcome
Screen.You may want to HIDE them on this opening screen, to prevent the user from accidentally
changing them. You will always be able to access them on the User Settings Screen.
Use the "Clean up the Welcome Screen" Button on the right side of the User Settings Screen (circled
below) to show or hide the the "Edit Workbook" Button, the "Create New Workbook" Button, the
"User Settings and Features" Button, and/or the User Workbook List from the Welcome Screen.
75
"Clean up Welcome Screen" Button on User Settings Screen
User setting: Show the Text Caption Box
The User Settings Screen is also where you can turn on the Caption Box for a given user; that is, you
can set the user to see the Caption Box on any workbook screen.
Use the "Open Text Caption Box Settings" Button on the right side of the User Settings Screen (circled
below) to show or hide the Caption Box.
76
"Open Text Caption Box Settings" Button on User Settings Screen
The Caption Box itself is discussed in more detail in Chapter 8 - "Adding Text".
User setting: Set up the Export feature
The Export Settings Screen is also accessed from the User Settings Screen. This is where you set up the
user to have his or her speech turned into videos, playlists, or audio mp3 files that can be played on
handheld devices, posted on the Internet, or emailed to friends and family. The button to access Export
Settings Screen is circled in the screen shot below.
"Open Export Settings" Button on User Settings Screen
The Export feature itself is discussed in more detail in Chapter 9 - "Exporting your speech".
On the left side of the User settings Screen, you will also see buttons to access the Workbook Manager
and tools for creating customized workbooks.
Open the Workbook Manager
All users get their own private copies of the built-in workbooks, and these private copies are listed
under "SELECT A WORKBOOK" on the User Settings Screen. There will be times when you may want to
make a fresh copy of a system workbook, or to delete, duplicate, or rename your own workbooks. To
do this, click the "Open Workbook Manager" Button, circled in the screen shot below.
77
Open Workbook Manager Button
The Workbook Manager screen is described in more detail in Chaper 5 - "Using Workbooks".
Open the Edit Workbook Screen
Each user has his or her own customized workbooks, so you access the editing tools from the
Customize User Screen. The Edit Workbook Button lets you customize the selected workbook; the
Create New Workbook Button creates a new workbook which you can then edit. Both buttons are
highlighted in red below:
78
Workbook Editing Buttons on User Settings Screen
Workbook editing is discussed in Chapter 10 ("Editing tools").
Open the Edit WordFinder Screen
The program also includes a tool for modifying the WordFinder or creating custom WordFinders (see
Chapter 10 for more details). This tool is accessed from the User Options Screen. Click the button on
the top right, circled in the screen shot below.
Button to open WordFinder Editor on User Settings Screen
CHAPTER 7:
WORD-FINDING HELP
SentenceShaper differs from many communication aids in its emphasis on helping users tap into their
preserved language abilities. And so, for word-finding, we try to give the user tools to think of words
rather than trying to anticipate every word that a user will need to know. But SentenceShaper also
incorporates more specific help with word-finding, and it can even be used in conjunction with other
programs for still more support.
There are several ways to get word-finding support while using SentenceShaper:
79
Processing support
The Vocabulary Cue Buttons
The WordFinder
Getting word-finding help from 3rd-party software
Processing support for word-finding
The memory support provided by the program can frequently help users find words on their own.
In particular, playing back words or phrases that the user has already recorded can be extremely
helpful. People are especially good at completing sentences ("Please brush your __"). People with
language problems may know a lot more than we (or they) may think they do, and listening to what
they have produced may activate words and structures that they (and we) didn't think they could
produce.
Please see the section on Tips for creating better speech with the program for details about how to use
SentenceShaper's processing support to help with word-finding and sentence construction more
generally.
The Vocabulary Cue Buttons
The Vocabulary Cue Buttons are the buttons along the right and left sides of the Main Screen in most
workbook pages.
Each Vocabulary Cue Button displays written text or sometimes a small picture; clicking on the button
plays this word or phrase aloud. To incorporate a Vocabulary Cue Button word into a sentence, the
user plays the button as many times as necessary, records the word in his or her own voice, and then
adds it to the other snippets.
Some workbook pages have Vocabulary Cue Buttons designed to provide words for the specific picture
on the screen. But for more unconstrained speech, the Vocabulary Cue Buttons typically feature a set
of very general verbs, prepositions, and pronouns. The page featured in the "E1 - Blank Pages with
Simple Vocabulary Cues" workbook is shown below. The Vocabulary Cue Buttons have been outlined in
red:
80
This page has been used in most research studies with SentenceShaper. Its 27 general Vocabulary Cue
Buttons can be very helpful. Two useful strategies are:
Circumlocation
The general verbs on the Vocabulary Cue Buttons can be very effective substitutes for more specific
words; for example, the Vocabulary Cue Button verb "take" can be used in place of "grab", "steal",
"find", "pick up", "lift", "pull", etc. An important component of effective SentenceShaper use is a
willingness to use whatever words come to mind, as long as they are reasonably appropriate, rather
than trying to come up with the perfect word or phrase.
Preposition/verb bootstrapping
In addition, these default Vocabulary Cue Button words (especially prepositions) can sometimes be
used to help the user think of other words. If a user is stumped, it can be helpful to suggest playing
verb or preposition Vocabulary Cue Buttons to see if they suggest anything. If someone is talking about
a festive dinner and can't think of what to say next, playing the Vocabulary Cue Button "on" may
stimulate "on the table" or "on my plate"; playing the Vocabulary Cue Button "make" may stimulate
"make a salad", and so forth.
The WordFinder
81
The most explicit and extensive word-finding help in the program is provided by the WordFinder. It is
an organized list of printed words; as with the Vocabulary Cue Buttons, clicking a printed word causes
its sound file to be played, and the user records the word in his or her own voice to include it in a
sentence.
The default WordFinder
The default WordFinder contains approximately 1,000 words but can be pruned or enlarged in the Edit
WordFinder Screen.
Opening the WordFinder: Not all pages show the WordFinder Button. Whether or not a page has this
feature is something that you can set by editing that page in the Edit Page Screen. If a page allows
access to a WordFinder, you can enter the it by clicking theWordFinder Button on the lower right of
the main screen (circled):
WordFinder Button (outlined in red)
The page shown above is found in the "E1" workbook. You will now see the opening screen of the
WordFinder, which looks like this:
82
WordFinder Opening Screen
Finding a word: The icons on this screen represent groups of words, the 'top level categories' of the
default WordFinder. Click any button to hear its name and to select that category. When you have
found the category you want, click Open (outlined in red) to enter that section of the WordFinder.
If you open the 'People and Animals' category, for example, you will see a screen like this:
83
WordFinder Main Screen
All the words or phrases on the left side of this screen are subcategories of the parent category,
'People and Animals' ; single-clicking on any item in this list will cause it to be played aloud. Some of
the subcategories contain one or more individual words, which are immediately displayed on the right
side of the screen. Subcategories may contain subcategories of their own, just as folders in your
computer can themselves contain folders or individual files. To open a WordFinder subcategory, just
click it.
Recording the word: When you have found an appropriate word, you then record it in your own voice
by clicking the Microphone Button at the bottom of the WordFinder Screen (highlighted in red in the
screenshot below). A snippet playing this word will appear in the Work Area, although you won't see it
until after you exit from the WordFinder. You can play it from within the WordFinder, though. The
button on the left of the microphone button plays the last thing you recorded, so you can check your
recording before leaving the WordFinder.
WordFinder Main Screen - Record Button highlighted in red
The button on the far left of this screen plays the contents of the Sentence Row, which is not visible
within the WordFinder. So if the user has created "With my cereal, I want a...", then this unfinished
sentence can be played from within the WordFinder.
Moving around in the WordFinder: Click the Up and Down arrows on the WordFinder screen to
navigate up or down the list of categories on the left side of the WordFinder screen.
To return to the top level (or "home") of the WordFinder, where the top-level categories are displayed,
click the icon on the lower left side of the WordFinder screen, shown below:
84
Exiting from the WordFinder: To return to the Main Screen, click on the 'Done' button at the bottom
right.
As noted above, any recordings you made from within the WordFinder will be waiting for you as
snippets in the main screen. However, the number of words that can be recorded from within the
WordFinder each time is limited by the fact that the Work Area can only hold seven items at a time.
Related topics:
Edit WordFinder Screen (how to modify WordFinders)
Edit Page Screen (how to set a page to use a different WordFinder and how to remove the WordFinder
from a page)
Word-finding help from other software
You can run SentenceShaper at the same time as programs which provide different kinds of wordfinding support.
Two possibilities are described below:
Word-finding aid on a handheld device
Word prediction and text-to-speech software
Word-finding aid on a handheld device
There are now many programs that run on handheld devices to provide word-finding support (for
example, Lingraphica's "SmallTalk Aphasia"). Typically, image icons are linked to text and spoken
output. A person who needs more pictorial support for word-finding might benefit from using
SentenceShaper for sentence and message construction, while using this third-party program (on a
handheld next to the computer) to look up specific words.
85
Word prediction and text-to -speech software
Another kind of word-finding support can be provided by word prediction software, which makes
suggestions about appropriate next words as you type in text. (It also reads the text in the Caption Box
aloud.) SentenceShaper does not do word prediction itself, but it can be used with a third-party
software program such as WordQ or SoothSayer™, if you have it installed on the same computer as
SentenceShaper, and if the user has some ability to type in text.
Here's how to use both programs at the same time:
-- Make sure that the SentenceShaper screen is NOT "maximized". To do this, open the "General
Settings" Menu on the Welcome Screen, and choose "Maximization of SentenceShaper screen..." This
opens up a screen where you can choose whether or not to maximize the SentenceShaper screen. If
you make a change, you will need to exit from SentenceShaper and then start it again in order for this
change to take effect.
-- Start WordQ (or SoothSayer or other similar program)
-- Start SentenceShaper
-- Now you should see two small boxes on top of the SentenceShaper screen. They are outlined in red
in the screen shot below. The one on the right lets you change WordQ settings and tell it to read the
selected text or to give you word predictions. The one on the left displays word predictions as you type
into the SentenceShaper Caption Box. (Note: WordQ's predictions are based on what you have just
typed, so even if there is already text in the Caption Box, WordQ will not make predictions until you
actually start typing.) When you select one of the choices, it will appear in the SentenceShaper Caption
Box.
86
Using WordQ to help add text to the Caption Box
For some people, this combination of SentenceShaper and WordQ (or similar software) may allow
them to draw on a wider range of preserved abilities.
CHAPTER 8:
ADDING TEXT
SentenceShaper is designed for use by people who may have NO ability to read or type in text.
However, if the individual does have some ability to type and/or read text, this can open up many new
ways to use the program.
The Caption Box is a text area on the Main Screen where you can type in text.
Potential uses of this feature are:
-- To help people work on their reading by transcribing the spoken utterances they have created on
SentenceShaper, or by reading text transcriptions typed in by a helper.
87
-- To create "subtitles" for spoken utterances in exported videos and mp3 files (see Chapter 9). These
can help the user to deliver a speech, for example; or, in a digital scrapbook, to help listeners
understand the user's speech.
-- To draw support from third-party programs such as WordQ or SoothSayer™ . These programs can
read the text in the text area aloud with computer-generated speech ("text to speech"), and can
suggest words or phrases to complete a sentences that you are typing into the SentenceShaper
Caption Box ("word prediction").
-- If the user is trying to memorize sentences or phrases, as in a workbook used for language therapy or
for script training, it may be helpful for the user to see the text of the target sentence displayed.
Topics in this chapter:
Adding your own text: How to use the Caption Box
Using WordQ and other software to help create and read text
Accessing your text
Using screen readers to read other text in SentenceShaper
Using speech recognizers to add text within SentenceShaper
Adding text without a keyboard
How to use the Caption Box
You can use the optional "Caption Box" (shown below) to add text to a workbook page. It is a small
area on the Main Screen where you can type in text for a workbook page.
88
The Caption Box (outlined in red)
This page tells you how to use the Caption Box.
Hiding or showing the Caption Box
To access the Caption Box, click the "Open User Settings and Features" button on the Welcome Screen.
On the right of this screen is a button ("Open Text Caption Box Settings") to turn the Caption Box on or
off.
If you have created text for a page, it will be saved even if you subsequently turn the caption feature
off. When you turn it on again, you will see your text.
Note: The tutorial workbooks run differently than other workbooks, and do not show the Caption Box
even if this feature is turned on. So if you turn on captions, don't be surprised if they do not appear in
these two workbooks.
Using the Caption Box
If you right-click inside the Caption Box, you will see a menu with these options:
89
Caption Box Menu
The first six options are standard editing actions such as copying the selected text (note: you need to
select text before you can copy it).
The "Large text area" option lets you make the Caption Box larger. It will hide some areas of the Main
Screen, however. "Small text area" returns it to normal size.
You will see scroll bars along the right side if they are needed to let you see all the text in the Caption
Box.
Note: If the Caption Box is displayed, it will slightly complicate your use of the space bar to turn the
sound recorder on and off...when you first open a page, or after you have typed text into the Caption
Box, the space bar won't respond unless you first click some part of the screen outside of the Caption
Box.
Captions for non-English writing systems
Regarding languages that do not use the standard English set of characters (for example, those used in
Chinese, Arabic, Hebrew, Hindi):
-- The Caption Box displays and saves text for many of these non-English character sets. Shown below
is a SentenceShaper page with "Hello" in various languages:
90
Caption Box with non-Western characters
-- We have not tested the interaction between SentenceShaper and text-to-speech and word
prediction programs designed for other languages. In fact, we would be interested to hear from you
about whether and how this works.
-- If you are using a non-Western character set (e.g., Chinese), you may need to create your text
captions in a text document (like Word) and then paste them into the SentenceShaper text box. You
can do this by right clicking on the text box and selecting "Paste", or using the Windows key shortcuts
Control-C to copy text and Control-V to paste it.
Using SentenceShaper with WordQ
There are a number of programs -- for example, WordQ and SoothSayer™ --that help users to create
and understand text. They do this in two ways:
-- Playing back any text selected in a text area ("text-to-speech")
-- Suggesting possible next words as the user types in text ("word prediction")
if you have one of these programs installed on the same computer as SentenceShaper, then you can
run it at the same time as SentencerShaper and it will help the user to create text in the Caption Box.
91
Here's how to use SentenceShaper and WordQ at the same time:
-- Make sure that the SentenceShaper screen is NOT "maximized". To do this, open the "General
Settings" Menu on the Welcome Screen, and choose "Maximization of SentenceShaper screen..." This
opens up a screen where you can choose whether or not to maximize the SentenceShaper screen. If
you make a change, you will need to exit from SentenceShaper and then start it again in order for this
change to take effect.
-- Start WordQ
-- Start SentenceShaper
-- Now you should see two small boxes on top of the SentenceShaper screen. They are outlined in red
in the screen shot below. The one on the right lets you change WordQ settings and tell it to read the
selected text or to give you word predictions. The one on the left displays word predictions as you type
into the SentenceShaper Caption Box.
Note: You may want to turn off the word prediction feature within WordQ if all you want to do is play
back your text. We suggest that you make this change in WordQ, and then restart both programs.
Using WordQ to help add text to the Caption Box
92
The procedure is the same for other programs such as SoothSayer. We cannot guarantee that
SentenceShaper will work with all such programs, of course.
Using SentenceShaper
in other languages
This section is about using the program with someone who speaks a language other than English.
Topics in this section:
Language-specific features
Using the program without translating anything
Suggestions about what to translate
Dealing with non-English letters and characters
Language-specific features
The Vocabulary Cue Buttons, Page Prompt, and WordFinder all contain English text linked to
prerecorded English words or sentences.
To use the program with someone who does not speak English, you have two options: you can run the
program without these language-specific features, or you can use the program's editing tools to
customize them for the user's language.
Using the program without translating anything
The core mechanism of SentenceShaper is not specific to any language: it is the memory support that
provides by letting the user record his speech in short clips, replay them, and build them up into larger
units such as sentences and stories. See Chapter 2 for a discussion of why this helps people to create
better speech.
You can use the program without its language-specific features and still reap the benefits of this
memory support. In fact, the program's impact on speech was initially demonstrated (Linebarger et al.,
2000) by disabling all such features.
To run the program without the language-specific features, just set the user to run the workbook
named "E2 Blank Pages with NO Vocabulary Cues". On the Welcome Screen, select this workbook in
the list of user workbooks.
When you open the workbook, each page will look like this:
93
Main Screen with no Vocabulary Cue Buttons
This screen is very simple: it has no WordFinder button, no Prompt, and no Vocabulary Cue Buttons.
You can still provide some word-finding support by recording a few words yourself and leaving these
snippets in the Work Area or the Story Row. If the user has good reading skills, you could also provide a
written list of words.
Note: If your language is read from right to left, then you may want to avoid the "Play Sentence Row"
and "Play Story Row" buttons, because they play sequences from left to right. Just click on the
individual snippets and beans.
Suggestions about what to translate
You can customize the Vocabulary Cue Buttons, Page Prompts, and/or the WordFinders for speakers of
another language by using the editing tools described in this Manual. In the discussion below, we will
assume that you are familiar with the three editing tools; detailed instructions about how to use them
are provided in Chapter 10.
Translating the important features: suggestions
Below are a few suggestions about how to translate a few of the most important language-specific
features of the program
Translate the "Simple Buttons" page layout first. Perhaps the most important thing to do is to
translate the Cue Buttons on the pages of some of the "E" workbooks, which contain pages without
pictures. The pages in the workbook "E1 Blank Pages with Simple Vocabulary Cues" use a layout which
has been used in most research studies with the program, and provides a small set of highly flexible
verbs, pronouns, and prepositions. It would not take long to revise this page for the user's language.
You could then create workbooks using this page, possibly in conjunction with the user's photographs
(for electronic scrapbooks) or any other materials you wish to use.
94
Translate a workbook: To translate a system workbook, open the Edit Workbook Screen as described
in Chapter 10. Now edit each page to provide Vocabulary Cue Buttons and Page Prompts in the user's
language.
Suggestion: Don't translate the WordFinder. This would be the most time-consuming task, but the
WordFinder is not as important as the Vocabulary Cue Buttons and the Page Prompt, so you could just
make sure that the WordFinder is removed from each page. (Do this by editing each page in the Edit
Page Screen, Chapter 10).
Dealing with non-English letters and characters
Currently, the program handles non-English characters as follows:
-- Text added to the Main Screen's Caption Box (described in Chapter 8) can contain non-English
characters, though you may need to create your text captions in a text document (like Word) and then
paste them into the SentenceShaper text box. You can do this by right clicking on the text box and
selecting "Paste", or using the Windows key shortcuts Control-C to copy text and Control-V to paste it.
-- The Vocabulary Cue Buttons can display non-English text, but only if you create a custom text label
in the Edit Page Screen.
-- The WordFinder does not currently display non-English text. However, it is not an essential part of
the program.
Accessing your text
If you have created text for a page in the Caption Box (shown below), this text is saved and will reappear whenever the page is opened (assuming the user is set to view the Caption Box at that time).
Also, if you export a workbook, a transcript of the text for the entire workbook will be created and
placed in your Export Folder, in a subfolder named "Transcripts". See "Chapter 9 Exporting your
Speech" for details about the export feature.
95
The Caption Box (outlined in red)
Using screen readers
Much of the text in the program is accessible to screen readers, that is, to programs which can read
text aloud. WordQ works especially well for this purpose, as it reads the text in the SentenceShaper
screen, rather than copying it into a separate window. Any text in SentenceShaper that can be
highlighted should be accessible to WordQ. Many other programs with text-to-speech capability (such
as TextAloud) are also able to read it (note, however, that Dragon Naturally Speaking cannot read the
material in the SentenceShaper text area). In the screen shot below, which shows the first screen of
the SentenceShaper Tutorial Workbook 1, the selected text is highlighted in blue.
96
Using WordQ to read the text in Tutorial 1
Using Speech Recognizers
You can run SentenceShaper 2 in conjunction with voice recognition software such as SpeakQ (included
in some editions of WordQ) or Dragon Naturally Speaking.
How? First, create a spoken sentence with support from the program, replay it as needed for practice,
and then turn on the speech recognizer's microphone and repeat the practiced sentence. The
recognizer's text will now appear in SentenceShaper's text area!
Why? The advantage of this approach is that SentenceShaper allows the user to have the utterance
planned and practiced before turning on the microphone to record it "live".
Here are some instructions and suggestions:
Make sure that SentenceShaper's Caption Box is showing.
When the speech recognizer listens to your speech, it creates a text transcript of what it thinks you
have said. This text will appear in SentenceShaper's Caption Box, which is a user setting.
Turn the recognizer's microphone on and off manually
97
It is probably best to turn the speech recognizer’s microphone on and off manually each time you want
to have it recognize your speech. Otherwise the text area gets filled up with everything that the
recognizer “overhears” as the user is assembling and practicing the sentence.
Most recognizers have simple ways to turn the microphone on and off. SpeakQ, for example, has a
button with a picture of a microphone for this purpose. Shown below are two screenshots of the
WordQ screen, with the microphone on (top) and off (bottom). Just click the microphone button to
turn it in or off.
WordQ (SpeakQ) - Microphone Button in ON and OFF positions
Make sure that your microphone and speakers are set up in BOTH programs
Even if your microphone and speakers are working fine within SentenceShaper, they may not work
properly with the speech recognition software (or vice versa), unless you test them in each program
before trying to run the two programs together. In SentenceShaper, use the "Sound Test" menu on the
Welcome Screen to test your audio equipment.
Make sure that the SentenceShaper screen is NOT maximized
Text in the SentenceShaper text area may not be accessible to a third party program if the
SentenceShaper screen is set to "Maximimized". Use the General Settings Menu on the Welcome
Screen to set it to not maximize.
Choosing a speech recognizer
98
One desirable feature in a speech recognizer is the ability to read back your text, via text-to-speech.
When the speech recognizer listens to your speech, it creates a text transcript of what it thinks you
have said, and puts this text in the SentenceShaper Text Area.
What if you want to use text-to-speech to read back THIS text? SpeakQ is a better option than Dragon
in this regard, because Dragon is not able to read back the text that it places in the SentenceShaper
text area. In contrast, SpeakQ can both create and read text in this area.
On the other hand, at least some versions of Dragon Naturally Speaking (but not SpeakQ) let you
browse to an audio file of your recorded speech and perform speech recognition on it. That could be a
useful feature, though perhaps not as important as having the text read back to you.
Entering text without a keyboard
Since tablet computers are normally used without hardware keyboards, Sentence Shaper displays a
virtual keyboard when text needs to be entered. For example, the keyboard appears when you are
asked to type in the name for a new SentenceShaper user:
Onscreen Keyboard
Two things to note:
First, you can always use your own keyboard to enter text.
99
Second, if you have a physical keyboard, you may want to hide the onscreen keyboard. You can do this
from the General Settings Menu (open the menu and choose "Show or Hide Onscreen Keyboard").
CHAPTER 9:
EXPORTING YOUR SPEECH
The "Export" Feature helps you to use spoken utterances created on SentenceShaper in real life. You
can turn your workbooks into videos or mp3 files, which can (depending upon their size and format) be
posted on the Internet, emailed, or played on handheld devices like iPads.
Topics in this chapter:
Getting set up:
Overview of the export feature
The Export Settings Screen
Adding text captions to exported messages
Using your exported files:
Playing exported files on your computer
Uploading your videos to the Internet
Emailing exported files
Playing your exported speech on iPads and other handheld devices
Using exported files in phone calls
Next page: Overview of the export feature
Overview of the export feature
This feature supports "real world" use of SentenceShaper by creating video and audio files containing
users' SentenceShaper productions, packaging them with personal photos and text subtitles if desired.
Here are the basic steps:
1) First, each user has his or her own settings for exporting messages. The Export Settings Screen is
accessed from the User Settings Screen. It lets you choose what kind of file you want to create (video,
audio mp3, playlist), the location of your "Export Folder" where the files will be placed, and other
choices such as whether to have SentenceShaper amplify your sound files when they are exported.
2) Once the user is set up, you will see an Export Button on the main screen (lower right) whenever
this user is running a workbook. It is outlined in red below:
100
Workbook page open in SentenceShaper (Export Button outlined in RED)
3) Now create some "purple beans" in the Story Row. If you have chosen to add text captions, type or
paste in your text as instructed in the section on captions (the Caption Box is shown above).
4) Then click the Export Button. The exported file(s) will be copied to your Export Folder, where you
can access them for whatever you plan to do with them -- uploading them to the Internet, emailing
them, playing them on a mobile device, etc.
5) In addition, the following files may be created:
-- If the Caption Box is showing when you click the Export Button, the program saves the text you have
created into the Export Folder (in a sub-folder named "Transcripts").
-- If you are exporting a playlist, SentenceShaper also creates a zip file containing the entire set of
playlist files, and places it in your Export folder (in a sub-folder named "Zipped Playlists").
Next page: The Export Settings Screen
Return to home page of Export chaper
The Export Settings Screen
101
To open this screen, open the User Settings Screen (click the "User Settings & Features" button on the
Welcome Screen). On the upper right, click "Open Export Settings". You will now see the Export
Settings Screen, shown below:
Export Settings Screen
On this screen, you will make three choices:
Choice #1: What format you want the program to use. The three options are described below. Click the
question mark button to the right of each option for more detailed help.
-- "WORKBOOK VIDEO": If you choose this option, you'll see a button labeled 'Export Video' on the
lower right of the screen whenever you are in a workbook. When you click that button, the program
will create a video containing all the speech, pictures, and text that you've added to the entire
workbook.
If you select this option, you will then see a button labeled "Change Settings". This opens a screen
where you can modify various settings. including the video format (mp4 or mpg); video resolution (you
may need to choose the low resolution if you have an older or slow computer); and whether to show
an Internet access button. This is a button that you'll see after the workbook has been exported. It will
102
let you go directly to Facebook, YouTube, or Vimeo. There you can log into your account and upload
the video. There are also some settings related to the display of text captions that you can change
here.
-- "SINGLE PAGE VIDEO OR MP3": If you choose this option, you'll see a button labeled "Export Page"
on the lower right of the screen whenever you are in a workbook. When you click that button, the
program will create a file that plays the speech you recorded on that one page, along with the picture
(if there is one) and any text you have added. This file can be either a video or an audio file in mp3
format (click the "Change Settings" to make choices about format and so forth).
Which format is better, video or audio? Both will play your speech, but we recommend that you
choose a video format if there are any pictures or text on your page. Media players will almost always
show the pictures and text in a video, but may only play the SOUND in an mp3 file.
Note also that the mp4 video format is generally preferable to the mpg format, because it creates
smaller video files (better for emailing) and will play on ipads. However, some older media players may
only play mpg videos.
-- "WORKBOOK PLAYLIST": If you choose this option, you'll see an "Export Playlist" button on the lower
right of the screen whenever you are in a workbook. When you click it, SentenceShaper will create a
playlist with the speech in that workbook. The playlist will consist of a set of mp3 audio files, along with
a file which tells music players what order to play them in. These mp3 files also contain the pictures
and text, although some older media players may not display them.
Perhaps the only reason to select this playlist format is to make it easier to practice the speech on each
page (for example, in script training). You can replay the speech on a page over and over without
having to find the beginning. But for all other uses, we recommend that you choose one of the video
options, as videos are easier to share.
-- "DO NOT EXPORT": If you choose this option, you will not see an Export button on workbook screens.
However, whenever you decide you would like to share your spoken productions, you can just re-open
the Export Settings Screen and select one of the other options. Then you can export the workbook.
Note: Only pages that contain "purple beans" in the Story Row will be exported.
Choice #2: Where to create the "Export Folder" containing this user's exported files. Put this folder
some place where you can find it easily...perhaps in your Documents folder or on your Desktop.
One suggestion: if you use DropBox (www.DropBox.com), then you can put your Export Folder in your
DropBox folder, and it will automatically show up on an iPad or other mobile device that is running the
DropBox app and is linked to the same account. (Warning: SentenceShaper itself should not be installed
in the DropBox folder.)
103
Note: If more than one person will be using the computer, and if they will be logging into it under
different Windows user names, you may want to agree on a location for the Export Folder that
everyone can access. Otherwise, one clinician may set up an export folder for a client, but when
another clinician runs SentenceShaper with the same client, she will get an error message saying
that the video (or whatever) cannot be created in that client's Export Folder. In this case, the Export
Folder can be reset to a new location and the file exported there. but it will be less trouble to find a
location that is accessible to everyone who uses the computer.
Choice #3: Whether to have the program amplify user's recordings when it exports them. This can
make them easier to understand if the individual speaks softly, but at the cost of audio quality. It will
not affect the original recordings within SentenceShaper, just the exported files.
Next page: Adding text captions to exported messages
Return to home page of Export chaper
Add text captions
You can use the optional "Caption Box" to add text to a page before you export it.The Caption Box is a
small area on the Main Screen where you can type in text for a workbook page.
If you export a page or playlist while the caption box feature is turned on, your text (if any) will be
shown while the sound file is playing. For example, the screen shot here shows a personal workbook
page playing in Windows Media Player, along with a subtitle added by the user.
Exported workbook page (mp3 file) playing in Windows Media Player
104
If a page does not have a picture, then just the caption will be displayed.
If you are using a non-Western character set (e.g., Chinese), you may need to create your text captions
in a text document (like Word) and then paste them into the SentenceShaper text box. You can do this
by right clicking on the text box and selecting "Paste", or using the Windows key shortcuts Control-C to
copy text and Control-V to paste it.
Additional text options
In the Export Settings Screen, you will see a button labeled "Change settings" when you select one of
the expert options. This will open a screen where you can choose how your text will be displayed: the
text can be white on a black background (the default), or black on a white background (as shown
above). You can also change the size of the text displayed in your video or mp3 file. The default
settings are for large text on a black background.
Note: If you are creating a Playlist, the text display settings for a single page export will be used.
Next page: Playing exported messages on your computer
Return to home page of Export chaper
Playing exported files on your computer
Let's say that you have created some speech in a workbook and clicked the Export Button. The
program will now take the purple beans the user has created on that page and turn them into video or
audio files (depending upon your export settings). These files will be placed in your Export Folder.
So what do you do now? This page tells you how to play the exported files on your computer. Later
sections will tell you how to use them in other situations, but the first step is to understand how your
computer plays sound files.
Topics covered below:
How to play an exported VIDEO
How to play an exported MP3 AUDIO file
How to play an exported PLAYLIST
How to play an exported VIDEO
Let's say you selected the "Workbook Video" format in the Export Settings Screen, and that you have
just exported a workbook named "Summer Vacation". Here is how to play it...
105
If you chose to locate your Export Folder on your desktop, then you will see a folder named
"SentenceShaper exported messages for <your user name>" on the desktop. When you open your
export folder, you will see a sub-folder named "Videos". When you open this folder, you should see a
file named "Summer Vacation.mpg" or "Summer Vacation.mp4" (depending upon your choice of video
format).
To play this video, double-click on it. This should open your default music player (for example,
Windows Media Player), and cause it to play the video. If nothing happens, or if it does not play both
audio and pictures, you may have to right-click on the video file and choose "Open with...", then select
a program to play the file. It all depends on how your computer is set up.
NOTE: If the sound files and the pictures in your video are out of sync (that is, the wrong picture is
shown fore a sound file), this is probably because the computer you are playing it on is older and does
not have the ability to handle high-resolution videos. You may need to choose the low resolution
option in the Export Settings Screen in order for the video to play correctly.
Incidentally, some older computers may take a VERY long time to create high resolution videos. Again,
the solution is to choose the low resolution option in the Export Settings Screen.
How to play an exported MP3 AUDIO file
Let's say you selected the "Single Page" format in the Export Settings Screen, and chose the audio mp3
format. After you have exported a page from a workbook, here is how to play it:
If you chose to locate your Export Folder on your desktop, then you will see a folder named
"SentenceShaper exported messages for <your name>" on the desktop. When you open your export
folder, you will see a file named "SentenceShaper_Message.mp3".
To play this mp3 file, double-click on it. This should open your default music player (for example,
Windows Media Player), and cause it to play the mp3 file. If nothing happens, you may have to rightclick on the mp3 file and choose "Open with...", then select a program to play the file. It all depends on
how your computer is set up.
If the page you exported had a picture on it, that picture should be be shown when you play the mp3
file. Also, if you typed in a text caption, it should also be displayed when the mp3 file is played.
The screen shot below shows an exported workbook page playing in Windows Media Player (top) and
iTunes (bottom).
106
Exported workbook page (mp3 file) playing in Windows Media Player
Some older software for playing mp3 files may not show the exported picture, but all you may need to
do is to download a newer version of the sound file player.
Different media (music) players behave differently. Some players may not show the pictures, but
Windows Media Player and iTunes do.
In summary ... whenever you play exported mp3 files, the same thing will probably happen: the
computer will launch the default music player, or ask you to select one. In most cases, you will see the
exported page pictures and text captions while the mp3 files are playing.
107
Note: If you selected the "Single Page" format in the Export Settings Screen, and chose the video
format, your exported video will be placed in your Export Folder. It will be named "SentenceShaper
Video Email.mpg".
How to play an exported PLAYLIST
Let's say you chose the "Workbook Playlist" format in the Export Settings Screen, and have just
exported a workbook called "Summer Vacation"
Let's also assume that you chose to locate your Export Folder on your desktop. Then you will see a
folder named "SentenceShaper exported messages for <your name>" on the desktop. When you open
your export folder, you will see a sub-folder named "Playlists". When you open this folder, you should
see a folder named "Summer Vacation". When you open this last folder, you'll see something like the
screen shot below:
Exported workbook playlist files in user's Export Folder
The playlist file is outlined in red in the first screen shot above. It tells the computer which mp3 files to
play, and in what order. It will have a name that begins with the word "PLAYLIST" and ends in ".m3u".In
the example above, it is named "PLAYLIST Summer Vacation.m3u".
108
To play an entire playlist, double-click on this playlist file. This should open your default music player
(for example, Windows Media Player), and cause it to play all the exported mp3 files in order. You may
have to right-click on the playlist file and choose "Open with...", then select a program. Again, it
depends on how your computer is set up.
If you use iTunes to play your mp3 files, you'll want to read the section on transferring exported files to
mobile devices for more detailed instructions. Also, in order to see the pictures within iTunes itself,
you'll need to click the button (outlined in red on the upper right of the screenshot here) to set you to
view the playlist in "Cover Flow" mode.
Note: Transferring the exported mp3s to an iPad or other handheld device will be covered later.
Next page: Uploading your videos to the Internet
Return to home page of Export chaper
Uploading your video to the Internet
After your video has been created, you will see a screen like the one shown below. It tells you where to
find the video in your Export Folder, along with other information. And, if you selected "Display button
to access Internet" when you set up the export feature for this user, then it will also have a button like
the one highlighted in red below:
109
Popup after video has been created
This button will launch a browser (assuming that your computer is connected to the Internet) and will
go to one of three Internet sites where you can post your video: Facebook, YouTube, or Vimeo. You
choose the particular site in the Export Settings Screen.Once there, log in -- if it is your first time, you'll
need to create a free account first -- and upload the video. These sites typically create different
versions of your video, and ensure that it plays on whatever computer a person is using when they
view your video.
Next page: Emailing exported files
Return to home page of Export chaper
Sending your messages as emails
If you want to email speech created in SentenceShaper, open the Export Settings Screen and select the
"Single Page" option (you will also decide whether you want it to be an audio or video file). If you
choose the audio format, then SentenceShaper will create an mp3 sound file named
"SentenceShaper_Speech.mp3" containing all the utterances in the Story Area of the page you
exported. If you choose the video format, then SentenceShaper will create an mpg video file named
"SentenceShaperVideo Email.mpg" containing all the utterances in the Story Area of the page you
exported. This file will be placed in the Export Folder.
Two ways to email a file
1. If you already know how to send attachments (like pictures) in your regular email program, then you
can just open this email program and attach the SentenceShaper audio or video file like any other
attachment. All you need to know is the location of your Export Folder. If you forget, just open the
Export Settings folder and look at the bottom of the screen, where the location of the folder is
displayed.
2. Or you can open the Export Folder, locate the audio or video file you want to email, and then rightclick on it. From the context menu that appears, choose the "Send to" submenu; then choose "Mail
recipient". (The wording may vary across different versions of Windows.) This will open a new email
window in your default email program, with the file you selected attached to the email. All you need to
do now is to pick the email recipient and send the email as usual.
Unfortunately, the email program that you actually use for email may not be the one that your
computer thinks you use, so it may open an unfamiliar email program that does not have your contacts
and existing emails. In that case, you'll probably want to use the first option above.
Email troubleshooting
110
Some email programs automatically remove attachments from emails, and mp3 files sometimes get
stripped off in this way. We will be posting more information about how to deal with this, so please
check back with this web page in the future.
Also, some people may not see your pictures and captions when they play an mp3 file from you. We
suggest that they copy the mp3 file to their computer, then right-click on it and choose "Open with...".
The pictures should show up in Windows Media Player and in iTunes, but other players may not show
them. It depends on the individual player...whether they handle the "ID3" tags which carry the
embedded pictures.
Or try exporting the page in video (.mpg) format. This makes for a larger file, but one that may display
your pictures ad/or captions more reliably.
Next page: Playing your exported speech on iPads and other handheld devices
Return to home page of Export chaper
Playing your exported speech on iPads and other mobile devices
This section is about how to play your exported files on portable devices.
Below in this section:
Instructions for VIDEOS
Instructions for PLAYLISTS
We will focus on iPads and iPods below, but the same general approach should work for other devices.
Instructions for VIDEOS
You can transfer exported videos to an iPad in several ways:
Method #1: Upload the video to a site like Facebook, YouTube, or Vimeo, and use their iPad apps to
view the video on your iPad.
Method #2: The simplest method may be to transfer the video using a program like DropBox
(www.DropBox.com). Sign up for a free account and install it on the computer that is running
SentenceShaper. This will create a folder called "My DropBox". In addition, download the free DropBox
app onto your iPad, using the same account settings (user name and password). Then, in the Export
Settings Screen, make sure that your Export Folder in located your DropBox folder. Now your exported
videos will automatically show up on an iPad or other mobile device that is running the DropBox app
and is linked to the same account. NOTE: This method requires that you make the video in MP4 format
(one of your choices in the Export Settings Screen).
111
Method #3: Add the video to iTunes and then sync it to the device through iTunes. Instructions: Open
iTunes, and select "Add File to Library..." from the iTunes "File" menu. Make sure that the video is
included in the list of files to be synced, then sync as usual. NOTE: This method requires that you make
the video in MP4 format (one of your choices in the Export Settings Screen).
Method #4: If the video is not too large, you can use email to put it on the mobile device.
Instructions for PLAYLISTS
If you want to transfer your playlist to an Apple device such as an iPod, iPhone, or iPad, you will
probably use iTunes for this purpose. Transferring the playlist to iTunes is rather tricky, so please follow
the instructions below. ITunes is not really designed for this kind of use, so you have to follow these
procedures in order to ensure that your files are handled correctly by iTunes.
-- Start by opening iTunes...we will assume that you have used it before.
-- Open the "File" menu on the top of the iTunes screen
-- Now choose "Library"
-- Now choose "Import playlist..." as shown in the screen shot below:
112
This will open up a window for you to find the playlist on your computer. It will be in your Export
Folder, so browse to the export folder and open it.
-- You'll see a list of files that looks something like the one shown below. Click on the file whose name
begins with "PLAYLIST" (outlined in red below). Click "Open."That's all! You do NOT need to import the
other files; iTunes will do that for you.
Now play the workbook in iTunes to make sure it is correct. Note: in order to see the pictures in iTunes,
click the button (outlined in orange on the upper right of the screenshot here) to set you to view the
playlist in "Cover Flow" mode.
113
Next, connect the handheld device (iPod, iPad, iPhone, etc) to your computer.
In the device's sync settings, make sure it is set to "sync selected playlists" or to "sync entire music
library". If you choose to sync selected playlists, make sure that your workbook playlist is selected.
Finally,click "Apply" or "Sync" to transfer the files to your device.
Note about Syncing a REVISED workbook
If you revise a workbook and want to transfer the NEW version of the workbook to your apple device,
we recommend that you rename the workbook within SentenceShaper before re-importing it into
iTunes. Otherwise, iTunes may not import the new version properly.
In iTunes, you may want to delete the original playlist for that workbook, just to avoid confusion.
(Playlists are shown on the lower left of the iTunes screen; right click it and select "Delete").
If you have have iTunes set up to "sync entire music library", then you can now sync your device and
the new version should appear on the device. But if you have iTunes set to just sync just selected
playlists, then you will need to select the new, renamed workbook's playlist in the list of playlists to be
synced.
Once you have synced the playlist to your iPod, iPad, or iPhone, you will play it as you would play any
music playlist on your device. You can use the "Music" or "iPod" app on the device, or any other app
that plays music playlists. Note: Be sure to select "Playlists" in the ipod app, and do NOT turn on the
"Shuffle" feature since you probably want your utterances to be played in order.
Next page: Using exported files in phone calls
114
Return to home page of Export chaper
Using SentenceShaper recordings in phone calls
This section is for adventurous users who are willing to try out technology in new situations.
The utterances created in SentenceShaper can be used to help you talk on the phone. You can prepare
some utterances before starting a phone conversation, and use them during the conversation.
Why?
Creating speech ahead of time can be useful because the time pressure in a phone conversation can be
intense. Information that can be prepared ahead of time on SentenceShaper includes:
-- The user's address, phone number, full name, email address, or directions to his or her home
-- Explanations of the user's language difficulties and requests for help in conducting the call ("I have
aphasia... I can think fine but it is hard to talk", "Please speak more slowly", "Would you please repeat
that?", etc.)
-- Explanations of complicated matters such as medical or house repair problems
-- Personal speech such as congratulations, jokes, etc.
Pre-recorded utterances can be played during a conversation in which the user is also speaking
spontaneously. Depending upon the exact setup and the nature of the phone conversation, the listener
may not even be able to tell which speech is "live" and which is recorded. This potentially addresses
the awkwardness that many people with aphasia feel about the use of communication aids.
How?
Here are three general approaches to using SentenceShaper to help you on the phone...
-- "Self-cueing": Use your prerecorded speech to self-cue spontaneous speech. How? Sit in front of
your computer and open SentenceShaper or your Export Folder, so that you can access the relevant
recordings. Play back your recorded messages to yourself, and then try to repeat them to the other
person with "live" speech.
-- "Direct playback": Actually play your pre-recorded utterances to the other person over the phone.
That is, play your recorded utterances over the phone, probably intermingling them with "live" speech
during the conversation.(See below for details.)
115
-- Practice ahead of time: A third approach is to record your message (an instruction, question, piece
of information, anecdote, joke, or whatever) on SentenceSgaper and practice delivering it right before
you initiate the call. This is like practicing a script right before you go onstage
There are different ways to do this. All of them will require some trial and error experimentation on
your part, to see what works best for you. We will be very interested in hearing about your
experiences, so that we can learn what works for you, and what kinds of uses are most desirable and
worth supporting directly within the program.
On a landline
The most straightforward way to play a SentenceShaper-created utterance over the phone is to open
SentenceShaper, create the utterances you want to use, and then dial the call on a landline in front of
the computer's speakers. When you want to use your SentenceShaper speech, just hold up the phone
in front of the speaker and play your utterance.
On a cellphone
On a cellphone, you can use the procedure above (hold the cellphone up in front of a computer
running SentenceShaper and play the utterance into the phone),
On some cellphones, you can transfer your spoken utterances to the cellphone (see the section on
transferring exported messages to handheld devices), then start a conversation on the phone and
simply play the mp3 files, which are now on the phone, during the call.
With Skype
If you use Skype on your computer, there are two options.
-- The first approach is the procedure described above... start a Skype call, then play a SentenceShaper
utterance, either from your Export Folder or from within SentenceShaper, on the same computer you
are using for Skype.
-- The second approach is to use a Skype plug-in program named "Pretty May Call Recorder" (there
may be others which work well). Pretty May allows you to click on a list of mp3 files while you are
talking on a Skype call. The mp3 file is played into the Skype call directly. The advantage of this
approach is the potentially better sound quality of the recordings. If the same computer and
microphone are used to create the recordings and to engage in the Skype conversation, then the
listener may not even be able to tell which speech is live and which is recorded. As noted above, this
potentially addresses the awkwardness that many people with aphasia feel about the use of
communication aids. PrettyMay is only available for Windows computers at this time.
Below are some skeletal instructions about how to set up to use PrettyMay within Skype. We will
assume here that you are already familiar with Skype.
116
Instructions for using Pretty May to play SentenceShaper mp3s during a phone call
Install Skype
Install the free "add-in" program called the Pretty May Call Recorder. You can download it from:
http://www.prettymay.net/PrettyMay_Recorder_Extra.sparc (save it to your computer and then run it
to do the install).
Before starting a call, locate your exported SentenceShaper utterances, in the Export Folder you will
have set up from within SentenceShaper. Follow Pretty May's instructions on how to to find the mp3
files you will want to play.
Follow the instructions in PrettyMay for playing these mp3 files during a Skype call.
At the beginning of each call, Pretty May will ask whether it can start up and/or whether you would like
to record the call. You can say "No" to the recording.
Return to home page of Export chaper
CHAPTER 10:
THE EDITING TOOLS
The program includes three tools that allow you to create customized materials: workbooks, pages,
and WordFinders.
Topics in this chapter:
The Edit Workbook Screen
The Edit Page Screen
The Edit WordFinder Screen
The Edit Workbook Screen
This screen lets you modify built-in workbooks or create new workbooks of your own.
Topics below on this page:
117
Why edit a workbook?
How to create a brand new workbook
How to open the Edit Workbook Screen
Layout of the screen
Editing a page in your workbook
Deleting a page in your workbook
Duplicating a page in your workbook
Reordering the pages in your workbook
Renaming a page in your workbook
Adding pages from another workbook
Saving your changes
How to protect important workbooks
Advanced options: Edit preview picture and description
How to HIDE the edit buttons on the welcome Screen
Why edit a workbook?
There are many reasons why you might want to edit a workbook, including:
-- To create an electronic scrapbook with the user's personal photos are accompanied by spoken
comments in his or her own voice, created on SentenceShaper.
-- To modify the built-in workbooks for a particular user, probably by making minor changes such as
adding different words to the Vocabulary Cue Buttons.
-- To create a workbook that trains a different grammatical structure.This would involve more
substantial changes like re-recording the Page Prompts and/or the Vocabulary Cue Button answer keys
to elicit the new structure. For example, the A1 Simple Sentences Workbook could be modified to train
passive sentences by re-recording the simple active page prompts ("The woman is feeding the cat") as
passive sentences ("The cat is being fed by the woman").
How to make a brand new workbook from scratch
In order to create a brand new workbook (for example, with the user's own photographs), click the
"Create New Workbook" Button displayed on both the Welcome Screen and the User Settings Screen.
This will create a small starter workbook which you can expand and modify in the Edit Workbook
Screen.
How to open the Edit Workbook Screen
To edit an existing workbook, select it in the workbook list on the Welcome Screen, and click the "Edit
Workbook" button. Both this button and the button to create a new workbook are outlined in red
below:
118
Welcome Screen
"Create NEW Workbook" and "Edit Workbook" buttons highlighted in red
You can only edit workbooks in the user's workbook list; other users' copies of the built-in system
workbooks will not be affected by your changes. You may want to rename your copy of a workbook
before editing it, to remind you that this is your version. If you don't like your changes, you can always
make a fresh copy of the built-in workbook in the Workbook Manager Screen, which is also the screen
where you can rename the workbook.
(Note: You can also access the Edit Workbook Screen from the User Settings Screen.)
Layout of the screen
On the right side of the Edit Workbook Screen, you will see a list of the pages in the workbook that is
being edited (circled below).
119
The workbook being edited is on the right
If the selected page has a picture on it, you will see a small thumbnail of the picture below the list.
To the right of this list you will see seven buttons, which allow you to perform various operations,
described below.
Editing a page in your workbook
Select the page you want to edit and click the Edit Page button on the far right of the screen. This
opens the Edit Page Screen so that you can make changes to this page. You can modify the page's
picture, vocabulary cue buttons, prompt, and WordFinder.
Any changes you make will affect only the page in the workbook being edited. So if you copy a page
from one workbook to another, then change the picture on the page in the second workbook, the
original page in the first workbook will not be changed.
Deleting a page in your workbook
Select the page you want to delete and click the Delete Page button on the far right of the screen.
This just deletes the page from the workbook being edited. If you copied it from another source, the
original will not be deleted.
120
Duplicating a page in your workbook
To make a copy of a page in the same workbook, select the page and then click "Duplicate Page".
If the user has created snippets or purple beans on the page you are copying, you will be asked
whether you want to copy these user sound files as well as the basic page layout (image, buttons,
prompt, WordFinder).
Dialog asking whether to copy user sound files
If you click "Yes", then it will copy any snippets and purple beans recorded by the user on that page
into your workbook. If you click "No", then it will copy the page itself but will not copy the user's
recordings.
Reordering the pages in your workbook
To reorder pages in the workbook, select the page you want to move and click the Up button to make
it come earlier in the workbook or the Down button to make it come later.
Renaming a page in your workbook
Select the page you want to rename and click the Rename Page button on the far right of the screen.
Note: this is strictly for your own convenience. Page names are not displayed when the workbook is
run, and workbooks can many pages with the same name.
Adding pages to your workbook
You can add a new page to the workbook by copying in a page from one of your other workbooks. Use
the "Add Page from other Workbook" button on the far right. This will cause the user's other
workbooks to be displayed on the left side of the screen. First select the workbook you want to copy
from. Its pages will then be displayed below the workbook list. The workbook list is circled in the
screen shot below:
121
Edit Workbook Screen -- workbook list and "Add" Buttons circled
Select the page you want to copy, and click Add (or click Add All to copy in the entire list). These
buttons are circled above.
After adding the page, it will appear in the list on the right. Any changes that you make will only show
up in this workbook; the original version of the page in the workbook you copied from will not be
affected.
Note: You can add more than one copy of a given page to a workbook. For example, you could add 10
copies of the page named "PictureAreaSimpleVocabularyCues " from the "E4" workbook, then edit
each page to change the picture and other features. (You can leave the page name the same for all 10
copies if you like.)
The copied page(s) will be inserted above the currently selected page in the workbook. If the page has
any user utterances on it, you will be asked if you want to copy them as well.
Saving your changes
To exit the Edit Workbook Screen, click either "Save" or "Cancel". If you click "Cancel", then some or all
of the changes you made will be discarded. You will see this dialog box:
122
Workbook Editor Cancel Options
-- If you click "Discard ALL changes", then the workbook will revert to the backup copy that was created
when you started the editing session. Even changes that you deliberately saved (by clicking "Save" in
the Edit Page Screen, for example) will disappear.
-- If you click "Discard any UNSAVED changes", then only changes since the last save will be discarded.
(Re "the last save": During an editing session, you will sometimes be telling the system that you want
your changes to be saved, and the Edit Page Screen has buttons to save your changes as you go.)
How to protect important workbooks
Some workbooks may contain especially important files, such as long productions created by the user
for a speech or electronic scrapbook, or data you are collecting for a research study.
For extra precaution against loss of user recordings, open the Workbook Manager Screen, select the
workbook you want to protect in your workbook library list, and click "Duplicate". This will make a
copy of your workbook, including any user recordings it contains. It will have the same name as the
workbook, but will begin with the words "COPY_OF_". Just in case something happens to your
workbook, you will always have this backup. If you want to make another copy later (to include
subsequent changes), you will need to either delete this copy or rename it to something else.
In addition, the program automatically makes a temporary copy of any workbook you are editing, at
the start of each editing session. In case something goes wrong in the process of saving your changes,
this will at least protect the workbook from being ruined.
The reason we take all these precautions is that every now and then Windows is unable to copy files
while saving a workbook. One reason for this can be that the files it wants to copy are in use by
another program. That's why we recommend that you close alll other programs while you are running
SentenceShaper 2. It's especially important to make sure that you do not have the SentenceShaper 2
folder open in Windows Explorer while you are running the program.
Please do let us know if you do run into any problems with saving your workbooks.
Advanced options: Edit preview picture and description
123
When a workbook is selected on the Welcome Screen, a small 'preview' picture is shown, along with a
sentence or two describing what the workbook is about. For example, in the screen shot below, a
user's workbook about a vacation trip is customized with a picture of the desert and a short text
description:
Workbook Preview Picture and Text Description
You can customize these two features in the Edit Workbook Screen. Click the "Advanced Options"
Button on the upper left side of this screen. This opens a screen where you can:.
Edit the text of the short description of the workbook displayed when it is selected in the user's
workbook list.
Change the "preview picture" shown when this workbook is selected in the user's workbook list.
How to hide the Edit Buttons on the Welcome Screen
You may want to hide the edit buttons if the person with language problems might find them confusing
or might accidentally damage a workbook. Since these two buttons are also displayed on the User
Settings Screen, they do not have to appear on the Welcome Screen as well. To remove them from the
Welcome Screen, open the User Settings Screen and click "Clean up the Welcome Screen".
The Edit Page Screen
124
The Edit Page Screen allows you to customize four aspects of a workbook page: the picture (if any) it
displays, the Vocabulary Cue Buttons, the page Prompt, and the WordFinder (if any) it provides.
Topics below on this page:
How to open the Edit Page Screen
Entering the Edit Page Screen
Changing the Main Picture
Changing the Vocabulary Cue Buttons
Changing the Page Prompt
Changing the WordFinder
How to create a brand new page
Exiting
How to open the Edit Page Screen
First, you need to choose a workbook, and open it in the Edit Workbook Screen. Then select the page
in that workbook that you want to edit, and open the Edit Page Screen for it.
To choose the workbook, select it in the workbook list on the Welcome Screen, and click the "Edit
Workbook" button (circled) below the list:
Welcome Screen - "Edit Workbook" Button circled
This will open the Workbook Editor. Select the page you want to edit, and click "Edit Page".
Entering the Edit Page Screen
125
The Edit Page Screen is shown below. If the page has a picture, it is displayed. You can click the
Vocabulary Cue Buttons or the Prompt Button to hear them, and you can click the WordFinder Button
for information about the WordFinder assigned to that page.
To start editing, decide what part of the page you want to change. Click on the appropriate button to
begin editing.
Edit Page Tool - Opening Screen
Changing the Main Picture
If you click "The Main Picture", you will now see a screen like the one below (the picture will be
different):
126
Change the Main Picture
There are four buttons here. From left to right:
"Search for a picture on your computer": This opens a browser so you can find a picture on your
computer to put on the page. It will then import the picture; that is, it will make a copy of the picture
and put it in that user's Picture Library.
You can use personal photos (either from a digital camera or film photographs that you have scanned
in) or images from the Internet. For example, you may want to use sites like Google Images to find
pictures for your workbook pages. Just save them somewhere in your Windows Pictures folder, then
browse for them using the button described here.
127
"Choose a picture from a built-in workbook": This opens a browser in the folder where SentenceShaper
stores the pictures for its built-in workbooks.
"Do NOT show a picture on this page": This removes the picture from the page. Pages do not need to
have pictures.
"Advanced Options... ": Clicking this button opens a couple of more advanced choices:
o The "Use this picture as the workbook preview" button causes the current page picture to be
displayed on the Welcome Screen button to run the workbook. The dog picture shown below is
a personal photo that has been selected to serve as a workbook preview.
Workbook Preview Image on Welcome Screen
The "Look in my Picture Library" button opens a screen so that you can choose from pictures that you
have previously imported. Whenever you import a picture, it is copied into one of the user's
SentenceShaper folders. This helps with portability: if you copy a user's folder to a different computer,
all that user's materials will run on the new computer.
If you try to import a picture that has the same name as a picture you already imported, you will see a
message telling you that "_COPY" will be added to the picture name (and, if that file exists too,
"_COPY_COPY" will be added, and so forth). If you see this message a lot, then you may be importing
the same pictures over and over again, which will use up space on your computer. To re-use a picture
you have imported previously, click "Advanced Options" and then "Look in my Picture Library".
Changing the Vocabulary Cue Buttons
If you click "The Cue Buttons" on the Edit Page Tool's opening screen, you will now see this screen:
128
Change the Vocabulary Cue Buttons
The Vocabulary Cue Buttons are visible along the sides if the screen, and can be played by clicking.
When you click a button, it will also be selected for editing. The button you are editing will be
highlighted in red, as shown above. Your options are (from left to right in the screenshot above):
"Record NEW utterance for button": Click this button if you want to change the content of the button -for example, to change it from "My dog" to "Fido". You will be asked to type in a name for the button,
and then the recording box will immediately pop up. Record the sound file and click "Done". After a
moment, the new sound can be heard by clicking the button.
You may wonder why the program asks you to type in a name for the utterance. This is because all the
sound files you create for this user are saved so that they can be reused. See below about how to find
utterances you have recorded earlier.
129
"Re-record button's current utterance": Click this button if you are happy with the word or phrase
played by a button, but don't like the quality of the sound file. The recording box will pop up, and you
can try again, then play the button to hear the results..
"Find an existing sound file for button": Clicking this button will open a small panel in the picture area,
at the top of the screen:
Choosing an Existing Sound File for your Button
The list on the left of this new area (dark background) is a list of all the sound files that are available to
use on the button. They include both SentenceShaper system sound and files you have recorded.
To hear the sound file that is selected in this list, click the button labeled "Hear Selected Sound". To
choose this sound file for your button to play, click the lower button marked "ADD Selected Sound to
Button".
Note: If you record a sound file with the same name as a system sound file, then that user will always
hear the version you recorded, but the system sound file will not be affected, and other users will hear
the original version.
130
"Change button's APPEARANCE (size, font, etc.)": Clicking this button will also open a small screen in
the picture area, shown in this screen shot:
Changing your Button's Appearance
This new area (dark background) has three small panels. From left to right:
"Choose Button Size": Buttons can be single or double, as shown below:
Single versus double Vocabulary Cue Buttons
This button lets you change a double button into a single, or vice versa. (Some buttons cannot be
double, and the screen will tell you that.)
"Show Text or Picture": This button lets you decide whether you want the button to display the name of
the sound file, or a small image.
-- If you select "Text", then the third panel will be one that lets you choose the font size and case of the
button text. The text on the button will change immediately when you change the font size or case. If a
word or phrase does not fit on the button, you can make the text smaller or change the size of the
button
131
-- If you select "Picture", then the third panel will be one that lets you choose a picture to go on the
button. One button ("Import new label picture") will let you find an image on your computer and copy
it into your SentenceShaper folder. Another button ("Search in my Label Library") will let you choose a
label picture that you have already imported (or one that is already in this user's private Label Library).
Finally, click "Create Custom Text Label" if you want to customize other button features. This will open
a screen where you can change the background and foreground colors of the button, and where you
can type or paste in text from writing systems other than English (Chinese, Hebrew, Arabic, etc.)
Customized label images can be useful in the following ways:
Displaying non-English text
Helping users with reading problems to find the right button (For example, in some of the built-in
workbooks, the key image on a Vocabulary Cue Button indicates that the Vocabulary Cue Button plays
one possible answer to the question or task posed by the Prompt Button.This key image is included in
the starter Label Library for each user)
Hiding the text if you want users to try to think of the item themselves first. (For example, you can
create a button with no text and a blue background color.)
Marking buttons with some special function (for example, using different background and text colors for
questions and answers).
The last cue button option:
"Clear button": If you click this, the selected Vocabulary Cue Button will not be displayed on your page.
Changing the Page Prompt
The Page Prompt is a sound file that is played by a special button on the page. It may provide a model
of the target sentence, or ask the user a question, or suggest something to talk about. It can be set to
play when the user first opens a page, and it can also be played manually by clicking the Prompt
Button.
If you click "The Page Prompt" on the Edit Page Tool's opening screen, you will now see this screen:
132
Page Prompt Selected for Editing
The Prompt Button will be highlighted in red, as shown above. Your options are (from left to right in
the screen shot):
"Record NEW utterance for prompt": Click this button if you want to change the content of the prompt
-- for example, to record a passive sentence instead of an active sentence to describe the main picture.
You will be asked to type in a name for the button, and then the recording box will immediately pop up.
Record the sound file and click "Done". After a moment, the new sound can be heard by clicking the
button.
"Re-record prompt 's current utterance": Click this button if you are happy with the word or phrase
played by the prompt , but don't like the quality of the sound file. The recording box will pop up, and
you can try again, then play the prompt to hear the results..
"Find an existing sound file for prompt ": Clicking this button will open a small screen in the picture
area, just as it does if you are editing a button.You will be able to choose an existing sound file -- either a
system sound file, or one that you have already recorded -- and make it the page prompt.
Choosing or removing a WordFinder
What we will cover here is how to select or remove a WordFinder for the page you are editing. (For
more information about the WordFinder itself, see Chapter 7. And remember that the actual editing of
WordFinders is done in the Edit WordFinder Screen.)
If you click "The WordFinder" on the Edit Page Tool's opening screen, you will see this screen:
133
Change the WordFinder
The WordFinder Button will be highlighted in red, as shown above. Your options are (from left to right
in the screenshot):
134
"Show the DEFAULT WordFinder". This WordFinder has approximately 1100 words and phrases on a
variety of topics. The words are grouped into nine categories like "People", "Things", or "Feelings".
"REMOVE WordFinder from page": If you click this button, the page will not show the WordFinder
button at all. There are good reasons to omit the WordFinder --- it may be distracting or confusing, or
you may want the user to practice a small set of vocabulary items that you can put on the Cue Buttons
along the side.
"Choose a WordFinder": This button opens a window where you can see descriptions of available
WordFinders, and select one for this page. The window looks like this:
Selecting a WordFinder
Select a WordFinder in the list box (circled above). You will see a brief description of it below the list
box, and you can add it to your page by clicking "OK".Available WordFinders include small ones created
for the "D" workbook series, and any that you have created yourself.
How to create a brand new page
There are two steps to creating a brand new page in a workbook:
First, add a page to the workbook, in the Edit Workbook Screen. Click "Add page from other
workbook" to copy in a page from another workbook, or click "Duplicate Page" to clone an existing
page. Once the page has been copied, select it and click the "Edit" button on the right side of the Edit
Workbook Screen. This will open up the Edit Page Screen, and you can edit this new page as described
here.
When you exit: Cancel or Save?
When you finish editing a page feature -- picture, Cue Button, Prompt, or WordFinder -- you will decide
whether to save your changes. The "Save changes" button will save the page with your changes, and
you will no longer have the original version of this page. But remember: Your changes will not affect
other users' versions of the page, as all editing is local to a given user. (Also, when you finish editing the
workbook that contains this page, you will have the option to throw away ALL your changes during that
135
session.) The "Cancel" Button discards your changes and leaves the page the way it was. However, any
changes you made to sound files (re-recording existing files or adding new ones) will be saved.
These buttons will return you to the opening screen of the Edit Page Tool. Now click "Close Page
Editor" to return to the Edit Workbook Screen.
The Edit WordFinder Screen
The Edit WordFinder Screen lets you modify the built-in WordFinders by adding, deleting, and rerecording words or groups of words. This Screen is for fairly advanced users, so we will assume that
you are familiar with the WordFinder itself and how it works.
Below on this page:
How to open the Screen
Layout of the screen
How to edit the Words List
How to edit the Subcategories List
How to edit Top Level Categories
Exiting: "Save", "Save as", or "Cancel"
Restoring the system version of a WordFinder
How to open the Edit WordFinder Screen
The Edit WordFinder Screen is entered from the User Settings Screen. On the upper right,uunder
"Advanced Options, click "Edit WordFinder". You will first select the WordFinder to edit, and then you
will go to the Edit WordFinder screen itself.
Layout of the screen
There are three main panels on the screen. Later in this section we will examine each panel in more
detail, but first we will give you an overview of the screen.
LEFT panel: Top level categories
The leftmost panel lets you change the top level categories, which you see when you open the
WordFinder during an actual recording session:
136
Top Level Categories on the WordFinder opening screen
Each top level category has its own button on that opening screen, with an icon. The default
WordFinder has nine top level categories ("People and Animals", "Things", "Feelings", "Verbs",
"Adjectives", "Places", "Asking Questions", "Numbers and Amounts", and "Time Words"), but a
WordFinder can have up to 12 top-level categories.
This leftmost panel is where you can add or delete top level categories. The current top-level
categories will be listed in the leftmost panel, circled below:
TOP LEVEL CATEGORIES on left panel of editing Screen
137
MIDDLE panel: Subcategories
In the middle of the Edit WordFinder Screen, all the subcategories of the selected top level category
are shown. This middle panel is circled below:
SUBCATEGORIES on middle panel of editing screen
For example, if the "Things" category is selected in the left panel, then the middle panel will display all
the subcategories of "Things" ("Clothing", "Equipment", "Food", etc.), along with any subcategories
that these subcategories may have. Below is a close-up of this center panel, with the "Food"
subcategory opened up:
138
SUBCATEGORIES panel in center, close up
The symbol "
" next to an item indicates that it contains one or more subcategories. For example,
"Food" contains the subcategories shown ("Desserts", "Beverages", etc.) but "Money" only contains
individual words.
RIGHT panel: Words
The right side of screen contains individual items rather than categories:
139
WORDS LIST on right panel (circled)
The words displayed on the right side of the screen are those contained in whatever category is
selected in the middle panel. While we call them “words,” you can record a whole sentence or phrase
as a single item.
One more thing you should know about the Edit WordFinder Screen: whenever you click a word or
category within it, you will hear the sound file associated with it.
So these are the three areas of the Edit WordFinder Screen. Below we will provide detailed instructions
for how to use each of these areas. We will start with the one on the far right, the "Words" list.
How to edit the Words List
To add, delete, or re-record words, you will use the Words Panel on the right.
Adding Words
As we saw above, the top level category "Things" includes a subcategory "Food", and "Food" is further
broken up into subcategories like "Beverages" and "Desserts". Suppose you want to add some more
words for "Beverages". You would start by selecting the "Things" top level category on the leftmost
panel. In the middle panel, you will now see all of "Thing"'s subcategories. Select the subcategory
"Food" and then the subcategory "Beverages". Now the right panel, for individual items, will look
something like this:
140
Close up of WORDS panel on right
Let's say we want to start by adding some more beverages to this list. Click the Add Word Button
shown above, right below the word list. This will open up a screen like the one shown below:
141
Adding a new word or phrase
This offers you two options: you can record a brand new word, or select an existing word.
If you click "Record New Word", you'll now see a screen like the one shown below, where you can type
in the word you want, let's say "Mineral water":
Type the name of the new word into this box
142
When you click Continue on the screen above, you'' see the familiar recording box:
Recording box to record "Mineral water"
The name of the word you are recording will be shown below the recording box. When you click Done,
the new word will appear in the word list on the far right, with the other beverage words.
Note: The program will tell you if you try to add a word that is already in the system.In that case, you'll
need to follow the instructions below.
To add an existing word to your WordFinder category, you can search for it by typing in part or all of its
name in the text box above the list of available words. The first word that matches what you typed in
will be selected, and will be highlighted in blue. (Or you can just scroll down the list, and click on a
word to select it.)
When you have selected the word you want to add to your WordFinder category, click the "Use
Selected Word" Button above the word list. The word will now appear with the other beverage words
in the word list on the right side of the screen.
Deleting Words
To delete a word, select it in the Words List and click the Delete button (this button will only be
enabled if a word has been selected). NOTE: When you delete a word from the Words List, it will be
removed from this section of the WordFinder, but it will still be available in the word list and it may
appear elsewhere in the WordFinder. You are not physically deleting the sound file.
Re-recording Words
To change the sound file that is played when a word is clicked, select that word in the Words List and
then click on the Re-record button directly below the list. This will cause the familiar recording box to
appear, as described above; the name of the word you are re-recording will be shown below the
recording box.
How to edit subcategories
143
The procedures described above are largely the same for editing subcategories, except that you will be
using the Subcategories Panel in the center of the screen.
Adding subcategories
In the center panel, open up the category that you want to add the new subcategory to.
For example, suppose you want to add a subcategory "Imaginary animals". First select the top-level
category "People and Animals". in the left panel.Then select its subcategory "Animals" in the middle
panel. Now click the button labelled "Add child sub-category to Animals" circled at the bottom of this
center panel. You will now see the familiar Add Word Dialog box:
Adding a new word or phrase
Since the phrase “Imaginary animals” is not in the list, you will need to add it, by clicking the "Record
New Word" Button. Follow the same procedure here as in creating a new word: type in the
word/phrase, click Continue, and record "Imaginary animals." The new category will now be displayed
in the center screen, under "Animals". The parent category "Animals" will now have the symbol "
to its left, because it now has a subcategory:
144
"
Animals subcategory with new subcategory "Imaginary animals"
You can now go to the panel on the far right to add words to this new subcategory ("Unicorn", "Loch
Ness Monster", etc.).
Re-recording subcategories
To make a better recording of the sound file that is played when a subcategory is clicked, select that
category and then click on the Re-record button at the bottom of the center Subcategories Panel; this
will cause the familiar recording box to appear. The name of the subcategory you are re-recording will
be shown below the recording box.
Renaming subcategories
You may wish to change the actual word(s) used as the name of a subcategory (for example, to change
"Animals" to "Pets"). To do so, select the target word or subcategory and then click the Rename button
at the bottom of the center Subcategories Panel.You will now go through the same procedure of
choosing an existing sound file or creating a new one. When you are done, the subcategory will have
the same items in it, but it will be have a different name.
145
Deleting subcategories
To remove a category, select it on the center screen and then click the button, "Delete <name>" (So if
you have selected “Animals,” the button will read “Delete Animals.”)
If you delete a subcategory from the WordFinder, you will automatically delete its contents as well.
You will not be physically deleting the sound files for these items, however. They will still appear in the
word list and they may even show up elsewhere in the WordFinder.
How to edit the top level categories
The top level categories correspond to the buttons on the opening screen of the WordFinder. To
modify these categories, we will use panel on the far left. When you click on a category name, its
sound file will play. Shown below is the top level category list with the "People and Animals" category
selected:
146
Top Level Categories Panel on left
You can add or delete top level categories by clicking the "Add Category" or "Delete Category" buttons
under the category list. You can also change an existing category in the ways described below.
How to re-record the sound file for a top level category
To create a better recording for a top-level category, select it and then click Record New Sound File. (If
you want to change the actual words used as the name of the category, choose "Rename Category"
instead.)
How to RENAME a top level category
147
To change the name of a top level category, click "Rename category". This will open a window where
you can search for existing sound file to use as the name of the category, or record a new sound file.
So, for example, if you wanted to change the name of the "Verbs" category to "Action Words", you
would click "Rename" and create this new name. If you wanted to keep the name "Verbs" for this
category, but wanted to make a clearer recording of this word, you would click "Re-record".
How to REMOVE the ICON for a top level category
To remove the icon from a category, check the checkbox labeled "REMOVE icon for this category?". If
there is no icon for a top-level category, then the text name of the category will be shown on the
opening screen of the WordFinder. Users will be able to click the button to hear the name of the sound
file.
How to CHANGE the ICON for a top level category
To provide a different image to display for the top level category you are changing, click "Add or
change icon". This will open a window where you can search for an image anywhere on your computer.
Exiting: "Save", "Save as", or "Cancel"
Clicking the Save Button will save the WordFinder under the same name you opened it. You will no
longer have the original version of this WordFinder. Your changes will not affect other users' versions
of the WordFinder, as all editing is local to a given user.
Clicking the Save as Button will save the WordFinder under a new name that you will create. This new
WordFinder will now appear when the system lists available WordFinders. In order to have your new
WordFinder actually appear on a workbook page, you will have to add it to a page in the Edit Page
Screen.
Clicking Cancel will close the WordFinder Editor without saving any unsaved changes. (If you were
asked to save during the editing session, then those changes will still be saved.)
Restoring the system version of a WordFinder
If for some reason you are unhappy with your changes, you can revert to the system's version of the
WordFinder that you are editing ...but only if you are editing a WordFinder that has the same name as
a built-in, system WordFinder. (If you created a WordFinder with a different name, then it will not have
a built-in counterpart.) Click the gray button labeled "Restore system version of this WordFinder" at
the bottom of the screen. (Remember also that new users come stocked with untouched copies of all
the built-in WordFinders.)
148
CHAPTER 11:
OTHER "HOW TO"s
Topics in this chapter:
How to turn Helpful Hints on and off
How to create, rename, and delete users
How to maximize or de-maximize the screen
Using the program with other languages
Getting program updates
Adding text without a keyboard
Hiding or showing
the "Helpful Hint" popups
Little popup messages titled "Helpful Hint" will be displayed when you enter various program screens.
Each popup will tell you something particularly important about that screen, and may let you change a
setting. For example, the one below appears when you open the WordFinder :
Helpful Hint popup
149
You will not be able to do anything until you close the popup, by clicking "OK". To stop seeing that
particular popup, click "Don't show this message again" on the lower left (circled above).
How to restore or hide all Welcome Messages
If you have been clicking "Don't show this message again" a lot, you might decide that you would like
to see these messages again.
To change the setting for this feature, click on the General Settings Menu. This menu can be found at
the top of the Welcome Screen. Click on the "Turn 'Helpful Hint' Messages on or off" menu option,
circled below:
General Settings Menu
Clicking this menu item will open up a dialog which will let you turn these messages on or off. If you
turn them all on, you can then turn them off them individually by clicking "Don't show this message
again". Or you can revisit this menu to turn them all off.
NOTE: This setting only affects messages labeled "Helpful Hint", not other messages displayed by the
program.
Creating, renaming, and deleting users
When you first launched the program, you were asked to create a new user, by typing in a name. Each
SentenceShaper "user" has his or her own settings and customized materials. Any changes you make to
workbooks will only affect the user whose materials you edit.
You can add, delete, or rename users on the opening screen, the "Welcome Screen ". Just click on the
"Add/Delete/Rename Users" Menu at the top of the Welcome Screen.
If you are ADDING a user, you will be asked to type in a user name. Most punctuation characters are
not allowed in a user name. The program will tell you if it does not like the name you type in, and you
will be able to change it. Note: Some earlier versions of the program may only allow one user. In that
case, you'll need to delete the current user in order to create a new one.
To DELETE a user, be sure that the user is selected in the user list. Then open the Add/Delete/Rename
Users Menu and click on the "Delete User" option. You will now be asked whether you really want to
delete this user; click "Yes".
150
To RENAME a user, be sure that the user is selected in the user list. Then open the Add/Delete/Rename
Users Menu and click on the "Rename User" option. You will now be asked to type in the new name
you want to give this user. Most punctuation characters are not allowed in a user name. The program
will tell you if it does not like the name you type in, and you will be able to change it.
Setting screen maximization
You can decide whether you want the SentenceShaper screen to be "maximized" or not.
If the SentenceShaper screen is maximized, it will fill up your entire computer screen and will HIDE all
other programs. This can be helpful because it will keep the user from accidentally switching to
another program, which could otherwise happen if he or she clicks somewhere outside of the program.
If it is NOT maximized, then it will take up 1024 x 768 pixels of your screen, but (depending upon the
size of your monitor) you may be able to see other programs, and can drag the SentenceShaper screen
to wherever you want.
If you are running SentenceShaper at the same time as WordQ, in order to let WordQ help you create
text for a SentenceShaper page, please make sure that the SentenceShaper screen is NOT maximized.
(Otherwise, if it is maximized, it will hide WordQ's prediction box.)
To set screen maximization, open the "General Settings" Menu on the Welcome Screen, and choose
"Maximization of SentenceShaper screen..." (shown below):
General Settings Menu
This opens up a screen where you can choose whether or not to maximize the SentenceShaper screen.
If you make a change, you will need to exit from SentenceShaper and then start it again in order for
this change to take effect.
If your computer screen is small, you may find that un-maximizing the SentenceShaper screen has an
undesirable side effect: the Windows taskbar (-- the horizontal strip at the bottom of your desktop that
shows open files and programs --) may cover the bottom of the SentenceShaper screen. In this case,
you can right-click on the taskbar, select "Properties", and check "Auto-hide the taskbar".
Getting program updates
151
We will be releasing regular updates for the program. If you are on our mailing list, you will be notified
when there is a new update, but you can also check for updates from within the program, from either
the Startup Screen or the Welcome Screen.
Topics on this page:
How to check for updates
How to install the update
How to check for updates
Click the button on the blue Startup Screen marked "Orders & Info" (circled below):
Button to access SentenceShaper website
You will now see a small screen like the one below:
152
Update option on the Startup Screen
Note that this screen displays your current version number. Make a mental note of this number (or
write it down), then click "GO".
This will take you to the page in our website where the update is posted. The website will indicate
which versions need the new update. If your version is included, then download the update as
instructed on the web page. After you have downloaded the update, you will need to run it, so
remember where you saved the update file (or, if you have a good Internet connection, click "Run"
instead of "Save").
How to install the update
-- First, make sure to exit completely from SentenceShaper. The program will not be able to update its
files if they are in use.(Make sure that the SentenceShaper folder is not open in Windows Explorer,
either.)
-- Locate the updater that you just downloaded, and double click on it to begin the update.
-- After the update, you may notice changes in the built-in system materials, but previously saved work
will not be affected.
-- To see any new built-in workbooks, you'll need to create a new user.
Upgrade to version 1.0.5: Important information for users of the Basic and Deluxe
Editions
Version introduced significant changes, especially for the Basic and Deluxe Editions which were sold
during the "Preview Release" phase (ending in early 2010).
Click on the links below for more details.
Elimination of Single Page Mode
How to access materials created in Single Page Mode
How to use the program without Single Page Mode
Elimination of Single Page Mode
The program originally had two modes, Single Page Mode and Workbook Mode. It was set to
Workbook Mode initially, so if you never changed your settings to run Single Page Mode you can skip
this section.
153
In version 105, we modified the program so that there is only Workbook Mode. Below are instructions
related to this change. Please contact us if you have any questions or run into any problems.
How to access materials you created in Single Page Mode
If you used Single Page Mode, you will need to know how to access any recording sessions that were
created in this mode. To do this, start the program. On the first green screen, the Welcome Screen,
click the "Open User Settings & Features" Button. Now open the Workbook Manager by clicking the
button below the workbook list. On the top of the Workbook Manager Screen, you will see a new
button marked "Create Session Workbook". If you click this button, the program will take any recording
sessions that the user created in Single Page Mode and put them into a workbook named "My
Sessions". You will now be able to access these sessions just as you would access any other workbook.
In the older version with Single Page Mode, there were screen layouts called "Loose Pages". Any loose
pages that you created and used will still be accessible, but you will have to copy them from any
workbooks you added them to. If you used them in Single Page Mode, you will be able to copy them
from the "My Sessions" workbook described above.
How to use the program without Single Page Mode
Again, if you never used Single Page Mode, you can skip this section. To open a screen with no picture
and generic vocabulary cues (the "Simple Buttons" page used in Single Page Mode), just set the user to
run the "E1" workbook. This has 30 pages with this layout. If you run out of pages, just make a fresh
copy of this workbook in the Workbook Manager. (You will be asked the rename the existing workbook
first.) Or you can open this workbook in the Workbook Editor and duplicate the existing pages.
For any users that existed before you run the the update, you will have to manually copy down these
new workbooks in the Workbook Manager. However, users that you create after the update will get
them automatically.
Using SentenceShaper
in other languages
This section is about using the program with someone who speaks a language other than English.
Topics in this section:
Language-specific features
Using the program without translating anything
Suggestions about what to translate
Dealing with non-English letters and characters
Language-specific features
154
The Vocabulary Cue Buttons, Page Prompt, and WordFinder all contain English text linked to
prerecorded English words or sentences.
To use the program with someone who does not speak English, you have two options: you can run the
program without these language-specific features, or you can use the program's editing tools to
customize them for the user's language.
Using the program without translating anything
The core mechanism of SentenceShaper is not specific to any language: it is the memory support that
provides by letting the user record his speech in short clips, replay them, and build them up into larger
units such as sentences and stories. See Chapter 2 for a discussion of why this helps people to create
better speech.
You can use the program without its language-specific features and still reap the benefits of this
memory support. In fact, the program's impact on speech was initially demonstrated (Linebarger et al.,
2000) by disabling all such features.
To run the program without the language-specific features, just set the user to run the workbook
named "E2 Blank Pages with NO Vocabulary Cues". On the Welcome Screen, select this workbook in
the list of user workbooks.
When you open the workbook, each page will look like this:
Main Screen with no Vocabulary Cue Buttons
This screen is very simple: it has no WordFinder button, no Prompt, and no Vocabulary Cue Buttons.
You can still provide some word-finding support by recording a few words yourself and leaving these
snippets in the Work Area or the Story Row. If the user has good reading skills, you could also provide a
written list of words.
155
Note: If your language is read from right to left, then you may want to avoid the "Play Sentence Row"
and "Play Story Row" buttons, because they play sequences from left to right. Just click on the
individual snippets and beans.
Suggestions about what to translate
You can customize the Vocabulary Cue Buttons, Page Prompts, and/or the WordFinders for speakers of
another language by using the editing tools described in this Manual. In the discussion below, we will
assume that you are familiar with the three editing tools; detailed instructions about how to use them
are provided in Chapter 10.
Translating the important features: suggestions
Below are a few suggestions about how to translate a few of the most important language-specific
features of the program
Translate the "Simple Buttons" page layout first. Perhaps the most important thing to do is to
translate the Cue Buttons on the pages of some of the "E" workbooks, which contain pages without
pictures. The pages in the workbook "E1 Blank Pages with Simple Vocabulary Cues" use a layout which
has been used in most research studies with the program, and provides a small set of highly flexible
verbs, pronouns, and prepositions. It would not take long to revise this page for the user's language.
You could then create workbooks using this page, possibly in conjunction with the user's photographs
(for electronic scrapbooks) or any other materials you wish to use.
Translate a workbook: To translate a system workbook, open the Edit Workbook Screen as described
in Chapter 10. Now edit each page to provide Vocabulary Cue Buttons and Page Prompts in the user's
language.
Suggestion: Don't translate the WordFinder. This would be the most time-consuming task, but the
WordFinder is not as important as the Vocabulary Cue Buttons and the Page Prompt, so you could just
make sure that the WordFinder is removed from each page. (Do this by editing each page in the Edit
Page Screen, Chapter 10).
Dealing with non-English letters and characters
Currently, the program handles non-English characters as follows:
-- Text added to the Main Screen's Caption Box (described in Chapter 8) can contain non-English
characters, though you may need to create your text captions in a text document (like Word) and then
paste them into the SentenceShaper text box. You can do this by right clicking on the text box and
selecting "Paste", or using the Windows key shortcuts Control-C to copy text and Control-V to paste it.
-- The Vocabulary Cue Buttons can display non-English text, but only if you create a custom text label
in the Edit Page Screen.
156
-- The WordFinder does not currently display non-English text. However, it is not an essential part of
the program.
CHAPTER 12:
TROUBLESHOOTING
This section tells you what to do if you encounter any problems.
Topics in this chapter:
What version of the program do I have?
List of problems and solutions
How to contact us
Updating your copy
Locating your activation code
What version do you have?
To find out what version you are running (which will be important if you need to call for support), click
on the "Ordering and Support" menu on the top of the Welcome Screen (shown below).
"Ordering and Support" menu
Click on "About SentenceShaper 2". You will now see a screen with information about your copy,
including the version number.
Problems and Solutions
This section tells you what to do if you encounter any problems.
Below in this section:
157
How to get technical support
The program is too big for the screen
The program is too small for the screen
The screen has frozen
How to exit if the program freezes
The program stops PLAYING BACK sound files
The program stops RECORDING sound files
Long silences in or before snippets
Poor sound quality or no recording or playback
The FIRST recording in a session is often poor quality
How to get technical support
Click on the "Ordering and Support" Menu at the top of the Welcome Screen, and then choose
"Contact us" or (if you are not connected to the Internet) "Offline Contact information."
Problem: The program is too big for the screen
If SentenceShaper 2 doesn't fit on your screen, you will need to adjust the screen resolution. (You'll
see a warning message to this effect.) To do this, right-click on the desktop and select Properties.
Under Settings, set the screen area to 1024 x 768 pixels (usually by moving a slider) and click Apply.
You may want to note the original setting, in case you wish to reset your screen after using
SentenceShaper 2.
Computers differ in how you change the screen settings. Sometimes when you right-click on the
Desktop you will see the option Personalize, and then a set of options including Display Settings. On
other computers, you will see Screen resolution listed when you. right-click the Desktop. Please give us
a call if you run into difficulties with this.
The program is too small for the screen
If your screen resolution is very large, SentenceShaper may look a little "lost" and off center. It can
actually help to set your screen resolution down to the lower 1024 x 768 pixels that the program is
designed for. Please see the instructions above about how to access these settings.
Also, you may want to poke around the settings to find the one that looks best...for example, avoid
options to "stretch" the program so that it will fit the screen.This can distort the screen. If you see any
option to "maintain aspect ratio", choose that. There may also be options for centering the program on
the screen, which is recommended.
The screen has frozen
Hopefully this won't happen, but see below if it does. But you might want to try these tactics first:
158
It might be that the program is just very busy. For example, if you are editing a workbook with a lot of
sound files, it may take your computer some time to save the workbook when you make a change.
A more obscure possibility is that the program is waiting for you to respond to something. For example,
if you access another program while SentenceShaper is open (for example, if you check your email while
editing a workbook), it may be that the system has opened a dialog box to ask or tell you something and
is waiting for your response.When you return, this dialog may be hidden by other screens. You can "altTab" your way through all the open screens on your computer, and if you see anything that has the
word "Dialog" or "Message" in it, you could see if it is related to SentenceShaper. Responding to it
should unfreeze the screen.
How to exit if the screen freezes
We certainly hope that this will never happen with SentenceShaper 2. But it is can happen with any
program, and you should know what to do if it does.
Here's what you do:
Launch the Windows Task Manager (by pressing the Ctrl, Alt, and Delete keys simultaneously).You will
now see a screen with several tabs along the top. The leftmost tab is labelled Applications, and it will
probably be open. Depending upon where you are in the program, you should see the blue
SentenceShaper icon and "Start SentenceShaper 2" listed under Applications. You may also see an
application named SentenceShaper 2. Select each icon and click End task.If you get a message that the
program is not responding, click End now. If this doesn't end the program (a very unlikely occurence),
click the Processes tab on the Windows Task Manager screen and look for "StartSentenceShaper2
.exe" in the list on the left, select it and then click End Process. You will then need to restart
SentenceShaper 2 by double clicking the desktop shortcut.
Note that the Task Manager may look different in different versions of Windows.
Problem: The program stops PLAYING BACK sound files
If the program has been playing sound files and suddenly stops, here are some suggestions:
-- Restart the program and see if sound plays again. Please let us know if this happens with any
regularity.
-- Try running the Sound Test (click on the Sound Test Menu at the top of the Welcome Screen).
-- Play several sound files to make sure that this is not just a case of a missing sound file.
-- Make sure that the Work Area is not full.
Problem: The program stops RECORDING sound files
If the program has been recording your voice without problems and then suddenly stops recording,
here are some suggestions:
159
-- Try running the Sound Test (click on the Sound Test Menu at the top of the Welcome Screen).
-- Restart the program and see if it records sound again. If you changed microphones while
SentenceShaper was running, that might have caused the problem.
-- You may have run out of space in the Work Area. After it has seven snippets, you have to make space
for more recordings, by deleting snippets or dragging them to the Sentence Row.
-- Do you have enough space on your hard drive to record new files? Every time you create a snippet,
you are adding a new file to your computer.
Problem: Long silences in or before snippets
If the user pauses while the Recording Box is open, this silence will be recorded. Encourage the user to
be ready to speak when he presses the Microphone Button, and to click Done in the Recording Box as
soon as he is finished speaking.
Problem: Poor sound quality or no recording or playback
If the quality of your recorded speech is consistently poor, then there is likely to be a problem with
your microphone. Open the Windows Control Panel and choose "Sound" (or something similar,
depending upon which version of Windows you are running). Under the "Recording" tab, make sure
that the microphone you are using is selected as the default microphone (select it and then click "Set
Default"). In the screen shot below, a desired microphone has been selected, but it is not yet the
default microphone (which has a green check by it). To make this microphone the default, click "Set
default", also outlined in red. Note: If there is more than one microphone marked as "default", make
sure that ONLY the desired microphone is marked as default.
160
Windows Sound Control Panel
Problem: The FIRST recording in a session is often poor quality
If the first recording you make when you start a workbook is very poor quality (or perhaps even silent),
this is probably not the fault of your microphone. It is a known problem that we hope to resolve in
future versions. One thing that seems to help is to have a page prompt always play on the first page of
a workbook.
How to contact us
To contact us or our distributor for support, click on the "Ordering and Support" menu on the top of
the Welcome Screen (shown below). The menu items highlighted in red will provide appropriate
contact information, which depends upon what country you are in.
161
"Ordering and Support" menu
Getting program updates
We will be releasing regular updates for the program. If you are on our mailing list, you will be notified
when there is a new update, but you can also check for updates from within the program, from either
the Startup Screen or the Welcome Screen.
Topics on this page:
How to check for updates
How to install the update
How to check for updates
Click the button on the blue Startup Screen marked "Orders & Info" (circled below):
Button to access SentenceShaper website
You will now see a small screen like the one below:
162
Update option on the Startup Screen
Note that this screen displays your current version number. Make a mental note of this number (or
write it down), then click "GO".
This will take you to the page in our website where the update is posted. The website will indicate
which versions need the new update. If your version is included, then download the update as
instructed on the web page. After you have downloaded the update, you will need to run it, so
remember where you saved the update file (or, if you have a good Internet connection, click "Run"
instead of "Save").
How to install the update
-- First, make sure to exit completely from SentenceShaper. The program will not be able to update its
files if they are in use.(Make sure that the SentenceShaper folder is not open in Windows Explorer,
either.)
-- Locate the updater that you just downloaded, and double click on it to begin the update.
-- After the update, you may notice changes in the built-in system materials, but previously saved work
will not be affected.
-- To see any new built-in workbooks, you'll need to create a new user.
Locate your activation code
163
If you are about to buy a new computer and will be re-installing SentenceShaper on it, make sure that
you still know your activation code so that you can re-activate it on the new computer. One way to find
this out is to open the "Ordering and Support" menu on the top of the Welcome Screen. Choose the
item labeled "Your Activation Code" (highlighted in red below). You can copy and paste this text if
desired.
"Ordering and Support" menu
CHAPTER 13:
DESCRIPTIONS OF PROGRAM SCREENS
This section lists every major screen in the program and summarizes what you can do on each screen.
The screens are listed in the order in which you are most likely to see them.
List of program screens:
Startup Screen
Welcome Screen
Main Screen
Main Screen (labelled)
WordFinder
Workbook Options Screen
Workbook Manager Screen
Edit Page Screen
Edit Workbook Screen
Edit WordFinderScreen
Startup Screen
The Startup Screen looks like this:
164
Startup Screen
What you can do on this screen:
Click the Start Button (far left) to open the Welcome Screen.
Click the "View Manual" Button to display the program manual.(Note: In the trial version, viewing the
manual does not count against your allotted usage time if you do it from this screen.)
Click the third button from the left to open the SentenceShaper website where you can view and print
out the most recent version of the manual, find out about updates, purchase the program, or learn
about research and community activities involving the program.
Click the Exit button on the far right to terminate the program.
The Welcome Screen
This is the first screen you see when you start up the program:
165
Welcome Screen
All SentenceShaper users are listed in the box on the left side of the screen. On the right side, there is a
list of all the workbooks this user can run.
What you can do on this screen:
--Click a user name to select the user you want to run. (There can be more than one user.)
-- Select a workbook from the list of user's workbooks
-- View a short description of the selected workbook
-- Click the workbook image (or the 'Run this Workbook' Button) to open the selected workbook and
begin a recording session.
-- There are two other buttons on the lower right, to edit the selected workbook or to create a new
one.
-- This screen has all five menus along the top of the screen. They are, from left to right...
The "User Settings & Features" Menu opens a screen where you can set various user-specific options as
well as access all the editing tools. This screen can also be accessed by a button, right below the user list.
The next menu lets you add, delete, or rename users
The Sound Test Menu launches a Sound Test to test your microphone and speakers.
The General Settings menu lets you change a couple of program settings: whether to show or hide the
"Helpful Hint" popups that appear throughout the program, and whether to run SentenceShaper fully
maximized, so that it hides all other program.These settings affect all users.
Finally, the Ordering and Support Menu has links to web pages or program screens where you can
contact us or a distributor, purchase the program, check for updates, find out about the version you are
running, get your activation code, or access program documentation.
User Settings & Features Screen
This screen is where you select various user-specific options: the workbook you want to the user to
run, and how you want it to behave. Workbooks and pages are explained in much more detail in
Chapter 5.
The User Settings Screen looks like this:
166
User Settings Screen
What you can do on this screen
On the LEFT side of the screen, you can:
-- Choose a workbook to run by selecting it in the list labeled "Select a Workbook".
-- Access buttons to edit the selected workbook or to create a new one.
-- Access the Workbook Manager Screen, where you can delete, rename, or copy workbooks.
On the RIGHT side of this screen, there are buttons to let you change various user settings. Each user
can set his or her own choices about exporting speech files, bookmarking (where to re-open
workbooks), page prompt autoplay (when to play a page's spoken prompt automatically), the Caption
Box (whether to display a text box on workbook screens), and whether to hide or show certain buttons
on the Welcome Screen).
Access the WordFinder Editor (look under "Advanced features" on upper right).
The "Workbook Manager" Screen
This screen is for managing your library of SentenceShaper workbooks:
167
"Manage Your Workbook Library" Screen
What you can do on this screen:
View lists of user's workbooks (top) and workbooks in the System Workbook library (bottom)
Add "fresh" copies of system workbooks to the user's library (if, for example, the user has created
utterances on every page of the workbook).
Delete or rename a user workbook.
Make a copy of a user workbook.
The Main Screen
The Main Screen looks something like this (it may or may not have a picture):
168
Main Screen
What you can do on this screen:
Record your speech (creating snippets in the Work Area)
Drag snippets to the Sentence Row to combine them into full sentences
Click the "Make a Bean" Button to add the sequence to the Story Row, where it will be represented by
a purple bean.
Get word-finding help from the Vocabulary Cue Buttons and WordFinder, if they are available on that
screen.
Enlarge the Main Picture by holding down your mouse on it.
Add text to the Caption Box (not shown above).
Click the "Export" Button to Export your utterances (plus the picture and captions, if there are any) for
use in email, handheld devices, etc.
Move to the next or previous page of the workbook
Click these links for more details:
169
QuickStart Guide
Tips for creating better speech
Labeled screen shot of the Main Screen
Labeled screen shot
of the Main Screen
Shown below is a labeled screen shot of a workbook page. If you are viewing this from within the
program, you will need to make the screen larger to see the entire image. Press your mouse down on
the lower right corner of the help screen and pull it out to enlarge. You can shrink the screen in the
same way. You may not be able to print it out from within the program, but you can access a more fully
printable version from our website, www.sentenceshaper.com.
170
The WordFinder
The WordFinder has an opening screen, where you select a general category of words; and a main
screen, with the actual lists of words.
The opening screen looks like this:
WordFinder - Opening Screen
What you can do on this screen:
Choose a category of words (for example, "People and Animals"). Clicking one of the buttons above
plays the name of the corresponding category.
Click "Open" to enter the main screen of the WordFinder
Exit back to the workbook page from which you entered the WordFinder
The main WordFinder screen is shown below:
171
WordFinder - Main Screen
What you can do on this screen:
View text words and click them to hear them spoken aloud
Repeat words in your own voice and record them (creating snippets in the Work Area that you can use
when you exit the WordFinder)
Navigate to and within the different categories of words
Use the two buttons on the lower left to play the contents of the Sentence Row and your last
recording, respectively.
Return to the WordFinder opening screen ("Top Level") or the SentenceShaper Main Screen
For more details, see Chapter 7.
Edit Workbook Screen
The Edit Workbook Screen looks like this:
172
Edit Workbook Screen
What you can do on this screen:
Add pages to a workbook
Delete pages in the workbook
Make a copy of an existing page in the workbook
Open the Edit Page Tool to edit a page in a workbook
Reorder pages in the workbook
Copy in a page from another workbook
Edit Page Screen
The Edit Page Screen looks like this:
173
Edit Page Screen
What you can do on this screen:
Change the picture displayed on a page
Change the WordFinder used with the page
Change the Prompt for the page
Change a Vocabulary Cue Button: what sound file it plays, and appearance of the button
Record new sound files or re-record existing ones
Edit WordFinder Screen
The Edit WorkFinder Screen looks like this:
174
Edit WordFinder Screen
What you can do on this screen:
Add, delete, or re-record words and categories in a WordFinder
Change the icon image for a top-level category
Credits/Acknowledgments
Grant support
The development of the SentenceShaper software and research about the program have been
generously funded by the National Institutes of Health (R01 DC02377; R24 HD39631; R01 DC05629;
R01 HD043991).
Technology design and development
Marcia Linebarger, John Romania, Bjorn Sayers, Ted Kantner, Deborah Dahl
Art Work
Chuck Dillon
Research Partners
People who we have collaborated with in research studies about SentenceShaper:
175
At Moss Rehabilitation Research Institute, Philadelphia, PA:
Myrna Schwartz, Megan Bartlett, Ruth Fink, Roberta Brooks, Susan Kohn, Monica Chun, Lauren
Leiter, Laura MacMullen, Diane [Locatelli] Stephens, Jennifer Lowery
At the University of Maryland School of Medicine:
Rita Berndt, Denise McCall, Telana Virata
Shareware
This application uses the following excellent shareware tools: shntool, a multi-purpose WAVE data
processing and reporting utility (see www.etree.org for more information); LAME, an educational
tool to be used for learning about MP3 encoding (see lame.sourceforge.net); and ImageMagick, an
open source software suite for image processing (www.imagemagick.org). Finally, we created a
plugin called "VideoGen" to turn your SentenceShaper workbooks into videos. Because this plugin
uses open source software, the plugin is itself free: you can redistribute it and/or modify it under the
terms of the GNU General Public License as published by the Free Software Foundation, either
version 3 of the License, or (at your option) any later version. You can download the source code for
this plugin at www.sentenceshaper.com/open-source-downloads/.
176