1
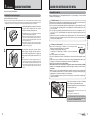
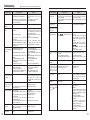
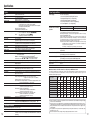
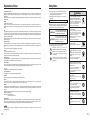
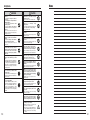
6.2 CONNECTING THE CAMERA DIRECTLY TO THE PRINTER
— PictBridge FUNCTION
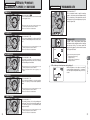
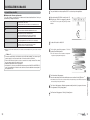
When a printer that supports PictBridge is available, images can be printed by connecting the
camera directly to the PictBridge-compatible printer without using a PC.
! In PictBridge function, images photographed on other than a camera may not be printed.
●
5
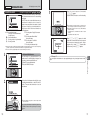
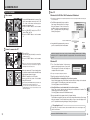
6.2.1 Specifying images for printing on the camera
1 01 03
2
0
1
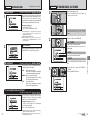
PRINT DPOF OK?
PRINT DPOF
OK?
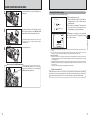
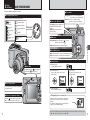
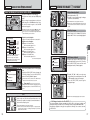
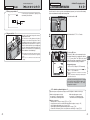
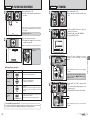
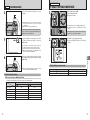
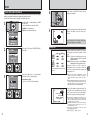
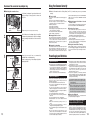
1 Press the “POWER” button to turn the camera
on.
2 Select “® ” in “USB MODE” in the SET-UP
menu (➡P.78).
3 Press the “POWER” button to turn the camera
off.
SET−UP
2
3
FRAME NO.
USB MODE
CCD−RAW
言語/LANG.
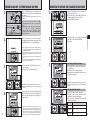
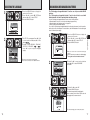
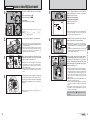
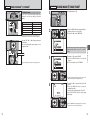
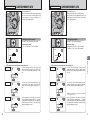
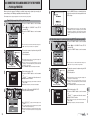
Press the “MENU/OK” button to download the data
to the printer and print the frames specified in the
DPOF settings.
PRINT DPOF
TOTAL/ 19
TOTAL
/ 19SHEET
SHEETS
YES
CANCEL
! Press
●
the “BACK (DISP)” button to cancel the printing.
Depending on the printer, the printing may not be canceled
immediately or printing may stop midway through. When
printing stops midway, briefly turn the camera off and then on
again.
4
:CONT.
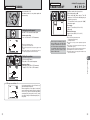
6.2.2 Specifying images for printing without using DPOF (single-frame printing)
:OFF
:ENGLISH
SET
CANCEL
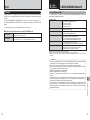
! Do not connect to a PC when the USB mode setting is set to
●
1 01 03
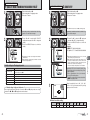
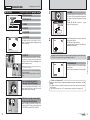
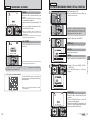
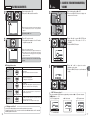
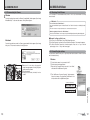
1 Press the “POWER” button to turn the camera
on.
2 Select “® ” in “USB MODE” in the SET-UP
menu (➡P.78).
3 Press the “POWER” button to turn the camera
off.
“®”. See P.115 if you connect to a PC by mistake.
2
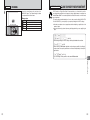
USB socket
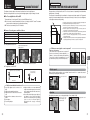
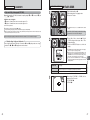
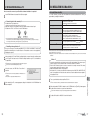
1 Connect the camera to the printer using the USB
cable (included).
2 Turn the printer on.
2
0
1
3
USB
CHECKING USB
camera cannot be used to specify printer settings such
as the paper size and print quality.
! Please connect the AC Power Adapter AC-3V (sold
●
separately) or AC-3VW (included with optional PictureCradle
CP-FXA10) to your camera.
! Use an xD-Picture Card that was formatted in the camera.
●
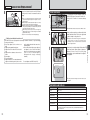
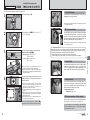
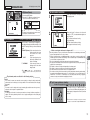
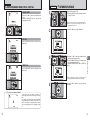
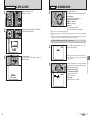
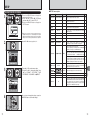
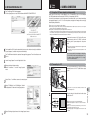
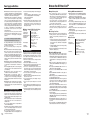
1 Set the Mode switch to “w”.
2 Press the “POWER” button to turn the camera
on.
“ s” appears and then the menu is
displayed on the LCD monitor.
2
3
FRAME NO.
USB MODE
CCD−RAW
言語/LANG.
! The
●
AC-3V (sold separately)
SET−UP
SET
4
:CONT.
:OFF
:ENGLISH
CANCEL
“®”. See P.115 if you connect to PC by mistake.
2
USB socket
setting is “®”.
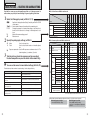
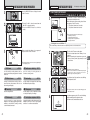
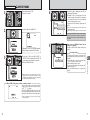
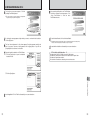
1 Press “a” or “b” to select “u PRINT DPOF”.
2 Press the “MENU/OK” button.
AC-3V (sold separately)
USB
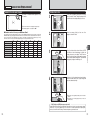
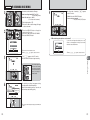
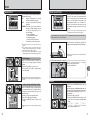
1 Set the Mode switch to “w”.
2 Press the “POWER” button to turn the camera
on.
“ s” appears and then the menu is
displayed on the LCD monitor.
! If the menu does not appear, check whether the USB mode
●
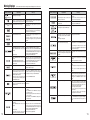
PICTBRIDGE
PRINT WITH DATE
PRINT WITHOUT DATE
PRINT DPOF
SET
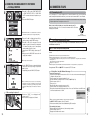
! When “d” appears, the DPOF settings are not
●
specified.
! To use DPOF printing, the DPOF settings must be specified
●
on FinePix E550 beforehand (➡P.70).
! Even when “WITH DATE” is specified in the DPOF settings,
●
the date is not inserted from printers that do not support date
printing.
setting is “®”.
! Depending on the printer, some functions are disabled.
●
Continued
6
Viewing Images
3
CHECKING USB
94
as the paper size and print quality.
connect the AC Power Adapter AC-3V (sold
separately) or AC-3VW (included with optional PictureCradle
CP-FXA10) to your camera.
! Use an xD-Picture Card that was formatted in the camera.
●
! Please
●
! Depending on the printer, some functions are disabled.
●
2
0
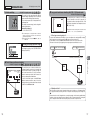
1 Connect the camera to the printer using the USB
cable (included).
2 Turn the printer on.
! The camera cannot be used to specify printer settings such
●
! If the menu does not appear, check whether the USB mode
●
4 01
! Do not connect to a PC when the USB mode setting is set to
●
95